MVP (Model View Presenter) Architecture Pattern in Android
Overview
MVP (Model-View-Presenter) is an architectural pattern in Android applications that separates the application logic from the user interface. It is a derivative of the MVC (Model-View-Controller) pattern but with the availability of the Presenter layer. MVP separates the application into three distinct layers, each having its responsibilities.
Introduction
MVP architecture Android is one of the most popular architectural patterns for Android applications that comprises three distinct layers that work independently.
Before the arrival of the MVP architecture, Android applications solely depended on the MVC (Model-View-Controller) architecture, but it also came with a few hassles that had to be addressed shortly. So, why not begin with comprehending these terms like Model, View, Controller, or Presenter?
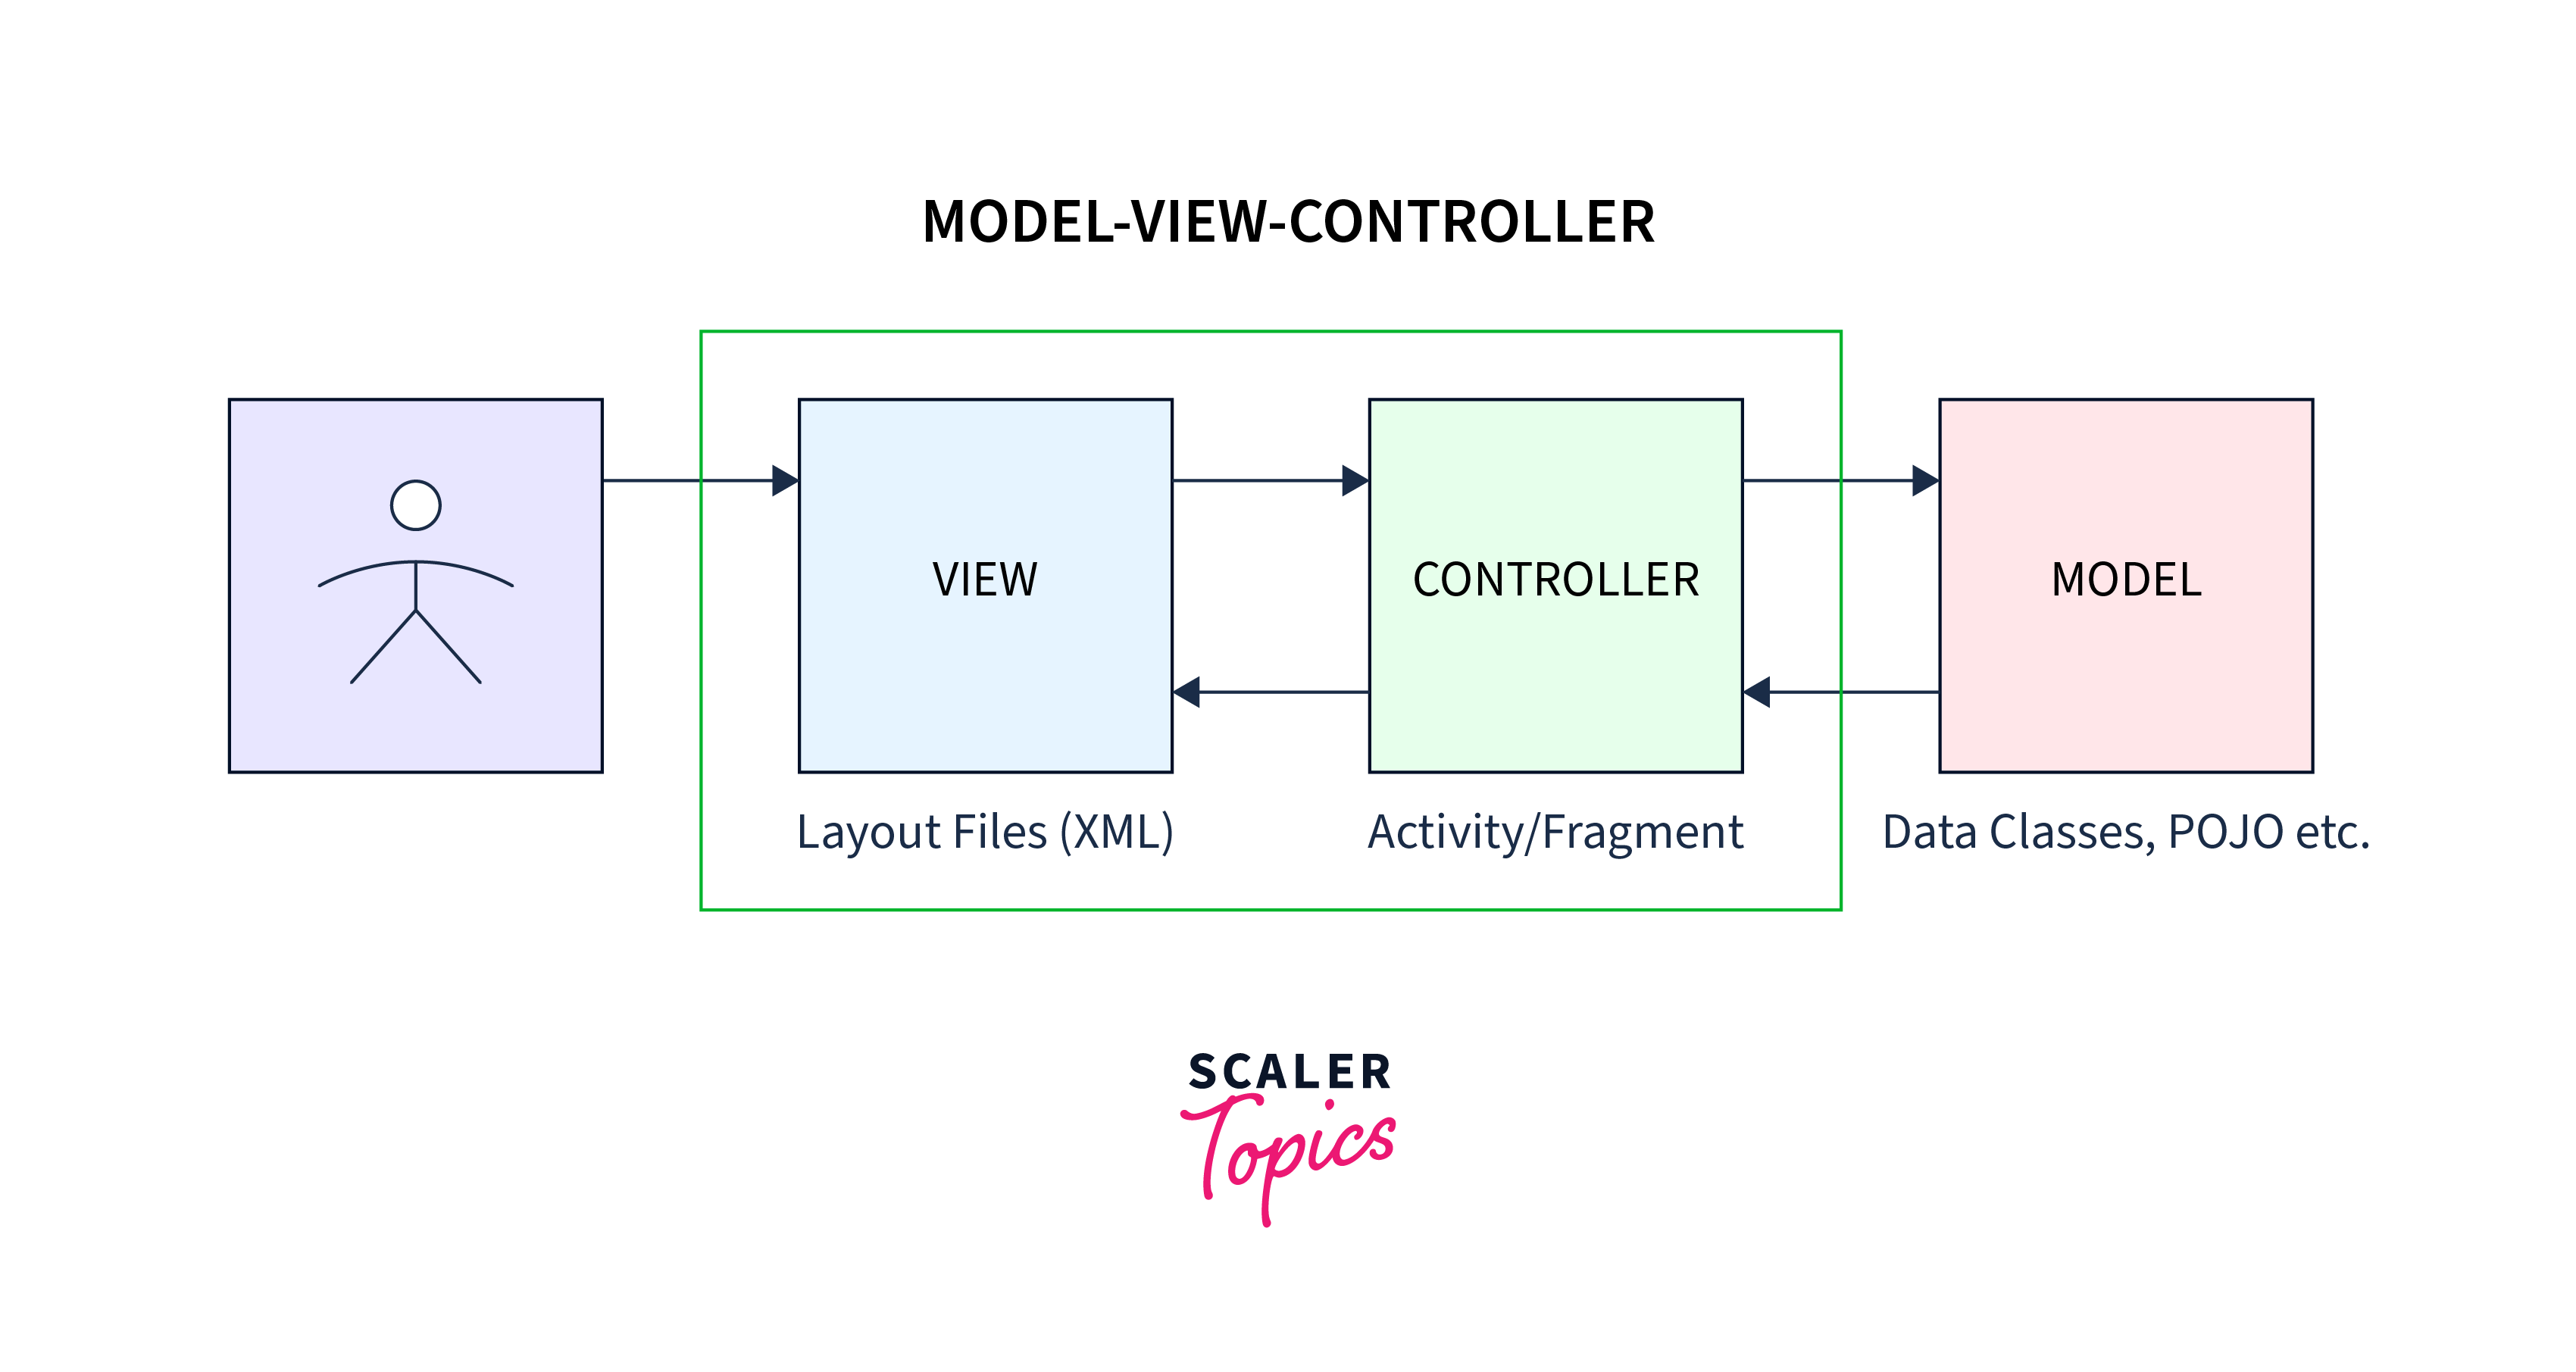
The Model layer manages the data as well as the business logic of the application. Additionally, it's the one responsible for retrieving data from external sources like a database, a network, or an internal source like local storage. The fetched data is then provided to the Controller or Presenter layer.
The View is the layer that you see inside an application. It s responsible for drawing the UI on the screen and handling all the user interactions. It captures all the user input and passes it to the Presenter or Controller layer.
The Controller or the Presenter layer is responsible for managing the user input and passing it to the Model layer after processing. It acts as a mediator that is meant to handle the user's interaction on the app process and act upon the changes addressed by the Model layer.
Differences Between MVC and MVP
Although the Model layer was previously independent of the View and the Controller layer The interaction had to be established between the View and the Controller layer. This shows that the View and the Controller layers are tightly coupled, so the changes in one of them had a significant impact on the other. This is where it indicated a violation of the separation of concerns, and there couldn't be any independent test cases written for each of these layers.
So, there was a need to separate and limit the dependencies of the layers on each there, thereby creating an architecture with improved flexibility and maintainability.
Model-View-Presenter (MVP) had made the Presenter layer independent of both the View and the Model layer. Now, the View layer was comprised of both the layout files (XML) as well as the Activities/ Fragments. The Presenter layer interacted with the View layer with the help of interfaces.

| MVC | MVP |
|---|---|
| The View layer may have direct references to the Model and Controller layers. | The View layer has no direct references to the Model layer and only indirect references to the Presenter layer. The Presenter retrieves data from the Model layer, processes it, and updates the View accordingly. The View layer should not directly access the Model layer. |
| The Controller layer can make changes in the View layer. | The Presenter layer can only provide data to the View layer that would then be rendered by the View. |
| Due to the dependencies on the View layer, the Controller layer was difficult to test. | Due to the separation of concerns, the Presenter layer could be tested independently. |
| There's a many-to-one relationship between the View and the Controller because a Controller is capable of managing different Views. | The View and the Presenter layer have a one-to-one relationship. The Presenter layer can manage a single View only. |
Key Points of MVP Architecture
Here are some key points of the Model-View-Presenter (MVP) architecture:
- Separation of concerns: The separation of concerns of the application into several distinct layers ensures better maintenance and flexibility.
- Testability: Since MVP architecture Android provides a clear separation between the layers, it becomes easier to test each of the layers separately and monitor all the testing scenarios.
- Scalability: MVP promotes building scalable applications that can evolve with the changes in the business logic as well due to the separation of concerns.
- Use of interfaces: The entire communication between the View-Presenter and Presenter-Model is based on the use of interfaces (also known as a Contract).
- Relationship: MVP comprises one-to-one relationships, so a Presenter can manage only a single View at a time.
- Separation between the Model and View: The View and the Model have no direct communication, and neither do they know about the existence of the other. The decoupling allows for better scalability. Different components can be scaled and tested independently.
Example of MVP Architecture
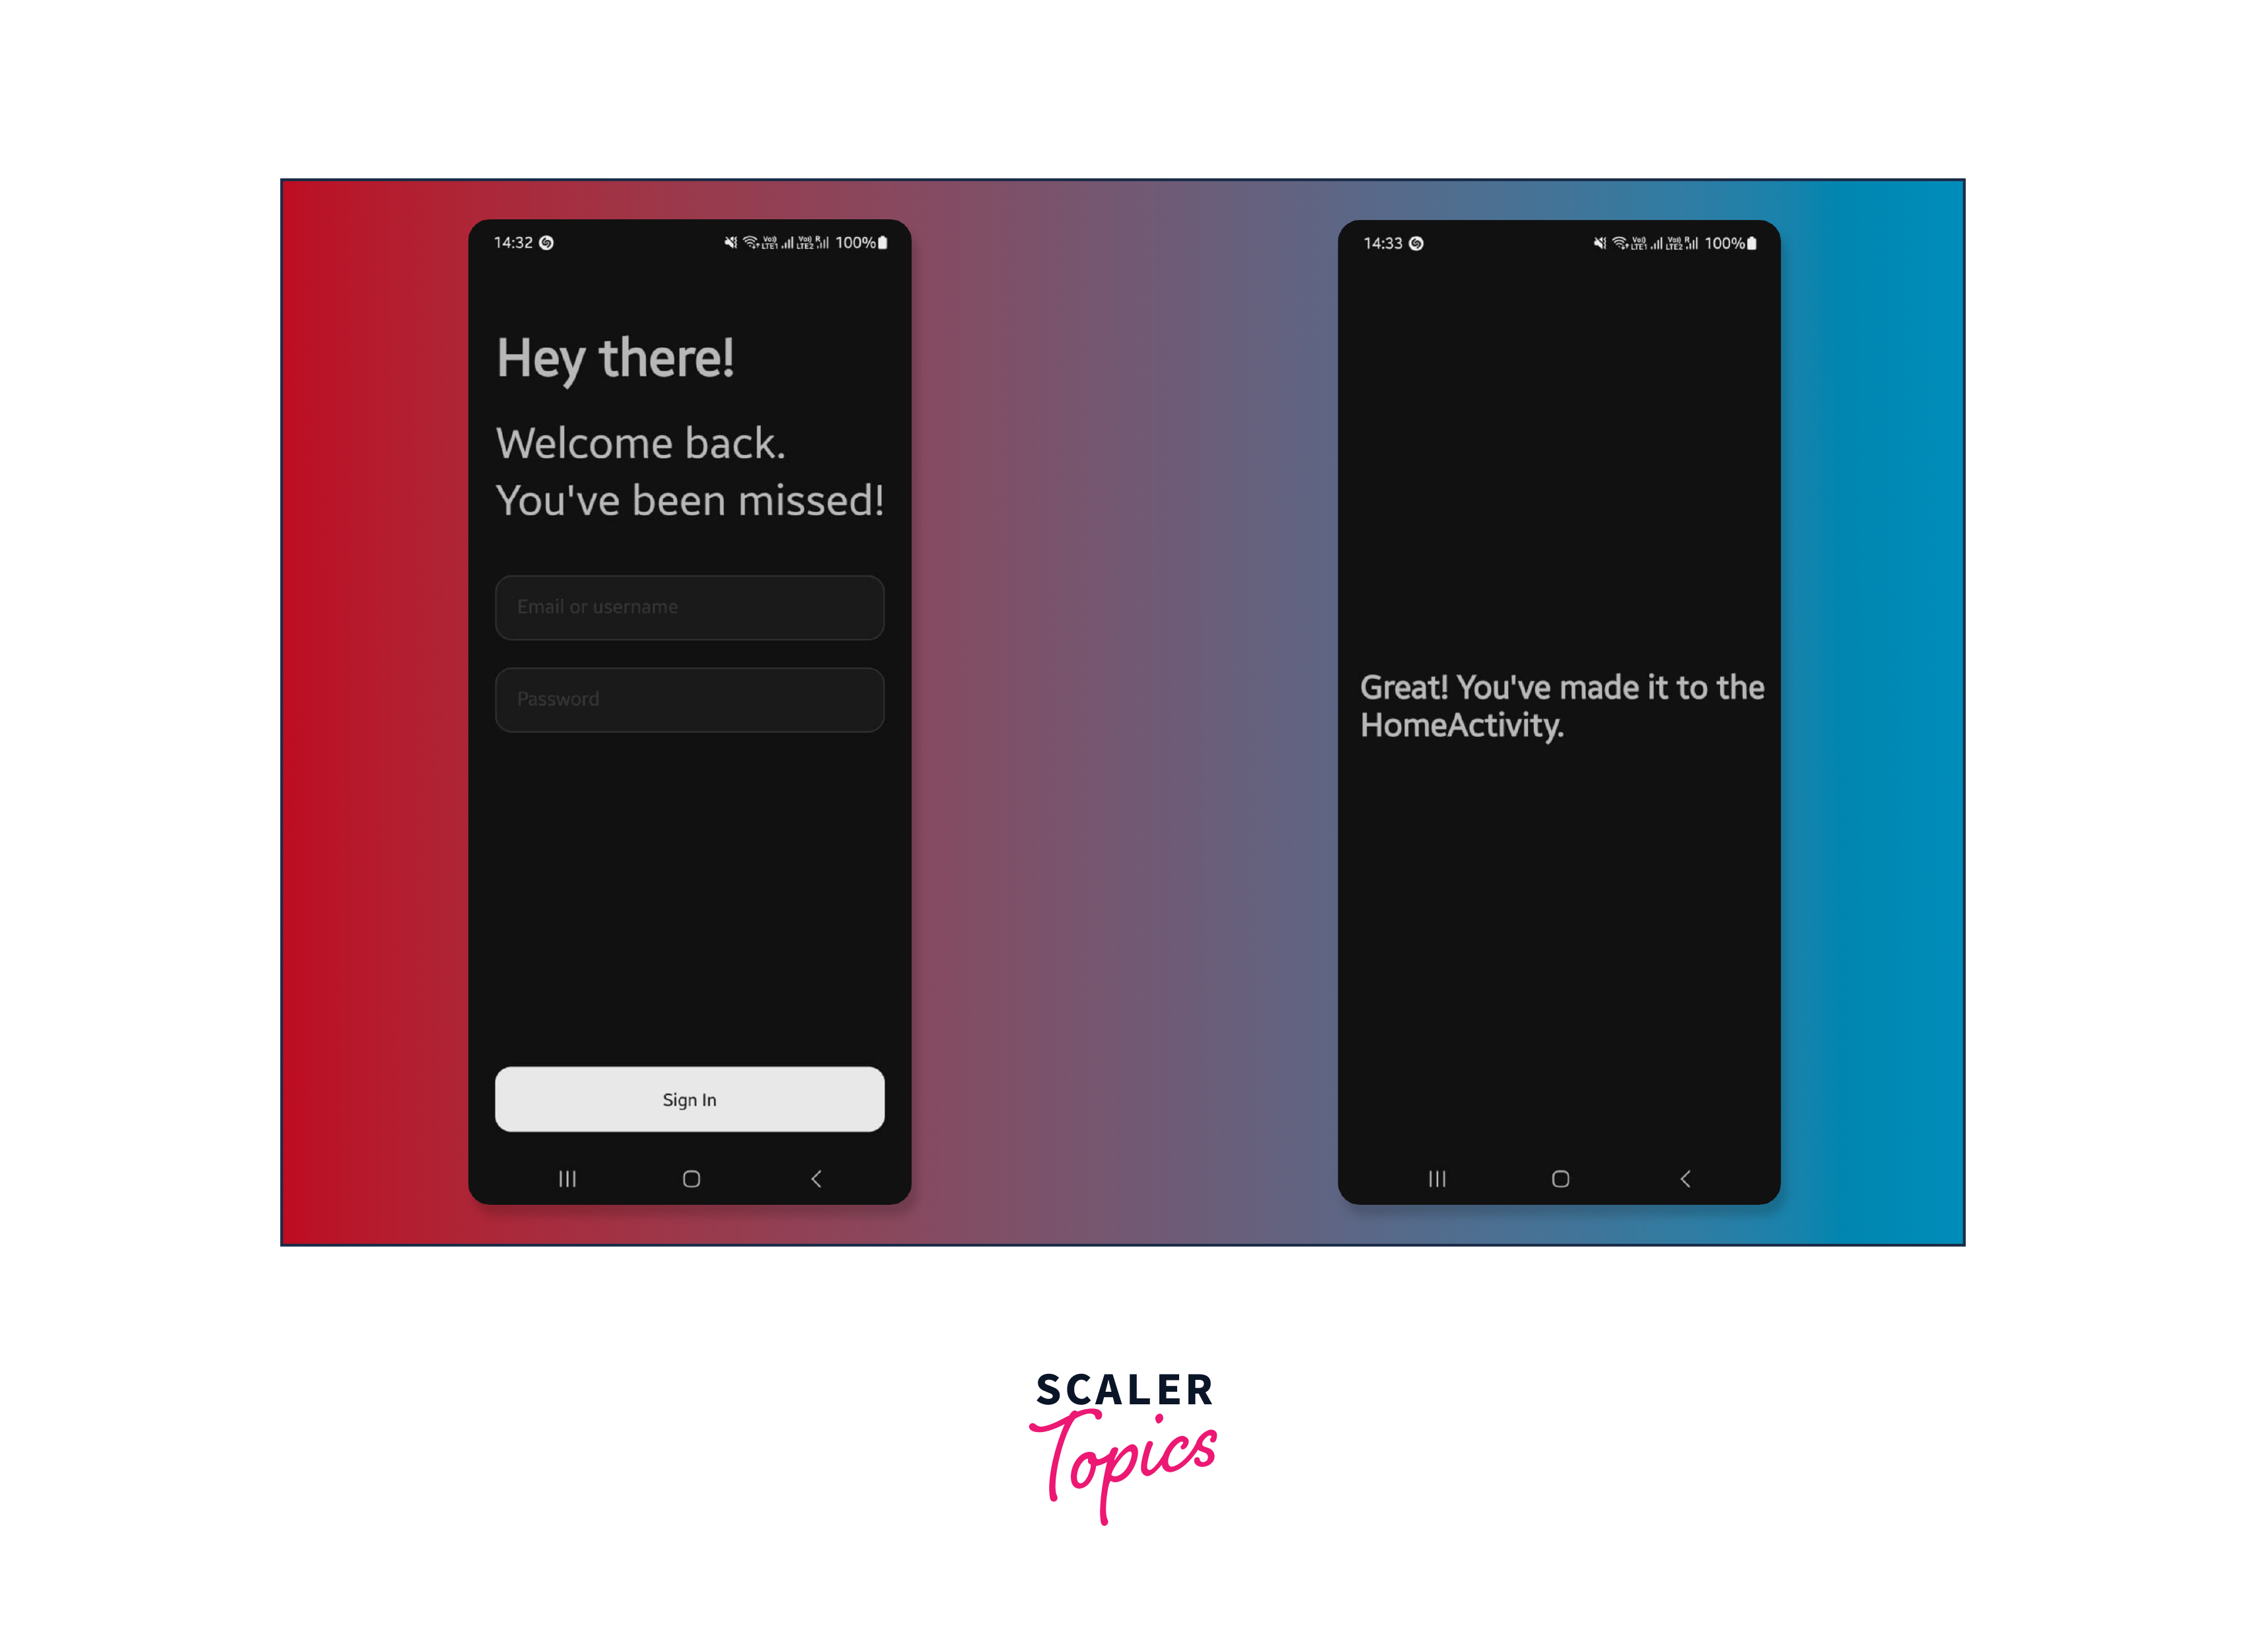
We can create a Sigin application in MVP pattern with a LoginActivity, which will redirect the user to HomeActivity upon successful login.
Step 1: Create a New Project
Create a new Android Studio project and choose the Empty Activity template.
Step 2: Working With the Activity_main.xml File
Since we are creating a SignIn application, the app will have two activities: one for the sign-in (MainActivity) and another for the home page (HomeActivity).
So, to make a better UI for both activities, let's add some more files and code before hopping onto the activity's XML file.
Let us define all the colors that would be used in the application inside the res -> values -> colors.xml.
It typically contains a list of color resources, each with a unique name and a corresponding color value in the form of a hexadecimal code.
Now, we need to set the theme for both Light as well as Dark modes for the application. You may change the theme as per wish, but in this case, we need everything to be black (#111111). So, set every color attribute name with black in both themes.xml for light and dark modes.
themes.xml:
themes.xml(night):
Now, usually, the EditText doesn't have a better-looking box. So, we can create a background for an EditText, button, and also for activities. So, the backgrounds can be created by navigating to res -> drawable and then clicking on Drawable Resource File.
Similarly, create another one for EditText with the name edit_text_box.xml and use the following code:
Create a new one for buttons with the name button_bg.xml:
We're good to go. We can now create activity_main.xml. Here, we'll use ConstraintLayout as it provides a lot more capability in providing constraints from all four directions and makes the app responsive. With ConstraintLayout, you can create layouts that can adapt to different screen sizes and orientations. It lets you create layouts without nesting the views and thereby reduces the view hierarchies in the layout.
To provide some description, we can use TextView in the beginning. activity_main.xml:
We also need to have a HomeActivity, so let's create an Empty Activity and then modify activity_home.xml with the following code: activity_home.xml:
Step 3: Modify the String.xml File
As per good coding practices, we should be defining all the string data inside res -> values -> strings.xml file. It is a resource file designed to contain all the strings that will be used throughout the app.
These strings can be accessed by using @string/string_name. strings.xml:
Step 4: Defining the Contract Interface File for the Model, View, and Presenter
We'll have a Contract Interface that will provide a standard set of data that can be accessed by the Model, the View, and the Presenter. The Contract Interface acts as an agreement between the View and the Presenter about what functionalities the View provides and what methods the Presenter can use to update the View.
In our case, we'll be specifying all the interfaces that will be used throughout the three distinct layers. It should be named LoginContract.java. Here are all the interfaces to be specified in the LoginContract interface.
Step 5: Creating the Model Class
The Model class will be used for verifying the data captured from the user's input. Since this is a login application, we'll have a login() method that internally uses the checkUser() method. Both these methods will consider String emailOrUsername and String password as their parameters.
As we created the interface for the Model inside the LoginContract interface, LoginModel will implement LoginContract.Model interface.
Before we create LoginModel.java, we need to have an arrayList of users with email address, usernames, and passwords. So, we need a POJO class with getter and setter methods for all the instance variables. User.java:
LoginModel.java:
Step 6: Creating the Presenter Class
The Presenter class will have to implement the LoginContract.Presenter interface and since it can act as a mediator between the View and the Model, it will have instances of both for the interaction and to update the View.
Step 7: Define functionalities of View in the MainActivity file
Since a user can see the changes on the MainActivity itself, it will implement the LoginContract.View interface. Also, if a user is able to log in successfully, then they would be redirected to HomeActivity with the help of Intent. Also, we don't need to make any changes in HomeActivity.java.
MainActivity.java:
Congrats! You've created the app. Run it on the emulator or a physical device. This is what your app will look like!
Output:
Advantages of MVP Architecture
- MVP separates the application logic from the user interface, making it easier to maintain and modify the application.
- MVP architecture Android promotes independent unit testing of the application logic, so it helps in easier detection of the issues.
- MVP architecture ensures code reusability across the different layers, thereby reducing the efforts and time consumed in the development process.
Disadvantages of MVP Architecture
- MVP architecture pattern comes with an additional layer of complexity that makes the application a bit difficult to understand.
- Despite the better maintenance, sometimes more efforts have to be put into building even smaller applications. This eventually increases the cost as well.
- The Single Responsibility Principle (SRP) has to be followed for the Presenter layer, otherwise, it can be very difficult to manage a single class with all the interaction interfaces.
- Verbosity is a potential drawback of the MVP architecture as it requires creating a larger number of classes compared to other architectures. This is because the separation of concerns and strict layering can lead to more classes being necessary for each layer.
Conclusion
- MVP (Model-View-Presenter) is an architectural pattern used in Android development for separating the application logic from the user interface.
- The MVP architecture pattern separates the application logic into three distinct layers - Model, View, and Presenter.
- It also enables unit testing of the logic layer alone, which is an important factor in improving the scalability and maintainability of the application.
- MVP can also eventually increase the complexity and over-engineering of building an application. So, it needs more effort in terms of understandability.
- MVP differs from MVC (Model-View-Controller) in terms of the separation of concerns as there is tigcouplinging between the View and the Controller in MVC, whereas MVP has the Presenter layer as well as the View separated with interaction being possible with the use of interfaces.