Working of DAX ( DynamoDB Accelerator) Part- 2
Overview
While using AWS DynamoDB databases, major issues are experienced in cache validation, data population, etc. AWS provides a fully managed in-memory cache known as DynamoDB Accelerator for use along with AWS DynamoDB. DynamoDB Accelerator in AWS reduces the response time of requests from milliseconds to microseconds, reducing the response time to one-tenth.
Use Cases for DAX
DynamoDB Accelerator serves various use cases, and we will discuss a few important ones.
Fast Response to Read Requests
- DAX Cluster consists of a primary node and other read replica nodes of the primary node.
- The read replicas perform only read requests.
- If any read requests are received, the Read replica cache node of the DAX cluster instantly responds to the read requests.
Frequent Requests for Smaller Items
- Suppose our application is an e-commerce application, and we showcase a product for a one-day sale.
- As a consequence, the read requests for that particular product increase.
- Now, instead of fetching the information from the DynamoDB instance each time, the data can be stored in the Cache memory for a day.
- Now, if any requests come for reading the data, they can be served within one-tenth of the previous response time.
Pocket Friendly
- The computational power of DAX is used for each read request made directly to the DynamoDB instance.
- Extra cost is charged for increasing the computational power if the requests increase.
- To save this cost, DAX cluster read replicas can be used, responding one-tenth of the time the DynamoDB instance takes.
Repeated Read Requests for Large Datasets
- Suppose our application is a weather prediction app. Users are making multiple read requests to get the prediction.
- To show the prediction each time, lots of analysis are going on behind the scene, which impacts the working of the DynamoDB instance.
- Instead of a DynamoDB instance, we can use read replicas of the DAX cluster, which stores the processed data in cache memory and can process read requests to yield responses within microseconds.
DAX: How it Works?
Before understanding the working of DAX, let's first explore the DAX Cluster.
What is DAX Cluster?
- DAX Cluster is a logical group of nodes that functions as a single unit.
- It comprises a primary/source database and other read replicas which are copies of the primary database and capable of performing only read operations. In other words, the read replicas can serve only read requests.
- Primary node serves the requests made to the cache cluster and handles all write requests.
- Ideally, it is expected to have at least three nodes in the production environment, where each node is located in a different availability zone. This helps increase the availability and reliability of the data stored in the DAX Cluster.
Working on DynamoDB Accelerator in AWS
Let's understand the working of DynamoDB Accelerator in AWS with the help of the diagram given below.
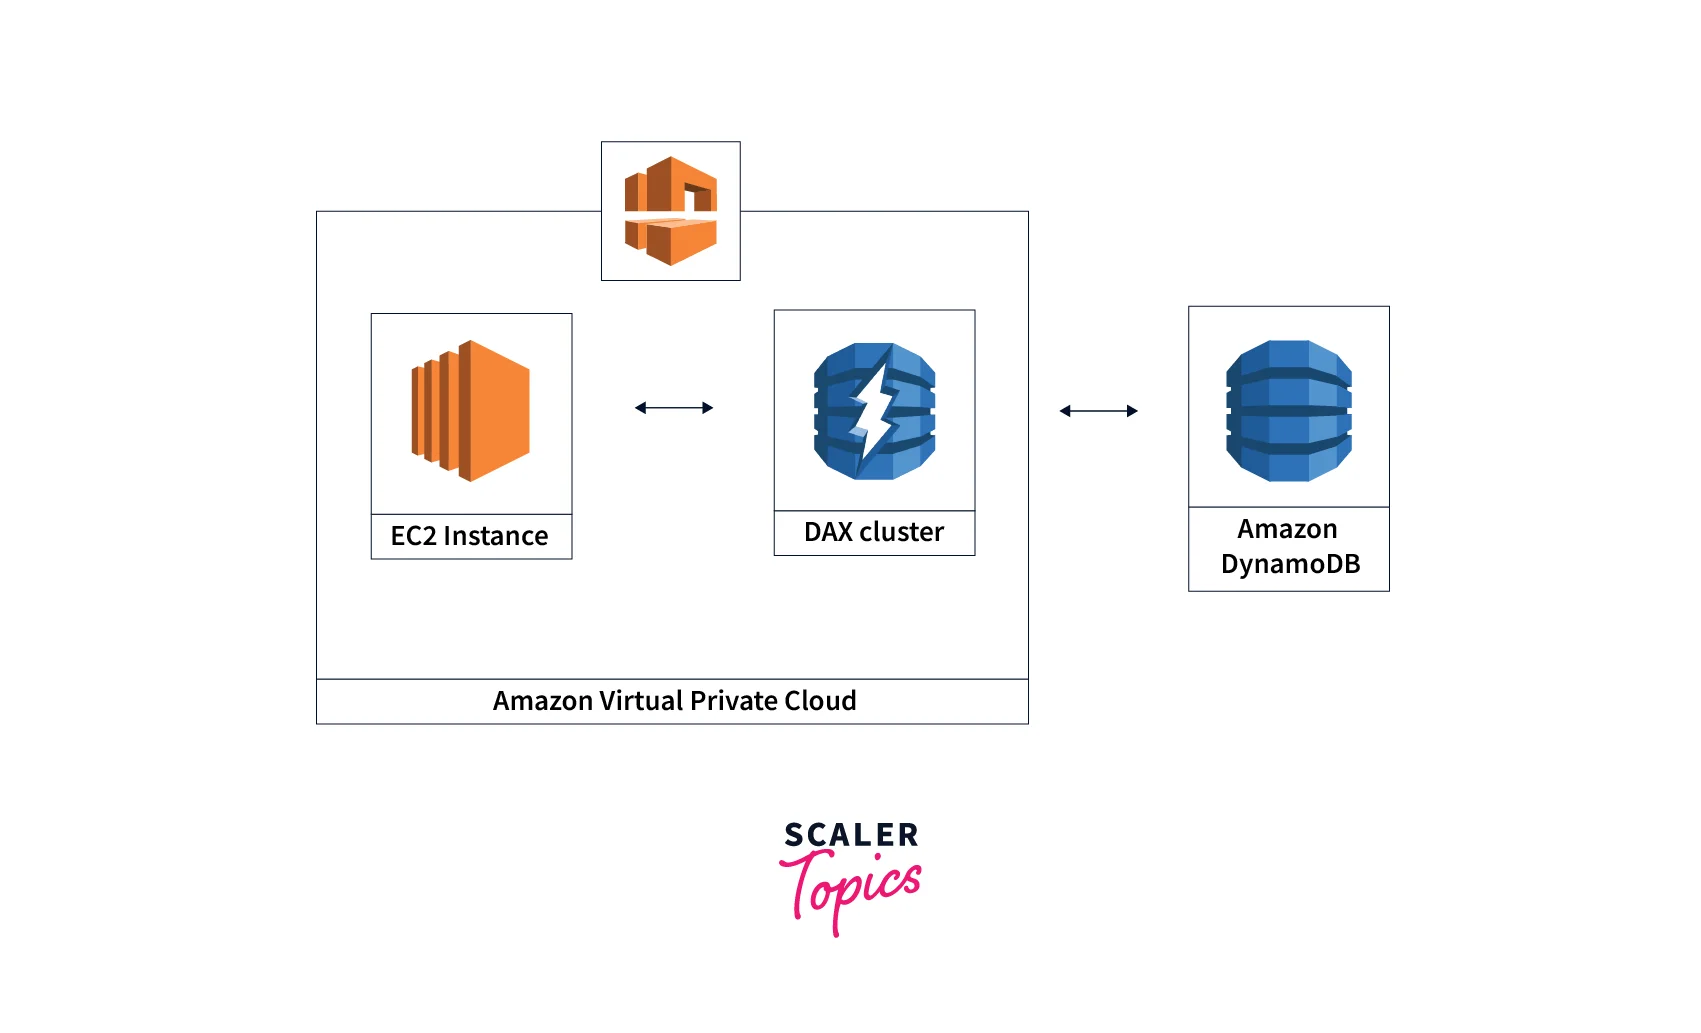
As shown in the diagram above:
- DynamoDB Accelerator in AWS is located within the Amazon Virtual Private Cloud (VPC).
- The VPC helps create a virtual network, and the security, IP access, networks, routings, etc., are taken care of under this VPC.
- We need to have a DAX cluster setup inside the VPC. We can specify the desired VPC, or AWS can choose the default VPC for creating the cluster inside it.
- We take the help of the AWS EC2 instance for running an application. DAX Client and the application code are also launched in this EC2 instance.
- The DAX client helps the EC2 instance to connect with the DAX Cluster within the VPC.
- When clients request the application for some CRUD operation, the DAX Client redirects the requests to DAX Cluster.
- The DAX Cluster responds to the request, and the response is sent back to the client via the application.
- Otherwise, if the DAX cluster cannot respond, the requests get forwarded to the Amazon DynamoDB database, which response to the requests, and the response is returned via the same path to the client.
DAX Cluster Components
Many small AWS infrastructure components combine and help the DAX Cluster to work smoothly in AWS. Let's have a look at each of those components.
Node
- Nodes are building blocks of the DAX Cluster. They contain read replicas of the cached data.
- Nodes are helpful while scaling the DAX cluster. If you want to scale the DAX cluster, then you can increase the number of nodes or the node's capacity by changing the node type.
Clusters
- Cluster is the logical group that comprises two or more nodes.
- Each DAX Cluster ideally contains a primary node and other read replica nodes.
- Read replica nodes serve only read requests made to the DAX Cluster whereas the primary node is capable of serving write requests.
Regions and Availability Zones
- DAX cluster has some limitations. It can only connect to DynamoDB data tables in the same AWS region as the cluster.
- If the DynamoDB data tables are present in some other AWS region, then to connect it to the DAX Cluster, we need to launch another DAX cluster in that region.
- Each AWS region comprises one or more Availability Zones. The nodes of the DAX Cluster are distributed among these availability zones to increase availability and fault tolerance capability.
Parameter Groups
- Parameter groups are a set of parameters used to configure the DAX cluster. This group is applied to all the cluster nodes to ensure all the nodes function together.
- For managing the runtime settings of DynamoDB Accelerator Cluster, we use parameter groups. Using this, we can optimize the performance of the cluster.
Security Groups
- Security groups are a set of rules determining the path for incoming and outgoing traffic.
- The DynamoDB Accelerator Cluster in AWS is located within the AWS Virtual Private Cloud.
- The VPC forms a virtual network with routing tables, network gateways, and security groups, forming an isolated environment.
Cluster ARN
- ARN stands for Amazon Resource Name.
- Each DAX cluster is assigned an ARN with the syntax same as: arn:aws:dax:region:accountID:cache/clusterName
Cluster Endpoint
-
The EC2 instance, which contains your application code needs to connect to the DAX Cluster to serve requests for cache data.
-
For the EC2 instance to be connected to the Cluster, it needs the Cluster Endpoint. The endpoint comprises the hostname and port number to establish the connection.
-
The cluster endpoint is something like this: dax://my-cluster.l6fzcv.dax-clusters.us-east-1.amazonaws.com.
This cluster is configured in the us-east-1 region and is not configured for in-transit encryption.
-
Let's take another example: daxs://my-encrypted-cluster.l6fzcv.dax-clusters.us-east-1.amazonaws.com.
Here this cluster is configured in the us-east-1 region, and it is configured for in-transit encryption.
Node Endpoints
-
Each node in the DynamoDB Accelerator Cluster has an individual hostname and port number, which represent the endpoint to which a connection can be made.
-
An example for Node Endpoint:
myDAXcluster-a.2cmrwl.clustercfg.dax.use1.cache.amazonaws.com:8111
Subnet Groups
- By default, the EC2 instance cannot connect to the nodes of the DAX cluster.
- To pave the way for connection between the two, subnet groups are created. It contains one or more subnets you want to grant access to for connection.
- You are prompted to create subnet groups before creating the DAX cluster.
Events
- Various events are going on inside the DAX cluster, and DAX maintains the record of these events.
- Some common events that can occur within the cluster are node failure, the addition of new nodes, change in security groups, etc.
Maintenance Window
- For every DAX cluster, a Maintenance window exists weekly during which system changes are made to the cluster.
- You can specify the time for the maintenance window. Otherwise, DAX uses a 60 min maintenance window by default.
Creating a DAX Cluster
Let's create the Amazon DynamoDB Accelerator (DAX) Cluster. We can create it either by using AWS CLI or The AWS Management Console. In this demo, we will see how we can create an Amazon DynamoDB Accelerator (DAX) cluster using the AWS management console.
Before creating a DAX cluster, we must create an IAM service role for DAX to access DynamoDB. In this demo, we use the Administrator role which has all the access.
Create a Subnet Group Using the AWS Management Console
Follow the given steps to create subnet groups using AWS Management Console.
-
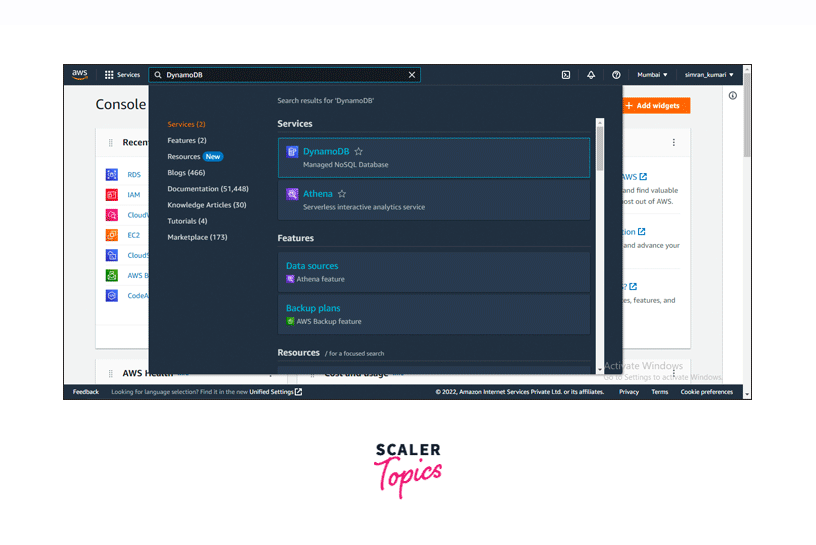
Sign in to the AWS Management Console, search for DynamoDB in the services search bar, and click on the first option, as shown in the image below.
-
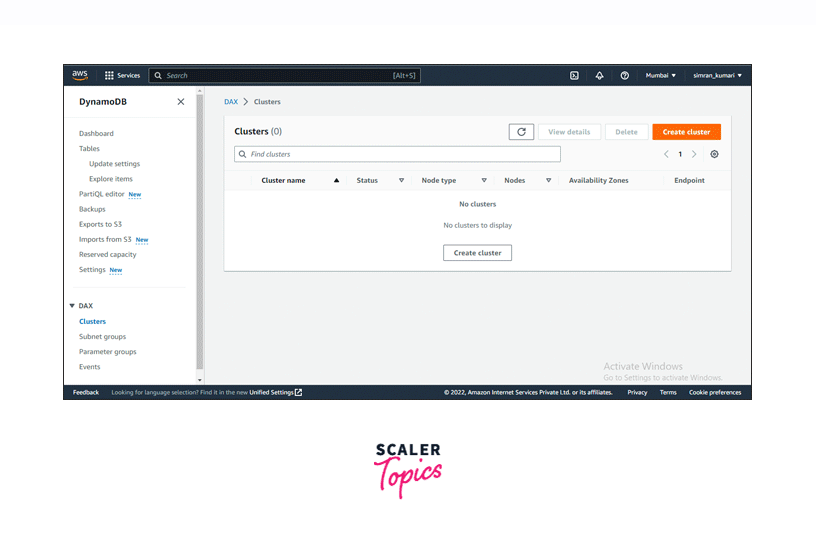
You are redirected to the DynamoDB page. In the left navigation pane of the DynamoDB page, scroll down to click on the Subnet Groups button.
-
Click the Create Subnet Group button to create a new subnet group.
-
Fill in the details for creating a new subnet group. Provide a name for the subnet group you are creating.
-
Select the subnets you want to include in the subnet group. After filling in the required details, click the Create Subnet Group button.
-
Our Subnet group is successfully created as specified by the message notification. You can see the recently created subnet group among the list of subnets.
Create a DAX Cluster Using the AWS Management Console
After creating the subnet group, follow the given steps to create the DAX cluster.
-
In the DynamoDB page of the AWS Management Console, click on the Clusters option under the DAX section in the left navigation bar. Here, click on the Create cluster button.
-
You are redirected to another page. Here, fill in the details required for creating the new cluster. Provide a name to the DAX cluster and add a description if you want.
-
Select the node family. Here we are going with the All families option. Select the node type based on your choice. Keep in mind that the charges will increase depending on the computational power of the node type you choose.
-
After filling in the details, click on Next.
-
Next, you must fill in other configurational settings. Select the subnet group we created recently.
-
For the Availability Zones, you can go with the Automatic option and click on the Next button.
-
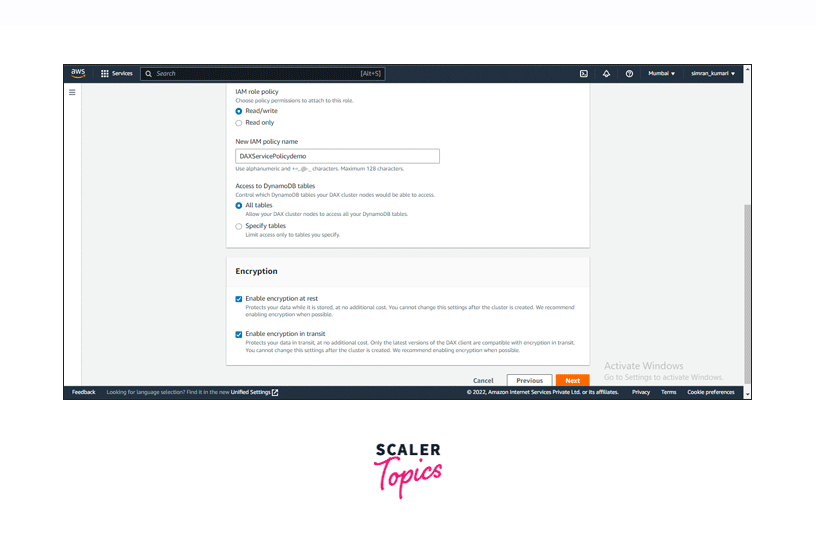
Next, we need to configure security settings. For the IAM role, you can choose an existing IAM role or create a new one. In this demo, we are creating a new IAM role.
-
Select and fill in the details required for creating a new IAM role like encryption, etc., and then click on the Next button.
-
Next, we have to configure advanced settings. This is optional, so we can skip it and click the Next button.
-
On the next page, review all the details specified by you for creating the cluster.
-
After reviewing the configurations, click on the Create cluster button.
-
Our DAX cluster is successfully created and is initially in a Creating state.
-
After some time, the status of the DAX Cluster changes from Creating to Available. Now our cluster is running.
Configure Security Group Inbound Rules Using the AWS Management Console
Once our DynamoDB Accelerator Cluster is created, we need to configure the security group using the following steps:
-
Sign in to the AWS Management Console and search for EC2 in the services search bar. Click on the EC2 service which appears in the list.
-
You are redirected to another page where multiple options are listed. Click on the Security groups option.
-
You are redirected to the Security Groups page. Select the security group from the list for which you want to configure the inbound rules. Following this, click on the Edit inbound rules button.
-
Add inbound rules for TCP and click on the Save rules button.
-
The inbound rules for the security group are successfully configured.
We successfully created a DAX cluster.
Developing with the DynamoDB Accelerator (DAX) Client
Follow the steps for running a sample application using DynamoDB Accelerator (DAX) in AWS.
Launch an Amazon EC2 Instance
First, we need to launch an EC2 instance using the following steps. Here, we will deploy our application.
Follow these steps:
-
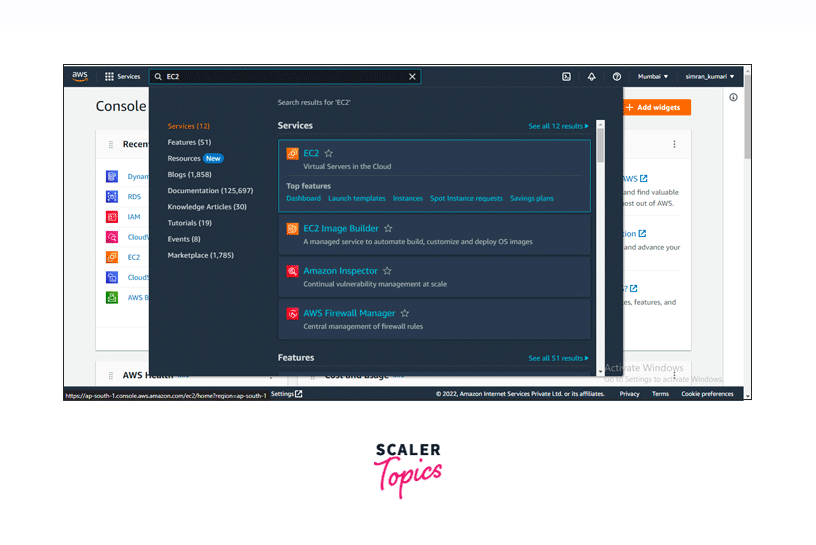
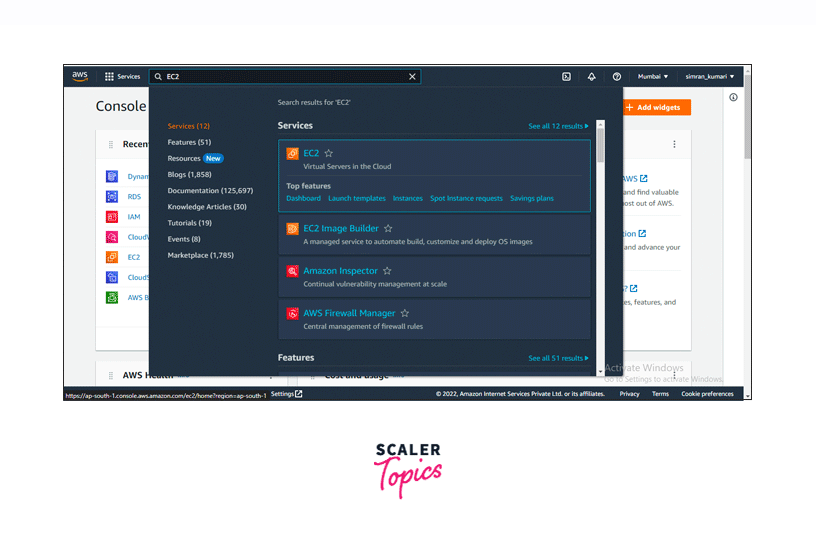
Go to the AWS console, search for the EC2 service, and click on it.
-
Click the Launch Instance button to configure a new EC2 instance.
-
Set a name for the instance.
-
Click on the Create new key pair button for this instance. We can also use any earlier created key pair.
-
On the next screen, we create a key pair. Provide a name to the key pair. Choose the type and format and click on Create key pair. Save this created key pair in your local system.
-
Scroll down and choose the default security group in Firewall (security groups). Leave all the fields as default, i.e., it will take t2.micro as server type, attach an 8 GiB storage volume to the instance, and Amazon Linux AMI as OS image. Click on Launch Instance.
-
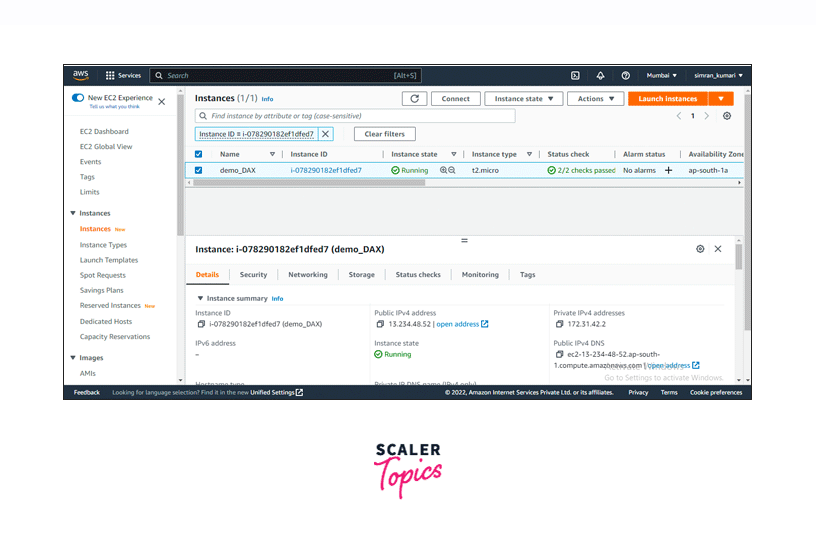
In a few minutes, it will show a Success message that the instance is successfully initiated. Click on the instance ID.
-
After a few minutes, we will see our instance is running and the status check is passed.
We successfully launched an EC2 Instance. Let's move further and create an IAM User Policy.
Create an IAM User and Policy
Now our instance is running and we need to create an IAM User with a specific policy. Follow these steps to create the IAM User and policy:
-
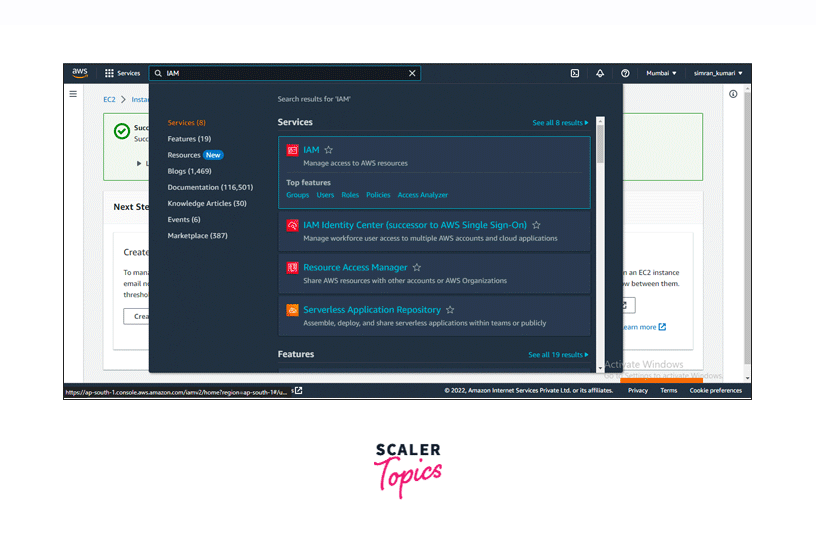
Search IAM in the search bar and click on Users. It will redirect us to the IAM User Console page.
-
Click on Add users to create a new IAM User.
-
Set a User name for the IAM User and choose Access key - Programmatic access as AWS credential type. Click on Next: Permissions.
-
Choose Attach existing policies directly and click Create policy.
-
It will open a new page to create the policy. Choose JSON and paste the following code:
The above policy allows the IAM user to get access to all the resources and actions associated with DAX and DynamoDB. Click on Next: Tags.
-
Leave this page as default, or you can add some tags and click on Next: Review.
-
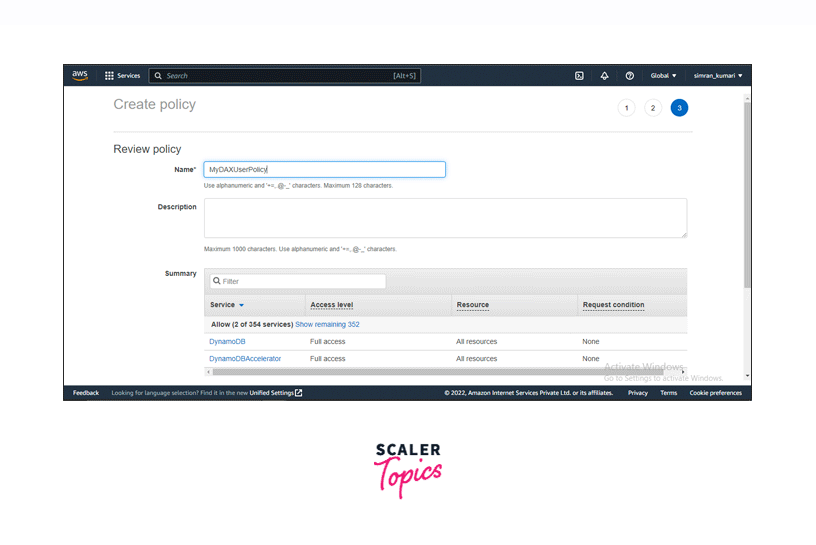
Provide a name to the policy and review the configuration of the policy.
-
After reviewing the configuration, click on Create policy.
-
The policy has been created successfully.
-
Return to the IAM User creation page, search for the created policy, and select it. Click on Next: Tags.
-
On the next page, we can add tags to the IAM User. Let's leave this page as default and click Next: Review.
-
Review all the configurations on the next page and click Create user.
We successfully created an IAM User. Copy the access and secret keys. It will be used later.
Configure an Amazon EC2 Instance
Let's configure the EC2 Instance. Follow these steps:
- Select the instance and click on Connect. It will show us different options to connect. We have to connect to the instance in the browser.
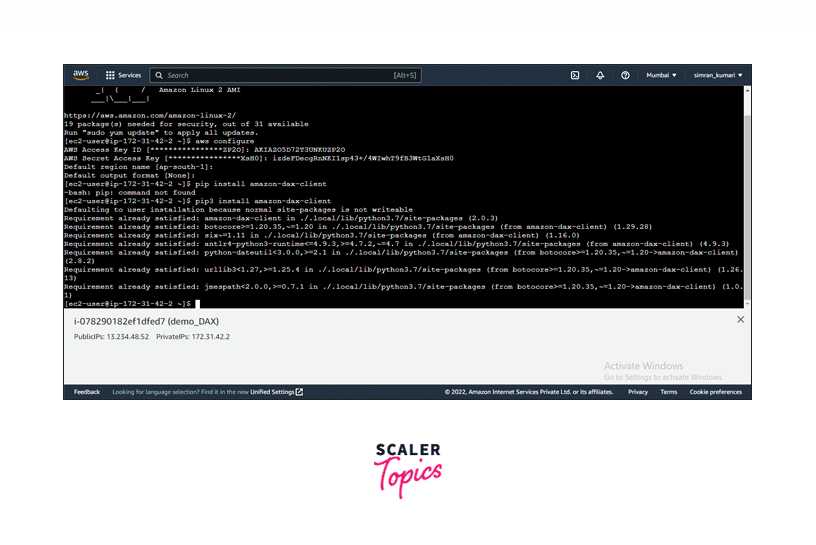
- We are now in our launched instance. Run the aws configure command to configure the instance. Log in with the copied credentials created in the IAM section.
We successfully configured the instance.
Run a Sample Application
Let's run a sample application in Python with DAX. We can also use Java, .NET, Node.js, and Go with DAX.
Follow these steps:
-
Using the pip utility, install the DAX Python client. Run command pip3 install amazon-dax-client.
-
Download the program source code using this command. wget http://docs.aws.amazon.com/amazondynamodb/latest/developerguide/samples/TryDax.zip
-
Unzip the downloaded file. unzip TryDax.zip
-
Go to the Python folder in the TryDax folder. Here we have the source code.
-
Run the command python 01-create-table.py to create a DynamoDB table named TryDaxTable.
-
Run this command to write data to the table: python 02-write-data.py
-
Also run the following Python programs: python 03-getitem-test.py python 04-query-test.py python 05-scan-test.py Note the number of milliseconds required to run the get-item, query, and scan tests.
-
Go to the DAX cluster console page and copy the cluster endpoint. It will look something like this: daxs://demodaxcluster.efdpwx.dax-clusters.ap-south-1.amazonaws.com
-
Run the get-item, query, and scan test program again but this time, define the cluster endpoint. python 03-getitem-test.py daxs://demodaxcluster.efdpwx.dax-clusters.ap-south-1.amazonaws.com python 04-query-test.py daxs://demodaxcluster.efdpwx.dax-clusters.ap-south-1.amazonaws.com python 05-scan-test.py daxs://demodaxcluster.efdpwx.dax-clusters.ap-south-1.amazonaws.com Again note down the number of milliseconds to run these. This time, the elapsed time is significantly lower.
-
At last, run the following program to delete TryDaxTable. python 06-delete-table.py
We successfully run a sample application using the DAX client.
Monitoring DAX
Maintaining the dependability, availability, and performance of Amazon DynamoDB Accelerator (DAX) is crucial. We can use AWS's tools to keep track of Amazon DynamoDB Accelerator (DAX). Some of these tools and technologies can be set up to perform the monitoring automatically, while others need manual intervention.
- In the Automated monitoring tools, we have Amazon CloudWatch Alarms, Amazon CloudWatch Logs, Amazon CloudWatch Events, and AWS CloudTrail Log Monitoring.
- In Manual monitoring tools, we can check the service health on the DAX dashboard. We can also create customized dashboards using CloudWatch.
DAX Access Control
-
Although DynamoDB instances and DAX cluster work together, their security measures and security groups differ.
-
For DynamoDB, we can create IAM policies, which will work for every AWS resource for DynamoDB.
-
For DAX, IAM service roles are created, and a cluster is associated with the role.
-
DAX service role example:
DAX Encryption at Rest
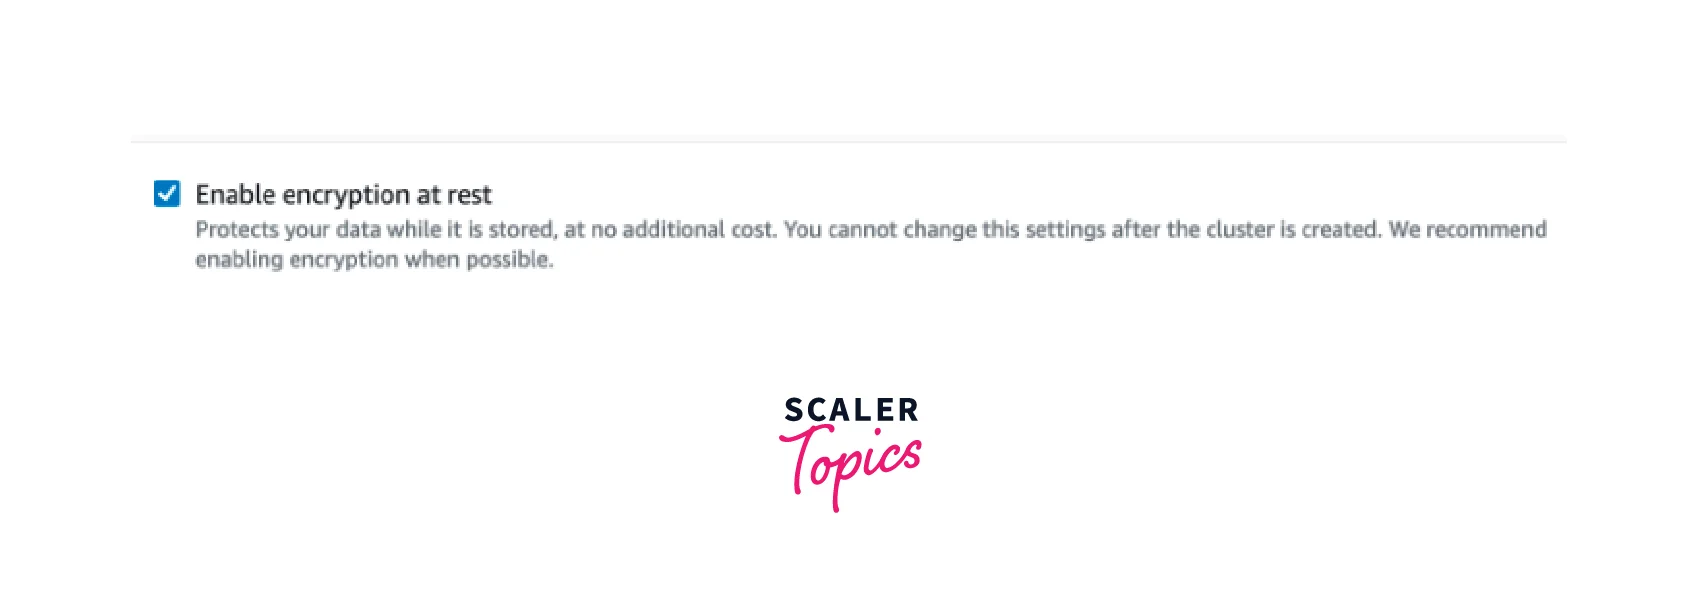
- Encryption at Rest helps secure the data stored in the DAX cluster from unauthorized access.
- While creating the DAX Cluster, we are redirected to configure the setting for our cluster. Here under the Encryption section, we can enable Encryption at rest.
DAX Encryption in Transit
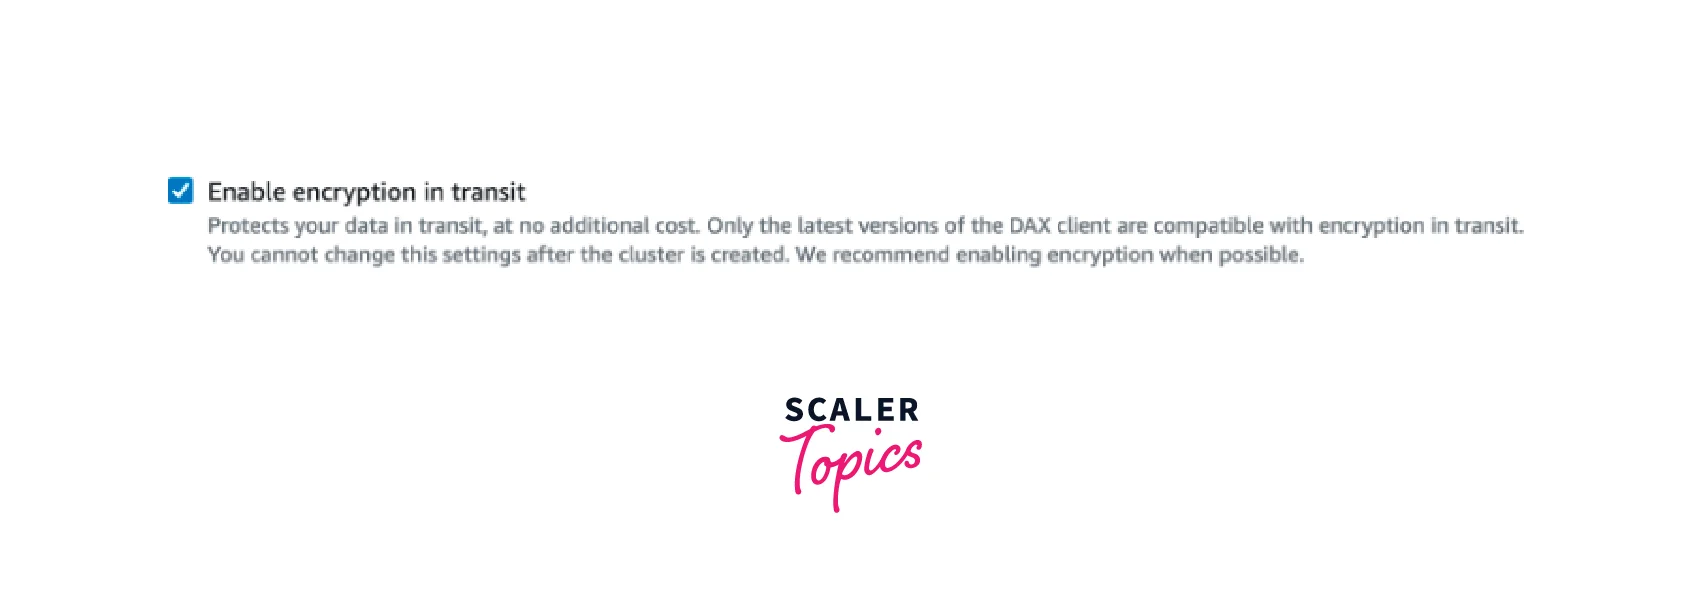
- Encryption in Transit encrypts the data while they are being transferred across the network channels.
- This helps protect your data without compromising its ability to move from a source to a destination.
- While creating the DAX Cluster, we are redirected to configure the setting for our cluster. Here under the Encryption section, we can enable Encryption in transit.
DAX API Reference
You can connect with the DAX cluster using APIs. For example, to create a new table in your DAX account, you can use the CreateTable operation. Visit this link to explore the Amazon DynamoDB Accelerator APIs.
Conclusion
- To reduce the response time of requests made to the DynamoDB instances, DynamoDB Accelerator is used. It reduces the response time of requests from milliseconds to microseconds.
- EC2 instance contains the application program and DAX Client, which connect to the DAX Cluster to serve read requests in microseconds.
- DAX Cluster comprises a primary node and other read replicas. The read replicas can serve only read requests, whereas the primary node can serve to write requests.
- The major components of a DAX Cluster include Nodes, Cluster ARN, Cluster Endpoint, Parameter Groups, Subnet Groups, Events, etc.
- We can encrypt our data stored in the cache memory of the DAX cluster. The data can be encrypted at rest or in transit.