What is Azure CLI?
Overview
Azure CLI is a command-line tool that enables users to manage and control Azure resources directly from the terminal. With a comprehensive set of commands, it allows resource creation, management, and automation, streamlining workflows for Azure services. It's especially useful for scripting, automation, and DevOps processes, providing quick and efficient interaction with the Azure cloud environment.
What Can Azure CLI Do?
Azure Command-Line Interface (Azure CLI) is a powerful command-line tool provided by Microsoft for managing Azure resources and services. Azure CLI allows users to interact with Azure cloud services, perform administrative tasks, and automate workflows through a command-line interface. Here are some of the key capabilities and tasks that Azure CLI can handle:
- Azure CLI enables you to create, update, and delete Azure resources such as virtual machines, storage accounts, databases, and more.
- You can use Azure CLI to manage resource groups, which are logical containers for Azure resources.
- Azure CLI supports authentication methods such as Azure Active Directory (Azure AD), allowing you to log in and manage resources securely.
- You can use Azure CLI to deploy applications and services to Azure, including deploying from templates, creating virtual machines, and setting up networking configurations.
- Azure CLI allows you to manage networking components such as virtual networks, subnets, network security groups, and firewall rules.
- You can manage Azure AD identities, user roles, and permissions using Azure CLI.
Using Azure CLI Without Installing
You can use Azure CLI without installing it on your local machine by utilizing Azure Cloud Shell, a browser-based shell environment directly within the Azure portal. Azure Cloud Shell provides a command-line interface with Azure CLI pre-installed, so you can manage Azure resources and perform administrative tasks without needing to install any software on your local computer. Here's how you can access and use Azure Cloud Shell:
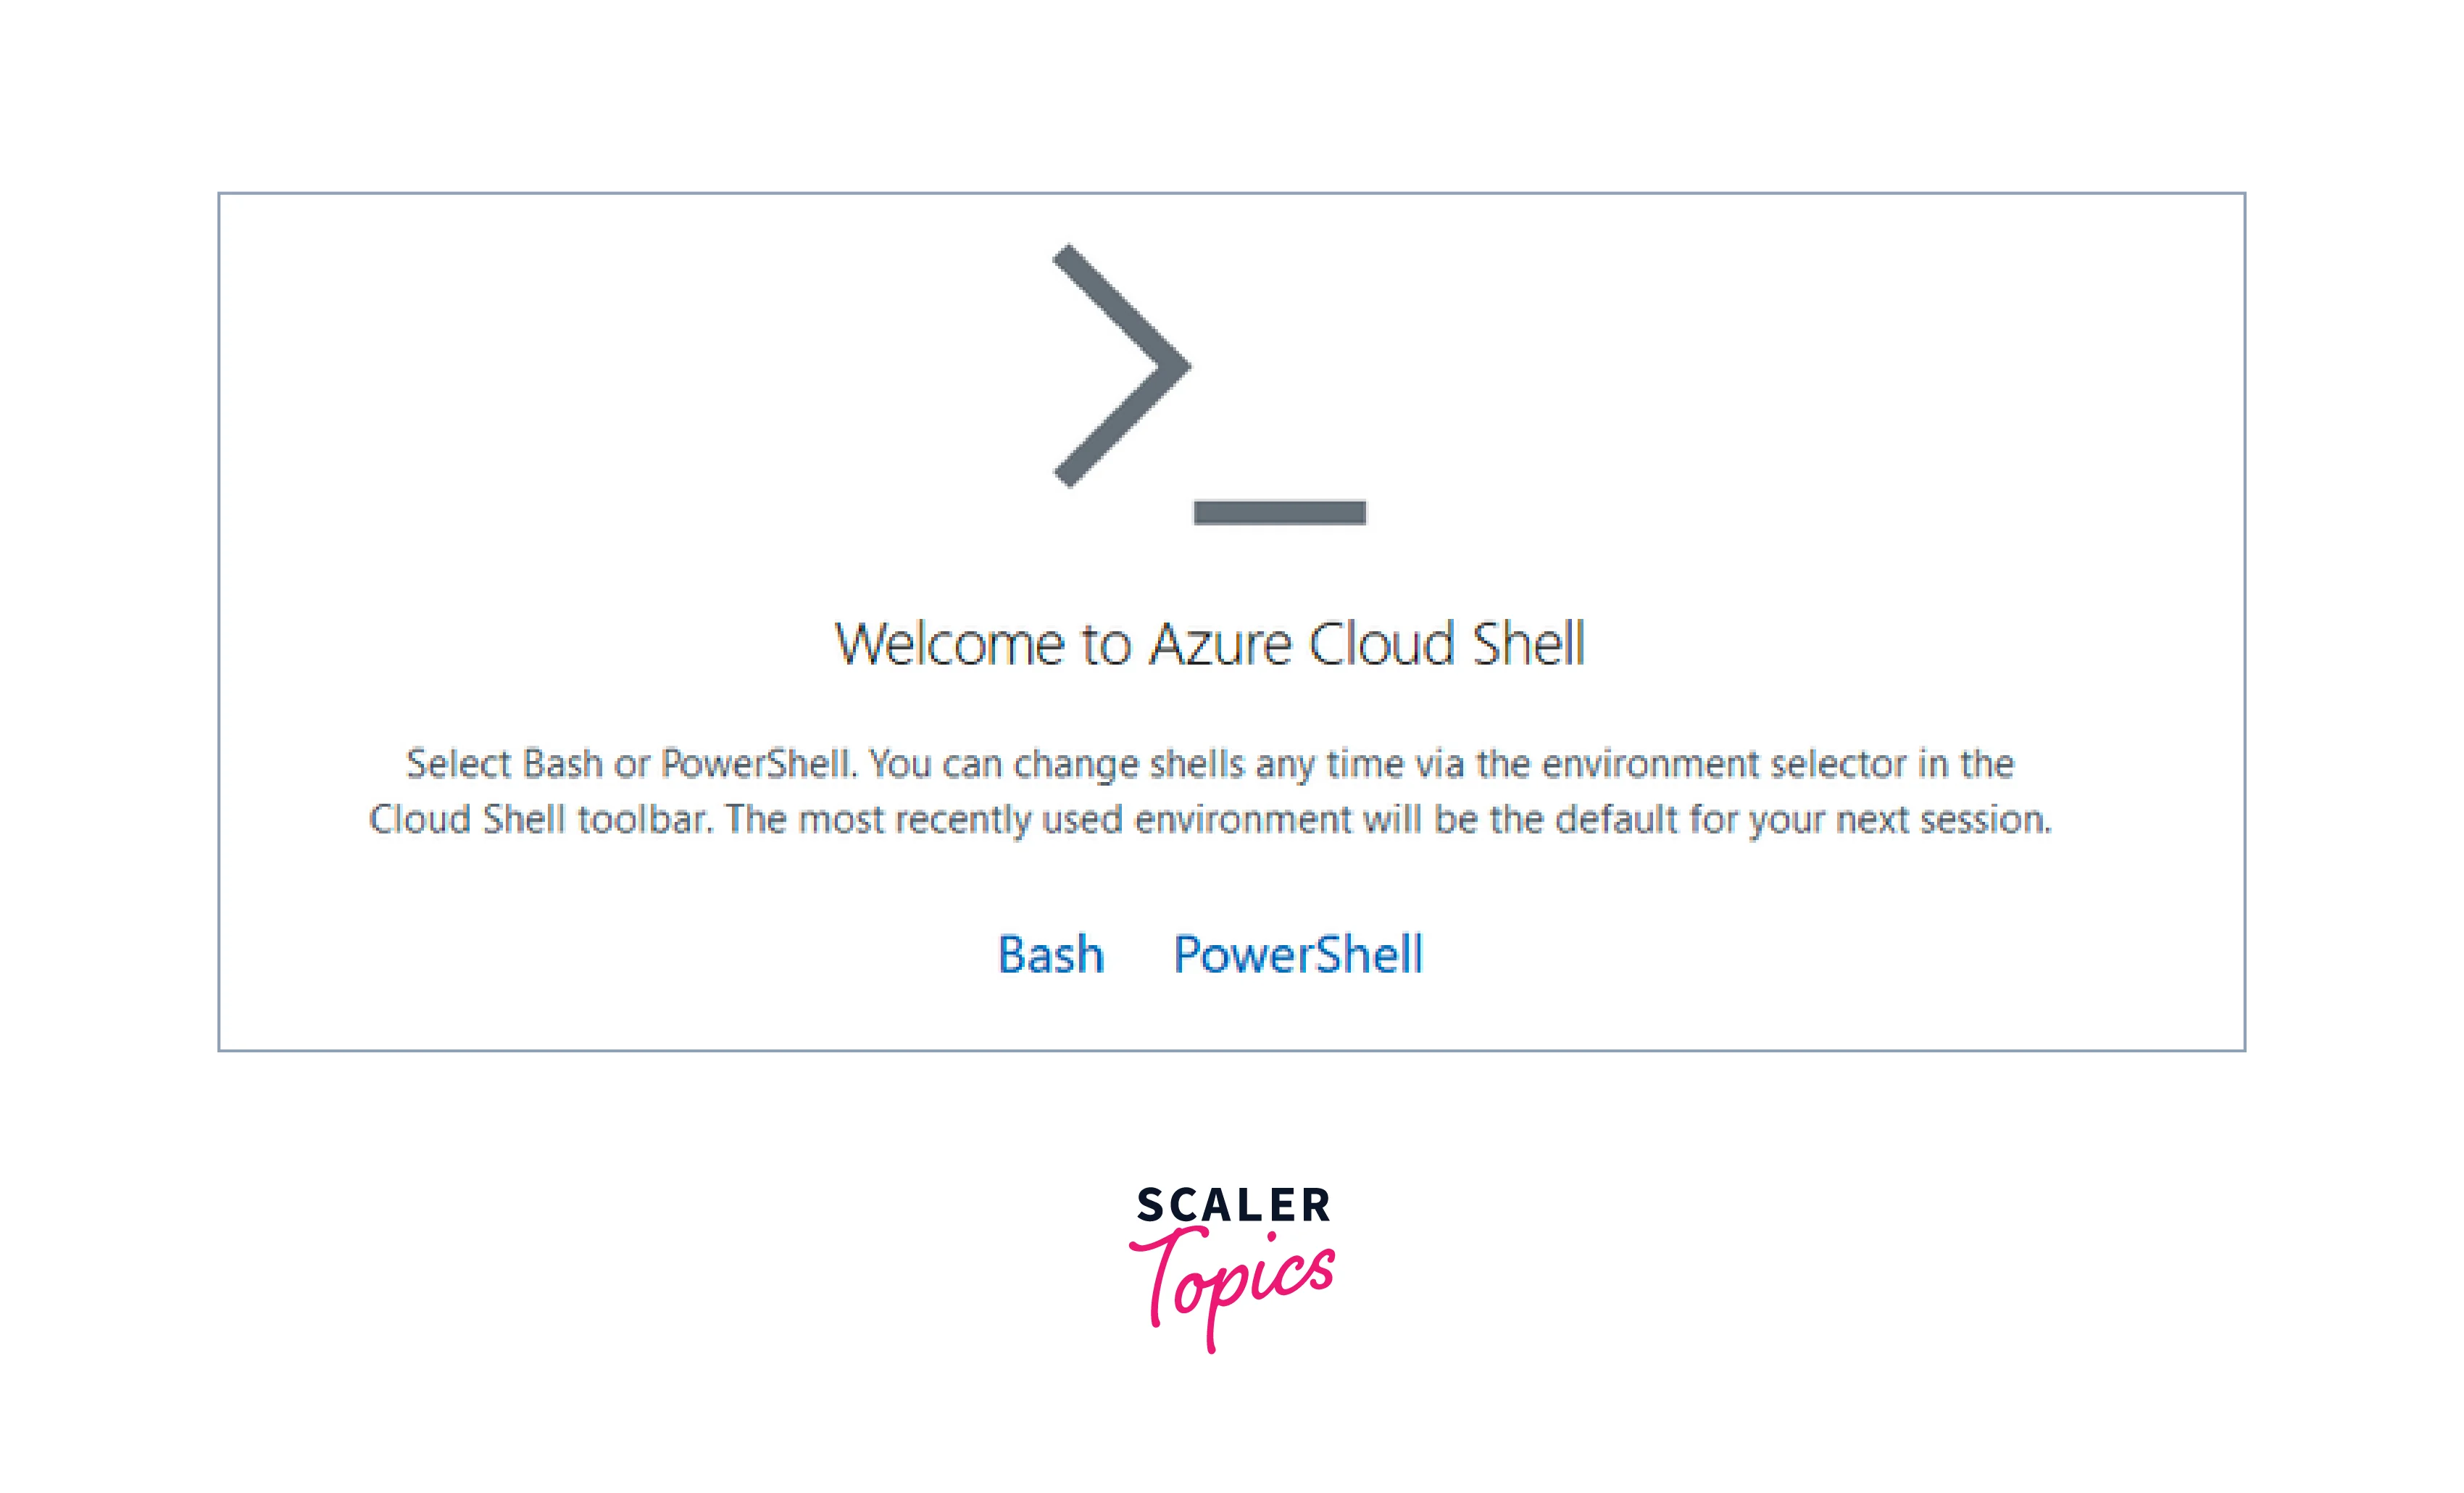
- Access Azure Cloud Shell:
- Log in to the Azure portal.
- Click on the "Cloud Shell" icon in the top right corner of the portal's menu bar (it looks like a ">_" symbol).
- Select Shell Type:
- Choose either "Bash" or "PowerShell" as your preferred shell type. Both options have Azure CLI pre-installed.
- Choose either "Bash" or "PowerShell" as your preferred shell type. Both options have Azure CLI pre-installed.
- Initial Setup:
- If it's your first time using Azure Cloud Shell, you'll need to set up a storage account to store your shell environment data. Follow the on-screen prompts to create a storage account (if required).

- If it's your first time using Azure Cloud Shell, you'll need to set up a storage account to store your shell environment data. Follow the on-screen prompts to create a storage account (if required).
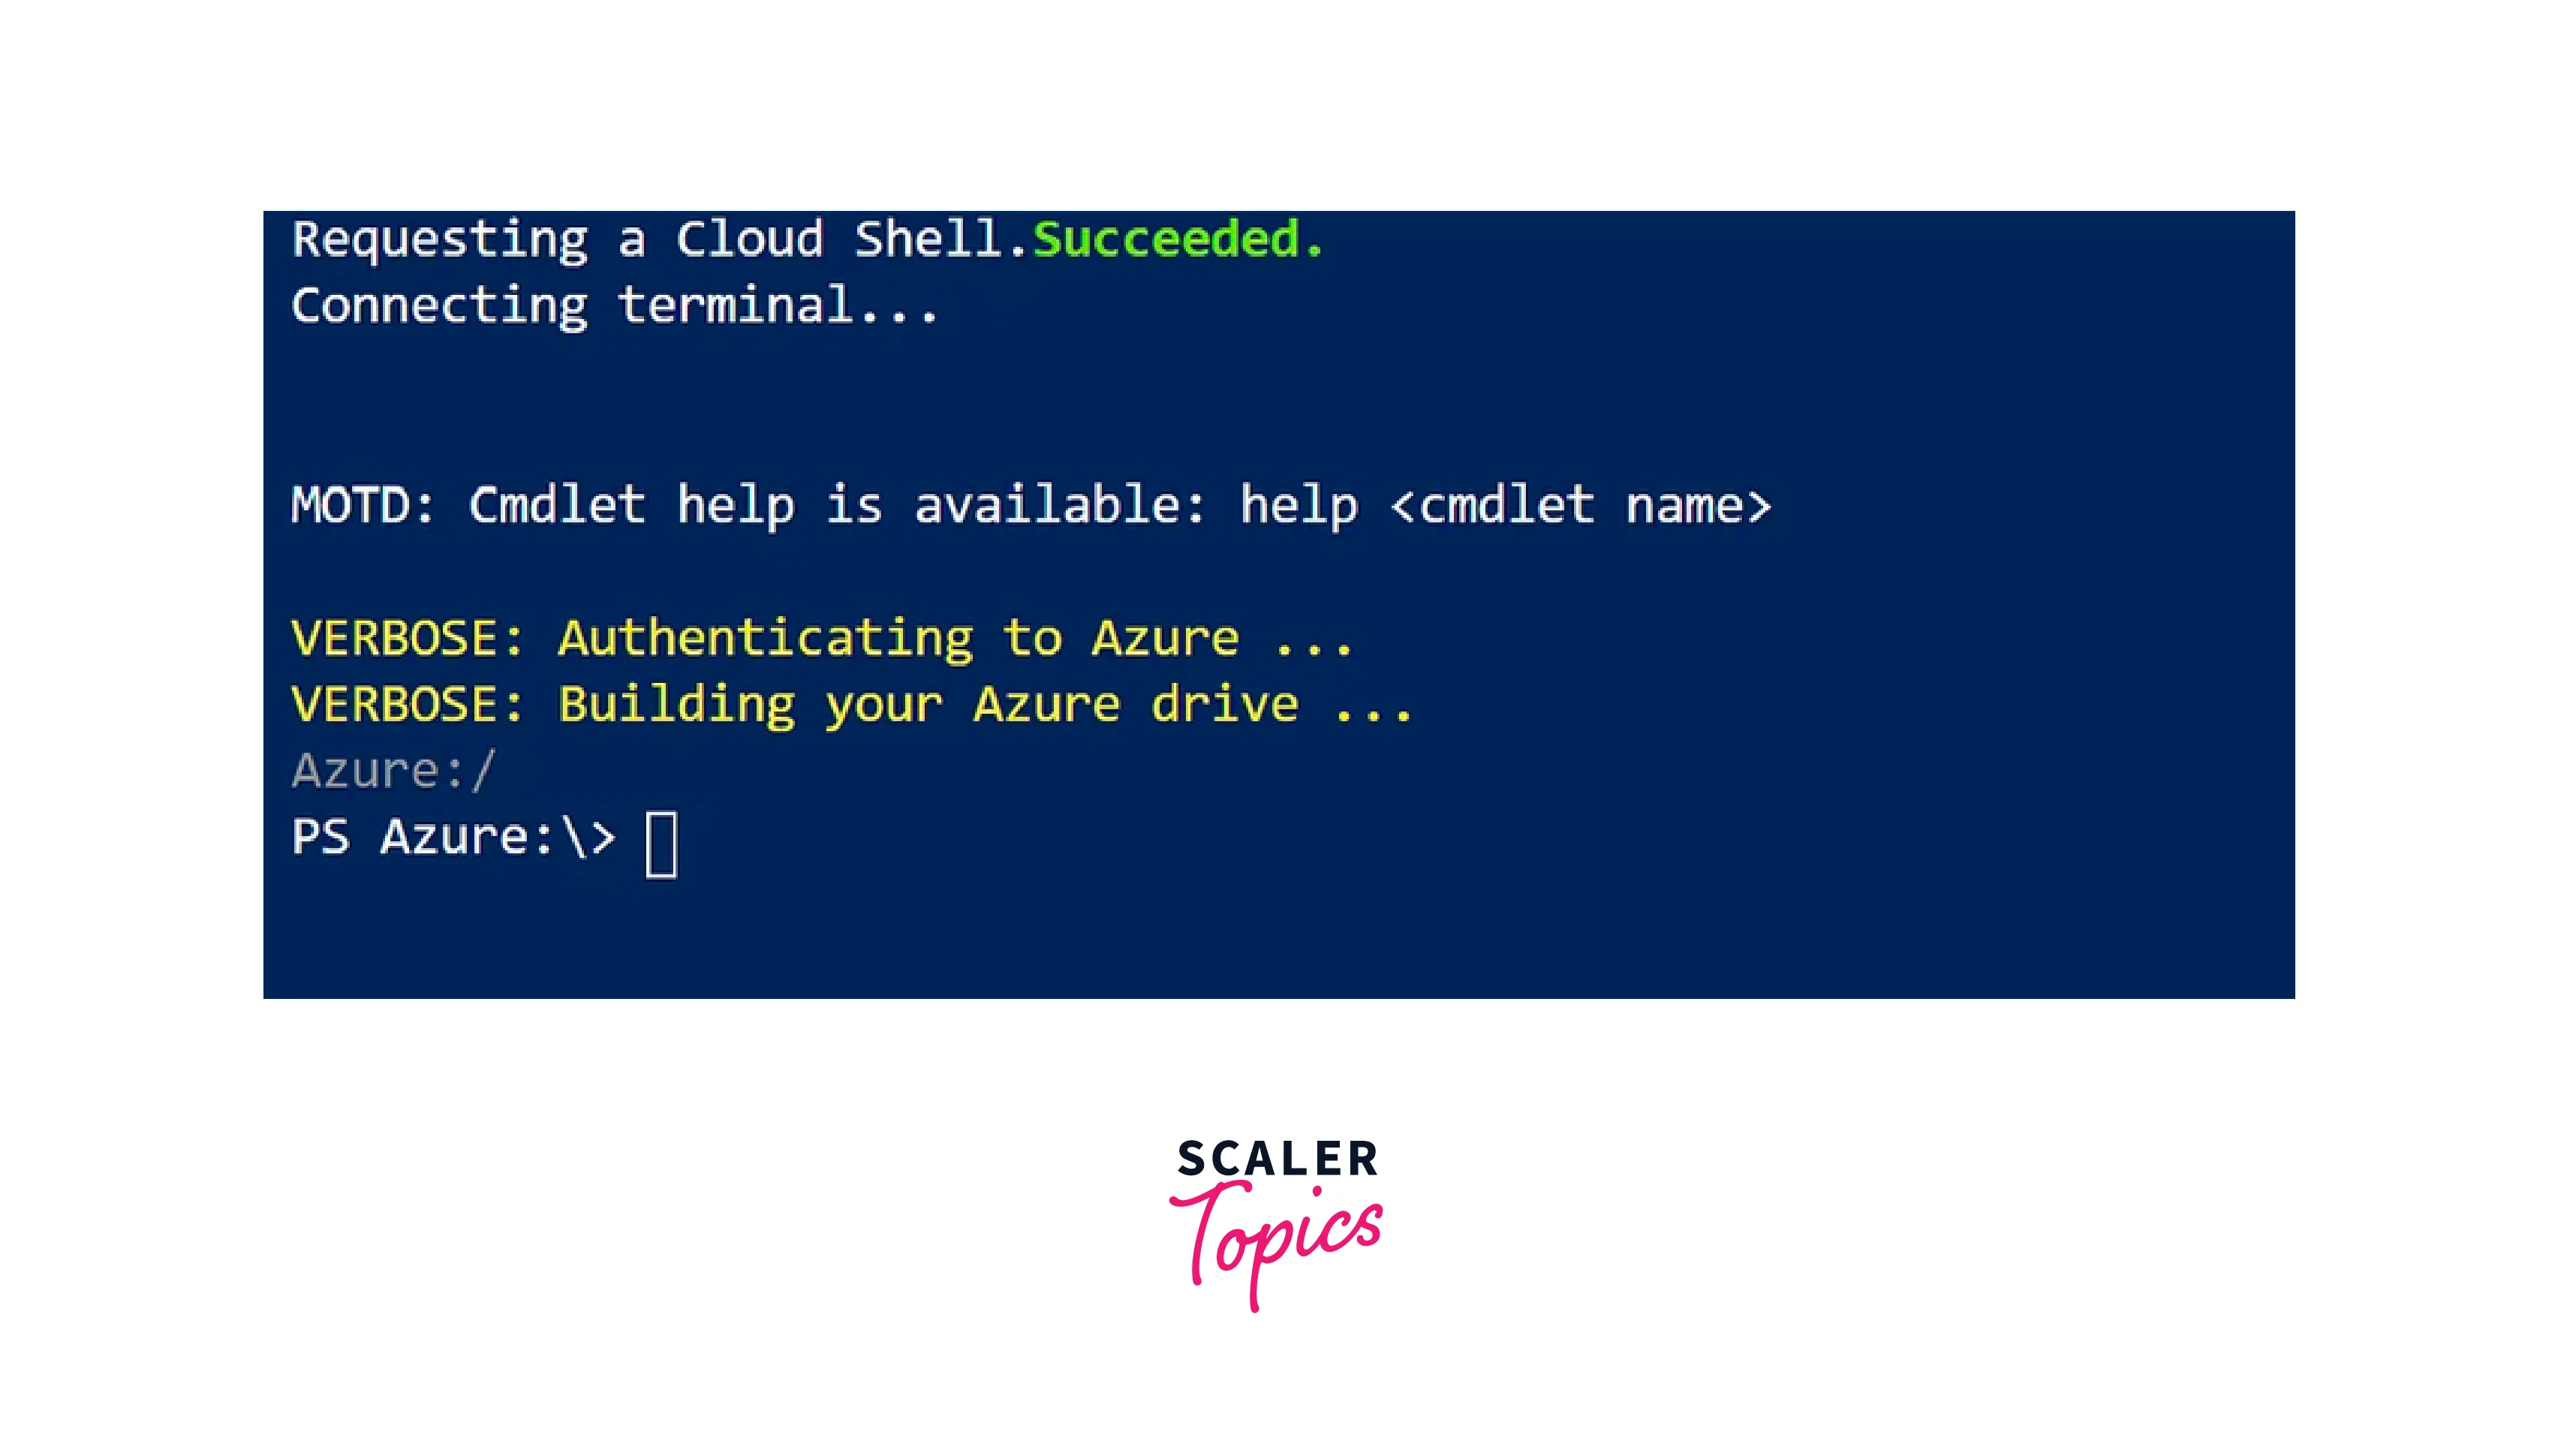
- Start Using Azure CLI:
- Once the Cloud Shell environment is ready, you'll see a command-line interface within the portal.
- You can start using Azure CLI commands just as you would in a regular terminal. For example, you can run commands like az group list to list your resource groups.
- Persistent Storage:
- Azure Cloud Shell provides a persistent storage location that you can use to store scripts, configuration files, and other data across sessions.
- Browser-Based Convenience:
- Since Azure Cloud Shell is browser-based, you can access it from any device with an internet connection, making it a convenient option when you don't have access to your local machine or prefer not to install the software.
- Exiting Cloud Shell:
- You can exit Azure Cloud Shell by closing the browser tab or clicking the "Exit" button in the Cloud Shell panel.
How to Install Azure CLI?
How to Install Azure CLI on Windows
We have two options to install the azure cli on Windows, either by windows powershell or using the Windows MSI installer. Using Windows Powershell Follow these steps to install azure cli in Windows using PowerShell:
-
Open windows powershell with administrative access and the following given command. $ProgressPreference = 'SilentlyContinue'; Invoke-WebRequest -Uri https://aka.ms/installazurecliwindowsx64 -OutFile .\AzureCLI.msi; Start-Process msiexec.exe -Wait -ArgumentList '/I AzureCLI.msi /quiet'; Remove-Item .\AzureCLI.msi
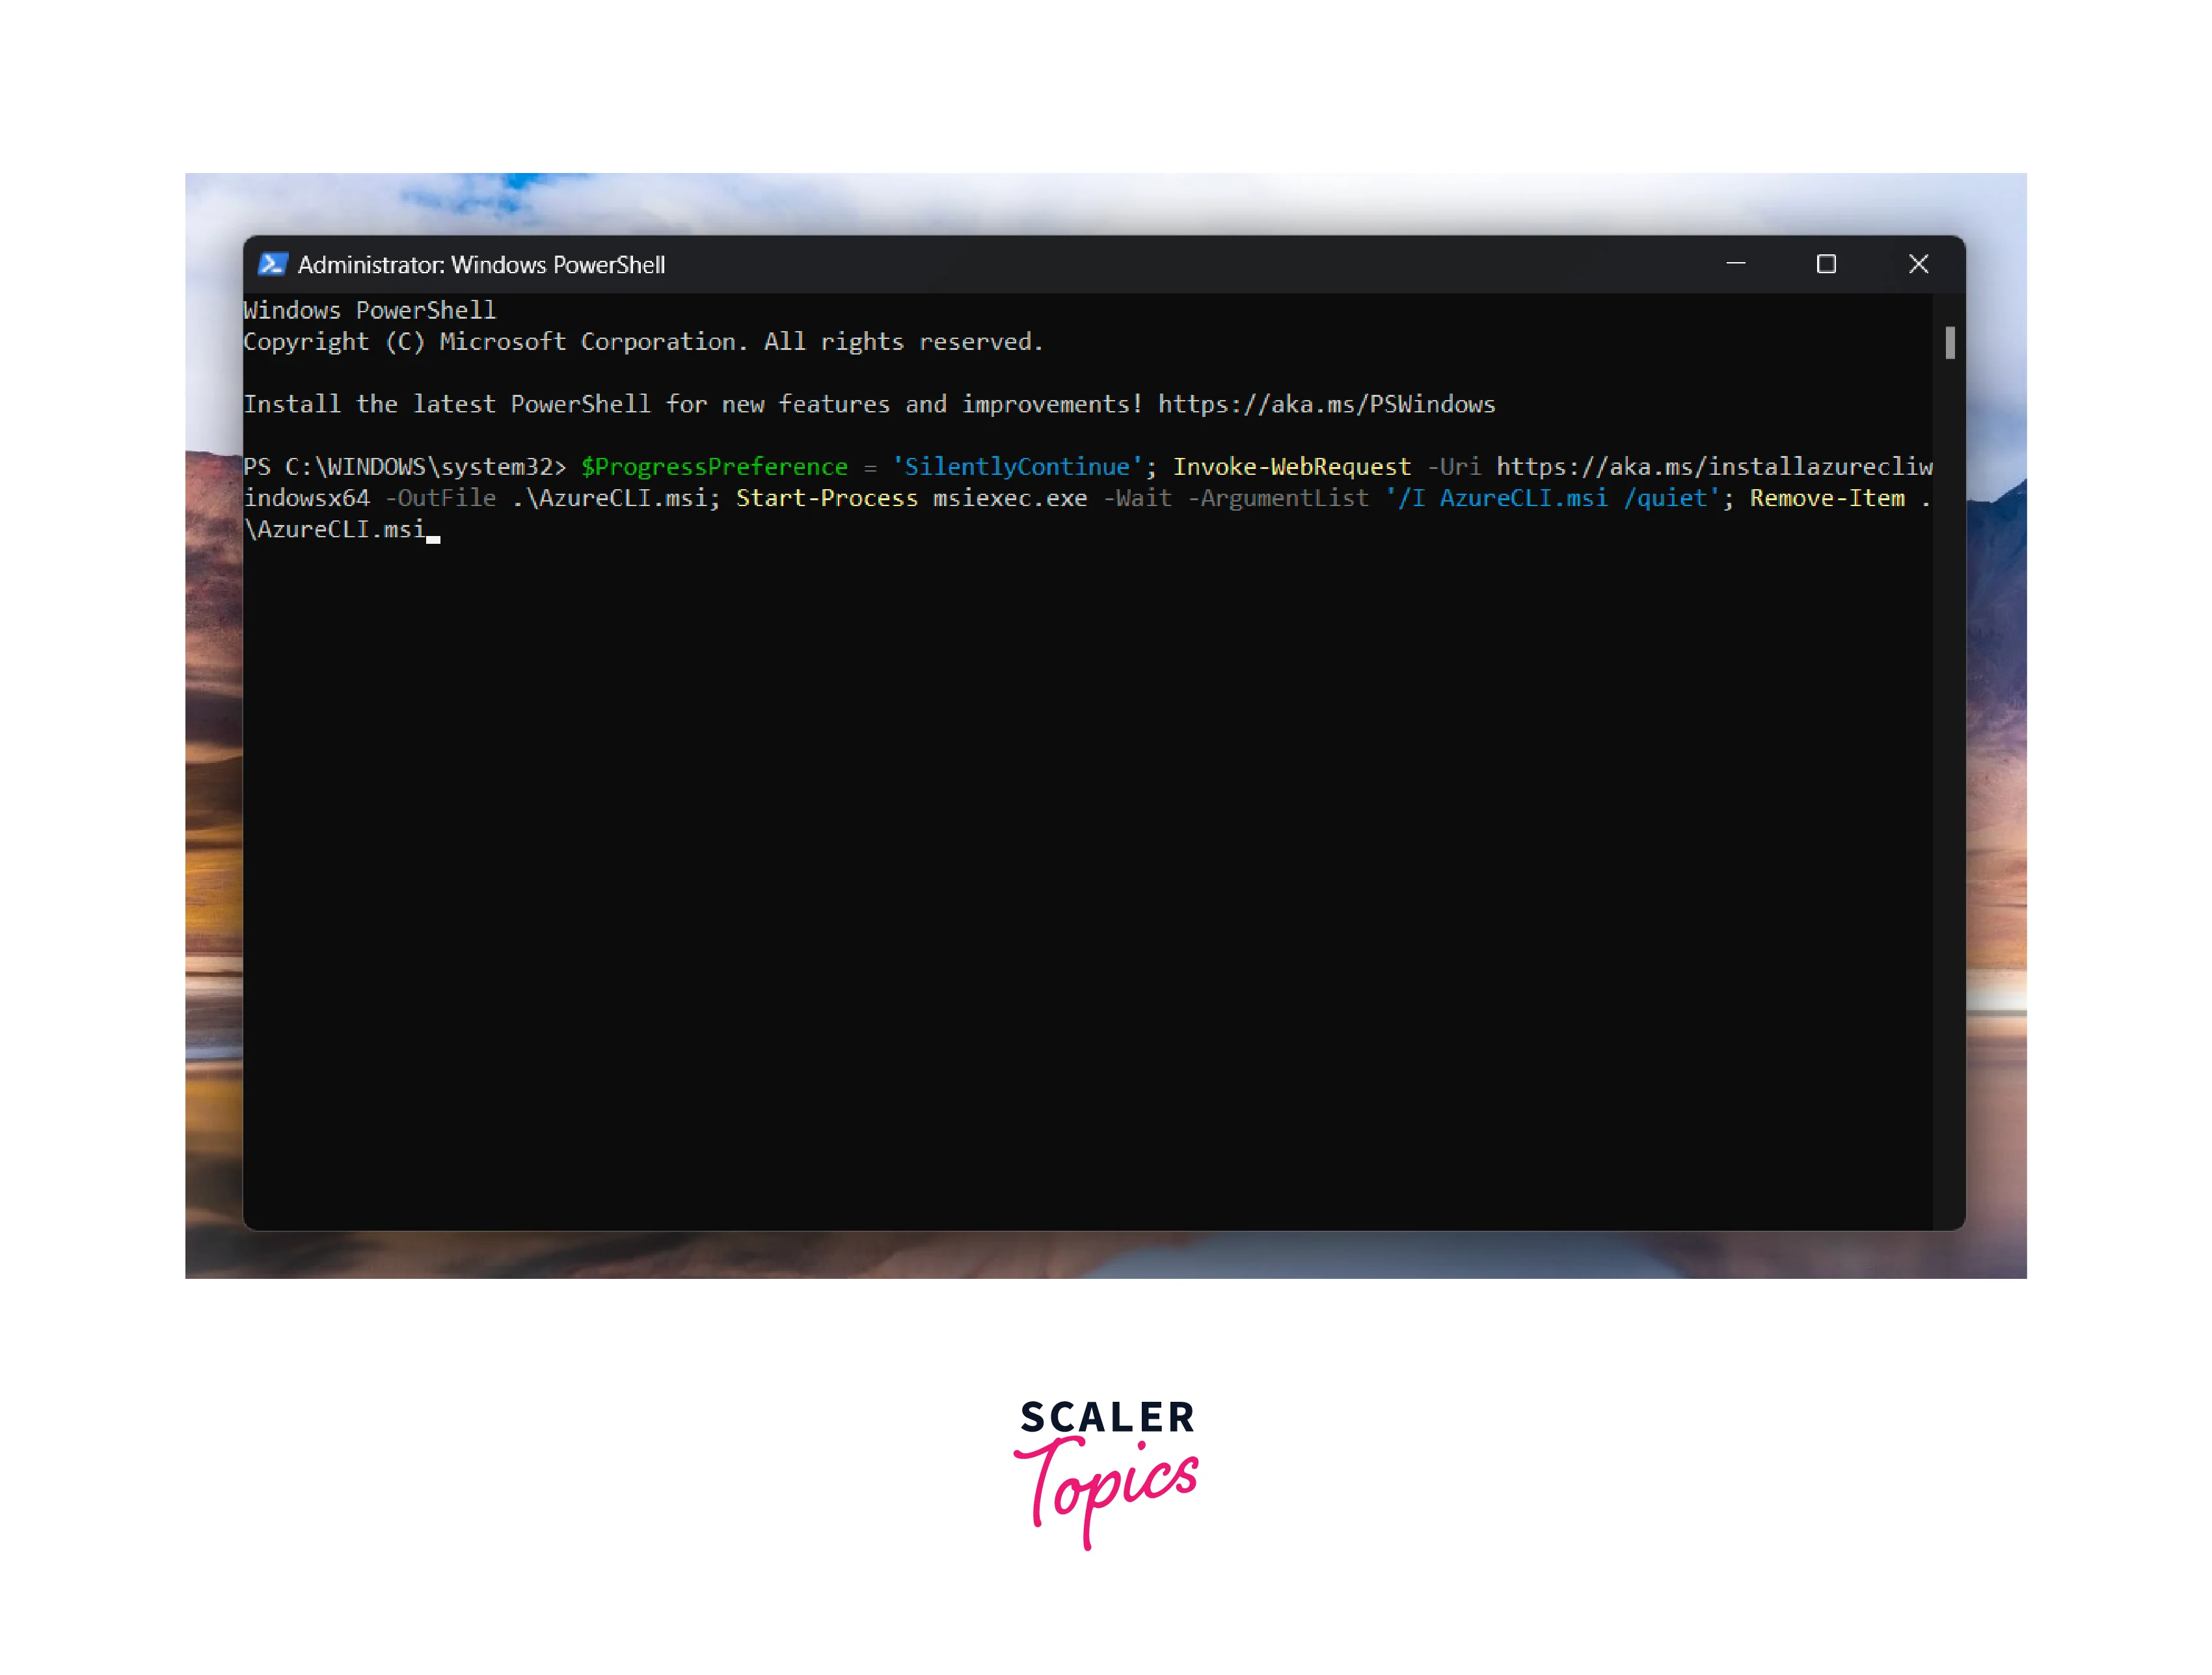 It will download and install the required packages for azure cli.
 -
You can check the Azure CLI version using the az version command.
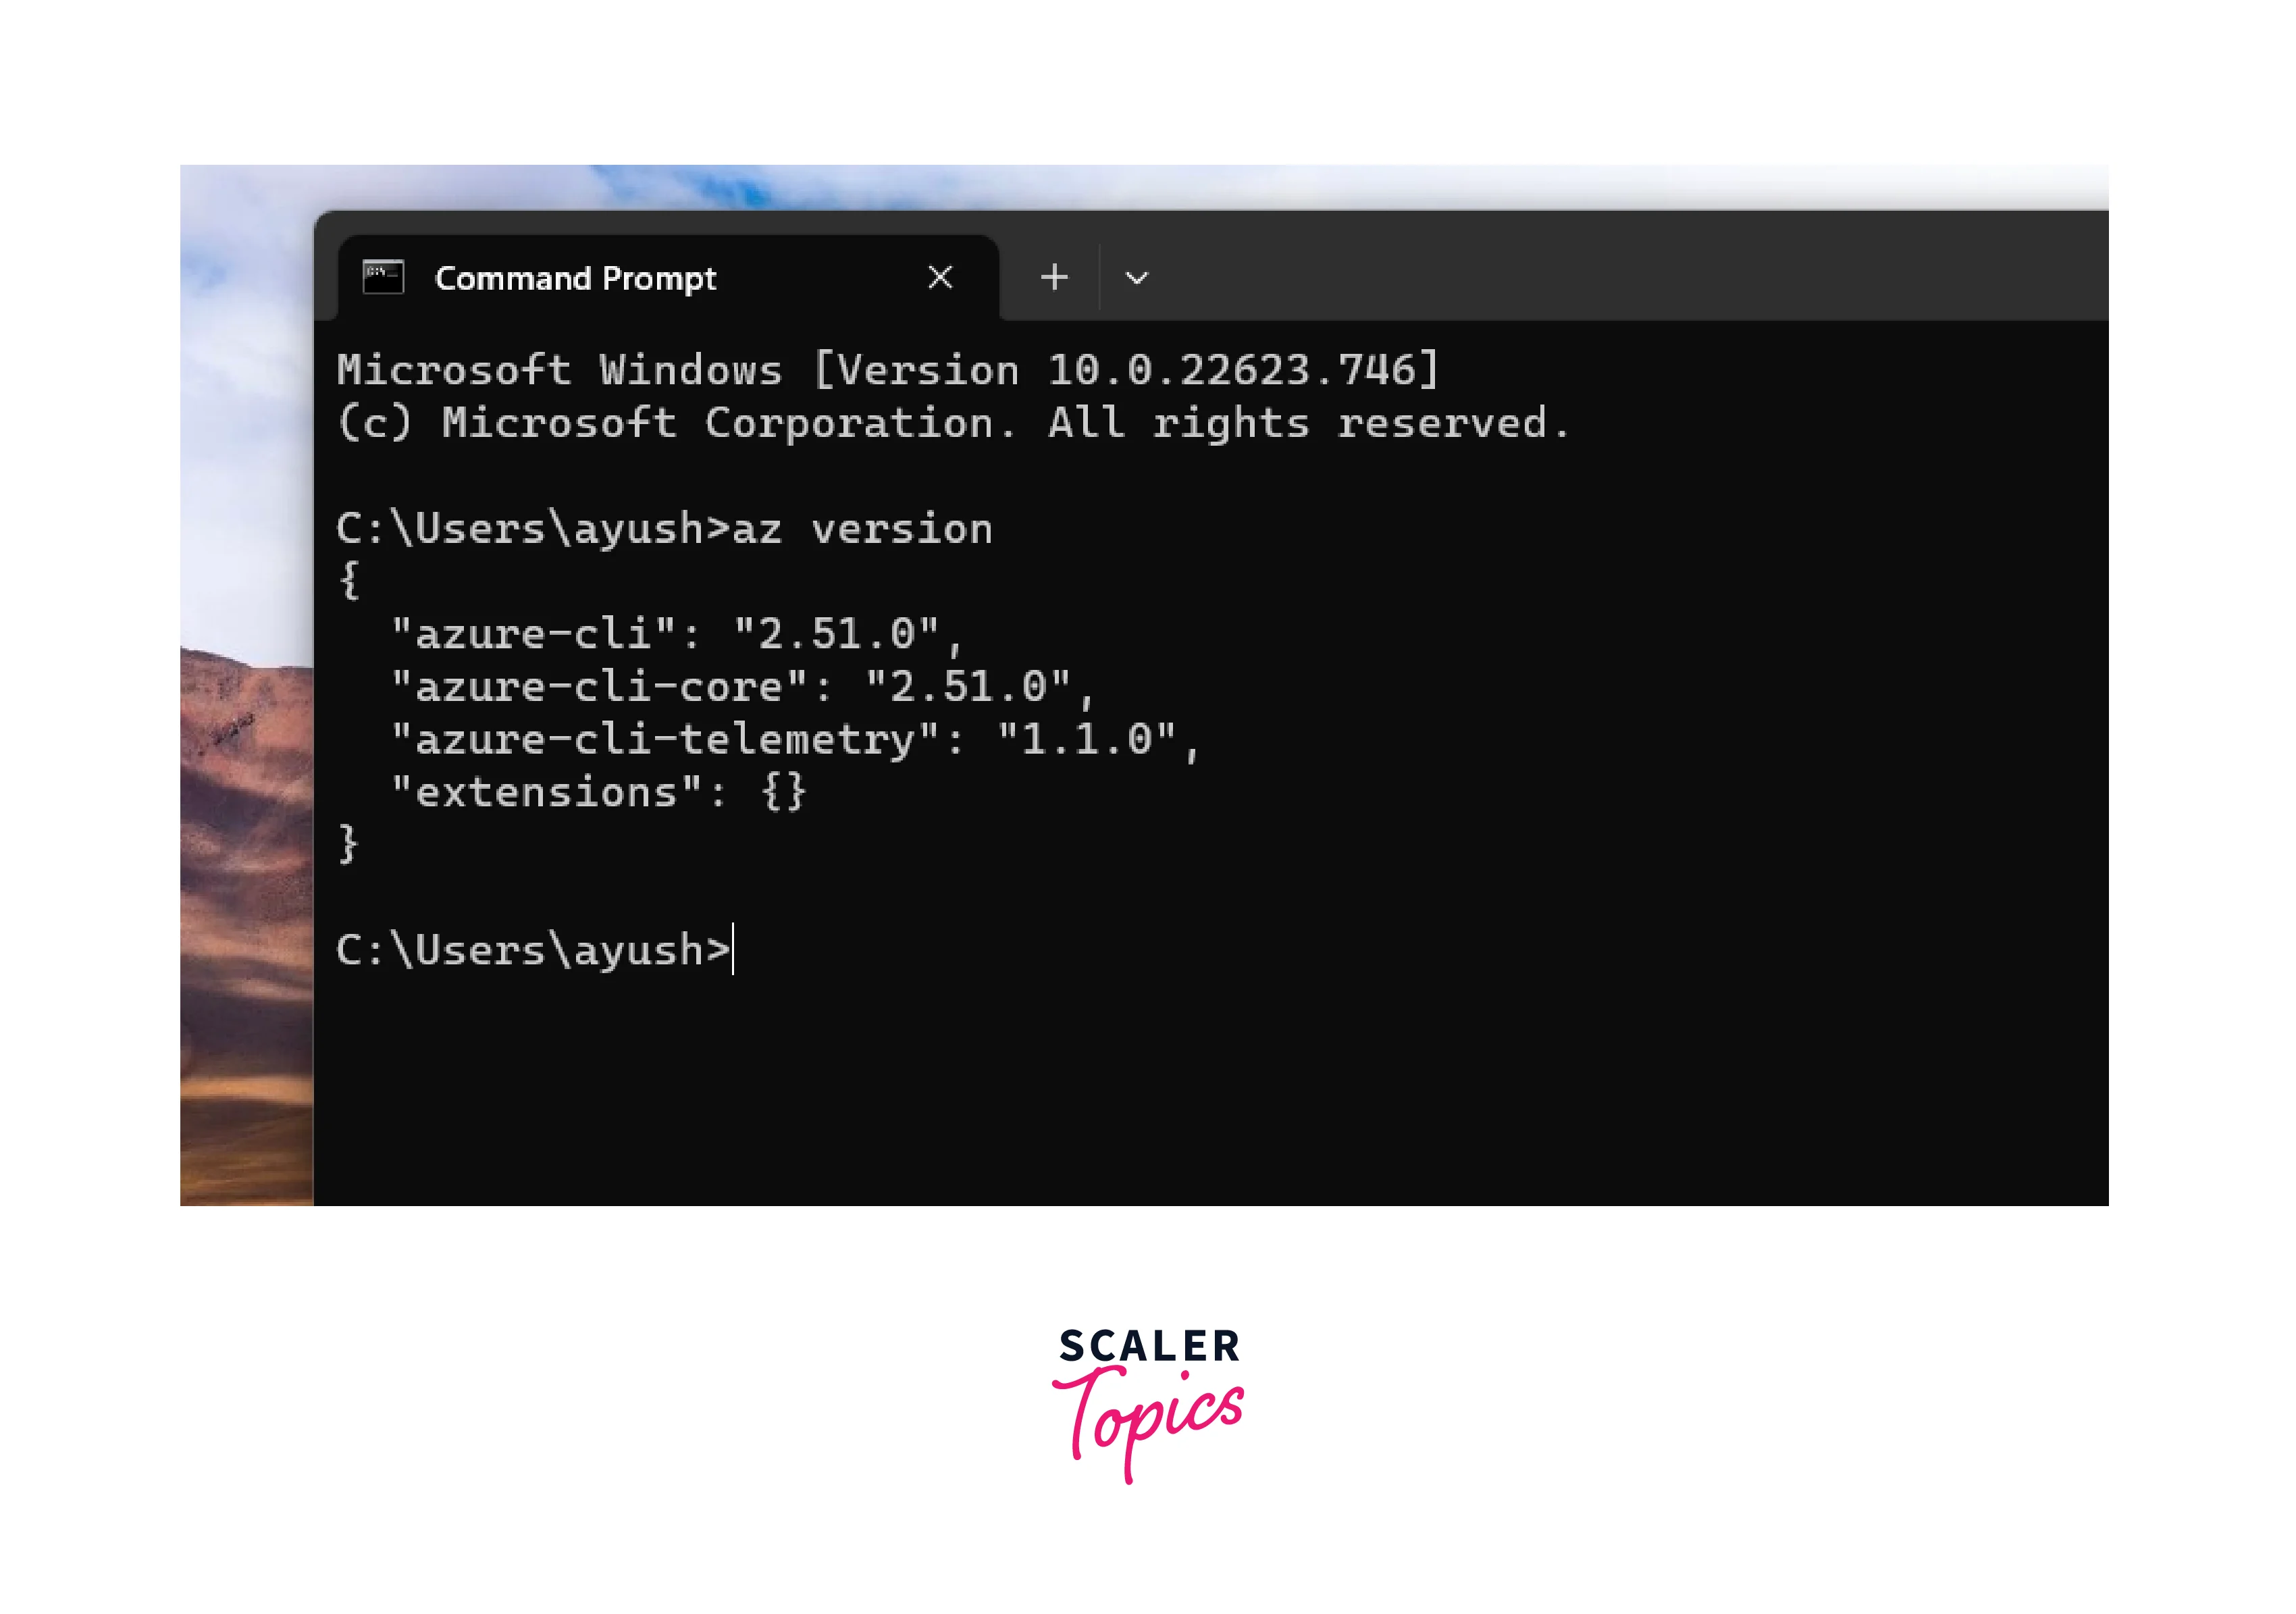 It shows we successfully install the azure cli.
Using Windows MSI Installer You can install azure cli using the Windows MSI installer by following these steps:
- Open this link and choose the installer to download.
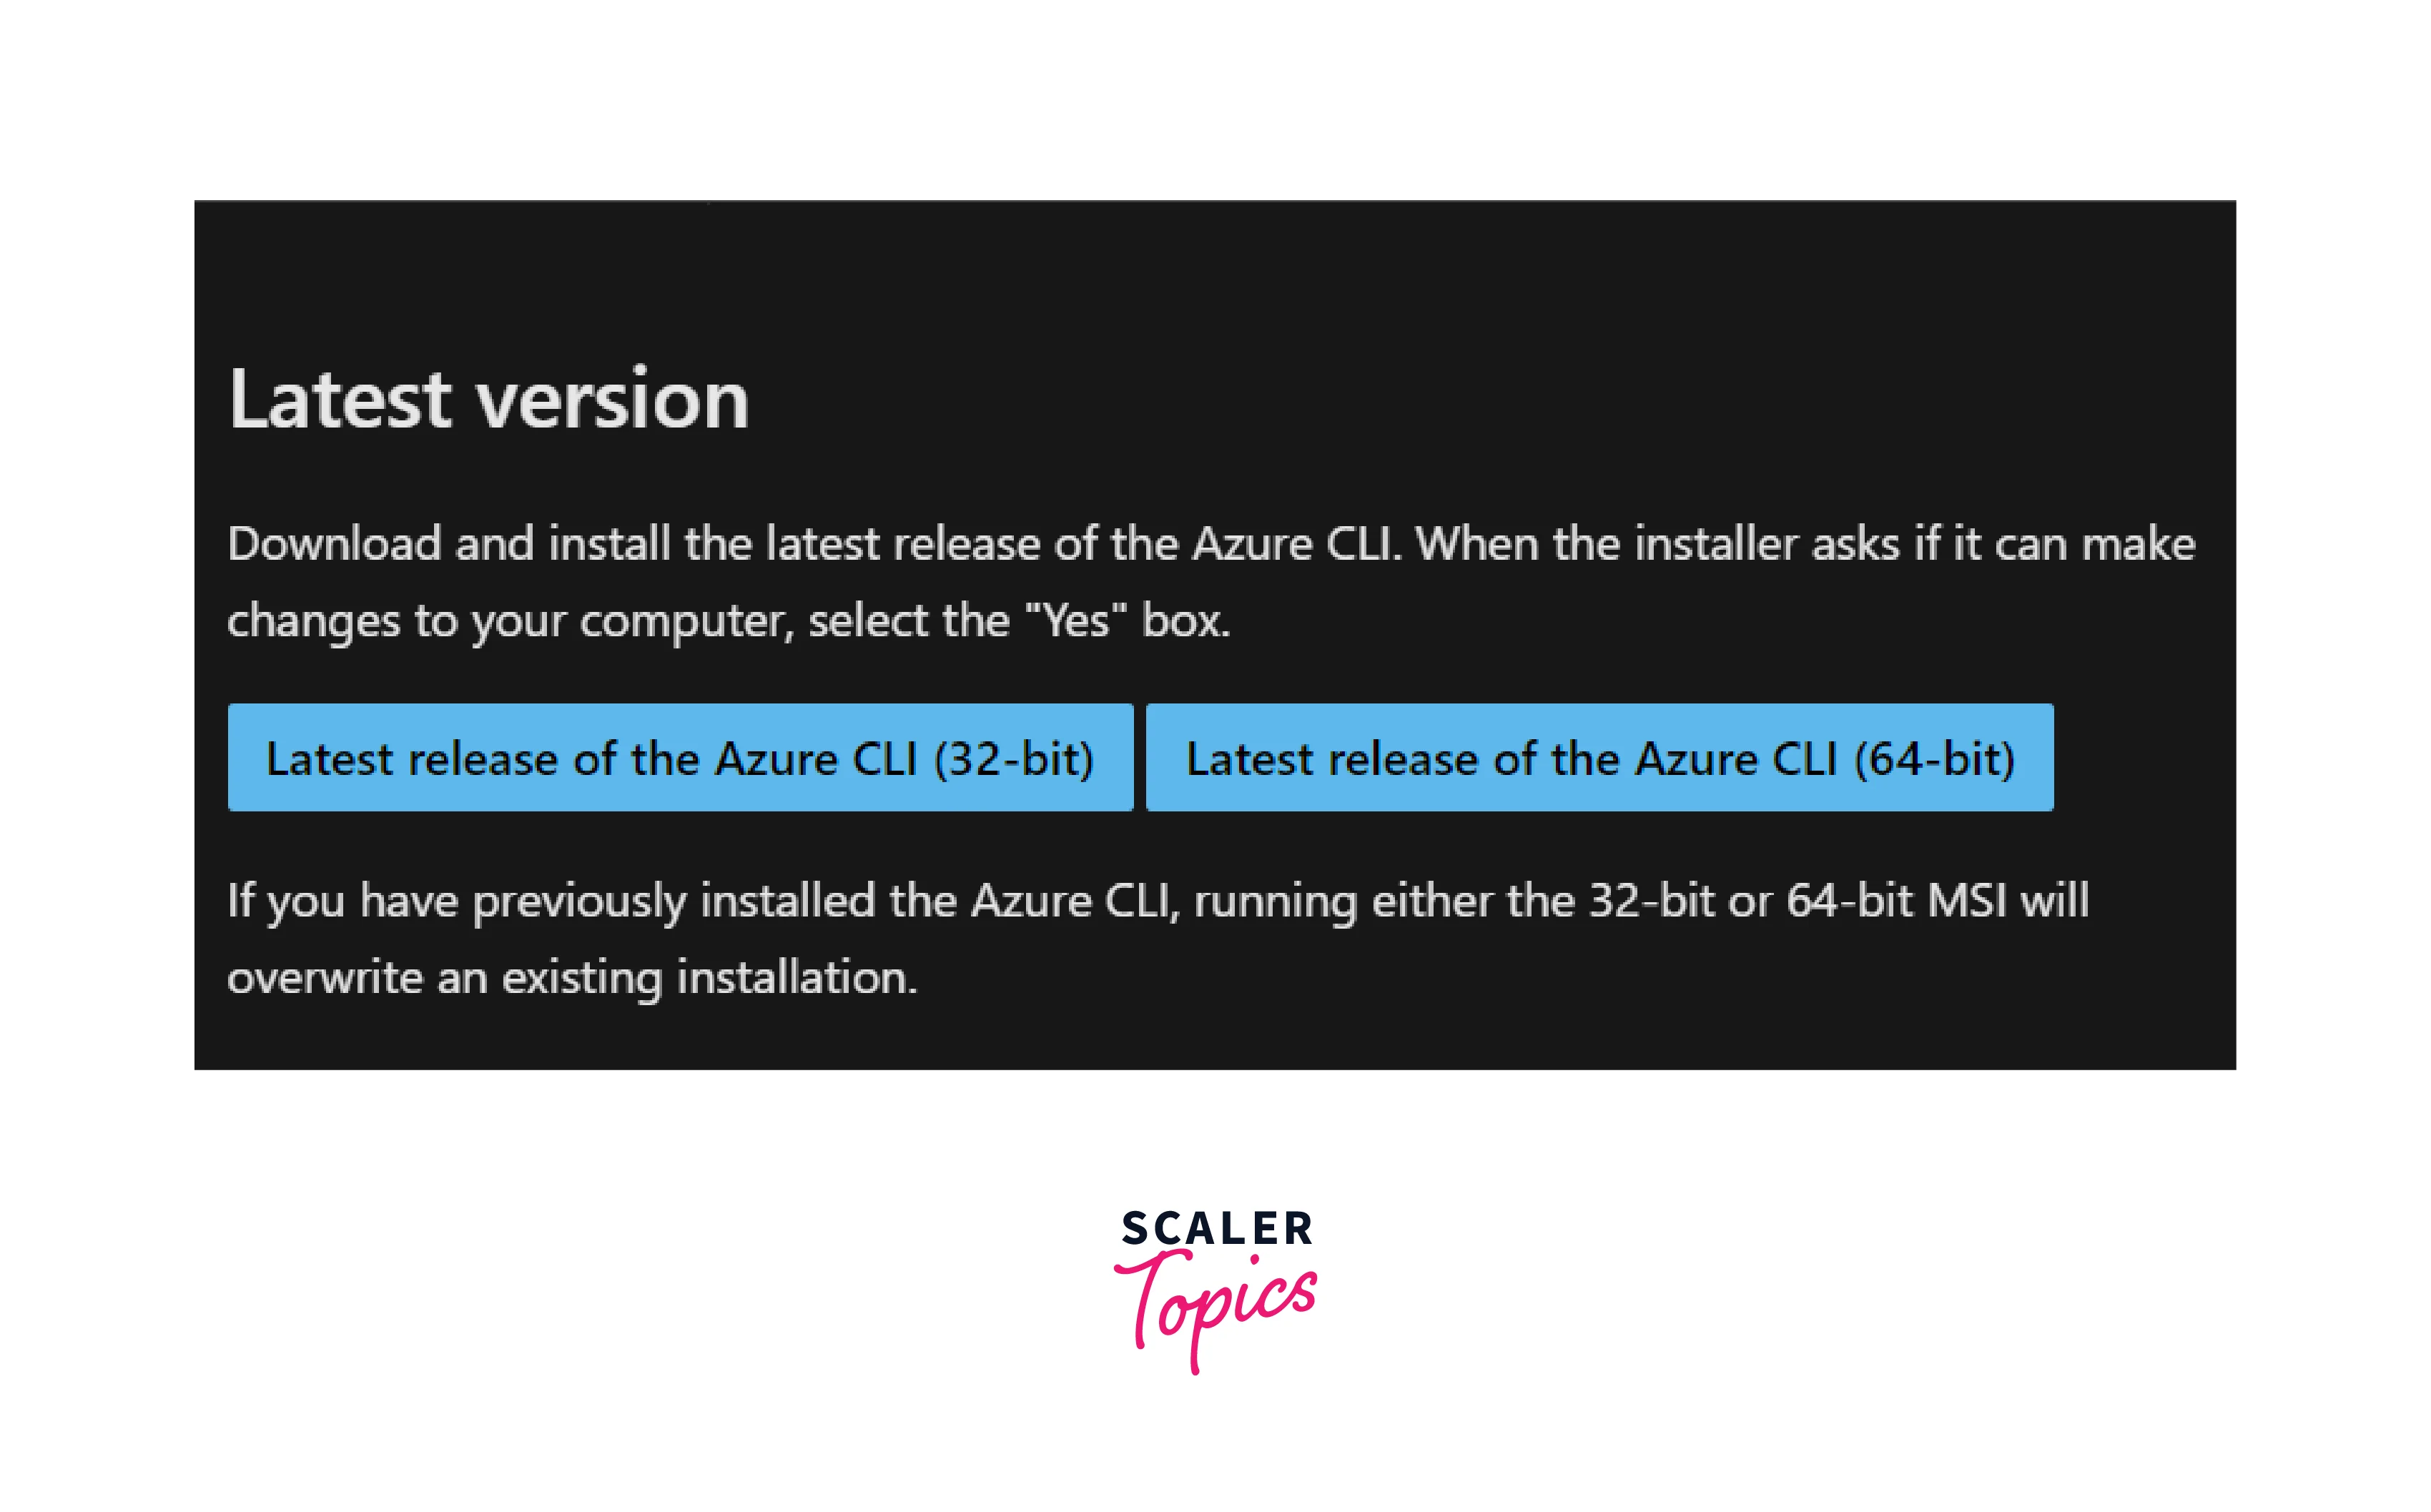
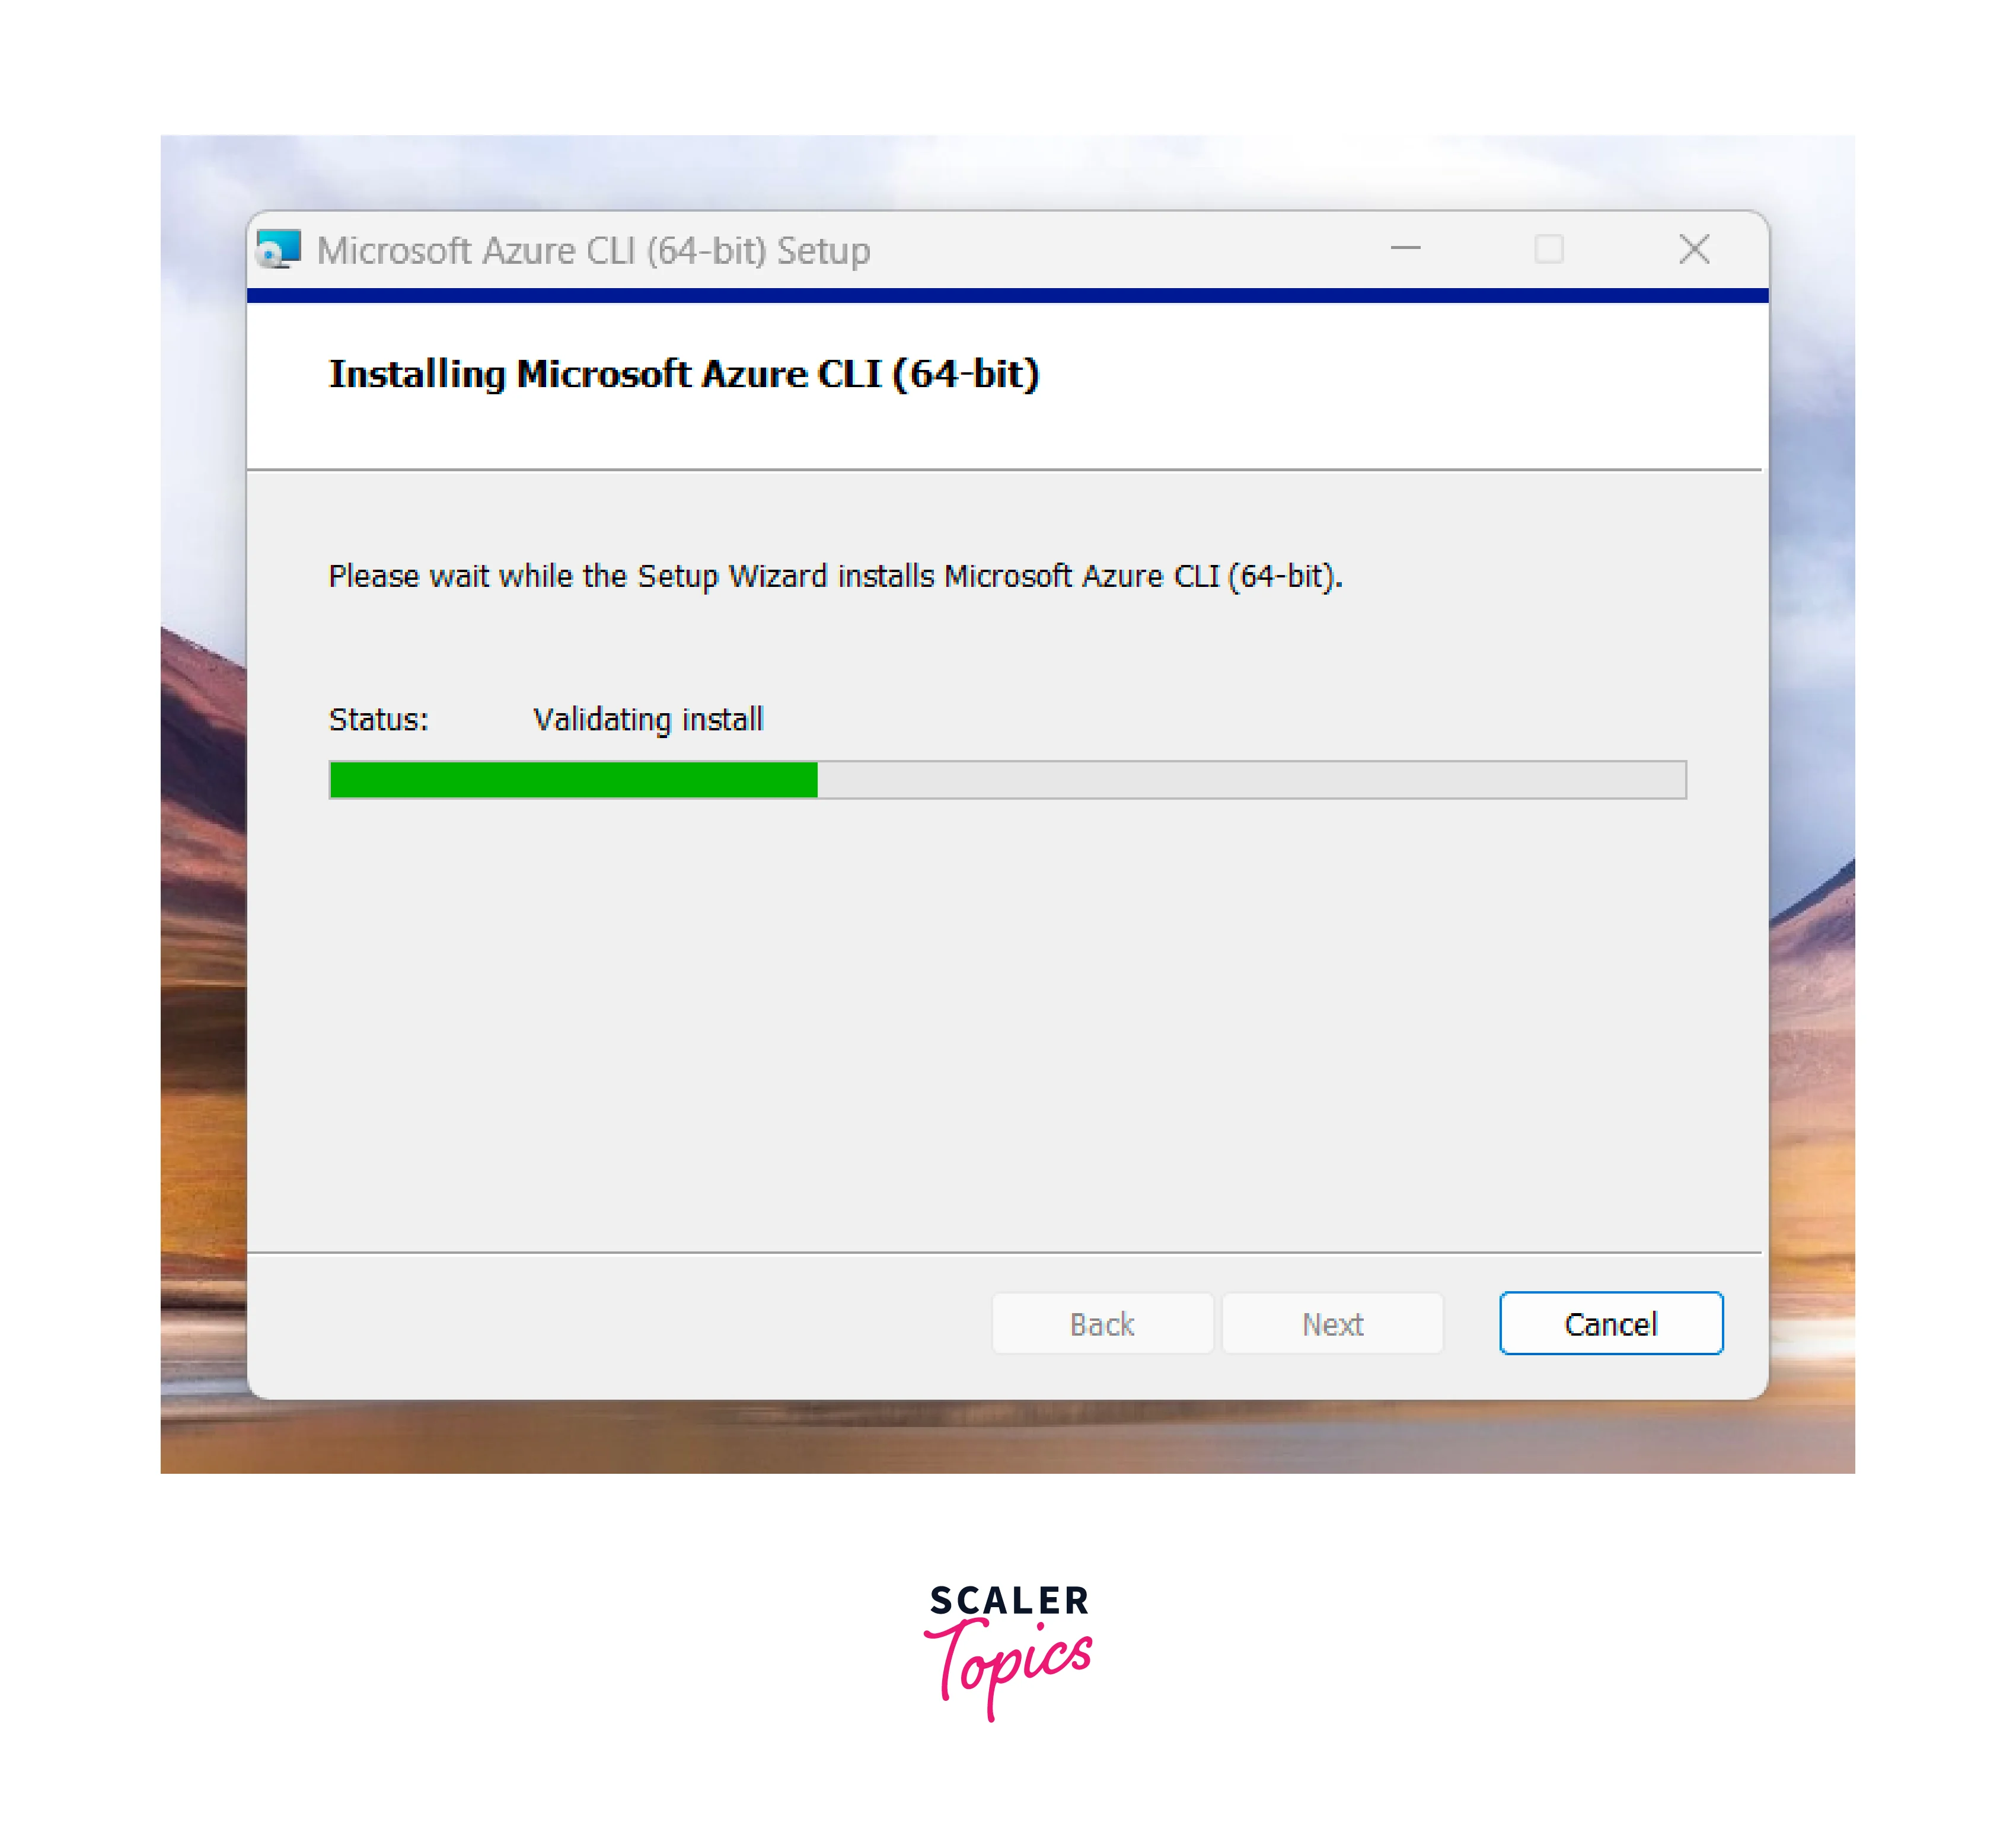
- Go to the download folder and open the installer to install it. Select Install after accepting the license.

- It asks for administrator access and then starts installing the required packages.
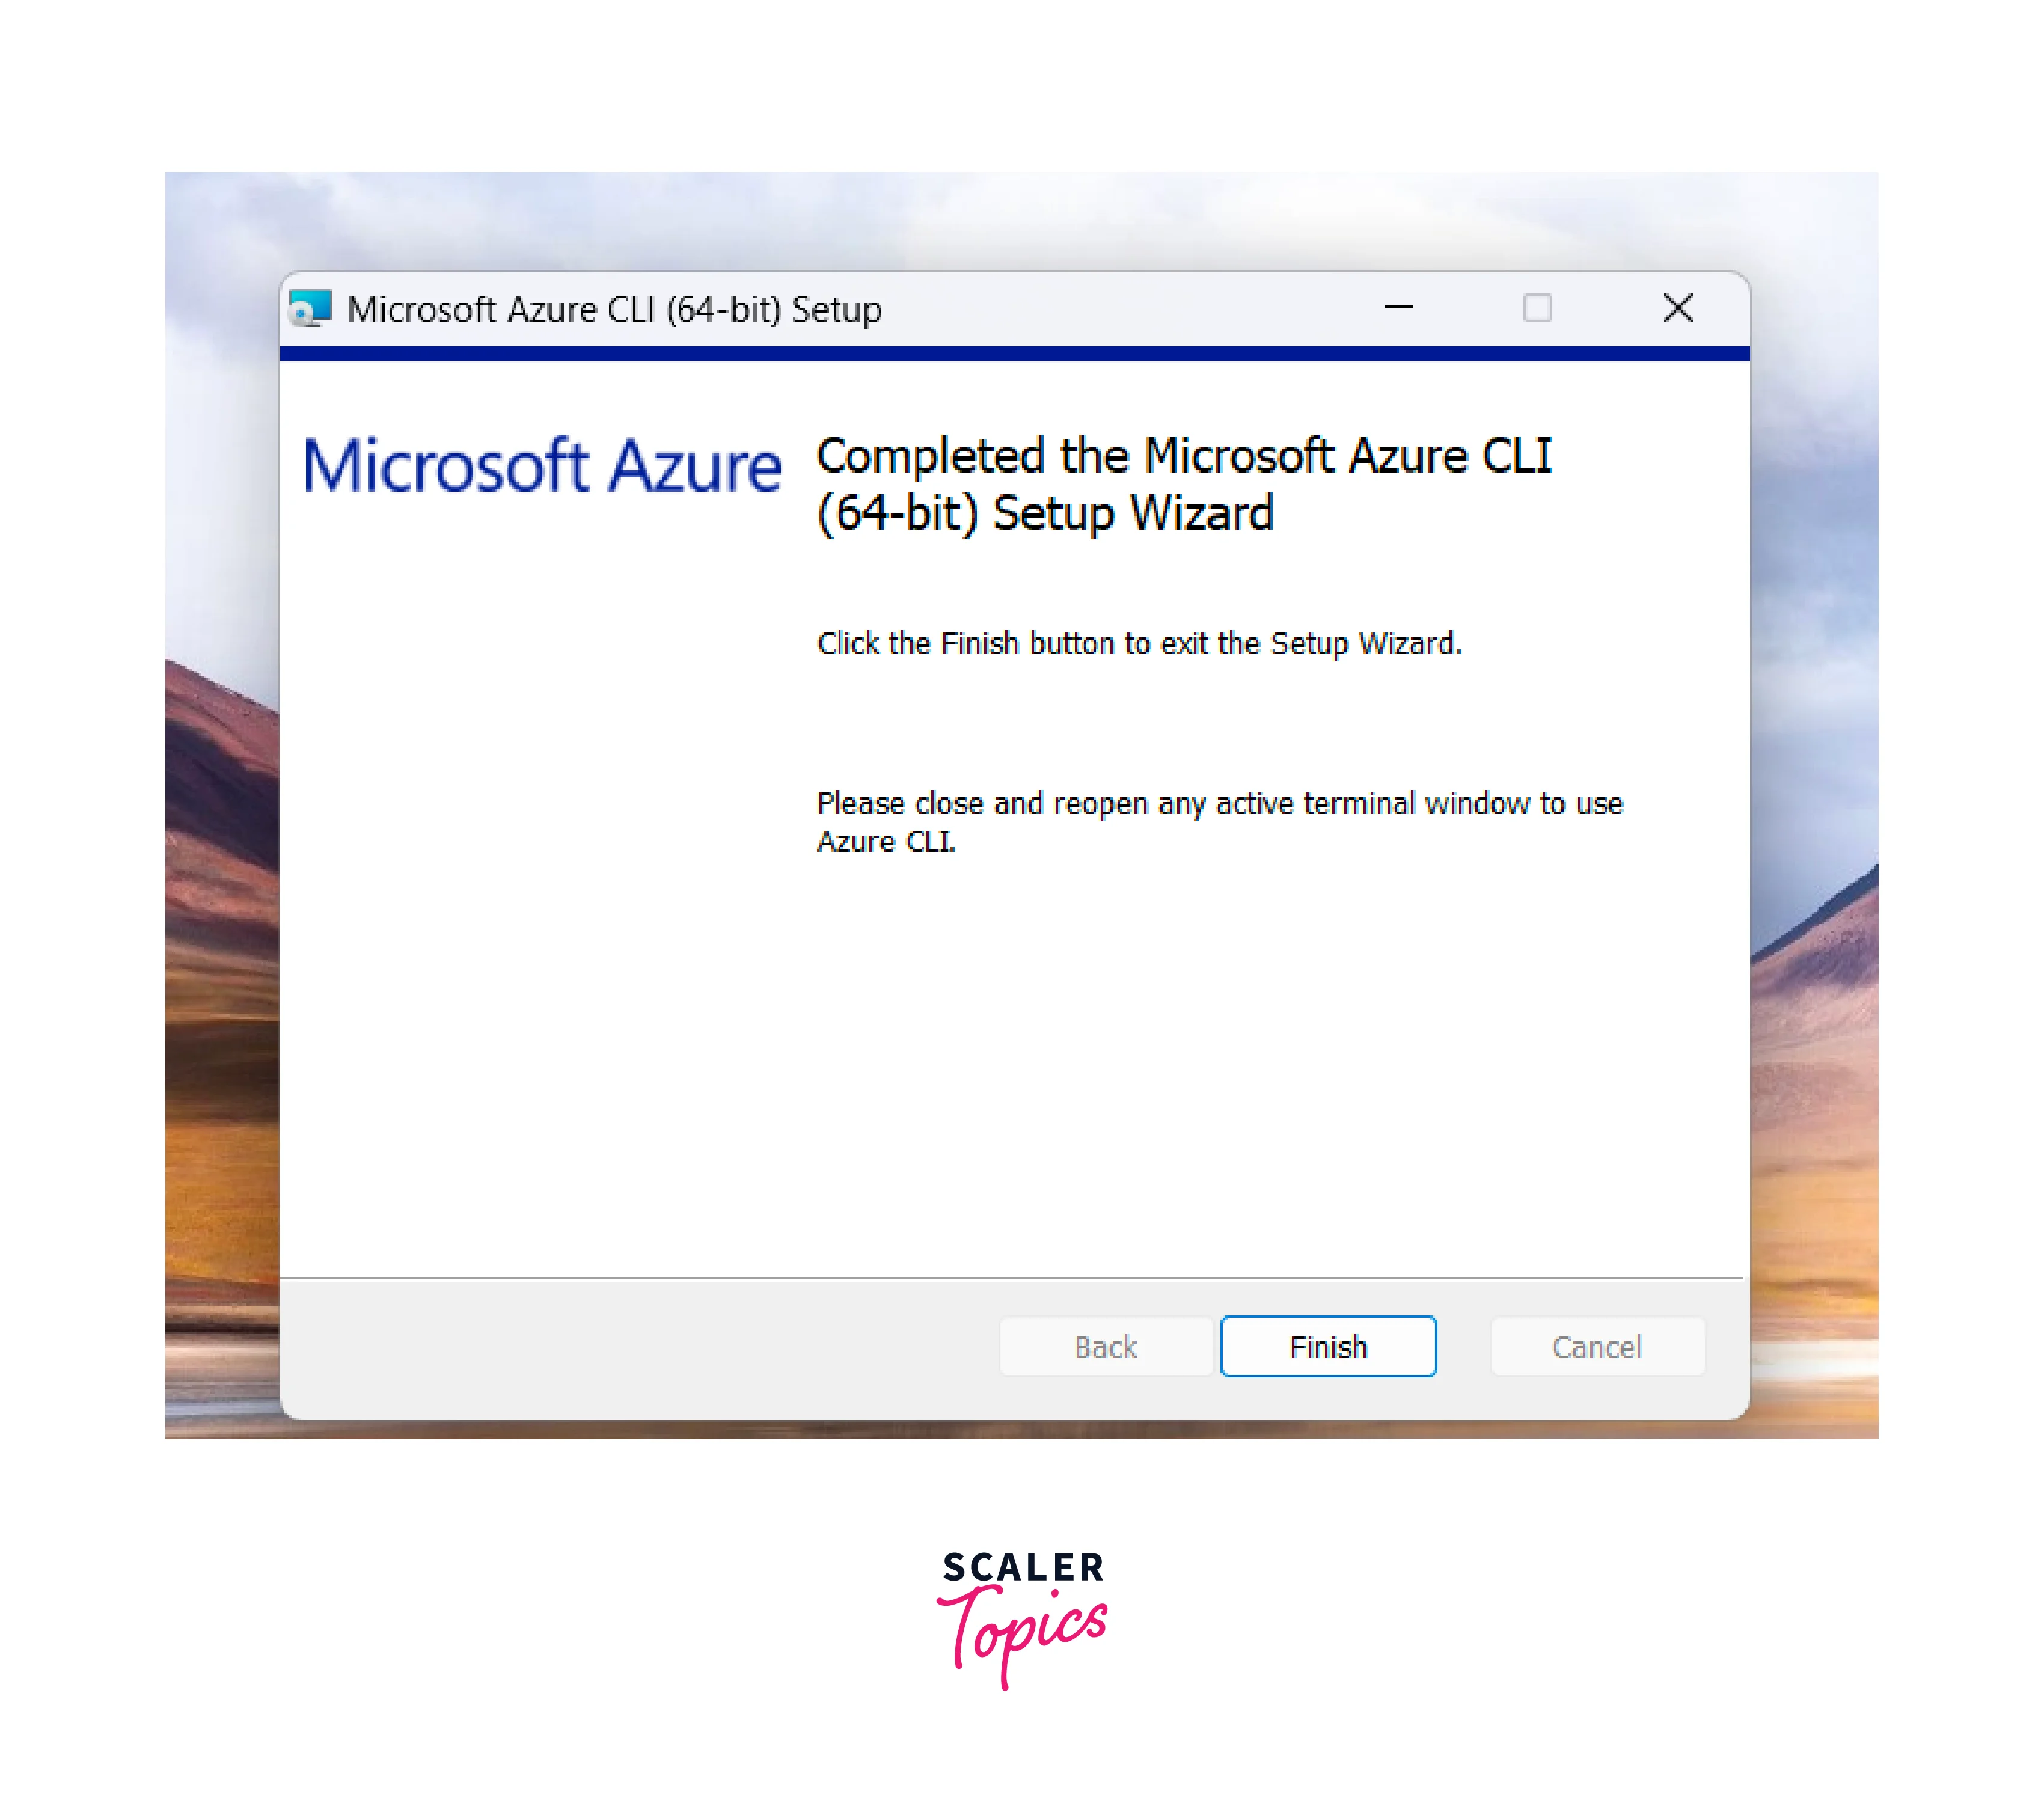
- Finally, click Finish to finish the installation procedure.
- Run the az version command in the command prompt to check the installation.
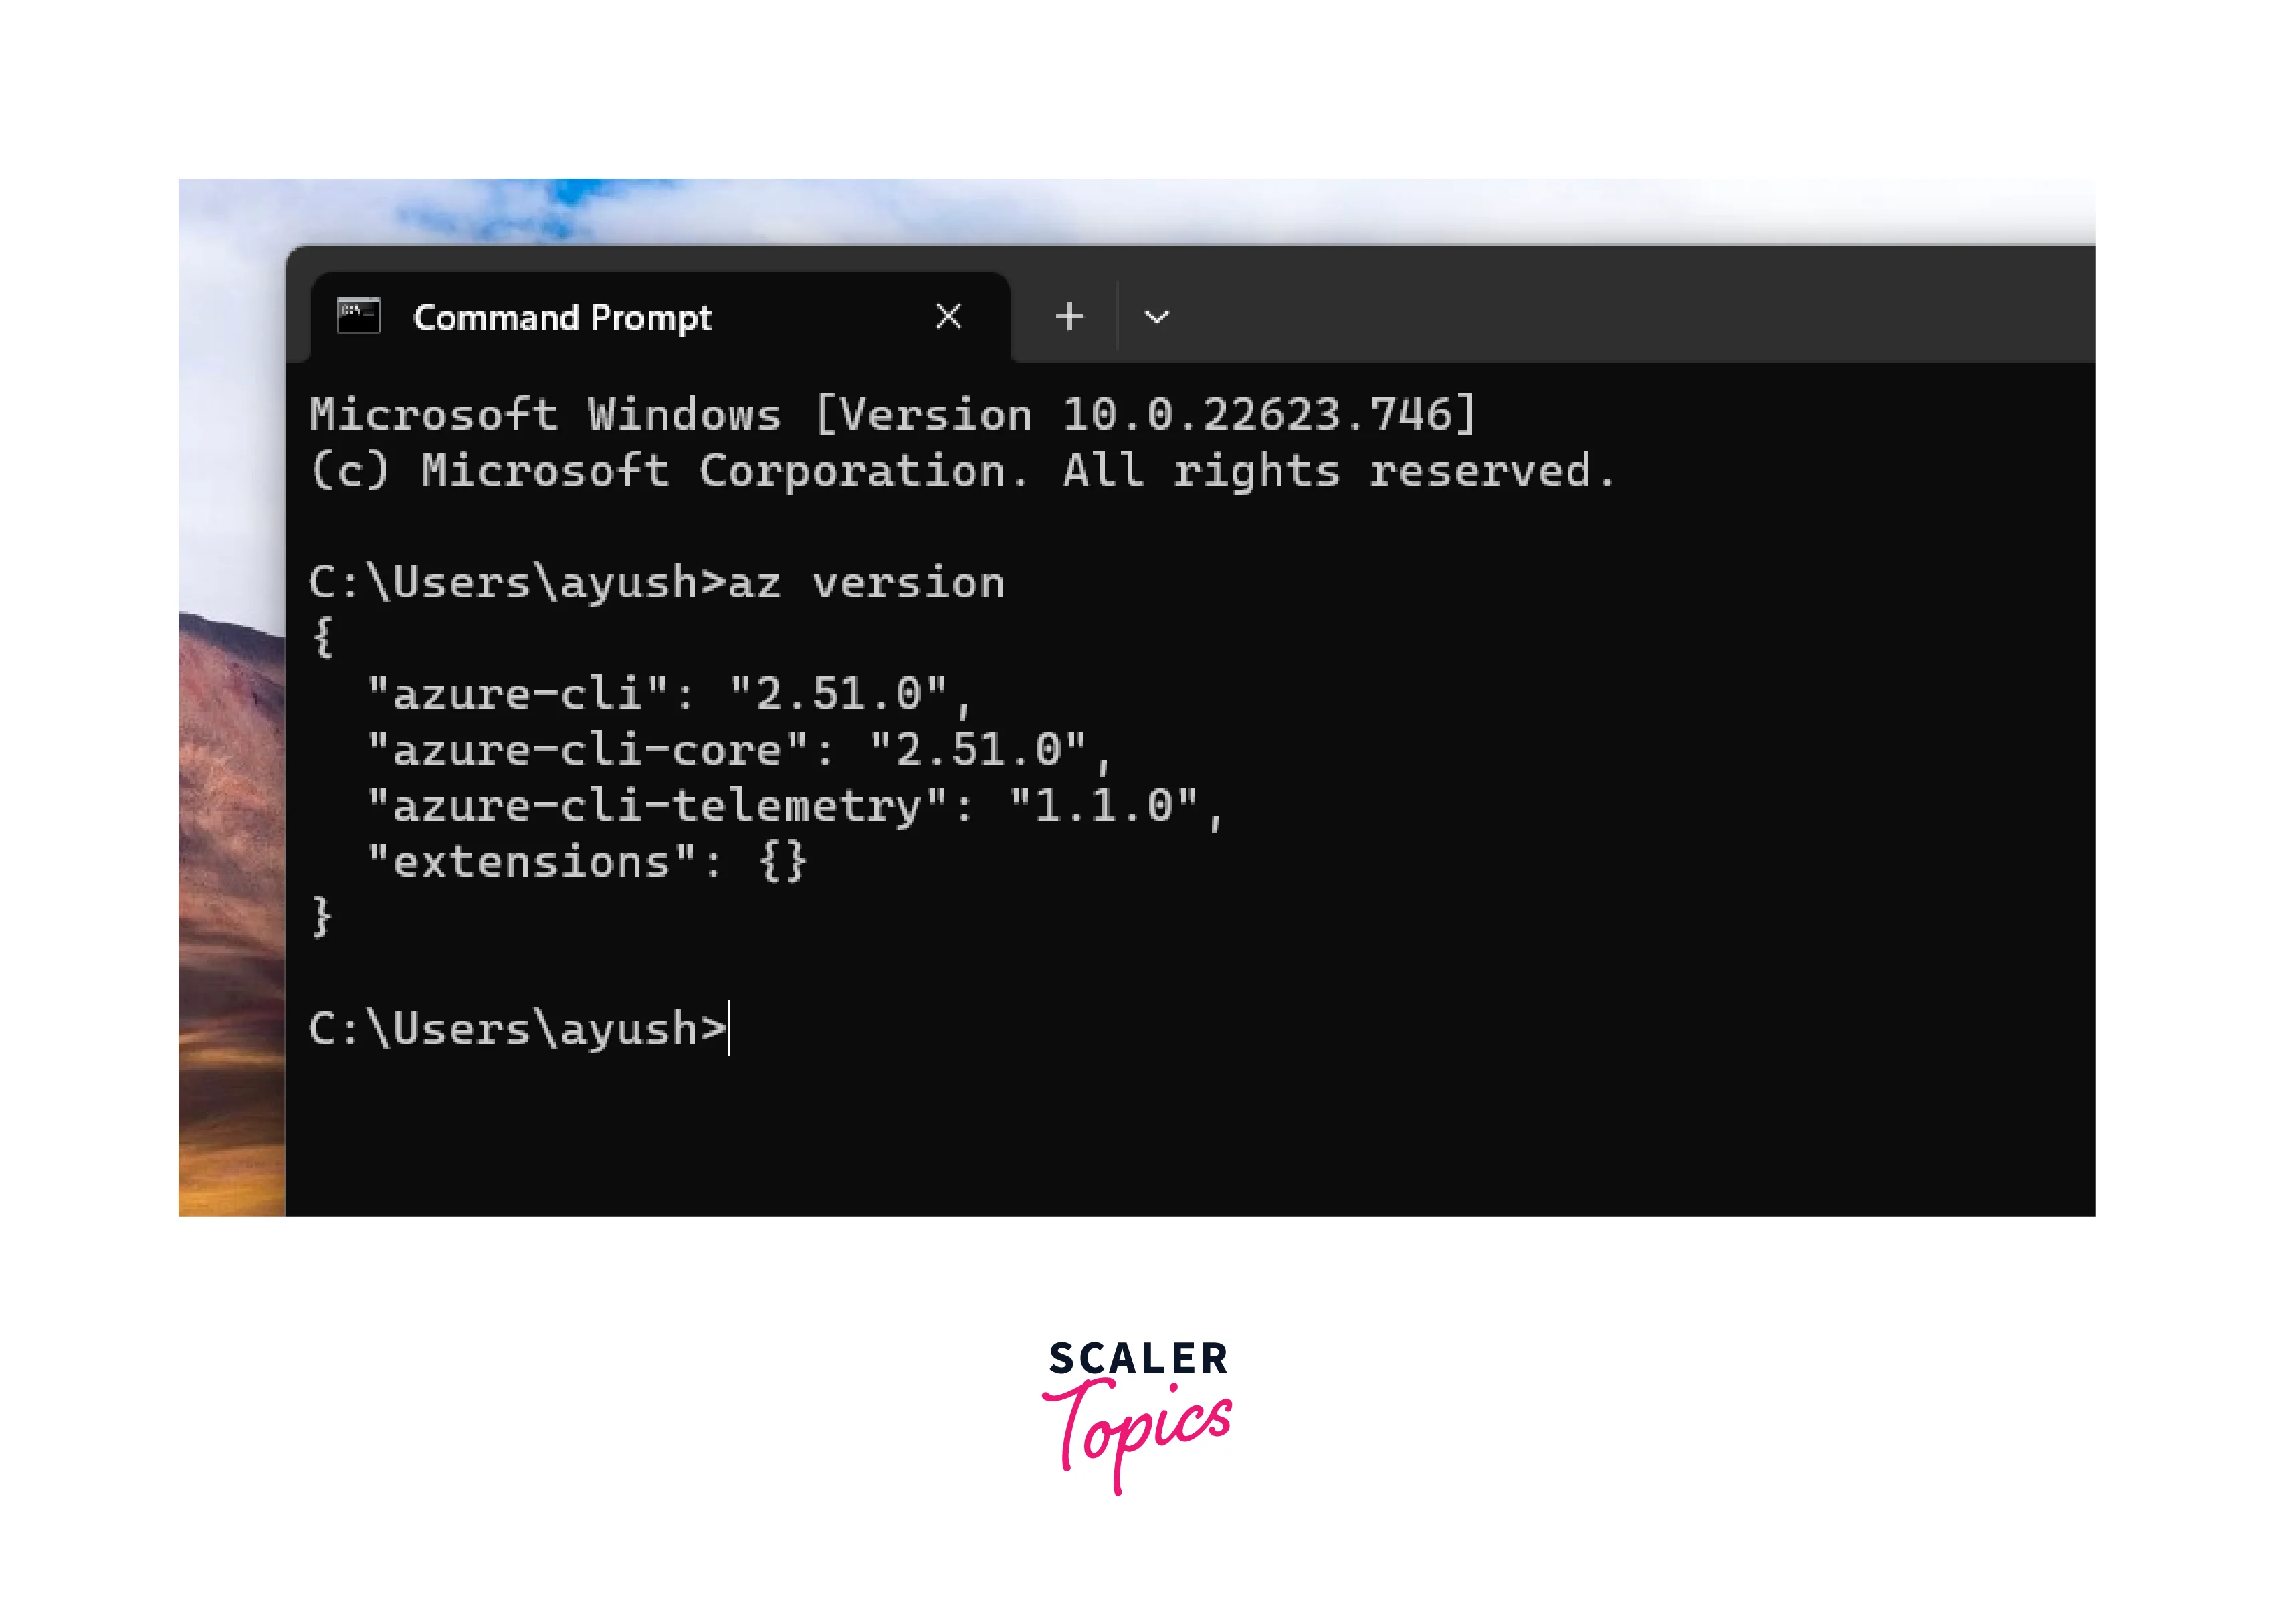 In these ways, we can install azure cli on Windows.
Installing Azure CLI on MacOS
We can install azure cli on MacOS using the terminal by following the given steps:
- You can install the Azure CLI on macOS by modifying the information for your brew repository. Install homebrew if it isn't already installed on your machine before continuing using this link.
- Open the terminal and run the following command to install Azure CLI in MacOS. brew update && brew install azure-cli
- It will install the azure cli in your system. You can check it by using the az command.
Installing Azure CLI on Linux
Follow these steps to install azure cli on Linux:
- Before manually installing, check libffi with Python 3.6.x, 3.7.x, or 3.8.x and OpenSSL package available for your distribution.
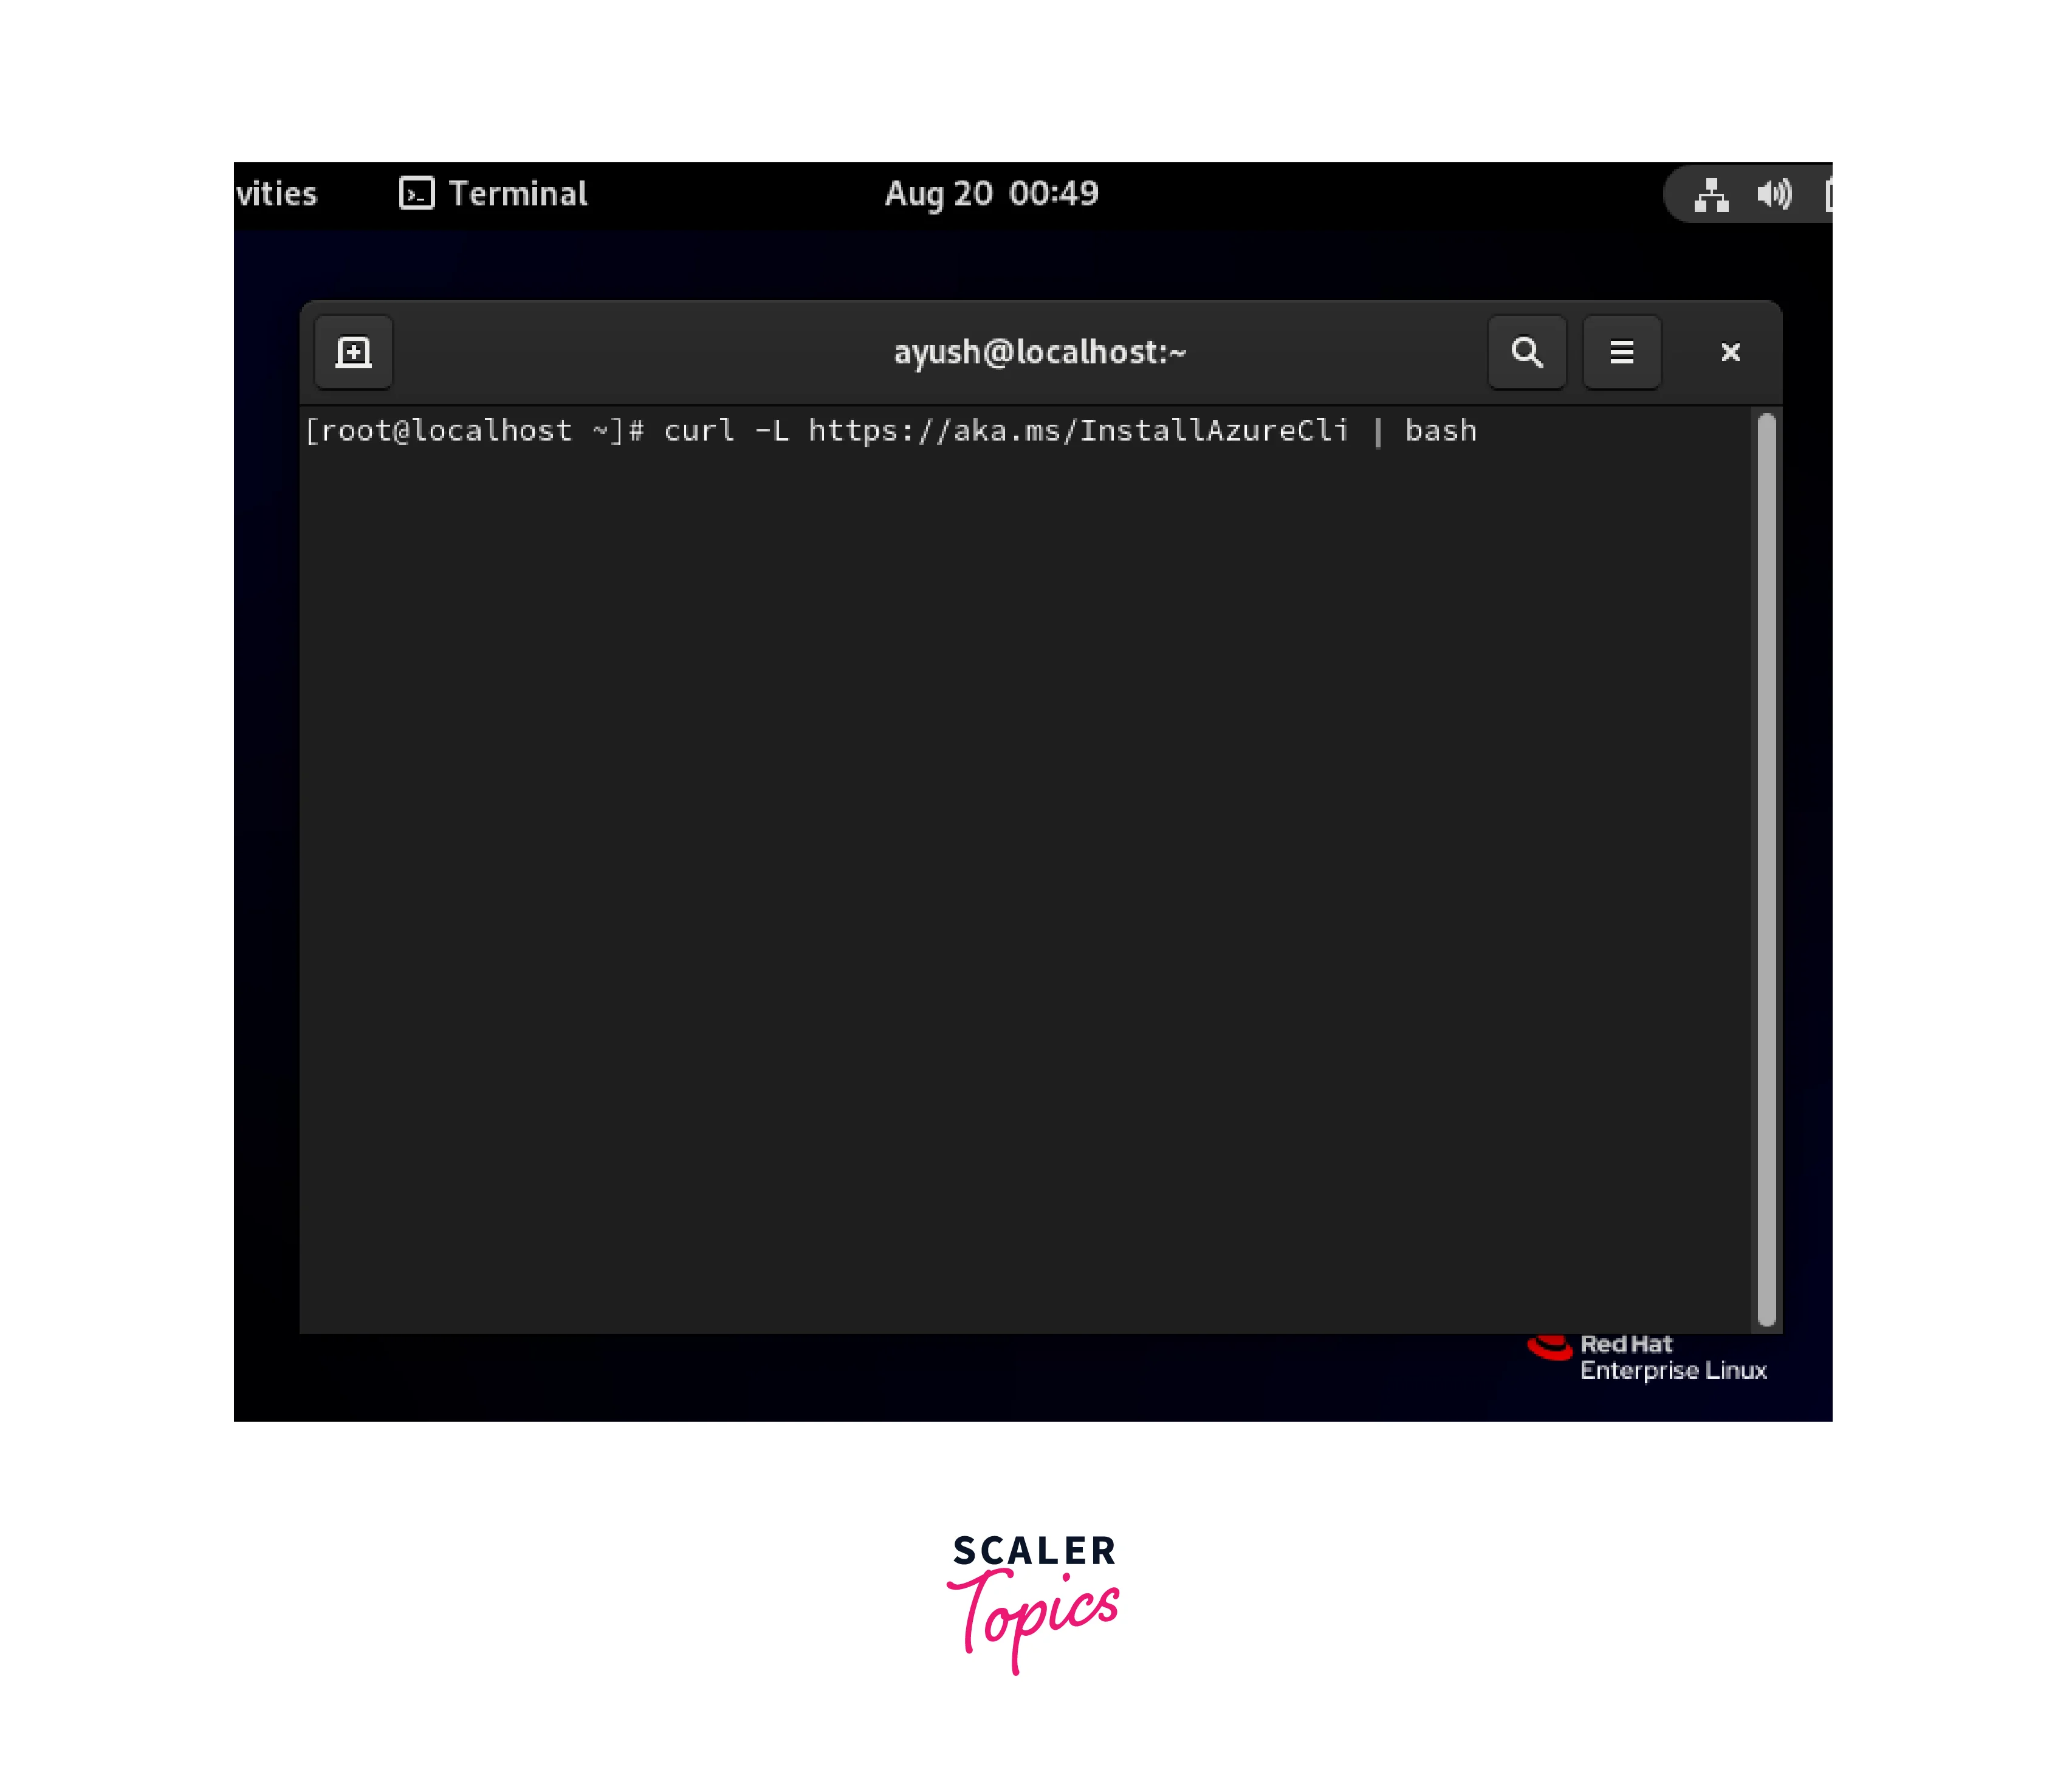
- Run the following command on the terminal.
curl -L https://aka.ms/InstallAzureCli | bash
- Choose Y to proceed further and press enter for few times to set the default installation location.
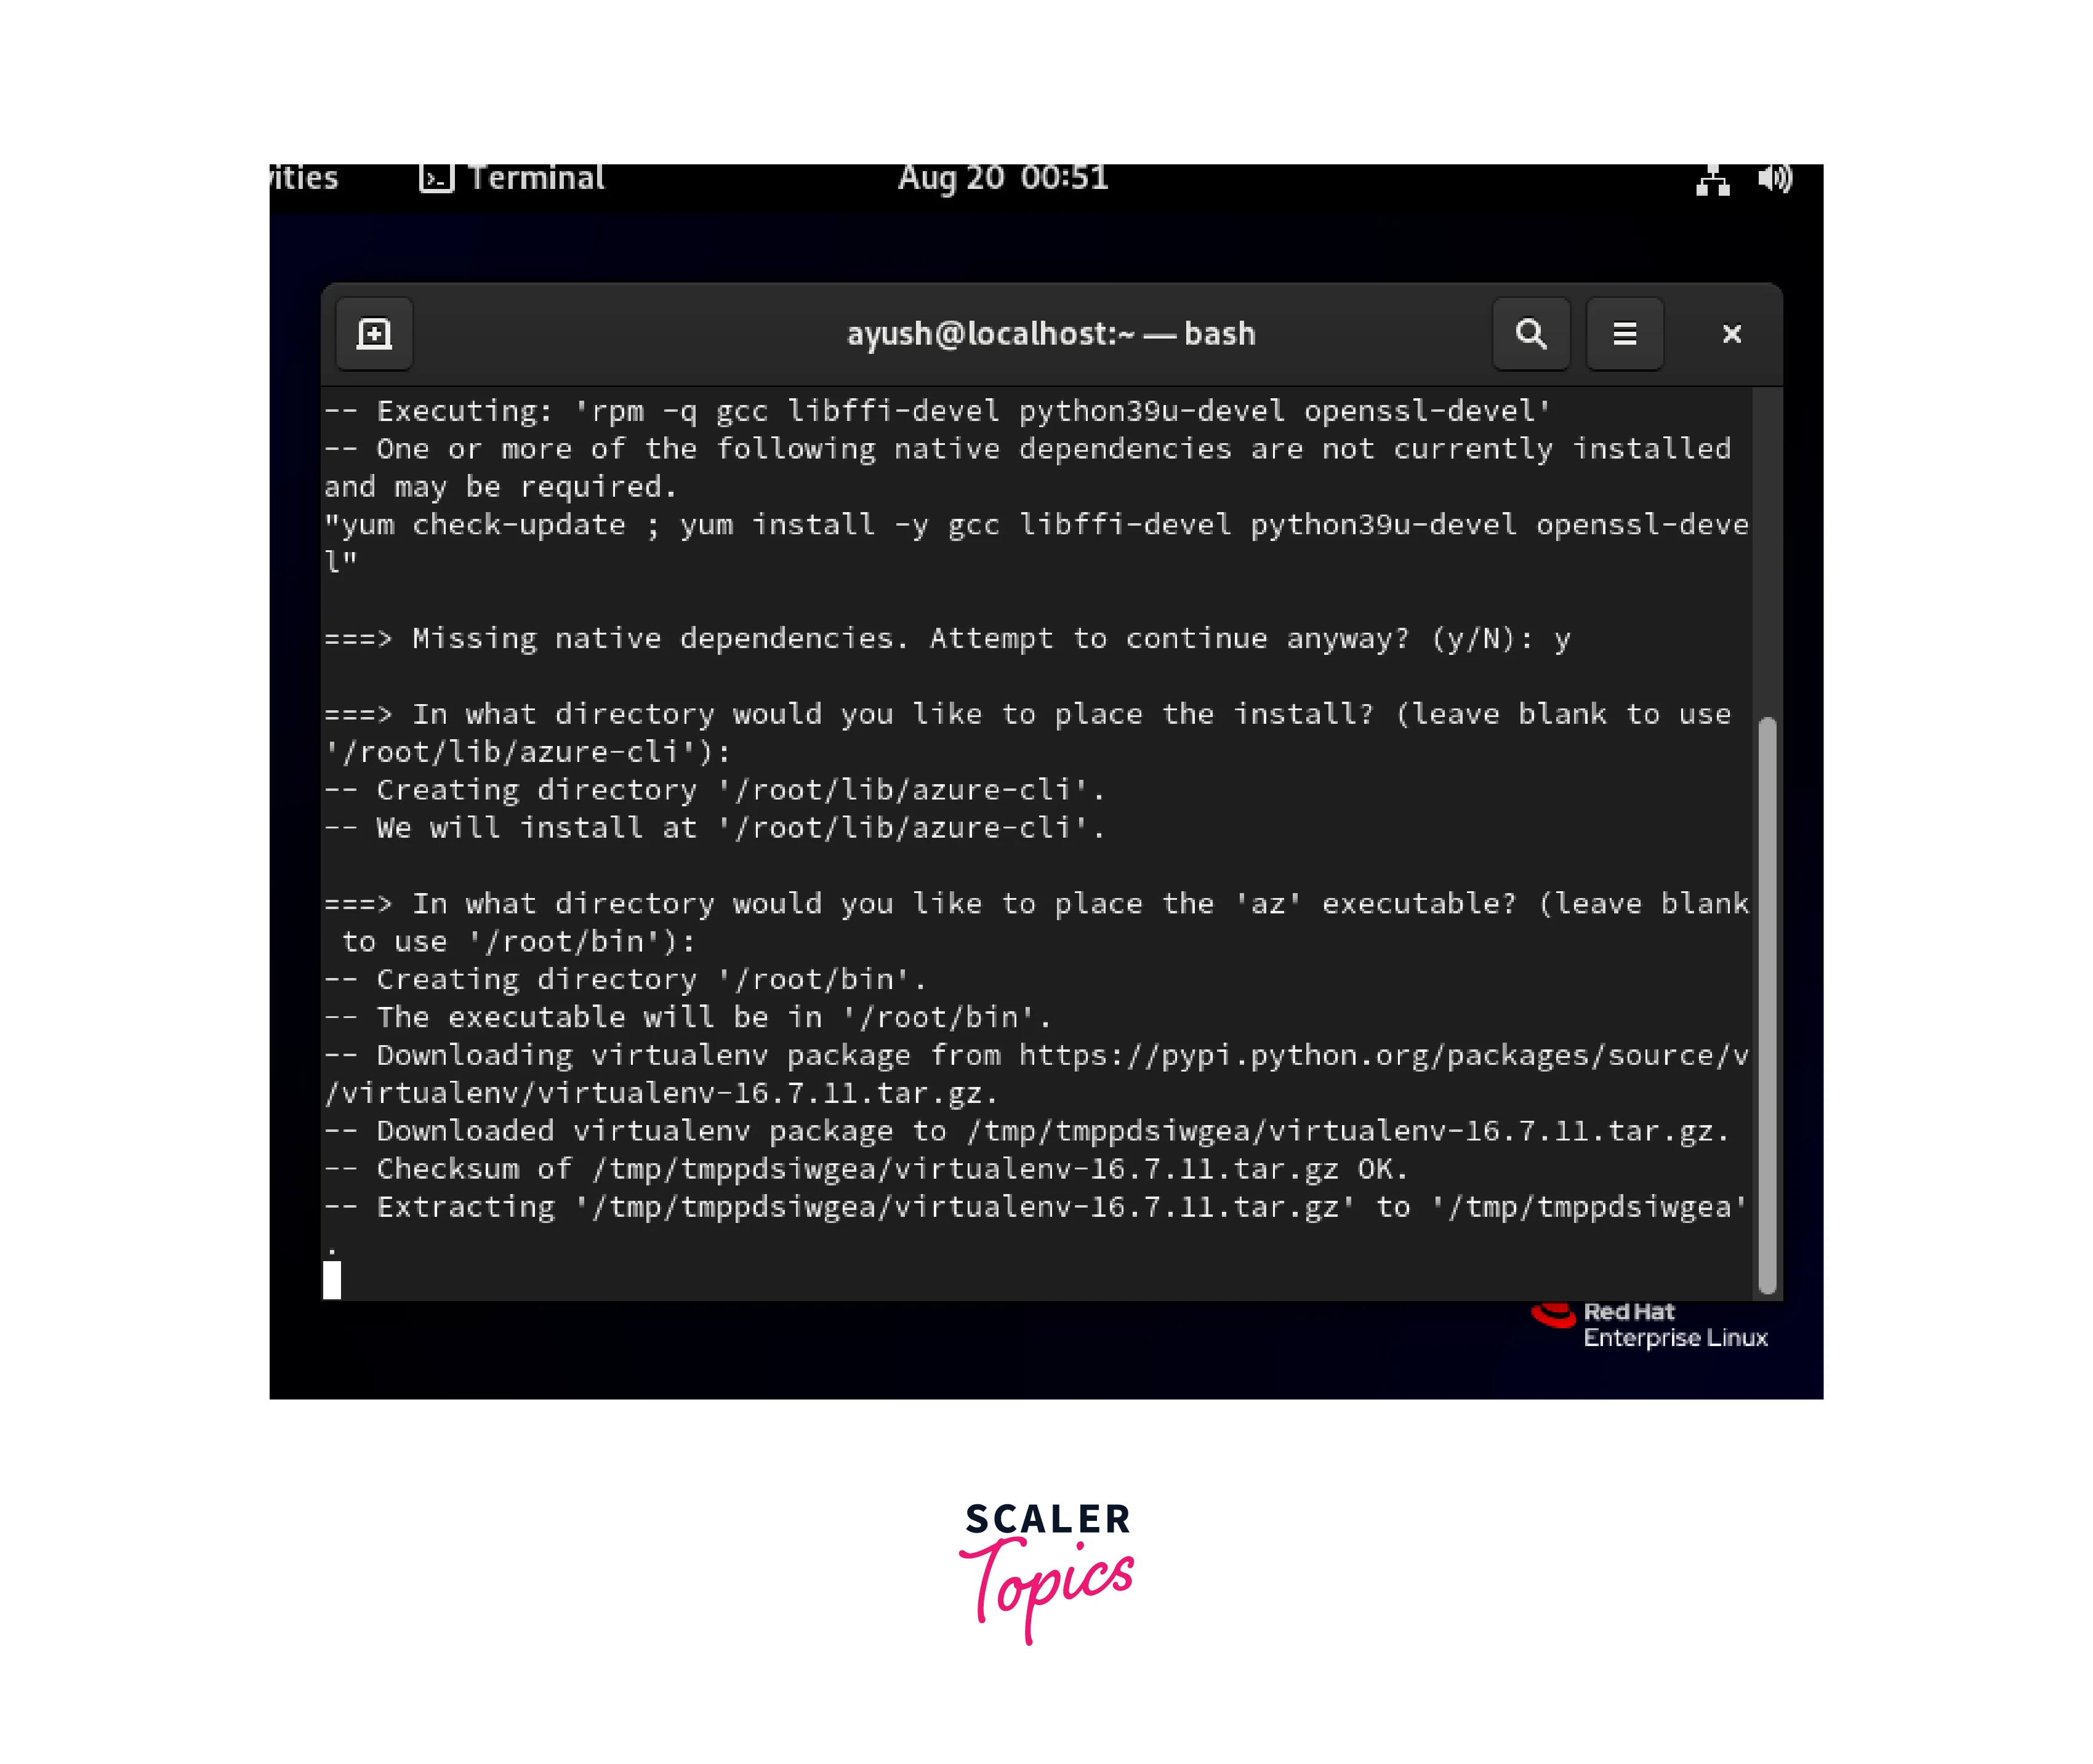
- Next, choose y to proceed and press enter to complete the installation.
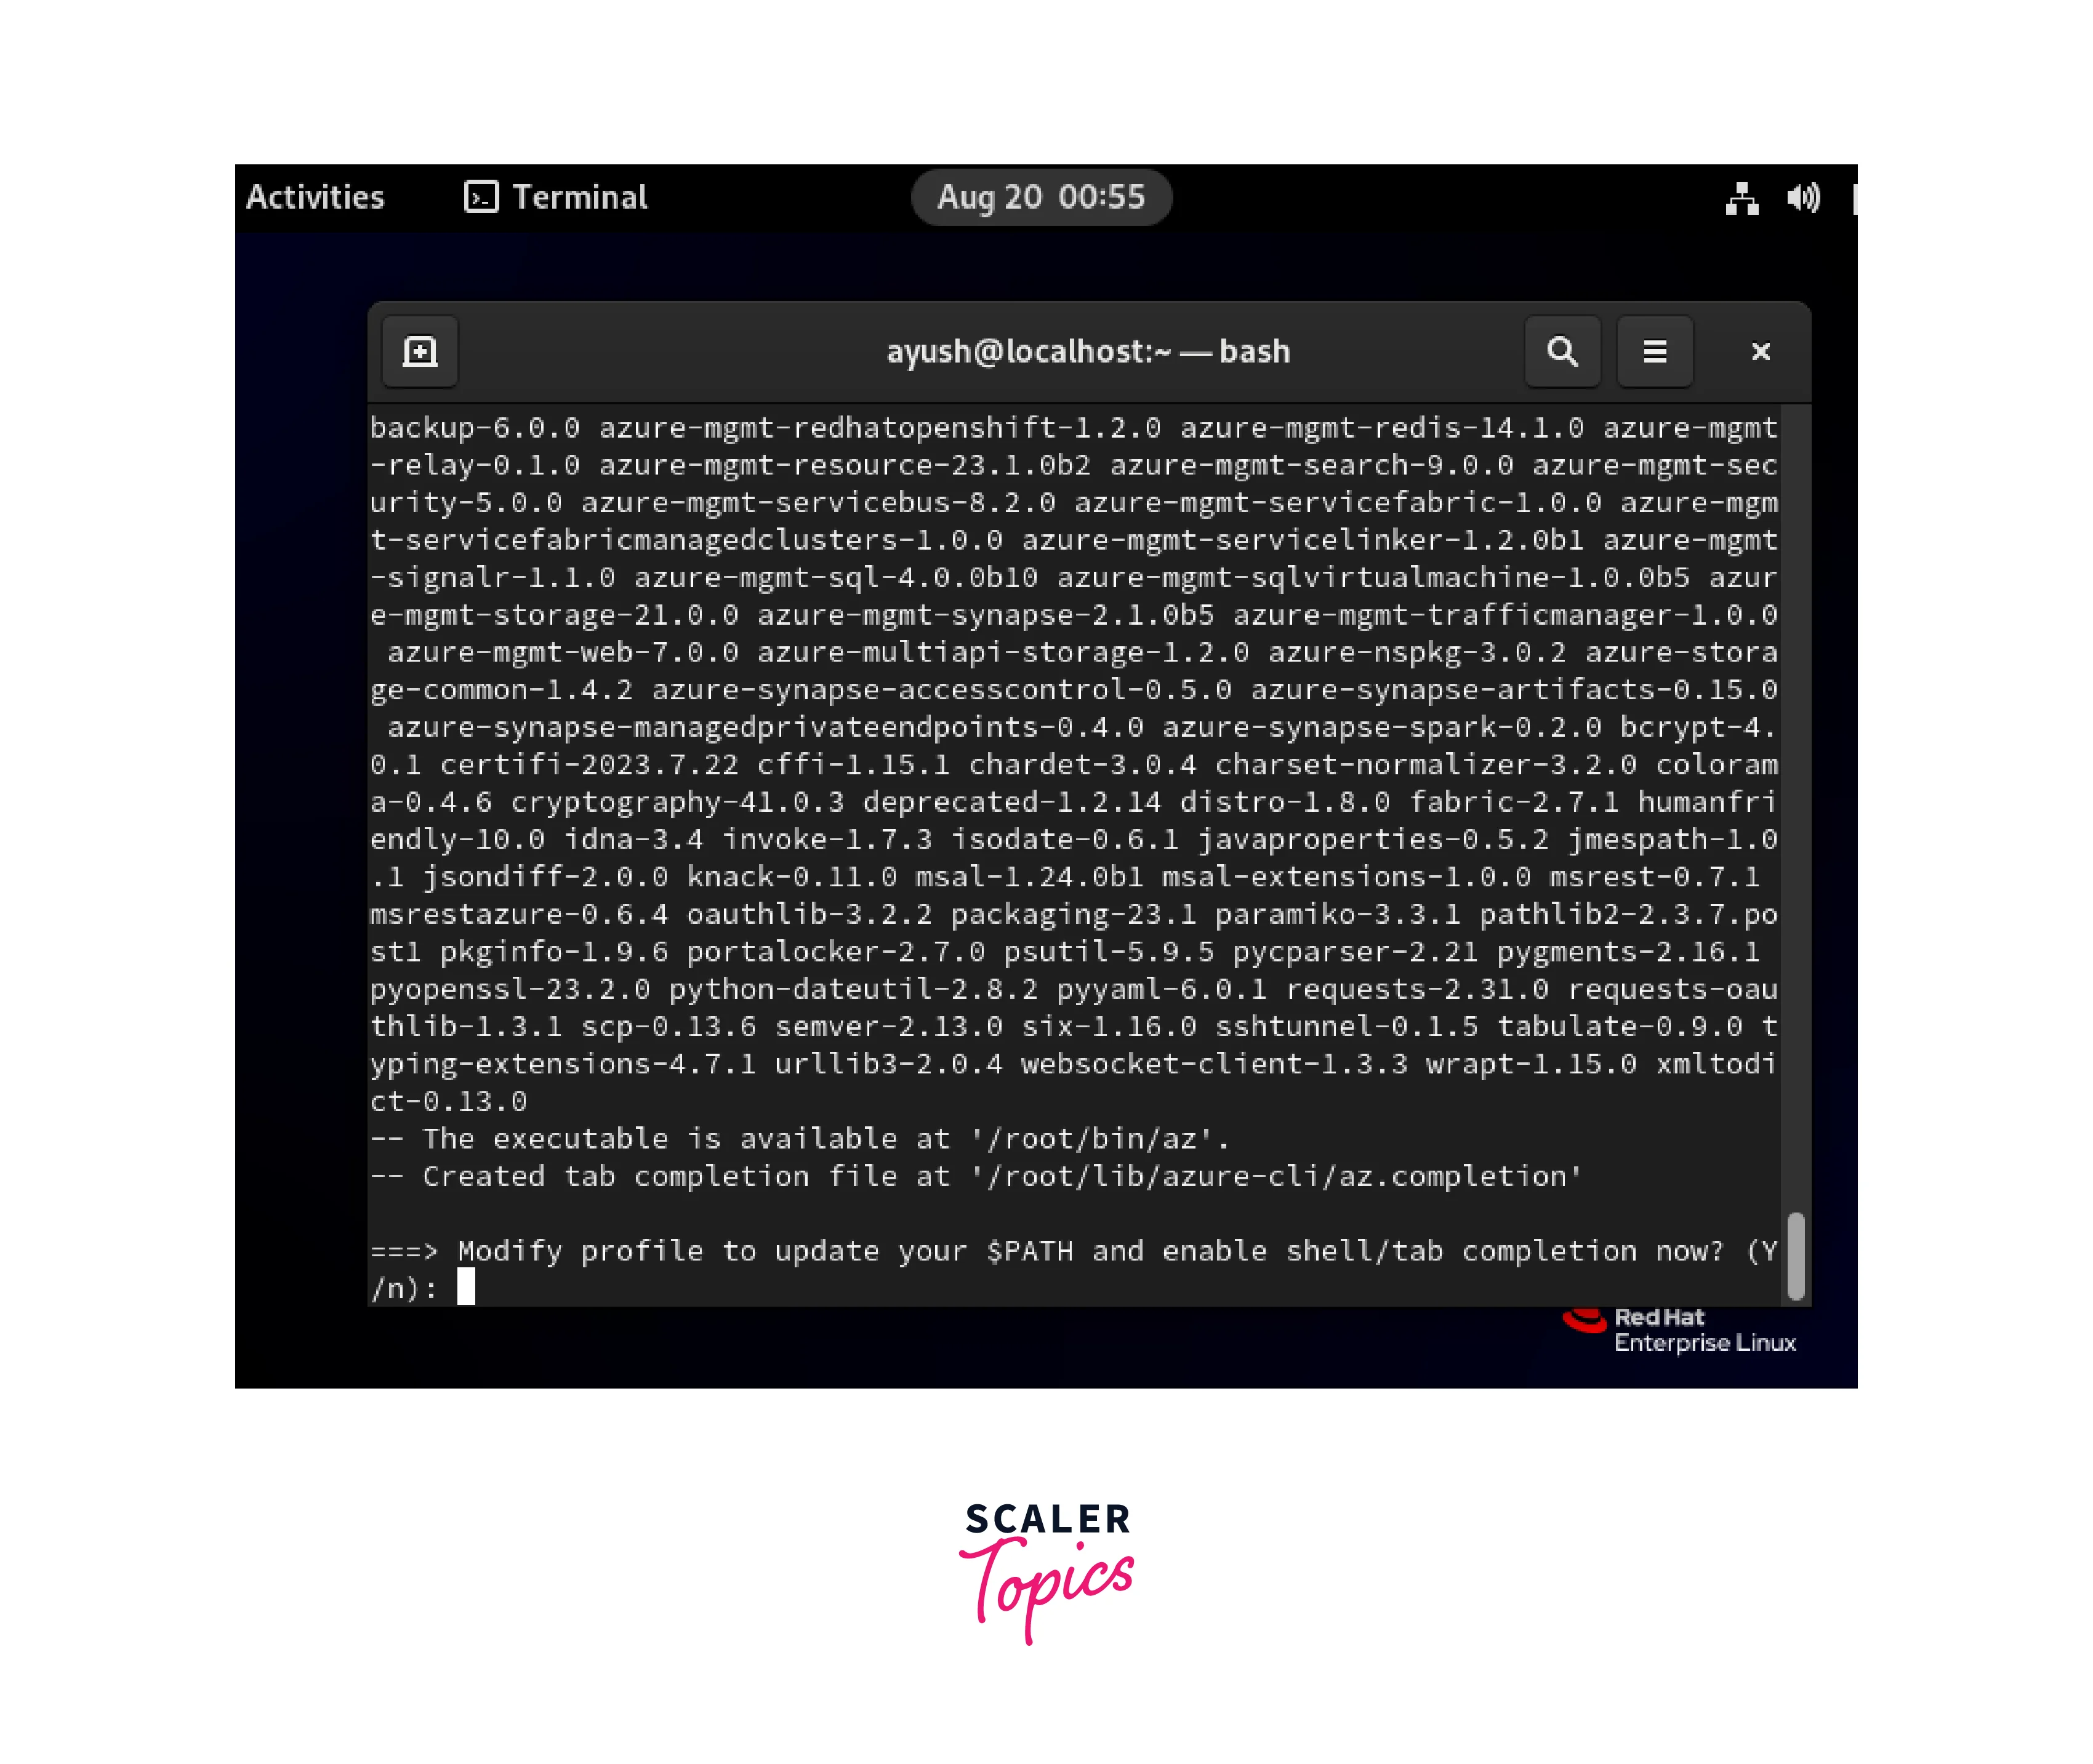
- It will finish the installation of Azure CLI. Now you can check the Azure CLI version using the az version command.
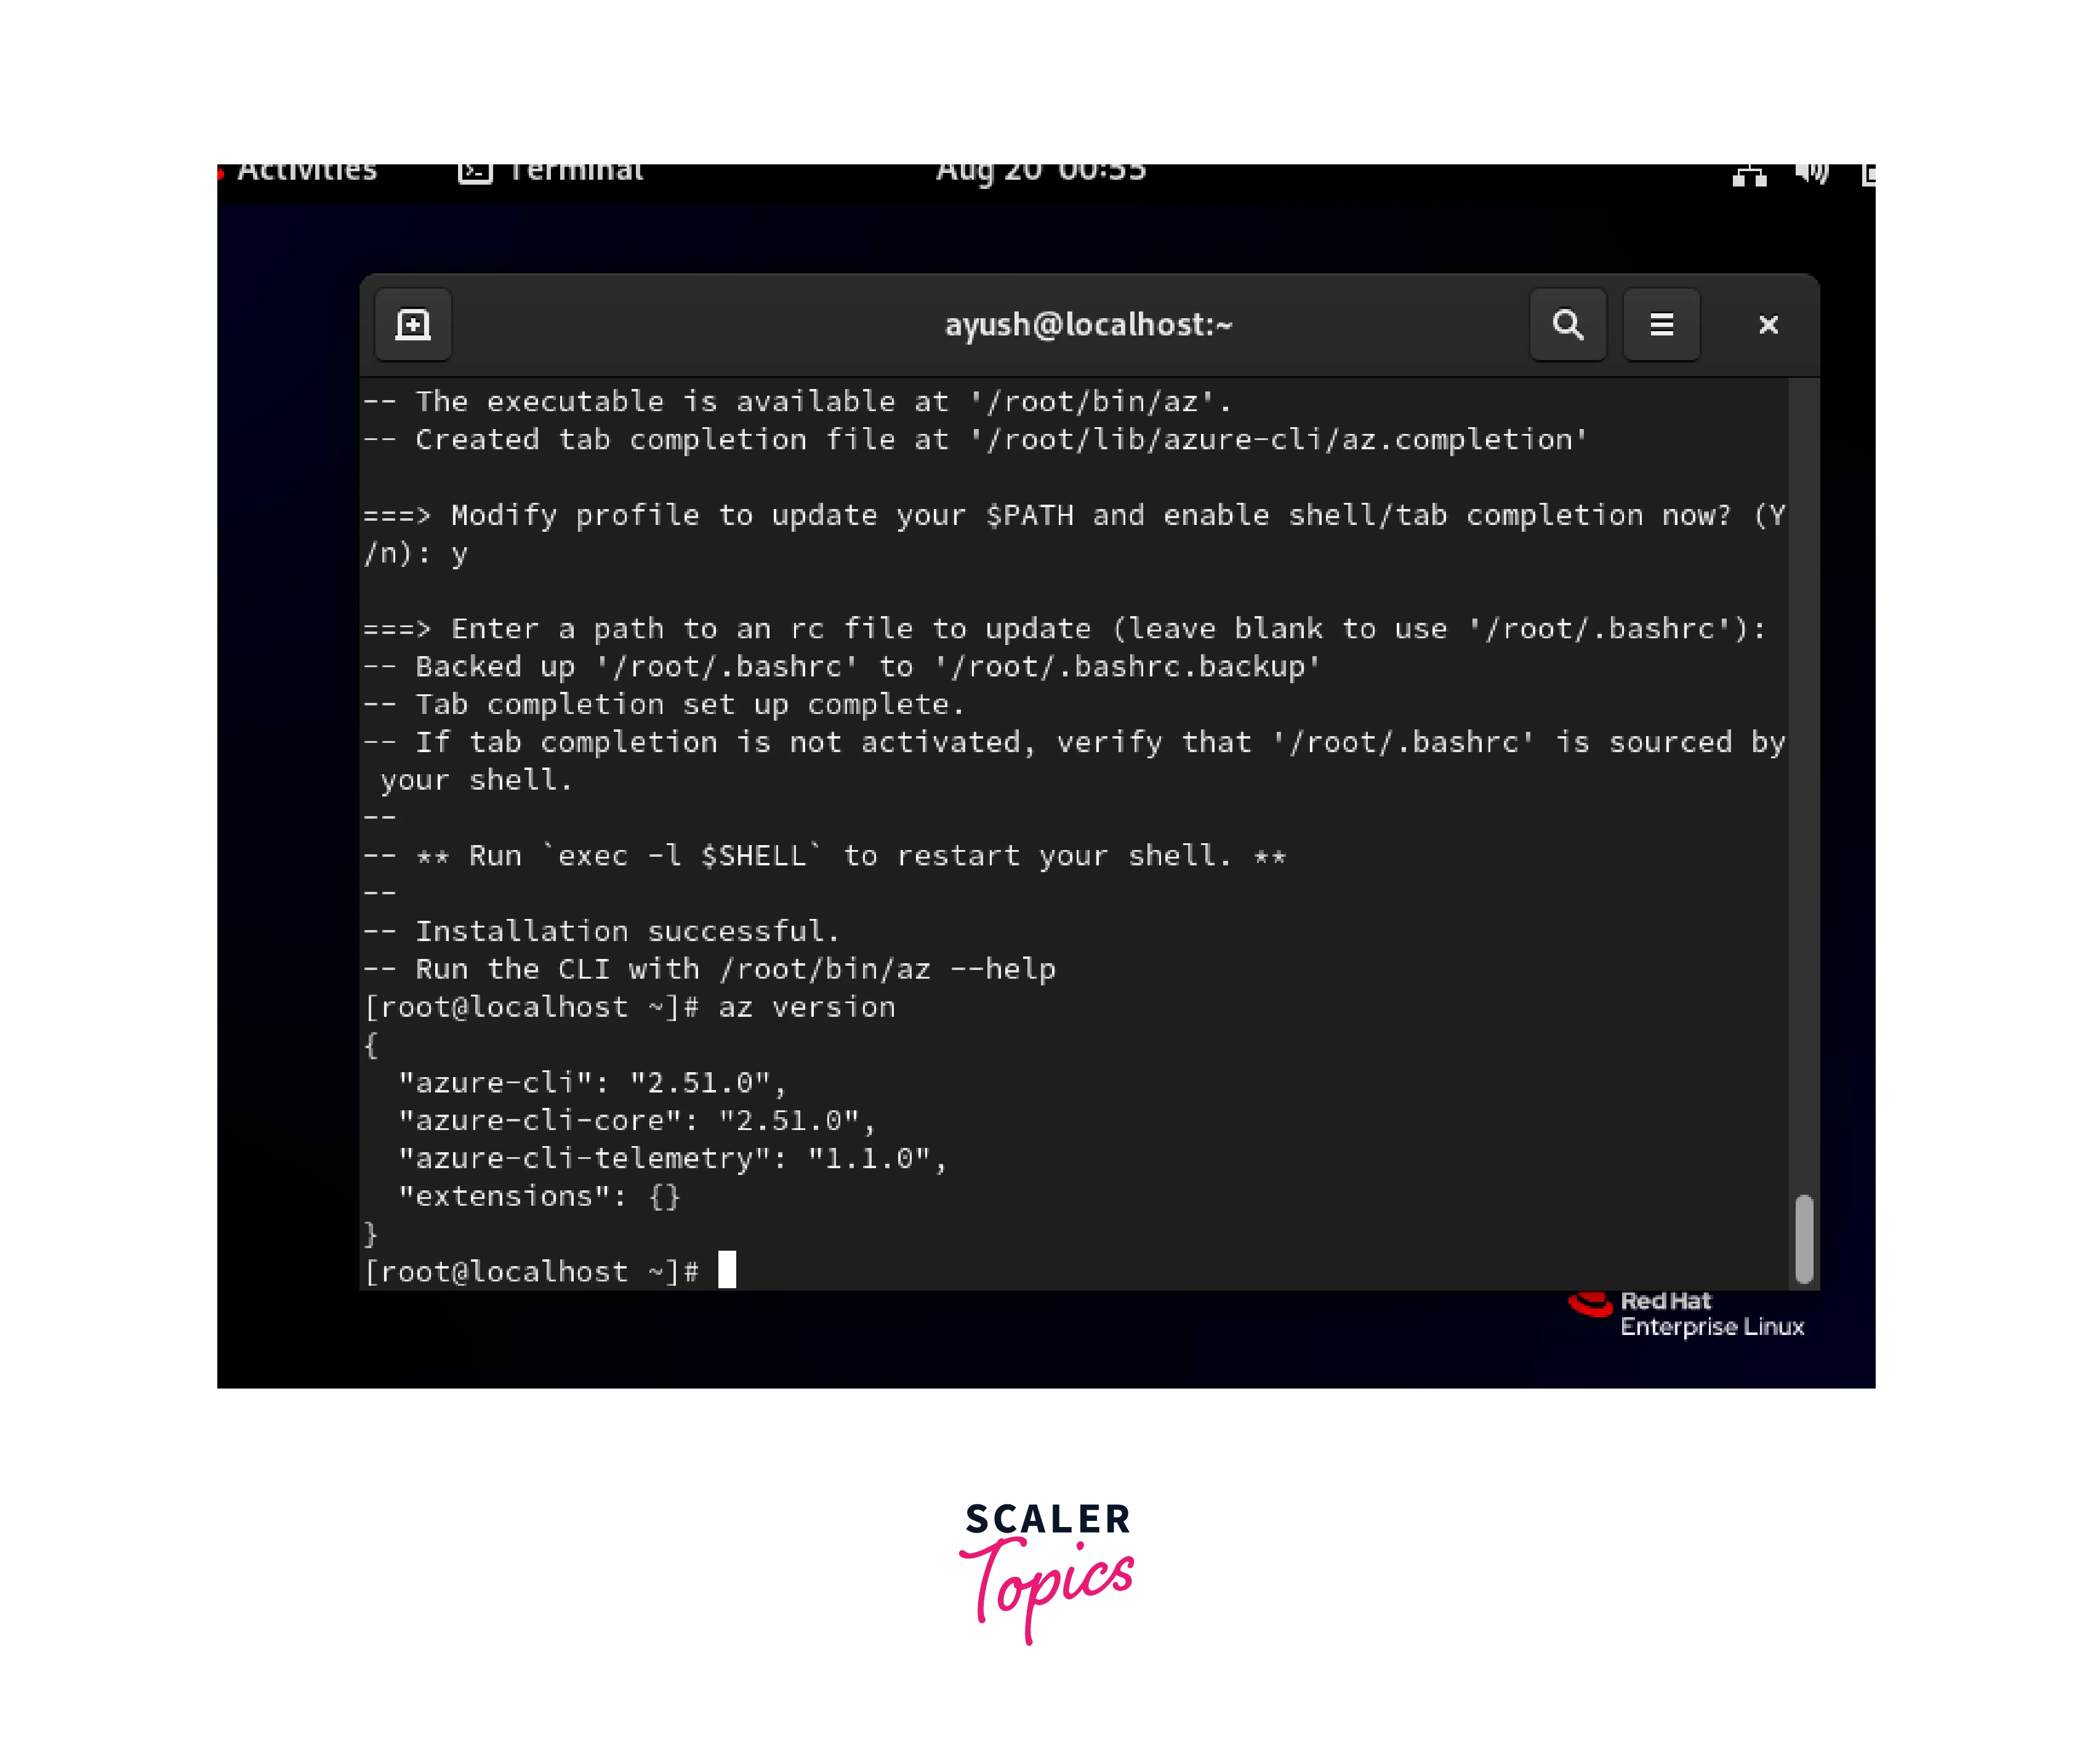 In this way, we can install azure cli on Linux.
Using Azure Command Line Interface
Interactive Mode
The interactive mode in the Azure CLI offers an improved user experience by providing an interactive shell that guides users through complex tasks. It allows users to dynamically input parameters, validate choices, and receive real-time feedback, making it especially useful for scenarios where multiple inputs are required or when you're uncertain about the required values.
- Use the az -h command to see what the interactive mode means.
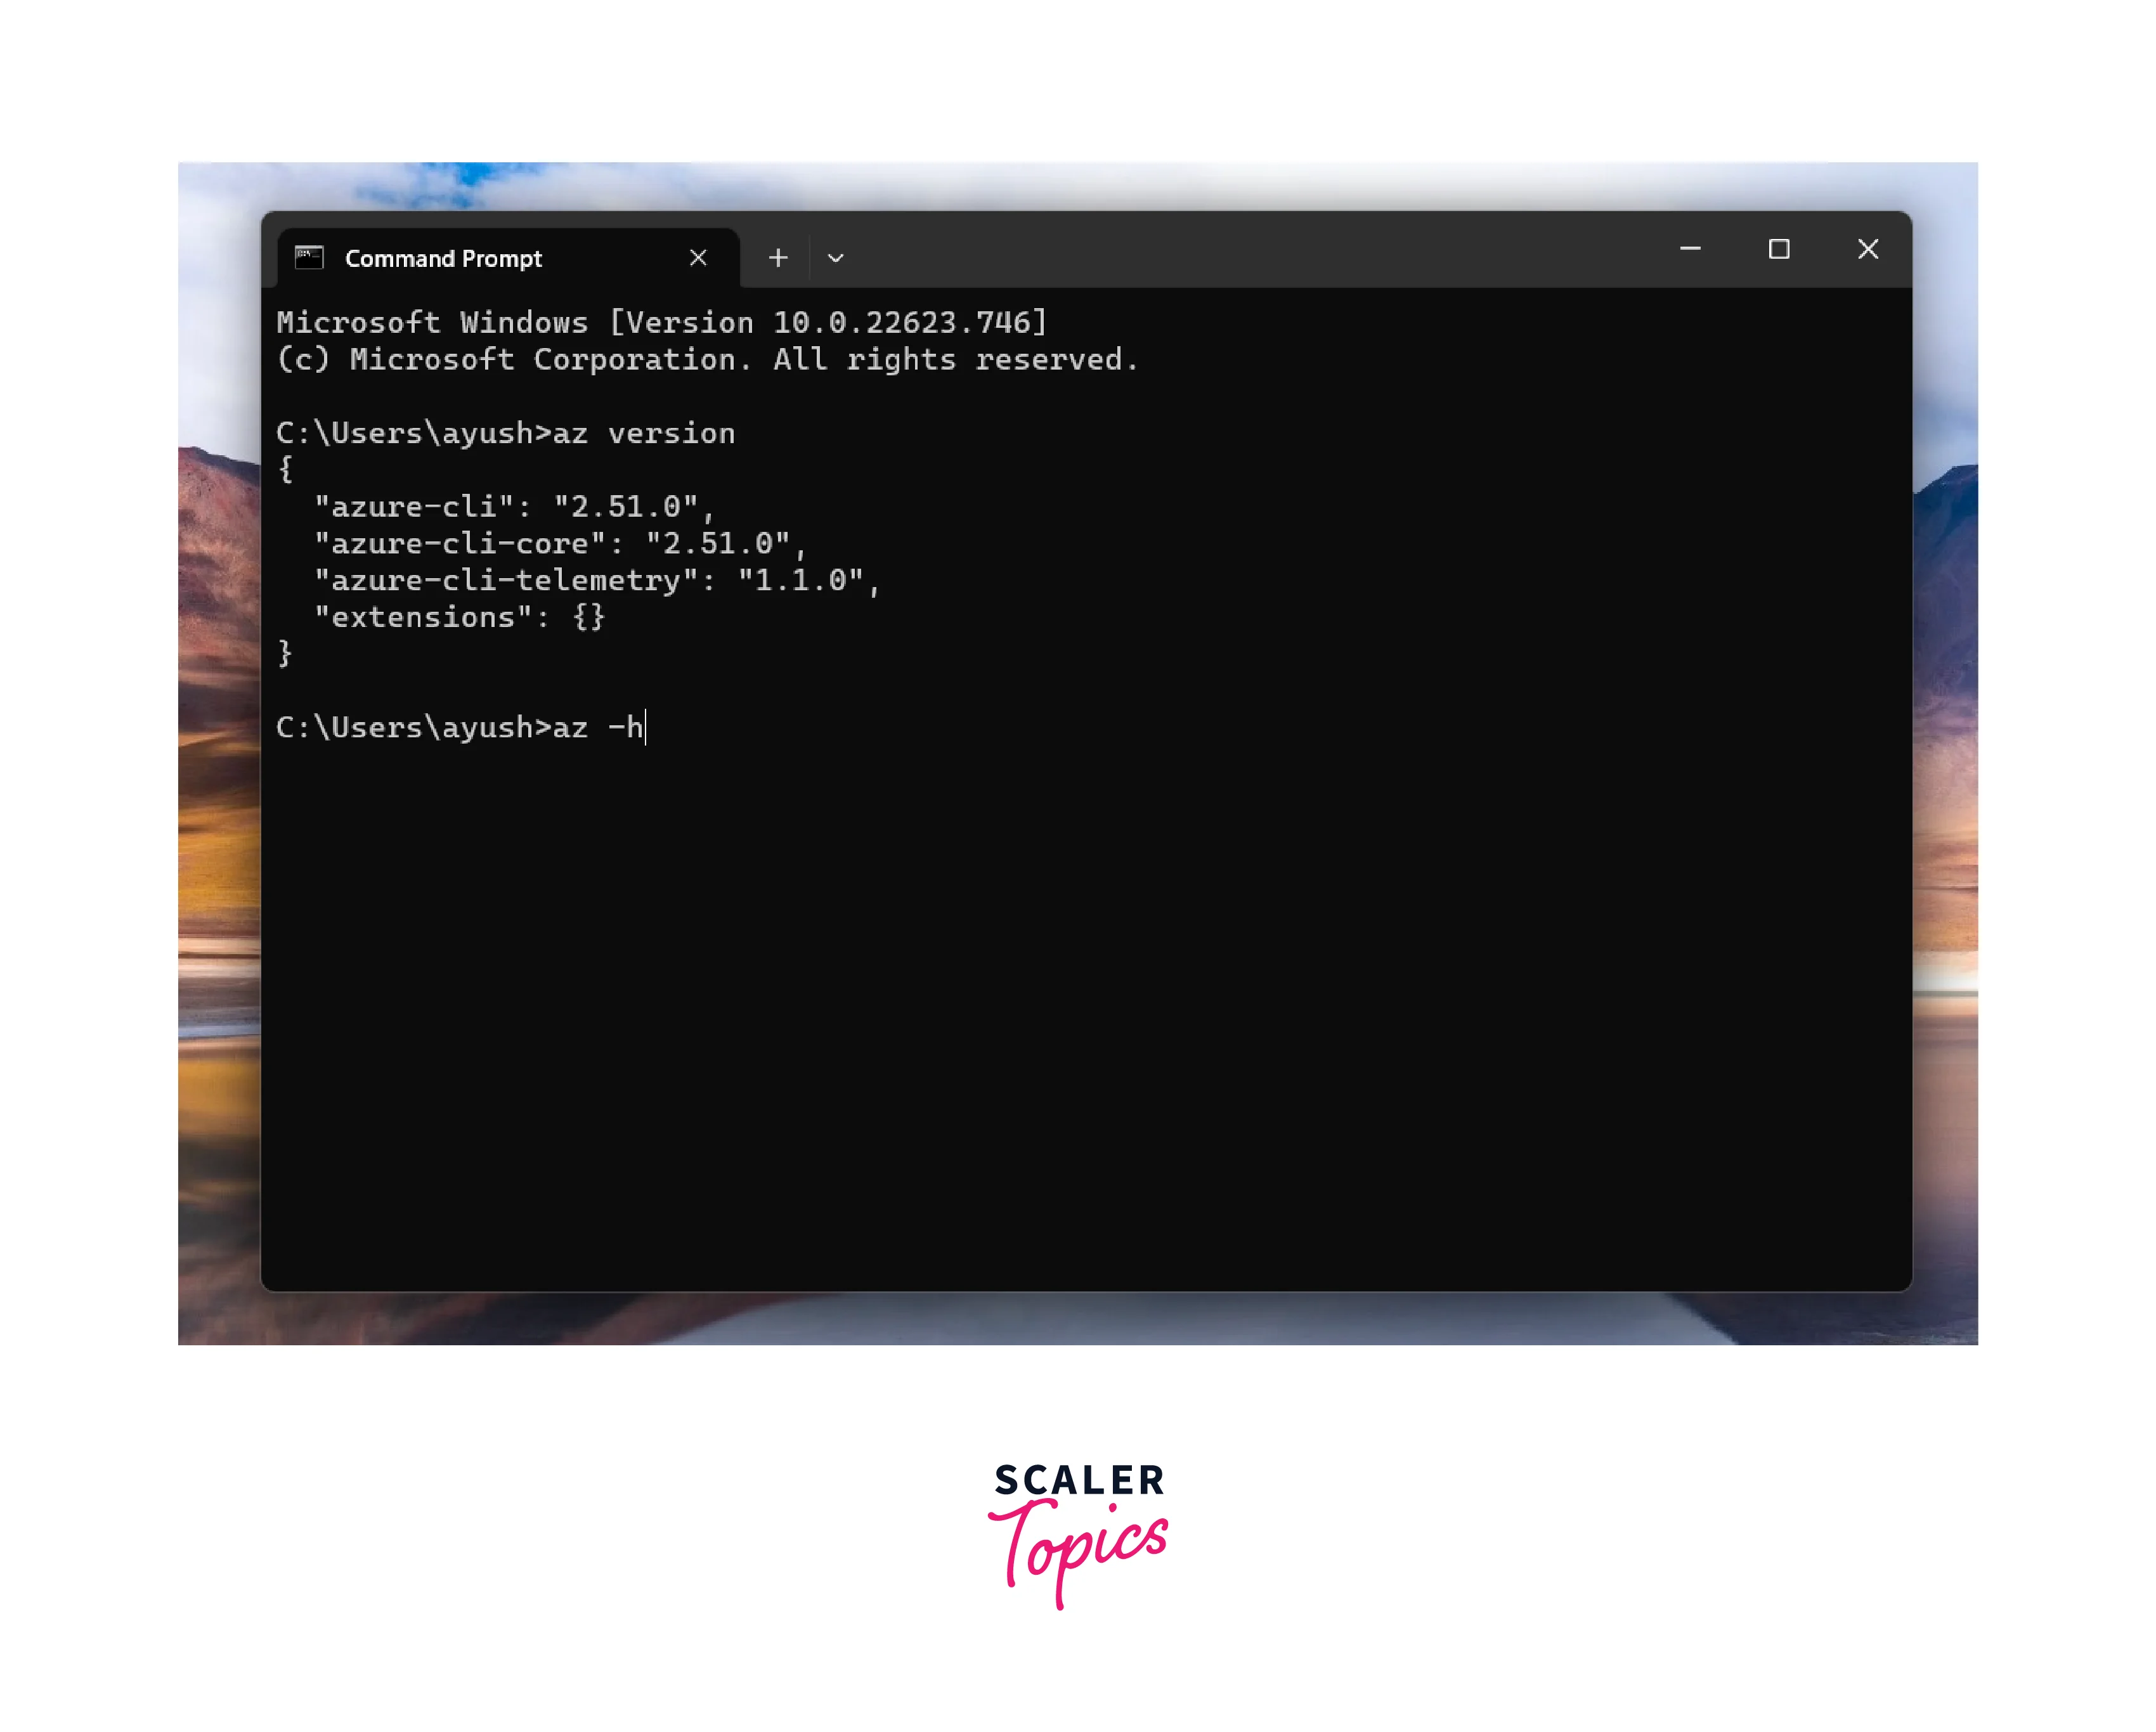
- To enter interactive mode, simply type az interactive in the command prompt.

- Type yes to start the installation.
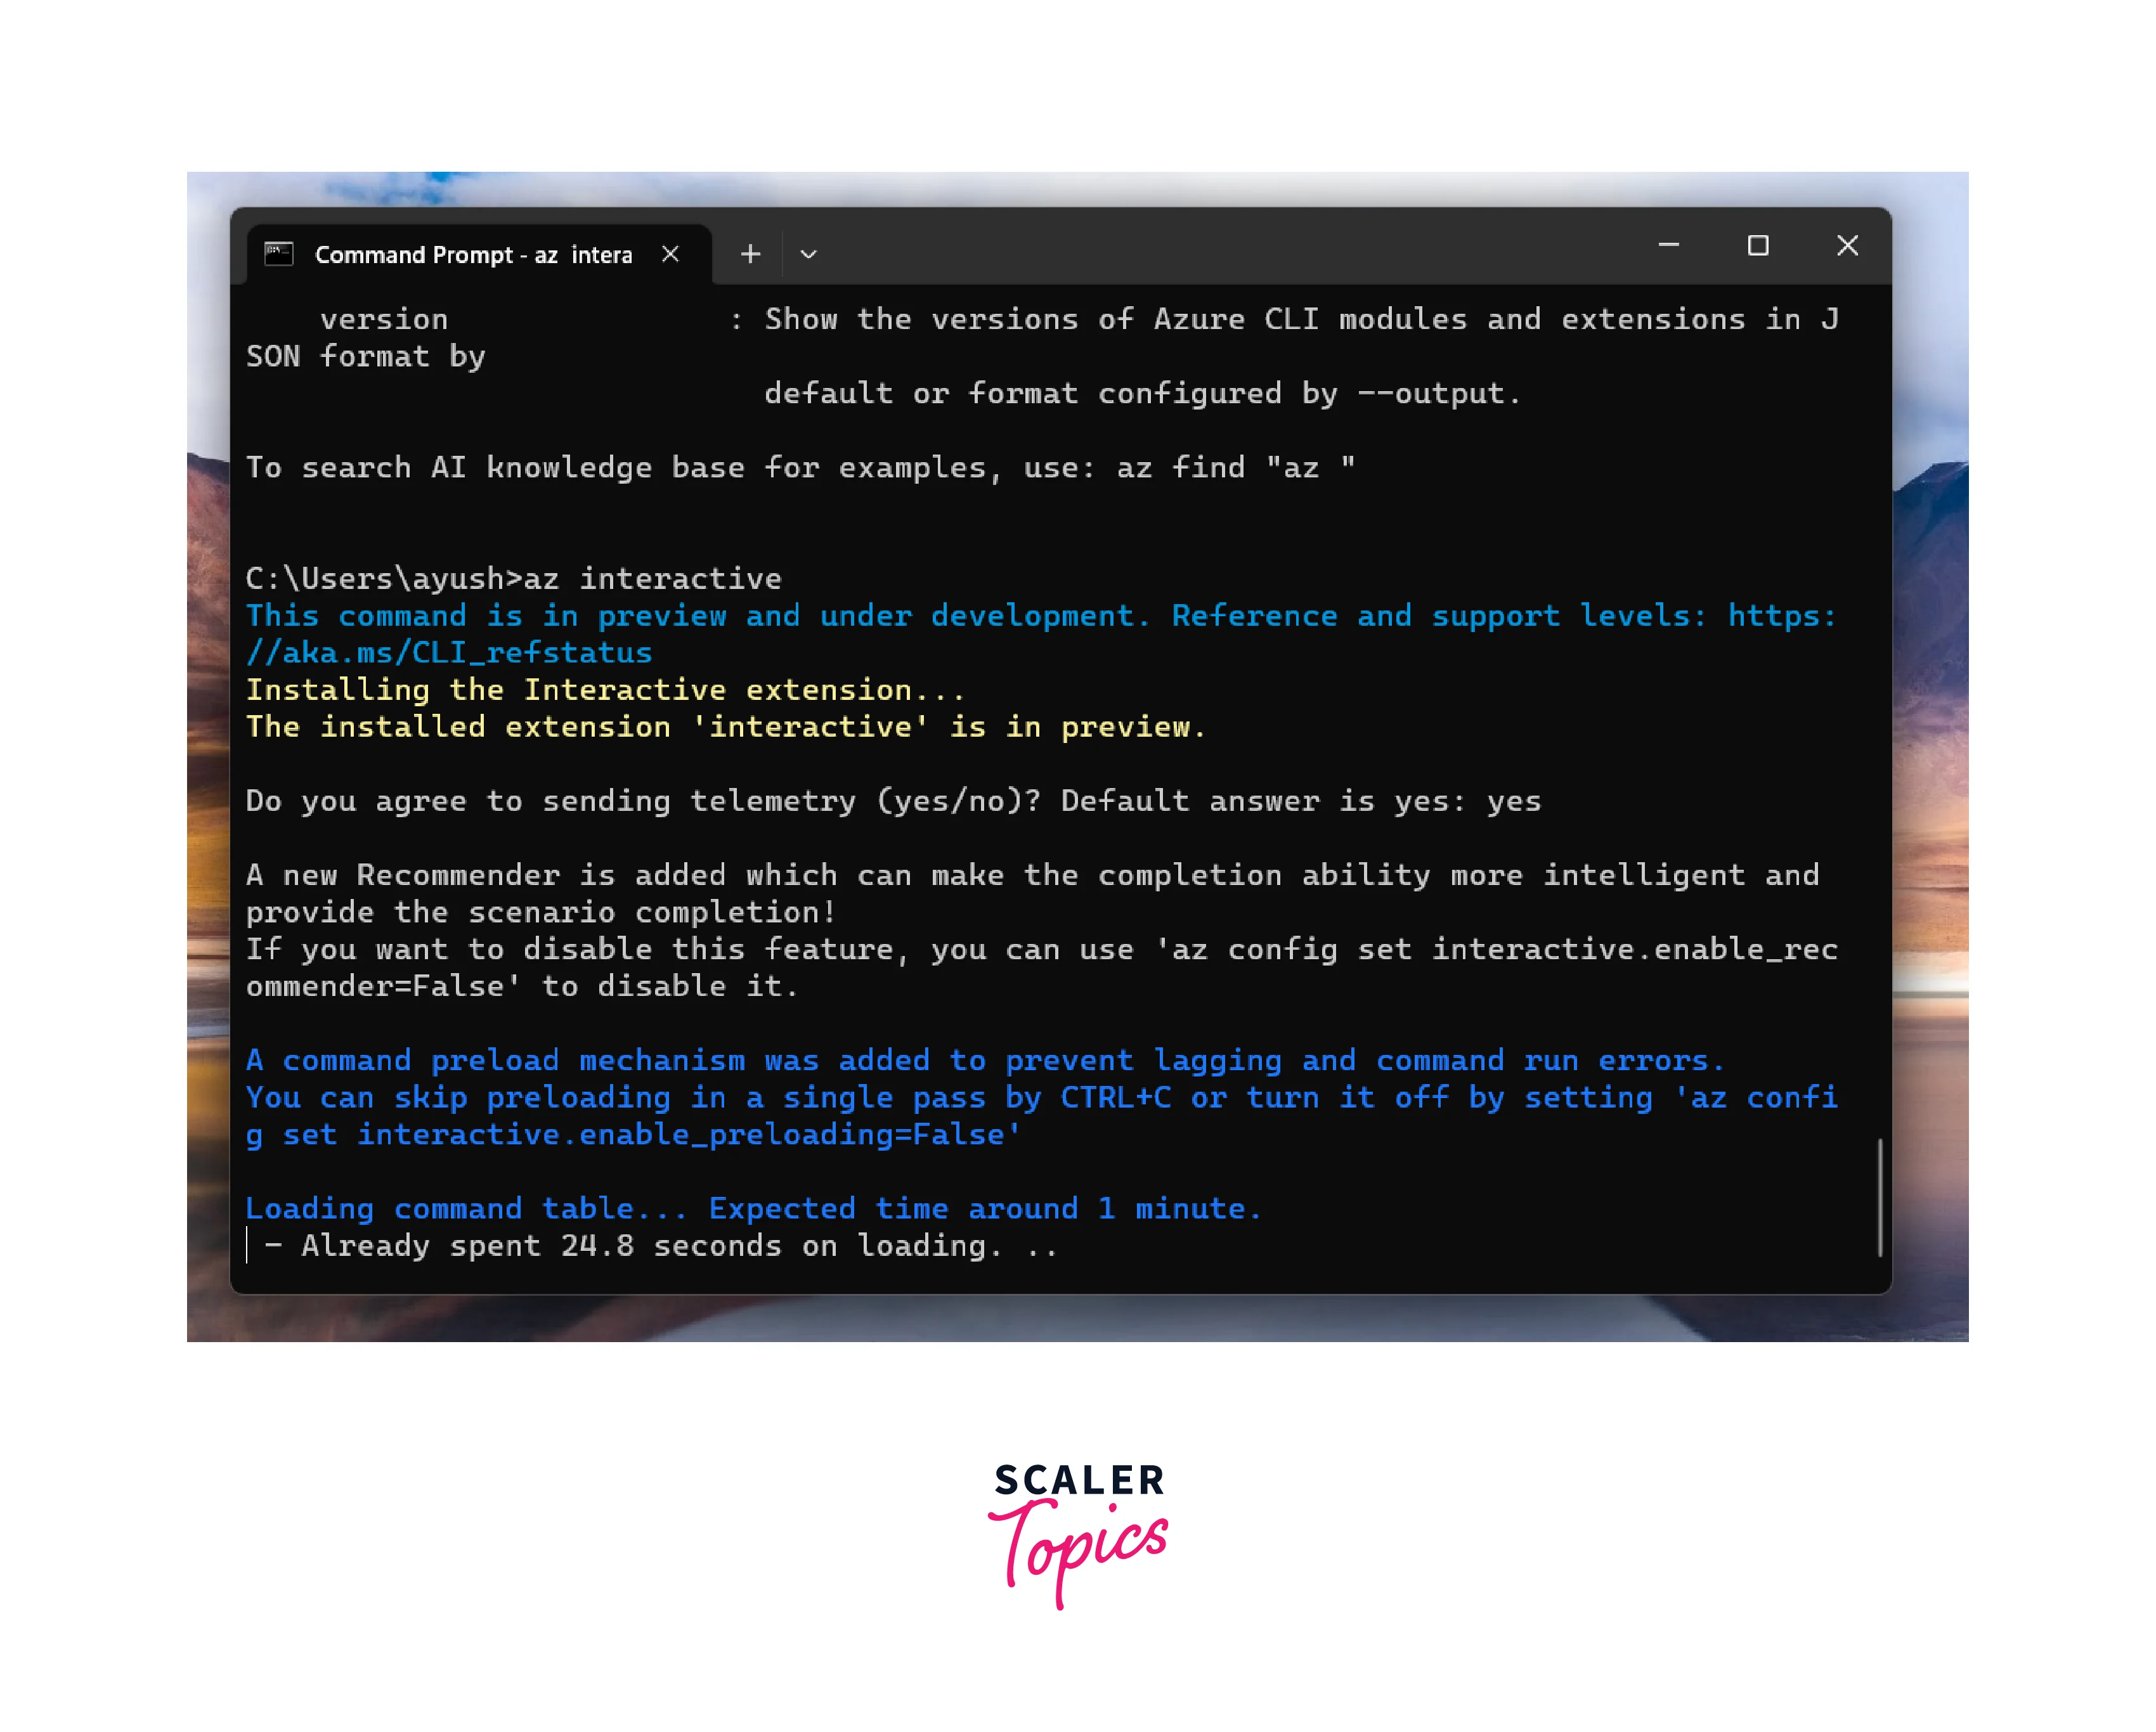
- You will see a screen like one shown below. In the interactive shell, you can use commands just as you would in the regular CLI.
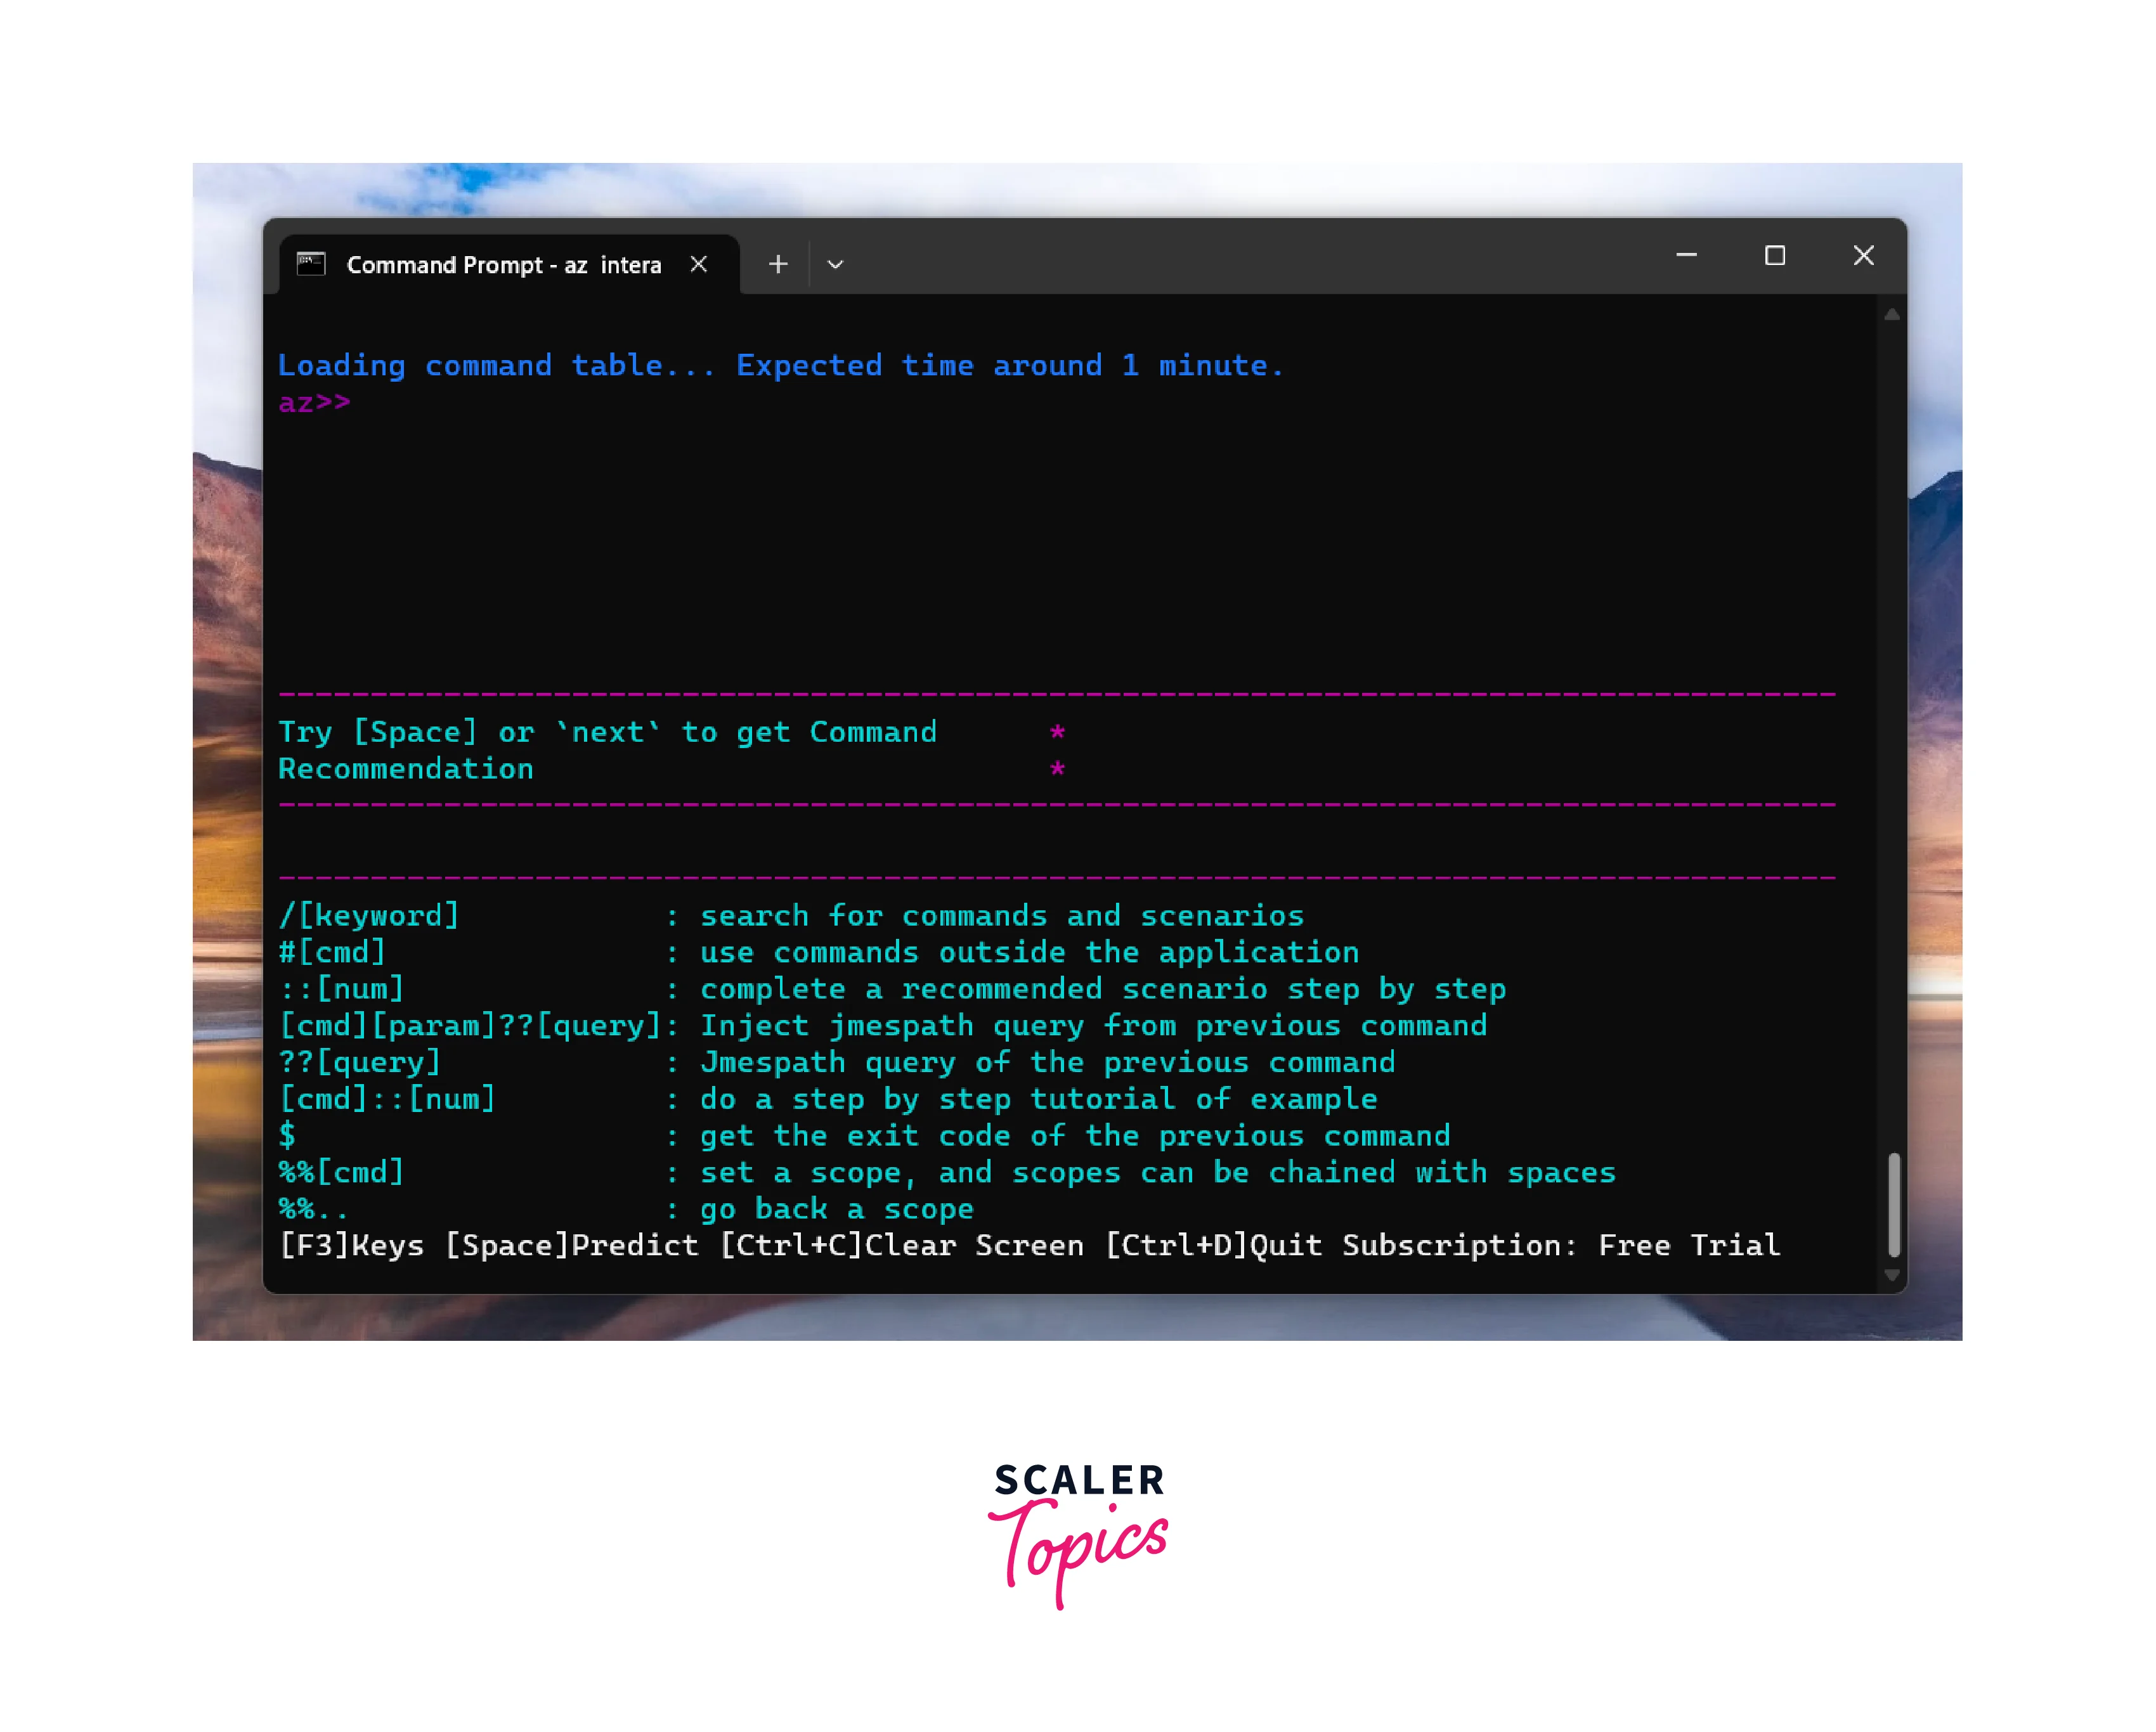
- Instead of providing all the parameters at once, the interactive mode prompts you for input one step at a time. It may ask you for details like VM name, resource group, image, location, etc.
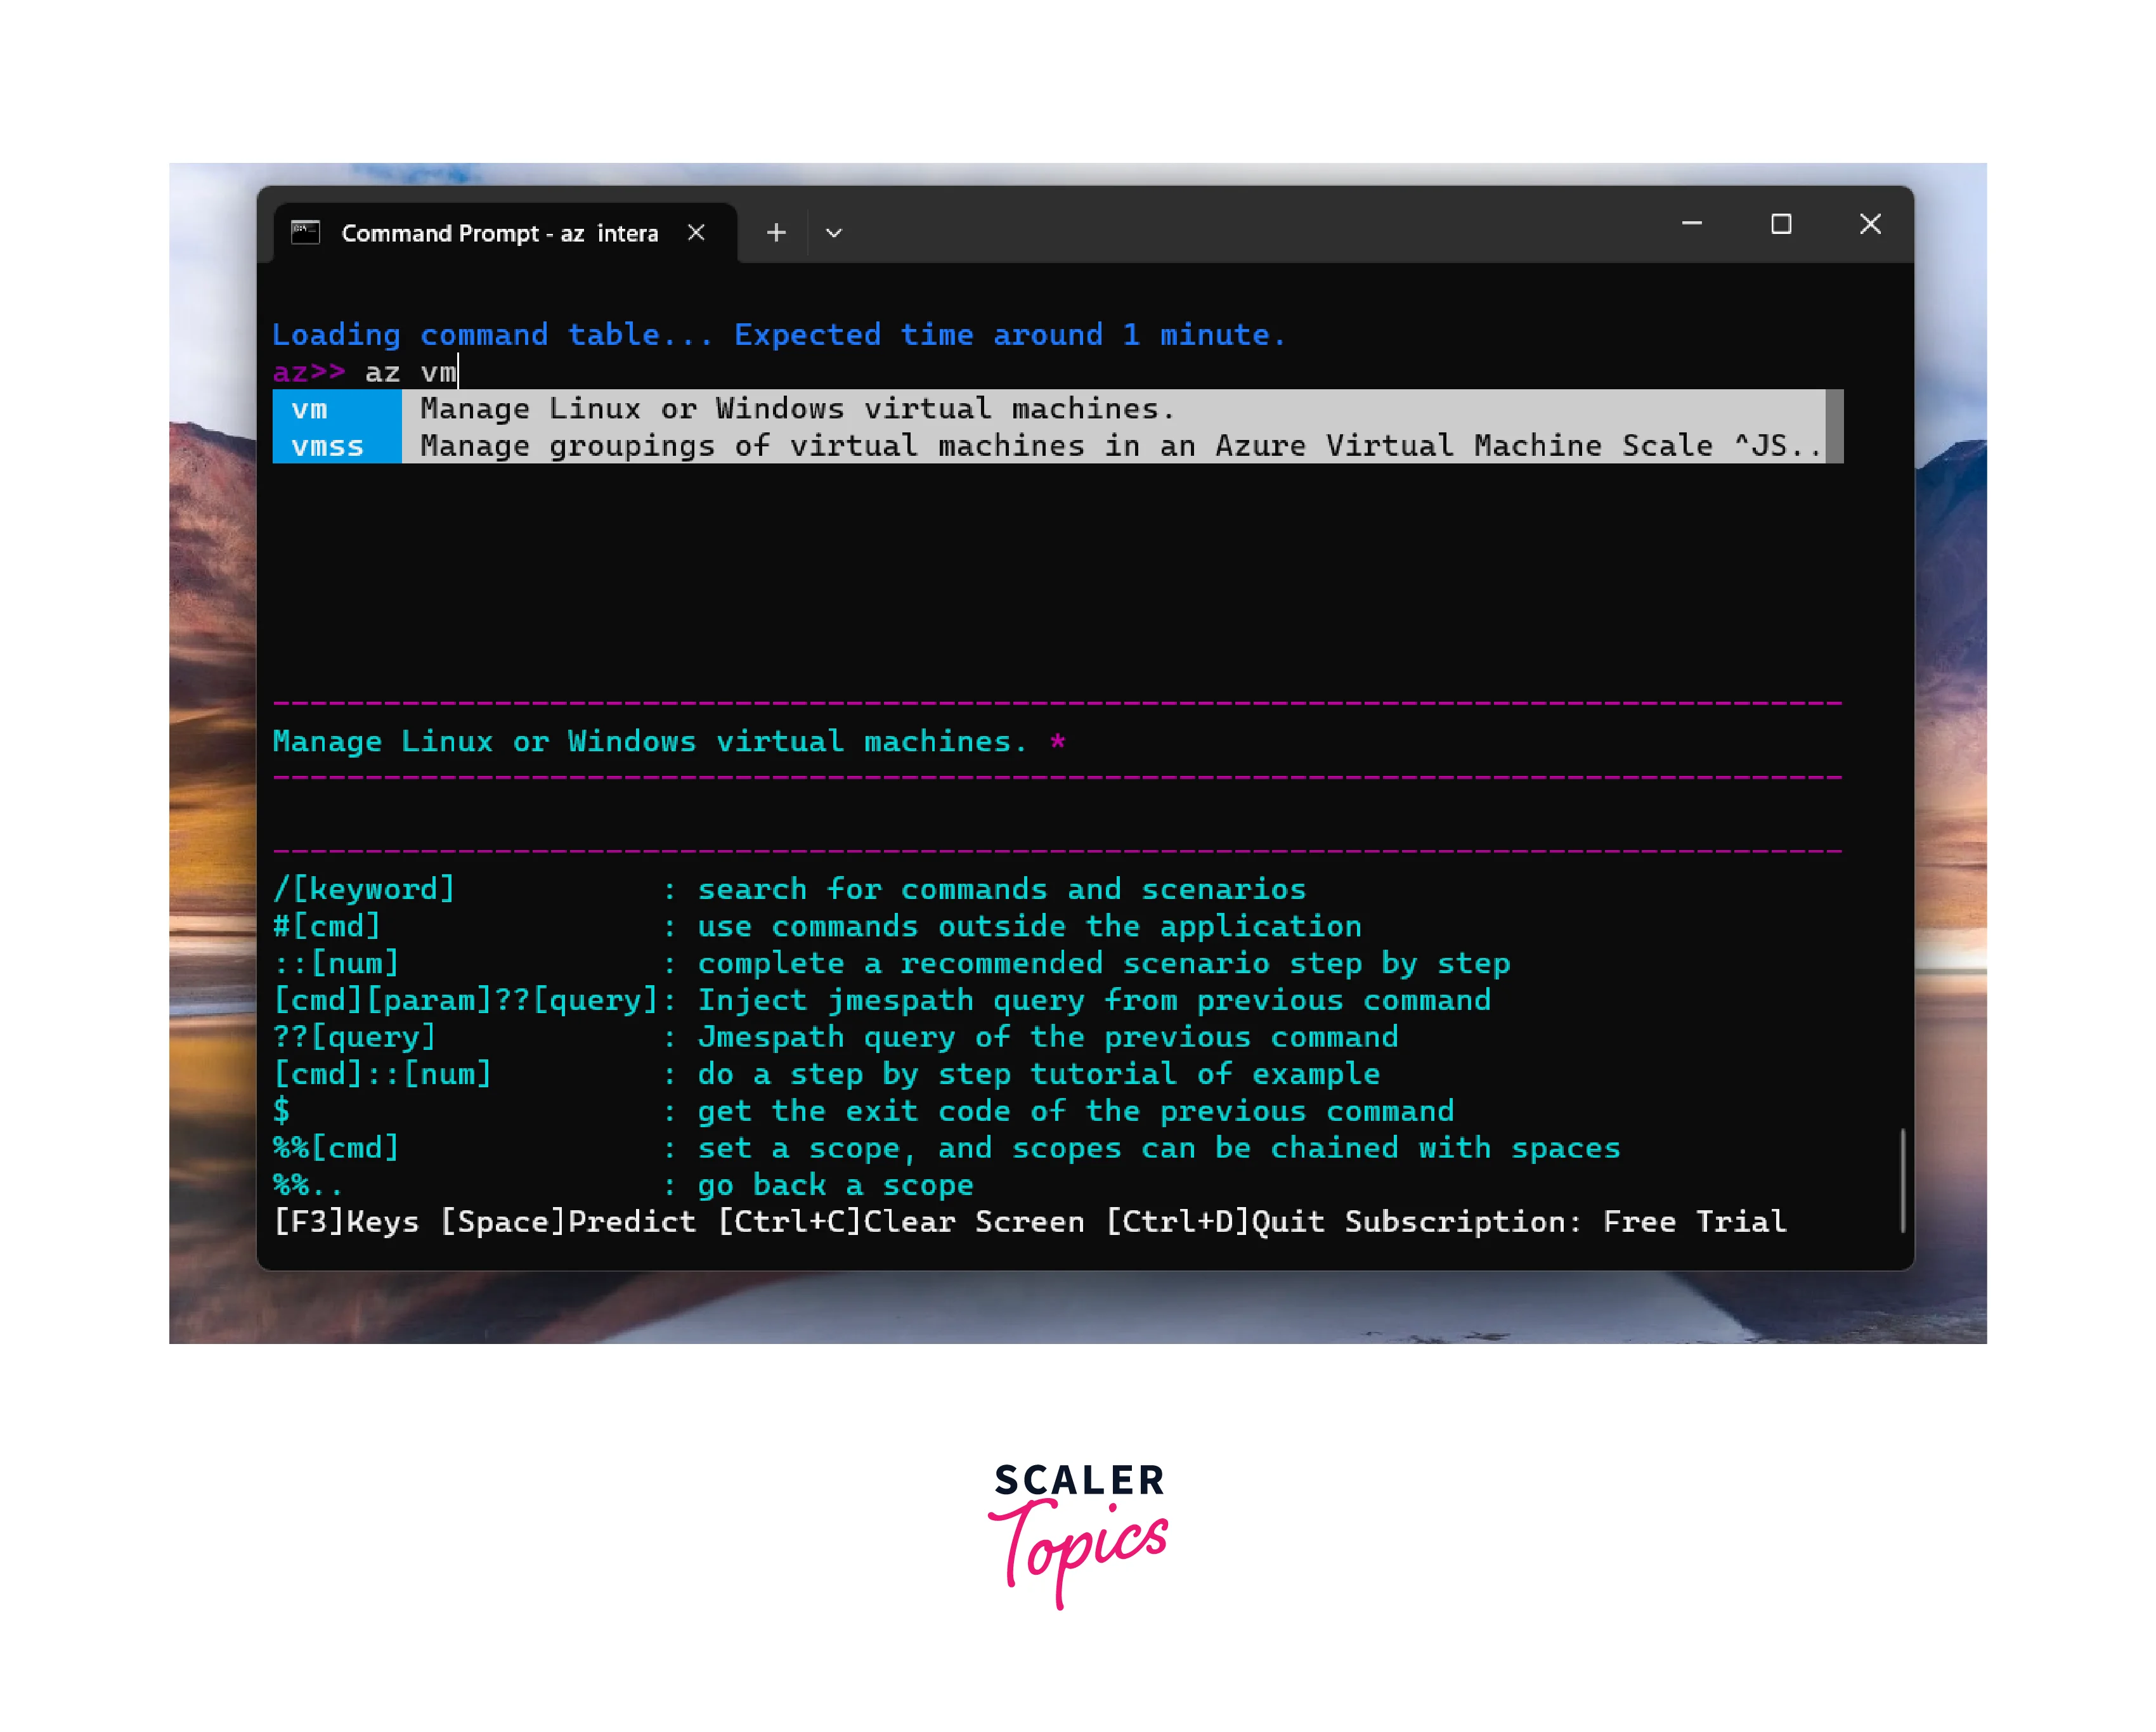
As you enter values, the interactive mode validates your input and may suggest options based on your subscription, location, or previously used values.
Azure Login
Authentication is a critical aspect of cloud computing, ensuring that only authorized users and applications can access resources and perform actions within your Azure environment.
Azure Active Directory (Azure AD) is Microsoft's cloud-based identity and access management service that provides robust authentication and authorization capabilities.Azure AD is designed to provide a seamless single sign-on experience for users across various applications and services.
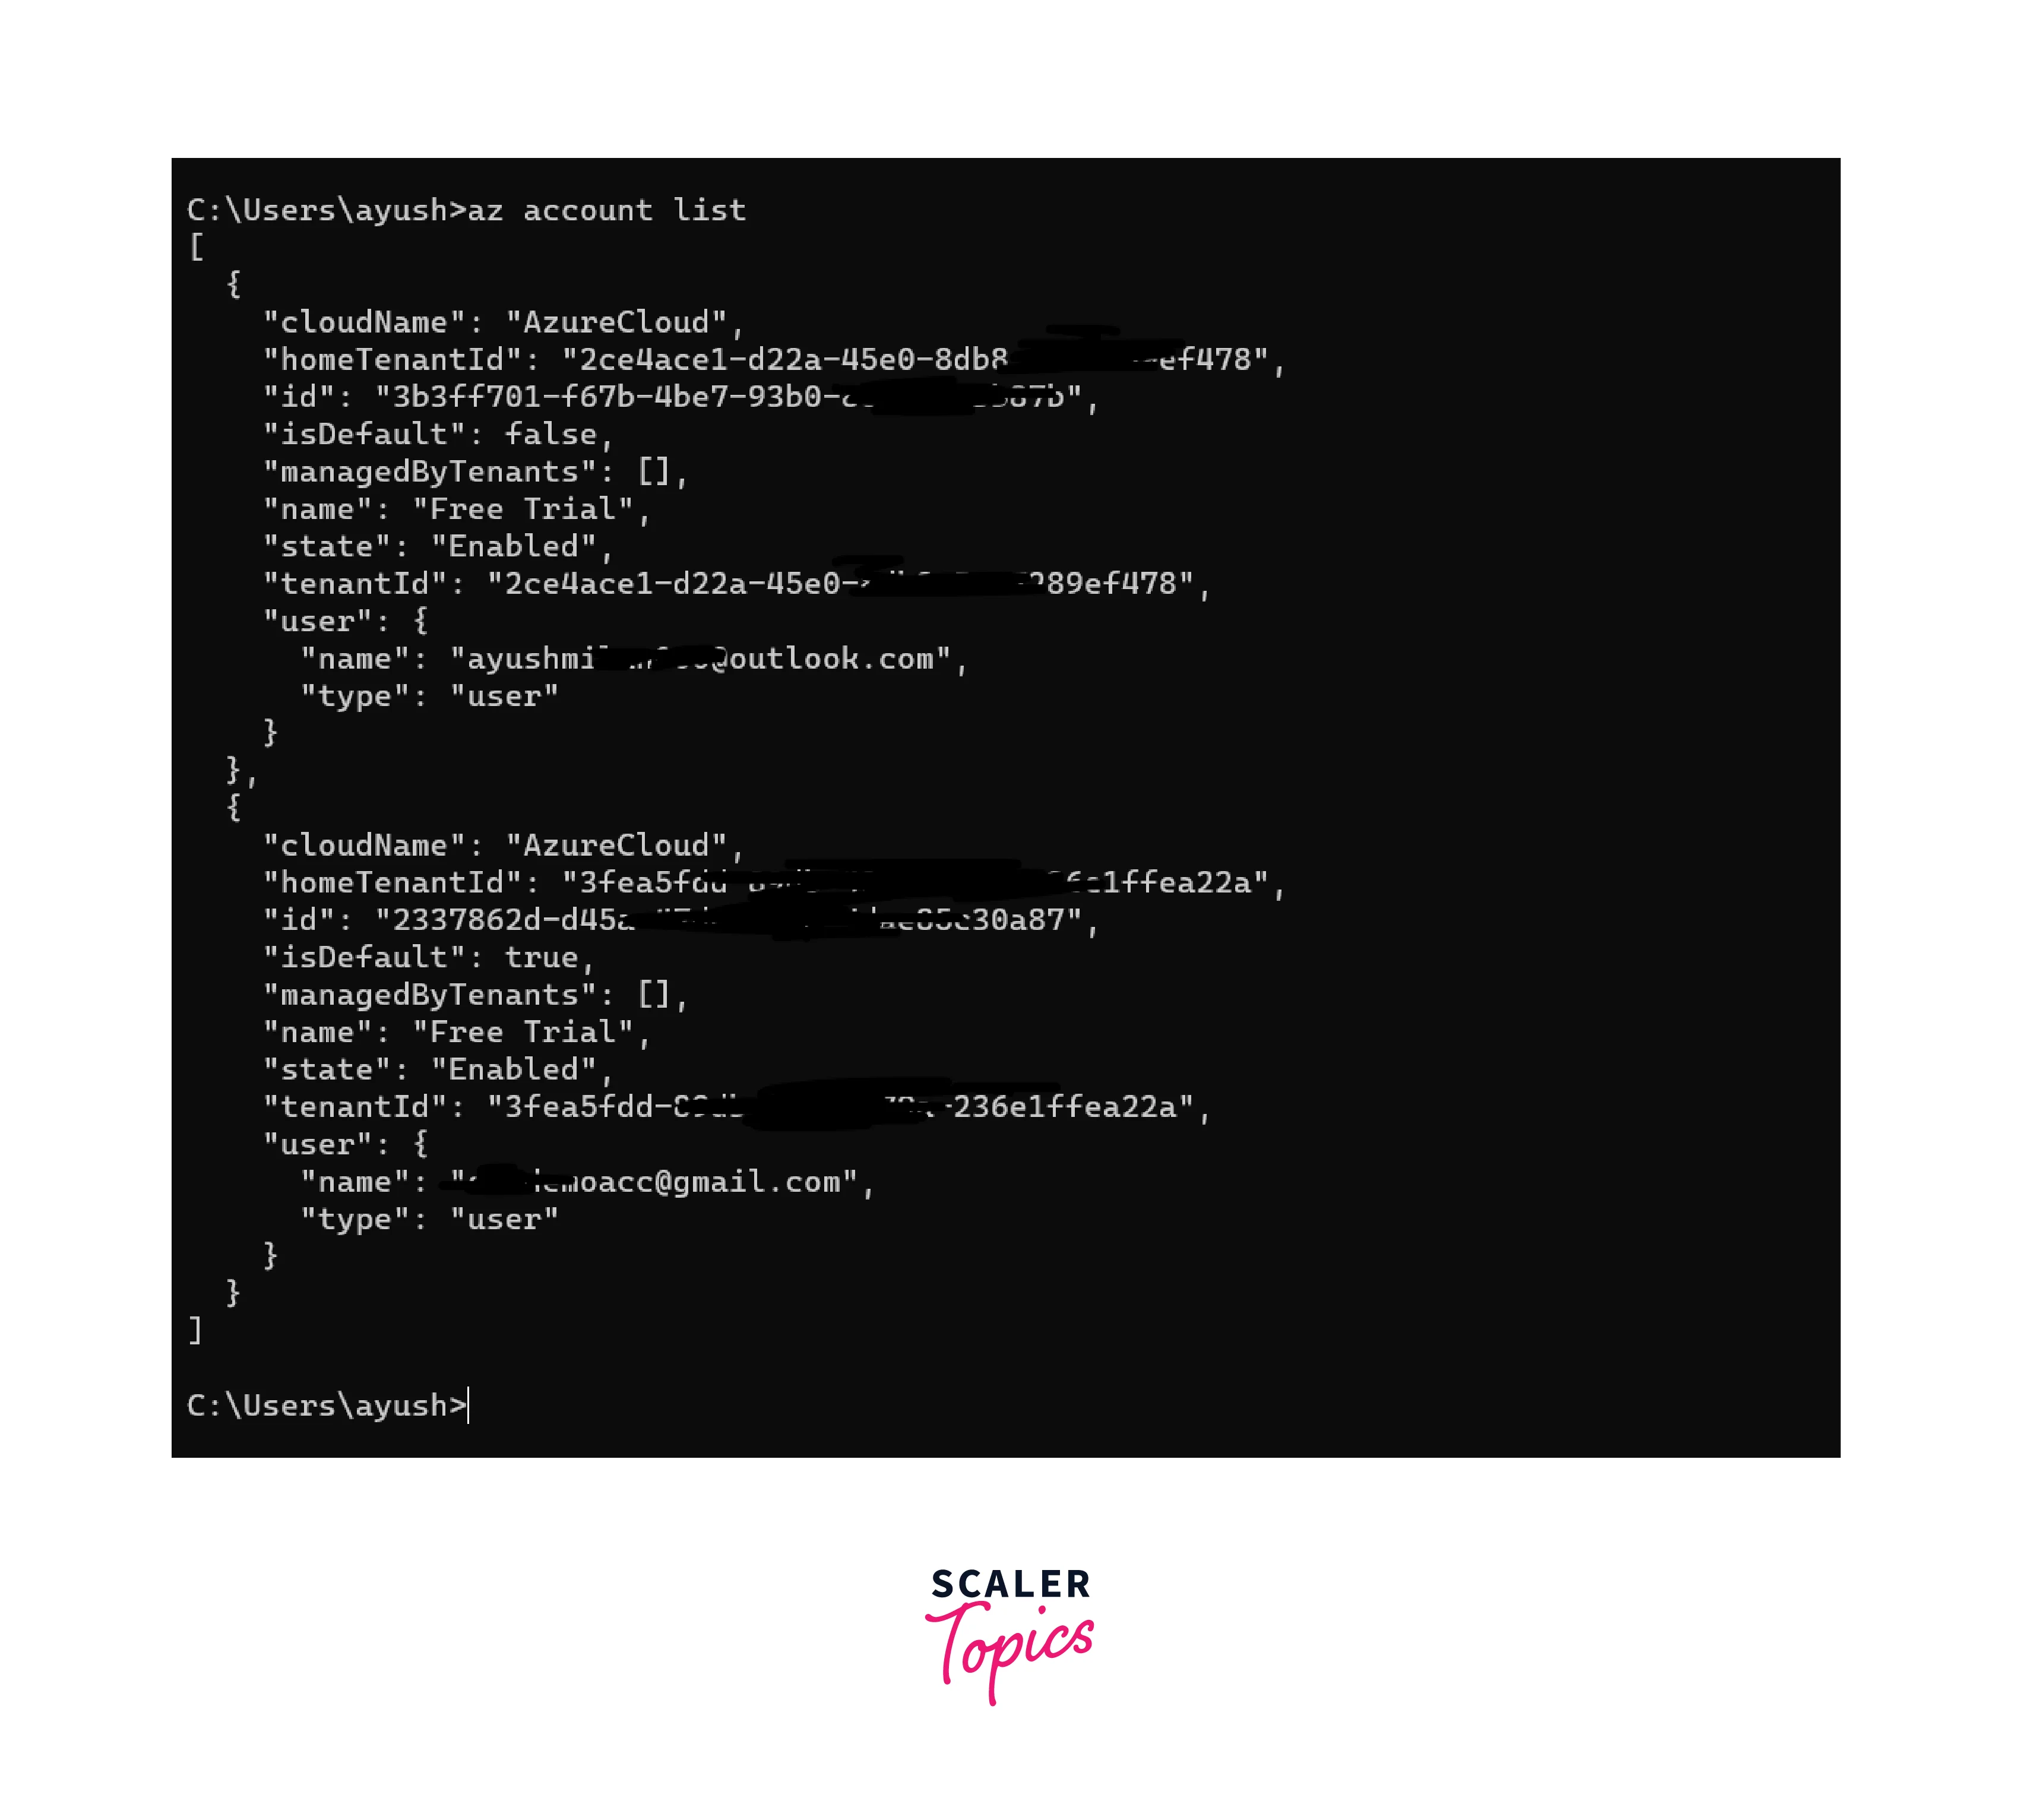
The az login command is used to authenticate and log in to your Azure account. It opens a web browser where you can enter your Azure credentials to establish the connection between your local machine and your Azure subscription.
 This is how it looks if you have any subscriptions enabled.
 After successful login, you can execute commands against your Azure resources.
Tenants and Subscription
Tenant: In Azure, a tenant represents a dedicated and isolated instance of the Azure Active Directory (Azure AD) service. It serves as a security and identity boundary for Azure resources.
Subscription: A subscription in Azure is a billing and management container that represents a specific customer environment or organizational project. It provides a way to organize and manage Azure resources, services, and workloads. Subscriptions are billed separately and offer distinct resource quotas and access controls.
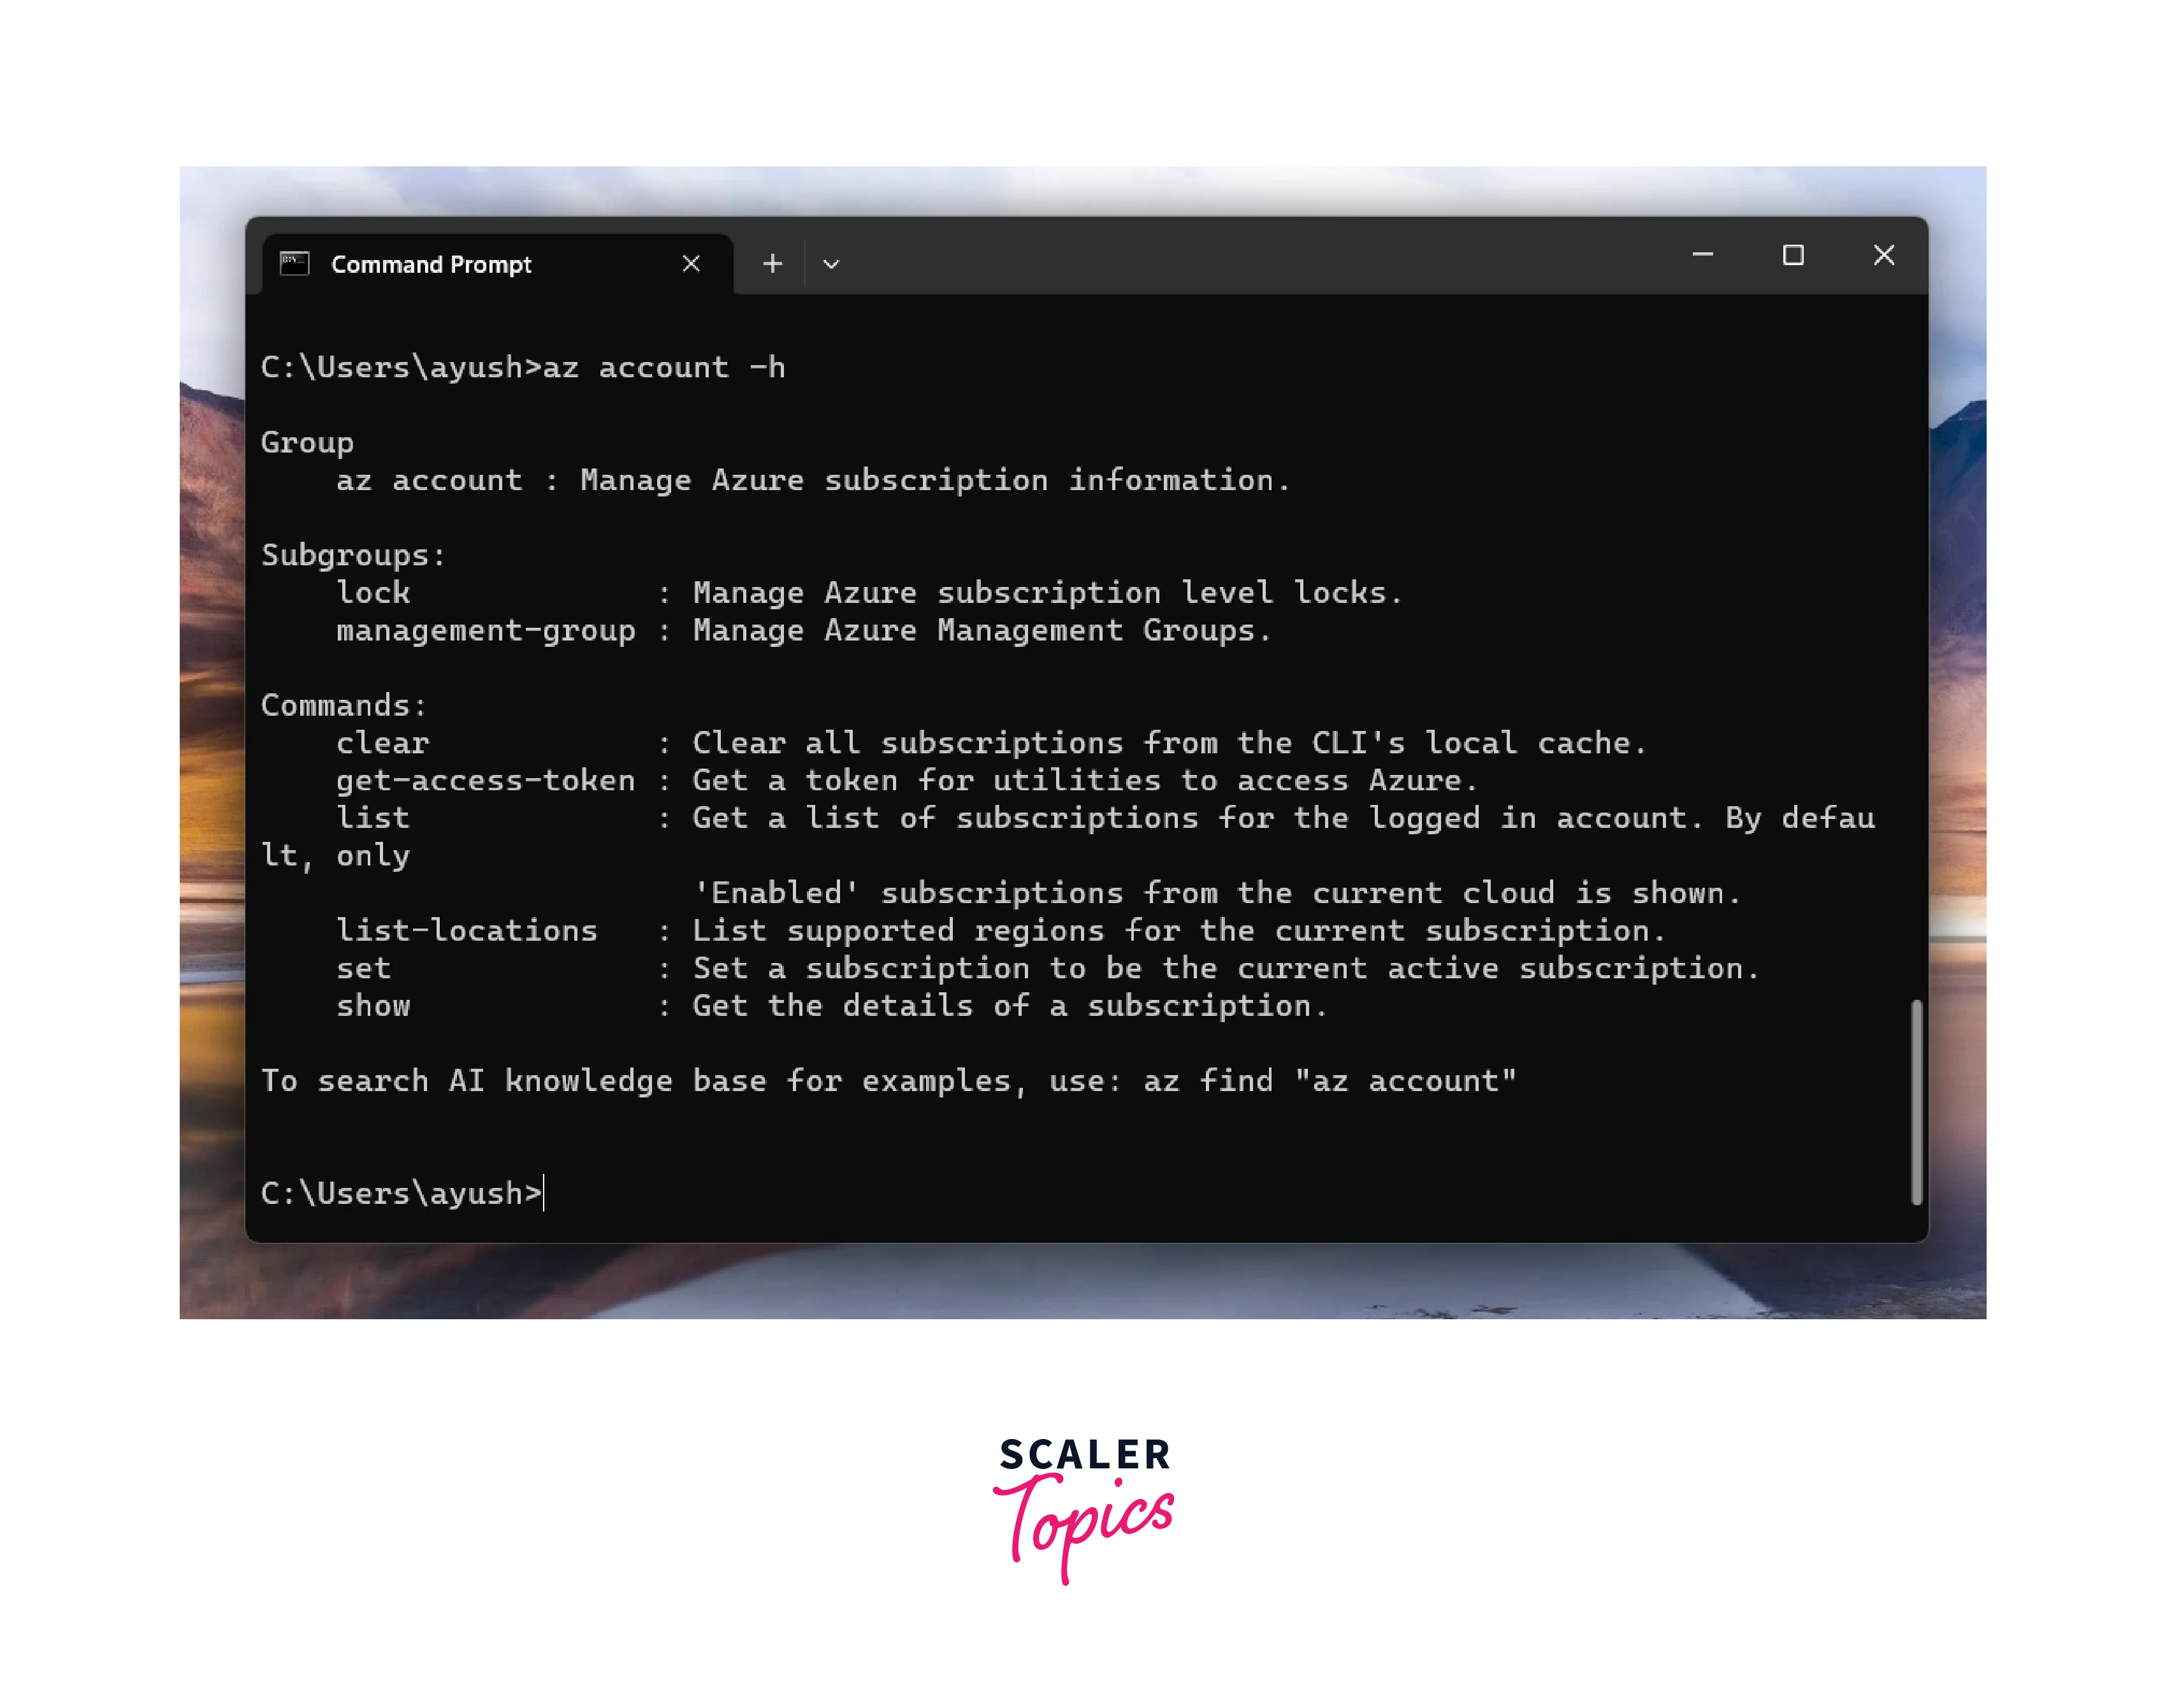
You can use the az account command to manage subscriptions and set the active subscription.
 Type the az account command with the -h flag to see the list of subcommands you can use.
Creating a Resource Group
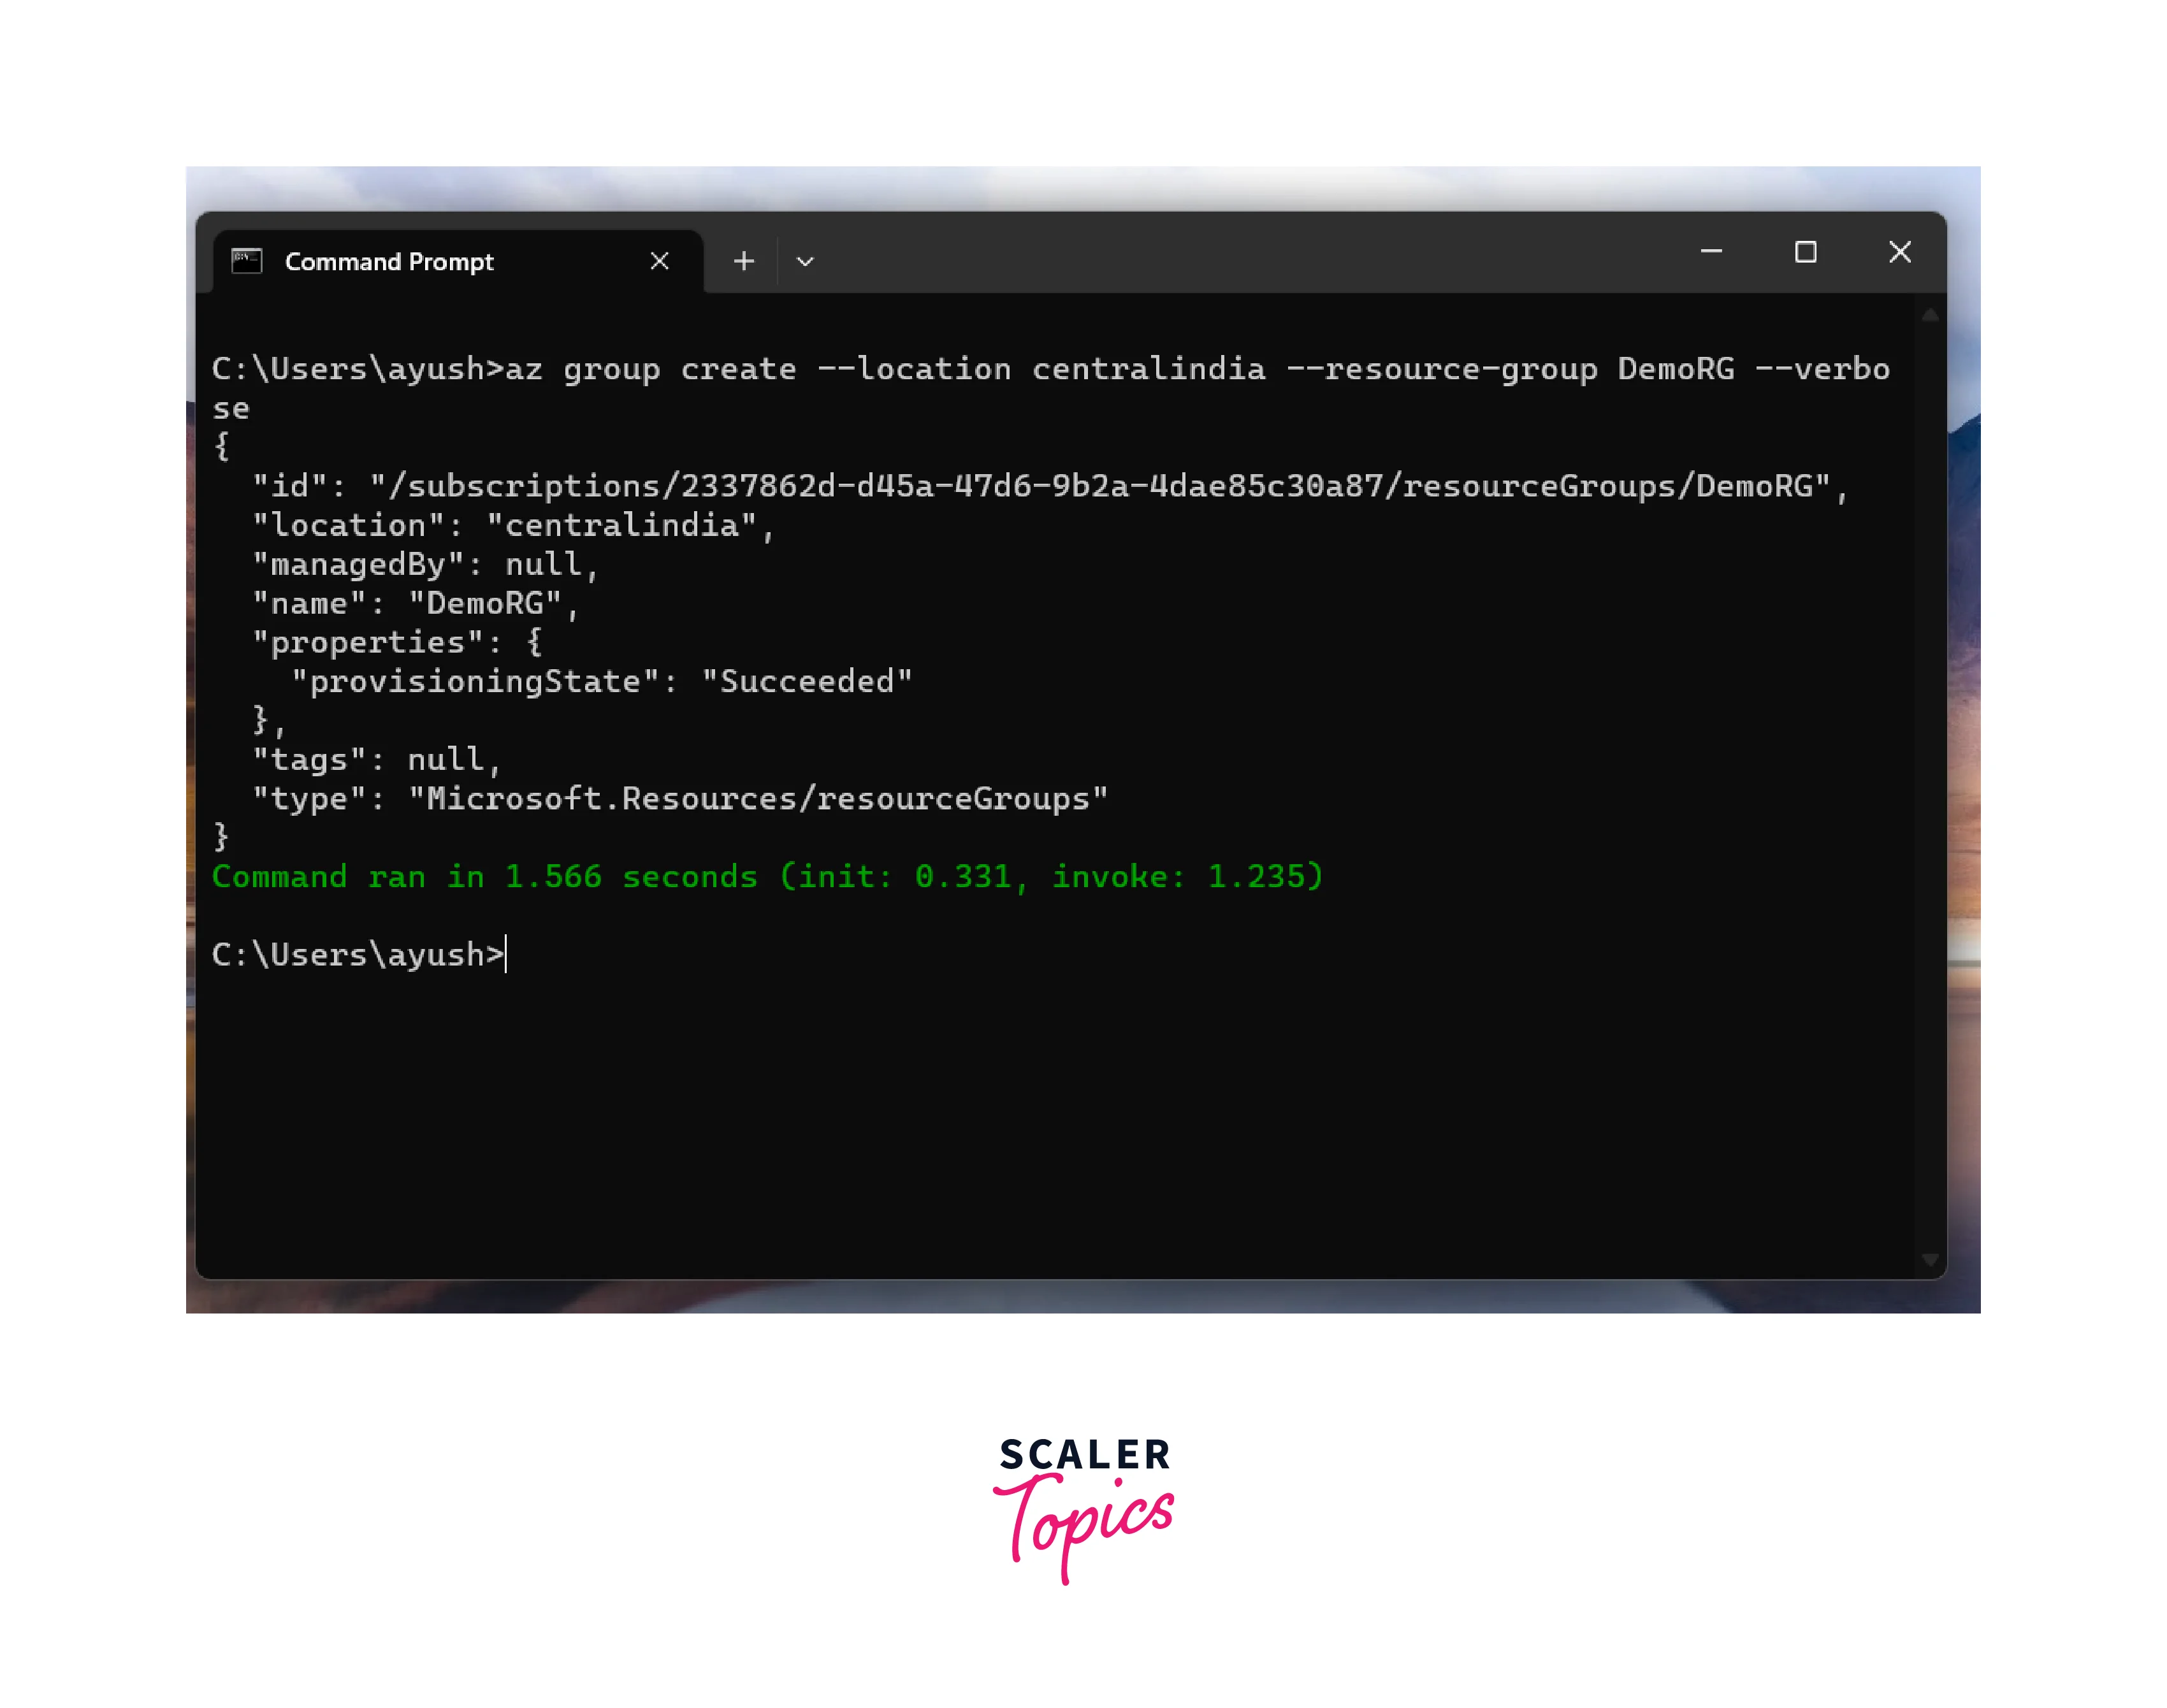
A resource group is a logical container for Azure resources that are connected. You can create a resource group using the az group create command. For example:
az group create --location centralindia --resource-group DemoRG --verbose
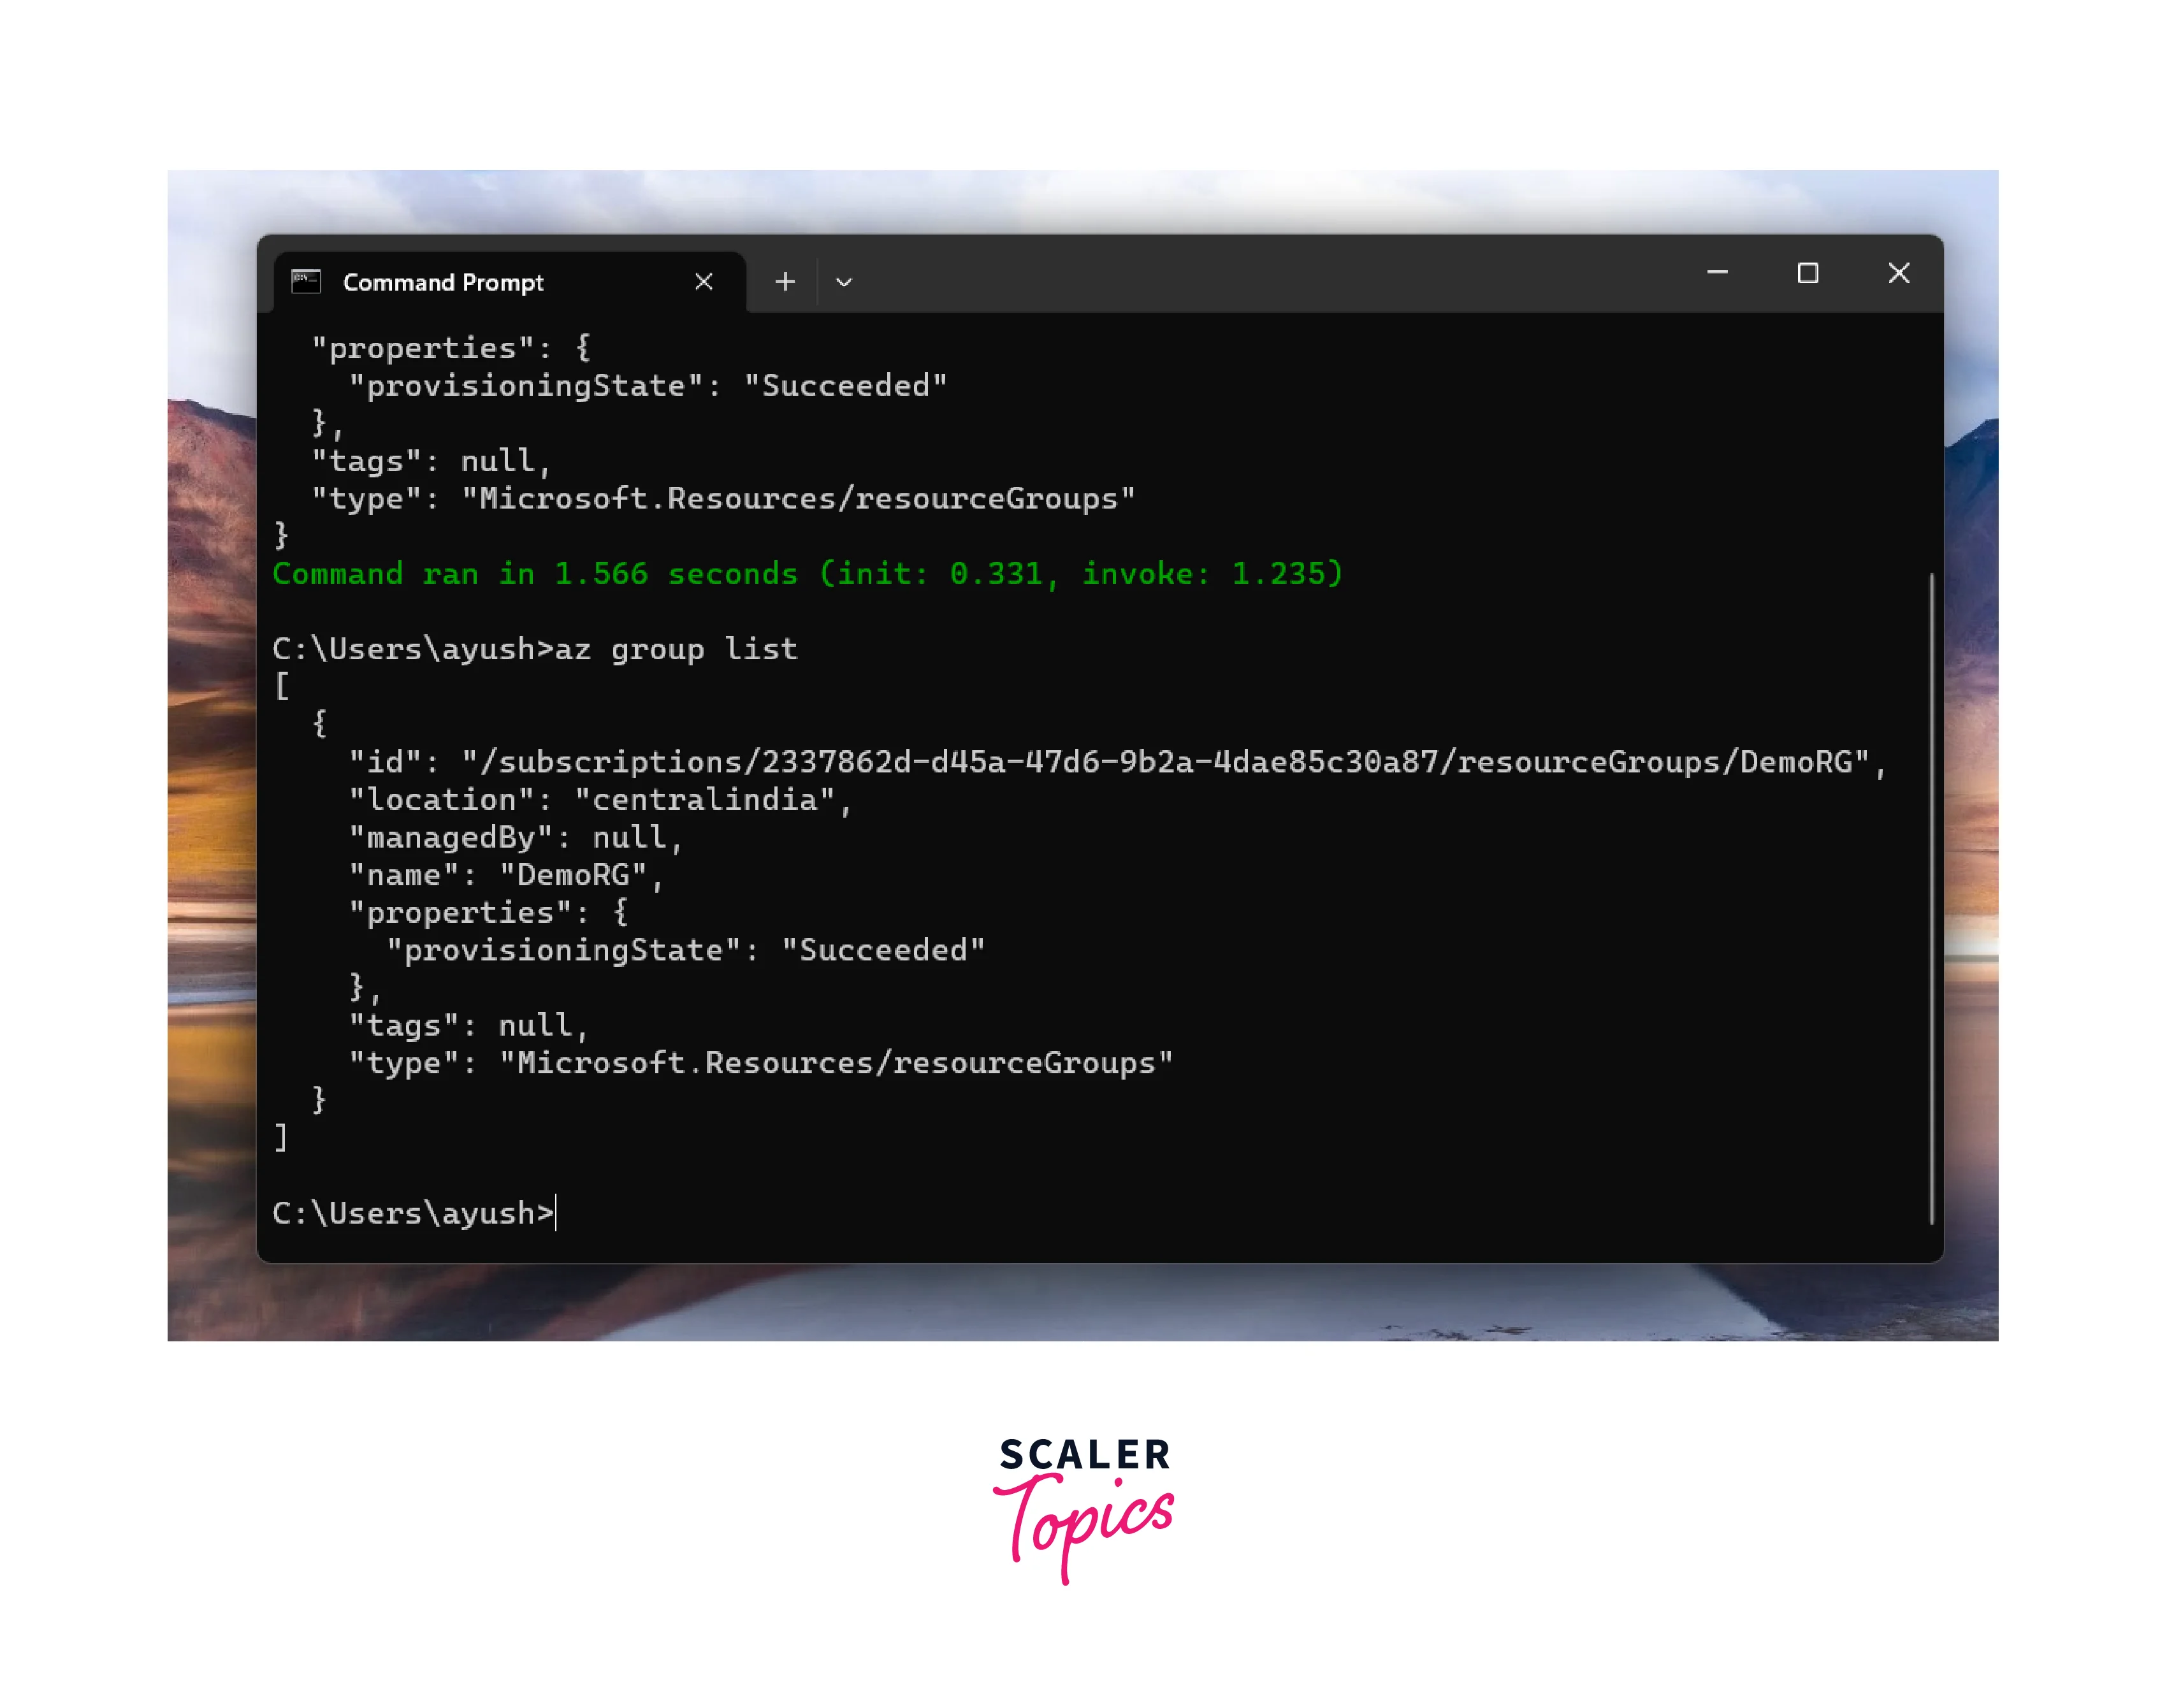
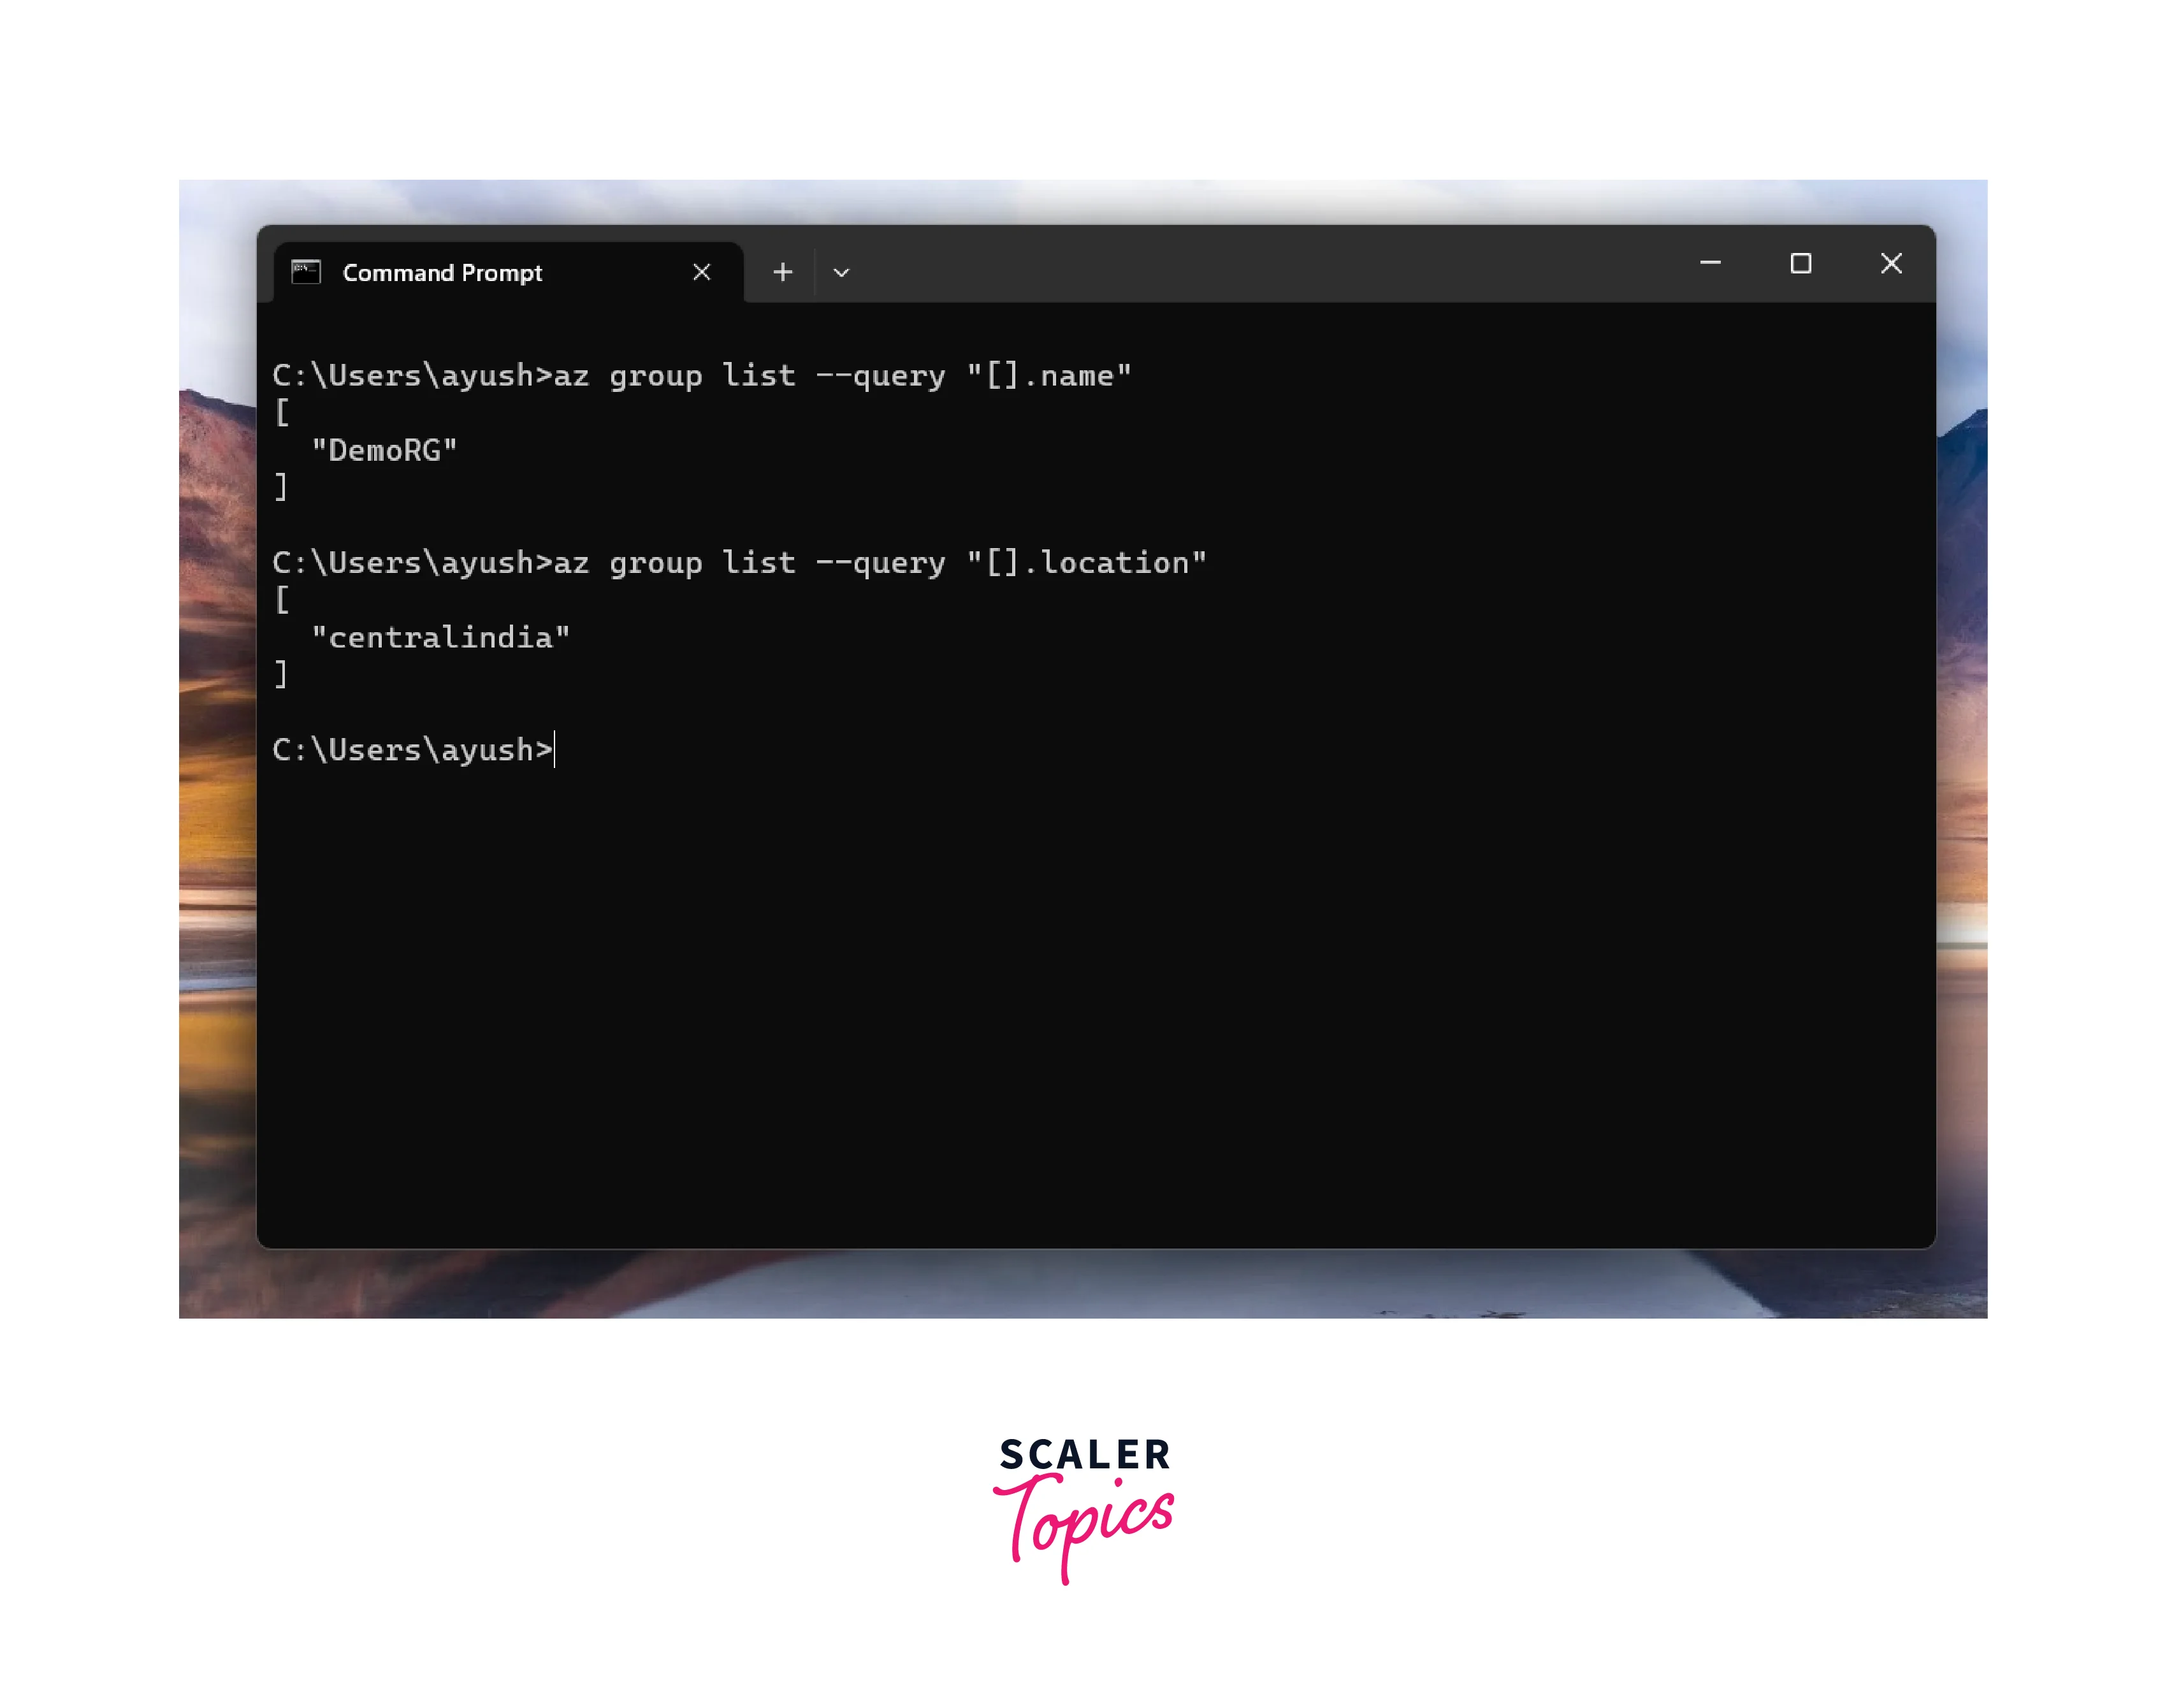
 You can execute az group list to see if the resource group is successfully created with the name DemoRG.
Querying
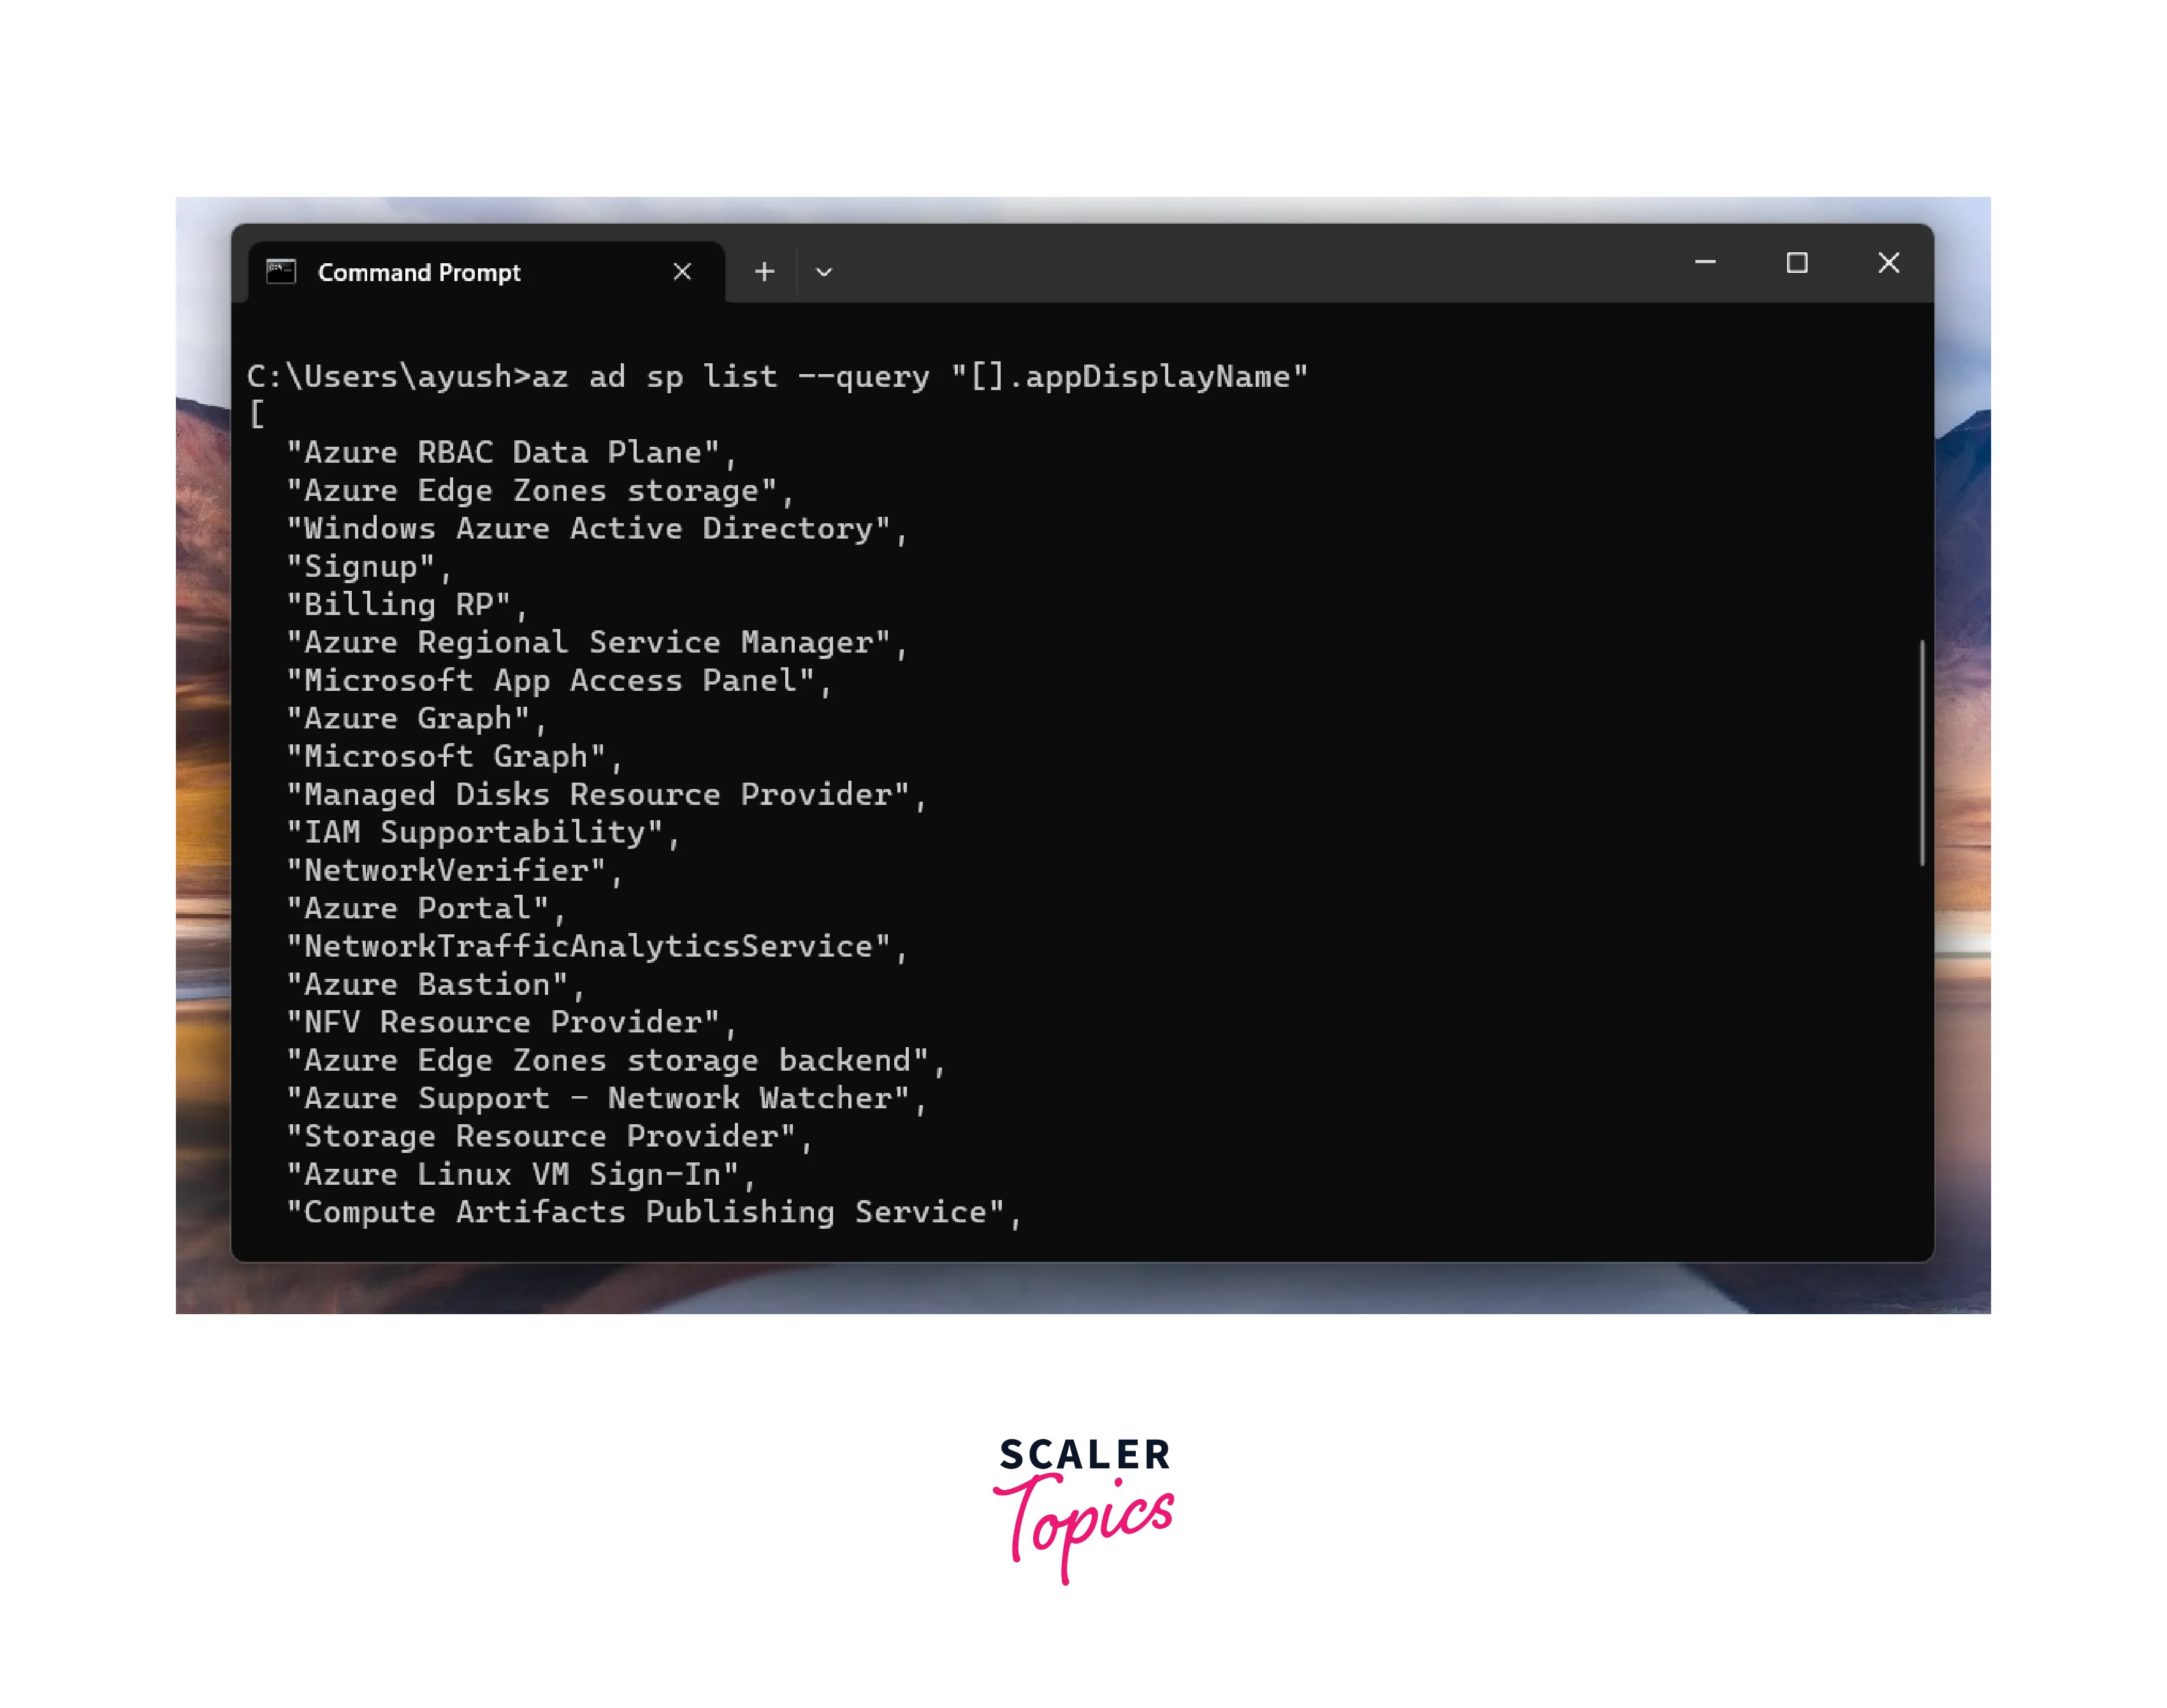
The Azure CLI provides options to query and filter output results. You can use the --query parameter along with JMESPath queries to filter and format the output of commands. This is particularly useful when you want to extract specific information from complex outputs. For Example:
-
az ad sp list --query "[].appDisplayName" : This can be useful to get a list of application display names associated with the service principals.
-
az group list --query "[].name" This command will provide a list of resource group names.
-
az group list --query "[].location" : Running this command will give you a list of the locations where your resource groups are deployed.
Querying with Azure CLI using JMESPath can greatly enhance your ability to extract specific information from complex outputs. Here are a few more examples to illustrate useful queries and their construction:
- Filter by Property Value:
- az vm list --query "[?powerState=='VM running'].{Name:name, ResourceGroup:resourceGroup}" : Retrieves names and resource groups of running virtual machines.
- Nested Property and Filtering:
- az aks list --query "[?provisioningState=='Succeeded'].{ClusterName:name, NodeCount:agentPoolProfiles[0].count}" : Lists names and node counts of successfully provisioned AKS clusters.
- Select Specific Elements from Arrays:
- az storage account list --query "[].name | sort(@)" : Lists storage account names in sorted order.
Debugging
When working with the Azure CLI, you might encounter errors or unexpected behavior. To debug issues, you can use the --debug flag when executing commands. This will provide more detailed information about the interactions between your CLI and Azure services, helping you identify the source of the problem. For example:
az group list --debug --verbose

- --debug: This flag enables debug mode, which outputs detailed debugging information about the command's execution. It includes information such as the HTTP requests made to the Azure APIs, the responses received, and other diagnostic information related to the command's interaction with Azure services. Debug mode is useful when you need to troubleshoot issues or understand the underlying communication between the CLI and Azure services.
- Scenario: You encounter unexpected errors while creating a virtual machine using az vm create, and you need more detailed information about the API calls being made.
- Usage: az vm create --name MyVM --resource-group MyRG --image UbuntuLTS --admin-username azureuser --debug
- Outcome: The --debug flag prints out detailed HTTP requests and responses, showing the API calls made during VM creation.
- --verbose: This flag increases the verbosity of the command's output. It provides additional information beyond the regular output, such as progress indicators, status updates, and other relevant details. It's particularly helpful when you want more context about what's happening during the execution of the command.
- Scenario: You're troubleshooting network connectivity issues in your virtual network and want to see additional details about the commands being executed.
- Usage: az network vnet show --name MyVNet --resource-group MyRG --verbose
- Outcome: The --verbose flag provides more verbose output, including additional context and information about the executed command.
Conclusion
- Azure CLI is a powerful command-line tool for managing Azure resources and services. It allows users to interact with Azure cloud services, perform administrative tasks, and automate workflows through a command-line interface.
- You can utilize Azure Cloud Shell, a browser-based shell environment in the Azure portal.
- Using Azure CLI:
- Enter interactive mode with the az interactive command.
- Use the az login command to authenticate and log in to your Azure account, and az account command to manage subscriptions and set the active subscription.
- To create a resource group, use the command az group create. The --query parameter is used with queries to filter and format output.