Microsoft Azure Storage Explorer
Overview
Microsoft Azure Storage Explorer is a graphical tool that enables users to manage and interact with Azure storage resources. It provides a user-friendly interface for viewing and manipulating data in Azure Blob storage, Azure Files, and Azure Queues. With features like drag-and-drop file transfers, storage browsing, and data editing, it simplifies the management of storage accounts in Azure.
What is Microsoft Azure Storage Explorer?
Microsoft Azure Storage Explorer is a standalone desktop application that provides a user-friendly interface for managing Azure storage resources. It allows users to easily navigate and interact with Azure Blob storage, Azure Files, Azure Queues, and Azure Tables. With Azure Storage Explorer, users can perform various operations such as uploading and downloading files, creating and deleting containers, viewing and editing data, and managing storage account settings. It simplifies the management and monitoring of Azure storage, making it a valuable tool for developers, administrators, and other Azure users.
How to Install Microsoft Azure Storage Explorer?
To install Microsoft Azure Storage Explorer, follow these steps:
- Visit the official Azure Storage Explorer download page.
- Select the appropriate operating system (Windows, macOS, or Linux).

- Once the installer file is downloaded, run it to start the installation process.

- Follow the on-screen instructions provided by the installer to complete the installation.
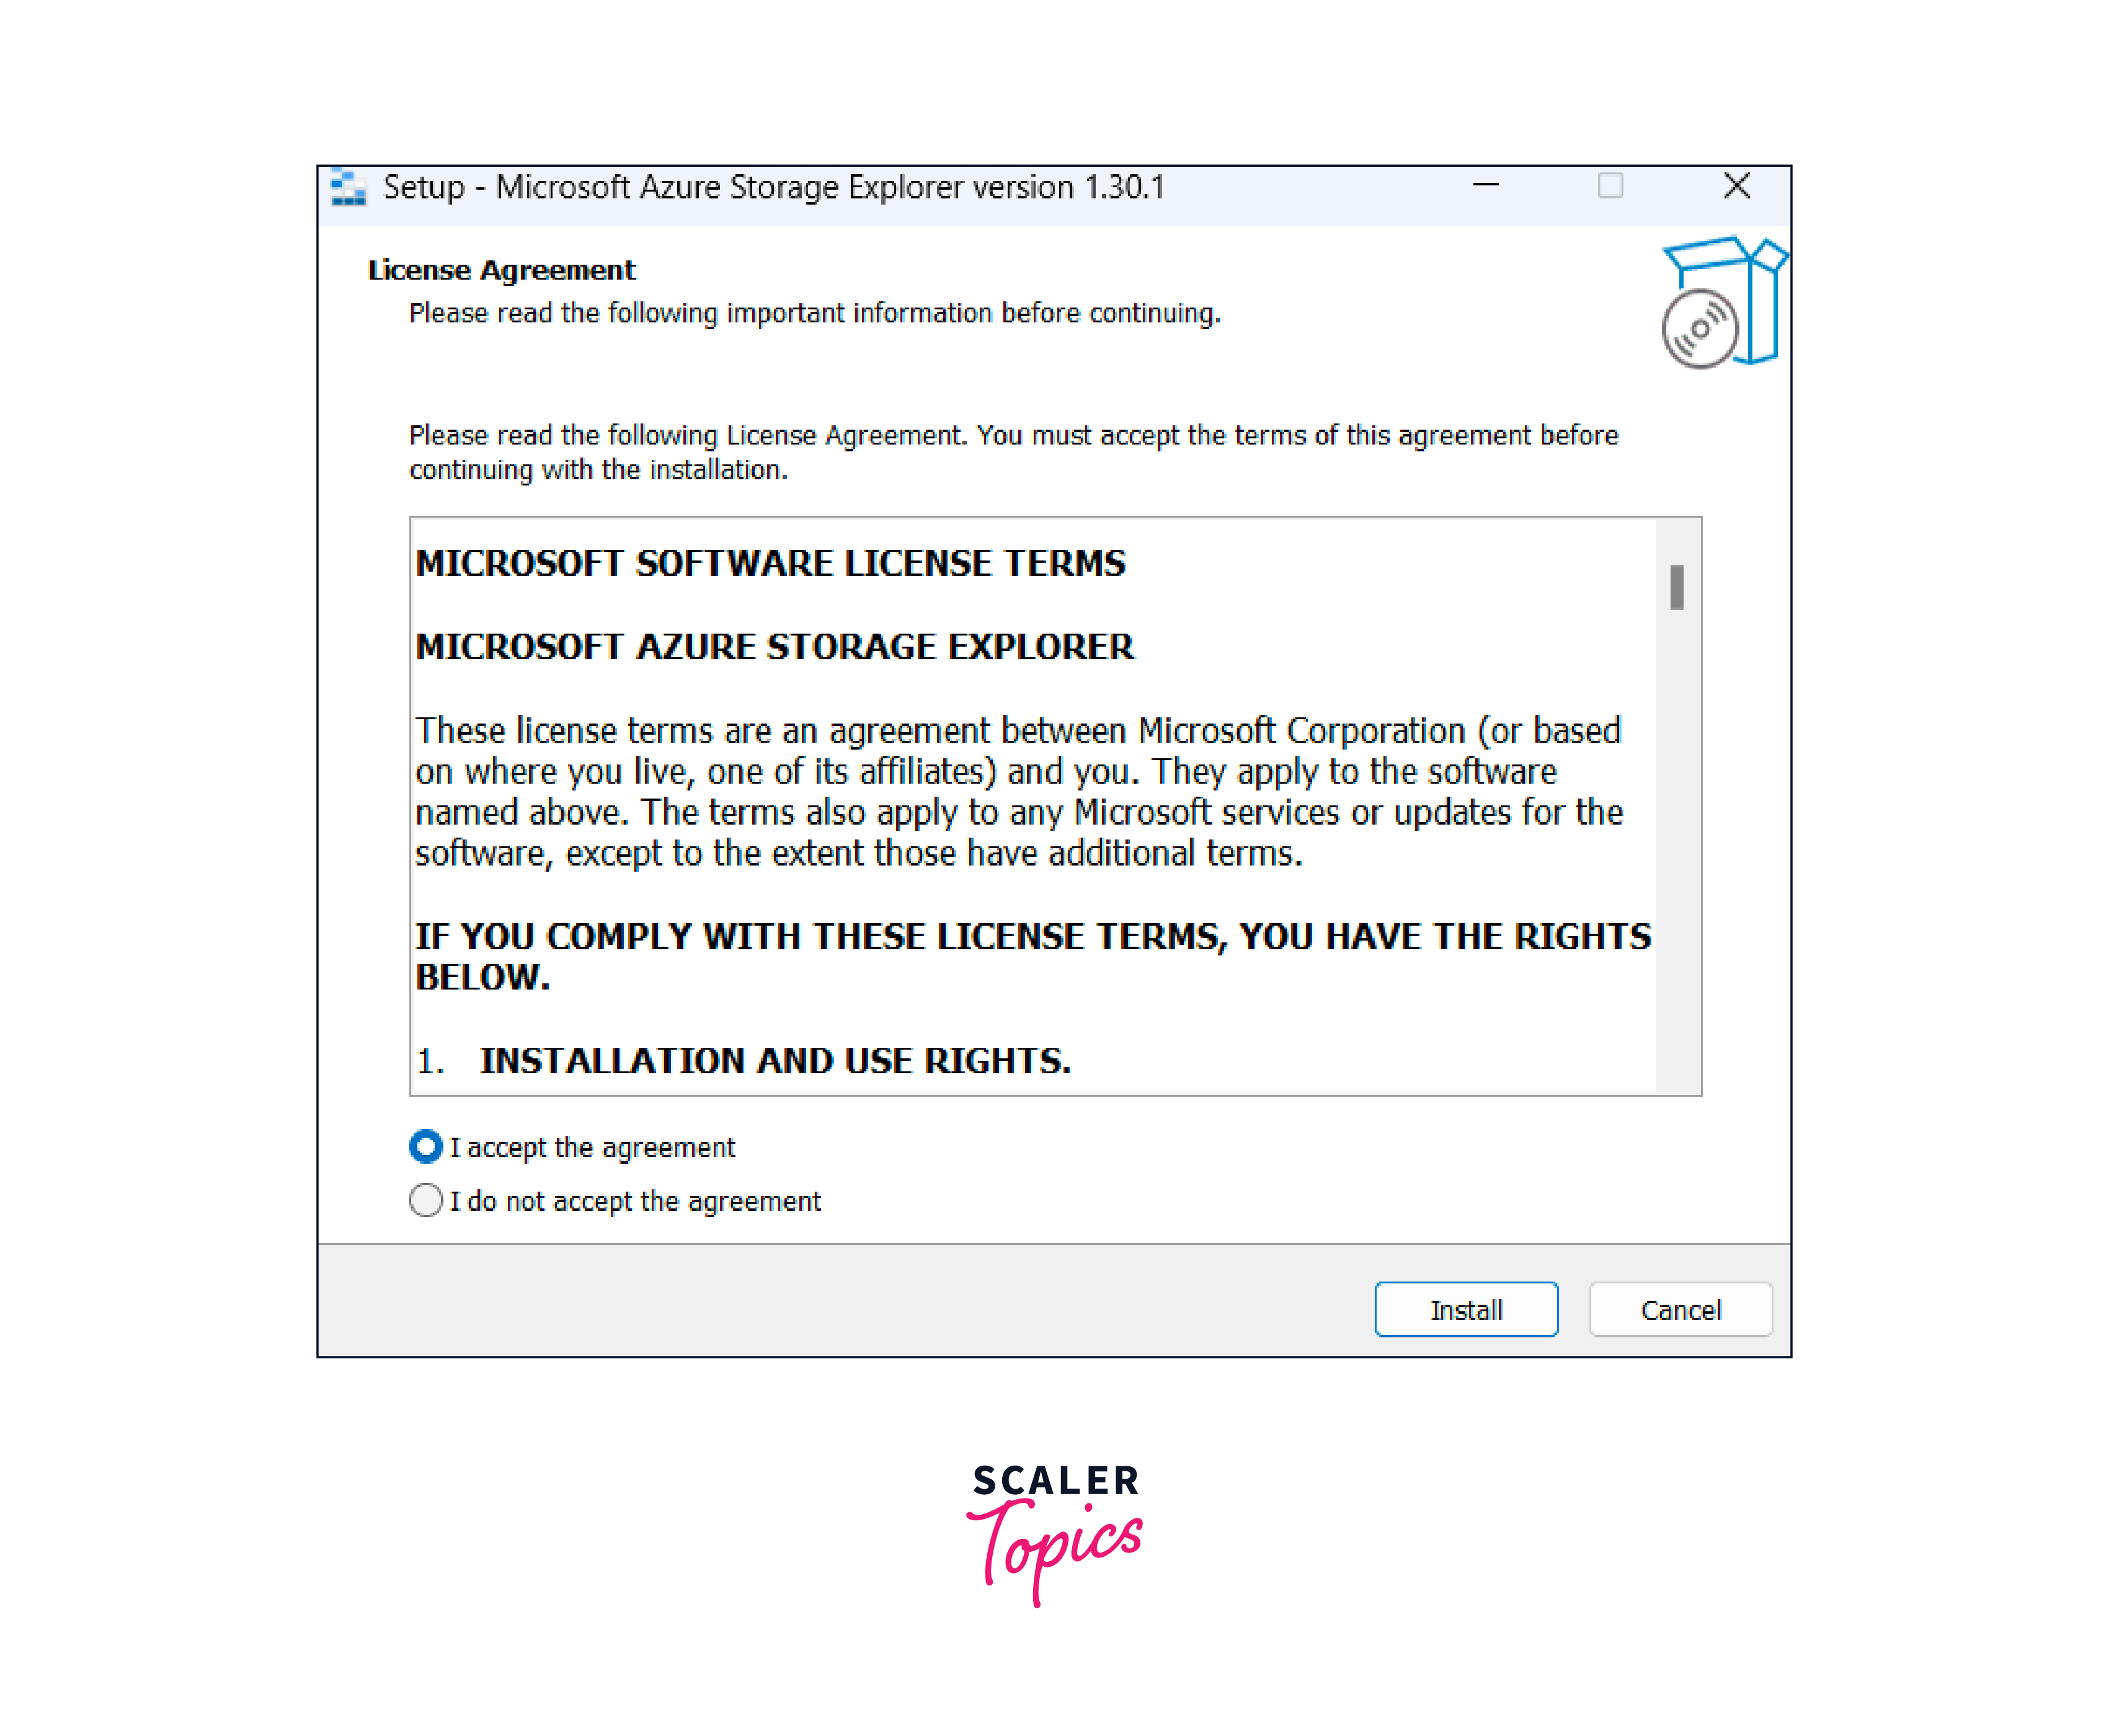
- After the installation is finished, launch Microsoft Azure Storage Explorer.
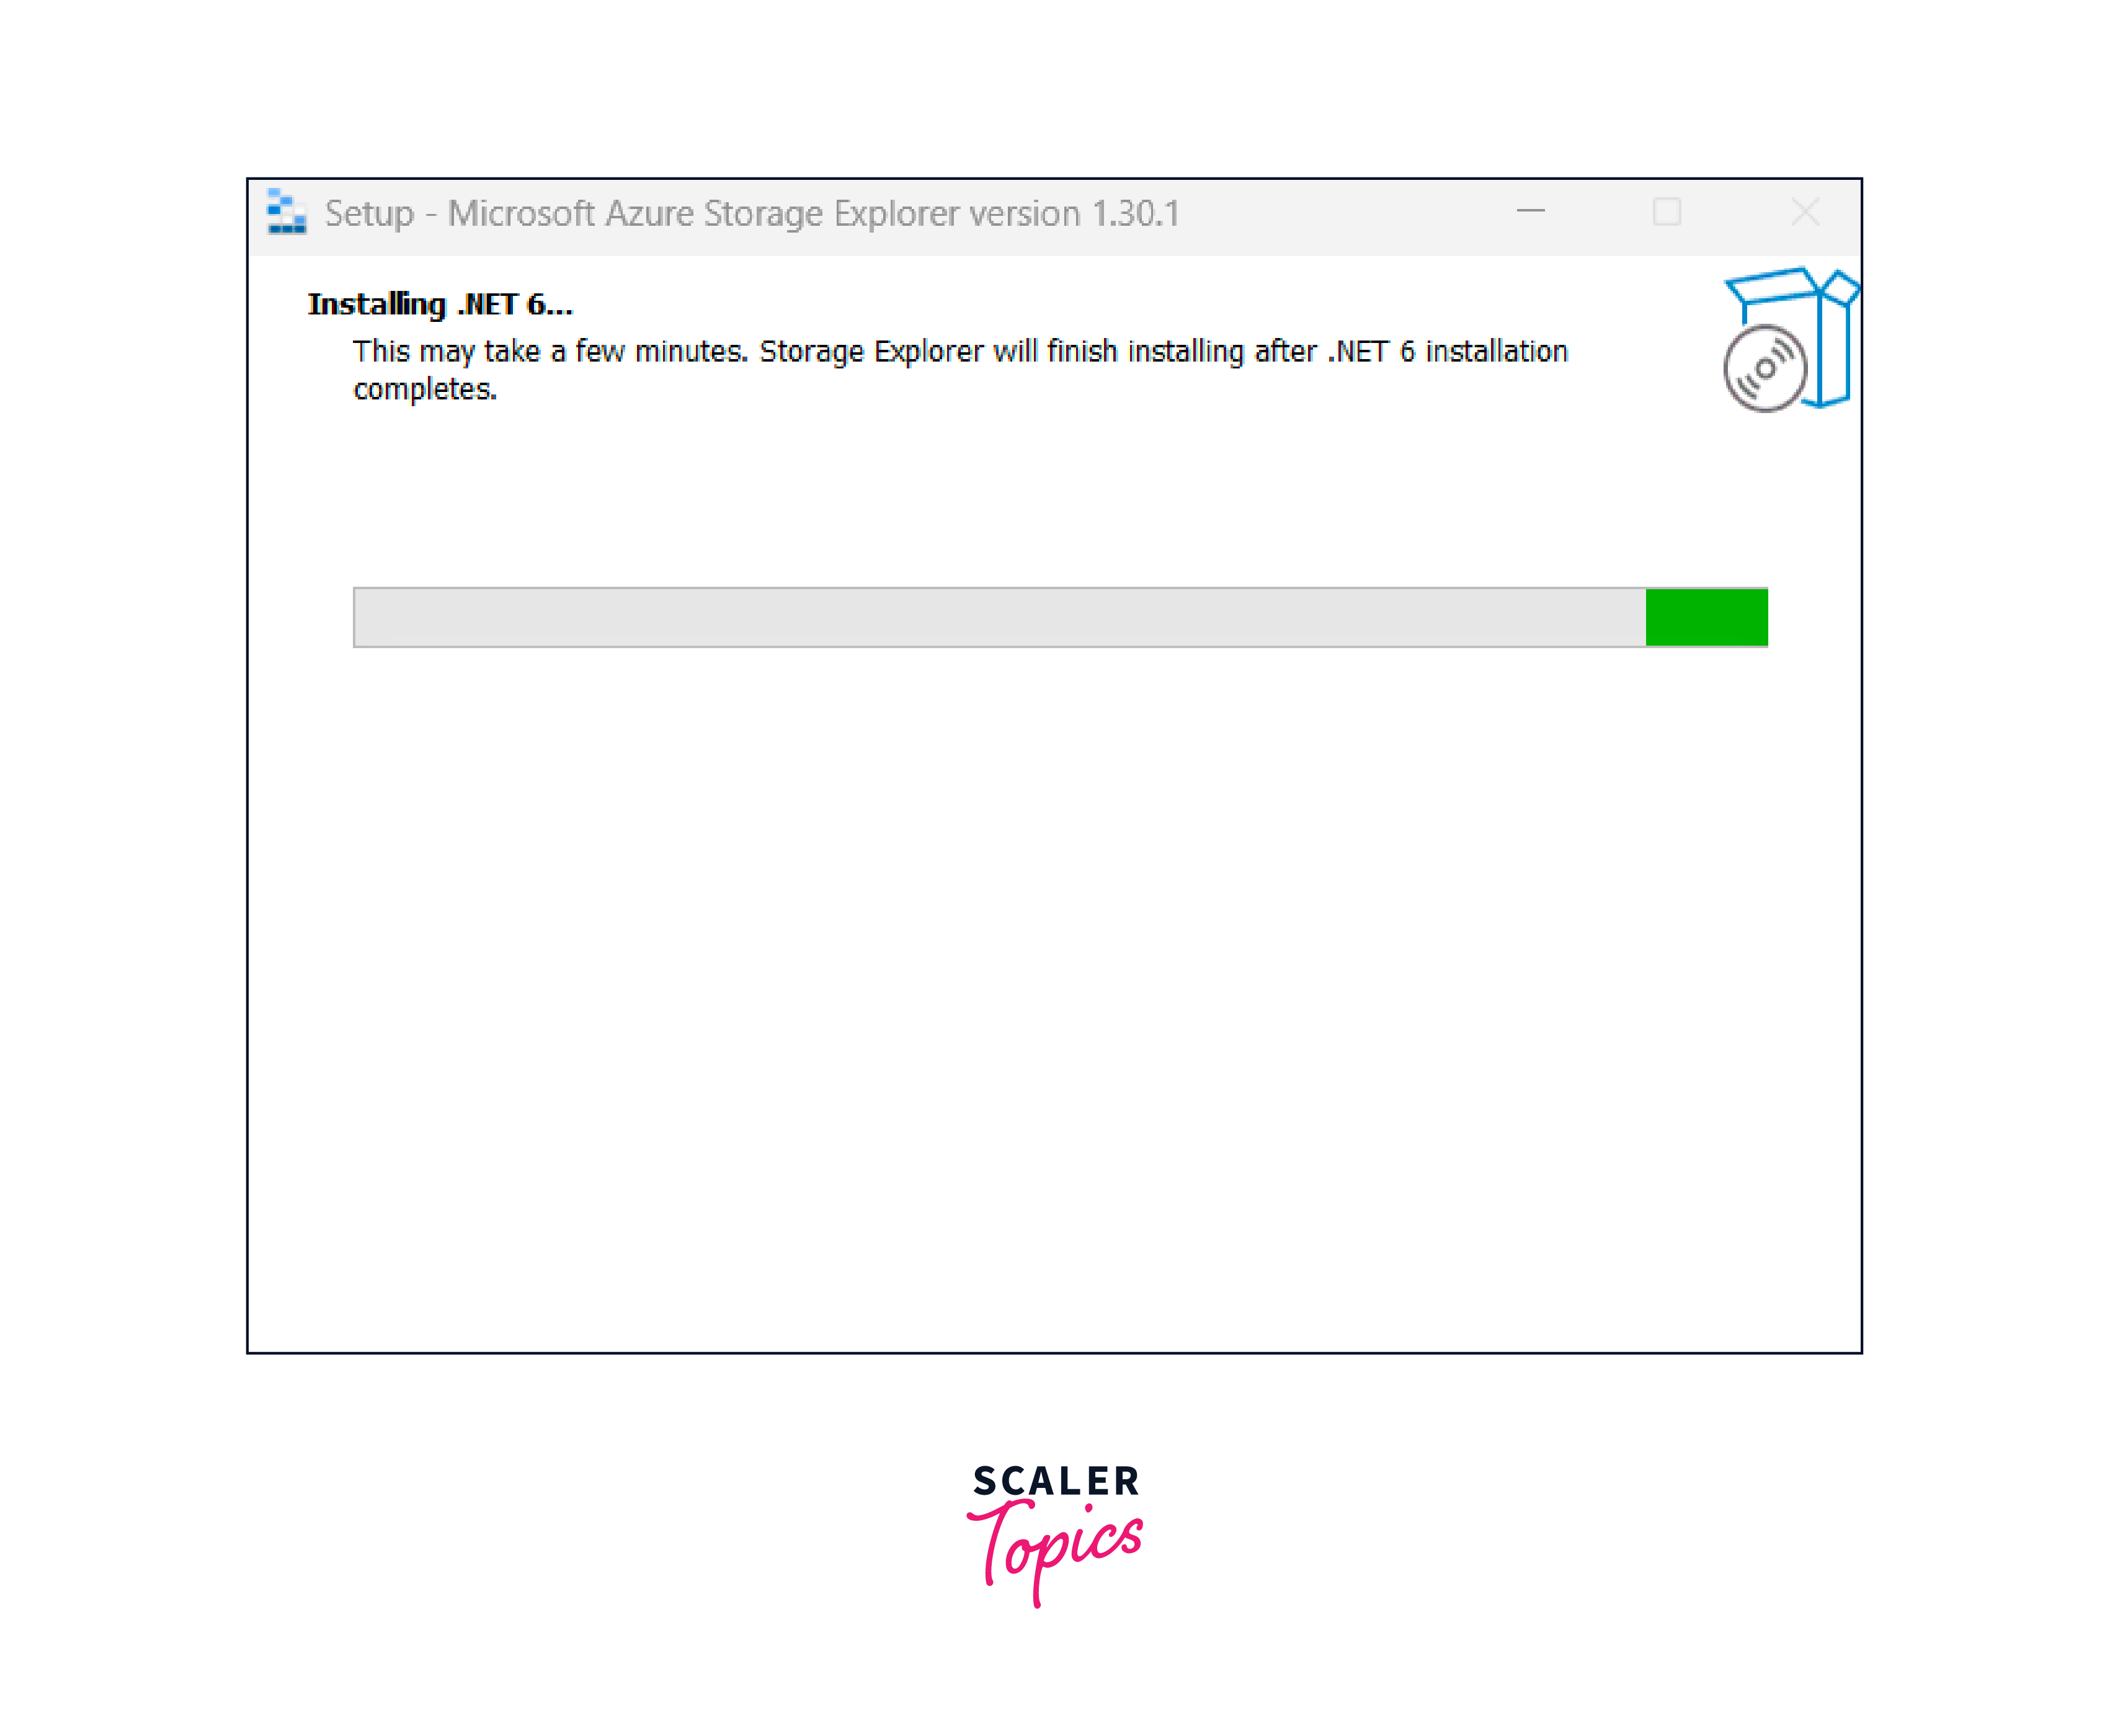
- On the initial launch, you may be prompted to sign in to your Azure account. Sign in using your credentials.
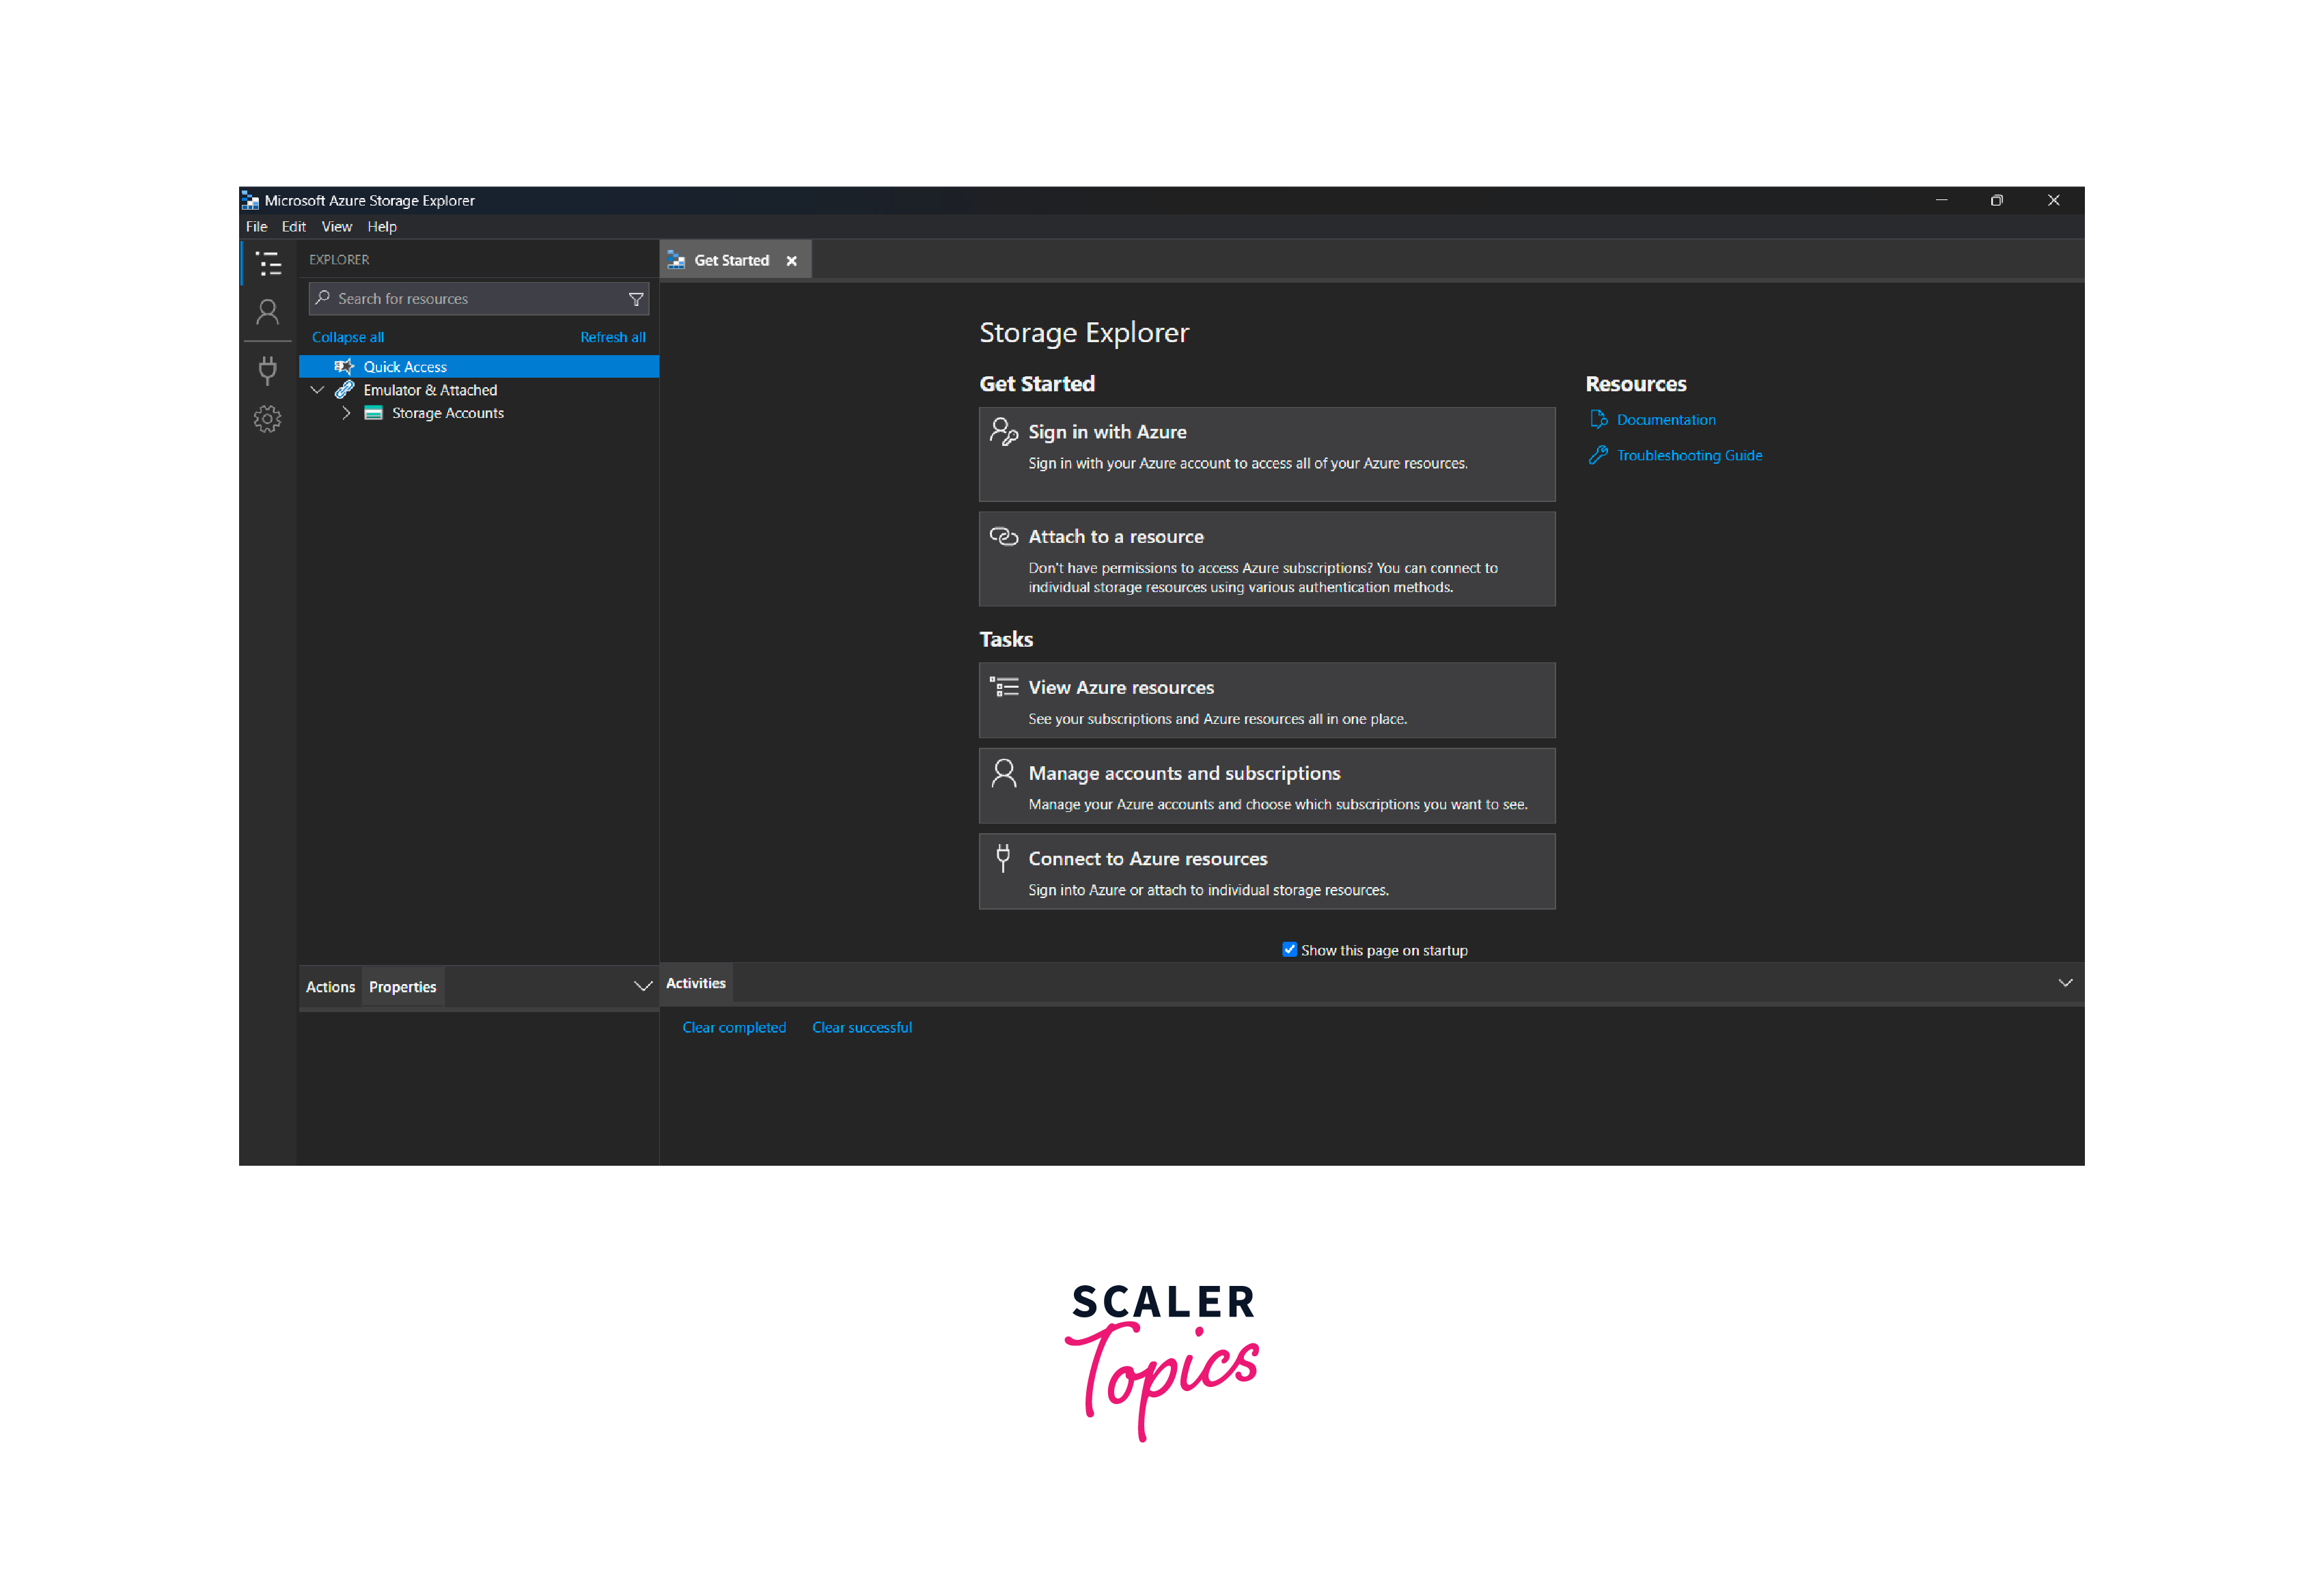
- Once signed in, you can start using Azure Storage Explorer to manage your Azure storage resources.
How to Use Azure Storage Explorer?
Azure Storage Explorer provides the capability to connect with storage accounts and other services in a variety of ways. When connecting your Storage Explorer application to Azure storage accounts, there are two primary permissions to consider: management and data.
The management permission grants access to view a comprehensive list of your storage accounts, containers, and service endpoints. This permission allows for high-level management tasks related to your storage resources.
On the other hand, the data permission is specifically related to the data layer and requires at least a read data role. With this permission, you can access and interact with individual data resources such as blobs, containers, and other data stored within the storage account.
Benefits of Azure Storage Explorer
There are several benefits of using Microsoft Azure Storage Explorer:
- User-Friendly Interface:
Azure Storage Explorer offers a user-friendly graphical interface, making it easy to navigate and manage Azure storage resources. It provides an intuitive and visual way to interact with your storage accounts. - Simplified Storage Management:
With Azure Storage Explorer, you can perform various storage operations, such as creating and deleting containers, uploading and downloading files, setting access permissions, and managing metadata. It simplifies the management tasks without the need for complex command-line tools. - Cross-Platform Support:
Azure Storage Explorer is available on multiple platforms, including Windows, macOS, and Linux. This cross-platform support allows you to access and manage your Azure storage resources from different operating systems. - Data Visualization and Editing:
Azure Storage Explorer provides data visualization capabilities, allowing you to preview and explore the content of your storage objects. You can also edit file contents directly within the tool, making it convenient for data analysis and manipulation. - Bulk Operations and Performance Optimization:
It enables you to perform bulk operations, such as uploading or deleting multiple files simultaneously, making it efficient for managing large datasets. Additionally, Azure Storage Explorer offers options for optimizing performance, including parallel file operations and configurable transfer settings. - Integration with Other Azure Services:
Azure Storage Explorer seamlessly integrates with other Azure services, allowing you to easily connect and interact with services like Azure Cosmos DB, Azure Functions, and Azure Logic Apps. This integration facilitates streamlined workflows and enhances overall productivity.
Types of Storage in Azure Explorer
There are four main types of Azure Storage Explorer:
- Table Storage
- Blob Storage
- Queue Storage
- File Storage

Table Storage
Azure Table Storage is a NoSQL key-value store that allows you to store structured data. It is suitable for scenarios that require storing large amounts of structured data, such as logs, sensor data, or metadata. Table Storage offers scalability, high availability, and durability, making it ideal for applications that need fast and efficient access to structured data.
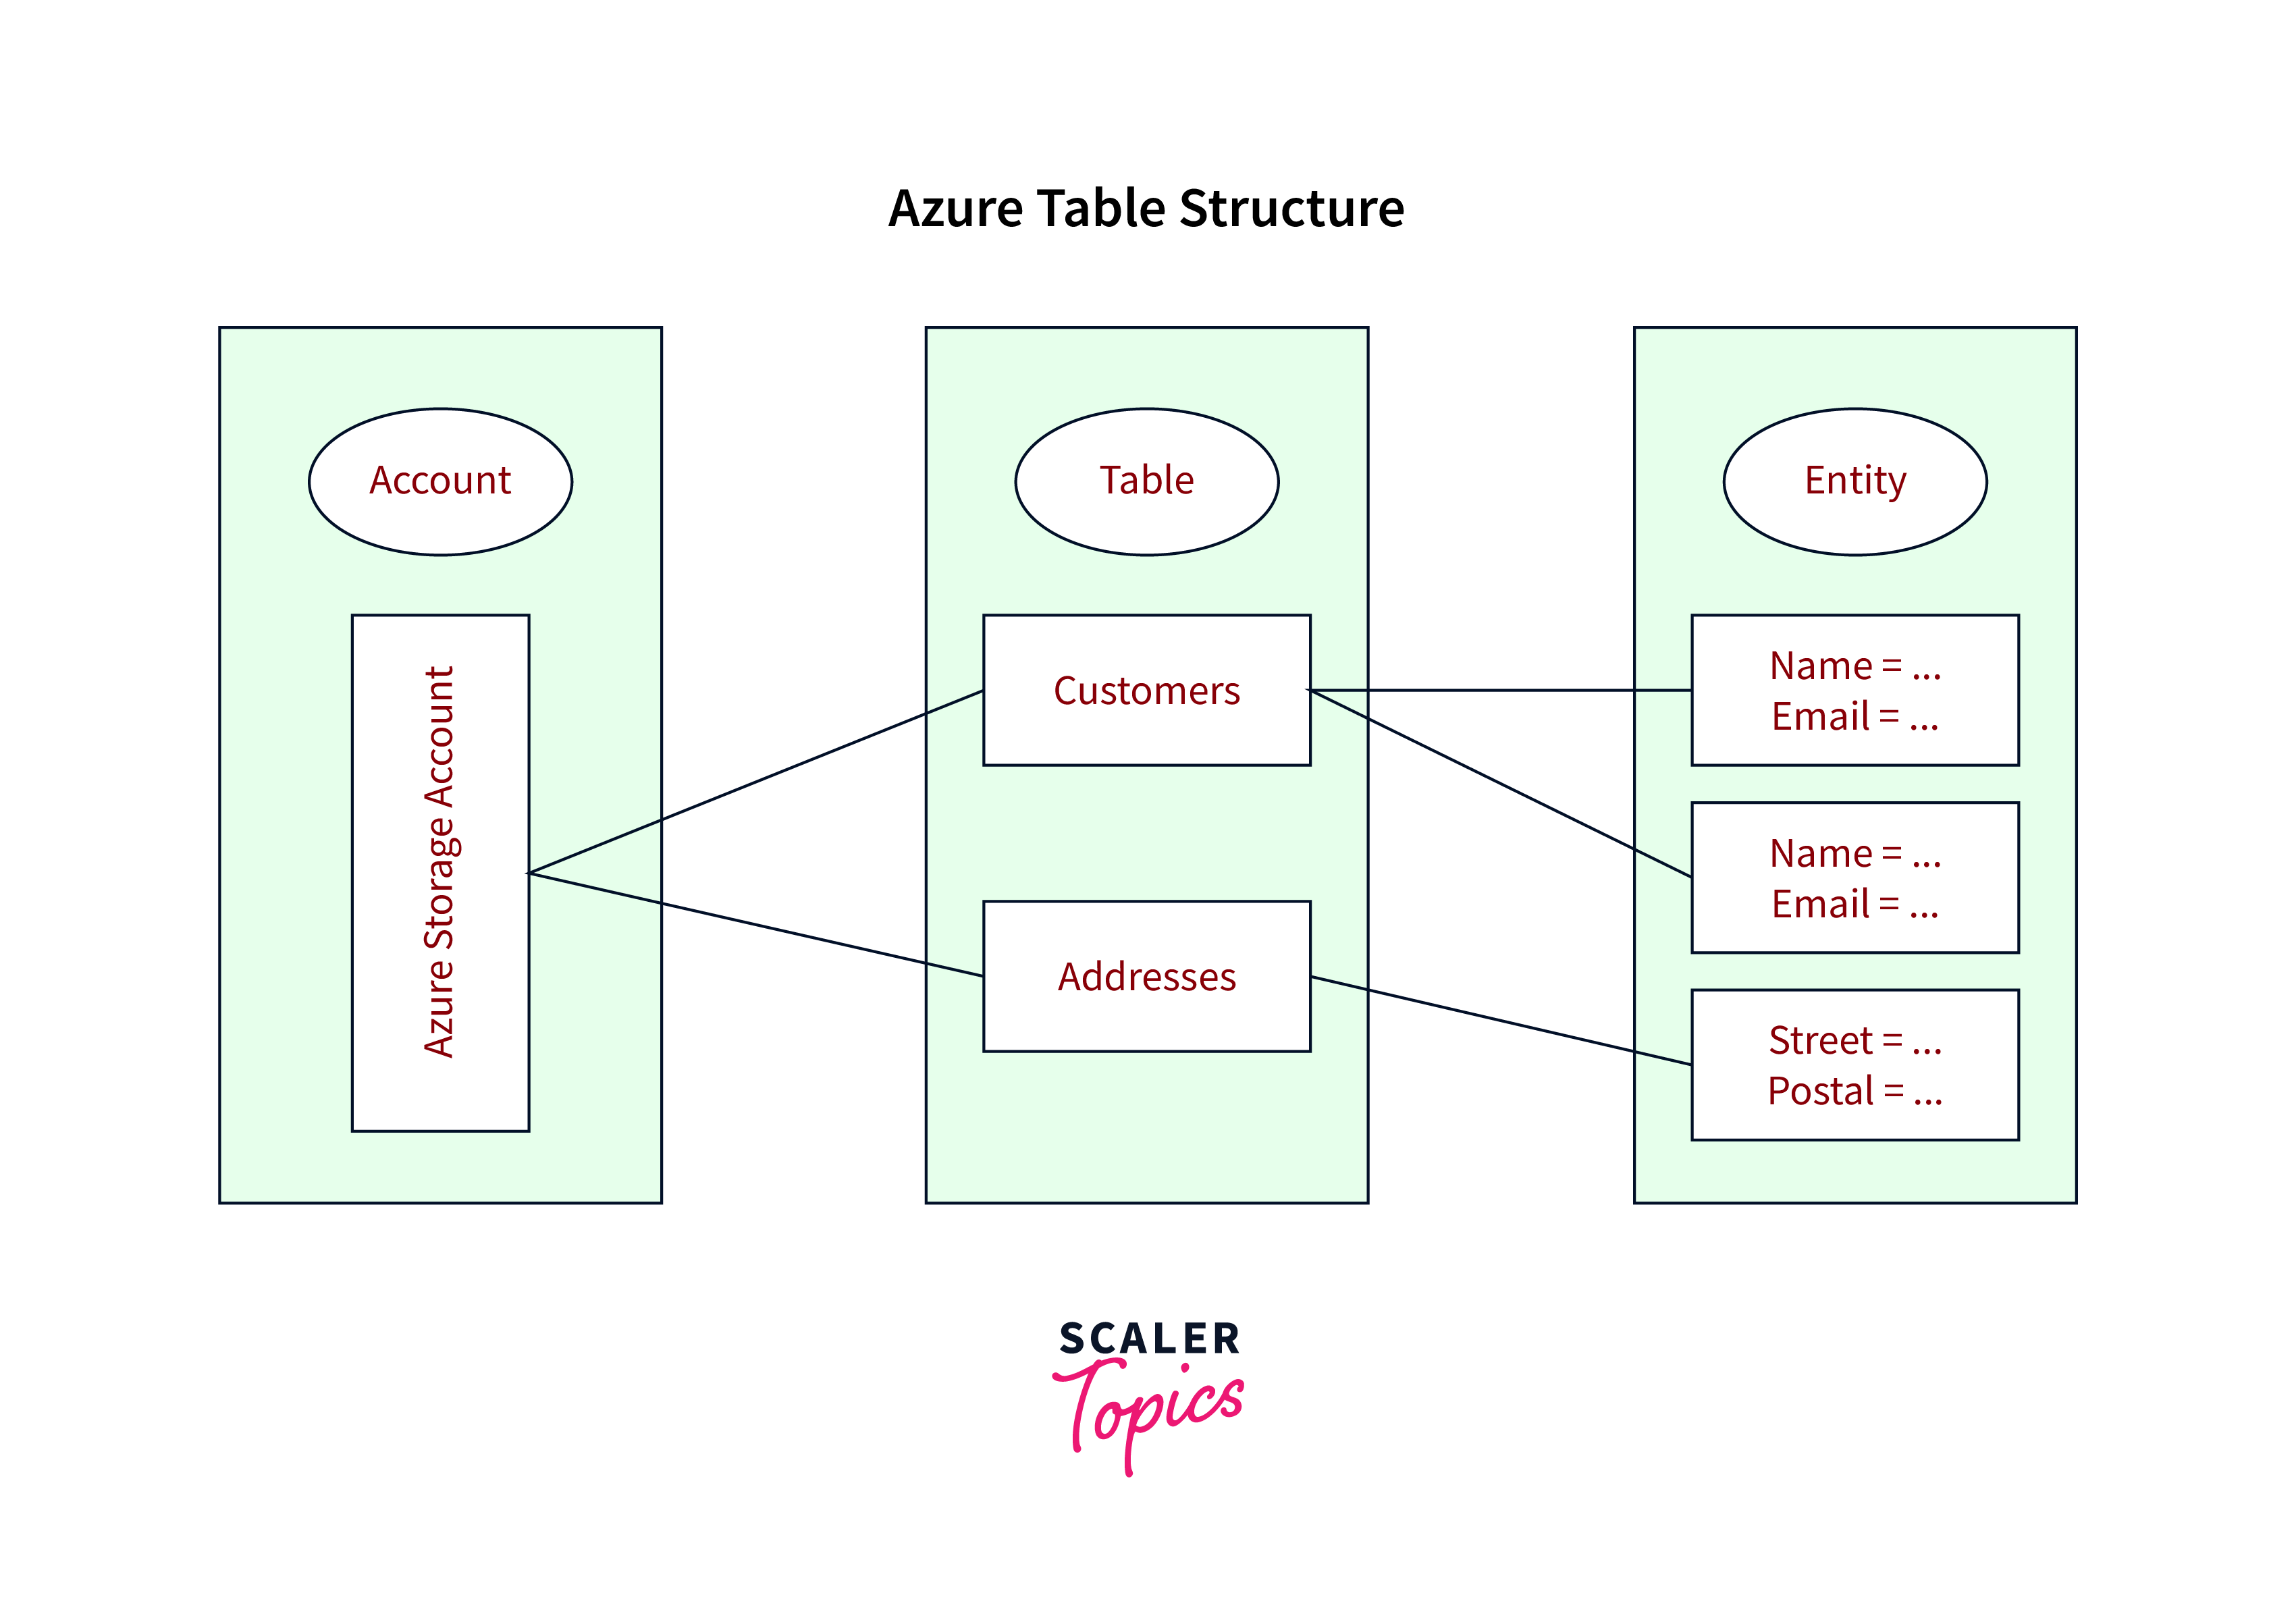
Benefits:
- NoSQL Data Storage:
Azure Table Storage provides a schemaless NoSQL storage option, allowing you to store structured data at a massive scale. - Cost-Effective:
It offers a cost-effective solution for storing large amounts of structured data compared to traditional relational databases.
Use Cases:
- IoT Data Storage:
Table Storage is well-suited for storing large volumes of device telemetry data generated by IoT devices. - Web Application Backend:
It can be used as a backend for web applications that require fast and scalable storage for structured data.
Blob Storage
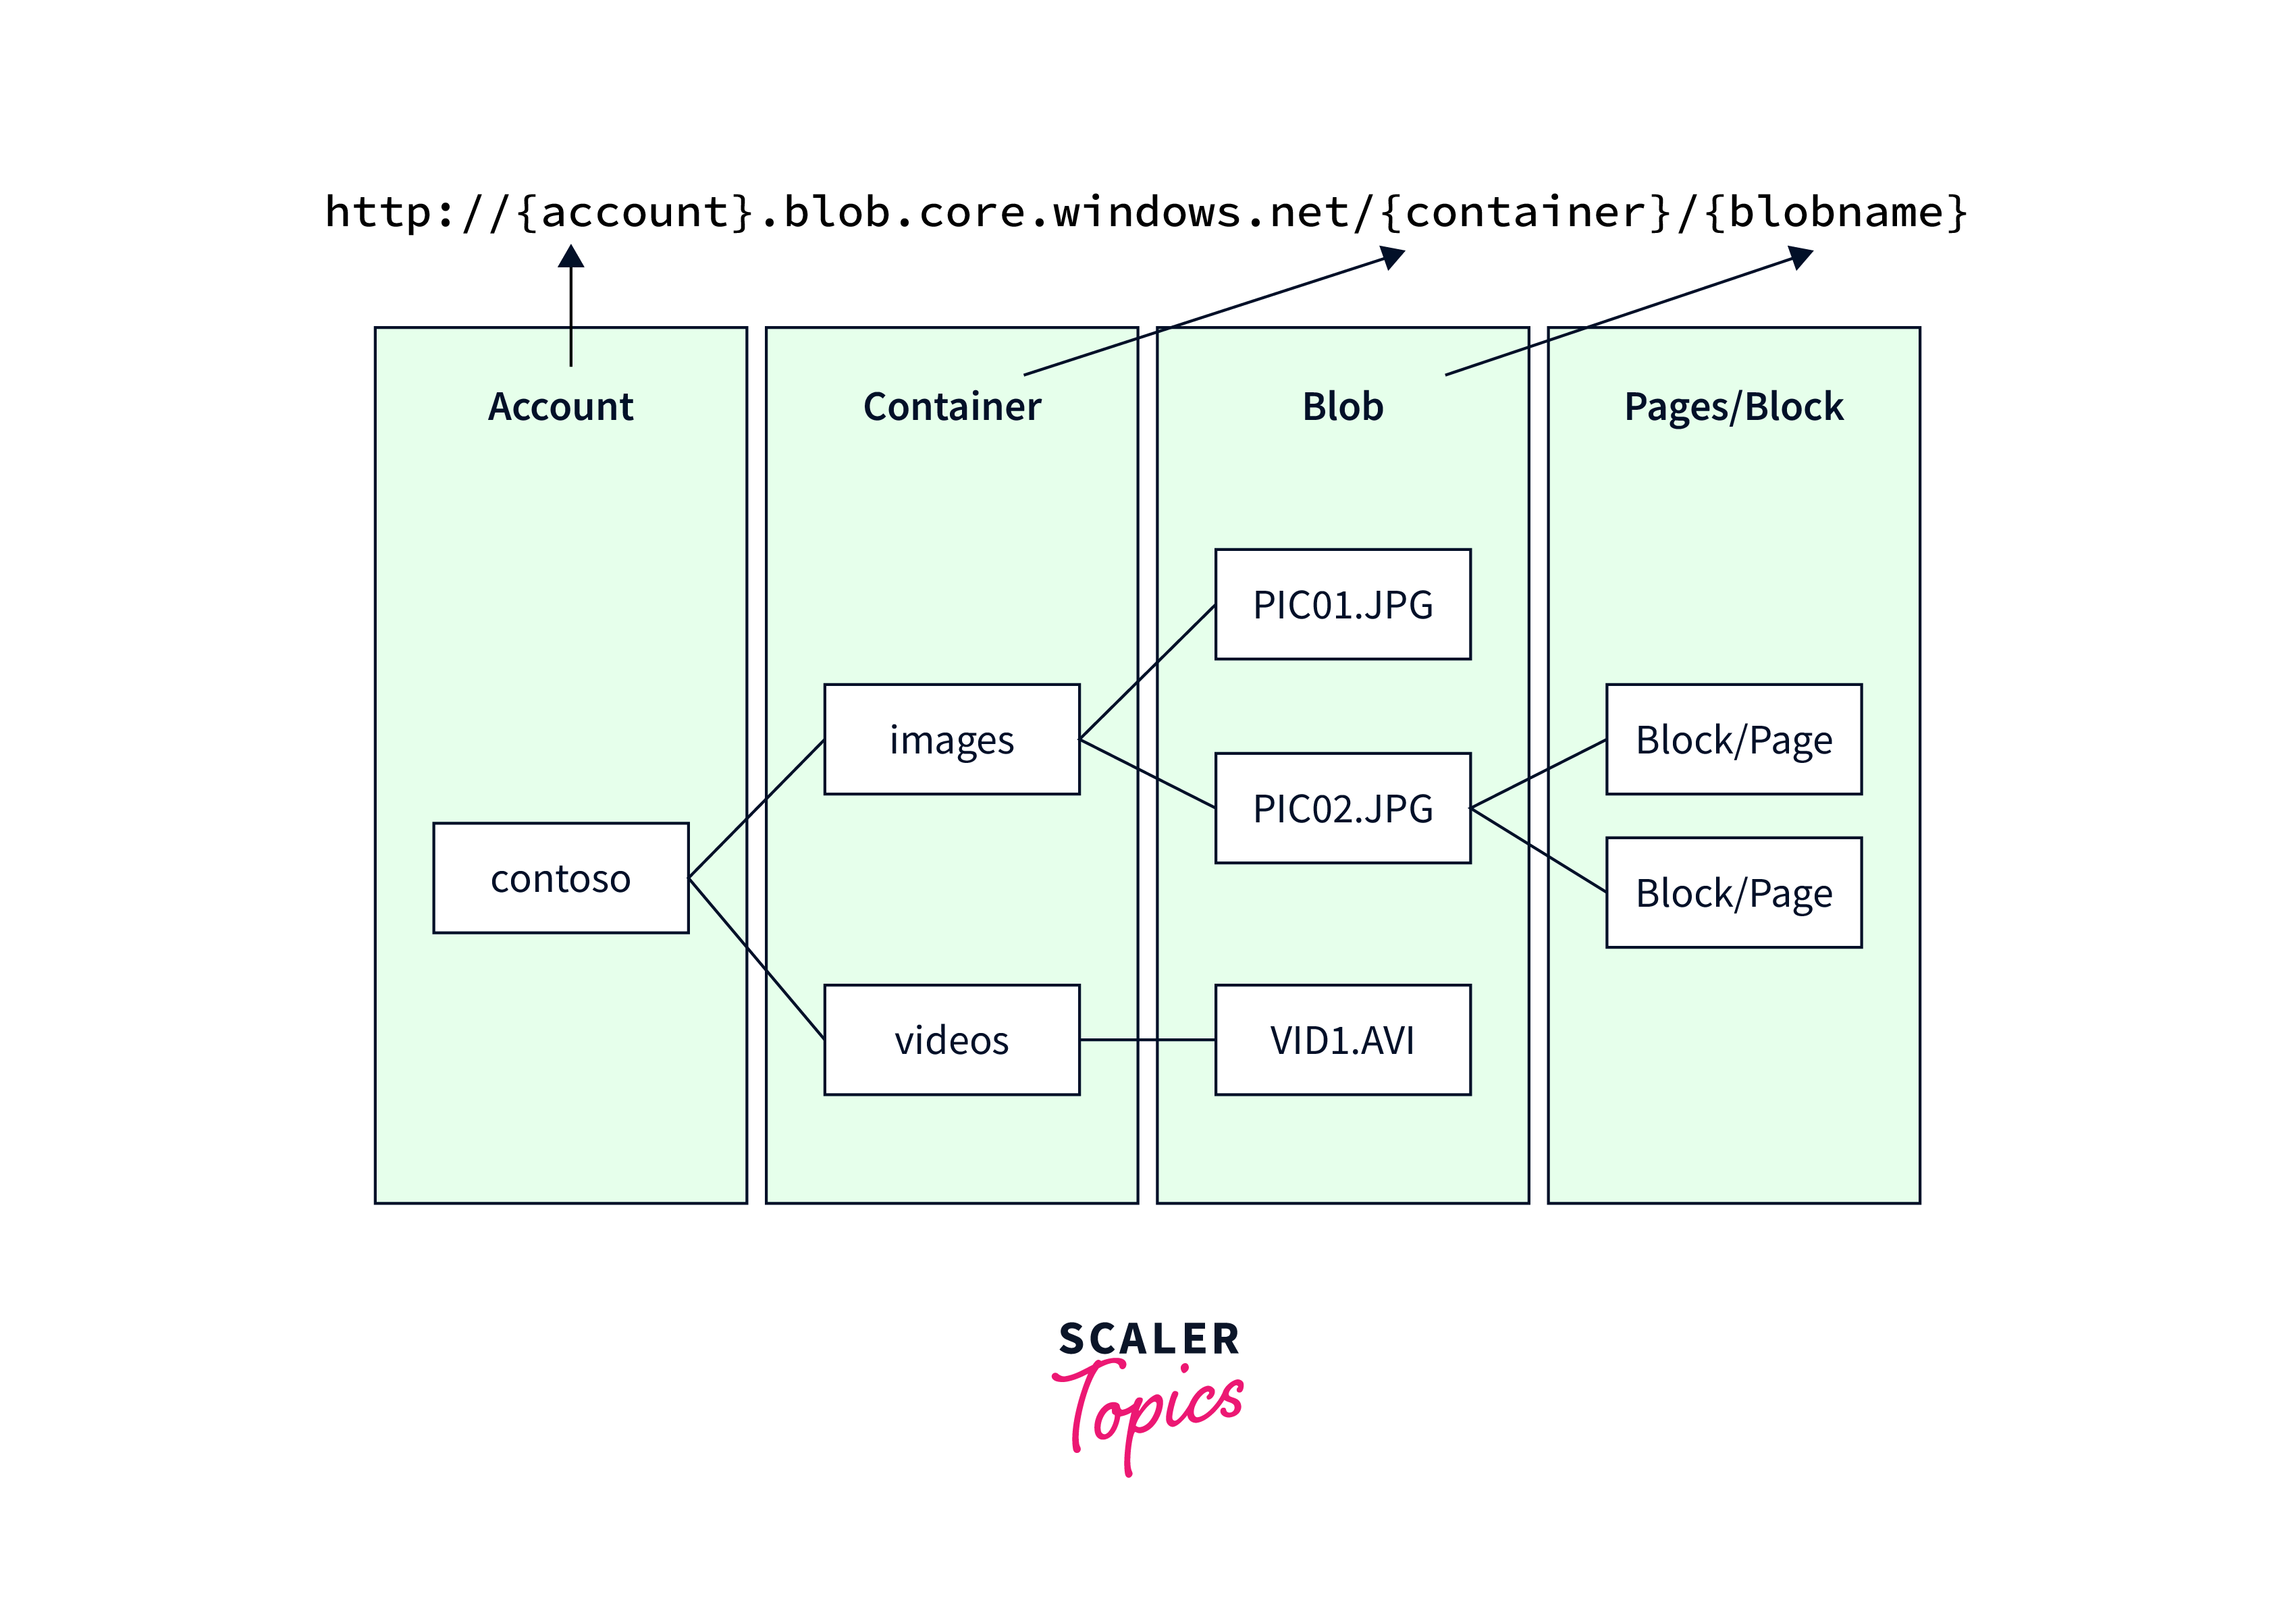
It is a scalable object storage service designed. It stores unstructured data such as images, videos, documents, and backups. It provides a cost-effective solution for storing and retrieving large amounts of data, with options for hot and cool storage tiers based on access frequency. Blob Storage also offers features like data encryption, versioning, and lifecycle management, making it versatile for various storage needs.
Benefits:
- Massive Scalability:
Blob Storage can handle massive amounts of unstructured data, such as images, videos, and documents, making it suitable for storing and serving media files. - Versatility:
It supports different storage tiers, allowing you to optimize costs by selecting the appropriate tier based on data access patterns.
Use Cases:
- Media Storage and Distribution:
Blob Storage is ideal for storing media files used in applications, websites, or streaming services. - Backup and Archive:
It can be used for long-term backup and archival storage of data, ensuring durability and accessibility over time.
Queue Storage
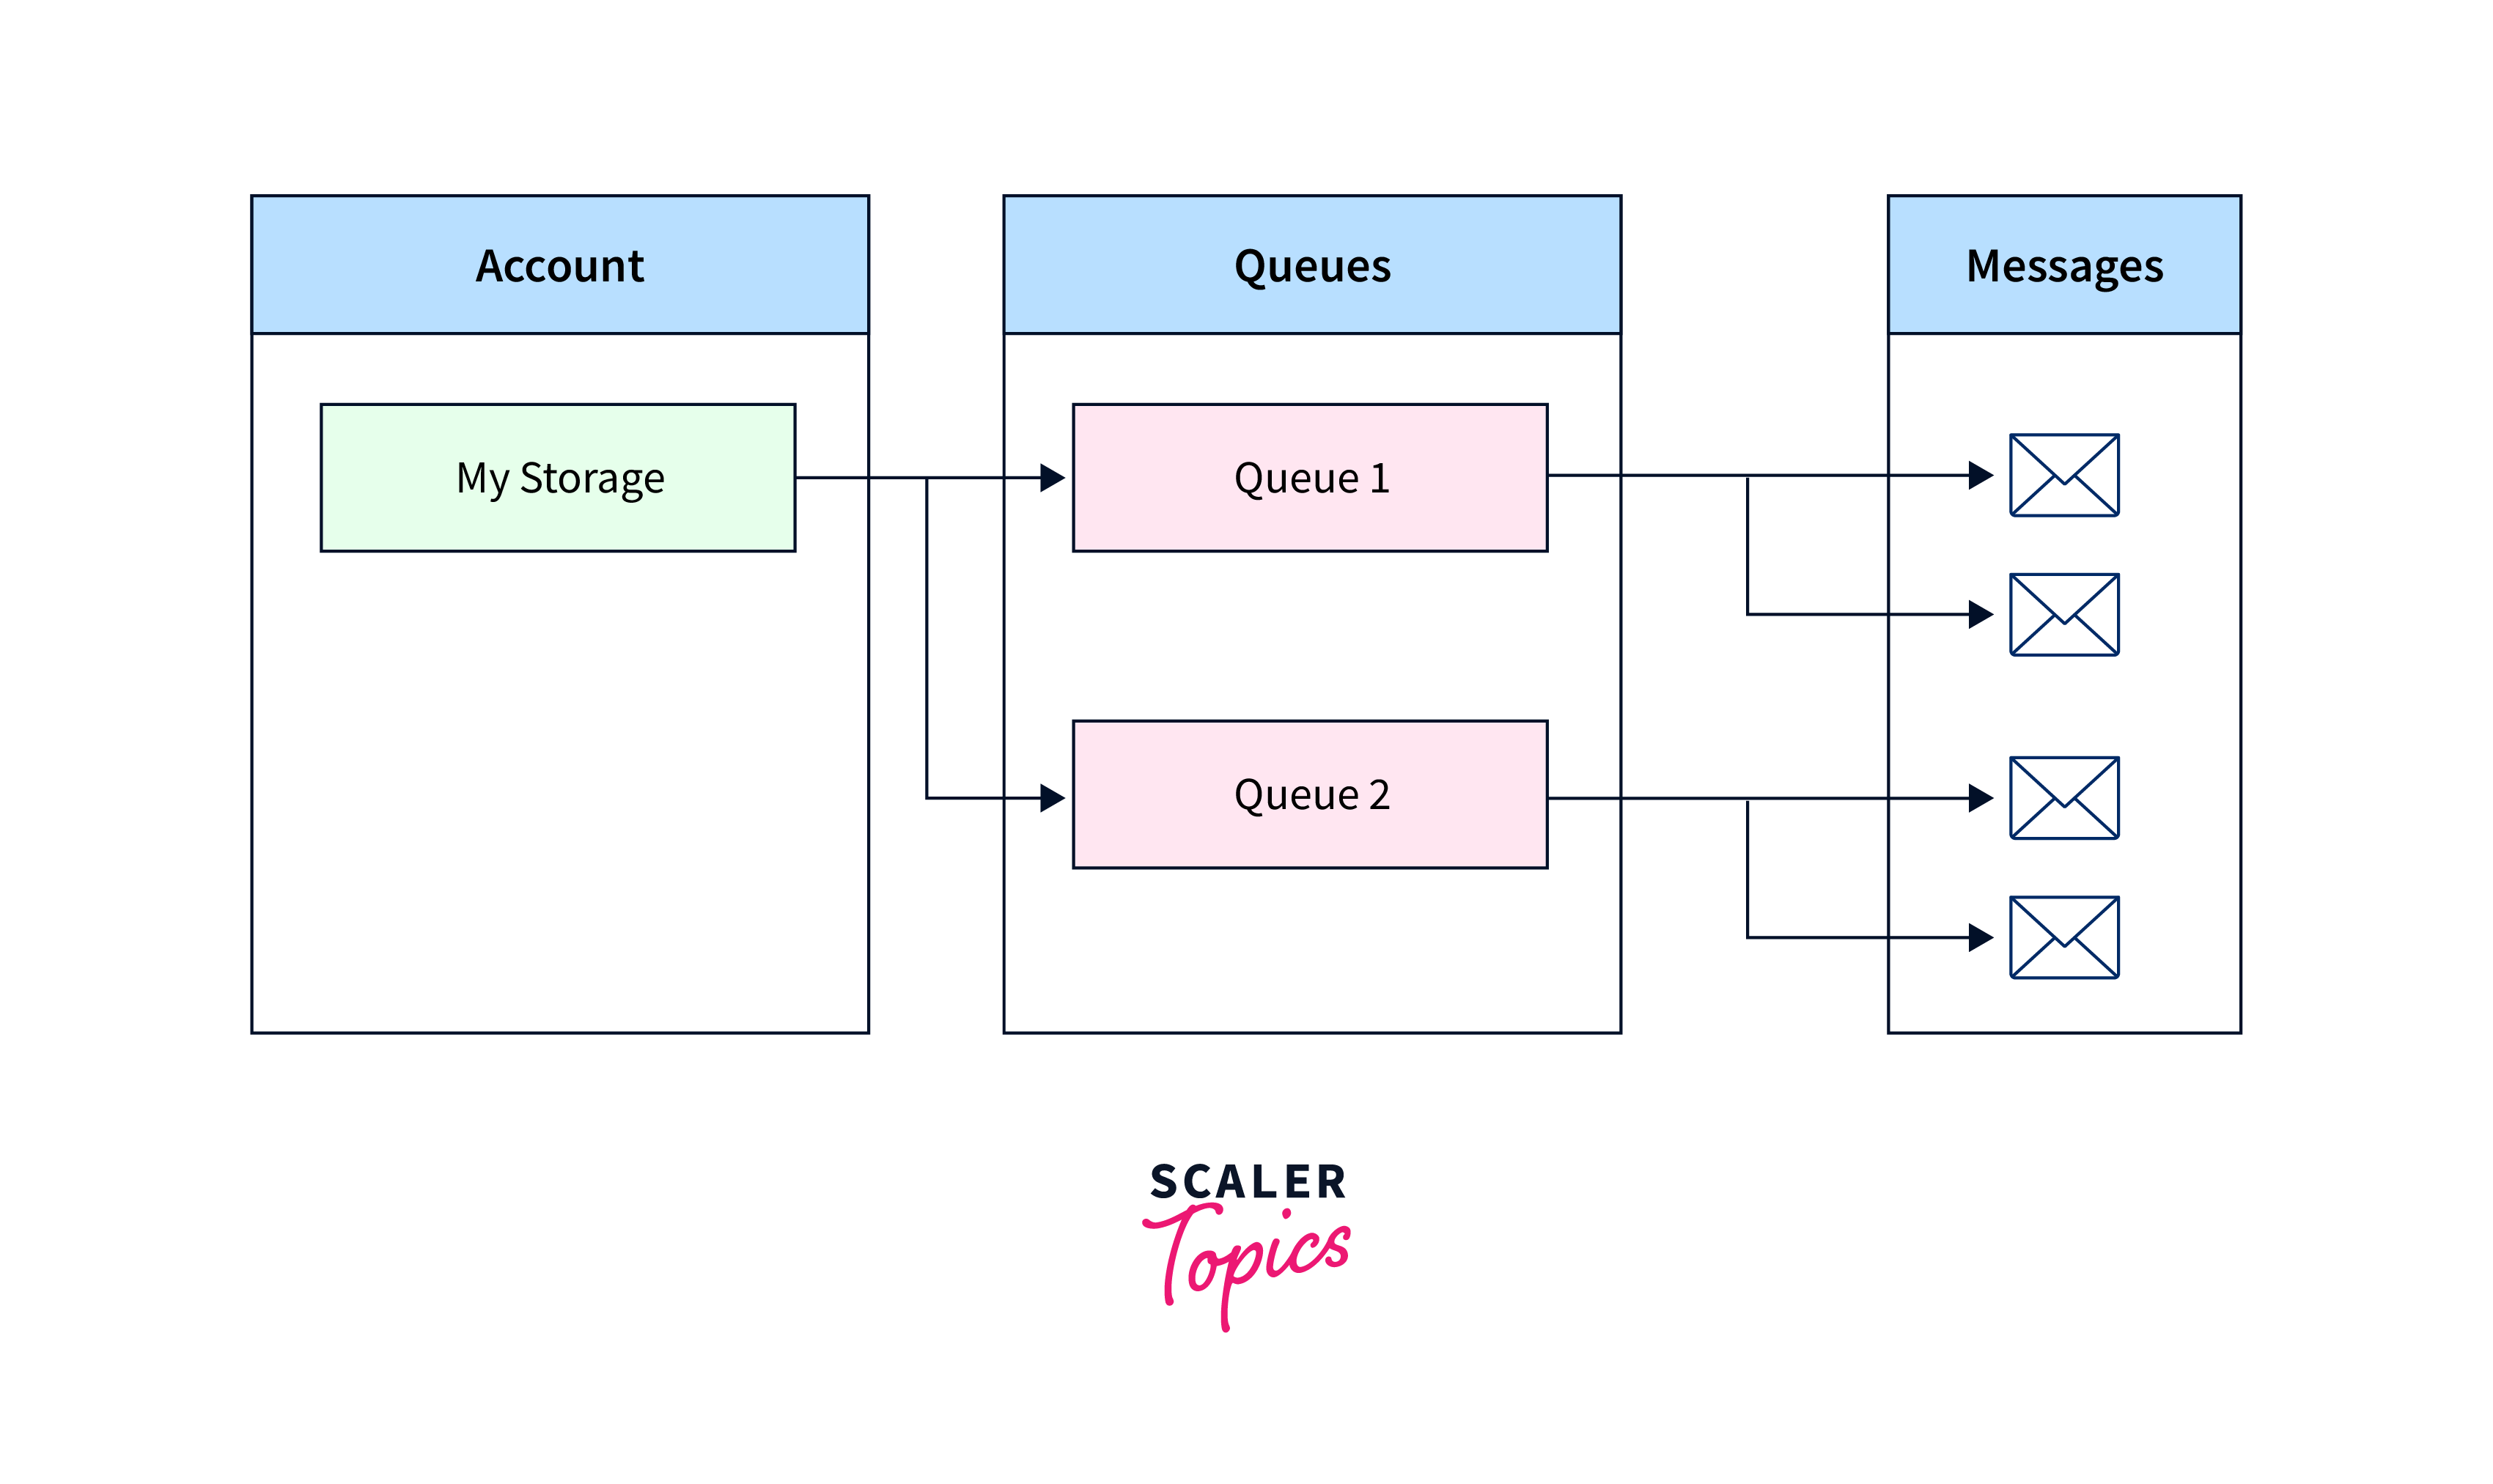
Azure Queue Storage provides a reliable messaging system for asynchronous communication between different components of an application. It enables the decoupling of application components, allowing them to work independently and scale efficiently. Queue Storage is commonly used for tasks such as queuing work items, passing messages between services, and creating event-driven architectures.
Benefits:
- Reliable Message Queuing:
Queue Storage offers a reliable and scalable messaging solution for decoupling components in distributed systems. - Asynchronous Processing:
It enables asynchronous processing of messages, allowing applications to handle workload spikes and improve overall responsiveness.
Use Cases:
- Task Queue:
Queue Storage can be used as a task queue to manage asynchronous background processing, such as processing user requests or offloading computationally intensive tasks. - Inter-Component Communication:
It facilitates communication and coordination between different components or microservices within a system.
File Storage
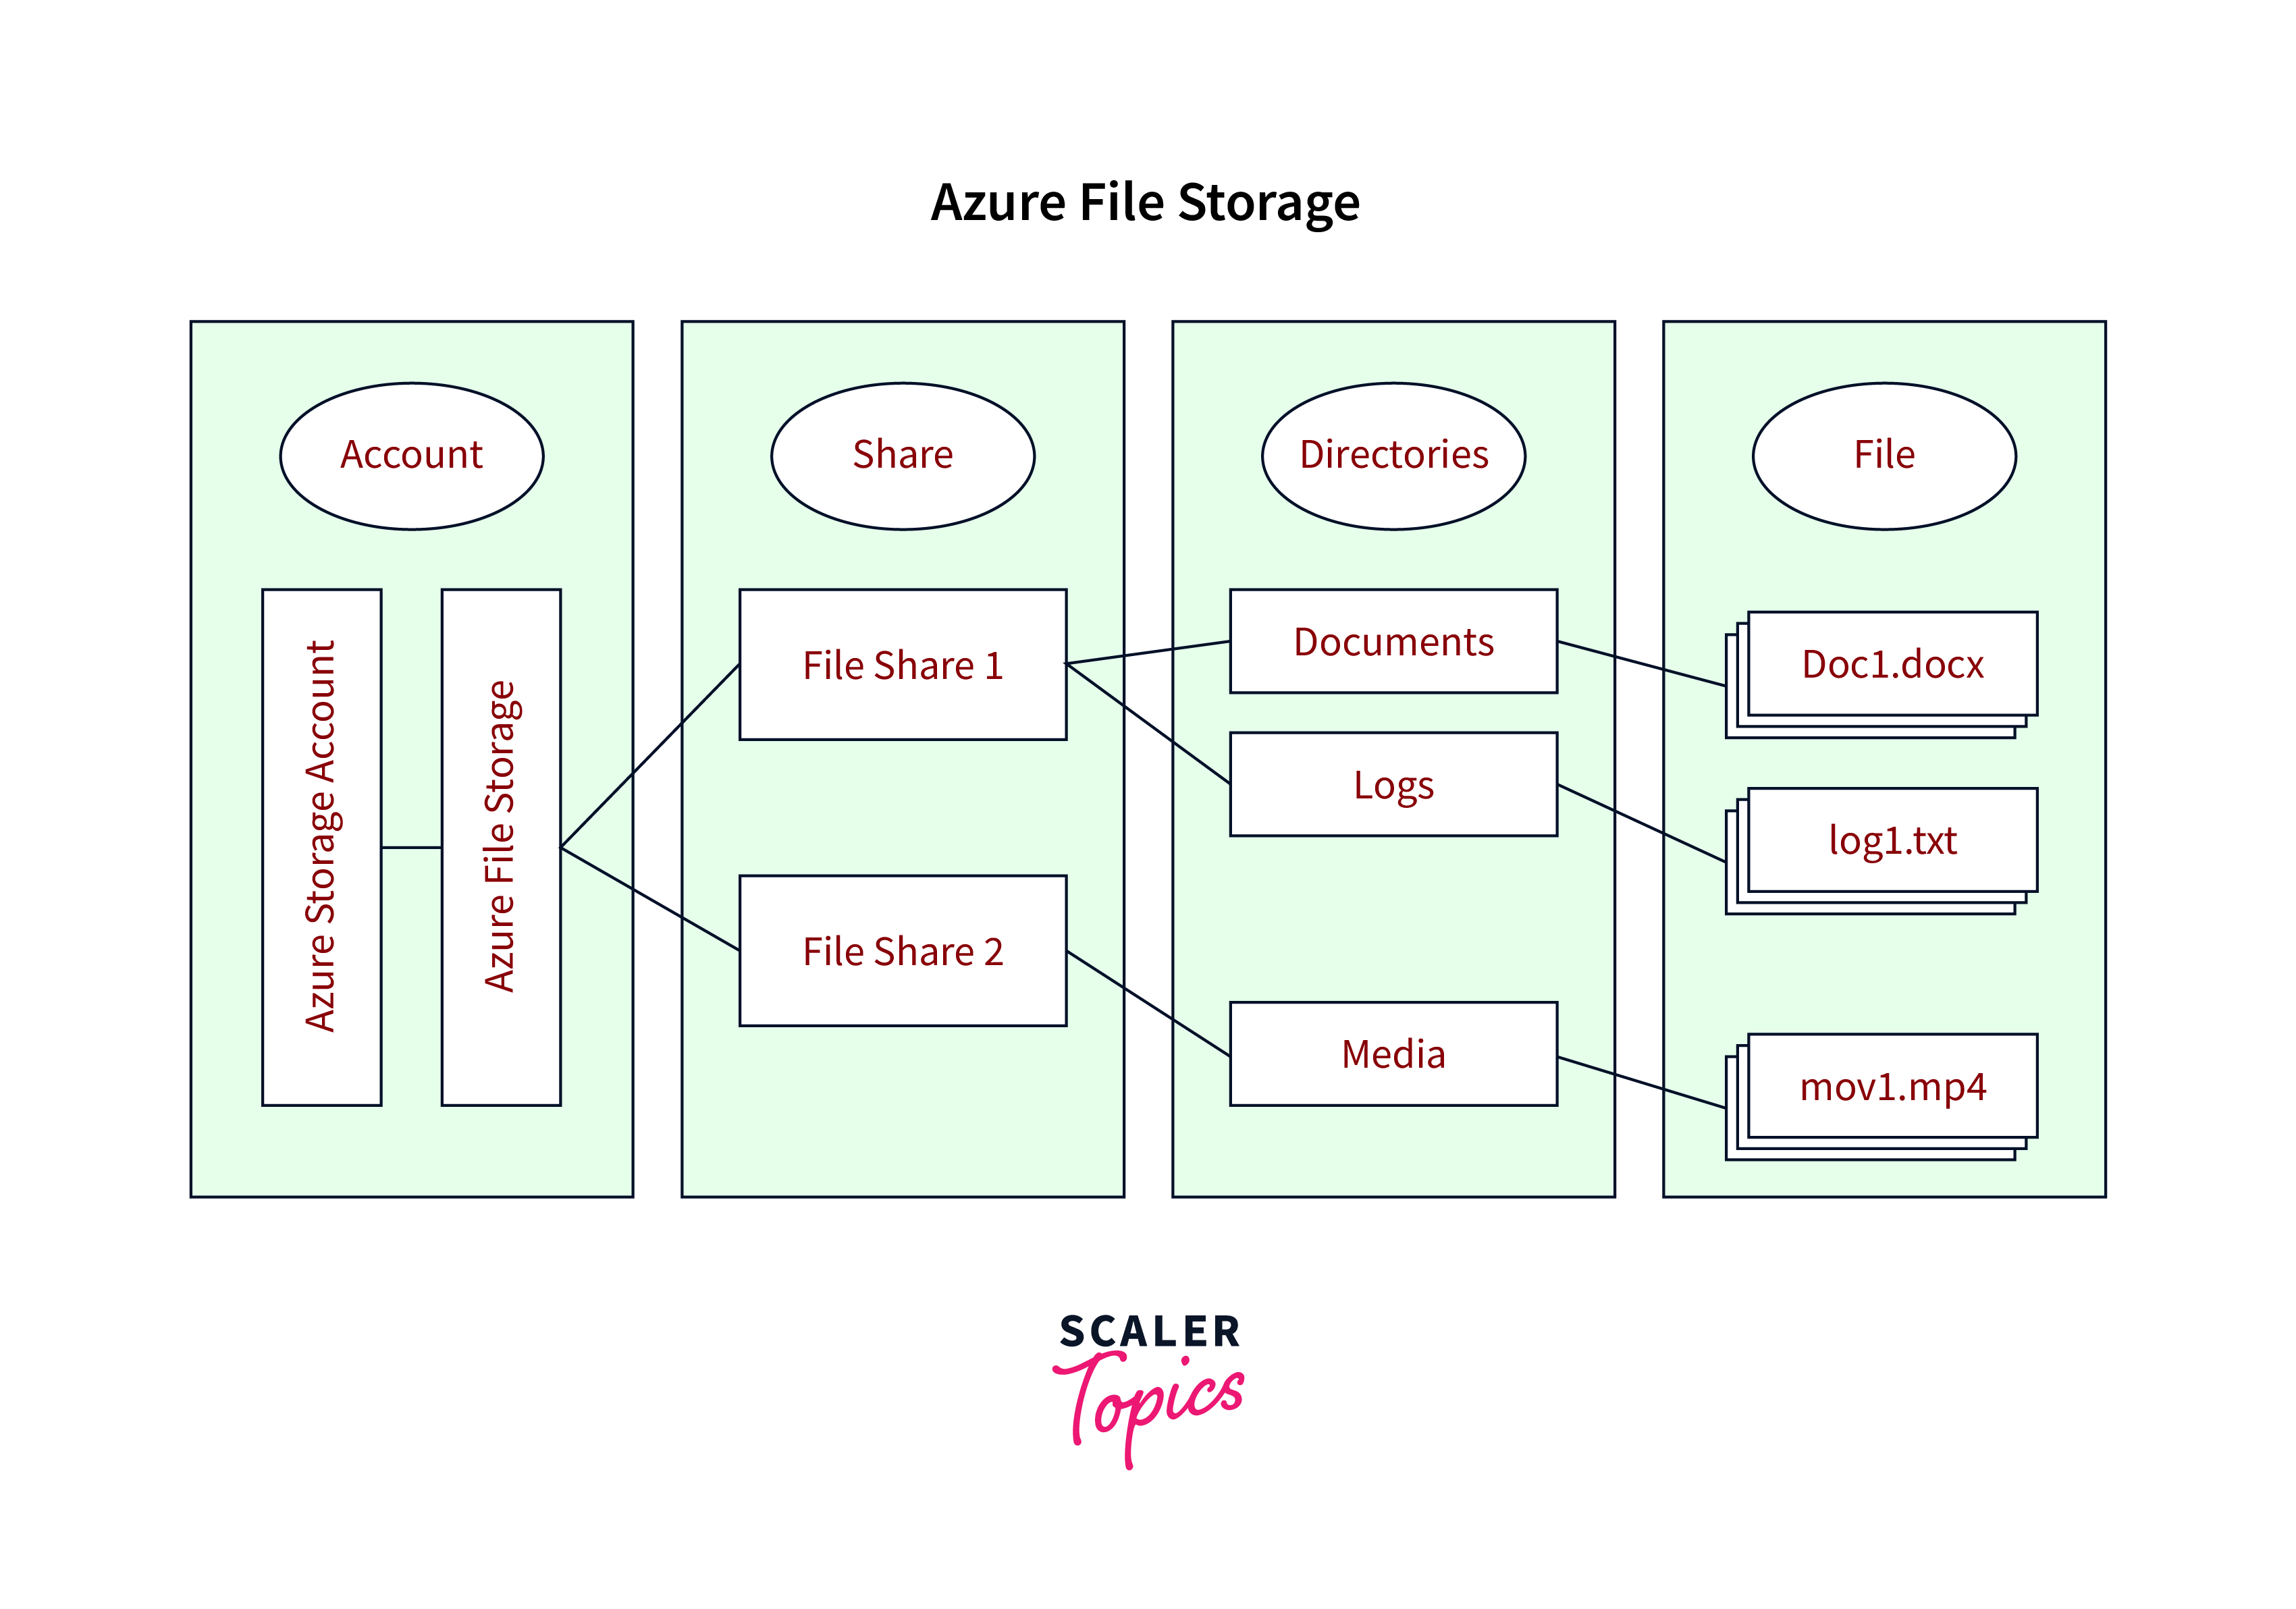
It offers fully managed file shares in the cloud which are accessed via the Server Message Block (SMB) protocol. It allows you to migrate on-premises file shares to the cloud and provides shared file access for virtual machines and applications running in Azure. Azure File Storage is suitable for scenarios that require shared file access, such as shared application configuration files, media sharing, or distributed file sharing across multiple VMs.
Benefits:
- Shared File System:
File Storage provides a shared file system that can be accessed concurrently from multiple virtual machines, making it suitable for applications that require shared access to files. - Easy Migration:
It allows easy migration of on-premises file shares to the cloud, enabling a seamless transition to cloud-based file storage.
Use Cases:
- File Sharing and Collaboration:
File Storage can be used as a shared storage solution for teams, enabling collaboration on files and documents. - Lift-and-Shift Applications:
It is useful for migrating legacy applications that rely on shared file systems to the cloud, providing compatibility and ease of migration.
Connection Types
Azure Storage Explorer supports various connection types to connect to Azure Storage accounts.
- Azure Active Directory (Azure AD):
You can connect to an Azure Storage account using Azure AD authentication. This method allows you to sign in using your Azure AD credentials and access the storage resources associated with your account. - Shared Access Signature (SAS):
Azure Storage Explorer also supports connecting using a Shared Access Signature (SAS) connection string. A SAS token grants temporary access to your storage resources with specified permissions and constraints. - Connection String:
You can connect using an Azure Storage connection string, which contains the necessary credentials and information to establish a connection to your storage account. This method is suitable when you have the connection string available. - Emulator:
Azure Storage Explorer allows you to connect to the Azure Storage Emulator, which is a local development storage solution. This enables you to test and develop against Azure Storage services locally without incurring any costs.
Let's look into the steps involved in connecting to the Azure Storage Account:
Add an Azure Account By Using AAD [Azure Active Directory]
- Open Azure Storage Explorer.
- Sign in to Azure by selecting the Add an Azure Account option.
- In the Connect to Azure Storage dialog, choose either Blob container, ADLS Gen2 container, or Queue from the Select Resource panel.
- Select Sign in using Azure Active Directory (Azure AD) as the authentication method.
- Choose the Azure account and tenant that has access to the target resources.
- Provide a display name and the URL of the resource you want to connect to.
- Review the connection information in the Summary panel and click Connect if the details are correct.
Shared Access Signature (SAS) Connection String
- In the Connect to Azure Storage dialog, select Storage account from the Select Resource panel.
- Choose Shared access signature (SAS) from the drop-down menu and click Next.
- Give a name to your connection and enter the SAS connection string for the storage account.
- Review the connection information in the Summary panel and click Connect if everything is accurate.
Connect to a Storage Account
-
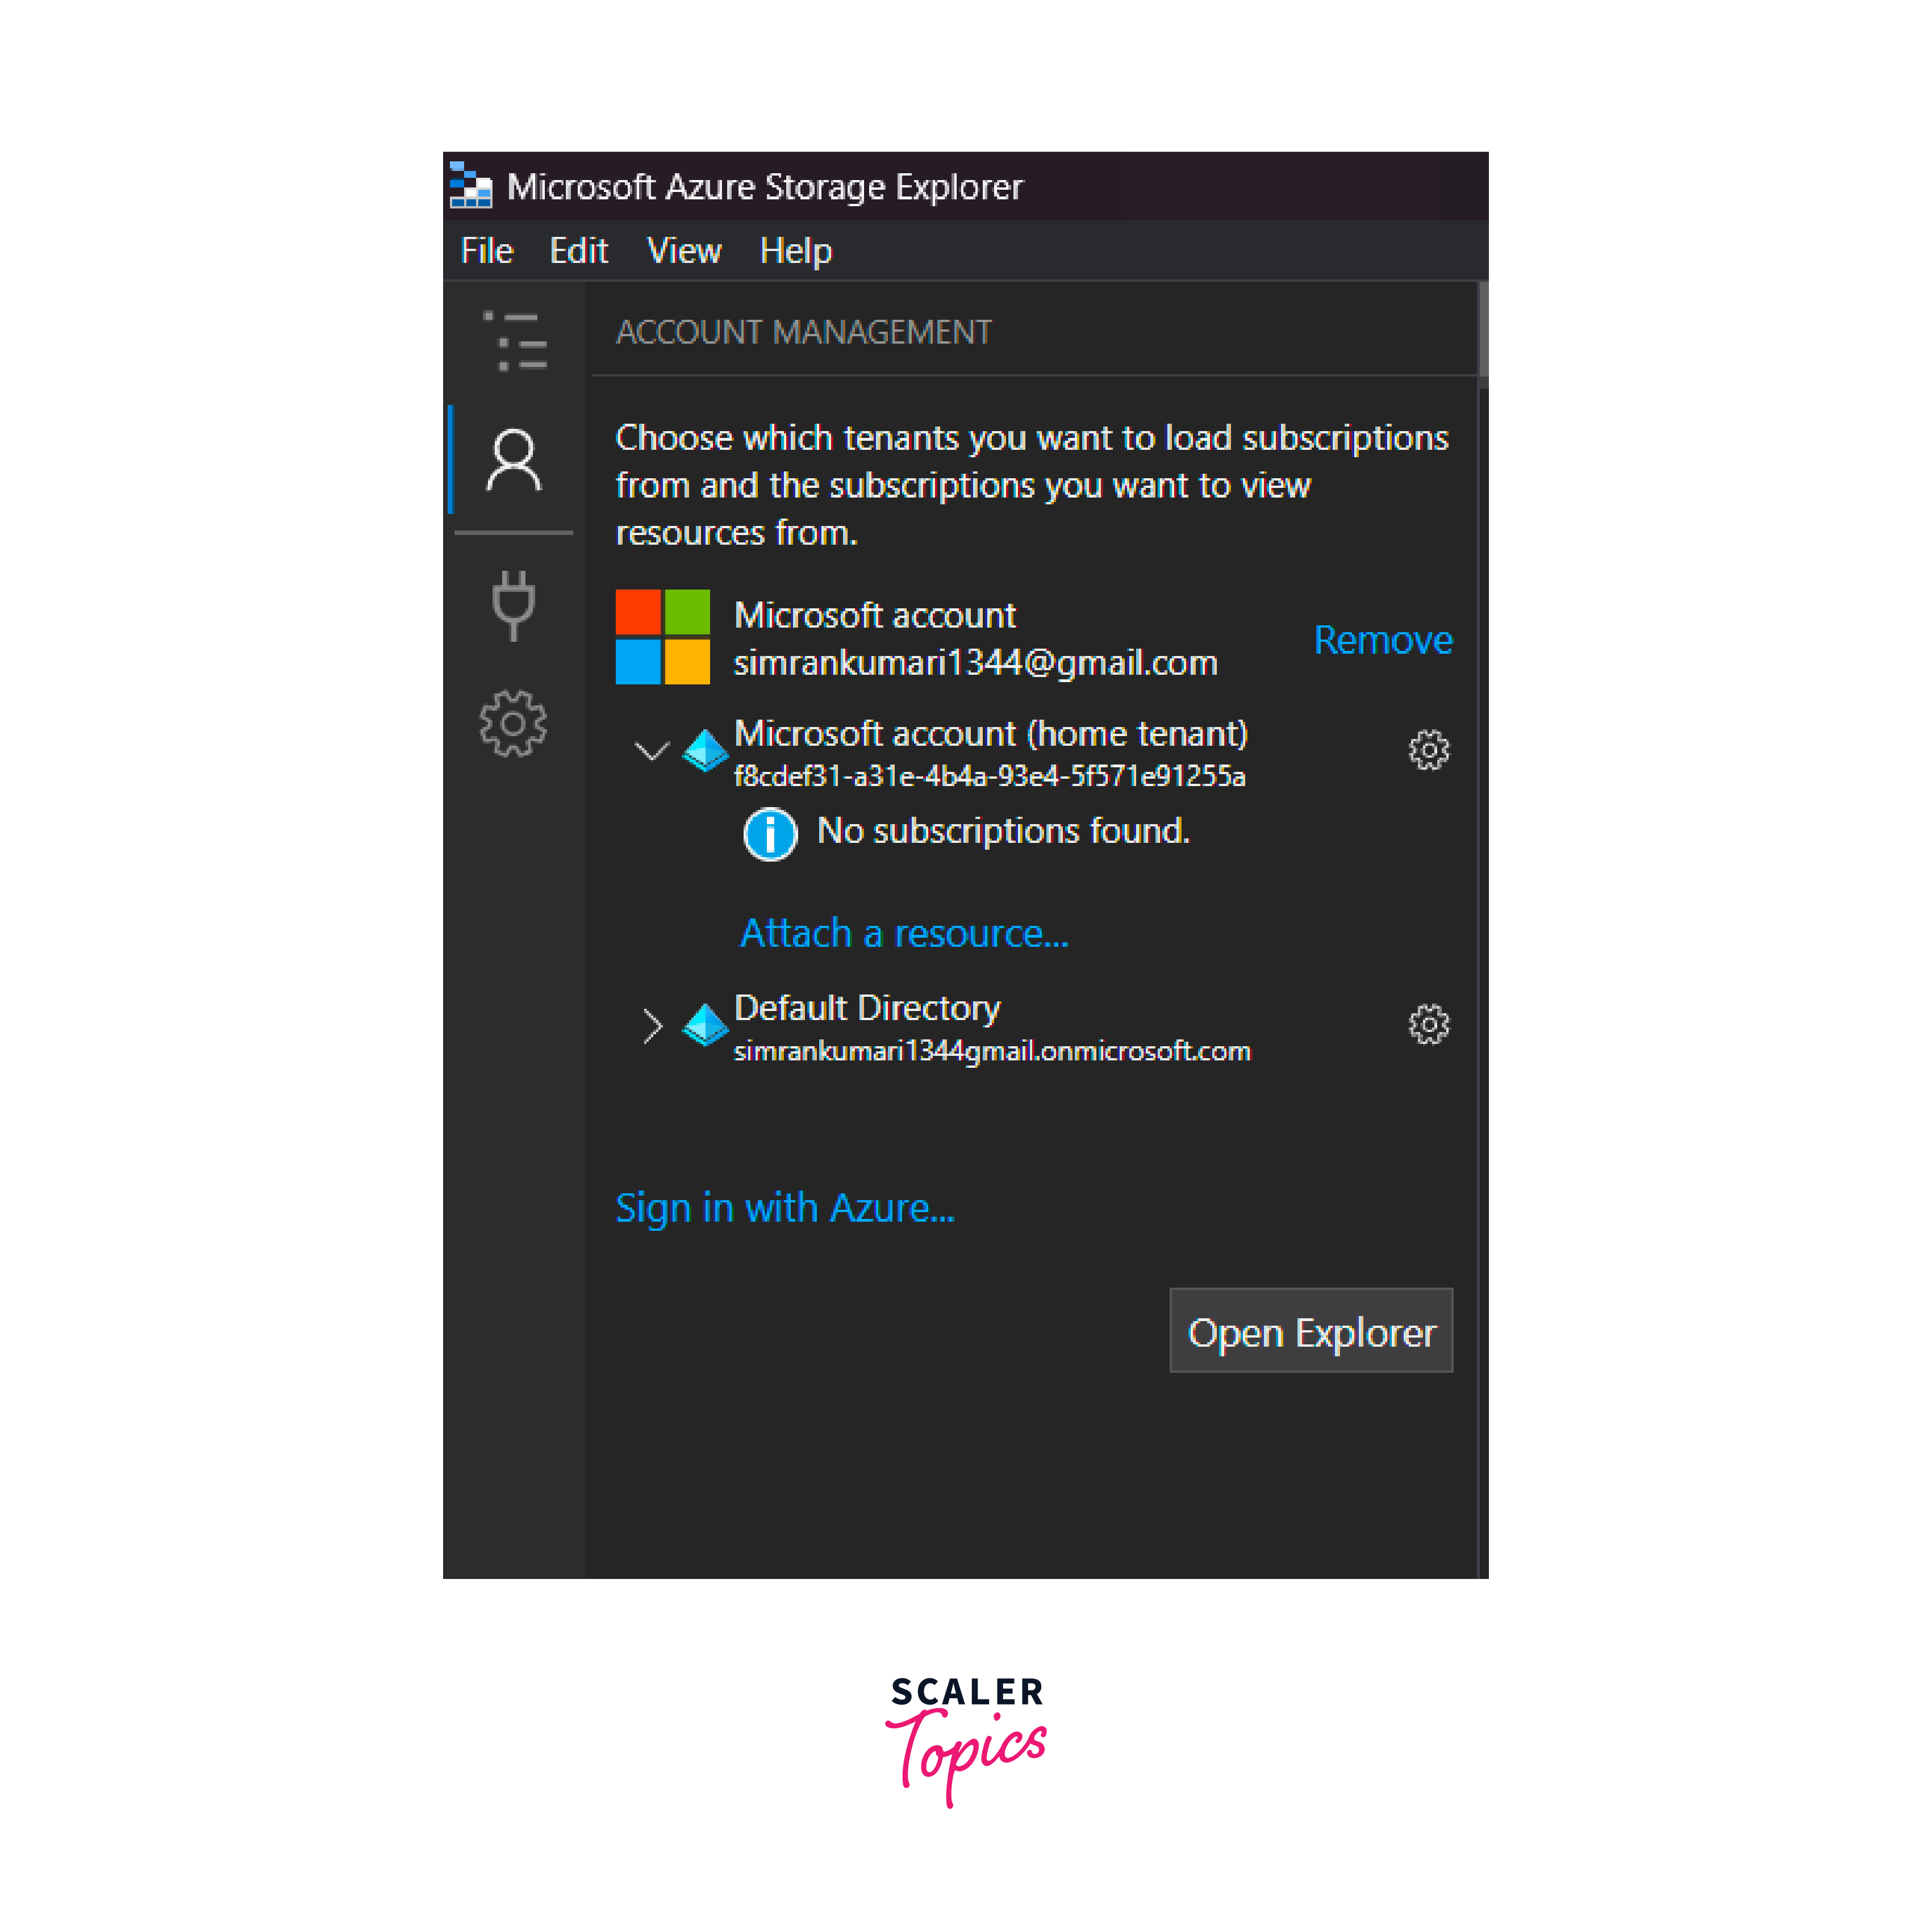
Click on the Account Management icon in the Azure storage explorer to see the list of Azure accounts
-
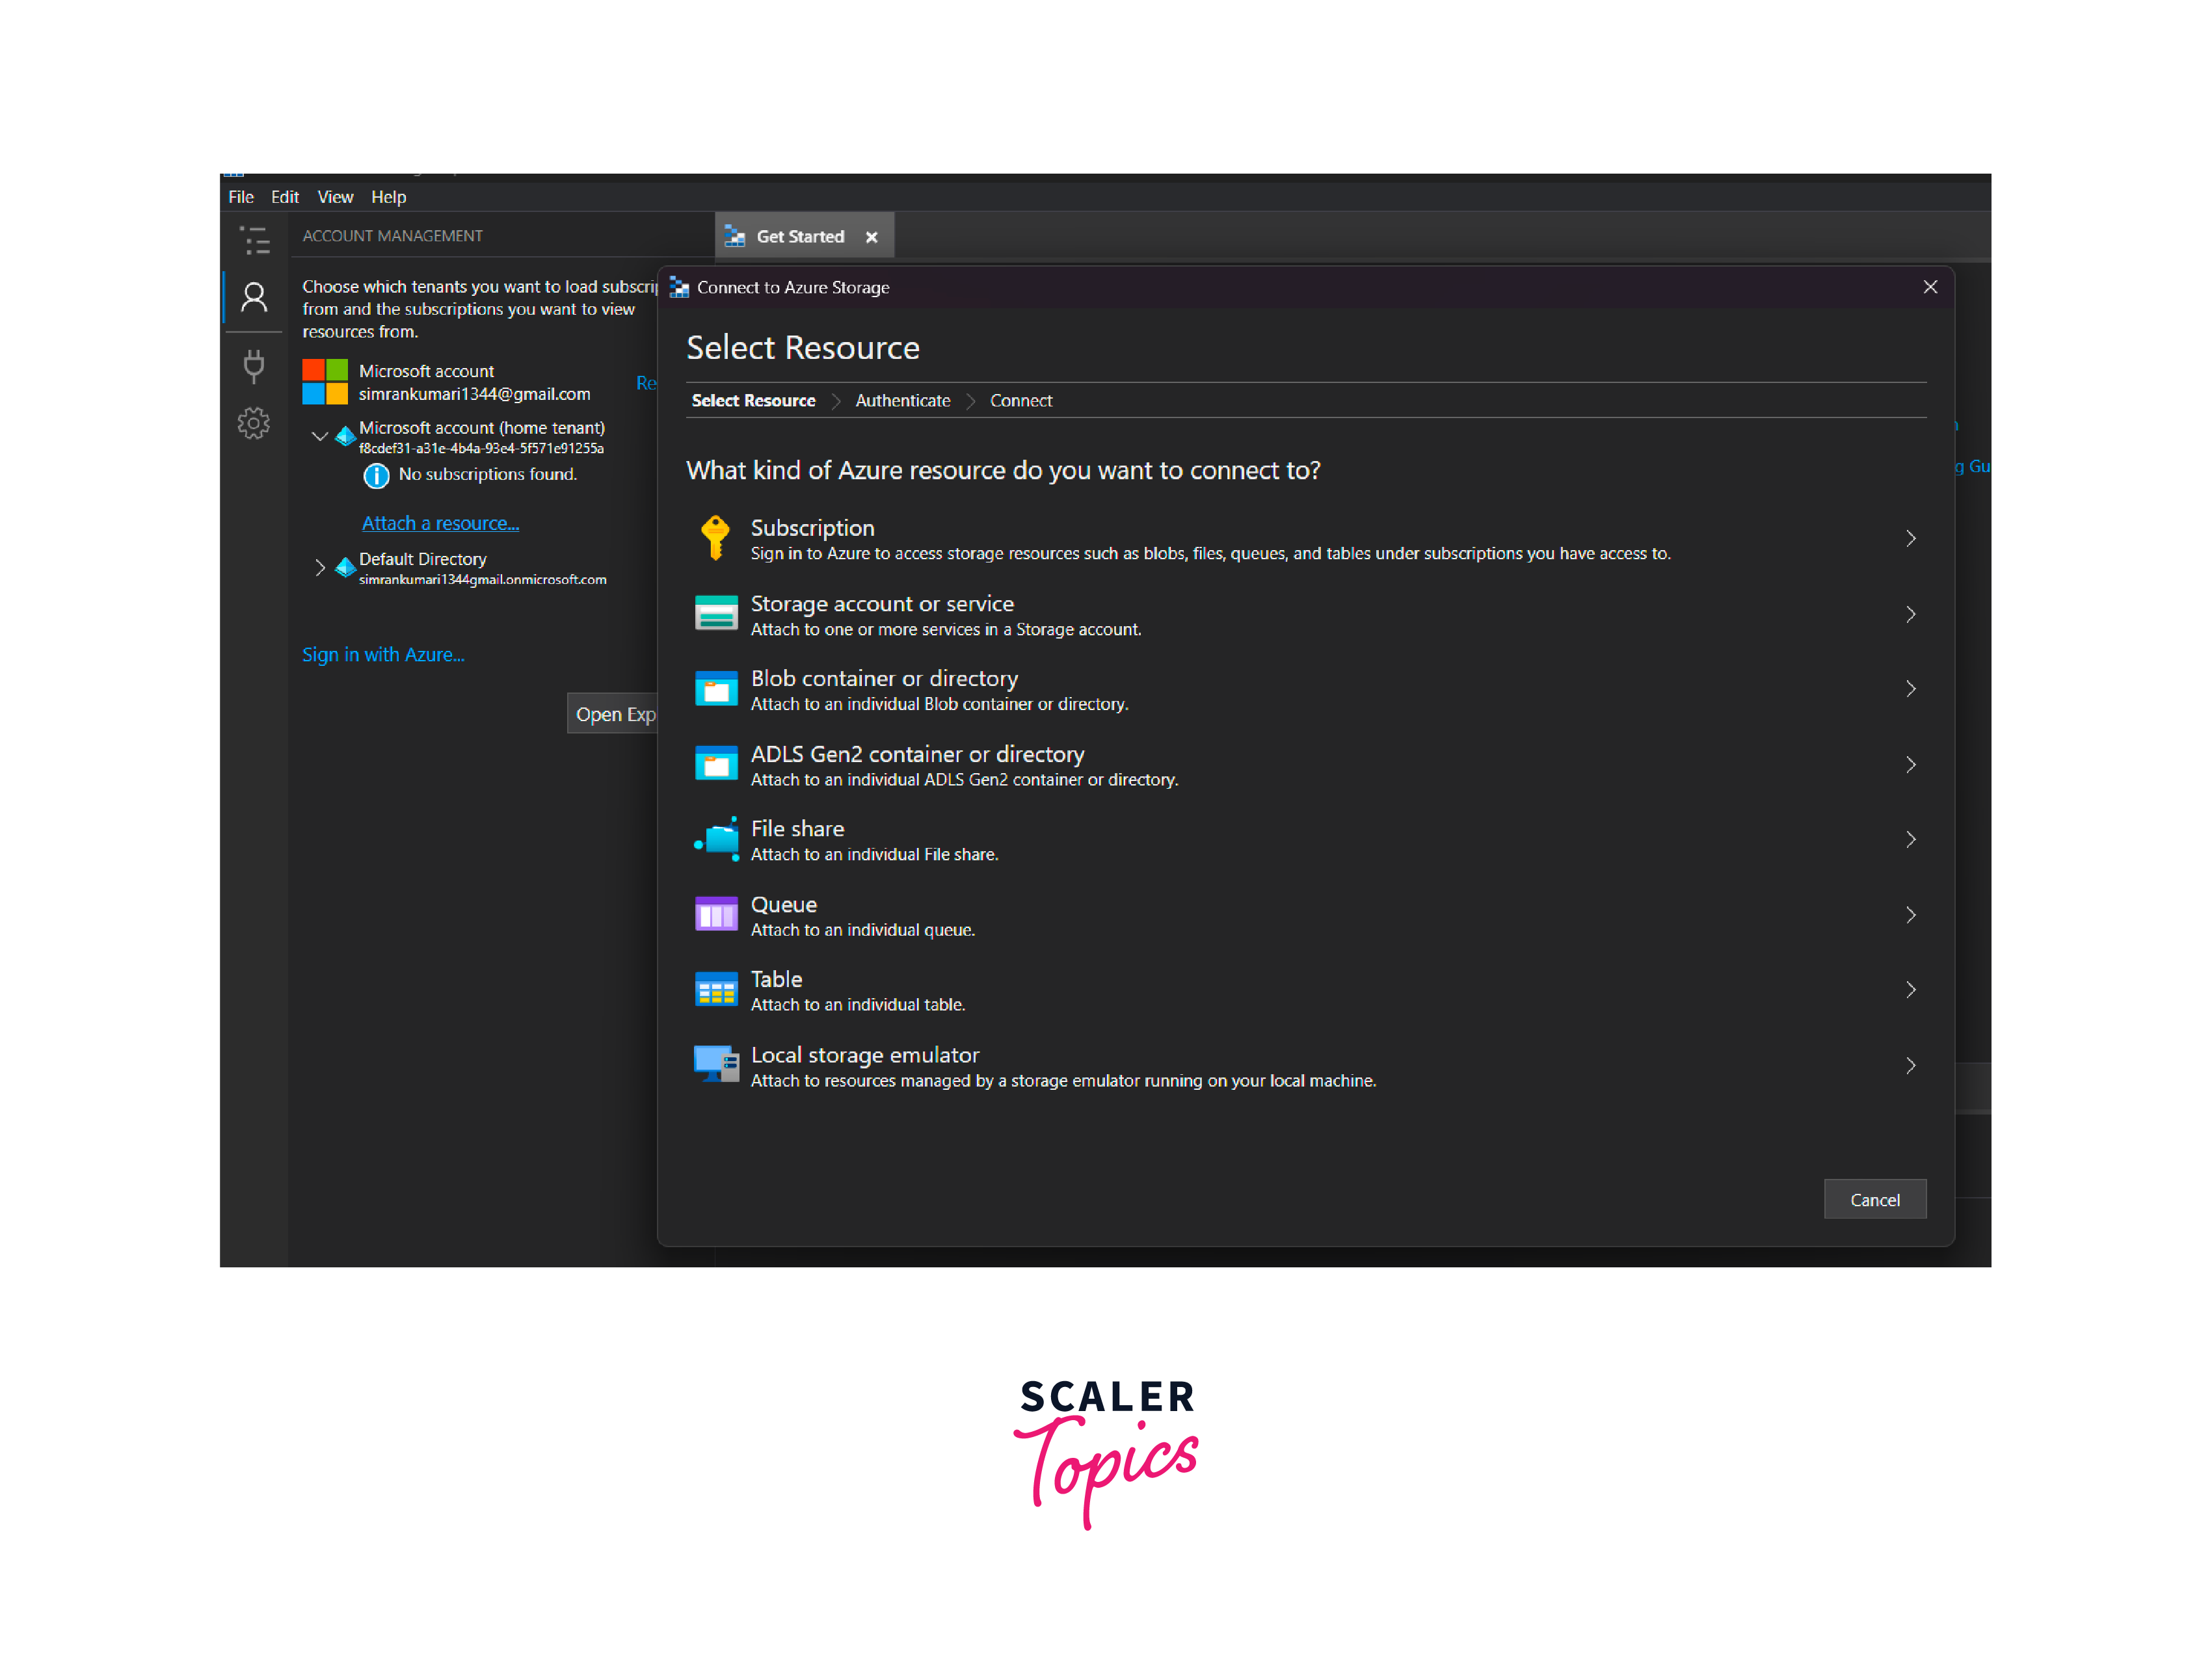
Click on the Attach a resource button, which prompts with the list of resources. Select Subscriptions
-
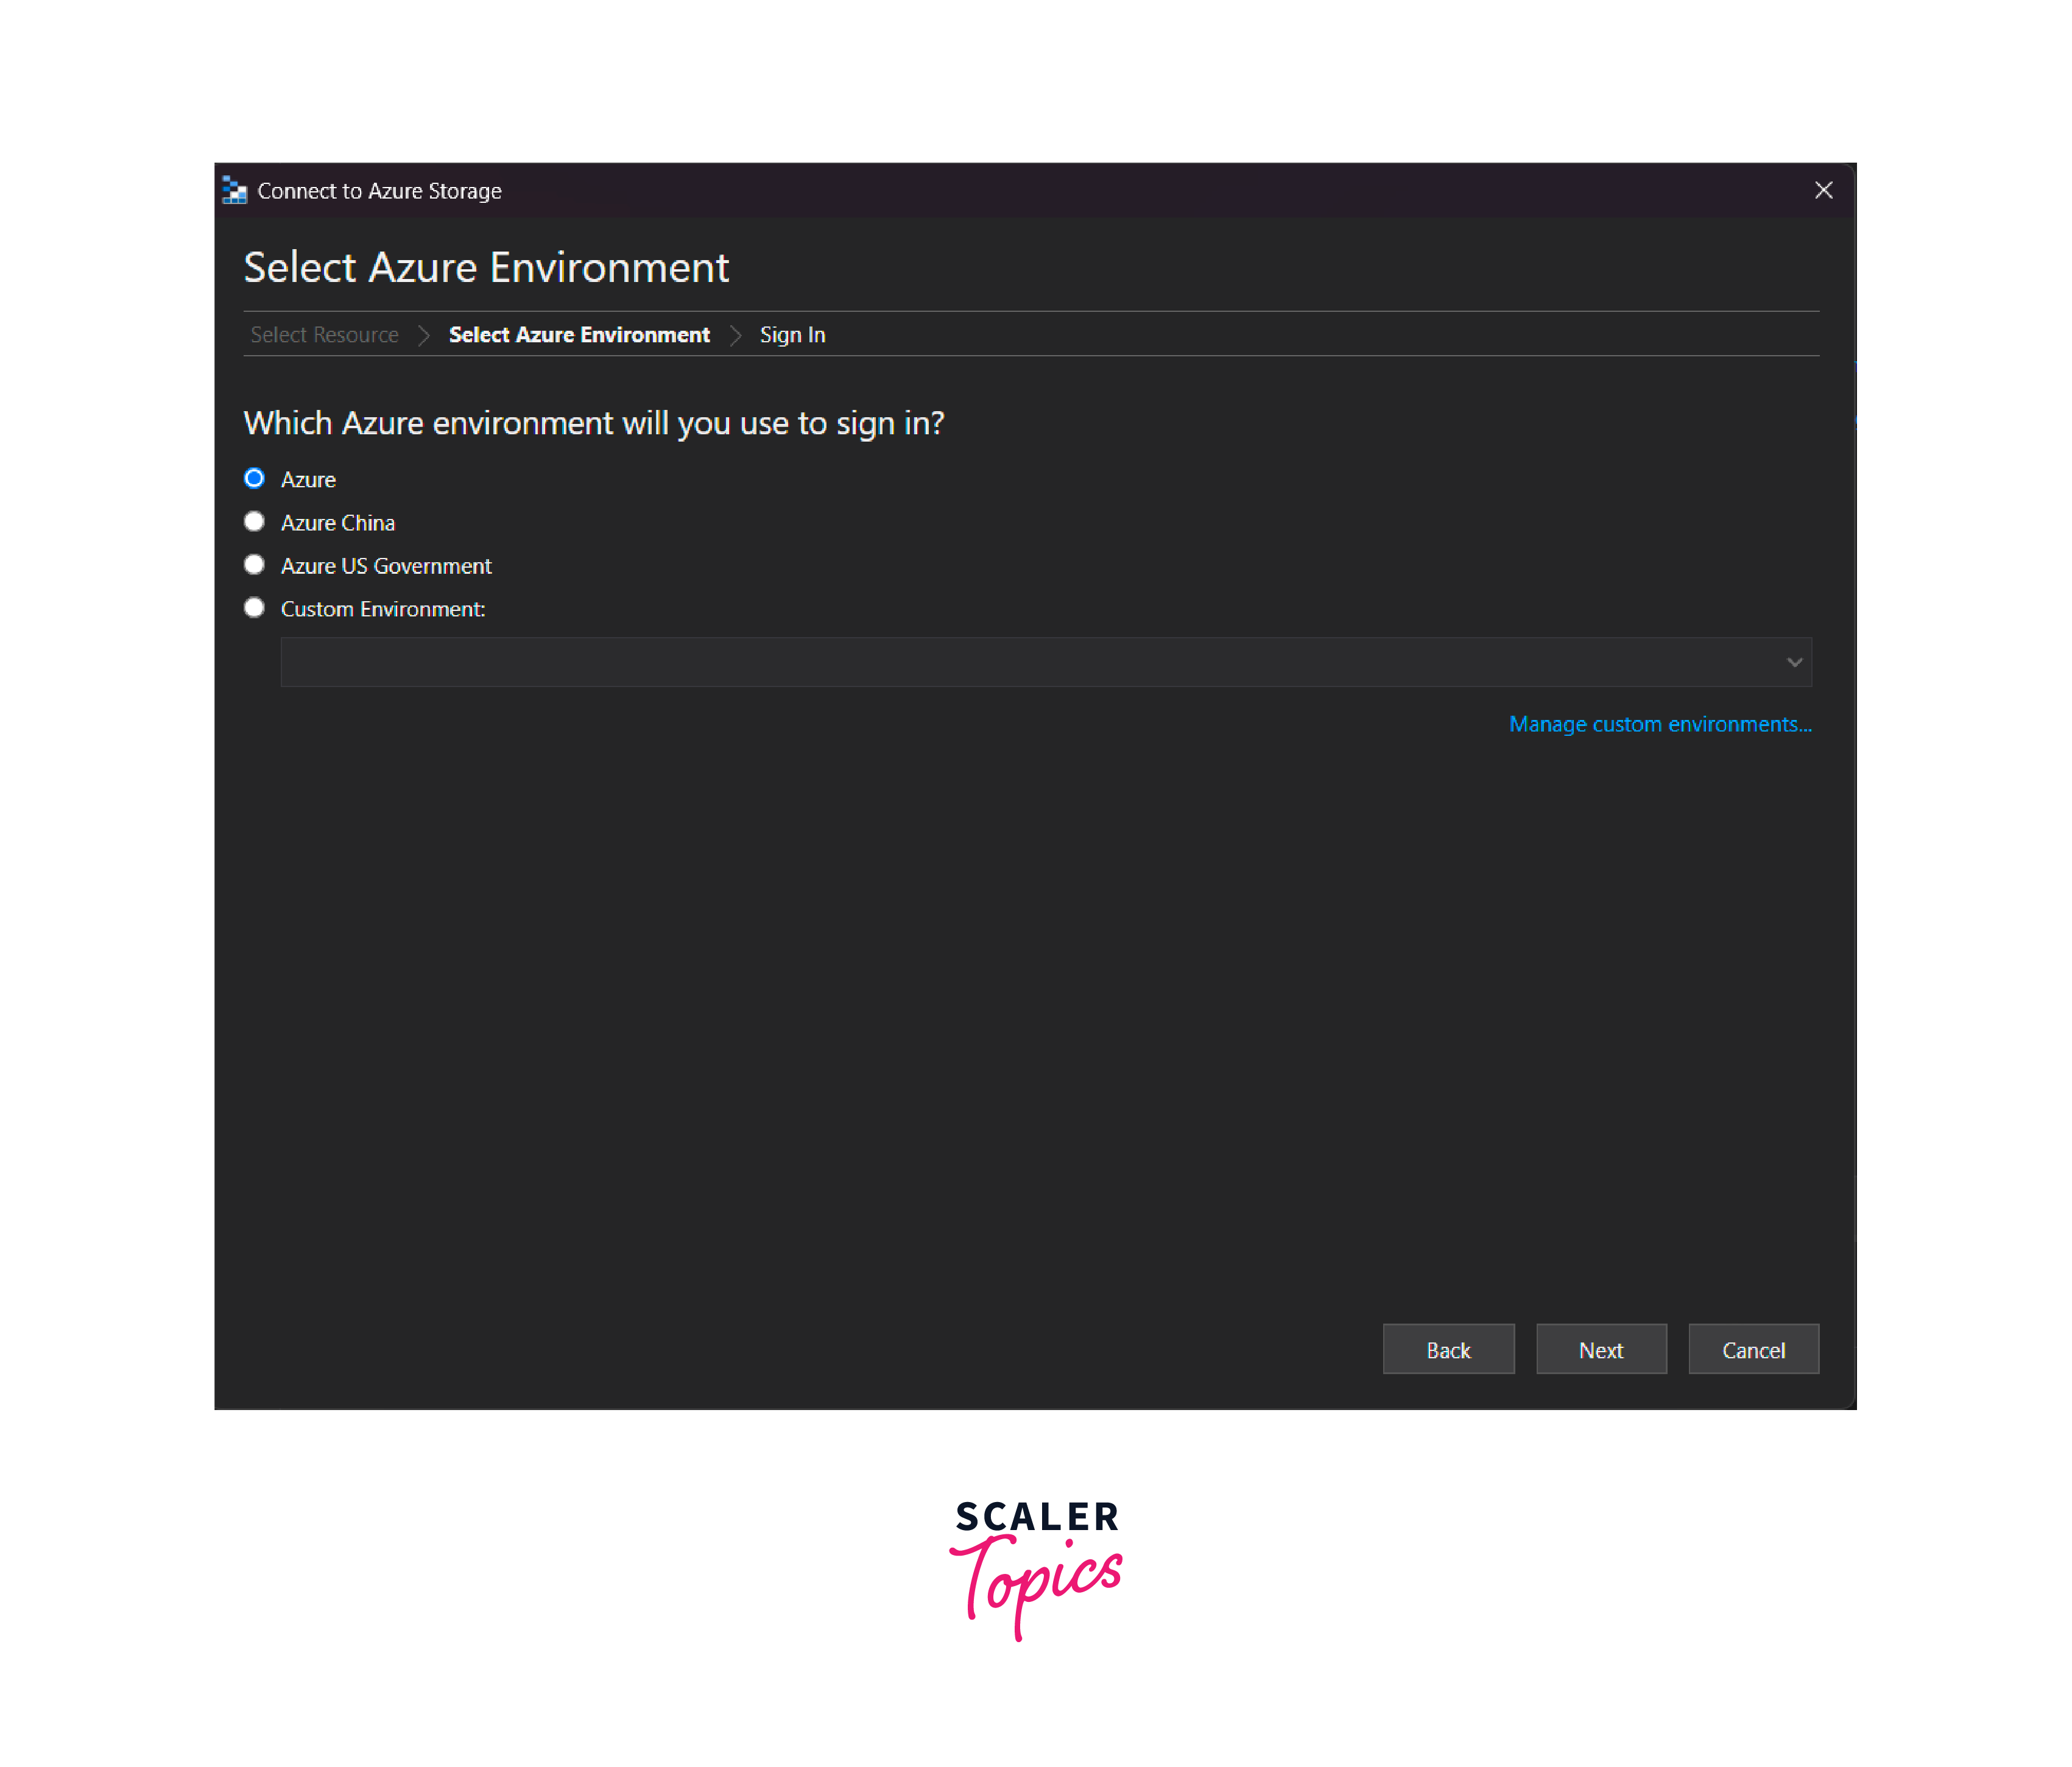
As the next step, select the Azure environment.
-
It will redirect you to the login page, on successful authentication, select the subscription you would like to use and click on apply.
-
You will be able to fetch the list of storage accounts associated with the subscription, choose one, and start working.
FAQs
Q. Is Microsoft Azure Storage Explorer available for Linux operating systems?
A. Yes, you can download the Linux version of Azure Storage Explorer from the official download page on the Azure website. It supports popular Linux distributions such as Ubuntu, CentOS, and Debian.
Q. Can I perform bulk operations on storage resources using Microsoft Azure Storage Explorer?
A. Microsoft Azure Storage Explorer allows you to carry out bulk operations on storage resources. It provides features like batch uploading and downloading of files, allowing you to transfer multiple files simultaneously. This can significantly improve efficiency when working with large amounts of data.
Q. Does Microsoft Azure Storage Explorer have any command-line interface (CLI) options?
A. Microsoft Azure Storage Explorer offers a command-line interface (CLI) called AzCopy. AzCopy is a command-line tool provided by Microsoft for efficiently transferring data to and from Azure storage. It supports advanced scenarios like data migration, syncing, and managing access permissions. You can use AzCopy alongside Azure Storage Explorer for more advanced and automated operations.
Q. How can I connect Microsoft Azure Storage Explorer to my Azure Storage account?
A. Follow the given steps to connect to the Azure storage account using the Microsoft Azure Storage Explorer application:
- Launch Azure Storage Explorer.
- Click on the "Connect" button in the toolbar.
- Choose the appropriate storage account type (Blob, Table, Queue, or File).
- Enter the required connection details, such as account name and access key, or use other available authentication methods.
- Click on "Connect" to establish a connection to your Azure storage account.
Q. Does Microsoft Azure Storage Explorer support managing both Azure Blob Storage and Azure Data Lake Storage?
A. Azure Storage Explorer provides a user-friendly interface that allows you to easily manage and interact with both types of storage services.
- On Azure Blob Storage, operations such as creating and deleting containers, uploading and downloading files, setting access permissions, and managing metadata can be performed.
- On Azure Data Lake Storage, Azure Storage Explorer enables you to navigate the file system, create and delete directories, upload and download files, view and edit file contents, and manage access permissions.
Conclusion
- Microsoft Azure Storage Explorer is a desktop application for managing Azure storage resources.
- It provides a user-friendly interface to navigate and interact with Azure Blob storage, Azure Files, Azure Queues, and Azure Tables.
- Developers, administrators, and Azure users can perform operations like uploading/downloading files, creating/deleting containers, viewing/editing data, and managing storage account settings.
- Once connected, you can perform various operations specific to each storage type:
- For Table Storage:
Store structured data, manage tables, and query data. - For Blob Storage:
Upload/download files, manage containers, and configure storage settings. - For Queue Storage:
Create/delete queues, send/receive messages, and manage queue settings. - For File Storage:
Access file shares, upload/download files, and manage file share settings.
- For Table Storage:
- Benefits of Microsoft Azure Storage Explorer include:
- User-friendly interface for easy management of Azure storage resources.
- Convenient storage operations without complex command-line tools.
- Cross-platform support for flexibility across different operating systems.
- Data visualization and editing capabilities for efficient data analysis.
- Connection with the Azure Storage Explorer can be established using the following ways:
- Azure Active Directory (Azure AD) for authentication.
- Shared Access Signature (SAS) connection string.
