Azure Load Balancer
Overview
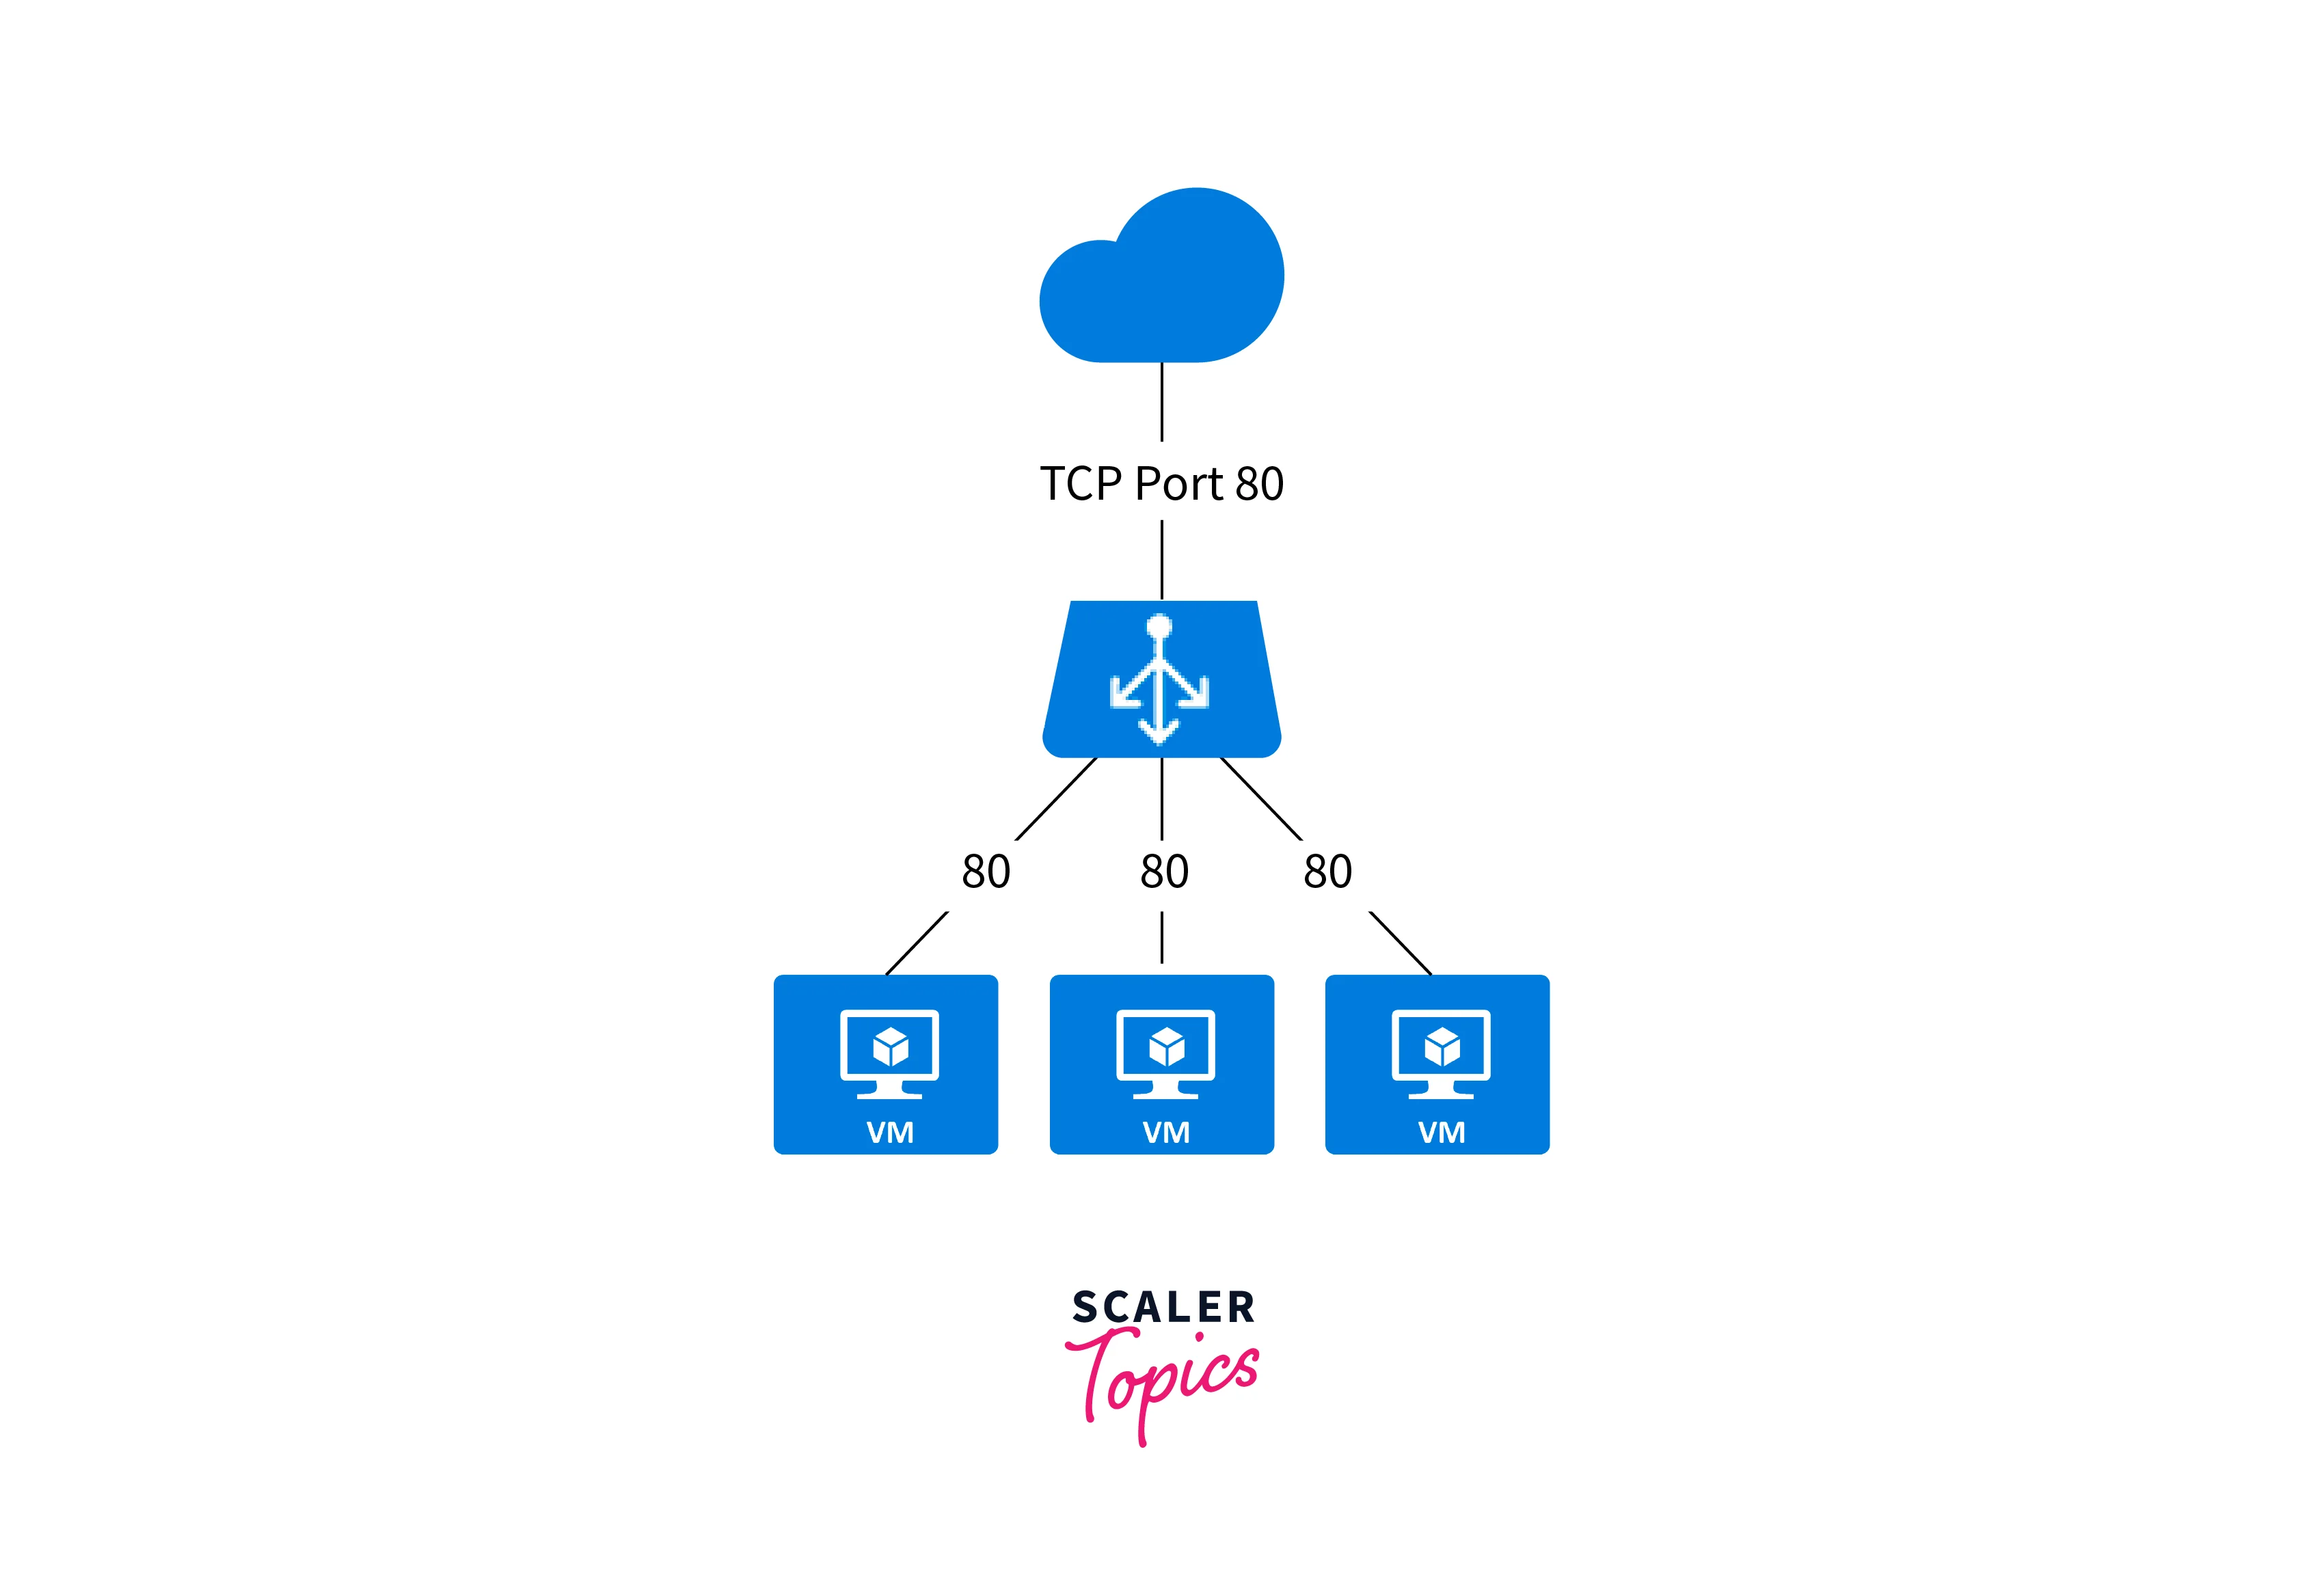
Load Balancer in Azure is a high-performance, scalable, and fully-managed load-balancing service offered by Microsoft Azure. It distributes incoming network traffic across multiple backend resources, such as virtual machines or machine scale sets, to ensure high availability and optimal resource utilization. With public and internal load balancing support, it plays a critical role in building reliable and highly available applications in Azure cloud environments.
What is Azure Load Balancer?
Microsoft Azure offers a cloud-based load-balancing service called Azure Load Balancer. It is a network load balancer that helps distribute incoming network traffic across multiple virtual machines (VMs) or instances within a virtual machine scale set in an Azure Virtual Network. The primary purpose of Azure Load Balancer is to ensure high availability and optimal performance for applications hosted on Azure.
Why Choose Azure Load Balancer?
There are several compelling reasons to choose Azure Load Balancer for load balancing and managing network traffic in your Azure environment:
-
High Availability:
Azure Load Balancer ensures high availability of your applications by distributing incoming traffic across healthy instances. It continuously monitors the health of instances, automatically removing any unhealthy ones from the rotation, ensuring that your applications remain accessible even during instance failures.
-
Scalability:
With Azure Load Balancer, your applications can easily handle increased traffic during peak times. It dynamically scales to accommodate traffic fluctuations, distributing requests evenly among available instances to maintain optimal performance.
-
Easy Integration:
Azure Load Balancer seamlessly integrates with other Azure services, making it straightforward to incorporate load balancing into your Azure environment. It works well with virtual machines, virtual machine scale sets, and availability sets.
-
Health Probing:
Azure Load Balancer performs health probes on instances to check their availability. It intelligently routes traffic only to healthy instances, ensuring that users are directed to responsive resources.
-
Cost-Effective:
Azure Load Balancer is available at no additional cost for Azure Virtual Machines. This makes it a cost-effective option for load balancing your virtual machines and applications in the Azure cloud.
What are the types of Load Balancer in Azure?
The two types of load balancer in Azure are:
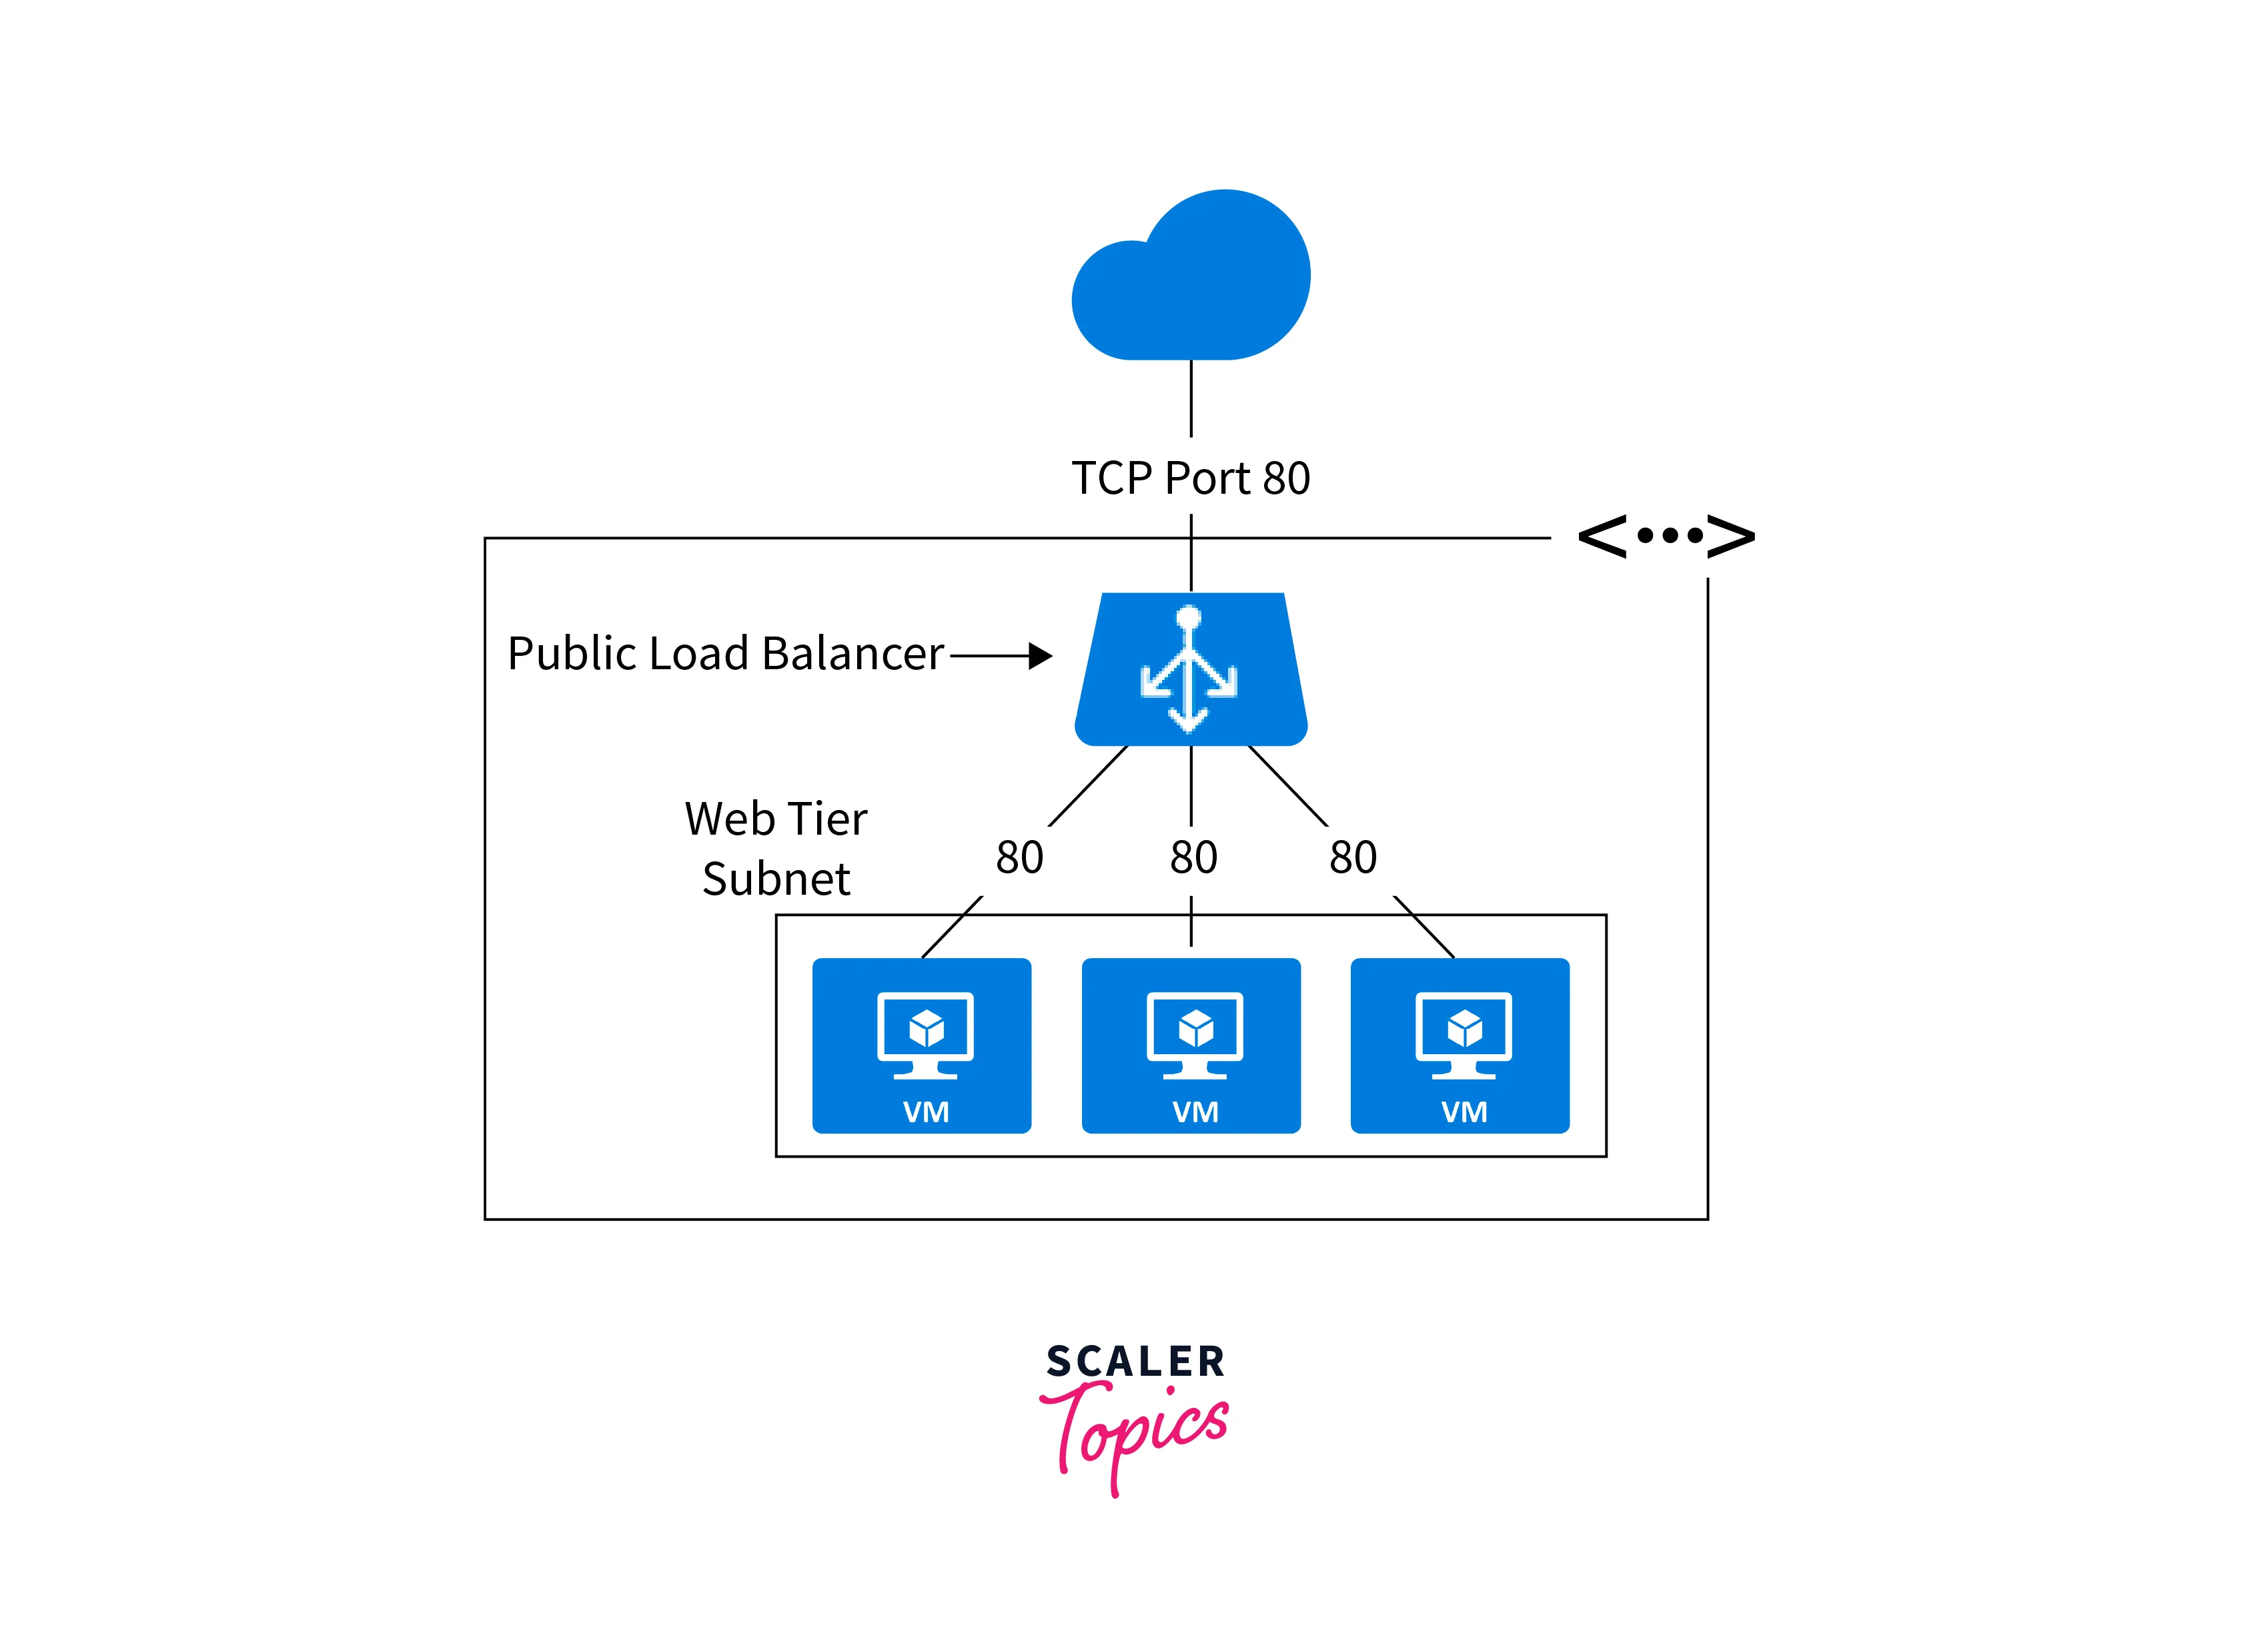
Public Load Balancer
- A Public Load Balancer is used to distribute incoming traffic from the internet to virtual machines or services that are exposed publicly.
- It provides a public IP address as the entry point for external users to access your applications.
- Public Load Balancer is commonly used for internet-facing applications, web servers, and other services that need to be accessible from the public internet.
Internal/ Private Load Balancer
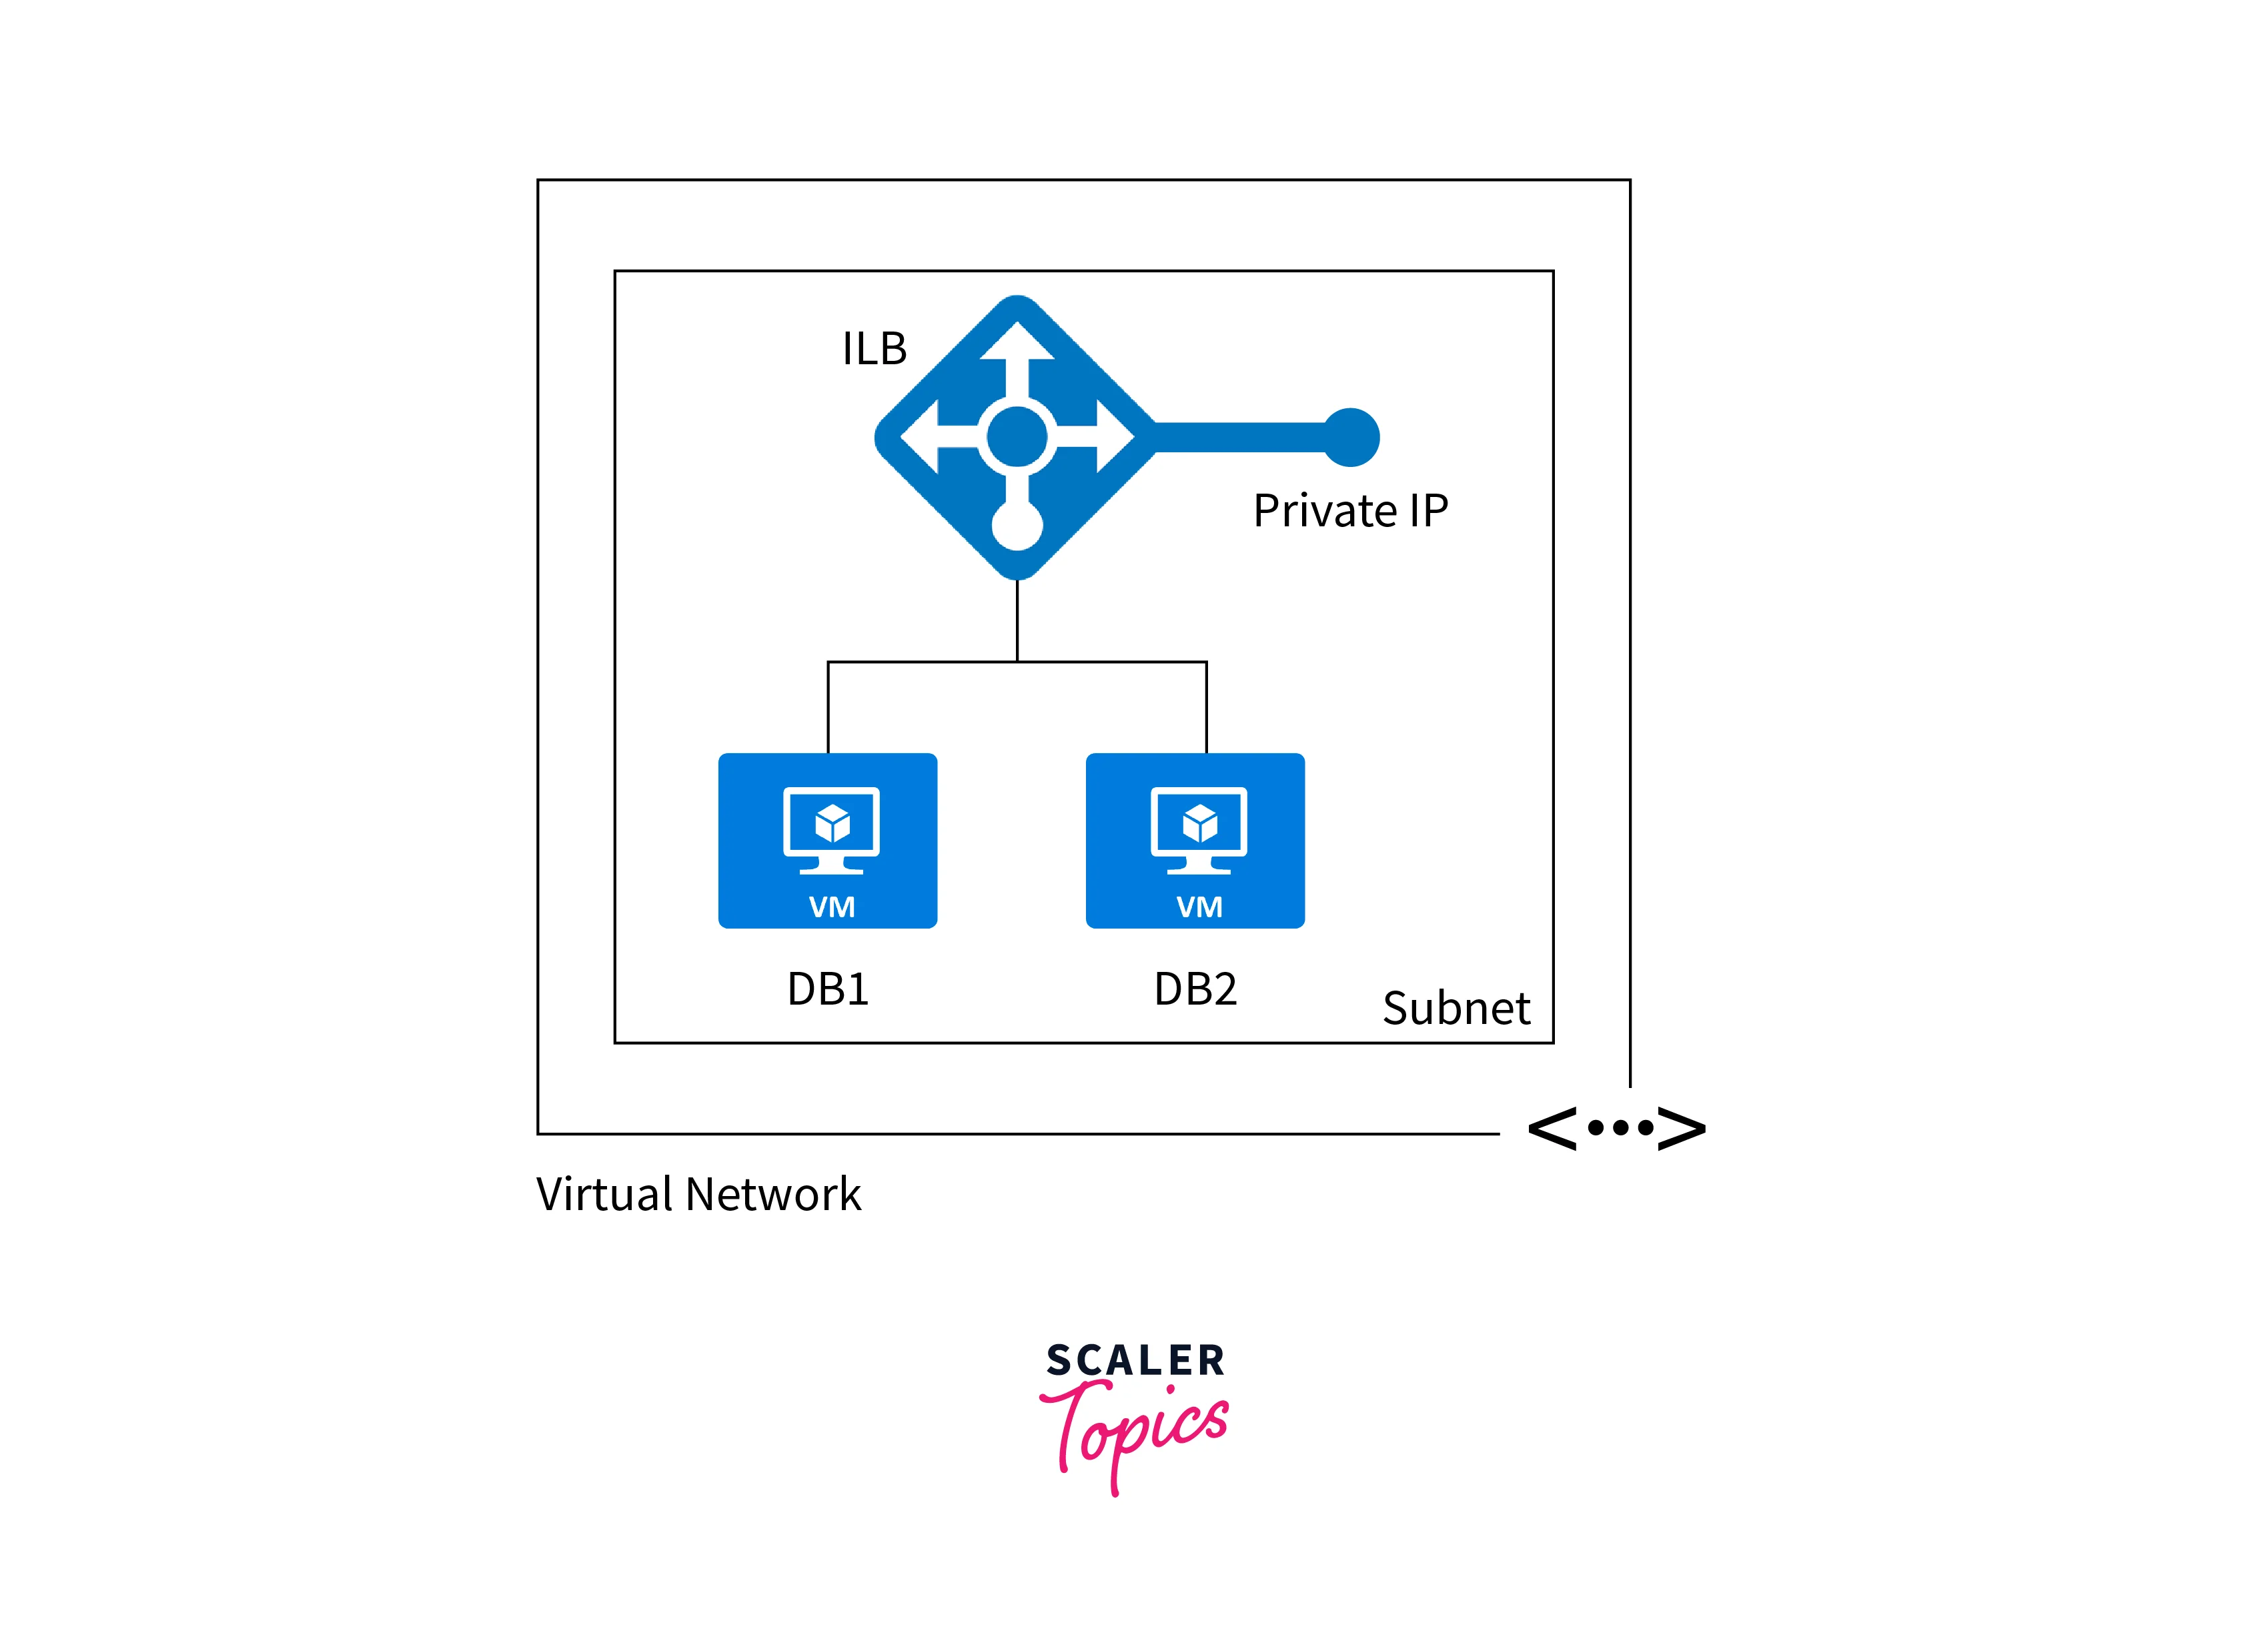
- An Internal Load Balancer balances traffic between virtual machines or services within a virtual network (VNet) that are not directly accessible from the internet.
- It provides an internal IP address within the VNet, making it accessible only from within the virtual or peered virtual networks.
- Internal Load Balancer is ideal for applications that run backend services, databases, or any other components that should not be exposed to the public internet.
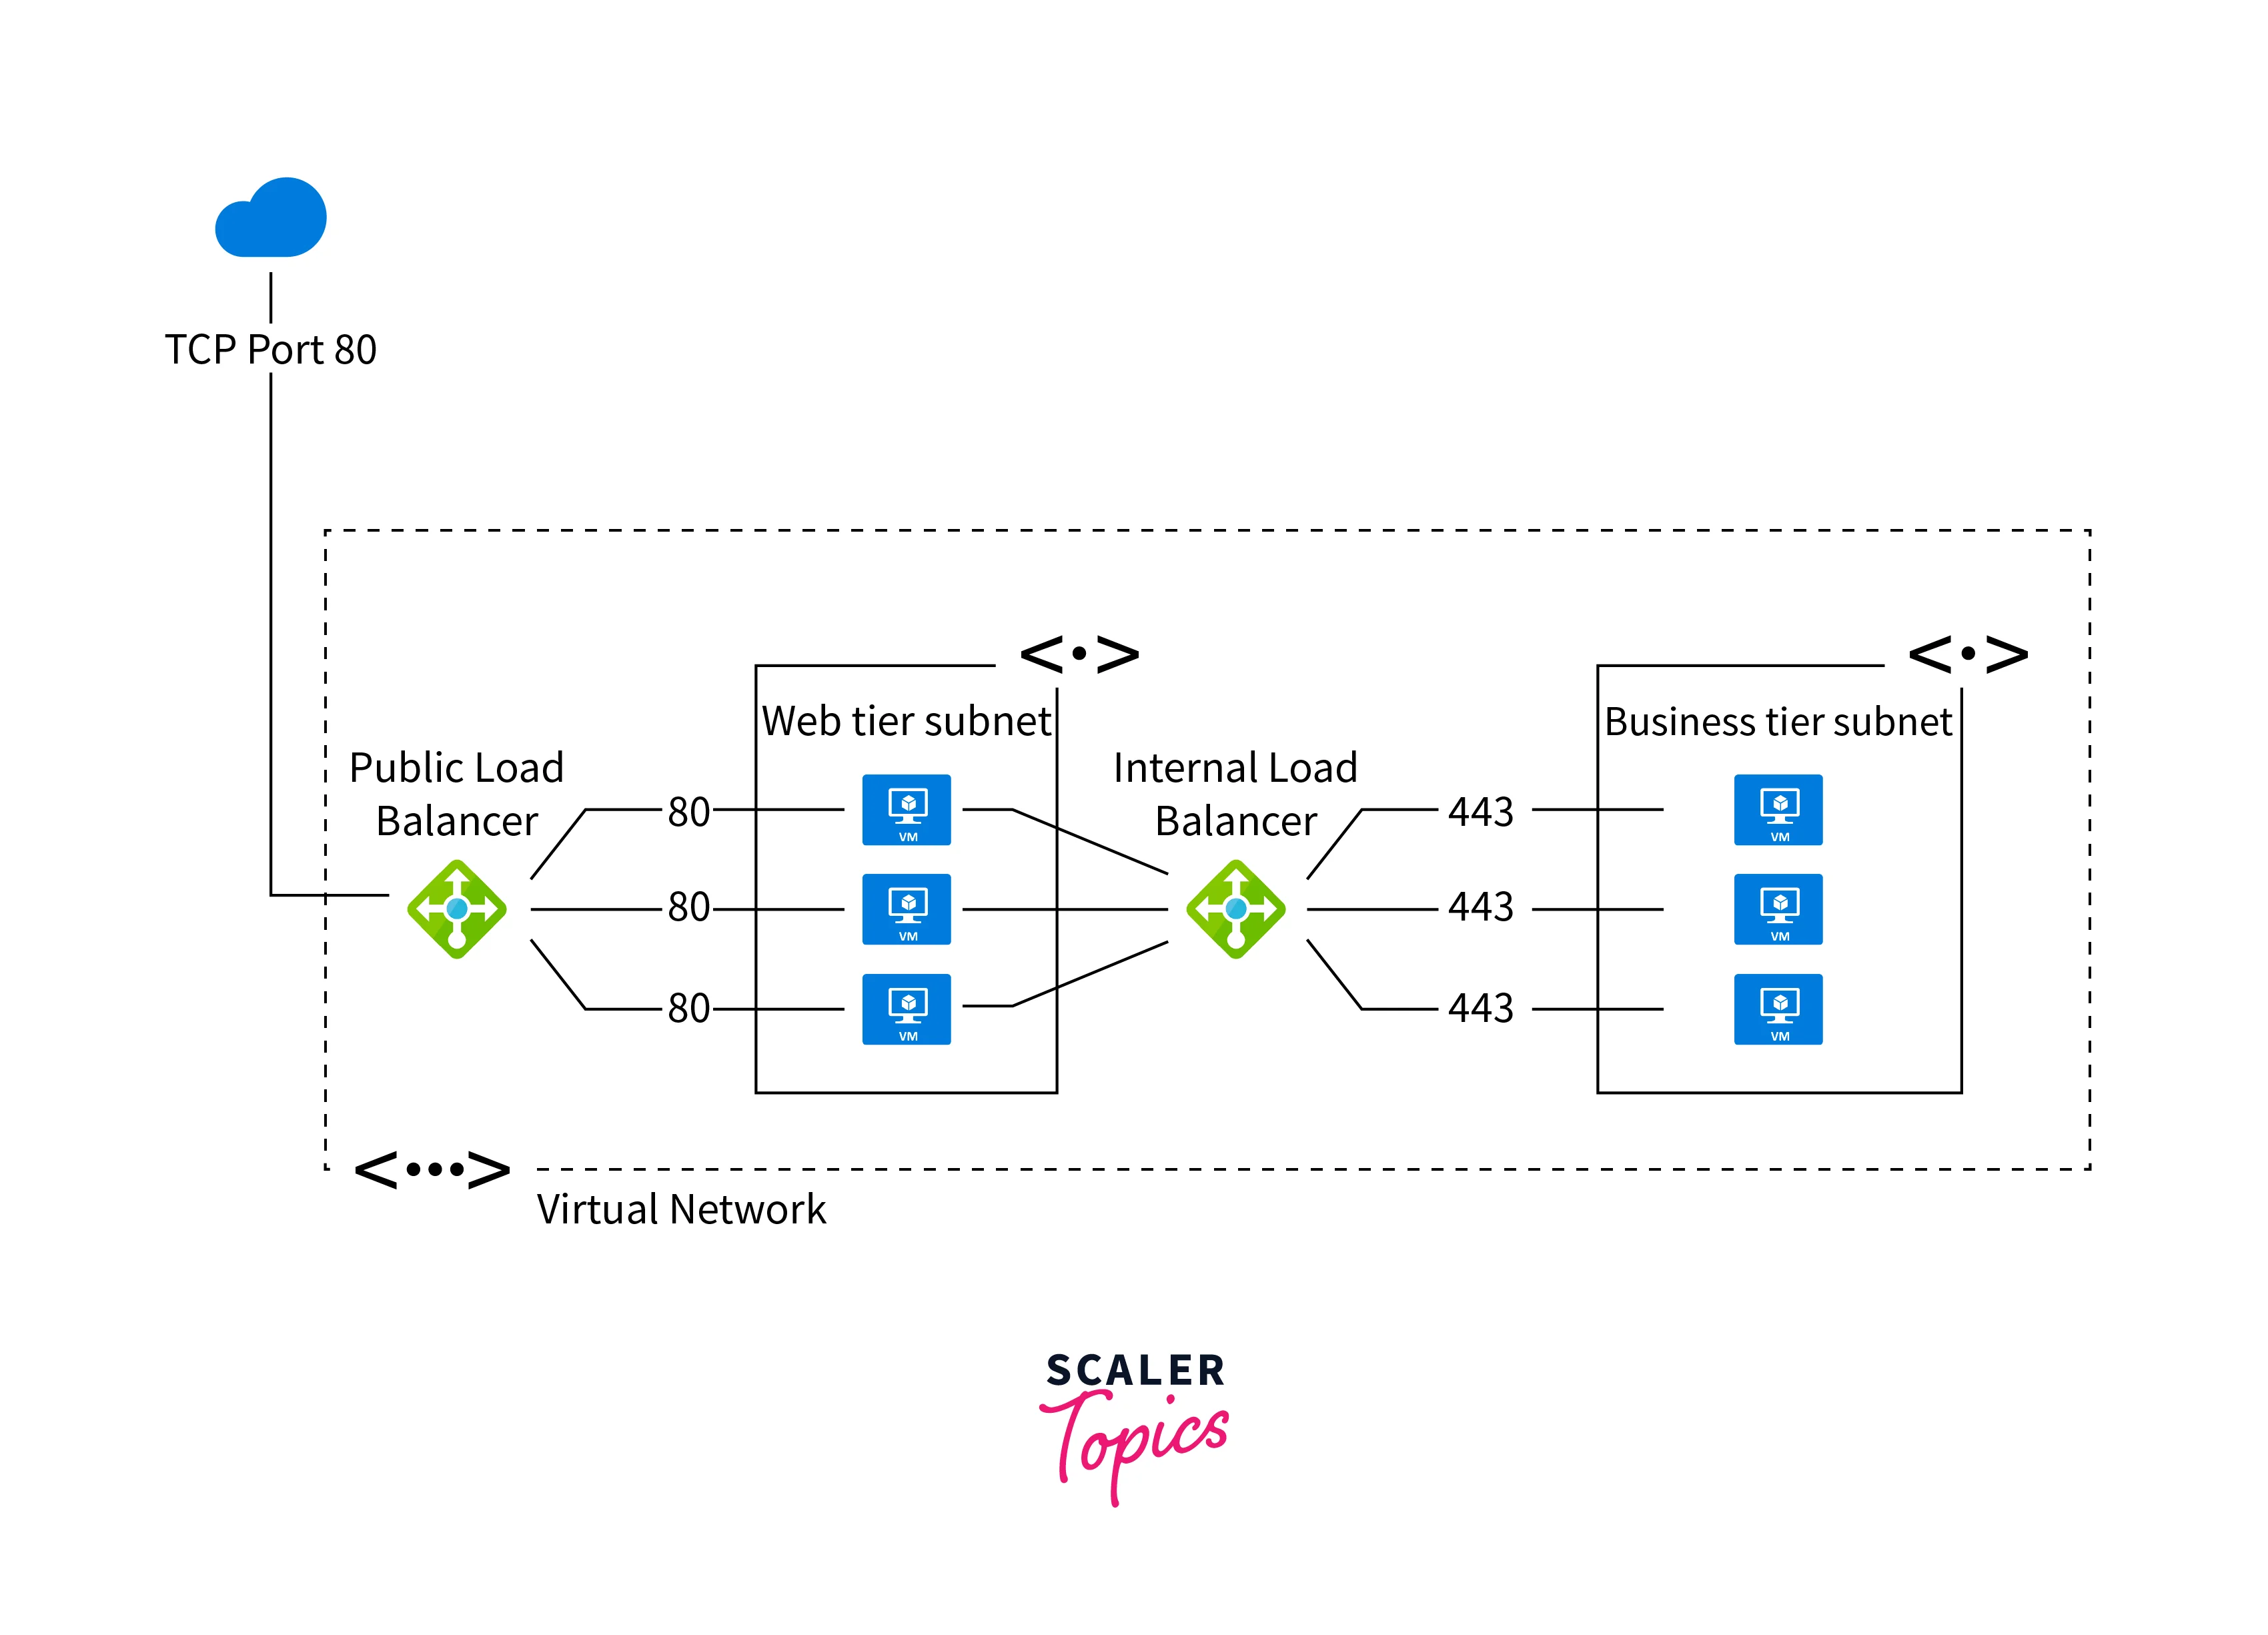
Both load balancers in Azure work at the transport layer (Layer 4 of the OSI model) and support TCP and UDP protocols. They provide high availability, automatic health monitoring, and traffic distribution across backend instances or services, ensuring your applications are scalable, resilient, and reliable. The choice between Public Load Balancer and Internal Load Balancer depends on whether your application needs to be accessible publicly from the internet or requires private access within a virtual network.
Features Of Azure Load Balancer
Features of Load Balancer in Azure include:
Load Balancing
- Distributes incoming network traffic across multiple virtual machines or instances within a backend pool.
- Ensures even workload distribution, preventing any single instance from being overloaded.
- Optimizes application performance and responsiveness during peak times.
Outbound Connection
- Allows virtual machines in a private network to initiate outbound connections to the internet.
- Enables virtual machines to access external resources, services, or APIs.
- Helps in scenarios where applications require external connectivity for updates or data retrieval.
Automatic Reconfiguration
- Automatically adjusts load balancing configuration as virtual machines are added or removed.
- Ensures seamless handling of changes in the backend pool, preventing disruption to services.
- Simplifies scalability and maintenance without manual intervention.
Application Agnostic and Transparent
- Operates at the transport layer (Layer 4), making it compatible with any TCP or UDP-based application.
- Works transparently with various applications, requiring no application-specific modifications.
- Offers versatility for load balancing a wide range of services and protocols.
Health Probes
- Regularly monitors the health of backend virtual machines or instances.
- Determines the availability and responsiveness of instances based on configurable health probes.
- Automatically removes unhealthy instances from the load balancer rotation to maintain application reliability.
Port Forwarding
- Allows setting up rules to redirect traffic from specific ports on the load balancer to backend virtual machines' specific ports.
- Facilitates exposing specific services or applications to external clients.
- Enables routing traffic to different backend services based on the port number.
Azure Load Balancing Rules
Load Balancer in Azure uses Load Balancing Rules to define how incoming network traffic should be distributed across the backend pool of virtual machines or instances. These rules allow you to configure the behavior of the load balancer, such as which ports to listen on, how to route traffic, and which backend instances should receive the traffic. Here are the key aspects of Azure Load Balancing Rules:
Frontend IP Configuration
- Specifies the frontend IP address and port on which the load balancer listens for incoming traffic.
- The frontend IP can be a public IP address for internet-facing load balancing or a private IP address for internal load balancing.
Backend Pool
- Defines the virtual machines or instances that will receive the incoming traffic from the load balancer.
- The backend pool can include virtual machines in an availability set, a virtual machine scale set, or individual virtual machines.
Protocol and Port Mapping
- Specifies the transport protocol (TCP or UDP) and port number on the frontend IP where the load balancer listens.
- Maps this frontend port to a backend port on the backend virtual machines where the traffic will be directed.
Load Balancing Algorithm
- Determines the method used to distribute incoming traffic among backend instances.
- Azure Load Balancer supports two algorithms:
- Default (Five-Tuple): Uses a combination of source IP address, source port, destination IP address, destination port, and protocol to determine the backend instance.
- Source IP Affinity: Directs packets with the same source IP to the same backend instance to maintain session affinity.
Health Probes
- Optionally, you can associate a health probe with each load balancing rule to monitor the health of backend instances.
- The health probe checks the instances' health status, and only healthy instances receive traffic from the load balancer.
Steps to Create An Azure Load Balancer
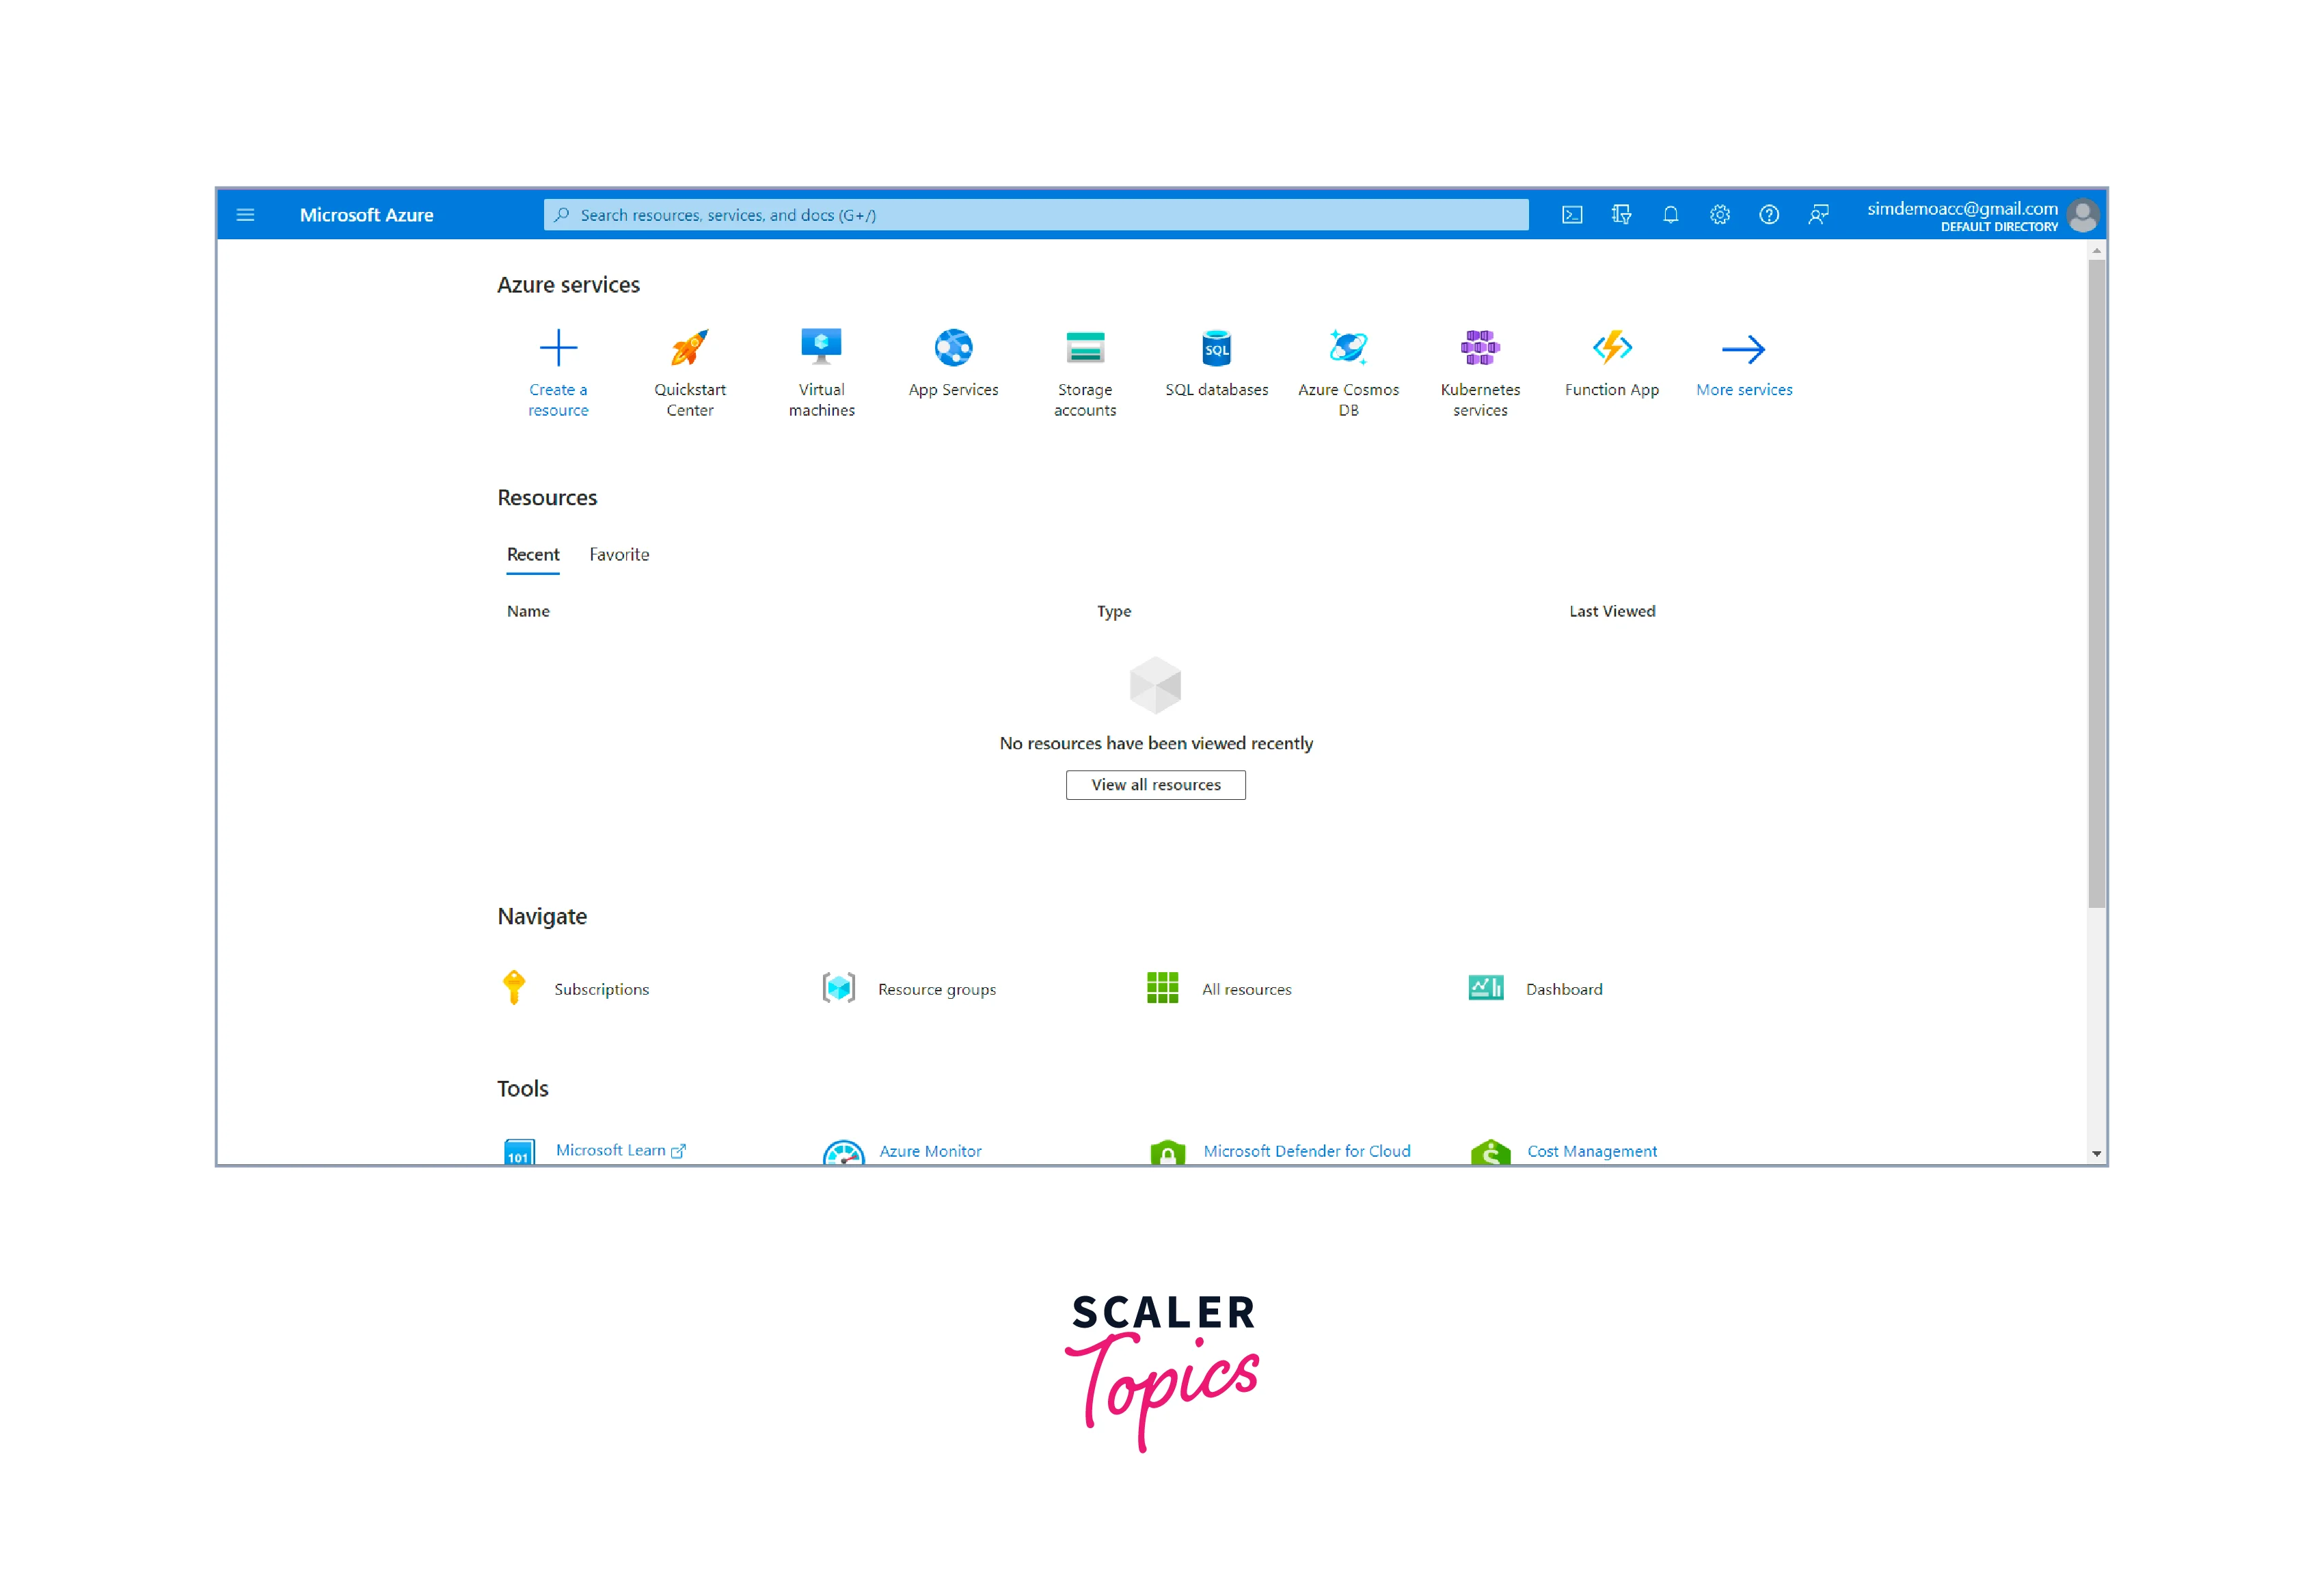
First, you need to Sign in to your Azure account at Azure Portal.
Once you sign in, you will be able to see a screen as shown below:
Create a Virtual Network
To start with, first, we will create a virtual network using the following steps:
-
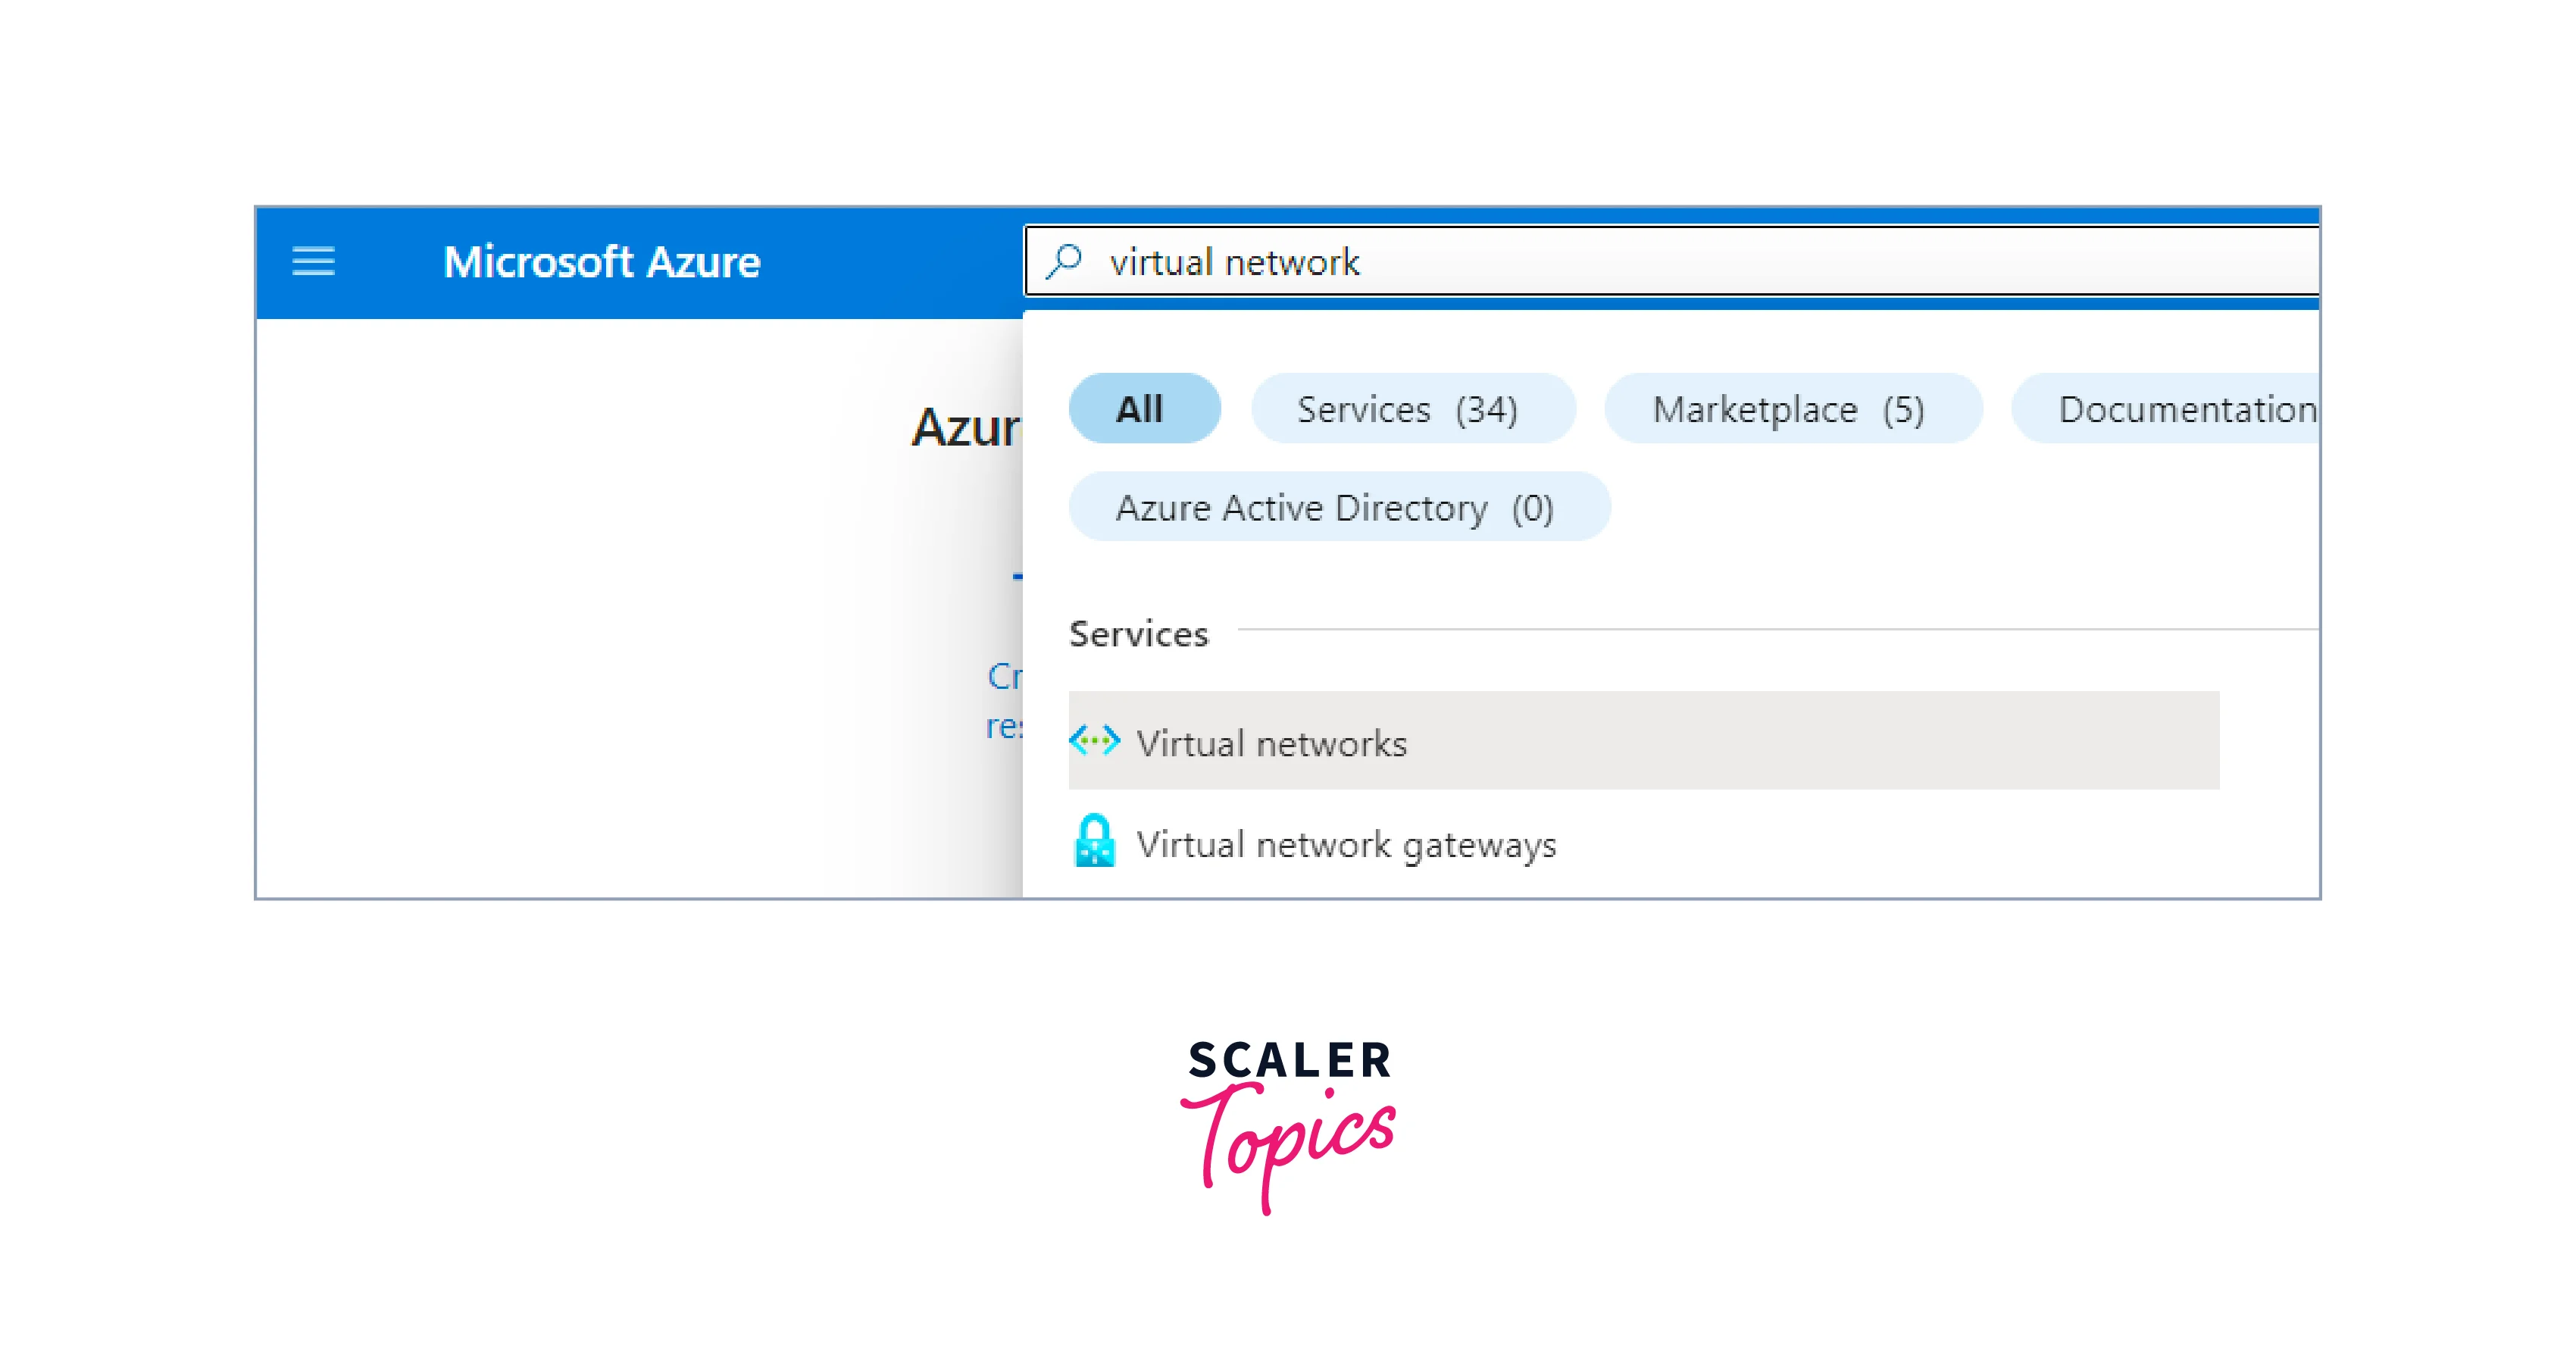
In the search bar, search for virtual network and select the Virtual Networks Resource from the dropdown.
-
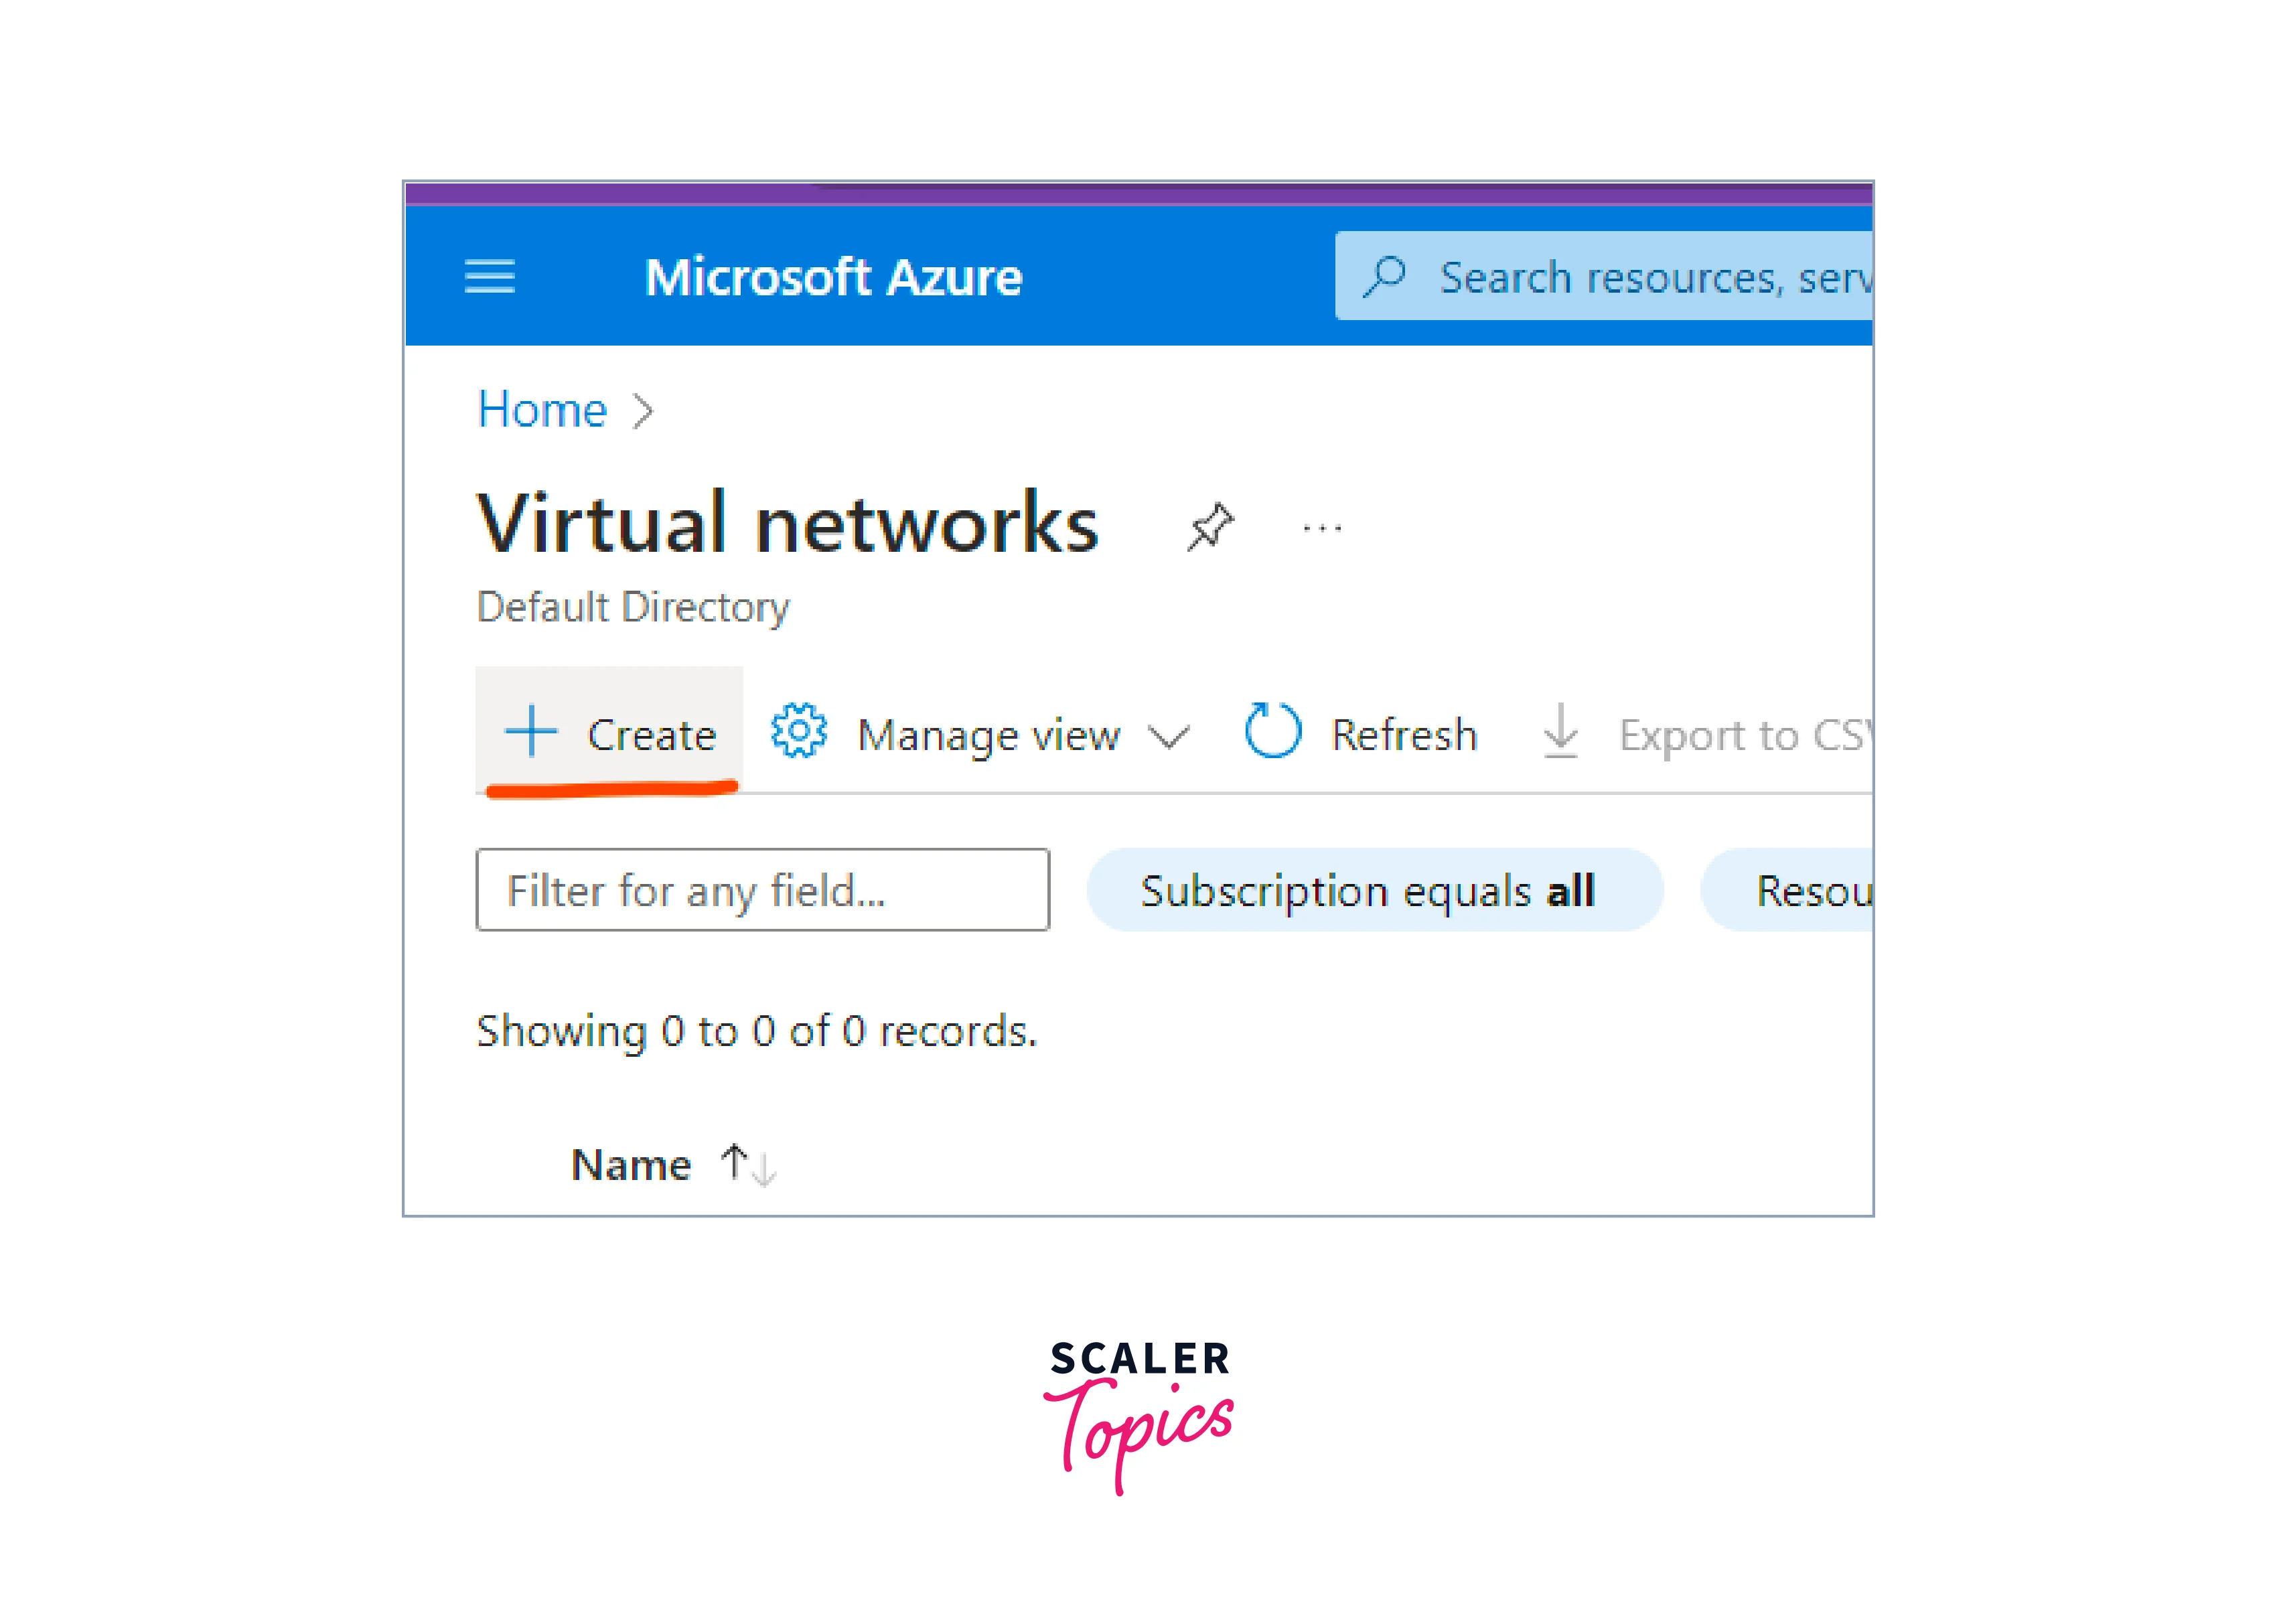
Now, you will see many options. Click on the Create button to create Virtual Network.
-
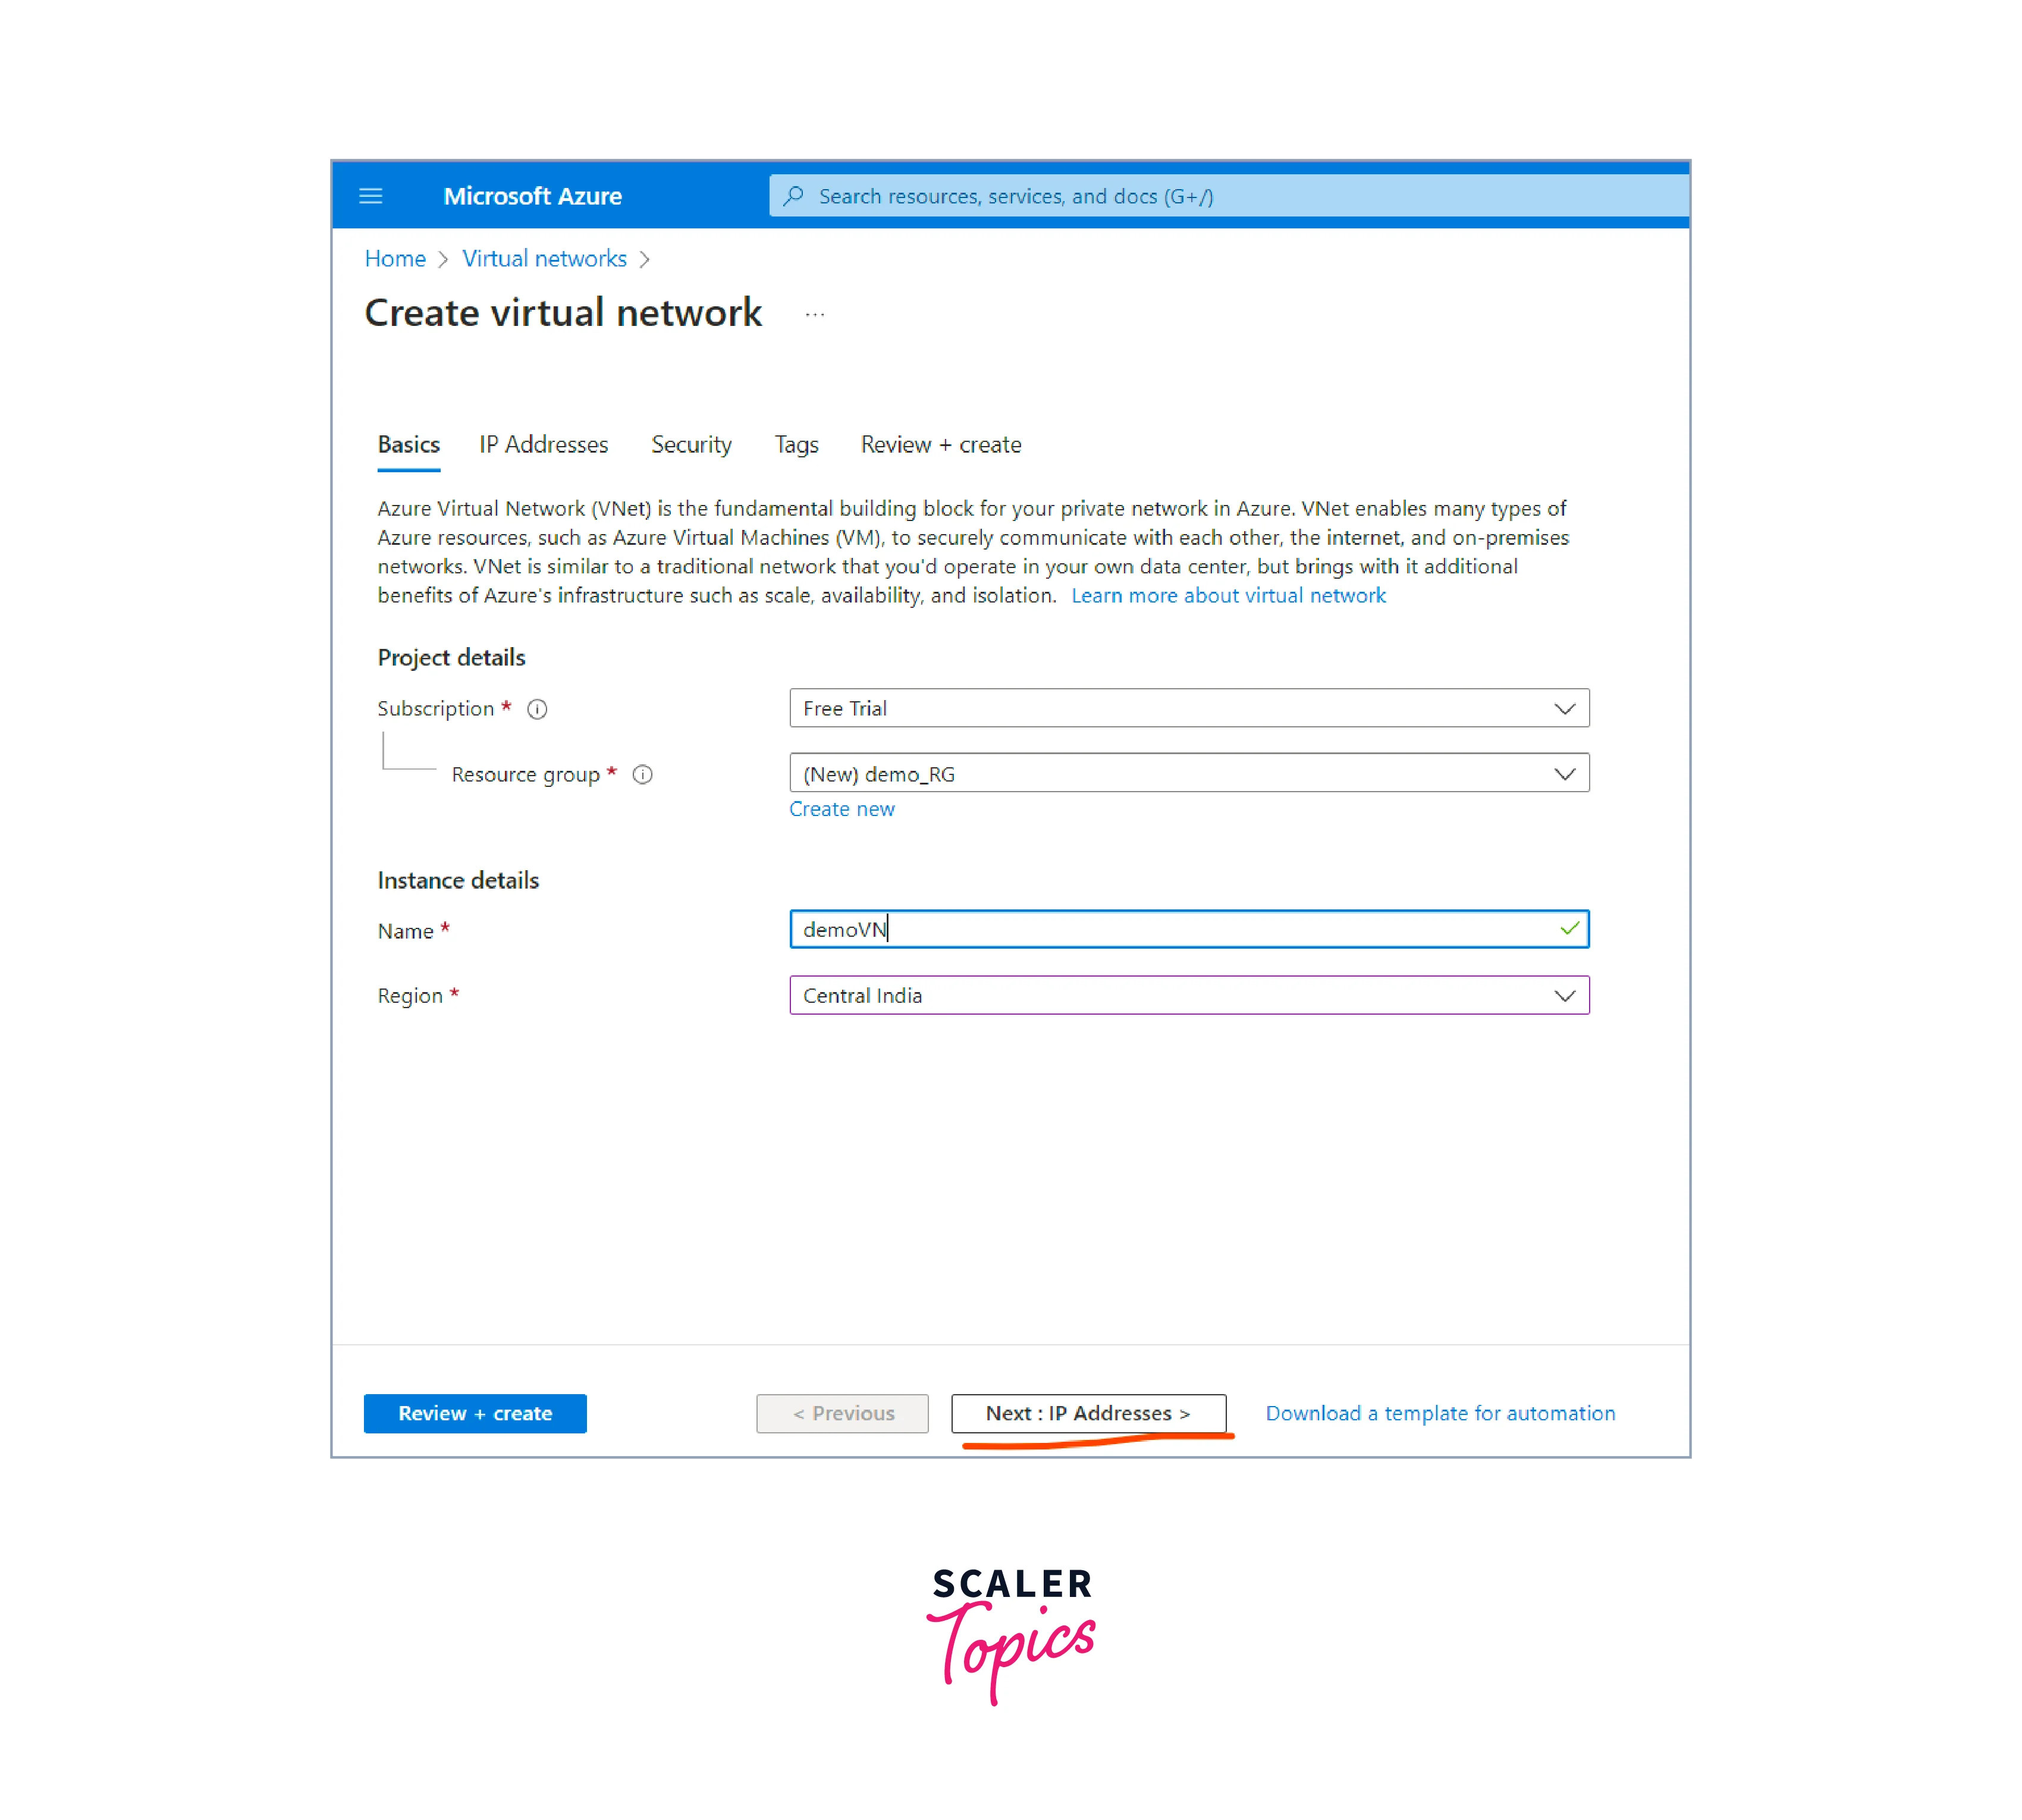
Fill in the required details on the next page
- Subscription: Select the appropriate subscription (if you have multiple subscriptions).
- Resource Group: Create a new resource group or select an existing one where you want to deploy the load balancer.
- Name: Provide a name to your instance.
- Region: Choose the Azure region where the load balancer will be deployed.
- Click on Next: Frontend IP Configuration.
-
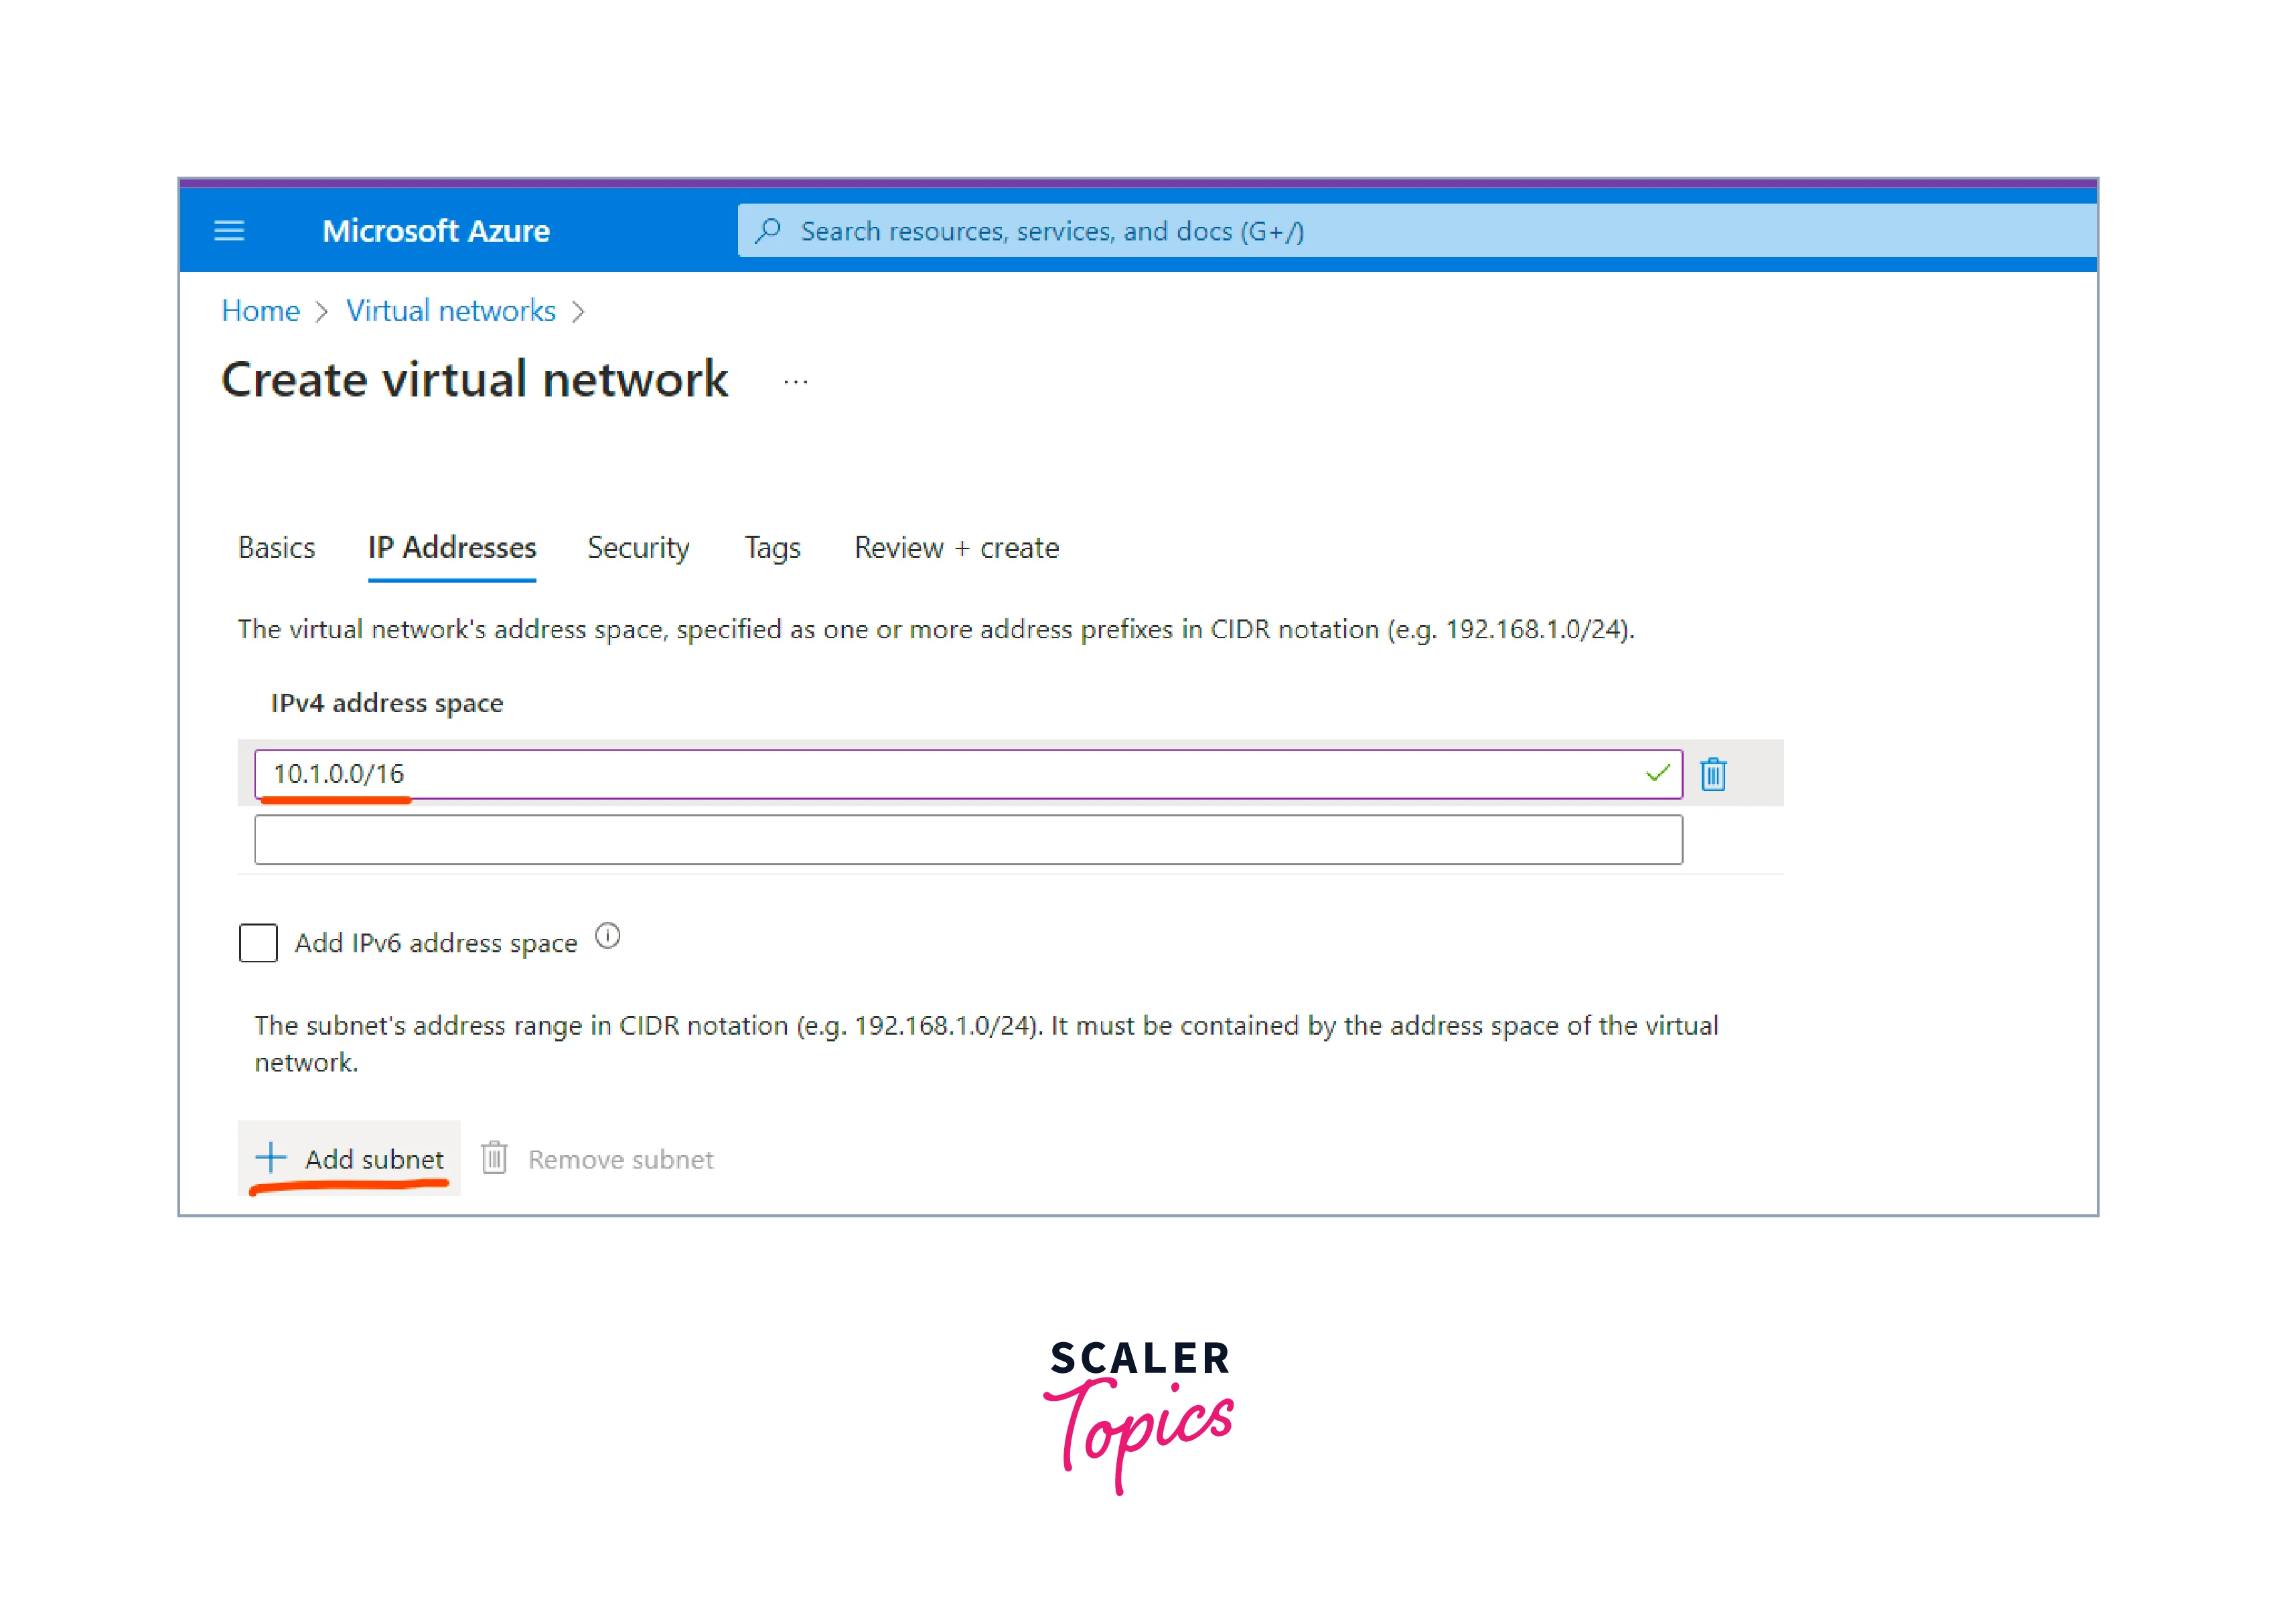
Leave the "IPv4 address space" in the next tab with its default value (e.g., 10.0.0.0/16), or customize it as needed. Next, hit the Add Subnet button.
-
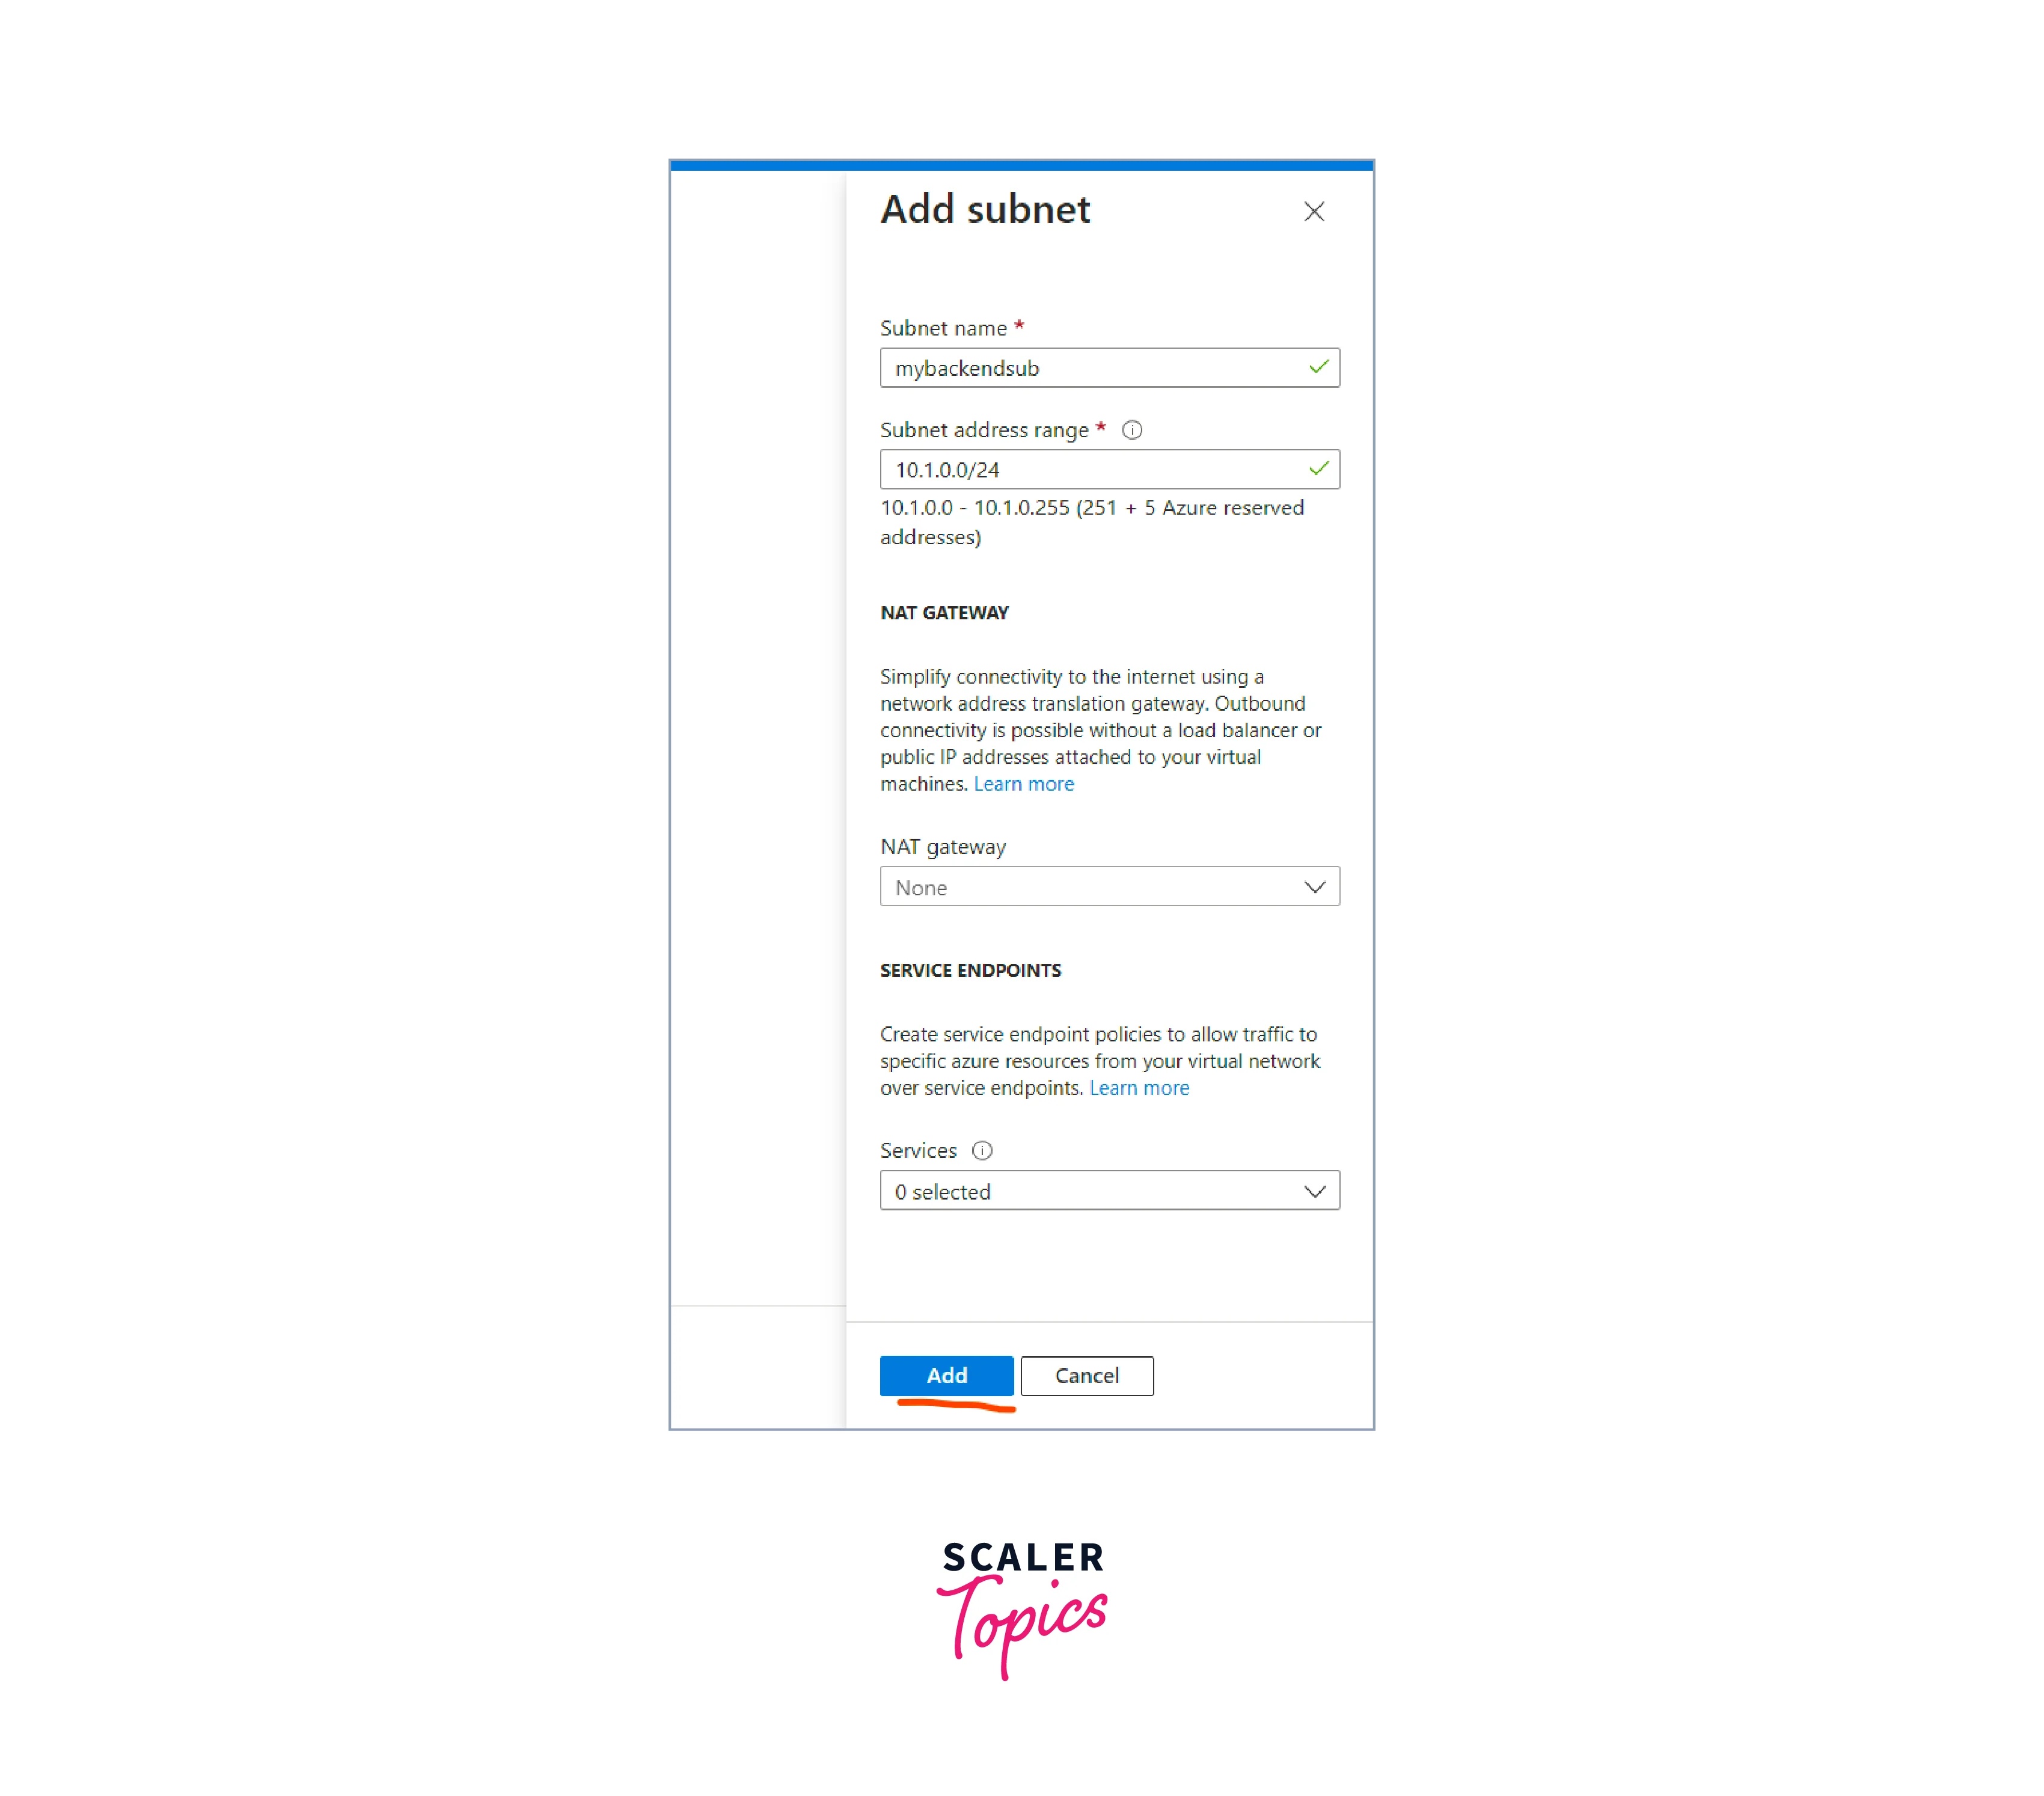
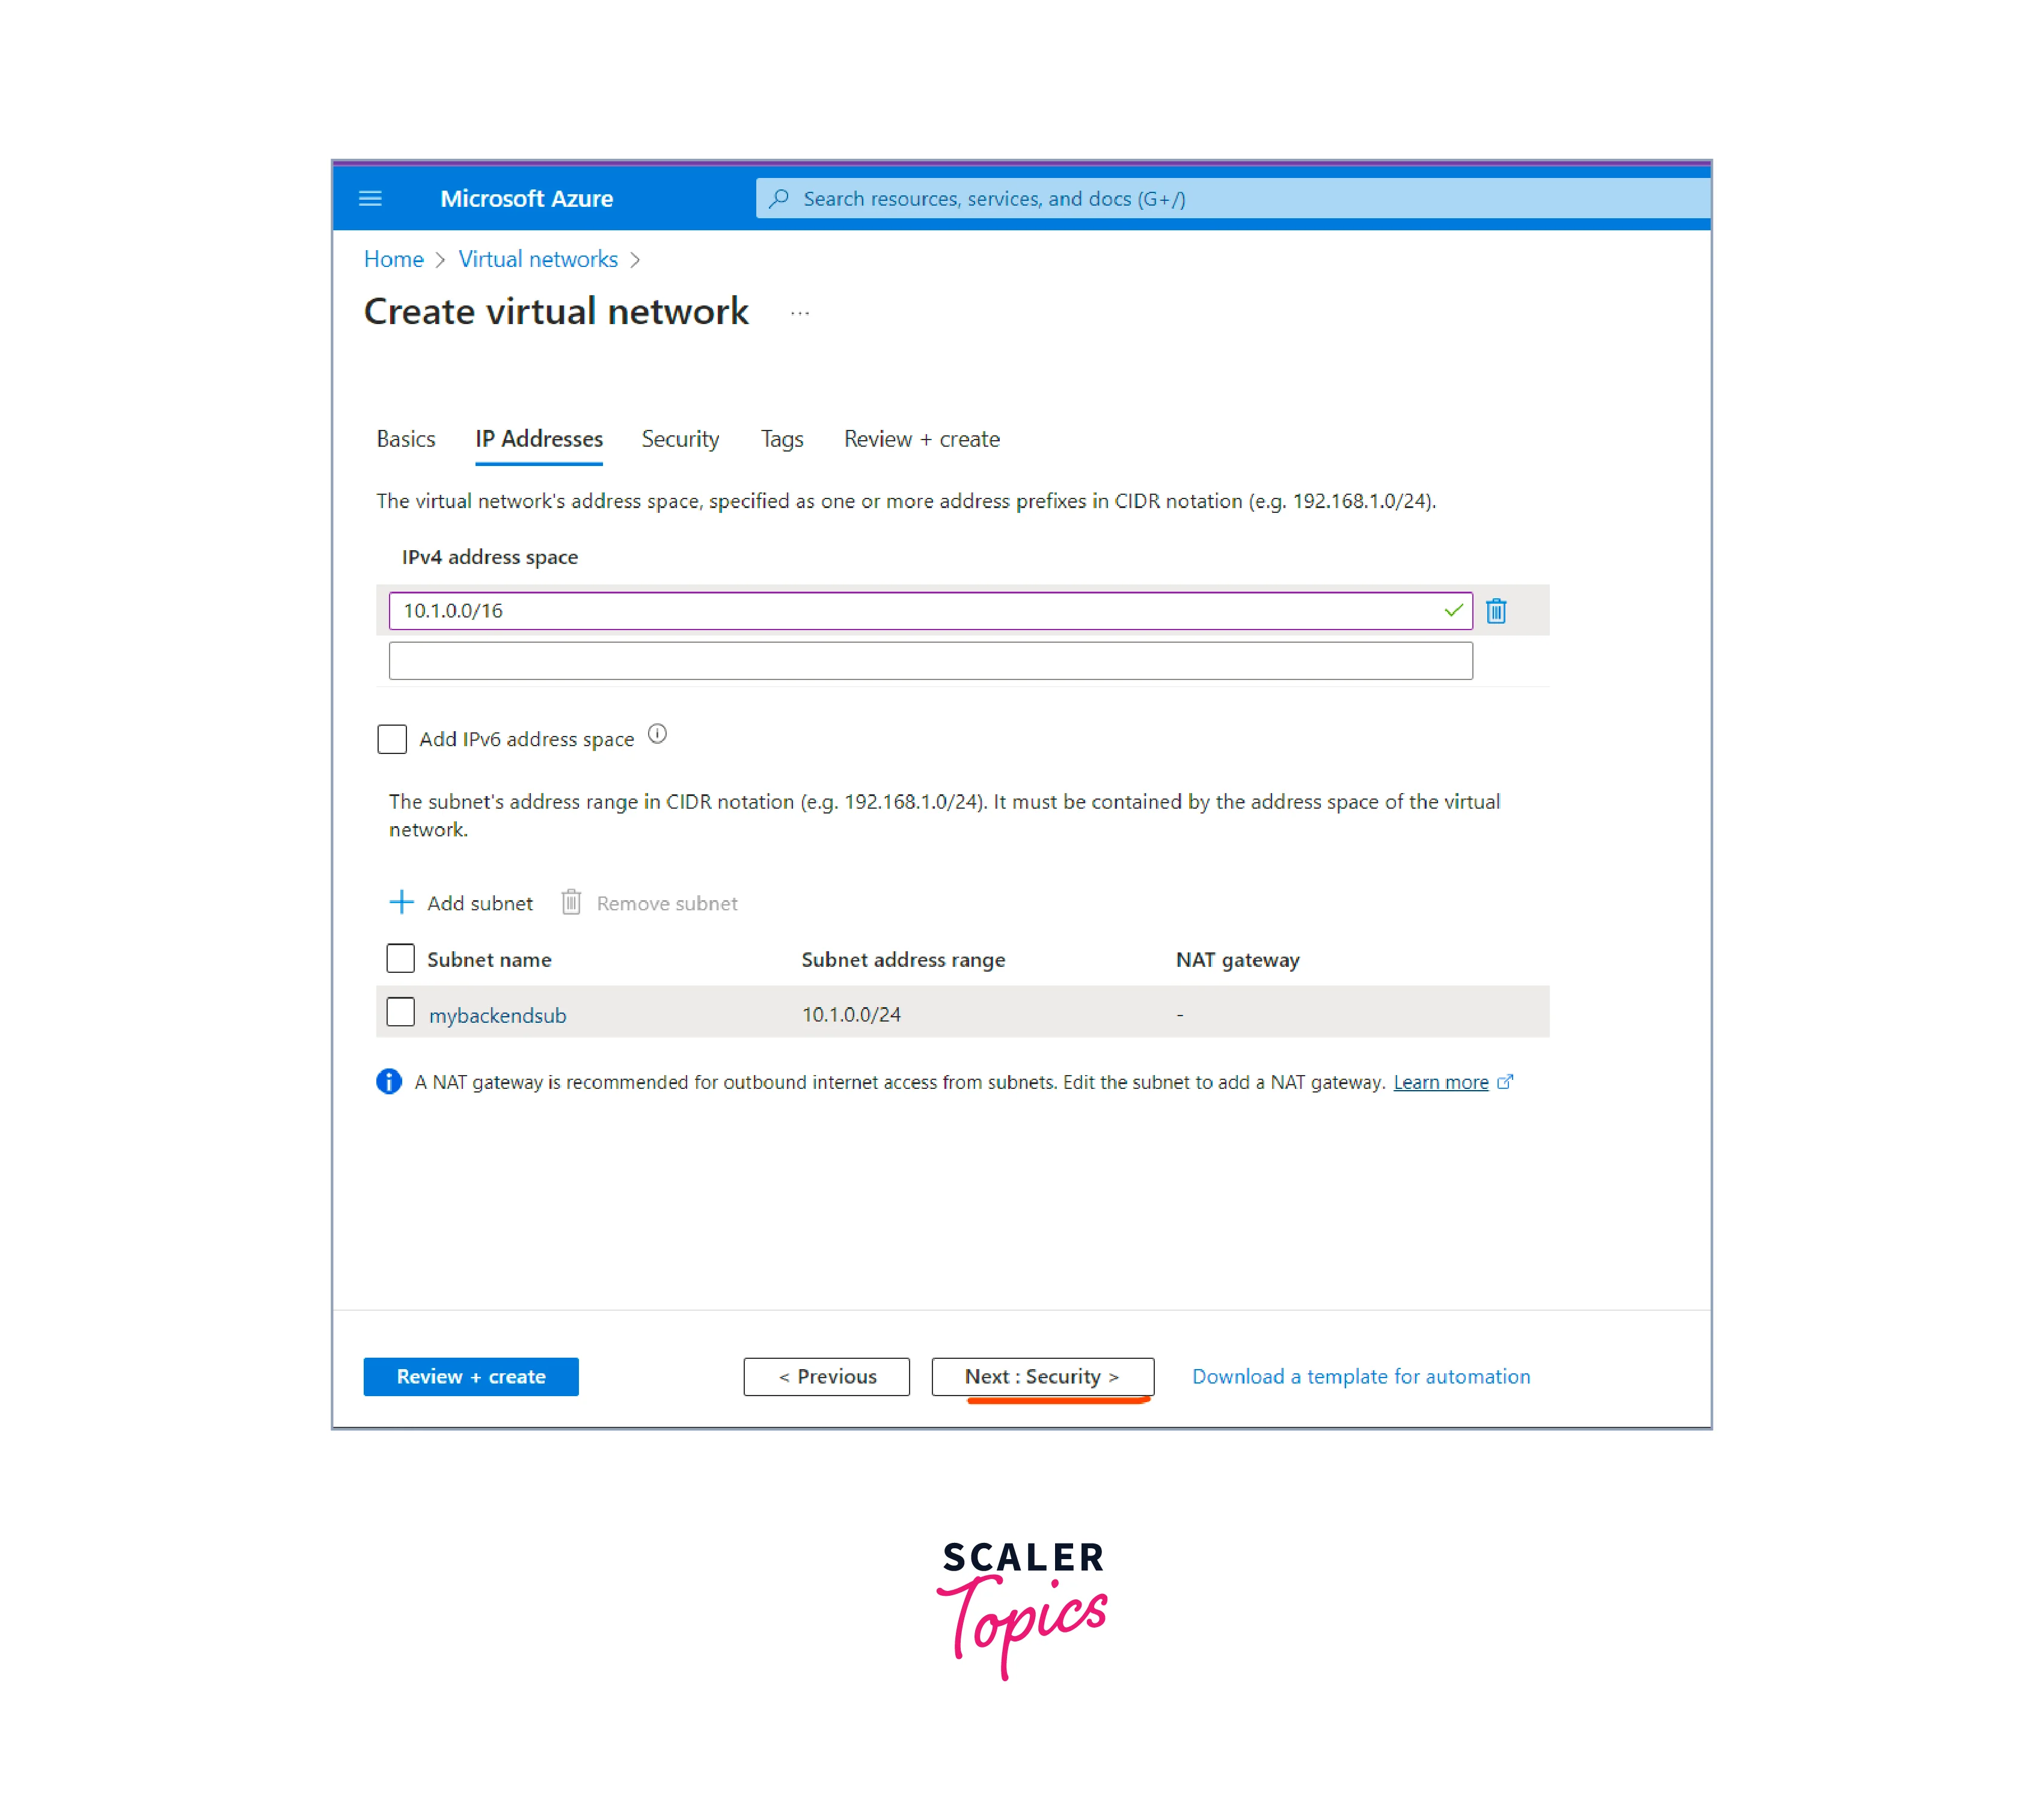
In the "Subnets" tab, you can create one or more subnets for your virtual network. Give your subnet a name, and specify an IP address range for the subnet (e.g., 10.0.1.0/24). Add it to the virtual network.
-
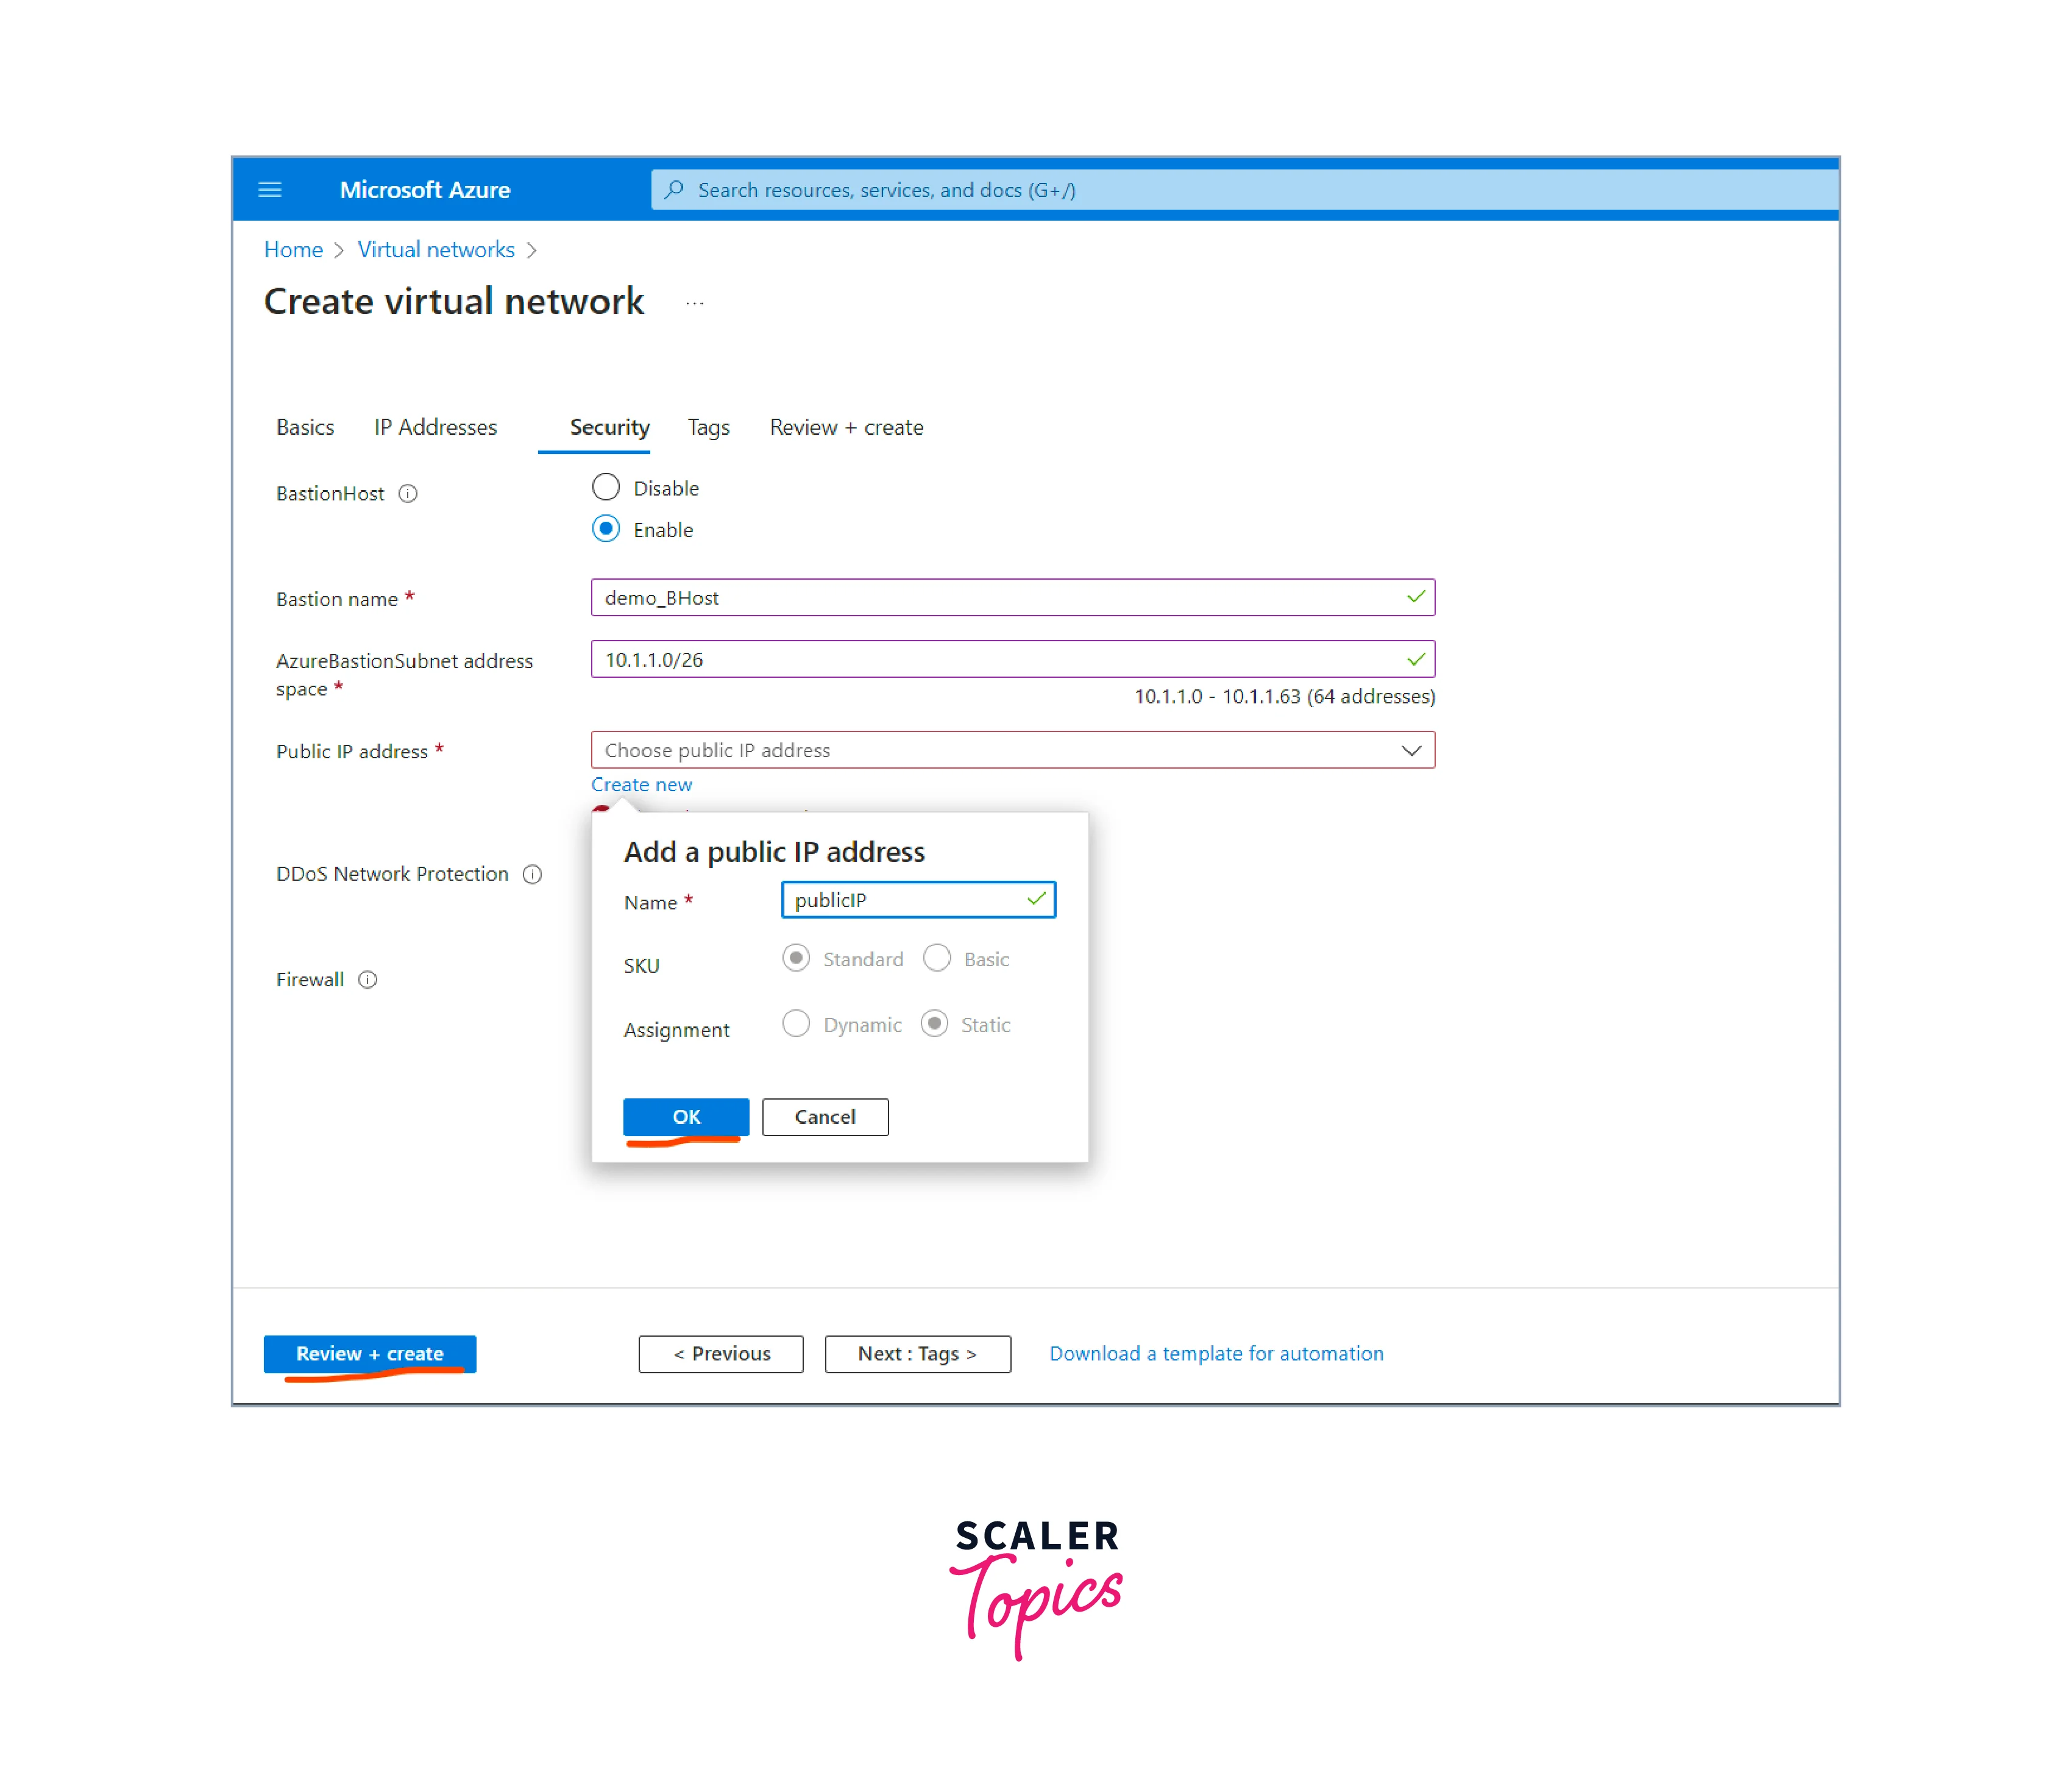
Next, the security needs to be configured.
-
In the "Security" and "Routing" tabs, you can configure network security groups (NSGs) to control inbound and outbound traffic and customize route tables if needed. These steps are optional but can provide additional security and control over network traffic.
-
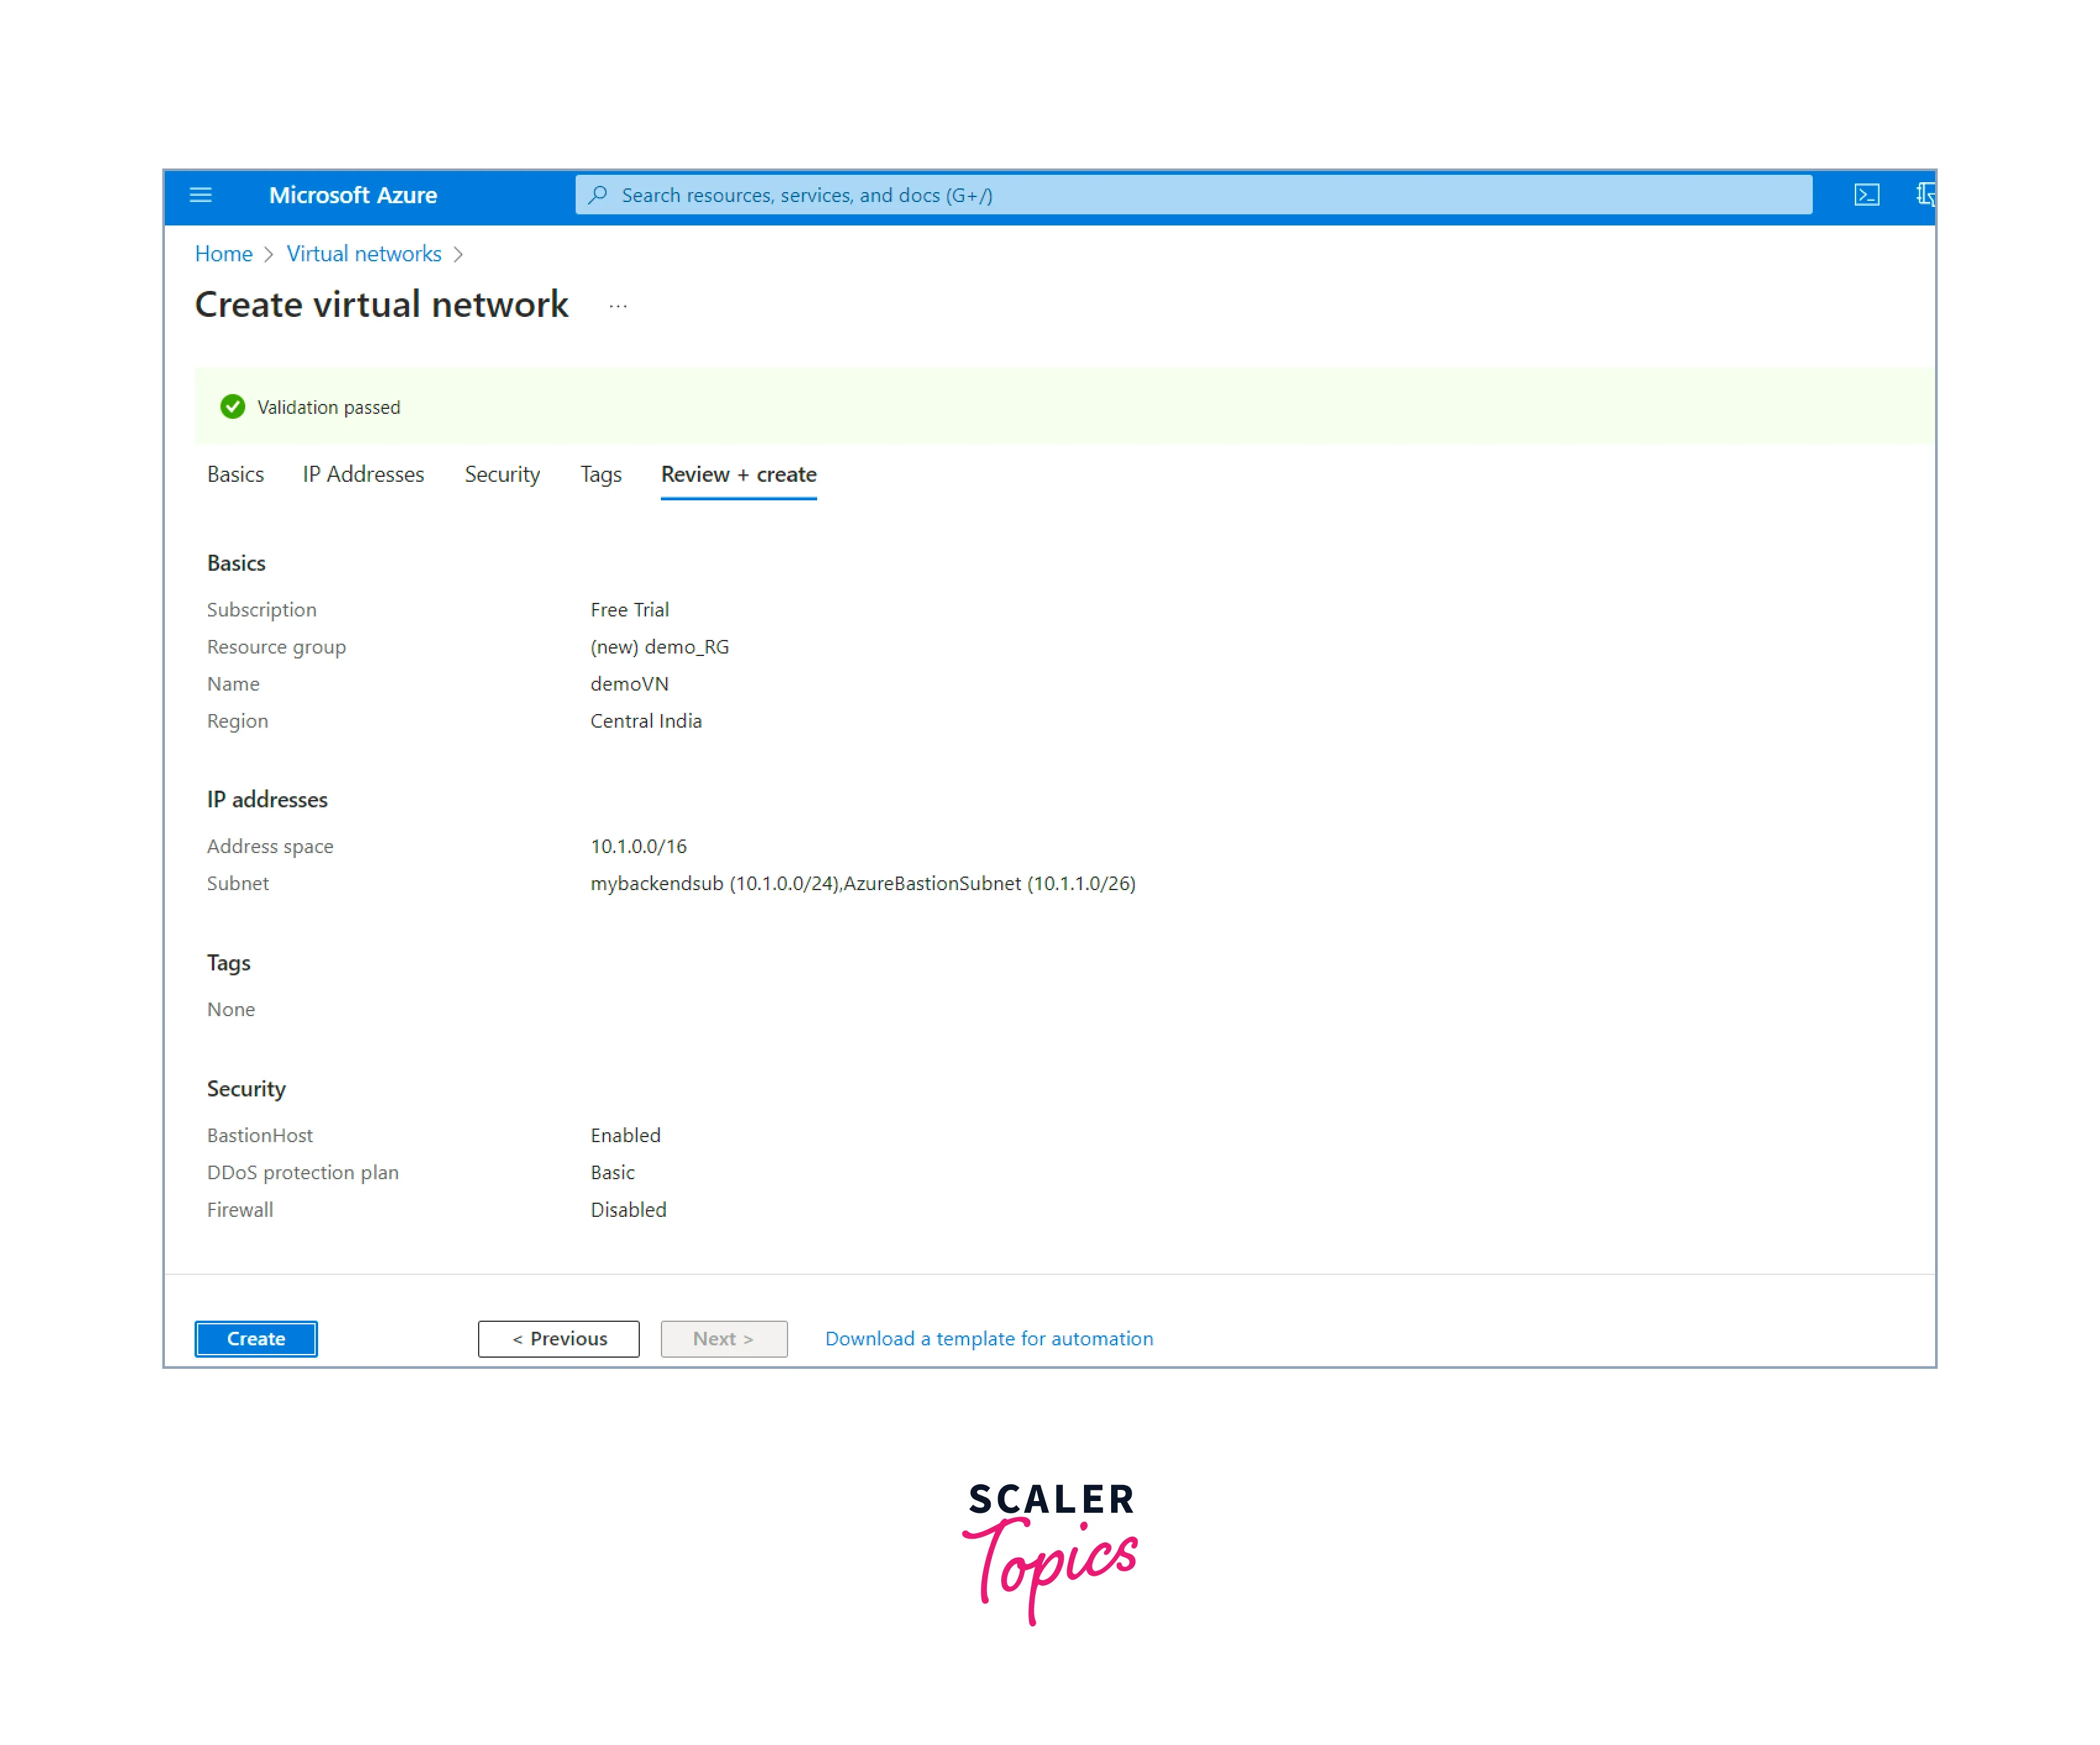
review the settings to ensure they are correct after completing all the necessary configurations. On clicking the Review + Create button, the deployment process of the virtual network starts.
-
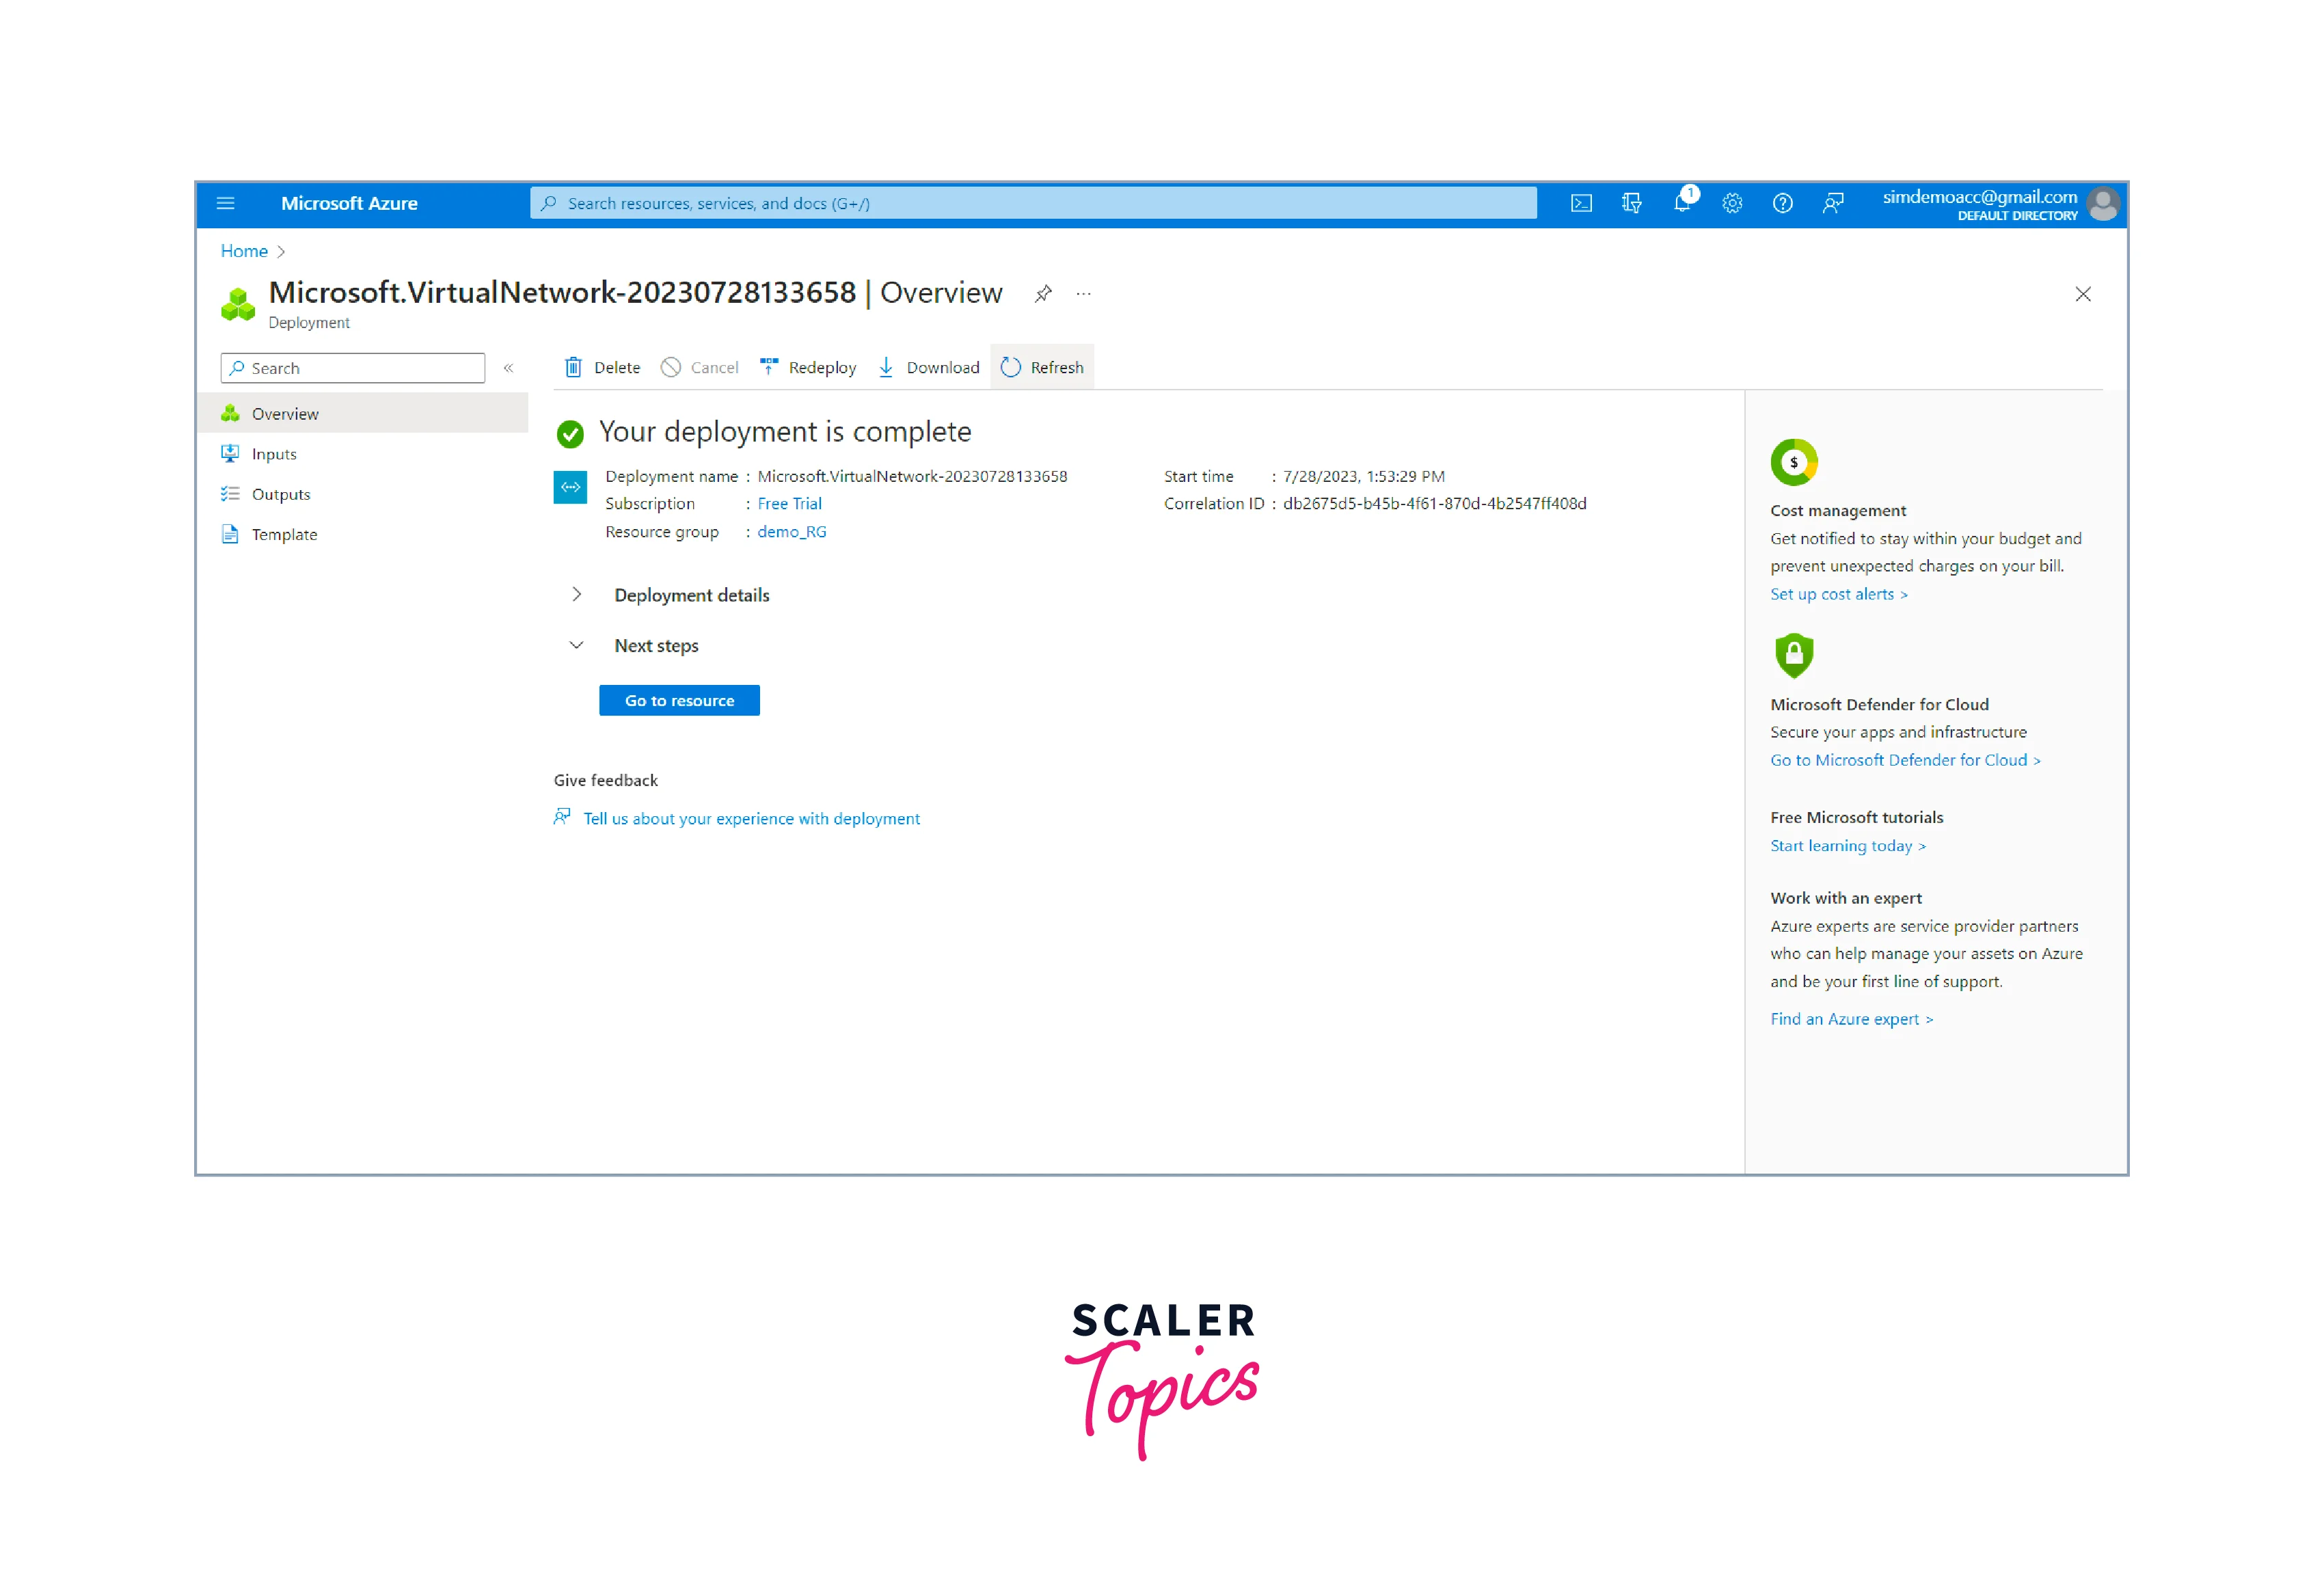
The deployment process might take a few minutes. You can monitor the progress on the Azure portal's "Notifications" pane.
Create Azure Load Balancer
Next, we need to create an Azure Load Balancer using the following steps:
-
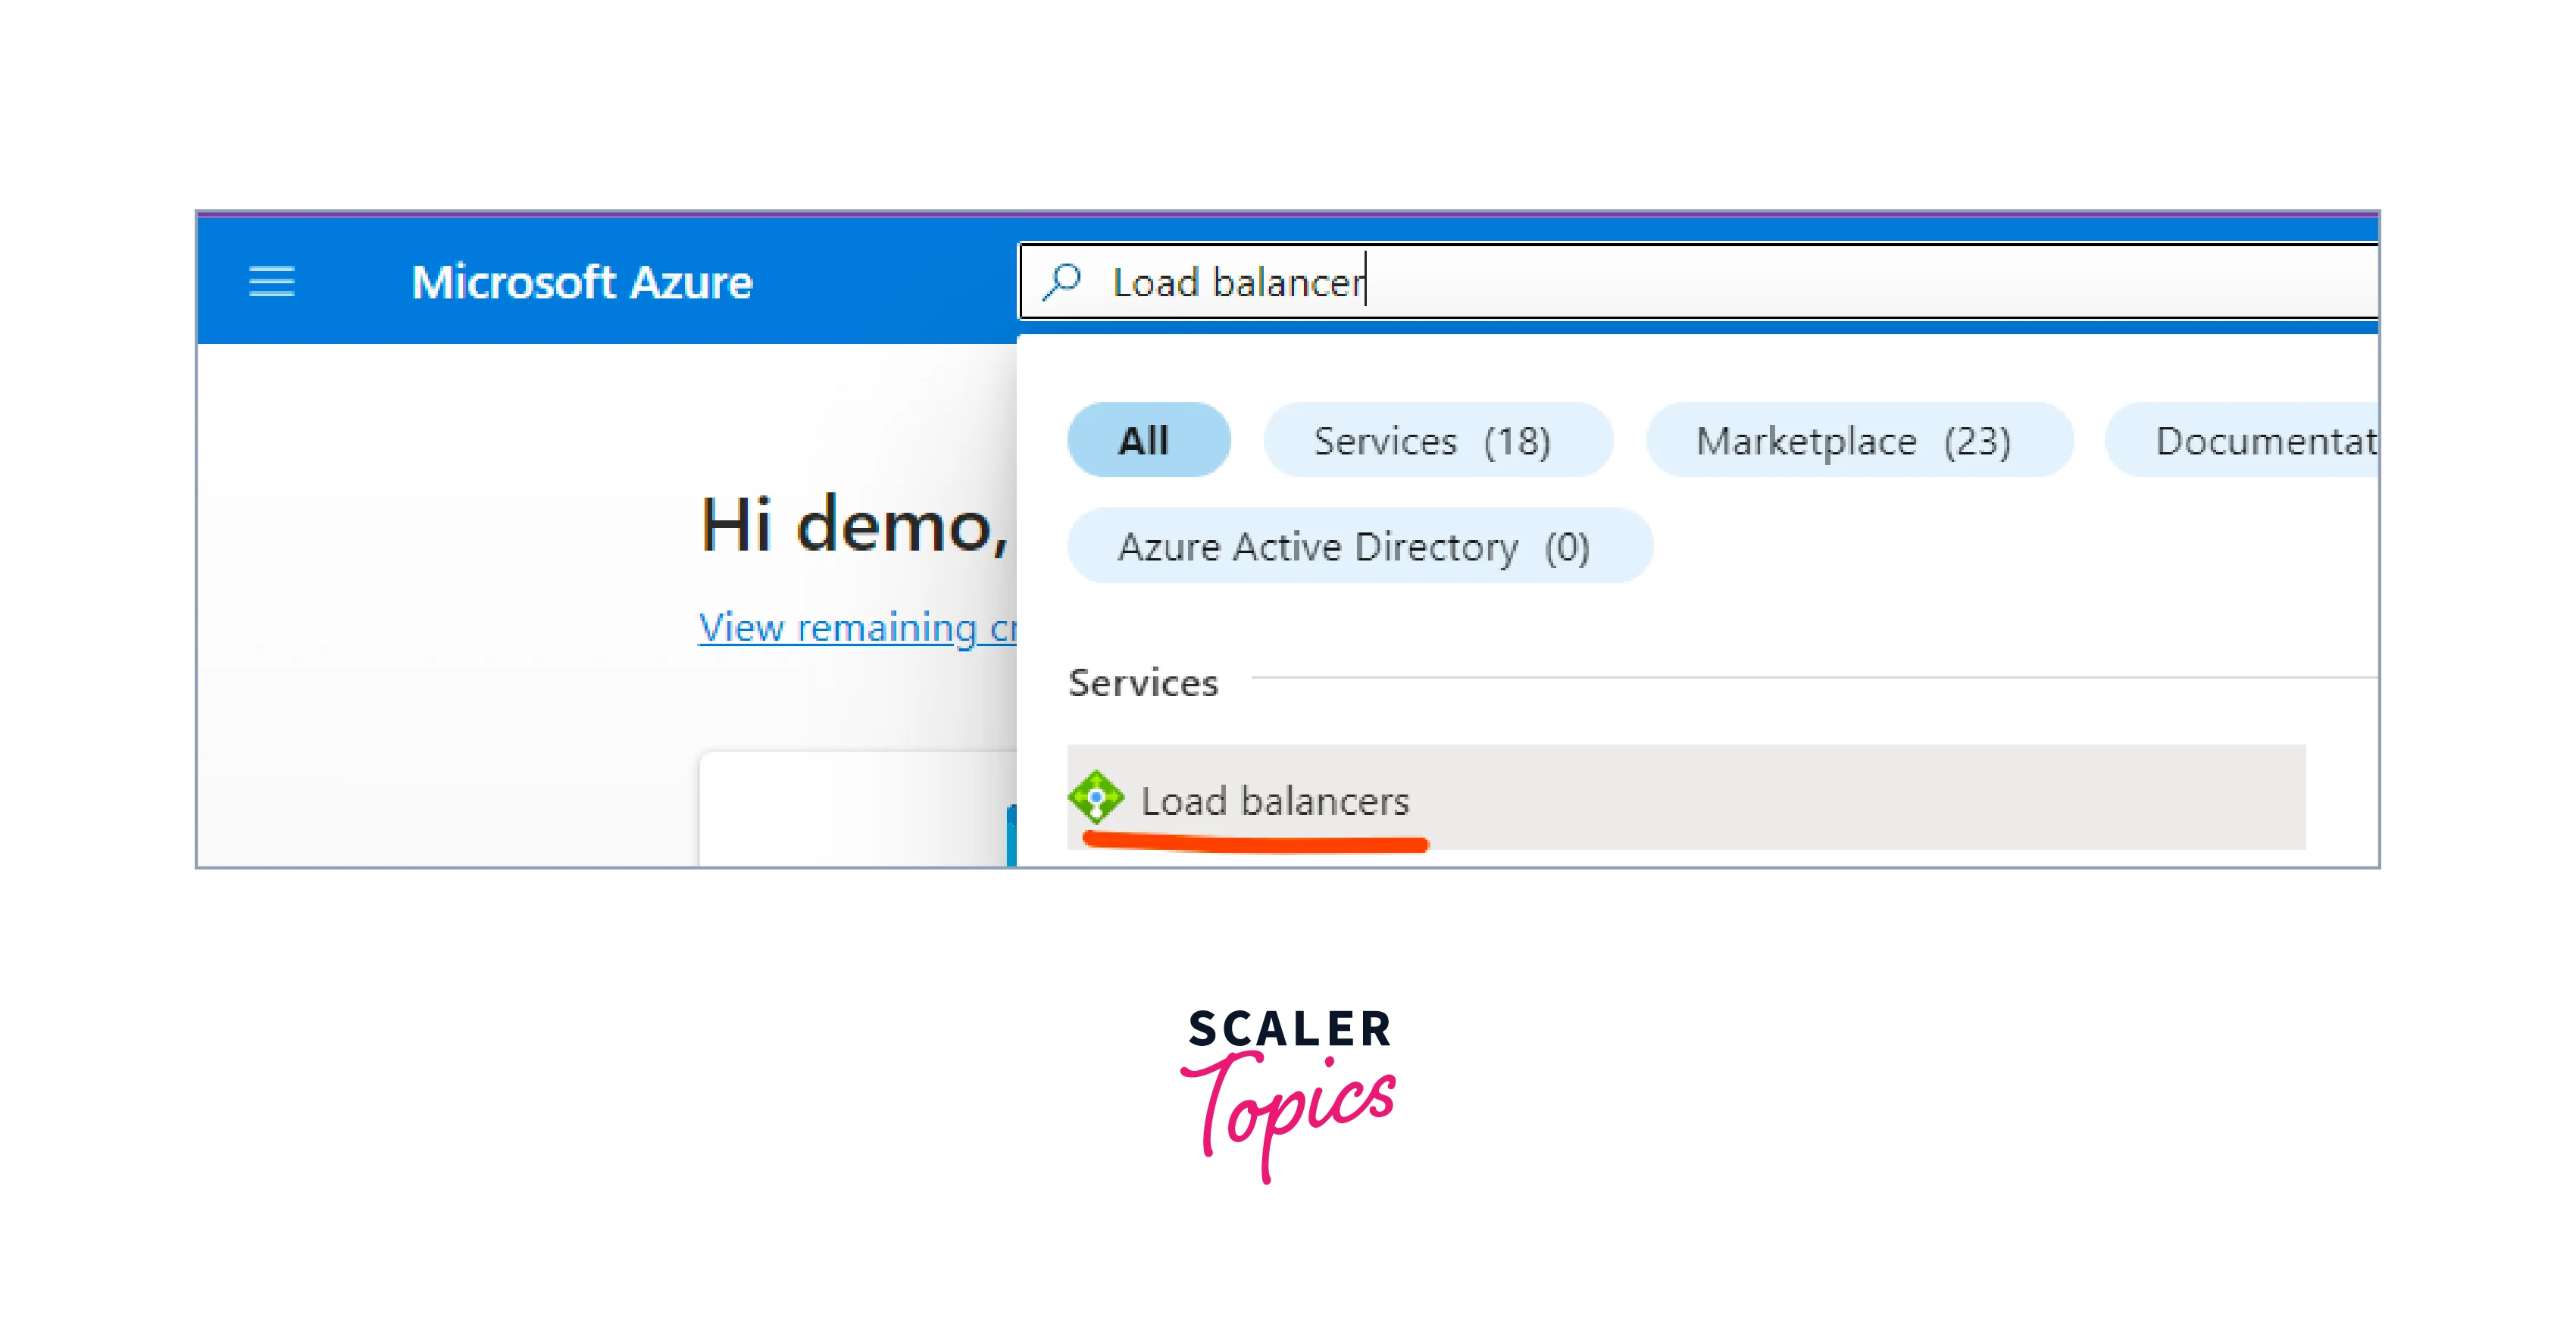
Similar to above, search for load balancer in the search bar, and select Load Balancers from the dropdown.
-
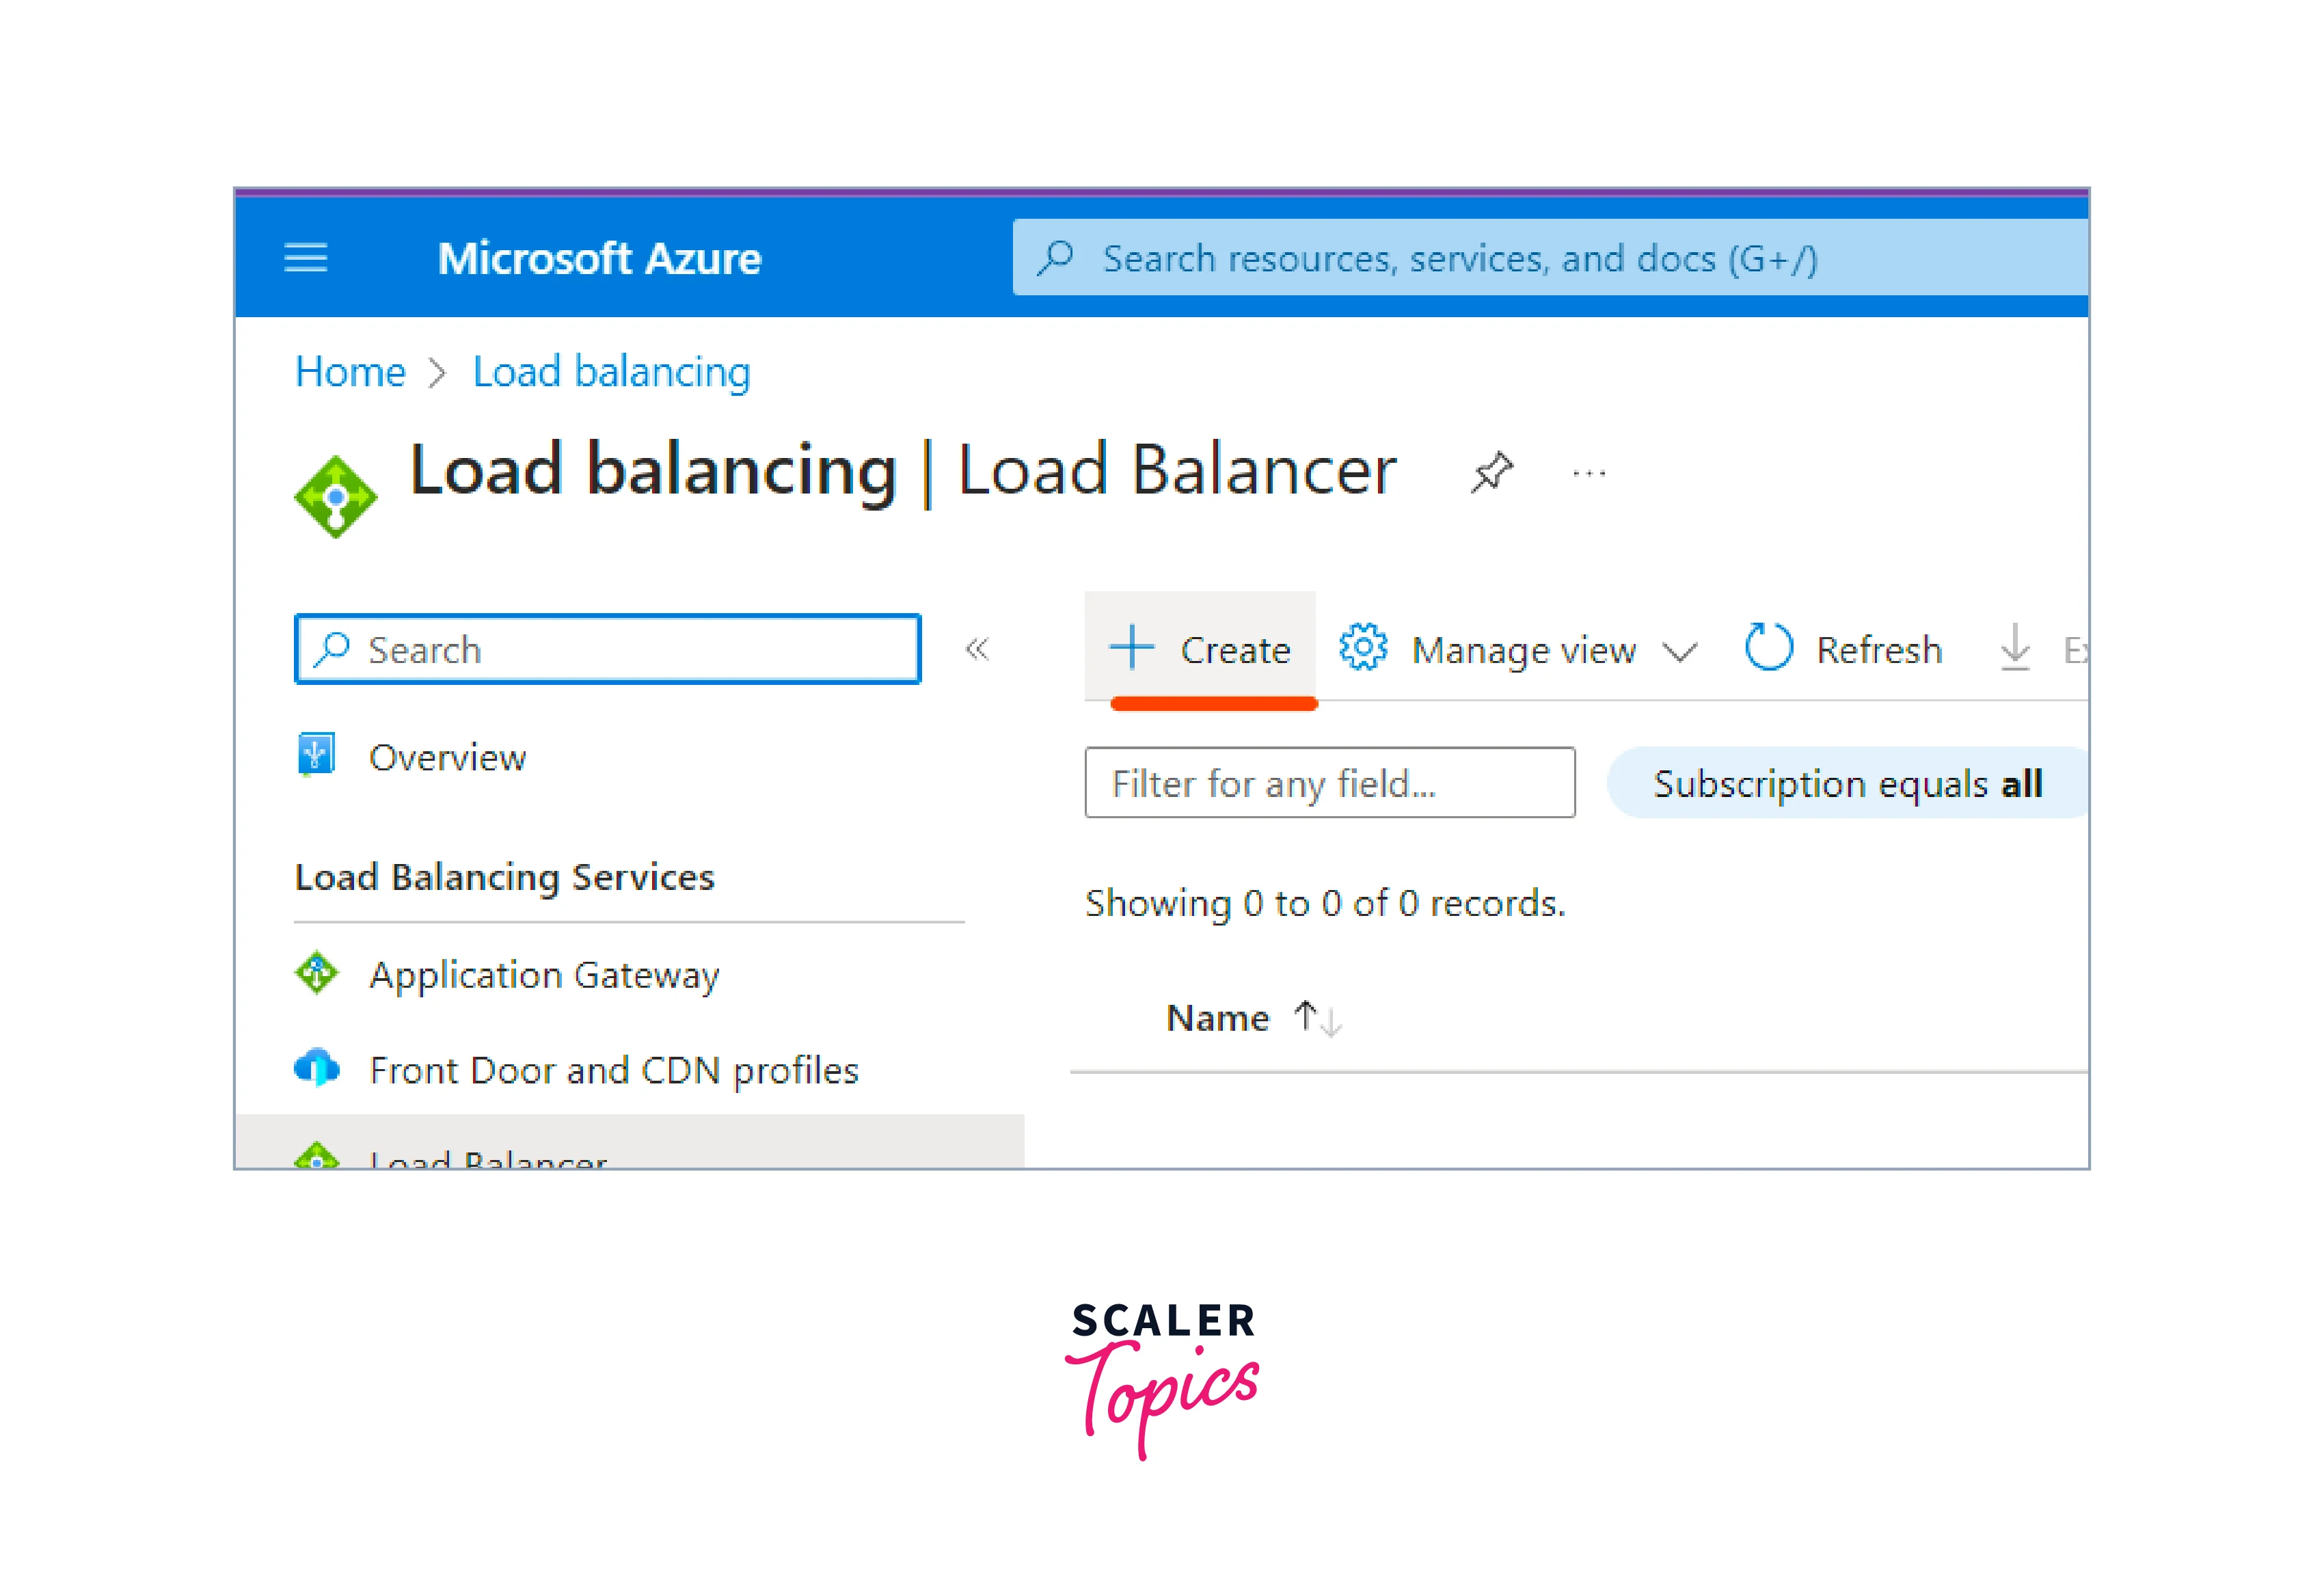
Hit the Create button to start creating the Load balancer in Azure.
-
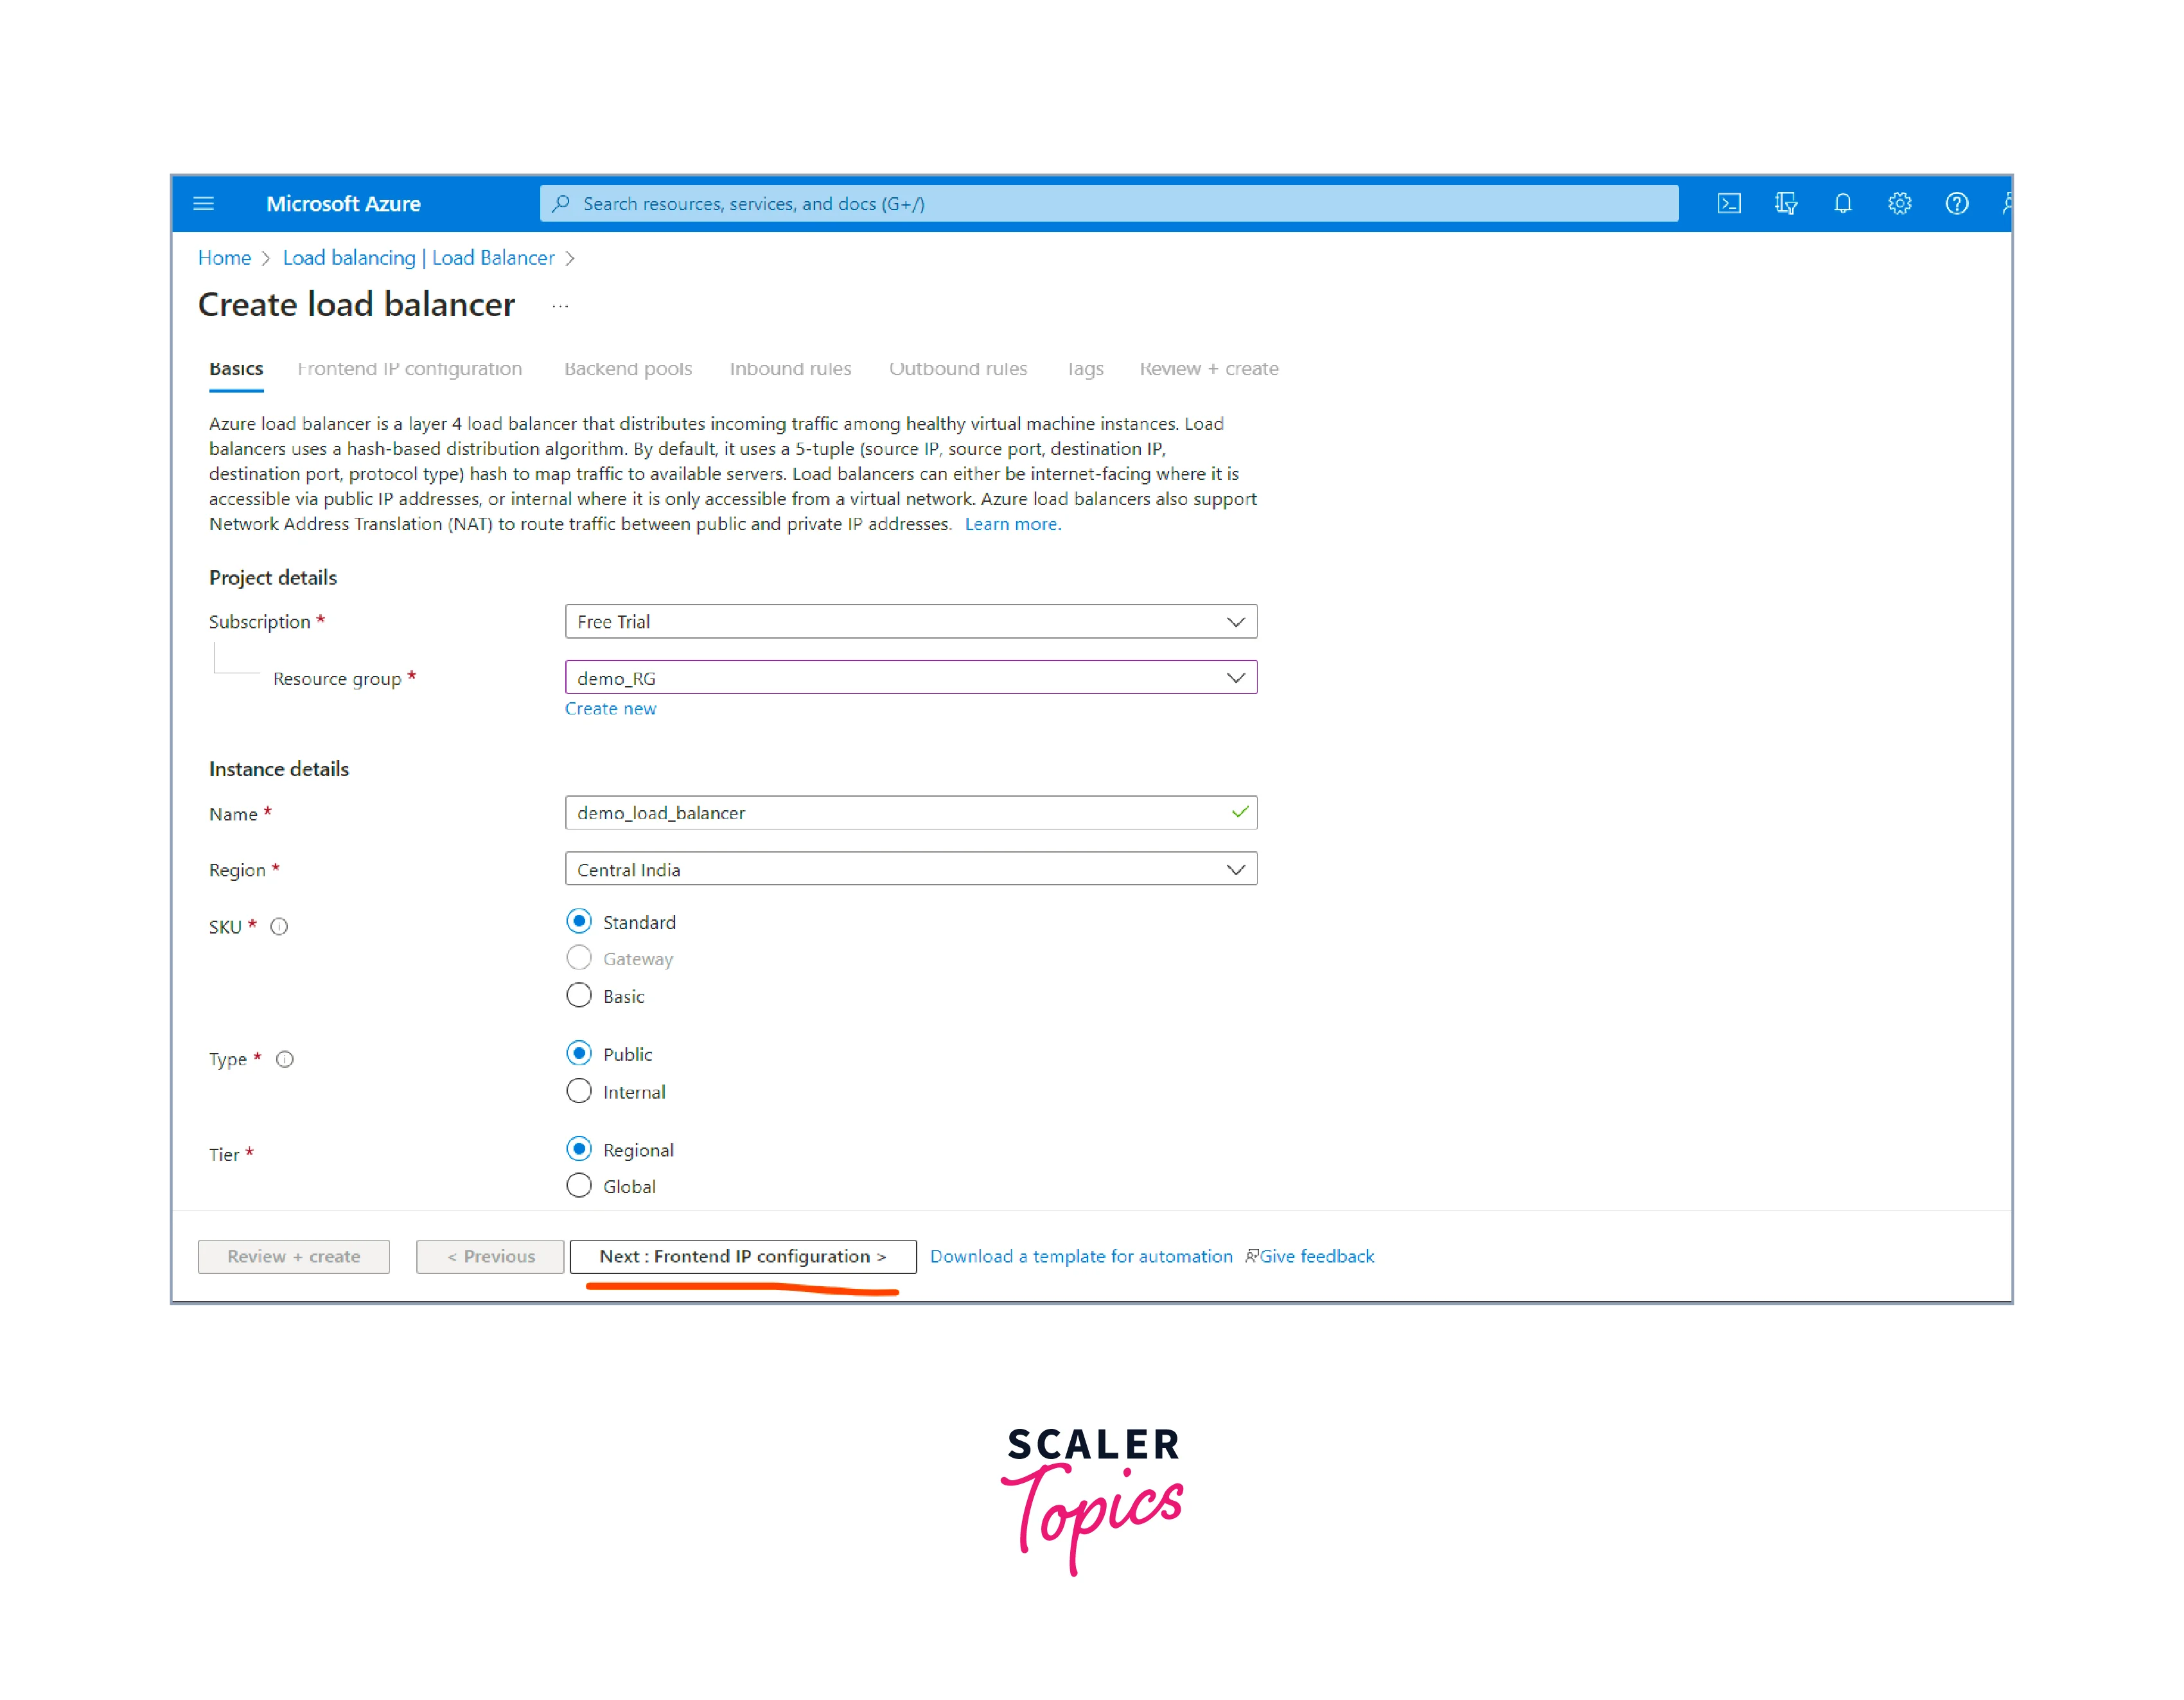
Fill in the load balancer details:
- Choose the appropriate subscription you want to use.
- Create a new resource group or select an existing one where the load balancer will be deployed.
- Provide a unique name for your load balancer in the name section.
- Choose the region where you want the load balancer to be located.
- Select the "Public" or "Internal" load balancer type, depending on your use case. For internet-facing applications, choose "Public"; for internal applications, choose "Internal."
- Choose the SKU (Standard or Basic) based on your requirements and availability.
-
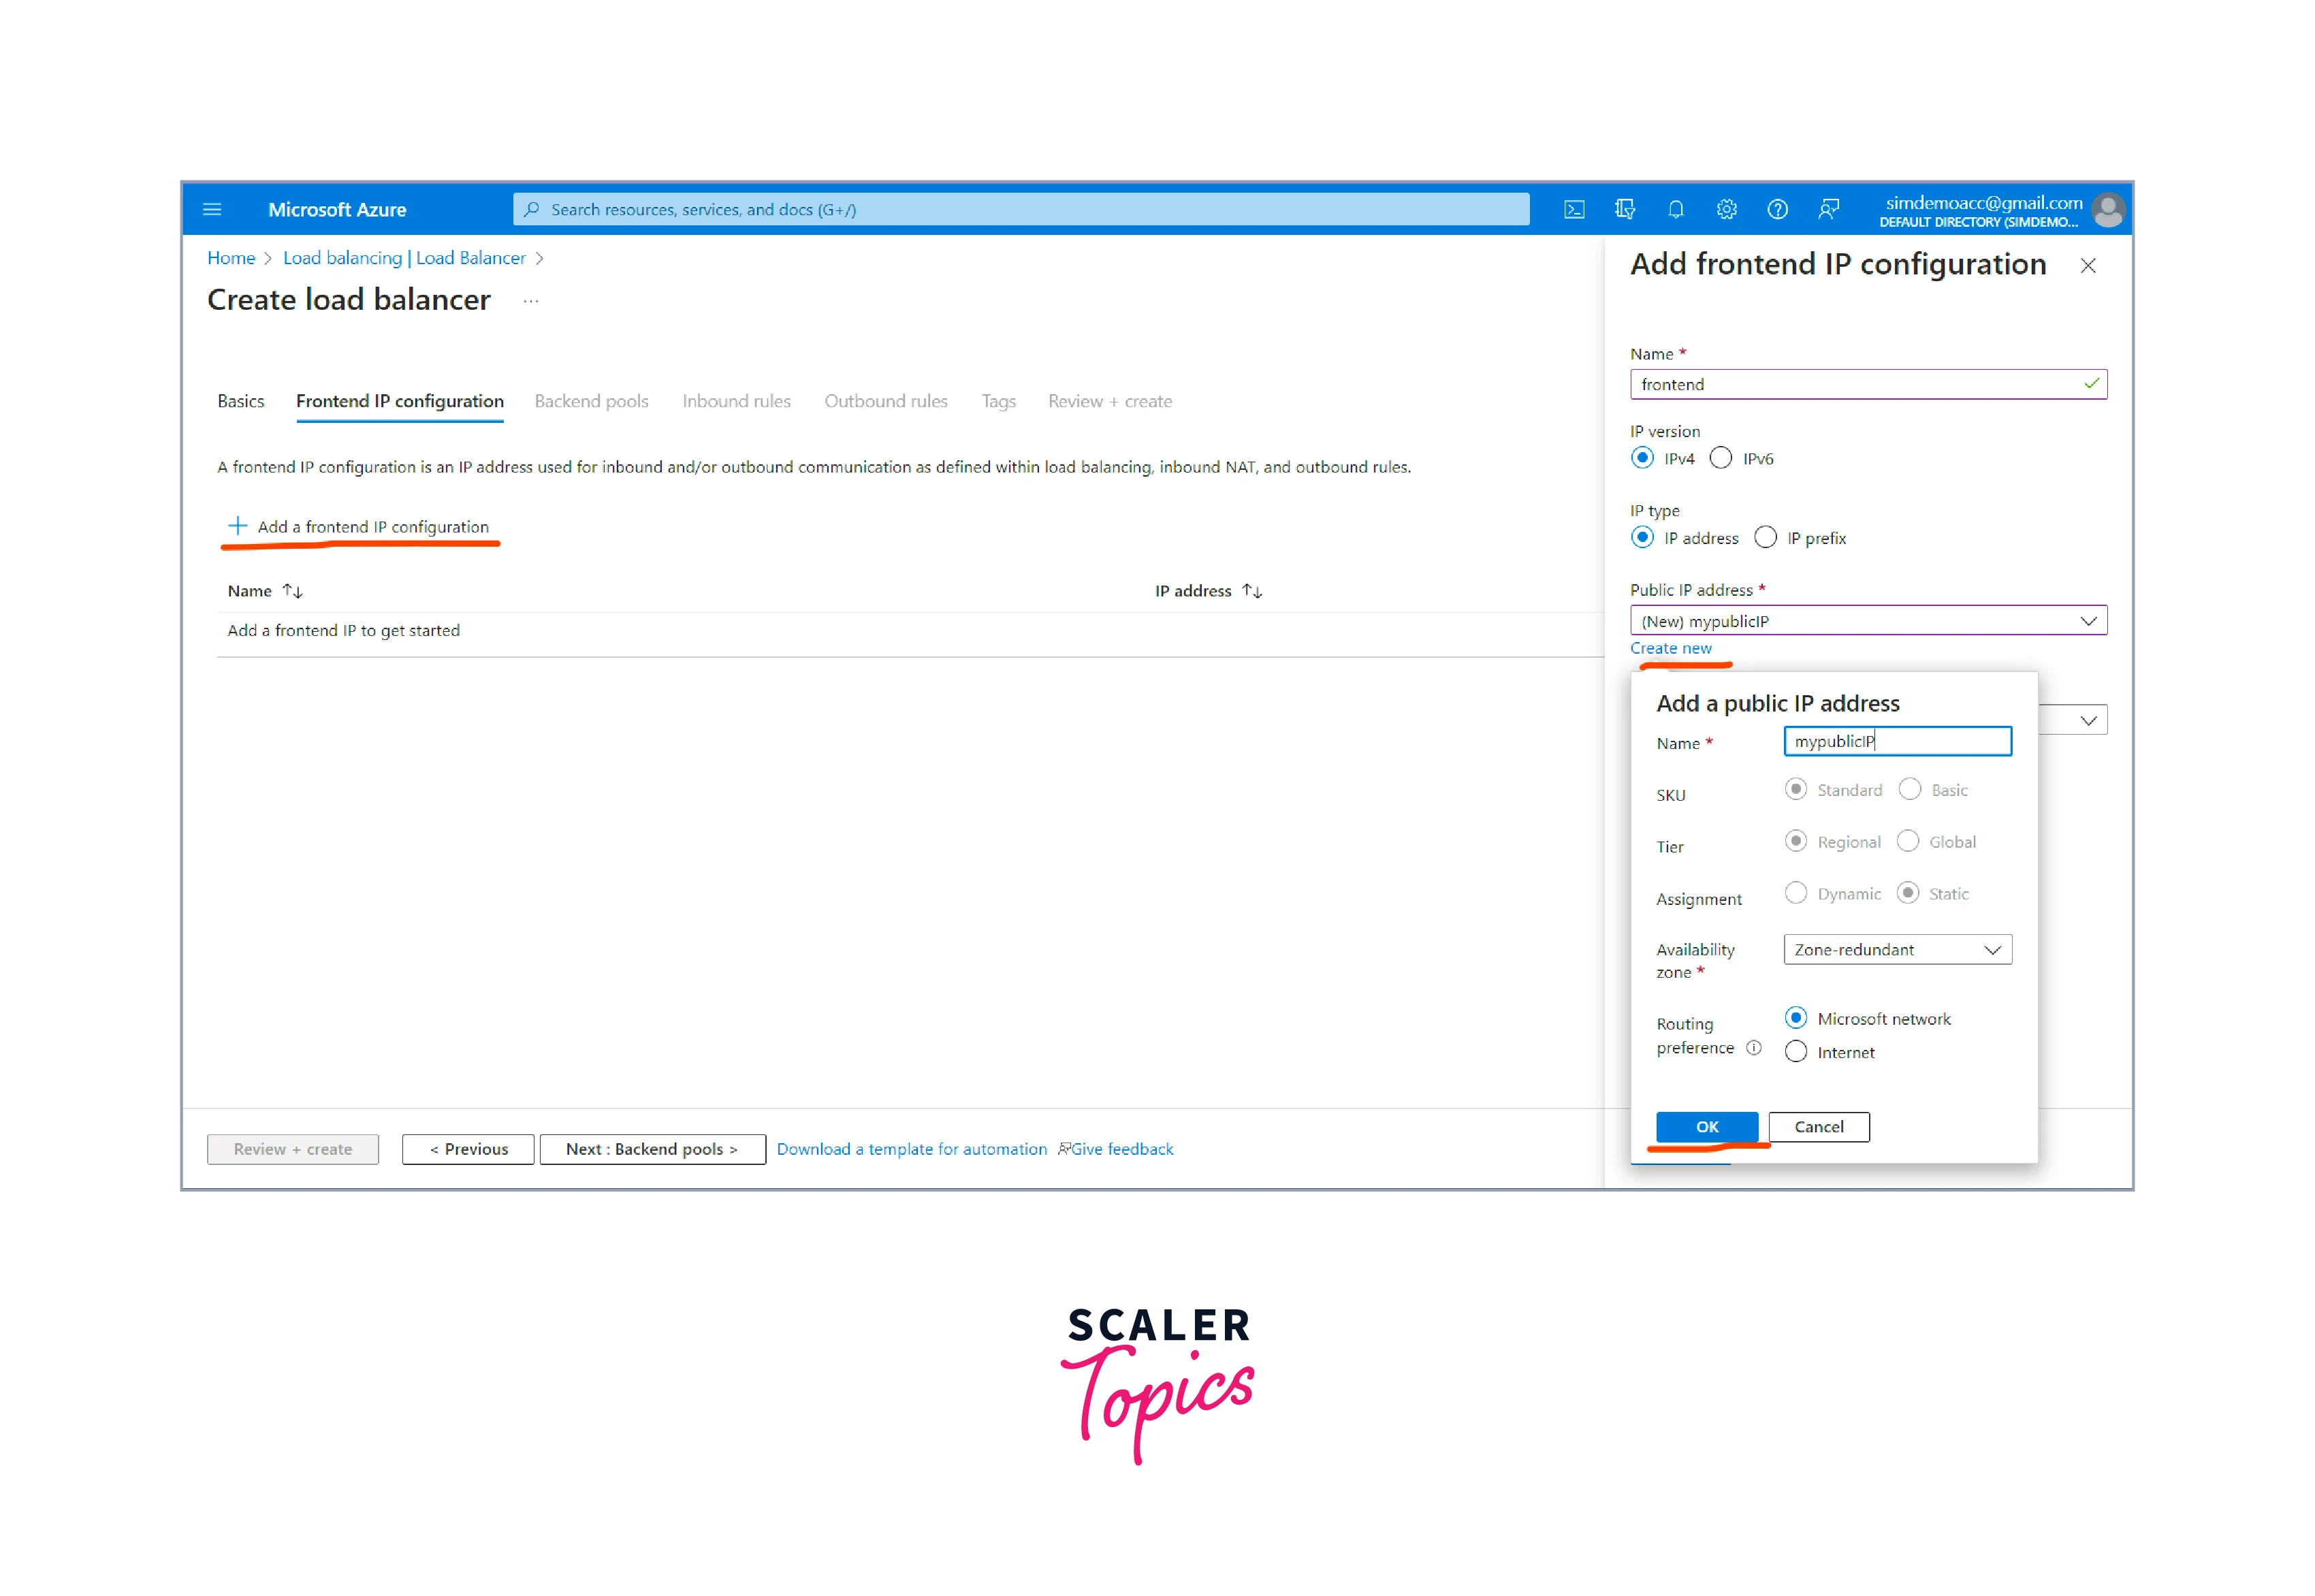
Configure frontend IP address (for public load balancer only):
- If you selected a public load balancer, you need to configure a frontend IP address. This IP address is the public IP that clients will use to access your application.
-
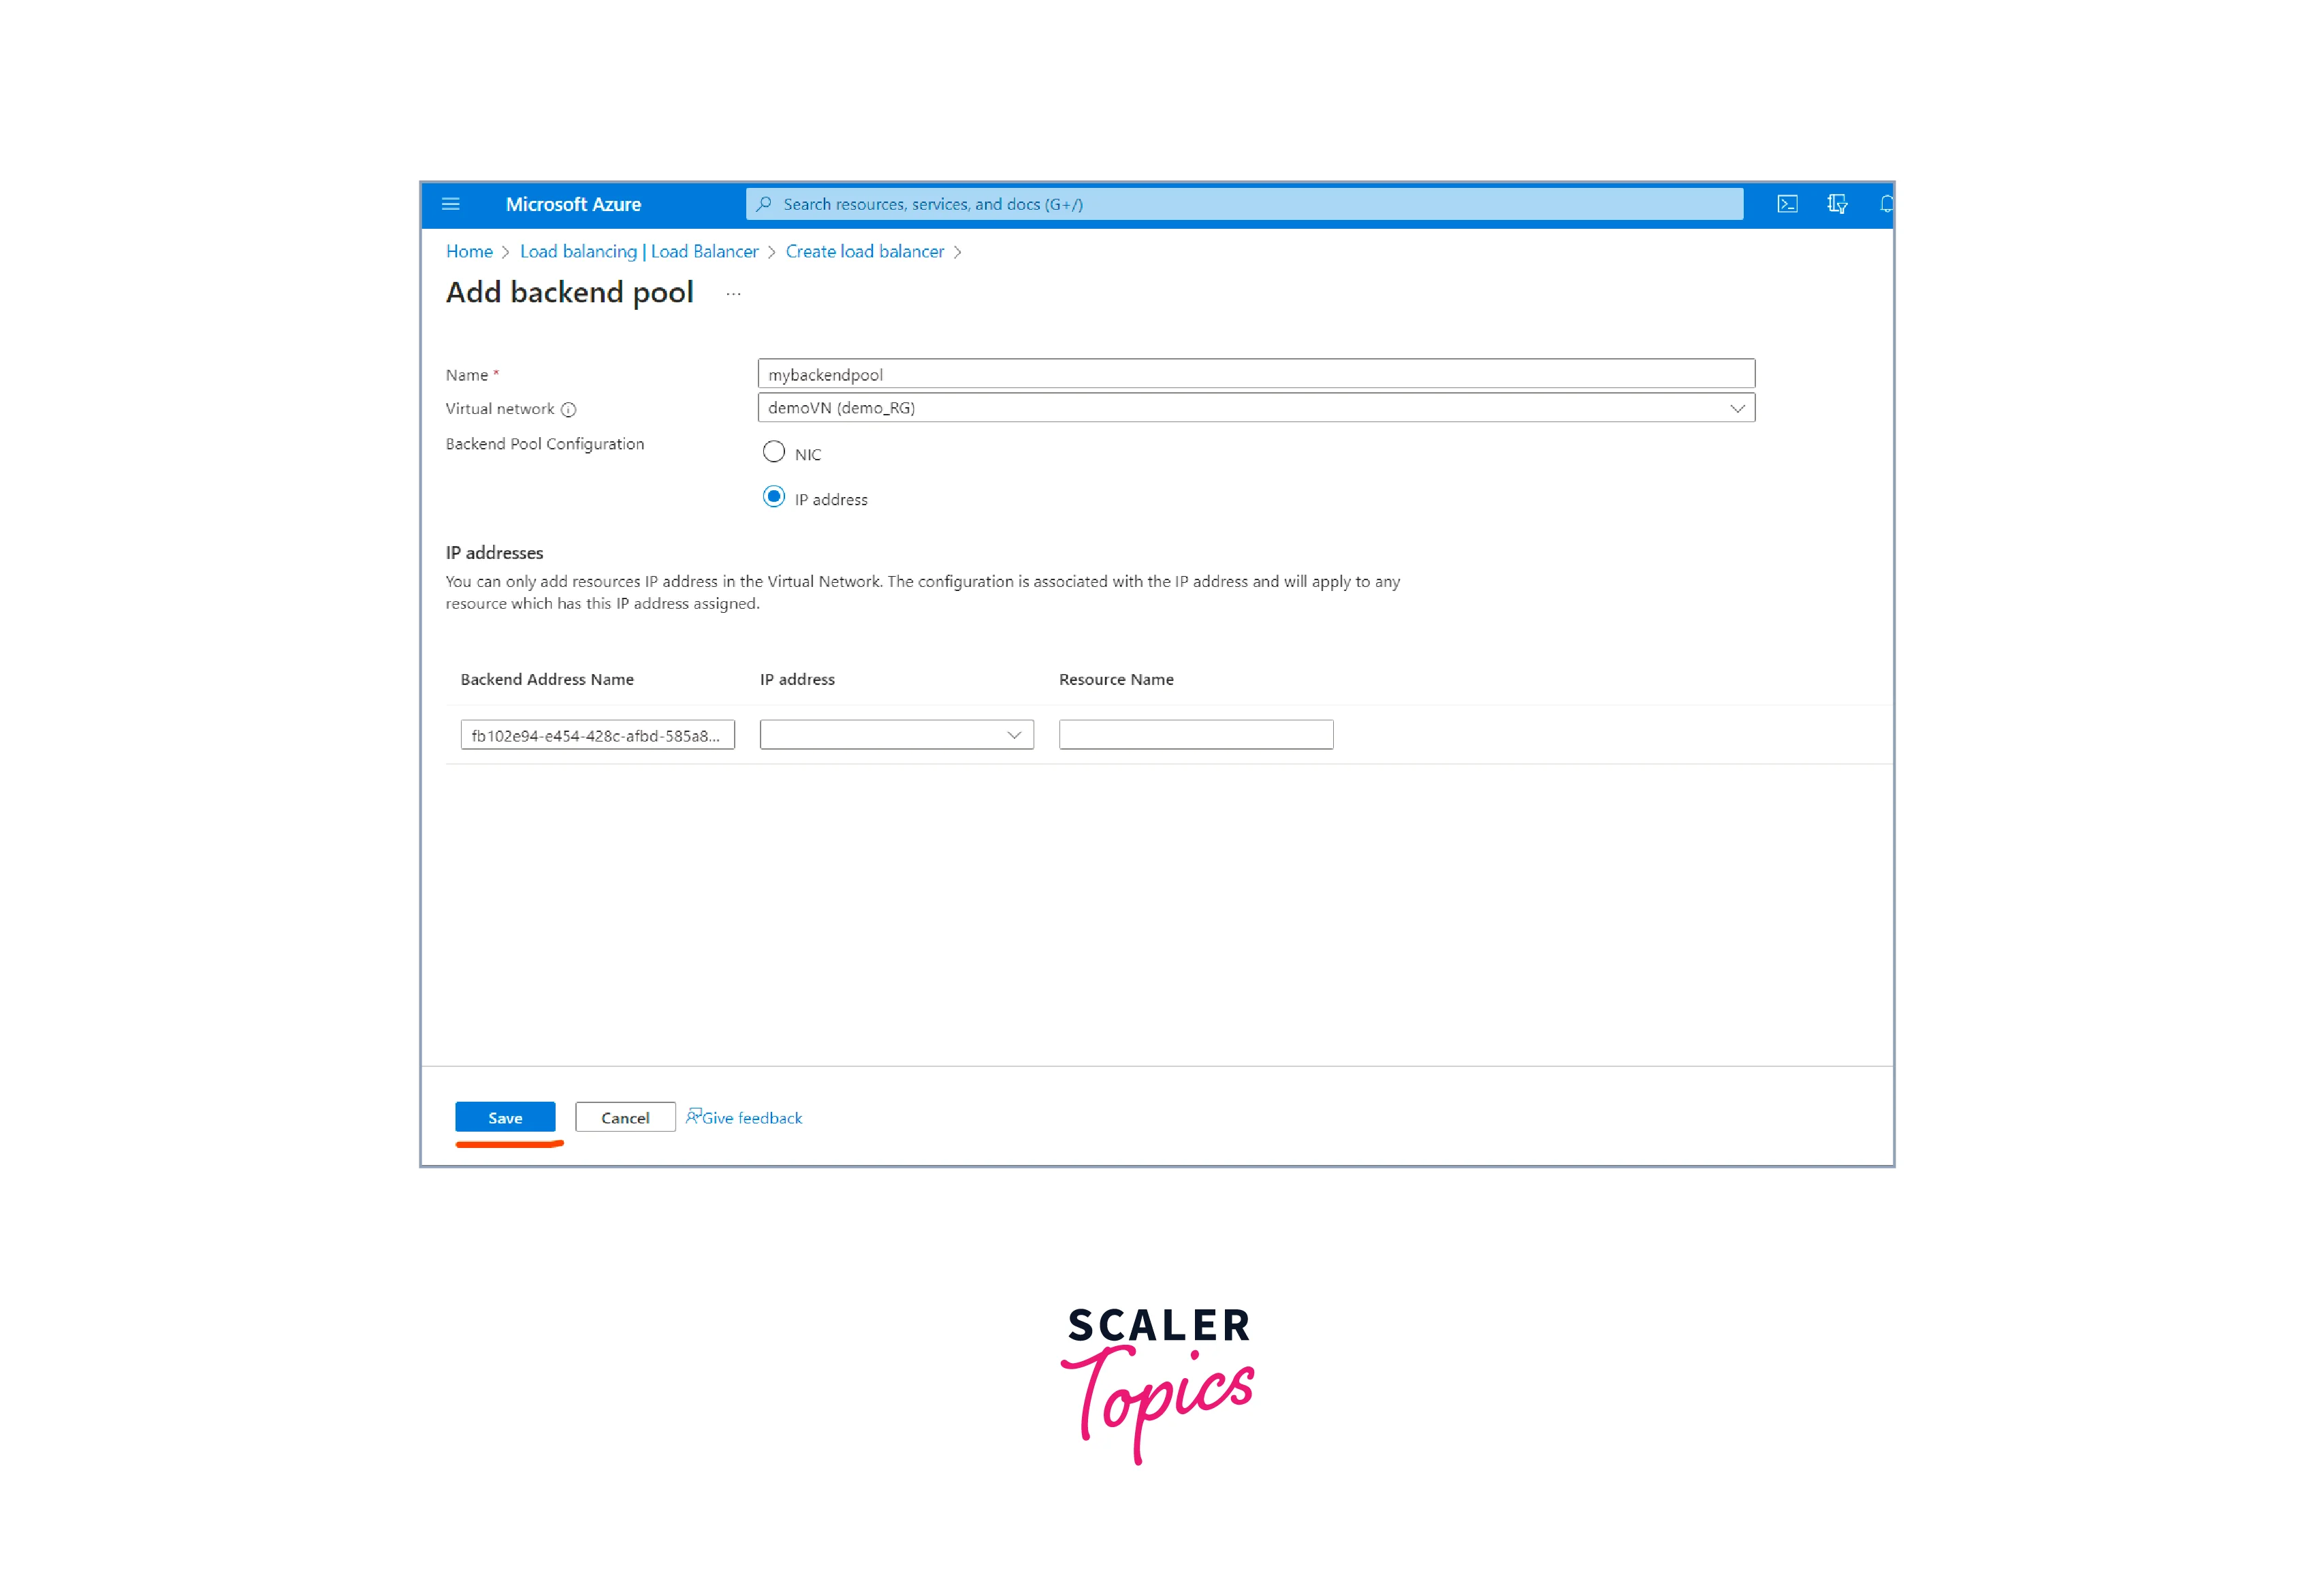
Next, we need to configure the Backend Pool.
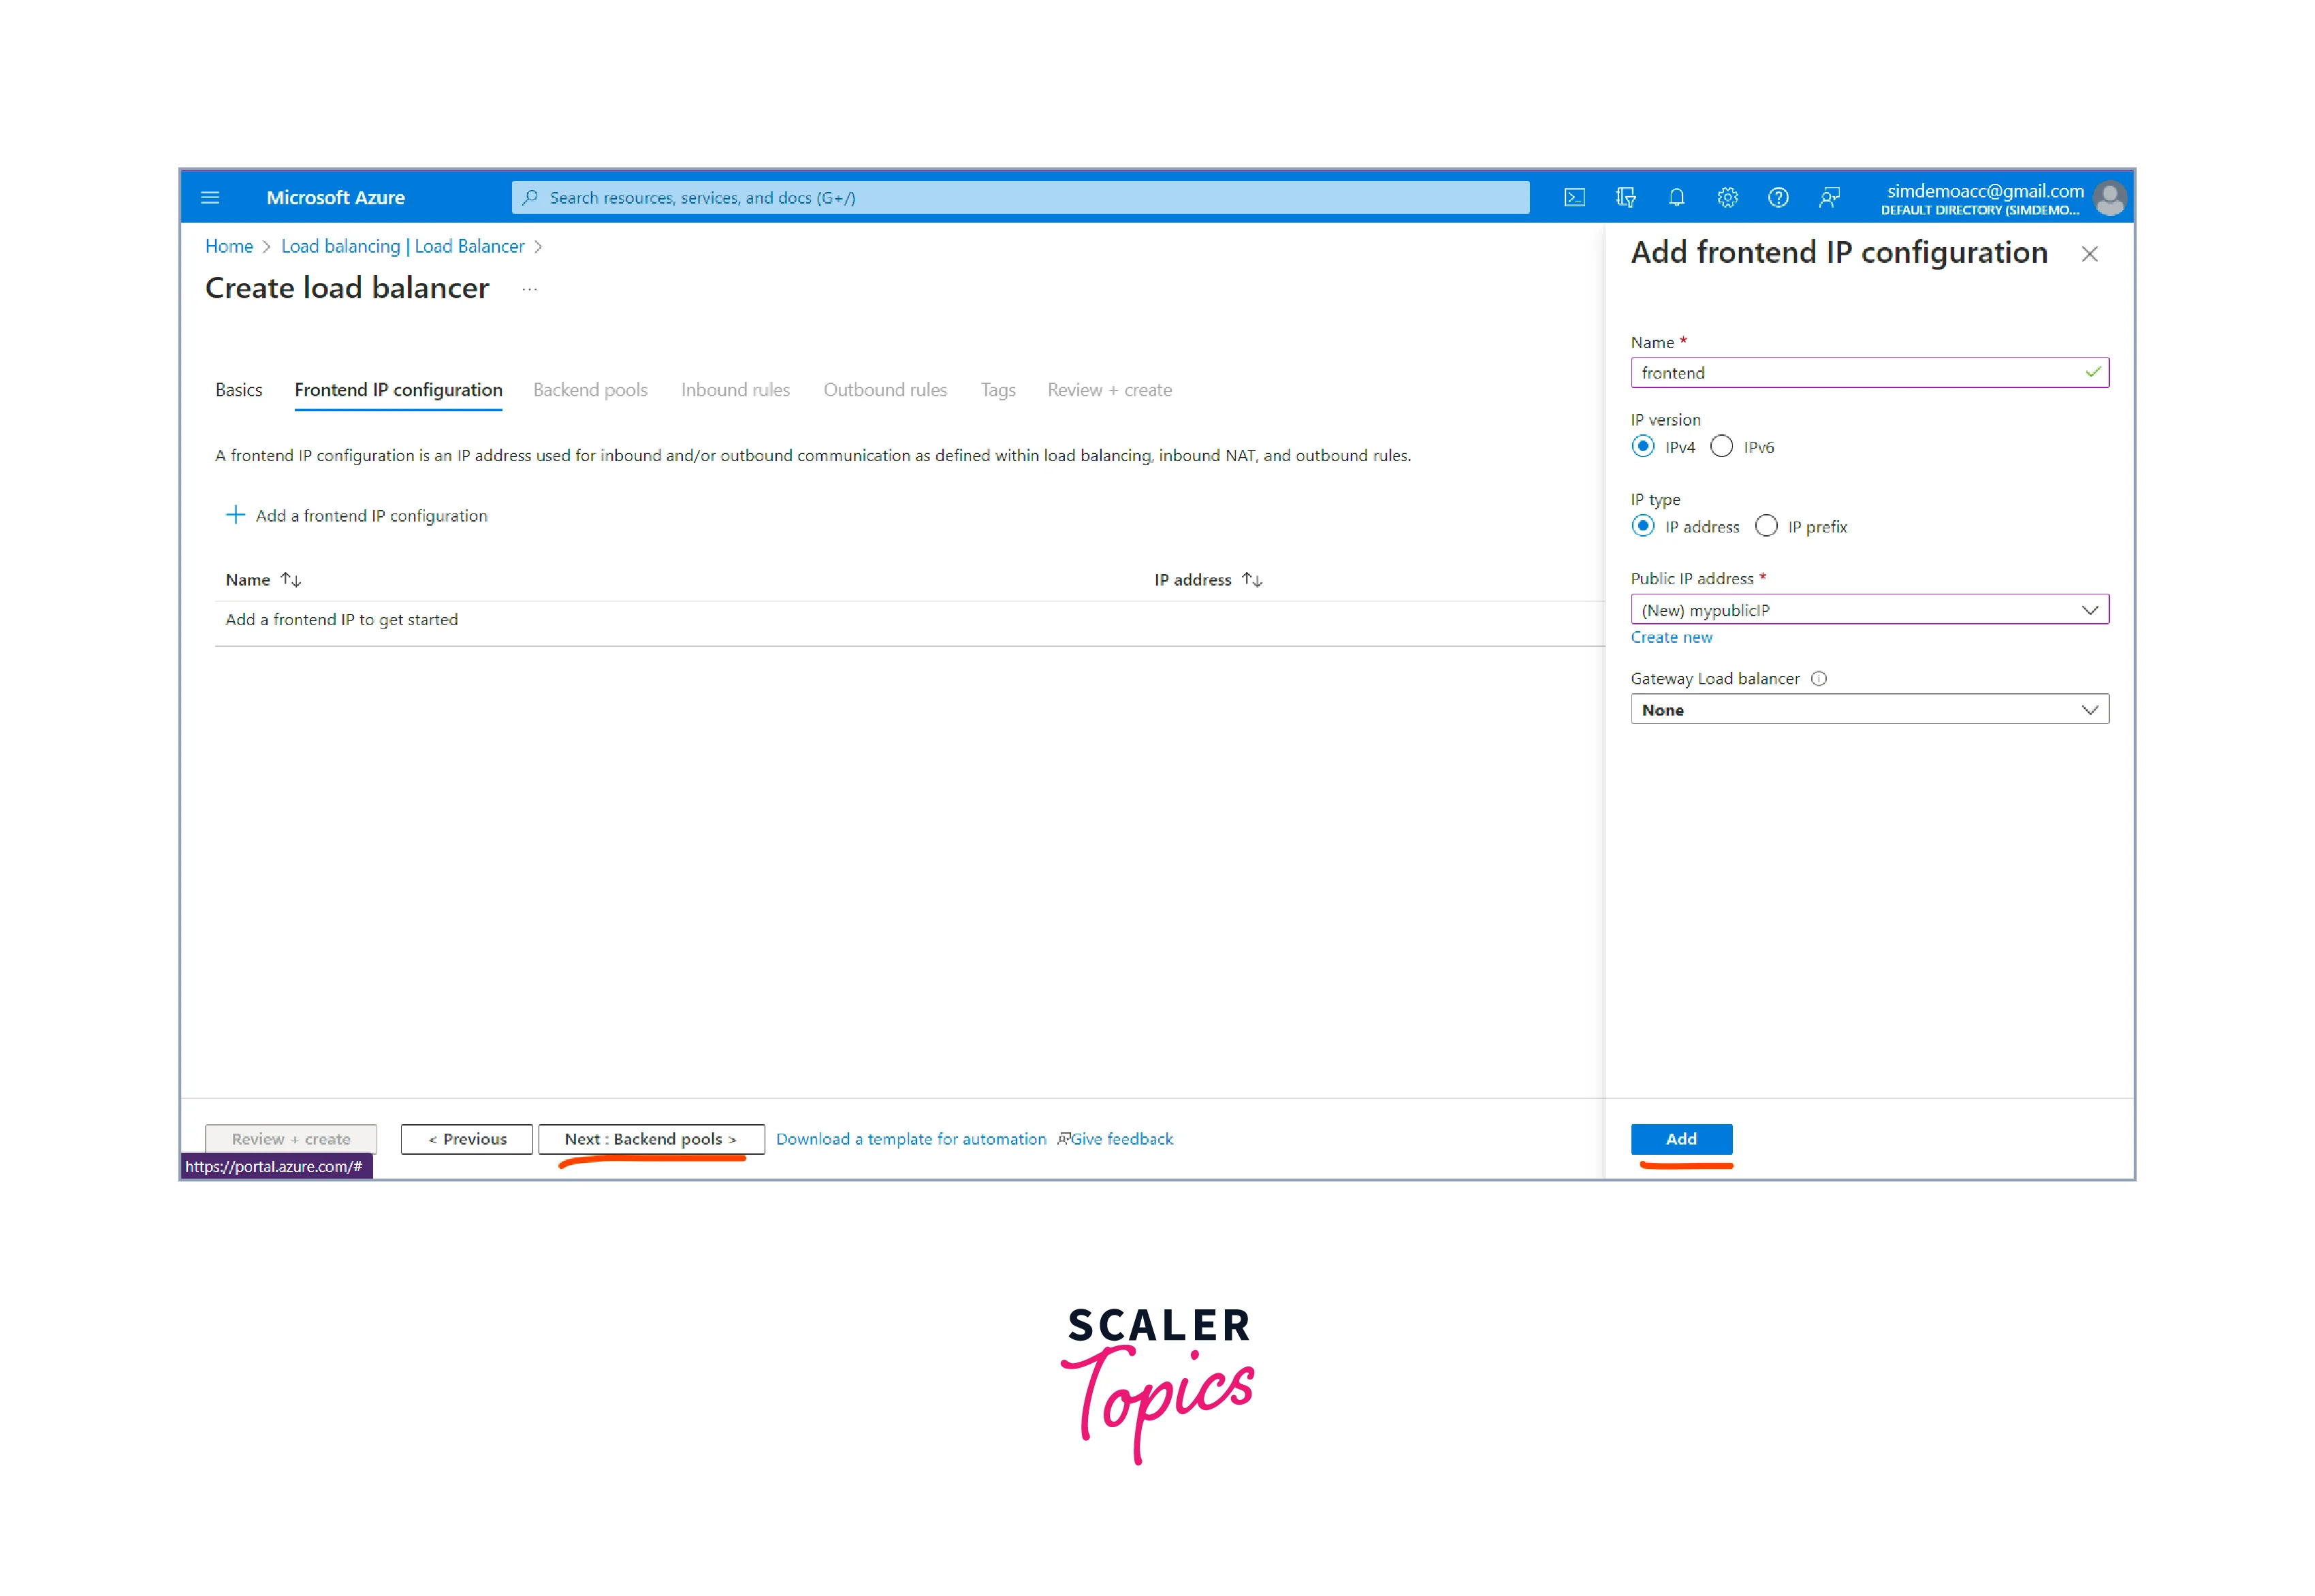
Create a backend pool
- click the "Add a backend pool" button to create a backend pool.
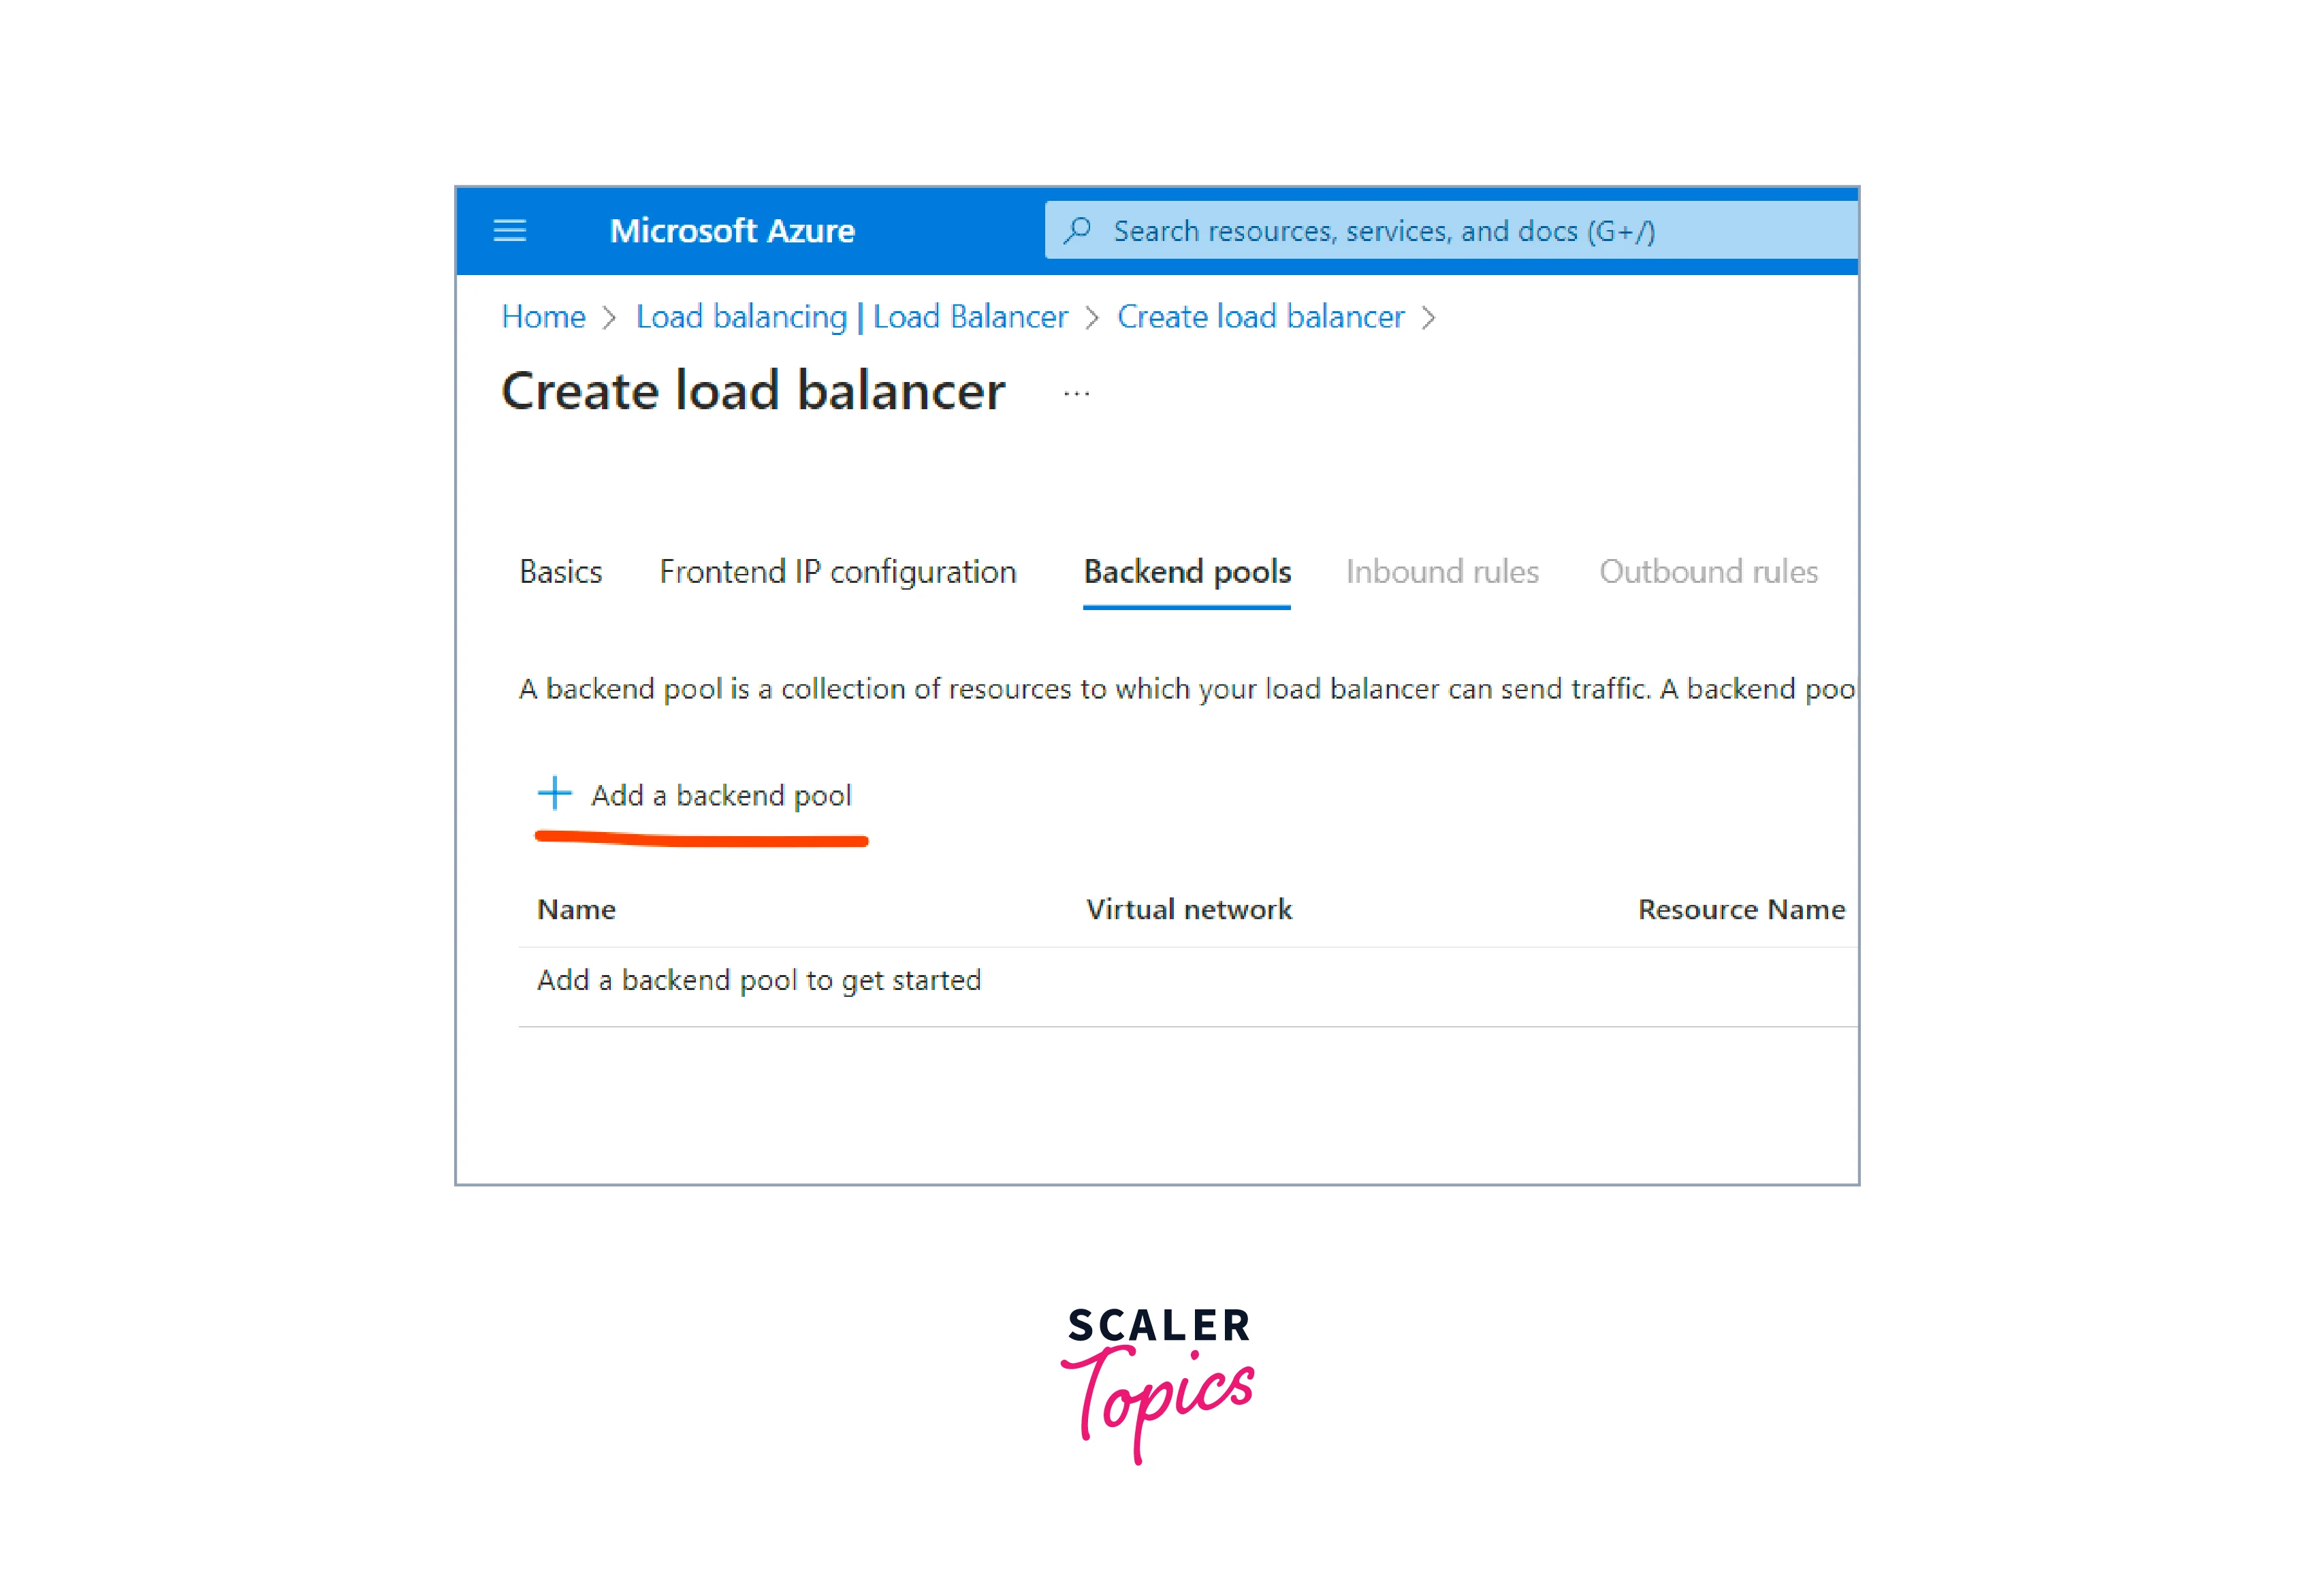
- Select the virtual machines or machine scale sets you want to load balance.
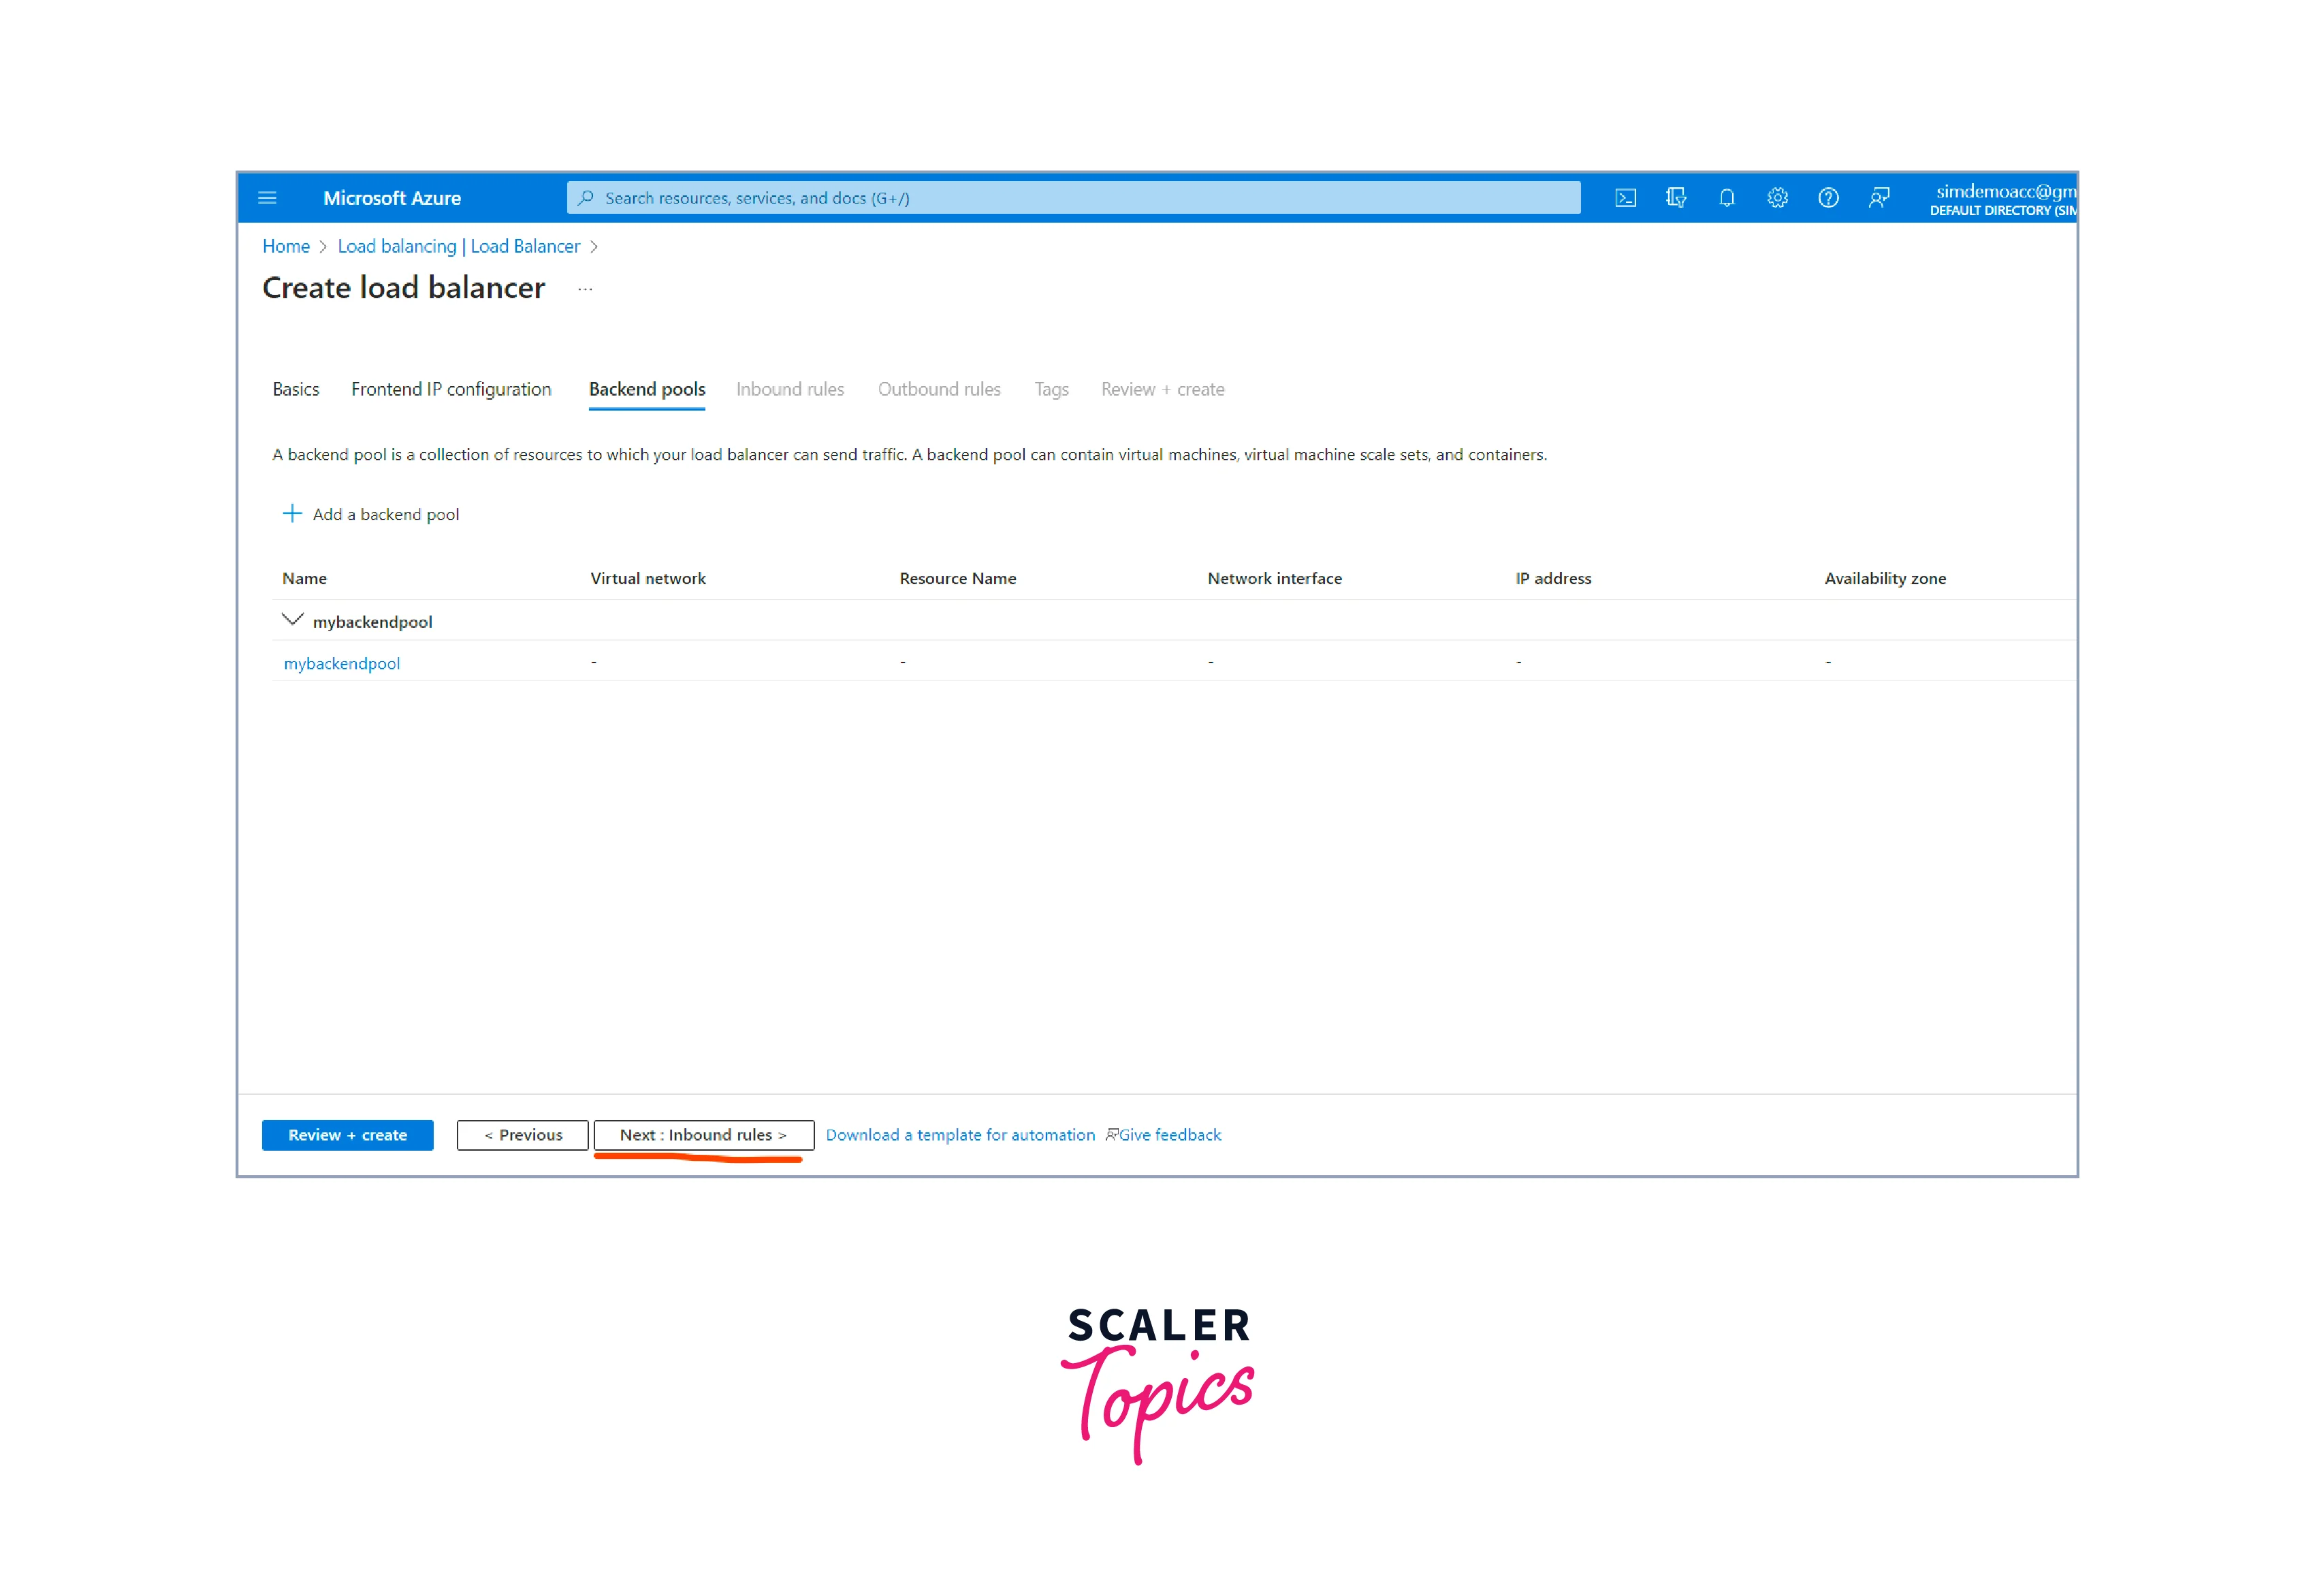
- Next, we need to move to the Inbound rules tab.
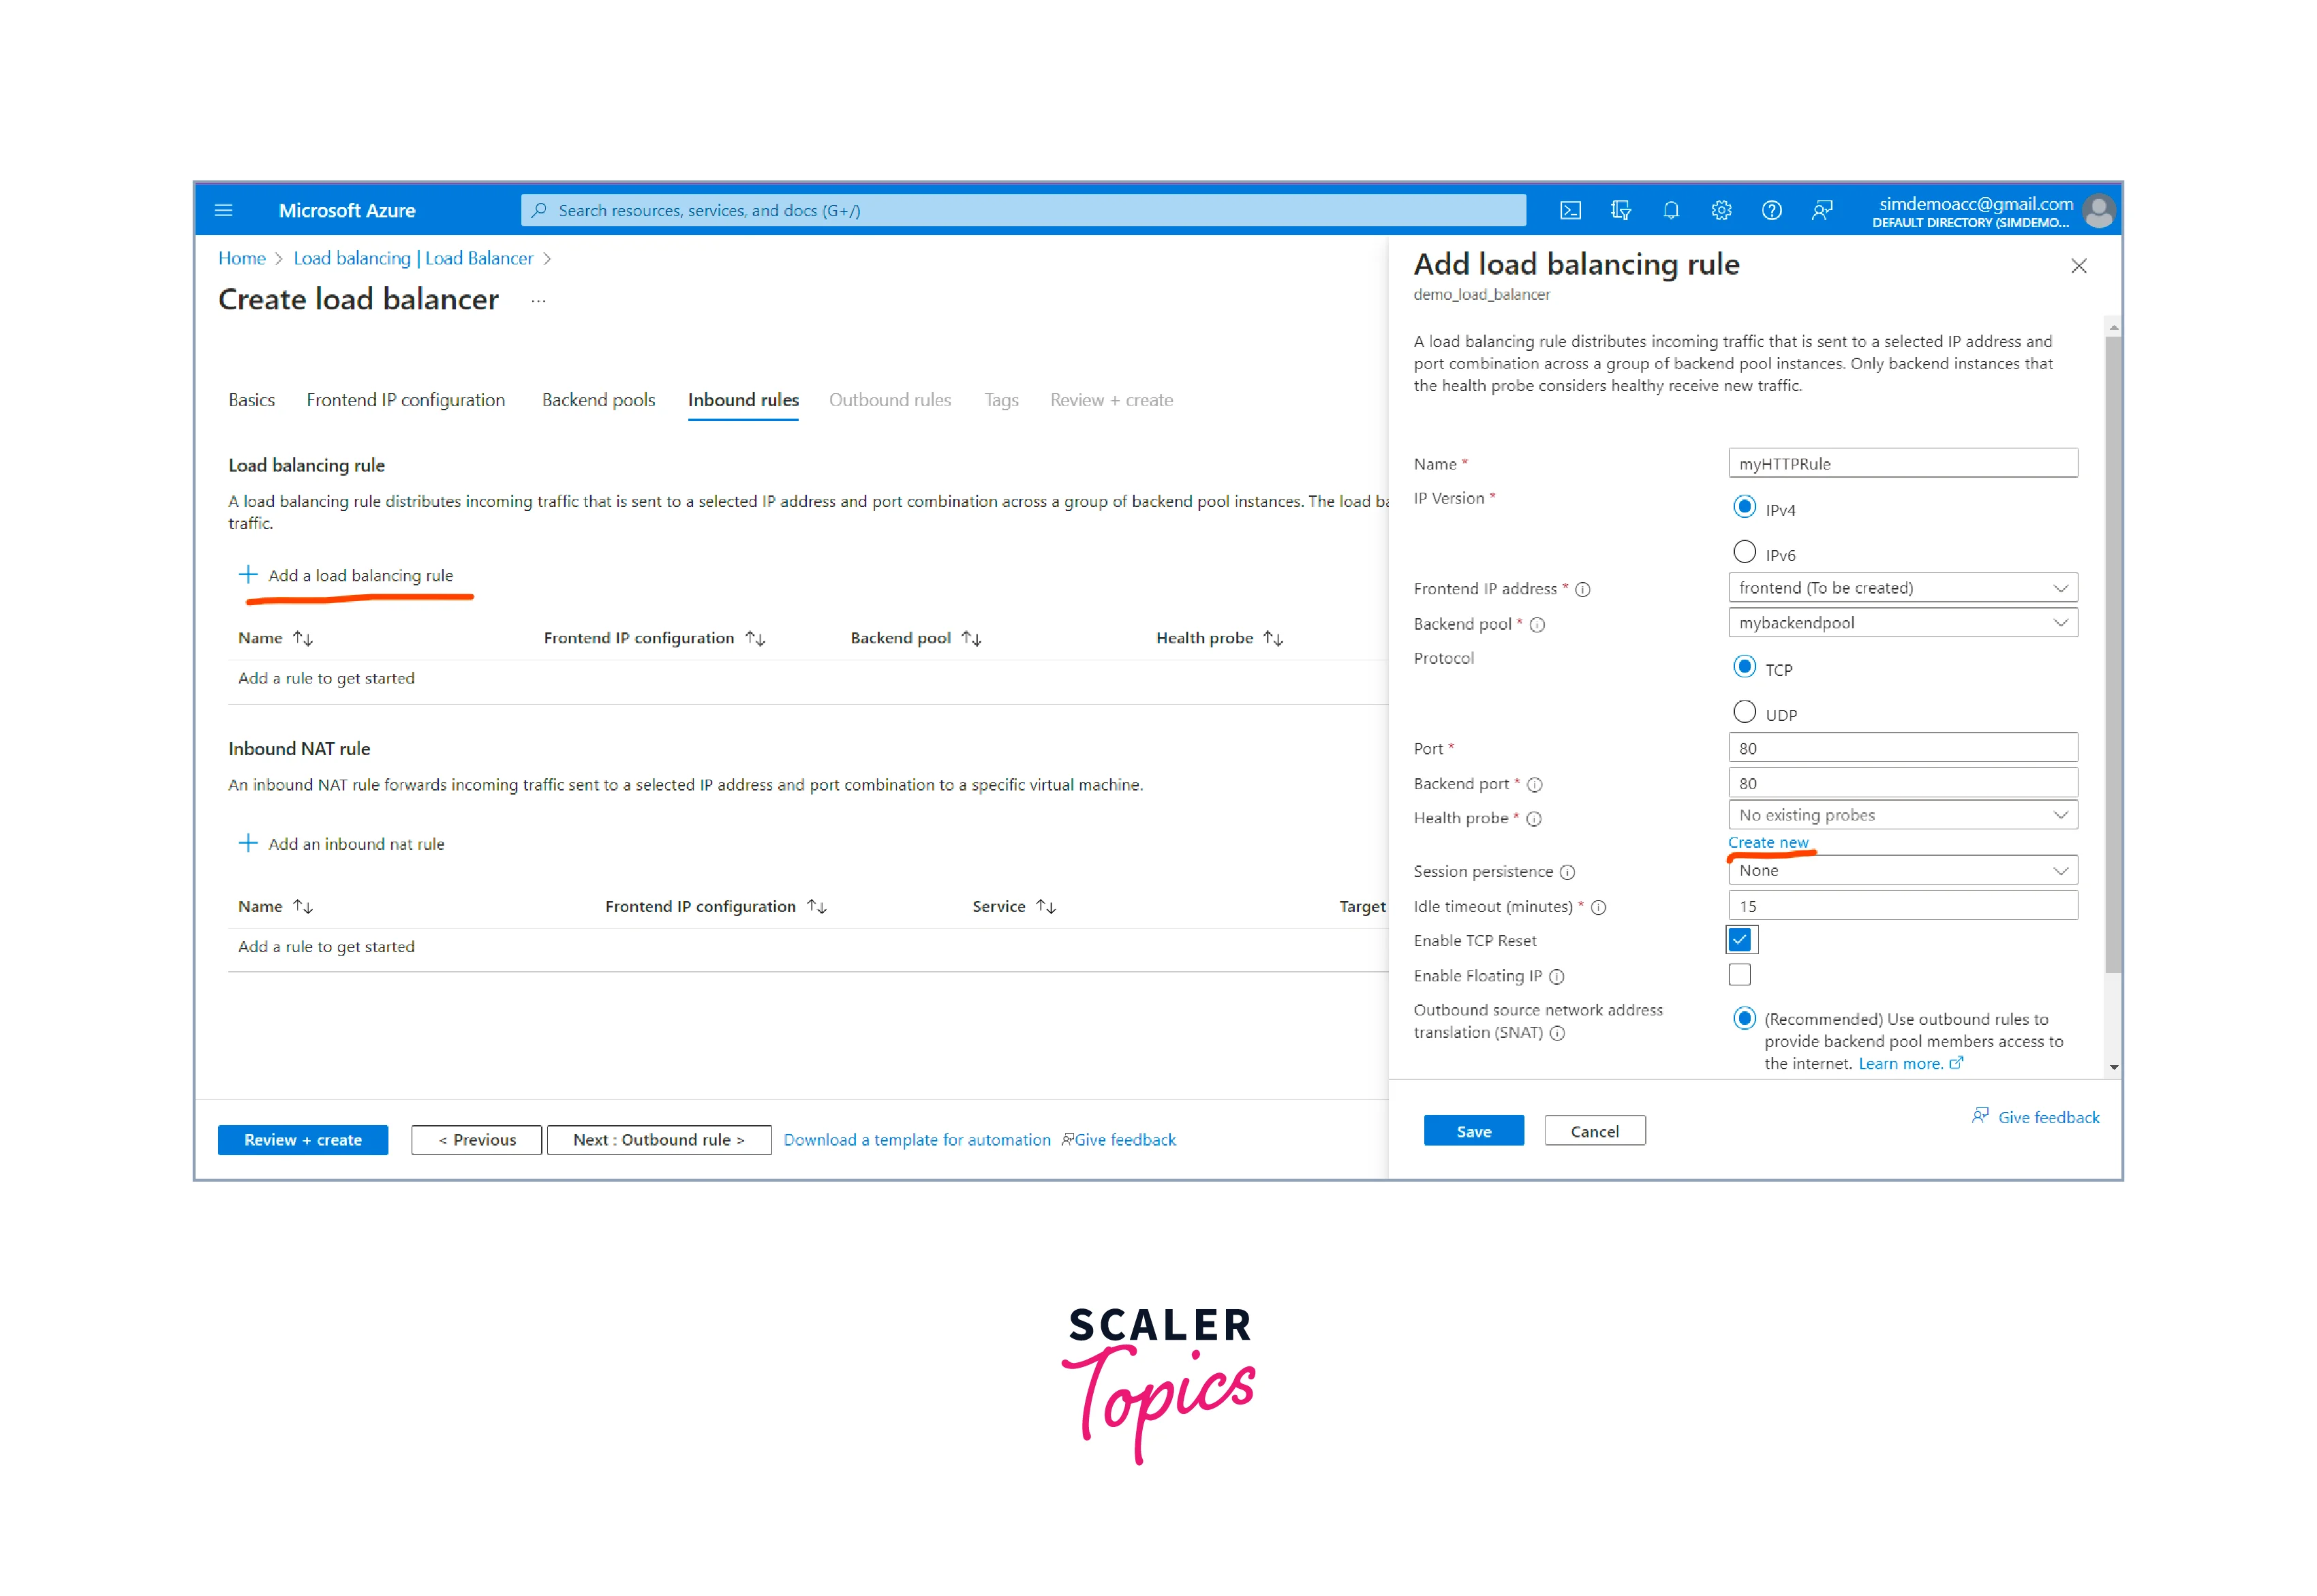
Create a load balancer rule
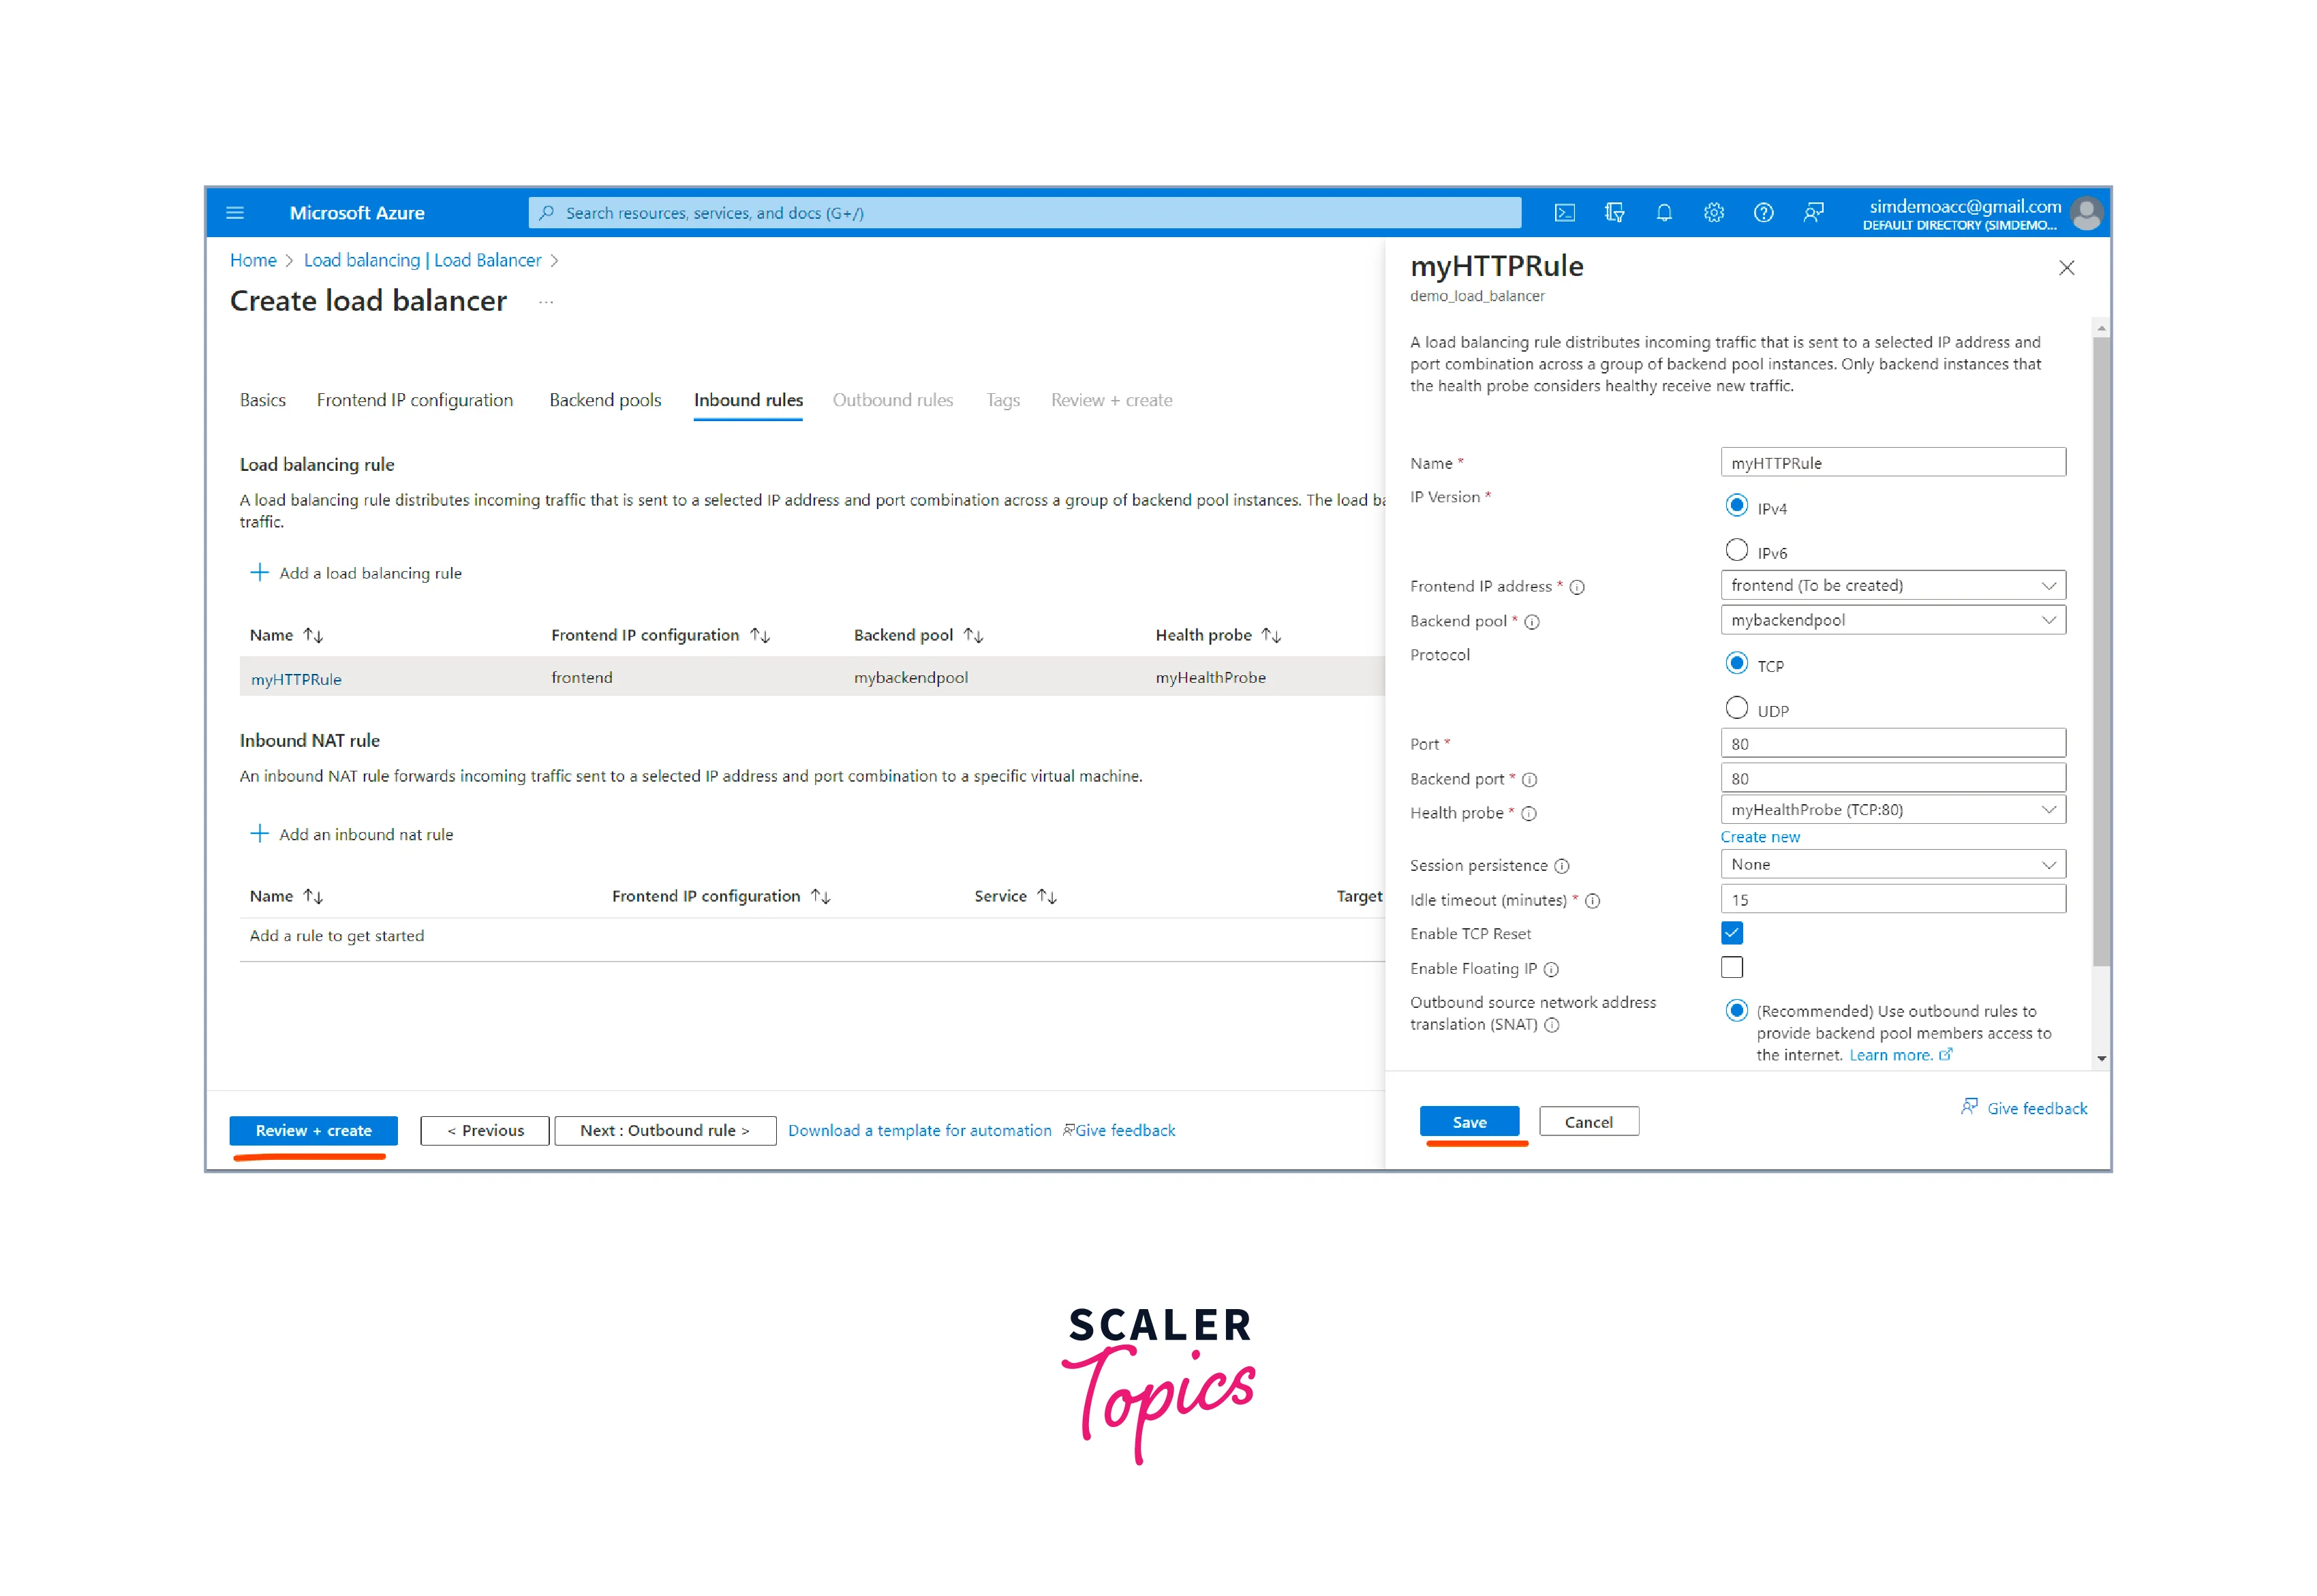
- Click' Add load balancing rule' In the Load balancing rules tab.
- Configure the load balancing rule to define how incoming traffic will be distributed to the backend pool.
Create health probes
- Configure the health probe settings to check the health of the backend instances.
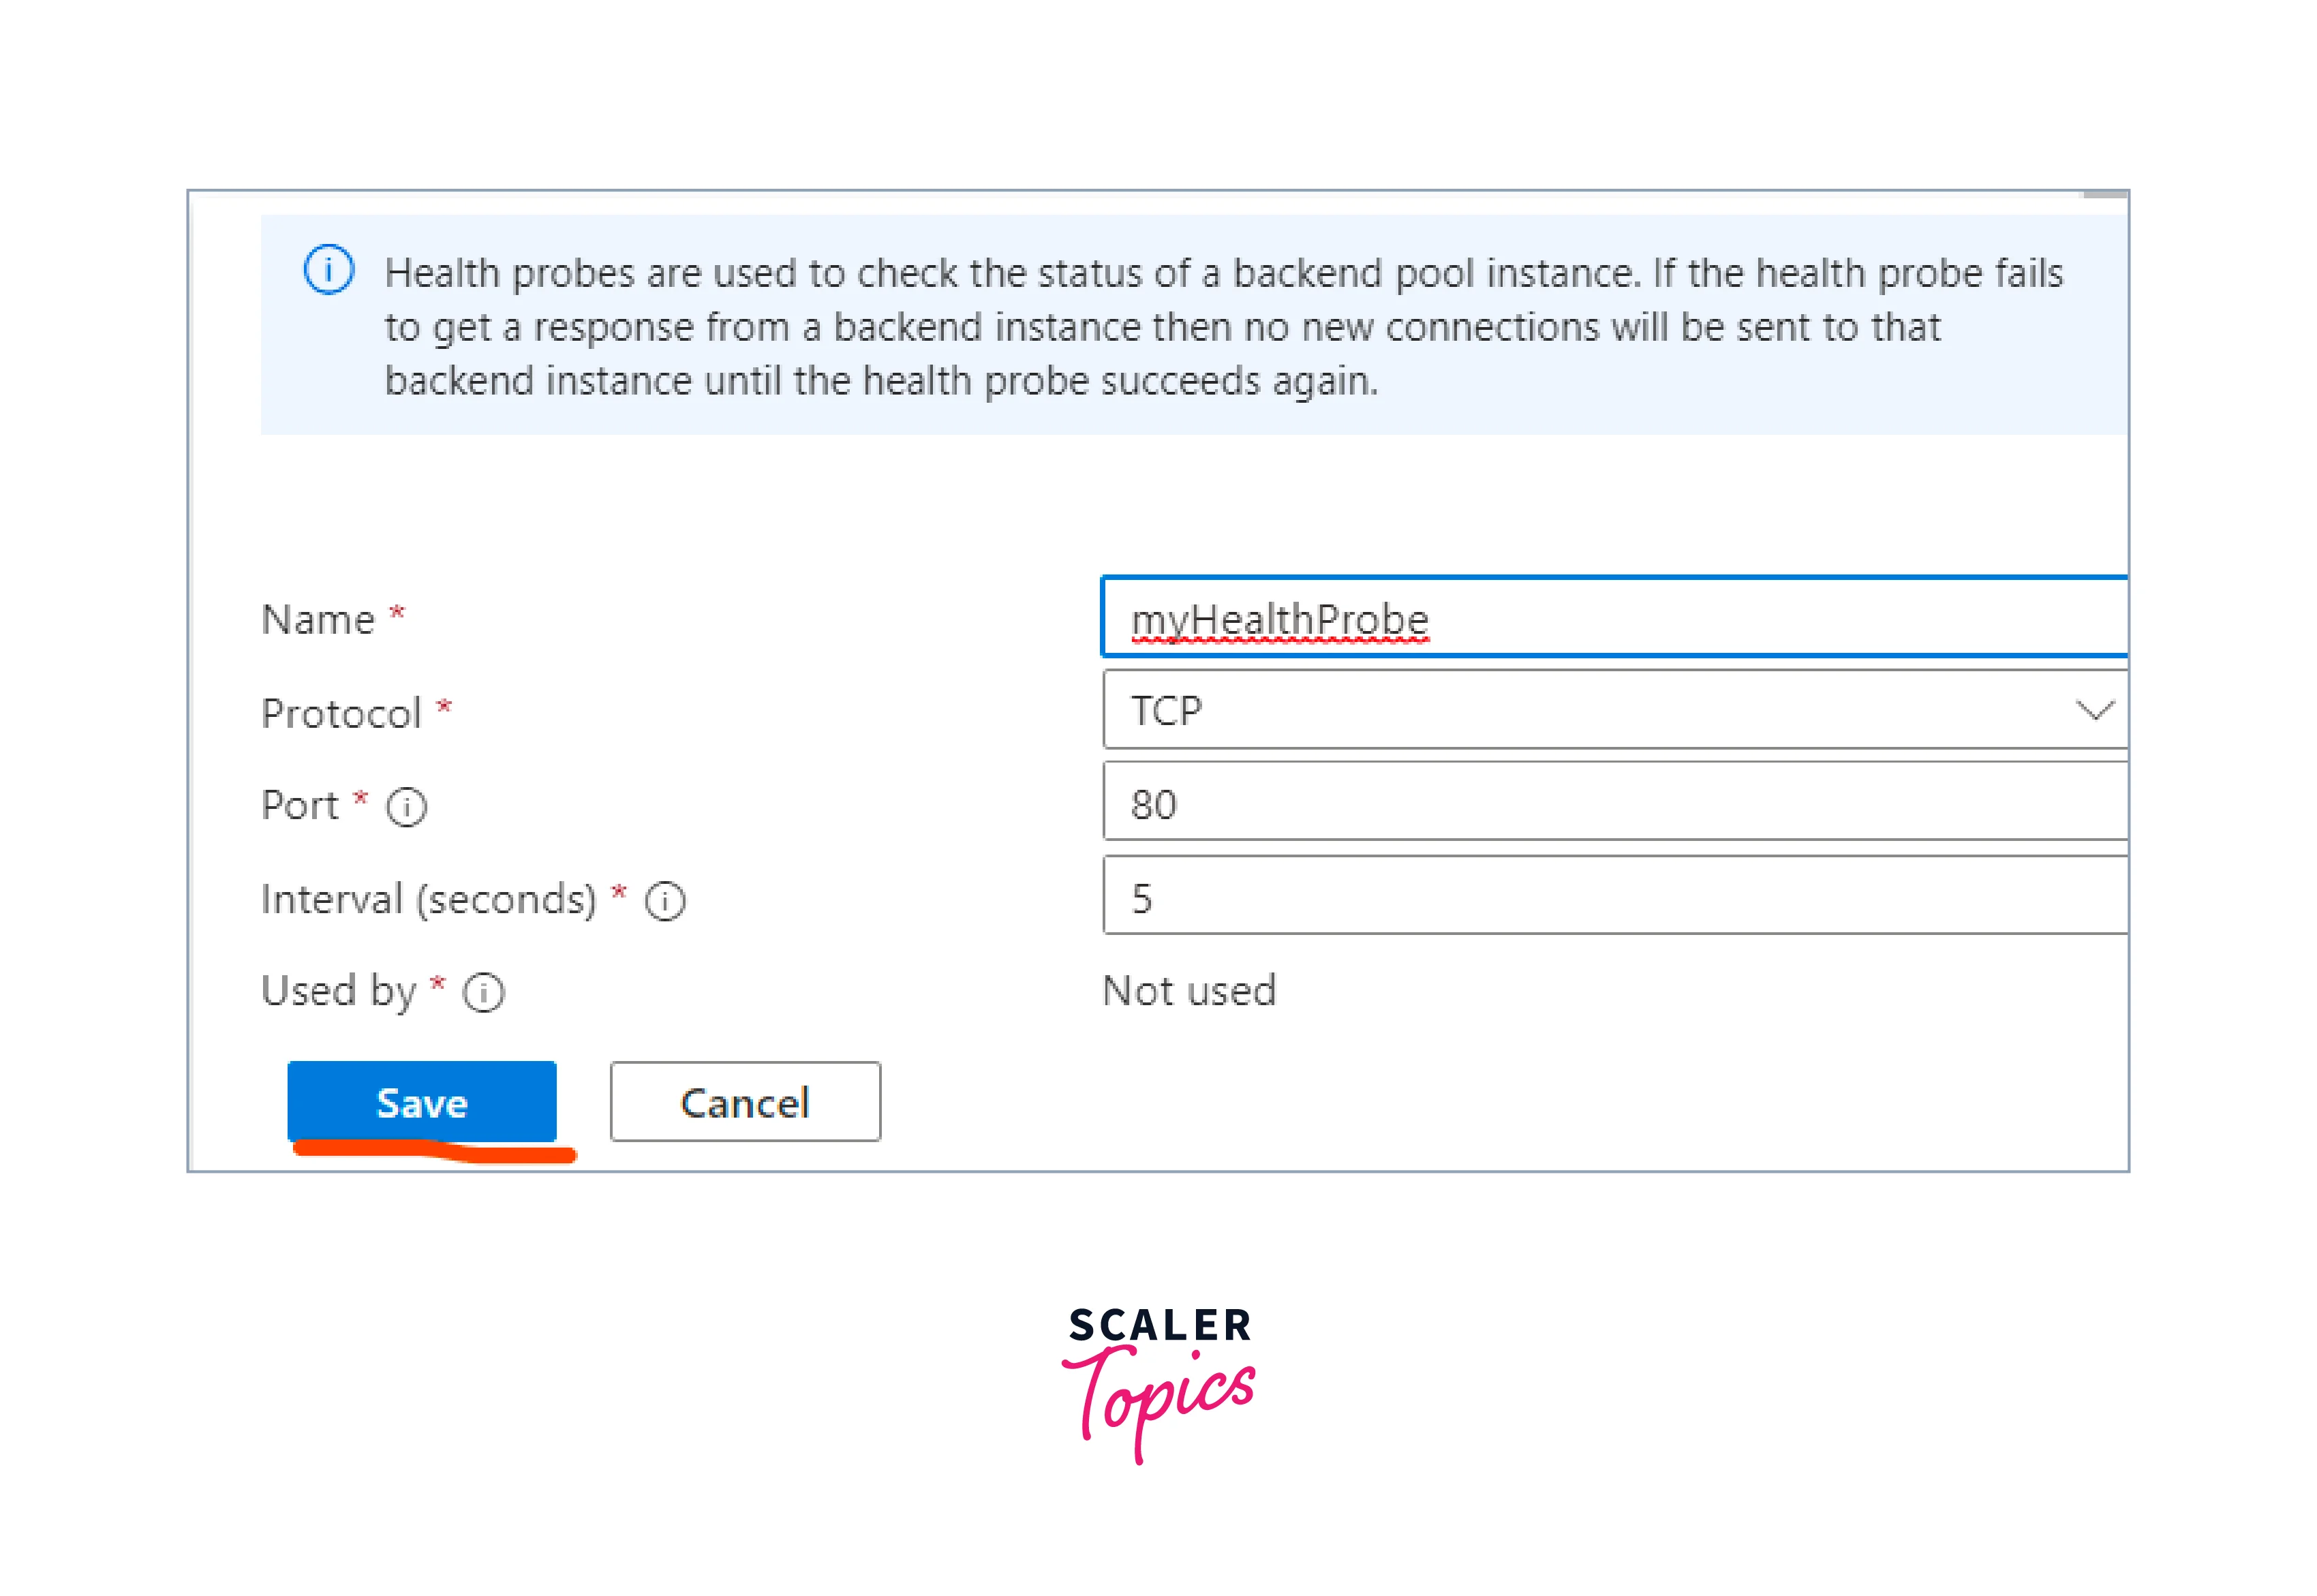
- Save the configurations and click the Review + Create button.
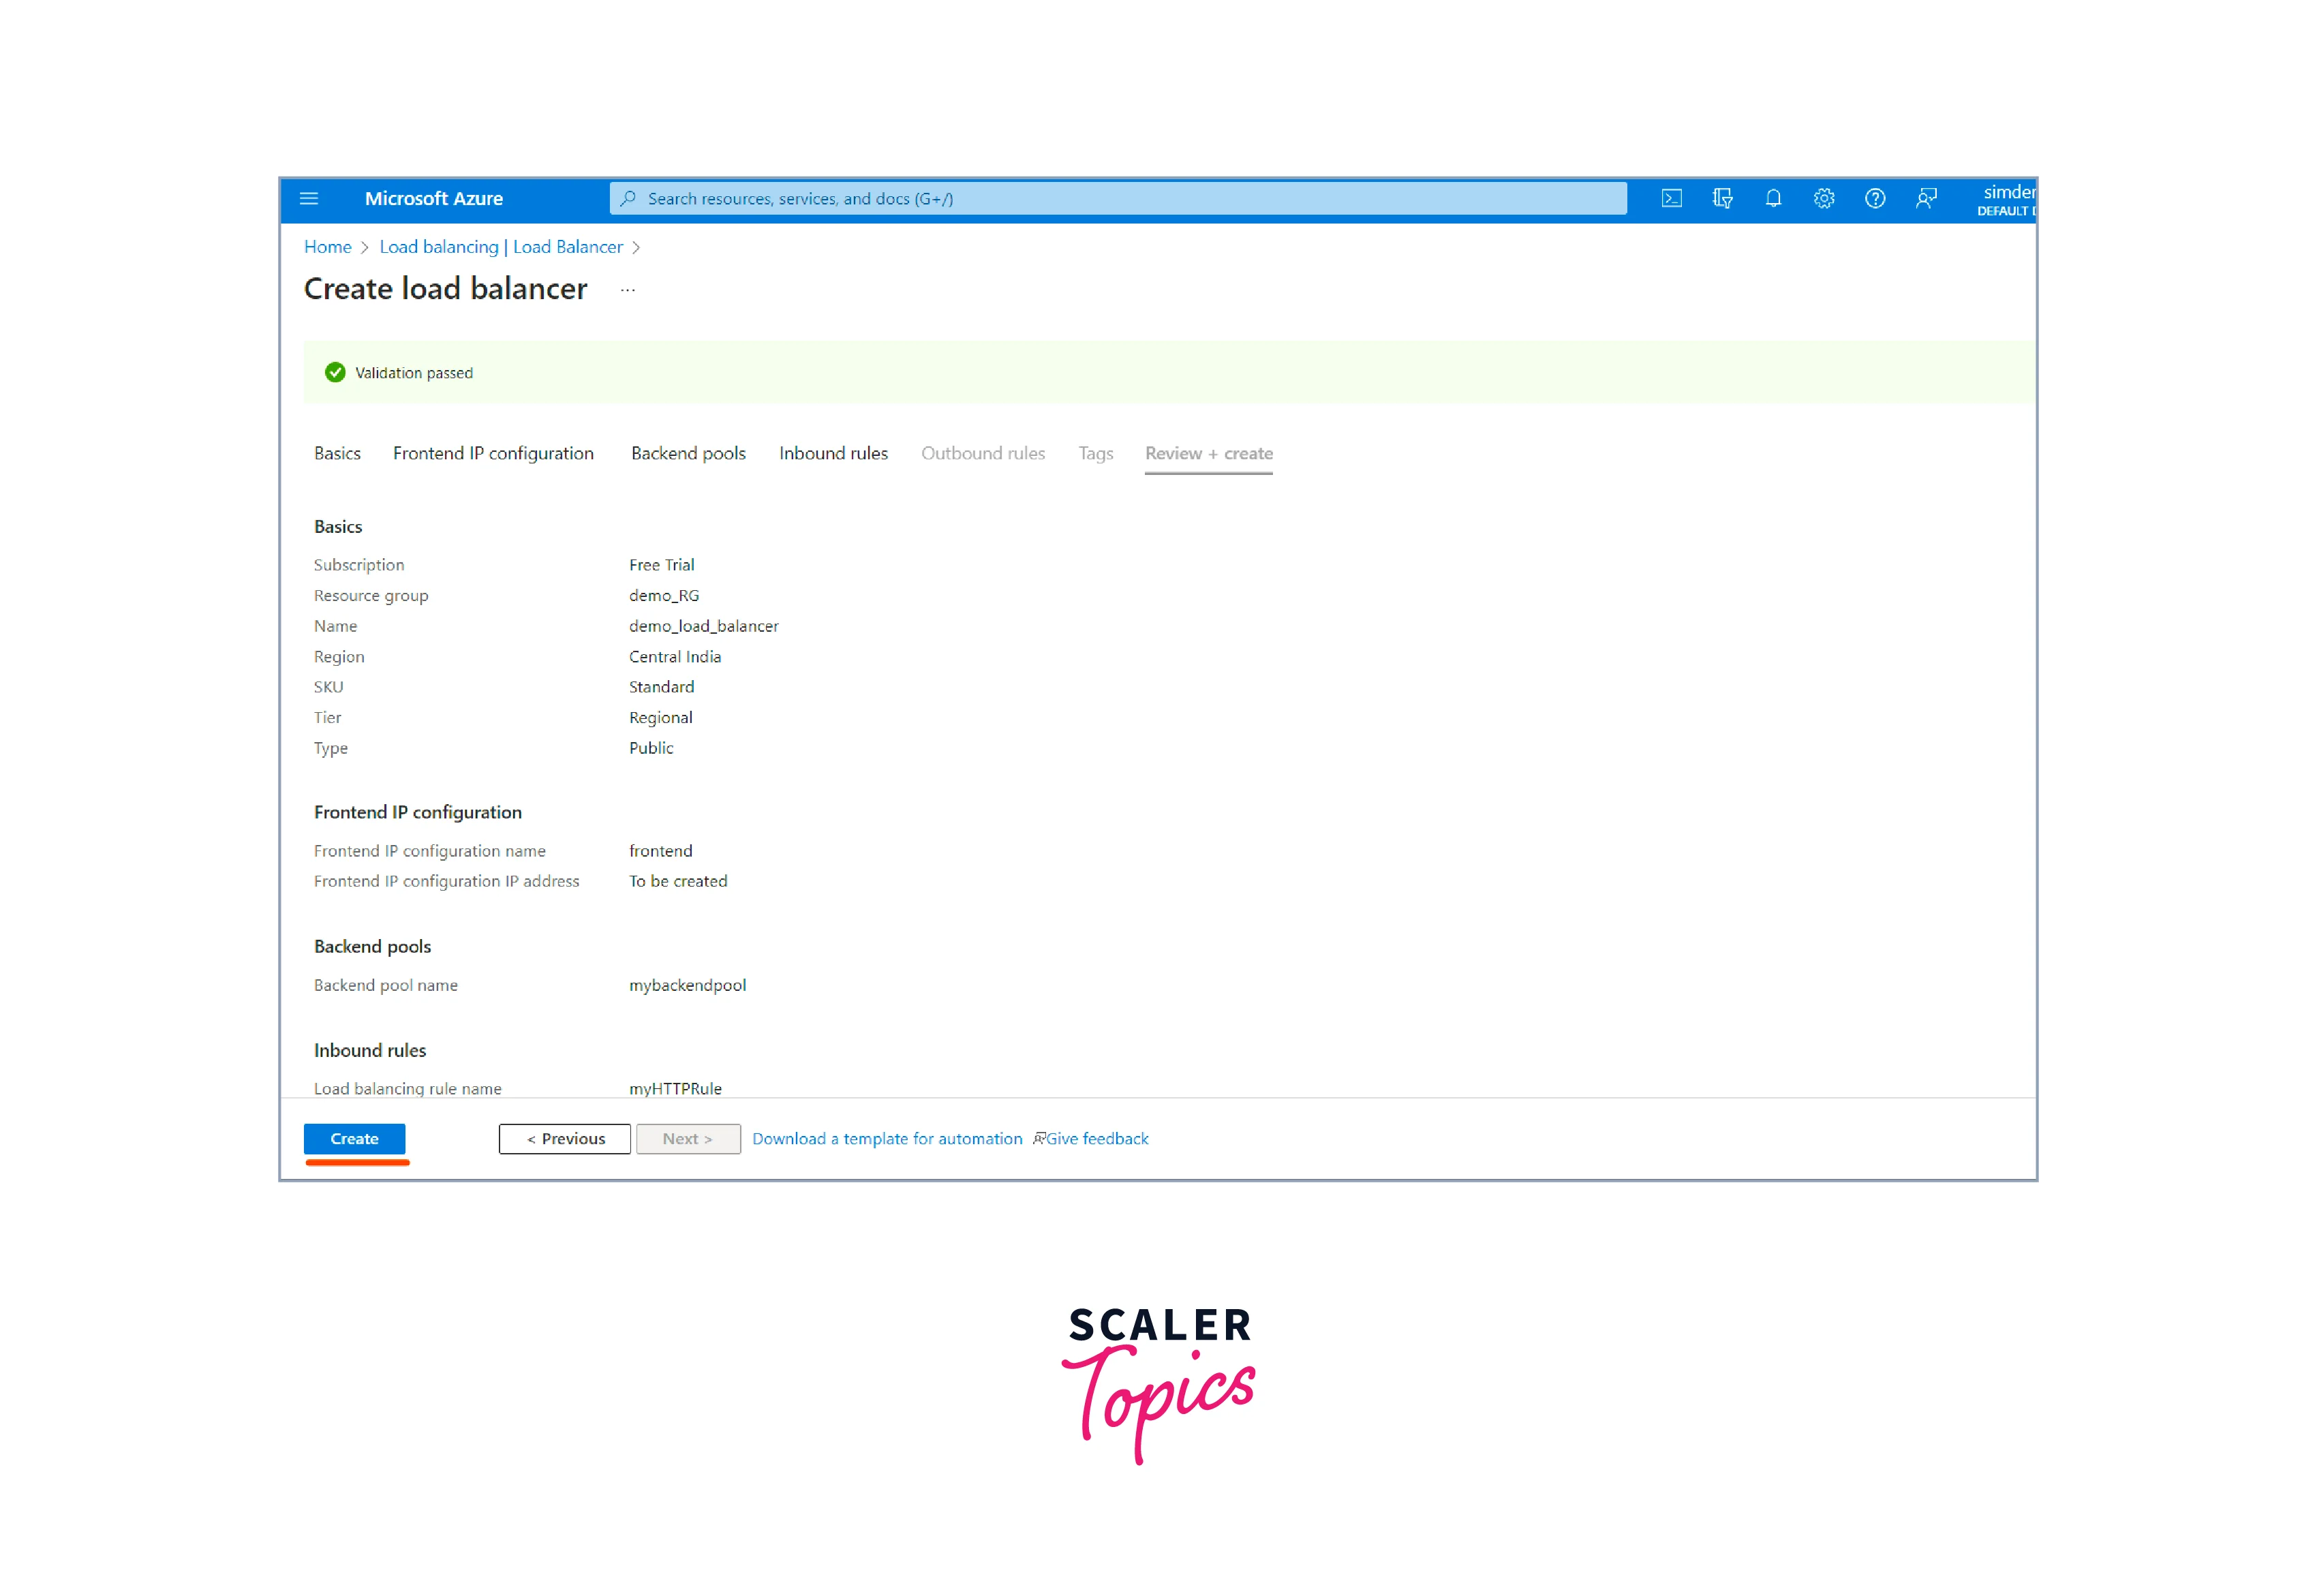
- Review the settings to ensure they are correct after completing all the necessary configurations. Click the "Create" button to start the load balancer creation process.
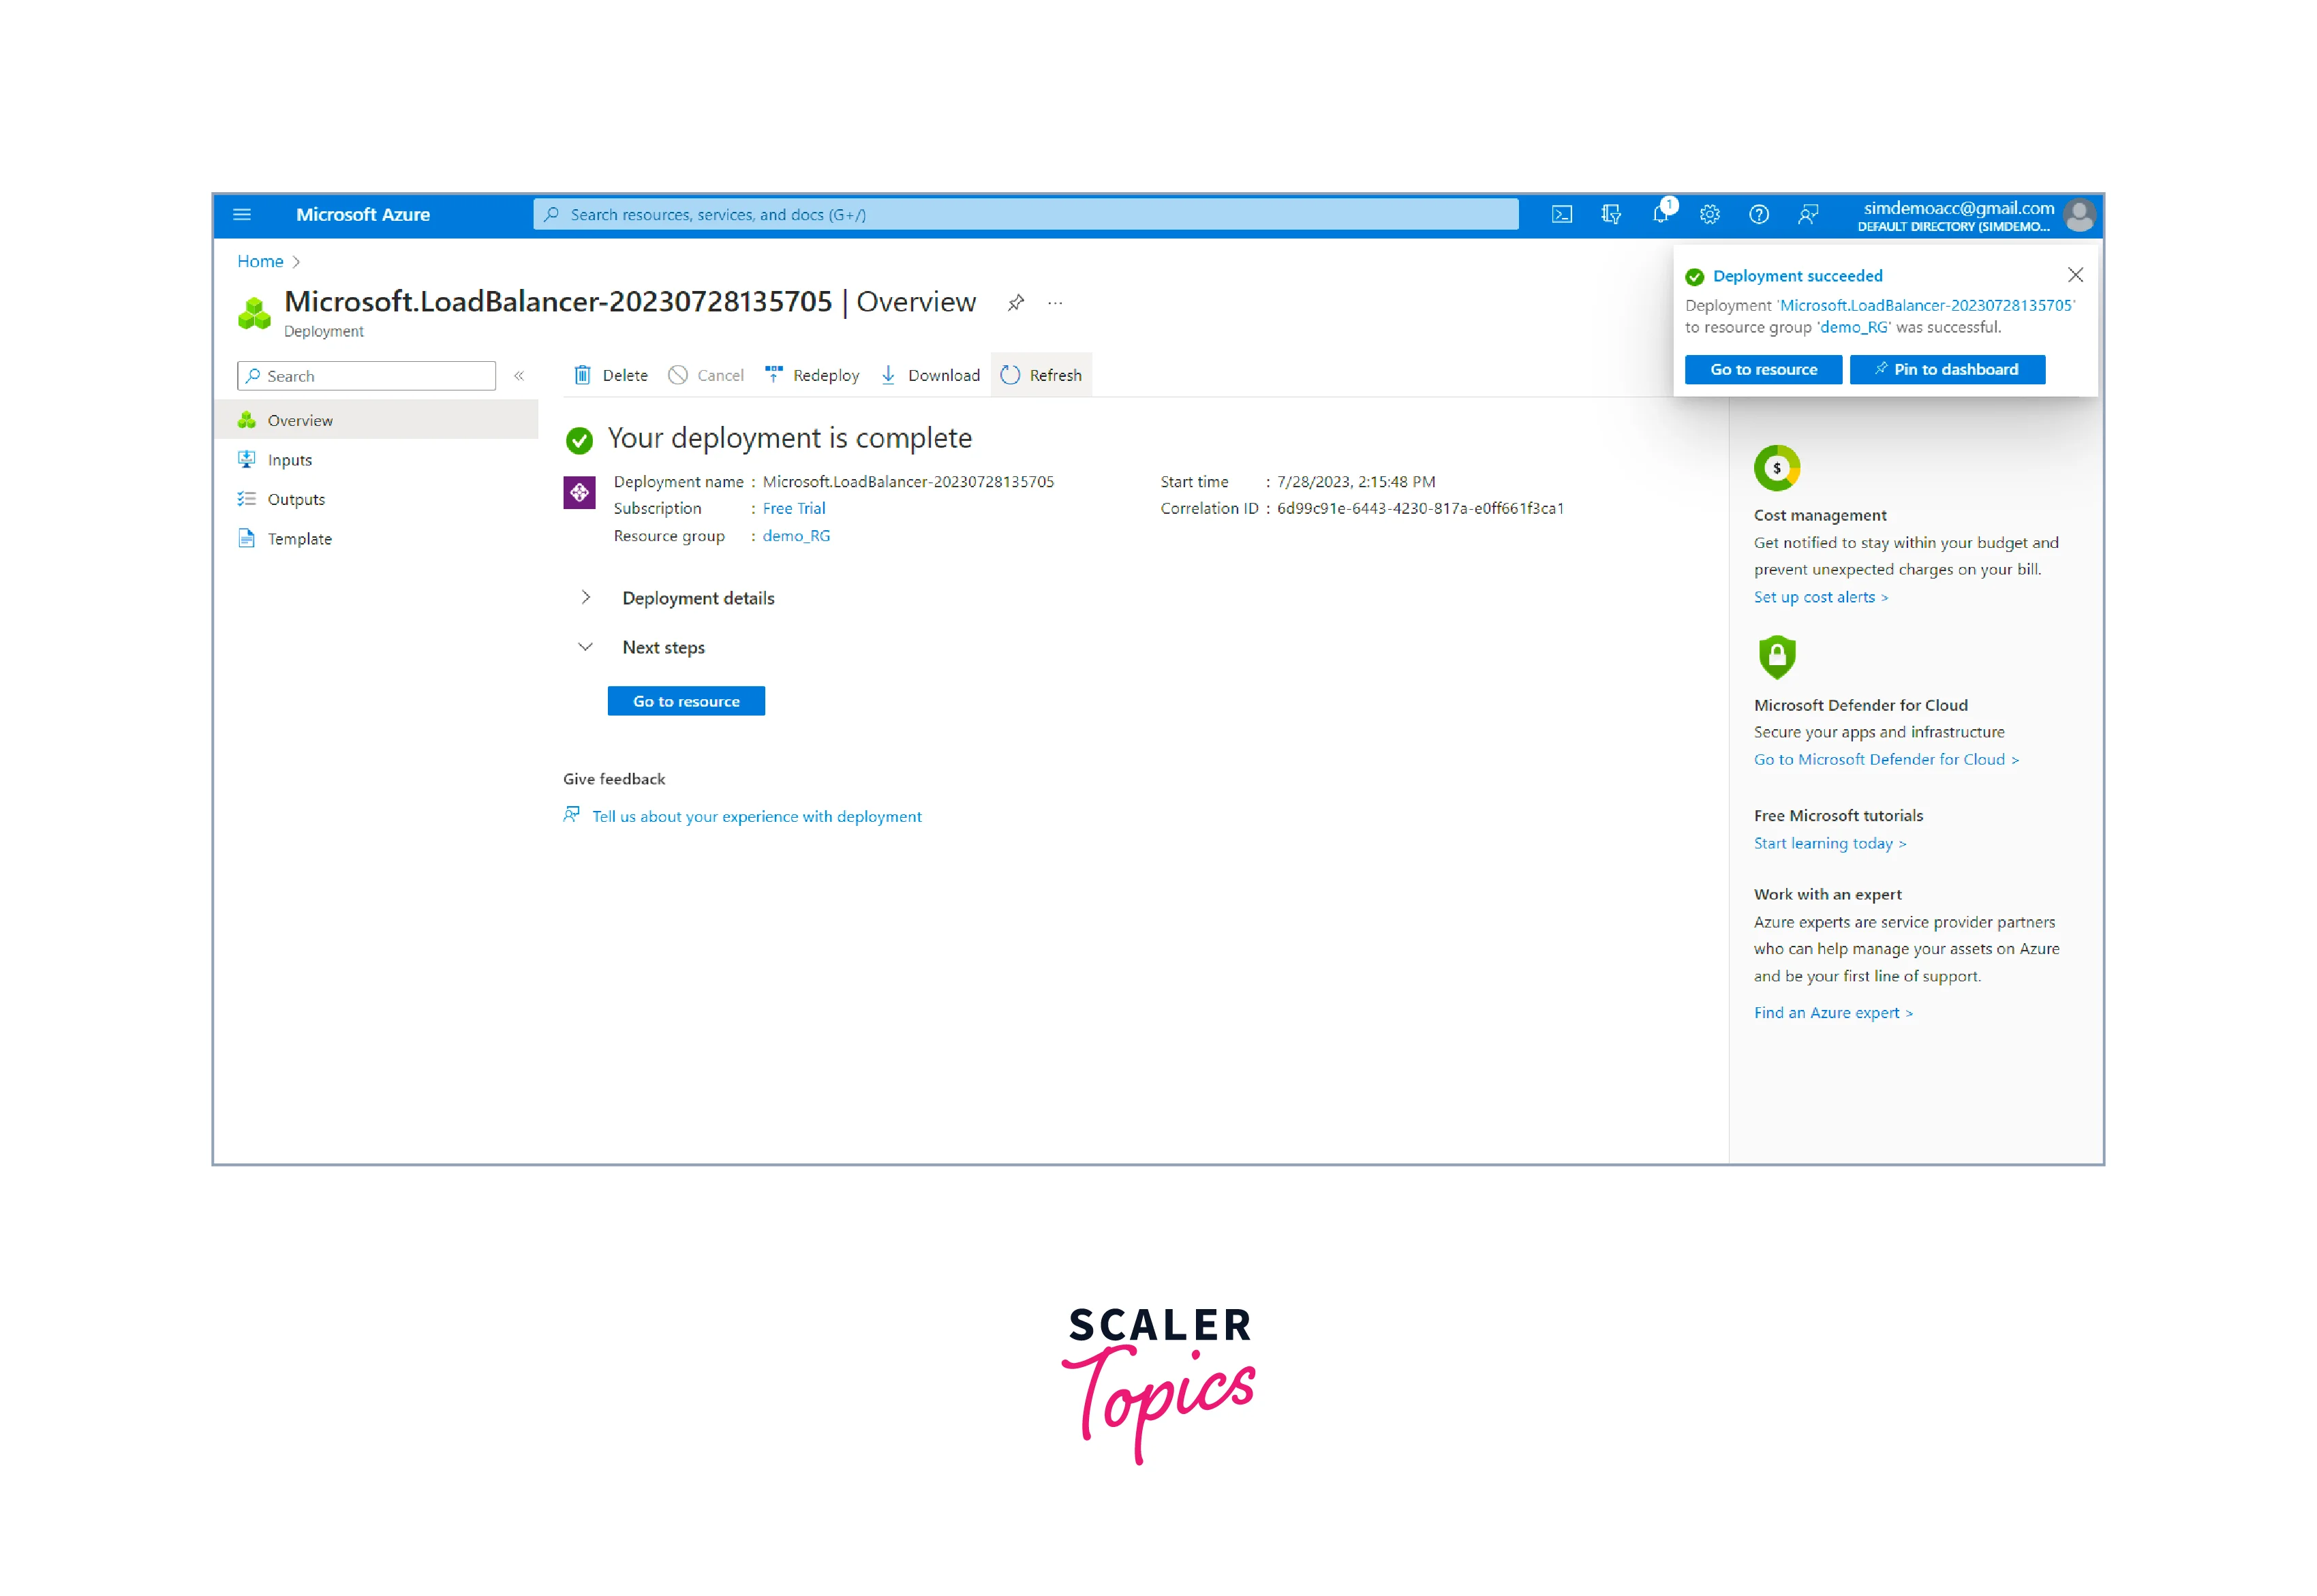
- Completing the deployment process takes some time, and you have your load balancer ready.
NAT Gateway
We also need to create NAT Gateway to connect to the Virtual machines inside the Virtual Network.
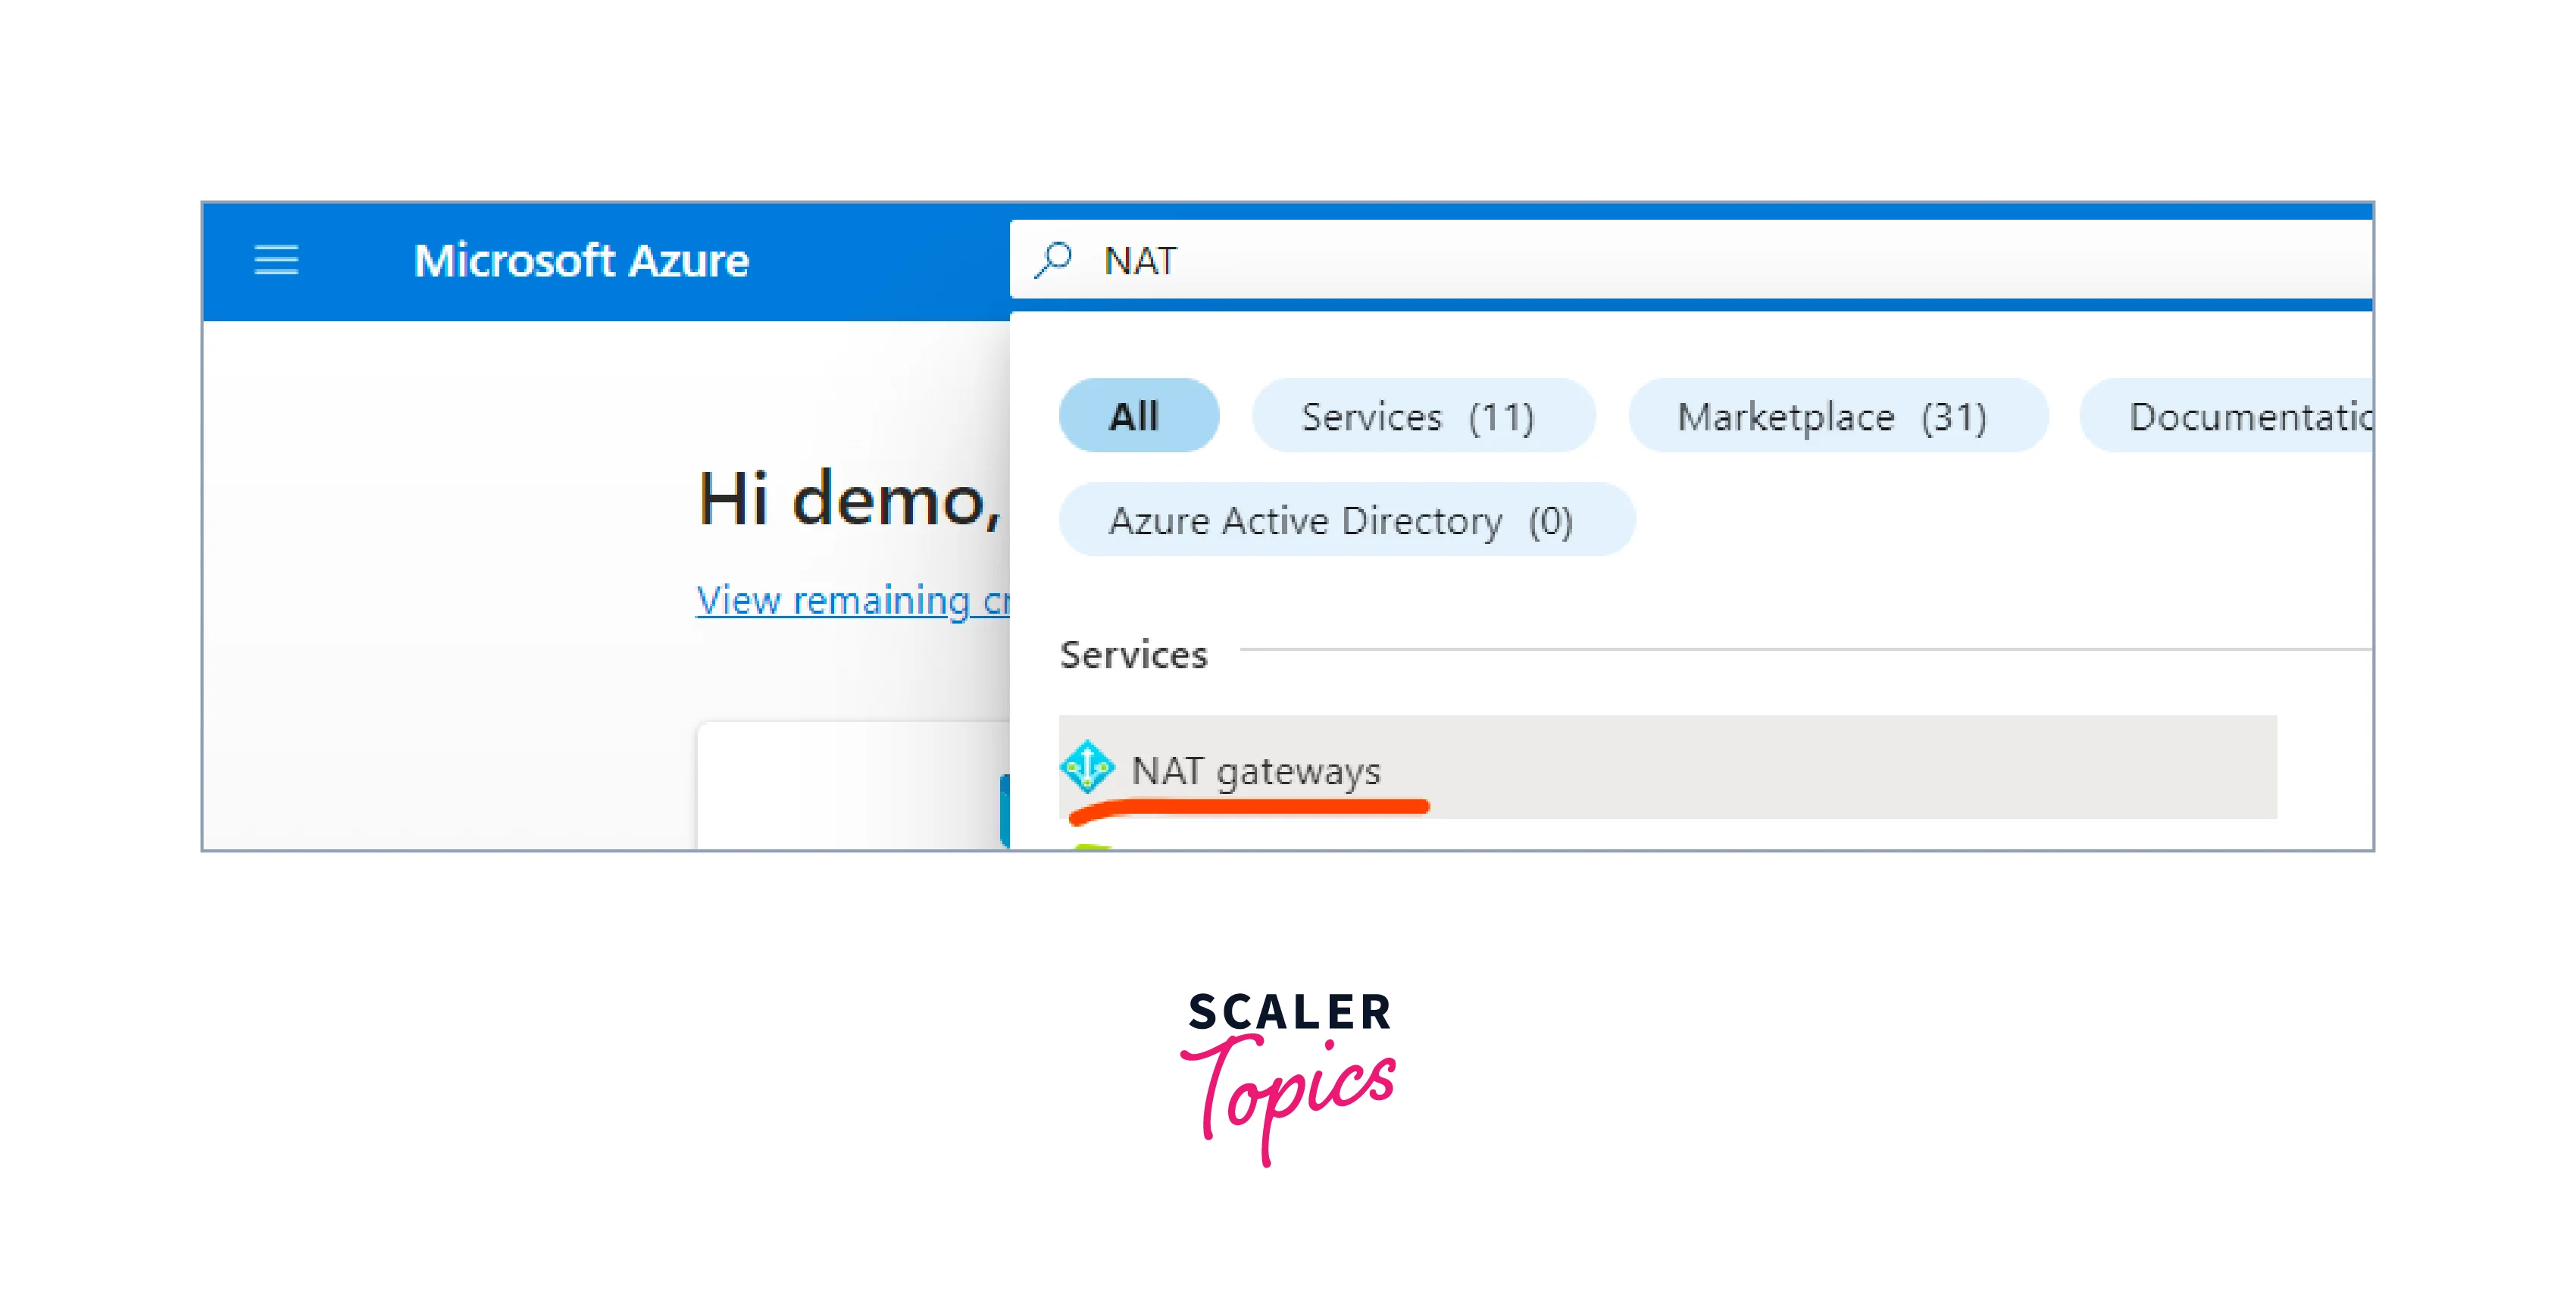
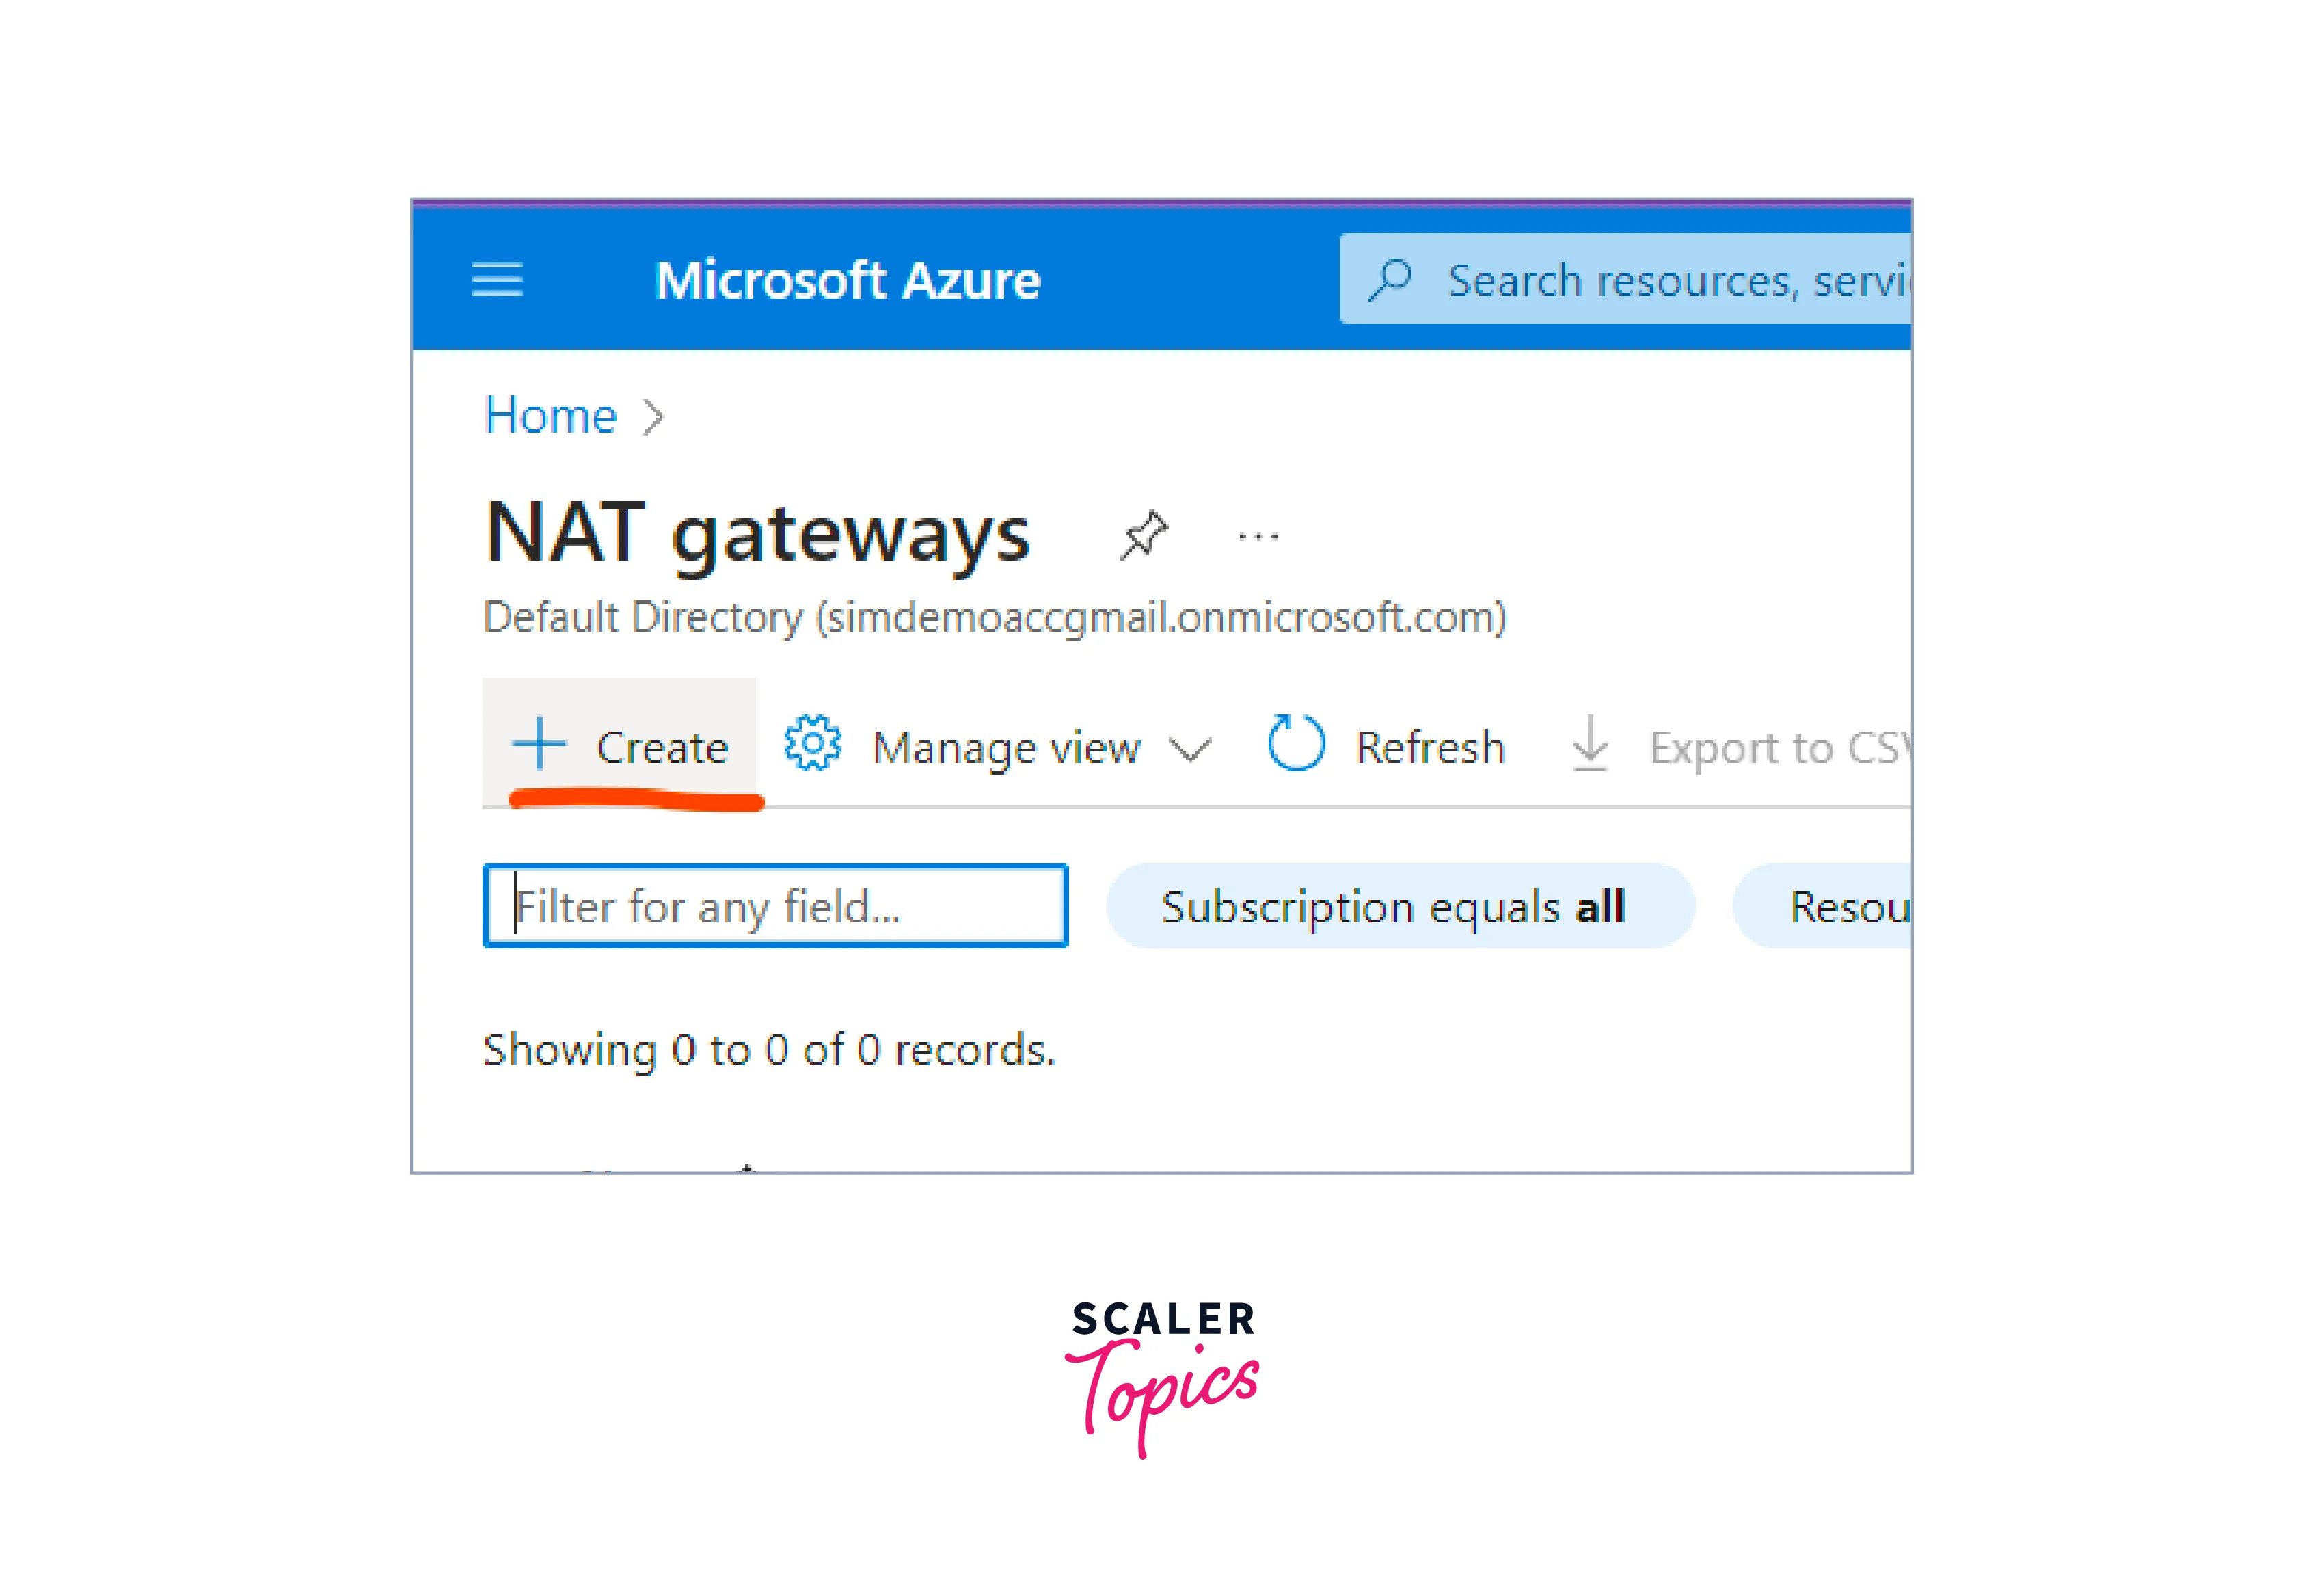
- Search for "NAT Gateway" in the search bar, and select the NAT Gateways resource from the dropdown.
- Create button can be used to create a new NAT Gateway.
-
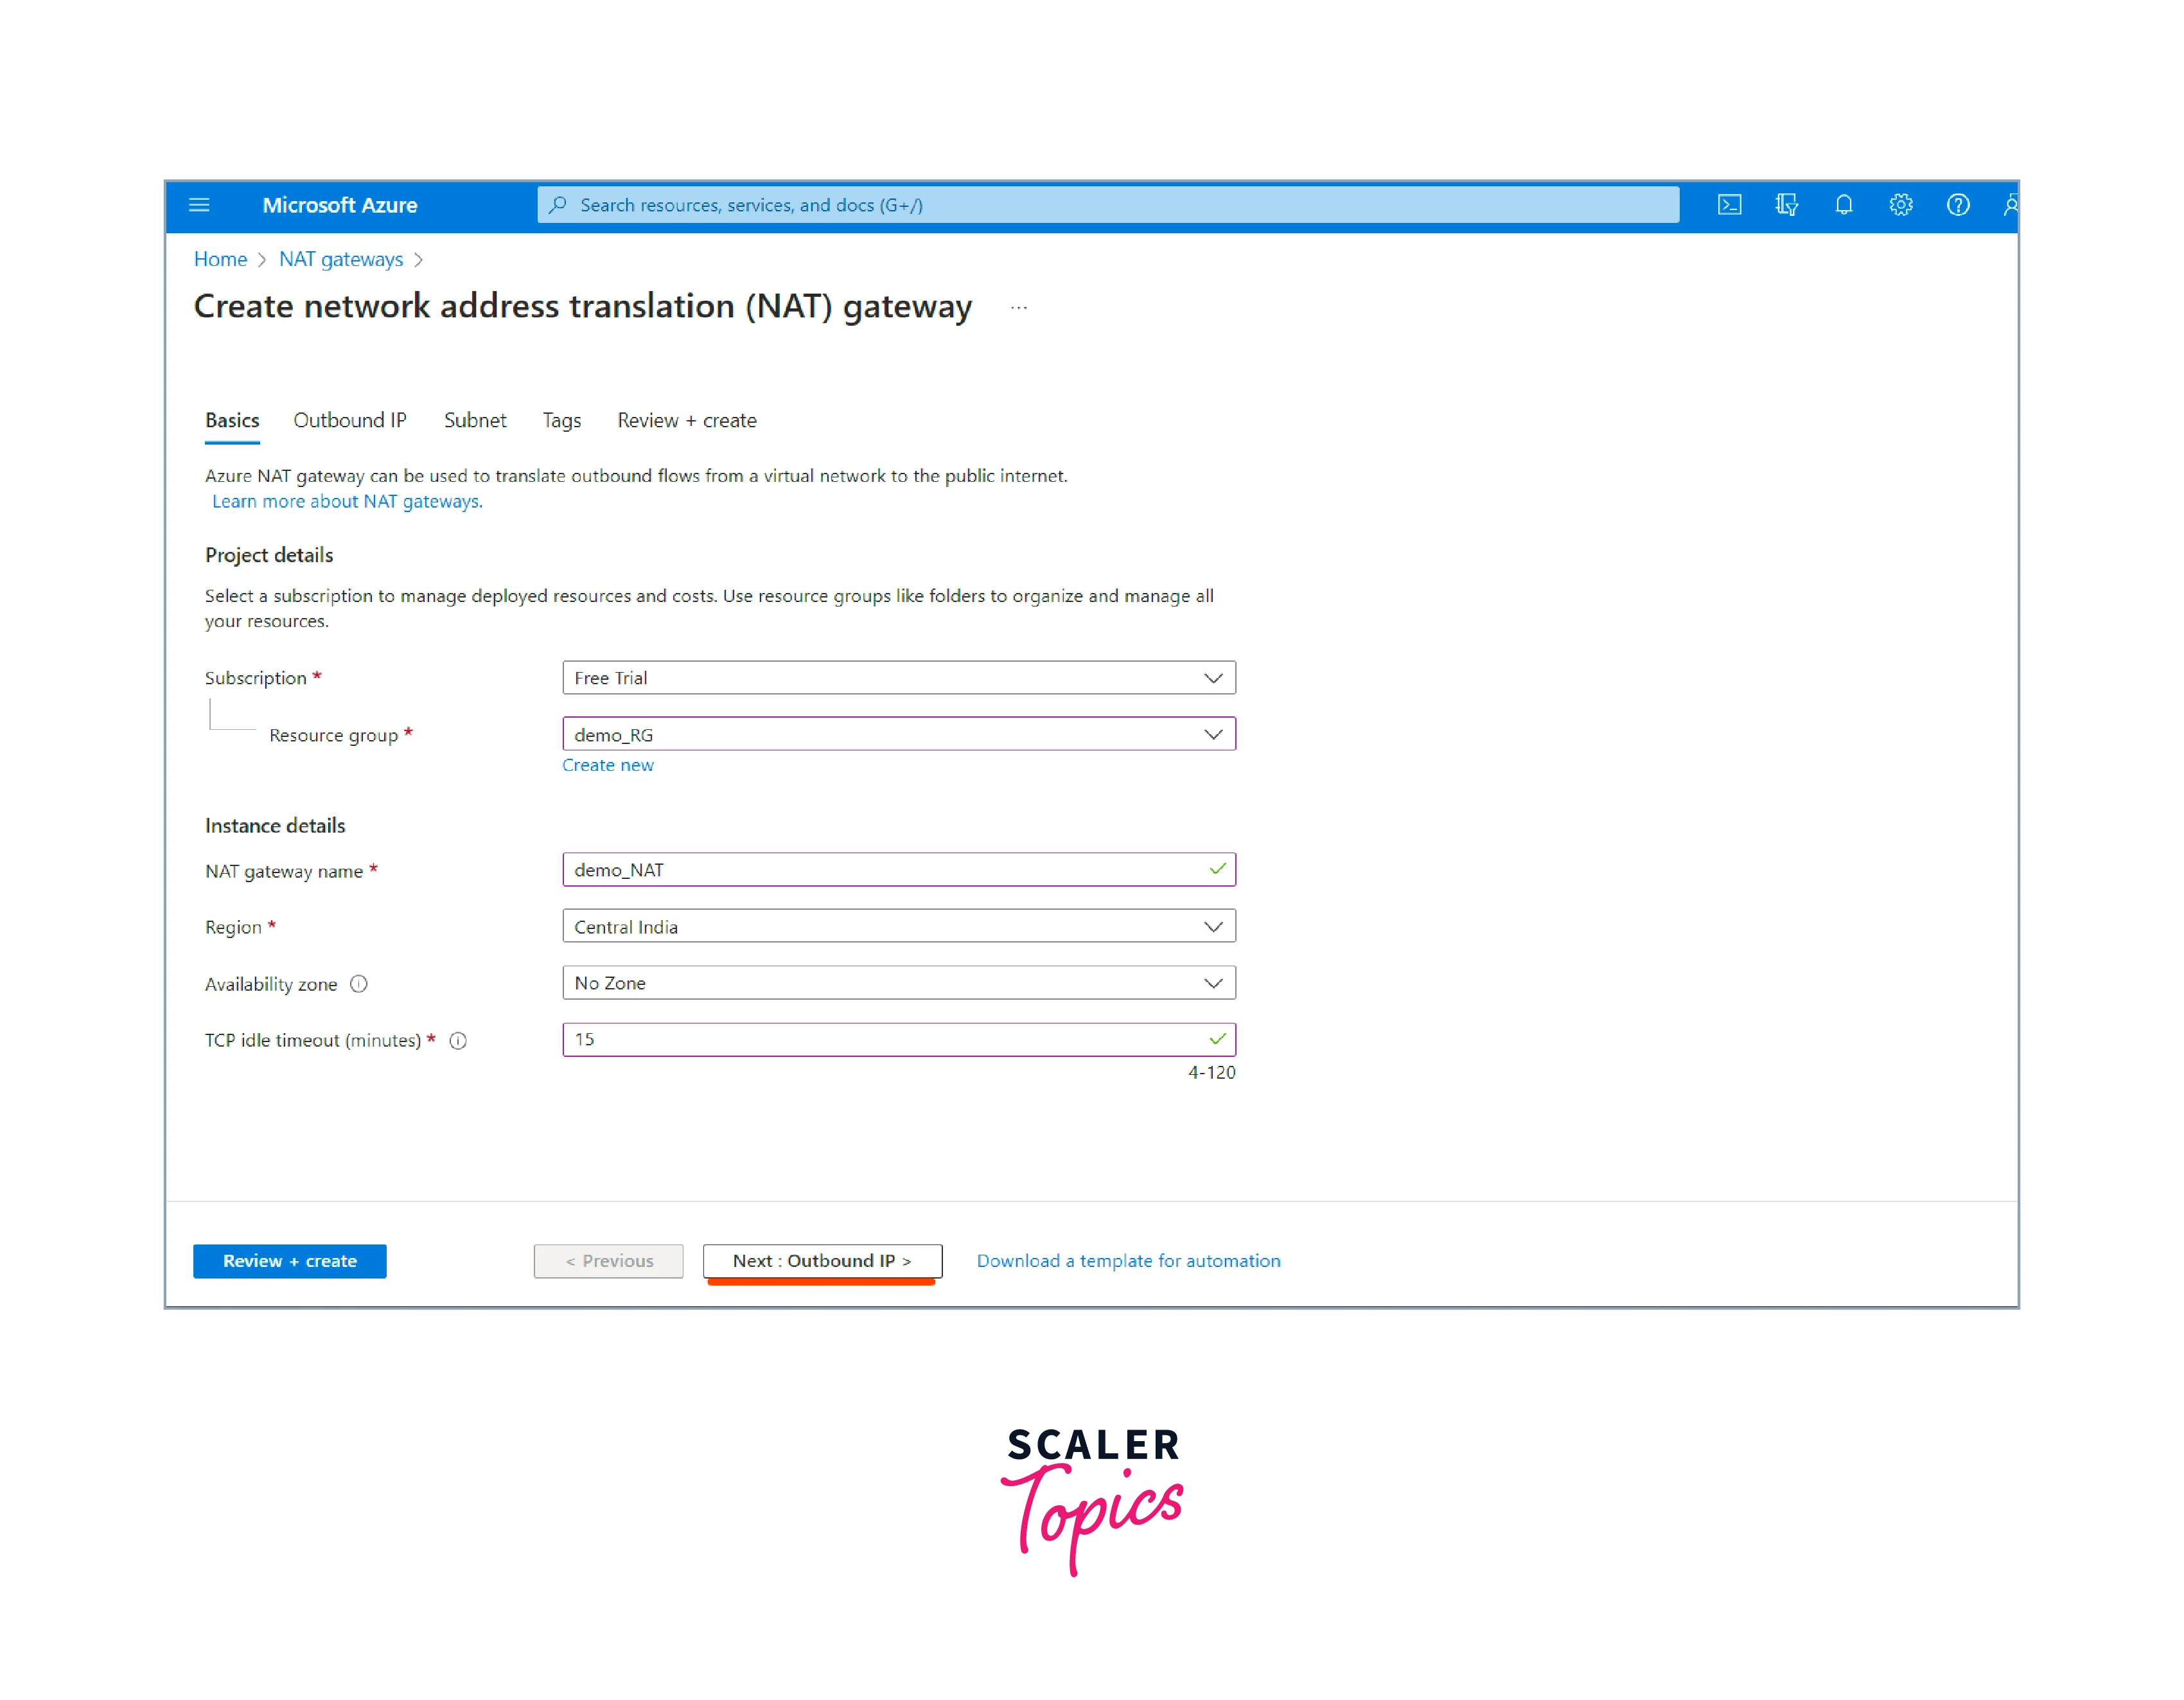
Fill in the NAT gateway details:
- Choose the subscription you would like to use while creating the NAT Gateway.
- Create a new resource group or select an existing one where the NAT gateway will be deployed.
- Provide a name for your NAT gateway. The name should be unique.
- Choose the region where you want the NAT gateway to be located. Next, we need to Outbound IP.
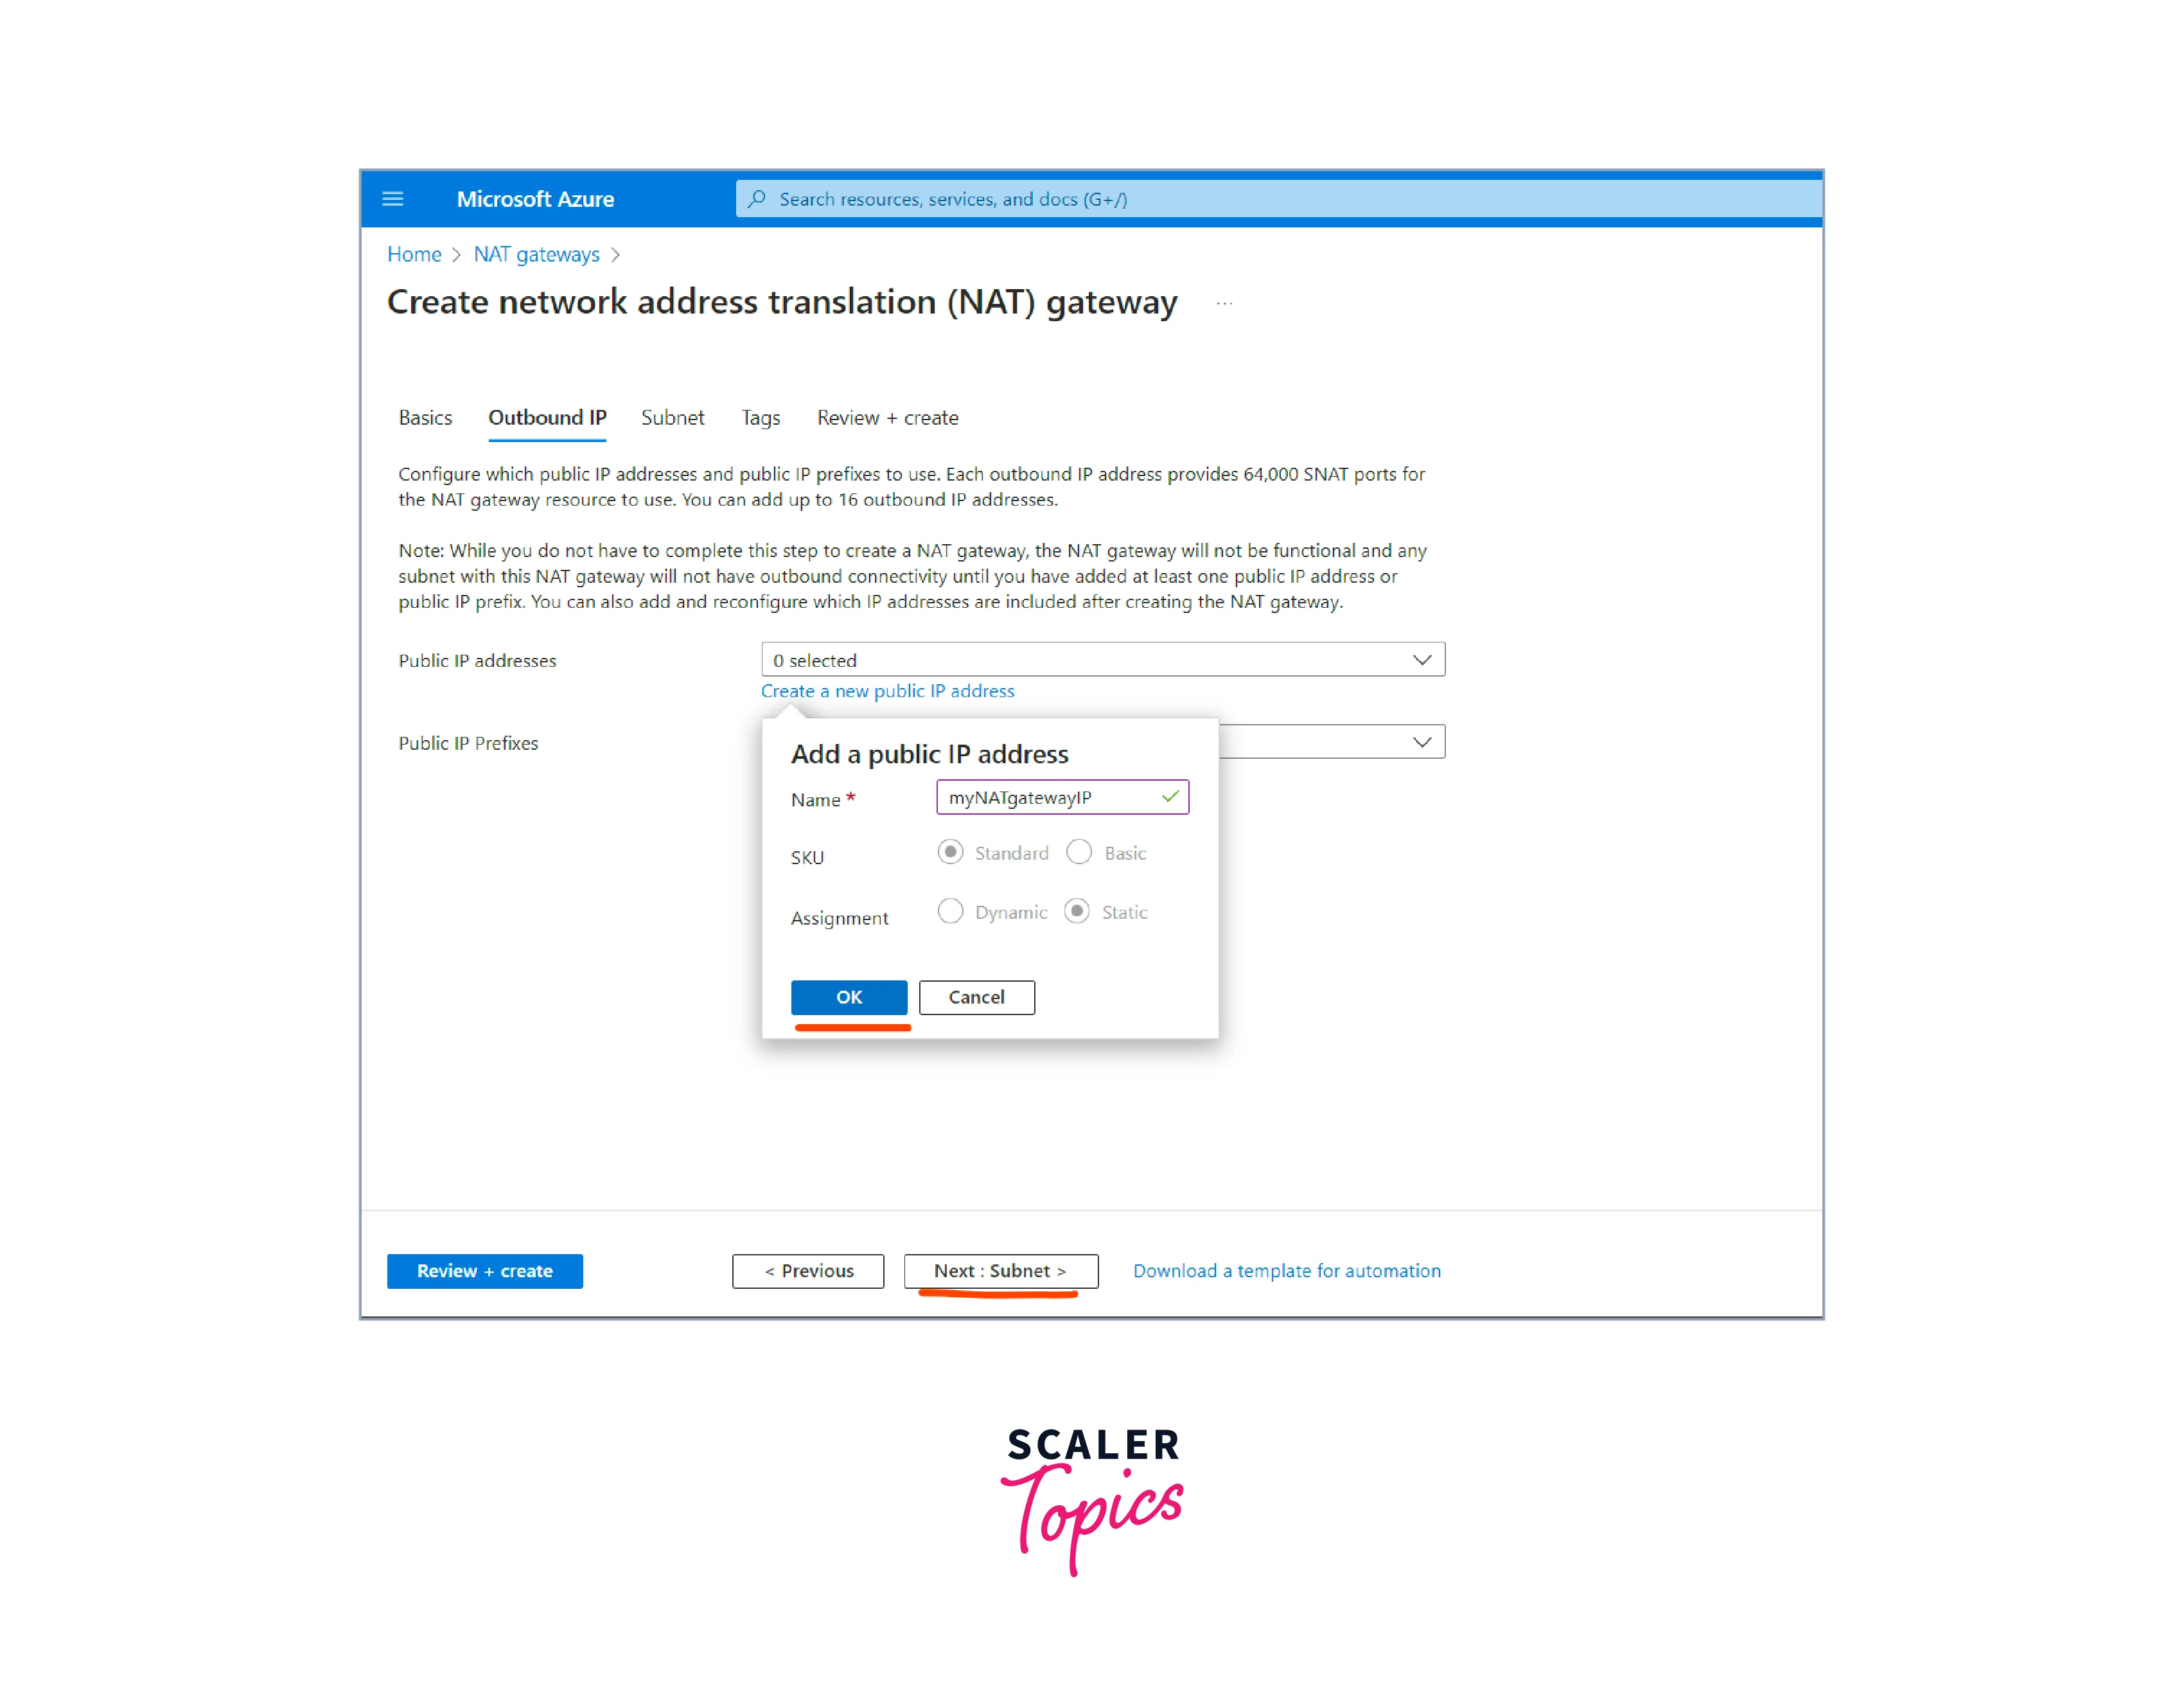
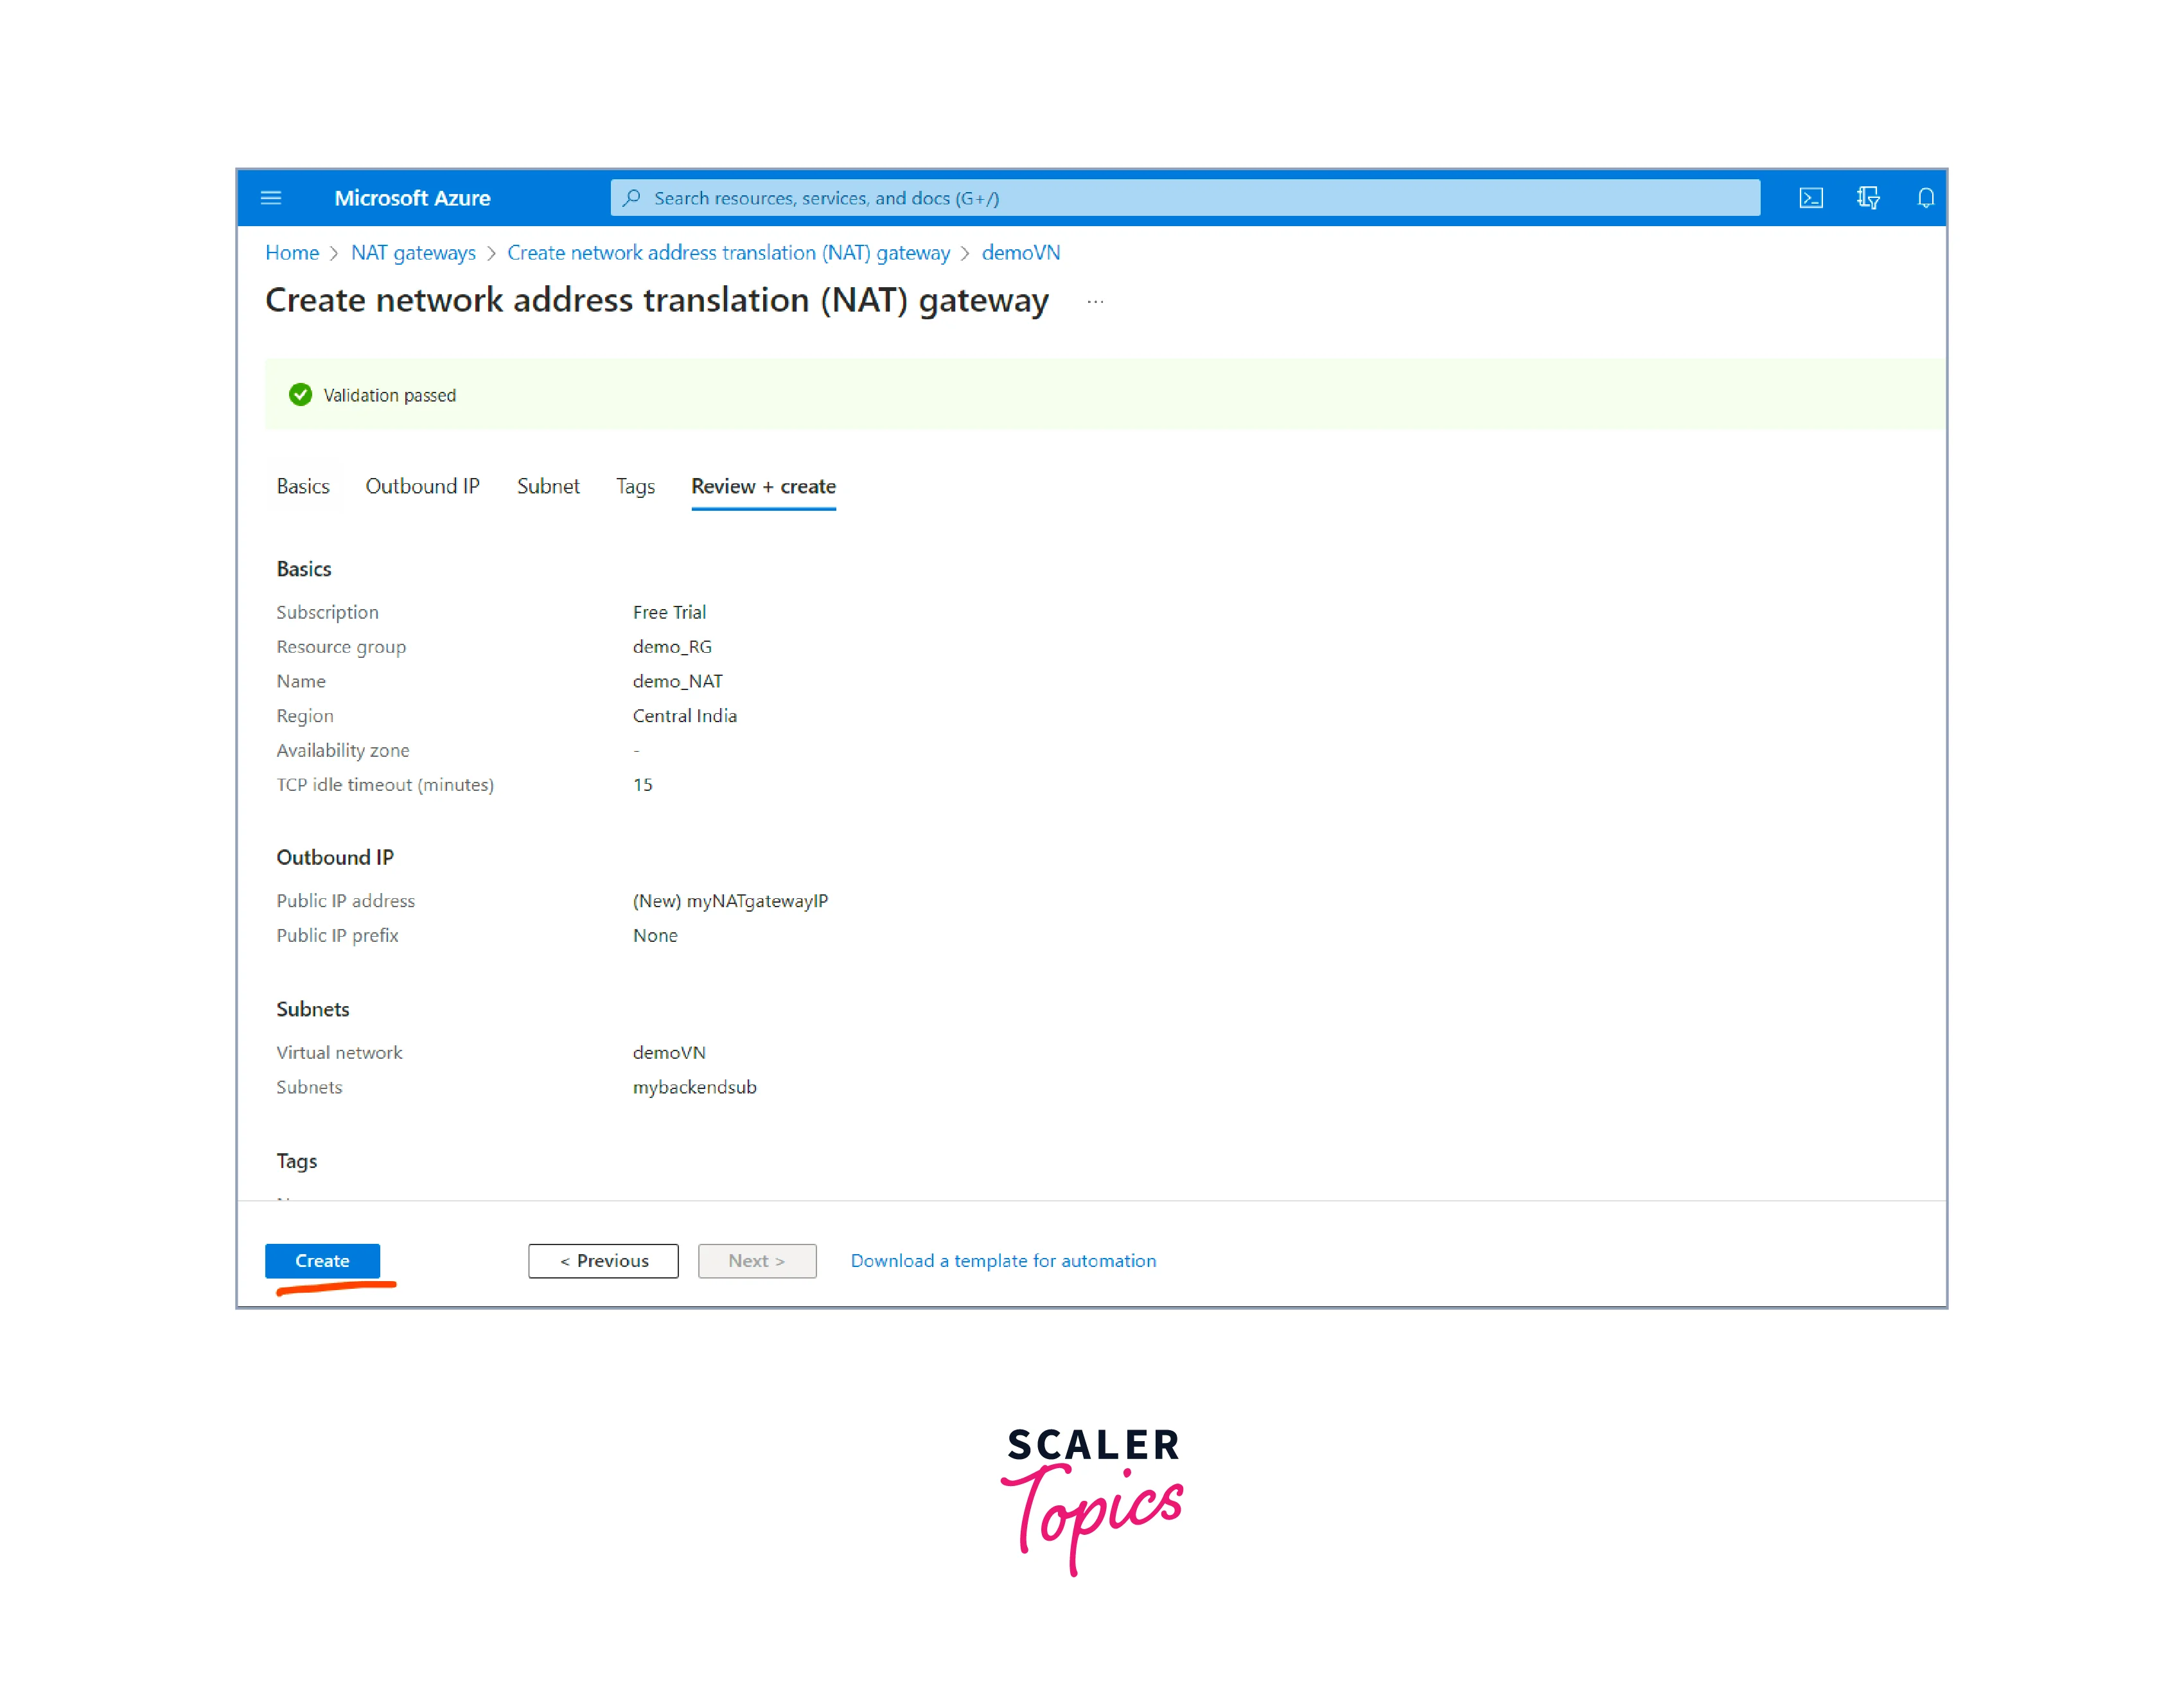
- In the Outbound IP tab, select an existing public IP address or create a new one for the NAT gateway. This public IP address will be used for outbound communication from resources in the virtual network.
- In the Subnet tab, choose an existing subnet or create a new one where the NAT gateway will reside. This subnet is where the NAT gateway's private IP address is assigned.
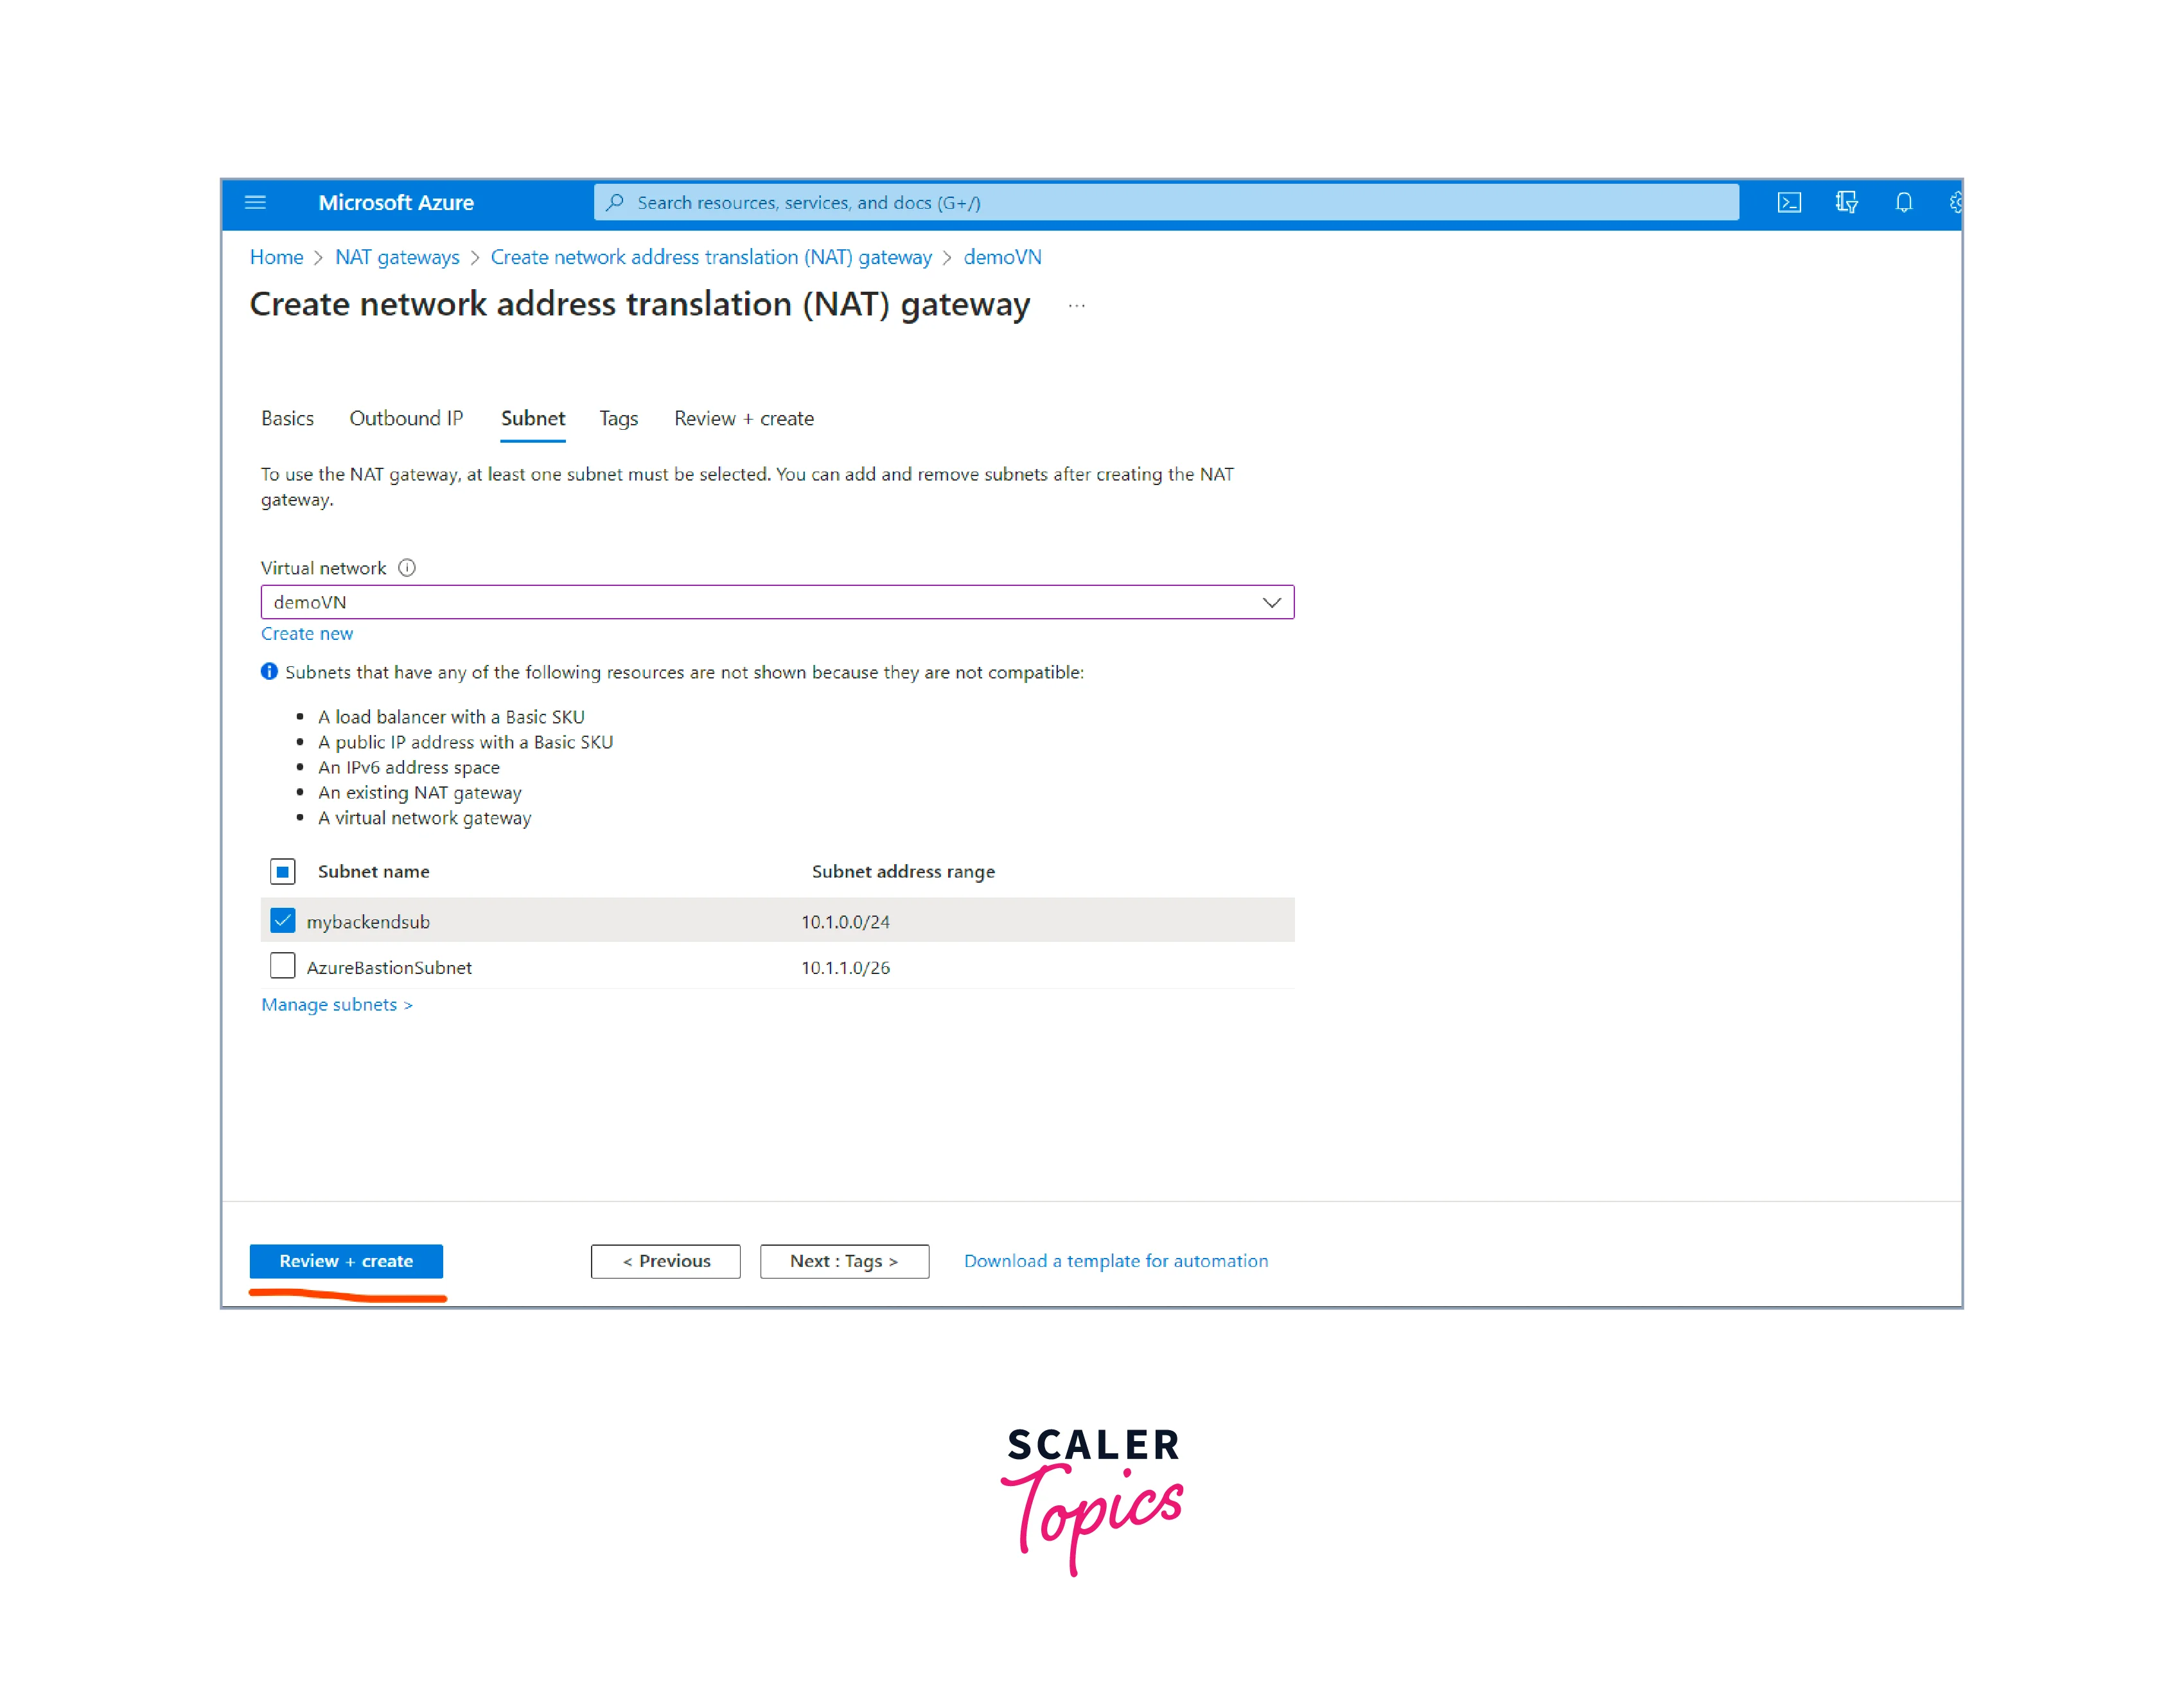
- review the settings to ensure they are correct after completing all the necessary configurations. Once the Create button is clicked, the NAT Gateway deployment process starts.
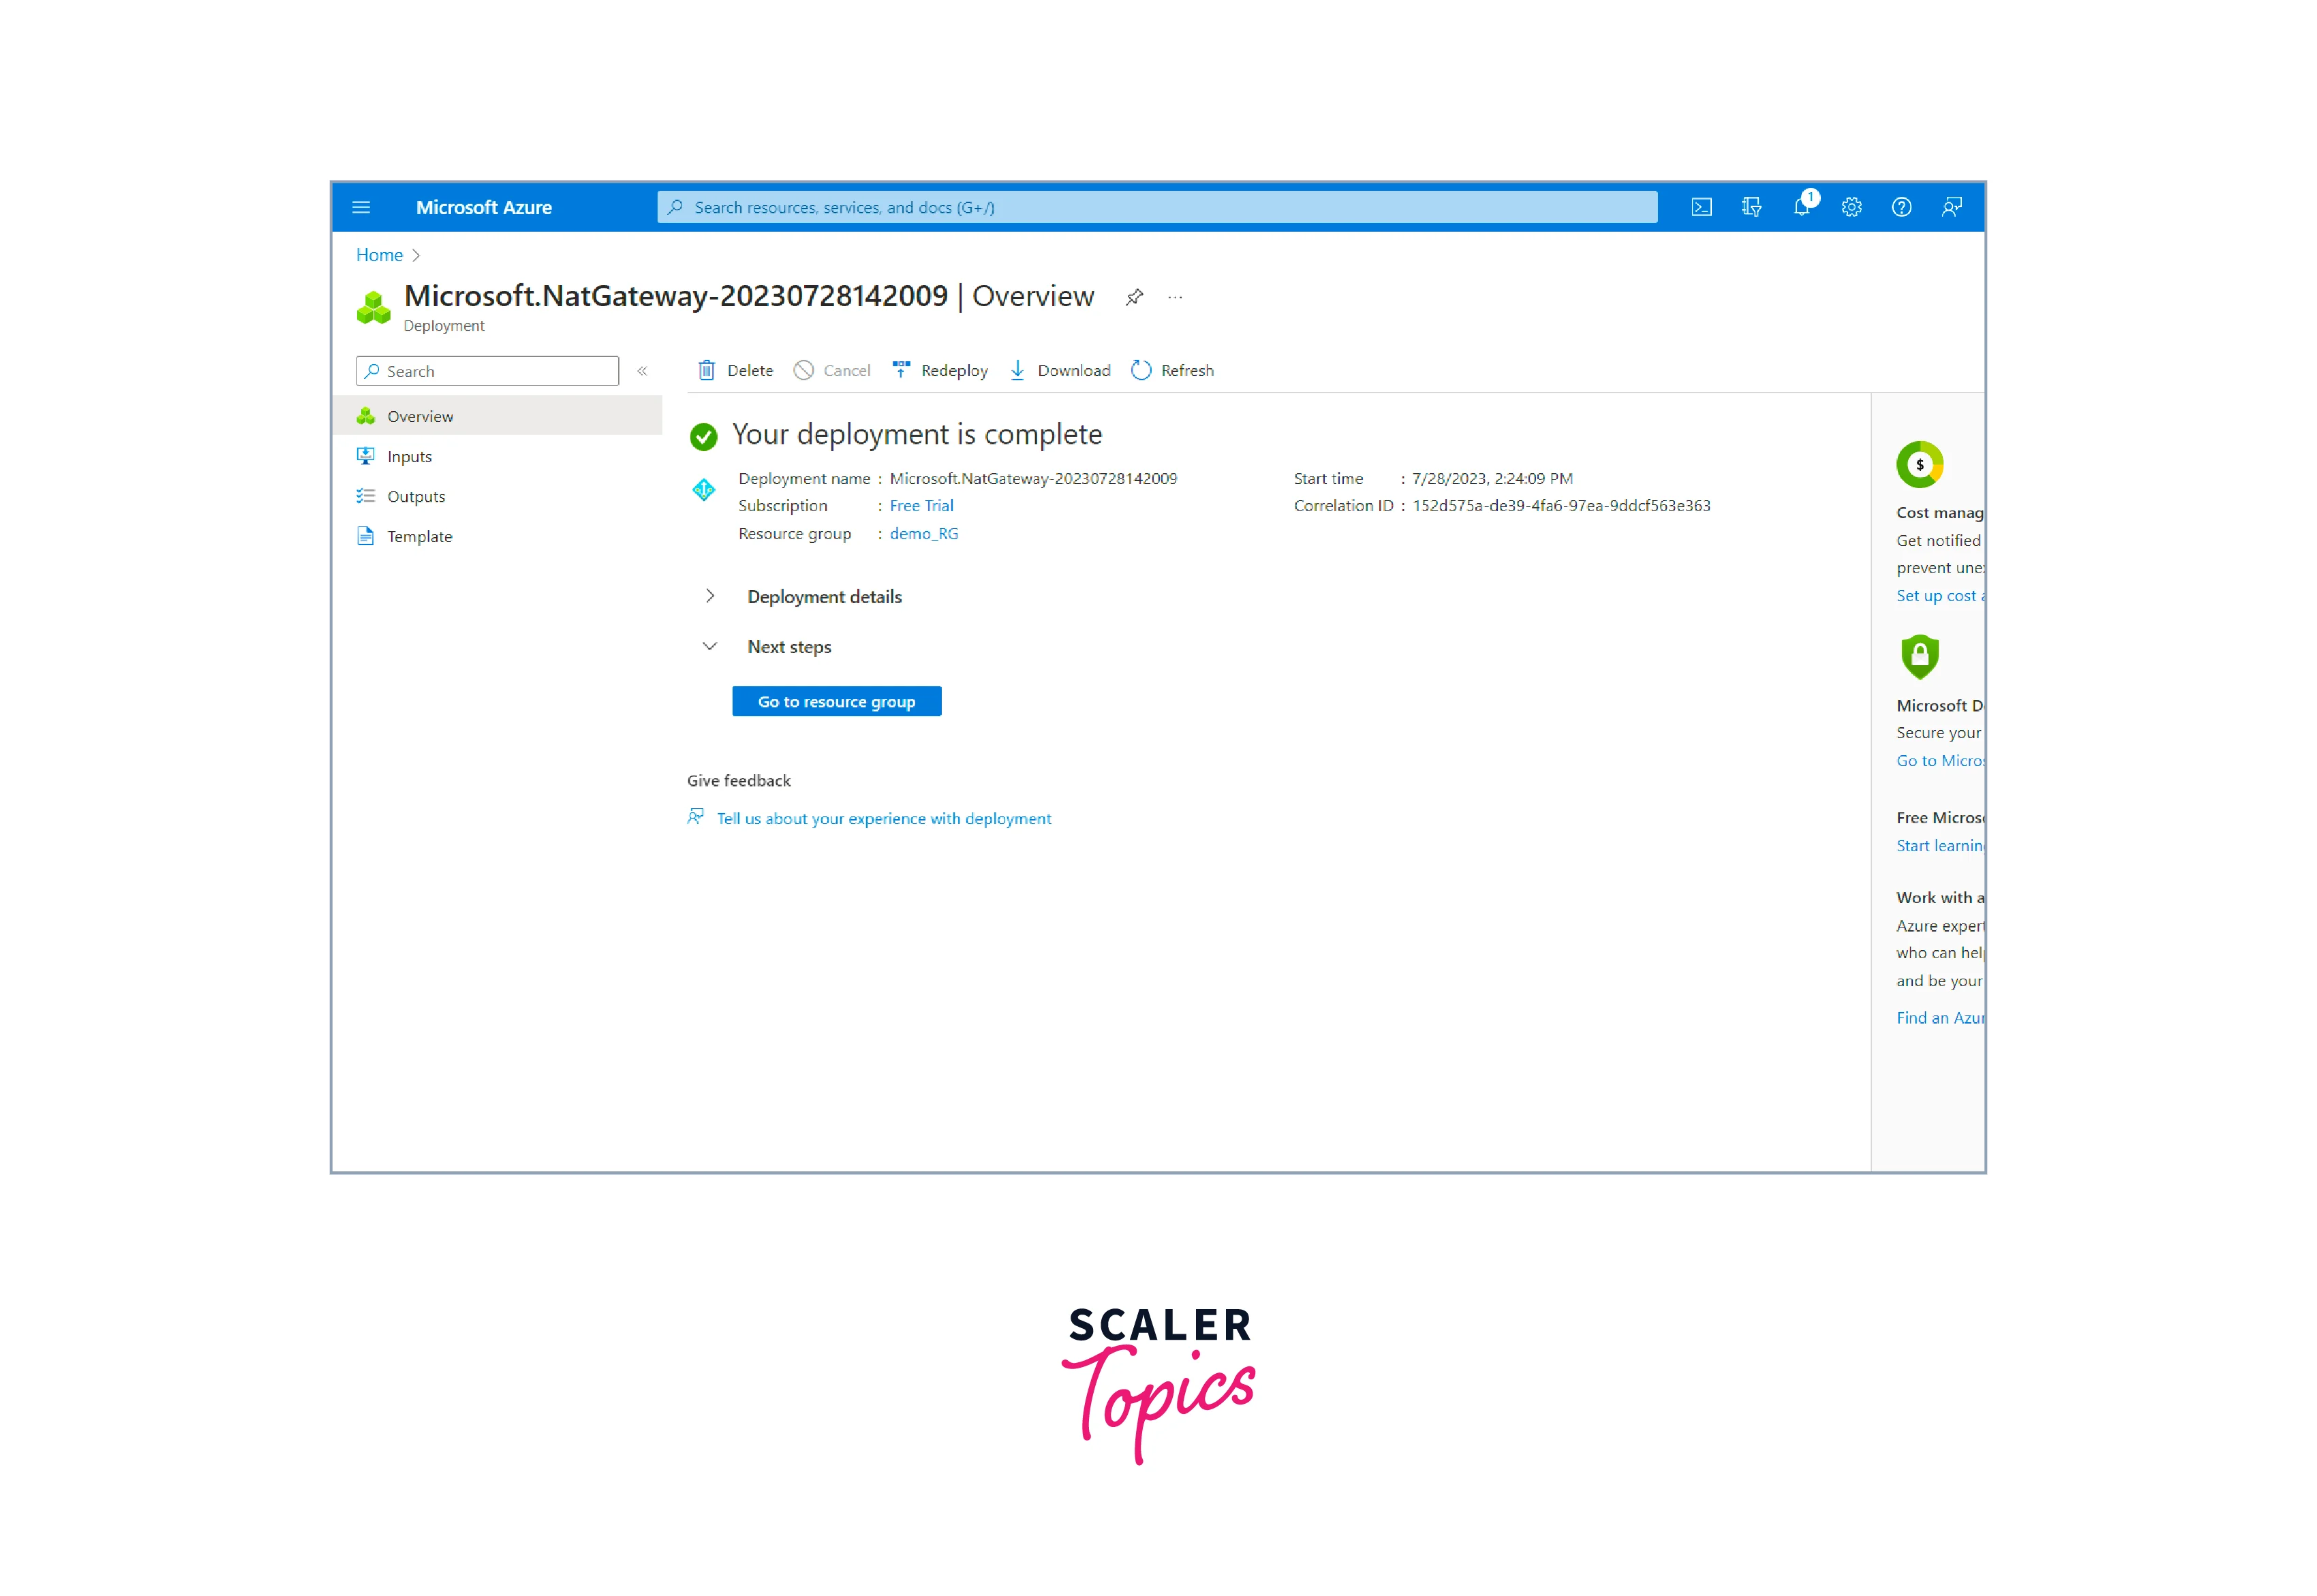
 7. The NAT Gateway is created once the deployment is completed.
Setup Two New Windows VM
We need to launch two virtual machines where the load balancer will redirect traffic.
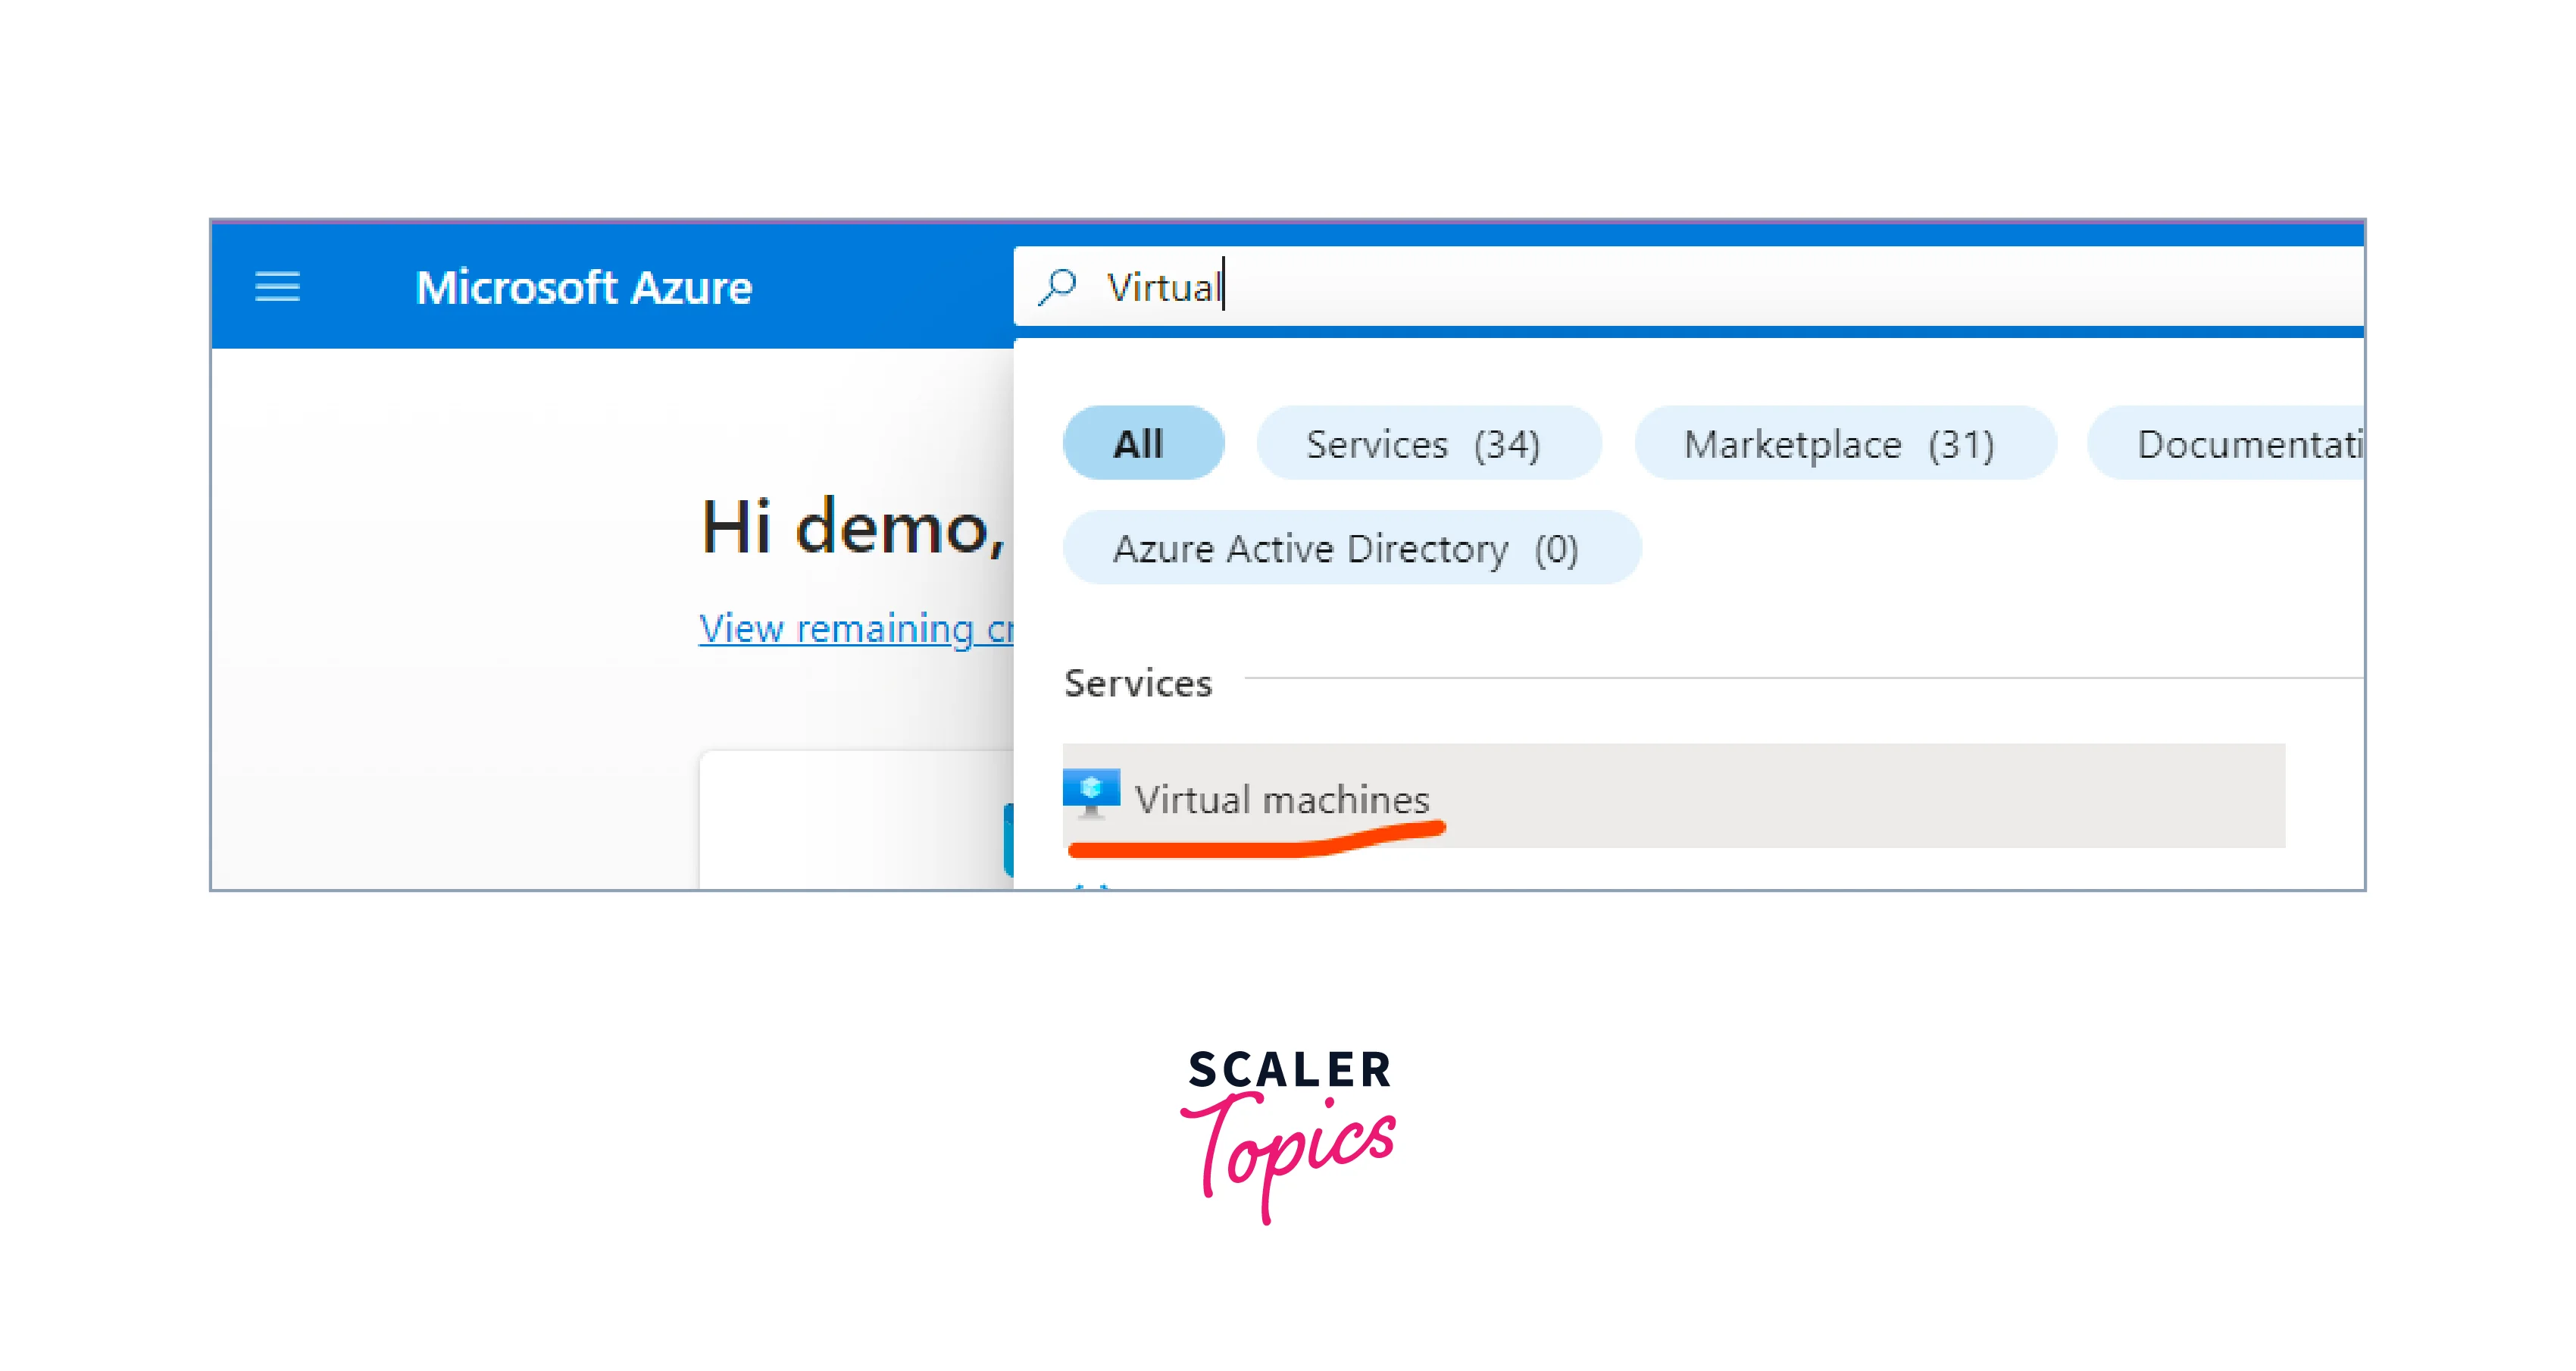
- Search for "Virtual Machine" in the search bar, and select the Virtual Machines resource from the dropdown.
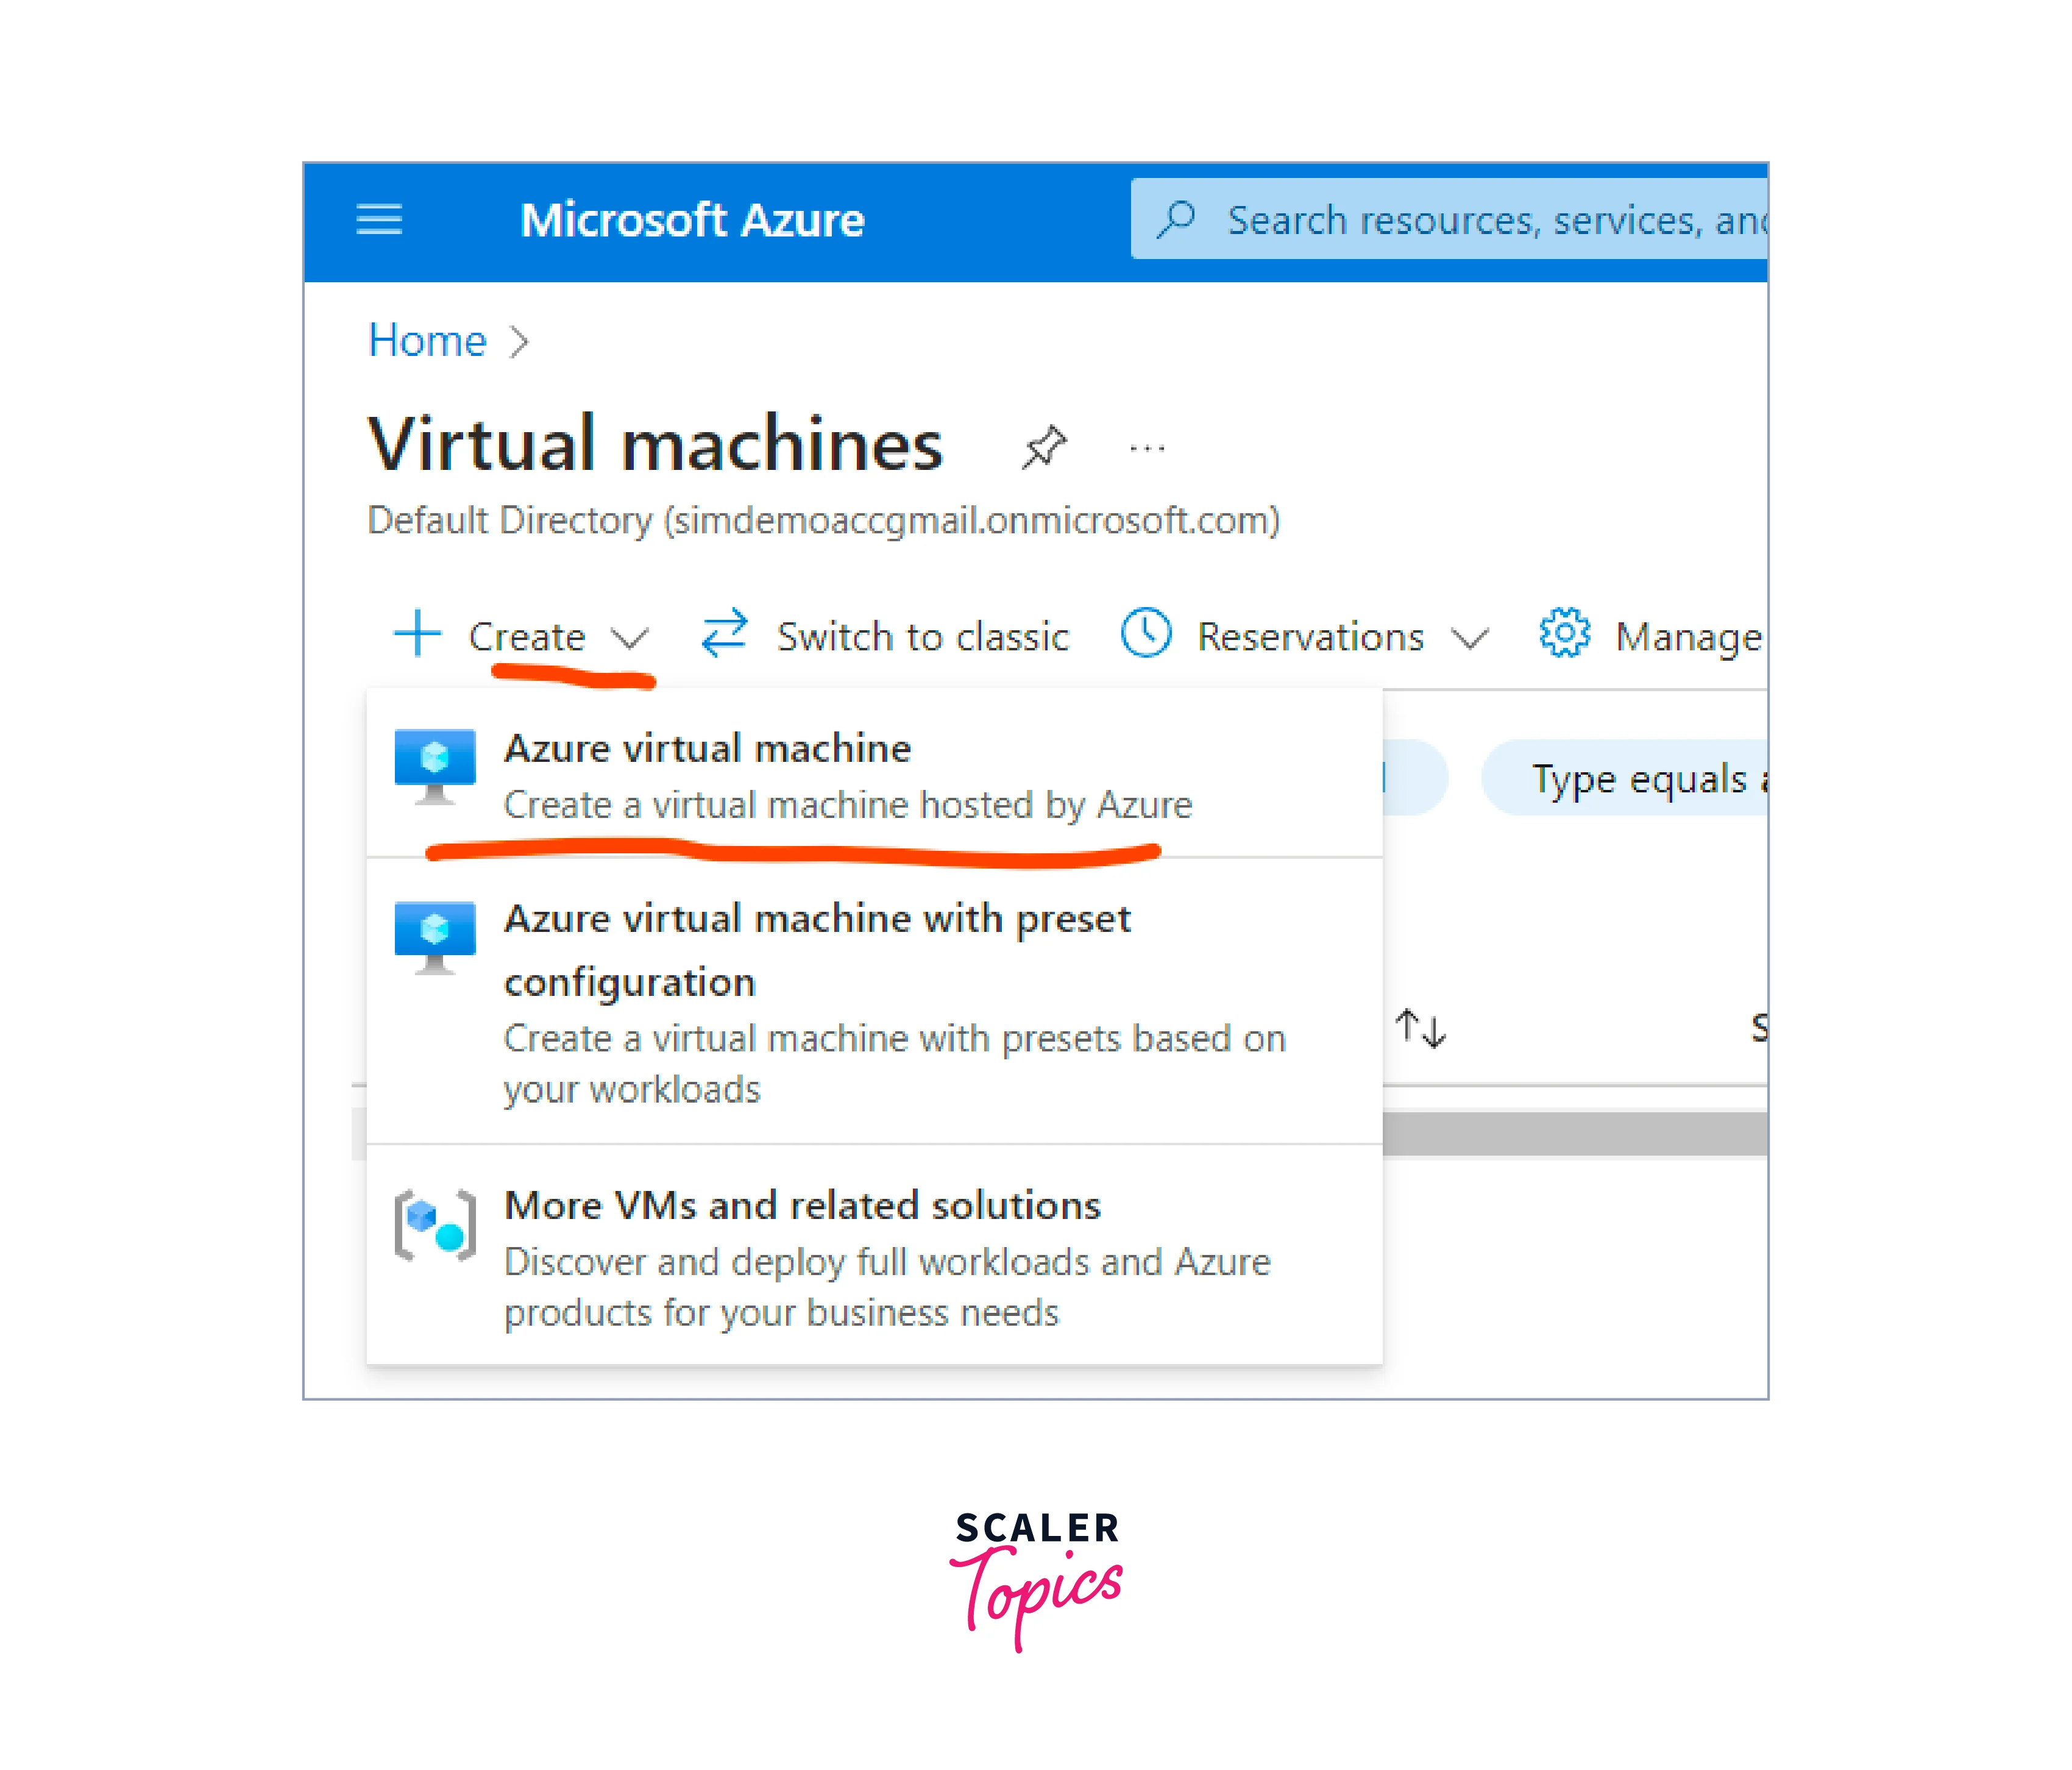
- Click the Create button on the next page and select the Azure Virtual Machine from the dropdown.
-
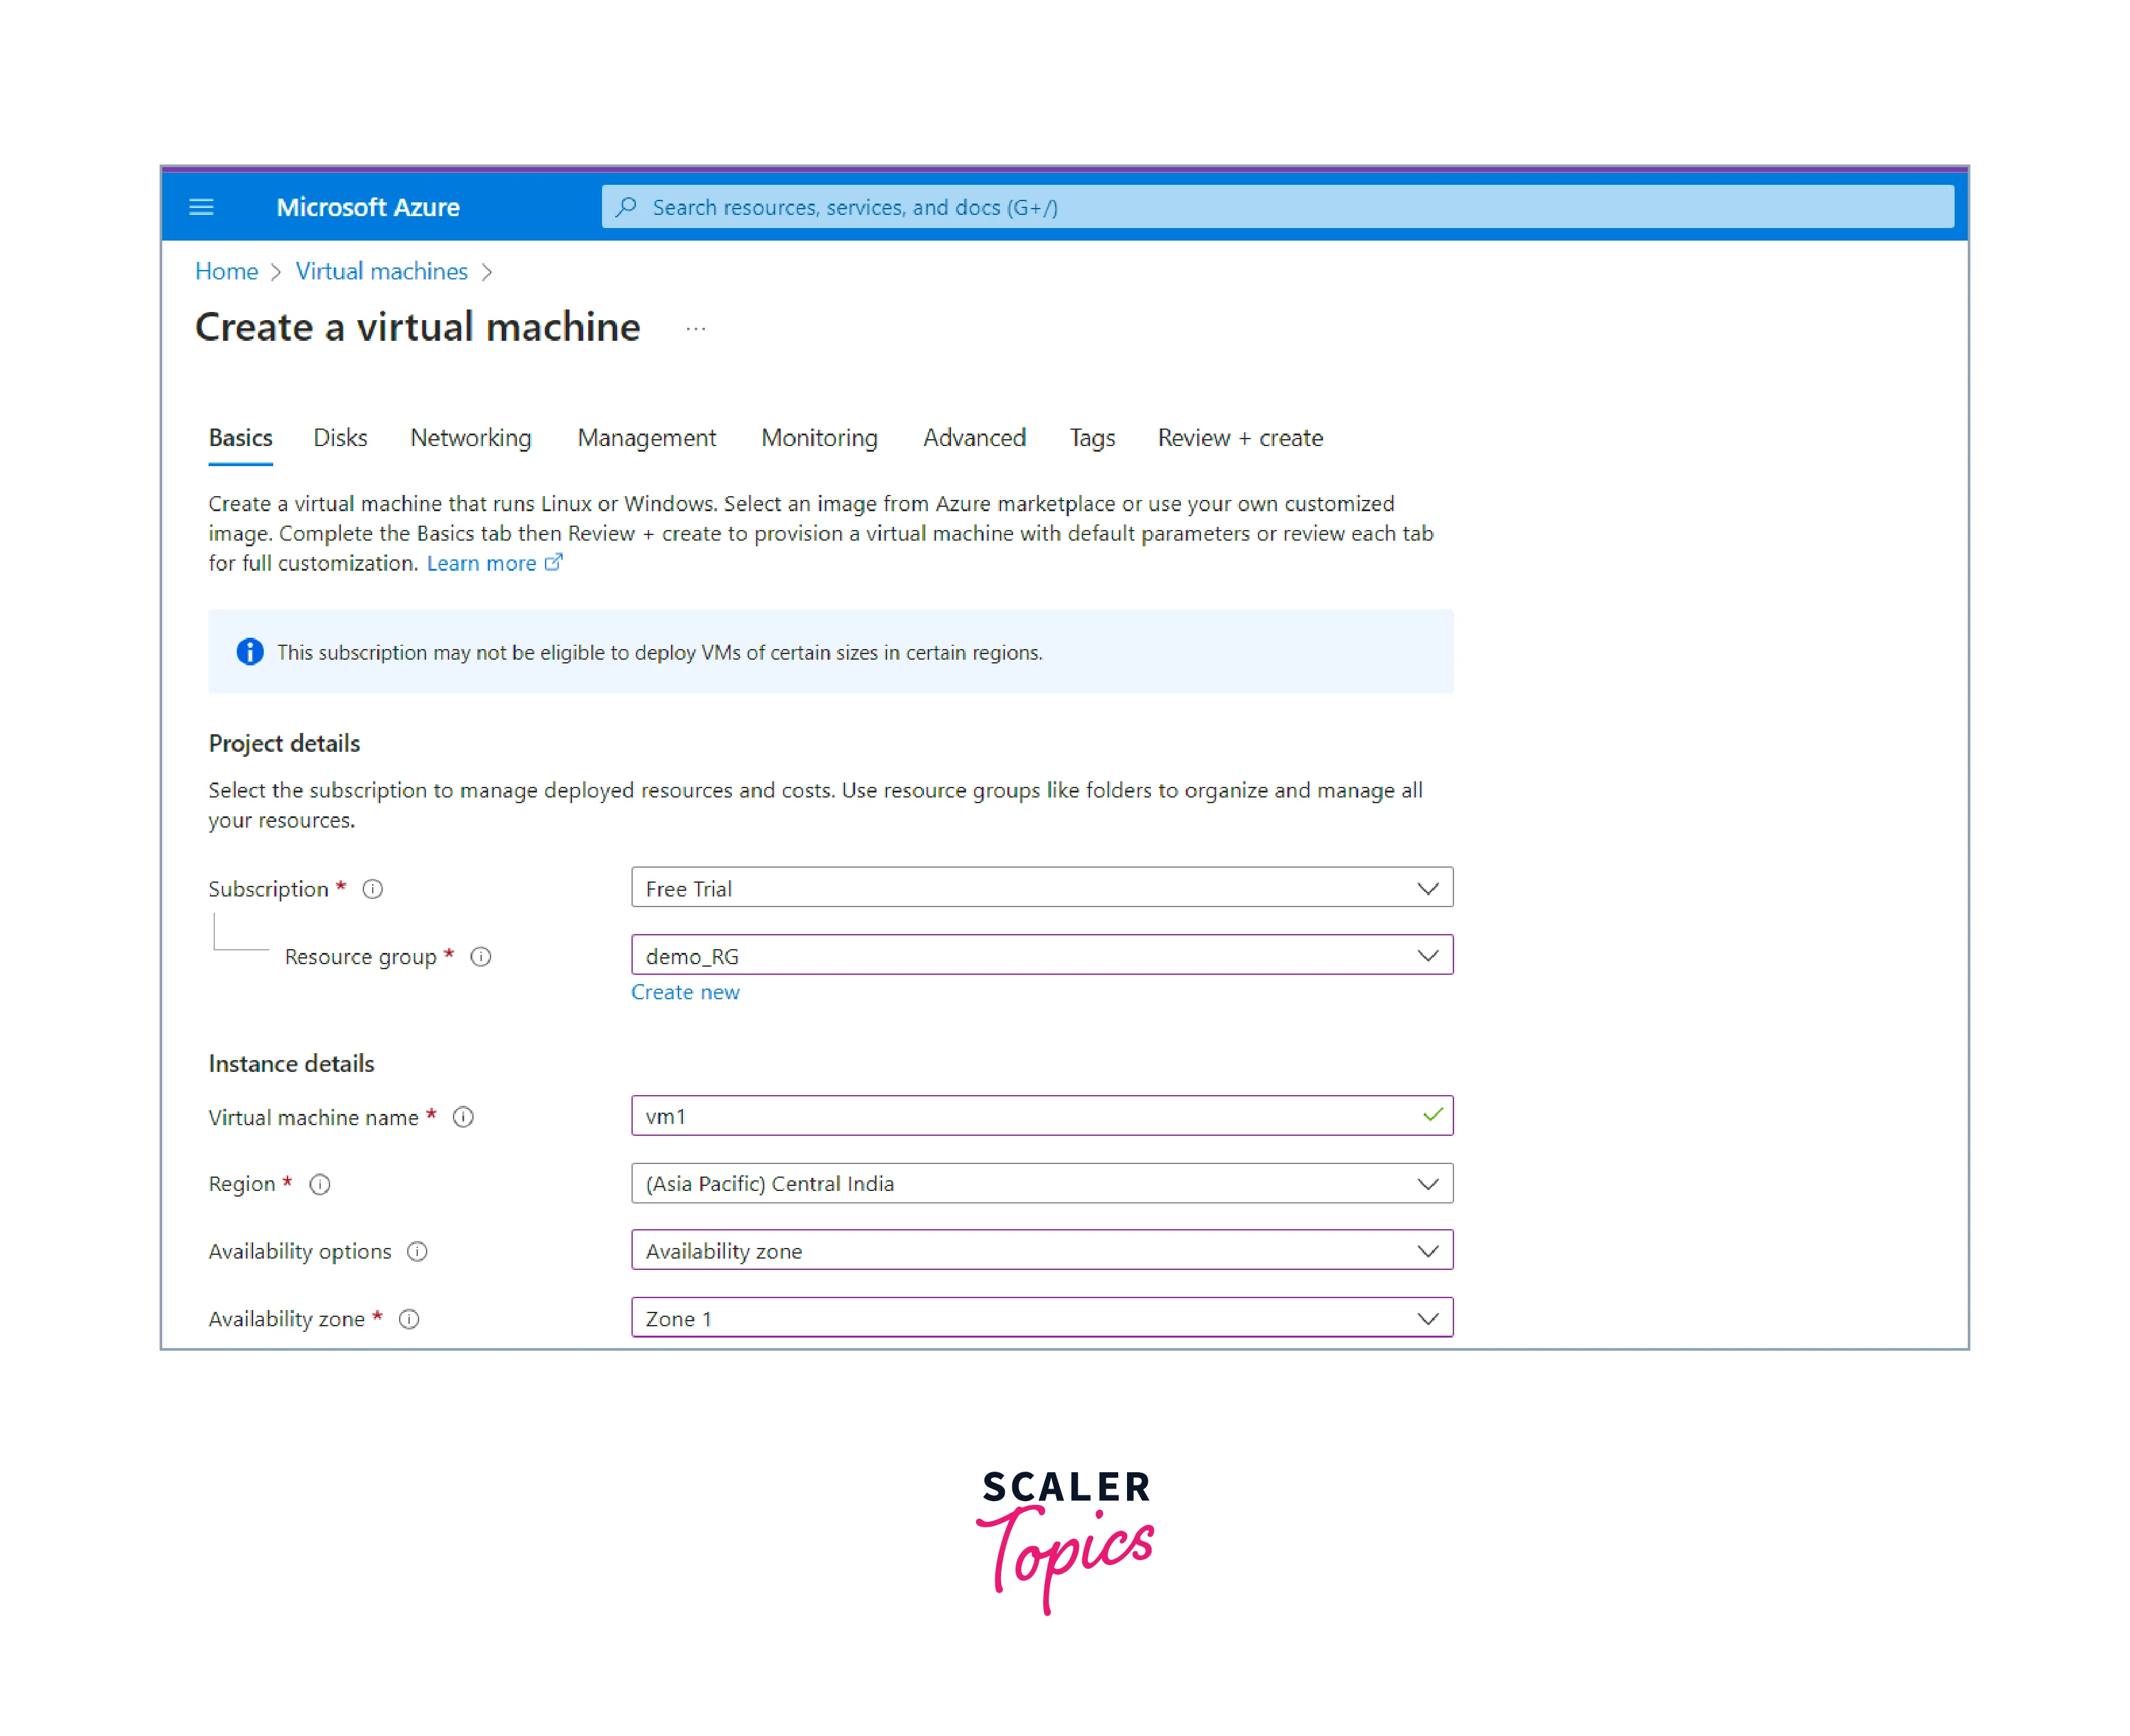
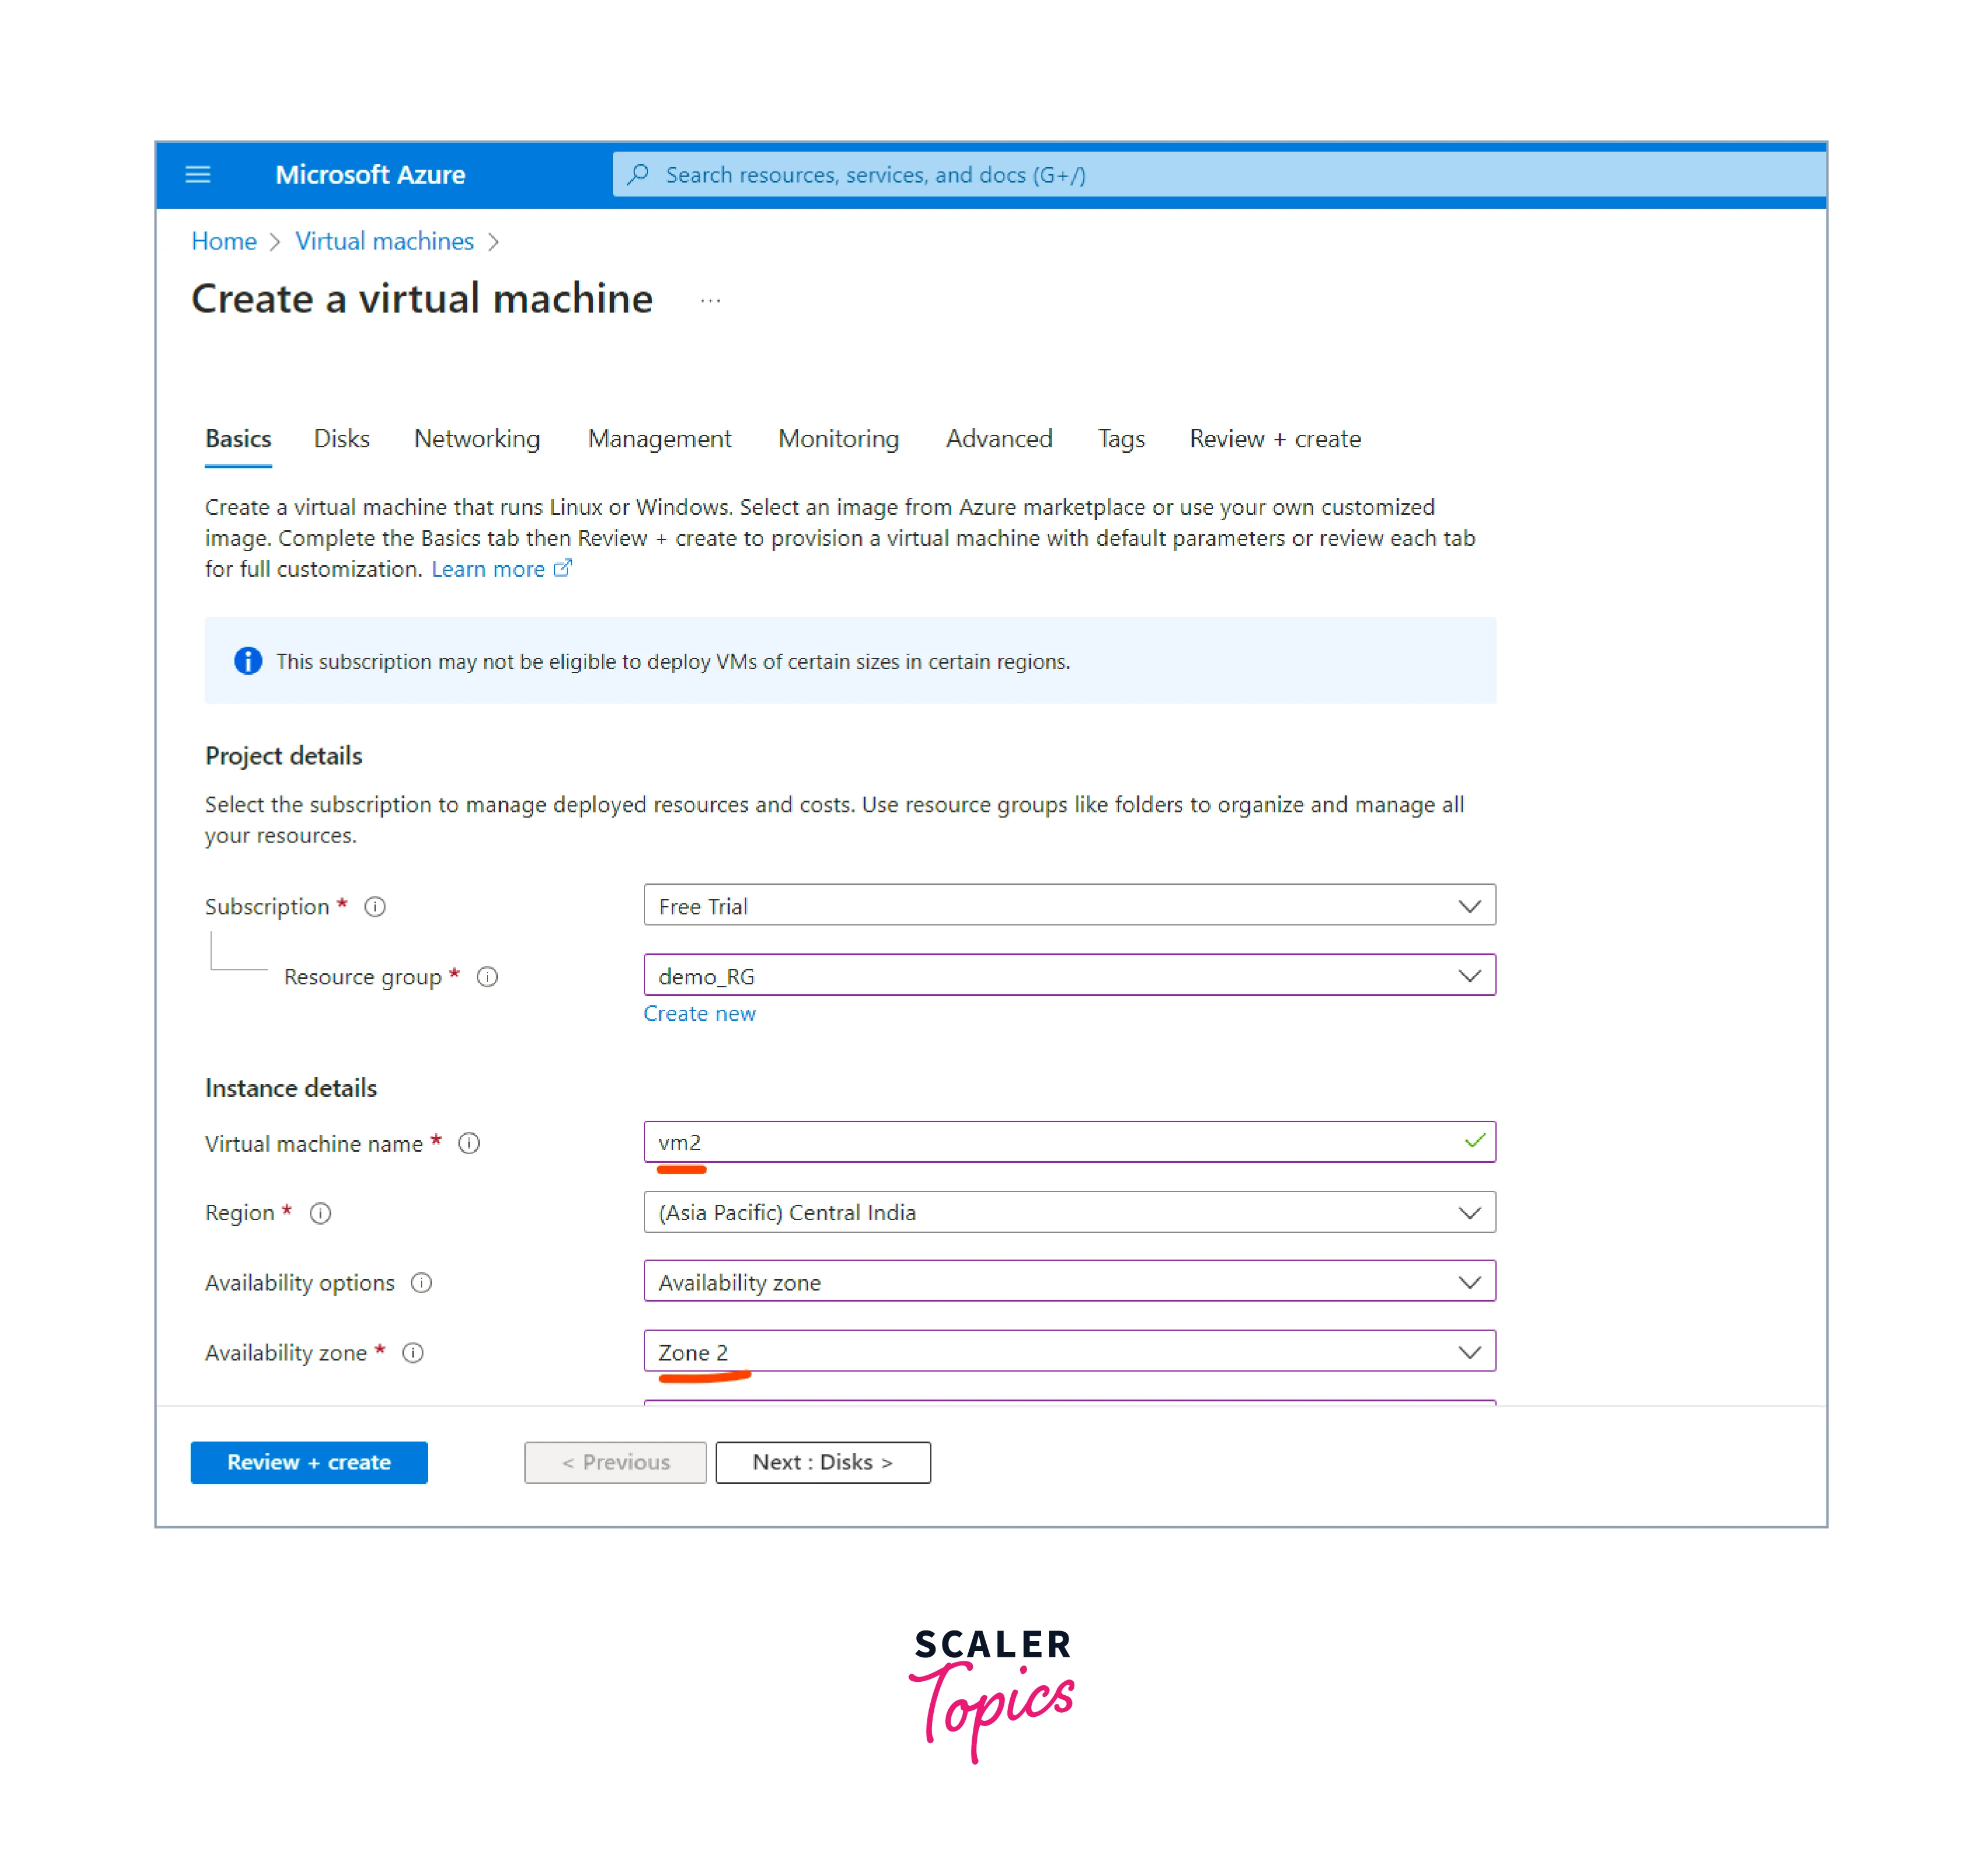
Configure VM settings:
- Provide a unique name to the Virtual Machine.
- Choose the appropriate region where you want to deploy the VM.
- Select the appropriate availability options (if needed).
- Choose the appropriate VM size which fulfills your requirements
-
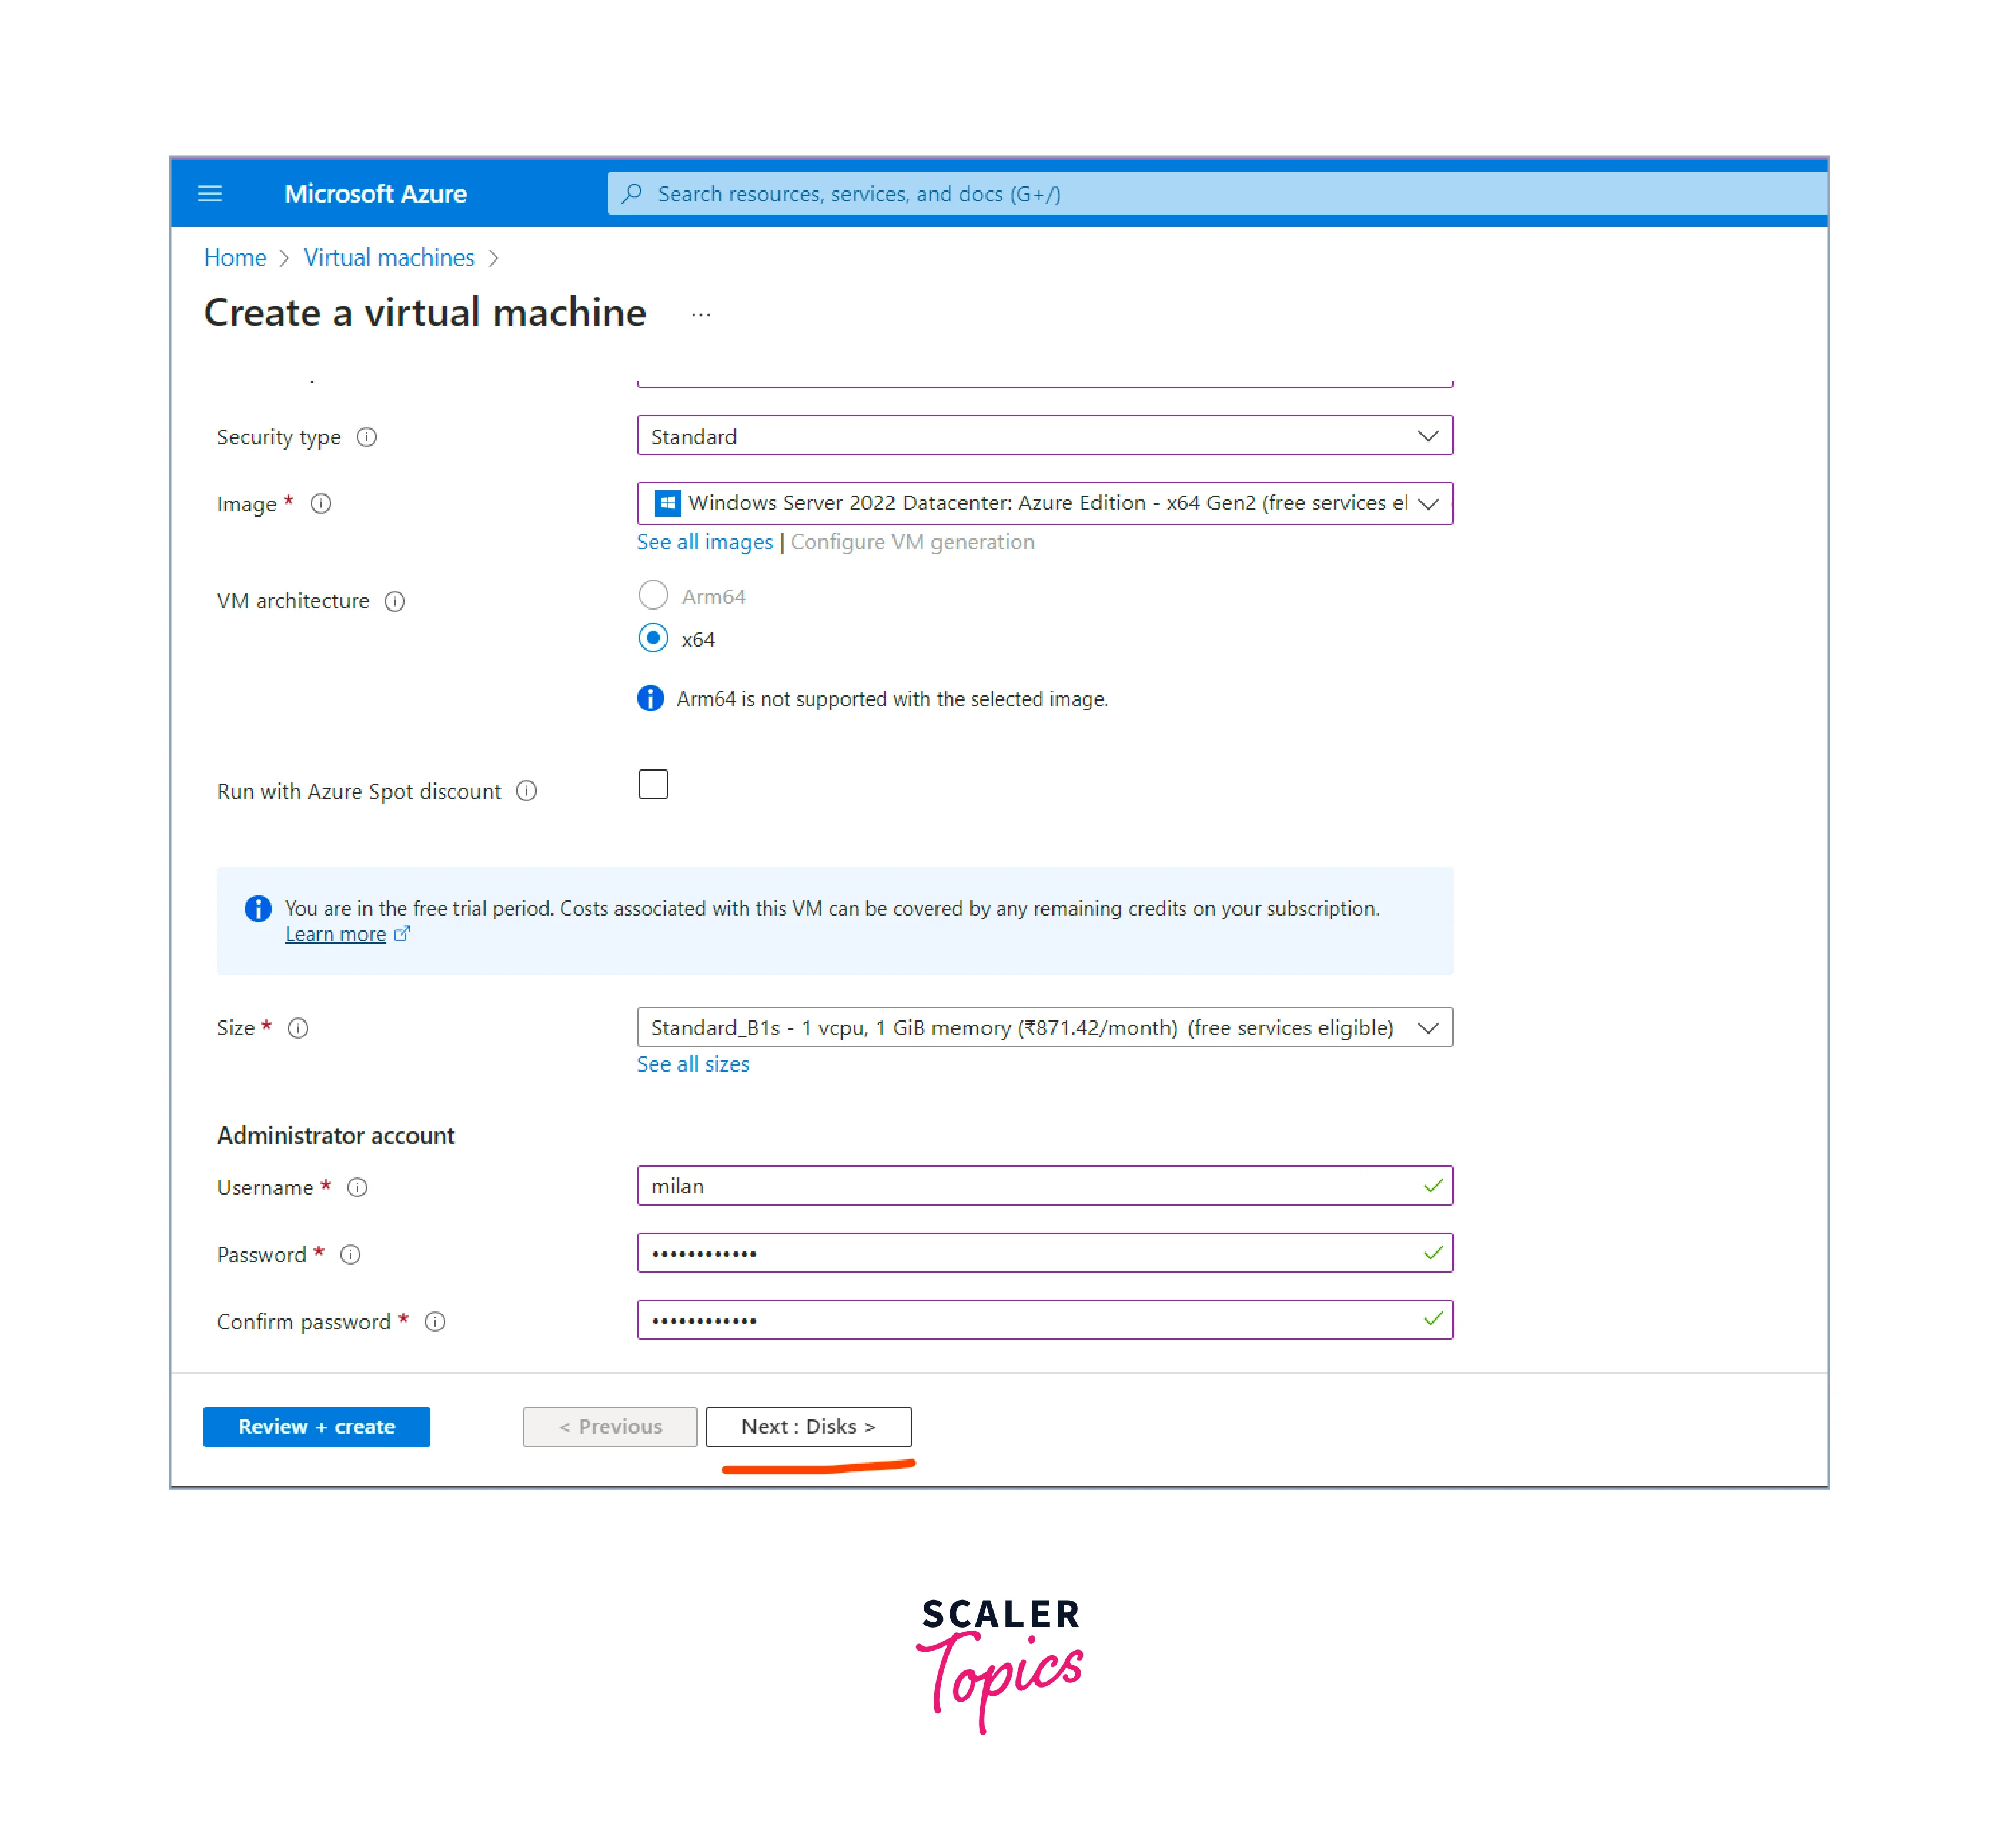
Configure authentication and login details:
- In the "Administrator account" section, enter a username for the VM's administrator account.
- Set a secure password for the administrator account, or use SSH keys for authentication (if preferred).
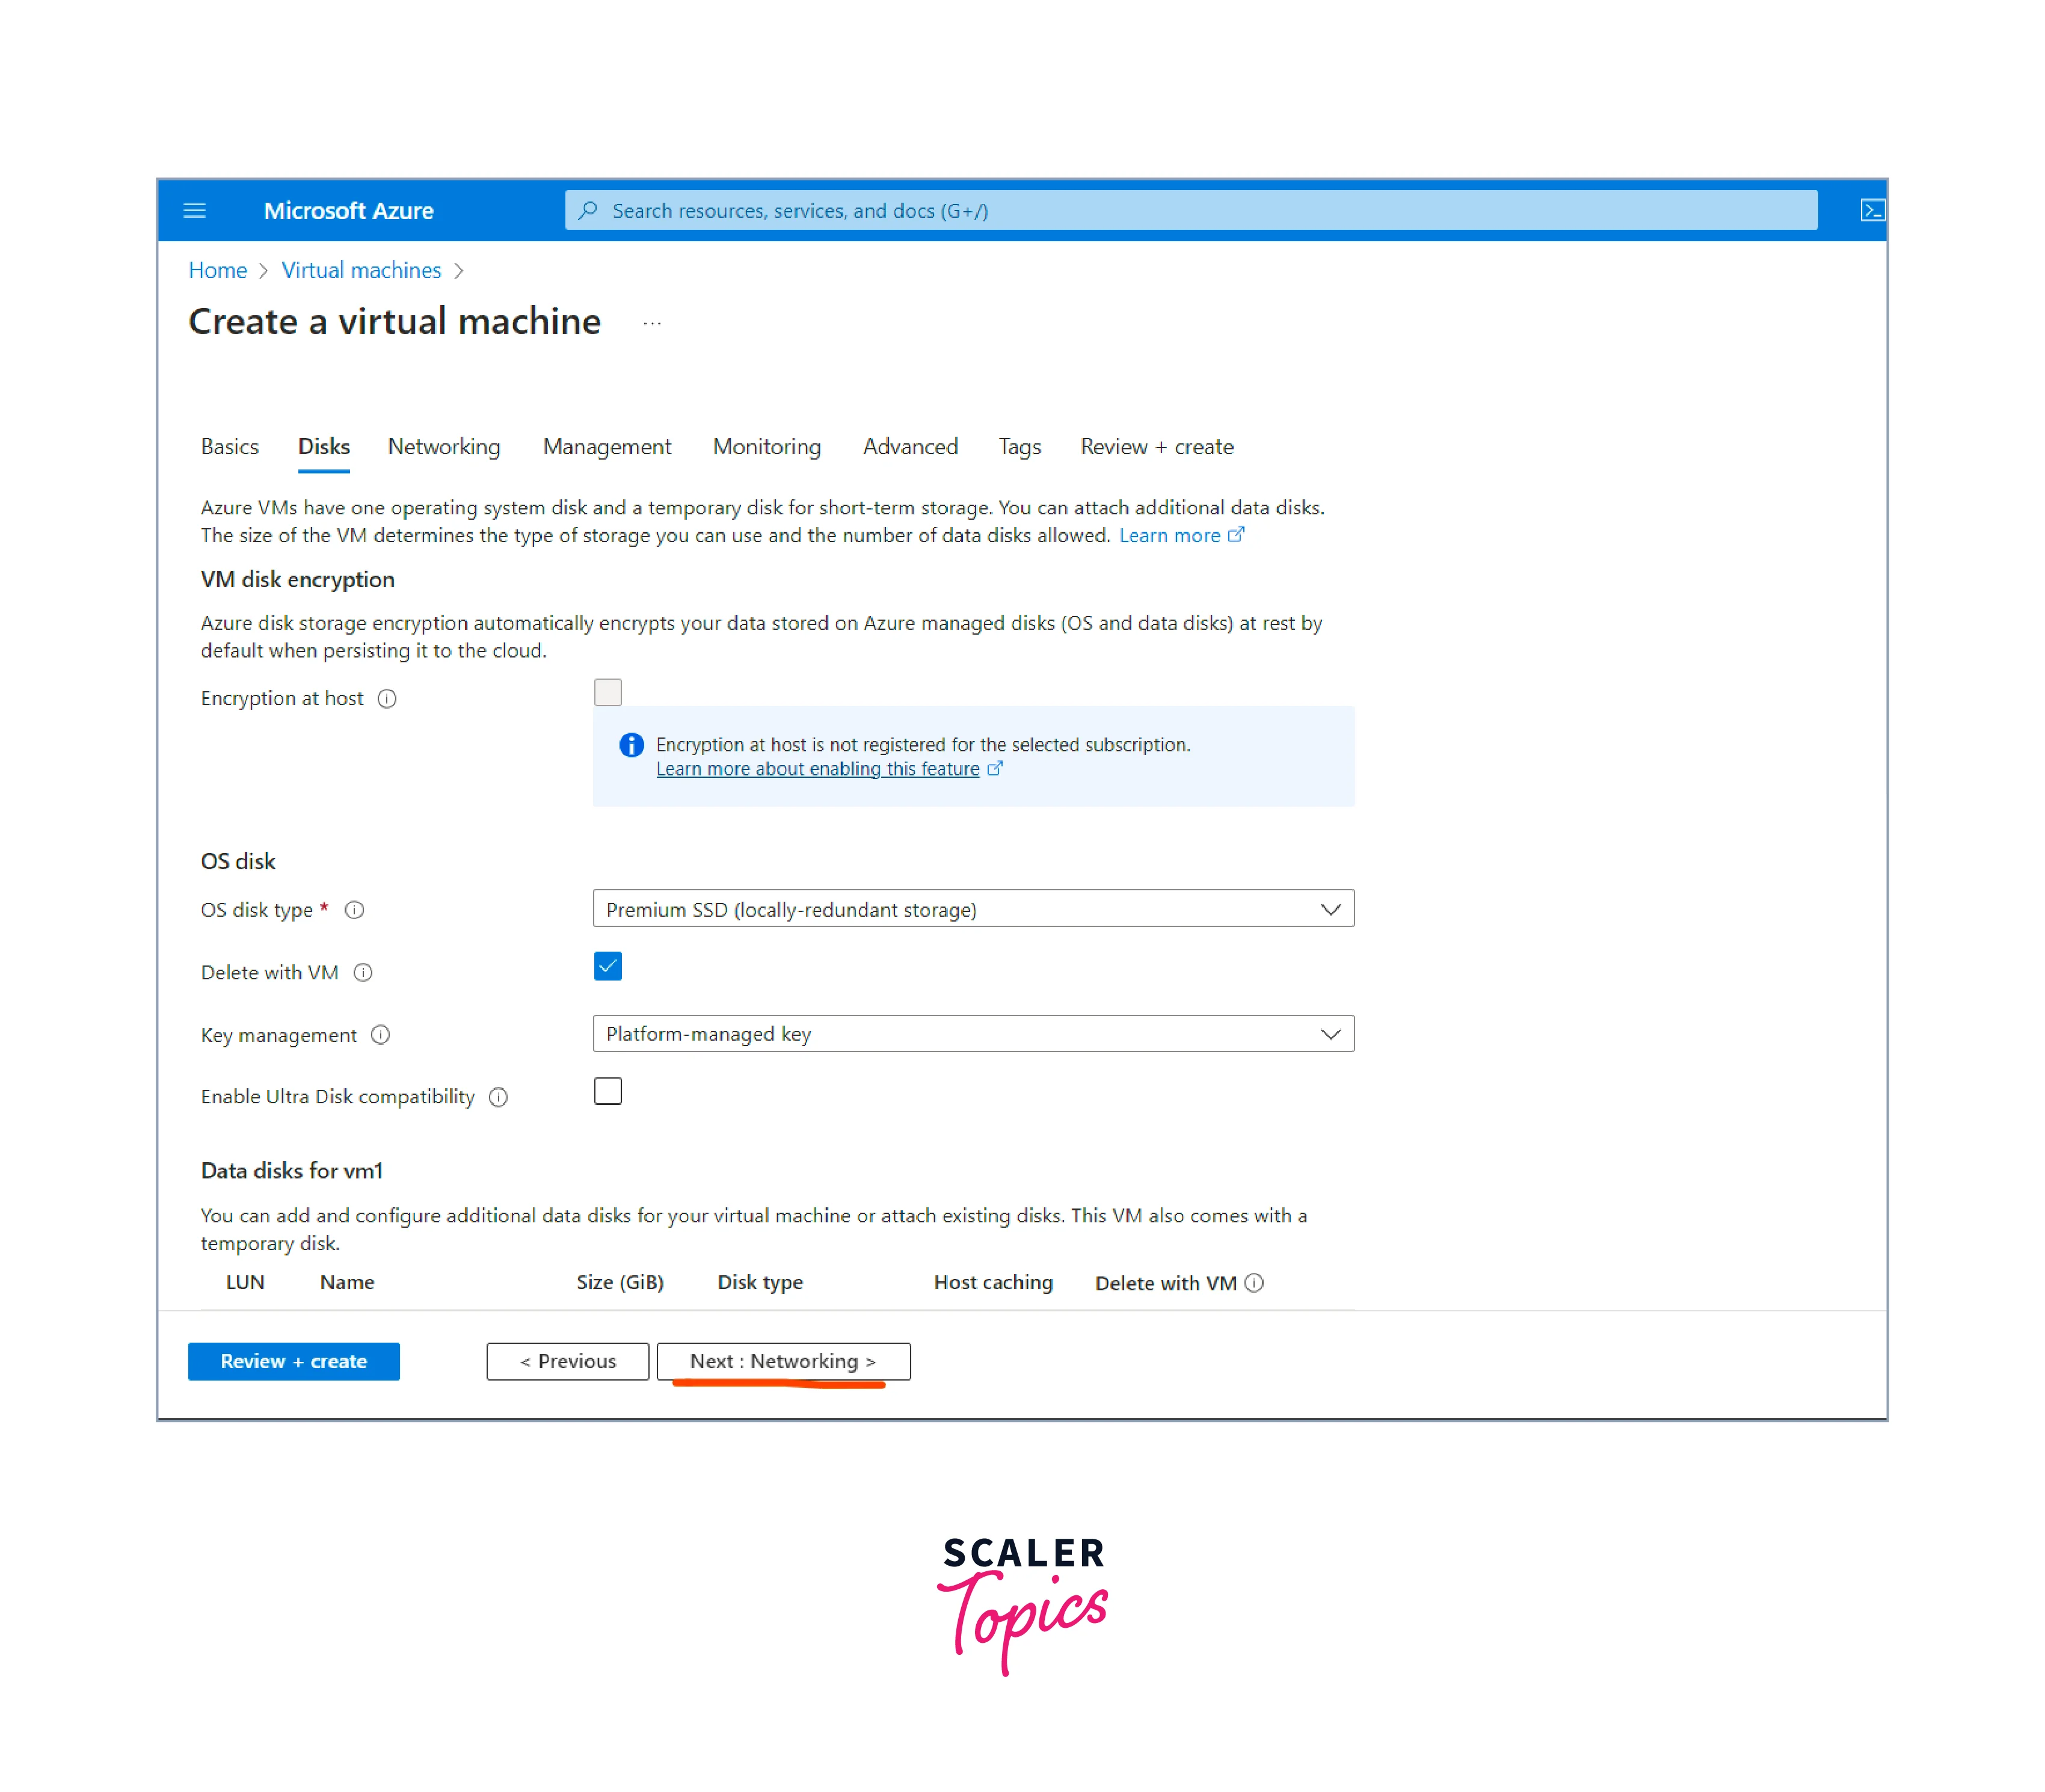
- Configure OS disk:
- In the "Disks" tab of the VM creation wizard, you can configure the OS disk settings for the VM.
- You can choose between an SSD (Standard) or a premium SSD (Managed Disks) for the OS disk. Premium SSDs offer better performance but come at a higher cost.
- You can specify the disk size for the OS disk. The default size is typically sufficient for most scenarios, but you can adjust it based on your needs.
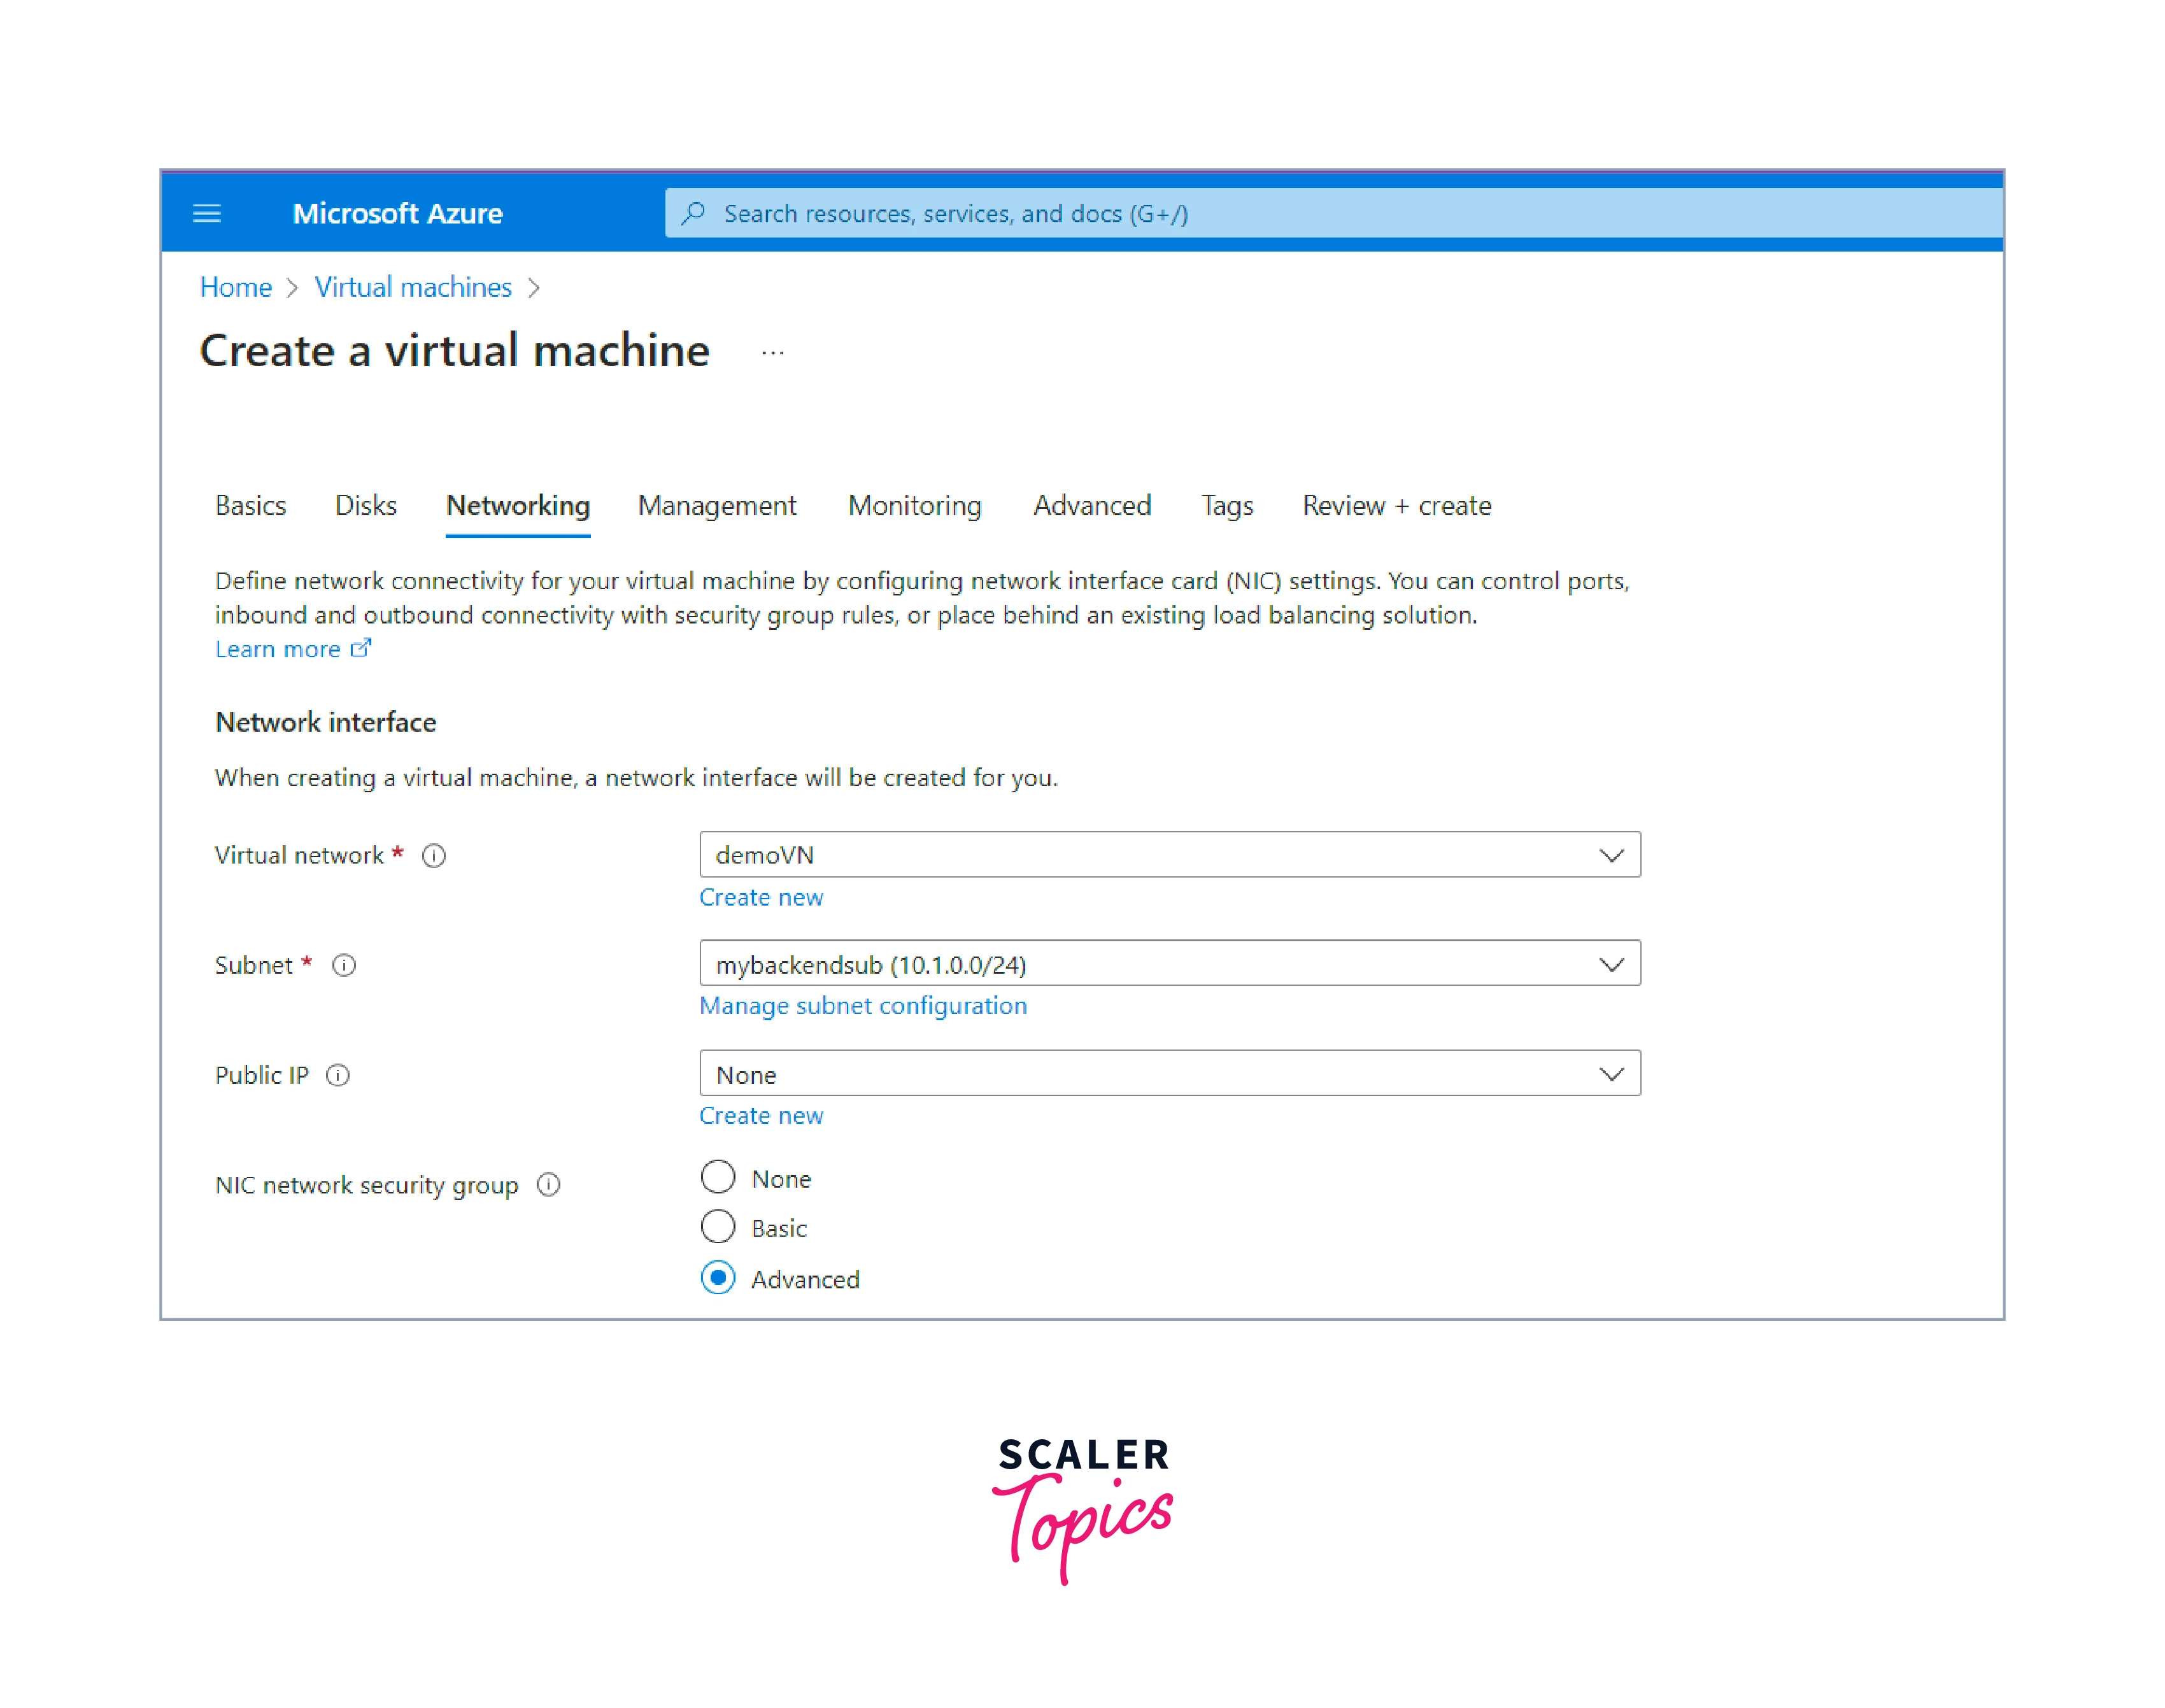
- Configure networking:
- Choose an existing virtual network or create a new one where the VM will be deployed. Here we will choose the virtual network we created before.
- Select a subnet within the virtual network for the VM's network interface.
- Choose whether you want to enable public inbound ports for the VM (e.g., RDP for remote access).
- Create a new network security group.
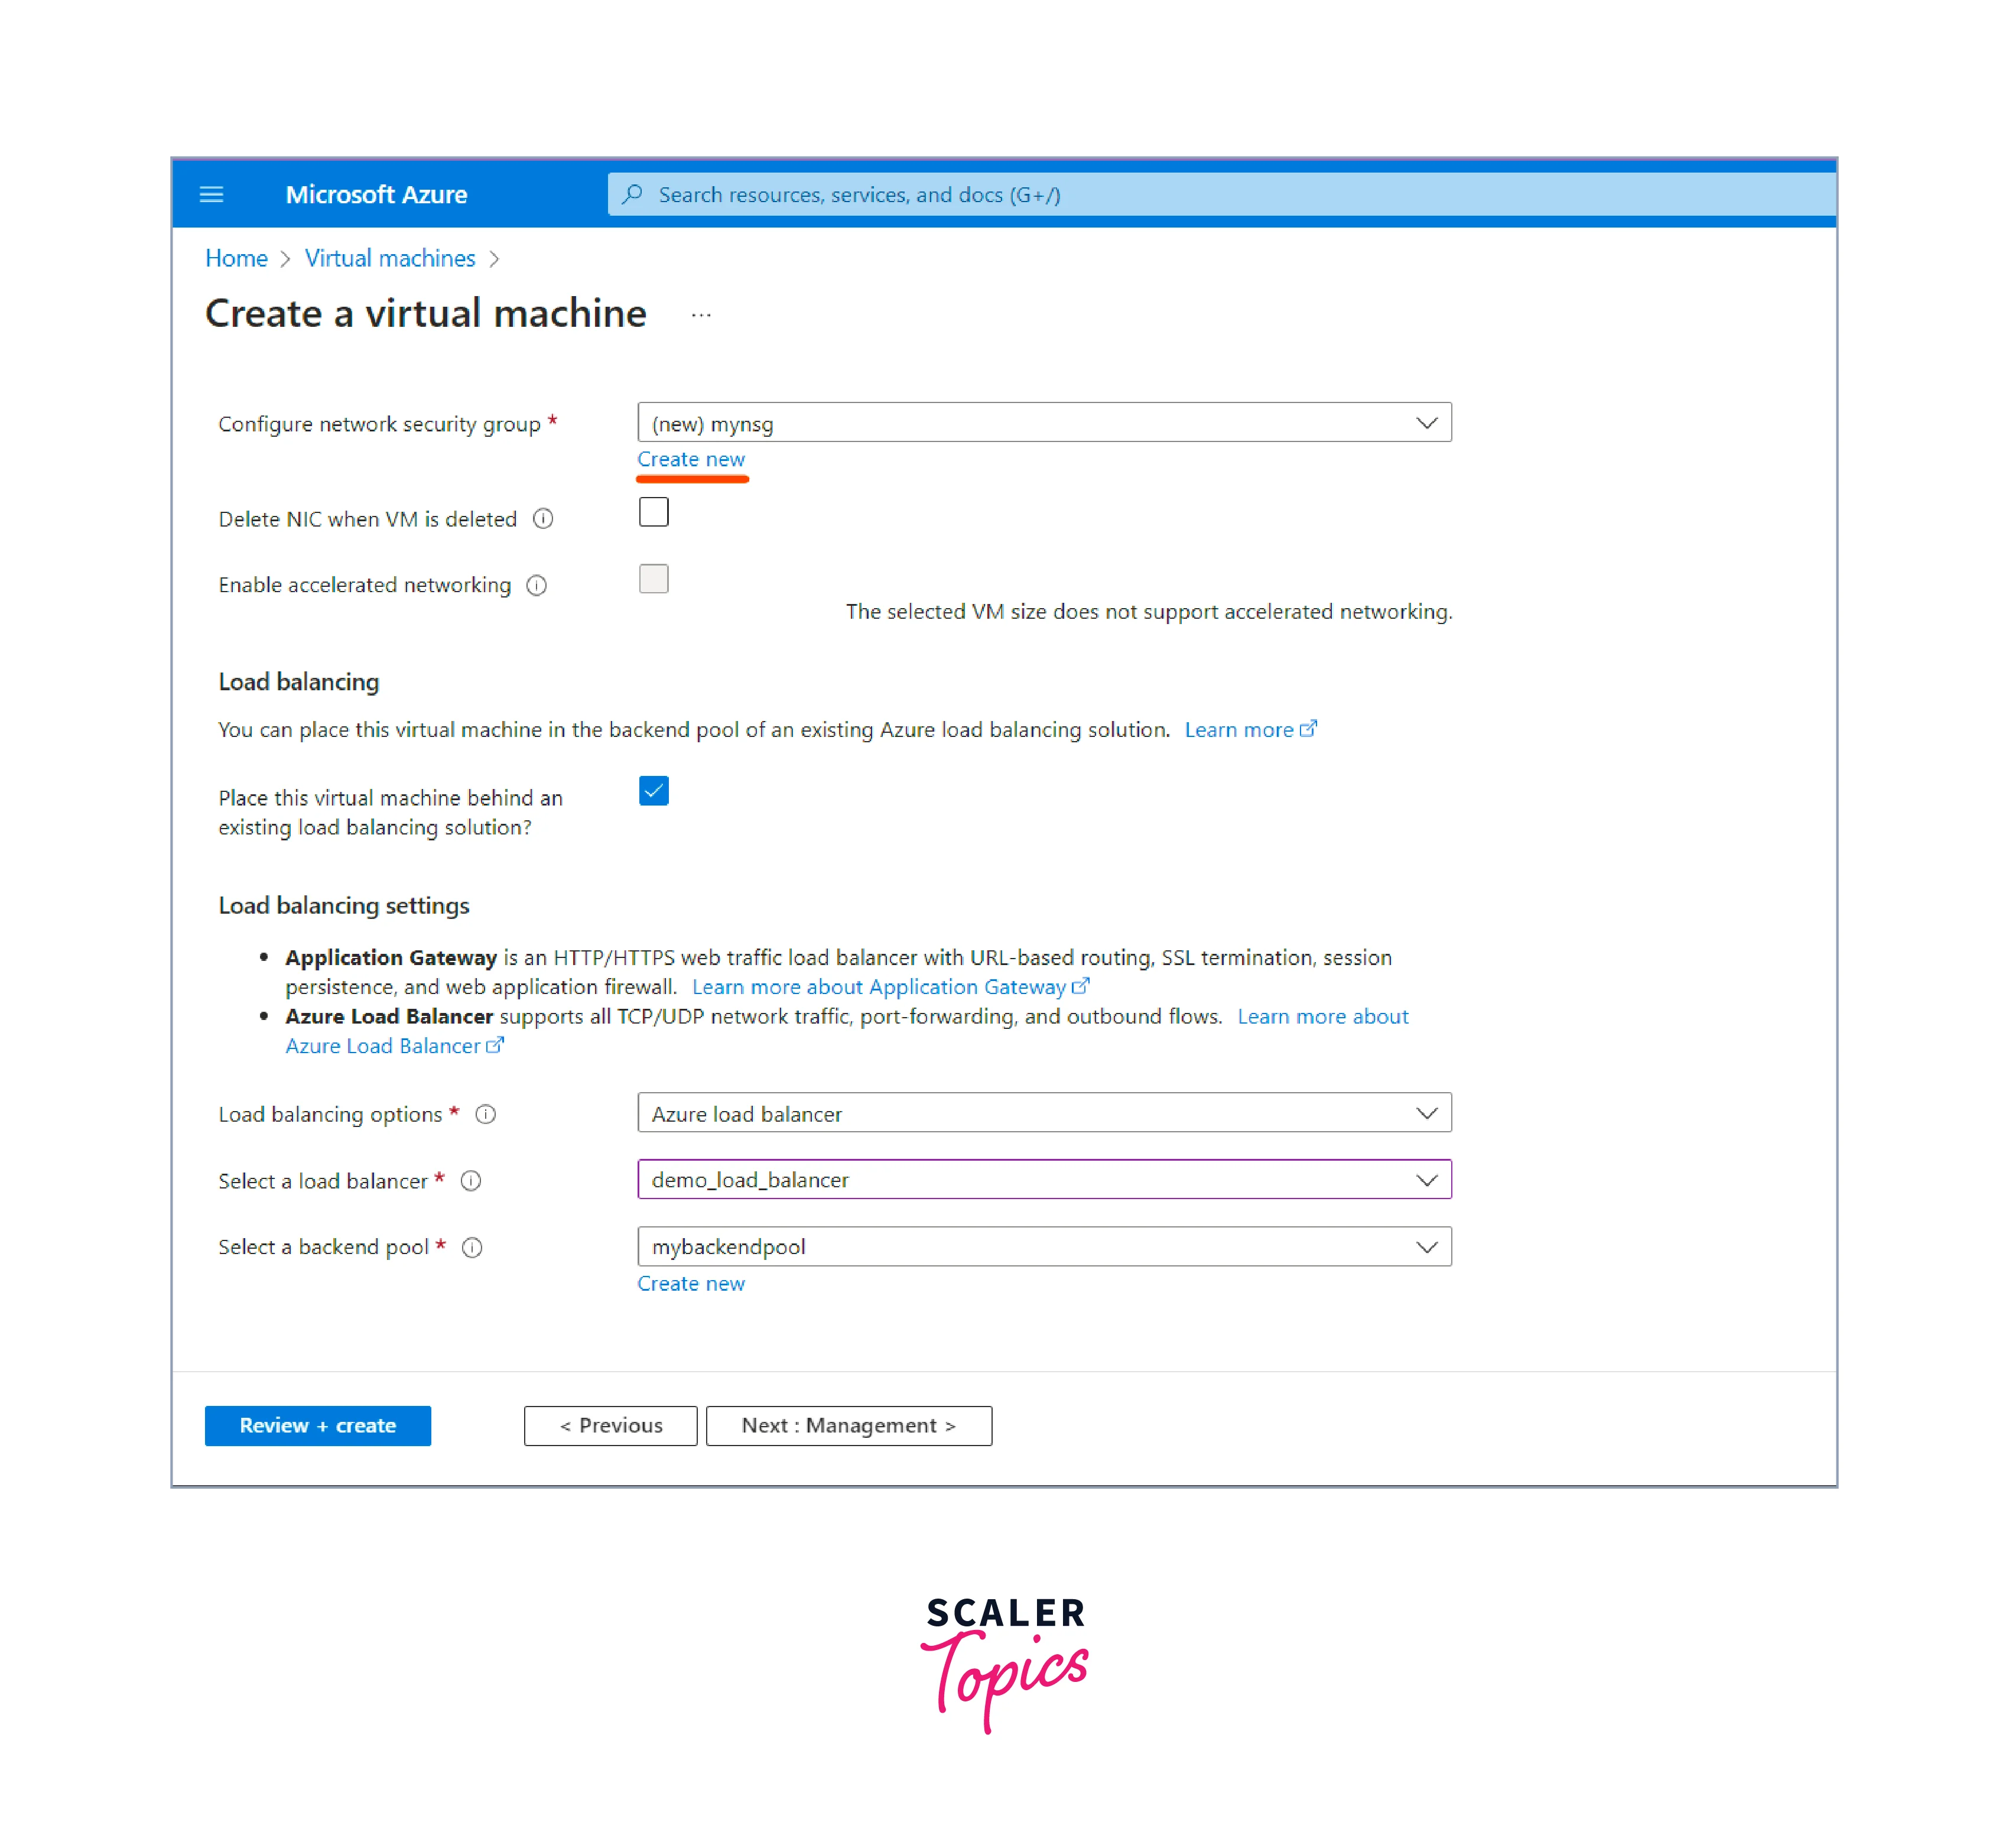
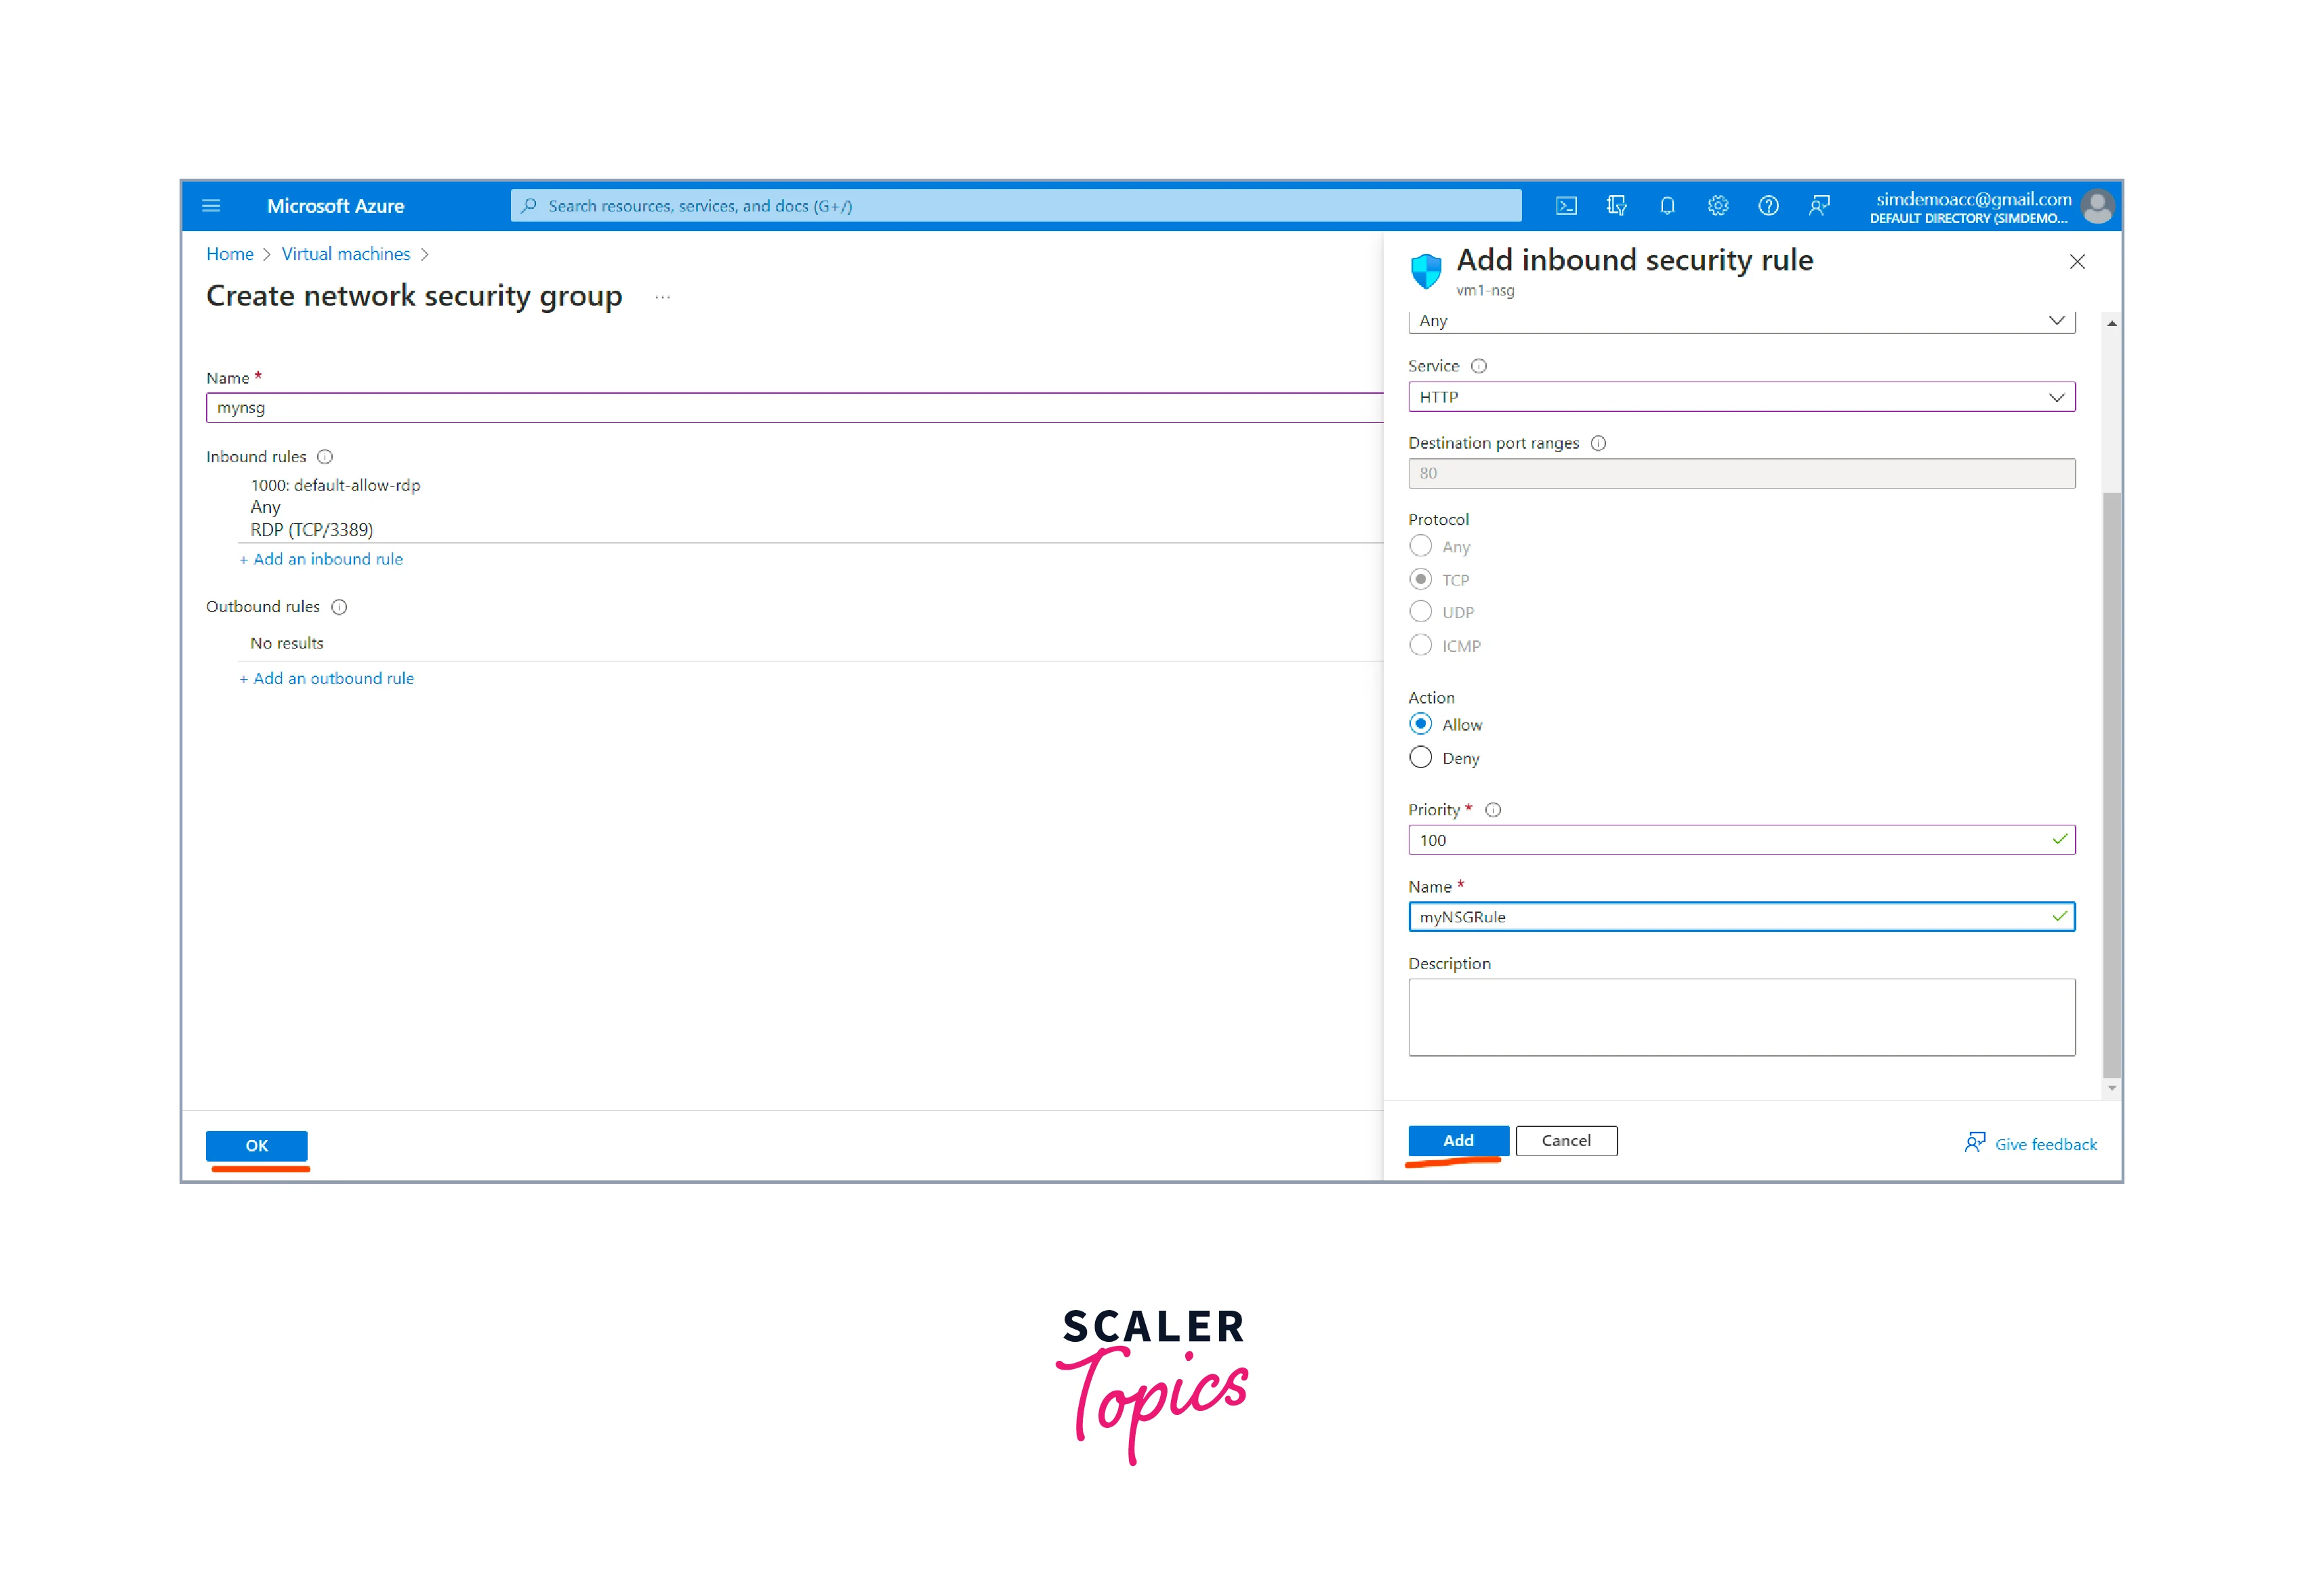
- Provide a name to the network security group and add inbound rules.
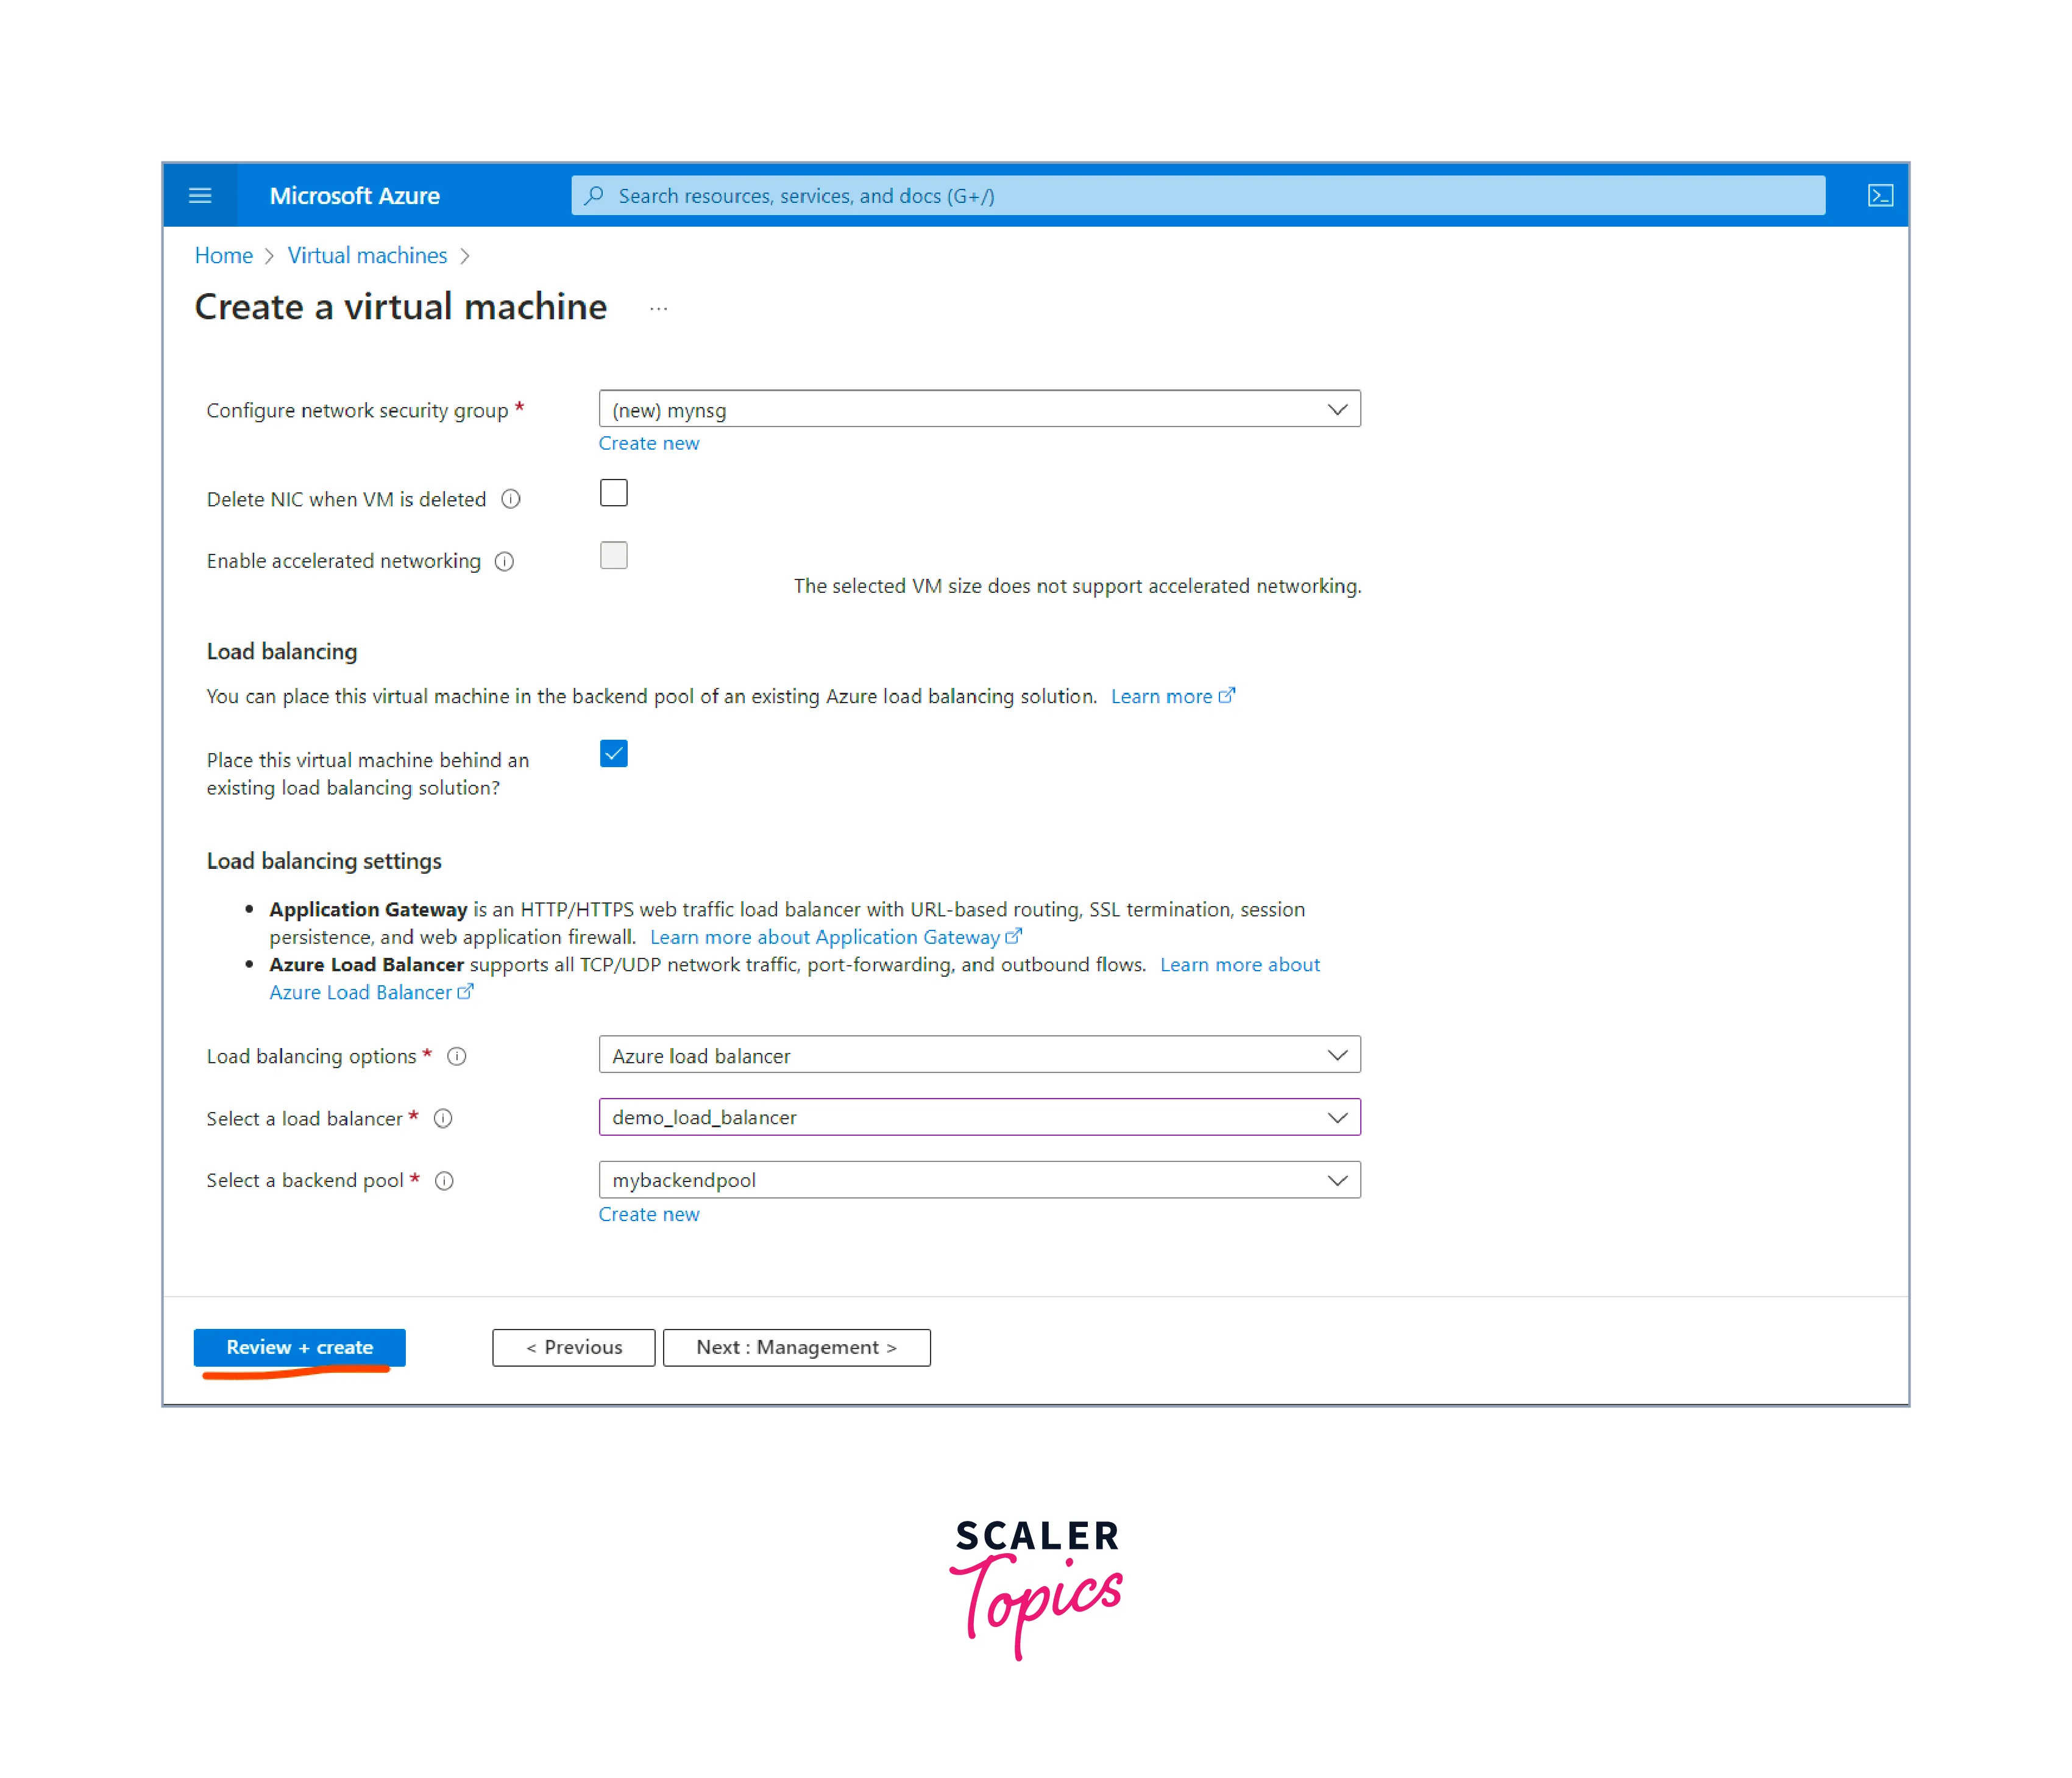
- After all the details are specified, click the Review + Create button.
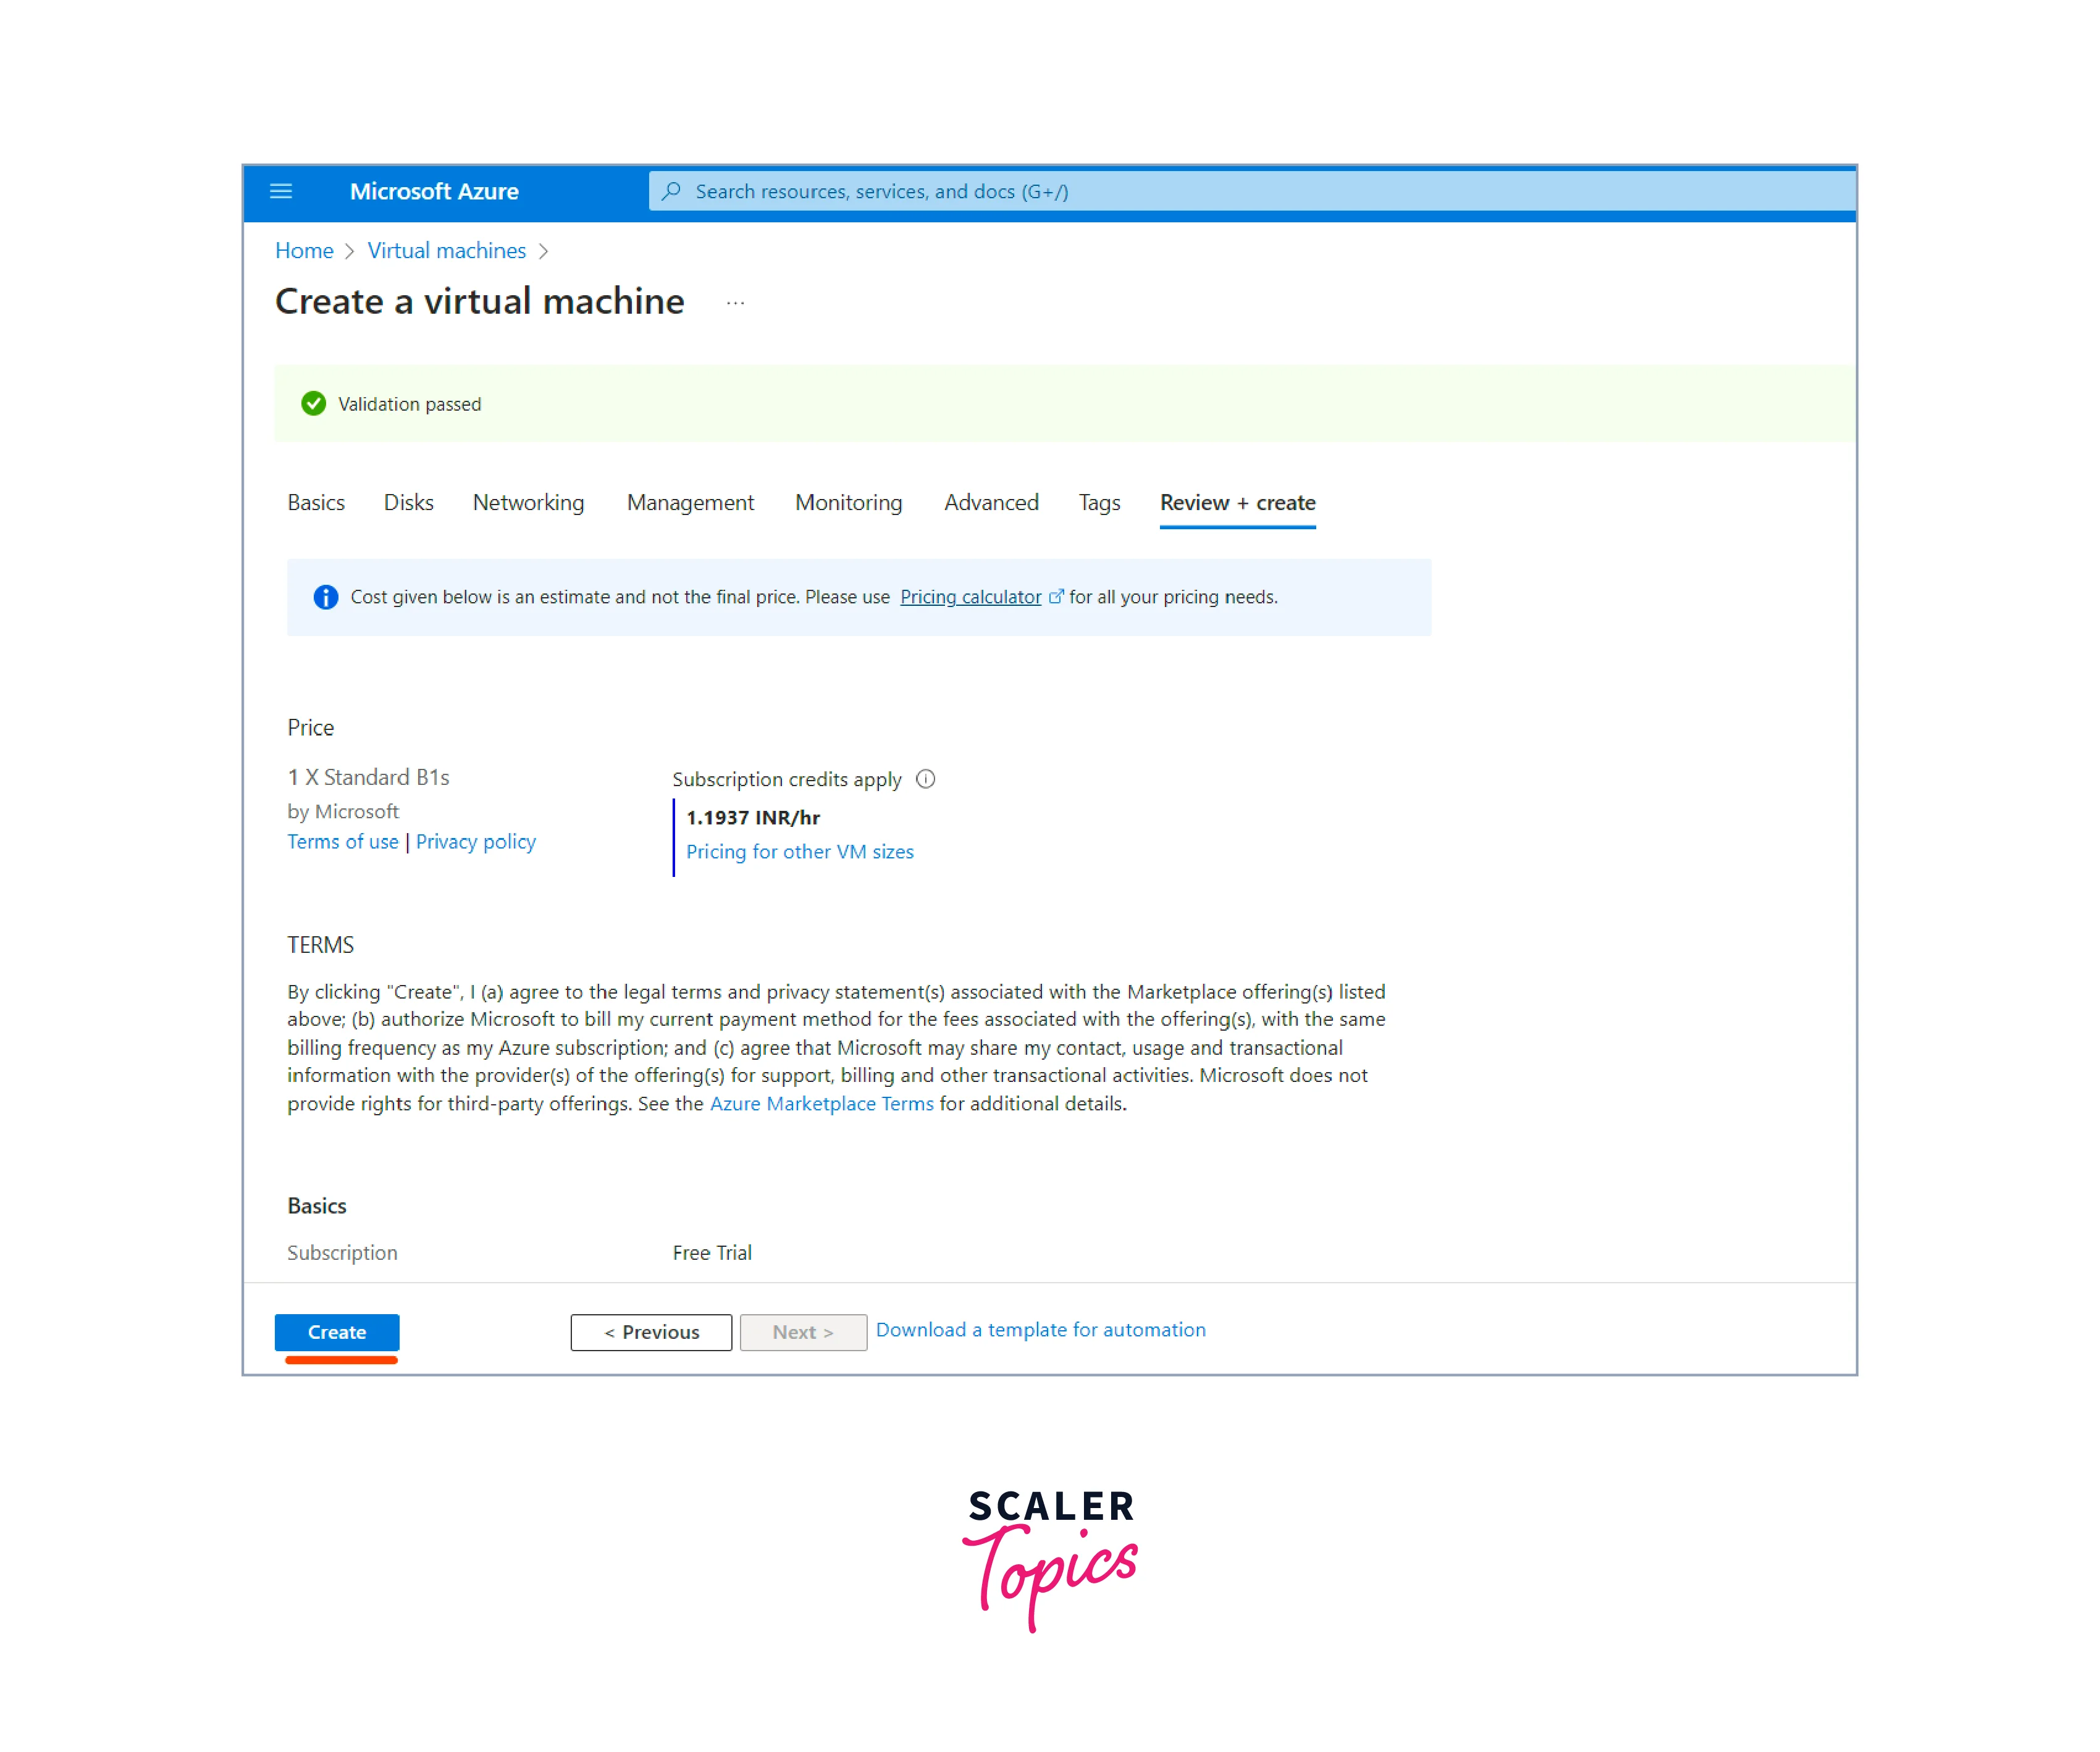
- Review the configurations and click the Create button to start the deployment process.
- your virtual machine is ready to use once the deployment is completed.
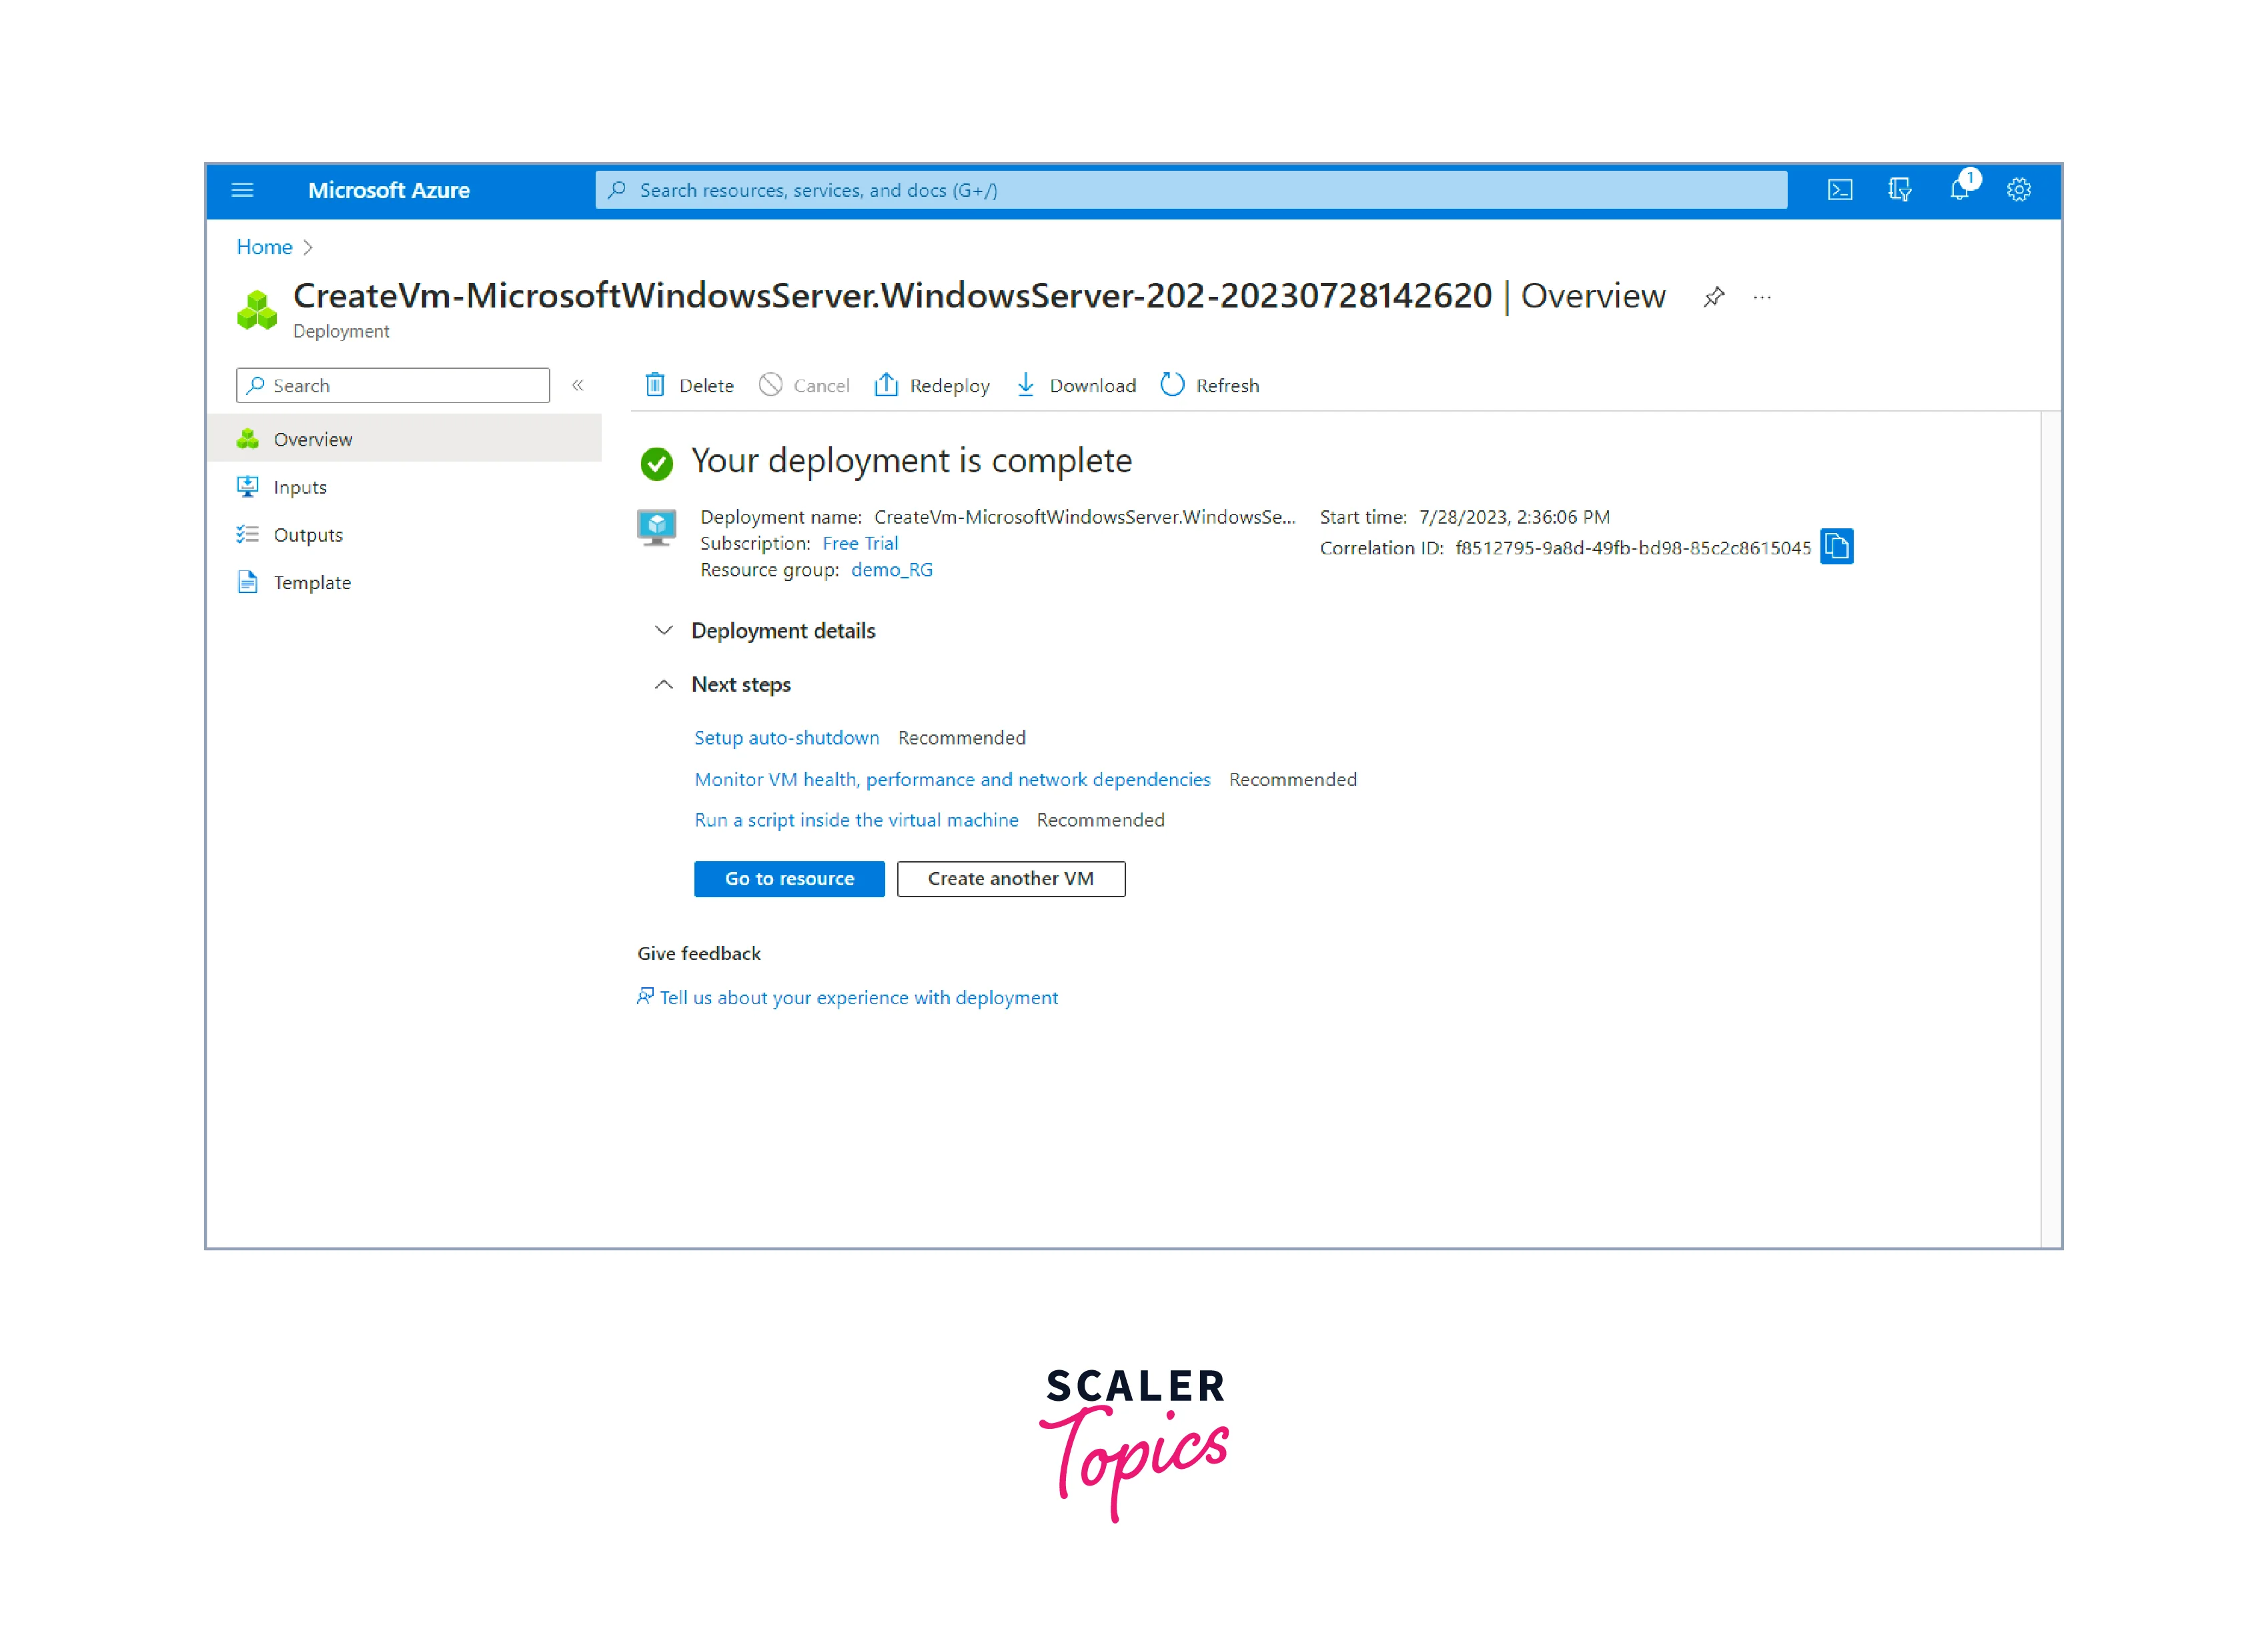
- Repeat the above steps to create one more Virtual Machine.
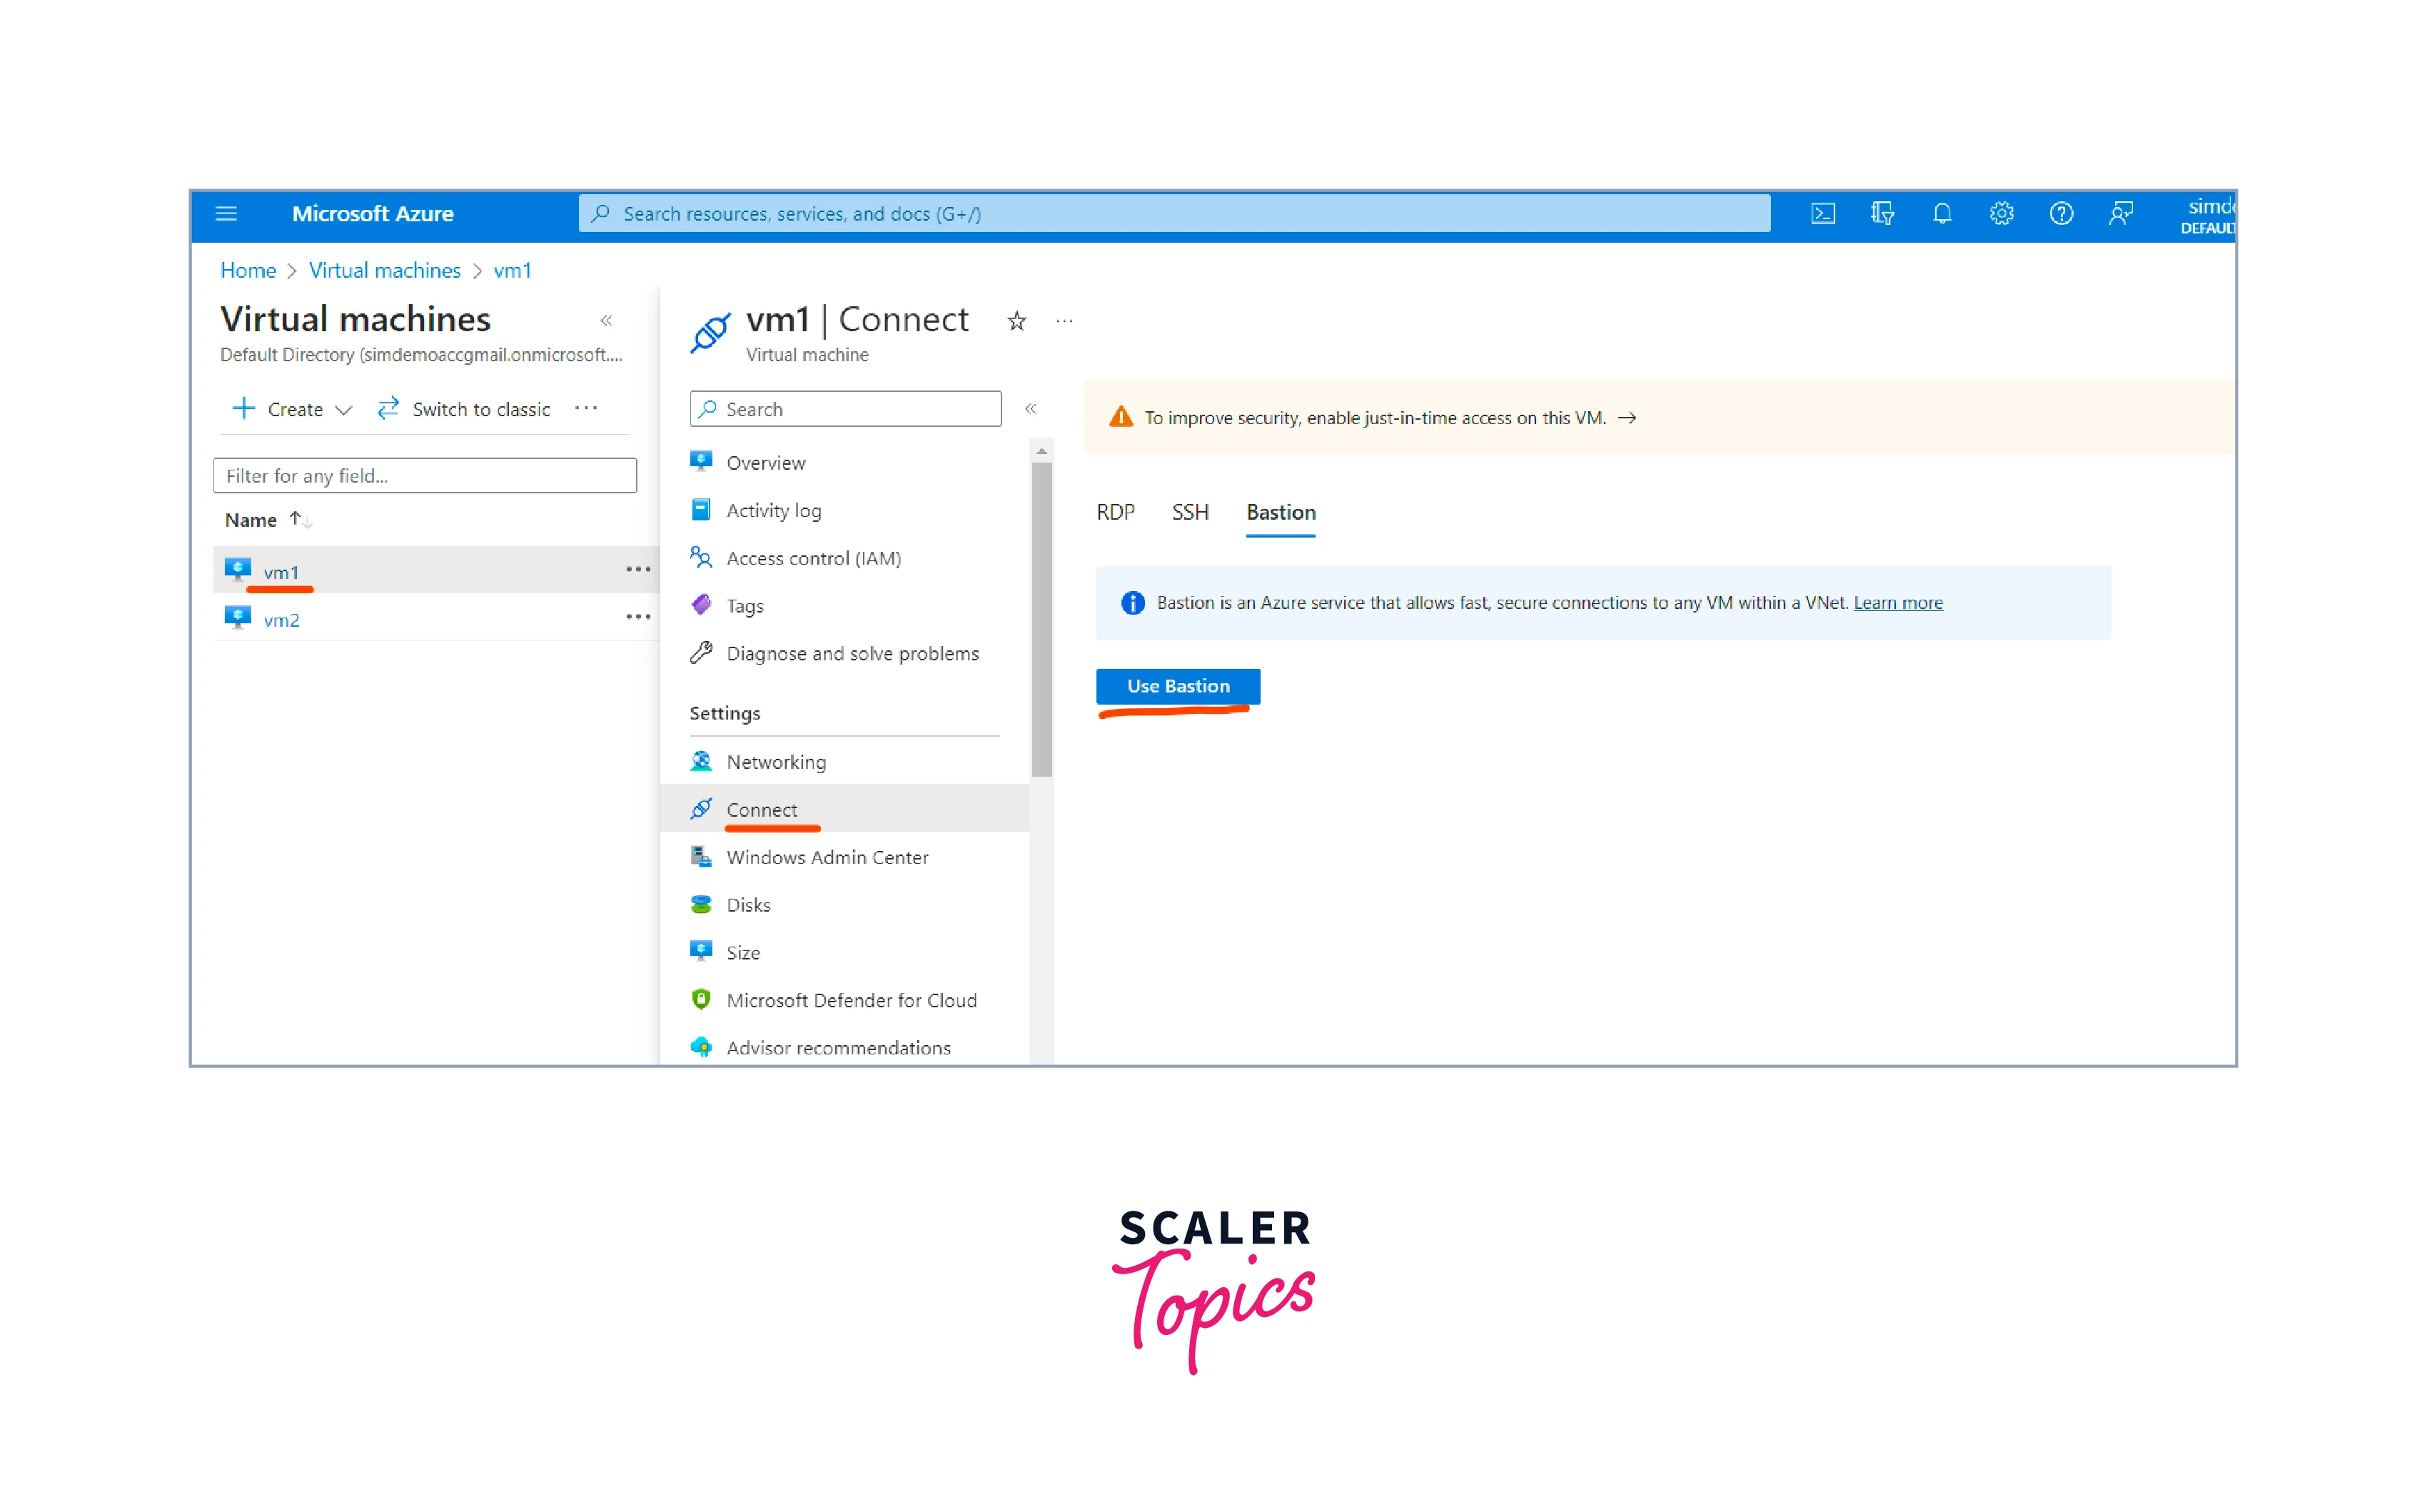
Install IIS for Testing
- Choose the first virtual machine (myVM1) on which you want to install IIS. Choose the Connect option and then Click onUse Bastion to connect to myVM1
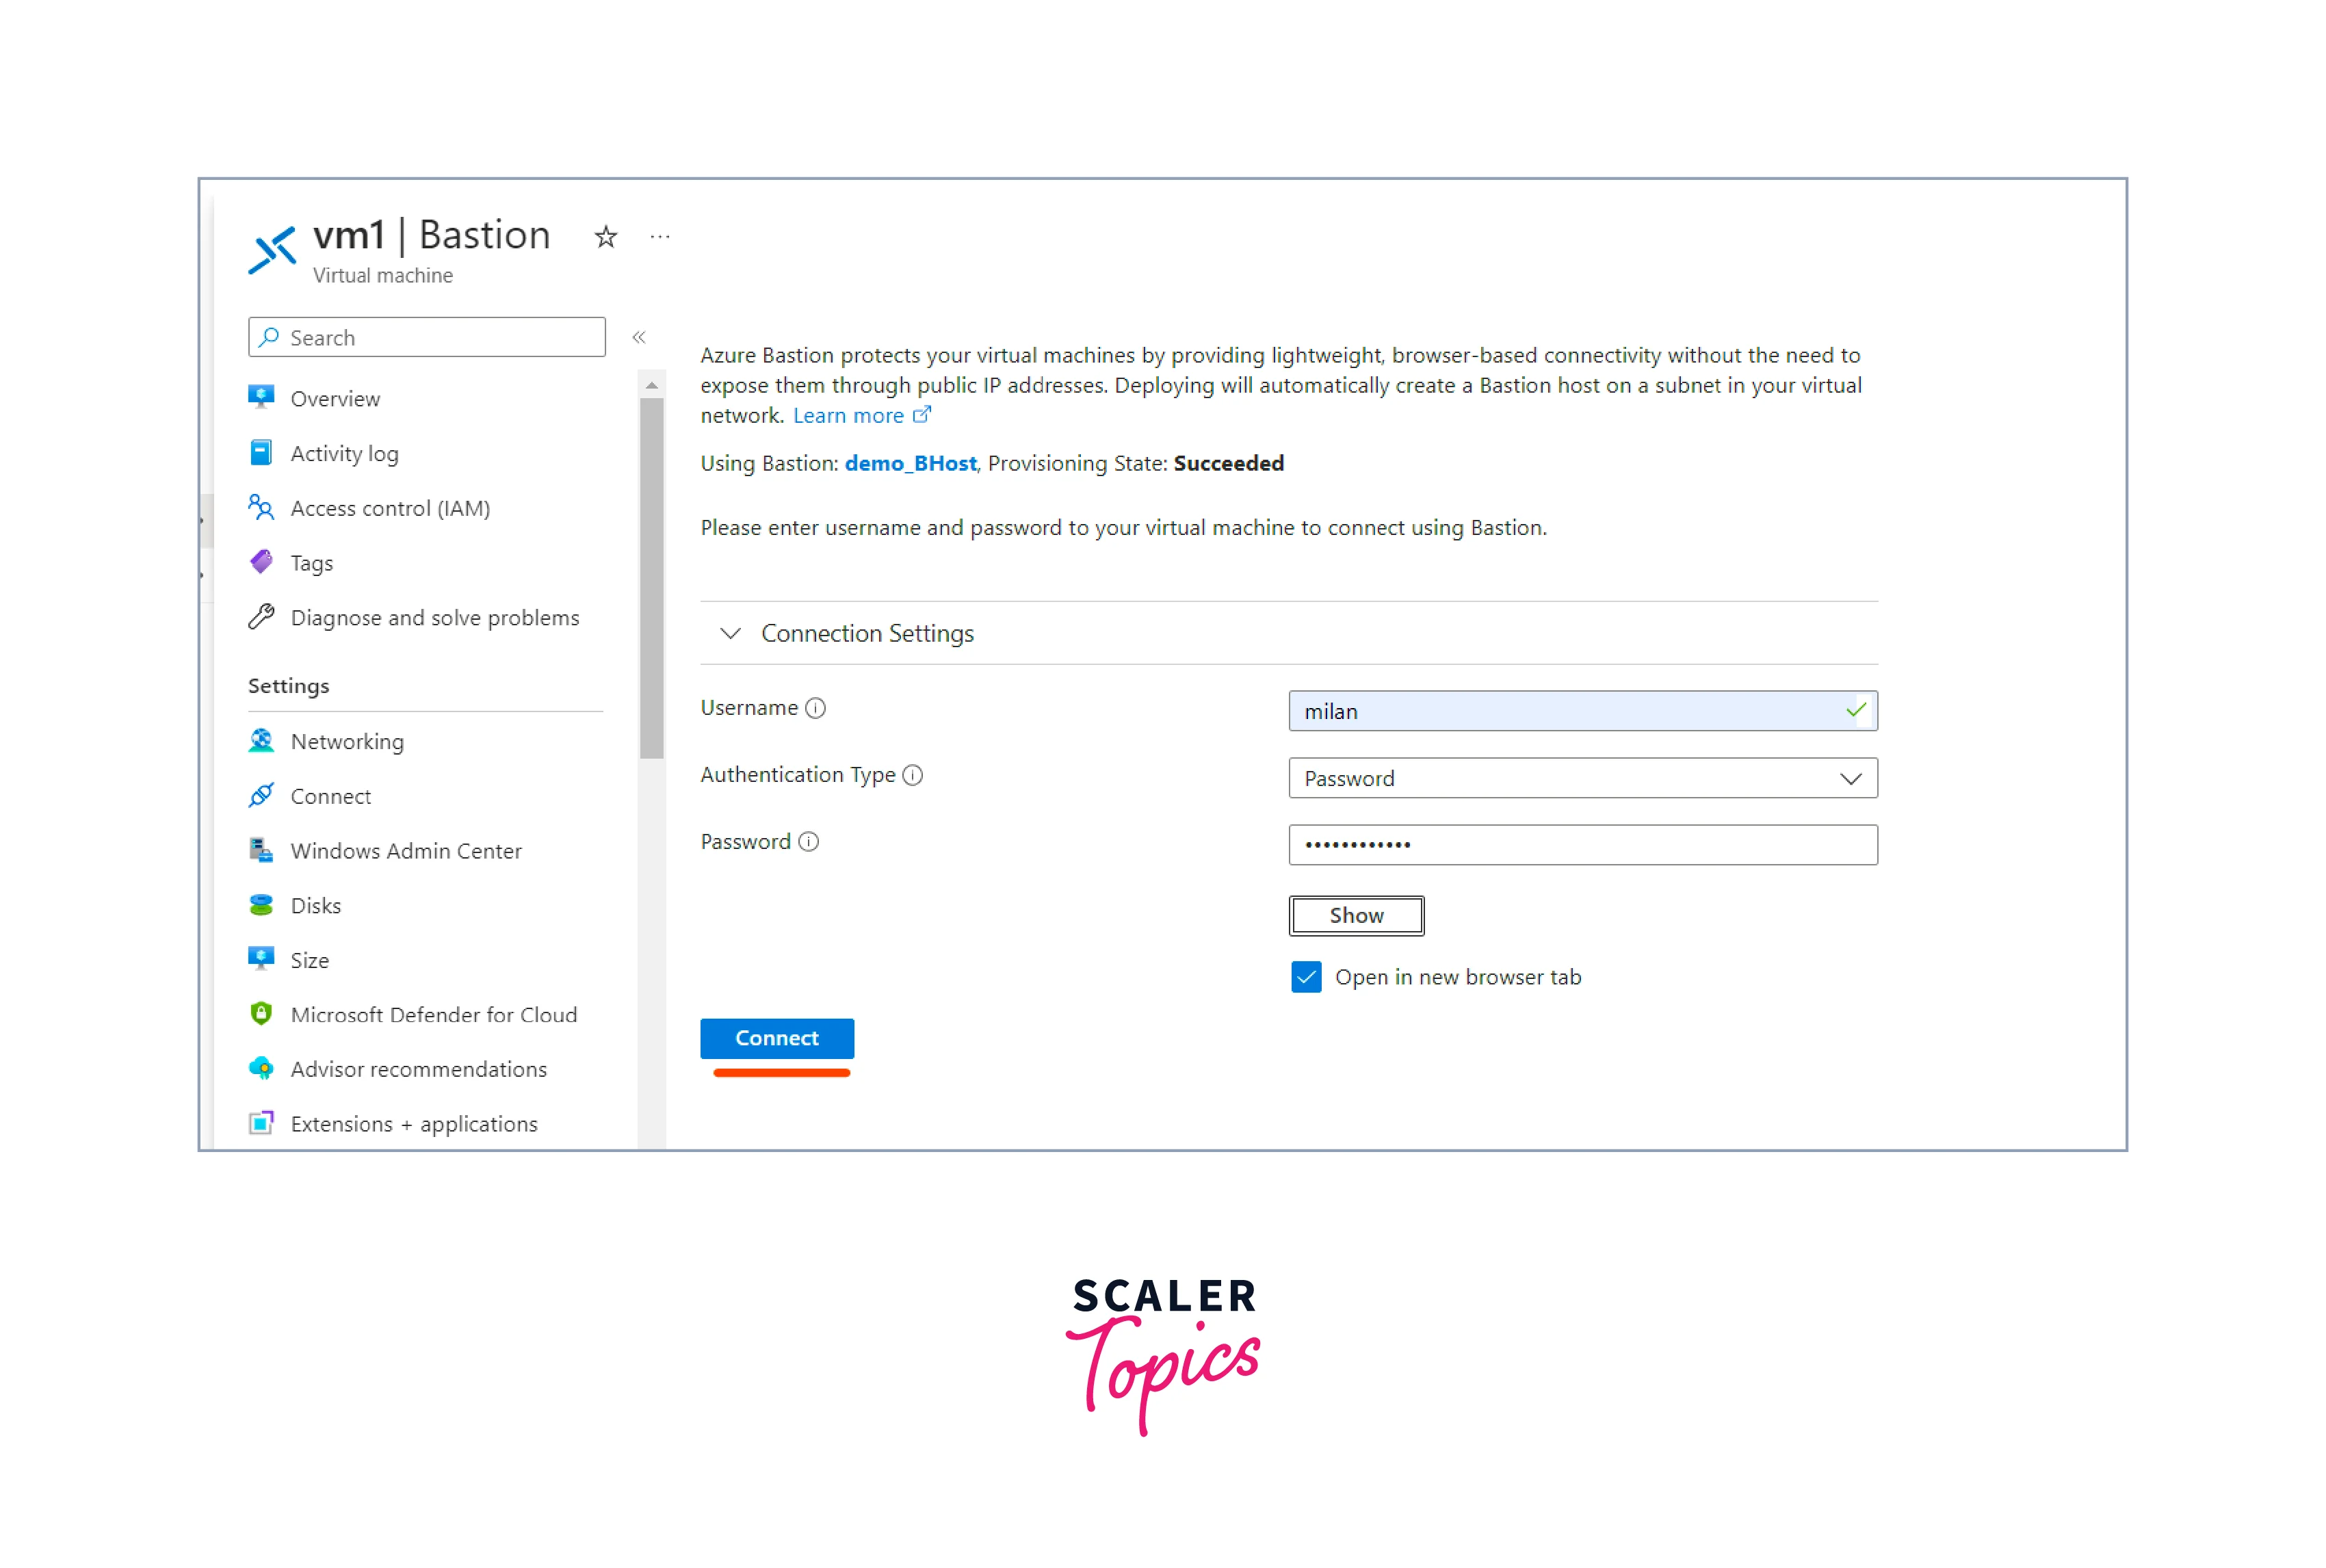
- Provide the username and password you set during VM creation, then click the Connect button.
- Open Powershell in the Virtual Machine Desktop.
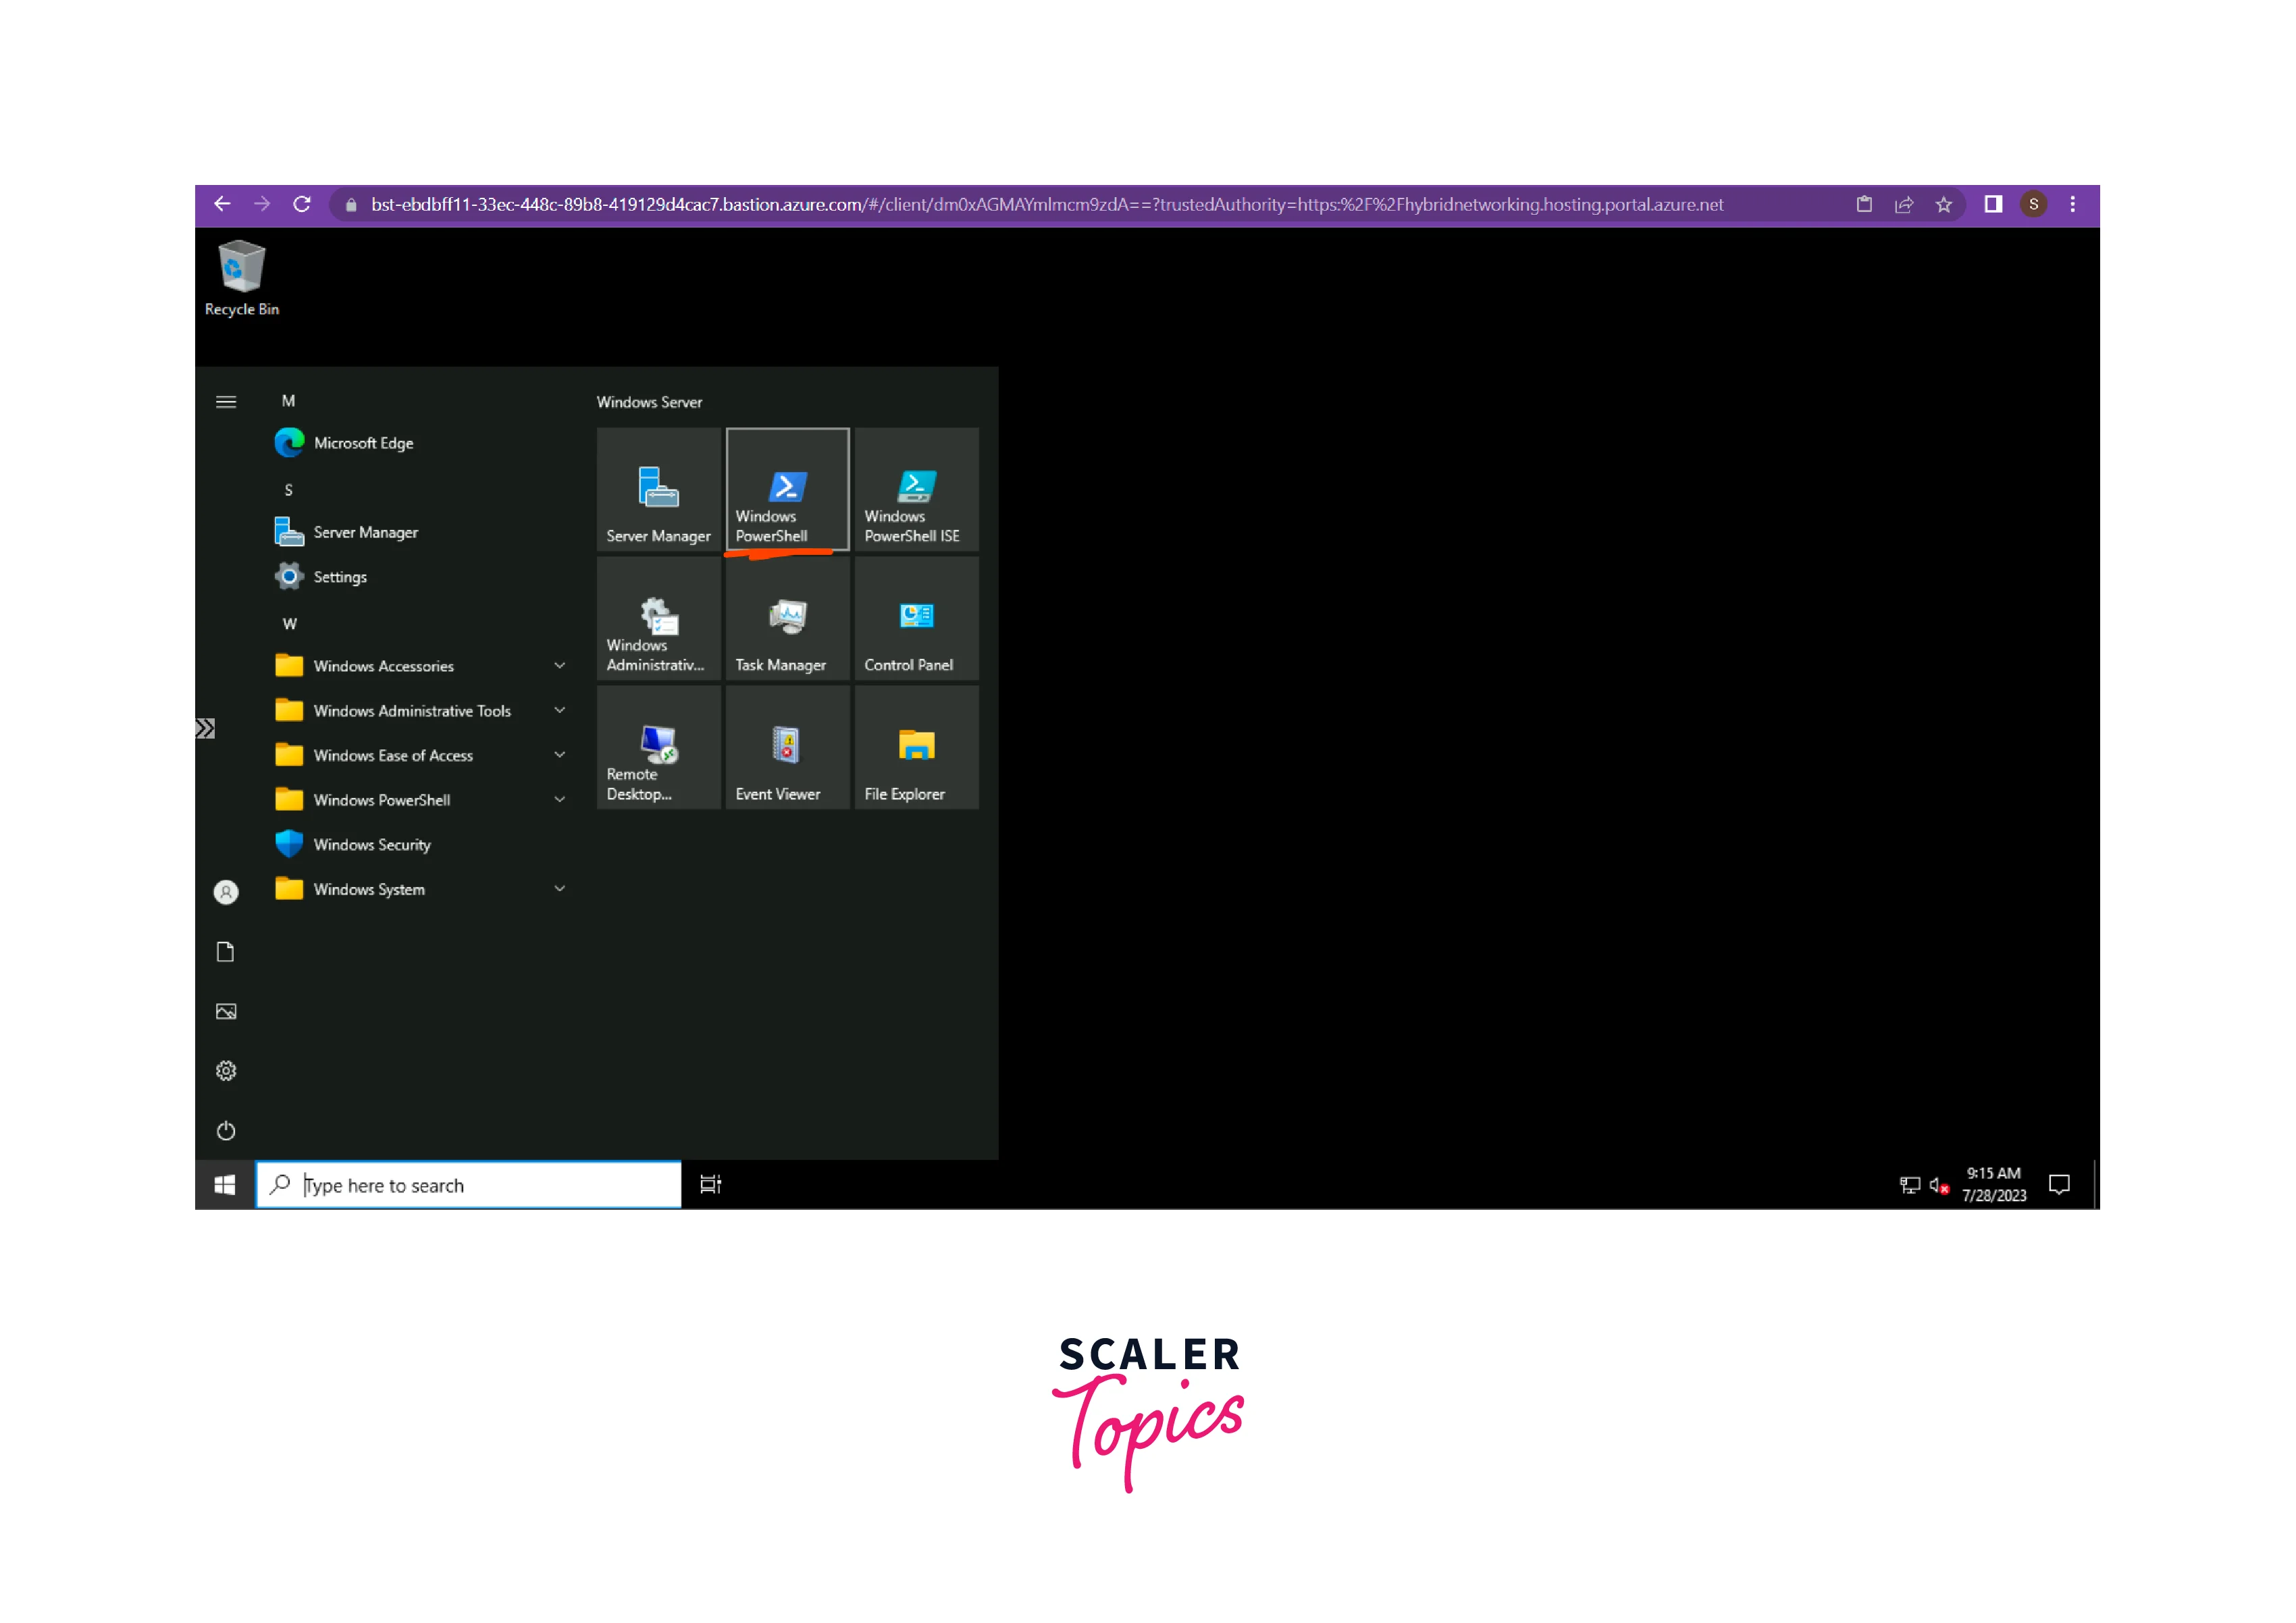
- In the PowerShell window of myVM1, run the provided commands:
- Install the IIS server role: Install-WindowsFeature -name Web-Server -IncludeManagementTools
- Remove the default iisstart.htm file : Remove-Item C:\inetpub\wwwroot\iisstart.htm
- Add a new iisstart.htm file that displays the name of the VM. Add-Content -Path "C:\inetpub\wwwroot\iisstart.htm" -Value $("Hello World from " + $env:computername)
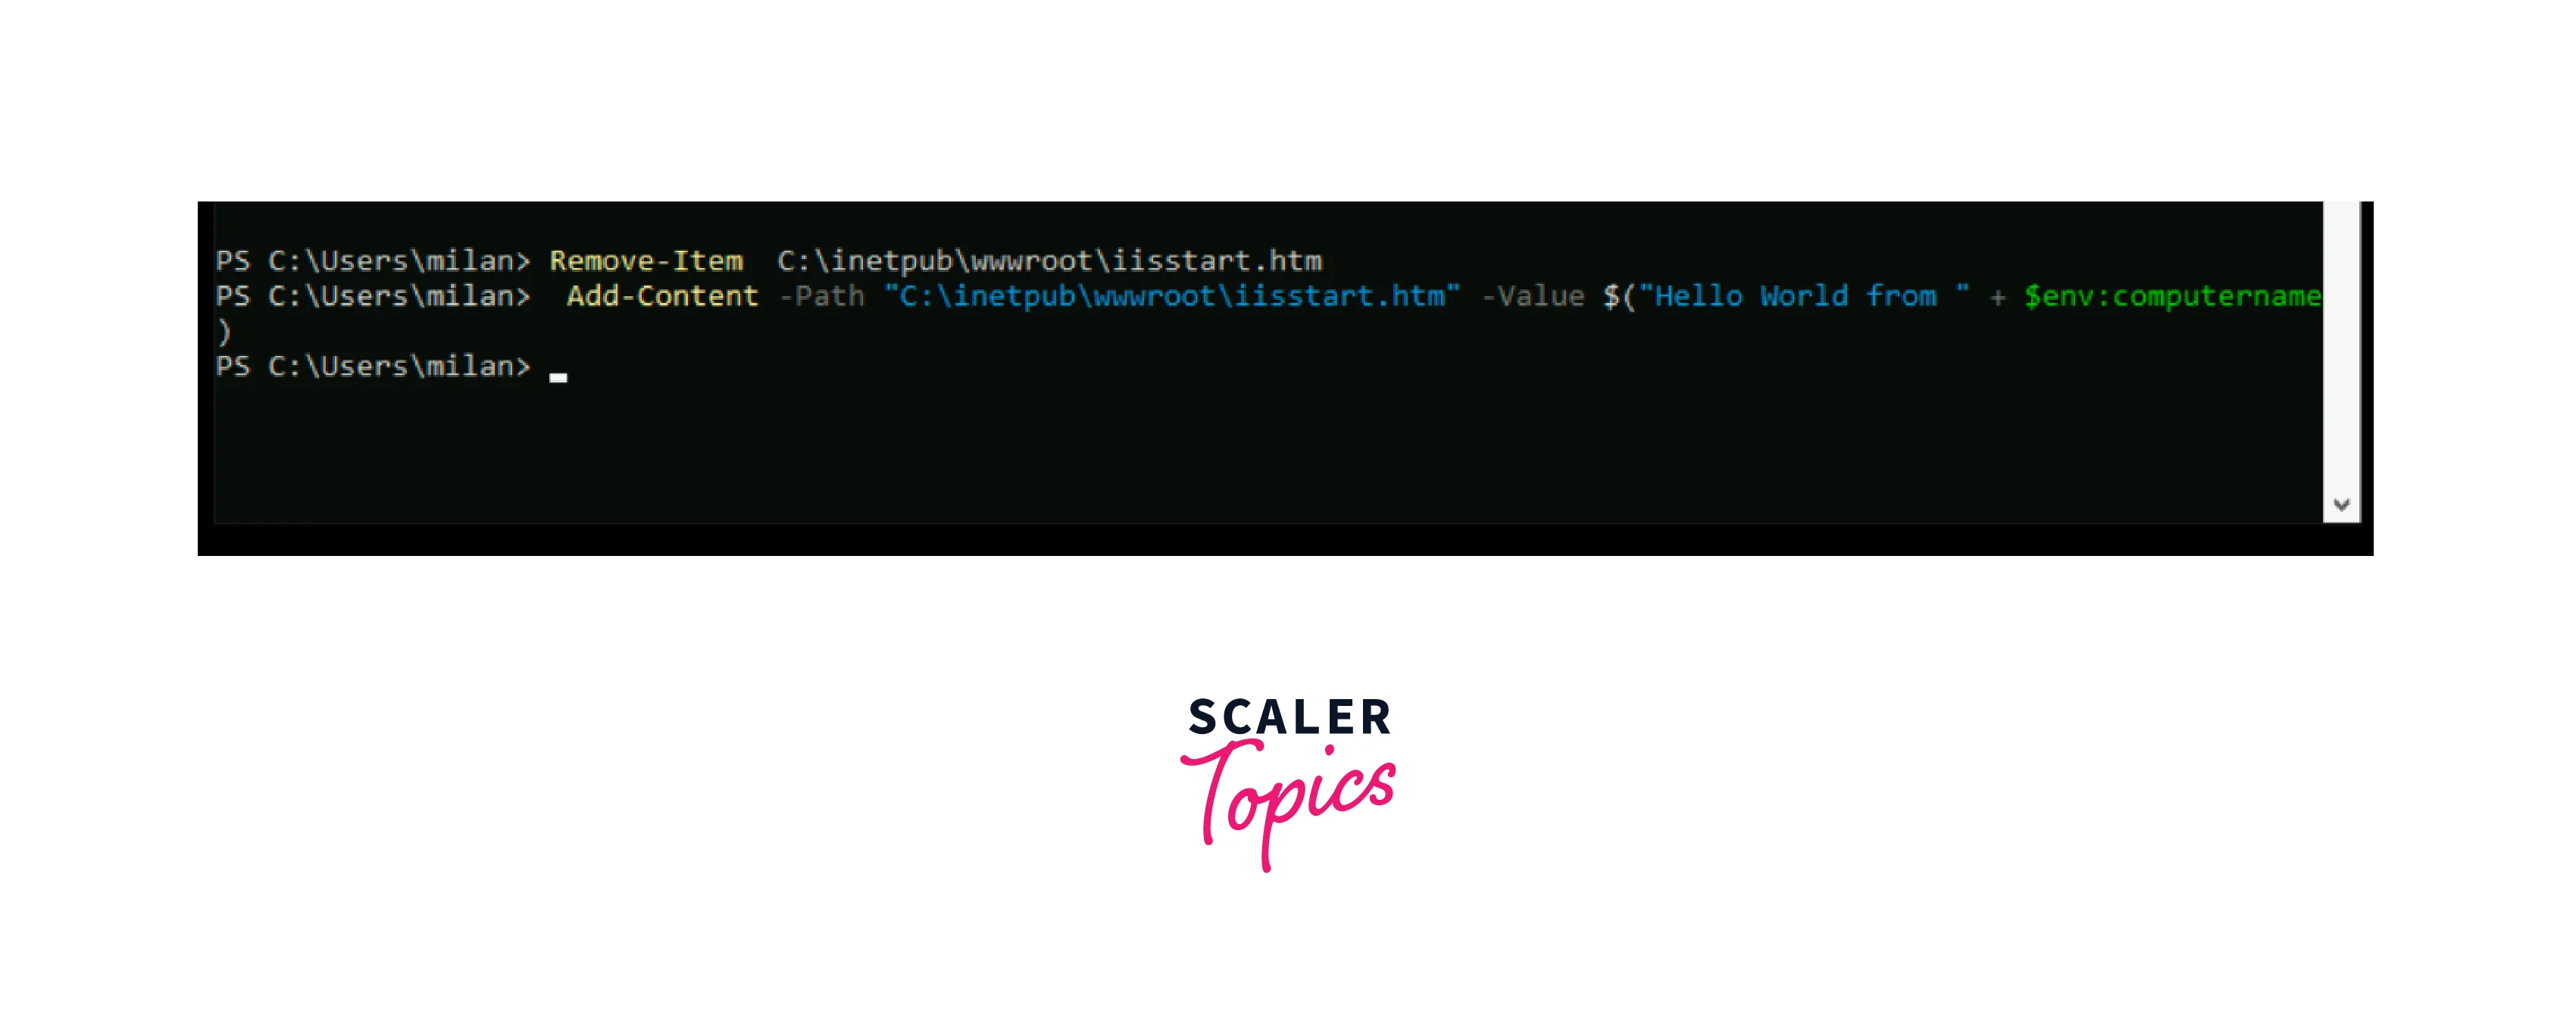
- Repeat the same for the second virtual machine.
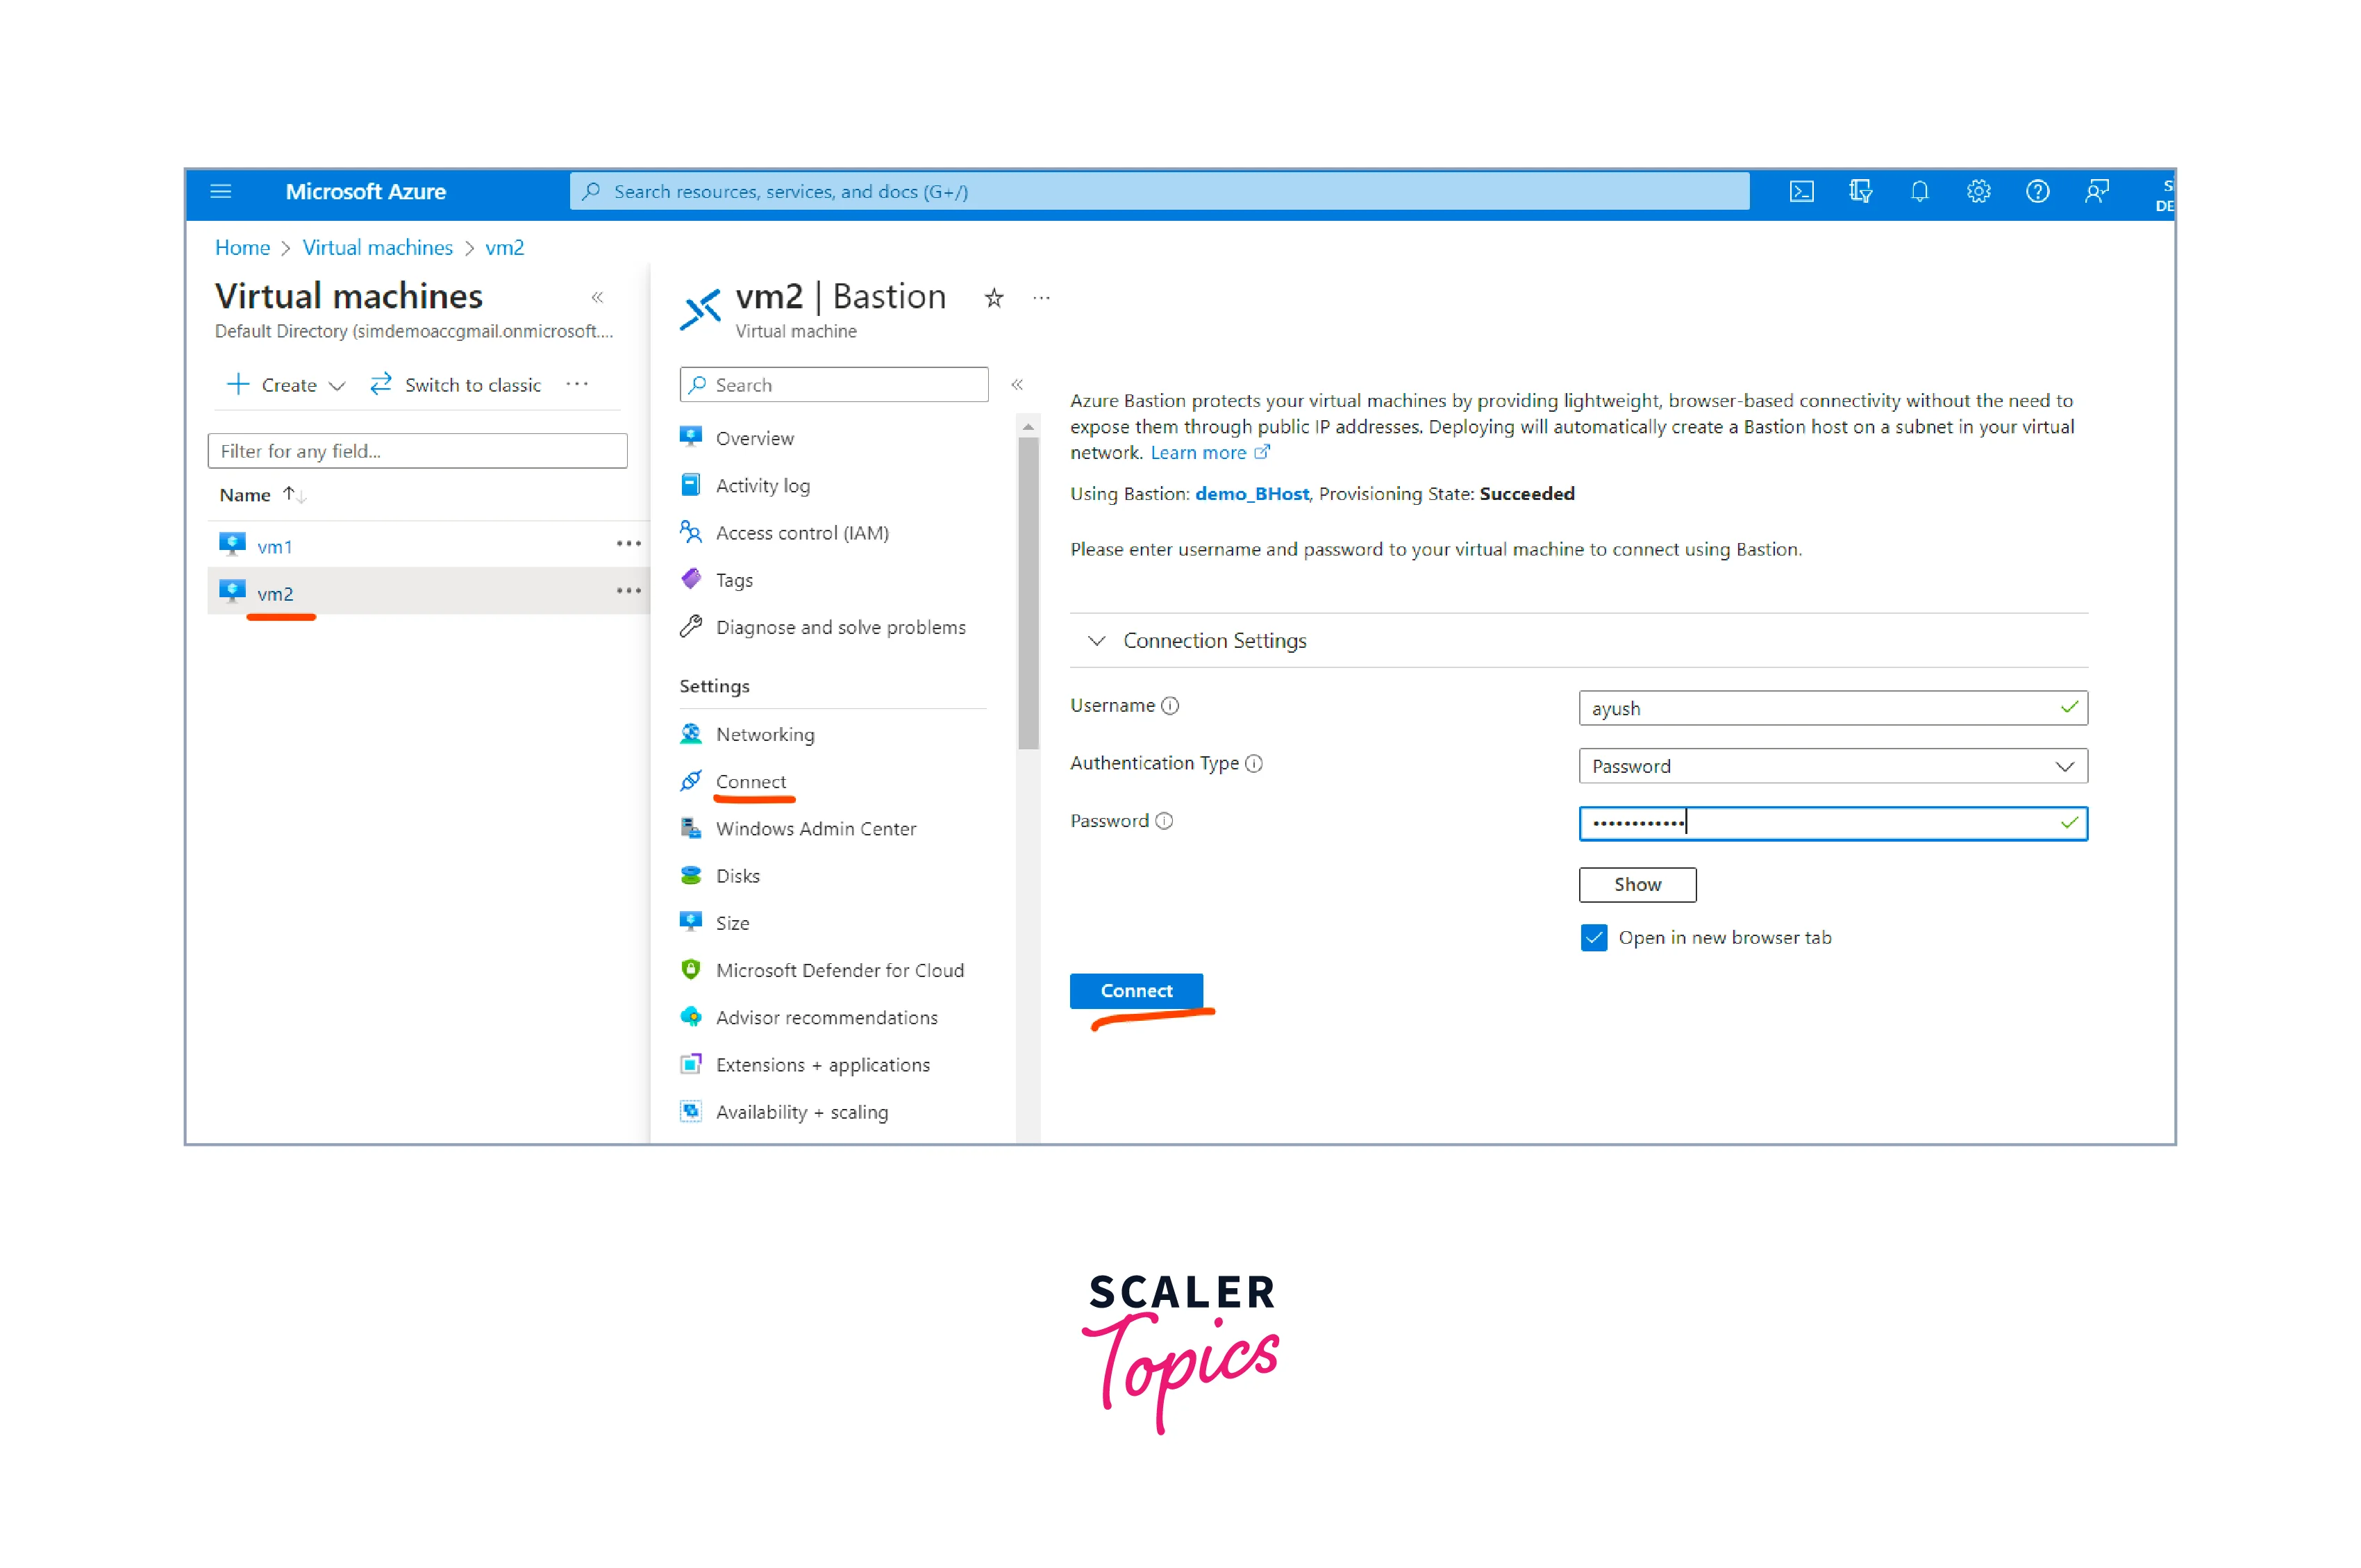
Test the Load Balancer
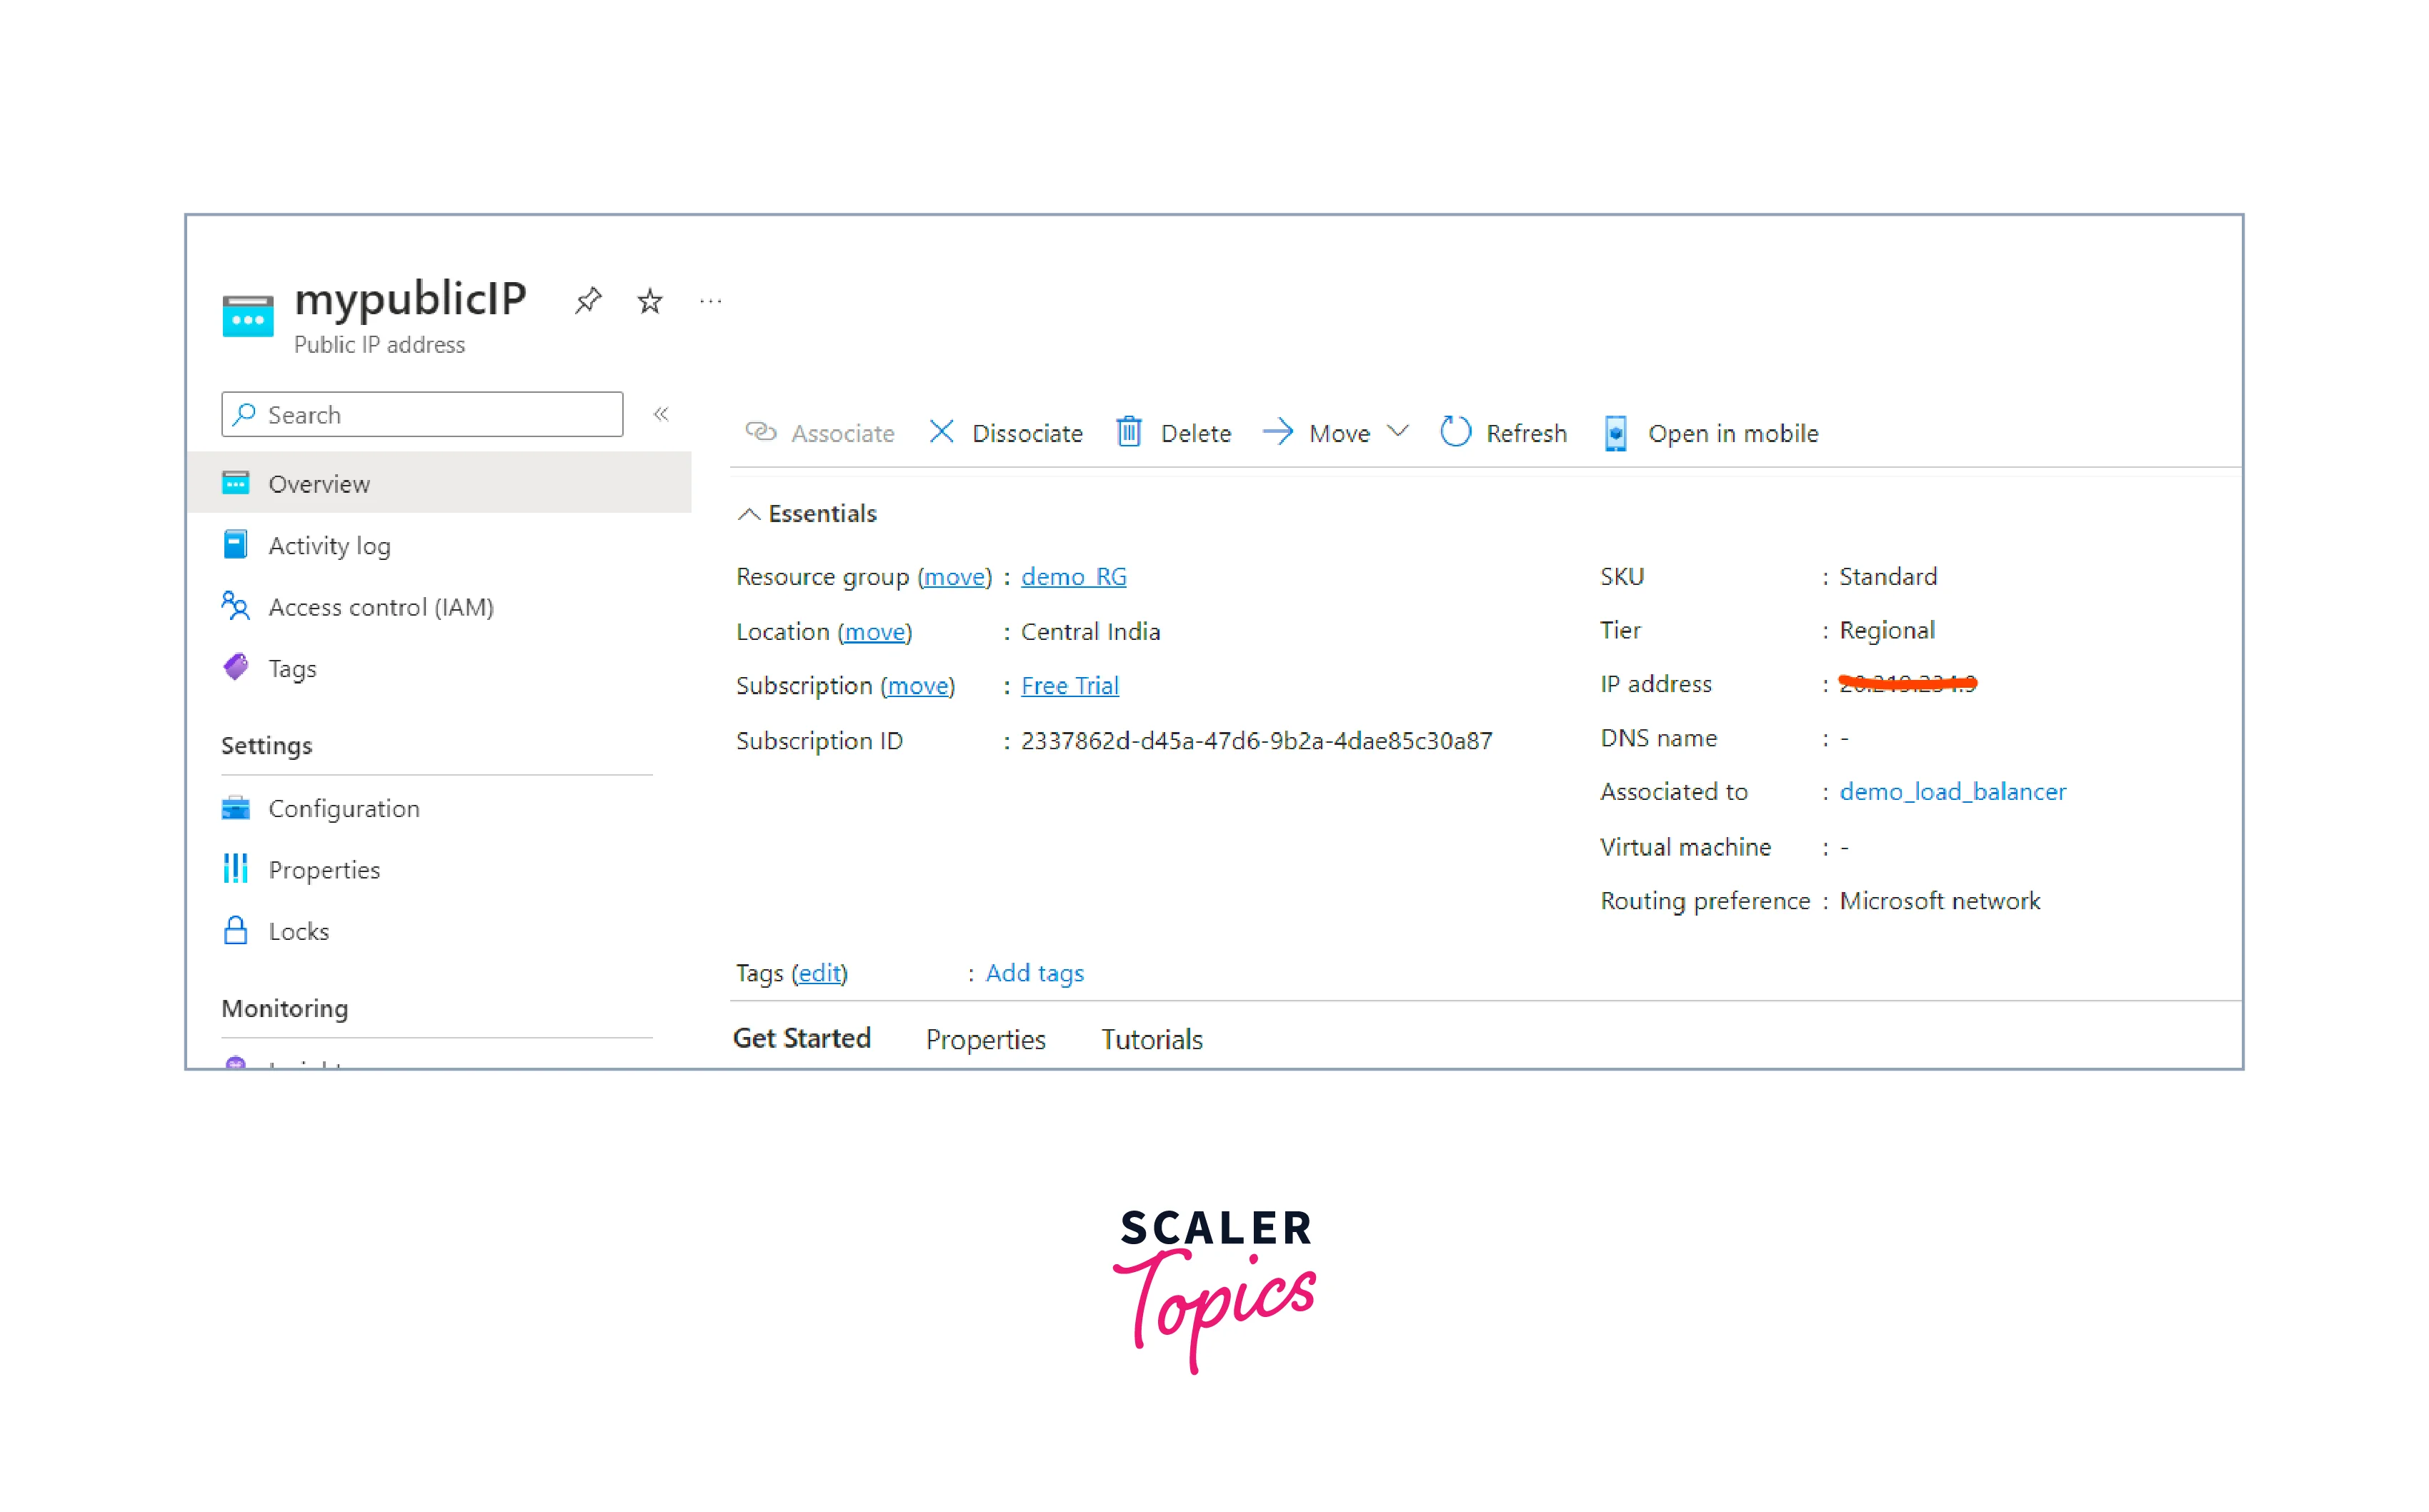
- Search for public IP in the search bar and select the Puclic IP addresses from the dropdown.
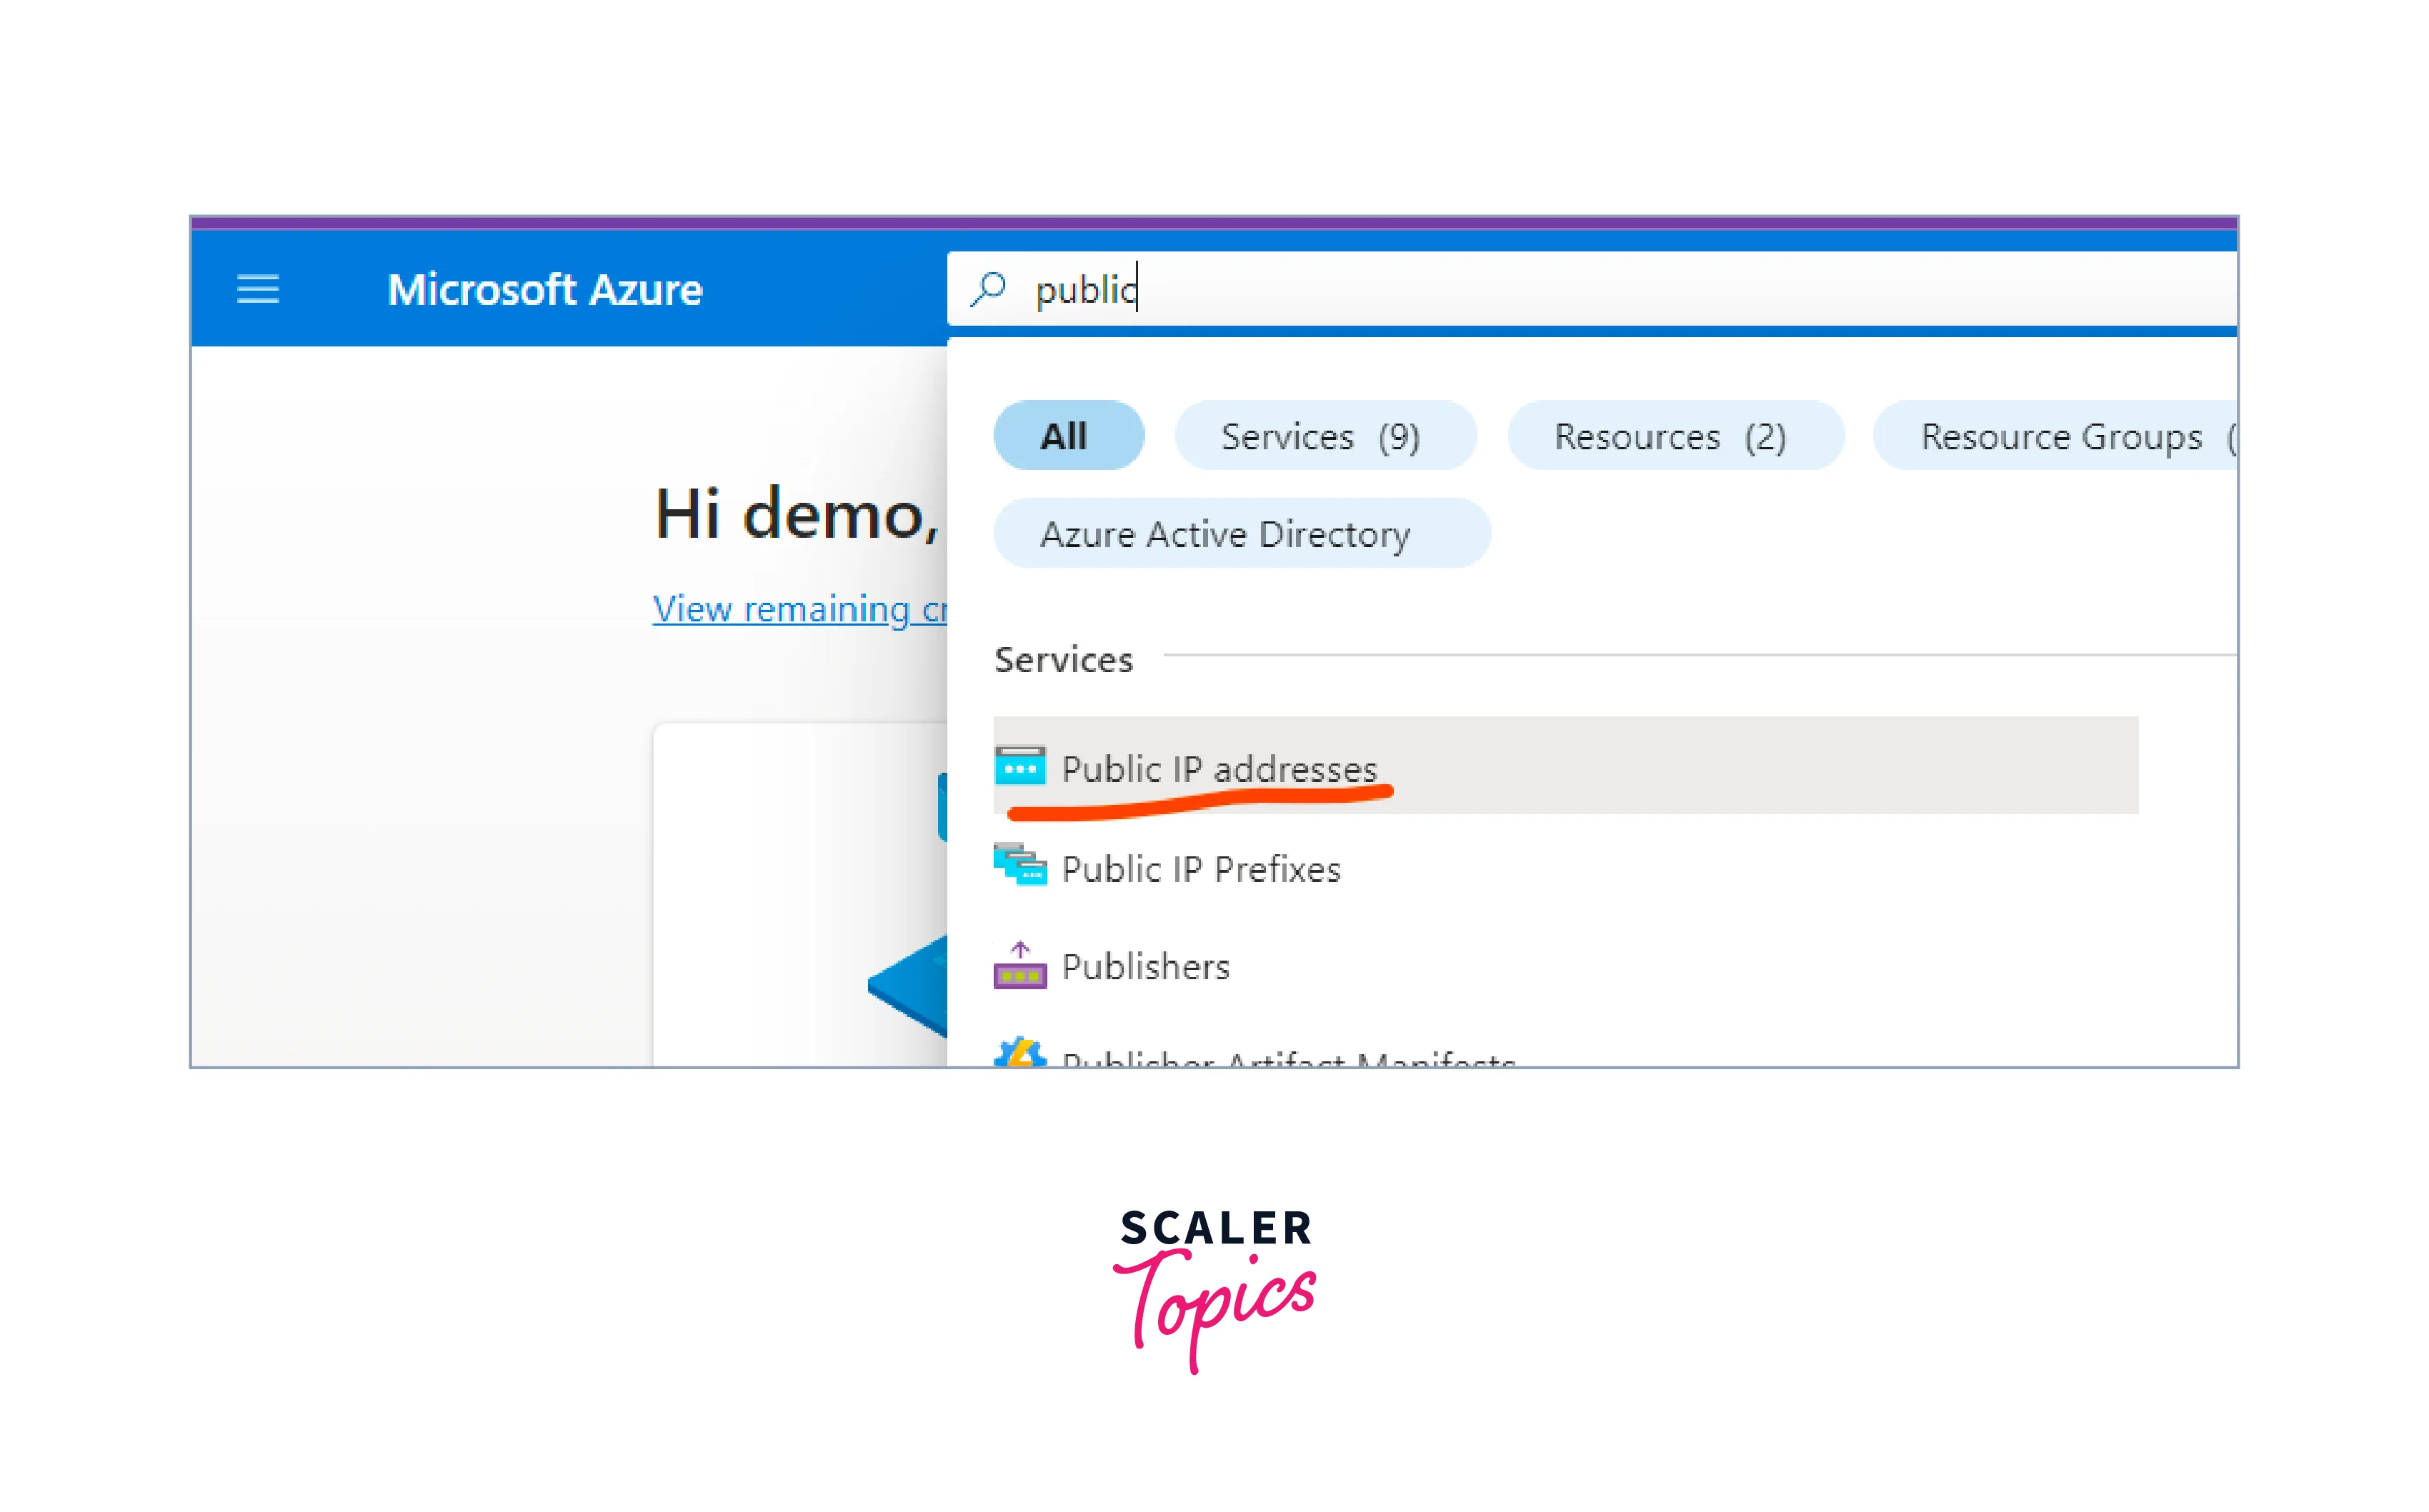
- Copy the IP address provided here and open it in the browser.
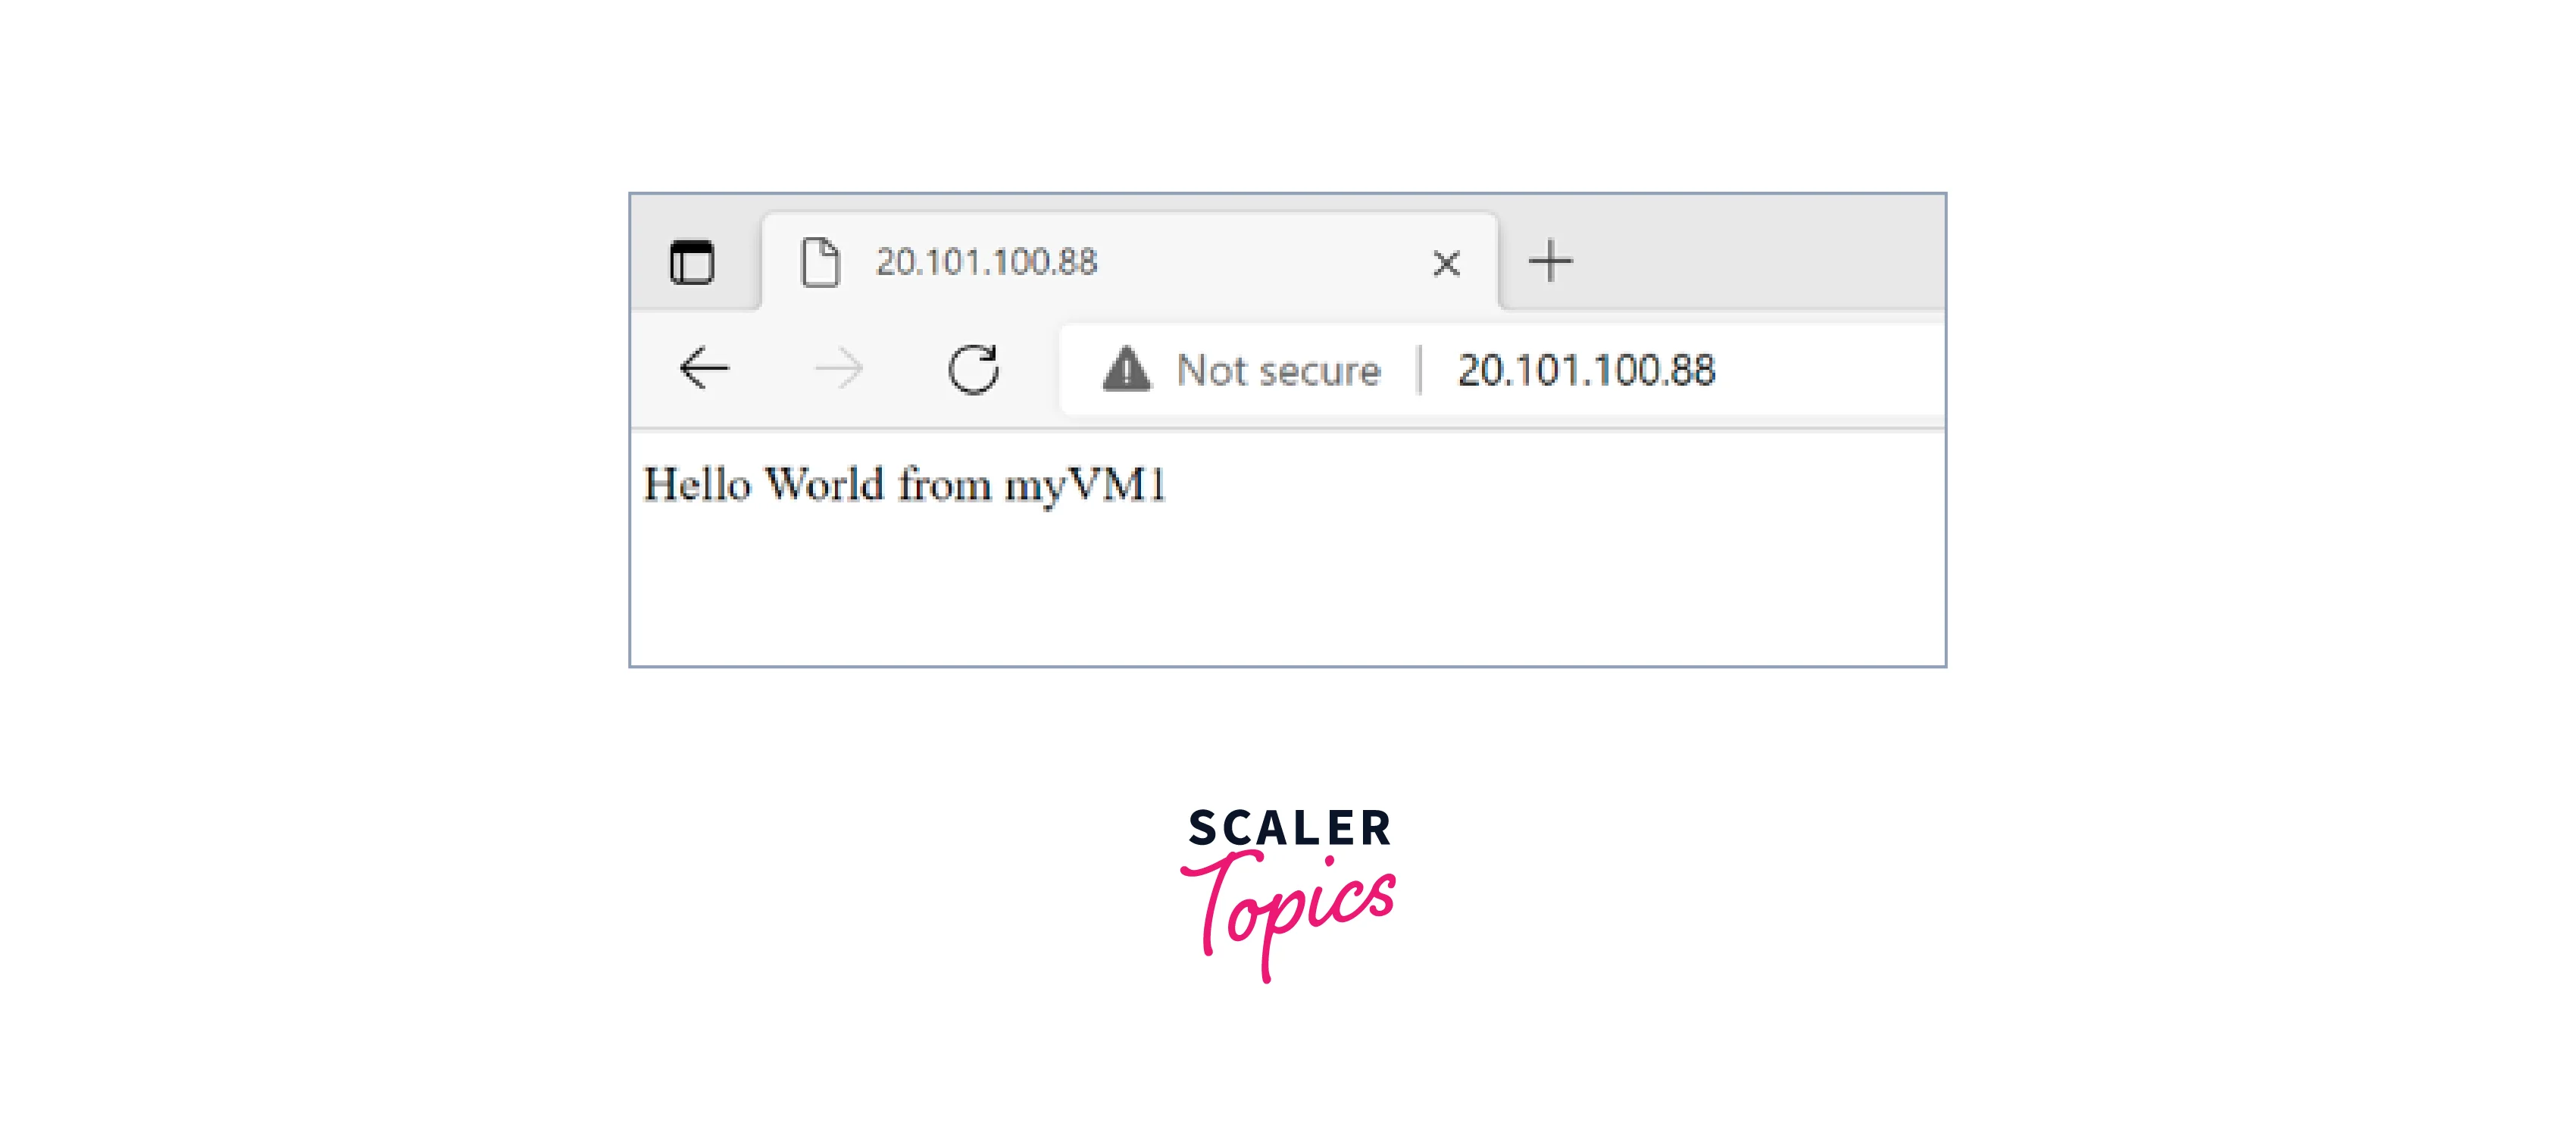
- The server is running, and the load balancer has redirected to the first virtual machine.
FAQs
Q. How are inbound NAT rules different from load-balancing rules?
A. Inbound NAT rules enable direct access to a single instance while load-balancing rules distribute traffic across multiple instances.
Q. How can I discover the public IP that an Azure VM uses?
A. To discover the public IP address that an Azure Virtual Machine (VM) uses, you can follow these steps:
- Go to the Azure portal https://portal.azure.com/ and sign in to your Azure account.
- Search for virtual machines and Select the Azure Virtual Machine for which you want to find the public IP address.
- On the VM overview page, the public IP address is listed under the "Connect" section. It will be displayed as a "Public IP address" and in the format of a public IP address (e.g., xxx.xxx.xxx.xxx).
Q. Does Azure Load Balancer support TLS/SSL termination?
A. Azure Load Balancer does not support TLS/SSL termination directly. Azure Load Balancer operates at the OSI model's transport layer (Layer 4) and is designed to distribute traffic based on IP address and port number.
Conclusion
- Azure Load Balancer is a cloud-based load balancing service provided by Microsoft Azure that distributes incoming network traffic across multiple virtual machines (VMs) or instances within a virtual machine scale set in an Azure Virtual Network.
- Types of Load Balancers: Azure offers two types of load balancers:
- Public Load Balancer: Used to distribute incoming traffic from the internet to publicly exposed VMs or services.
- Internal Load Balancer: Balances traffic between VMs or services within a virtual network, not accessible from the internet.
- Load Balancer in Azure uses Load Balancing Rules to define how incoming network traffic should be distributed across the backend pool of VMs or instances.
- Azure Load Balancer offers high availability, scalability, easy integration with Azure services, and security features, making it an excellent choice for load balancing and managing network traffic in your Azure environment.
