How to Install C language in Mac?

Overview
Are you facing problems while executing C programs offline on mac? And questioning yourself, how can I install C on mac? There are times when the internet is unavailable, or we cannot use online compilers to execute our code, so offline compilers were introduced, like visual studio code (the most popular text editor used by programmers). But how do we install C on a mac environment? We will be installing a compiler and a text editor in MacOS.
Let's install C on mac.
Introduction
To execute a code, we require a text editor and a compiler so that we can compile our code and get a relevant output. In our mac systems, we already have a compiler, i.e., clang installed. We will install a code editor, i.e., visual studio code, in our mac environment. Let's see how to install C on mac and work with it.
Code Editor
Code editors are used to writing the source code in the specified language, for example- "C programming".
The Pre-installed Code Editor in MacOS
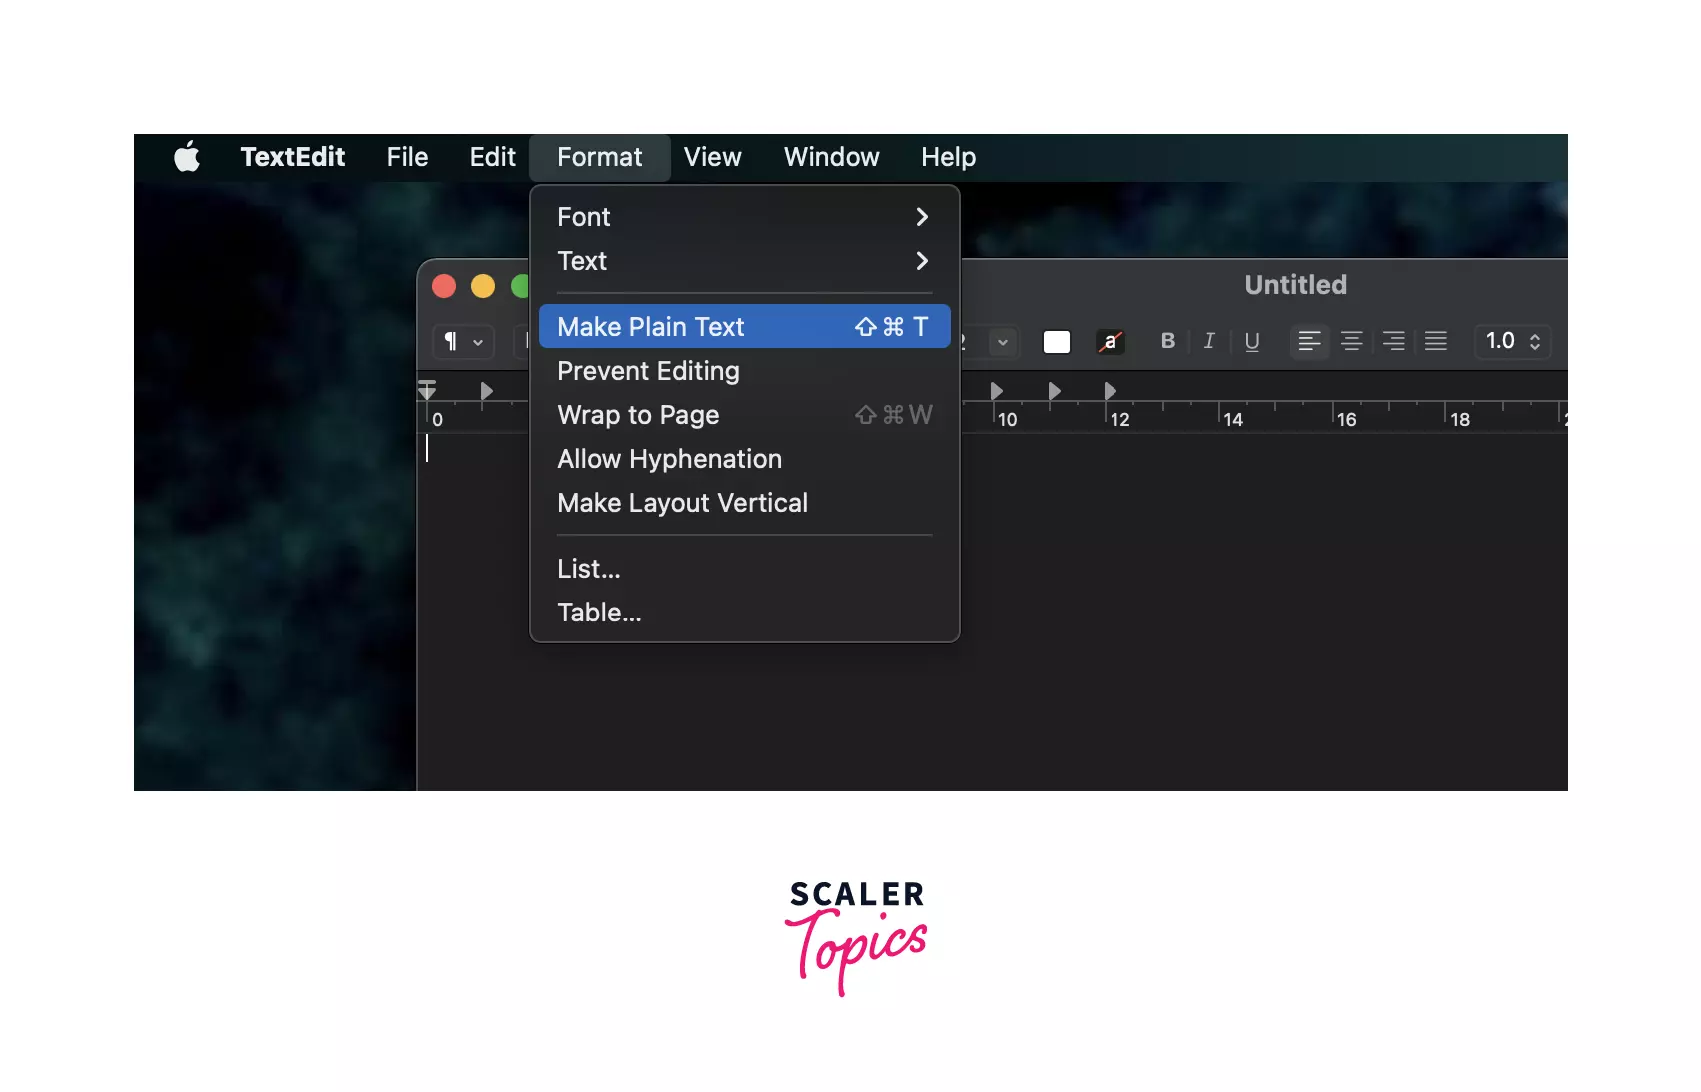
MacOS or BigSur laptops already have TextEdit installed in the system, which is similar to Notepad in Windows; all we have to do is save the program with the ".c" extension containing a valid code.
To save the file with the ".c" extension, we use the Main plain text format in the TextEdit as shown in the image.
 We will use Microsoft Visual Studio Code editor to write the source code.
C compiler
As we have already written source code in the code editor saved with the .c extension, we have to convert it into an executable file; therefore, here comes the need for a C compiler that converts the ".c" extension file to ".exe" file, i.e., an executable file that we can run.
We will use command-line tools to compile and execute the source code.
Installing the Command Line Tools
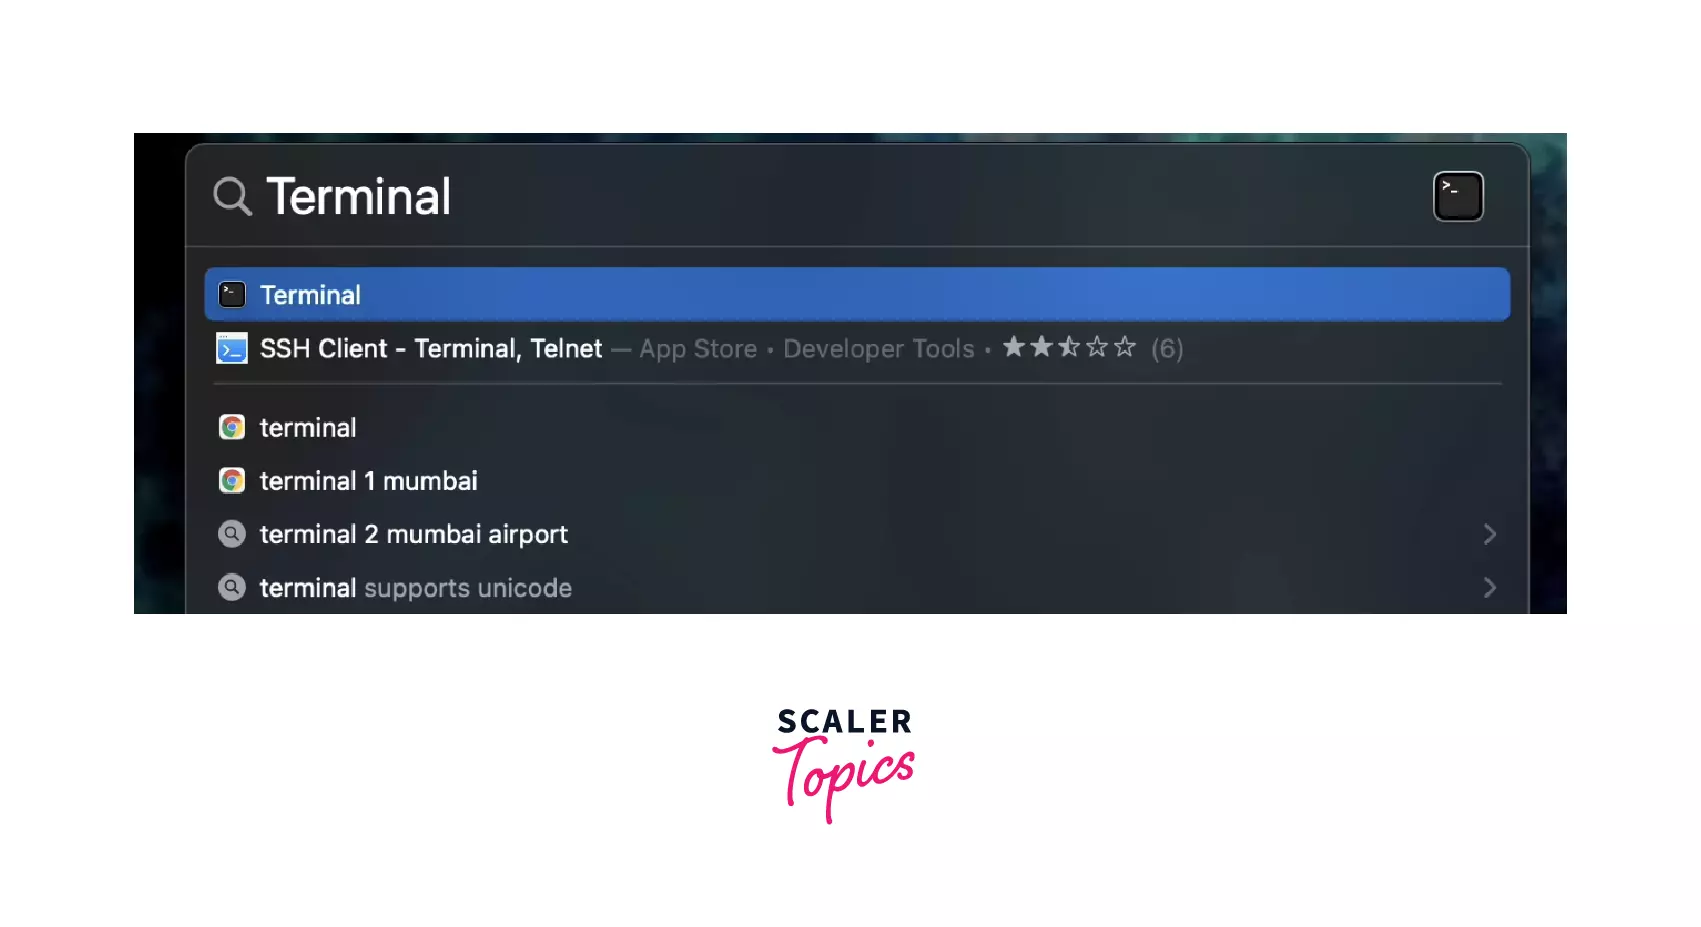
To work with command-line tools, first, check whether it is installed. To do that, search in the spotlight by typing Terminal, as shown in the image.
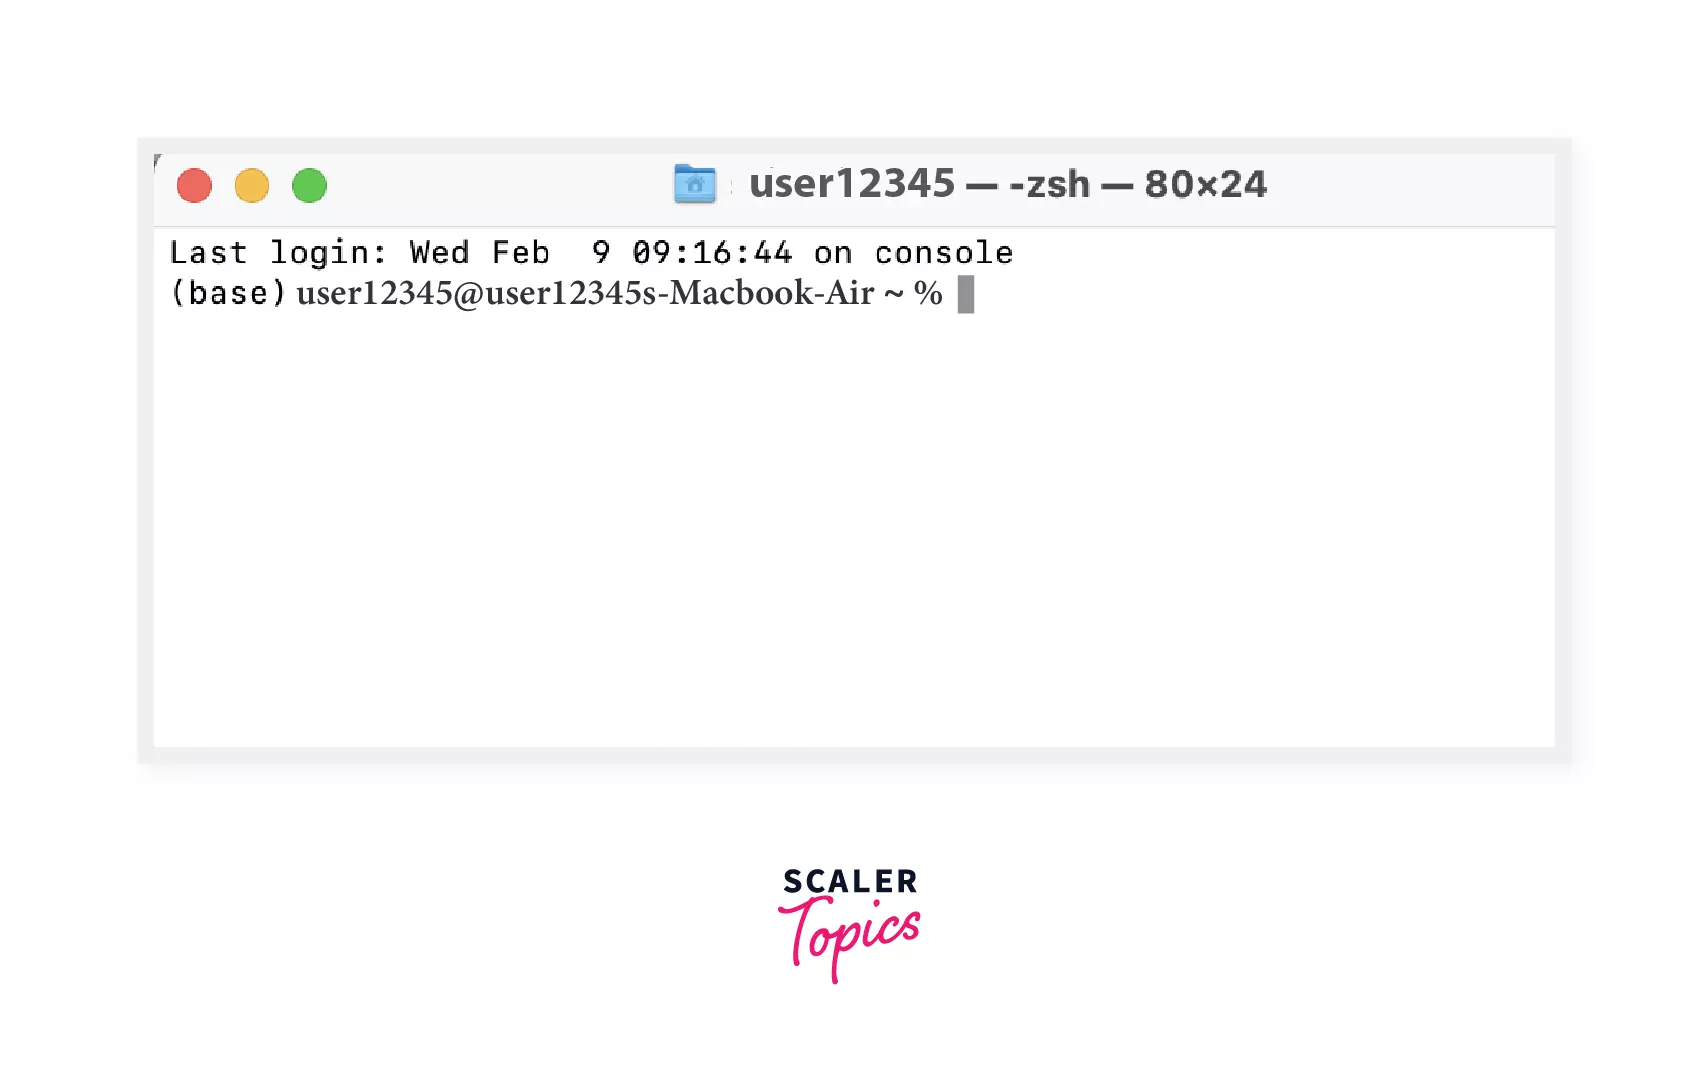
If it exists, open it, and a window will open as shown.
Apple provides a clang compiler to compile C programs and other languages too.
To check the clang version, type clang --version in the terminal and hit return. You can see the version as shown in the image, or you will see a prompt window to install command line tool. Afterinstalling it, you could check clang version.
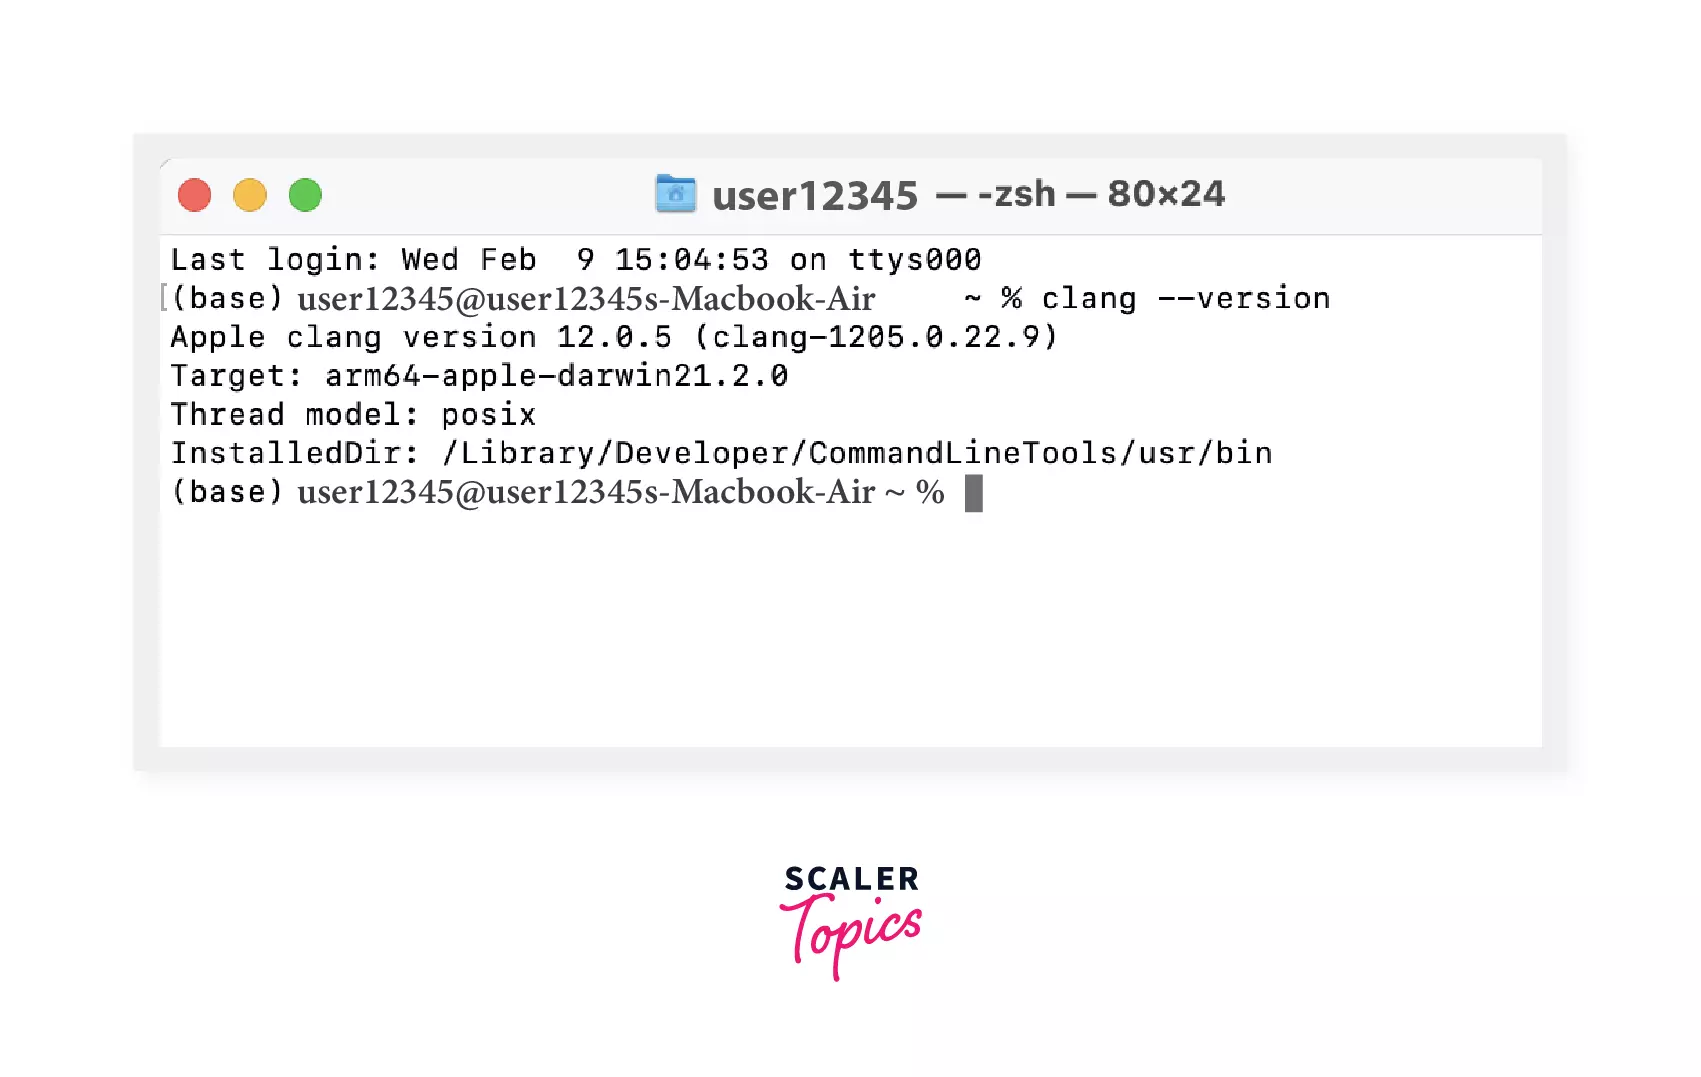
As you can see, the latest clang version, as per the article's date, is 12.0.5; well, it can get updated from time to time.
Installing Visual Studio Code
We will be using the free and powerful code editor Visual Studio Code. Instead of writing our source code in TextEdit, we will use Visual Studio Code. We can compile and run the program without leaving the Visual Studio environment, as it provides Integrated Terminal.
You can visit the visual studio to download it as shown in the image and click download for mac.
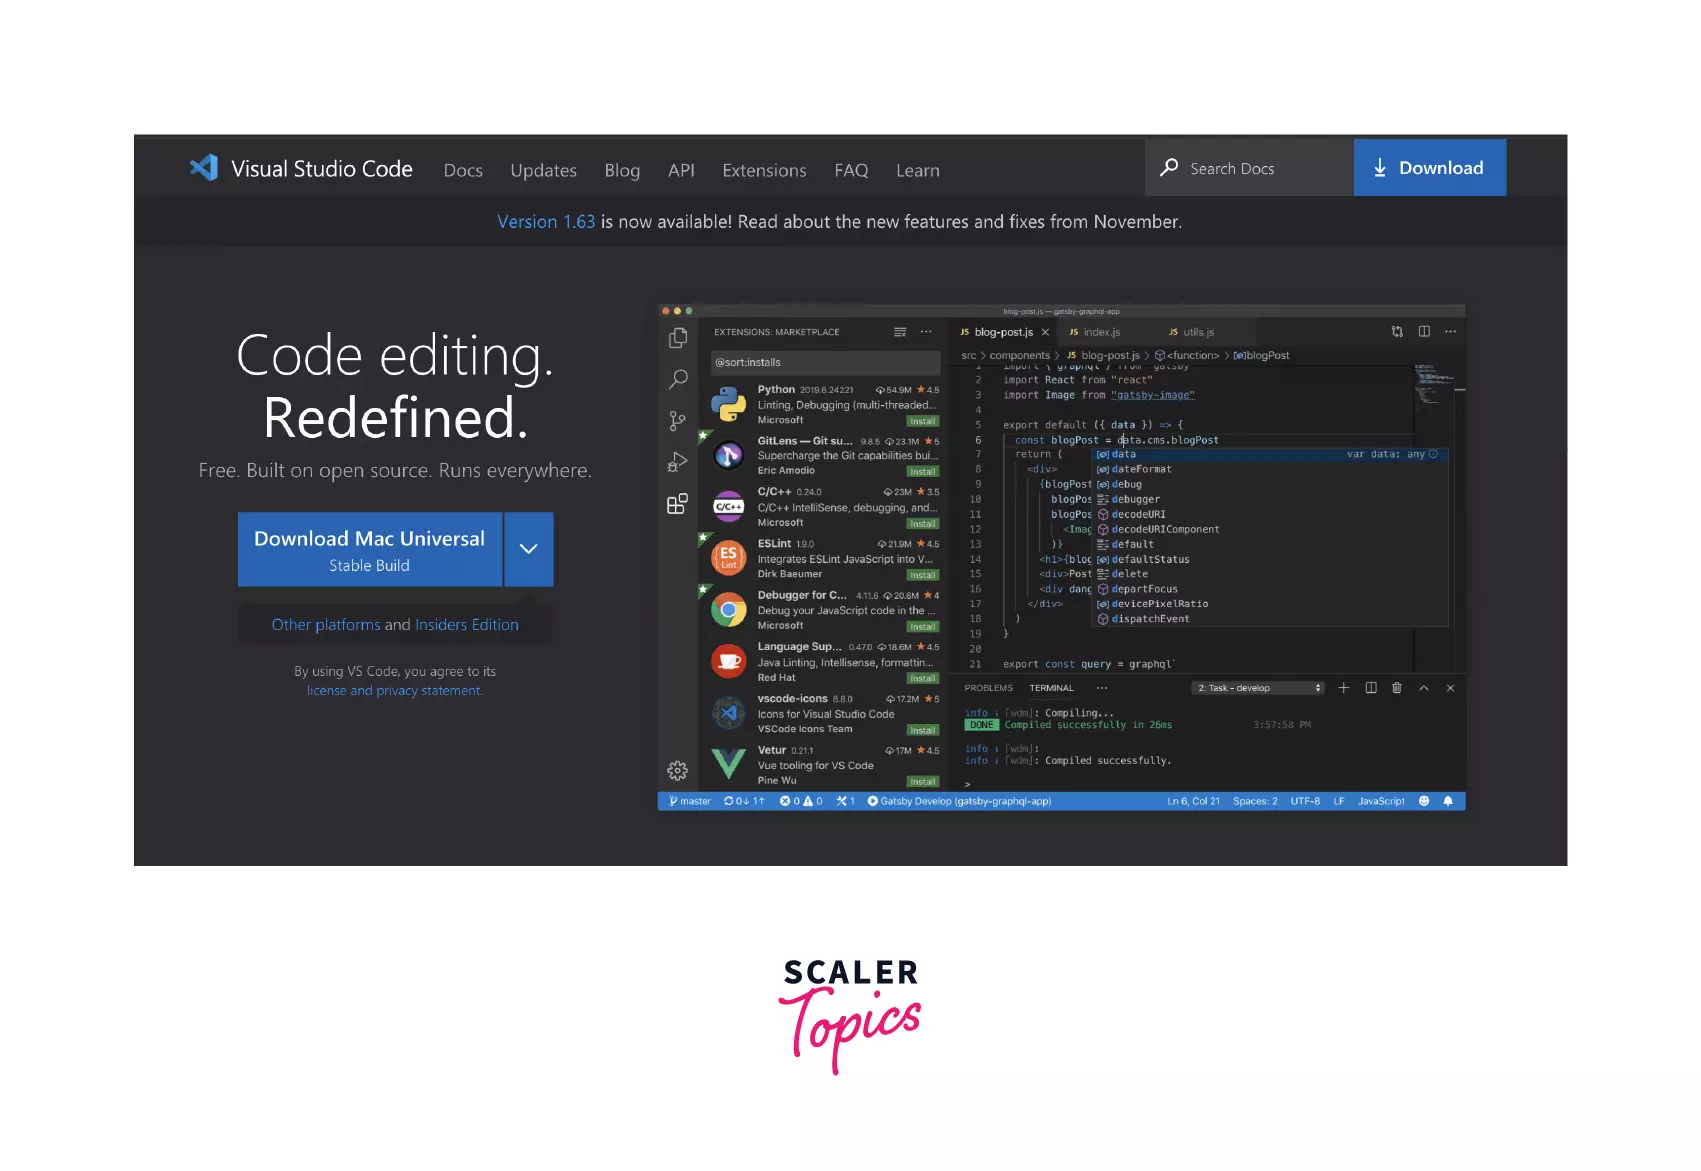
Downloading will begin automatically just by clicking on the download button. The downloaded file can be opened in the download folder in Finder or just by searching it using spotlight search.
After installing Visual studio, it will look something like this, as shown in the image.
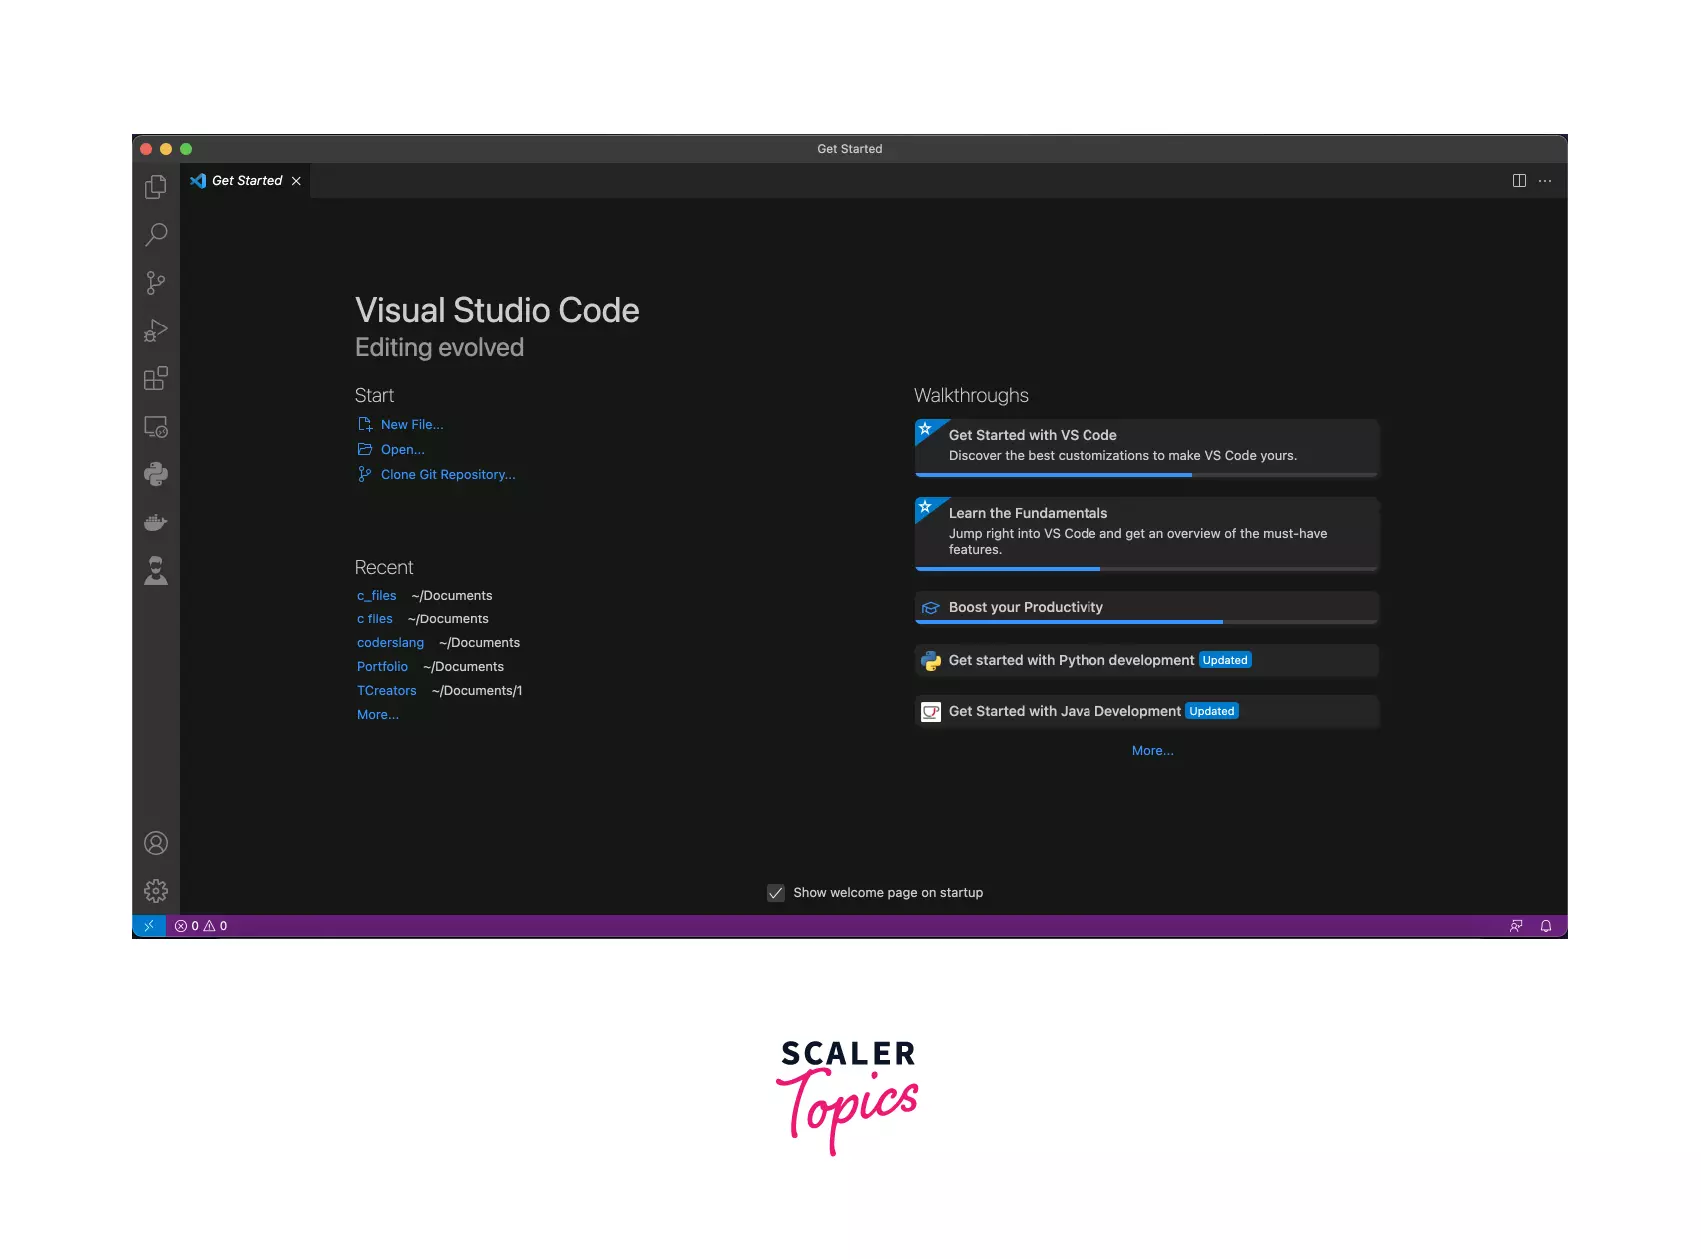
You can click on New file to create a new one and save it in any programming language.
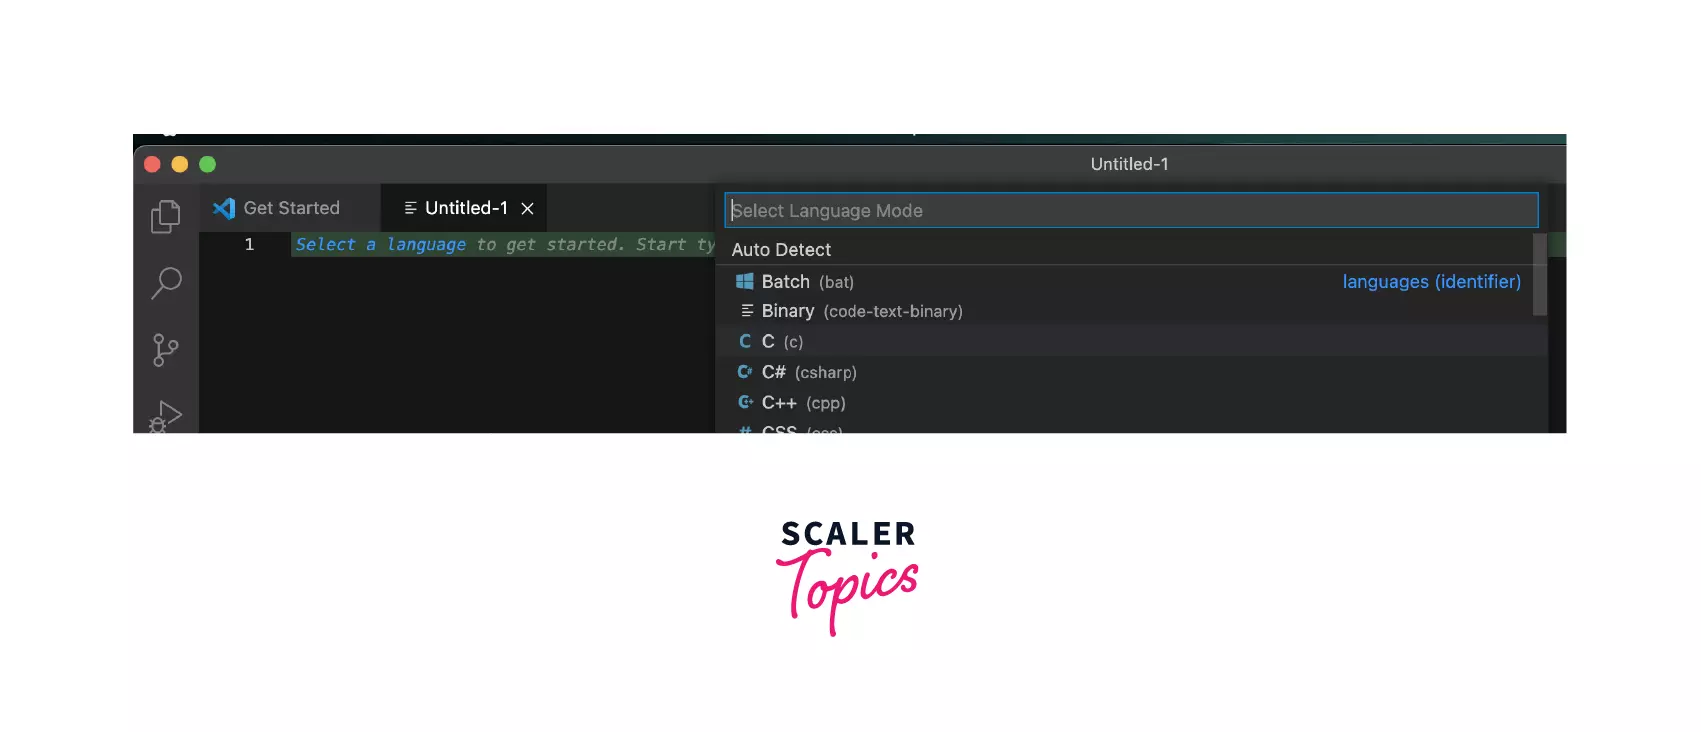
But before that, to write codes in C language in VS Code, we have to download the C/C++ extensions. Let's see it in the next section.
C/C++ for Visual Studio Code extension
To download the C/C++ extension, go to the extension tab in VS code, as shown in the image.
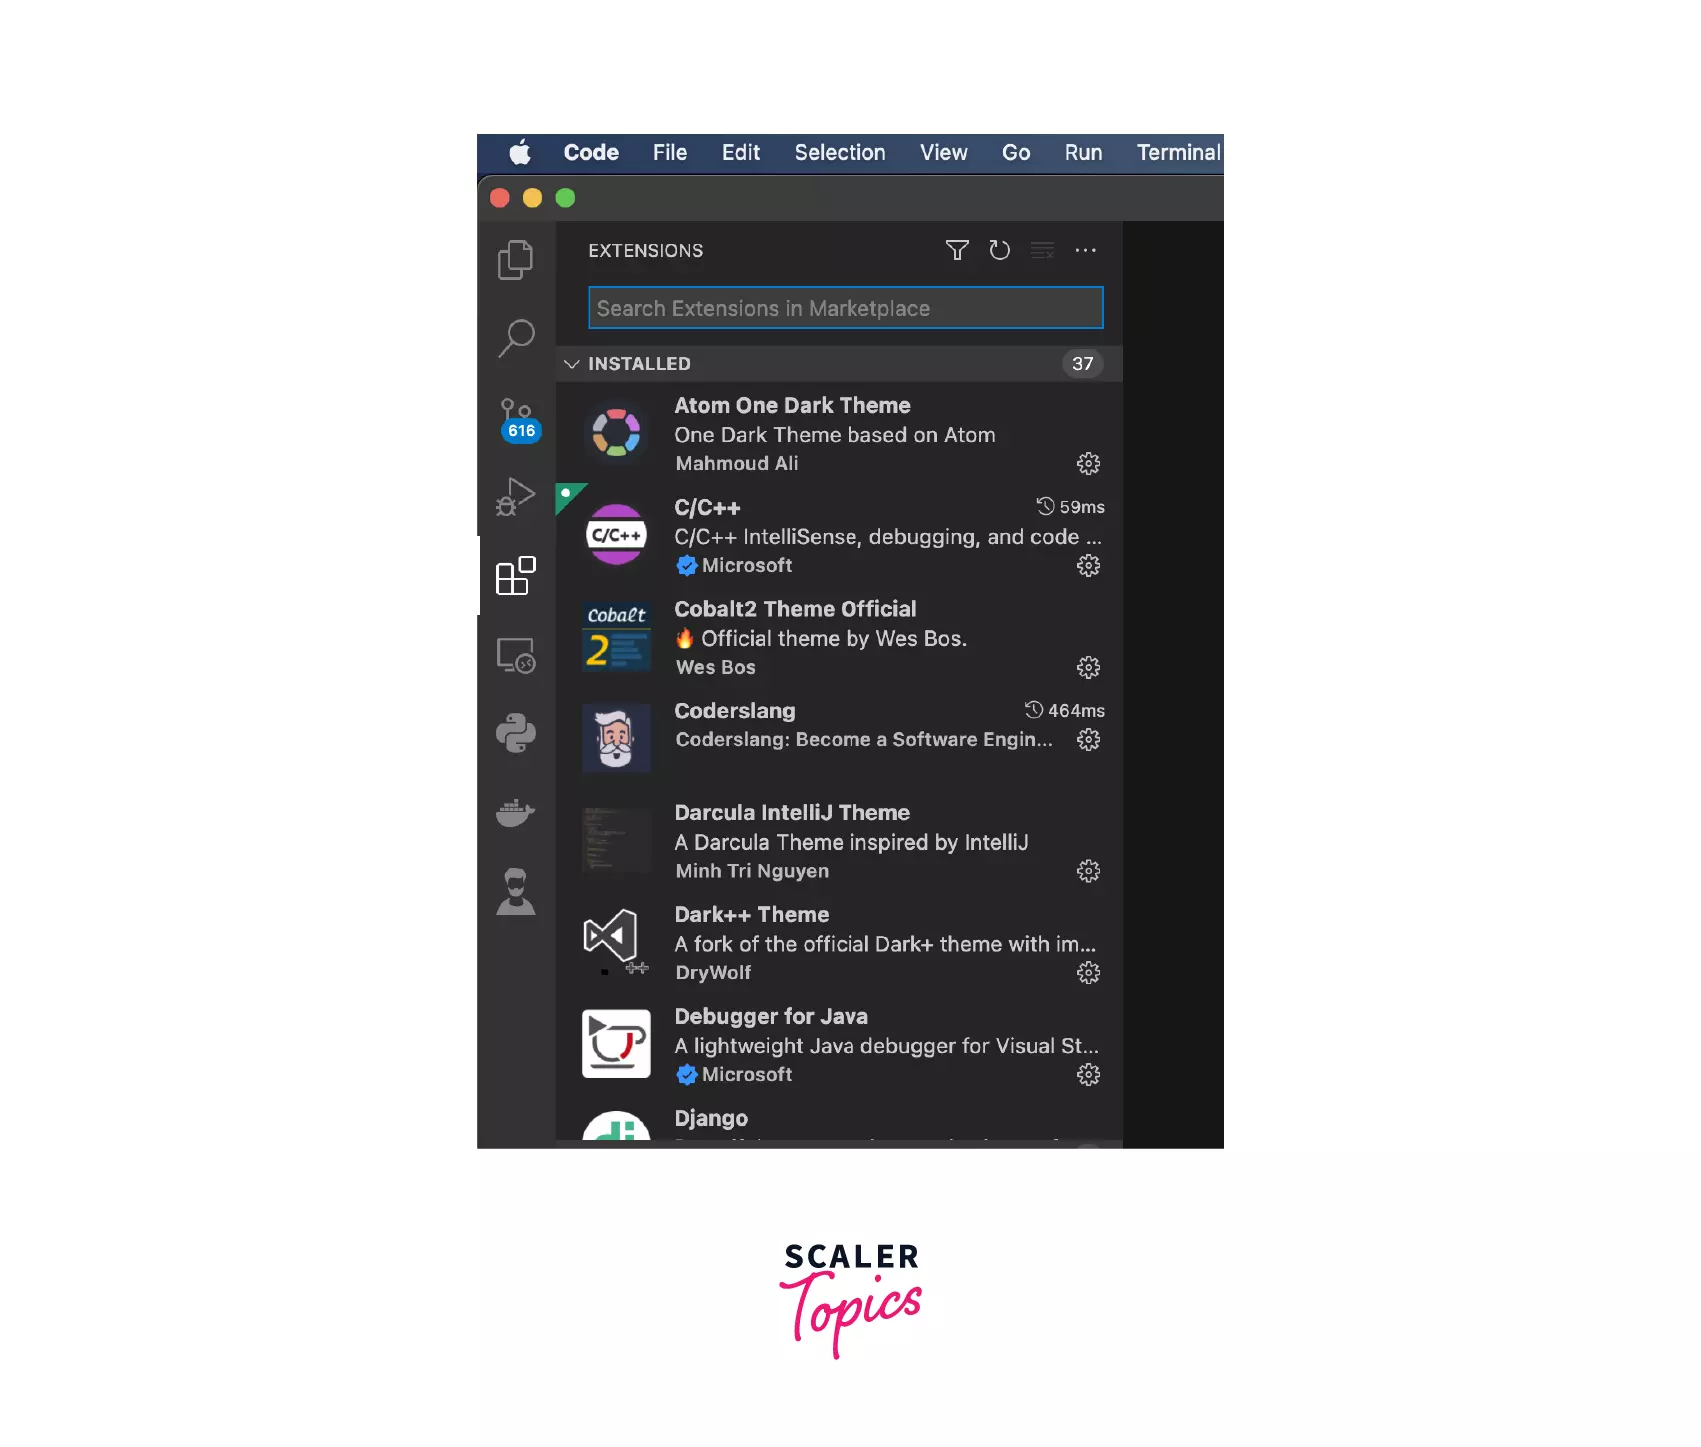
Search for the C/C++ extension by Microsoft in the search bar and then click install.
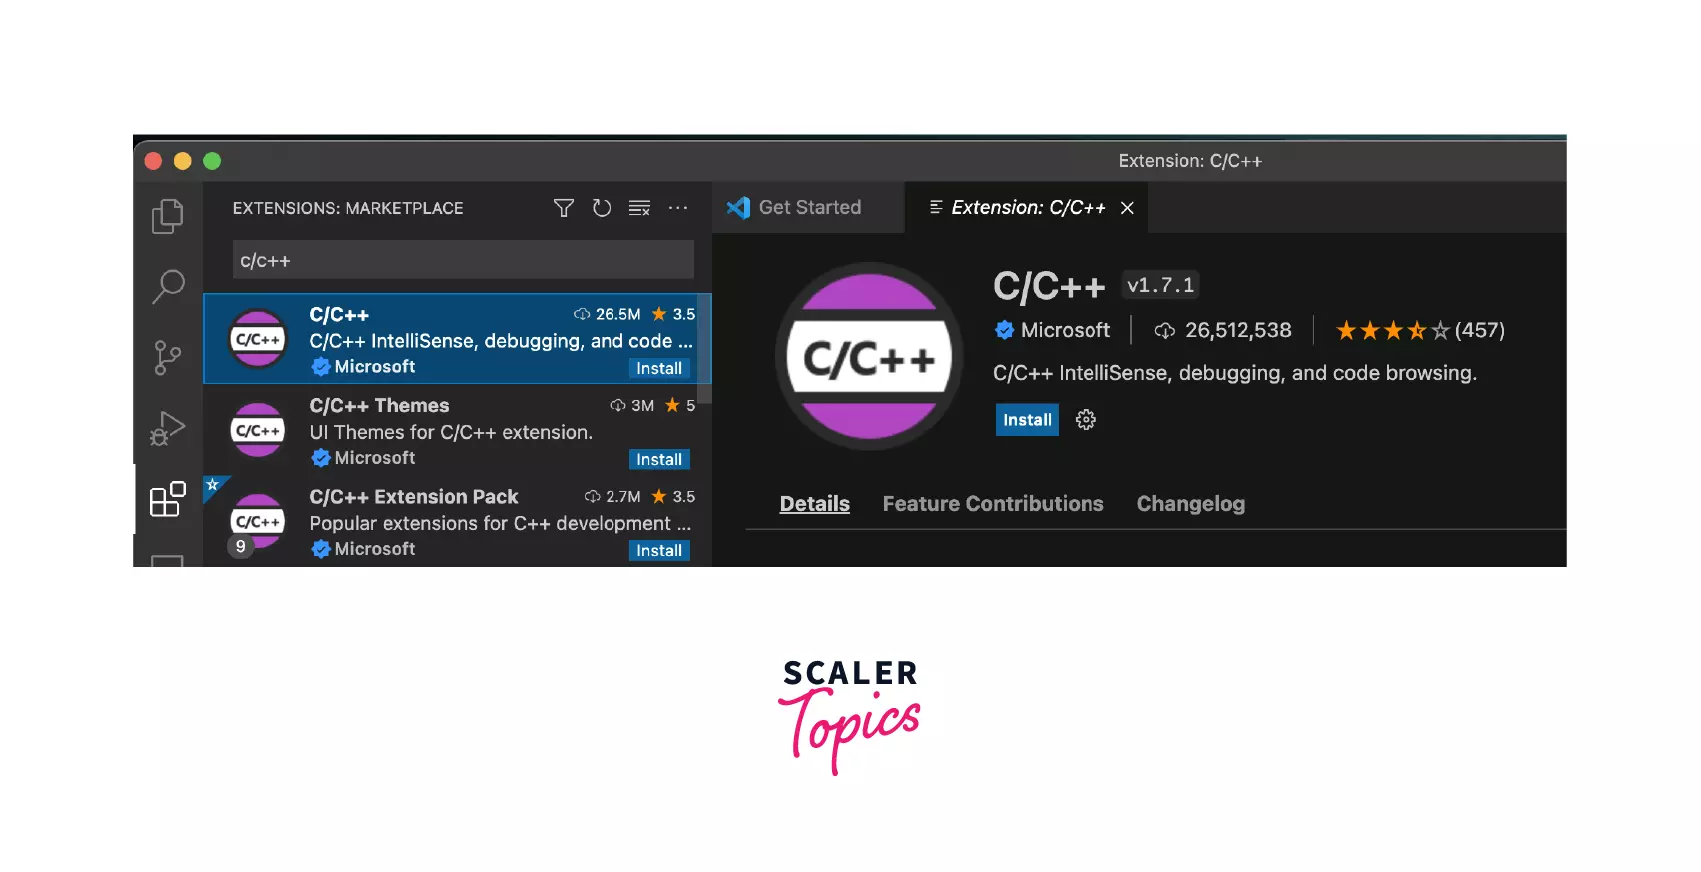
As we have installed the editor and the extension, let's write a simple C program in the editor.
Create a C program using Visual Studio Code
Now let's write a simple C program in VS code and execute it using clang in the terminal.
Code -
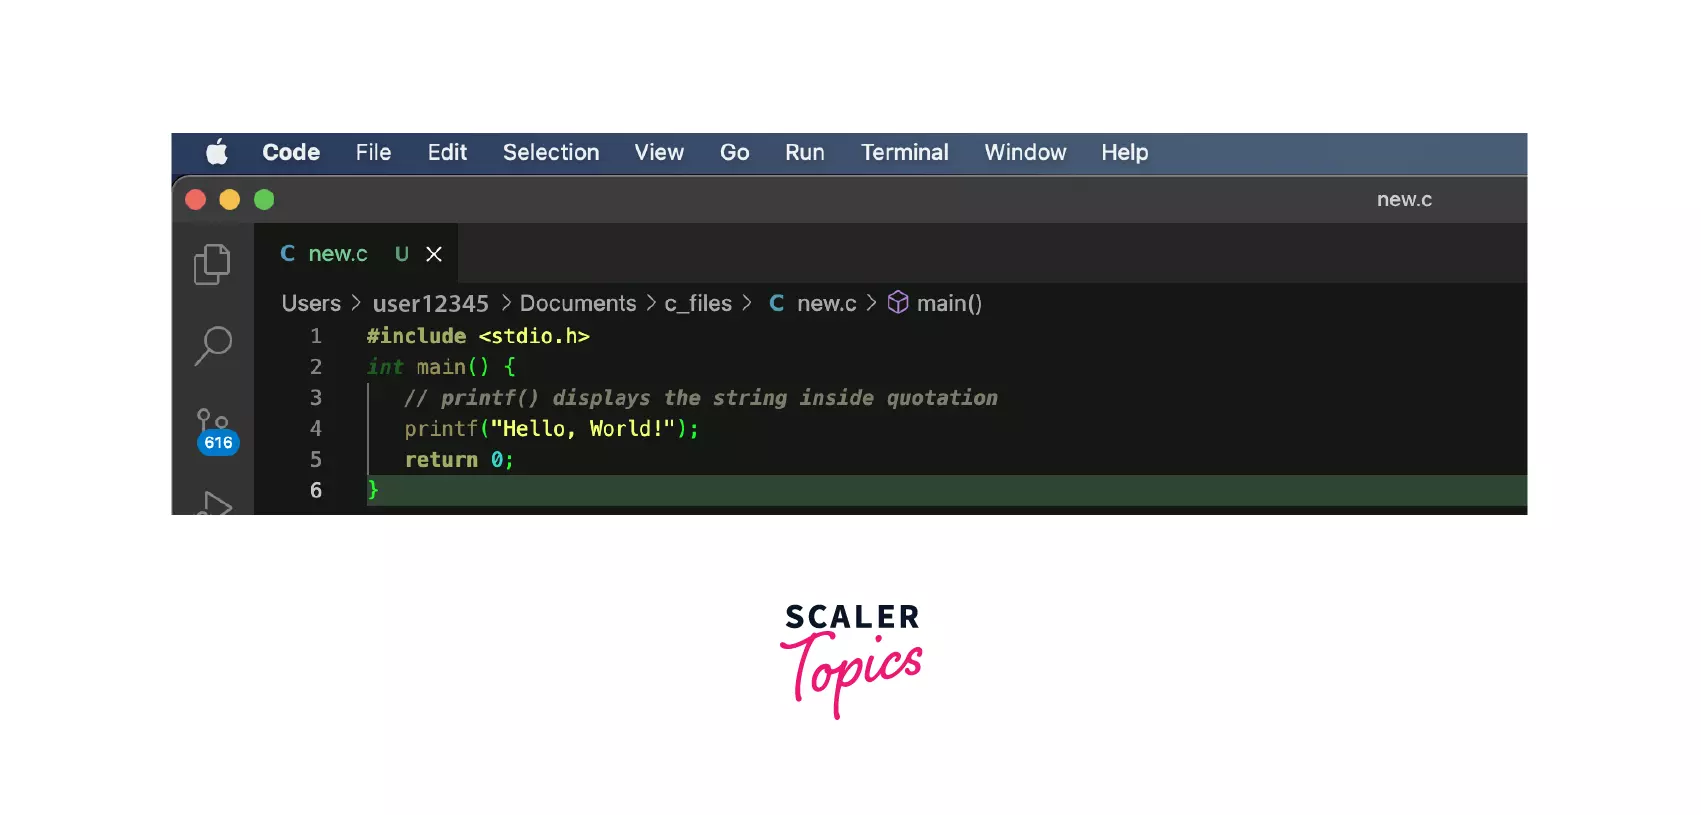
The file is saved with the name new.c in the c_files folder.
Now to open the folder c_files, which is located in Documents, we will first run the command pwd in the terminal to check our current location.
To get into the specific folder, we use command cd; here, we want to open the folder Documents so that we will run the command cd Documents. After that, run command cd c_files to go into the c_files folder.
To check your current location now again run the command pwd.
Now to run our new.c file, which is located in the c_files folder, run the command make new.
After the execution of the command, the output will be as shown in the image.
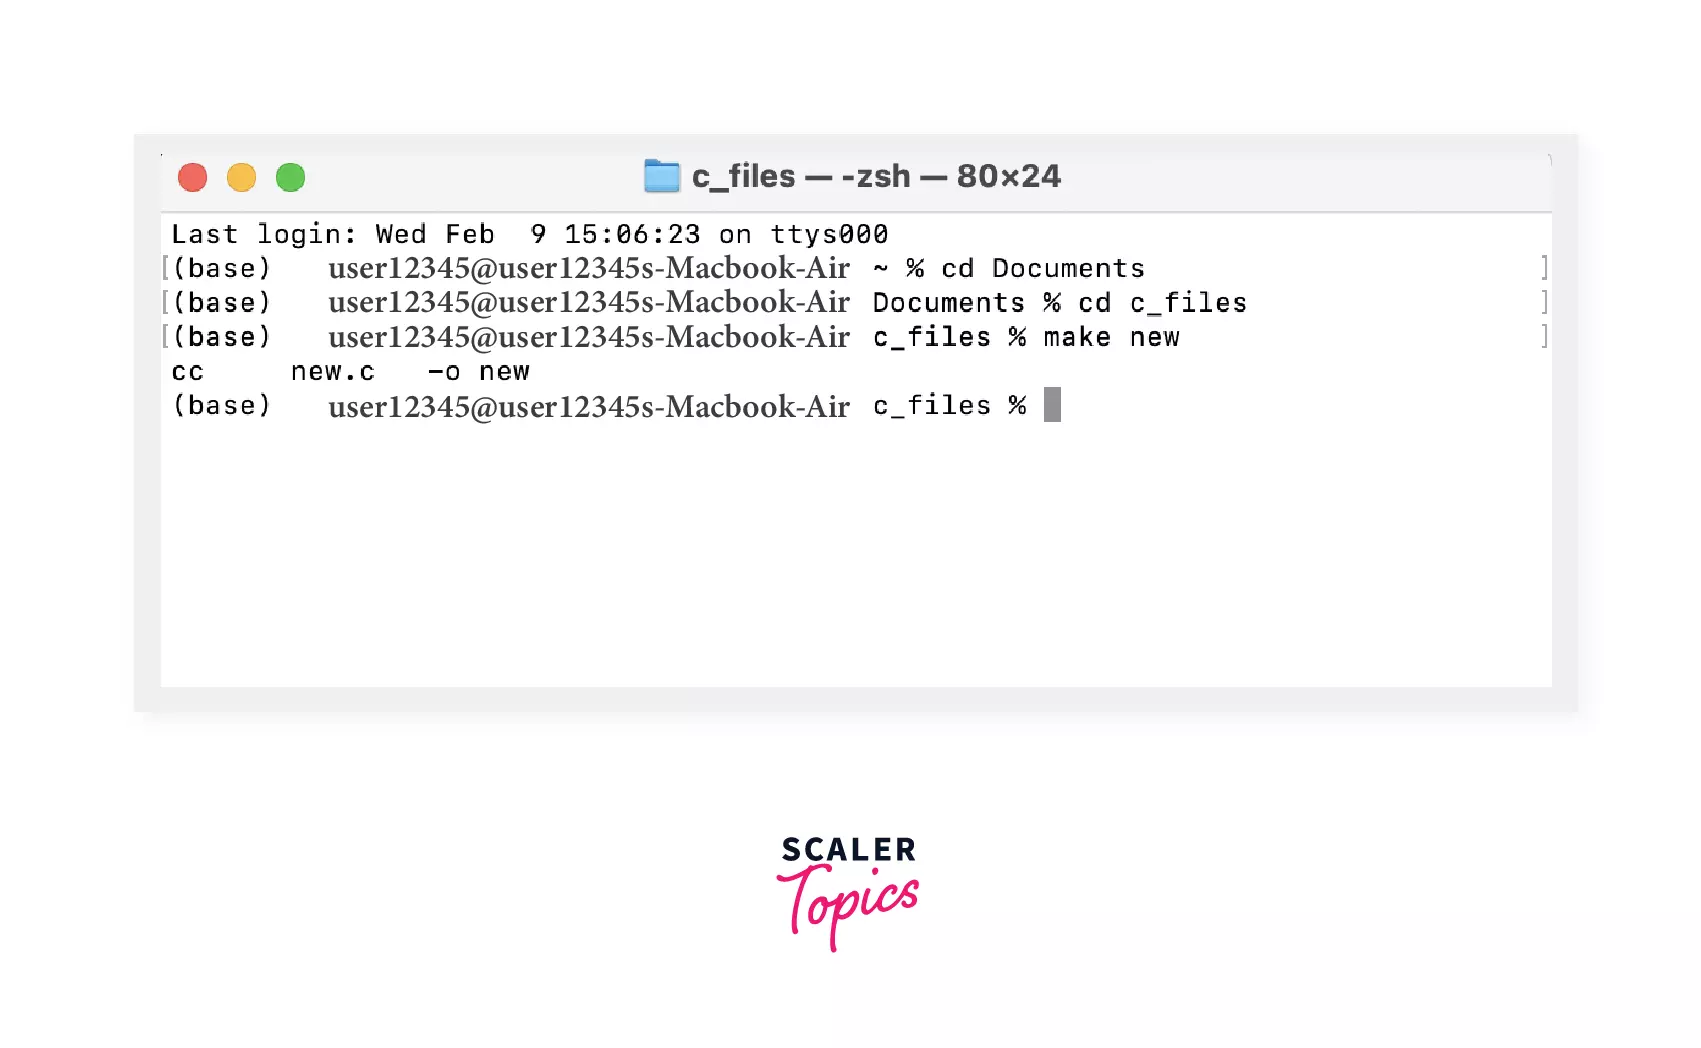
After this command is executed, an executable file is made in our c_files folder, as shown.
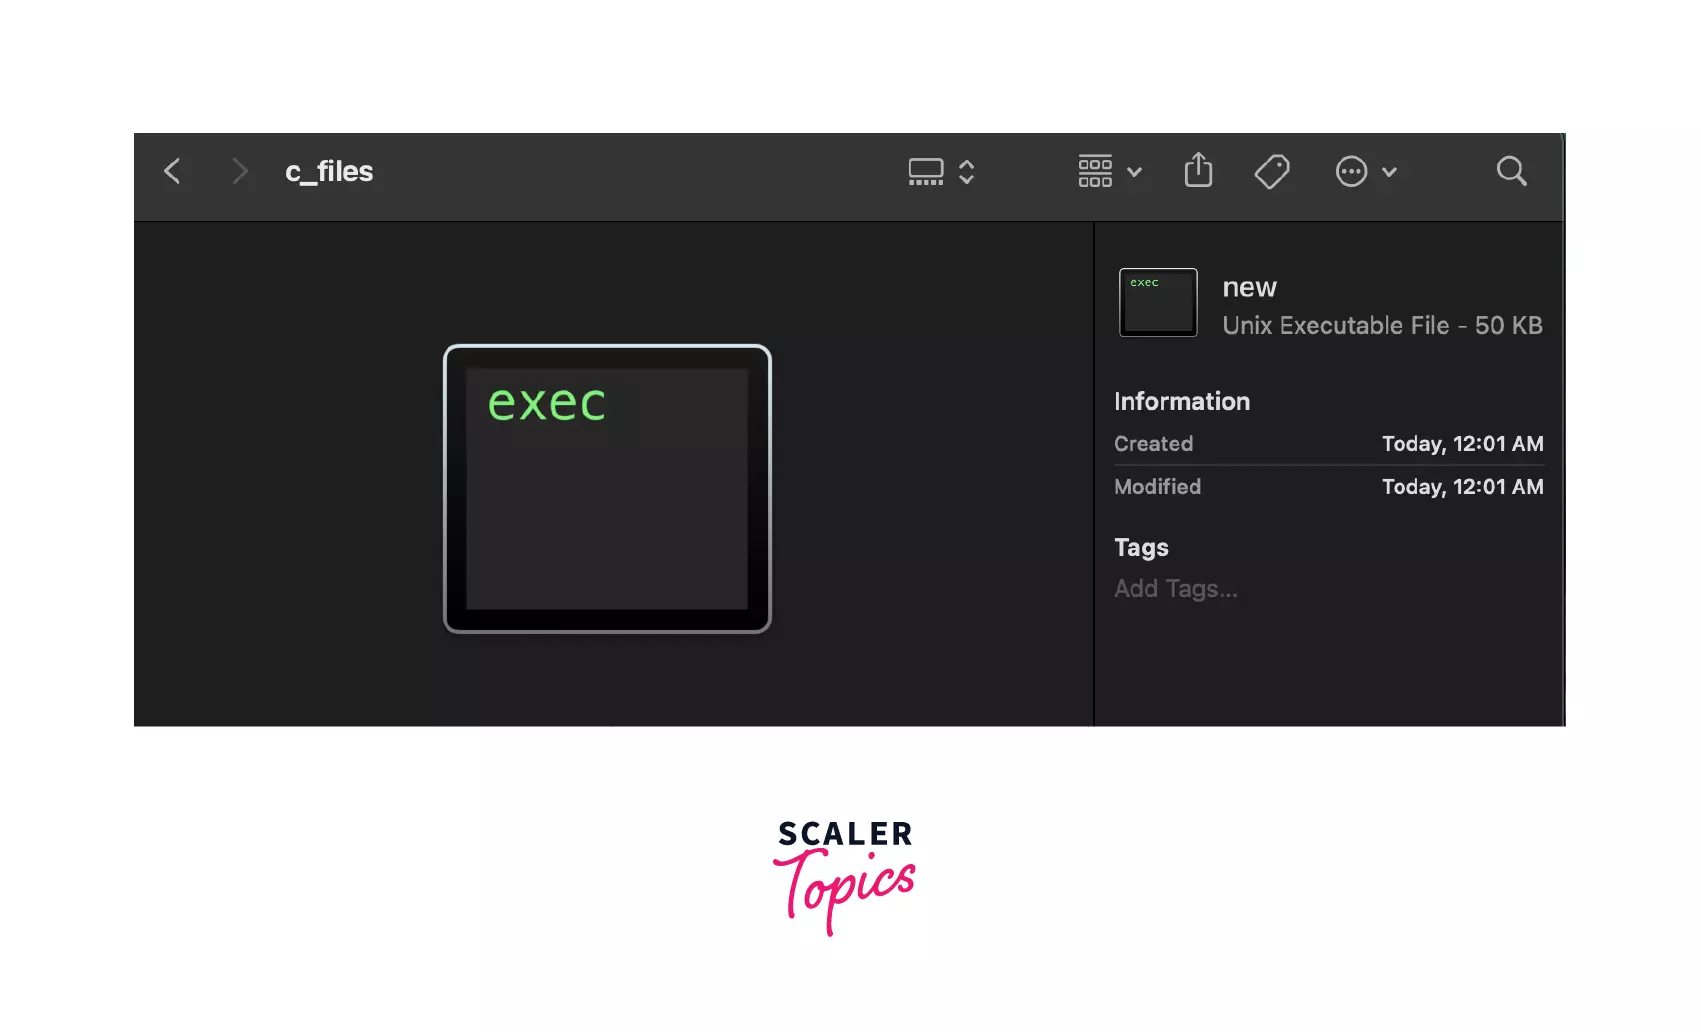
Now to get the output of this executable file, run ./new.
Output
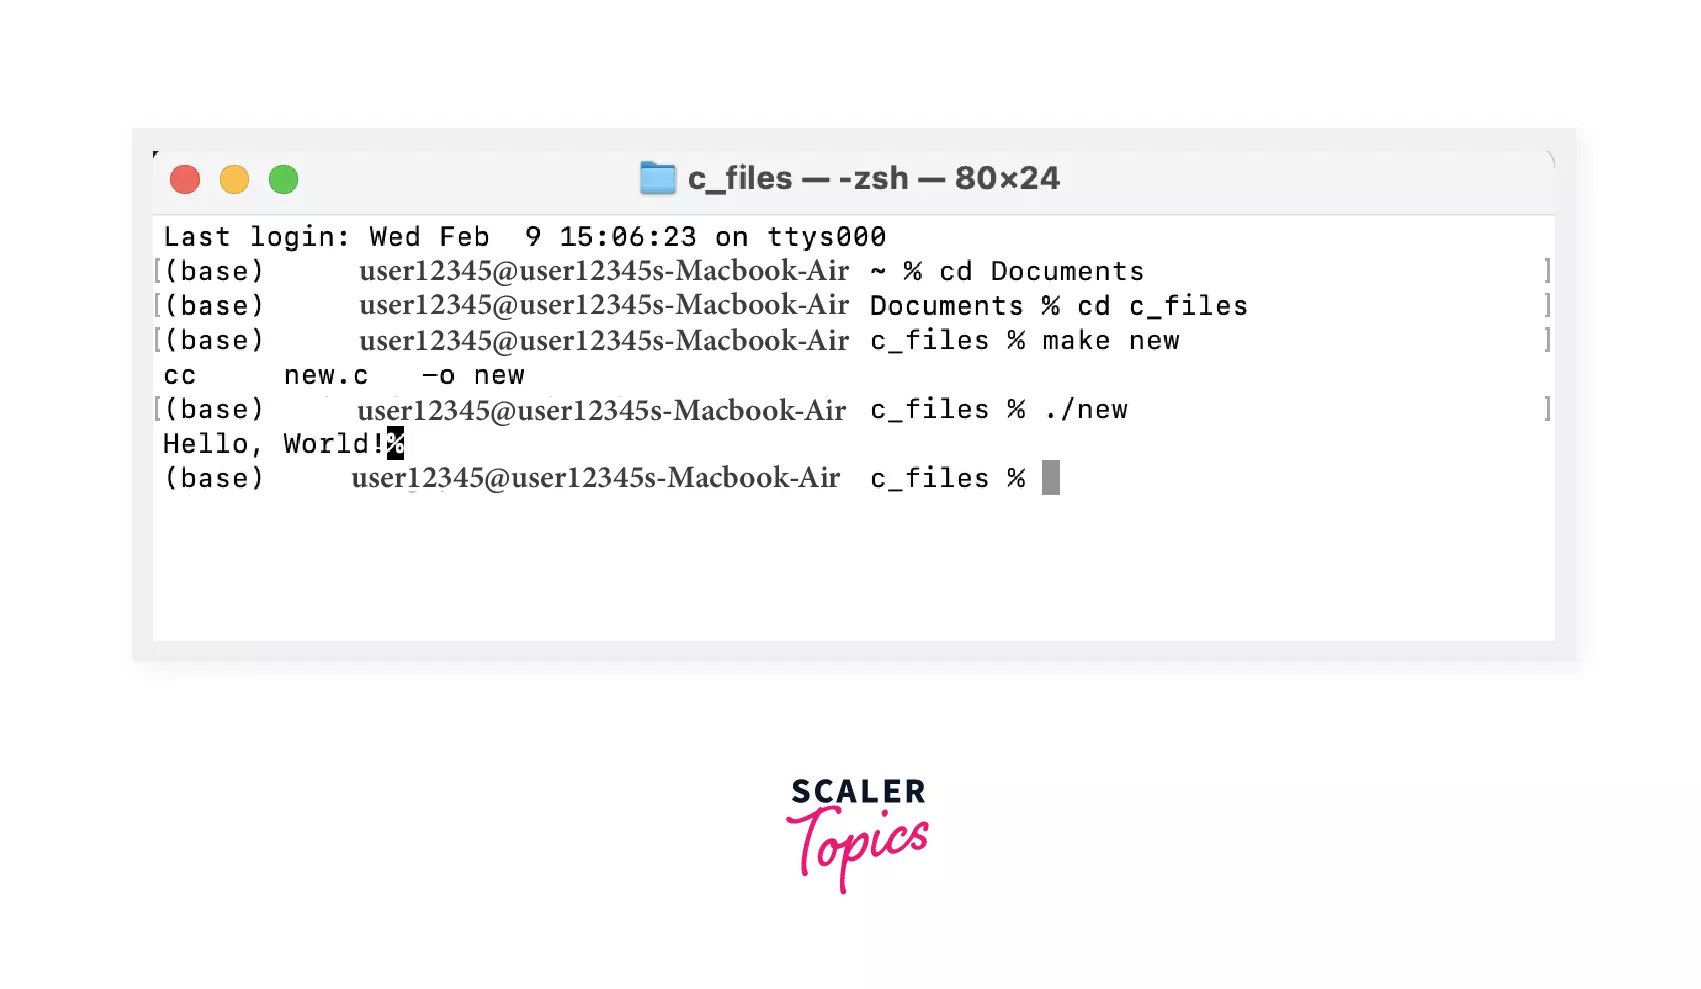
As you can see, Hello, World! is displayed in the terminal.
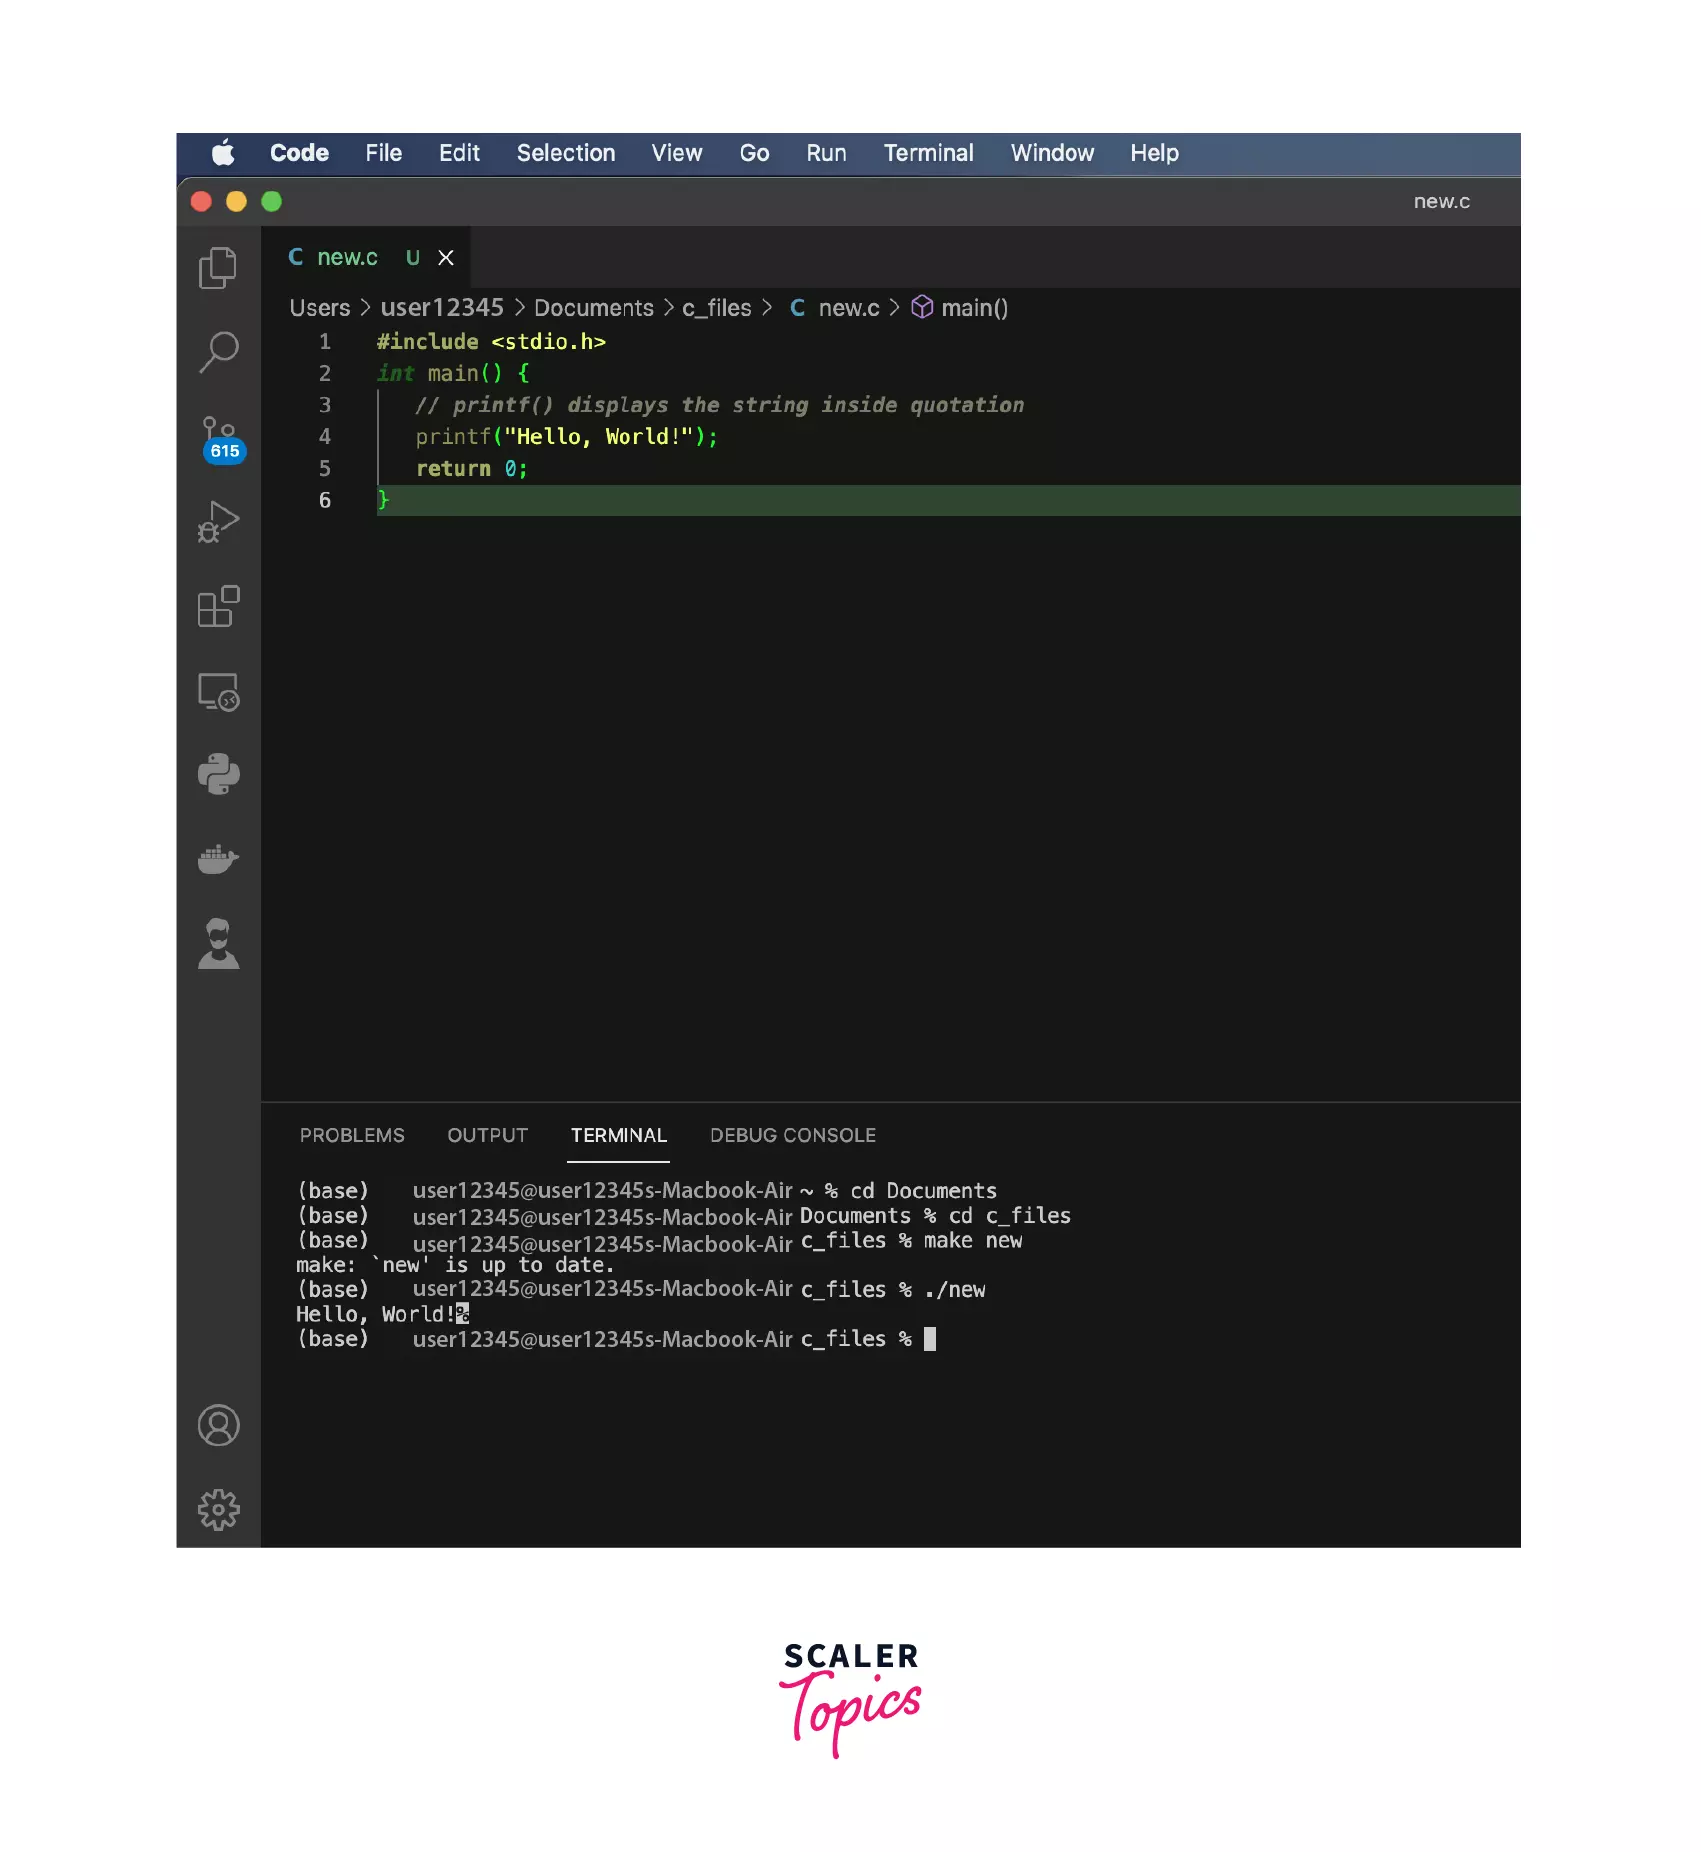
You can also run the program in the "Integrated Terminal " in VS code itself. To open the terminal, use the shortcut keys ctrl +
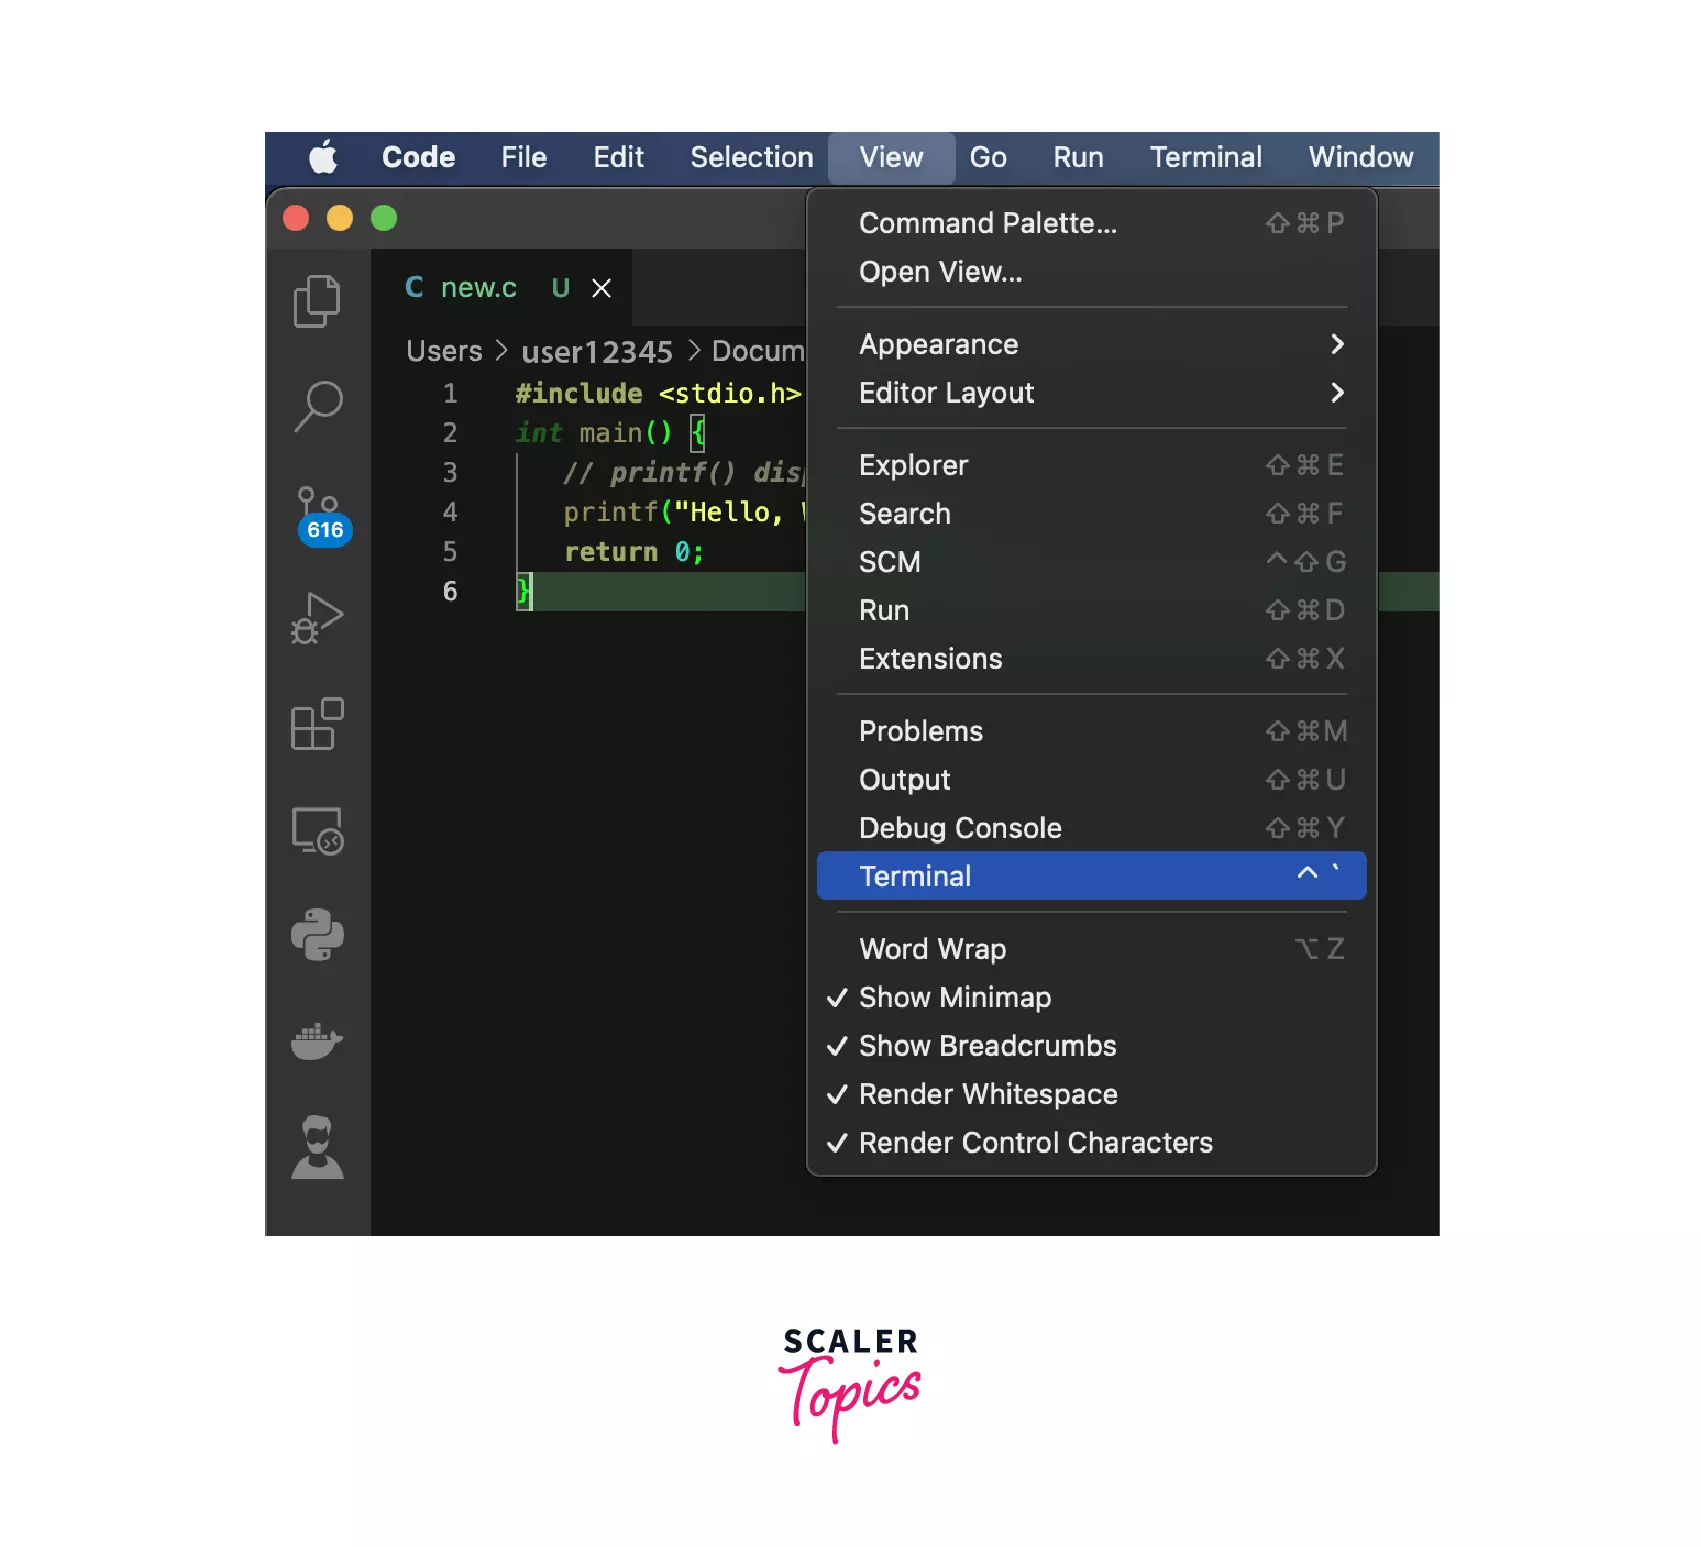
Or you can open the terminal as shown in the image. After that terminal will be opened, and you can run the same commands as we did in the main terminal.
Conclusion
- To run the C program in MacOS, we need a code editor and code compiler.
- The Code editor is used to write source code while the code compiler converts the source code into executable files.
- To write the source code Microsoft Visual Studio Code is used, while to convert it into executable files, we use command-line tools.
- The command-line tool used here is the clang compiler which Apple itself introduced.
