Building a Chat Interface using HTML and CSS - CSS Projects

Overview
Before visiting this page, you must be active on Instagram, WhatsApp, or Facebook messenger interacting with your network. All of us are engaged in some chat application. Have you ever wanted to design your own chat interface? Then don't worry; we have got you covered.
This article will show you how to use HTML and CSS to design a chat interface.
What are we building?
Chat apps are messaging platforms where users can exchange real-time messages, experiences, events, media, etc. Its response time is almost always faster than other communication channels, such as email or telephone. We can seamlessly integrate messaging apps into your daily routine. We can easily connect with people, continue our work, and take turns responding when the other party is available.
Pre-requisites
Make sure you understand the following fundamental ideas of HTML & CSS before continuing :
- Flex-box
- pseudo elements
- CSS Combinators
- CSS media queries
- CSS float property
- word wrap
How are we going to build the chat interface?
Before we dive into the steps to build our chat interface, let's understand its anatomy.
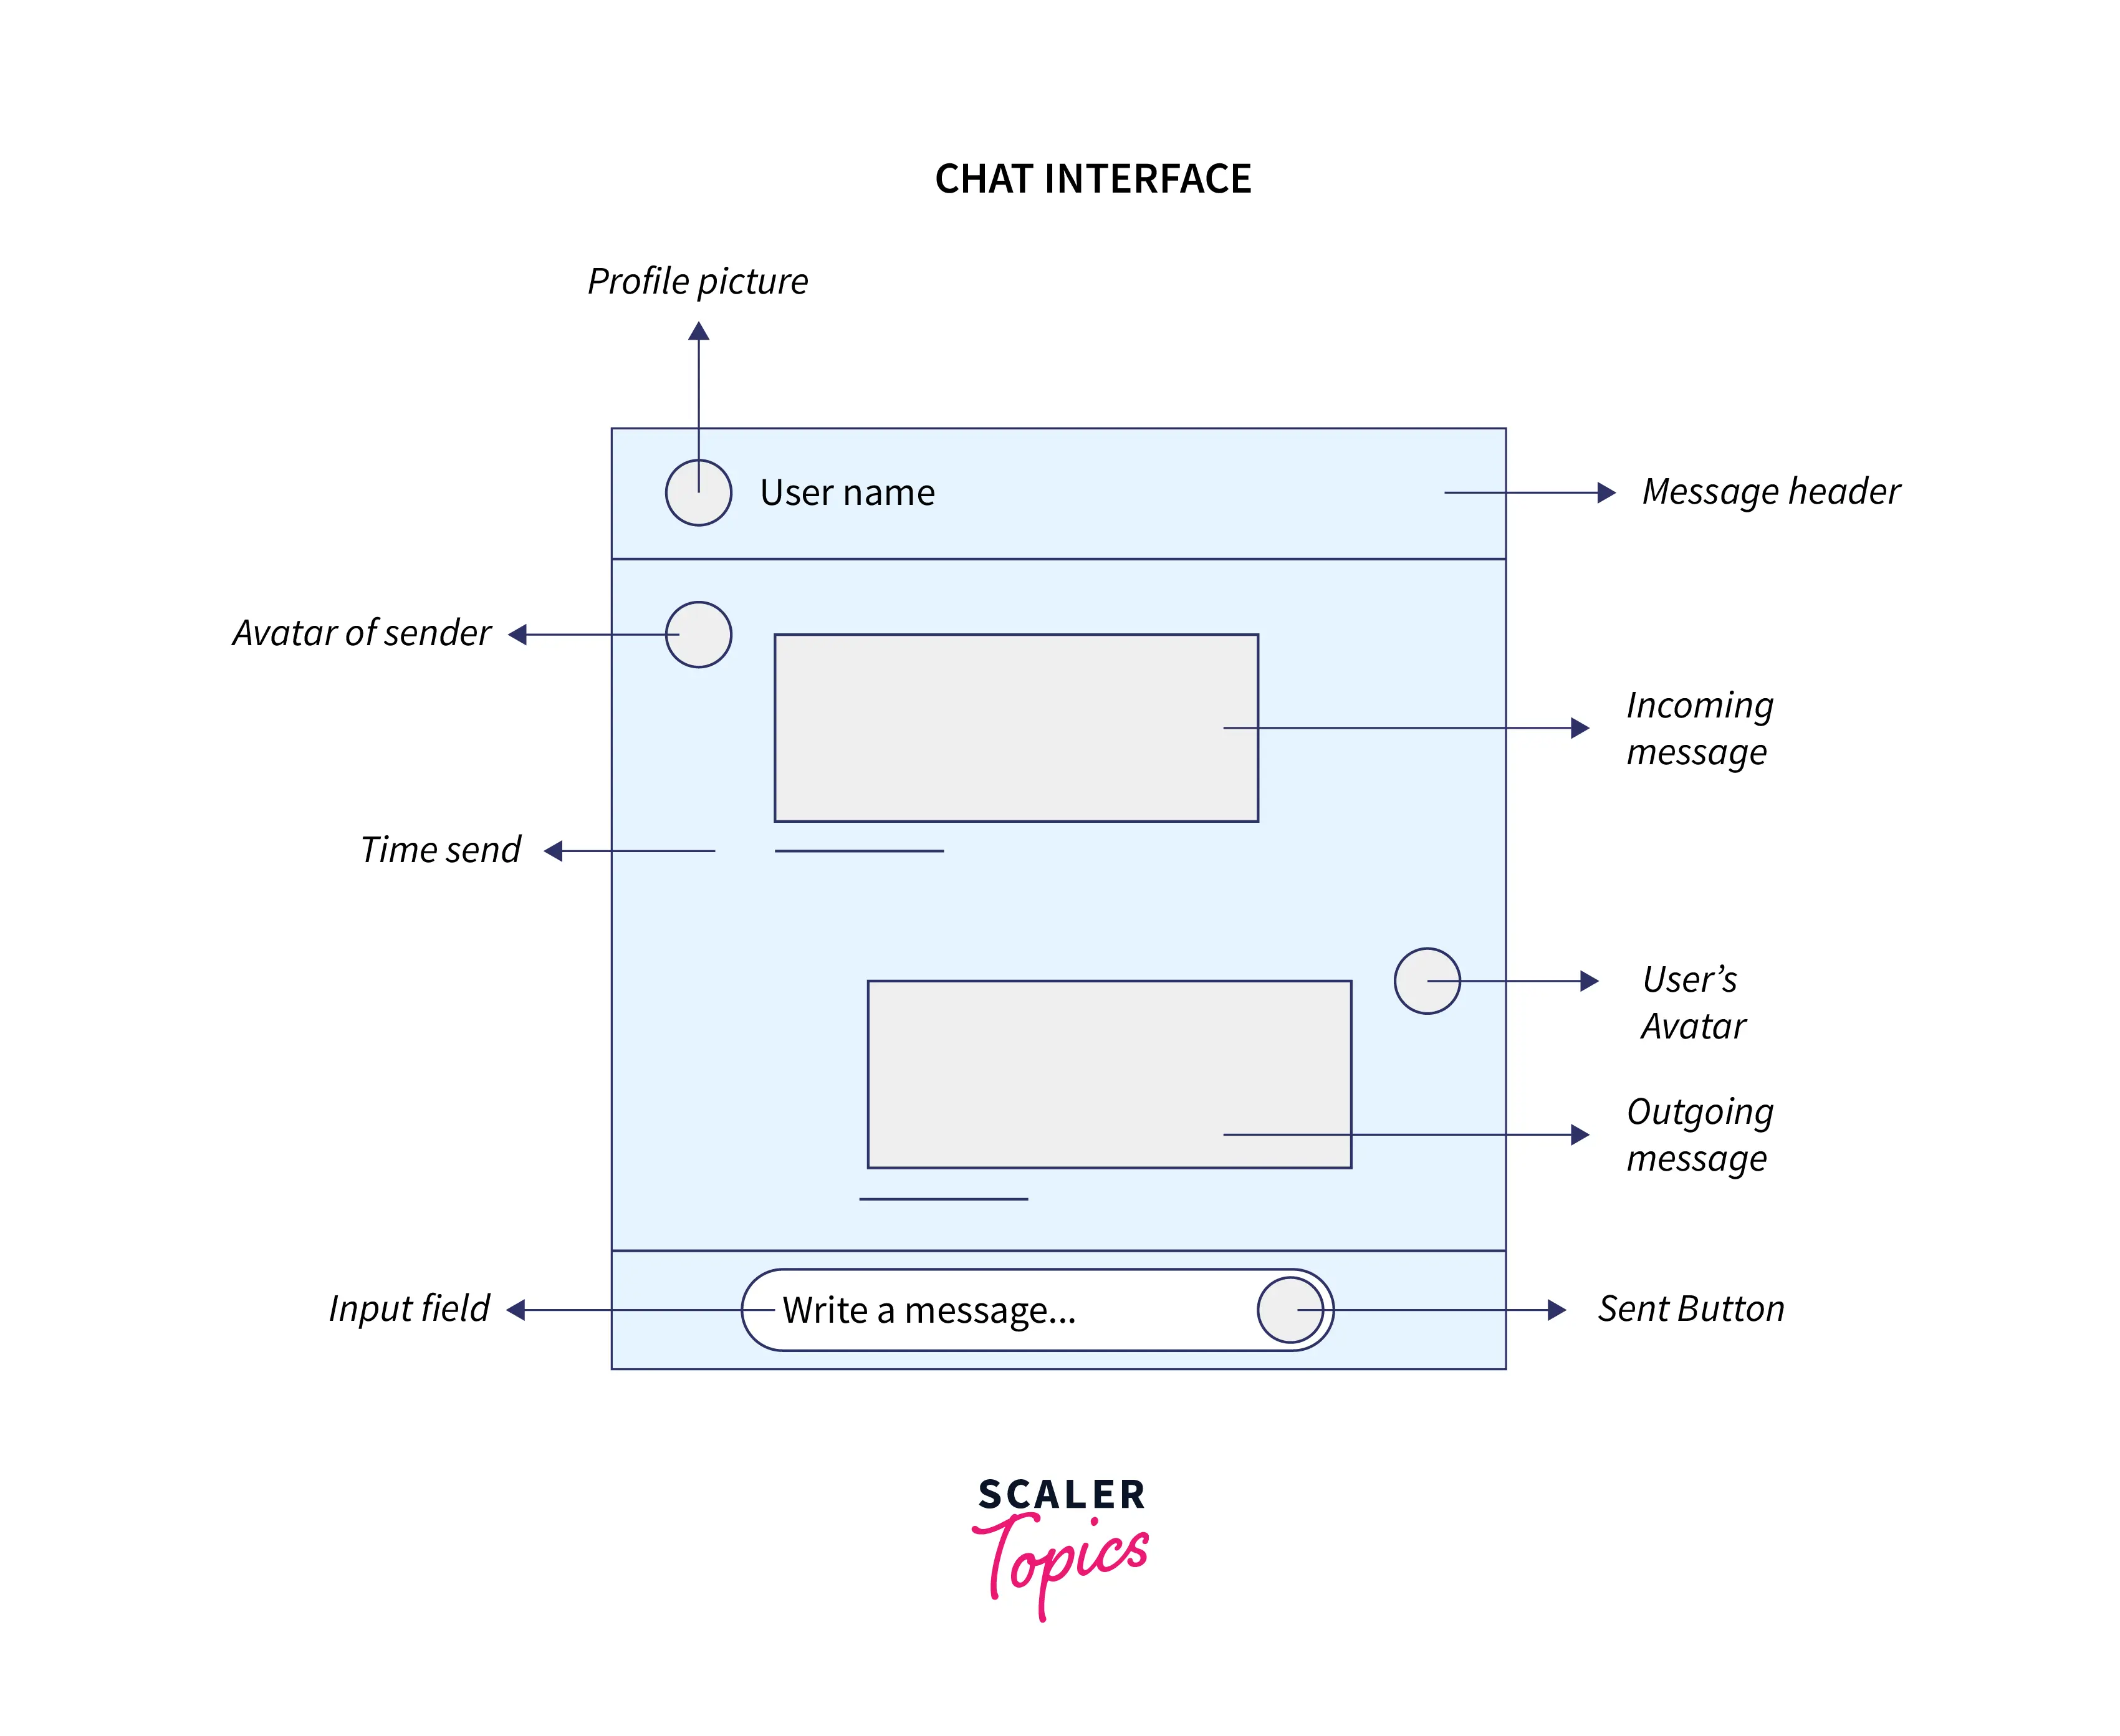
Anatomy of a chat interface
The chat interface primarily consists of two segments: the message header and the chat box. We can further subdivide these sections.
- Message-Header- The message header resides at the top of the chat box. It includes the user's name, avatar or profile image, and the user's last seen. Last seen is the last time the user was active.
- The Chat-Box- The chat box consists of the message page and the message bottom sections.
- Message page-The message page consists of incoming and outgoing messages, as well as the avatars of the senders. It also displays the time at which each message is sent.
- The Message-Bottom-This section contains an input field where the user can type in the messages and a send button to send them.
Approach
We will walk through the following steps to create a captivating chat interface with HTML and CSS.
- Create the basic structure using HTML.
- Add in the basic CSS.
- Create the message header section.
- Create the chat box.
- Add media queries to make the chat interface responsive.
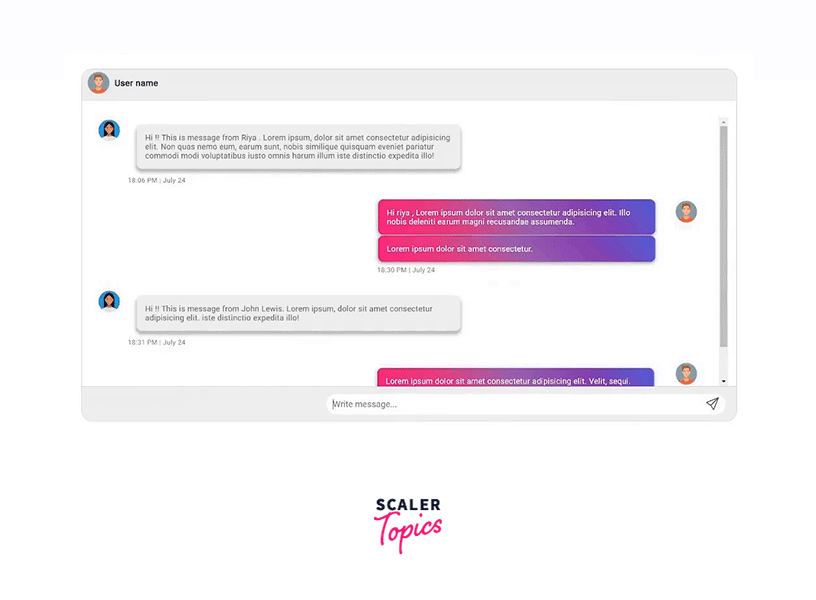
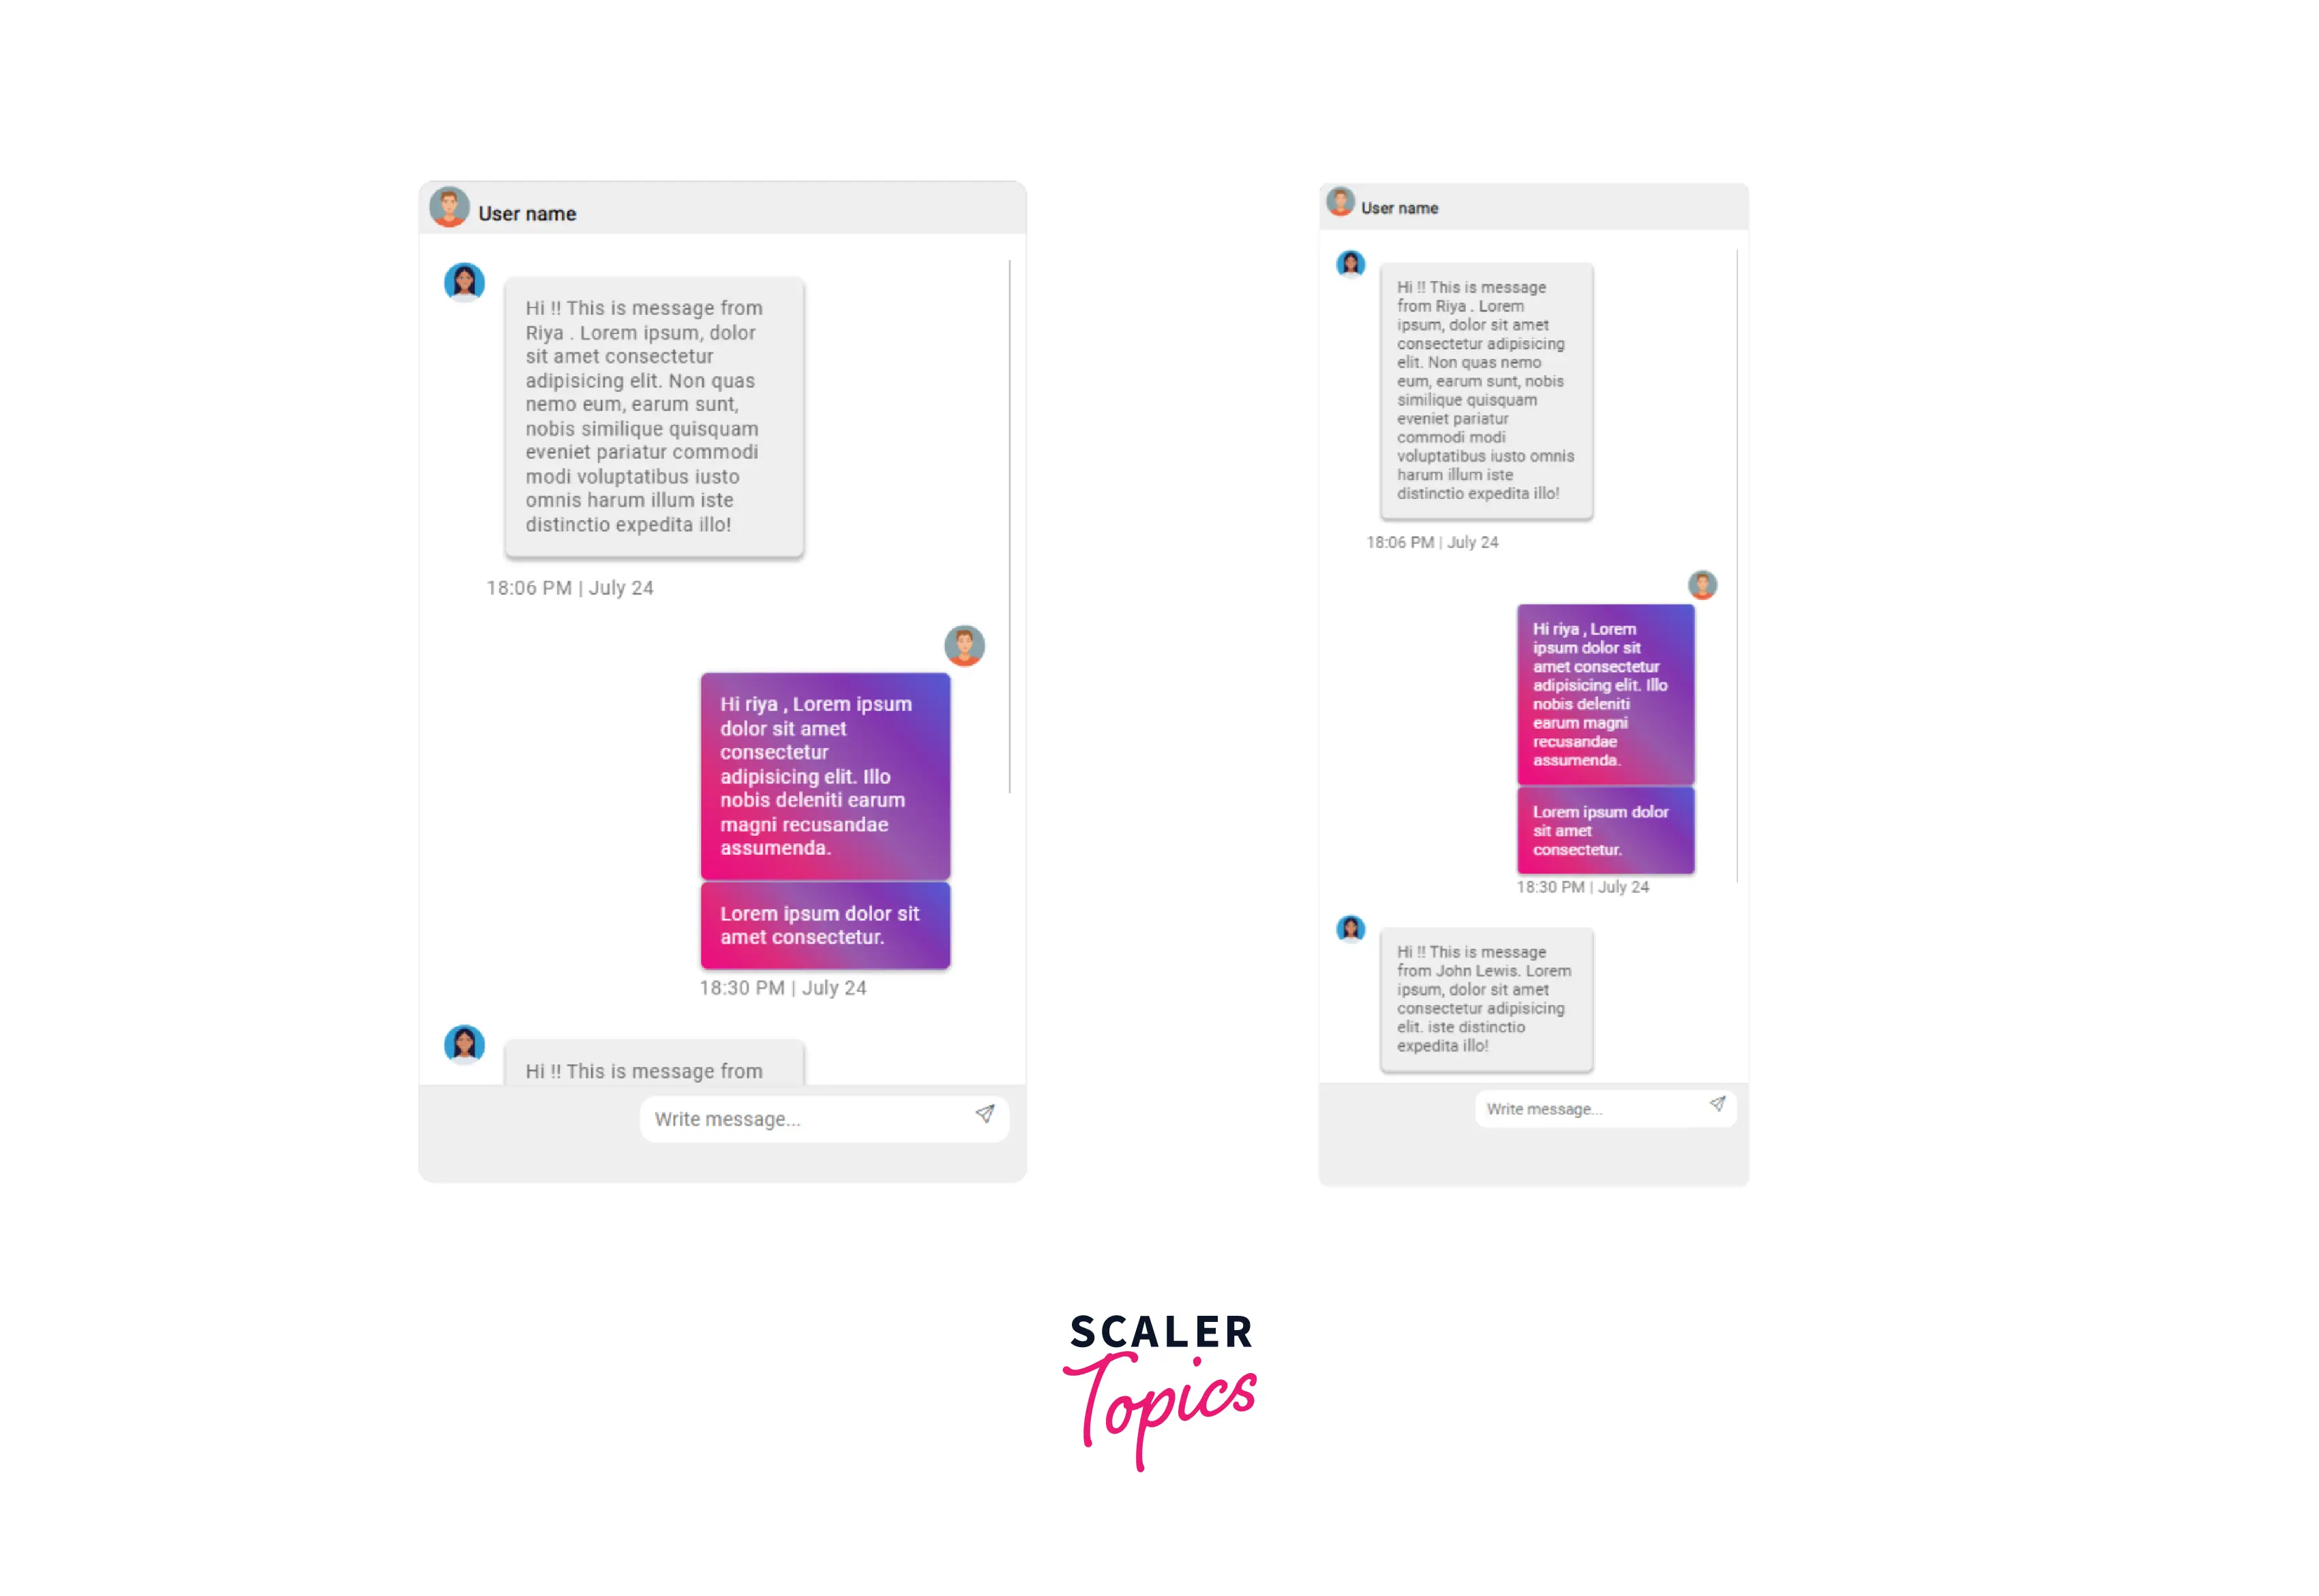
Final Output
After creating the chat interface, we would arrive at something like this:
-
DESKTOP VIEW
-
SMALLER DEVICES
Building the Chat Interface using HTML and CSS
1. Creating the basic structure using HTML
The message header and the chat box make up the chat interface container. The chat box consists of the message page and the message-bottom containers.
2. Adding the basic CSS
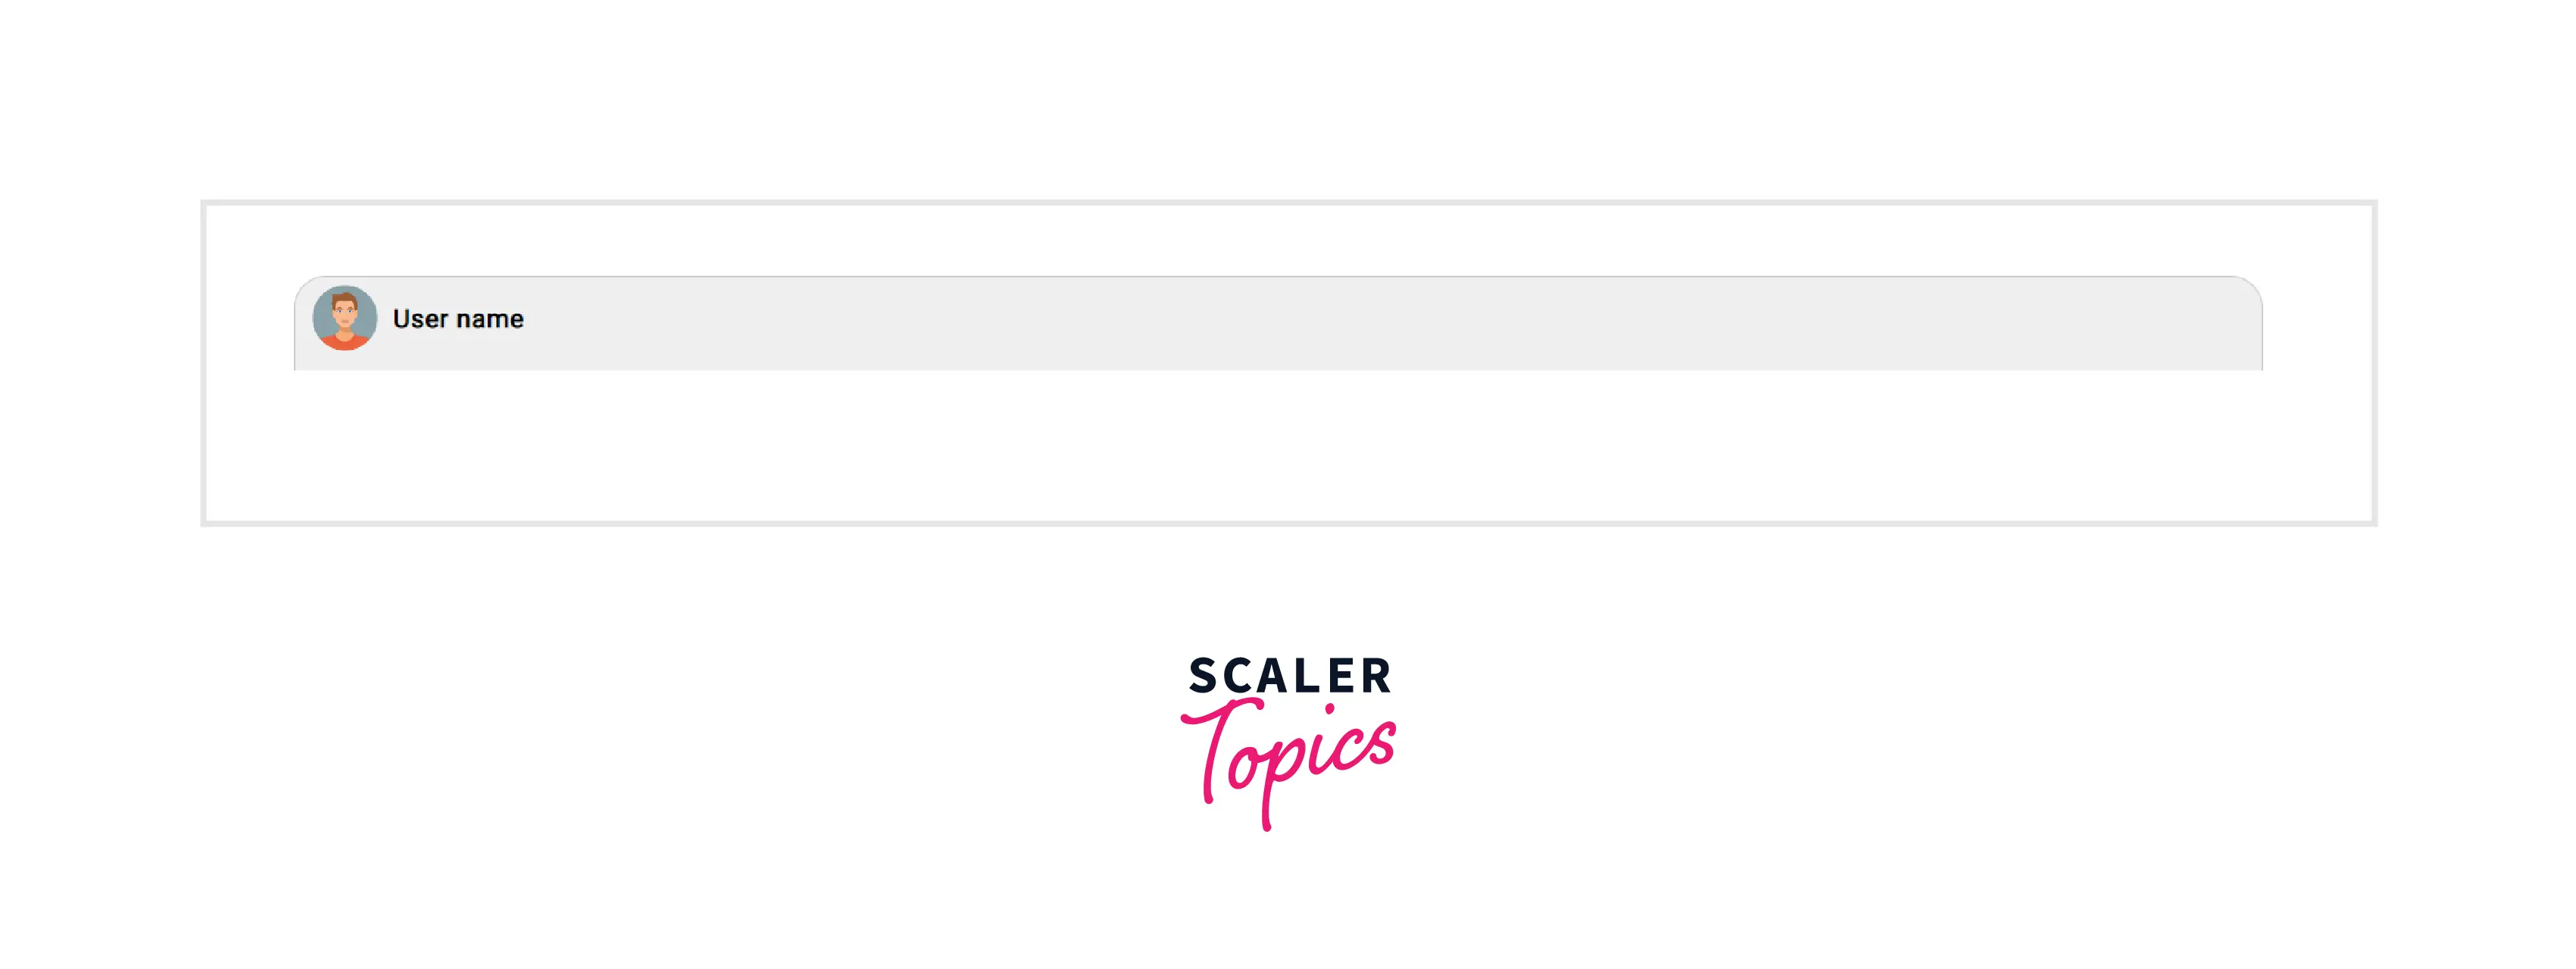
3. Creating the Message Header Section
The message header section comprises-
- User's profile picture or avatar
- Username
- Styling the message header
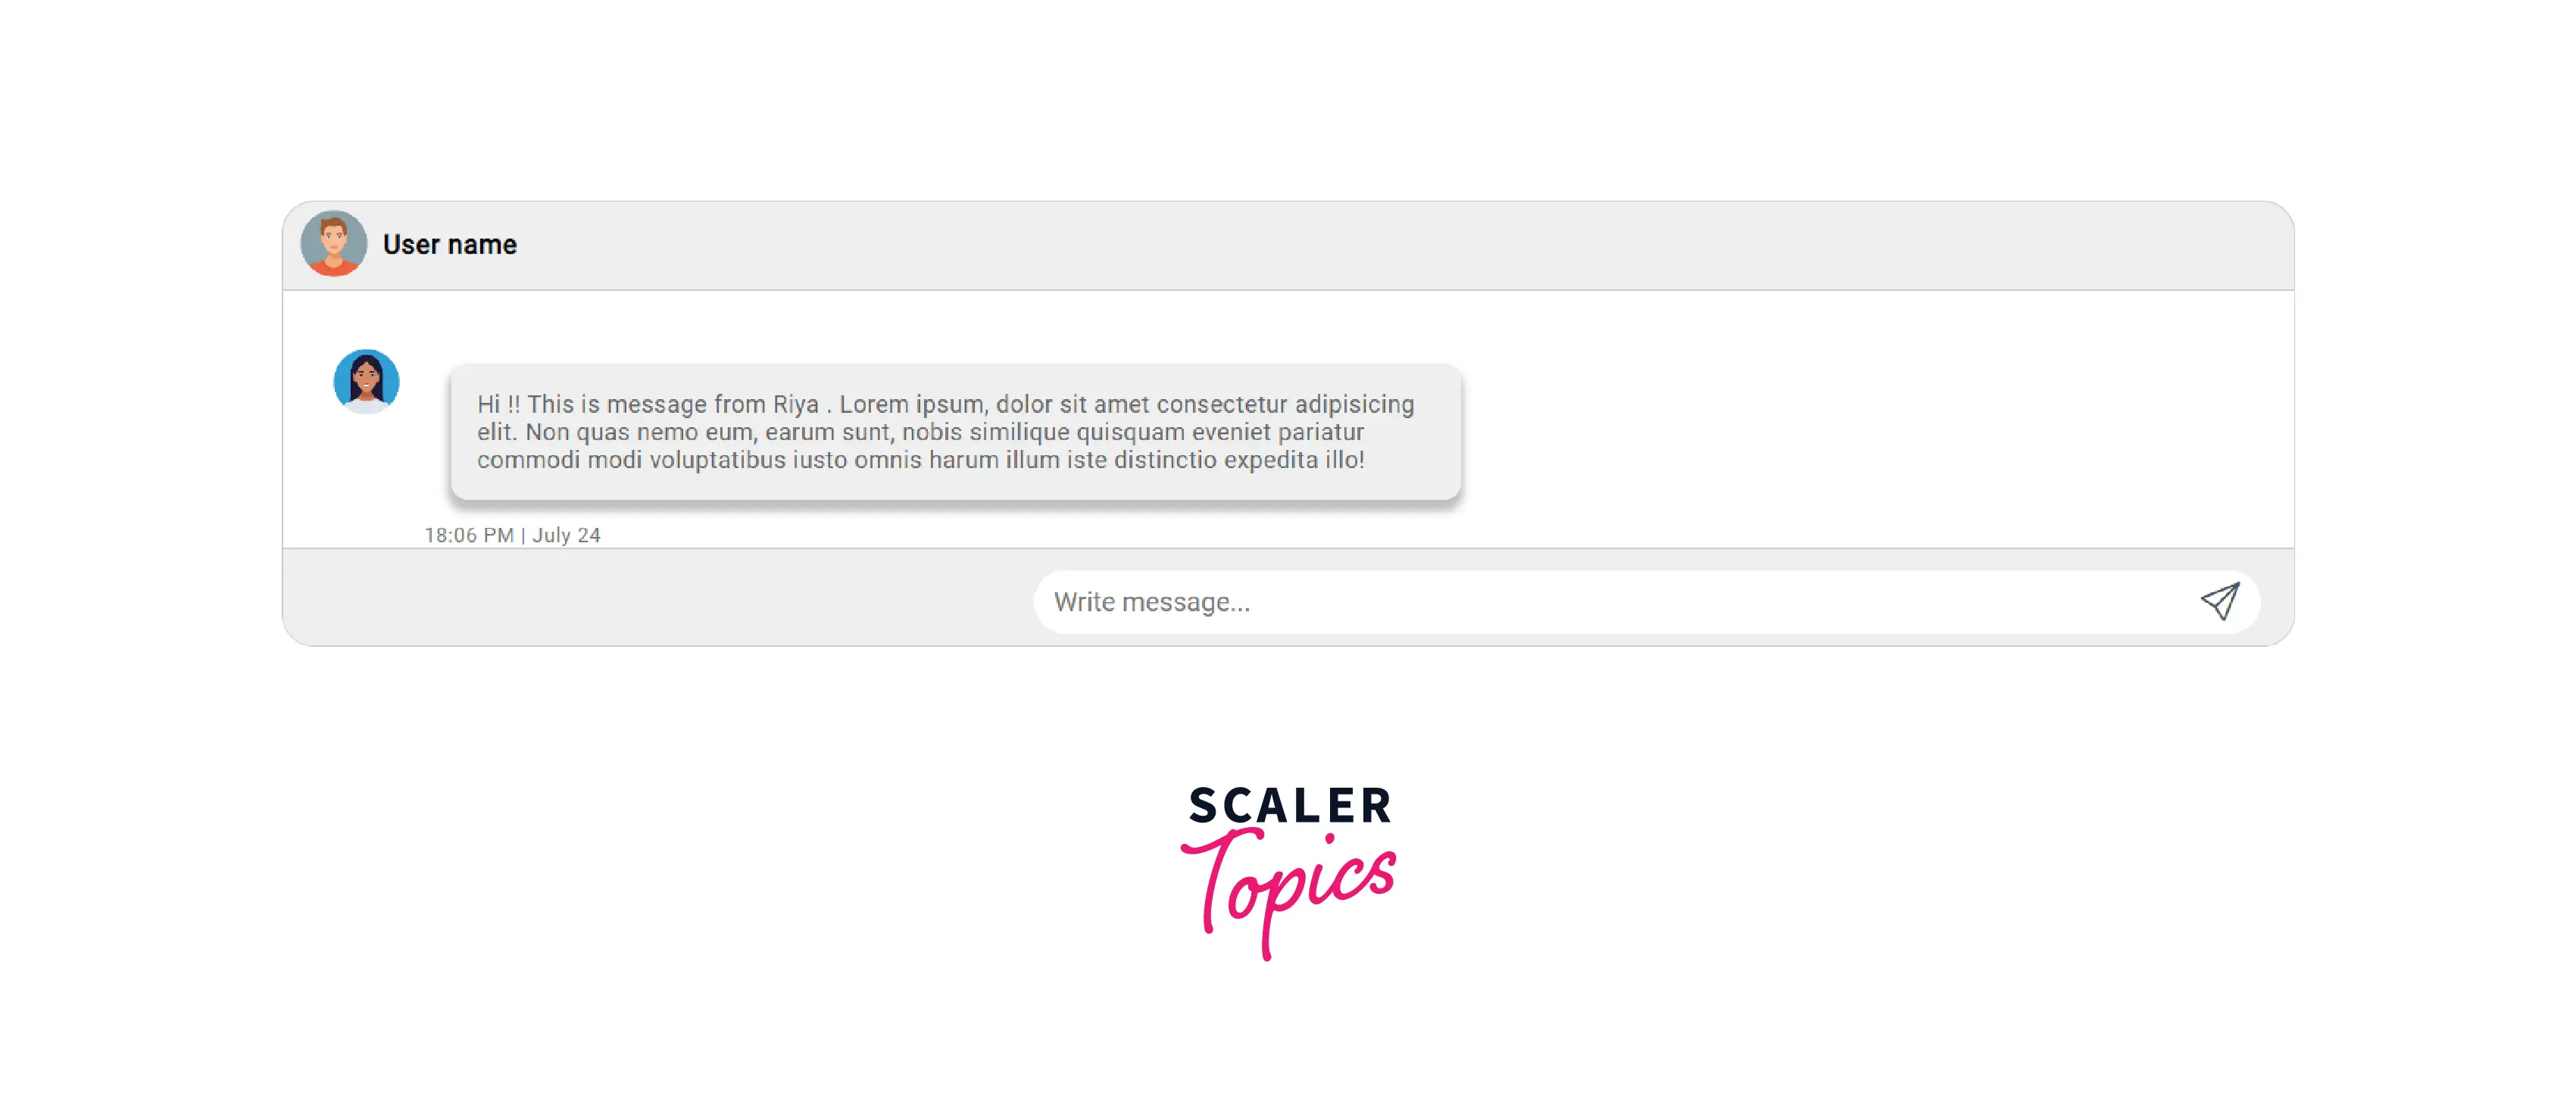
Output
4. Creating the Chat Box and Message Page
The message page will contain all the incoming and outgoing messages.
- Adding HTML
- Adding CSS
5. Creating the Message-Bottom Section
We will add an input field for the user to type in the messages and a send button to send them.
- Adding the HTML
- Styling the Message Bottom Section
Output

6. Adding the Incoming Messages
We will place the incoming messages inside the msg-page container. The incoming message comprises the sender's avatar, the text message, and the exact time each message was sent.
- Creating the structure of an incoming message
-
Styling an Incoming Message
The incoming message floats on the left. The sender's avatar is on the left, followed by the text. We will display the time below the message.
7. Adding the Outgoing Messages
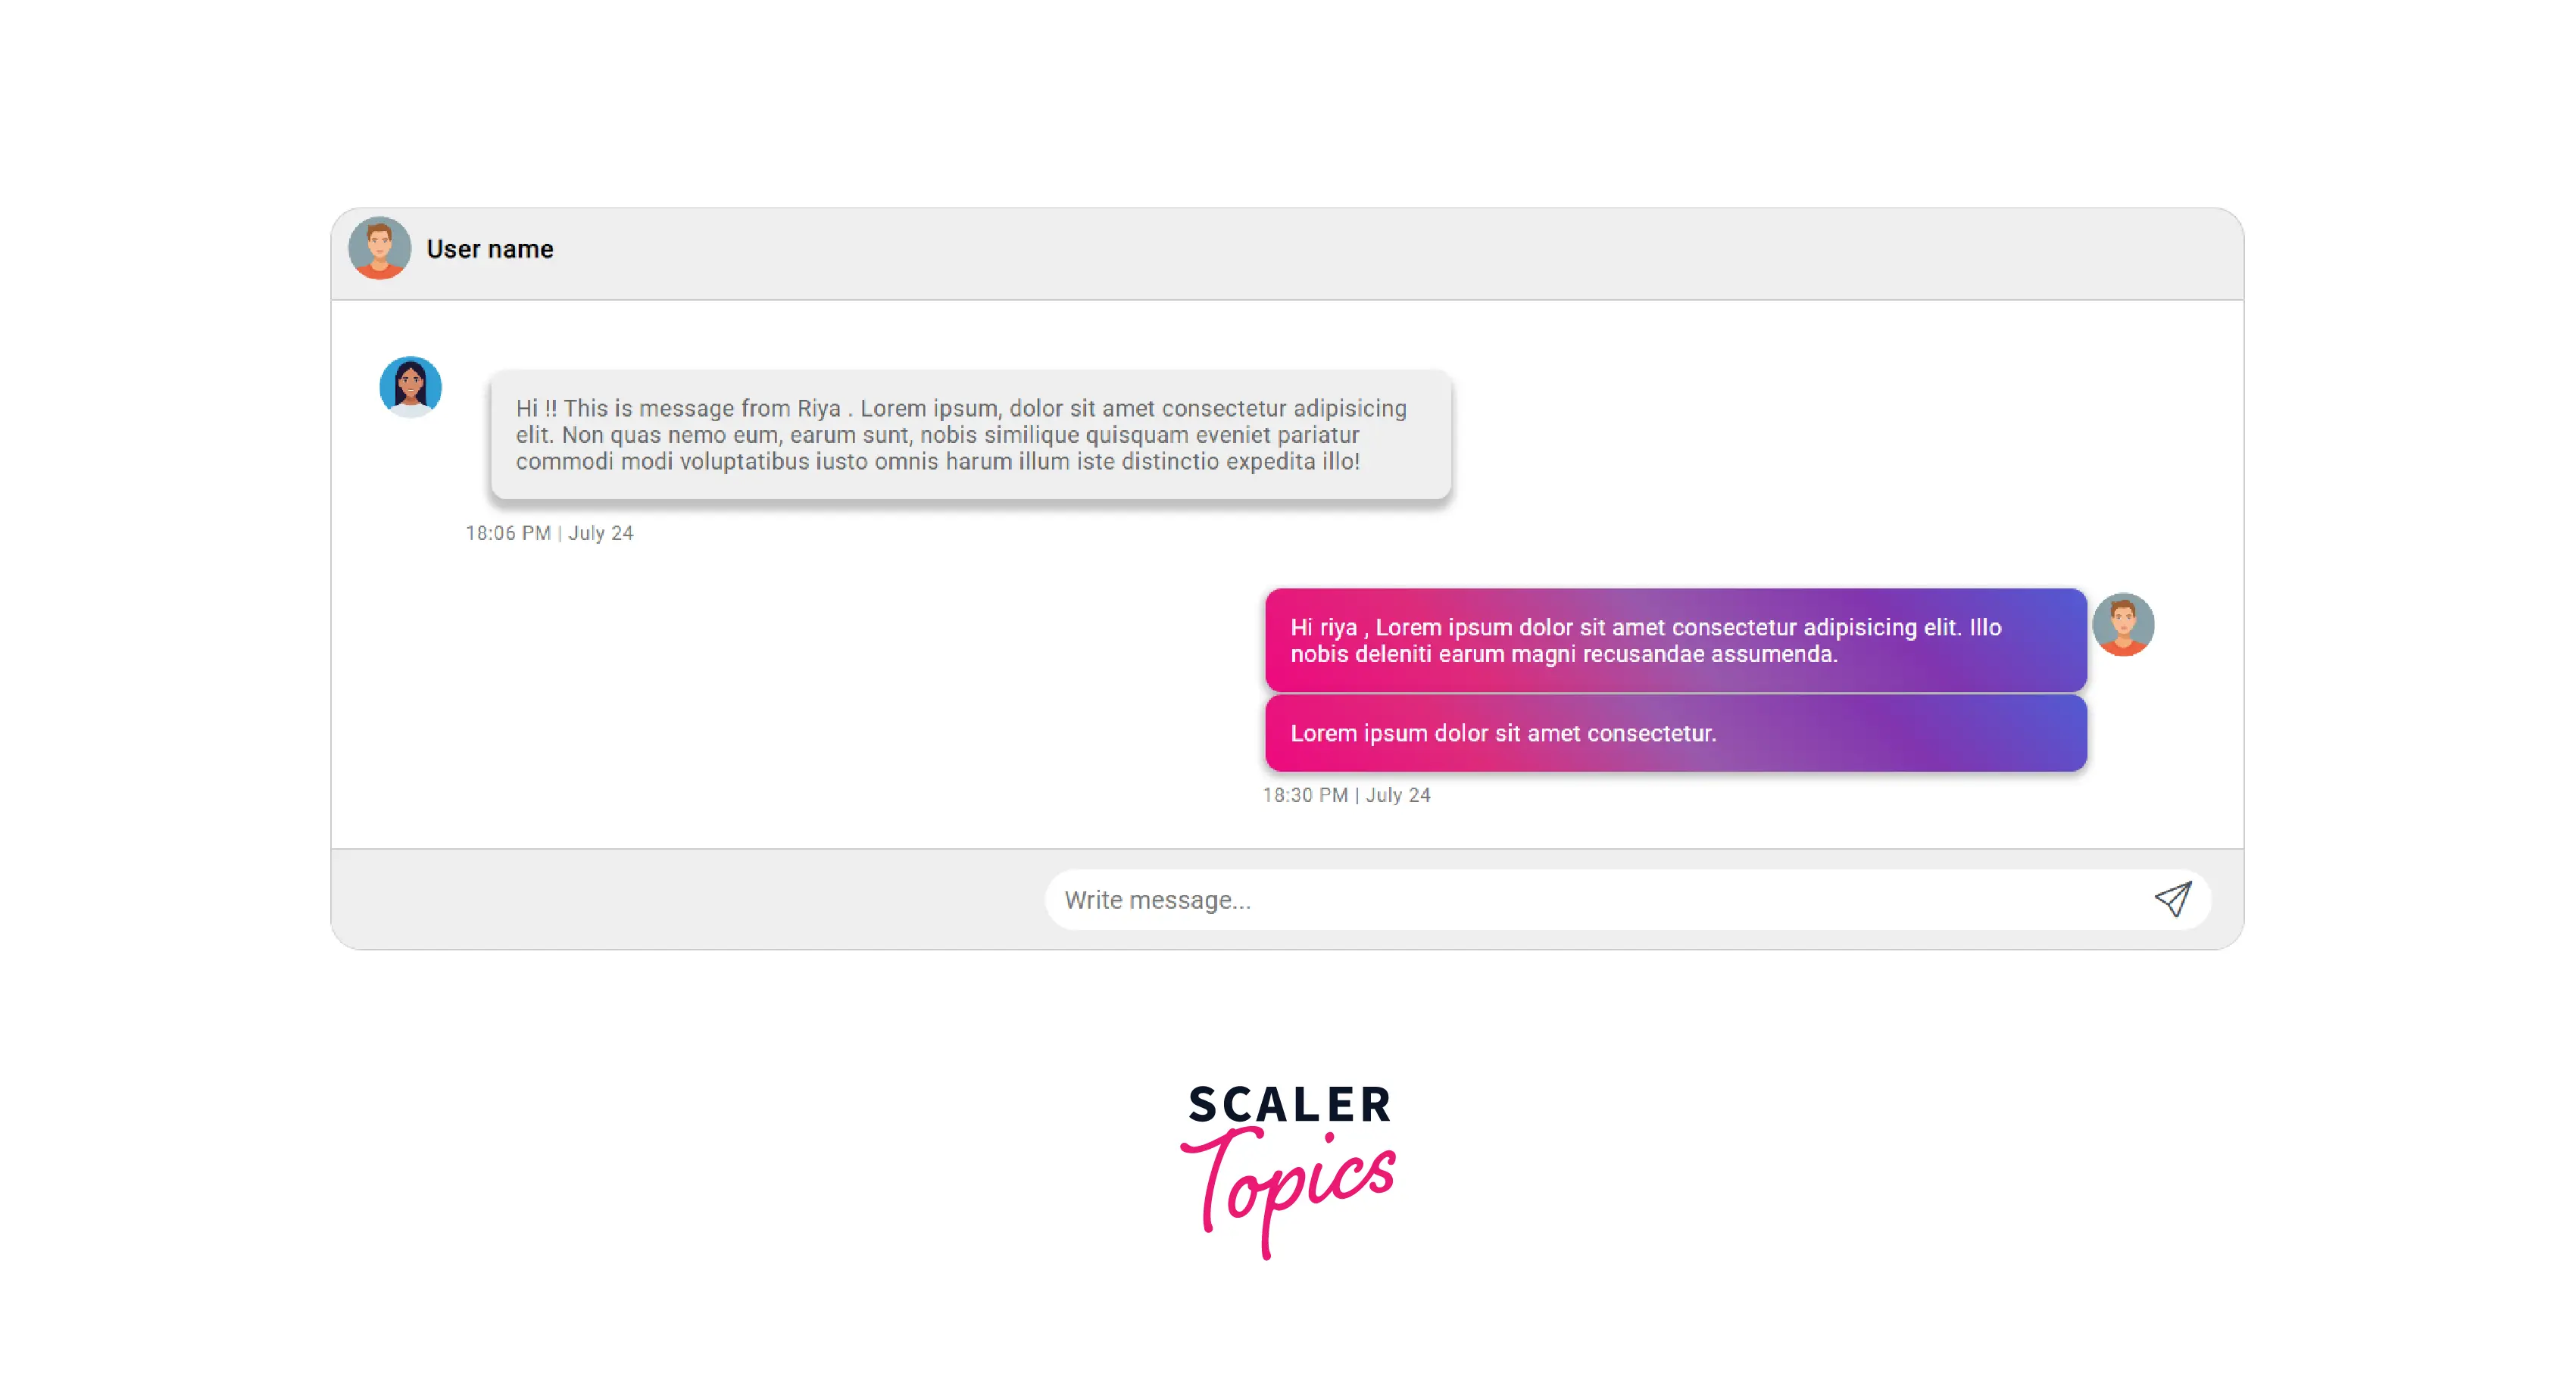
- Adding HTML The structure of the outgoing message is similar to that of the incoming message. If the user sends two texts in a row, we will display the avatar only once, and the gap between the two messages will be smaller.
- Styling the Outgoing Messages
The outgoing messages float on the right side, unlike the incoming messages.
Output
8. Adding a few more messages
Let us add a few incoming and outgoing messages in the msg-page below the outgoing message we just added in the previous step.
Output

9. Making the Chat Interface Responsive by Using CSS Media Queries
Output

The Chat Interface is Now Ready
The Final Code
- HTML
- CSS
What’s Next
We could add the following elements to the existing chat interface:
- Last seen of the user in the message header section.
- Buttons for attachments and emojis in the message bottom section.
- Status of the sent message. Whether the recipient has read the message or not if it was delivered.
Conclusion
- Chat apps are messaging platforms where users can exchange real-time messages, experiences, events, and media.
- A chat application consists of a message header and a chat inbox.
- The message header displays the profile picture of the user, the user's name, and the last time he was active.
- The chat inbox comprises the message page and the message bottom section.
- The message page consists of all the incoming and outgoing messages.
- The message bottom section contains an input field where the users can type in the messages and a send button to send them.