Command Line Arguments in Python

Python Command Line Arguments facilitate information input during program execution. Following the Python script name, as in "$ python script.py arg1 arg2 arg3," these arguments convey essential data to the program. Modules like sys.argv, argparse, and getopt aid in parsing and managing command line arguments. Python's command-line support allows interaction with scripts through various input parameters, offering flexibility in execution and interaction with the command line interface.
Using sys.argv
The sys module in commands line arguments in python has been accompanied by Python distribution from the early days. It is assumed to be similar to accessing the arguments via the C library using the argc/argv.
Elaborating on it,
- The first argument is sys.argv[0] represents the name of a script written in python.
- The arguments, sys.argv[1] to sys.argv[n], represents the command line arguments from 2 to n.
Quick note: Make sure to use the delimiter very accurately between each argument mentioned in the command on the command-line interface. Usually, we give proper one space gap as the delimiter between the various arguments we pass.
As can be seen below image, the yellow spaces symbolize the proper use of delimiter(one space gap):

The module gives the ability for some variables associated that can be maintained or used by the python interpreter along with functions that work strongly with the python interpreter. It provides the variables and functions that manipulate different parts of the runtime environment in python.
The sys.argv variable is considered to be the easy and useful list structure that can help to read the command-line arguments as a string by implementing the command-line arguments via the sys.argv list structure where the list element is single arguments serving two main purposes:
- Considered as the list of command-line arguments.
- With the len(sys.argv) it outputs the number of command-line arguments.
where **sys.argv[0]** is assumed to be the name of the current Python script.
Syntax:
Below is the syntax for the sys module:
Now let us take an example where we are implementing and using the sys module to subtract two numbers along with passing the numbers as command-line arguments.
Code:
Now when we execute the above script using the below command:
Command:
Output:
Explanation: As can be observed above, when we pass three arguments after creating the python script in which we have imported the sys module, we use three arguments to run that particular script. Hence, on using the len(sys.argv) we get the number of arguments as three. along with the list of arguments passed in square brackets as studied above.
Using Getopt Module
Similar to the getopt() function of the C language, the getopt module is implemented when we want to parse the command-line options and arguments. By the parameter validation property, it extends the separation of the input string. The getopt module allows both short, and long options along with the value assignment.
However, when implemented to process the input data properly the getopt() function requires the sys module to be imported along. To differentiate the two modules, the sys module helps to read the command-line arguments as strings whereas the getopt() module can be utilized only by first importing the sys module and then parsing the command-line arguments in the sys.argv module. To implement the getopt module, first, we need the first element from the list of command-line arguments.
You may notice, that each option-and-value pair returned will always have the first element as the option which is prefixed with a single hyphen for short options ('-h') and two hyphens for long options ('--long option).
Syntax:
Below is the syntax for the getopt() module:
Let us understand each parameter:
args: These represent the list of parameters that need to be passed as part of a command to run the script.
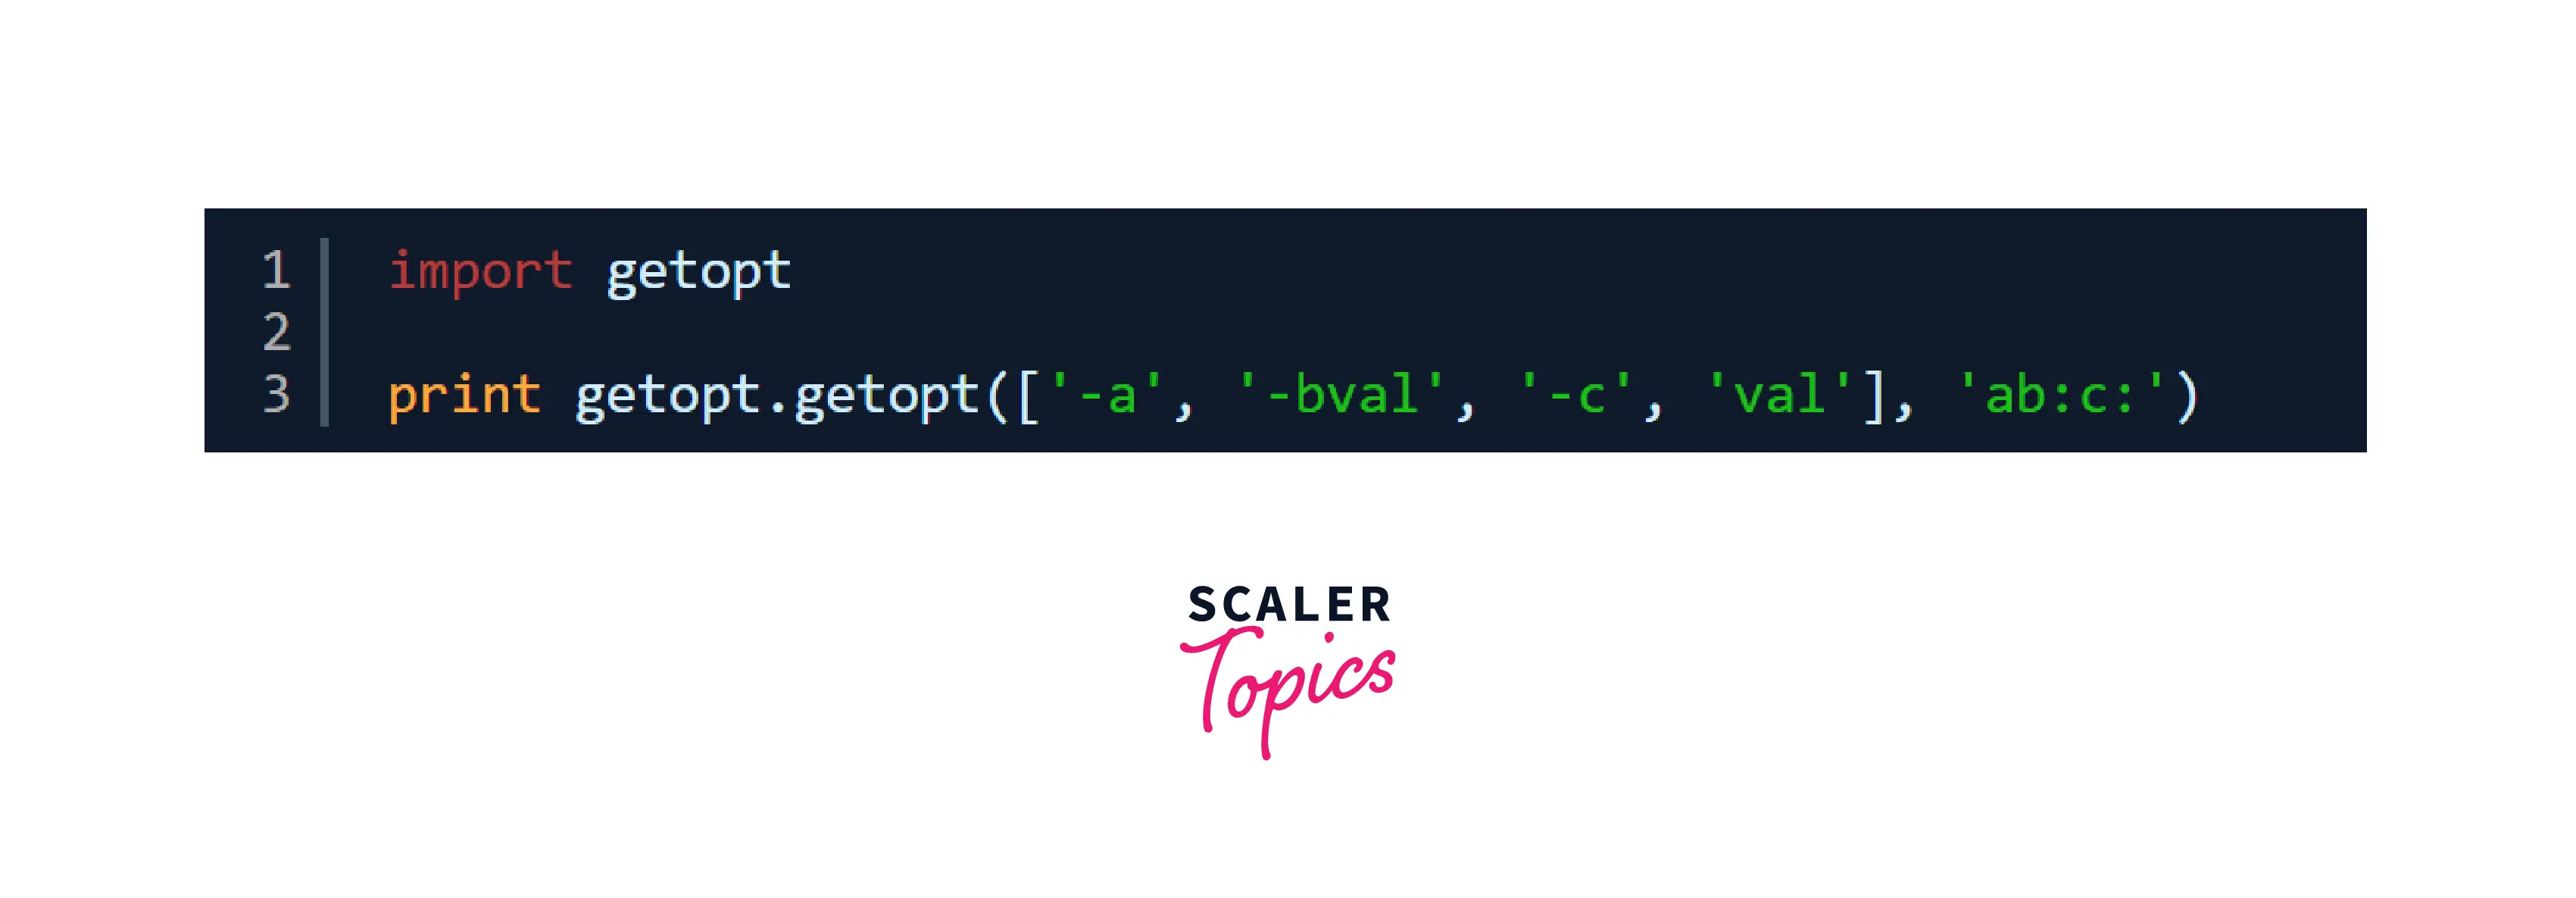
options: The options parameter elaborates the string of option letters that the script wants to recognize. When the option requires the argument, then it must always be followed by a colon(:).
As shown below, the script will be recognizing the options:

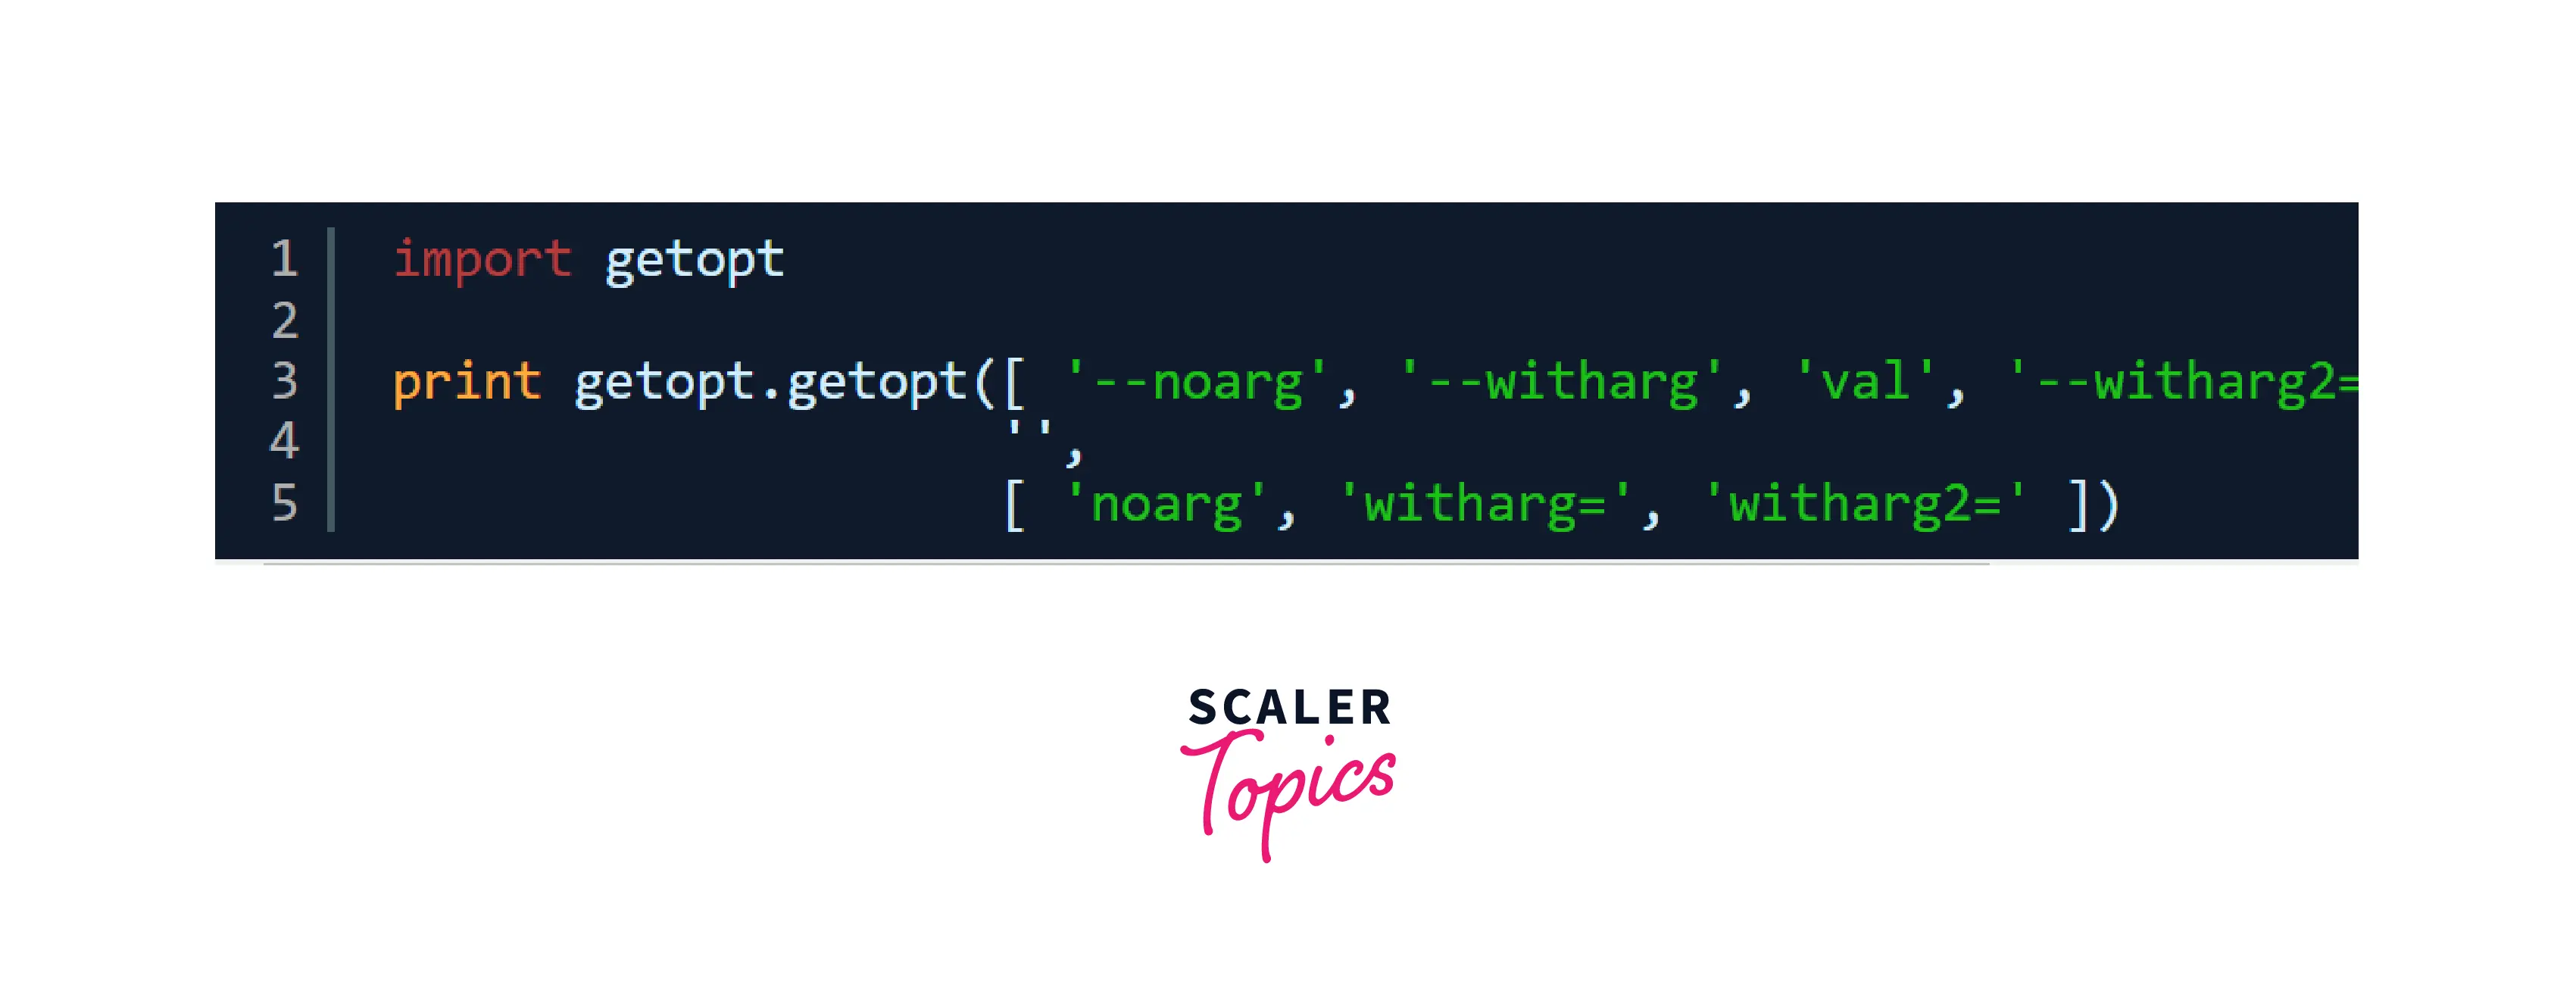
long_options: It is an optional parameter that when mentioned represents the list of the string given along with the name of long options that must be supported. When this option needs arguments then it must be followed by the equal sign(=). Also, when only long options are accepted, then it should be an empty string.
As shown below, the script will be recognizing the options:

Return Type: It outputs the value that contains two elements: the first represents the list of (option, value) pairs. The second represents the list of program arguments left after the option list was removed.
Code:
Now when we execute the above script using the below command:
Command:
Output:
Explanation: Here we created a script where we are first importing the sys and getopt modules. As we studied that with the help of the getopt module, we can parse the command line options and parameter list. Similarly, here as seen in output when we parse different options and args we get the output as we want it to be printed.
Exception getopt.GetoptError
As we studied above about the getopt module and how it can be useful in, now there are scenarios where we can catch errors, the getopt.GetoptError is one of them.
This getopt.GetoptError occurs when an unrecognized option is encountered in the argument list or when an option is not explicitly mentioned.
Note: We might also notice that the argument to its exception is a string that indicates why that error originally occurred. Also, the attributes msg and opt specifies the error message and its related option.
You might question, why should we use the argparse module? To answer this, we can understand it as when the code writer and the user executing the code are two different people then if the executor wants to skip going into the code and making changes to fit his requirement or his style of writing code into the script, the argparse module provides the ability to enter into the command-line arguments directly and execute the code.
Using Argparse Module
Unlike the sys module and getopt module, the argparse module is considered a better option as it allows to pass a lot of options like positional arguments, the default value for arguments, help message, specifying the data type of argument, etc. Here, the default optional argument includes -h in addition to its long option that is, -help.
There are three steps for using the argparse module in python.
Step 1 - Creating the parser:
We start by first importing the argparse module after which we create the parser or an ArgumentParser object. This object is created to store the necessary information that gets passed from the command line in python.
Syntax:
Let us understand each parameter:
- prog– Symbolize the name of the program which is default set as sys.argv[0]
- usage– This string describes the program. It is by default generated from the arguments that are added to the parser.
- description– This is the text that is set to display before the argument help. It is default set to none.
- epilog– This is the text that is set to display after the argument help. It is default set to none.
- parents– This represents the list of ArgumentParser objects of all the arguments that must also be included.
- formatter_class– This defines the class for customizing the help output.
- prefix_chars– It is the set of characters that prefix optional arguments that are set to ‘-‘ by default.
- fromfile_prefix_chars– It is the set of characters that prefix files from where additional arguments could be read. Its default value is None.
- argument_default– This is the global default value that is given for the arguments whose value is None.
- conflict_handler– It represents the strategy for resolving the conflicting options, which is not necessary to mention.
- add_help– This adds a -h/–help option to the parser which is mostly set as True by default.
- allow_abbrev– This permits the long options to be abbreviated (default set as True) when the abbreviation is unambiguous.
Once we create the parser we move to the second step which is,
Step 2 - Adding Arguments: Now we start by filling the information about the arguments of the program in the ArgumentParser object which helps the ArgumentParser to capture the arguments passed in the command-line arguments and convert them into objects.
Syntax:
Let us understand each parameter:
- name or flags– This is a name or a list of option strings.
- action– The basic action that can be taken when the argument is encountered at the command line.
- nargs– This represents the number of command-line arguments that could be utilized.
- const– This represents the constant value that is needed by some actions or nargs selections.
- default– When the arguments are not present on the command line the default value gets populated.
- type– This explains the type at which the command line arguments must be converted.
- choices– Represents a container for all the permittable values.
- required– This is an optional parameter which if or if not present, the command-line option gets omitted.
- help– Describes what an argument performs.
- metavar– In usage messages.
- dest– Represents the name of the attribute that must be specified for the object returned by parse_args().
Finally, the third step is as below
Step 3 - Parsing Arguments:
The third step is to parse the arguments through parse_args(). The information that is collected (as above in step 2) is stored and utilized in this step. Here, the data is initially loaded into the sys.argv array in a string format where it calls the parse_args(). The data first get converted into the expected data type and finally invokes the specified action to generate the output.
Syntax:
Let us understand each parameter:
- args– This represents the list of strings that is to be parsed where the default value is fetched from sys.argv.
- namespace– This represents the object to take the attributes whose default value is a new empty Namespace object.
Code:
Commands::
Output:
Explanation: As can be seen above, the argparse module has given the output where various optional parameters are also displayed which makes it a better module than the sys and getopt modules.
Conclusion
- Command Line Arguments can be explained as the arguments given in the command line shell of the operating system after the name of the program that will be executed.
- We have mainly three ways of arguments to deal with command line arguments in python as below:
- Implememtinig sys.argv
- Implementing getopt module
- Implememtinig argparse module
- Always make sure to use the indentation and spacing correctly as that may lead to errors like an incorrect number of arguments.
