Customizations in Django
Overview
Customizations in Django can be done to make the representation of objects and interface of the admin panel. From a front-end perspective, there are many parts whose manipulation can be done such as the title displayed, series of displayed fields, etc.
Django Admin – Redesign and Customization
Today we will study some customizations of the Django Admin parts. Better object representation is provided by these customizations. For doing this implementation in your project, use the given below command to make a new app named example in your Django Project.
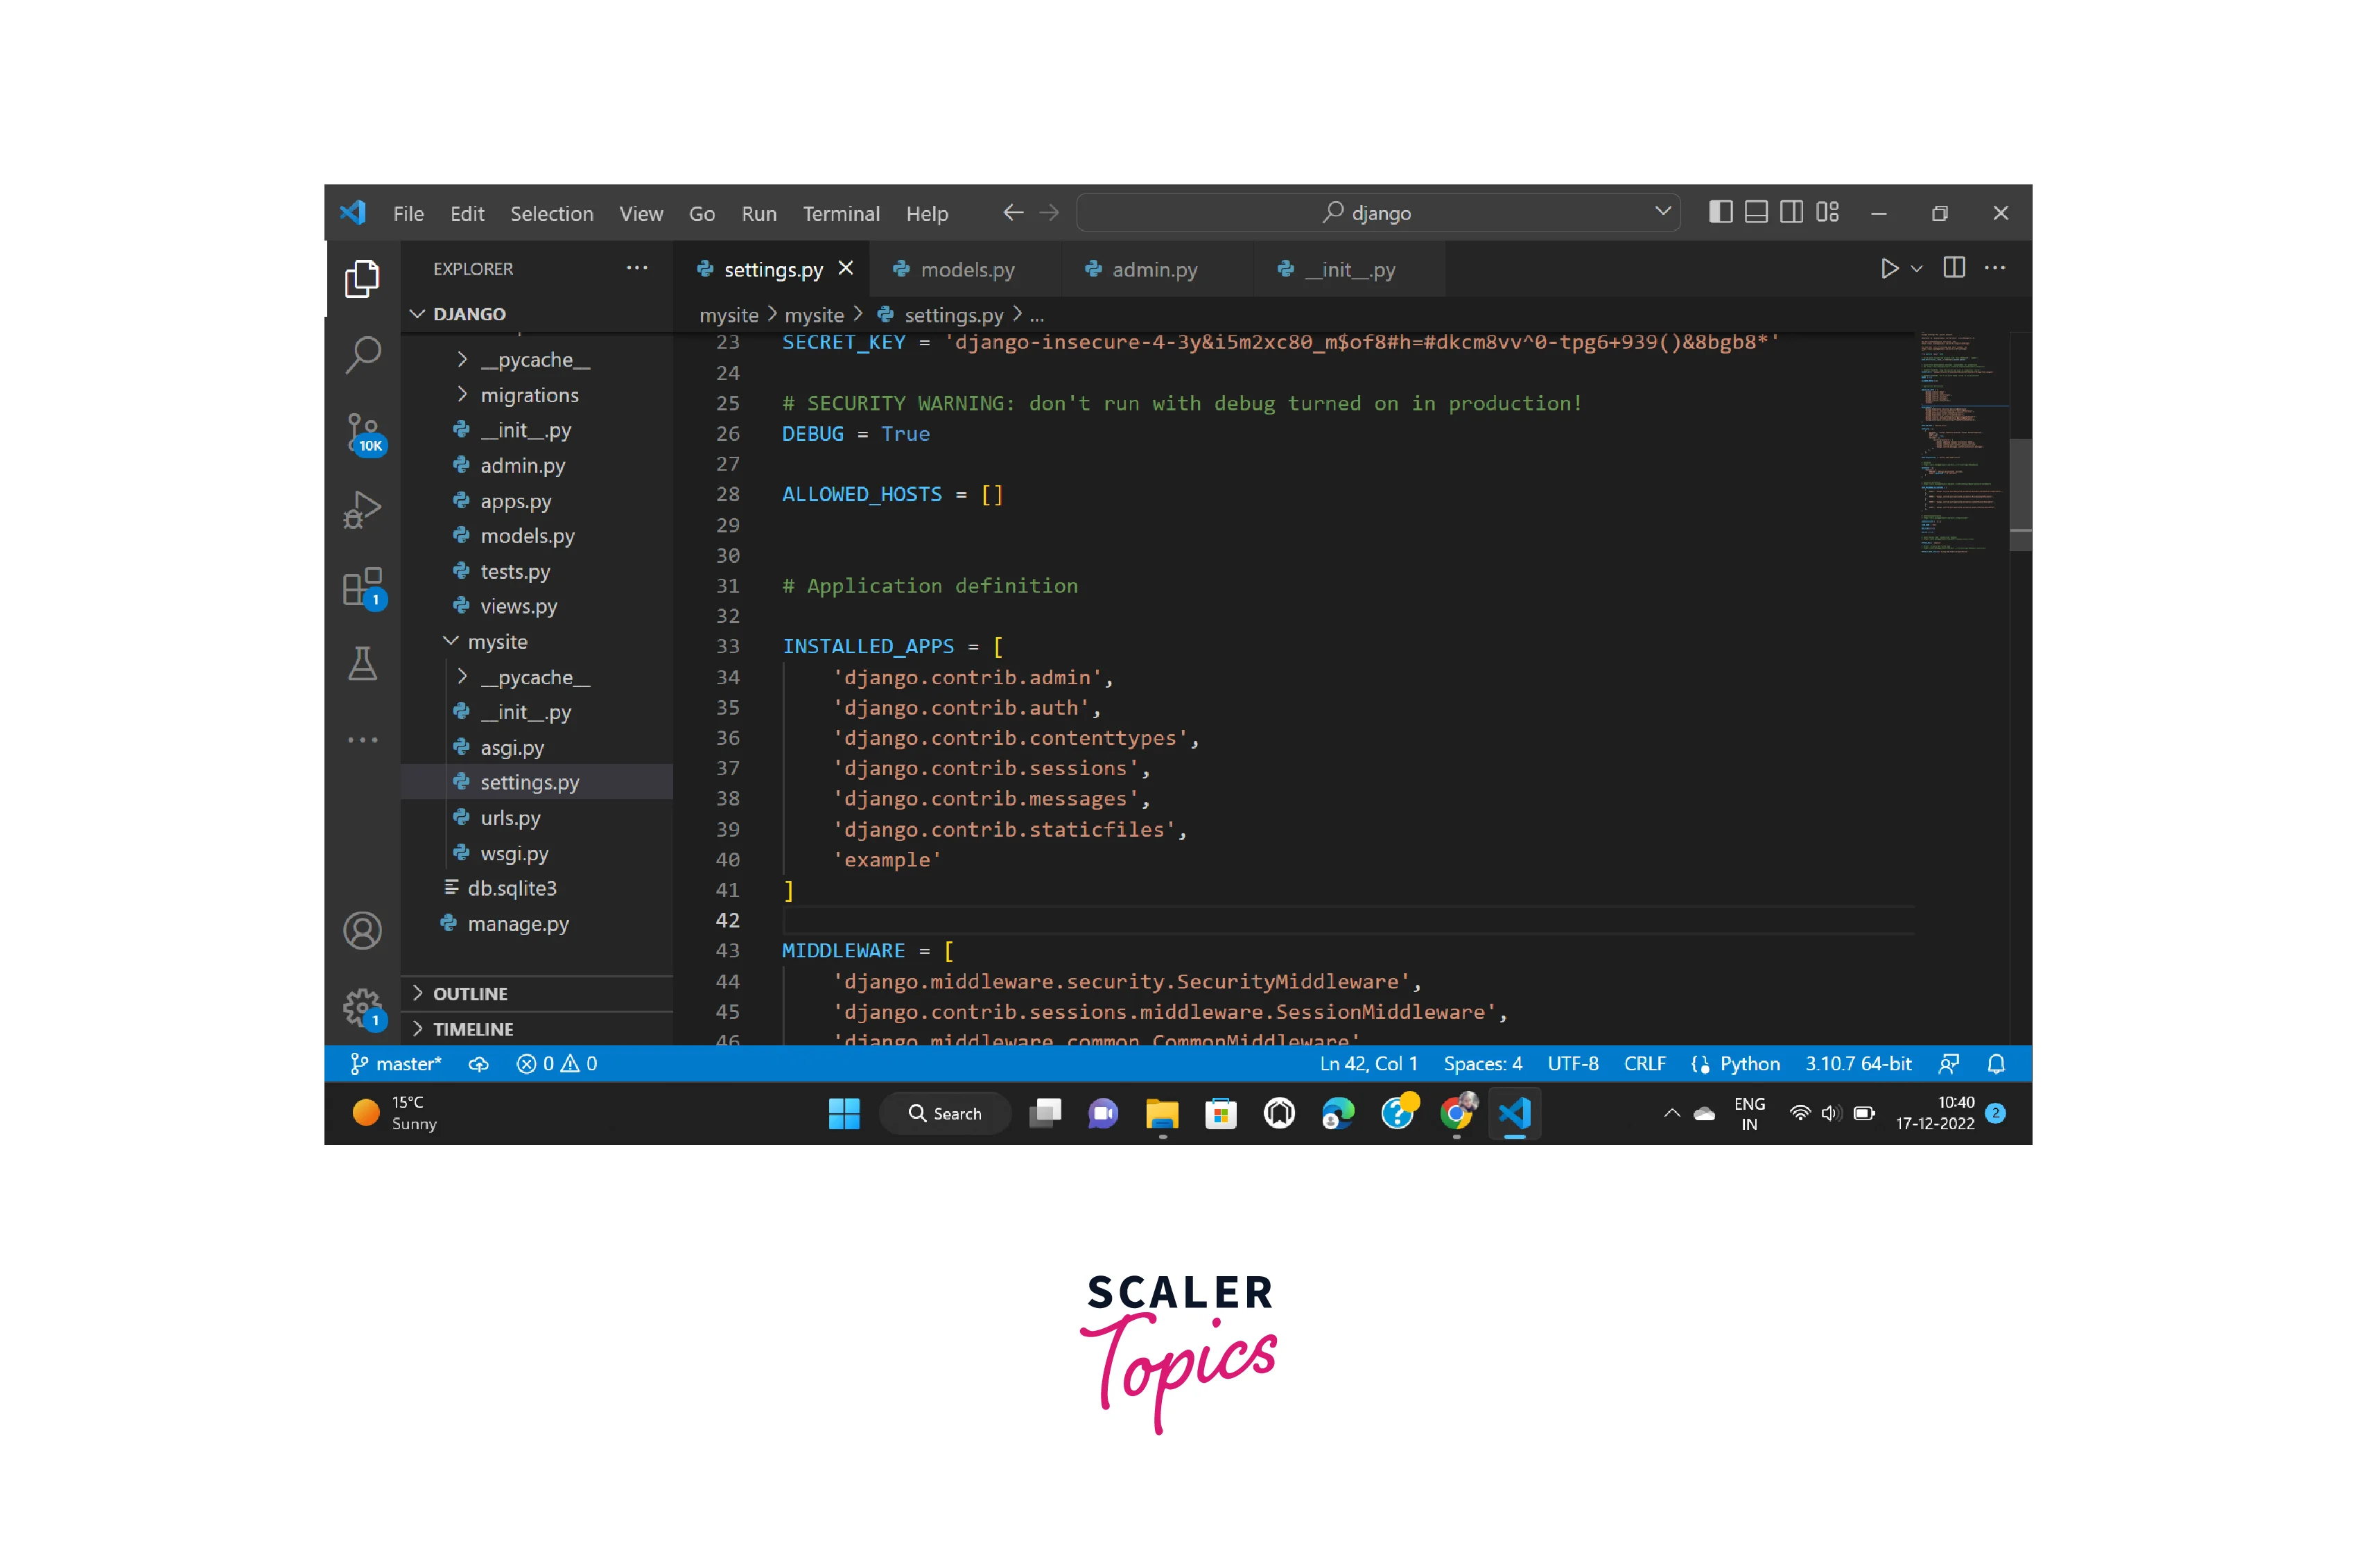
Install this application and then go to the settings.py file and type example in the list of INSTALLED_APPS.
Refer to the below image for the settings.py file
 Now we will make a model named student in the example app and use this model for the customization of the Django admin.
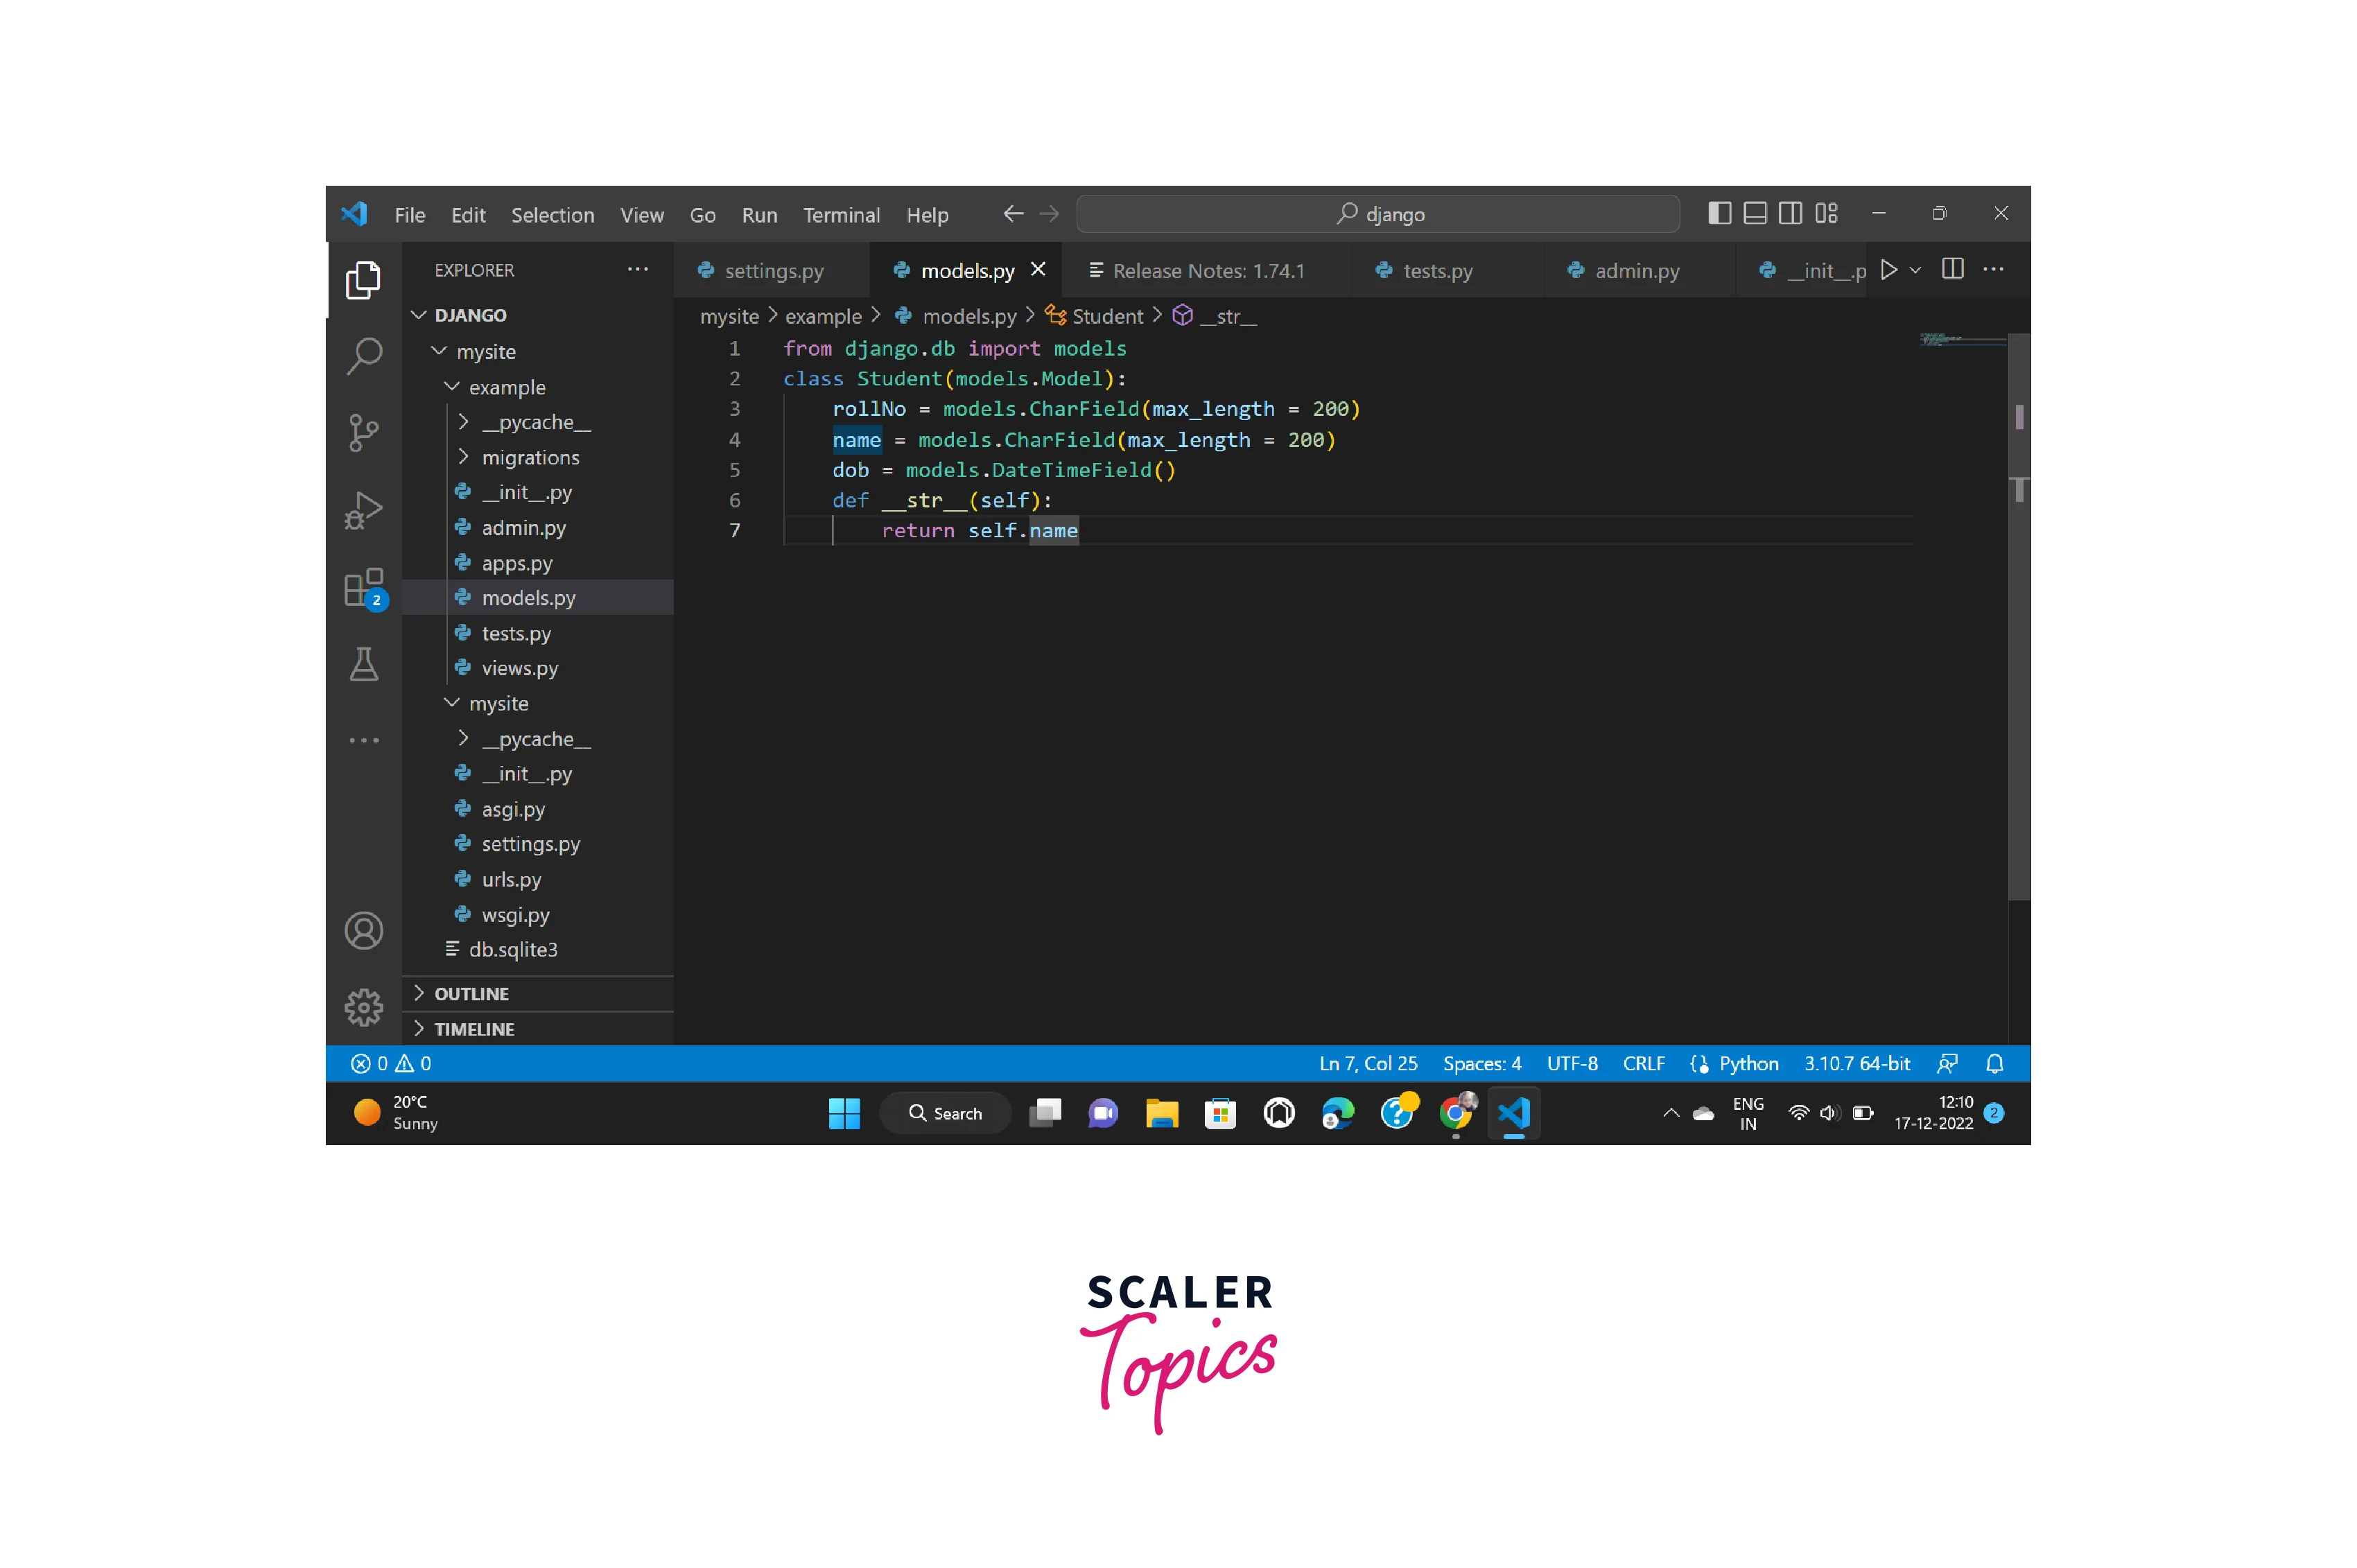
For creating the model type the below code in the models.py file of the example folder.
Refer to the below image for the models.py file
Now type the below-given commands in order one by one to migrate changes into the database:
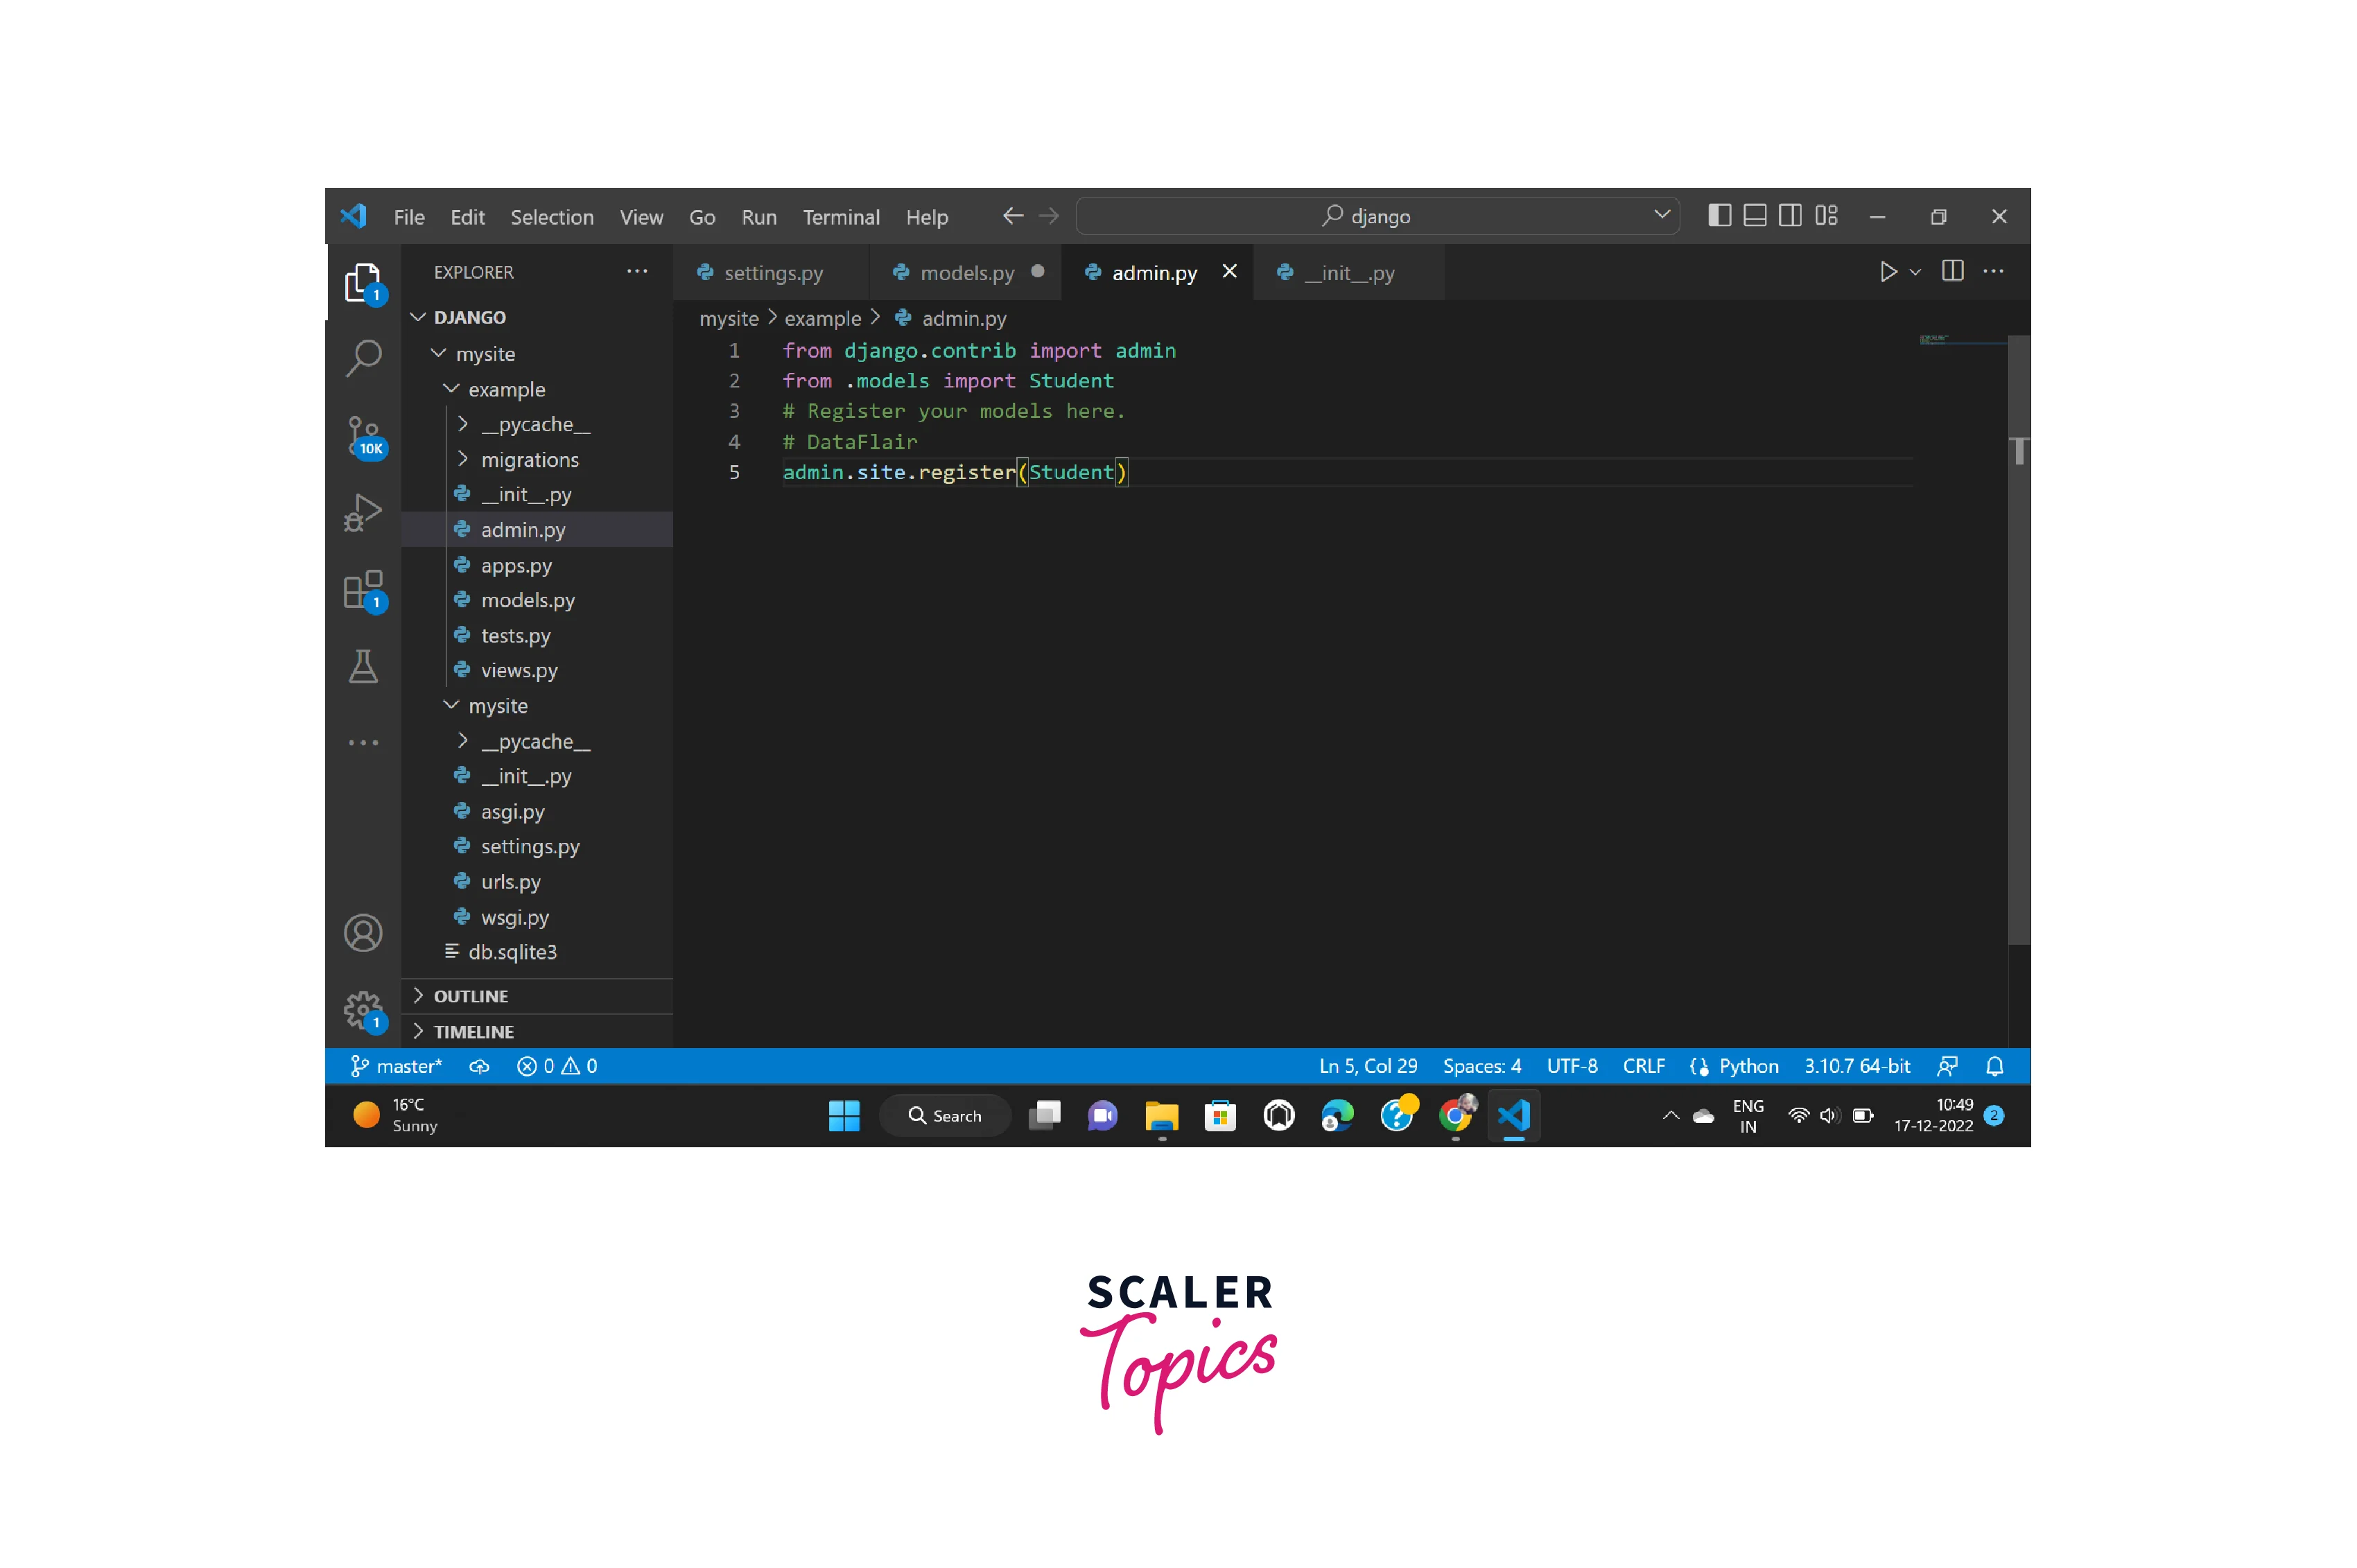
Now models need to be registered on the Django admin for that go to admin.py available in the example and then clear all the code present in it and type the code given below.
Refer to the below image for the admin.py file
Now create a superuser by executing the command given below
And create the username and password and also enter your email id. Now start your server by executing the following command:
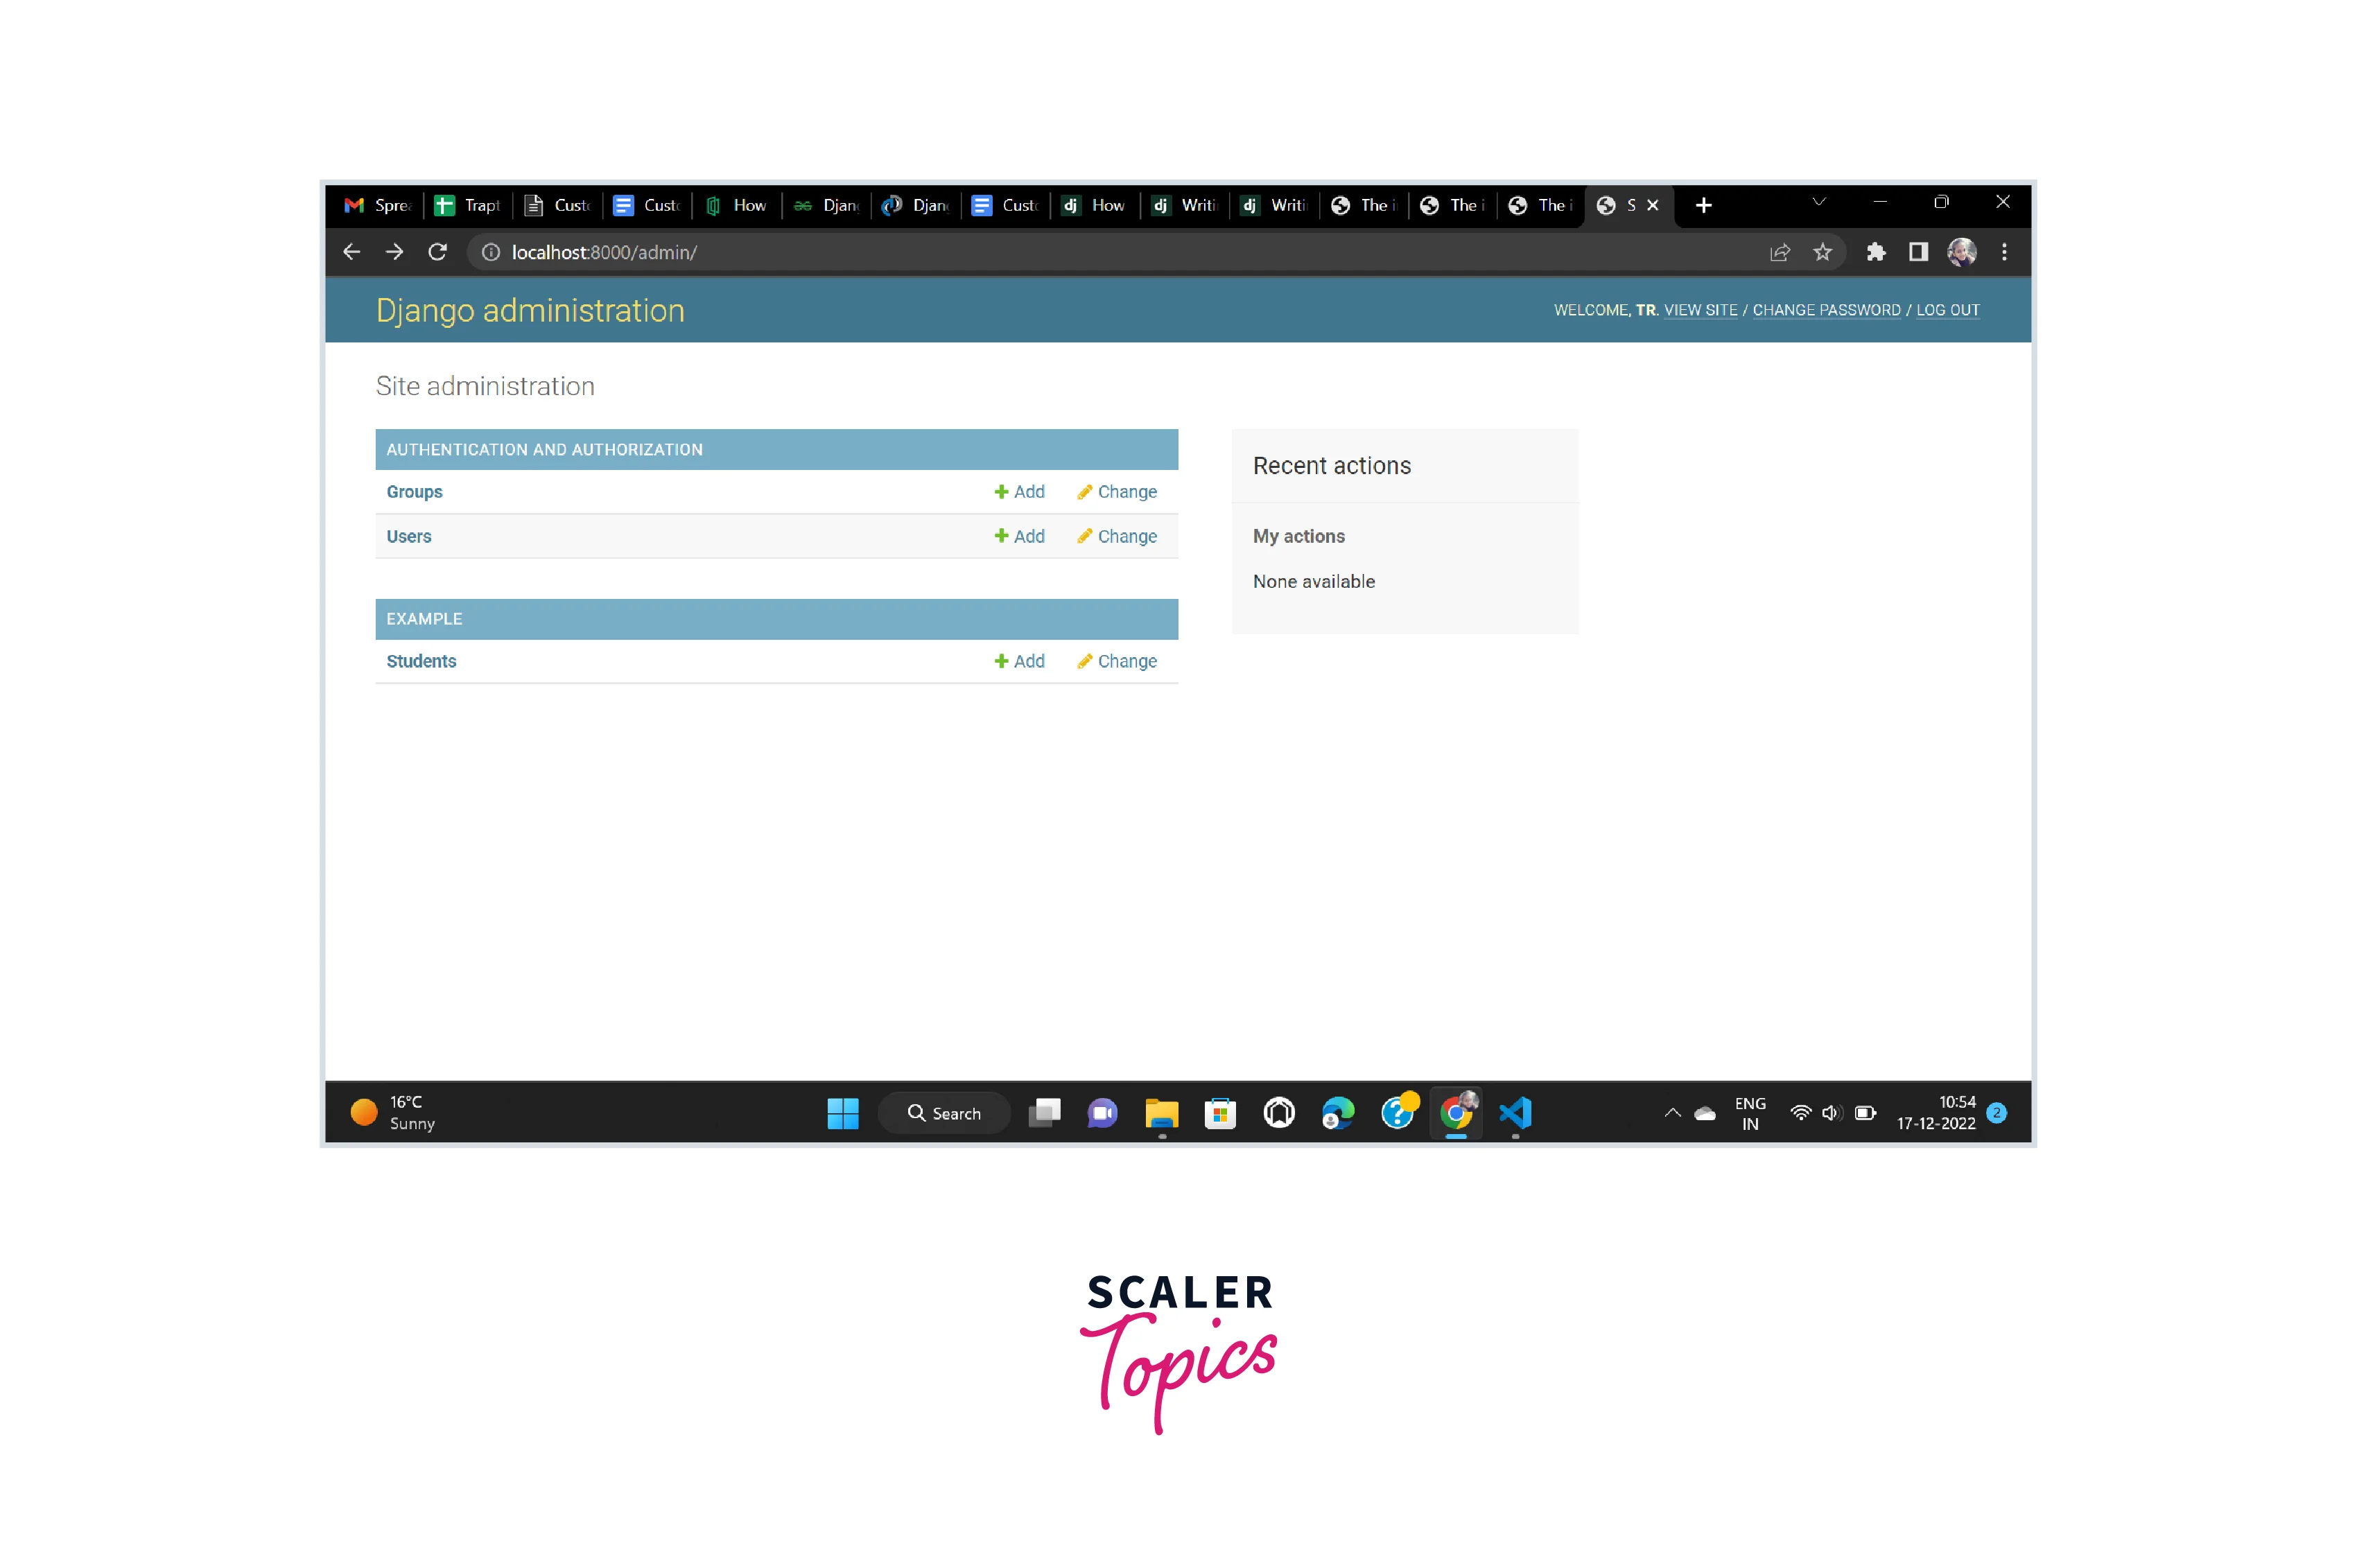
Enter the below-given URL in your browser and log in with your created username and password now we will do customizations and redesigning on the Django Admin
Refer to the below image for the admin panel display
Changing the Order of Fields
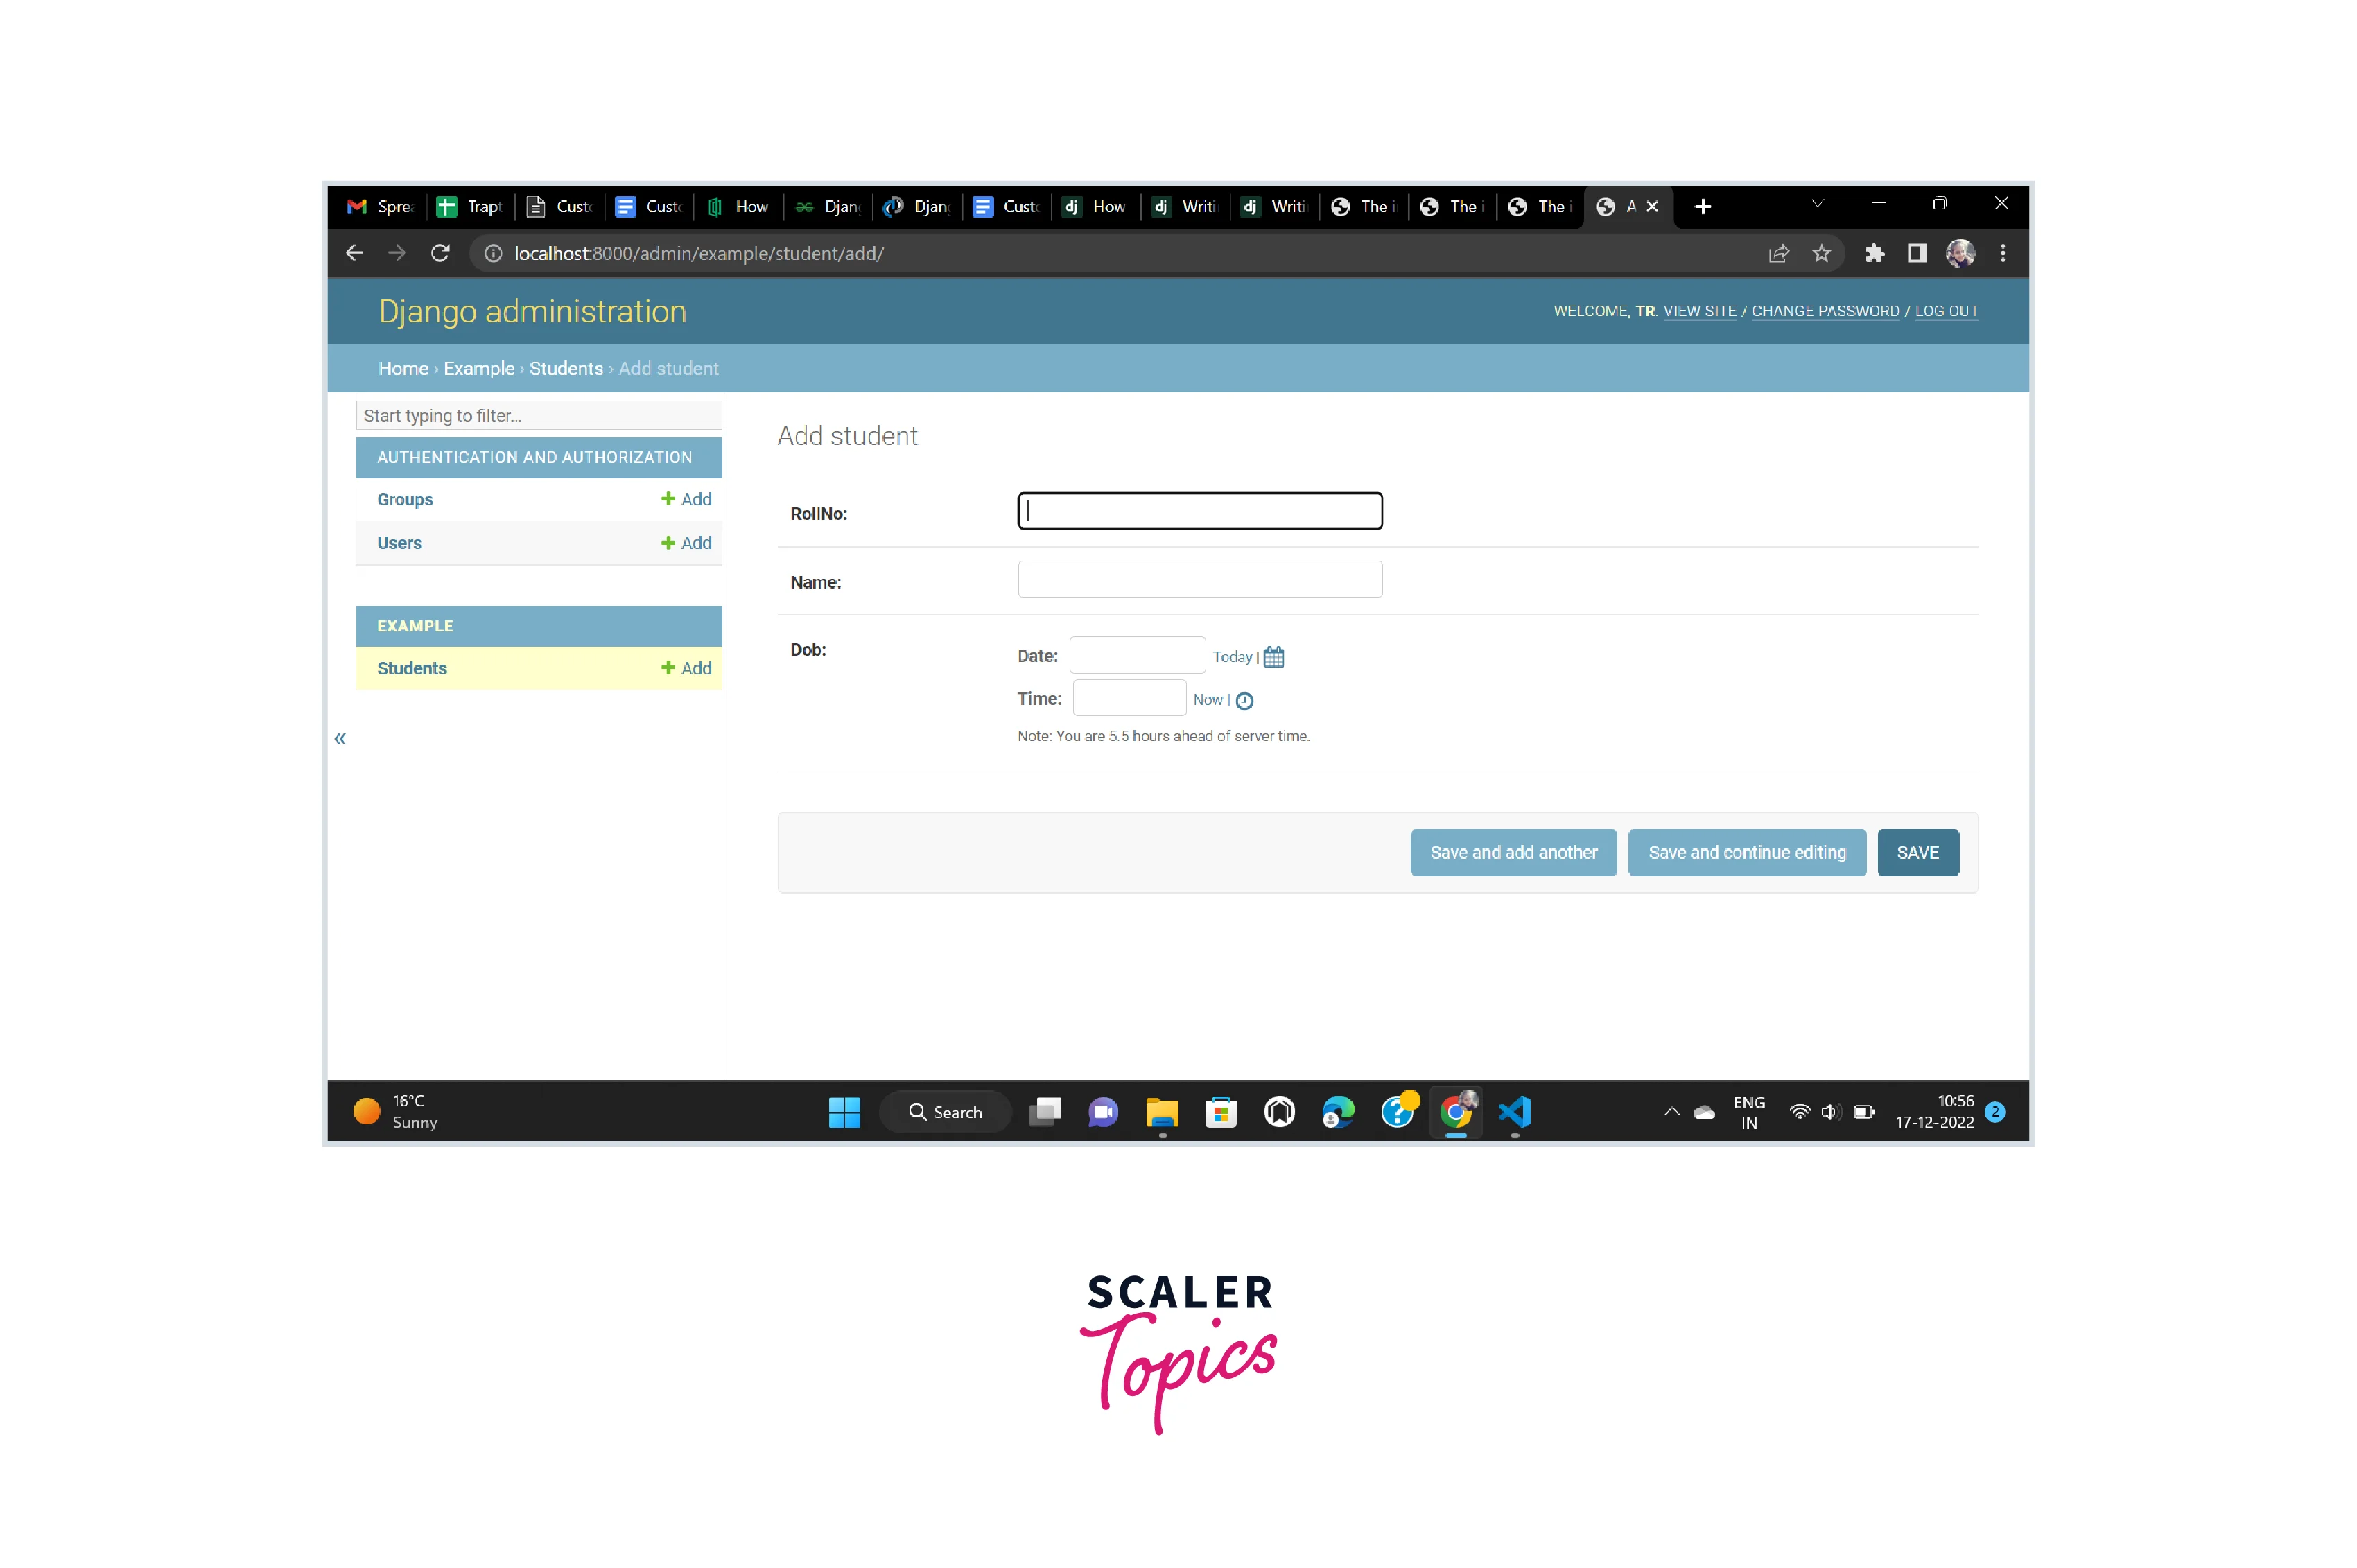
By default, the fields are displayed by the admit in a detailed view and the order of fields is also the same as the order of fields defined in the model. But a few editing in the admin.py file can change the order without going to models.py file. In our above example, we have the order of fields as rollNo, name, dob.
Refer to the below image for the current order of the fields
Now we can use the below code to change the order of the fields. Type the below code in the admin.py file
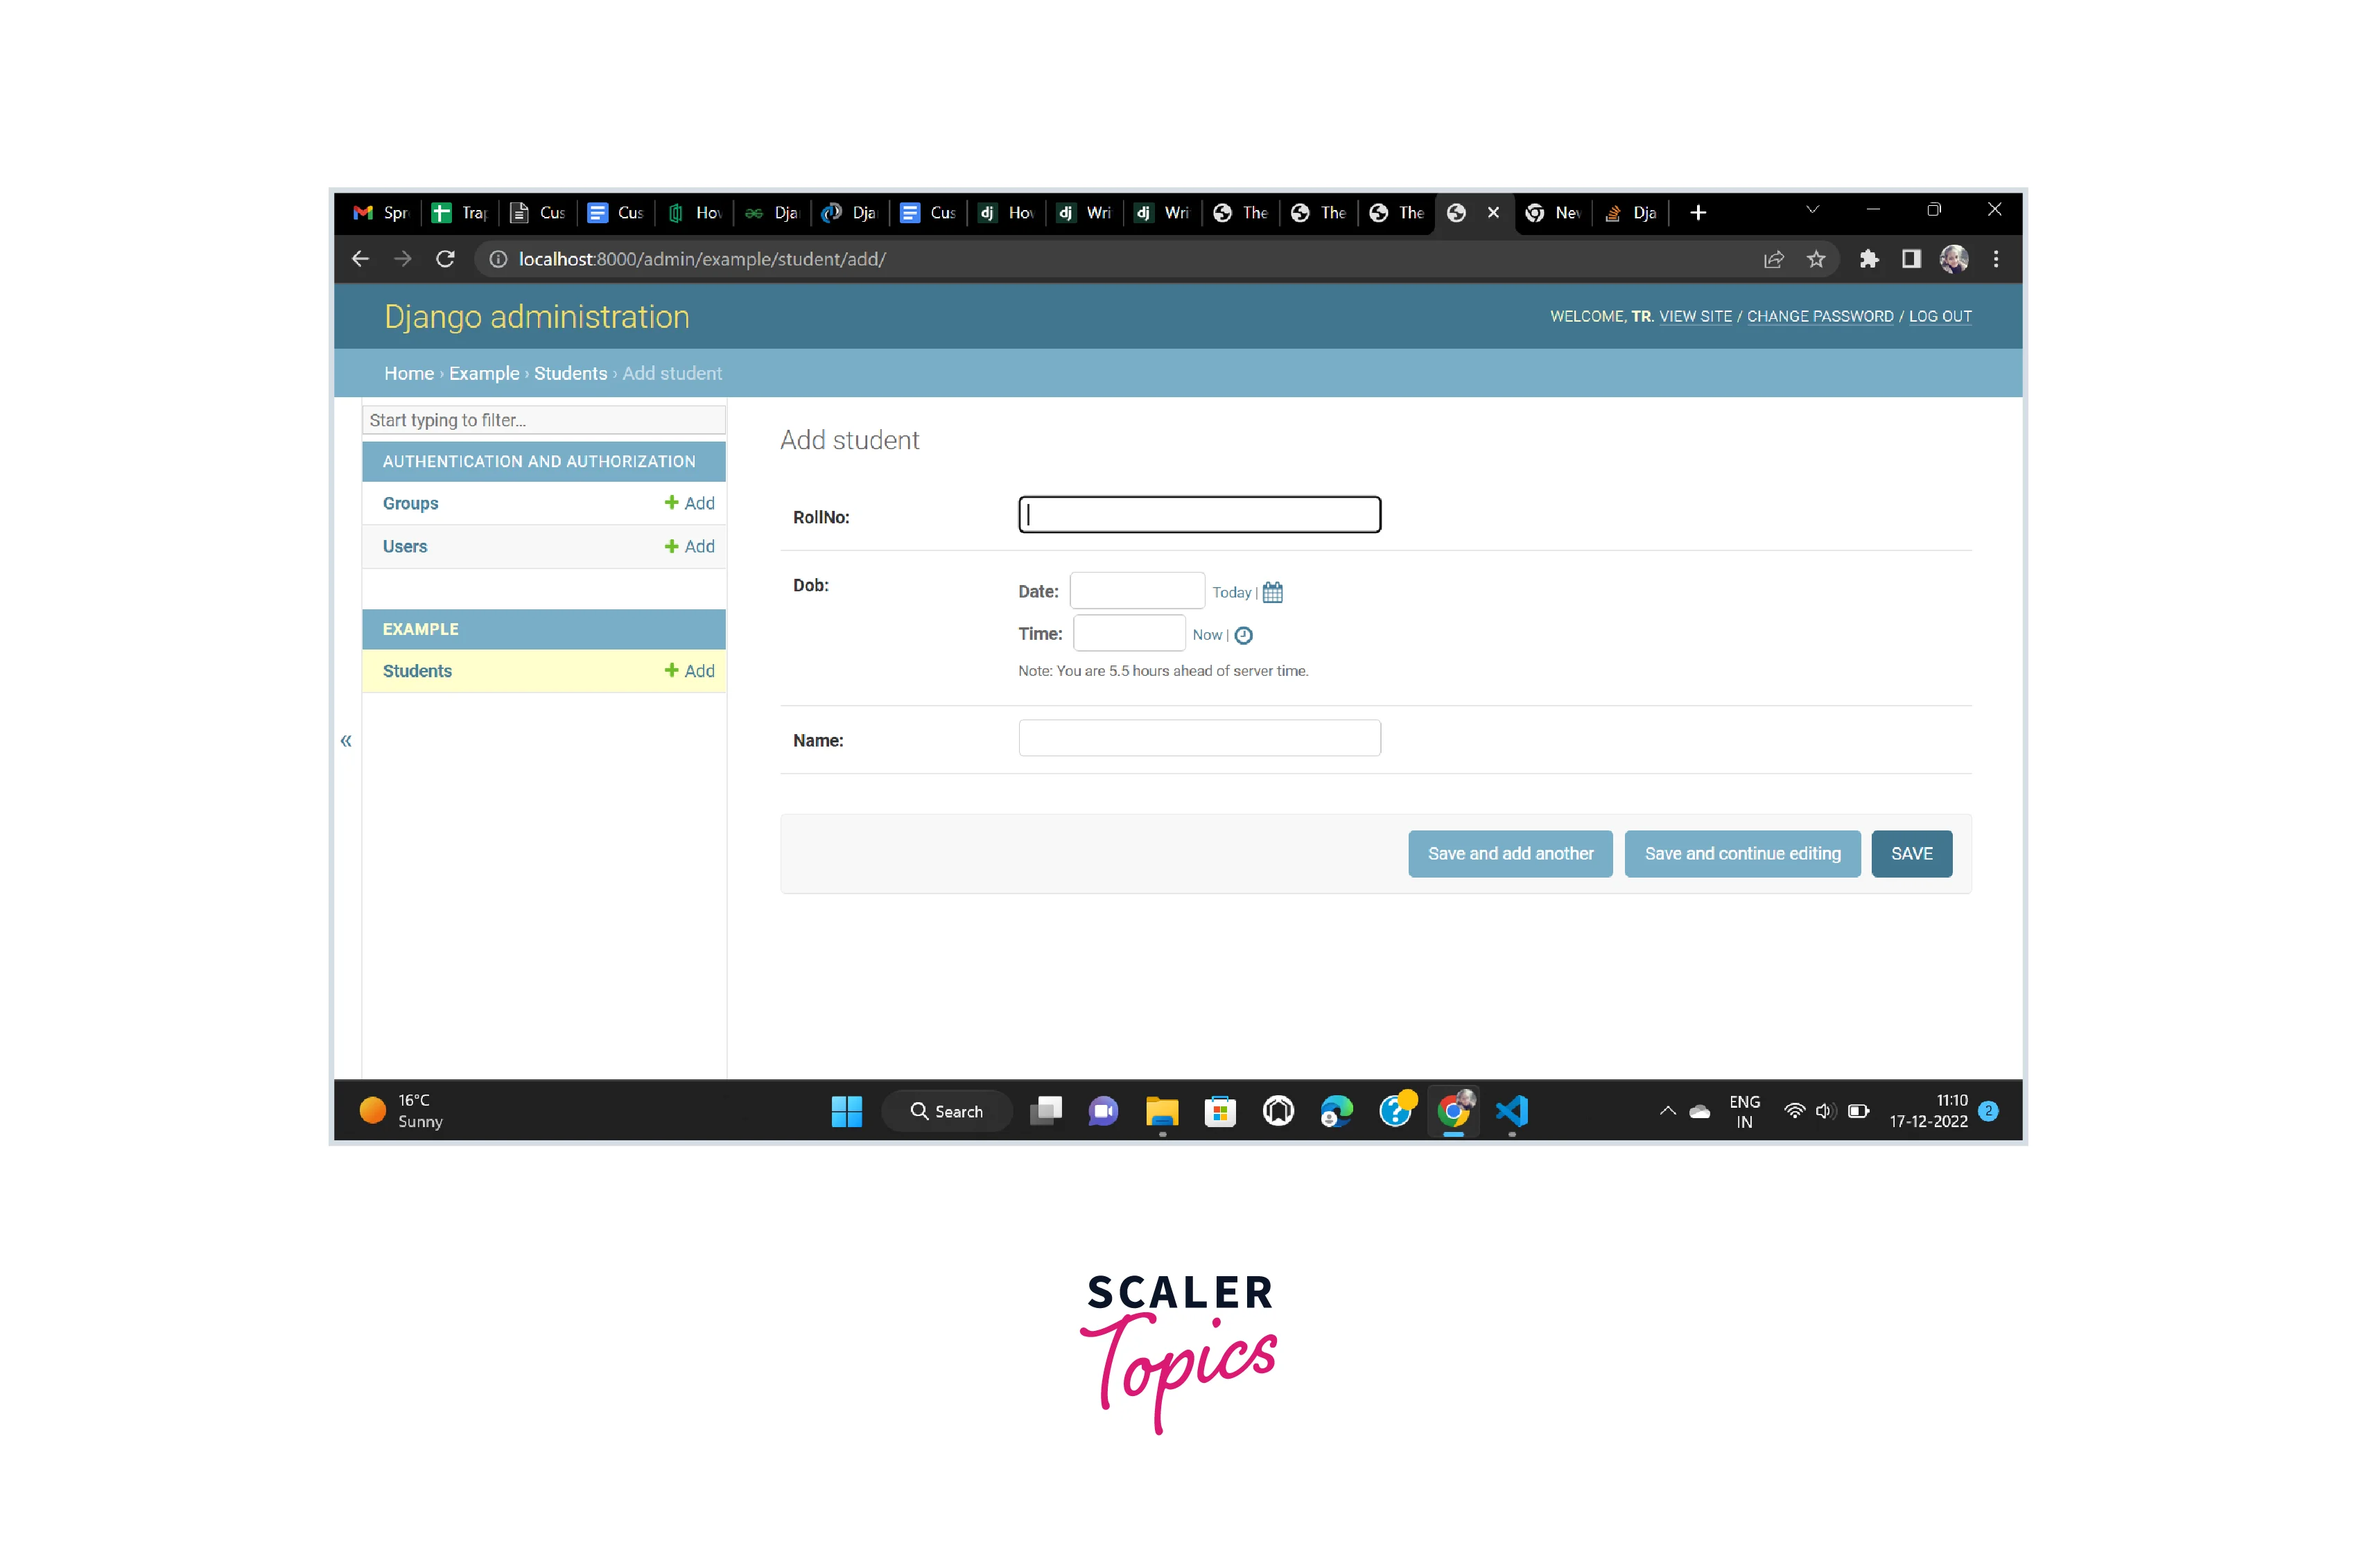
Now the order of the fields of the Student model has been changed
Refer to the below image for the changed order of the fields
Changing the Title of Django Admin
From a front-end perspective, there are many parts whose manipulation can be done such as the title displayed on the top-left of the web page can be changed. Manipulation of Django administration can be done as you like. For changing the title of the Django admin write the below line into the admin.py of the example
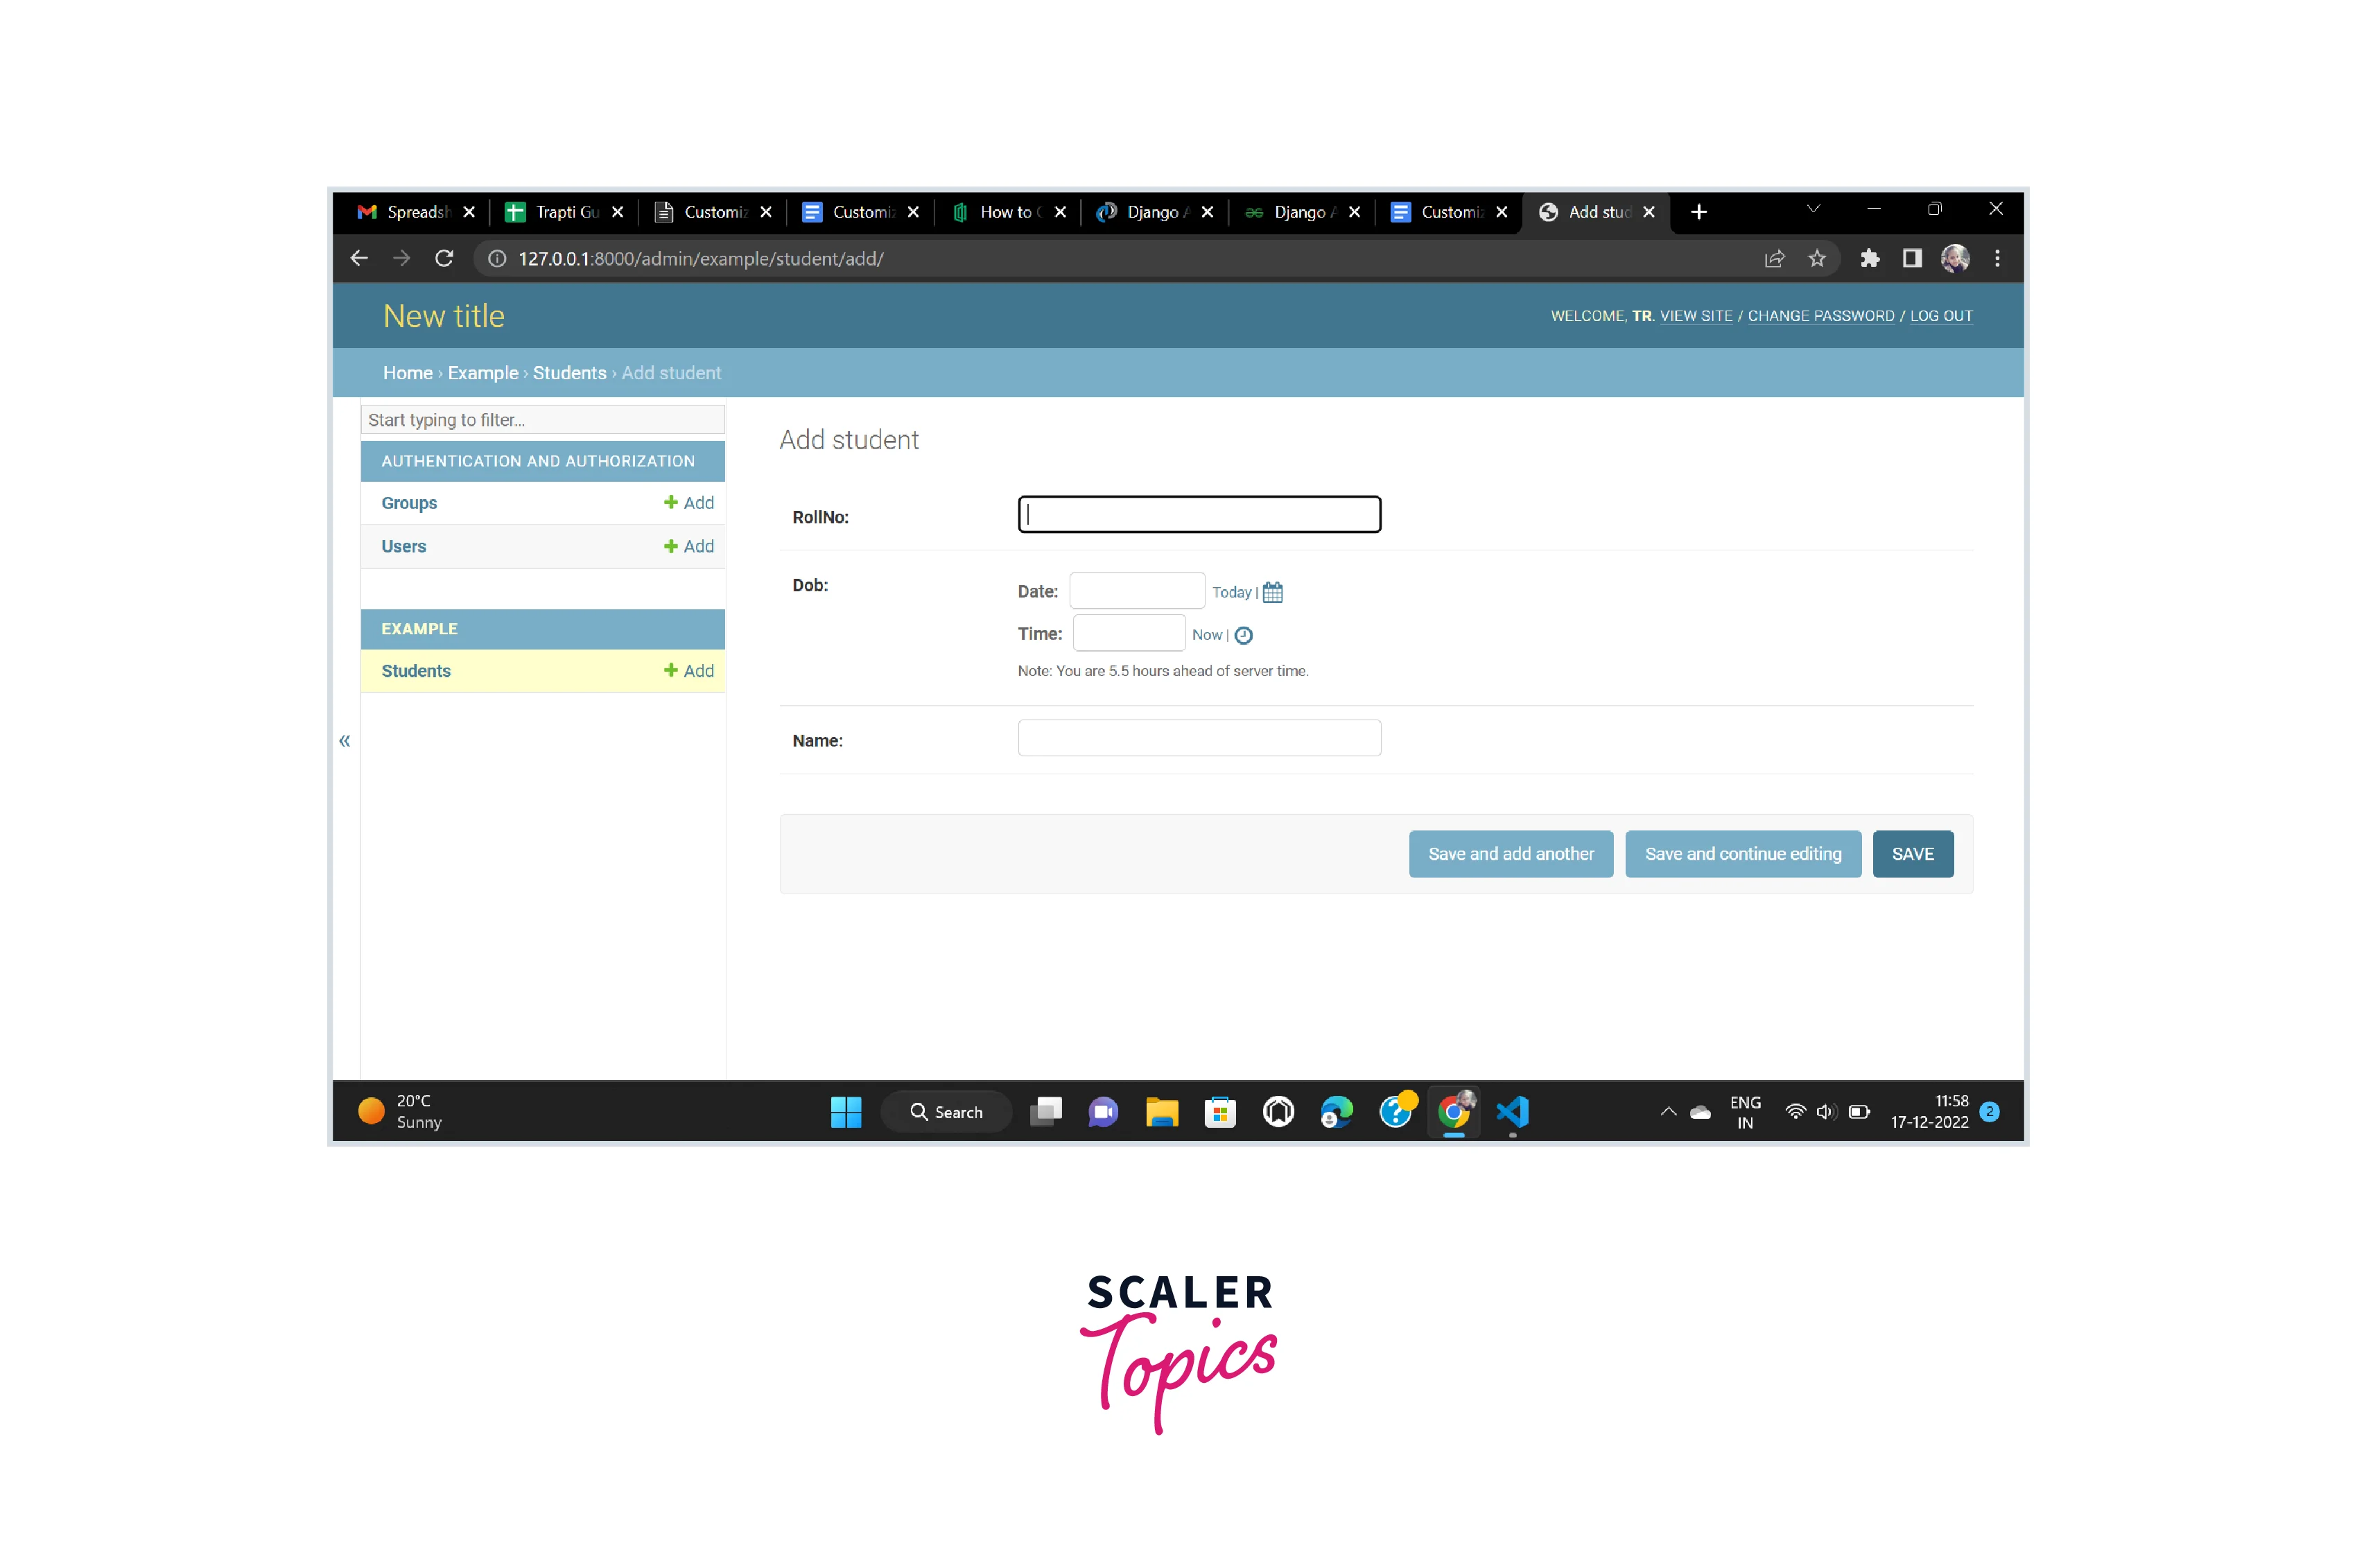
Now the title of the page is changed to the New title
Refer to the below image for the admin panel with the changed title
ModelAdmin Class
User-defined model representation in the admin panel is referred to as the ModelAdmin class. Various actions can be overridden by it. The ModelAdmin class comes up with a wide range of options. AdminModel is required to be registered with the model which we want to manipulate.
For example: We want to exclude certain fields from displaying on the admin panel, and here we are excluding the dob field of the Student model from displaying on the admin panel. For that simply write the below code in the admin.py file of the example.
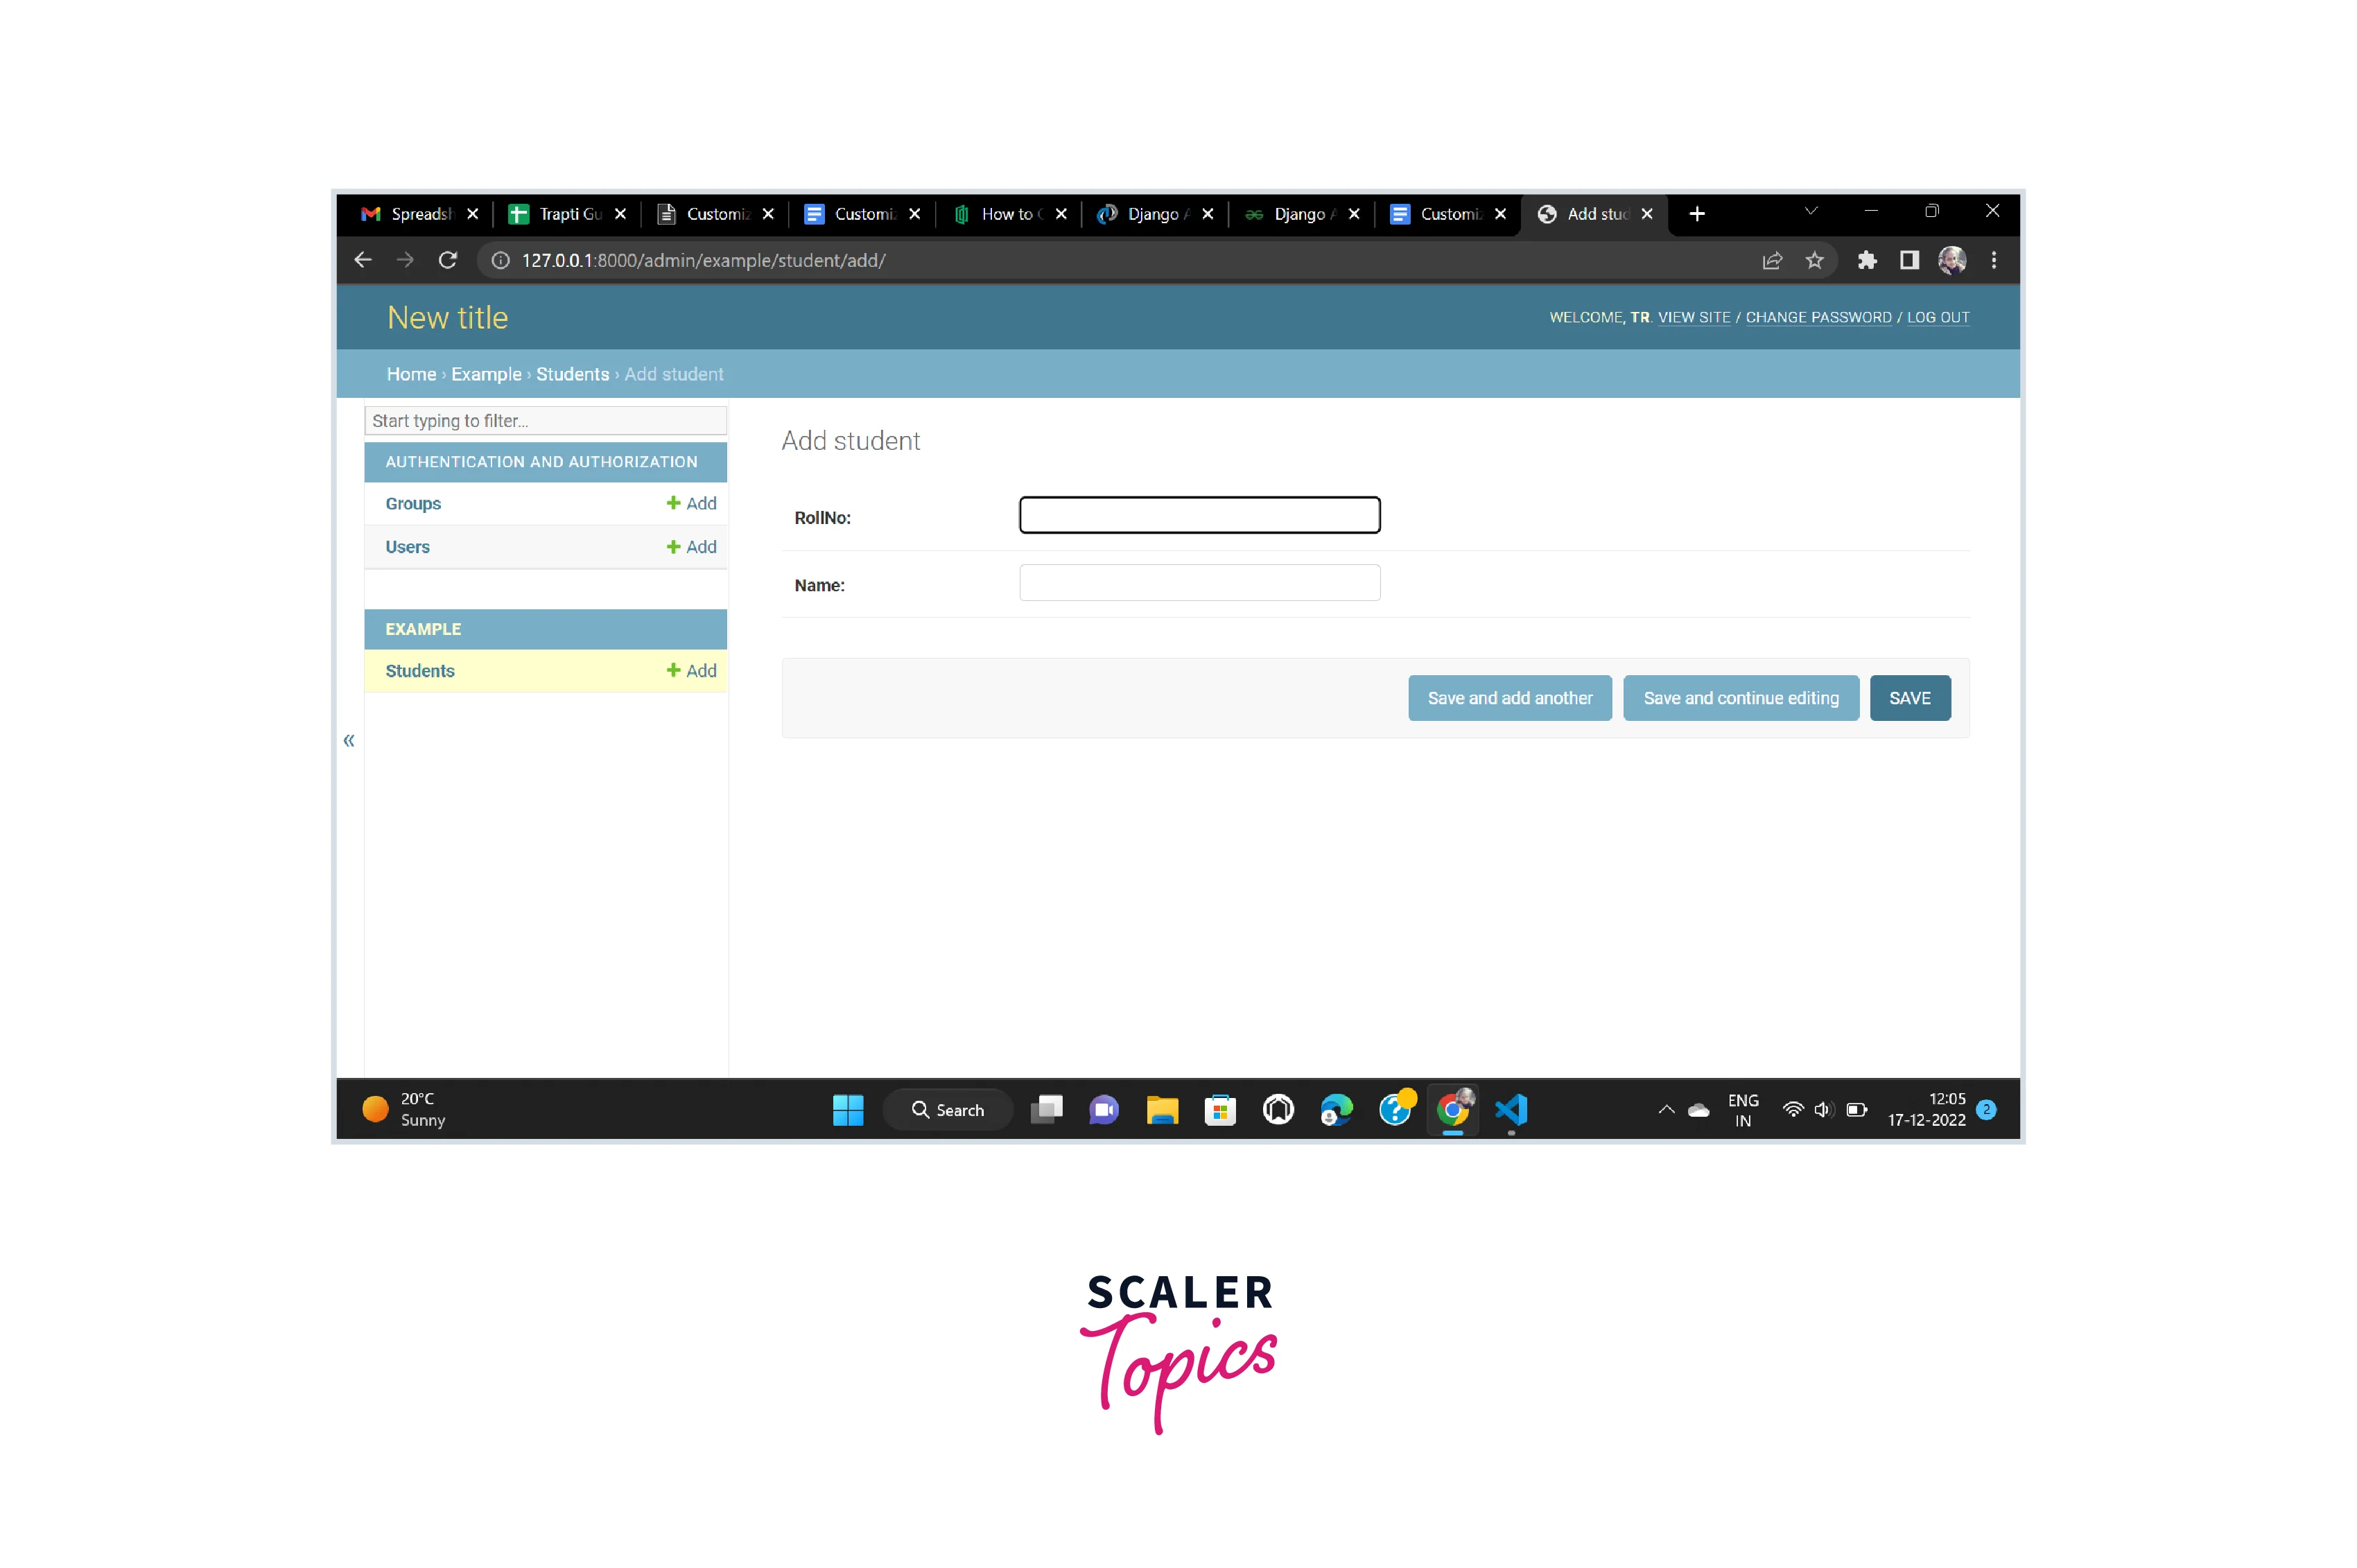
Now the dob field is excluded from displaying
Refer to the below image for the field-excluded model view
Customizing List Display in Django Admin
Add some data to the Student model. Open the model of the Student in the admin panel after adding the data. And now you will see the list of inserted students is displayed but only the name of the Student is displayed in the list as given below.
Refer to the below image for the current list view
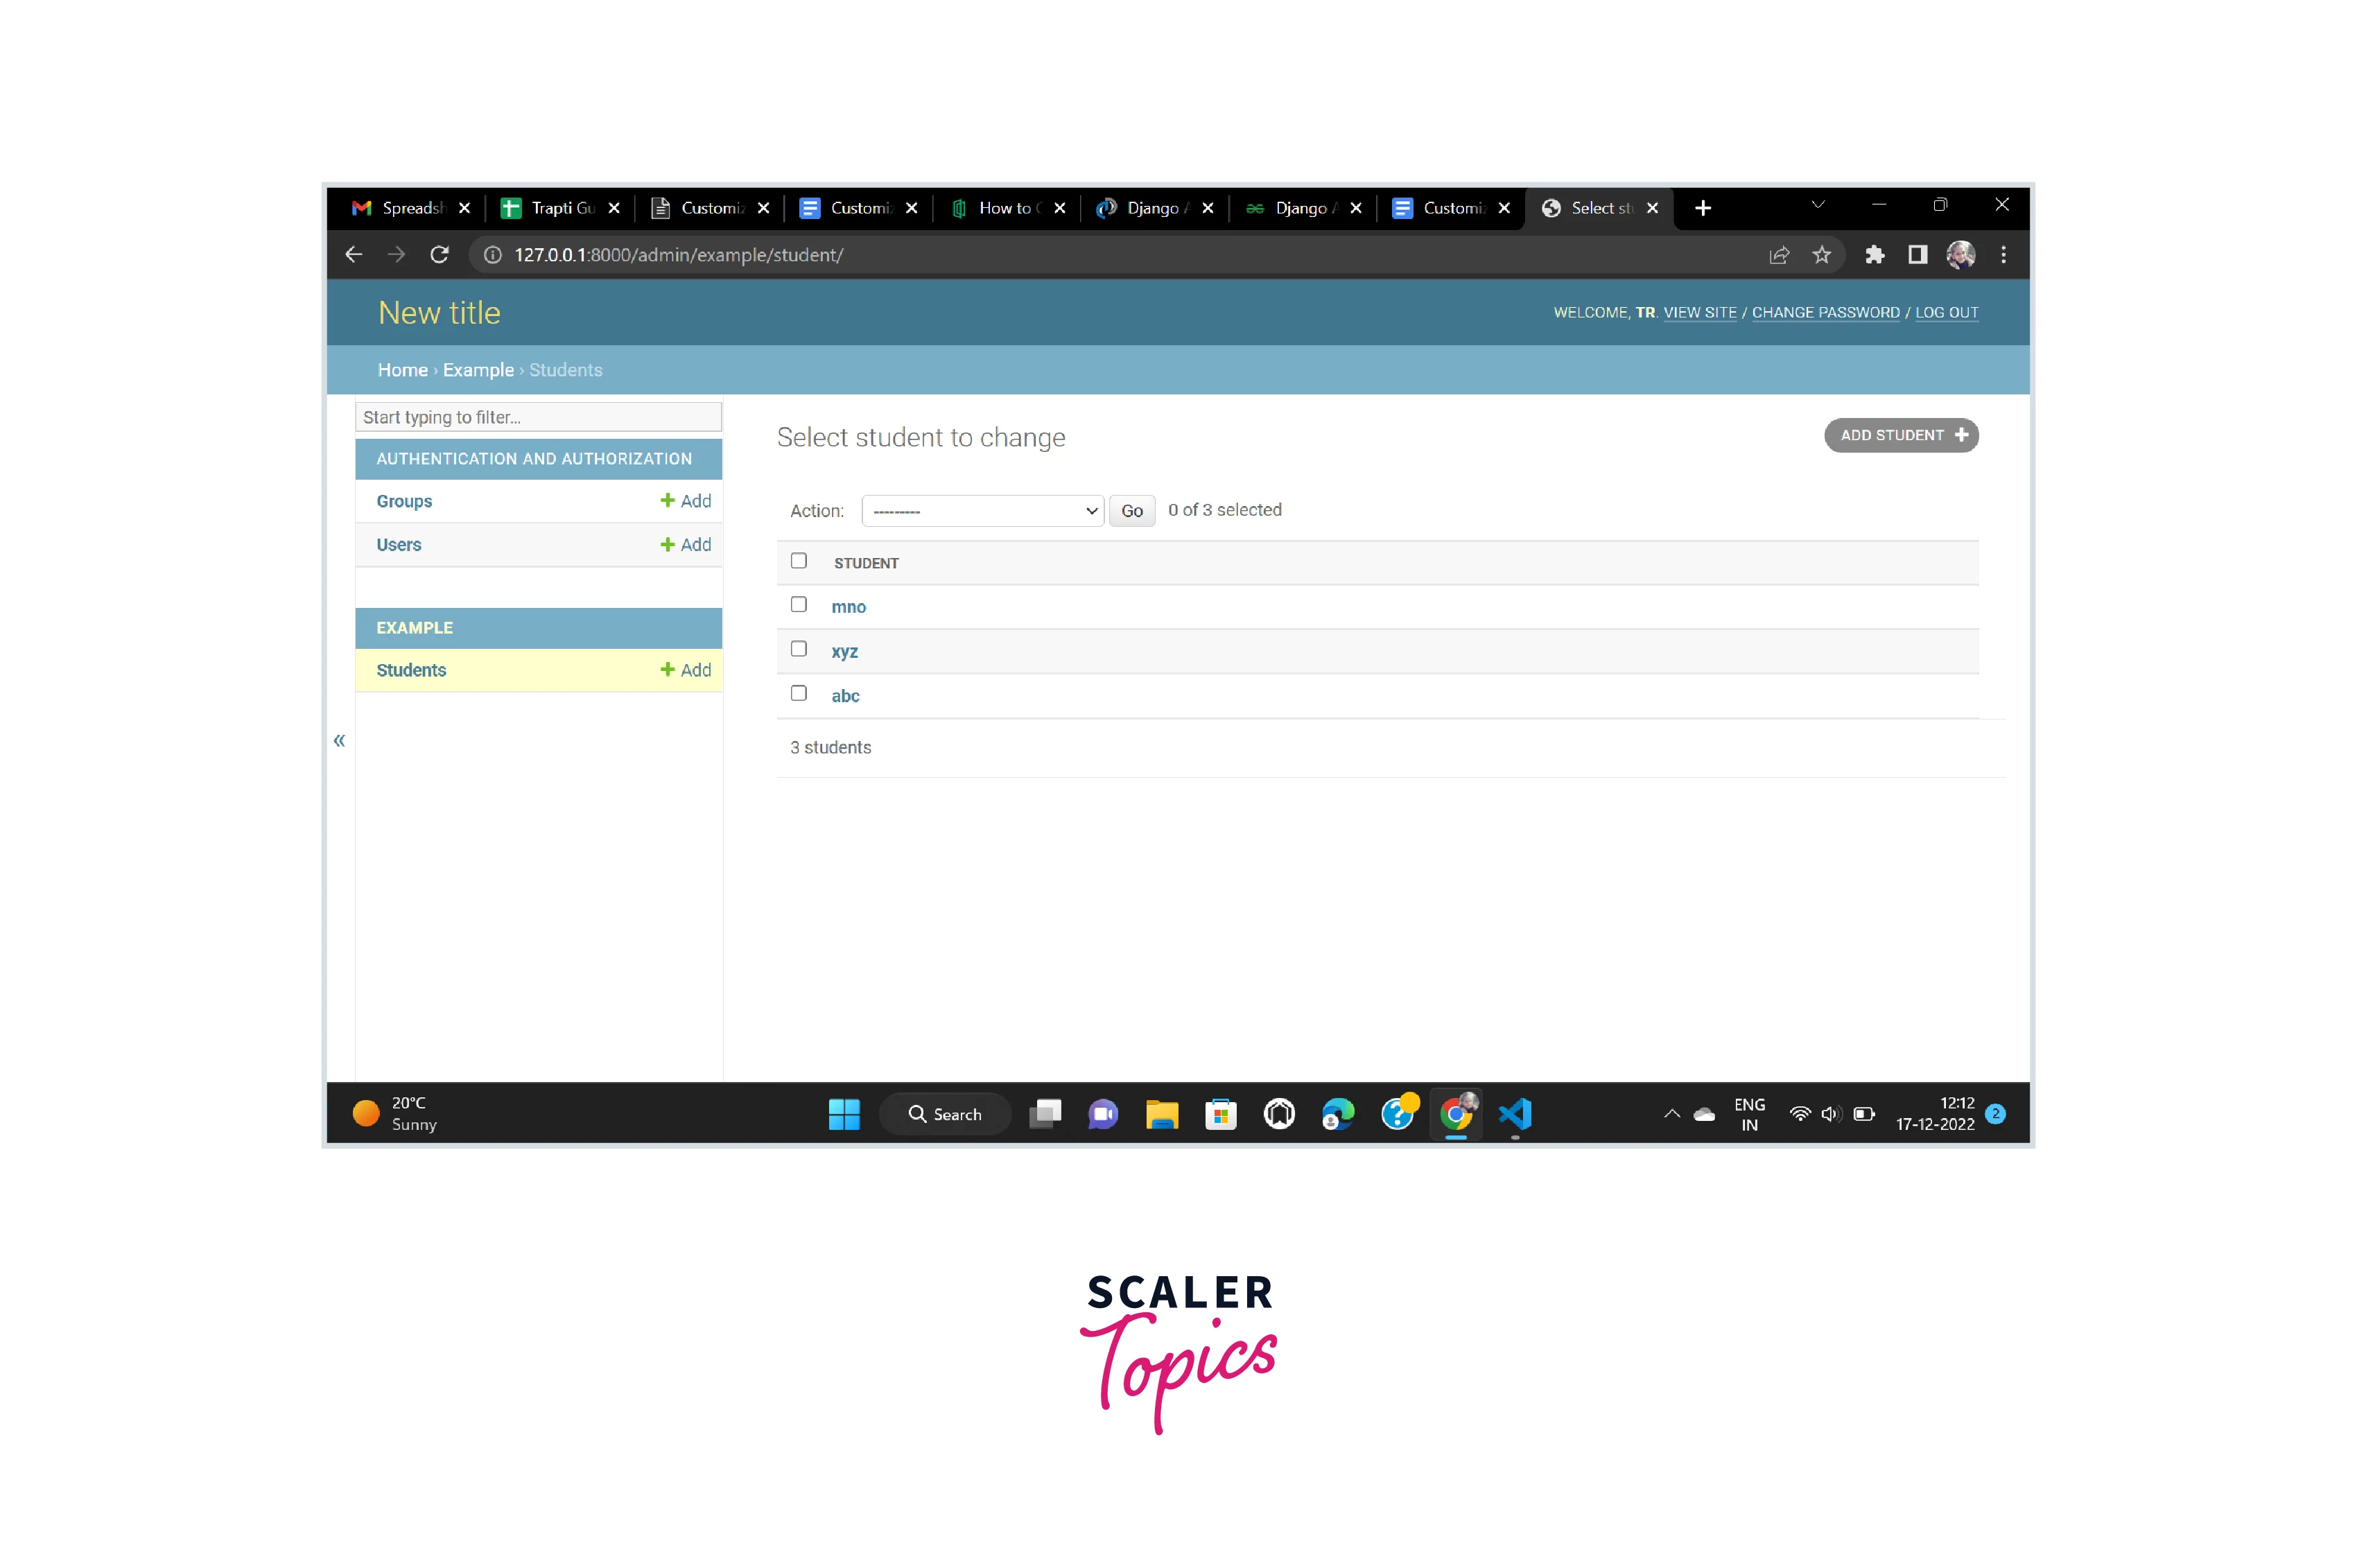 In some situations, there is a requirement of displaying more data in the list view. Just like all the database information can be seen. We can select the want to be displayed in the list view.
For changing the list view and in our example for displaying name and rollNo in the list view write the following code in the admin.py file.
Now the display of the list view of the data stored in the Student model is changed and now it will display name and rollNo both.
Refer to the below image for the changed list view
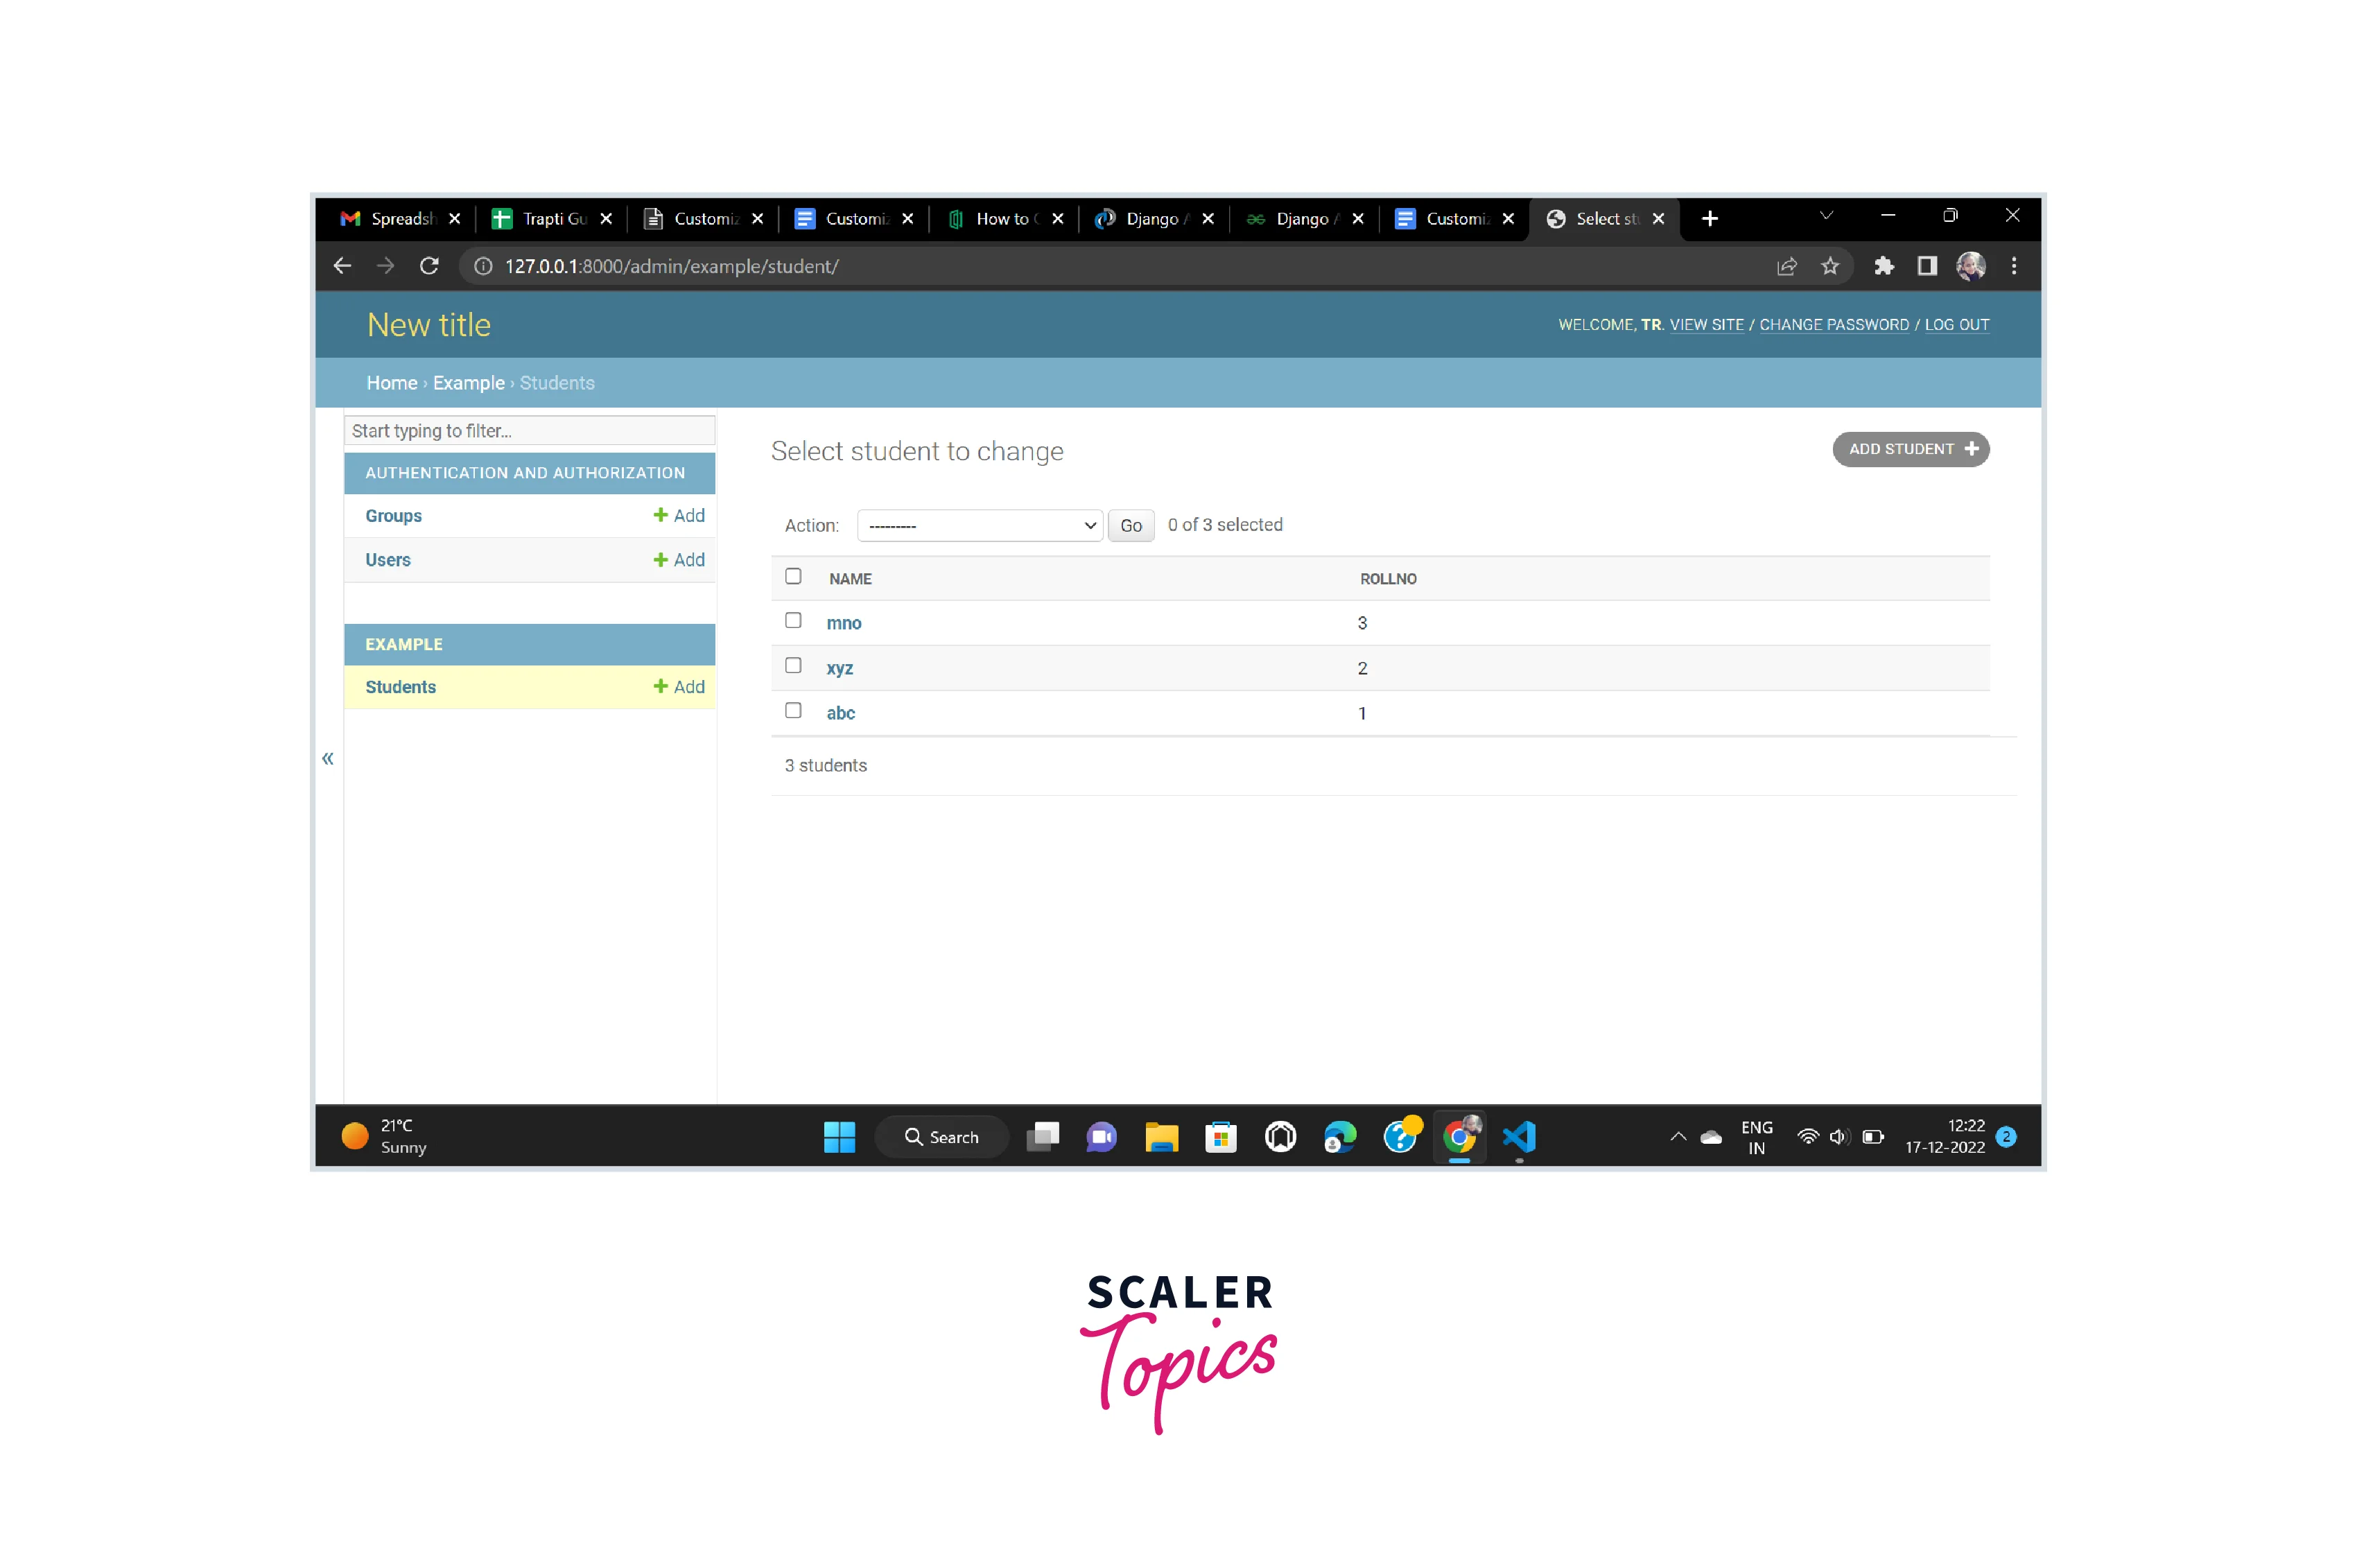
Adding Search and Filters
Getting the particular entry data becomes tedious if we go and look at every query when the number of entries in the model is increased to hundreds or thousands. For easy accessibility of the entries search bar or filter feature is required. Search A search bar can be added in the admin panel for searching the data in the model. We need to provide the list of fields that you want to be used for searching. In our Student model, we are using the rollNo field for searching the data. So write the below code to add a search bar.
Now the search bar is displayed in the Student model on the admin panel
Refer to the below image for the admin panel with the search bar
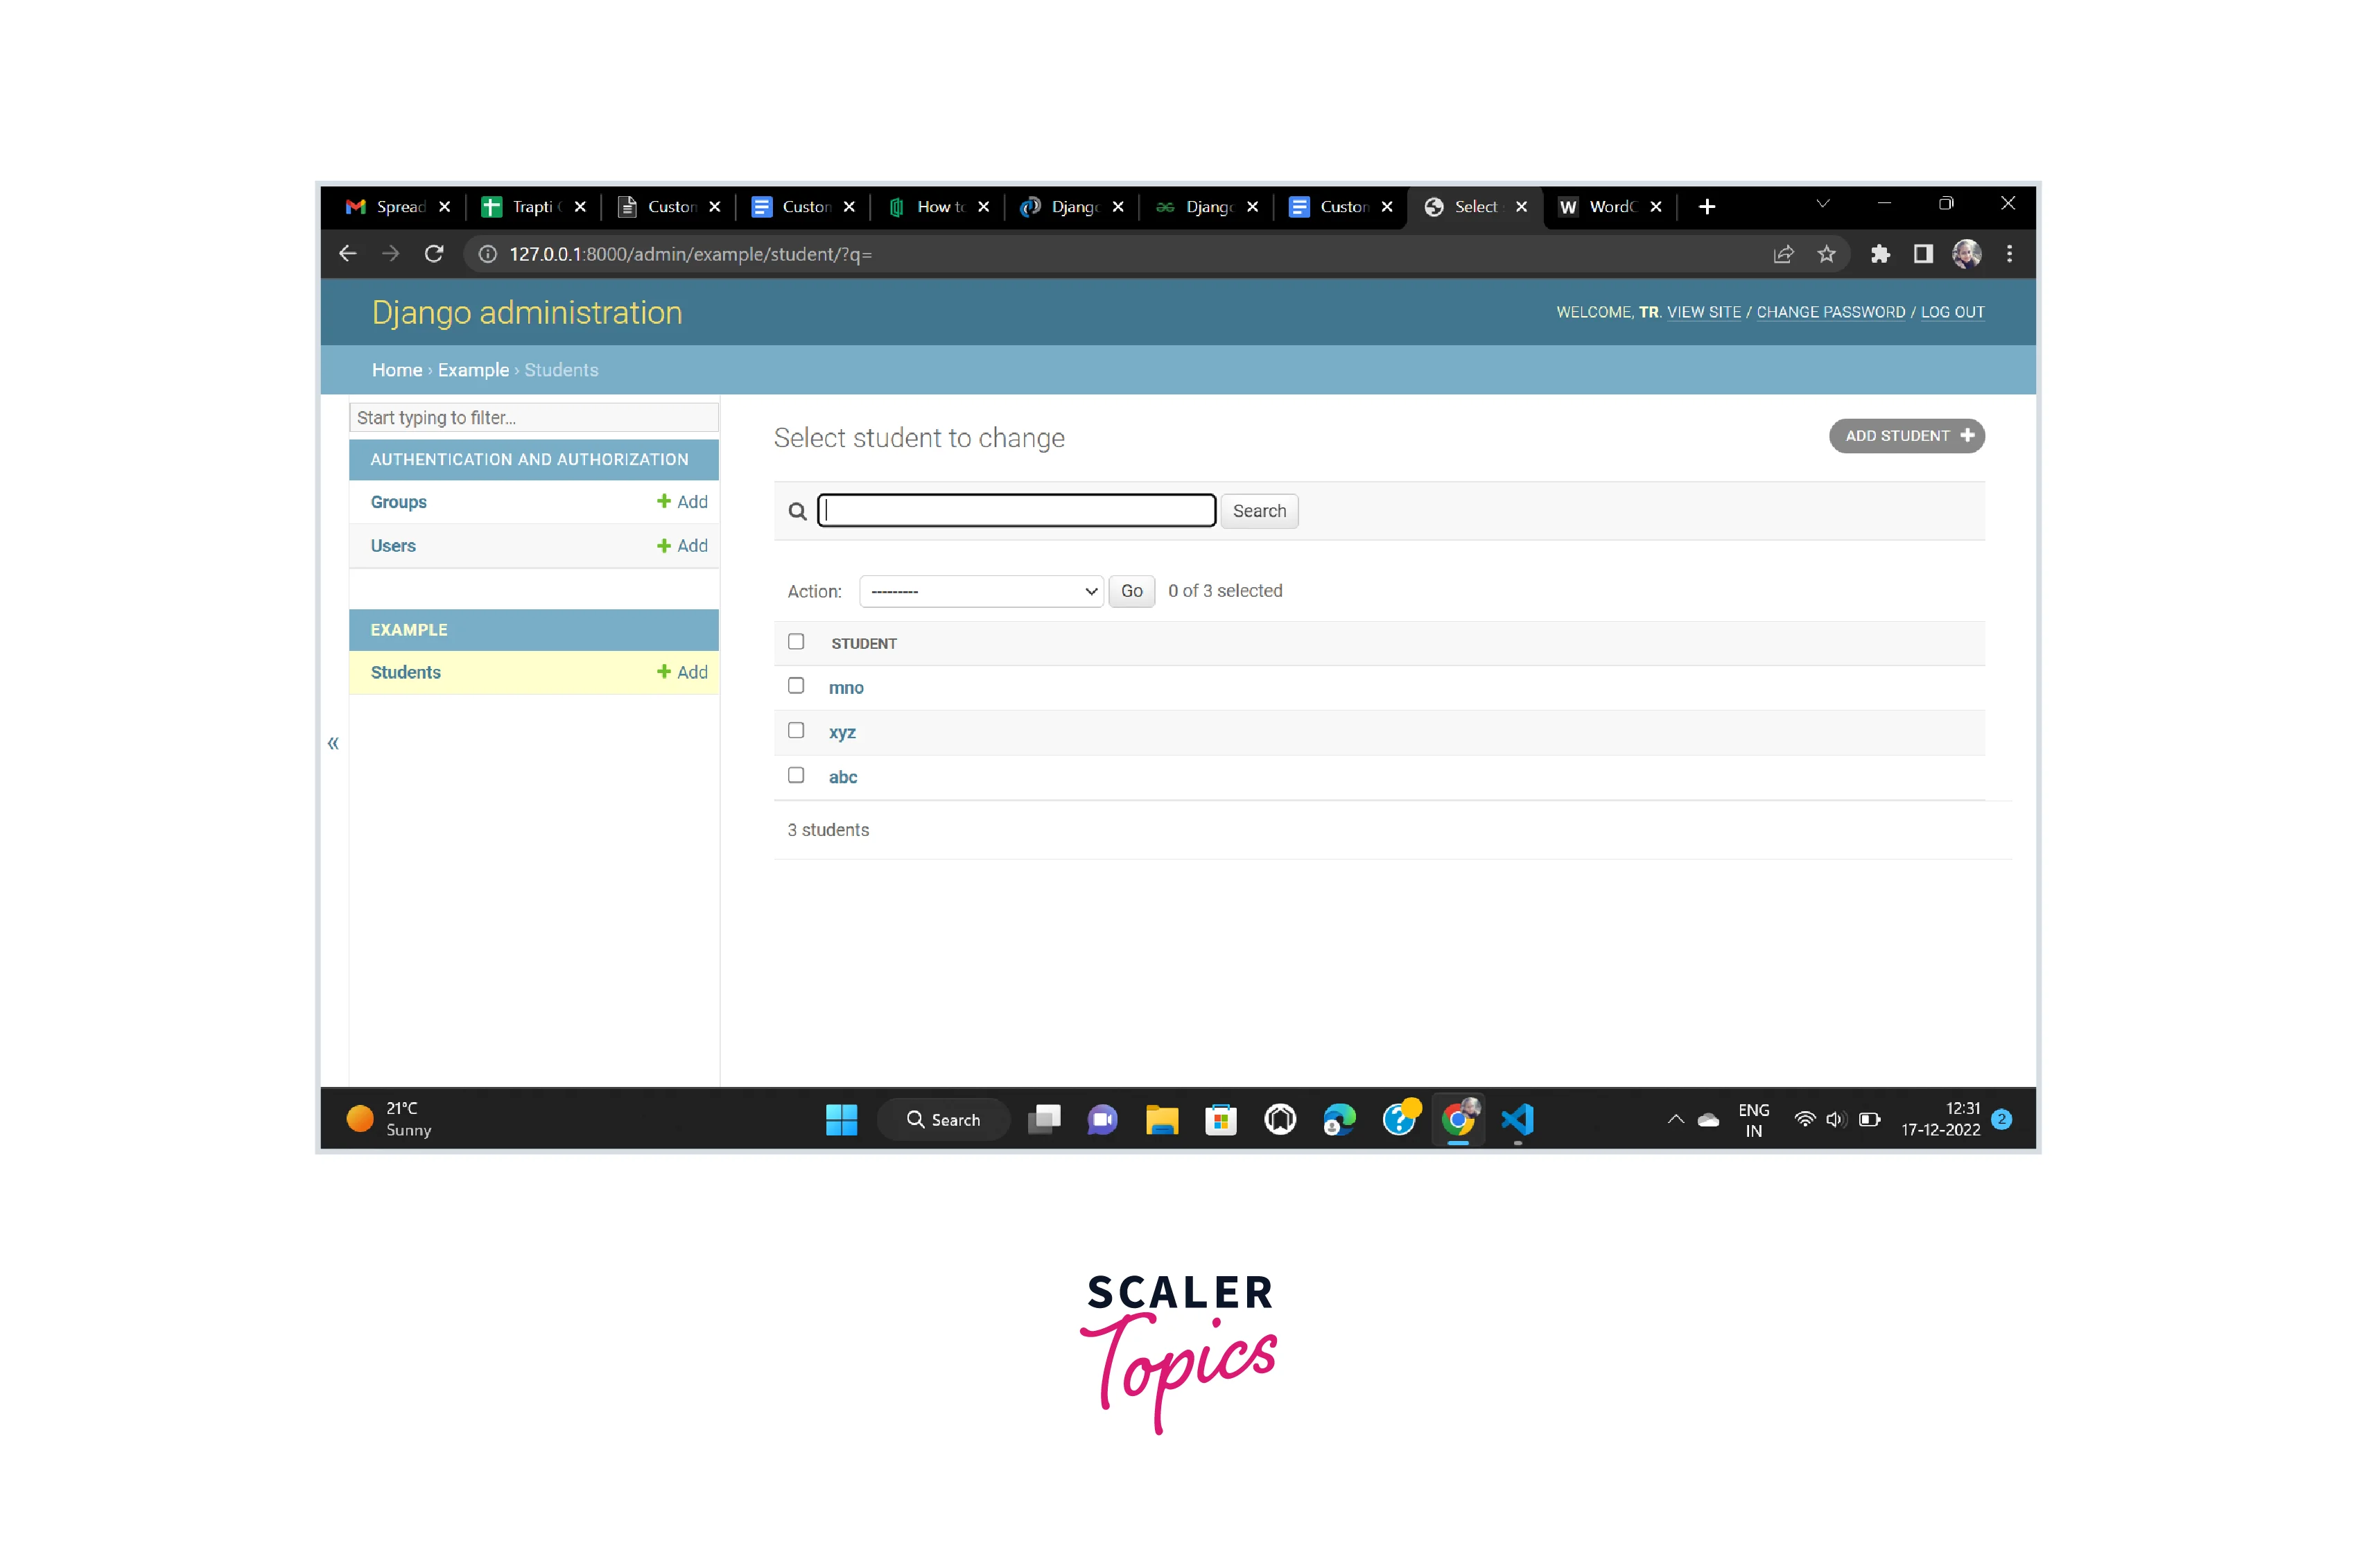
And we can search the rollNo of the Student to access particular student data.
Refer to the below image for the admin panel with searching using a search bar
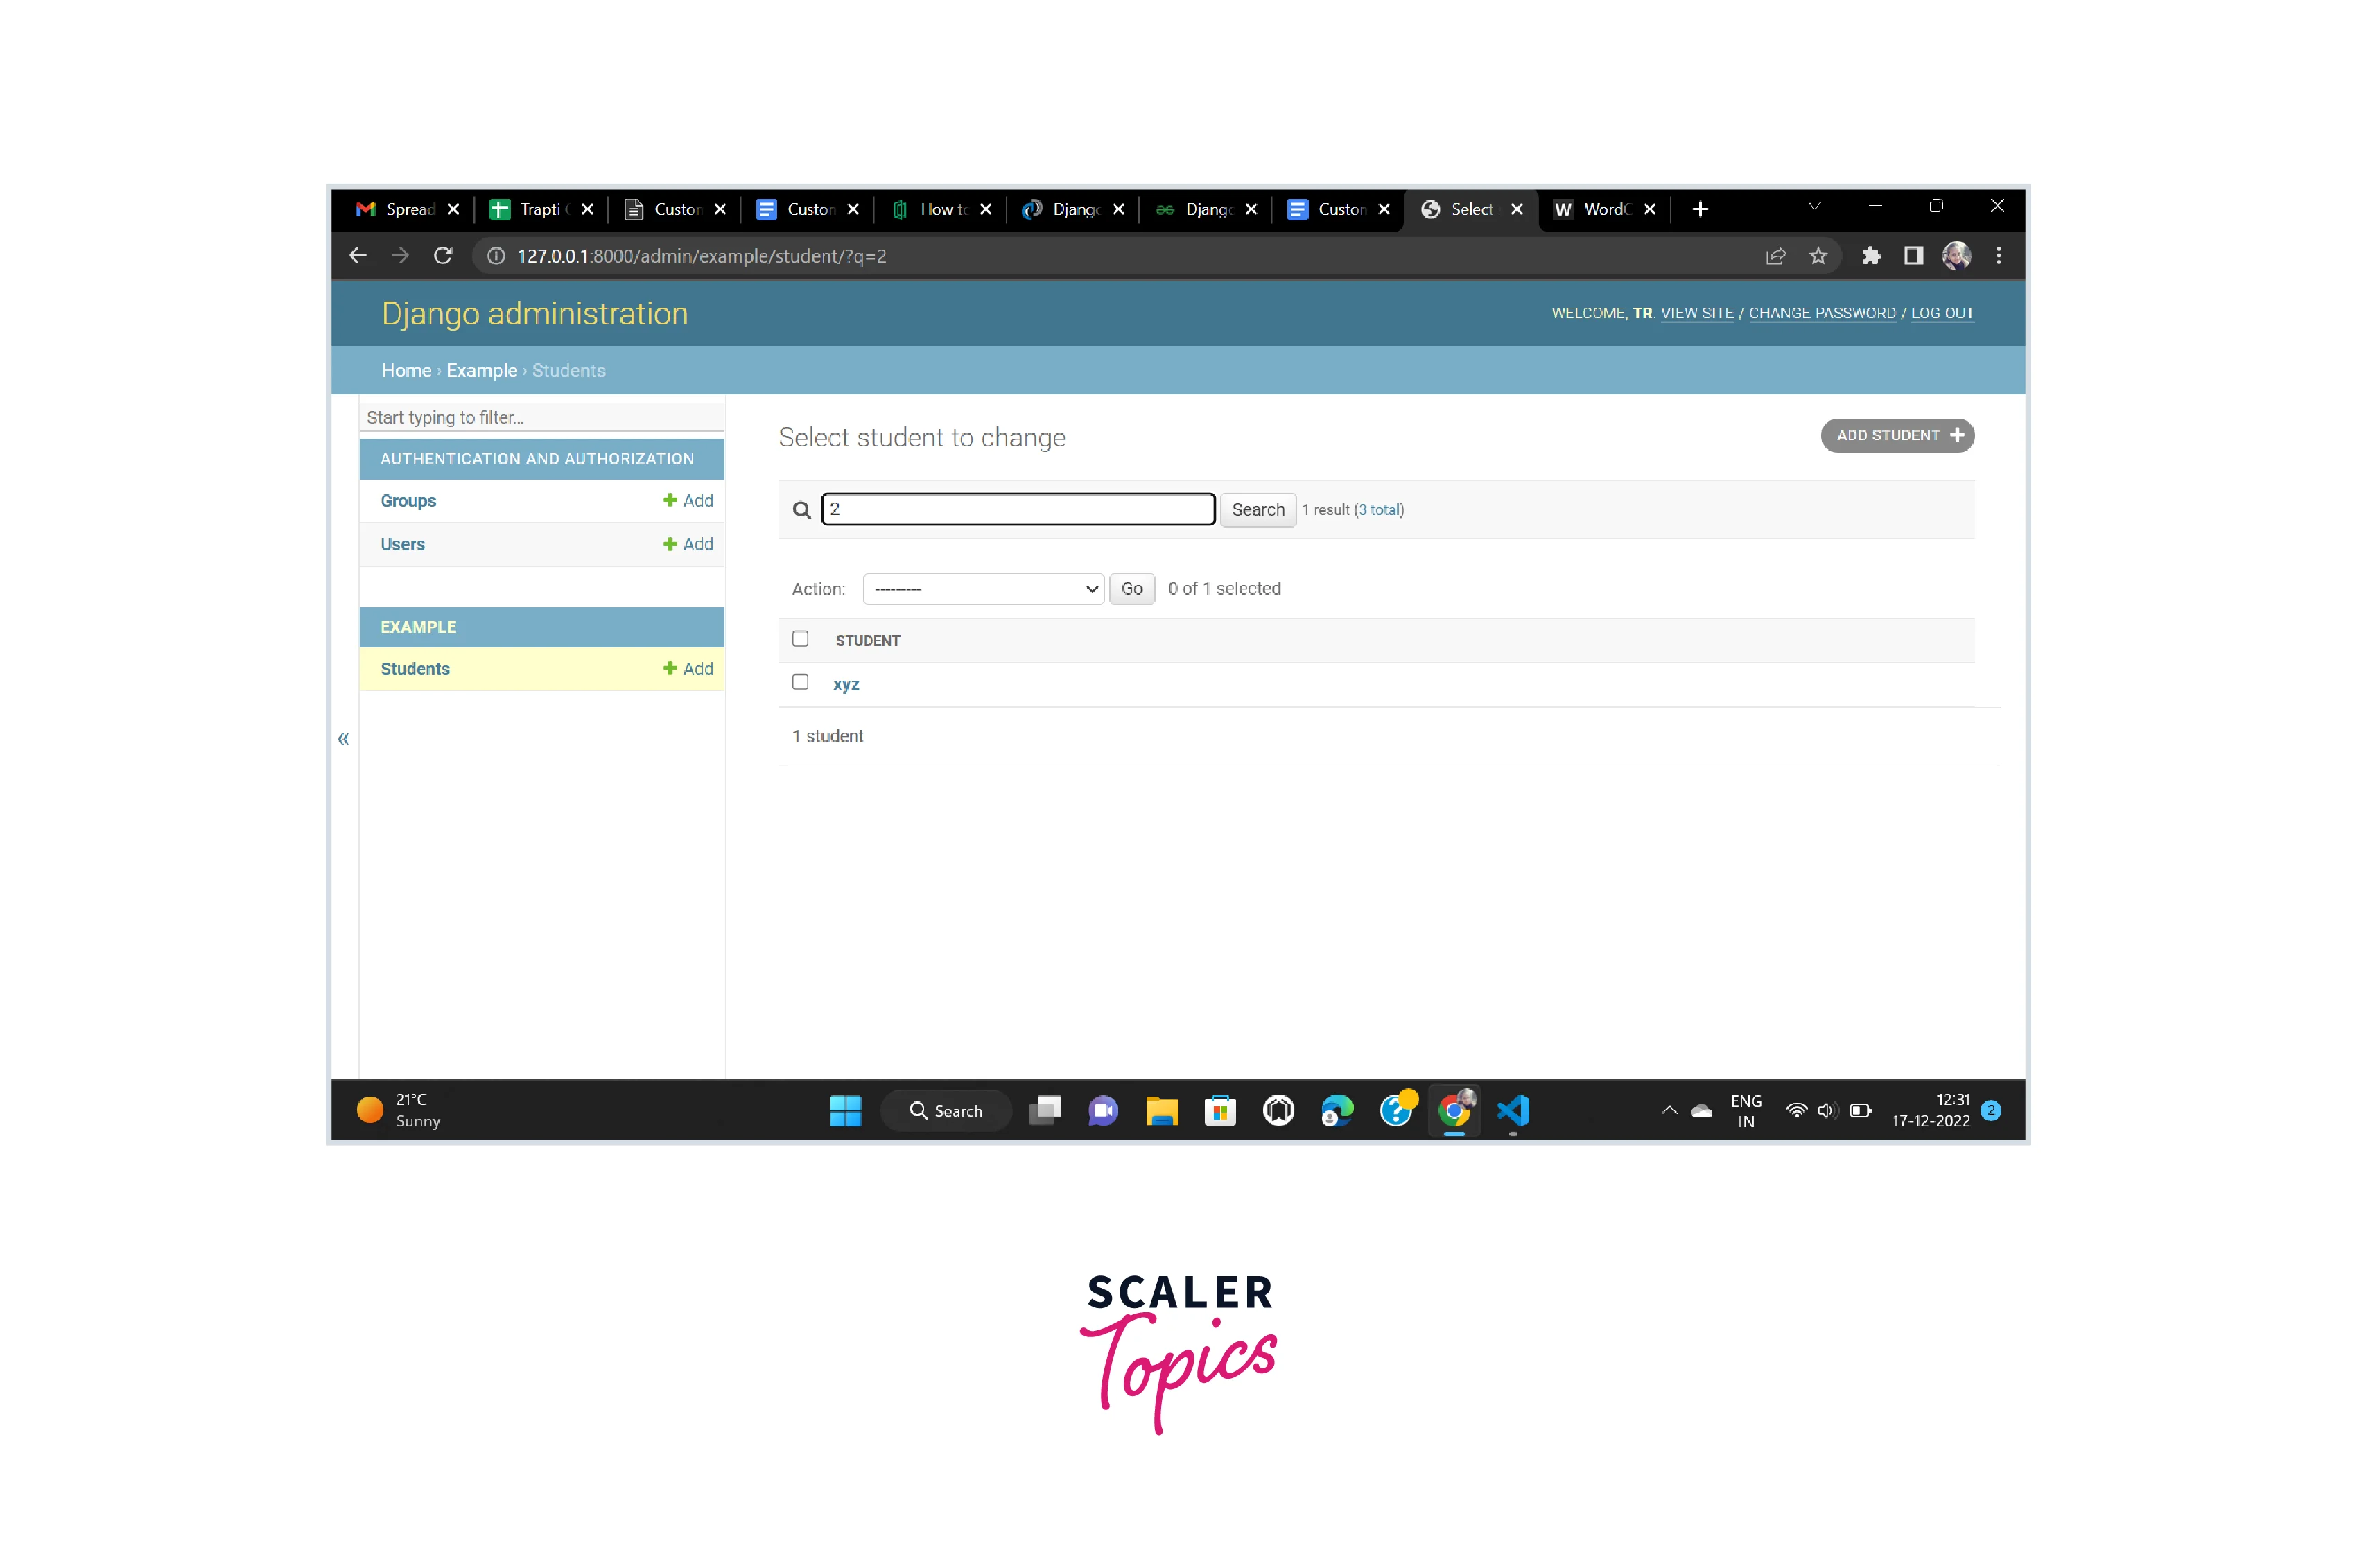 Filter
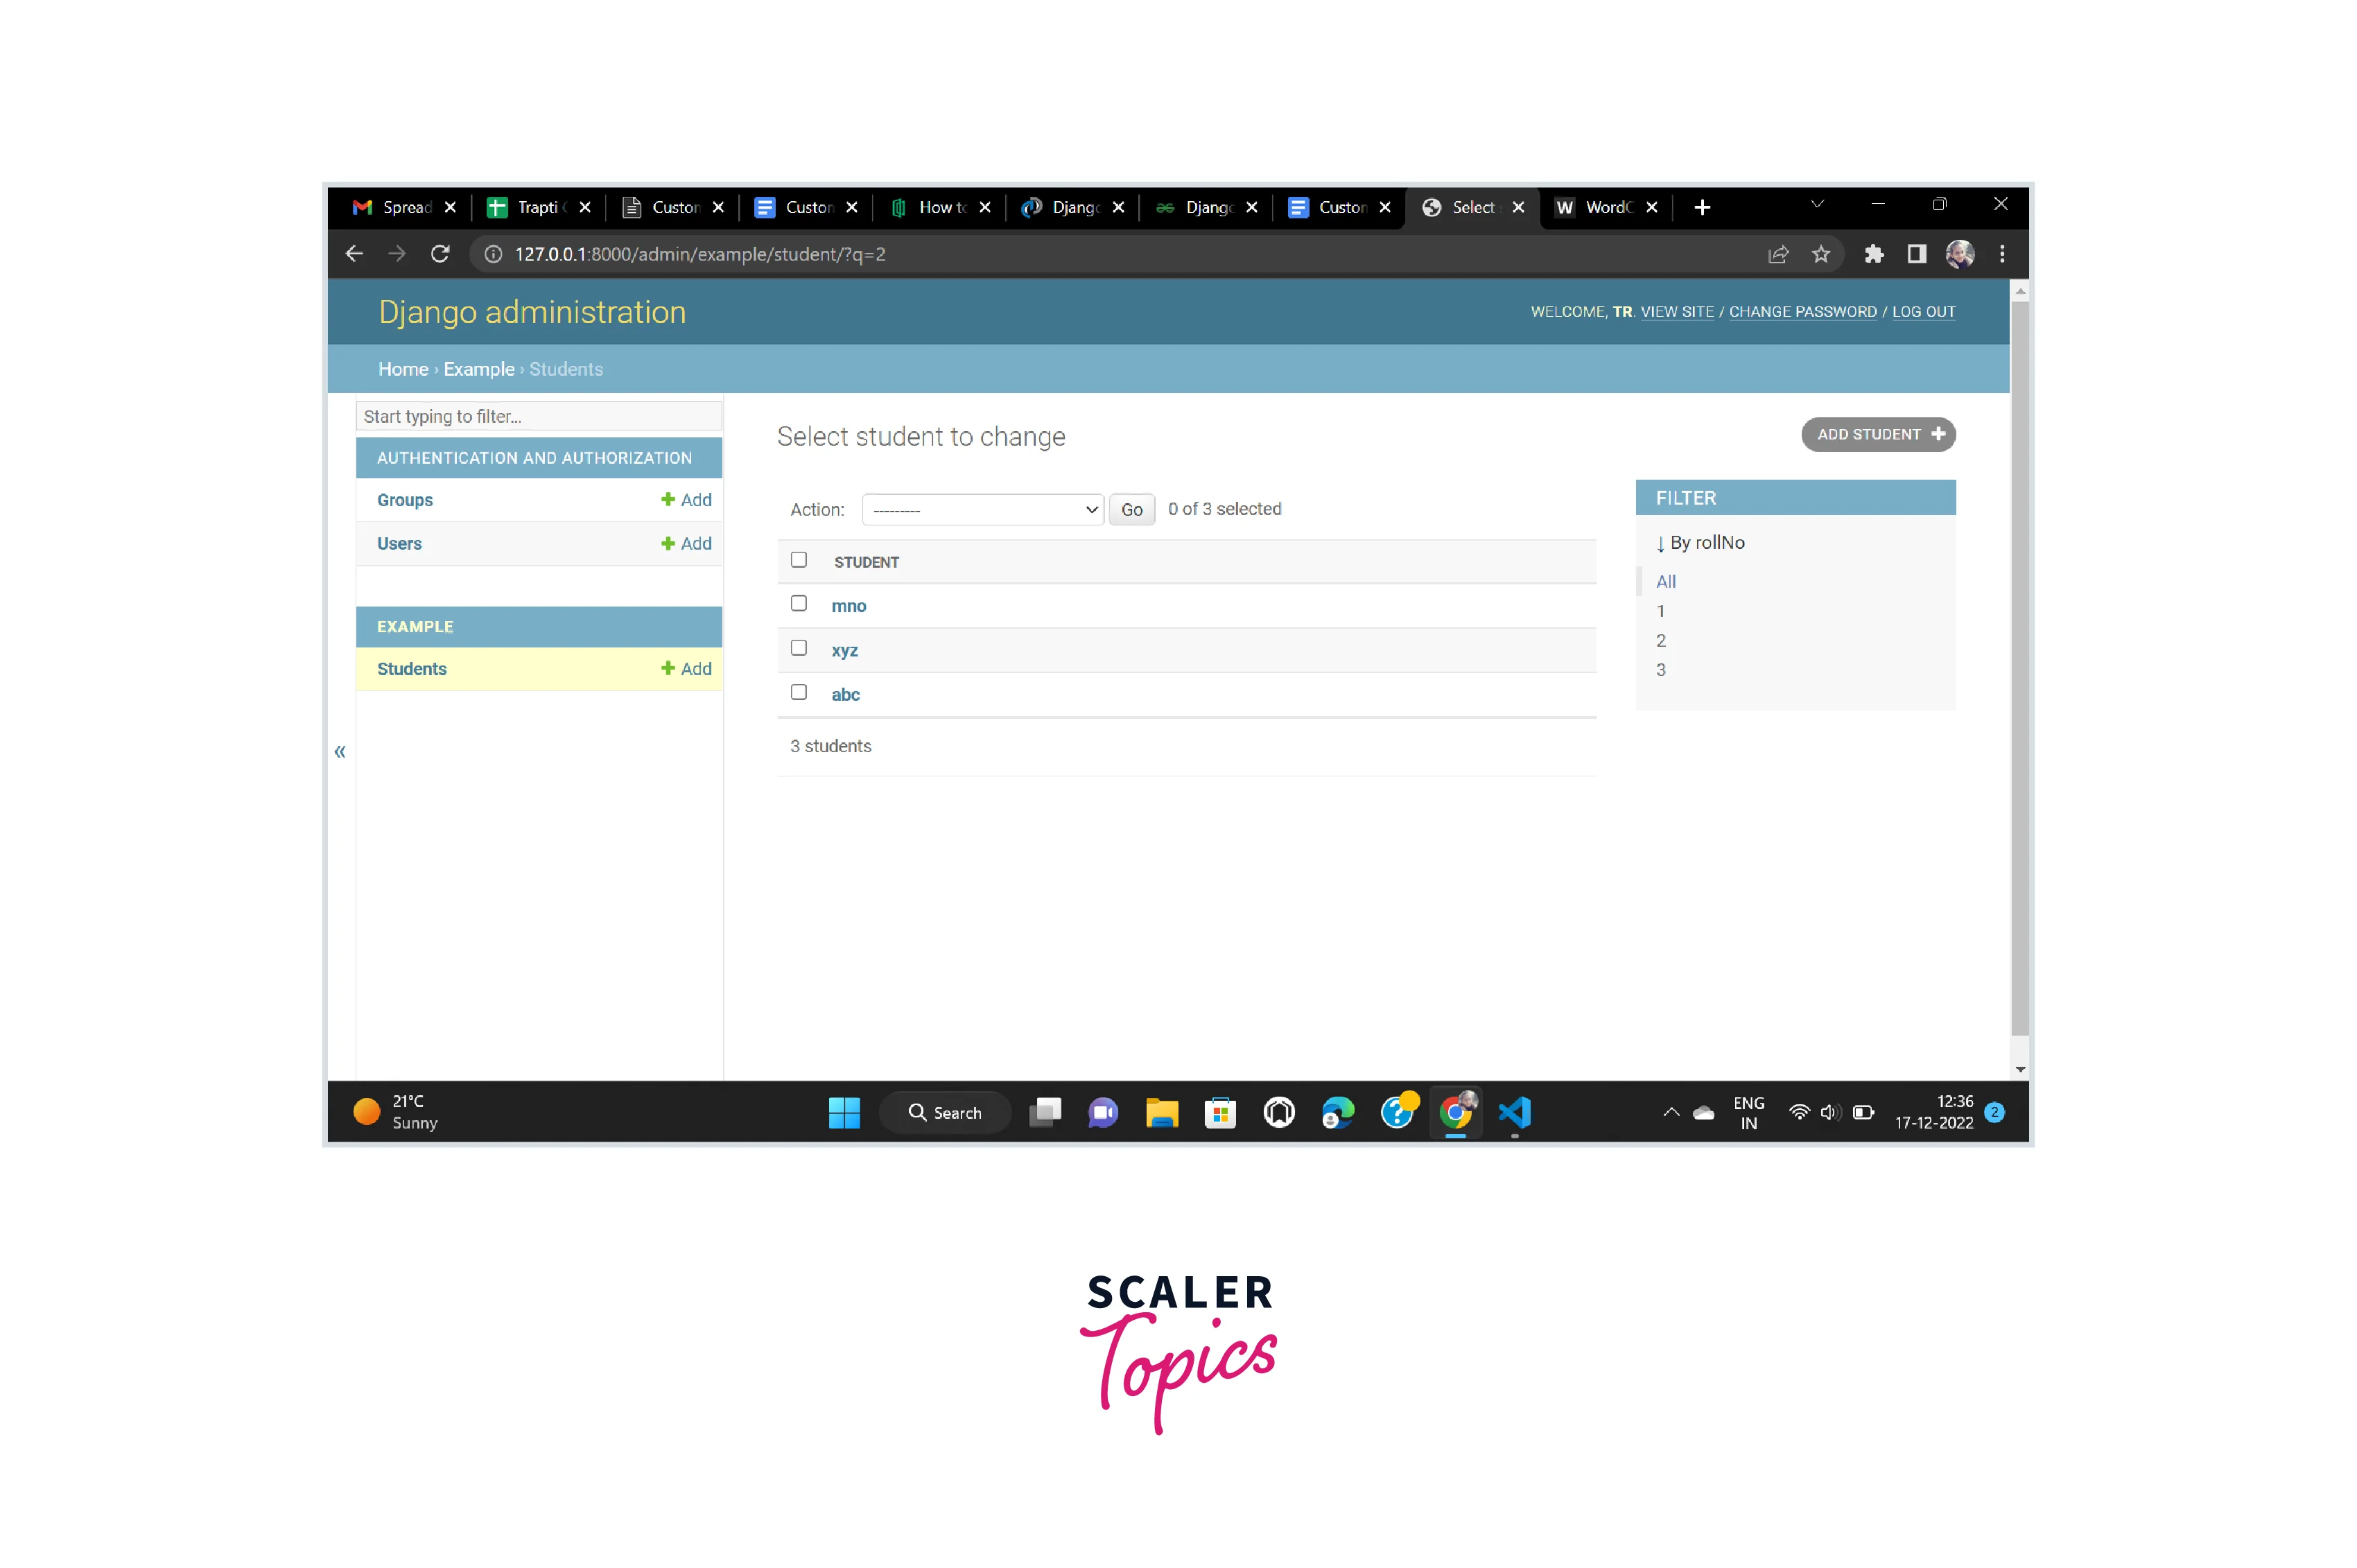
The filter can be added in the admin panel for filtering the data in the model. We need to provide the list of fields that you want to be used for filtering.
In our Student model, we are using rollNo field for filtering the data. So write the below code to add a filter.
And the filter is displayed on the admin panel just like given below image
Refer to the below image for the admin panel display with a filter
Viewing Additional Fields
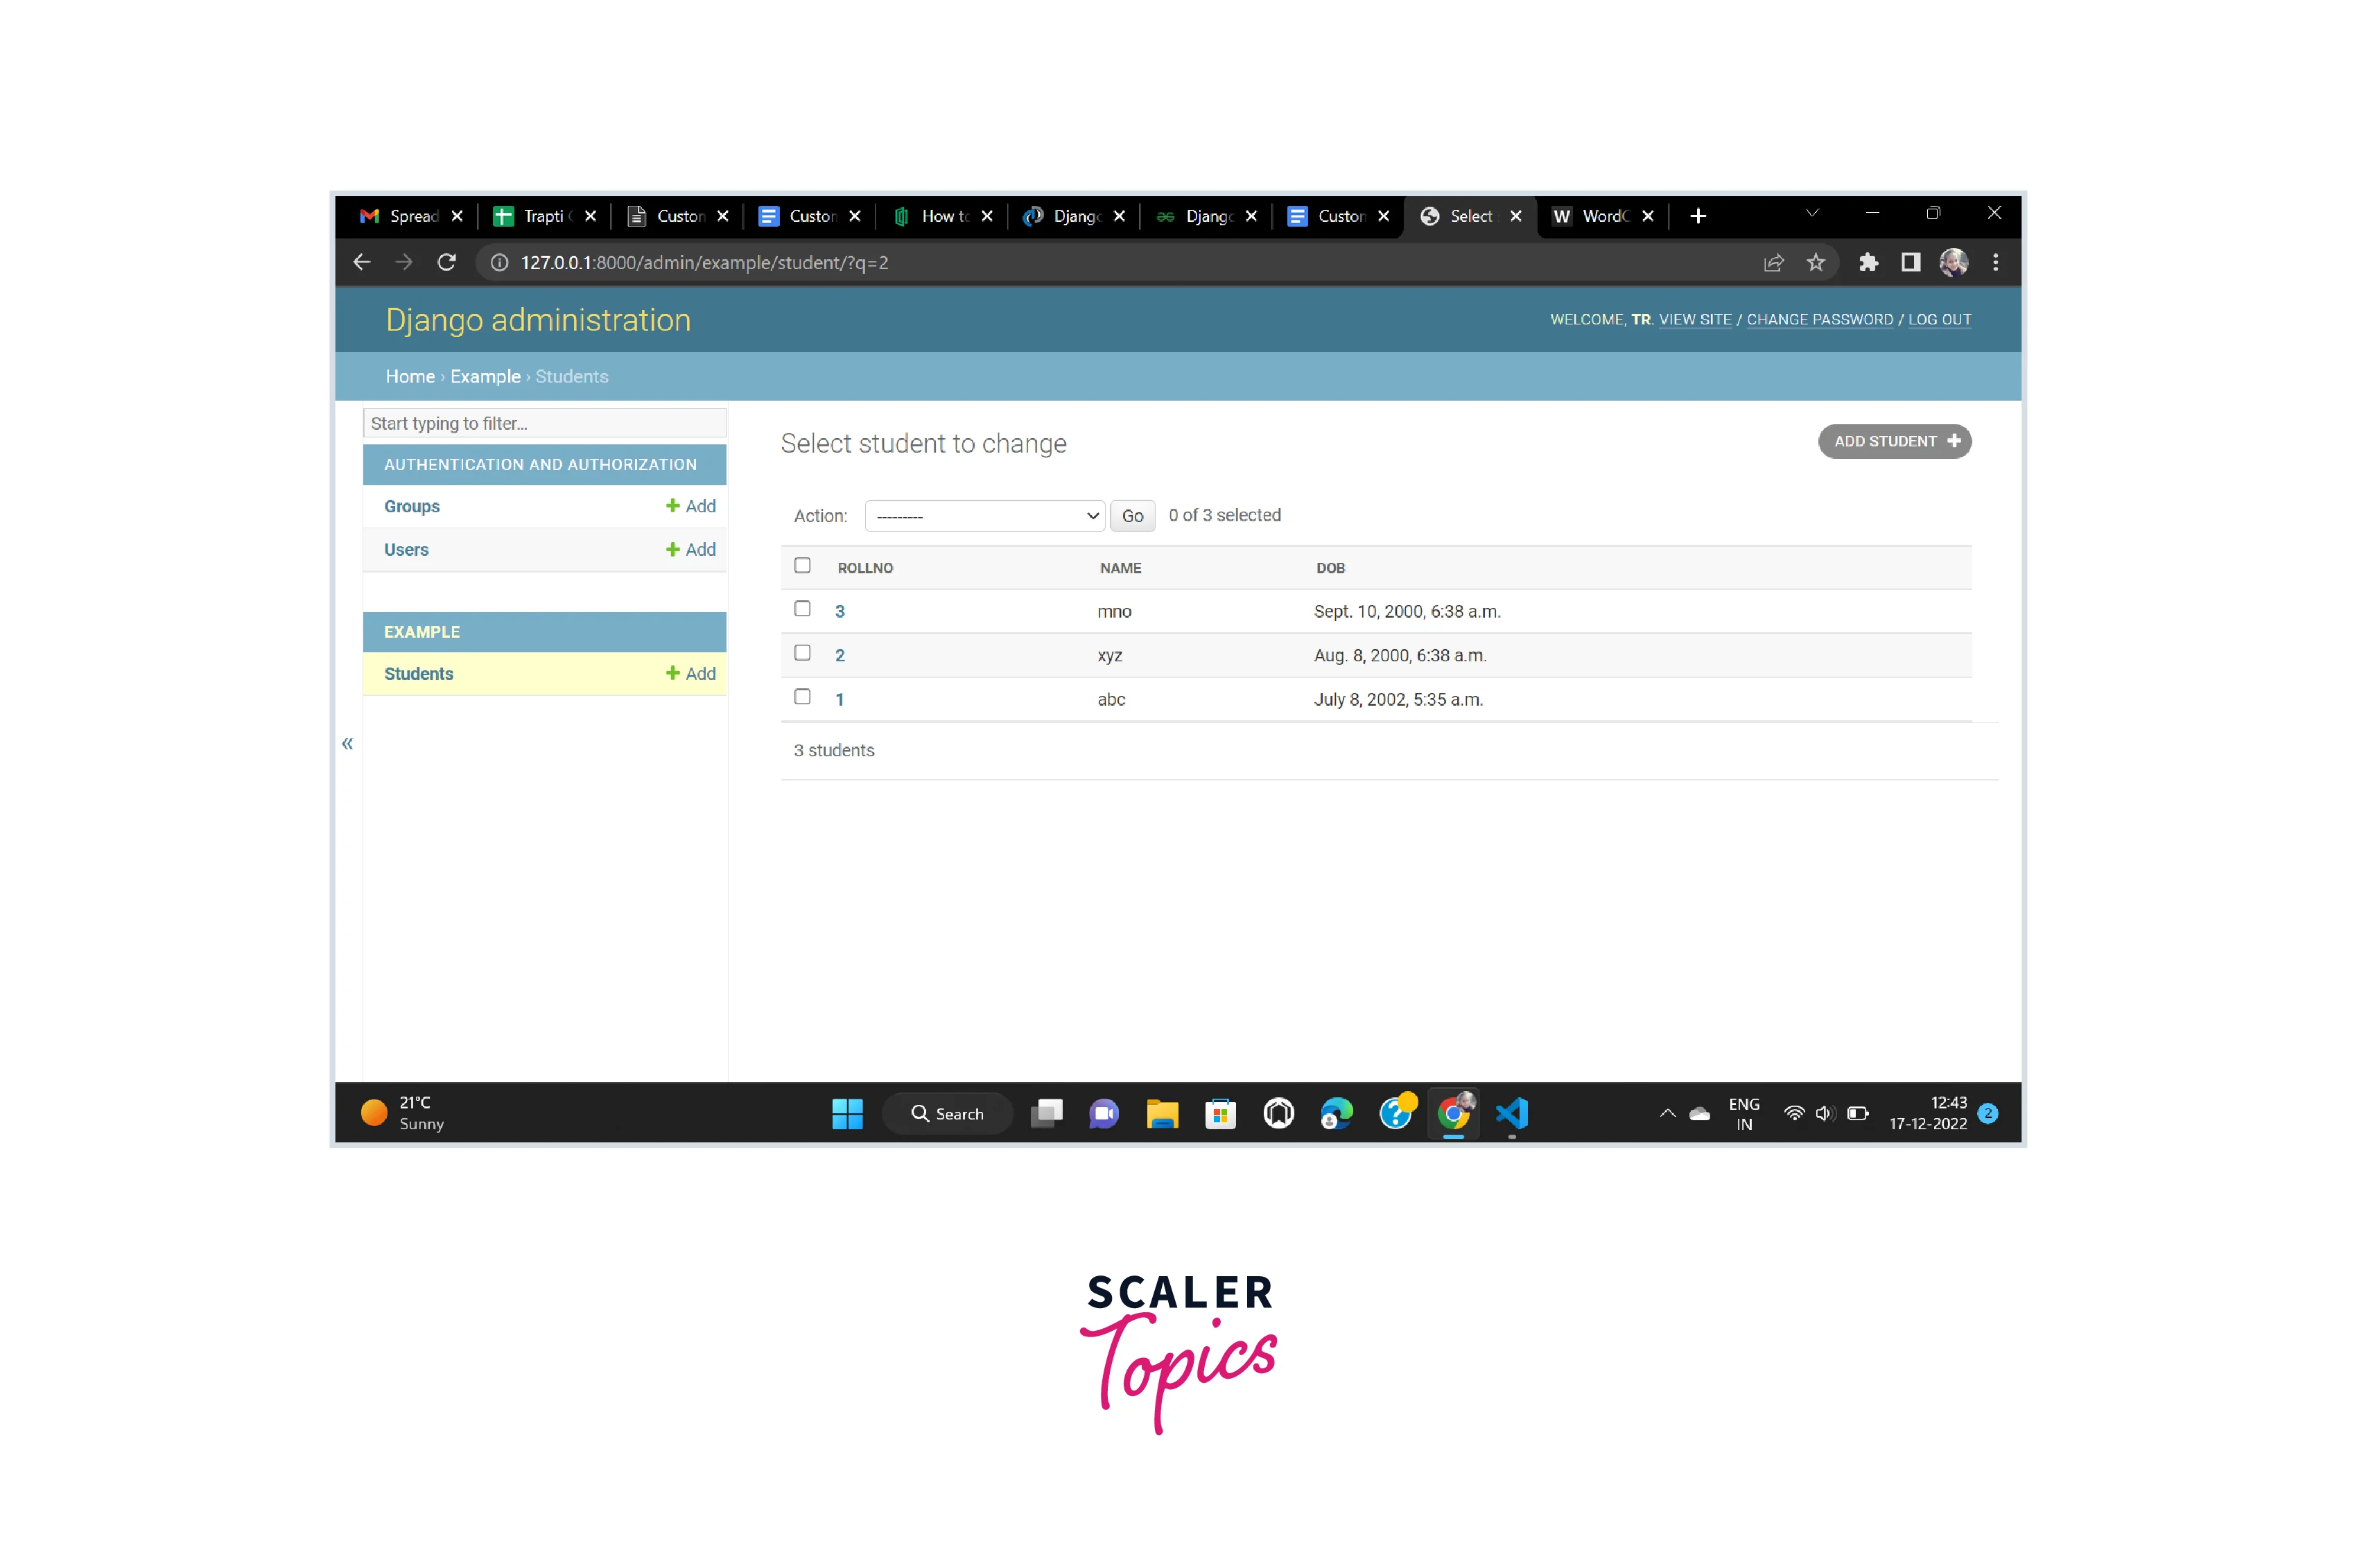
Generally in the list view, only one field of our models is displayed in the admin interface. More fields can be added to the view with list_display. In our example for displaying rollNo, name, and dob in the list view write the following code in the admin.py file.
Now the display of the list view of the data stored in the Student model is changed and now it will display rollNo, name, and dob.
Refer to the below image for the additional fields displayed in the list view
Editing List View
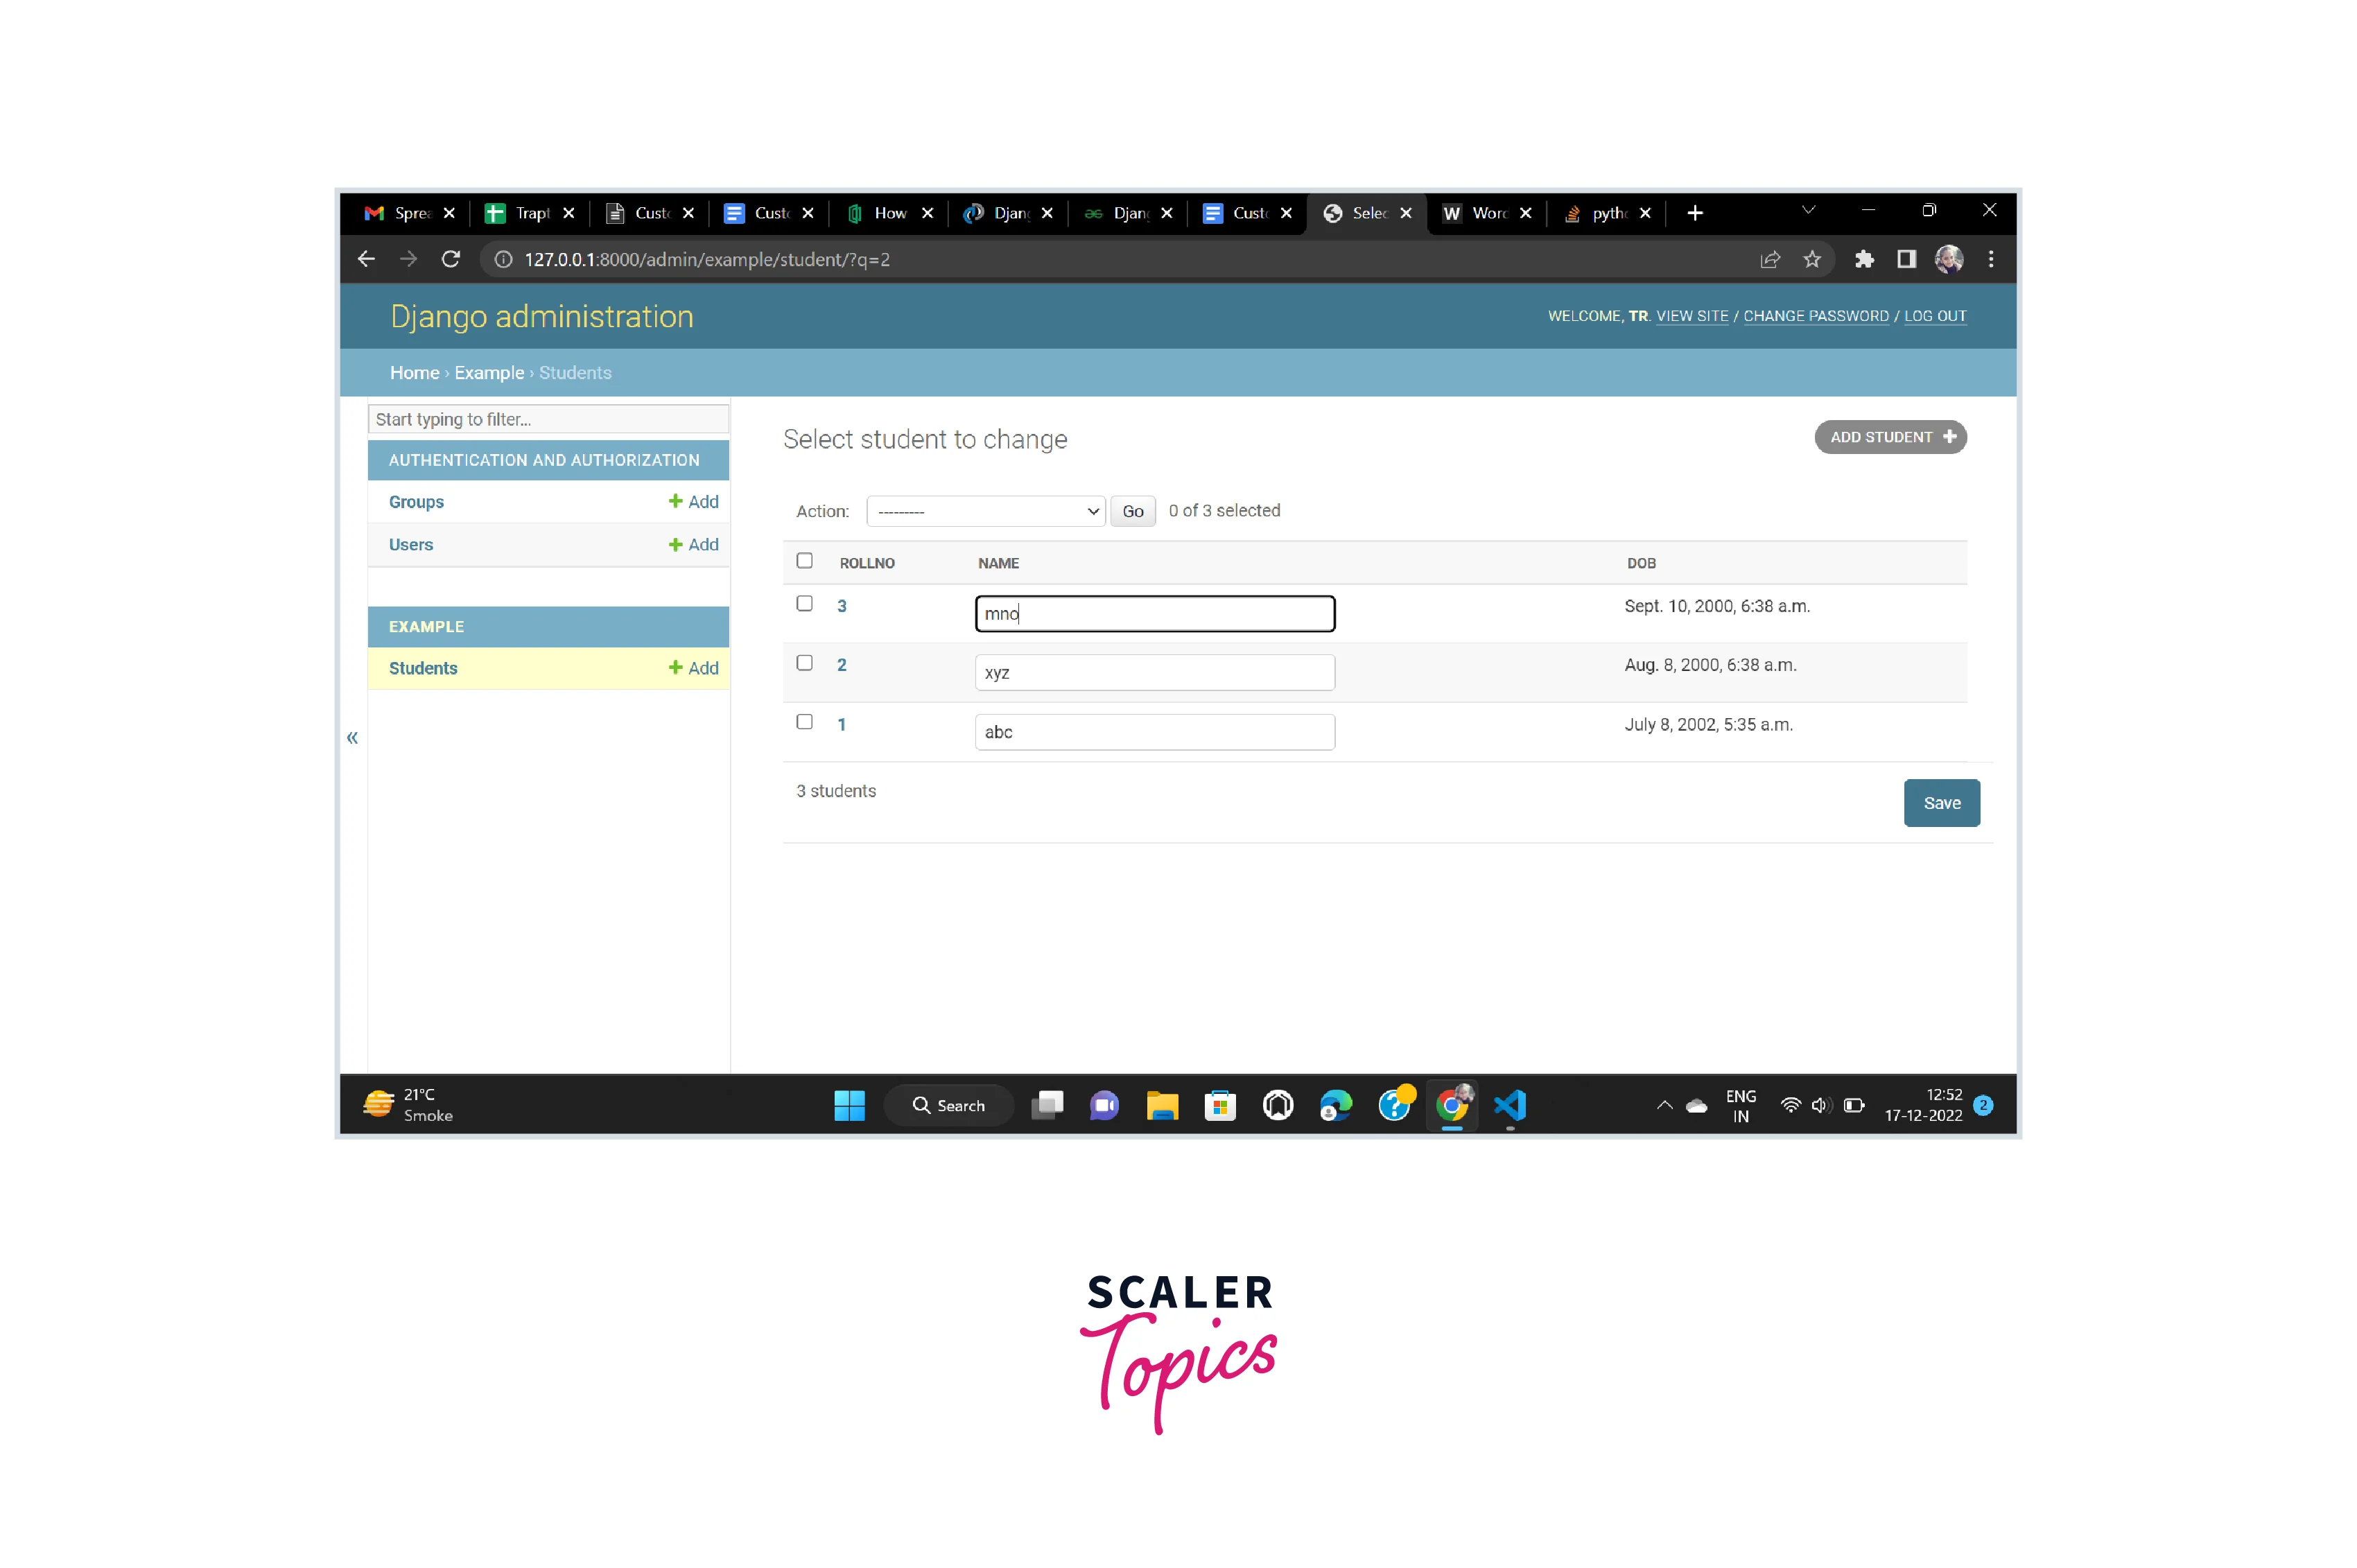
You can also add the ability for manipulating value attributes from the list directly in place of doing manipulation from a detailed view. You can below code in the admin.py file to make the name of the Student editable in the list view of the Student model.
And the editable field is displayed on the admin panel in the following way
Refer to the below image for the editable field in the list view
Admin Template
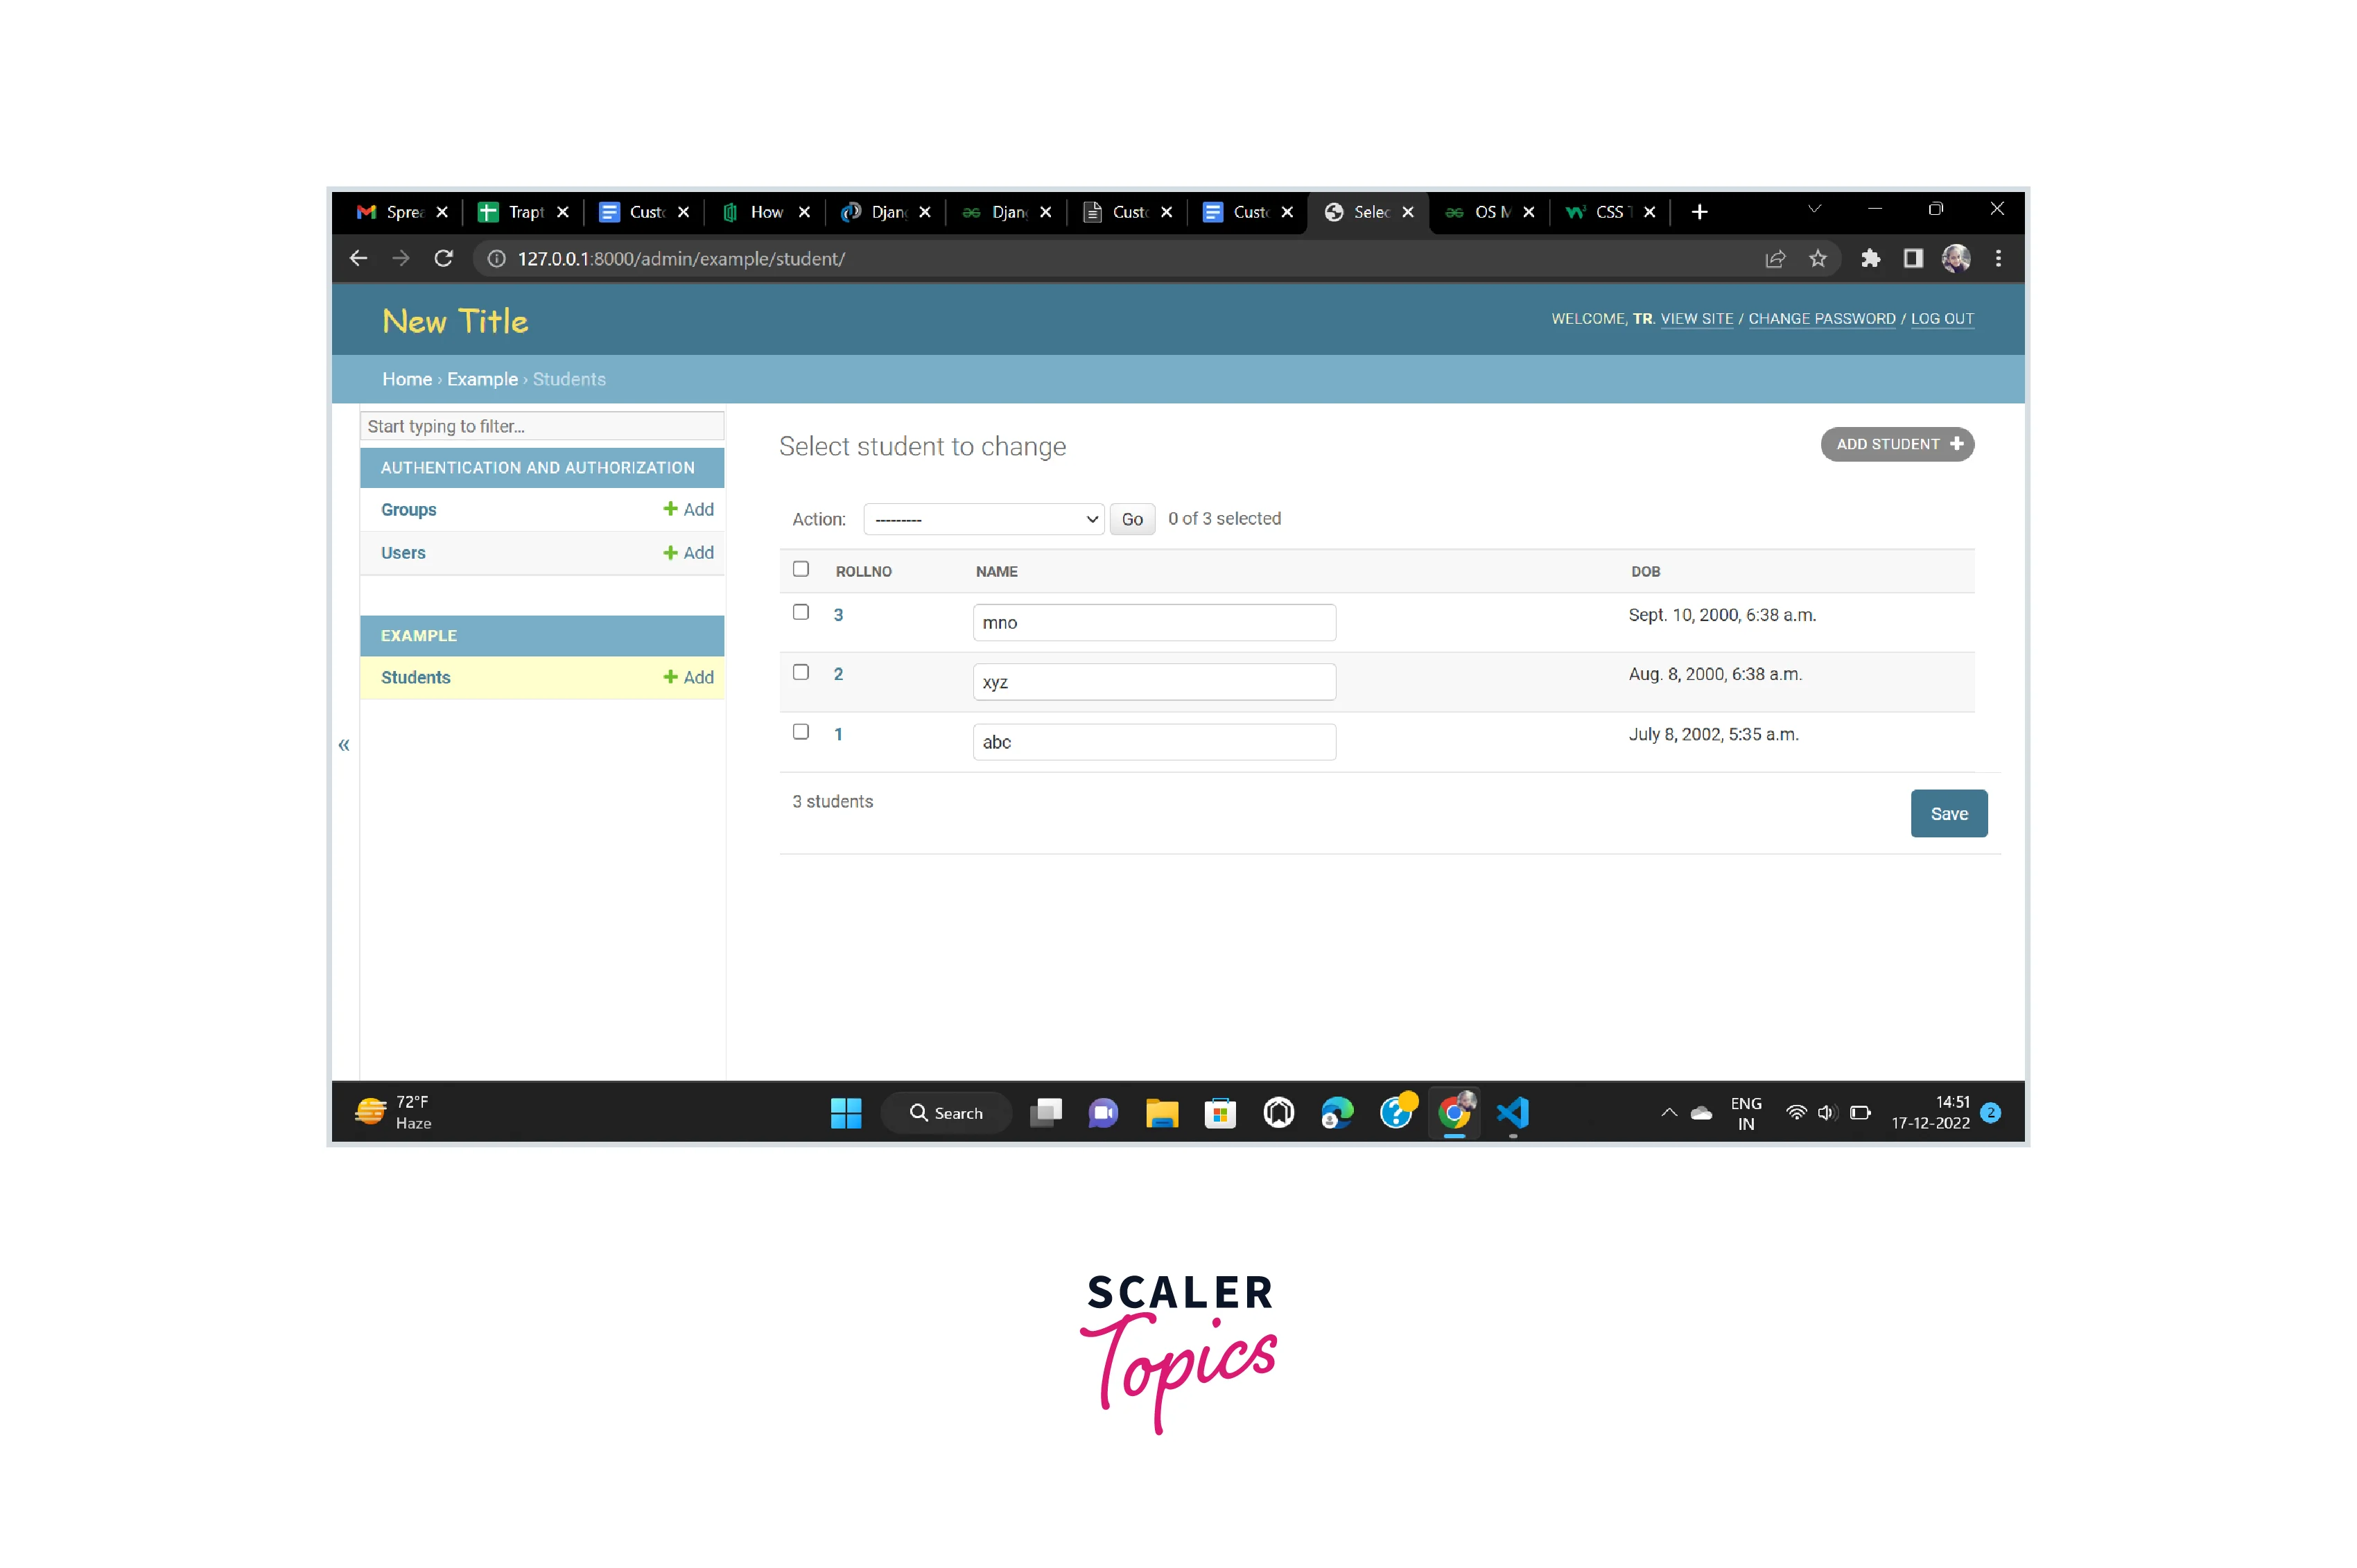
In some scenarios, there is a requirement of changing the admin panel layout and user interface and in these scenarios in our project it is required to add our templates and then these changes will be displayed to the admin interface of Django. In the root folder create one folder with the name templates. Inside the template create another folder with the name admin folder and then your HTML file needs to be added to this folder. And then create a base_sit.html inside this folder and write the below-given code in this HTML code. Below is the code which will change the style and text of the Django admin panel title.
Now the title of the admin panel has been changed
Refer to the below image for the admin panel with the changed title
Django Admin Actions
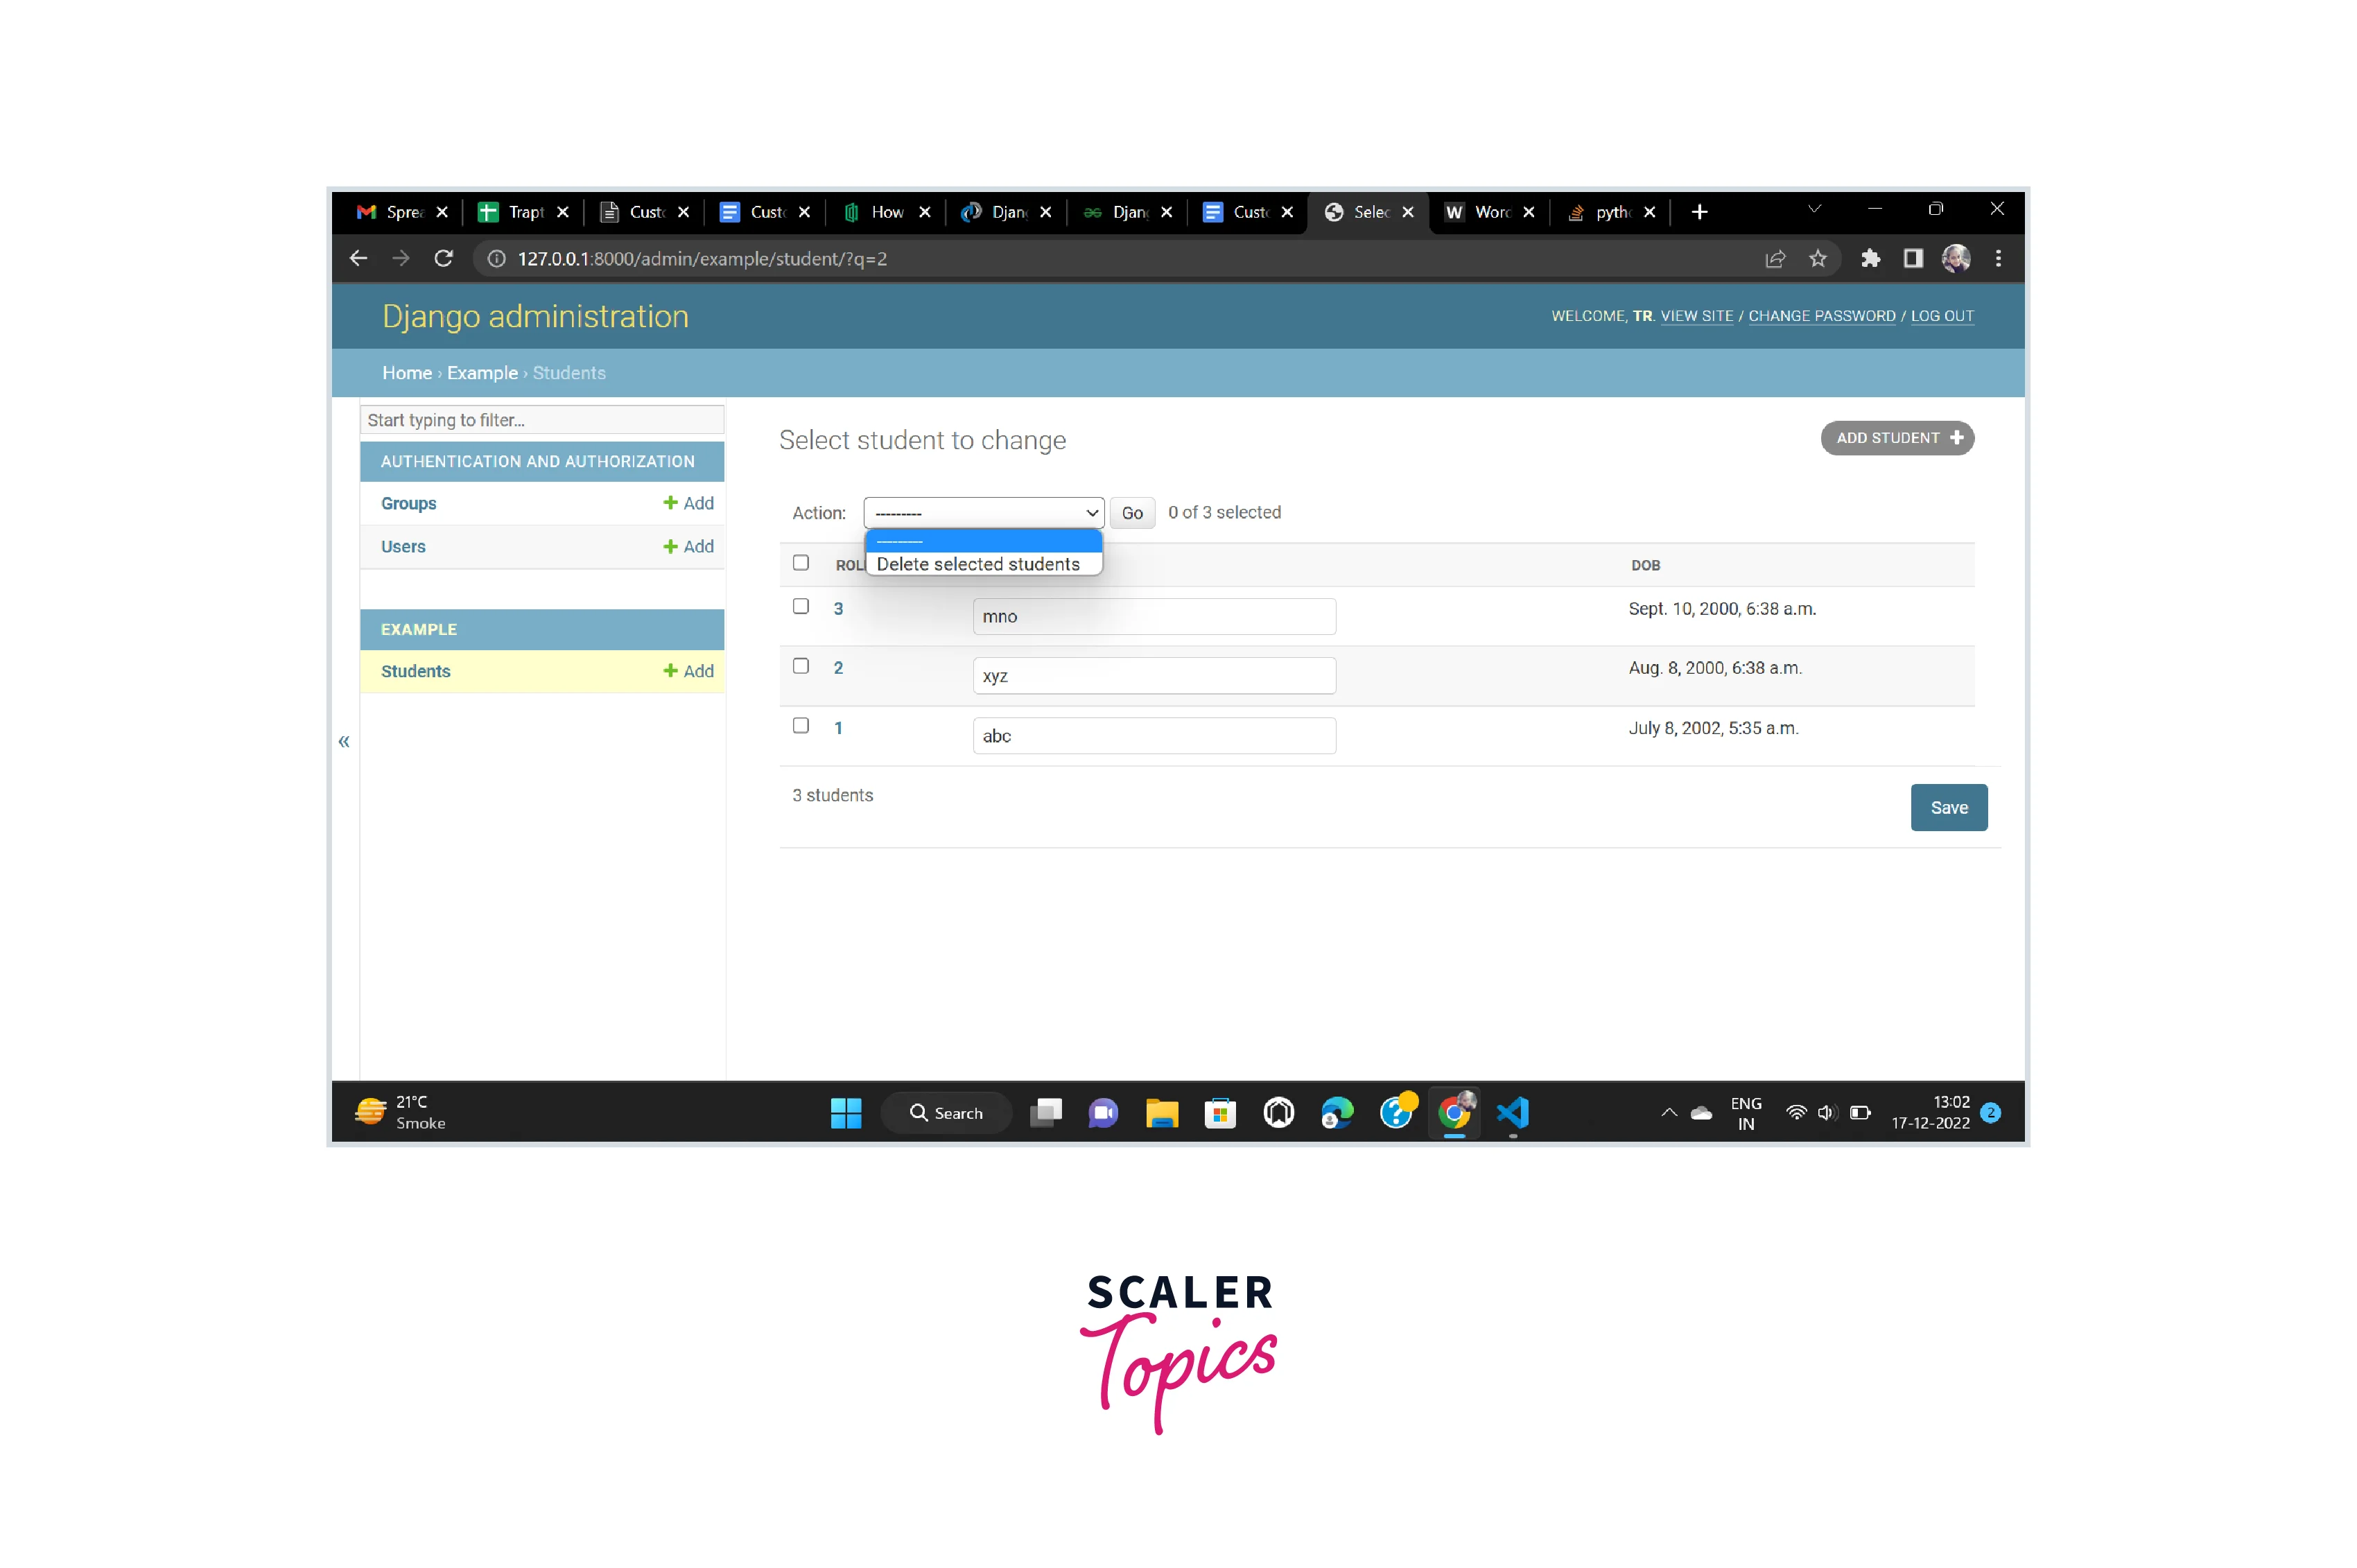
Admin actions are referred to as functions used for collective data manipulation. In the admin panel, multiple object deletion is a very easy process as given in the image below. Apart from this, we have also provided the functionality to make our actions.
Refer to the below image for the view of the delete option
Conclusion
- Customizations in Django can be done to make the representation of objects and interface of the admin panel.
- Few editing in the admin.py file can change the order of fields displayed on the admin panel.
- ModelAdmin can be used to exclude fields of the model.
- The design of the admin panel can also be customized with the help of templates.
- In the admin panel, multiple object deletion is very process
