Adding Google Maps to A Flutter App
Overview
Google Maps is a service for platforms like web browsers, iOS, and Android devices with a user-friendly interface and extensive features. It helps users to see detailed maps, satellite imagery, street views, and real-time traffic conditions. This is widely used in most of the applications and this service plays an important role in any developer’s toolkit. In daily life, everyone uses google maps to navigate from one place to another and find routes and locations of places you don't know. This is difficult to think of our life without Maps and hence this has become a necessity in today's era.
Introduction
Google Maps are widely used in Flutter applications and we need to use a third-party package to use google maps.
We can get different locations and directions around the world, can also access information on public transportation systems, including buses and subways, we can see real-time traffic and we can also see public spaces like airports, shopping malls, museums, and stadiums using Google maps in all kinds of flutter applications. We get to see regular updates and extensive features in google maps which makes it one of the most widely used and trusted mapping services globally.
Installation and Configuration
We know that to use google maps in Flutter applications, we have to use third-party libraries and perform the operations according to our needs. Along with the installation of dependency, we also need to have an account on Google Developers Console. We need APIs to integrate Google Maps in our Flutter application and we enable those from Google Developers Console.
We will learn step by step to integrate google maps into Flutter applications.
Step 1
Add the Googlemapsflutter dependency: Open the pubspec.yaml file of your Flutter project and add the following line under the dependencies section and pub get it.
Step 2
Need to have Google Maps API key: To use Google Maps in your application, you need an API key. Follow these steps to obtain an API key:
-
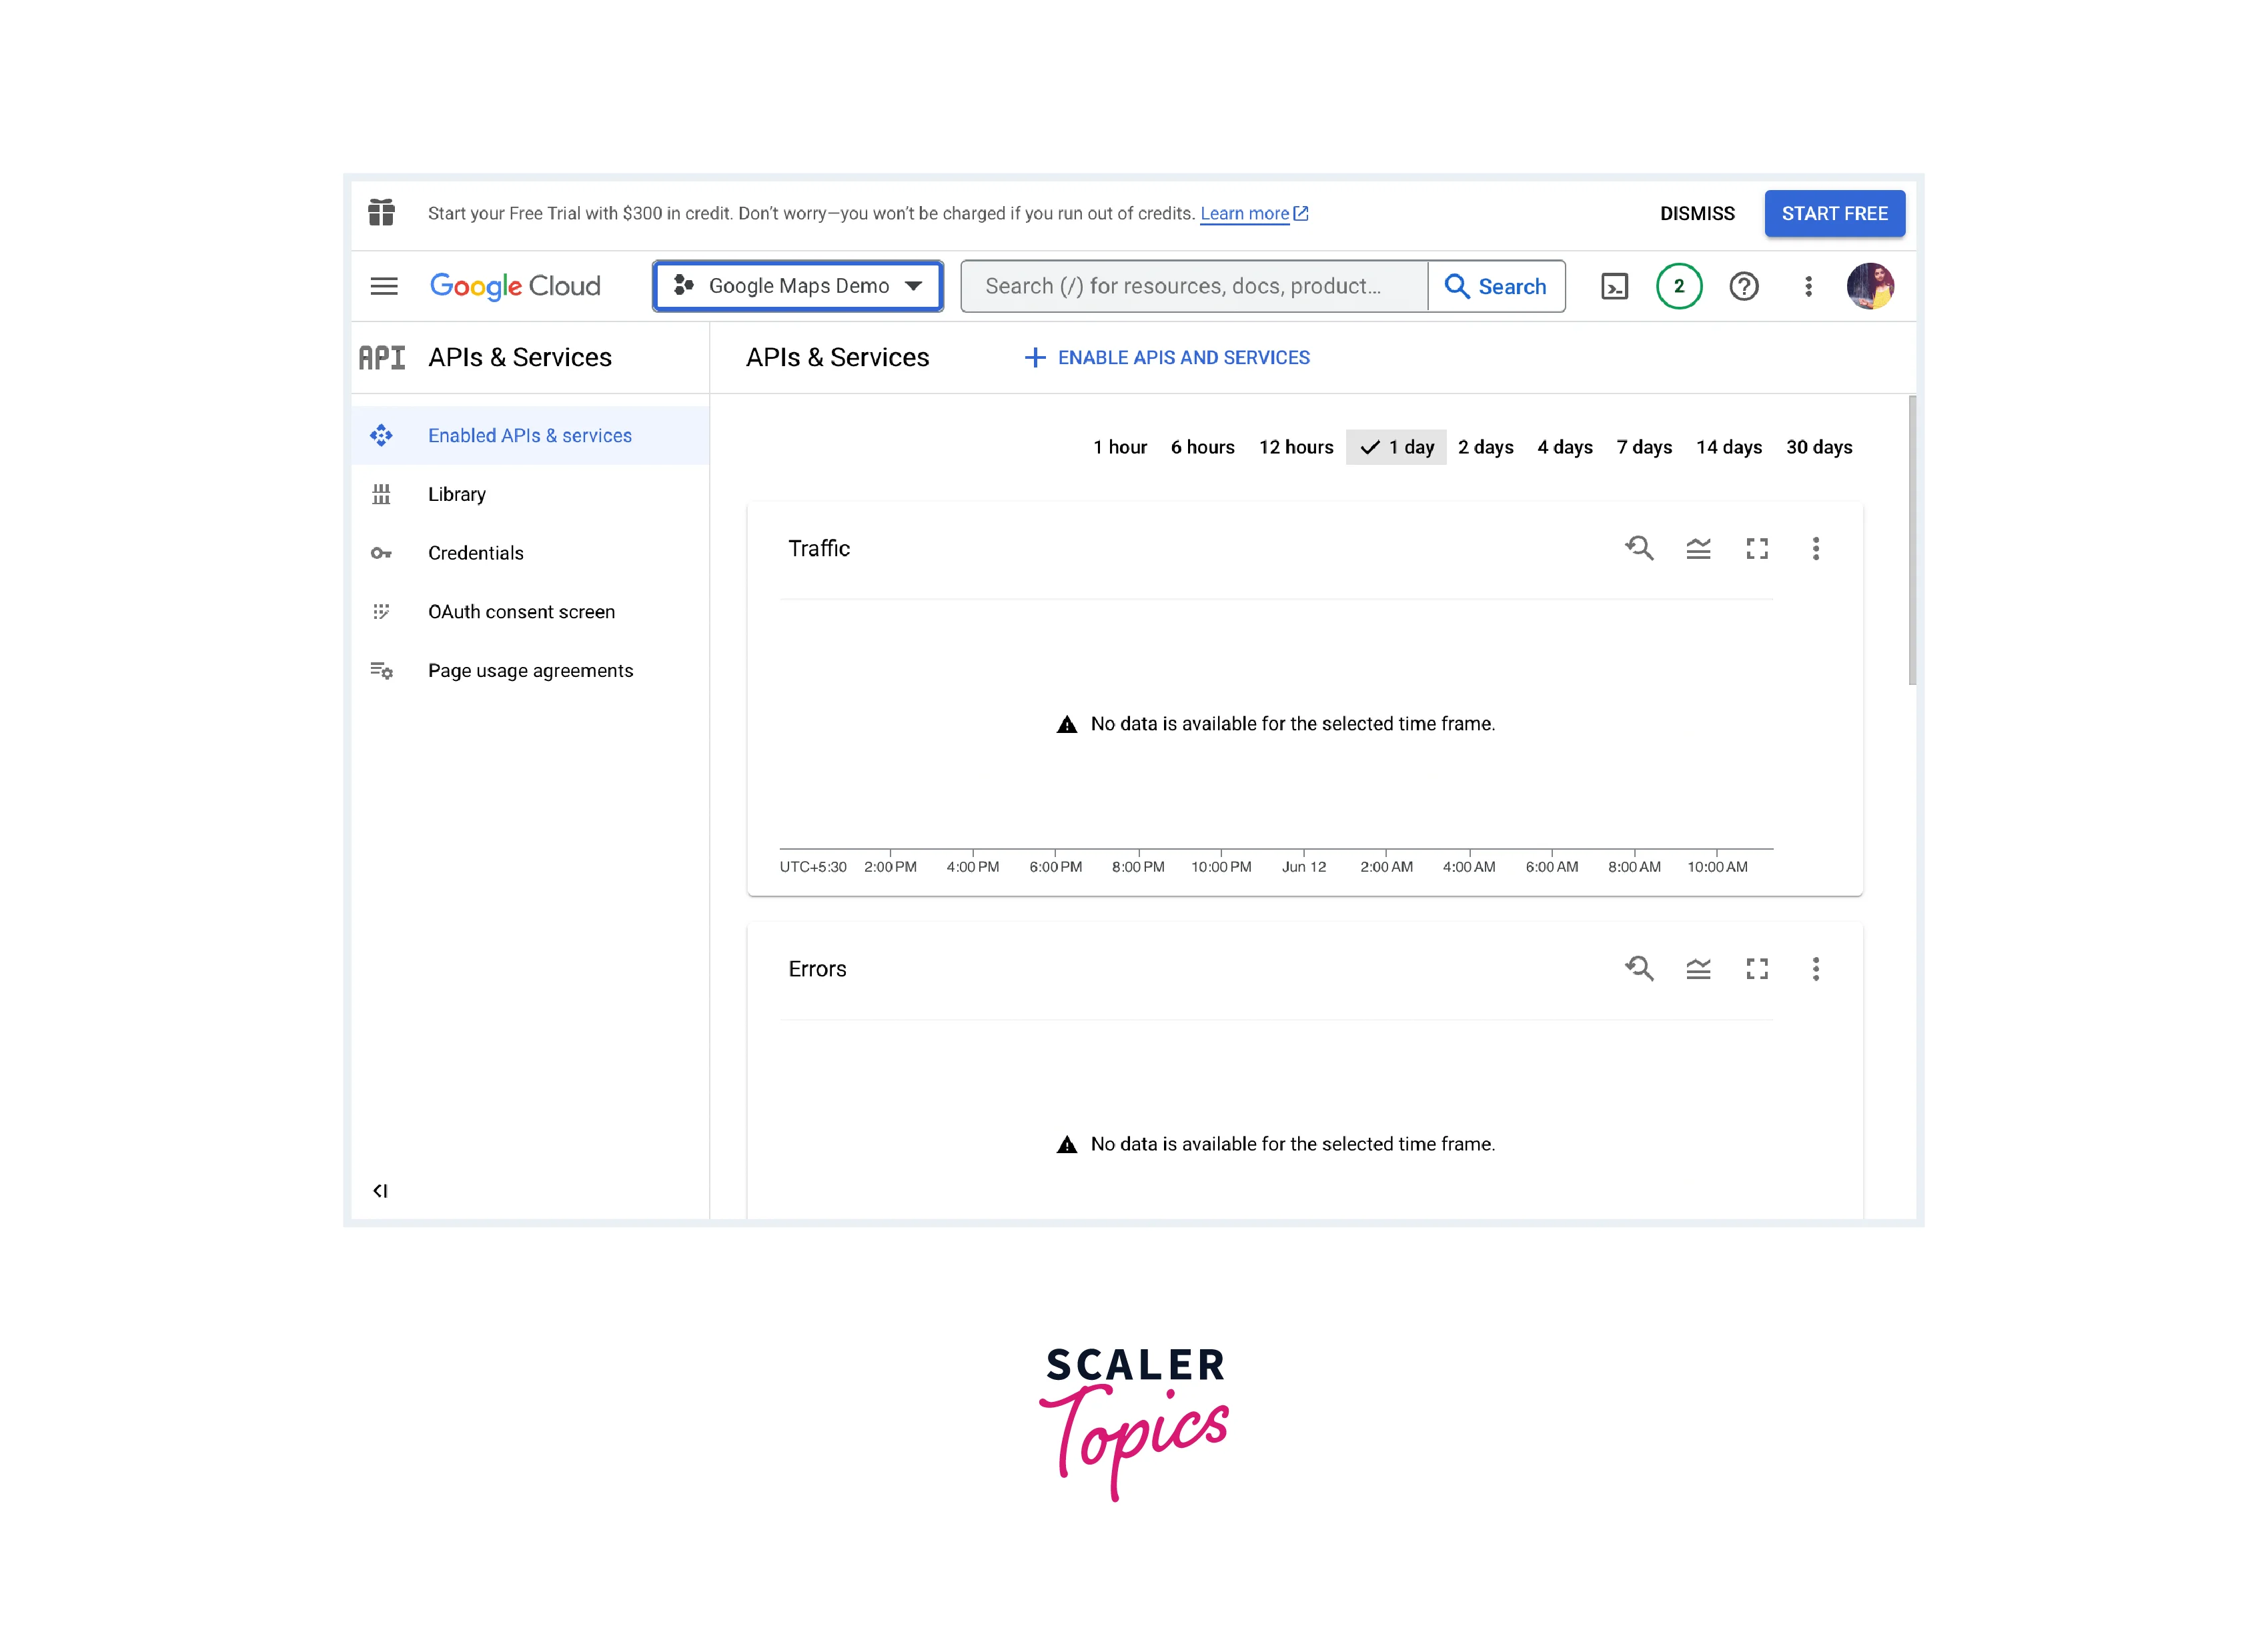
Go to Firebase Console and you will see the console like this.
-
After that you can select your existing project or you can create a new project to integrate google maps. You will see this written near Google Cloud. I have created the project - Google Maps Demo.

-
Enable the "Maps SDK for Android" and "Maps SDK for iOS" APIs for your project by clicking on the "Library" menu inside "Enabled APIs & services".
-
We need a Google API key to integrate into our project.
Select the "API & Services" option from the drawer and click on "Enabled APIs & services".

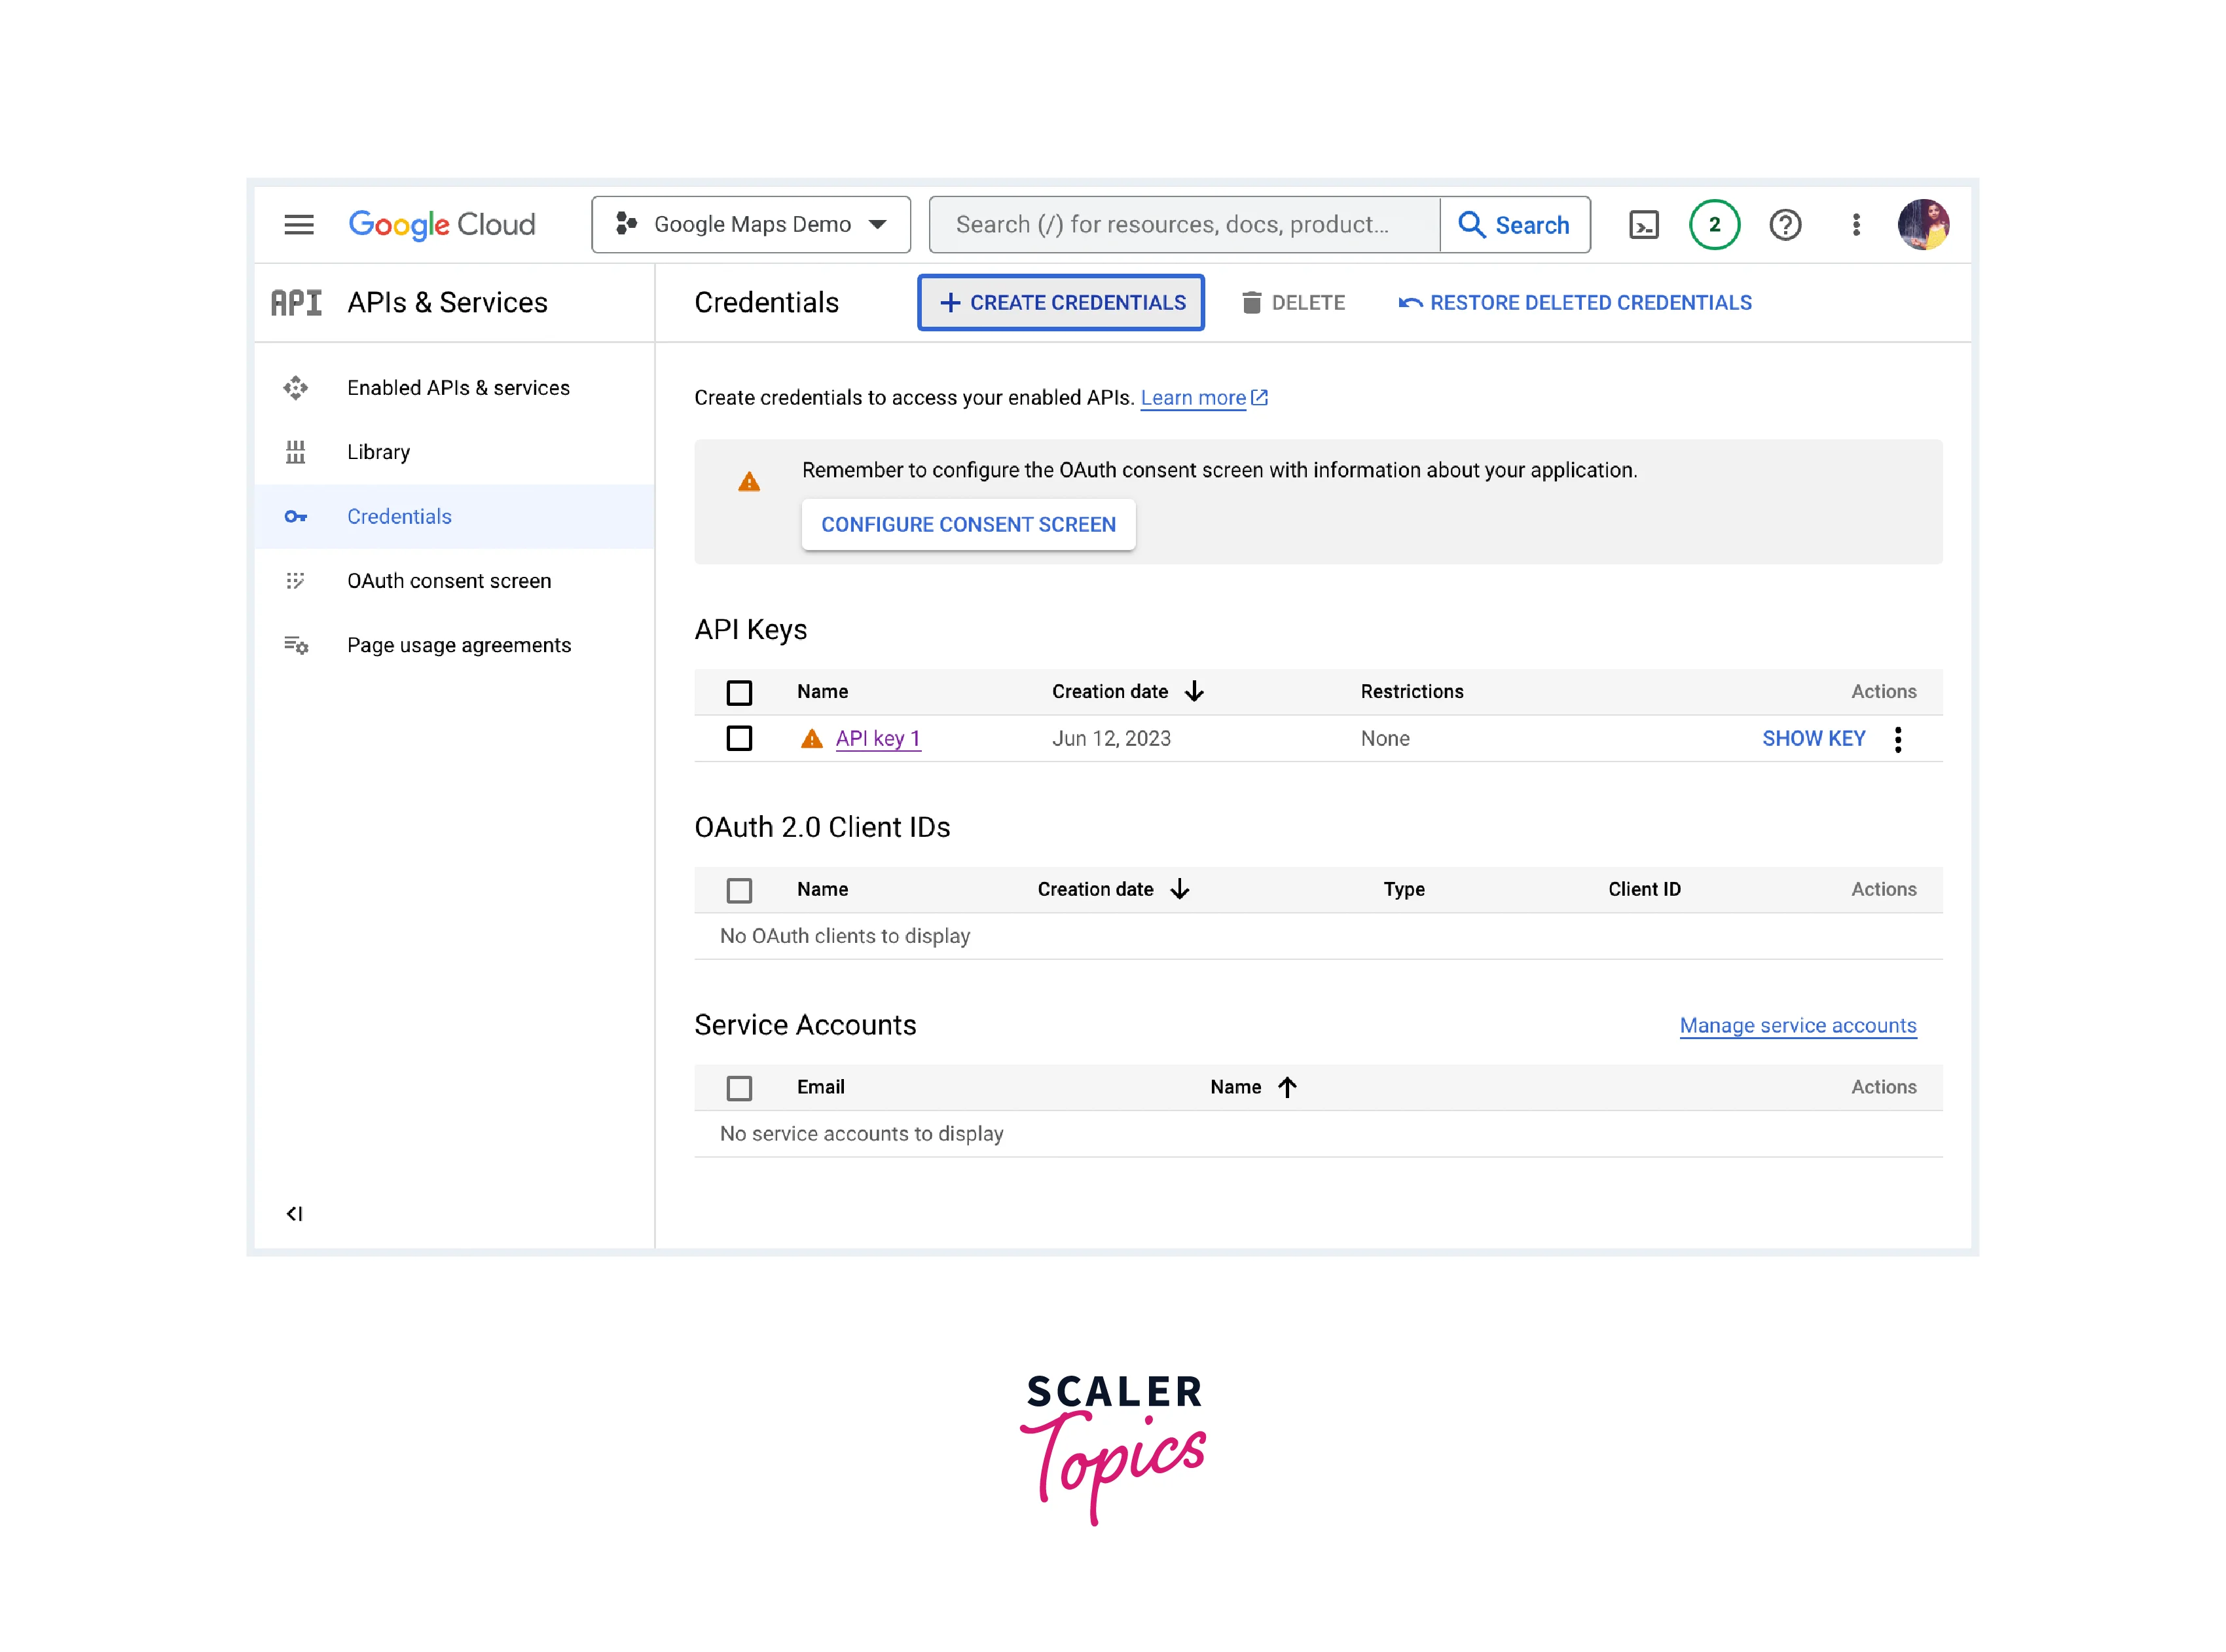
After it, click on credentials and you will see an option on top "Create Credentials" on the console and click on it.
Then you will see API key inside the "API Keys" section.
You can create two keys for iOS and Android to track more accurately.
-
Take note of the generated API key as you'll need it in the next steps.
Step 3 Android and iOS configuration in the project:
Android configuration
-
Open the android/app/src/main/AndroidManifest.xml file and add the following permissions just before the </manifest> closing tag.
-
Inside the <application> tag, add the following metadata element with your API key.
Remember to replace "YOUR_API_KEY" with the key you got from the develoepr console.
Change the compileSdkVersion
You may also get the error of changing the ext.kotlin version. This you can resolve by pasting the latest version of Kotlin in the project build. gradle file.
iOS configuration
-
Open the ios/Runner/Info.plist file and add the following key-value pairs.
-
Open the ios/Runner/AppDelegate.swift file and add the "import GoogleMaps" statement at the top and also add the following code of GMSServices. It will look like this.
This is all we need for the installation and configuration of google maps in our application. Further steps involve the use of the GoogleMap widget in the dart file.
Implementing the GoogleMap Widget in the App
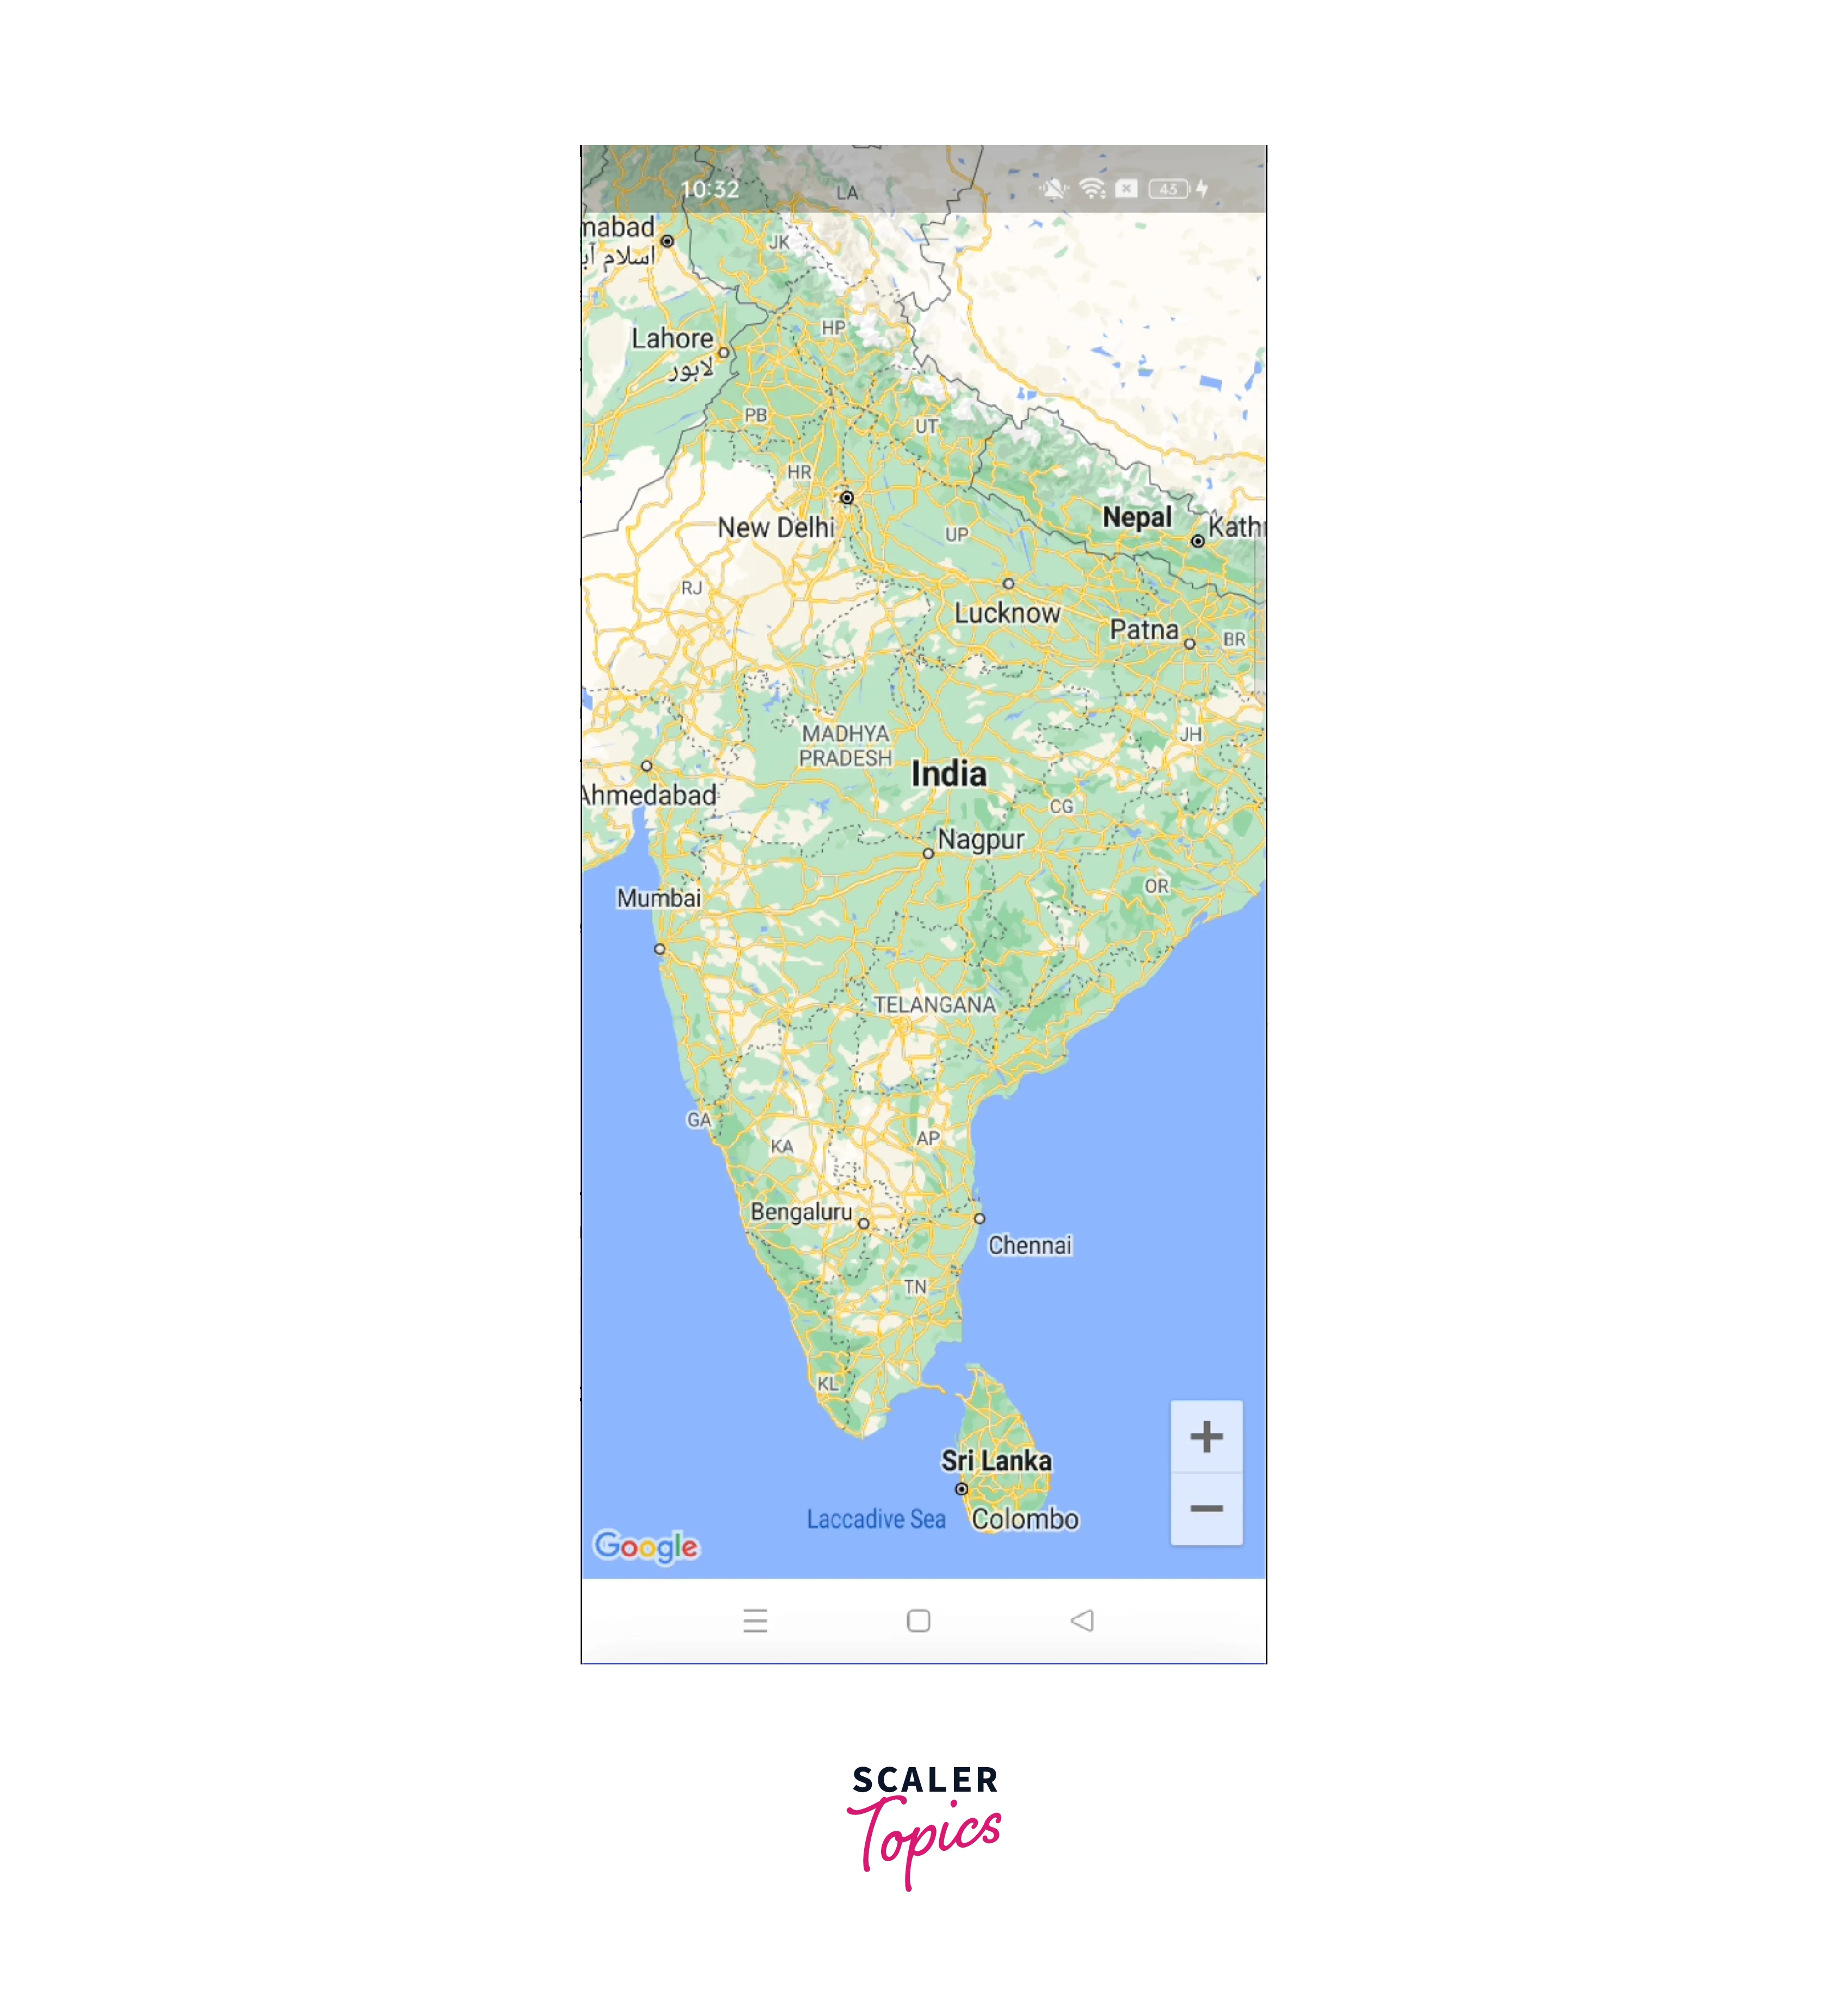
After following the above steps, you will be able to see Google Maps in your application by using the GoogleMap widget.
-
Create a GoogleMap widget in the dart file.
-
initialPosition holds the default location to show on the map when it’s loaded and we can also define the zoom level inside it. This is compulsory to pass in the GoogleMap widget.
-
GoogleMapController: It’s the controller for a single GoogleMap instance running on the host platform. This controller is like any other controller be it TextEditingController, this manages various functionalities like camera position, zoom, animation, etc.
-
onMapCreated: This method is called when the map is created and takes the GoogleMapController as its parameter.
This is how it will look.
Current Location
To find the current location of any person using google maps in Flutter, you have to follow some steps-
-
First perform the above steps for configuration and installation of google maps and add the "geolocator" dependency in yaml file and pub get it.
-
Import the necessary and required packages in your working dart file.
-
Request the location permission from the user first and get the current location then.
This function requests for the permission of location, and if there is any error you can check that in the onError method.
If permission is allowed, you can call the Geolocator.getCurrentPosition() method and return it to the function to get the current location.
-
Also in the GoogleMap widget, pass the controller created globally in the complete method and set myLocationEnabled to true.
-
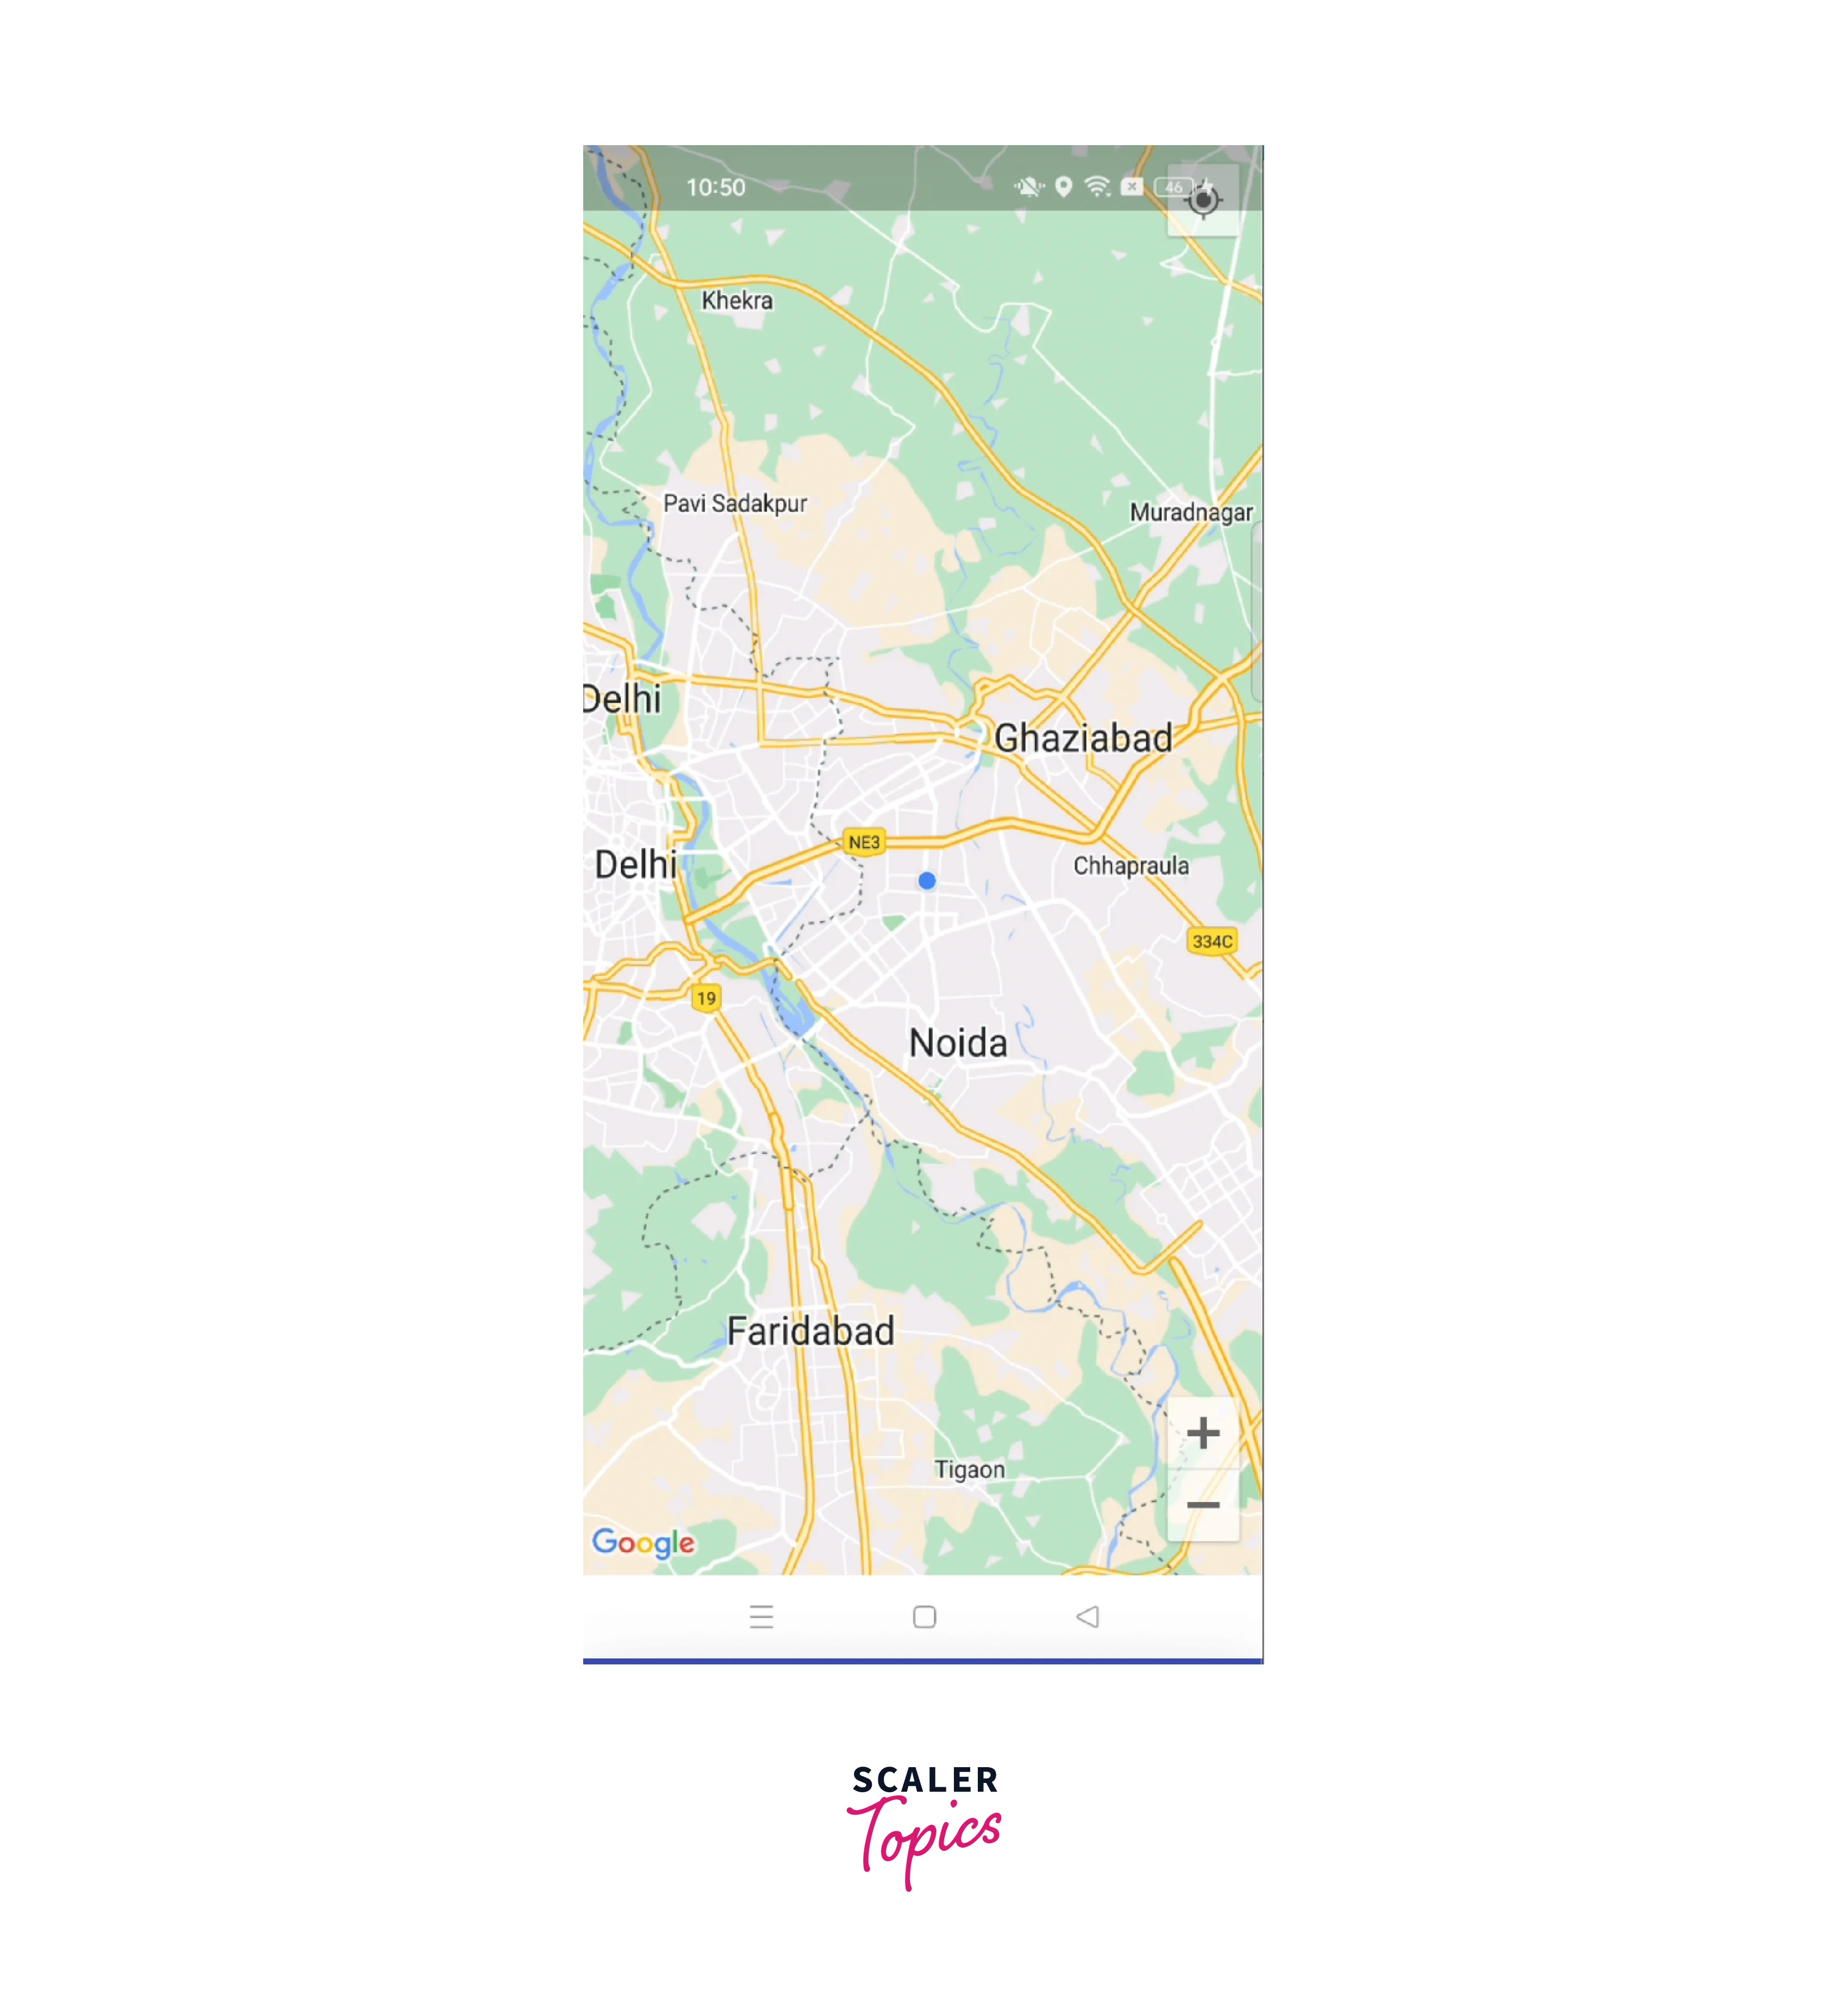
To show the current location initially just after opening the Google map- call this currentLocation() method in the initState method.
Also if you want to show the current location on any button click- just call this currentLocation() method on the onTap property of the button.
By following these steps, you should be able to retrieve the current location and display it on a Google Map in your Flutter application.
Drawing Polygons and Polylines
First, we should know what these terms mean and then will learn how to use these in google maps for Flutter.
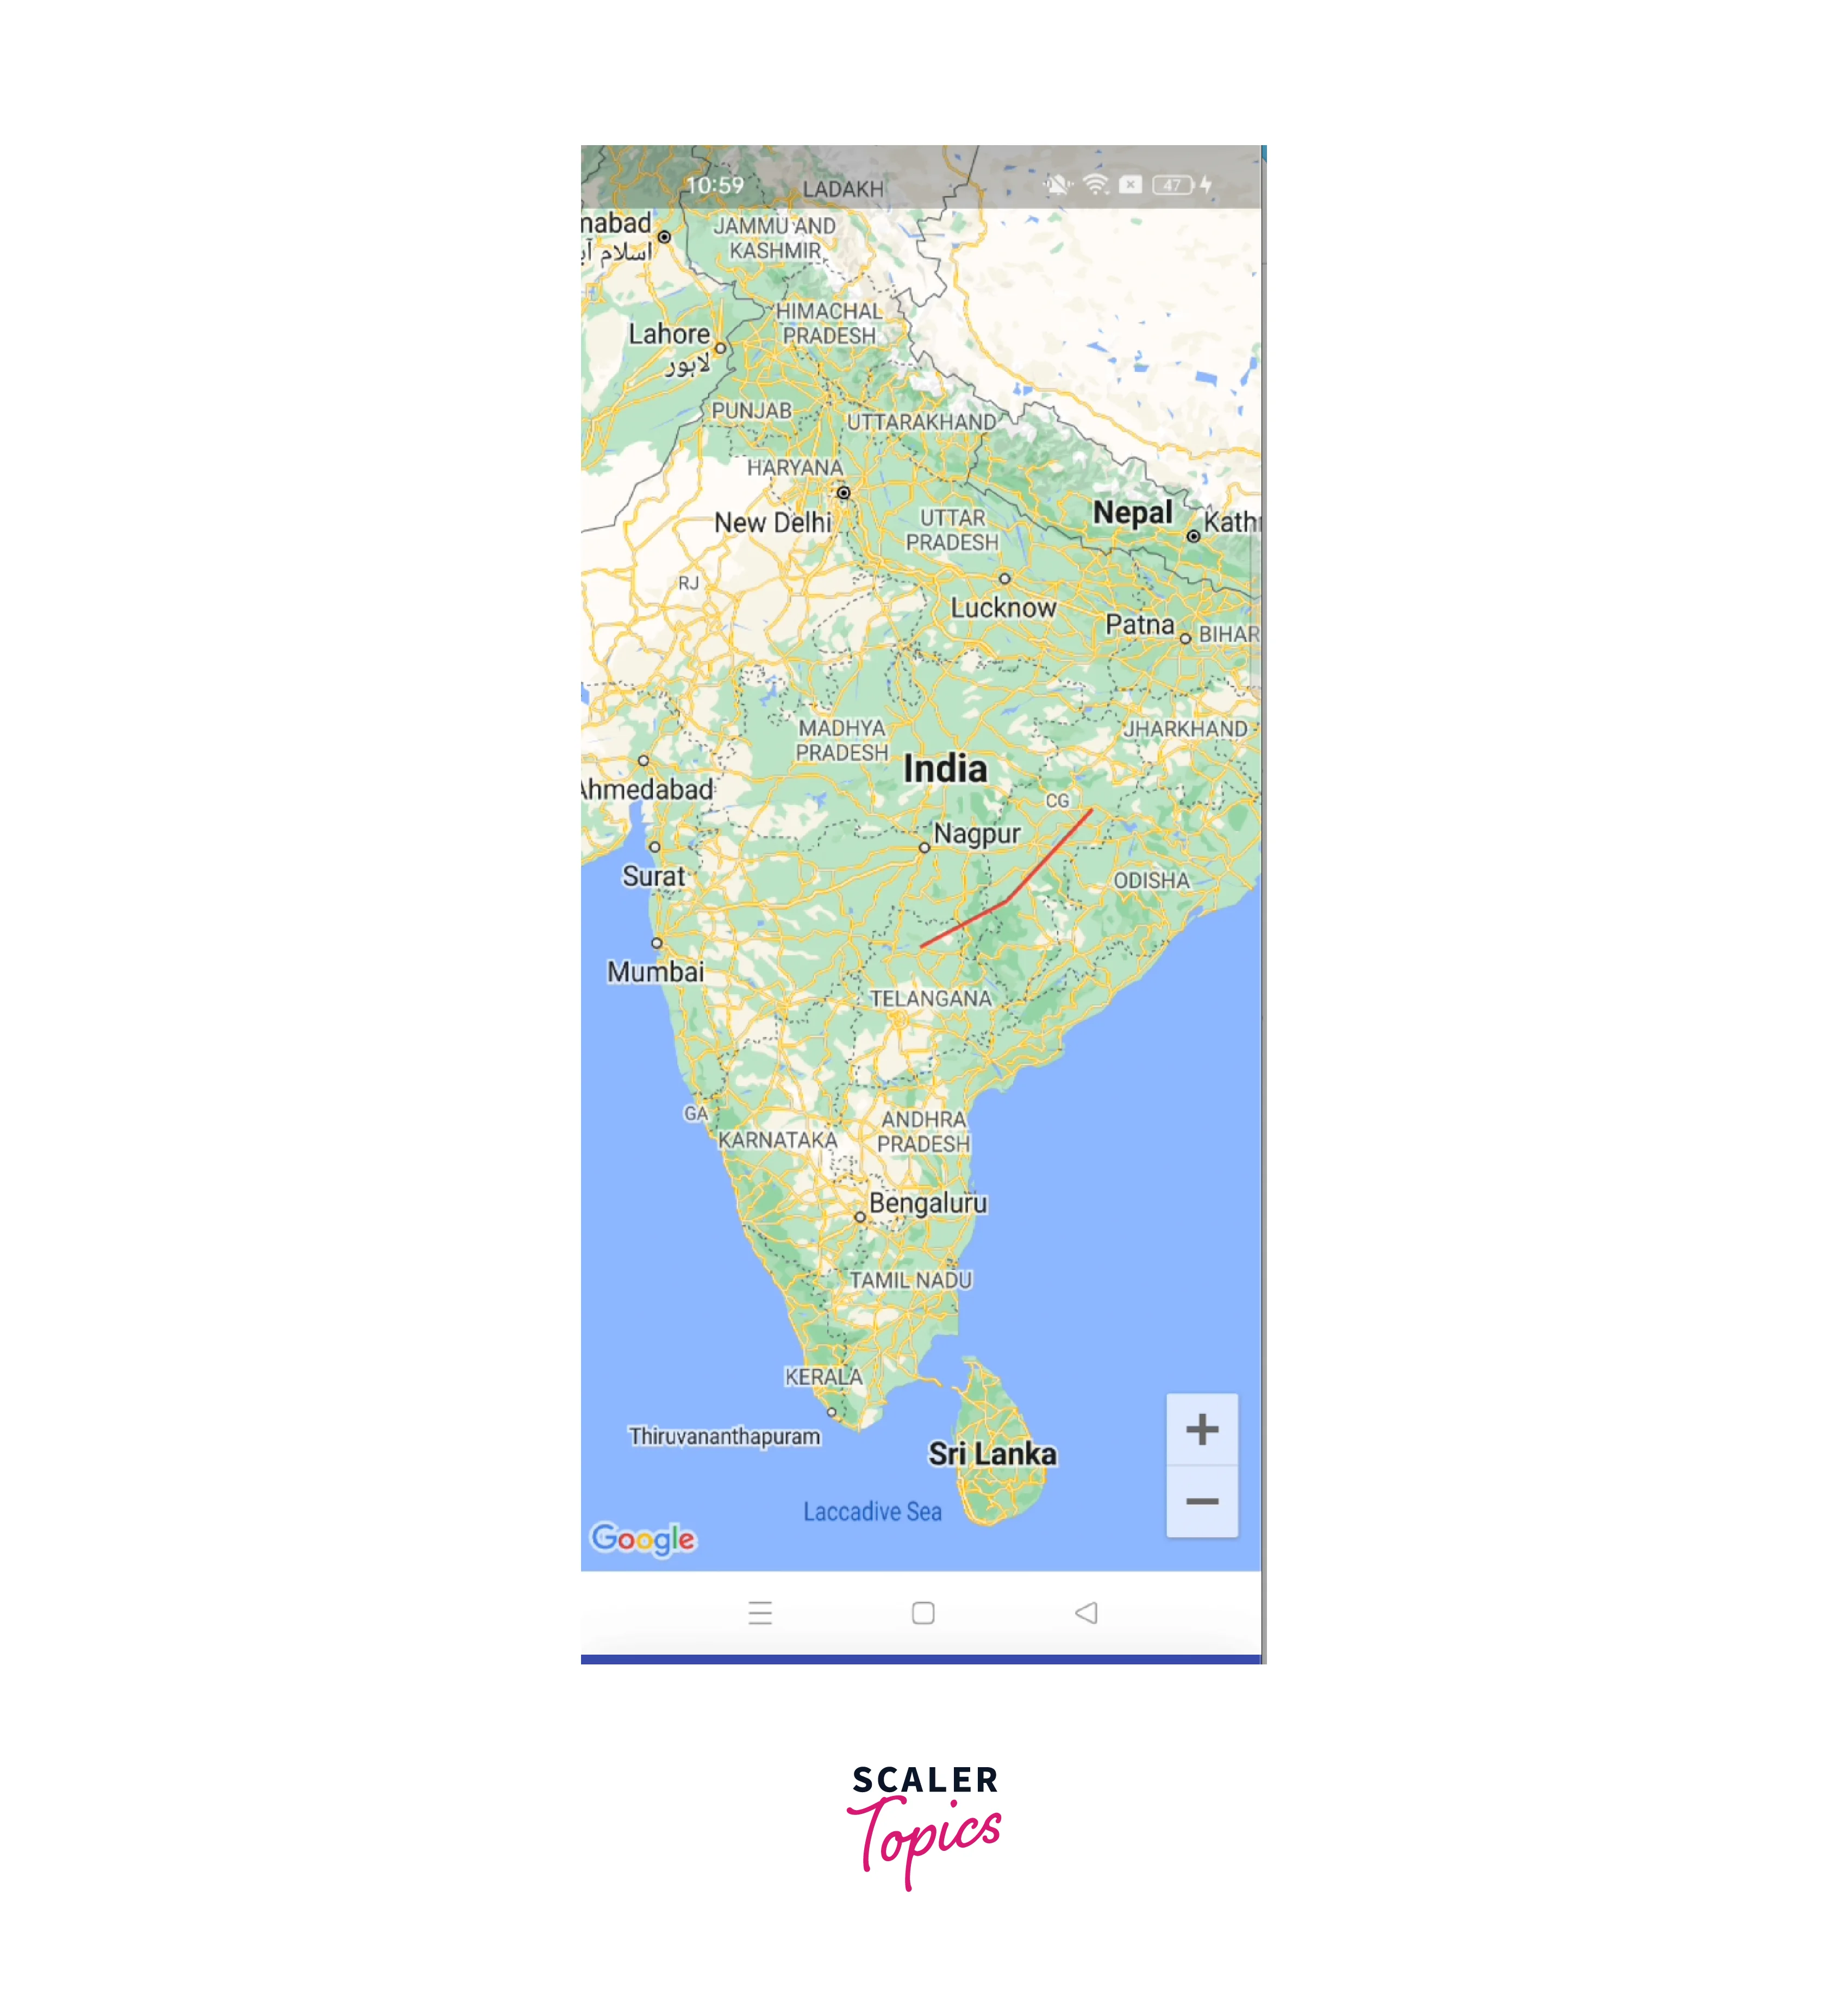
A Polyline is a list of points, where line segments are drawn between consecutive points. These are used to represent boundaries, roads, rivers, and other lines on google maps.
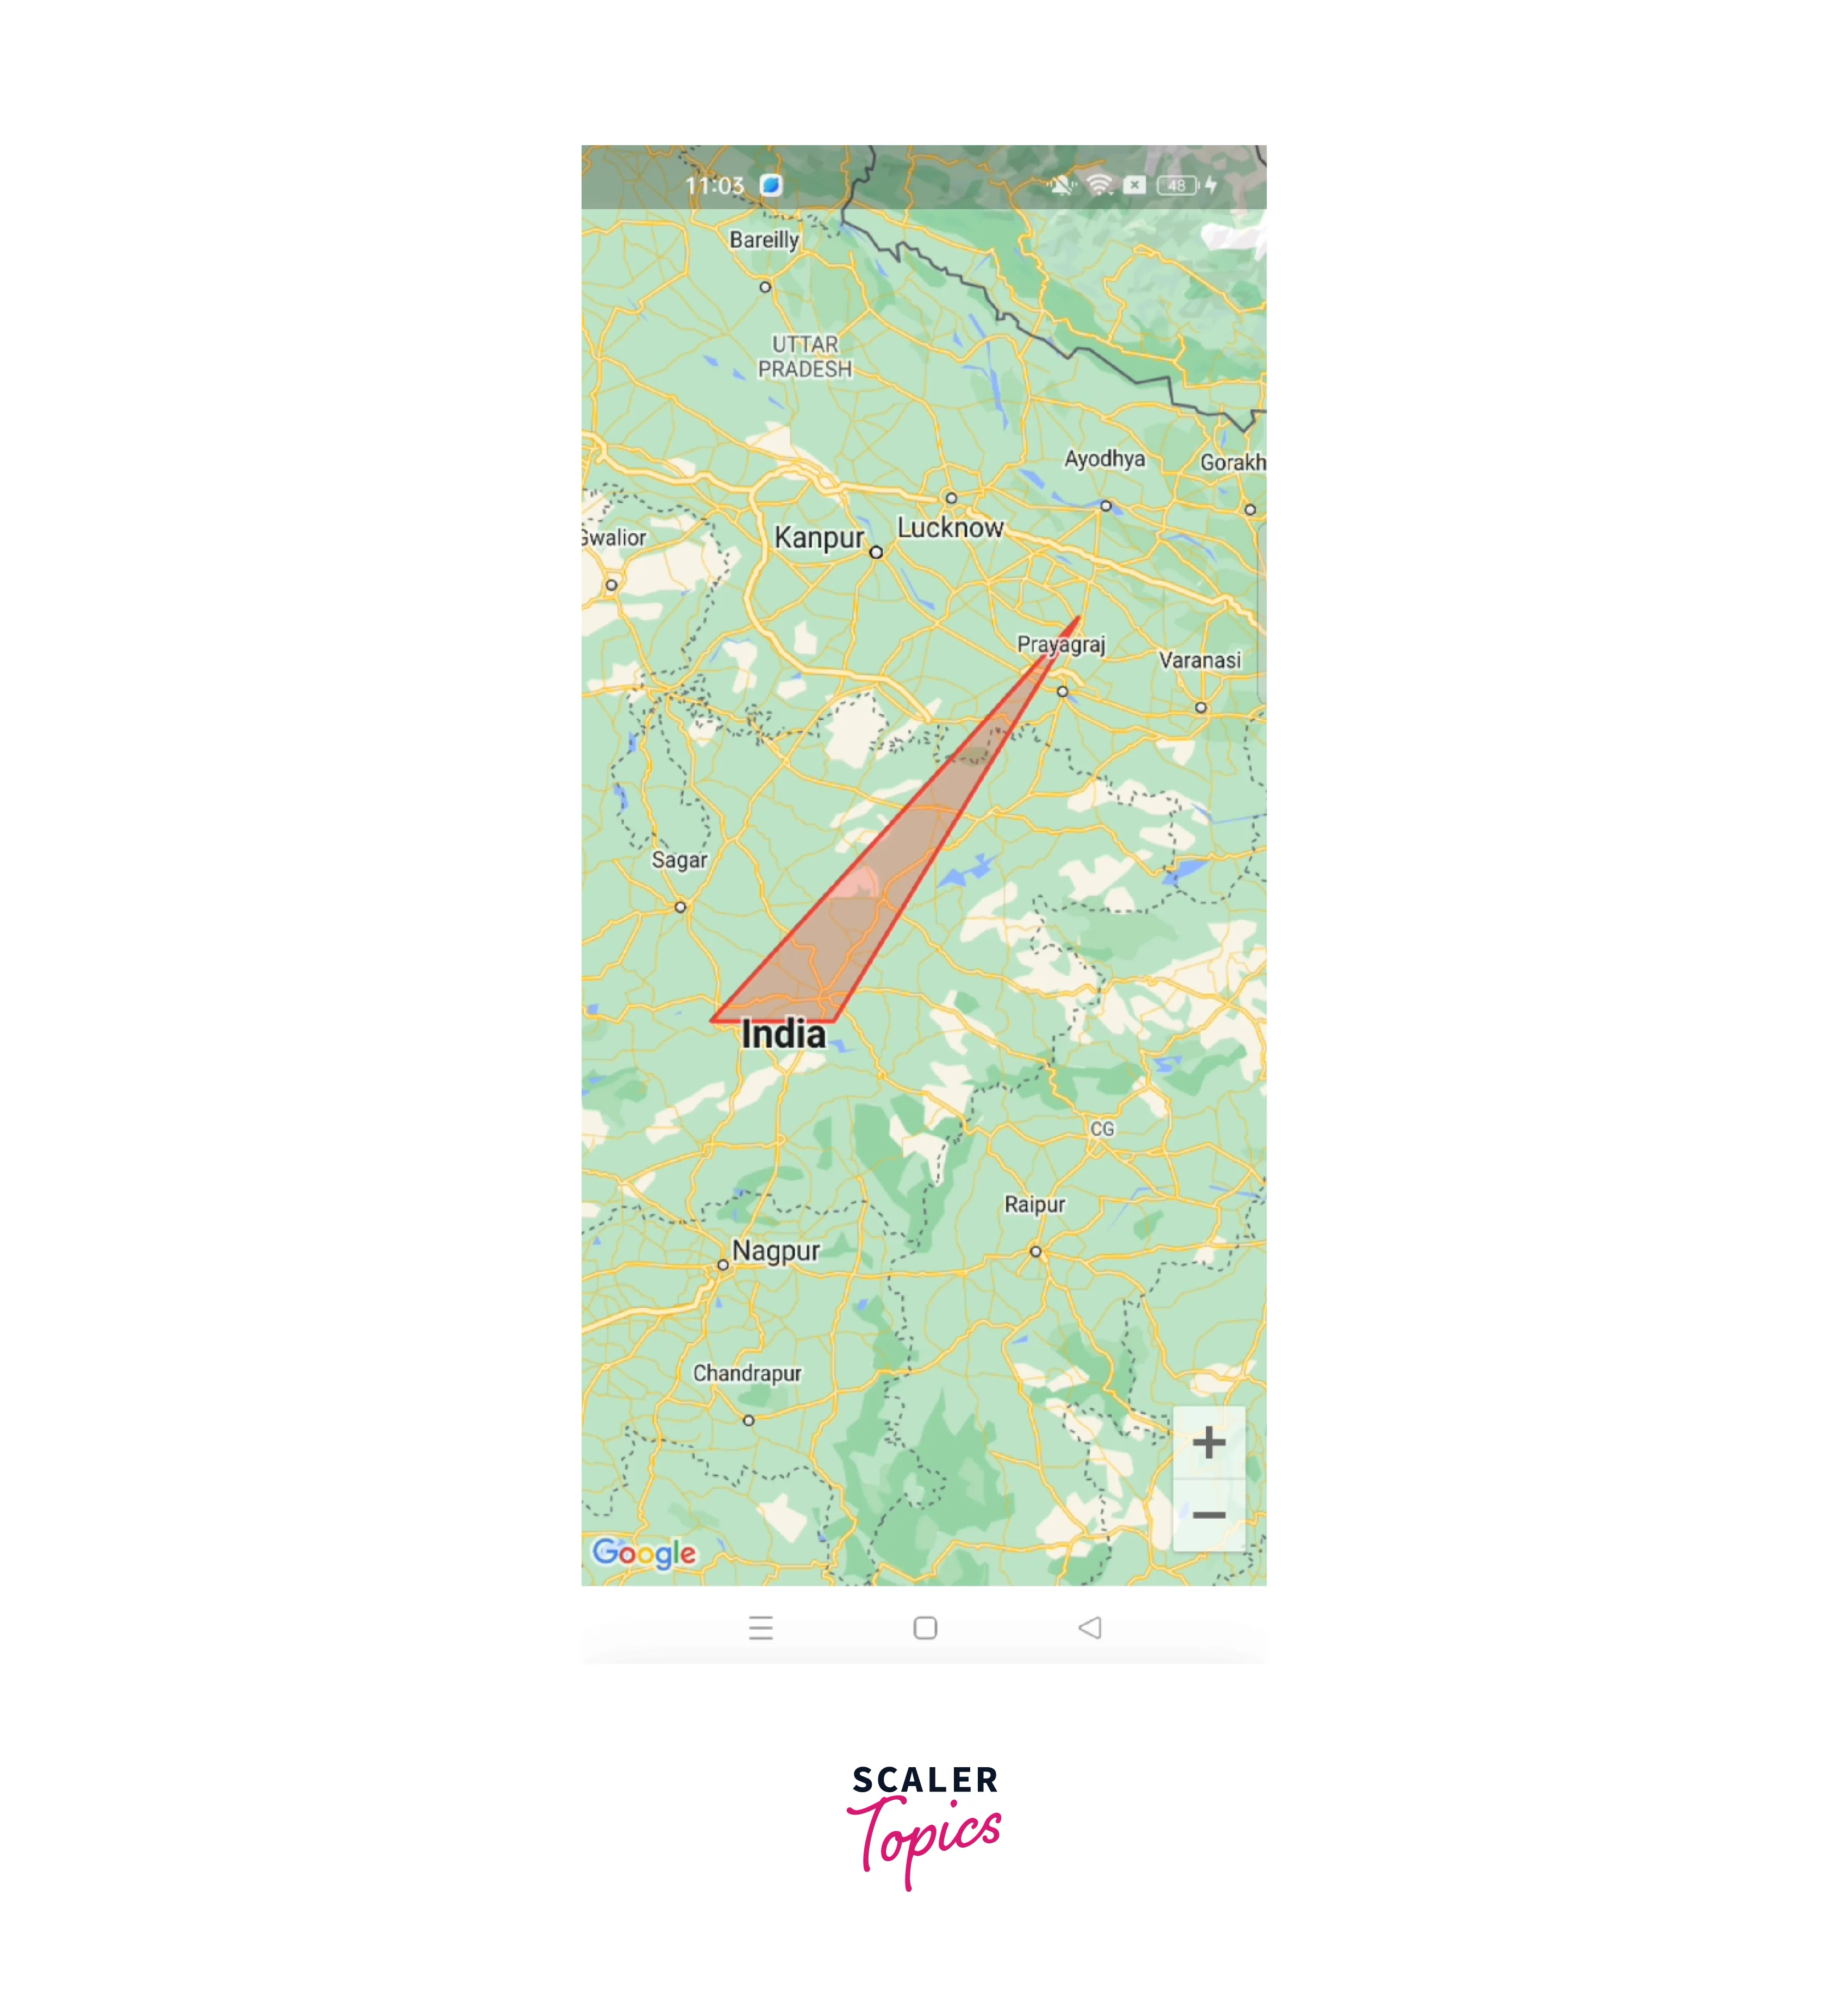
A Polygon defines a series of connected coordinates in an ordered sequence and forms a closed loop and defines a filled region. These are used to highlight a particular geographical area of a state or a country in google maps for Flutter applications.
Polygons
-
Create a list of locations to display in polygon
-
Define a Set of polygon objects to store the polygons you want to draw on the map.
-
Define the points list and other properties of the polygon.
-
Add the polygons in polygonList in initState.
-
Use the GoogleMap widget and pass the polygonList to the polygons property of GoogleMap.
We will see something like this in drawing a polygon.
Polylines
-
Create a list of locations to display in polygon
-
Define a Set of Polyline objects to store the polylines you want to see on the map.
-
Define the points list and other properties of the polyline.
-
Add the polyline in polylineList in initState.
-
Use the GoogleMap widget and pass the polylineList to the polylines property of GoogleMap.
We will see something like this on drawing a polyline.
Getting Addresses from Latitude and Longitude
There are times when we have latitude and longitude and we need to get the address from these two values.
For this, we have to use the "geocoding" package and Pub get it and use this with google maps.
We need the placemarkFromCoordinates() method and pass the coordinates in this method. From this, you can get the address as shown below.
Call the getAddressFromLatLong() method on the button tap.
Getting Latitude and Longitude from Address
There are times when we need to get latitude and longitude from the given address. This situation occurs when we search for a place on the map, we get the address. We need to pass LatLong for this address to the backend for storing both addresses and LatLong.
For this, we have to use the "geocoding" package and pub get it.
We need the locationFromAddress() method and pass the address inside it and fetch the LatLong from this.
Call the getLatLngFromAddress() method on the button tap.
Different Types of Map
There are various types of maps available and we can use them according to our needs in google maps. There is a mapType property and we can see multiple options for the map. This property tells us about the type of Map tiles to display in google maps. Five types of tiles are-
| Property Name | Description |
|---|---|
| none | Do not display map tiles. |
| normal | Normal tiles with traffic, labels, and subtle terrain information. |
| satellite | Satellite imaging tiles (aerial photos). |
| hybrid | Hybrid tiles (satellite images with some labels/overlays |
| terrain | Terrain tiles (indicates type and height of terrain). |
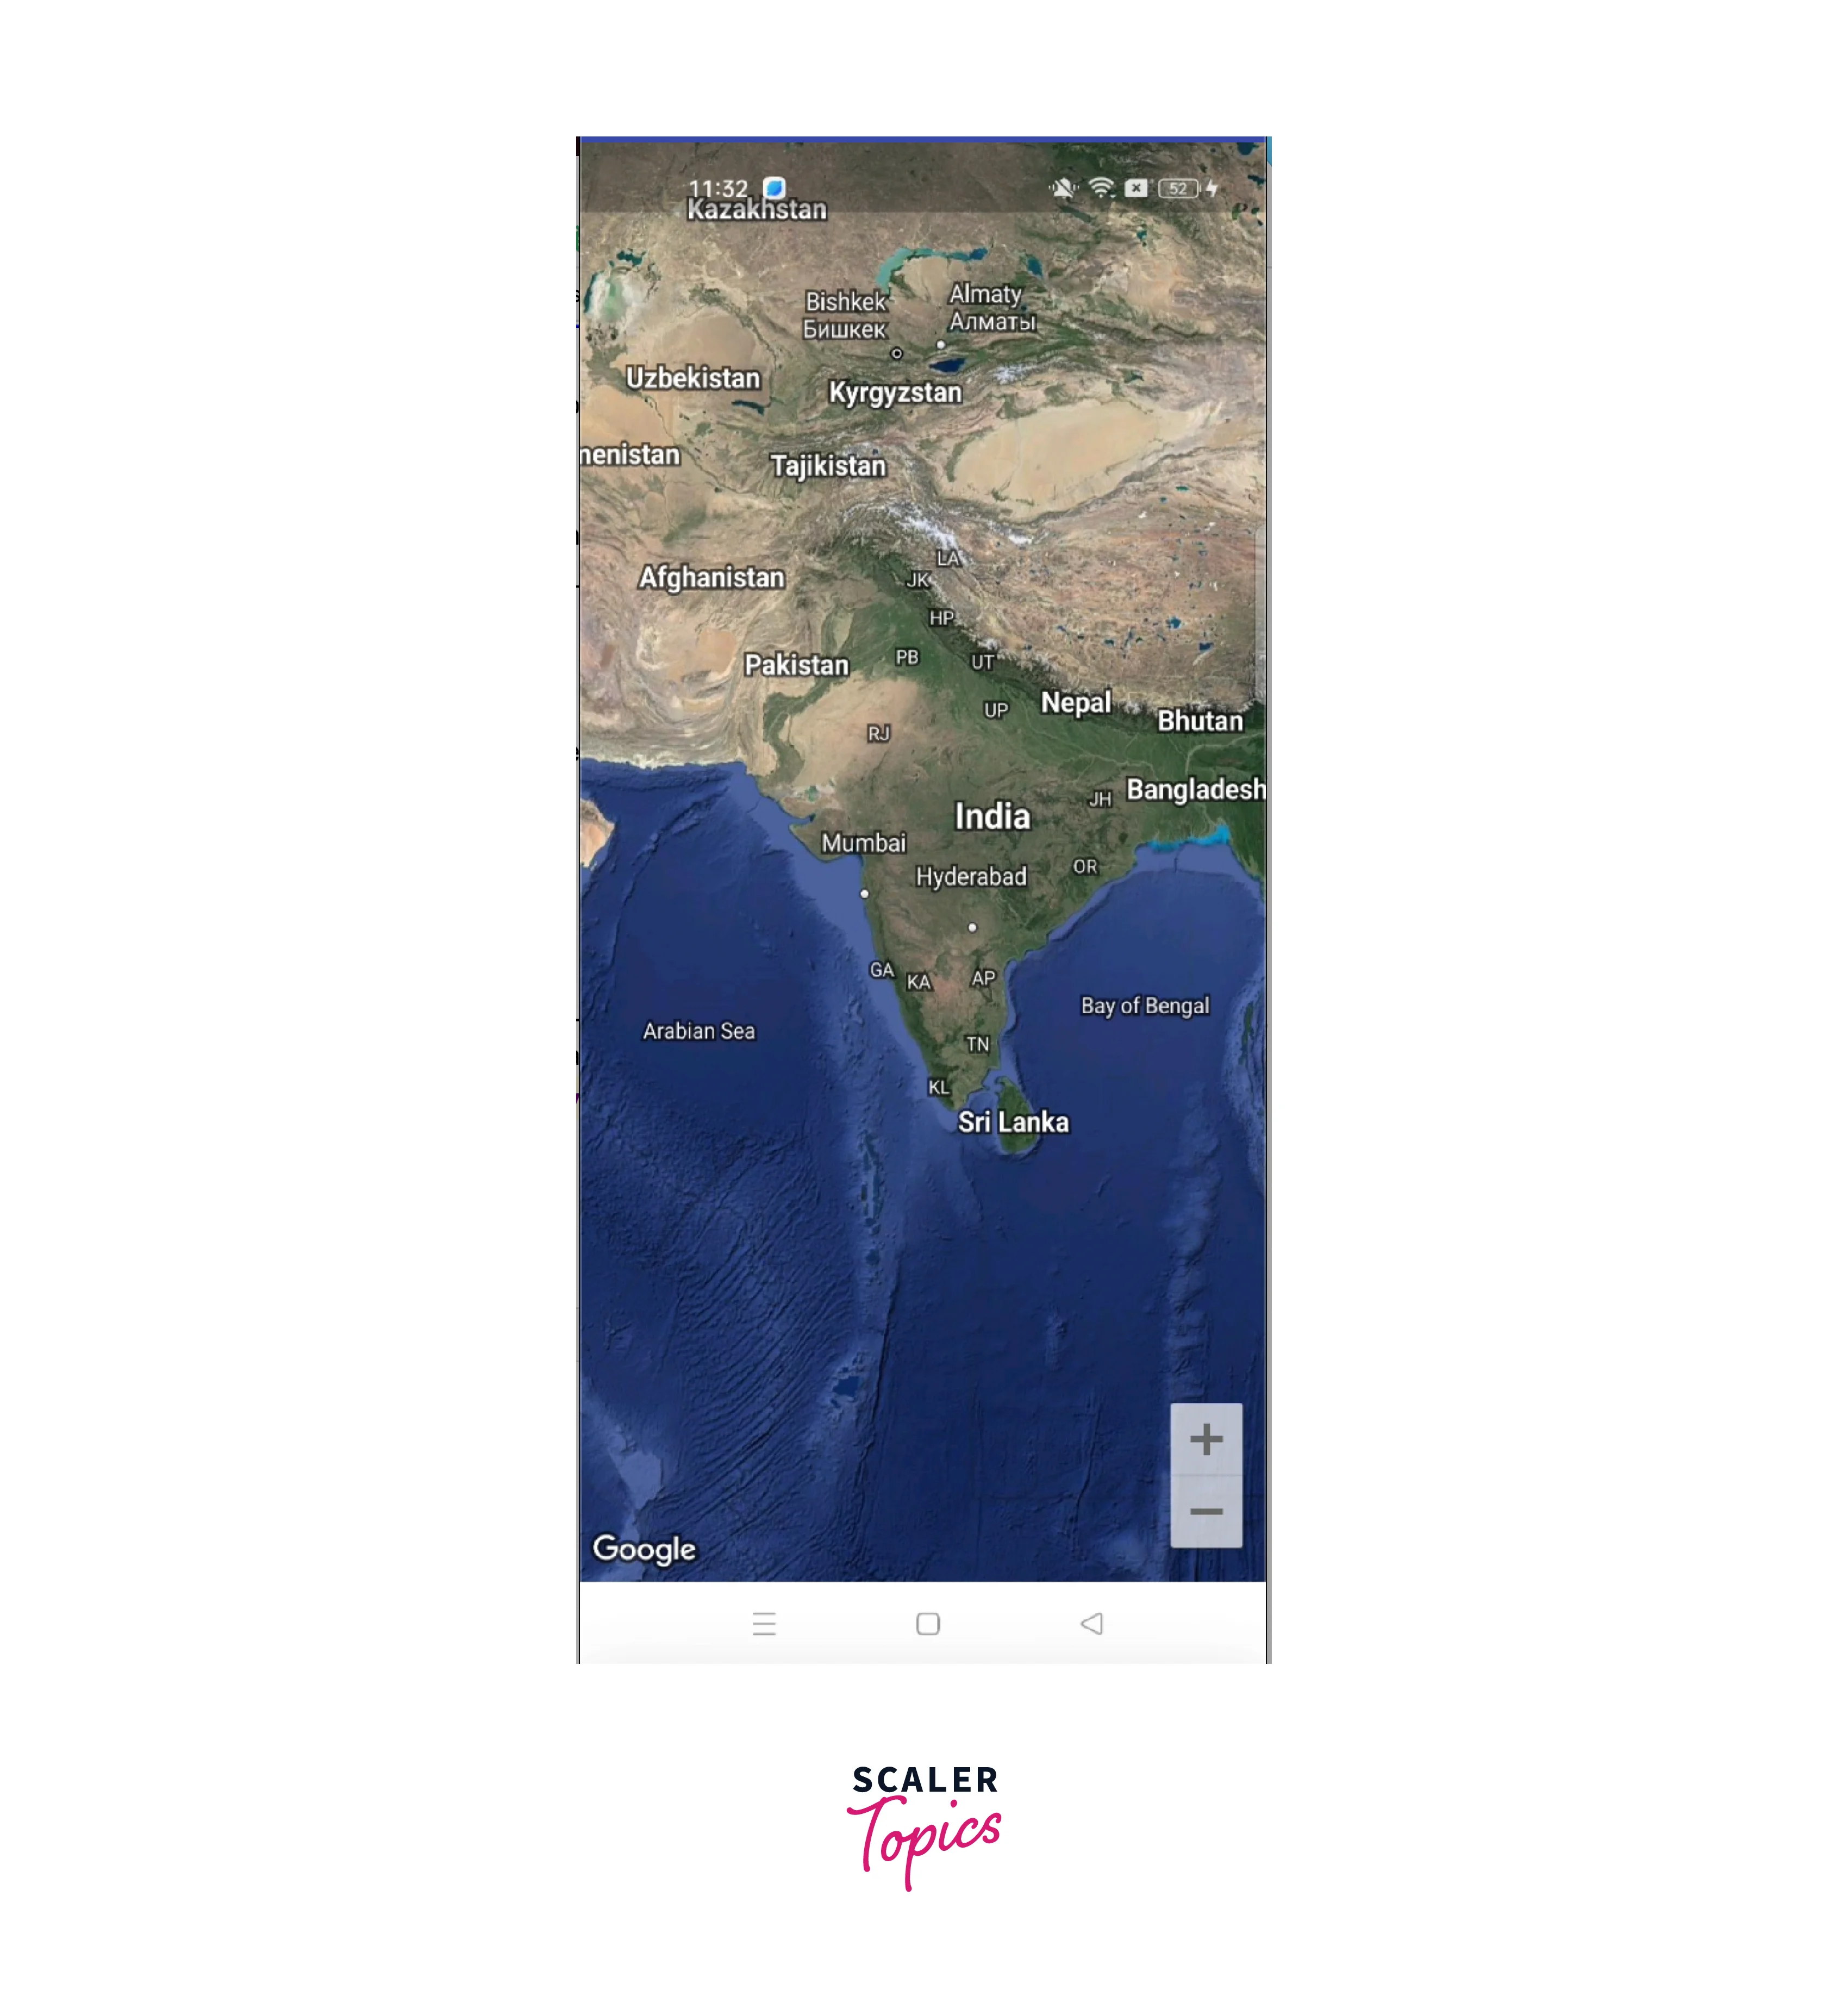
Below is the picture of the hybrid map for your reference and you can change them according to your requirement with MapType.normal or MapType.terrain.
Themes of Map
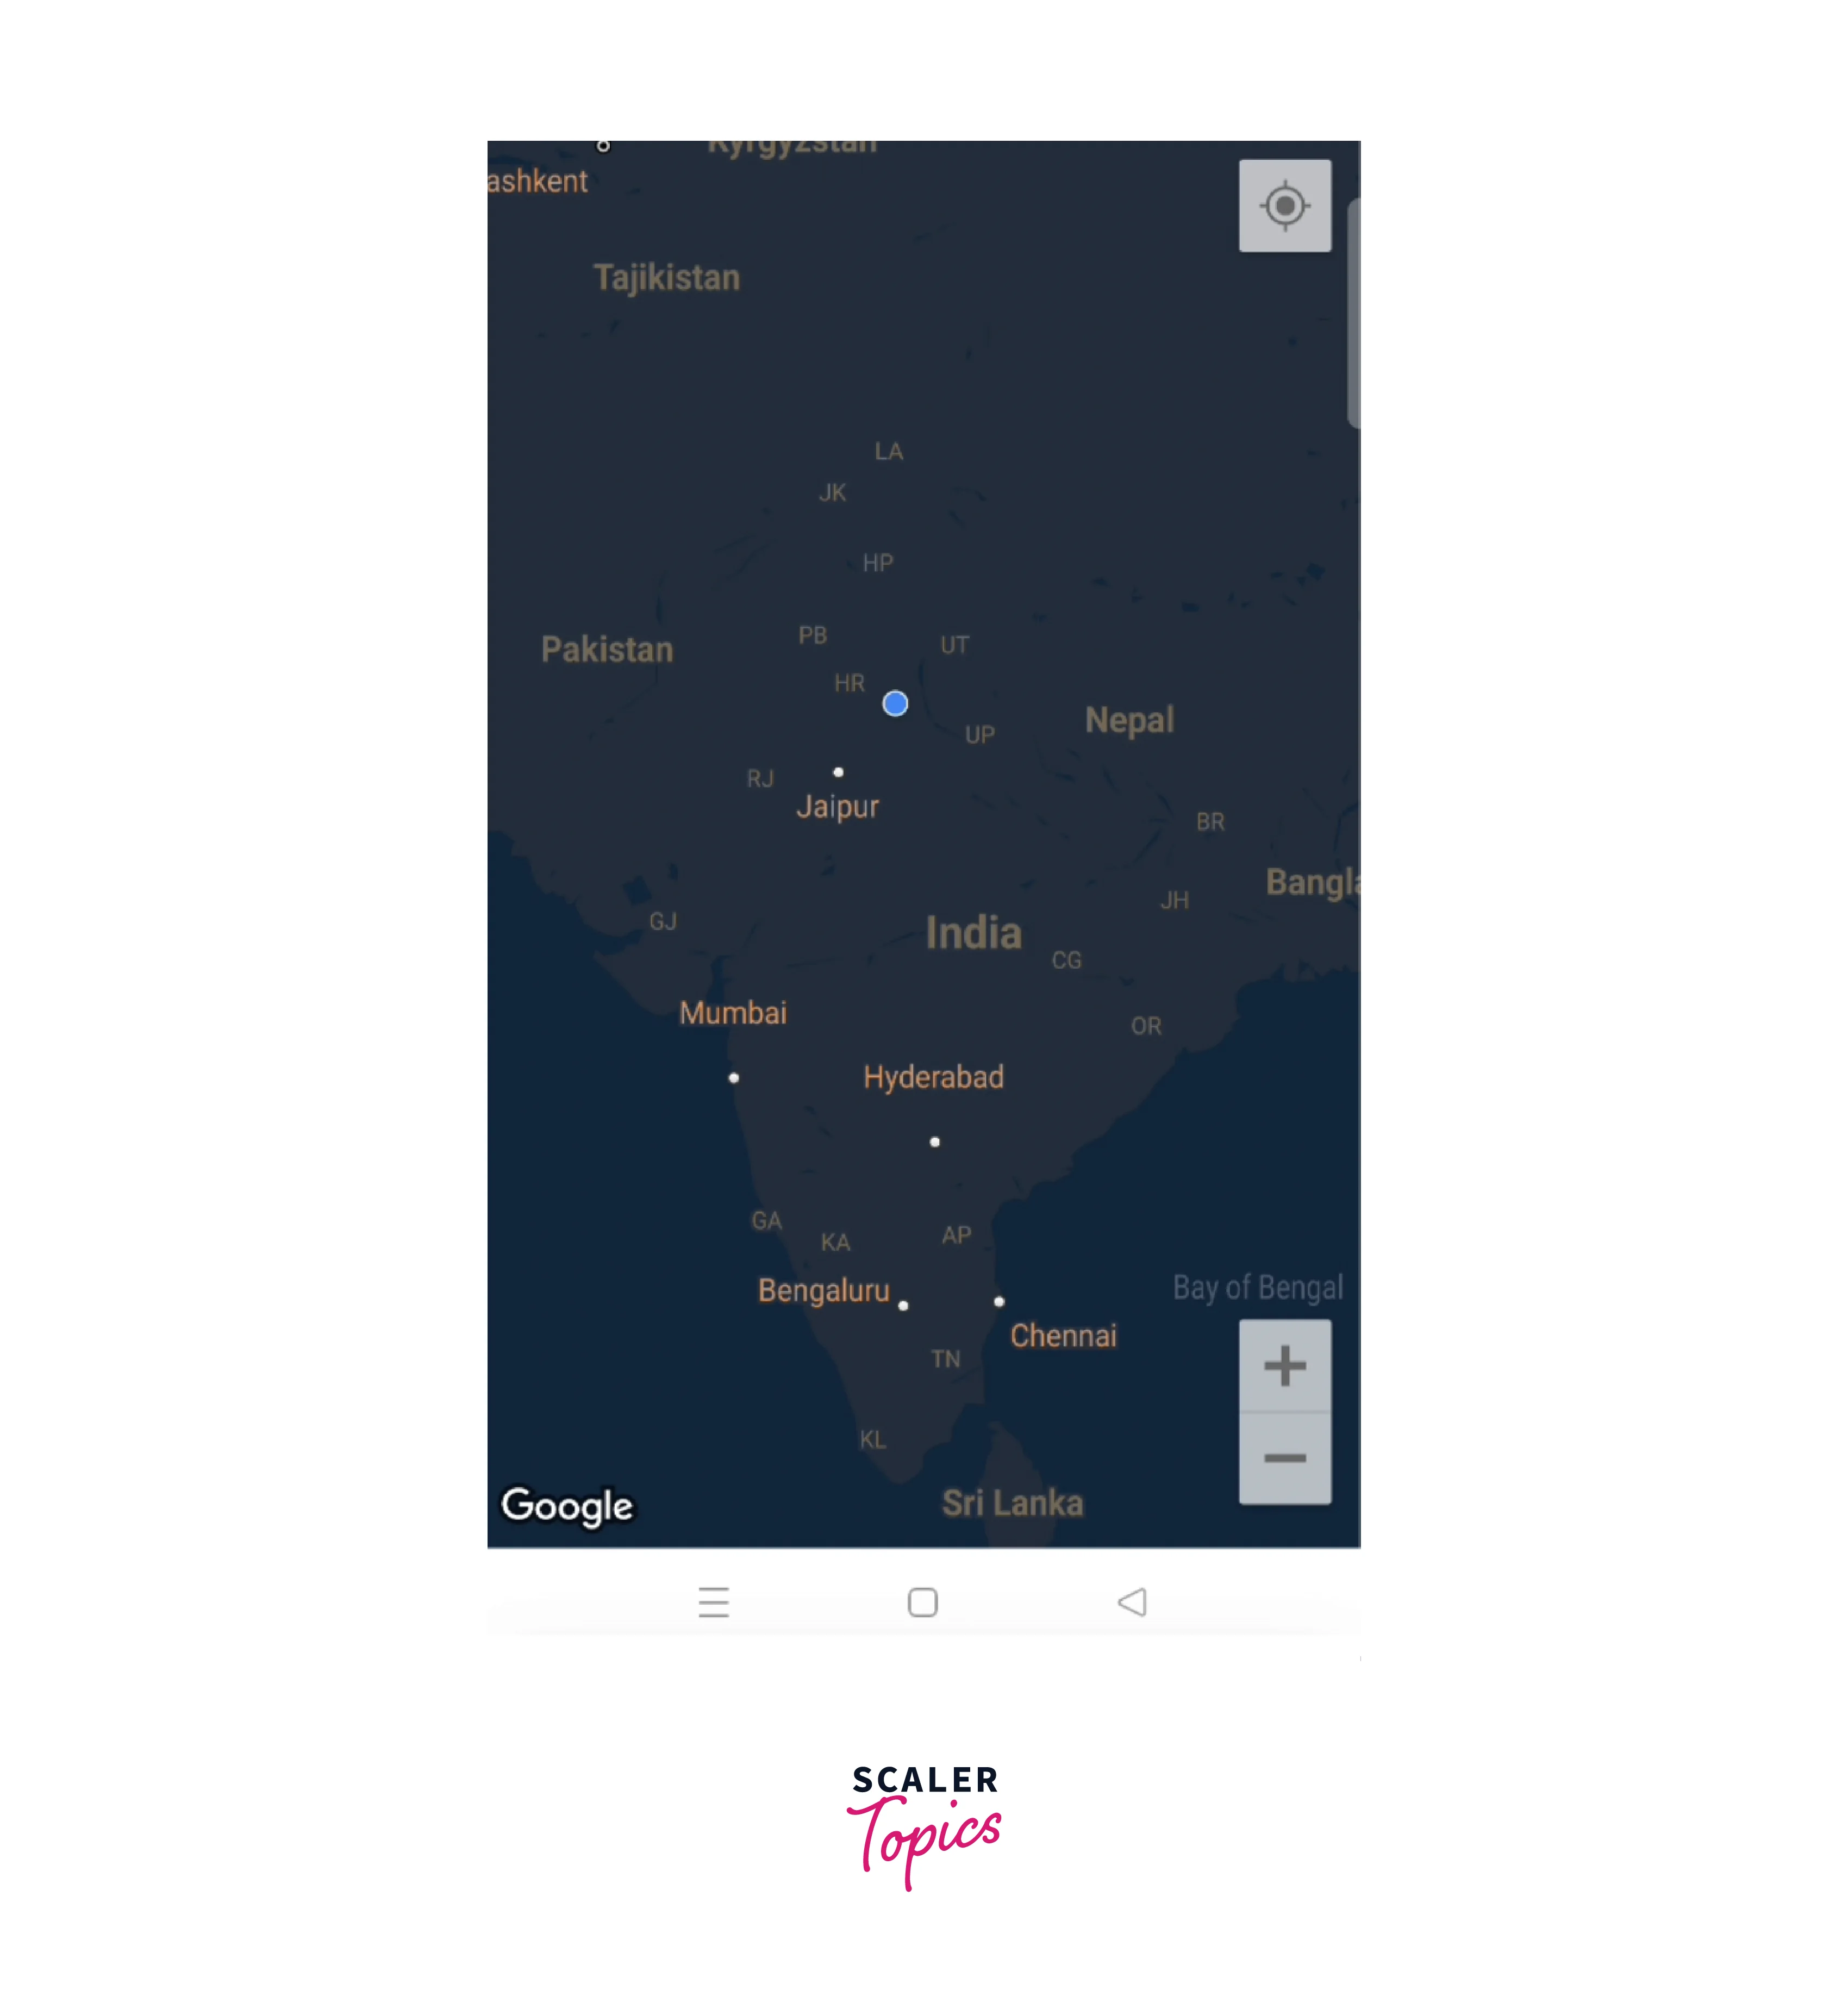
We can change the themes of Google Maps by customizing the map style. The map style defines the visual appearance of the map, including colors, roads, landmarks, and other elements.
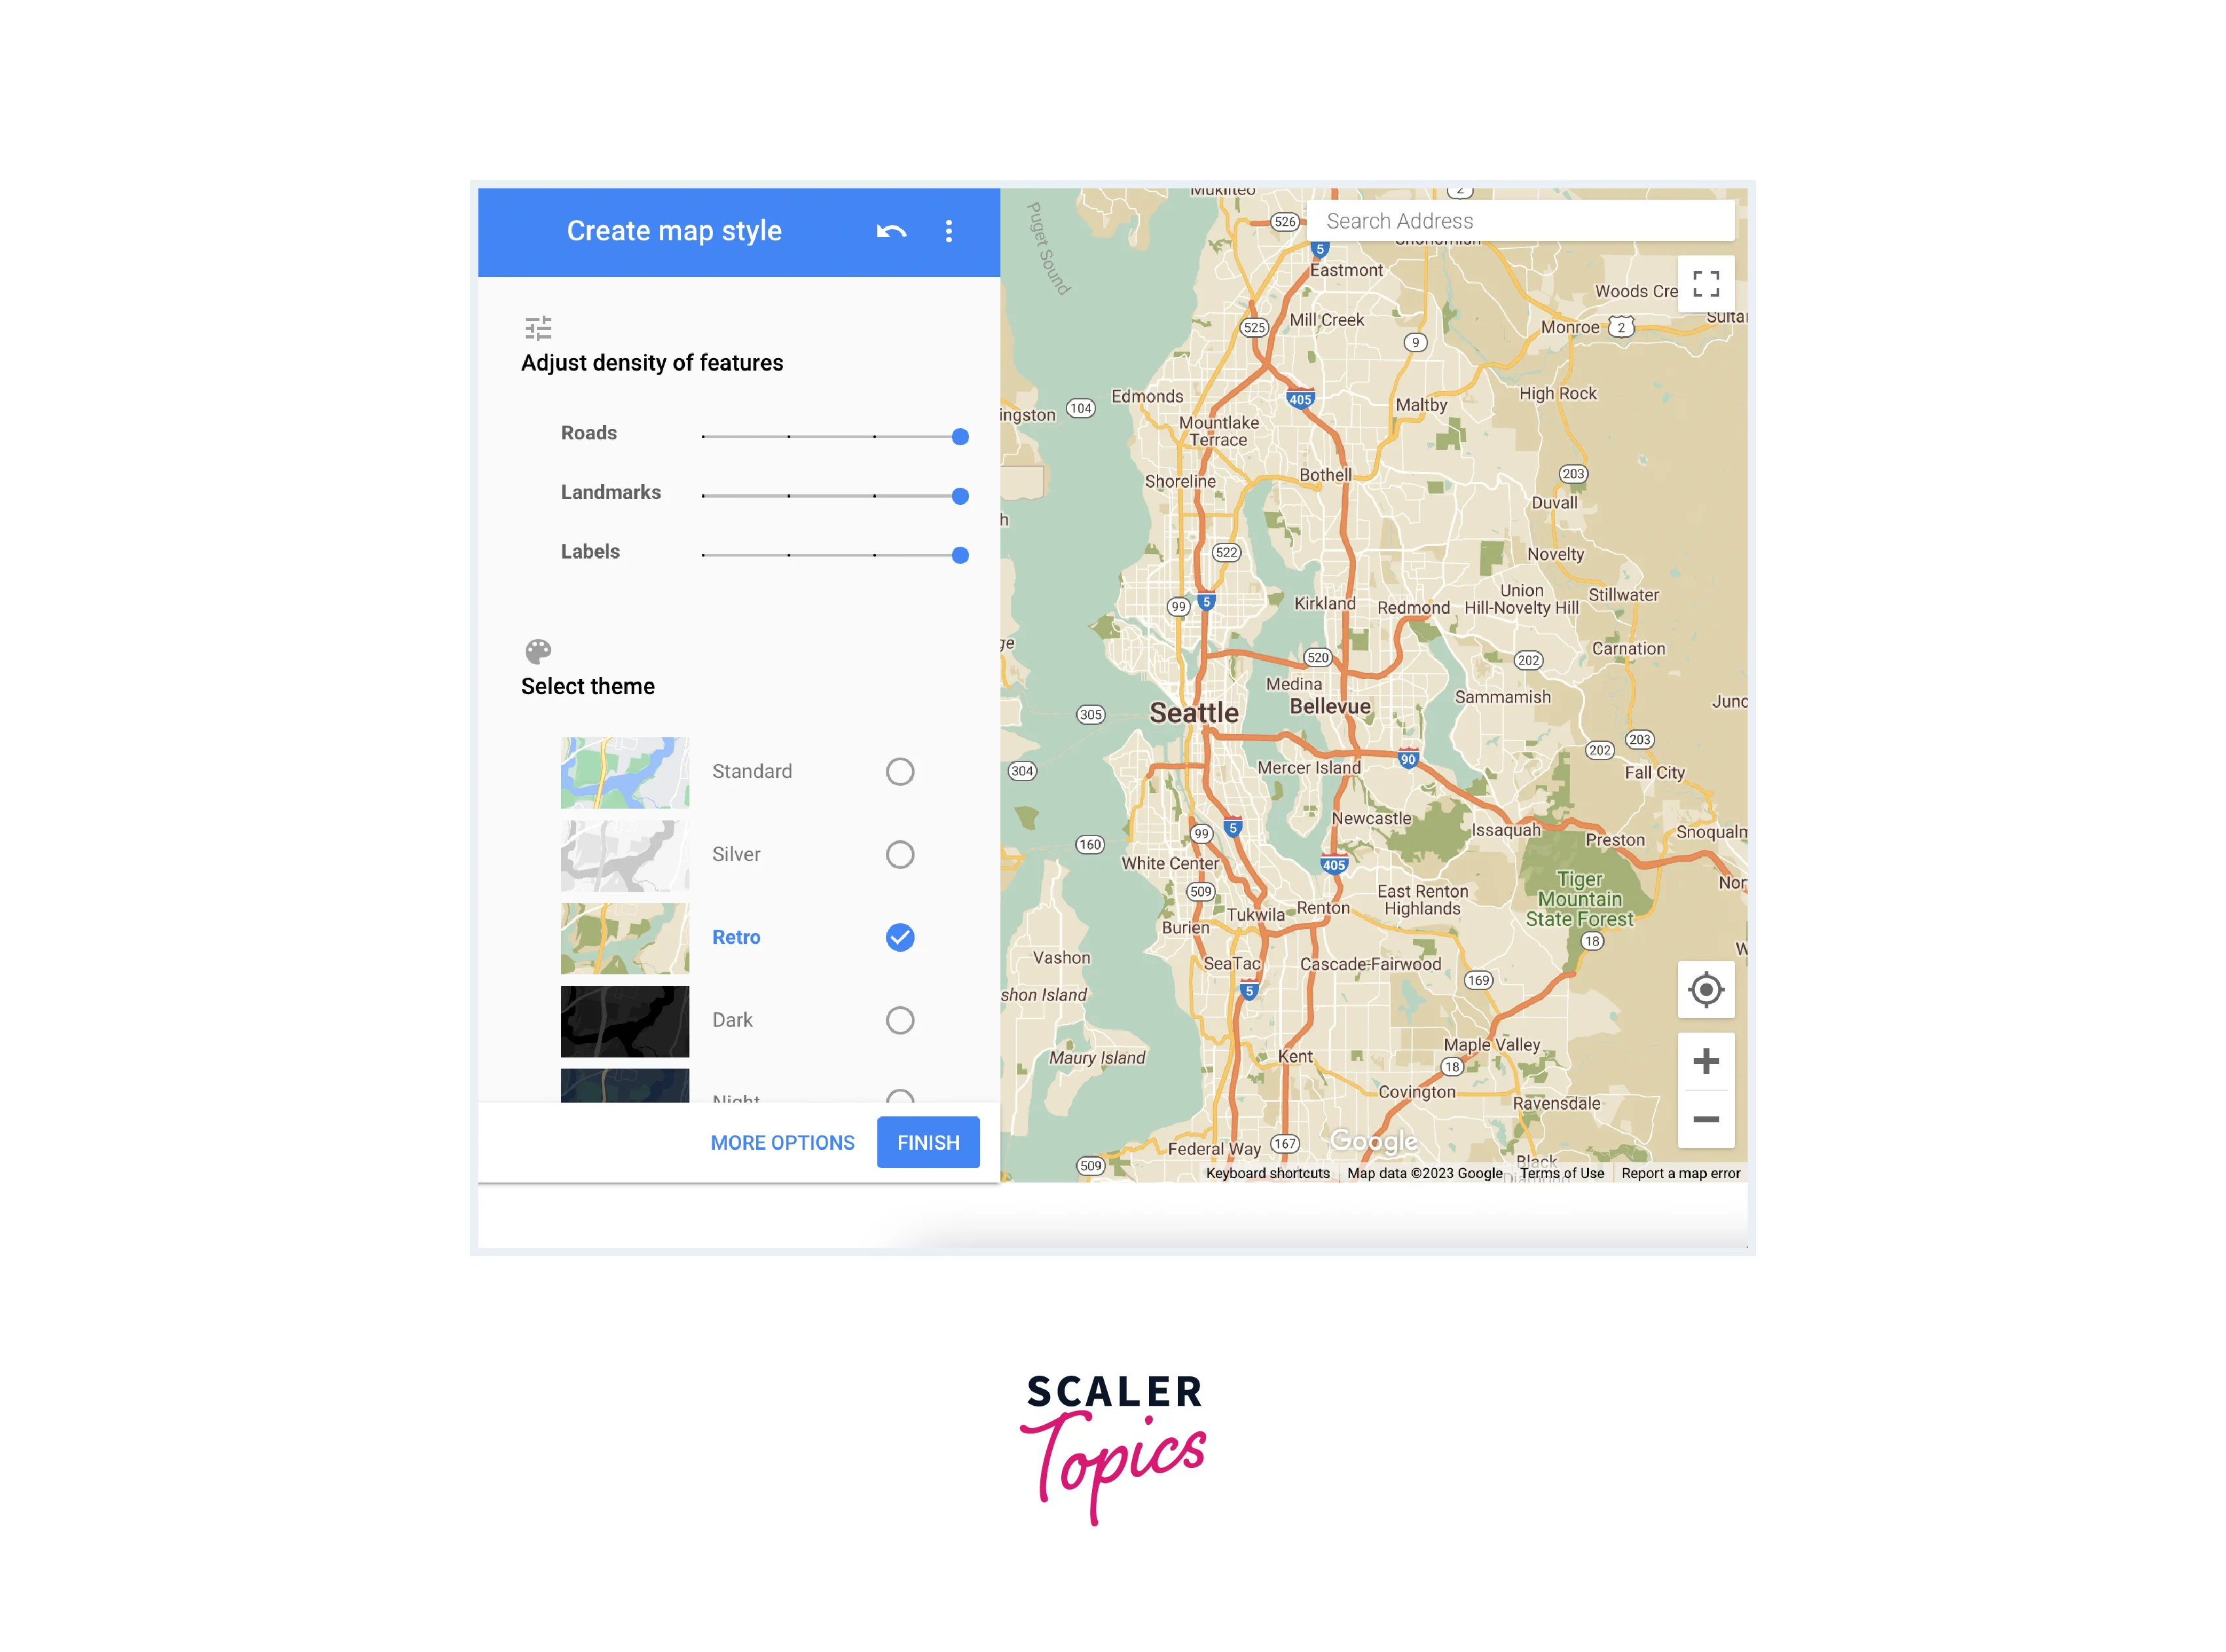
- You need to go to this https://mapstyle.withgoogle.com/ website and choose the theme of your preference.
- Adjust the density of features and click on Finish.
- Click the COPY JSON button and you will get the JSON object of the selected theme.
Now to use these styles, you have to add this to your code. For this create an assets folder in the root directory and create a map_theme directory. Inside map_theme, you can paste your copied JSON in different classes like night_theme.json, retro_theme.json and silver_theme.json.
Remember to add the assets in yaml file.

Load and add the map style- Create a function where you have to load the copied JSON data in a variable and pass the variable to the setMapStyle method of the controller as shown below.
Then just pass this method to the onMapCreated property of the GoogleMap widget like this.
Hence by doing this, you will be able to see the night theme and can change themes by loading another JSON.
Example App
This app is for using google maps in Flutter and will include all the properties and features discussed above like current location, changing themes, drawing polygons and polylines, and getting addresses fromLatLong and vice-versa.
You need to perform all actions beforehand that are discussed in the "Installation and Configuration" section like creating an account, getting and adding keys, and giving permissions in Android and iOS.
Add all the dependencies as discussed above and add JSON for Google map themes.
There are two main files containing all code.
- main.dart
- all_features.dart
For whole code, you can checkout my repository link-https://github.com/riyatyagi99/google_maps
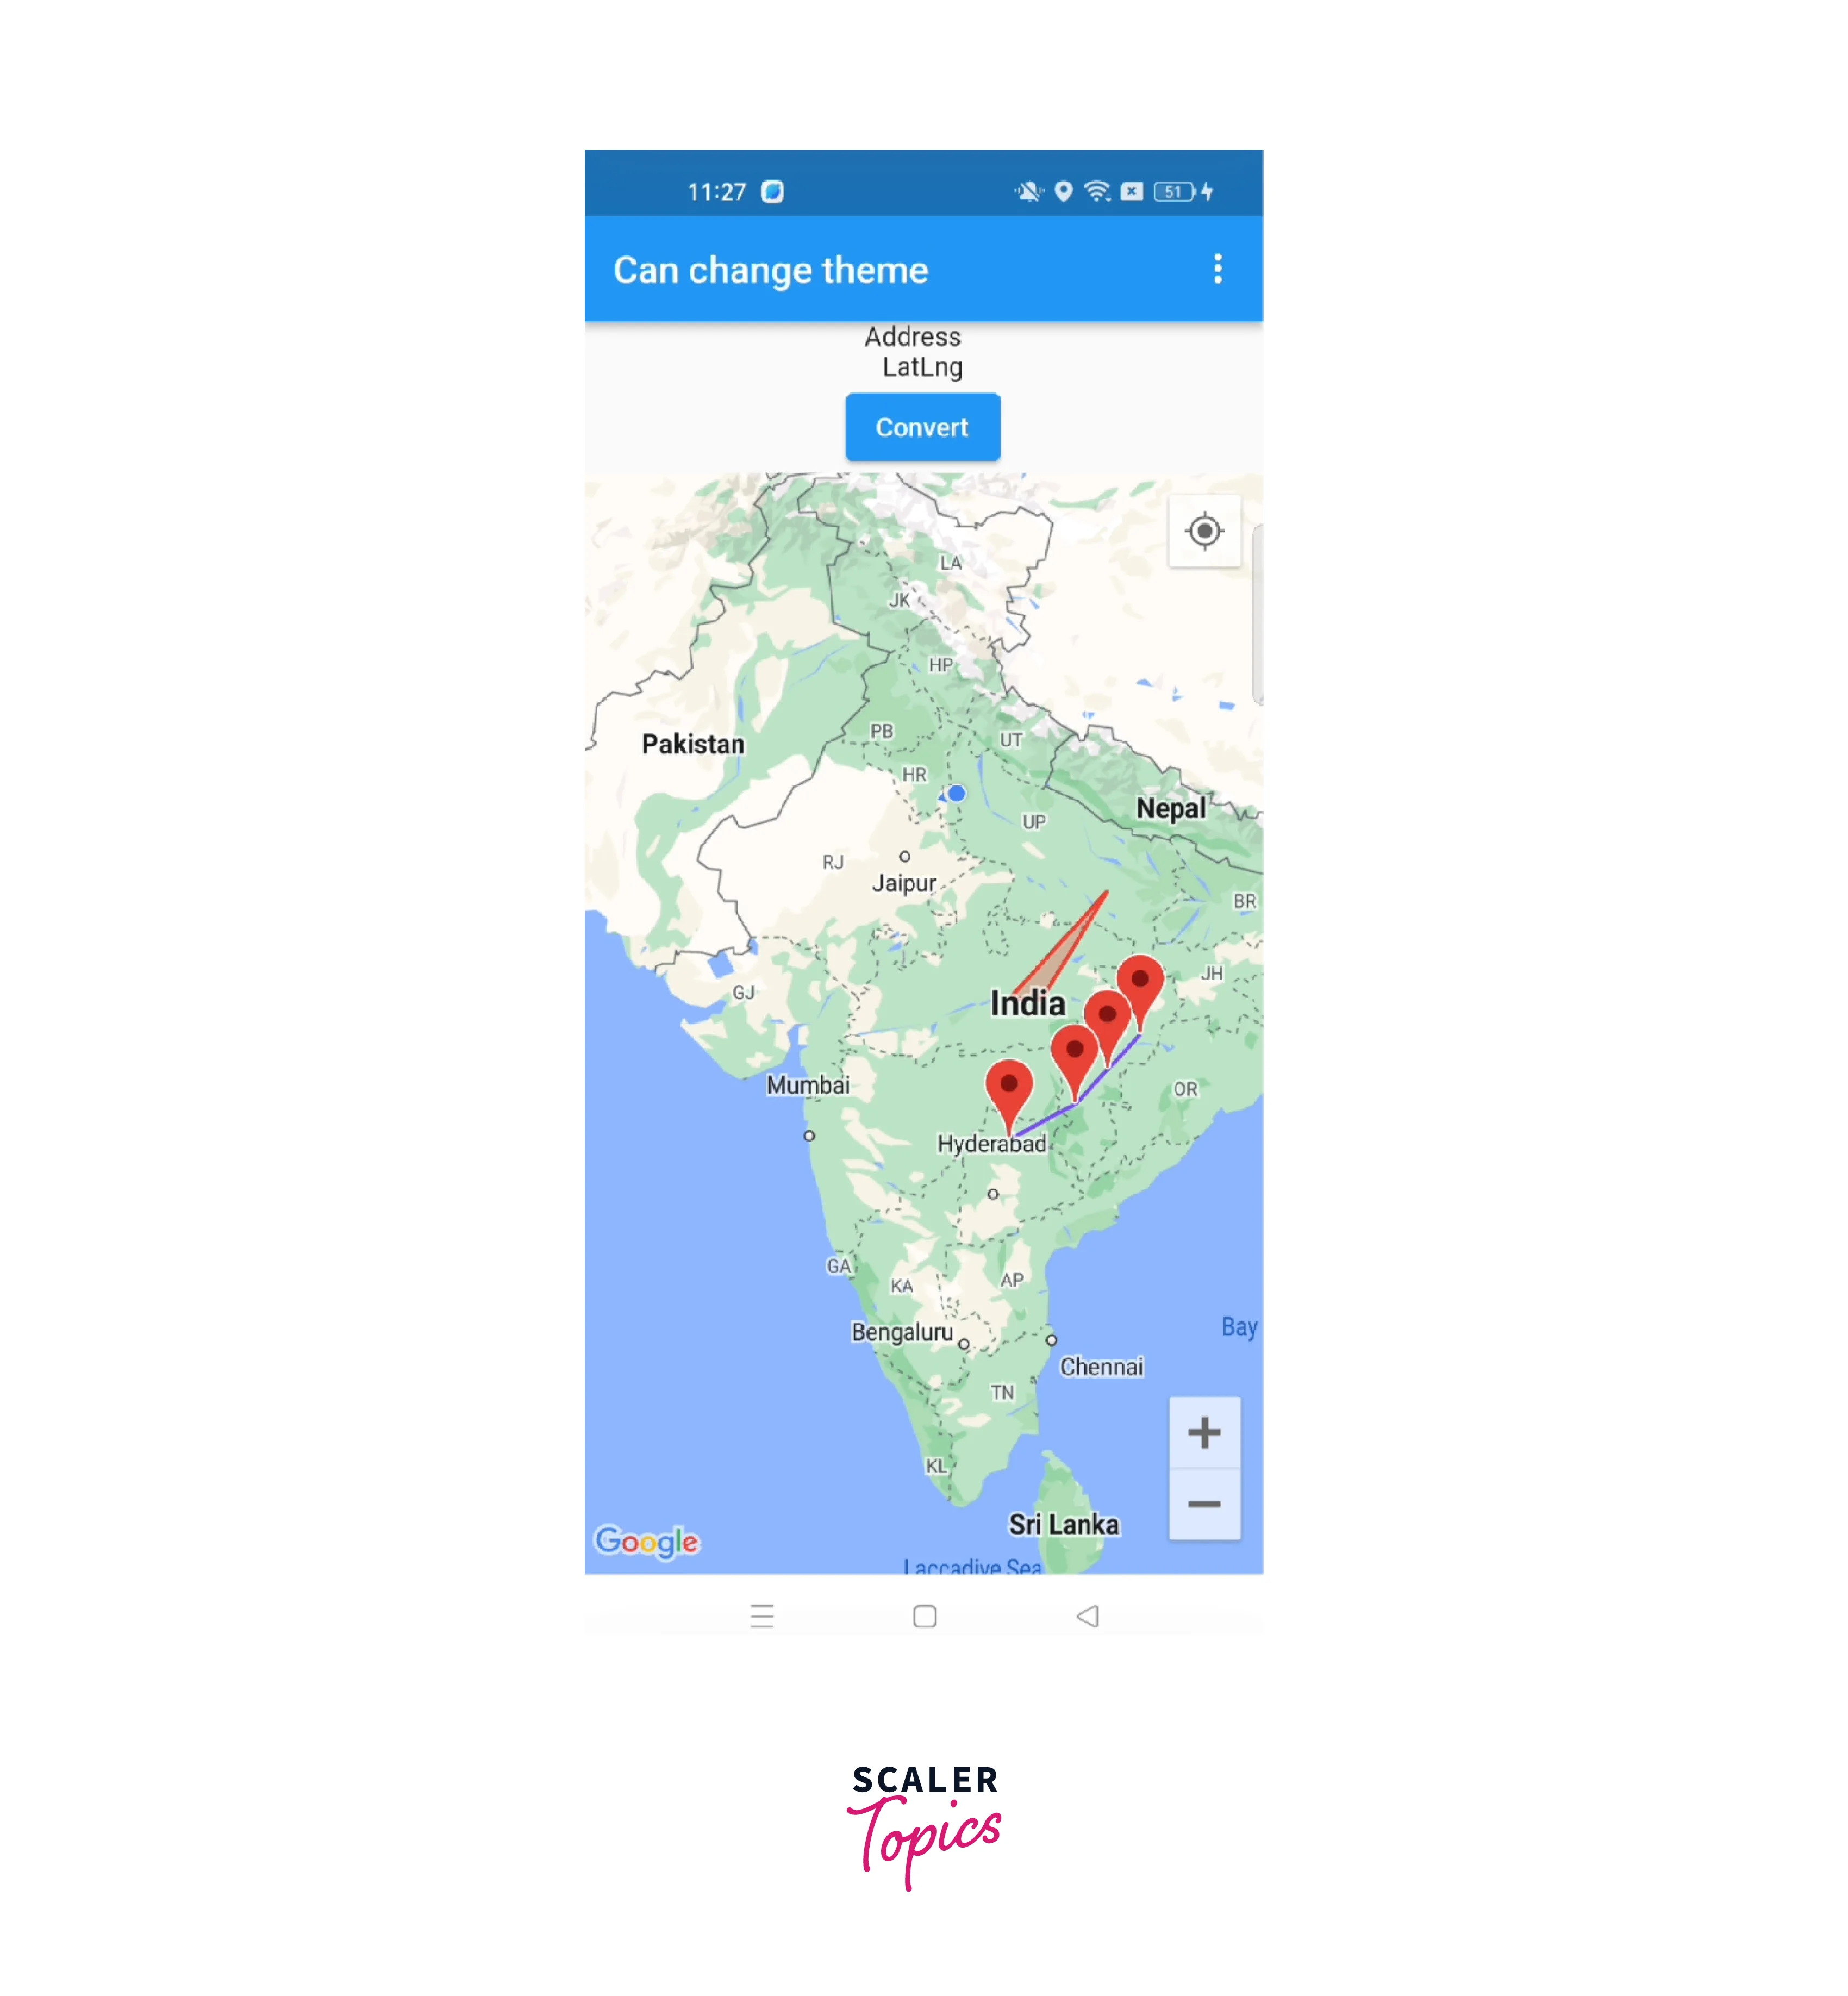
This is the attached screenshot for your reference the above code is done. For the whole code, you can check out my repository link- https://github.com/riyatyagi99/google_maps.
Conclusion
- We can use the "google_maps_flutter" dependency to use google maps in Flutter.
- For getting the current location of any user, we use a "geolocator" dependency.
- To get the address from LatLong and get latLong from the address, we can use the "geocoding" dependency.
- We can draw polygons and polylines using google maps in our application by getting the list of latitude and longitude and passing them in the GoogleMap widget. We can give color and width to polylines and can fill color in polygons along with giving strokeColor and strokeWidth.
- We can also change the theme of our google maps by copying the JSON object and loading the data in the application.
- We can add markers in our google maps by giving some markerId and can show some info like title and snippet on the marker.
- We can change the mapType to normal, hybrid, terrain, and satellite.
