How to Create a Flutter App?
Overview
A Flutter app is an application that is created with the Flutter framework. Flutter enables developers to construct cross-platform programs that operate on a variety of platforms such as Android, iOS, web browsers, and desktop operating systems. Developers use Flutter to build a single codebase in the Dart programming language, which is then turned into native code for each target platform.
Flutter apps also benefit from capabilities such as hot reload, which allows developers to see changes to the code quickly reflected in the app without restarting or losing the app's state. To create a Flutter app, you need to follow a few key steps. But before that, let's have a little introduction to Flutter.
Introduction
Google created the open-source UI (User Interface) toolkit Flutter to allow developers to create natively built applications for desktop, mobile, and web platforms using a single codebase. With a wide variety of pre-built widgets, it enables developers to construct stunning, high-performance apps.
Now let’s begin with the process of how to create a Flutter App.
Setting Up the Environment
The following stages are involved in preparing the environment to Create the Flutter app:
Stage - 1: Flutter SDK must be Installed
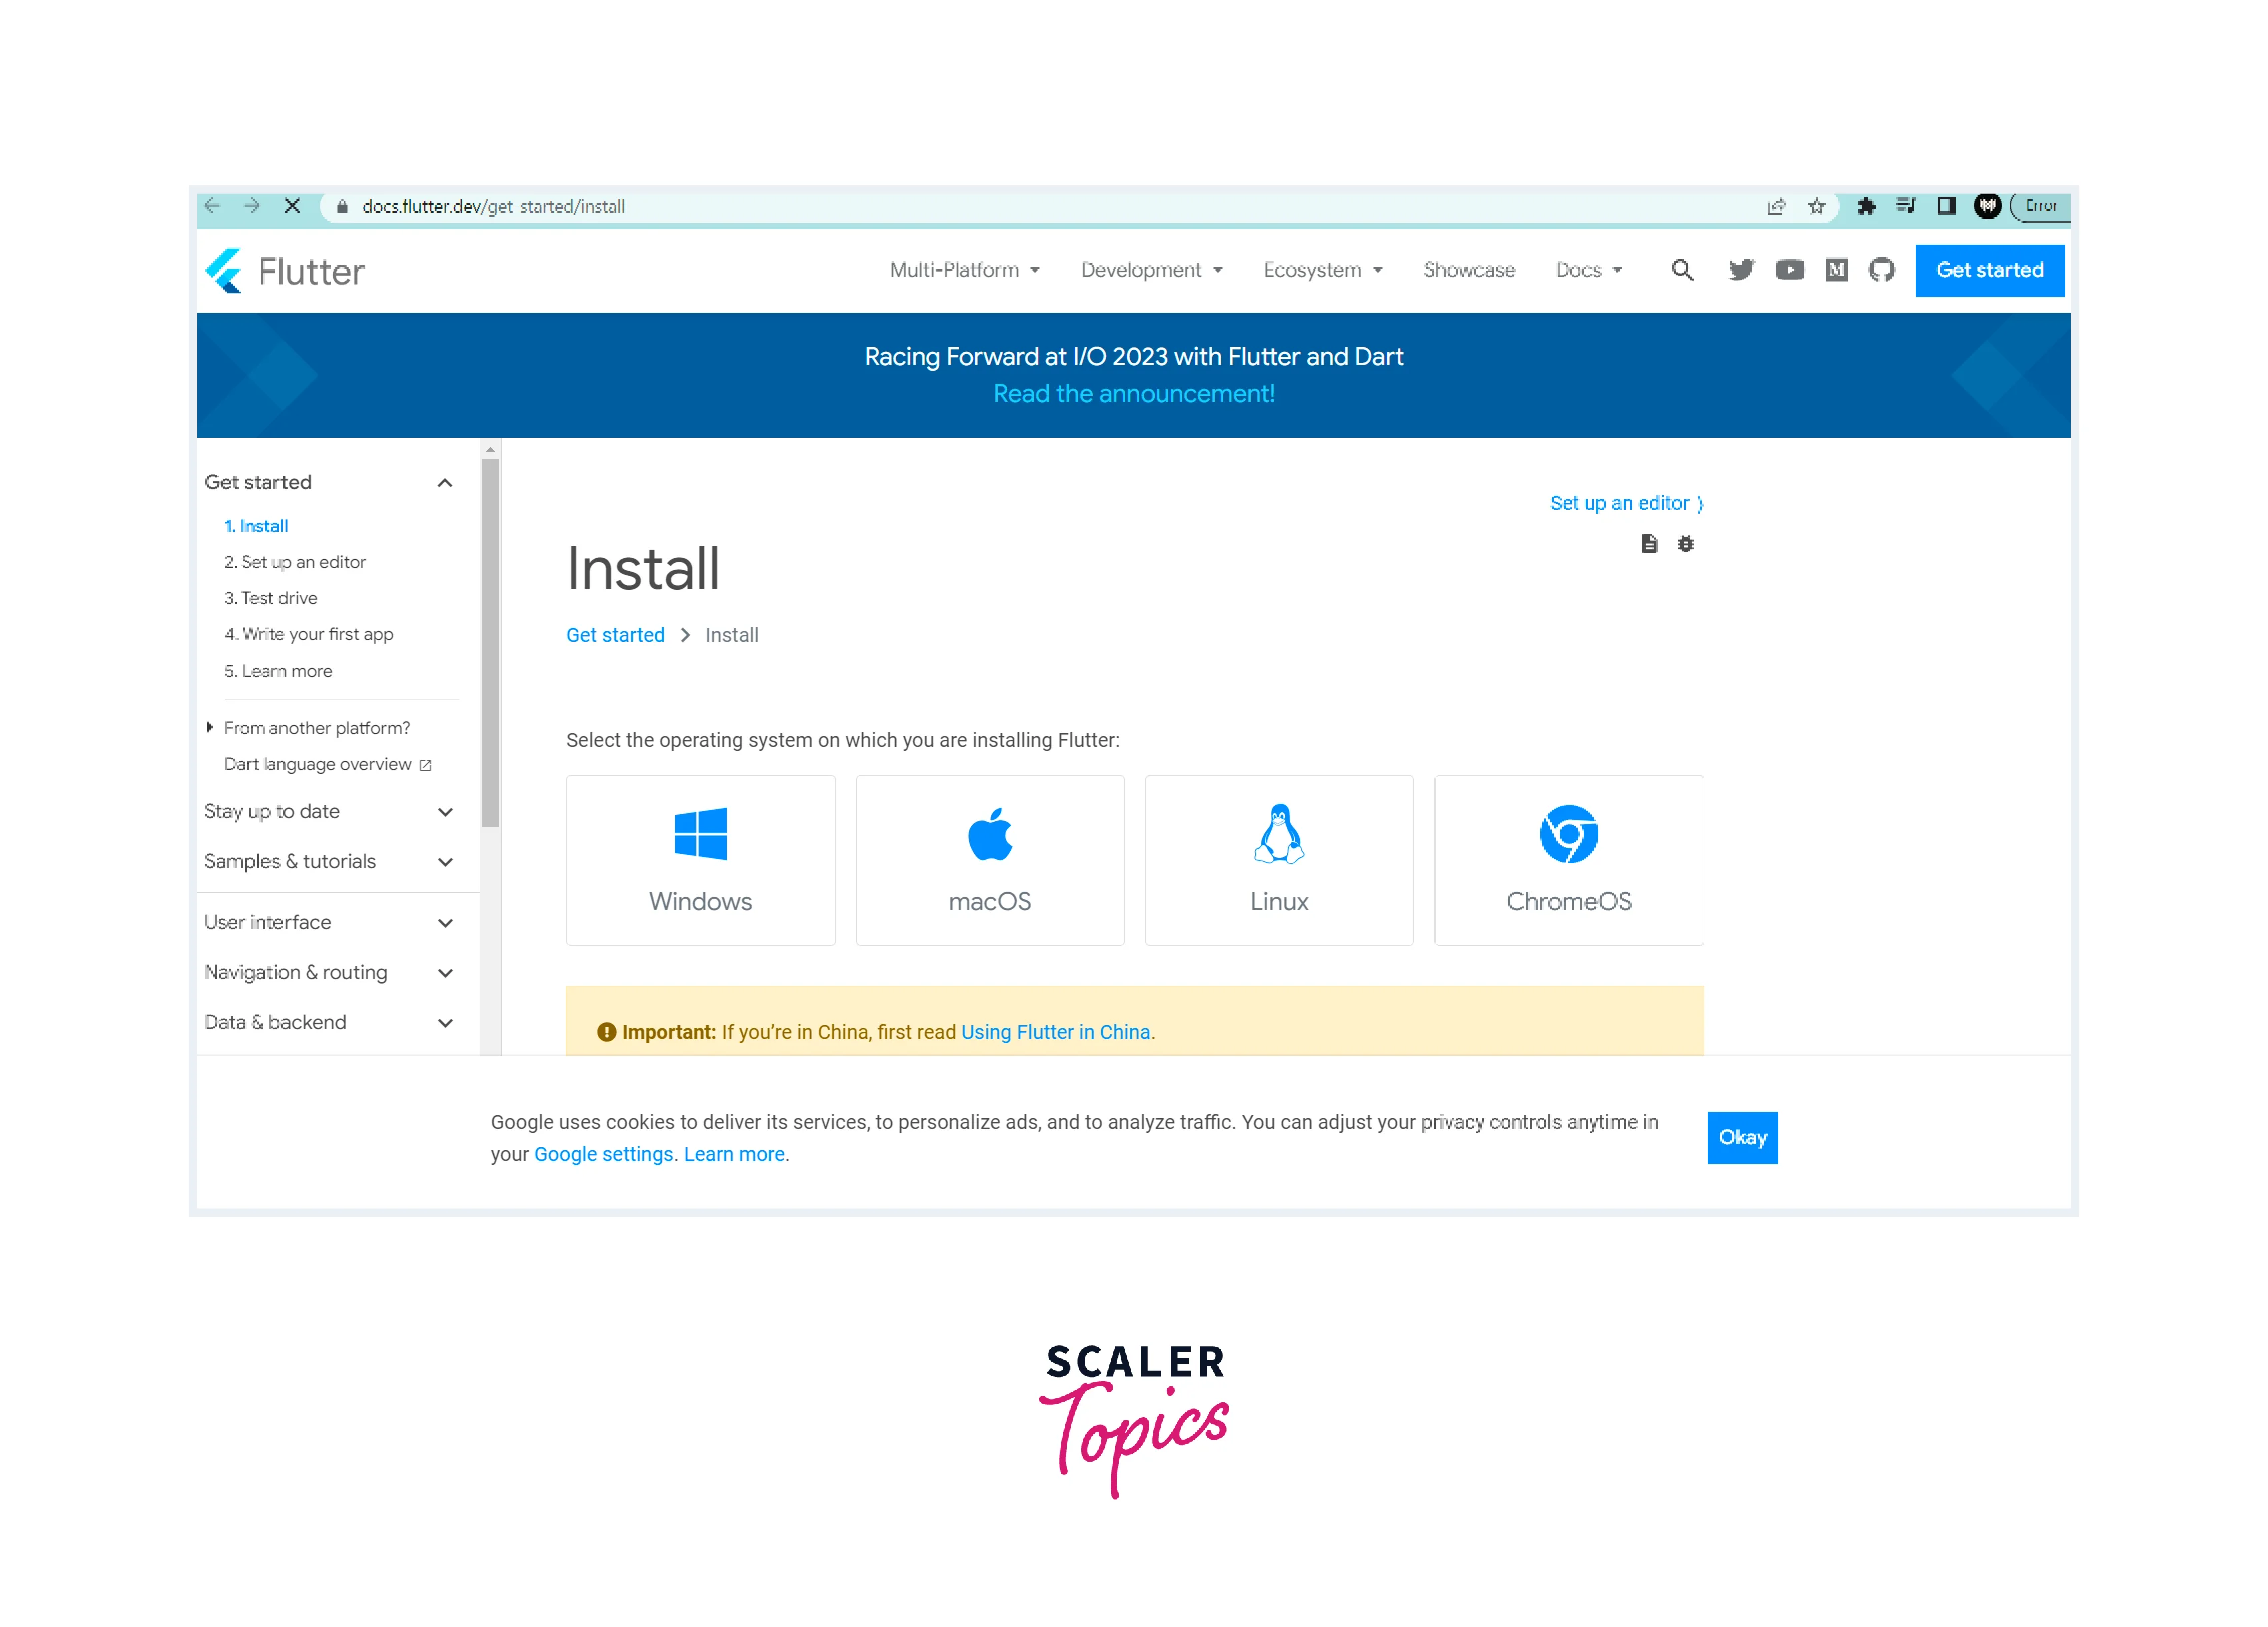
- Go to the Flutter website at https://docs.flutter.dev/get-started/install.
- Select the proper operating system (Windows, macOS, or Linux) by clicking the "Get Started" button.
- Install the Flutter SDK for your OS system.
- Save the downloaded bundle to a folder on your computer. On Windows, for example, you may extract it to C:flutter or /Users/your-username/flutter on macOS.
- Flutter's binary path should be added to your system's PATH variable
Adding PATH Variable
For Windows:
- Look in the Start menu for "Environment Variables."
- Then, select "Edit the system environment variables."
- Click the "Environment Variables" button in the System Properties box.
- Select the "Path" variable in the "System Variables" section and click "Edit."
- Click "New" and provide the location of the Flutter bin folder (for example, C:\flutter\bin).
- To save the changes, press the "OK" button.

Run flutter doctor at the terminal/command prompt to confirm the installation. It will look for any missing dependencies and advise you on how to fix them.
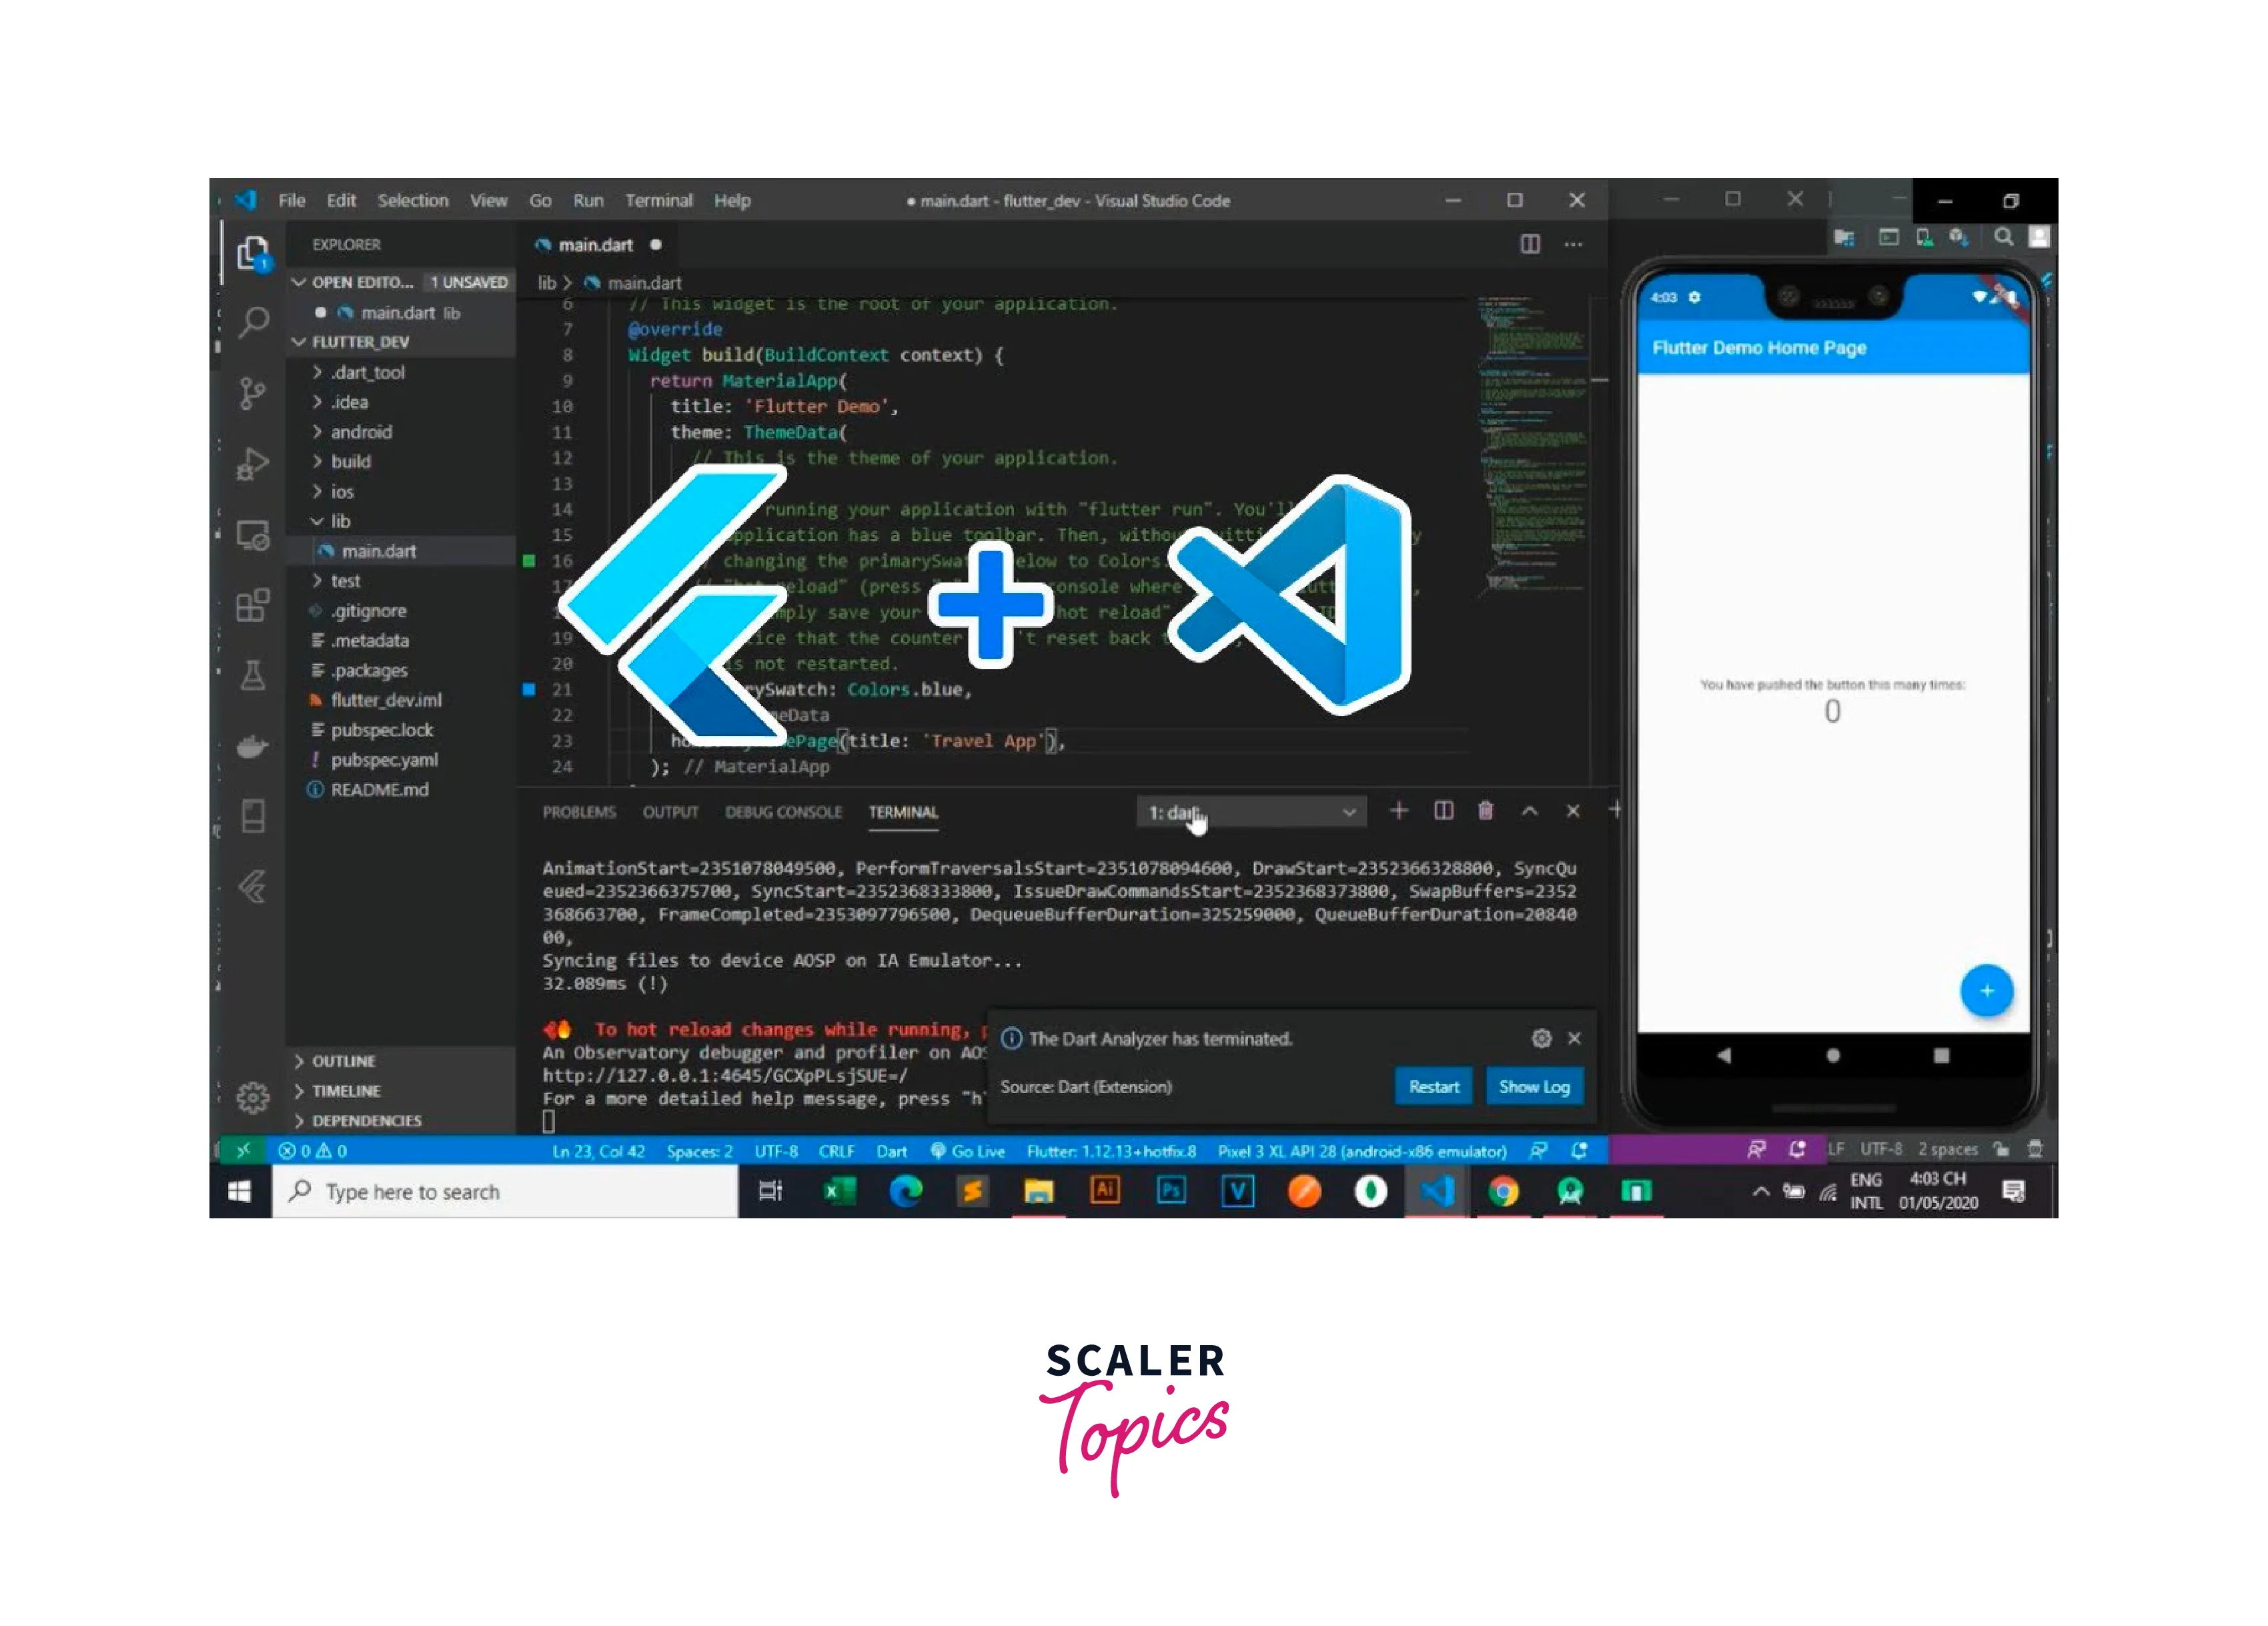
Stage - 2: Install Android Studio(recommended) or Visual Studio Code
1. The Android Studio:
Android Studio may be downloaded from the official website at https://developer.android.com/studio.

2. Using Visual Studio Code:
Visual Studio Code may be downloaded from the official website at https://code.visualstudio.com/.
Stage - 3: Install the Flutter and Dart Plugins in Android Studio
- Open Android Studio.
- On the Home screen of Android Studio, go to "Configure" and then "Plugins."
- Look in the Marketplace tab for "Flutter."
- To install the Flutter plugin, click the "Install" button.
- Similarly, on the Marketplace tab, search for "Dart" and install the Dart plugin.
Stage - 4: Installing the Android Emulator (for Android Development)
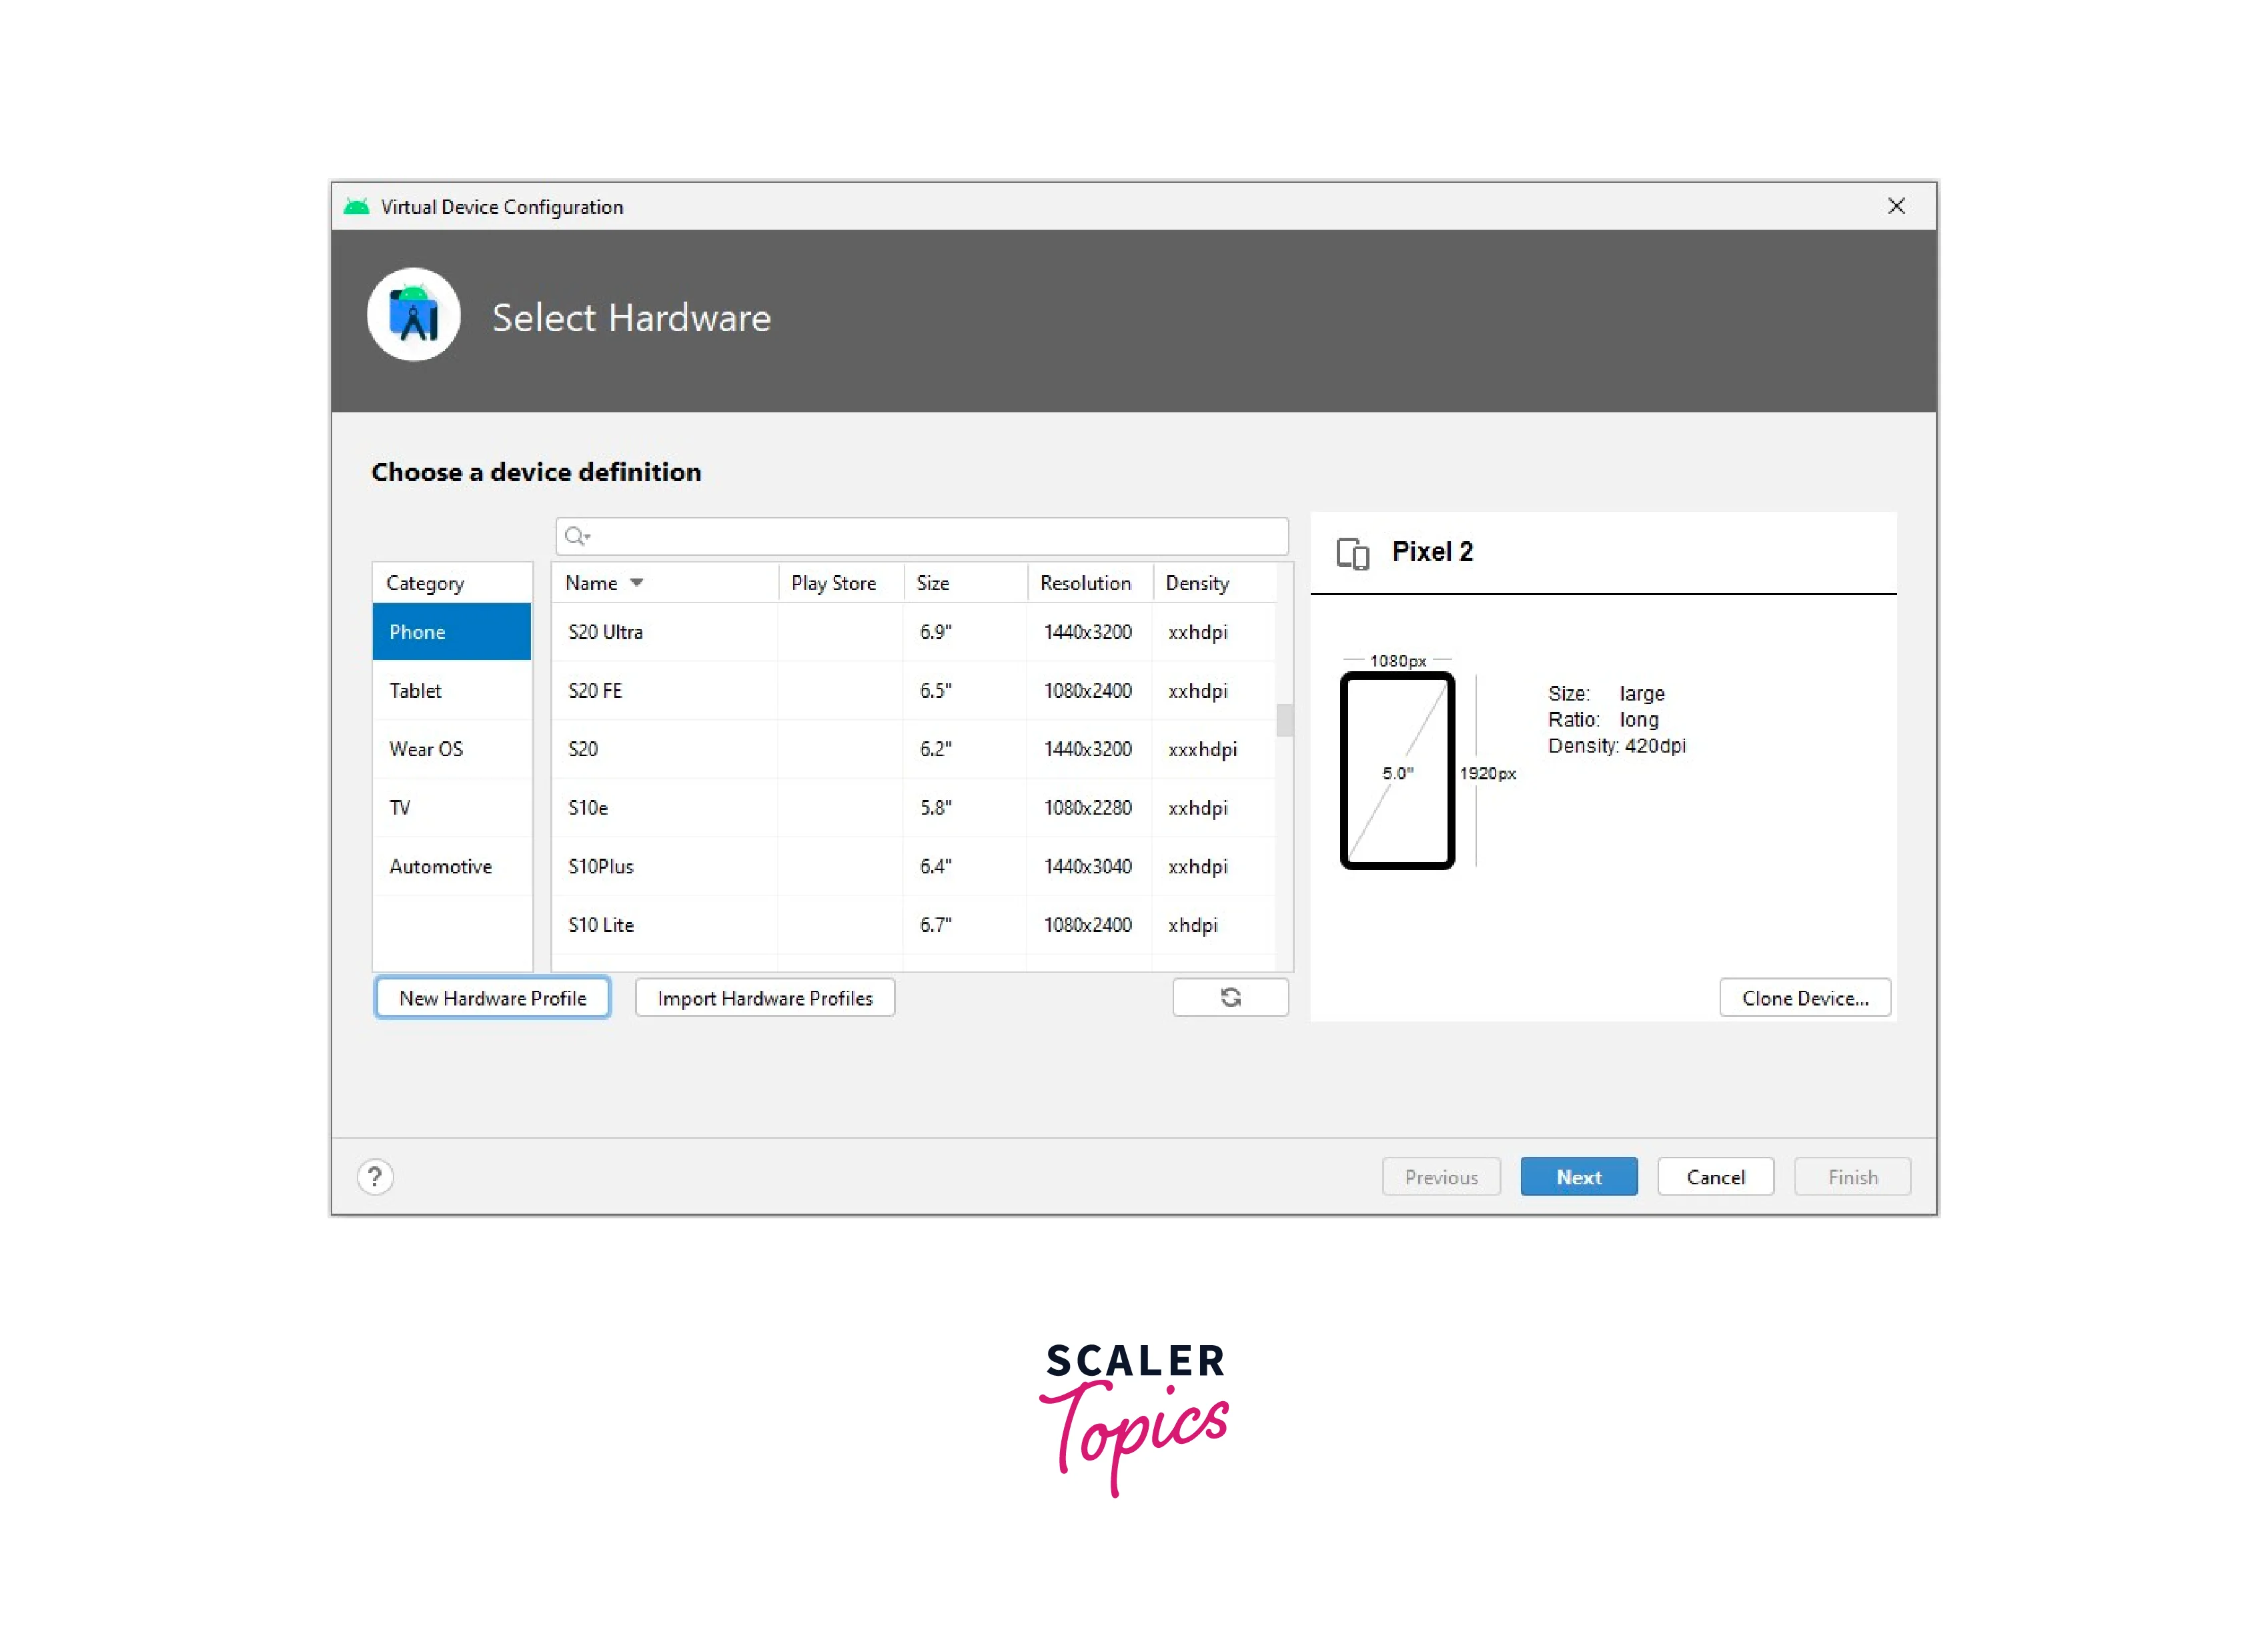
- Launch Android Studio and navigate to "Configure" -> "AVD Manager."
- In the AVD Manager panel, select "Create Virtual Device."
- Select a hardware profile that corresponds to the device you wish to simulate (for example, Pixel 4).
- Click "Next" and then choose a system image for the emulator (for example, Android 11 - API Level 30).
- Click "Next" and name your virtual device.
- To finish creating the emulator, click the "Finish" button.
Stage - 5: Licences for Flutter Doctor for Android
- Launch a terminal or command prompt.
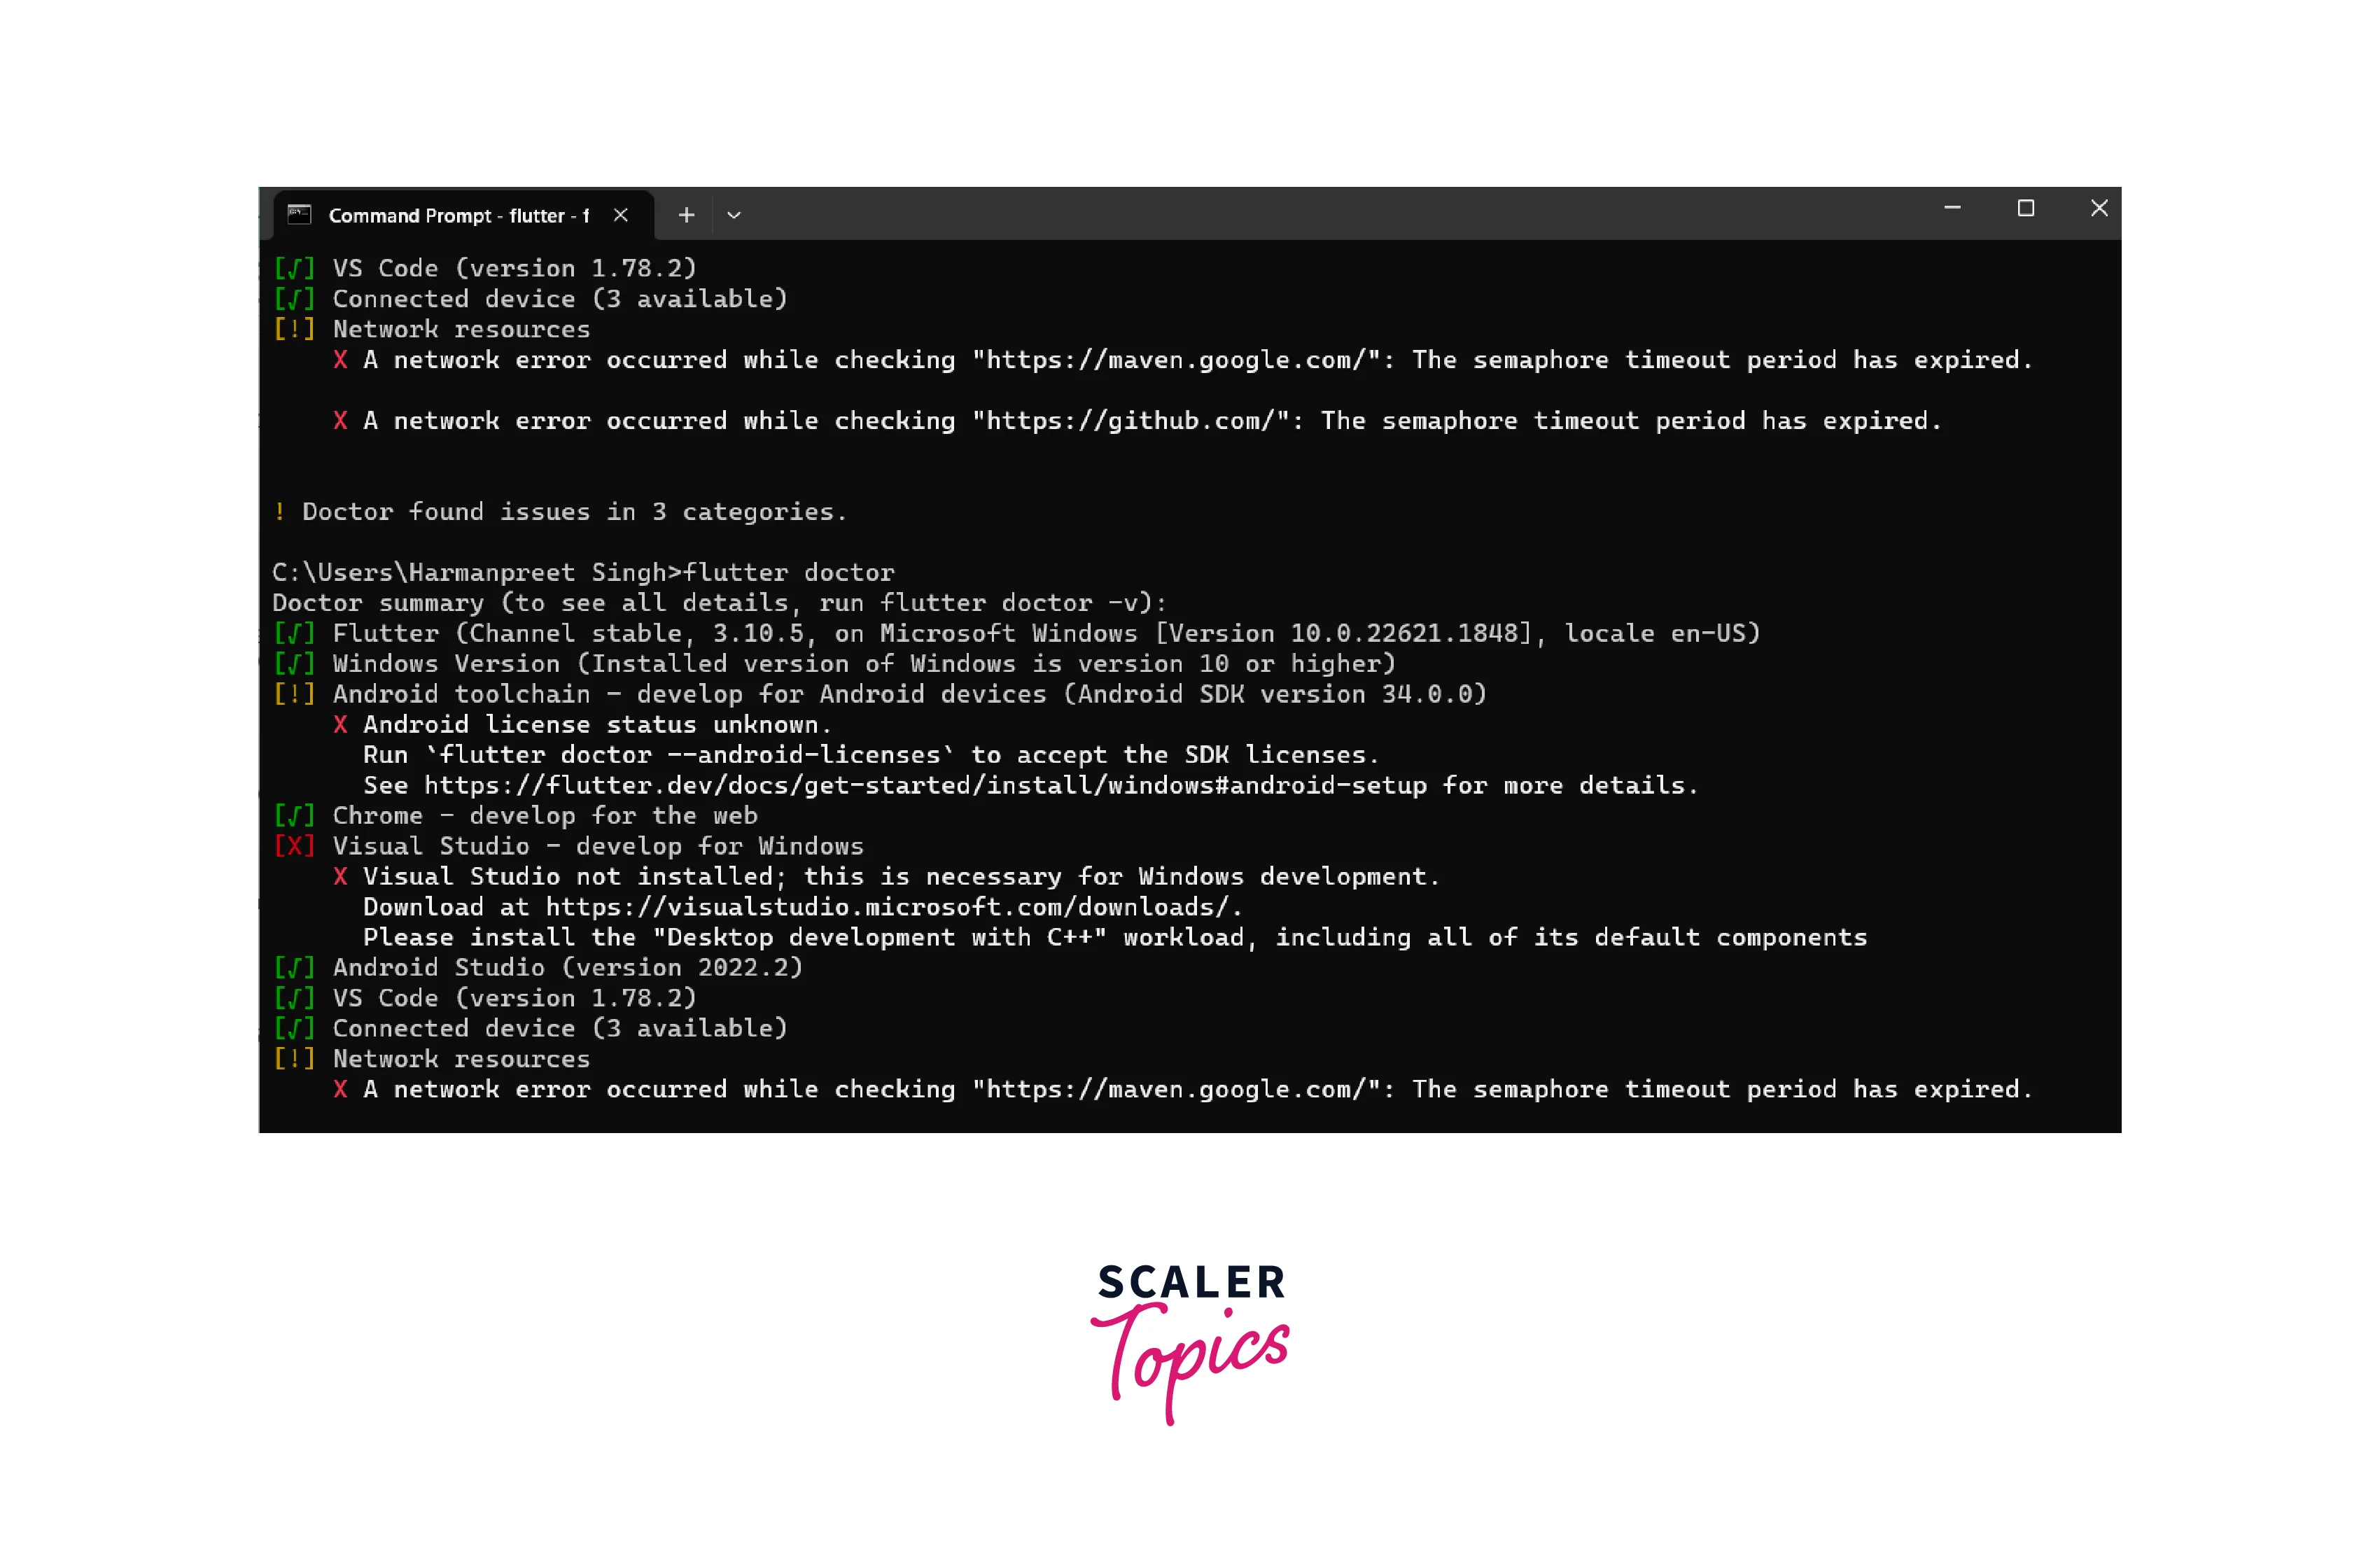
- Run the flutter doctor --android-licences command.
- Several licensing agreements will be shown. When prompted, review the agreements and type 'y' to accept them.
Before accepting licenses:
After accepting licenses
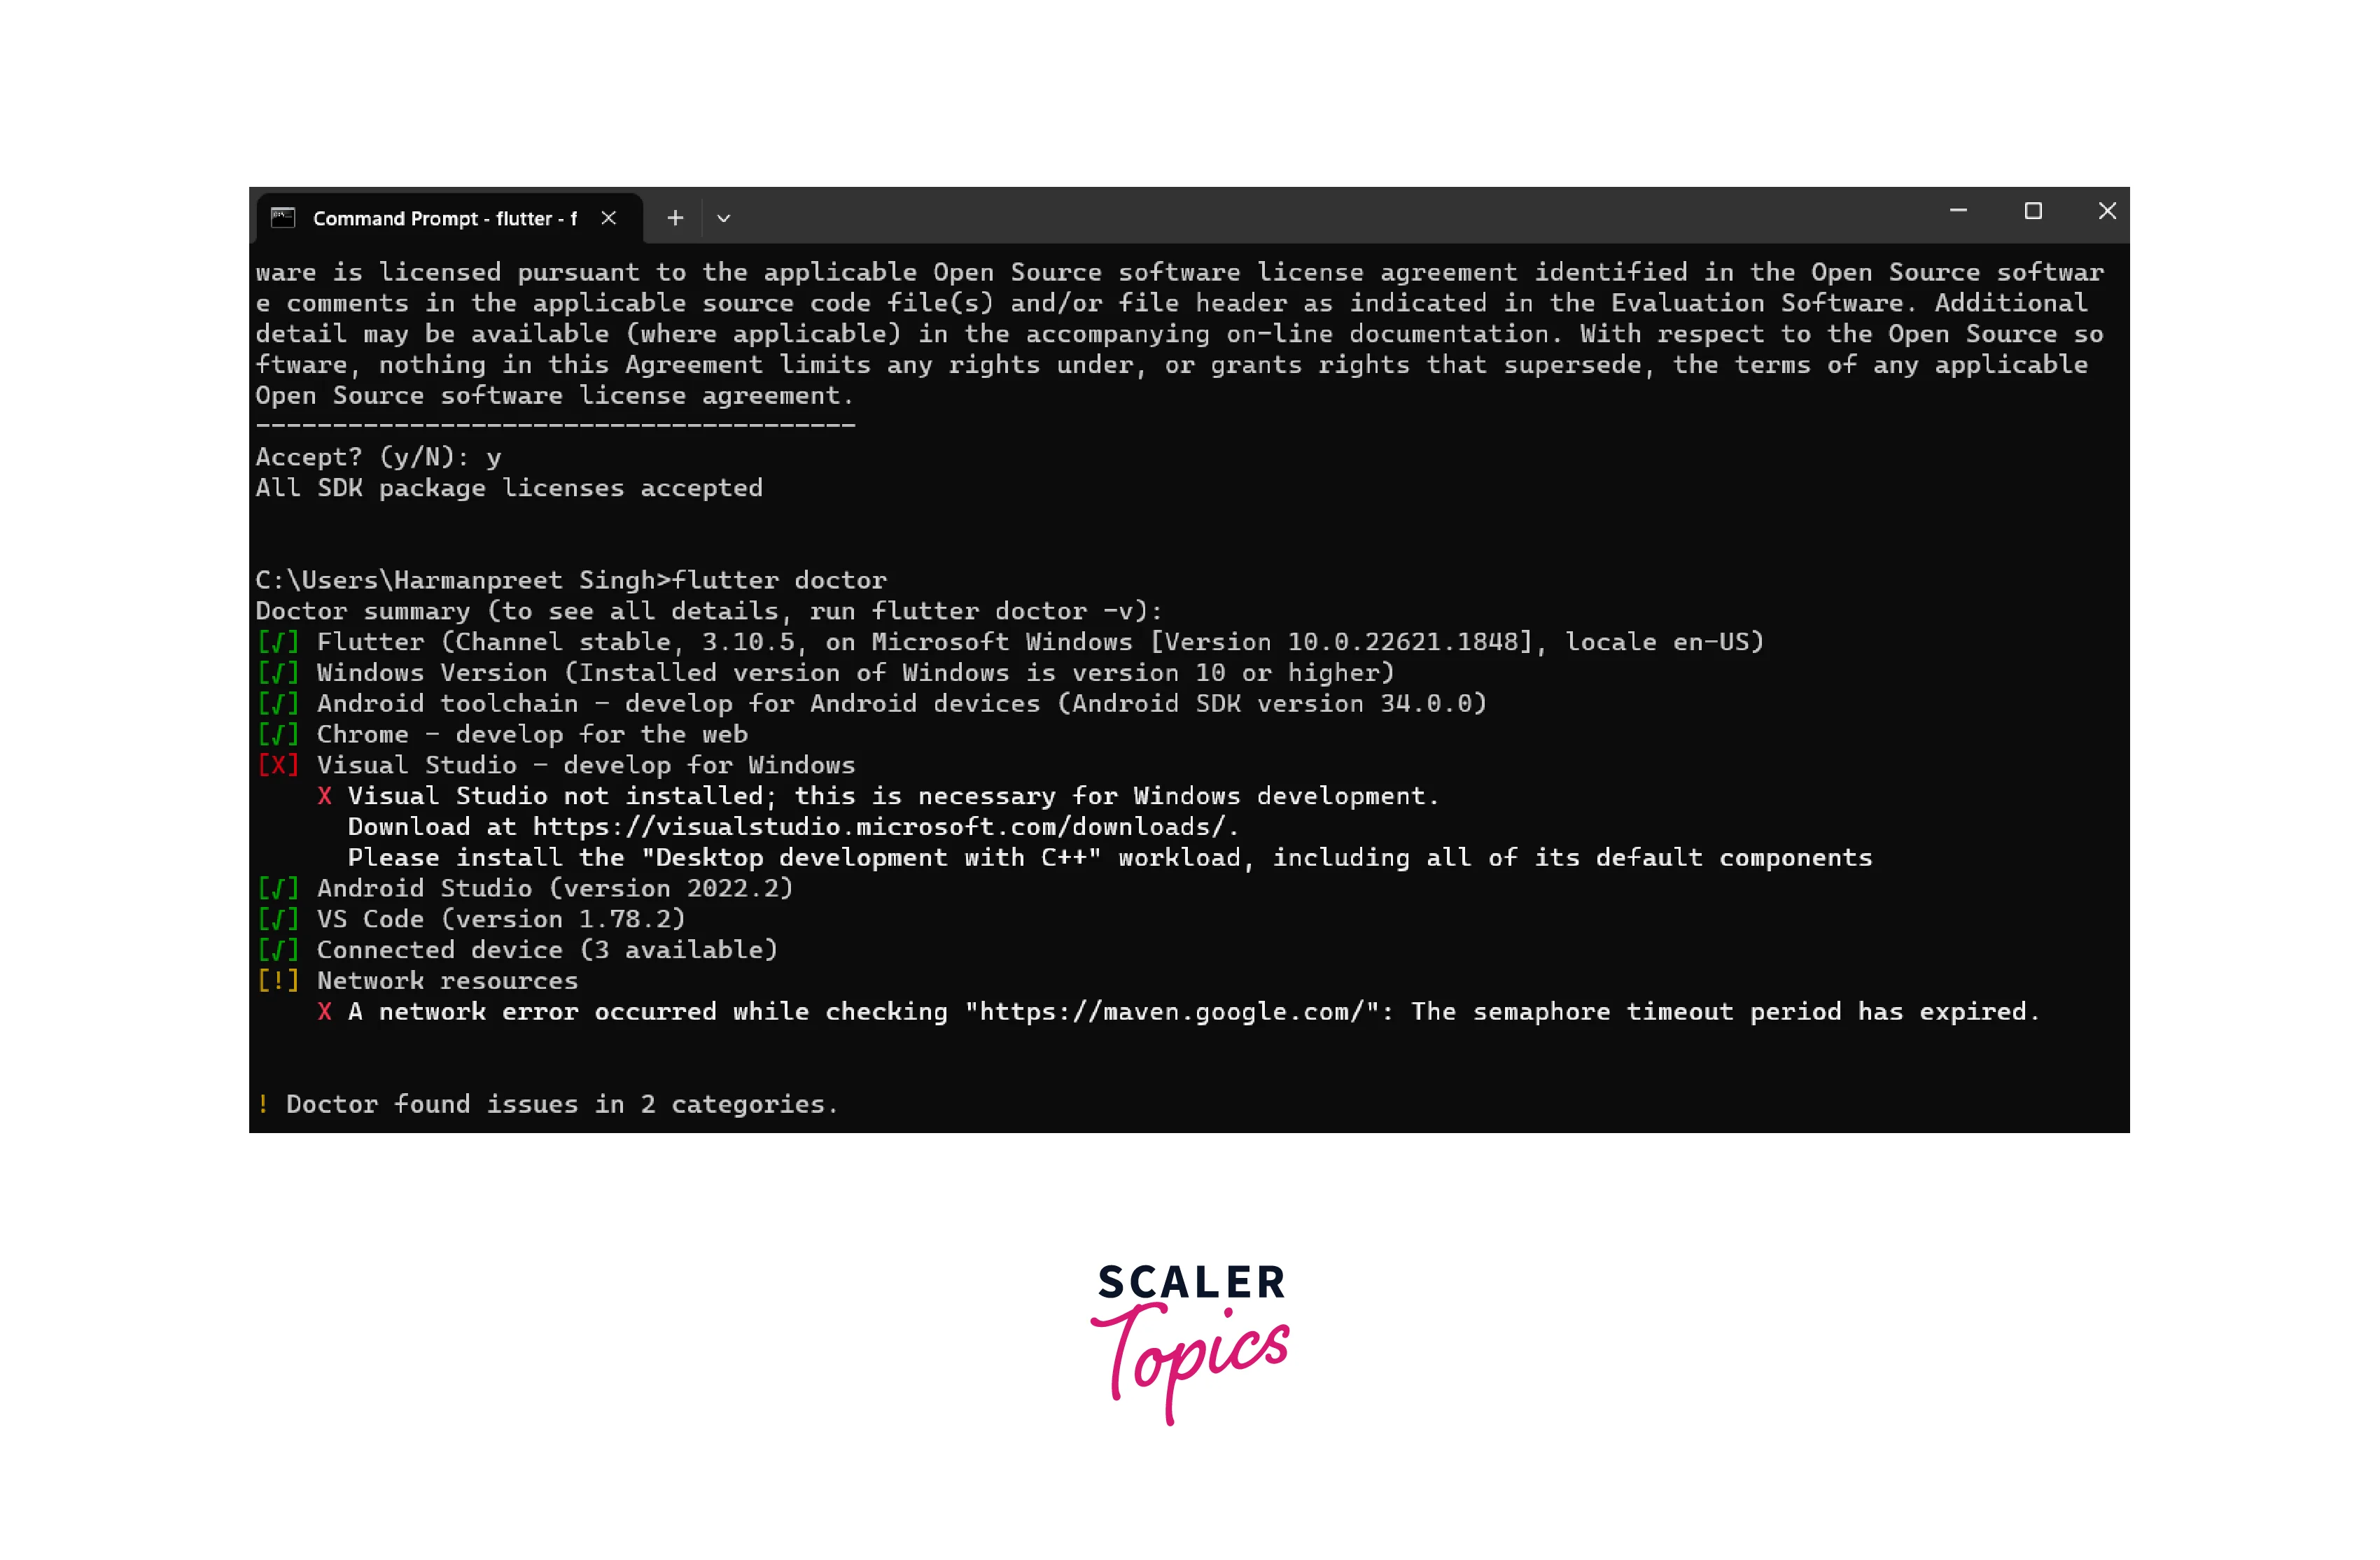
Now you are all set to create a Flutter app but before that let’s learn how to create a new project in Flutter.
Creating a New Project
Flutter may be used using Android Studio/Visual Studio Code or the Flutter CLI to create new projects. Let's examine both approaches to project creation and gain an understanding of the project structure:
Using Flutter CLI
- Launch a command prompt or terminal.
- To start a new Flutter project, enter the command below: flutter create project_name
- Change project_name to the name you've chosen for your project.
- Watch for the project files and dependencies to be generated by the Flutter CLI.
- Once the project has been created, use the following command to access the project directory:
Using Android Studio
1. Set the Android Studio Flutter SDK Path:
- Open Android Studio.
- Click "File" then "Settings" then "Languages & Frameworks" and then "Flutter."
- The "Flutter SDK path" box has a "Browse" button next to it.
- Select the Flutter SDK directory that you extracted in Step 2 by navigating to and choosing it.
- To save the adjustments, click "Apply" and then "OK".
2. createNew Flutter Project:
-
Open Android Studio.
-
Click on "File" -> "New" -> "New Flutter Project".
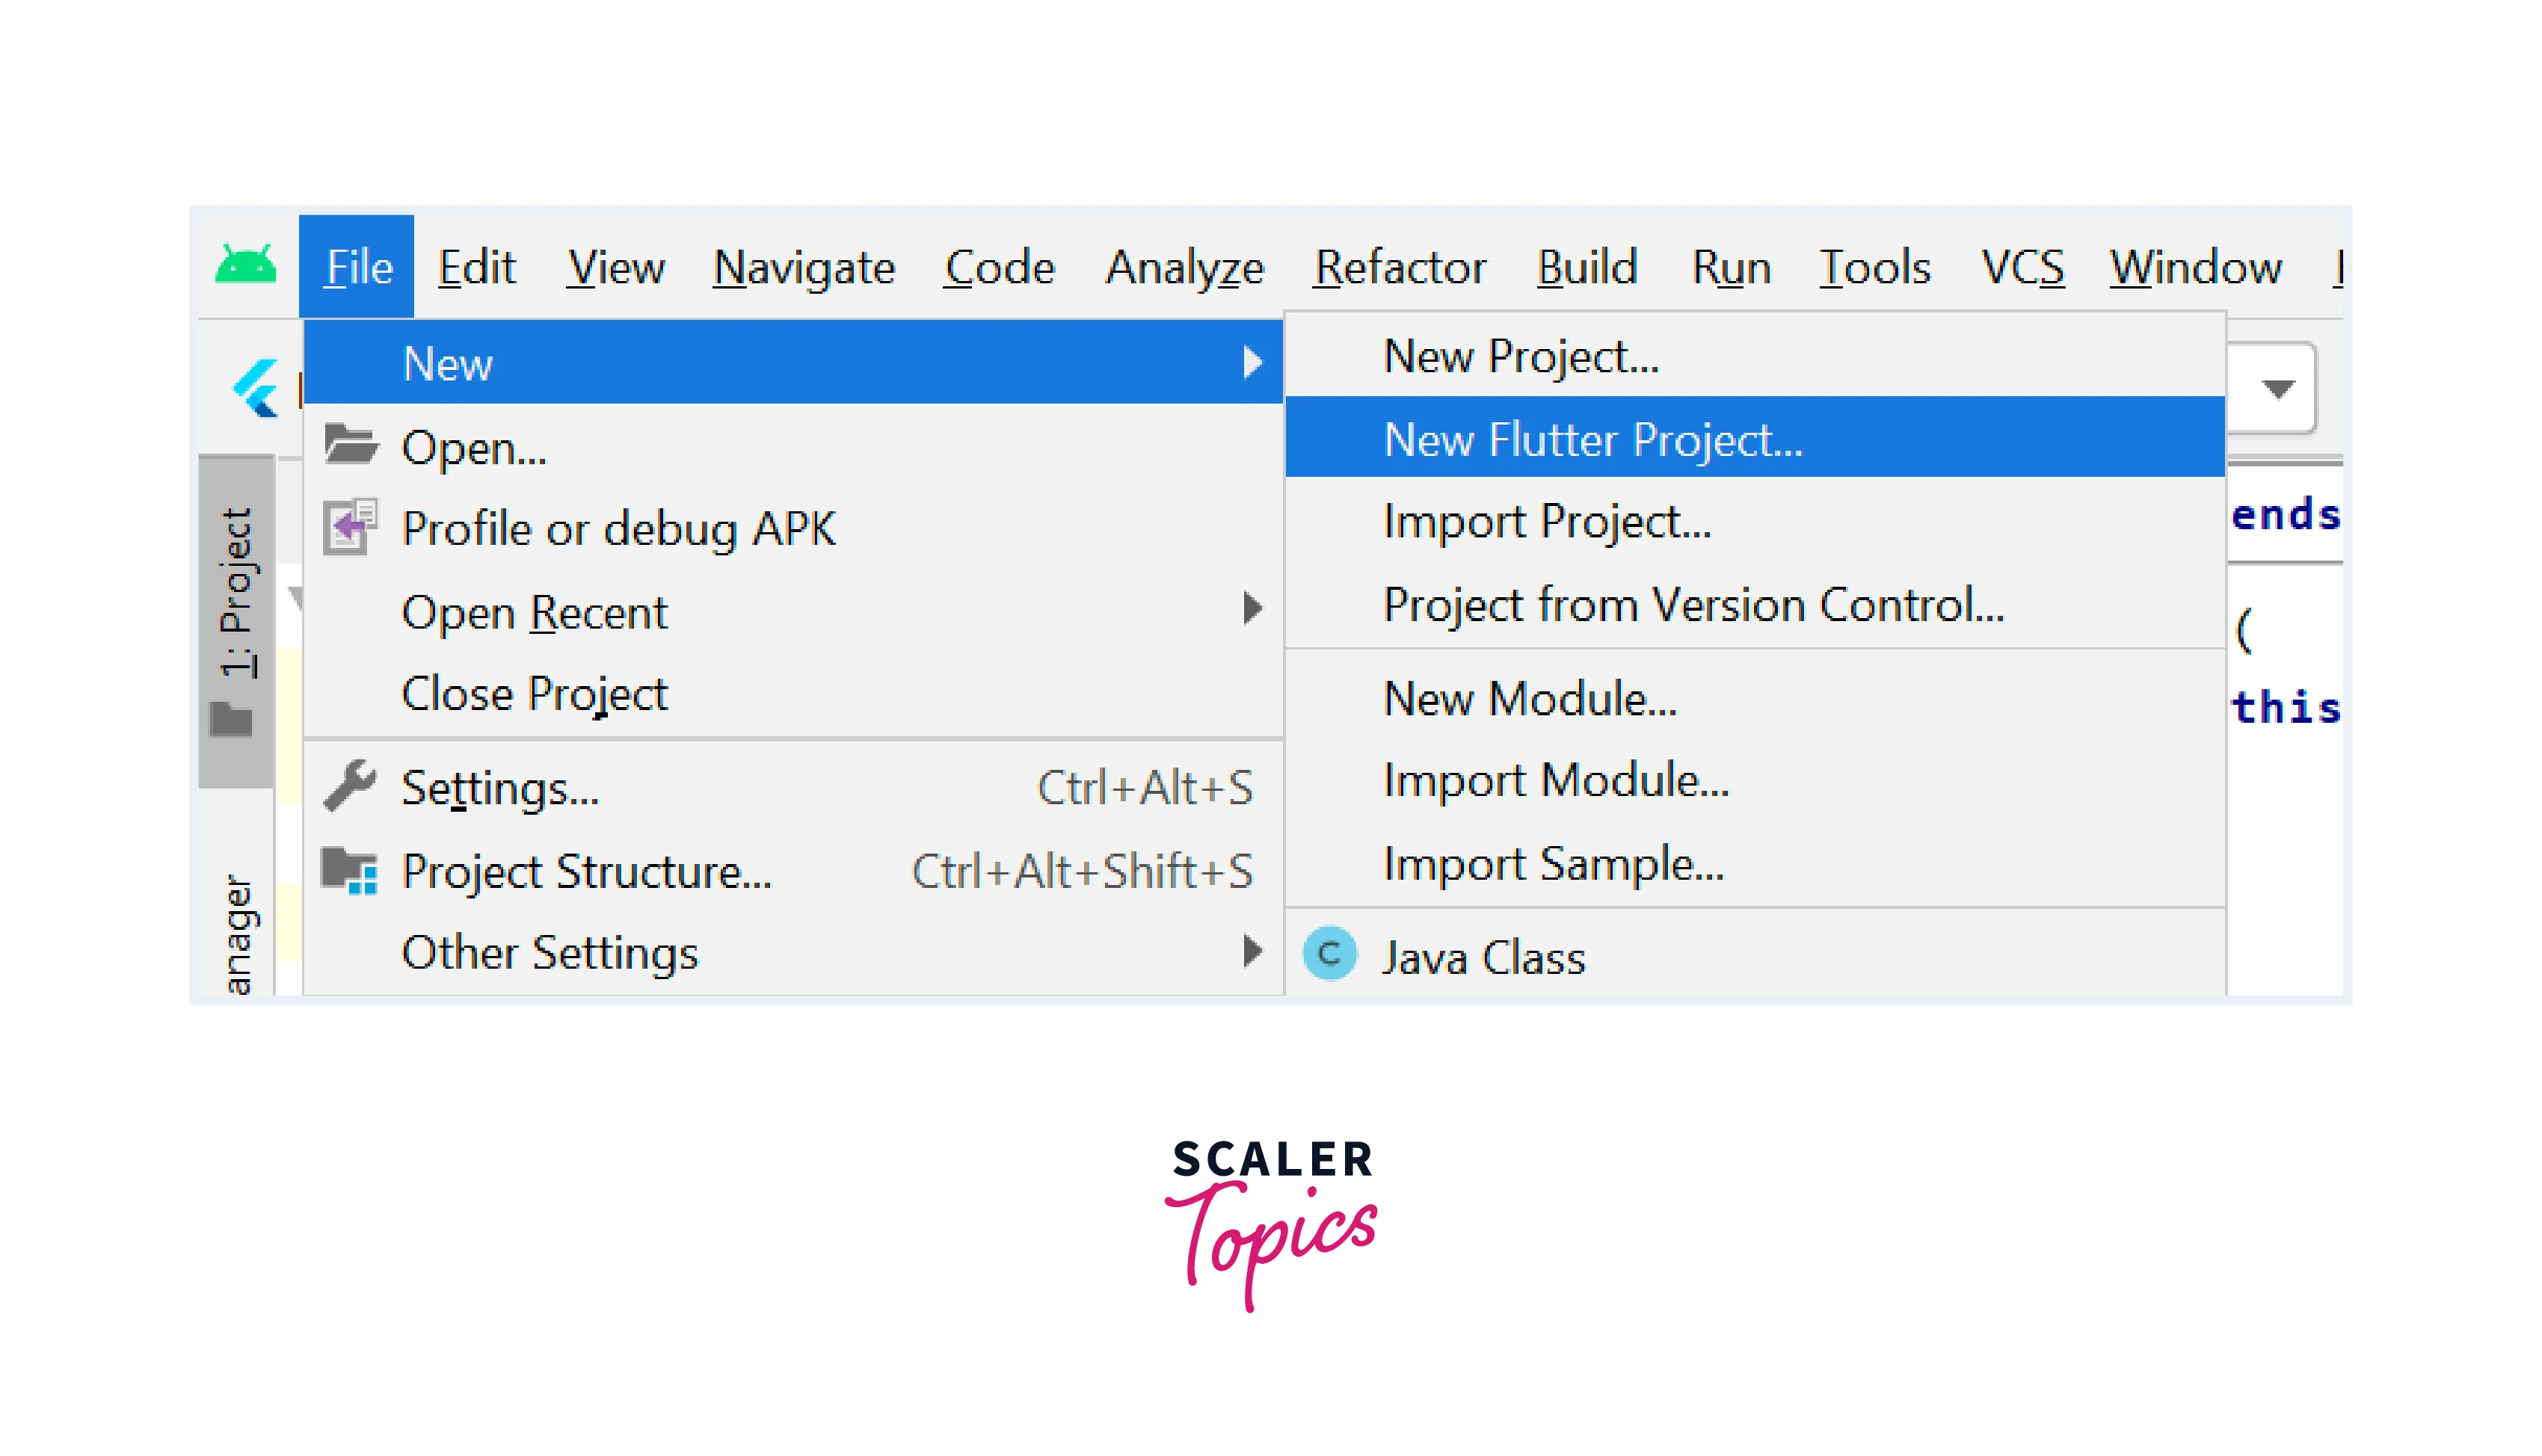
-
In the "New Flutter Project" dialog, select the project type you want to create (e.g., Flutter Application, Flutter Package, Flutter Plugin).
-
Click "Next".
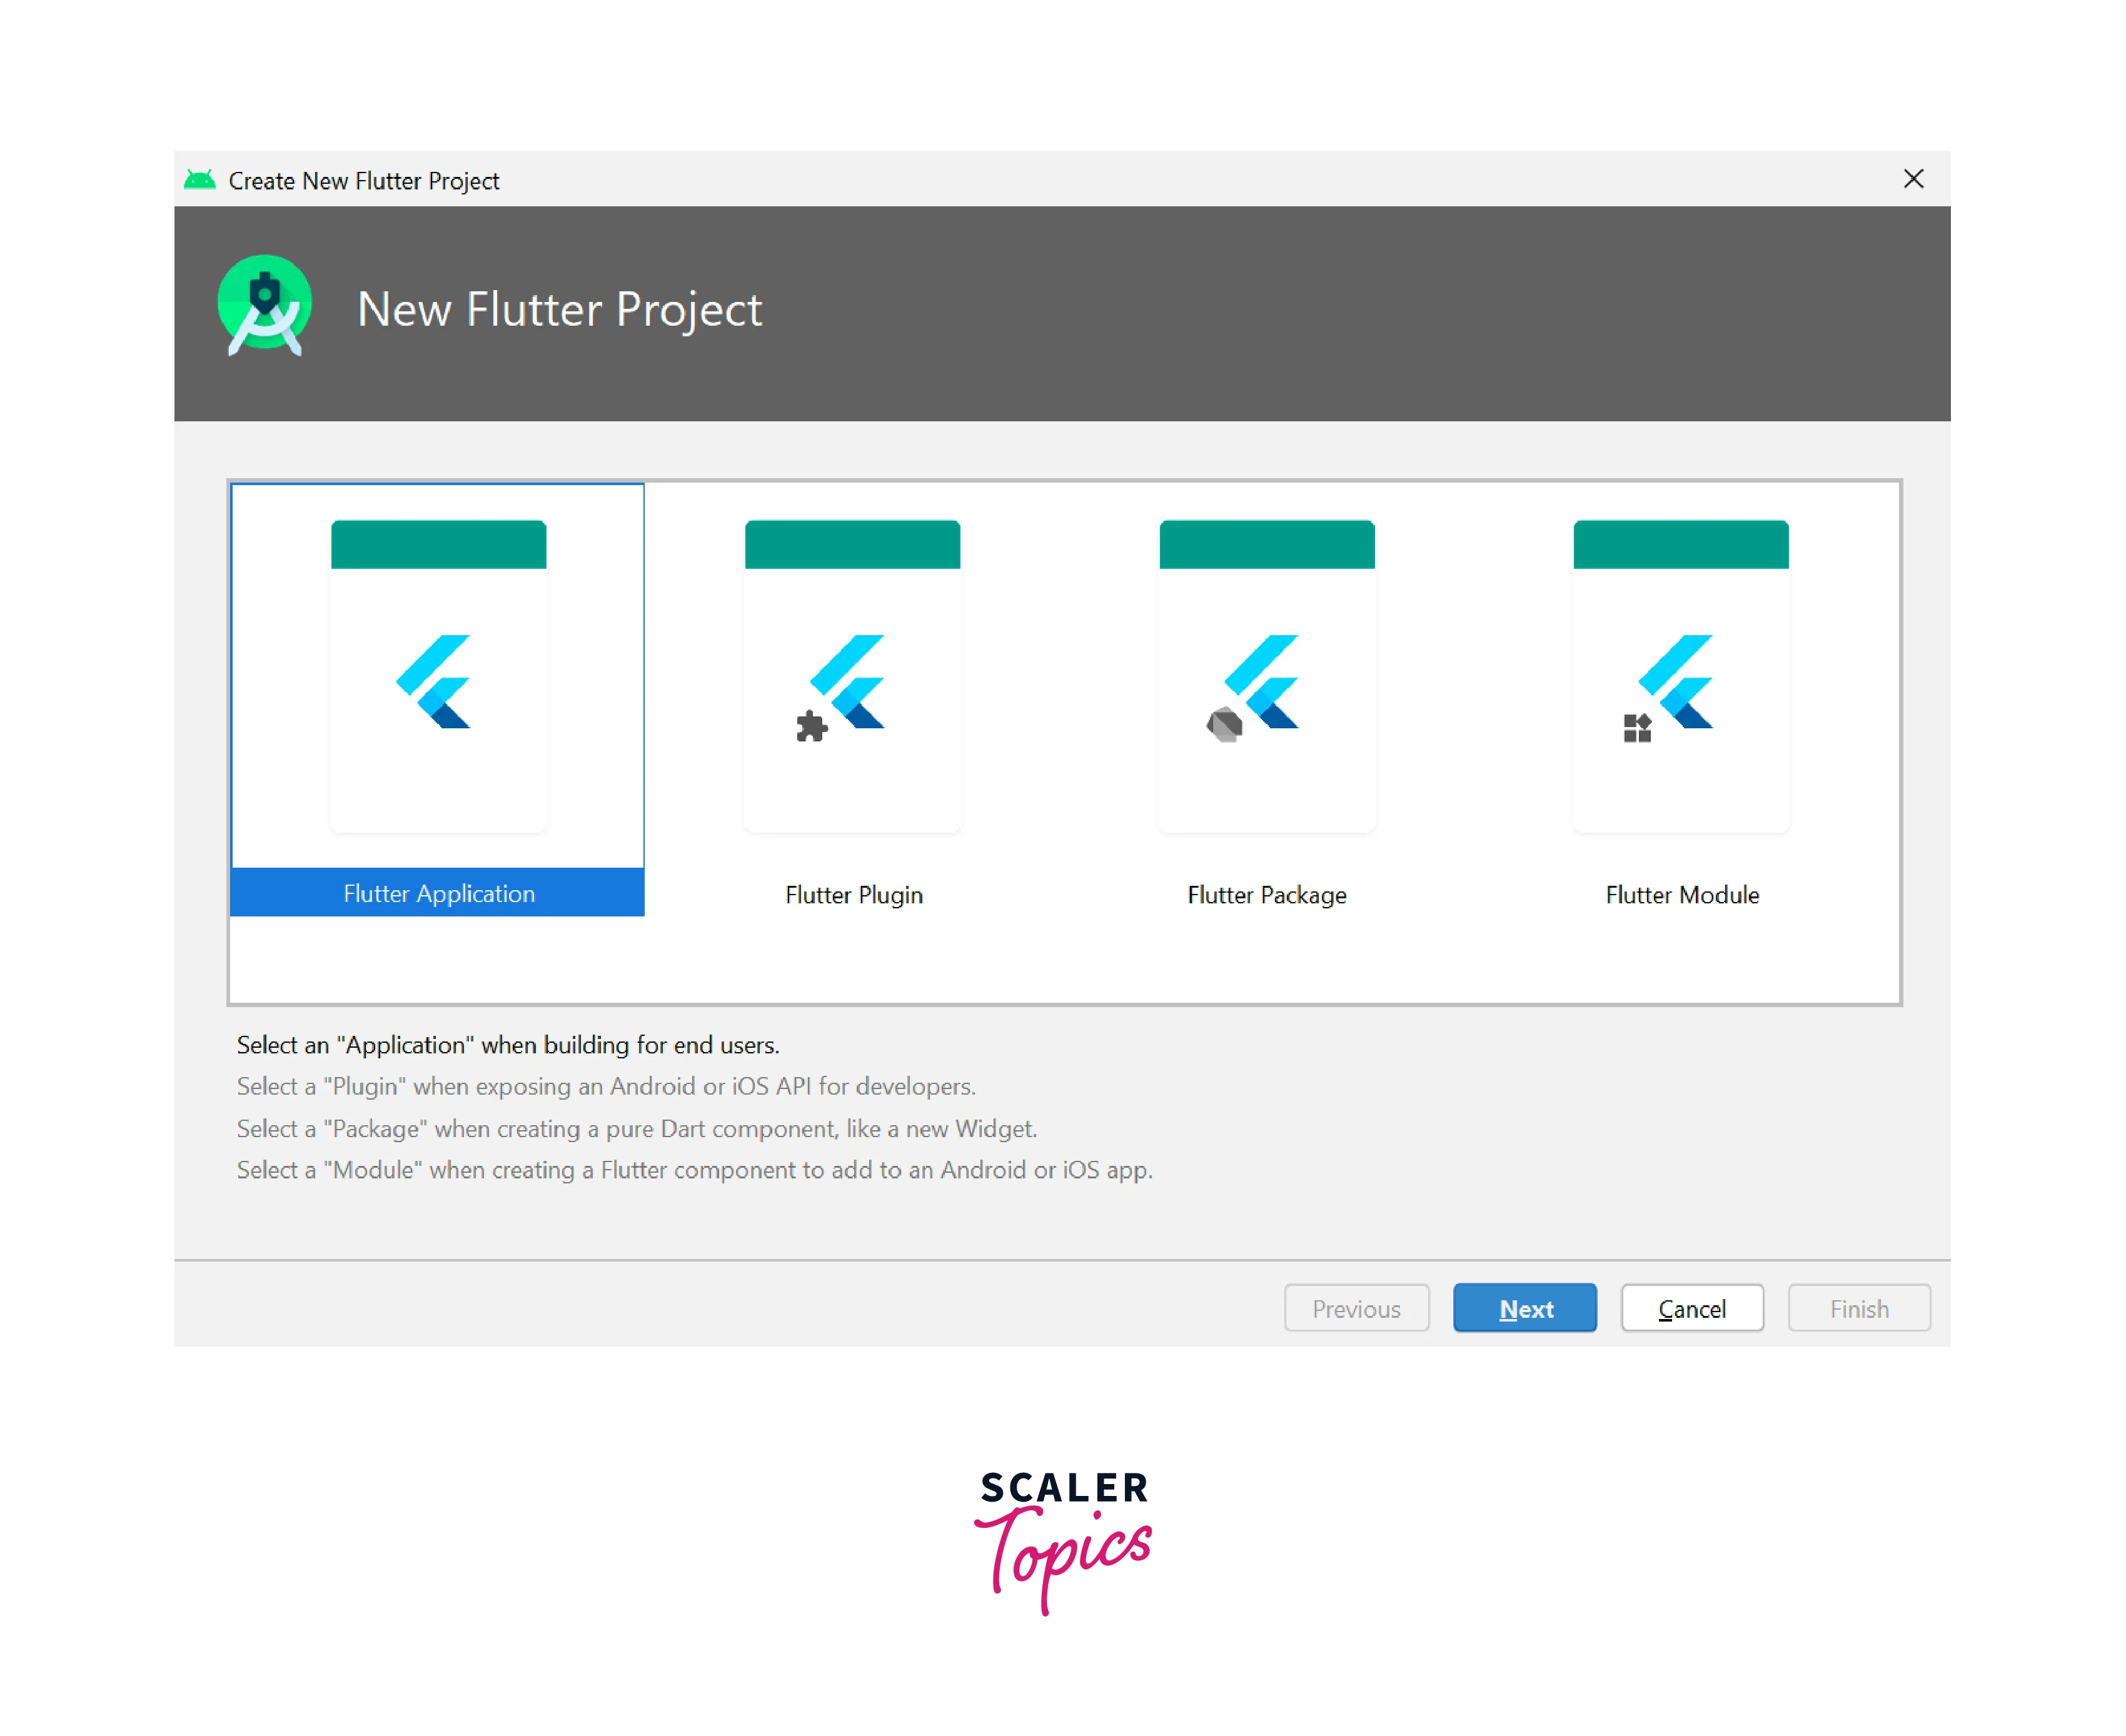
-
Enter the project name and choose the location where you want to create the project.
-
Click "Next".

-
Select the Flutter SDK path if it's not pre-selected.
-
Choose the language for the project (Java or Kotlin for Android, Swift or Objective-C for iOS).
-
Select the desired platform versions (Android and iOS).
-
Click "Finish".
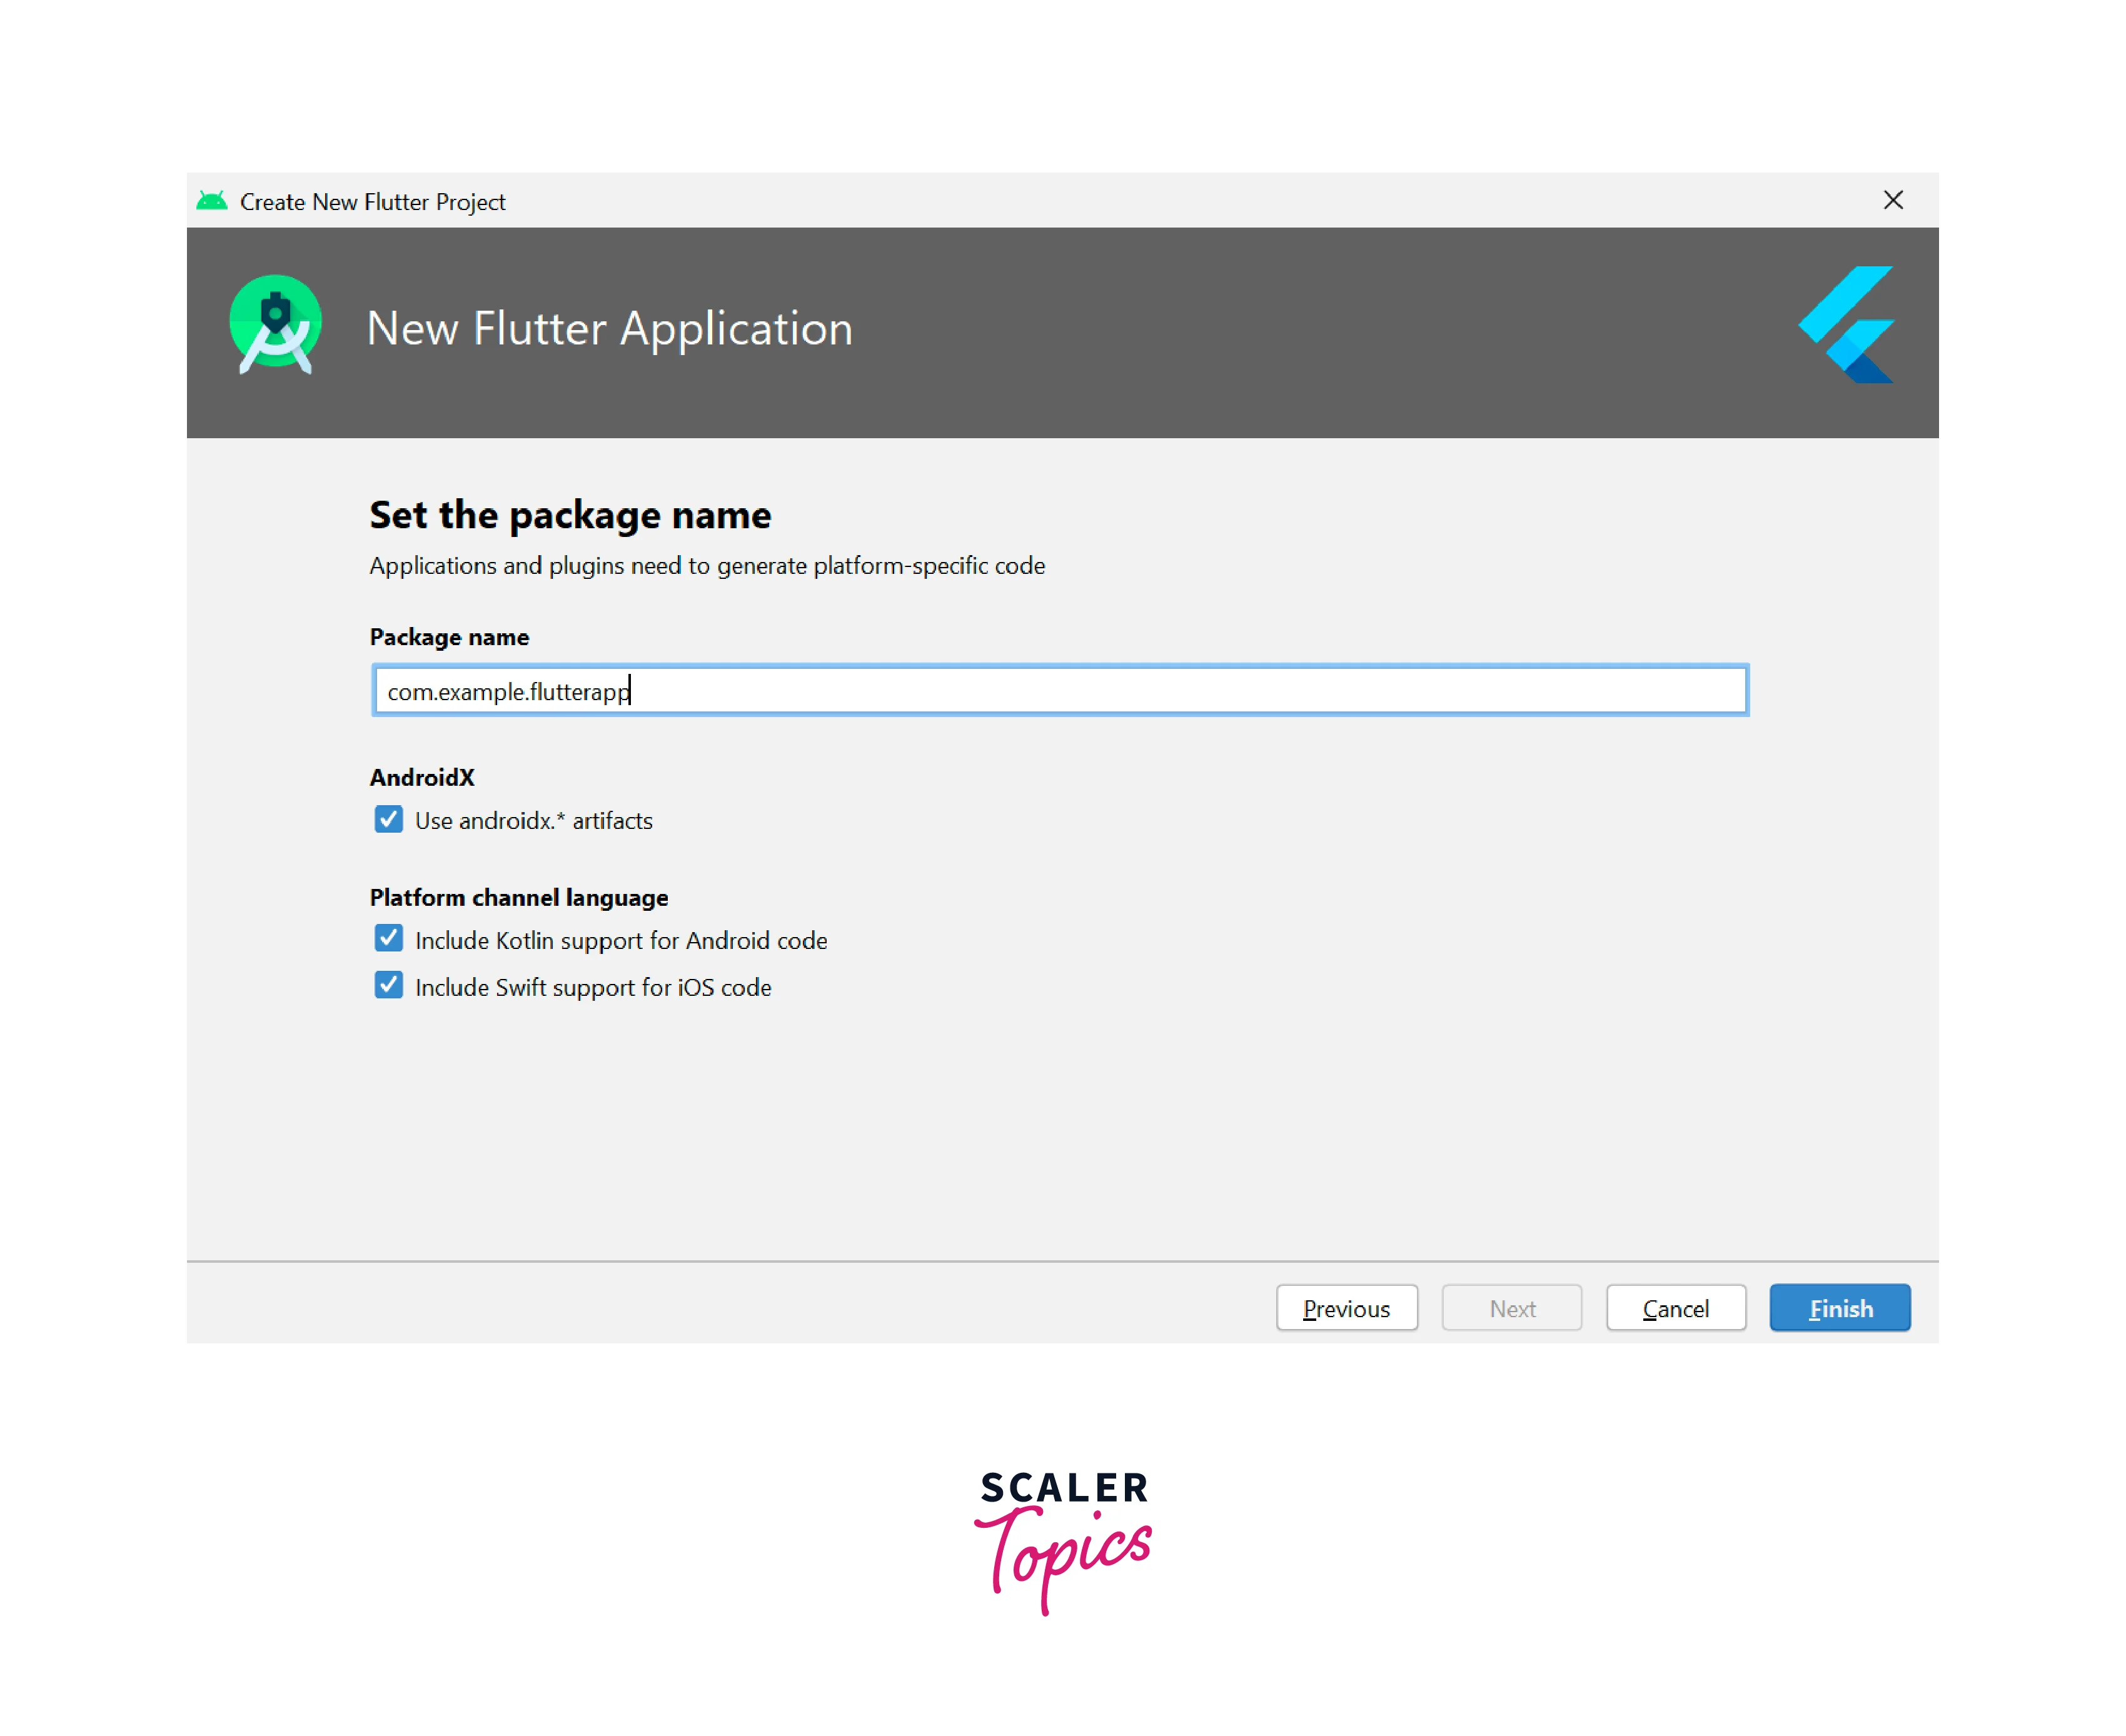
3. Await the project's launch:
- The Flutter project will be created by Android Studio using the chosen template and dependencies.
- A little while may pass while the startup procedure is completed.
4. Launching the project:
-
As soon as the project is generated, Android Studio will launch it.
-
The "Project" view, located on the left side of the Android Studio window, will display the project structure.

With either Android Studio or Visual Studio Code as your IDE of choice, you can immediately begin to create a Flutter app by writing code, creating UIs, and testing your app on a variety of hardware and emulators.
Understanding the Project Structure
When you start a new Flutter project, it adheres to a certain structure that aids in the organization of your code, assets, settings, and platform-specific files. Understanding this structure is critically important to create Flutter app creation and maintenance.

The following are the major directories you will come across:
-
android/:
This directory includes all of your Flutter app's Android-specific files and settings. It contains the Gradle build files (build.gradle), the Android manifest file (AndroidManifest.xml), and other Android-specific resources. -
ios/:
The ios/ directory contains all of your Flutter app's iOS-specific files and settings. The Xcode project (Runner.xcodeproj), the Info.plist file (Info.plist), and other iOS-related materials are all included. -
lib/:
The lib/ directory is where you will spend the majority of your time building the functionality of your program. It includes your app's Dart code. Your app's main entry point is main.dart which is in lib/ itself. -
test/:
The test/ directory is where you'll write tests for your program. Flutter promotes test-driven development, and this directory makes it easy to arrange your tests. -
pubspec.yaml:
A critical configuration file for your Flutter project is pubspec.yaml. It specifies the information, dependencies, assets, and other parameters for the project. Under the dependencies area, you list the packages on which your app relies, such as Firebase or HTTP clients. -
Other documents:
Other files may be found in addition to the primary folders indicated above. The .gitignore is used to designate files and folders that version control systems like Git should ignore. The .metadata file is produced automatically and holds details about the Flutter project.
Understanding the project structure allows you to easily discover specific files, arrange your code, and browse your project.
You may manage and create the Flutter app in a systematic and organized manner by using the project structure, allowing for effective collaboration and future scalability.
Running the App on an Emulator/Simulator/Real Device
Follow these steps to execute or create the Flutter app on an emulator, simulator, or actual device:
Install the Emulator/Simulator:
- Refer to Stage 4 of "Setting up the environment" above
Connect a Real Device (Optional)
- If you wish to execute your program on a physical device, ensure sure USB debugging is enabled on the device.
- Use a USB cord to connect the gadget to your computer.
- Check that your development environment (Android Studio or Xcode) recognizes your device.
Start the "emulation/simulation/real" Device:
-
Start the emulator or simulator for the platform on which you wish to execute your program.
-
For Android, open Android Studio and navigate to the AVD Manager, then click the play button (green triangle) next to the virtual device you wish to start.
-
For IOS, Launch the iOS Simulator from Xcode by choosing the relevant simulator device from the device selection option in the menu bar.

Run the App from Android Studio or Visual Studio Code:
- Launch Android Studio or Visual Studio Code and navigate to your Flutter project.
- In your development environment, launch the terminal or command prompt.
- To check that your development environment is linked to the emulator or simulator, use the following command: flutter gadgets
- You should see a list of available devices, including the emulator, simulator, and any real-world devices that are linked.
- Use one of the following instructions to launch the app on the selected device: To be executed on all linked devices: flutter run
Inspect the App Launch:
- The Flutter app will compile and run on the emulator, simulator, or actual device of your choice.
- The program's output will be shown in the emulator/simulator/device screen, and the app will begin to operate.

Conclusion
There are many things we learned in the process to create the Flutter app, let's see a quick conclusion of the complete process to create the Flutter app.
- Configure the development environment:
Install the Flutter SDK and the necessary tools, such as Android Studio or Visual Studio Code, as well as the Flutter and Dart plugins. - Make a new project:
To create a Flutter app or project, use the Flutter CLI or an IDE such as Android Studio or Visual Studio Code. - Recognize the project structure:
Familiarize yourself with the Flutter app's project structure, which includes directories such as android/ and ios/ for platform-specific files, lib/ for Dart code, and pubspec.yaml for dependencies and assets. - Create the user interface:
Create the UI with Flutter widgets. Widgets are the UI's building pieces; they may be changed, mixed, and nested to produce the desired UI layout. - Style the UI:
To improve the aesthetic attractiveness of your program, utilize established themes, change widget attributes, apply decorators, and build custom styles. - Use an emulator/simulator/real device to run the app:
Set up emulators or simulators for the target platforms (Android or iOS) and, if required, connect real devices.
