Creating a Calculator using Flutter
Overview
A Calculator App built using the Flutter framework is a versatile and efficient tool for performing mathematical calculations on mobile devices. Flutter, a cross-platform development framework, allows developers to create native-like applications for both iOS and Android platforms. The Calculator App utilizes Flutter's rich widget library, enabling the creation of a user-friendly interface with buttons for digits, operators, and functions. The app incorporates the necessary logic to interpret user inputs and perform calculations accurately. With its flexibility, performance, and seamless integration with different platforms, a Calculator App developed with Flutter offers a convenient and reliable solution for mathematical computations on the go.
Introduction
The Calculator App, developed using Flutter, enables mathematical calculations on mobile devices. Flutter is a powerful cross-platform framework for creating impressive and functional iOS and Android applications. With Flutter's customizable widget library, the Calculator App offers a user-friendly interface. Users can effortlessly input numbers, operators, and functions using interactive buttons, while the app accurately interprets and computes the desired results. The Calculator App goes beyond basic arithmetic, providing advanced functionalities like scientific calculations, unit conversions, and memory storage. Its seamless performance and integration across platforms make it a reliable tool for professionals, students, and anyone in need of quick and accurate calculations on the go. Whether it's solving complex equations or performing simple math, the Calculator App built with Flutter delivers convenience, efficiency, and a delightful user experience.
Setting Up the Project
Before diving into the exciting world of building a Calculator App using Flutter, let's get our project set up. Here's a step-by-step guide to help you get started:
- Install Flutter:
Ensure that you have Flutter installed on your development machine. Visit the Flutter website and follow the installation instructions for your specific operating system. - Set up an IDE:
Choose your preferred integrated development environment (IDE) for Flutter development. Popular choices include Android Studio, Visual Studio Code, and IntelliJ IDEA. Install the necessary Flutter and Dart plugins to enable seamless development. - Create a new Flutter project:
Use the Flutter command-line tools or your IDE's built-in project creation wizard to start a new Flutter project. This will generate the basic project structure and essential files needed for development. - Configure dependencies:
Open the project's pubspec.yaml file and add any dependencies you may require for building the Calculator App. For example, if you plan to incorporate complex mathematical calculations, you might want to include a math library. - Set up device or emulator:
Connect your physical device or set up an emulator to test and run your app. Follow the Flutter documentation for instructions on connecting devices or creating emulators.
With these initial setup steps completed, you're now ready to embark on the exciting journey of building your very own Calculator App using Flutter. Let's start coding and bring this handy tool to life!
Building the Calculator Logic
Now that we have our Flutter project set up, let's dive into building the logic behind our Calculator App. This is where the magic happens! Follow these steps to create a robust and functional calculator:
- Design the UI:
Begin by designing the user interface (UI) for your calculator. Decide on the layout, color scheme, and style that best suits your app. Use Flutter's widget library to create buttons for numbers, operators, and other functionalities you want to include. For example, you can use FlatButton or ElevatedButton widgets to create the calculator buttons. - Handling button presses:
Set up event handlers for button presses. Each button should trigger a specific action, such as appending a digit to the input or performing a calculation. Utilize Flutter's onPressed property to associate the appropriate functions with each button. For example, you can define separate functions for digit buttons and operator buttons. - Managing user input:
Create variables to store the user's input, current operator, and previous result. As the user interacts with the calculator, update these variables accordingly. For example, when a digit button is pressed, append the digit to the input variable. - Performing calculations:
Implement the logic to perform calculations based on the user's input. This can involve parsing the input, identifying the operator, and executing the appropriate mathematical operation. Flutter provides various math functions, such as addition (+), subtraction (-), multiplication (*), and division (/), to help you accomplish this. - Error handling:
Account for potential errors, such as division by zero or invalid input. Implement error handling mechanisms to prevent crashes or unexpected behaviors. Display informative error messages to guide the user in case of invalid operations. For example, you can check if the current operator and input are valid before performing calculations. - Clearing and resetting:
Include options for clearing the current input, resetting the calculator to its initial state, or recalling previous results. These features enhance the usability and convenience of your calculator. For example, you can define a function to clear the input, operator, and previous result variables. - Testing and debugging:
Thoroughly test your calculator's logic by performing various calculations and verifying that the results are accurate. Use Flutter's debugging tools to identify and fix any issues or bugs that arise during testing.
By following these steps, you'll be able to build a robust and functional calculator logic for your Flutter app. Remember to keep your code organized, modular, and readable for easier maintenance and future enhancements. Now that the foundation is set, we can move on to the next exciting step—polishing the user experience of our Calculator App.
Customizing the UI
To create an engaging and visually appealing Calculator App, it's essential to customize the user interface (UI) to reflect your app's style and personality. Follow these steps to customize the UI of your Flutter Calculator App:
- Choose a design scheme:
Decide on a design scheme that suits your app's aesthetic. You can opt for a minimalistic look with clean lines and simple colors, or go for a more playful and vibrant theme. Consider the target audience and the purpose of your app when selecting the design scheme. - Define the layout:
Determine the layout of your calculator's UI. Flutter provides a variety of layout widgets like Column, Row, and Grid to help you arrange the UI elements. Experiment with different layouts until you find the one that best fits your design goals. - Styling buttons:
Customize the appearance of the buttons in your calculator. Use Flutter's ButtonStyle to define the button's background color, text color, shape, and other properties. Here's an example of customizing a button style: - Adding animations:
Add subtle animations to enhance the user experience and make the app more engaging. Flutter's AnimatedContainer and AnimatedOpacity widgets can help you achieve smooth transitions, fade effects, or button scaling animations when pressed. - Adding themes:
Use Flutter's Theme widget to apply consistent styling across your app. Define a theme that includes colors, fonts, and other UI properties, and wrap your calculator UI with the Theme widget. This allows you to easily change the entire app's look by modifying the theme. - Responsive design:
Ensure your calculator UI adapts to different screen sizes and orientations. Utilize Flutter's responsive design principles by using layout widgets like Expanded, Flexible, or MediaQuery to create a UI that scales gracefully across devices. - Testing and feedback: Continuously test your app on various devices and gather user feedback to ensure the UI customization meets users' expectations. Make any necessary adjustments based on the feedback received to improve the overall user experience.
By following these steps, you'll be able to create a visually appealing and user-friendly UI for your Flutter Calculator App. Remember to experiment with different design elements, colors, and animations to make your app stand out.
Testing and Deploying the App
Once you have built and customized your Flutter Calculator App, it's important to thoroughly test it before deploying it to users. Follow these steps to ensure a smooth testing and deployment process:
- Unit testing:
Write unit tests to verify the accuracy and functionality of the calculator logic and other critical components of your app. Flutter provides a testing framework that allows you to write tests using the flutter_test package. Write test cases to cover different scenarios and edge cases, ensuring that the calculator performs calculations correctly and handles errors appropriately. - Widget testing:
Conduct widget testing to ensure the UI components of your app are rendering correctly and functioning as expected. Flutter's flutter_test package provides tools for widget testing. Write tests to validate the UI elements, simulate user interactions, and verify that the expected results are displayed on the screen. - Integration testing:
Perform integration testing to ensure that different components of your app work together seamlessly. Write tests to validate interactions between the UI, calculator logic, and any external dependencies. Test scenarios where users input numbers, perform calculations, and verify that the expected results are displayed. - Emulator and device testing:
Test your app on emulators and physical devices to ensure it functions properly across different platforms and screen sizes. Run your app on various devices and orientations to check for any layout or responsiveness issues. Perform real-time interactions and calculations to validate the user experience. - Bug fixing:
If any bugs or issues are discovered during testing, address them by debugging and fixing the code. Use Flutter's debugging tools and error logging to identify and resolve any issues that arise. Repeat the testing process to ensure that fixes have been implemented correctly. - Beta testing and user feedback:
Consider conducting beta testing by releasing your app to a select group of users. Collect their feedback and incorporate it into your app, addressing any usability concerns or suggestions. This will help ensure your app is well-received and meets the needs of your target audience. - App deployment:
Once you are confident in the stability and functionality of your app, it's time to deploy it. Follow Flutter's documentation to build an optimized release version of your app. You can then distribute your app through app stores like Google Play Store for Android or the App Store for iOS. Prepare necessary app assets, screenshots, descriptions, and ensure compliance with relevant store guidelines.
Remember to regularly update and maintain your app, addressing any reported issues or adding new features based on user feedback. By prioritizing testing and providing a polished user experience, your Flutter Calculator App will be ready to delight and assist users with their mathematical needs.
Full Code
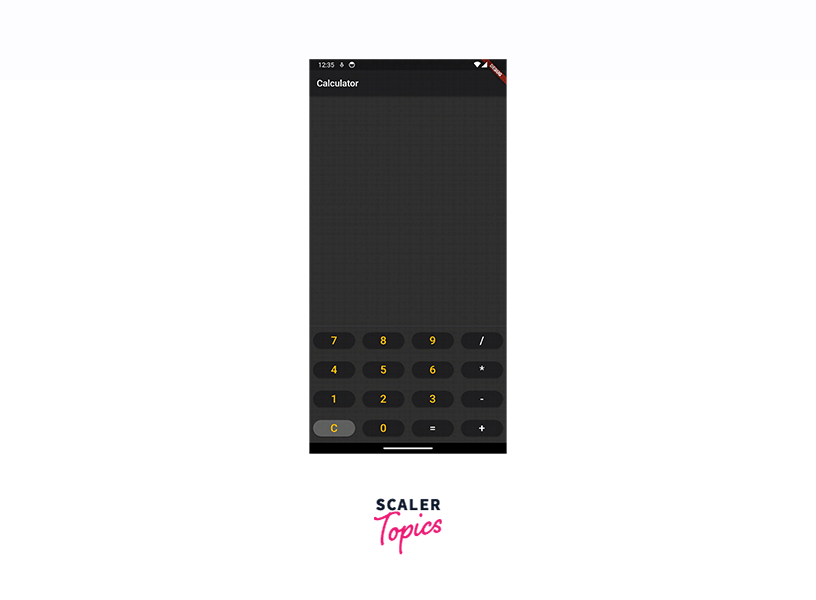
The code represents a basic calculator app implemented using Flutter. It consists of two main classes: CalculatorApp and CalculatorScreen.
- CalculatorApp is the root widget of the application. It sets the app's title and theme to a dark mode theme using ThemeData.dark().
- CalculatorScreen is a stateful widget that represents the calculator screen. It manages the calculator's state and UI.
- The calculator's state is stored in _output (the current display output), _num1 (the first number in an operation), _num2 (the second number in an operation), and _operand (the selected operator).
- The _buttonPressed method is called when a button is pressed. It updates the calculator's state based on the pressed button, handling numbers, operators, and the clear button.
- The UI is built using various widgets such as Container, ElevatedButton, and Text. Buttons are arranged in rows using Row and grouped in a Column widget.
- The UI styling is customized with different colors, shapes, and sizes for the buttons and text.
- The app is run using the runApp function, which takes the CalculatorApp as the root widget.
Conclusion
- Flutter's framework enables efficient development of cross-platform mobile apps, including calculator apps.
- With Flutter's widget library and customization options, creating a sleek and user-friendly calculator app is straightforward.
- The showcased calculator app demonstrates key features like input handling, state management, and Material UI design.
- Dark mode and Material UI 3 enhance the app's user experience and align with modern design trends.
- The modular code structure allows for easy maintenance and scalability.
- Building a calculator app in Flutter provides valuable learning and a foundation for future app development projects.