Managing Multiple Stashes
Overview
Git stashing is used to temporarily store data in Git without committing the code to the Github repository. It takes the incomplete state of your code and saves it temporarily. This gives the ability to go and work on something else without committing those changes, and then you can come back, restore and re-apply the stashed changes again.
This concept of stashing helps you to save the uncommitted changes for later usage.
Introduction
Git stashing is the concept of temporarily storing or stashing the staged or unstaged changes you have created on your current working directory so that in between, you can go and work on something else without committing those changes, and then you can come back, restore and re-apply them. It allows you to switch between branches without committing to the changes of the current branch. You can simply stash the changes, switch the branch, and then come and re-apply those changes in the previous branch whose uncommitted changes were stashed.
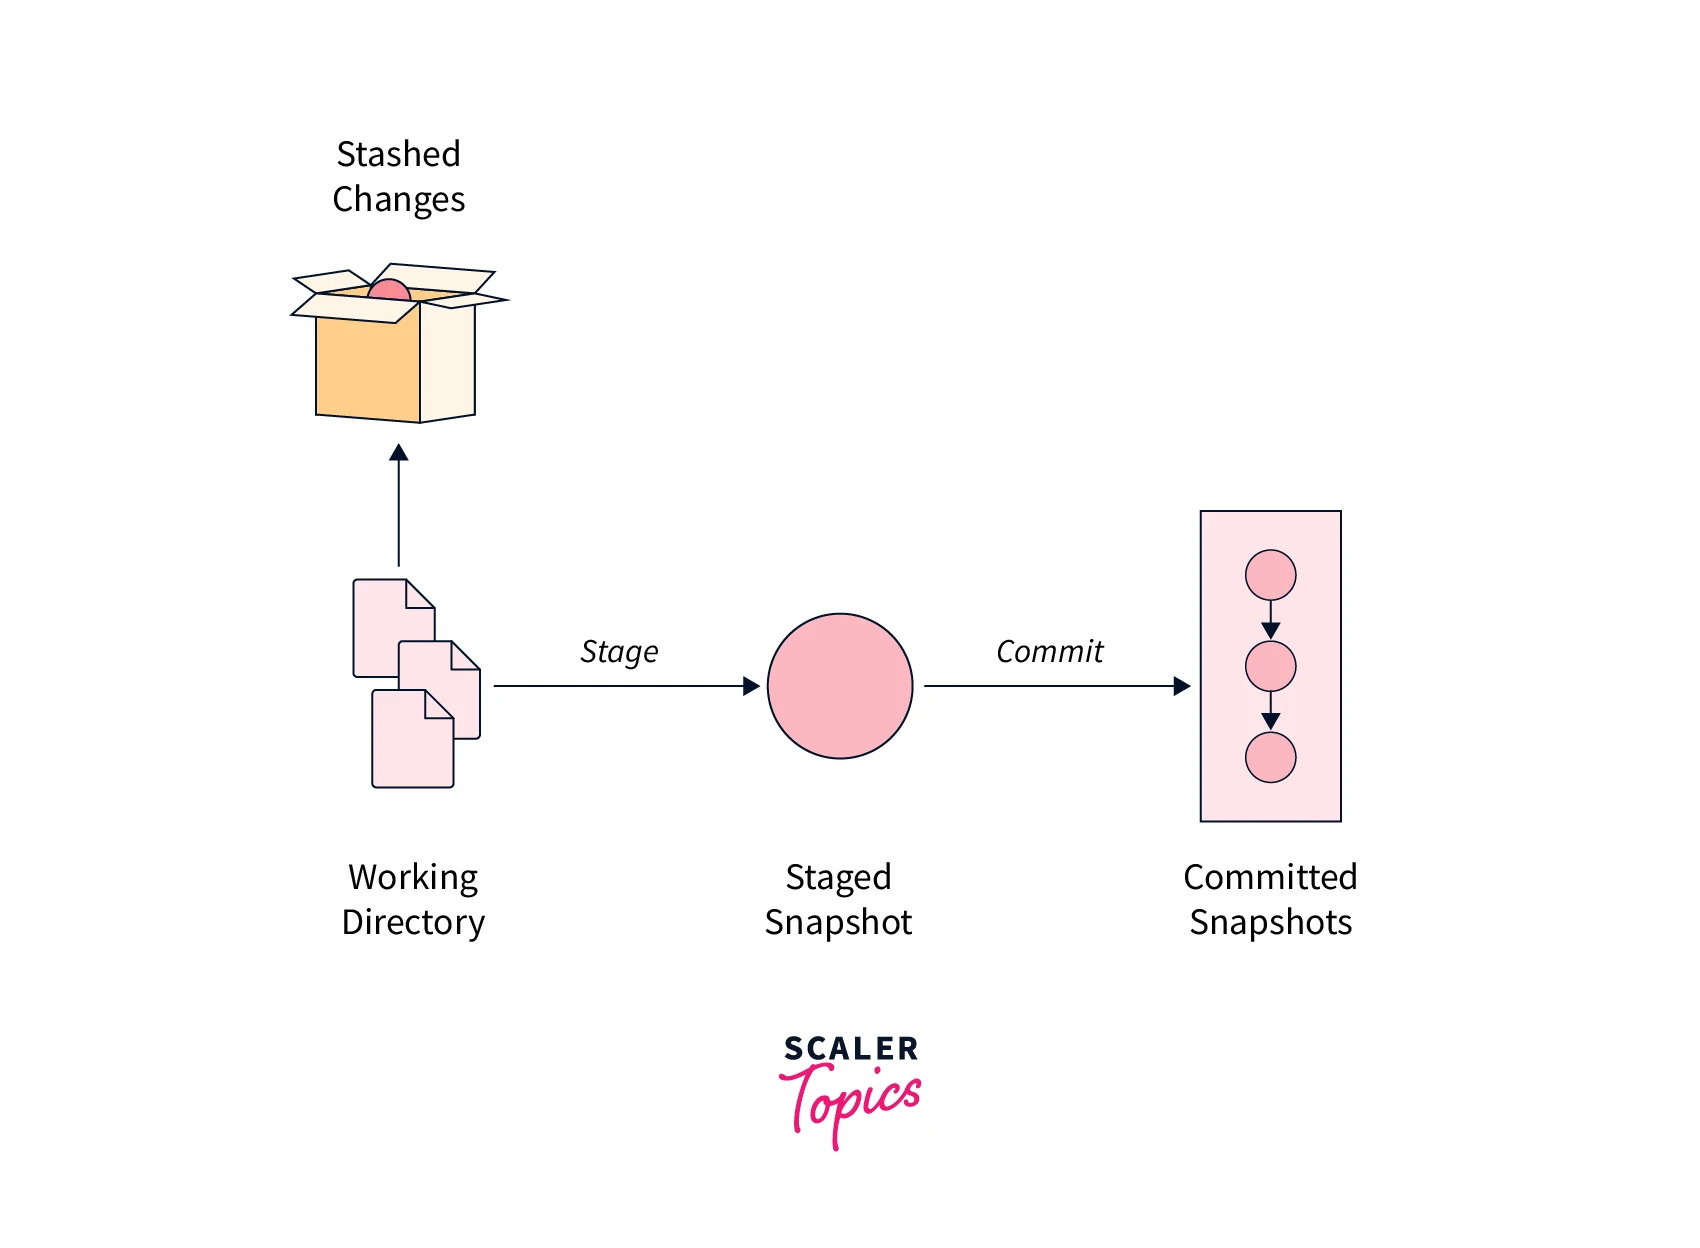
You can stash the changes using the command:
This git stash command will store the uncommitted changes (staged + unstaged changes) in a stack, save them for later use, and then re-applies them from your working directory.
The Git stash pop command can be used to re-apply the previously stored changes to your working directory.
This pop will allow you to remove the changes from the stash and apply them to your current working directory, but if you want the changes to be there in the stash, along with re-applying them, then you can use the command git stash apply, instead of the git stash pop command.
Benefits of Stash
There are many benefits of using stashing in git:
- It provides you with the flexibility and the convenience to get the job done easily
- It's helpful to have experimental and temporary code changes in your working directory that you can't commit yet.
- Helps identify new features and bugs that need to be fixed immediately without committing ongoing changes.
- Helps you merge local or remote branches while switching branches without conflicting changes in your working directory.
- It helps you to easily switch branches without even committing the current changes.
Managing Multiple Stashes
As we have seen that we can stash our changes using the command git stash. But, there is no limit on how many changes you can stash, so you can create multiple stashes according to the need by running the git stash command. To view the list of stashes, you can use the command :
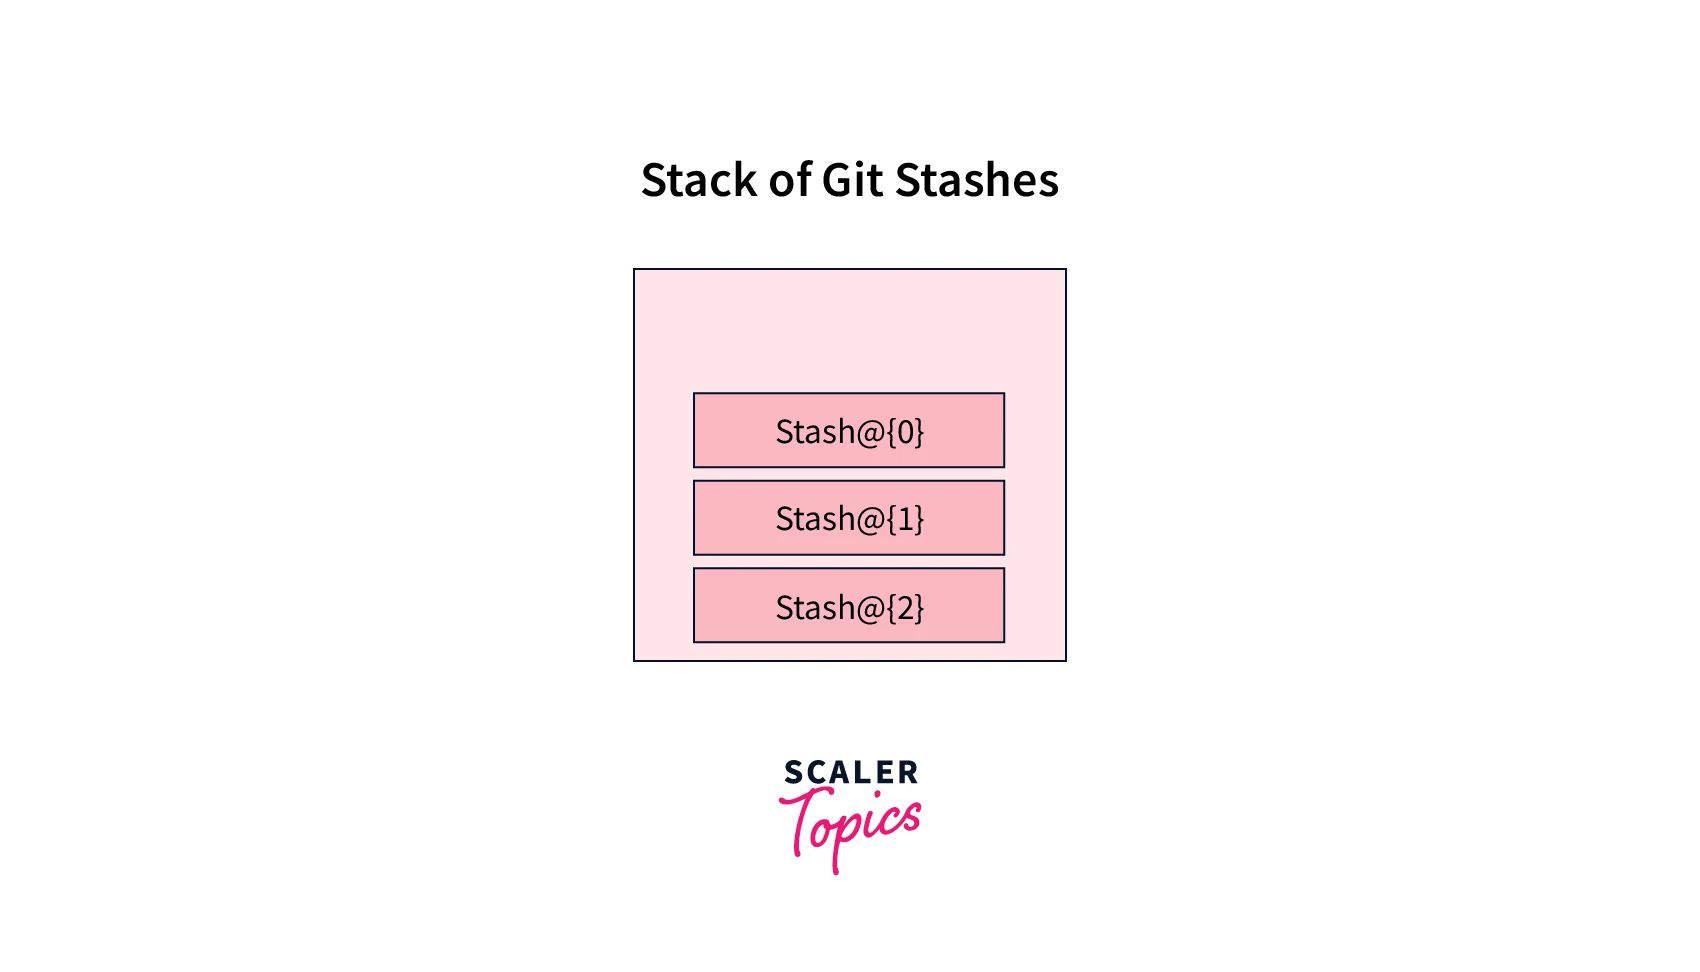
This git stash list command will get the list of all the repository's stashes. It will display all of your stashes and a corresponding stash index. The output of the above command would be something like this :
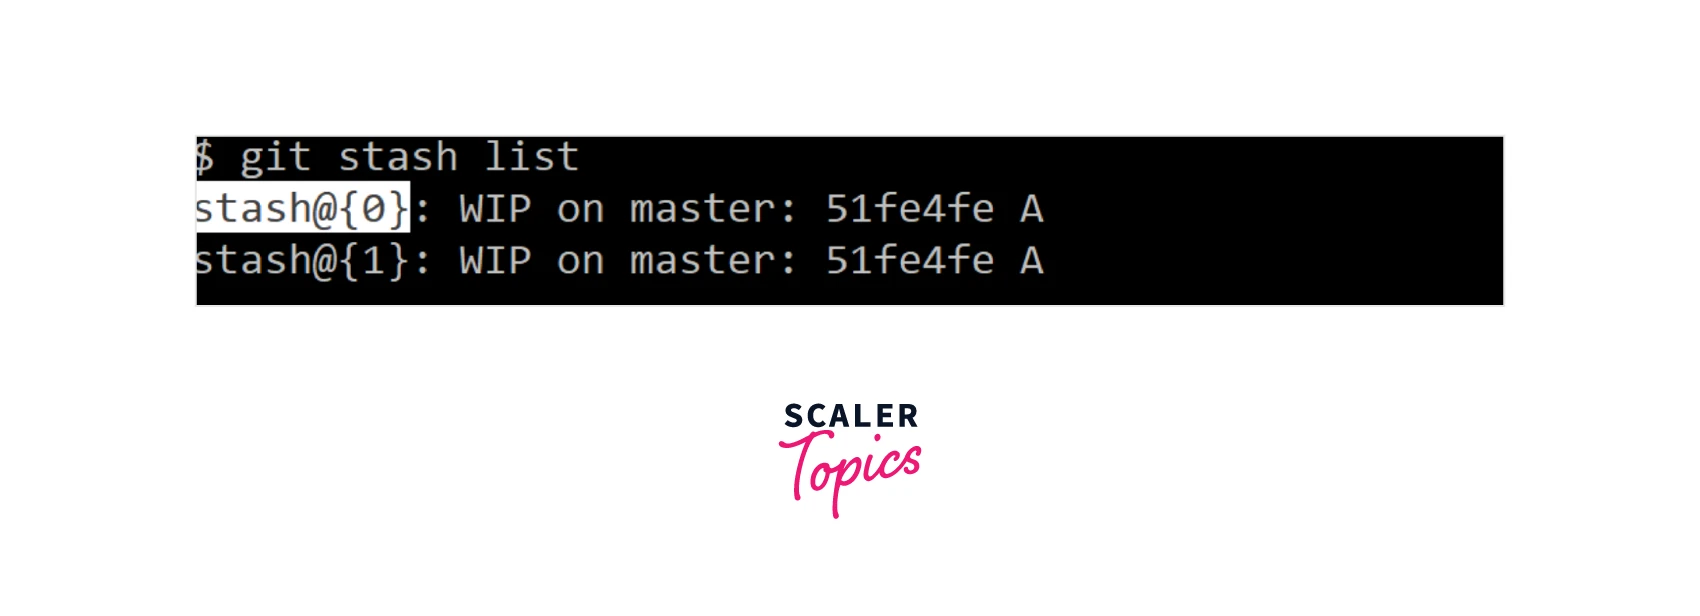
By default, the stash is simply called "WIP". In other words, the work in progress is on top of the branch and commit it was stashed from.
Now, if you want to re-apply any particular stash and not just the latest one, then you can pick that revision and either use any of the commands :
or
Viewing Stash diff
You can also view the summary of the stashed changes by using the command :
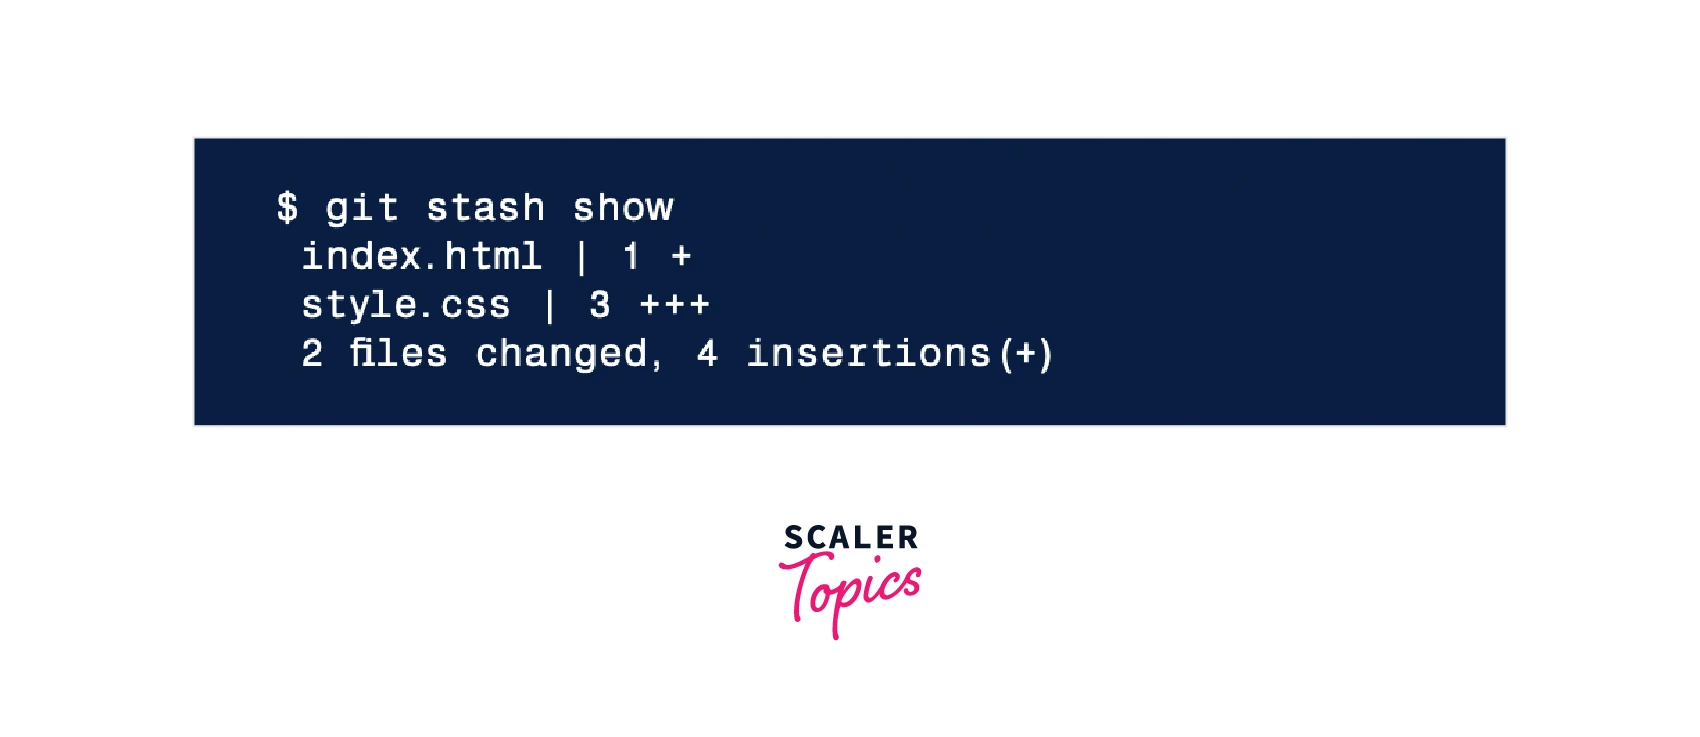
In case you have multiple stashes and you want to view the stash diff of an arbitrary stash, so to view the contents of a specific stash (in case of multiple stashes in a repository), you can run the Git stash show command followed by stash@ and the desired index like this :
This will show the summary of the stash having the index as 2.
Partial Stash
You can also use the concept of partial stashing in case you only want to stash a single file (or a collection of files) or some individual change within files. For that, you need to pass the -p option or the --patch option along with the git stash command, and it will iterate each changed "hunk" in your repository and will ask you if you want to stash that specific change or not by entering y or n.
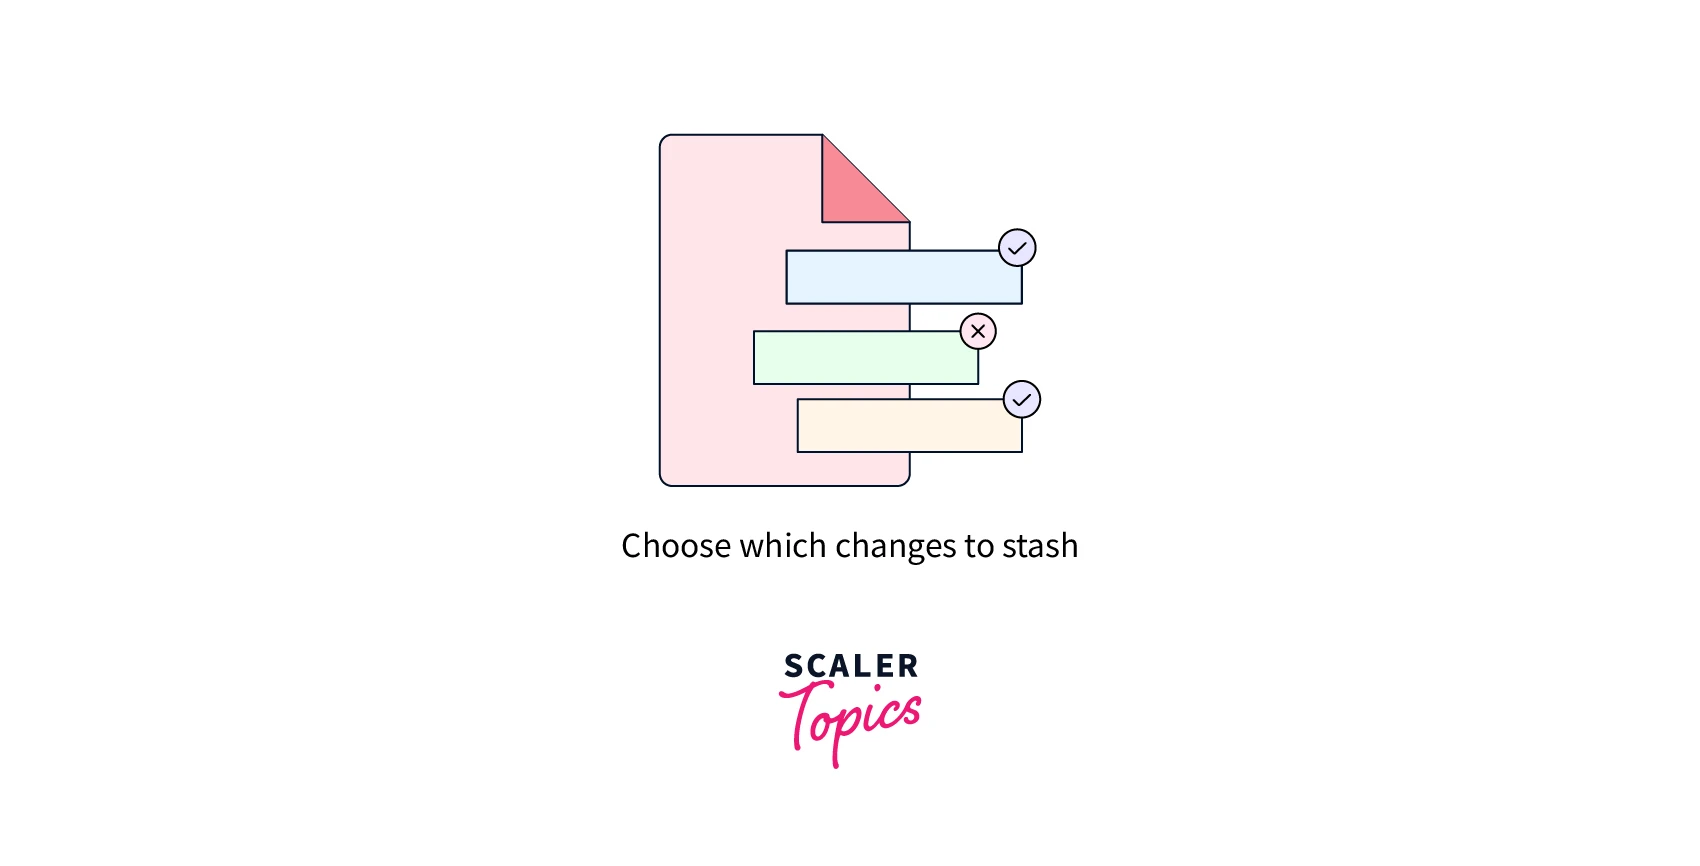
You can enter n to symbolize that we don't want to stash this change, y to allow stashing the hunk, q to quit (all the hunks stashed before pressing q will be stashed), and s to split a hunk into smaller hunks.
If you want to abort the stashing process, then you can press CTRL + C.
This allows you to stash some diffs in your working repository and interactively select the hunks you want to stash.
Creating a Branch from Stash
If the changes on your branch diverge from the changes in your stash, you may run into conflicts when popping or applying your stash. Instead, you can use the git stash branch to create a new branch to apply your stashed changes.
There might also come the situation when you stash some work, and then leave it there for a while, and continue working and making changes on the branch from which you stashed the work; then you may face merging conflicts and problems in re-applying the work (stashed changes) to the current branch. Then, to fix this, you can create a new branch from the stash using the stashing into a new branch command. This will establish a new branch for you with the name of the branch you've chosen, look up the commit on which you stashed your work, re-apply your work there, and then remove the stash or stored changes after it has been successfully applied.
To create a new branch from your stash, you can use the command:
The above command will create a new branch and check out the commit that you created your stash from. And then it will pop your stashed changes onto it.
Also, if you want to create a new branch from any particular stash and not the latest one, then you can mention the stash revision while creating a new branch using the command :
Let's understand the need for stashing into a new branch with the help of an example :
Suppose you are currently on a branch named master and have created a file index1.cpp and some other files. We have added the file to the staging area using the git add . command, but we don't want to commit the file at this point.
Now, due to some urgent work, we need to switch the different branches, but Git will not allow you to switch the branch without committing the changes. So, we will stash the changes using the command git stash.
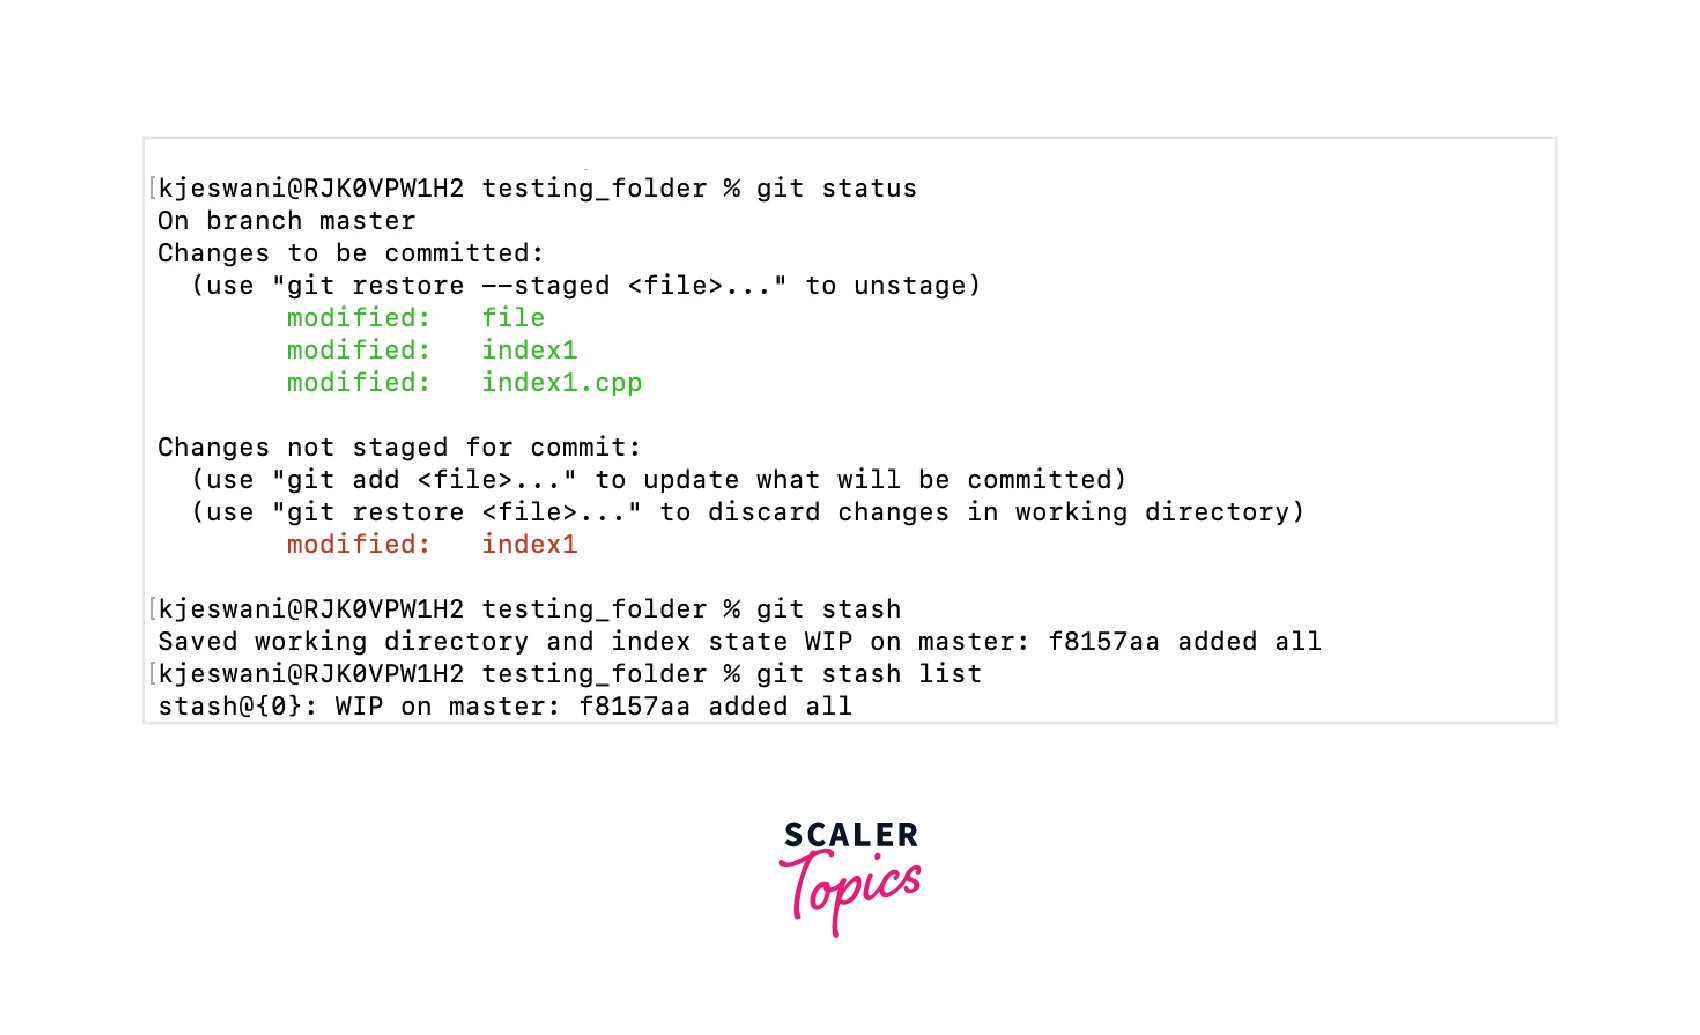
As we can see from the image, we have the modified index1.cpp file. And we have stashed the changes, which we can check using the git stash list command.
Now, let's say after some time, we again come to the branch master and make some edits again to the index1.cpp file. Now, while trying to re-apply the changes of the stash to the current branch, it will give merge conflicts as the current changes in the branch diverge from the stash causing the conflicts.
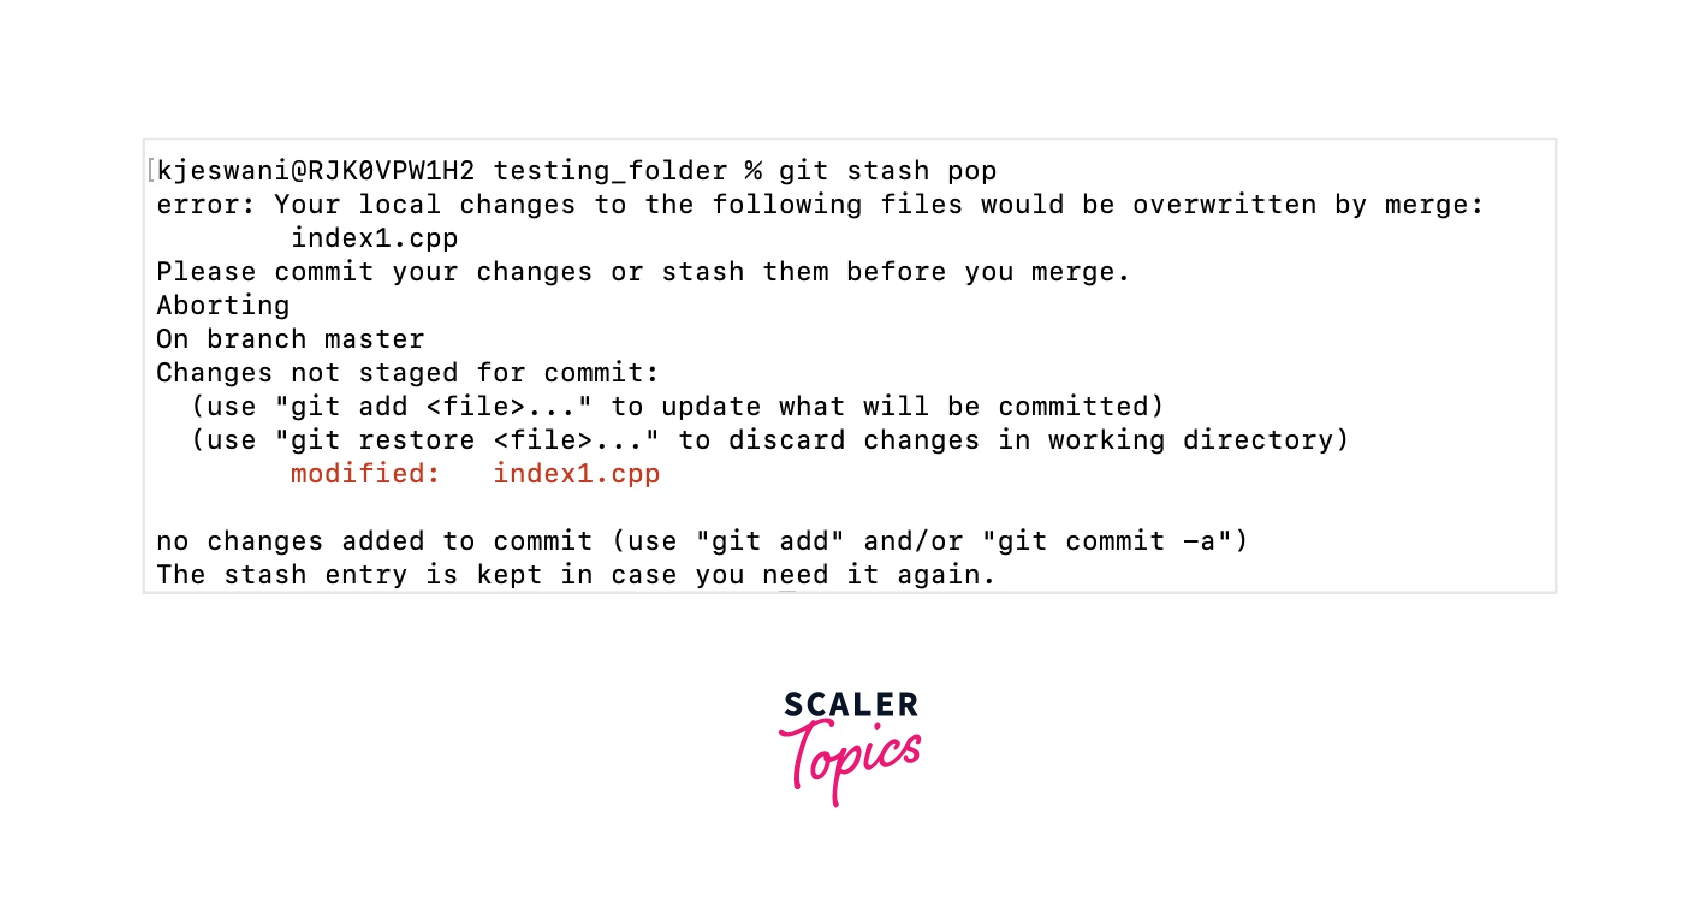 ng)
ng)
To resolve this issue, we can create a new branch, demobranch from the stash by using the command :
In our case, it is :
This will checkout to the commit that you created stash from and then pop your stashed changes onto it. And so, the conflict will be resolved, and the changes in the stash can be successfully applied.
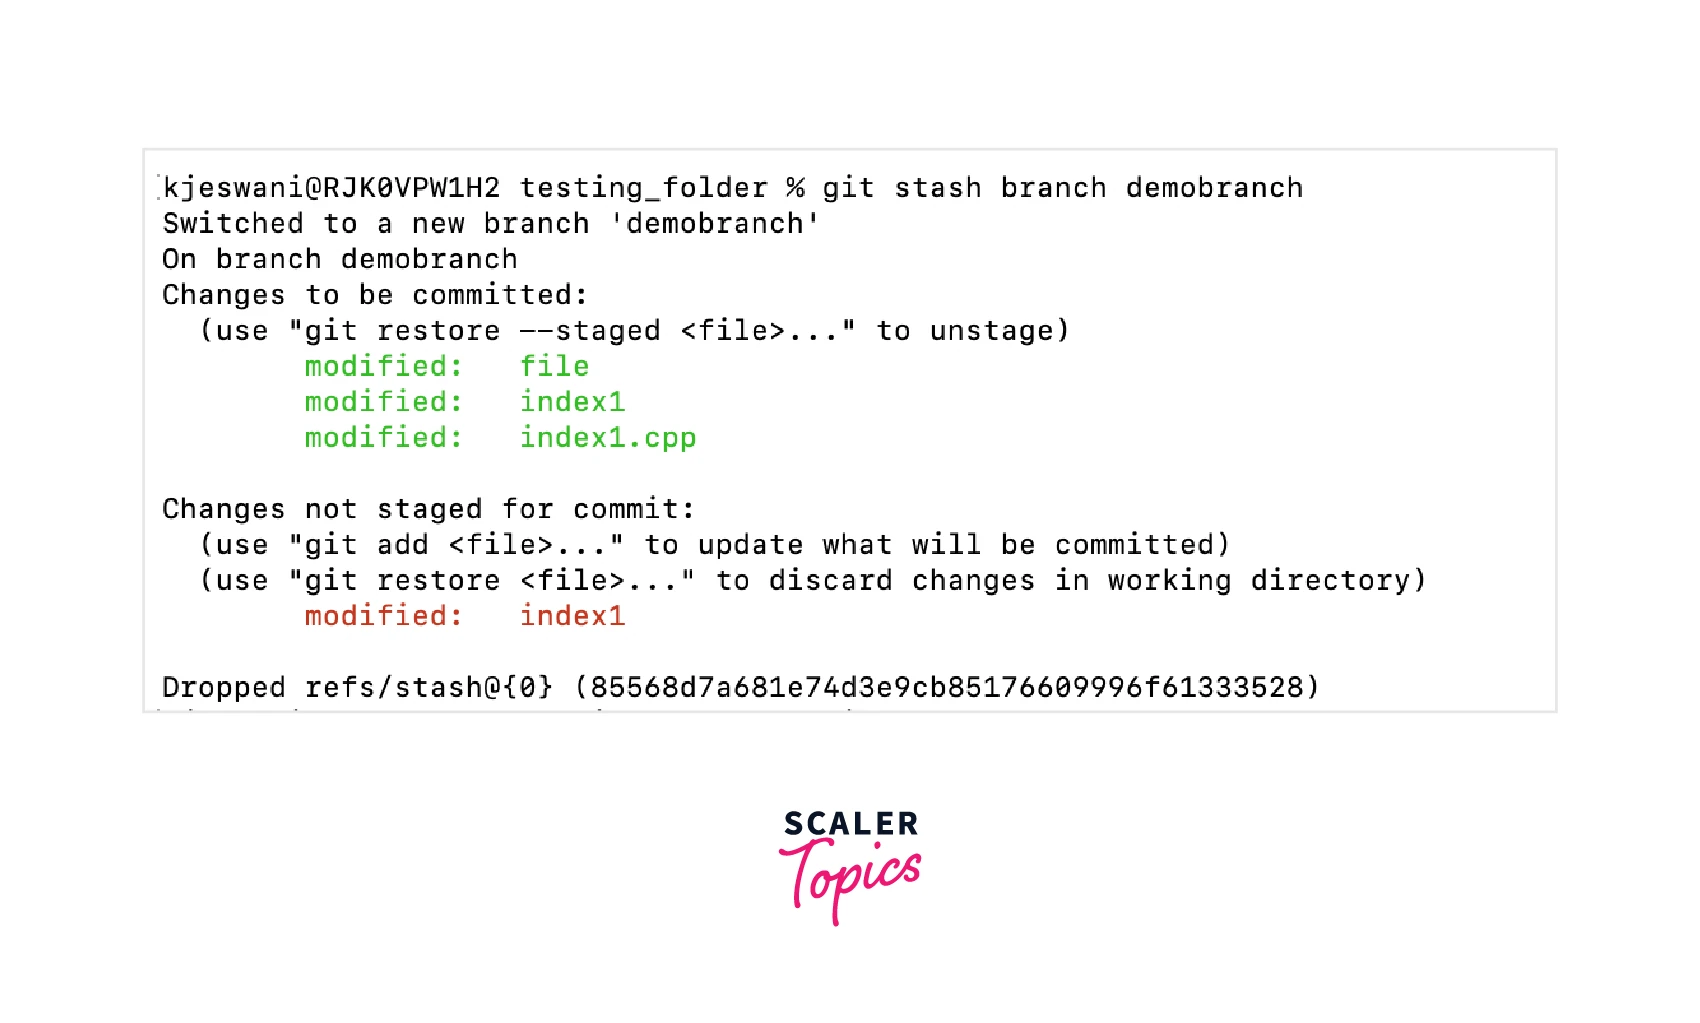
You can also create a branch from any particular stash revision, as shown in the below image :
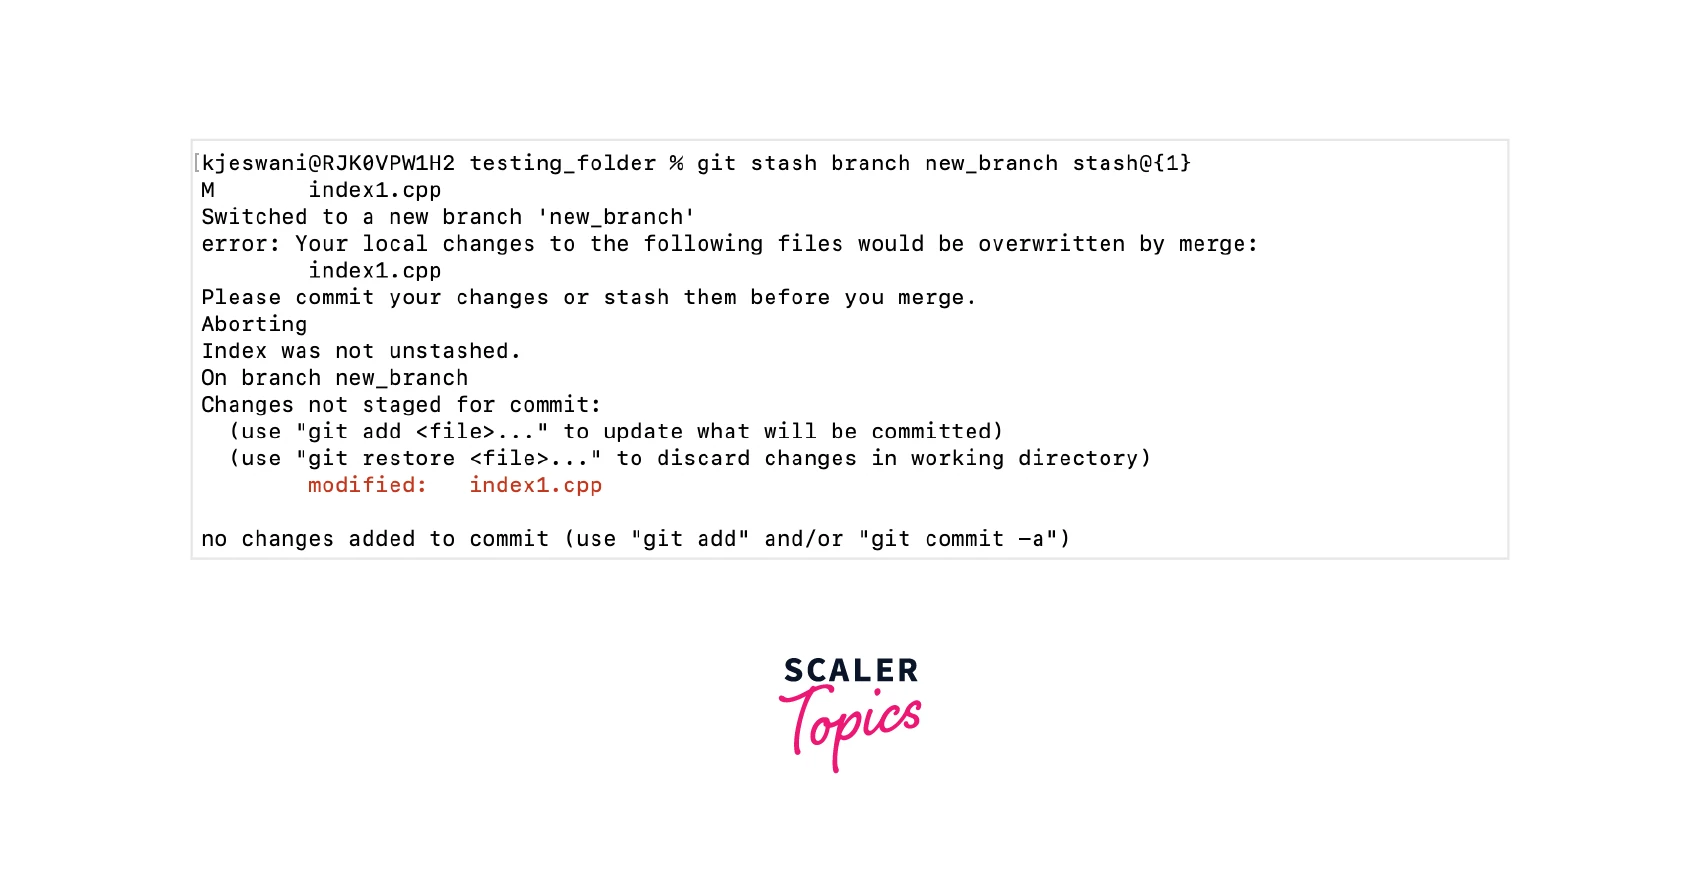
This concept will help you to create a new branch and share all the stashed work on that.
Cleaning Up a Stash
If you want to delete or clean up all of your stash in the repository, then you can use the command :
If you want to just drop a particular stash, then you can use the following:
This command will only delete the stash having the index as 1. In general, to delete a stash having a particular revision, you can use the command :
Conclusion
- Stashing is the concept in git which helps you to temporarily store or stash the staged or unstaged changes you have created on your current working directory so that in-between, you can go and work on something else without committing those changes and then you can come back, restore them and re-apply them.
- Git stashing will allow switching between branches without committing the changes of the current branch.
- git stash pop will allow you to remove the changes from the stash and apply them to your current working directory.
- git stash apply will keep the changes in the stash along with re-applying them to your current working directory.
- git stash show is used to view the summary of the stashed changes.
- git stash branch <branch_name> is used to create a new branch for you with the name of the branch of your choice, look up the commit on which you stashed your work, re-apply your work there, and then remove the stash or stored changes after successfully applying.
- git stash branch <branch_name> stash@{revision} is used to create a new branch from a particular stash revision.
- git stash show stash@{revision} is used to view the summary of the particular stash revision.
- git stash clear command is used to delete or clear all the stashed in the repository.
- git stash drop stash@{revision} is used to drop a specific stash revision.
- git stash -p command is used in case of partial stashing when you only want to stash a single file or a collection of files or some individual change within files. This command will allow you to stash some diffs in your working repository and interactively select the hunks you want to stash.
