How to Check Hostname in Linux?
The hostname of a Linux system is essential for network communication, system administration, and identification purposes. It can provide valuable information about the system's identity and facilitate communication between different devices on a network. Checking the hostname in Linux is a simple process and can be done using various commands and methods.
These methods involve using specific commands or inspecting certain files that store the hostname information. This article will explore different methods to check the hostname in Linux. Let's find out the most common methods to study the hostname in Linux.
| Command/File | Description |
|---|---|
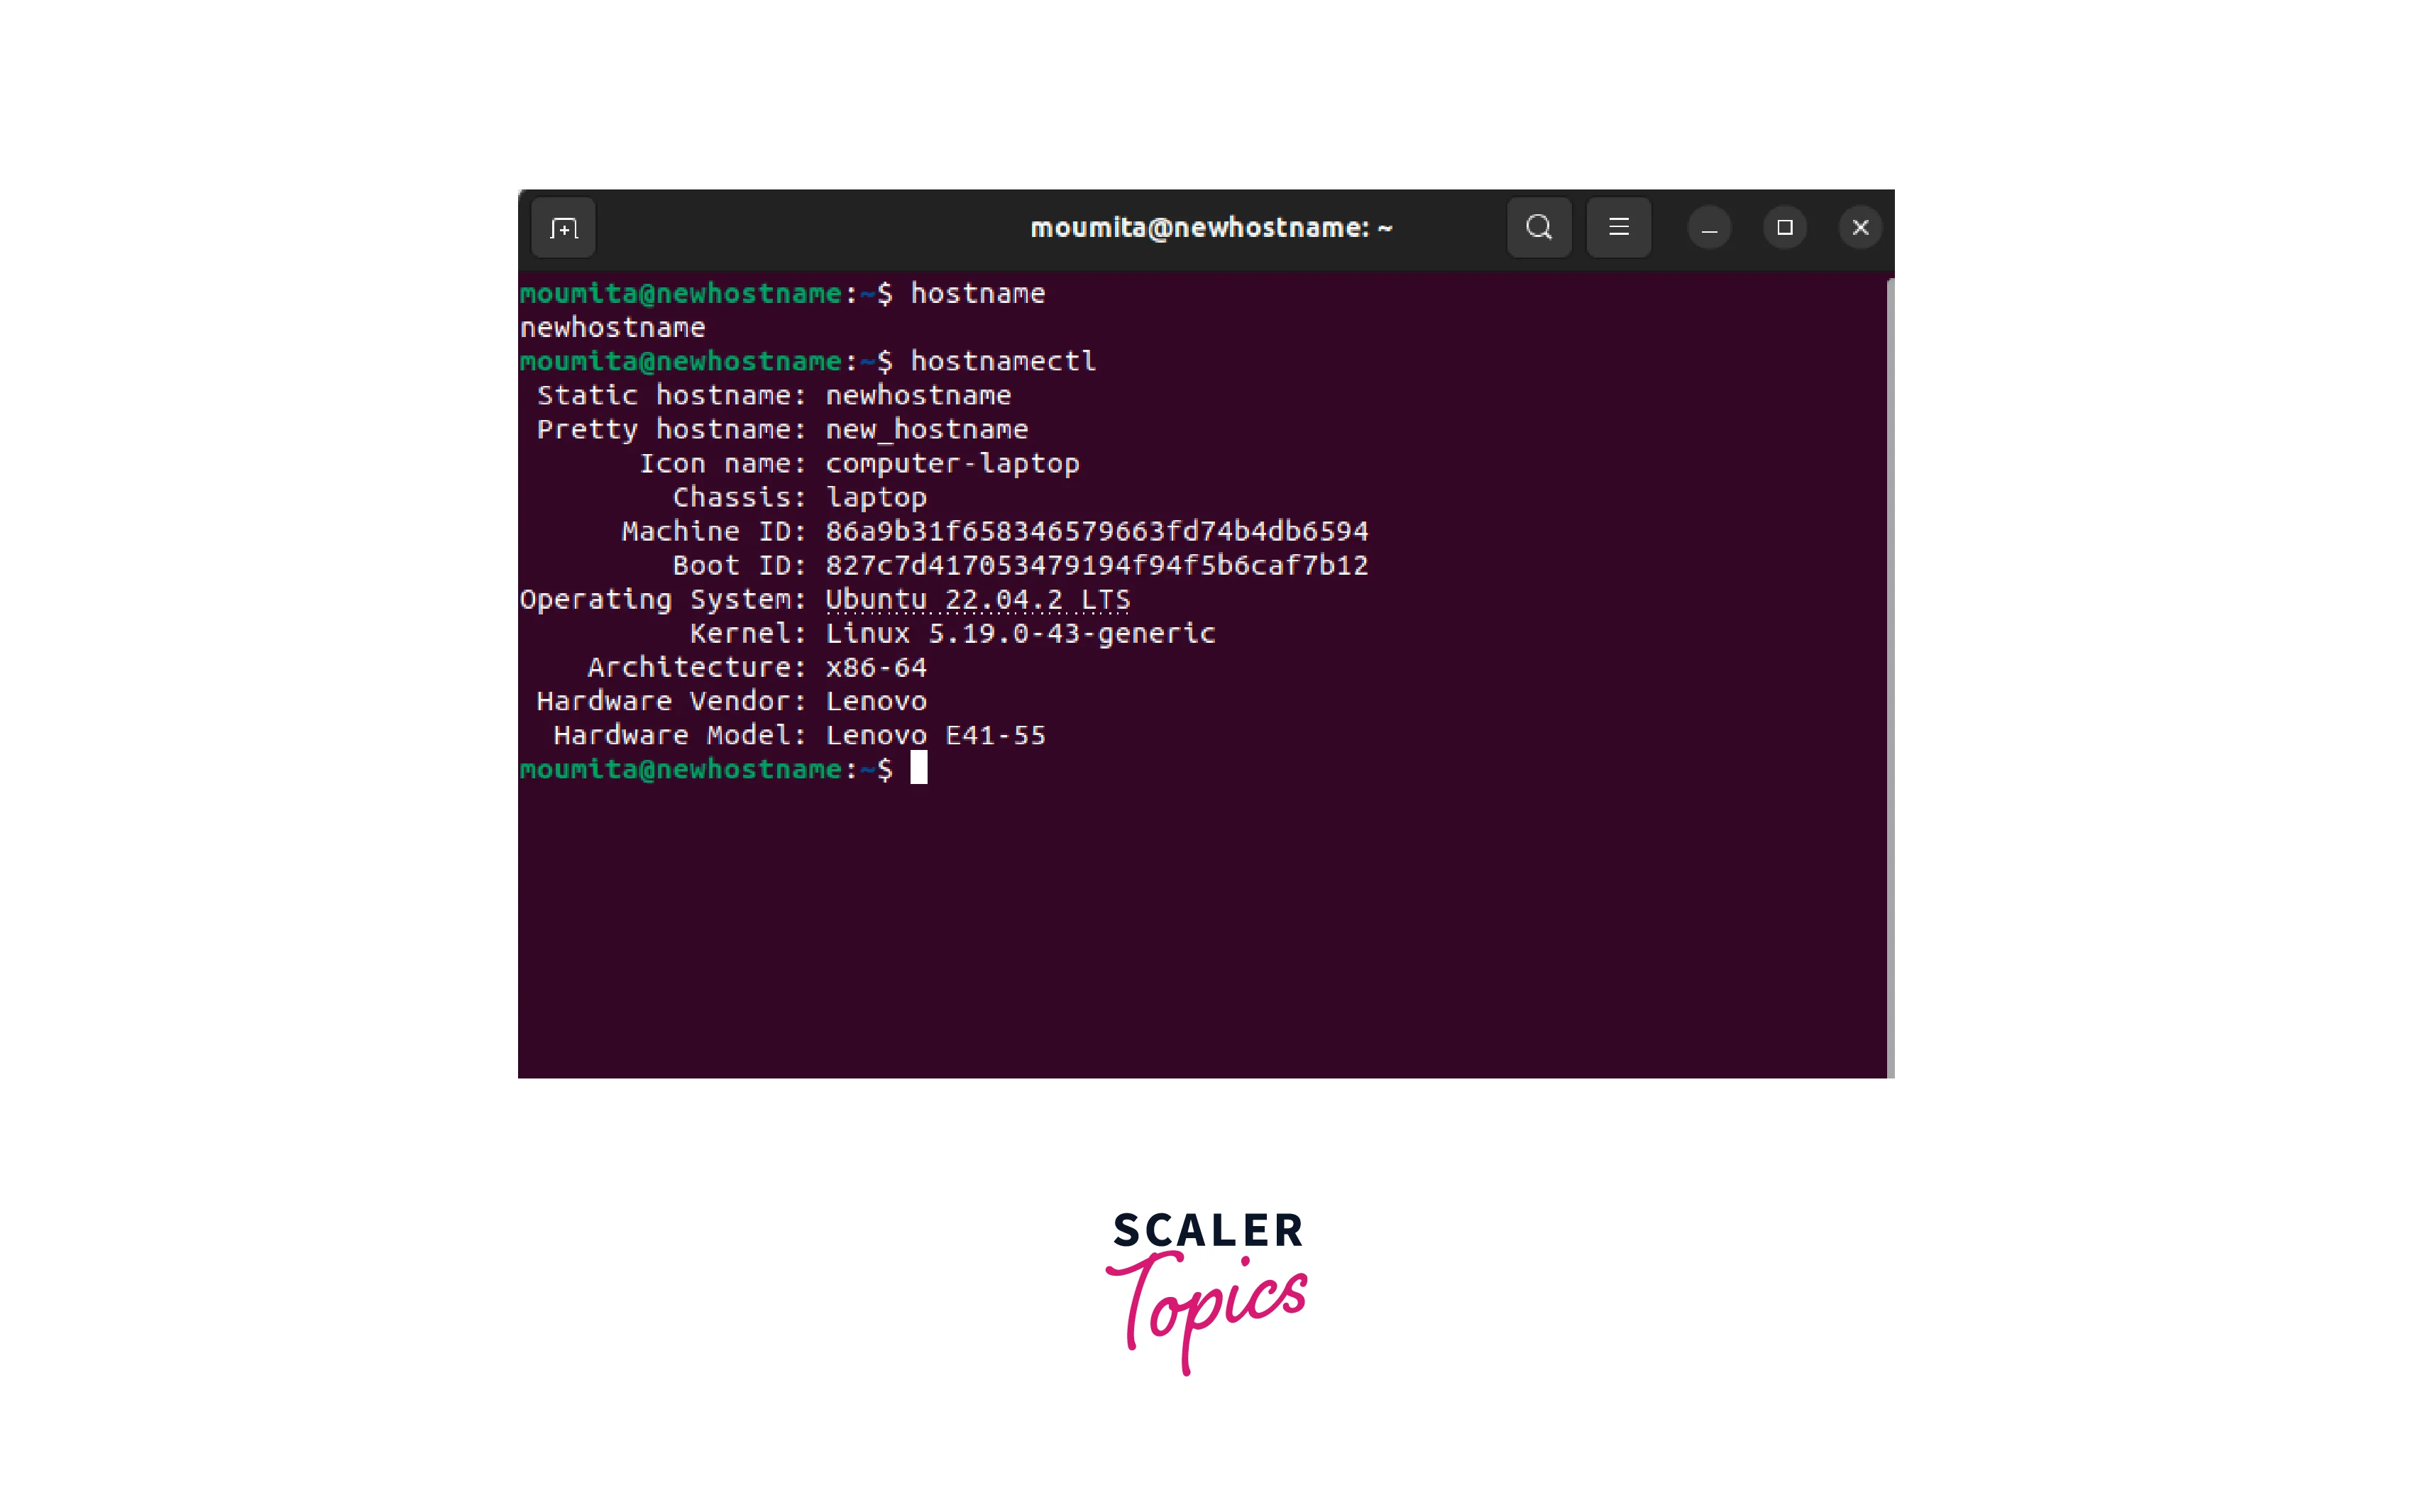
| hostname | Displays the current hostname of the system |
| hostnamectl | Shows or sets the hostname using systemd |
| nmcli | Retrieves the hostname using NetworkManager |
| uname | Returns the system information, including the hostname |
| sysctl | Reads the kernel hostname |
| /etc/hostname | Contains the persistent hostname for the system |
| /etc/hosts | Maps IP addresses to hostnames |
| /etc/sysconfig/network | Stores network configuration, including the hostname |
| ProcFS (in /proc/sys/kernel) | Contains the hostname in the kernel parameter |
| nmtui | An interactive text user interface for Network Manager |
Apart from the commands and files mentioned above, there are a few more alternative methods to check the hostname in Linux. These include:
-
/etc/hostname File: Contains the persistent hostname for the system.
-
/etc/hosts File: Maps IP addresses to hostnames.
-
/etc/sysconfig/network File: Stores network configuration, including the hostname.
ProcFS in Linux
ProcFS, short for Process File System, is a special file system in Linux that provides an interface to kernel data structures and information about running processes. It is mounted in the /proc directory and allows users and applications to access real-time system information and process-related details.
The ProcFS is a virtual file system that dynamically generates files and directories corresponding to various aspects of the running system. These files and directories act as an interface to the kernel, allowing users to read or write information and configure certain parameters. It provides a structured representation of kernel and process-related data, accessible through a file-based interface.
One of the essential uses of the ProcFS is to obtain information about running processes. Each running process has a directory with its process ID (PID) as its name inside the /proc directory. Inside these process directories, you can find files that provide details such as process status, memory usage, open files, command-line arguments, environment variables, and more. By accessing these files, you can gather insights into the system's state and the behavior of individual processes.
Additionally, the ProcFS offers files that provide information about system-wide configurations and parameters. For example, you can find files related to kernel parameters, CPU information, memory usage, mounted file systems, network statistics, and more. These files allow you to retrieve real-time information about the system and adjust certain settings if necessary.

"nmtui" Command in Linux
The nmtui command in Linux stands for NetworkManager Text User Interface. It is a command-line tool that provides an interactive text-based interface for managing network connections and configurations using NetworkManager.
NetworkManager is a service that manages network connectivity in Linux-based systems. It handles tasks such as connecting to Wi-Fi networks, configuring wired connections, managing VPN connections, and more. The nmtui command provides a user-friendly way to interact with NetworkManager through a terminal session.
Here's how you can use the nmtui command:
Open a terminal or shell session and run the command nmtui with root or sudo privileges.

The nmtui interface will launch, presenting a text-based menu with various options for managing network connections. You can navigate through the interface using the arrow keys, Tab key, and Enter key.
The available options will include:
-
Activate a connection:
Select an existing connection from the list and choose the Activate option to connect to it. -
Edit a connection:
Modify the properties of an existing connection, such as IP configuration, DNS settings, or Wi-Fi credentials. -
Add a new connection:
Create a new network connection, specifying its type (e.g., Wi-Fi, Ethernet, VPN) and entering the necessary configuration details. -
Delete a connection:
Remove an existing network connection from the system. -
View connection details:
Display information about a specific connection, including its IP address, gateway, and DNS settings. -
Enable/disable networking:
Enable or disable the network interface on the system. -
To make changes, select the appropriate option and follow the prompts to configure or modify network settings.
Once you have made the desired changes, exit the nmtui interface.
The nmtui command provides a straightforward and intuitive way to manage network connections in a text-based environment. It is particularly useful for systems without a graphical user interface (GUI) or for remote management scenarios.
By using nmtui, you can easily configure and monitor network connections, troubleshoot network issues, and streamline network management tasks in Linux.
How to Change Hostname in Linux?
To change the hostname in Linux, you can follow these general steps:
Step - 1. Using the hostnamectl command:
-
Open a terminal or shell session.
-
Run the following command with root or sudo privileges:

-
Replace new_hostname with the desired hostname you want to set.
-
Enter your password if prompted.
-
The hostname will be changed immediately, and you can verify it by running the hostnamectl command without any arguments: hostnamectl
Step - 2. Editing the /etc/hostname file:
-
Open a terminal or shell session.
-
Run the following command with root or sudo privileges to open the file in a text editor:

-
Replace <text_editor> with the text editor of your choice, such as nano, vi, or gedit.
-
Inside the file, replace the current hostname with the new desired hostname.
-
Save the changes and exit the text editor.
-
Reboot your system or restart the hostname service for the changes to take effect.
Step - 3. Editing the /etc/hosts file:
-
Open a terminal or shell session.
-
Run the following command with root or sudo privileges to open the file in a text editor:
-
Locate the line that starts with 127.0.0.1 or ::1, followed by the current hostname.
-
Replace the current hostname with the new desired hostname.
-
Save the changes and exit the text editor.
-
Reboot your system or restart the hostname service for the changes to take effect.
It's important to note that after changing the hostname, you may need to update other configuration files or services that rely on the hostname, such as Apache or network configuration files. Additionally, keep in mind that some changes may require a system reboot to take effect fully.
Remember to exercise caution when modifying system files and always make backups or take appropriate precautions before making any changes.
Learn More
You can learn more about Linux system administration and related topics on the Scaler Topics. Some crucial links related to this article are given below.
Conclusion
-
Checking the hostname in Linux can be done using various commands
-
Commands such as hostname, hostnamectl, nmcli, uname, and sysctl, and by inspecting files like /etc/hostname, /etc/hosts, /etc/sysconfig/network, ProcFS in Linux are nmtui in Linux are highlighted in this article.
-
Changing the hostname can be accomplished using hostnamectl or manually editing the configuration files.