Move and Copy Data
Overview
Excel is a "powerful spreadsheet program" that allows users to manipulate and organize data in various ways. One of the most basic functions of Excel is the ability to move and copy data within and between spreadsheets. Moving data in Excel involves cutting and pasting selected cells or ranges to a new location. Copying data, on the other hand, involves duplicating selected cells or ranges and pasting them to another location. Both moving and copying data in Excel can be done using keyboard shortcuts or through the ribbon menu. Excel also provides various options for how the data is pasted, such as pasting values only, formatting, or formulas.
Introduction
Excel is a widely used spreadsheet application that allows users to store, manipulate, and analyze data. One of the most common tasks that Excel users perform is moving or copying data (how to copy and paste on Excel)from one location to another within a worksheet or between different worksheets or workbooks. Move and copy operations can be performed on individual cells, ranges of cells, or entire worksheets. These operations are useful for tasks such as reorganizing data, creating backups, and consolidating information from multiple sources
Now let us read about Moving information using the drag-and-drop method:
Moving Information Using the Drag-and-drop Method
The drag-and-drop method is a simple and intuitive way of moving information from one location to another on your computer. It involves selecting the item you want to move by clicking on it and then dragging it to the new location using your mouse or trackpad. Let us read about the step-by-step guide on how to move information using the drag-and-drop method:
- Open the Excel workbook containing the cells or elements you want to move.
- Select the cells or elements you want to move by clicking and dragging your mouse over them. You can select individual cells or entire ranges of cells.
- Position your mouse pointer over the edge of the selection box until you see a four-headed arrow.
- Click and hold down the left mouse button while dragging the selection to its new location. You will see a ghosted image of the selection box as you drag it.
- When you have reached the desired location, release the mouse button to drop the selection into its new position. The cells or elements you moved will now be in their new location.
We can also move cells or elements by copying them instead of cutting them. To copy cells or elements, hold down the "Ctrl" key while dragging the selection to its new location. This will create a copy of the cells or elements in their new location while leaving the original cells or elements intact.
In addition to moving cells, you can also move other elements in an Excel workbook using the drag-and-drop method. Here are some examples:
- Moving worksheets:
To move a worksheet to a new location in the workbook, click on the worksheet tab and drag it to its new position. You can also right-click on the worksheet tab and choose "Move or Copy" from the context menu to move or copy the worksheet to a new location. - Moving chart elements:
To move a chart title, axis title, or another chart element, click on the element to select it, then click and drag it to its new location. You can also right-click on the element and choose "Format [element]" from the context menu to access more formatting options. - Moving objects:
To move a shape, picture, or another object in an Excel worksheet, click on the object to select it, then click and drag it to its new location. You can also right-click on the object and choose "Format Object" from the context menu to access more formatting options.
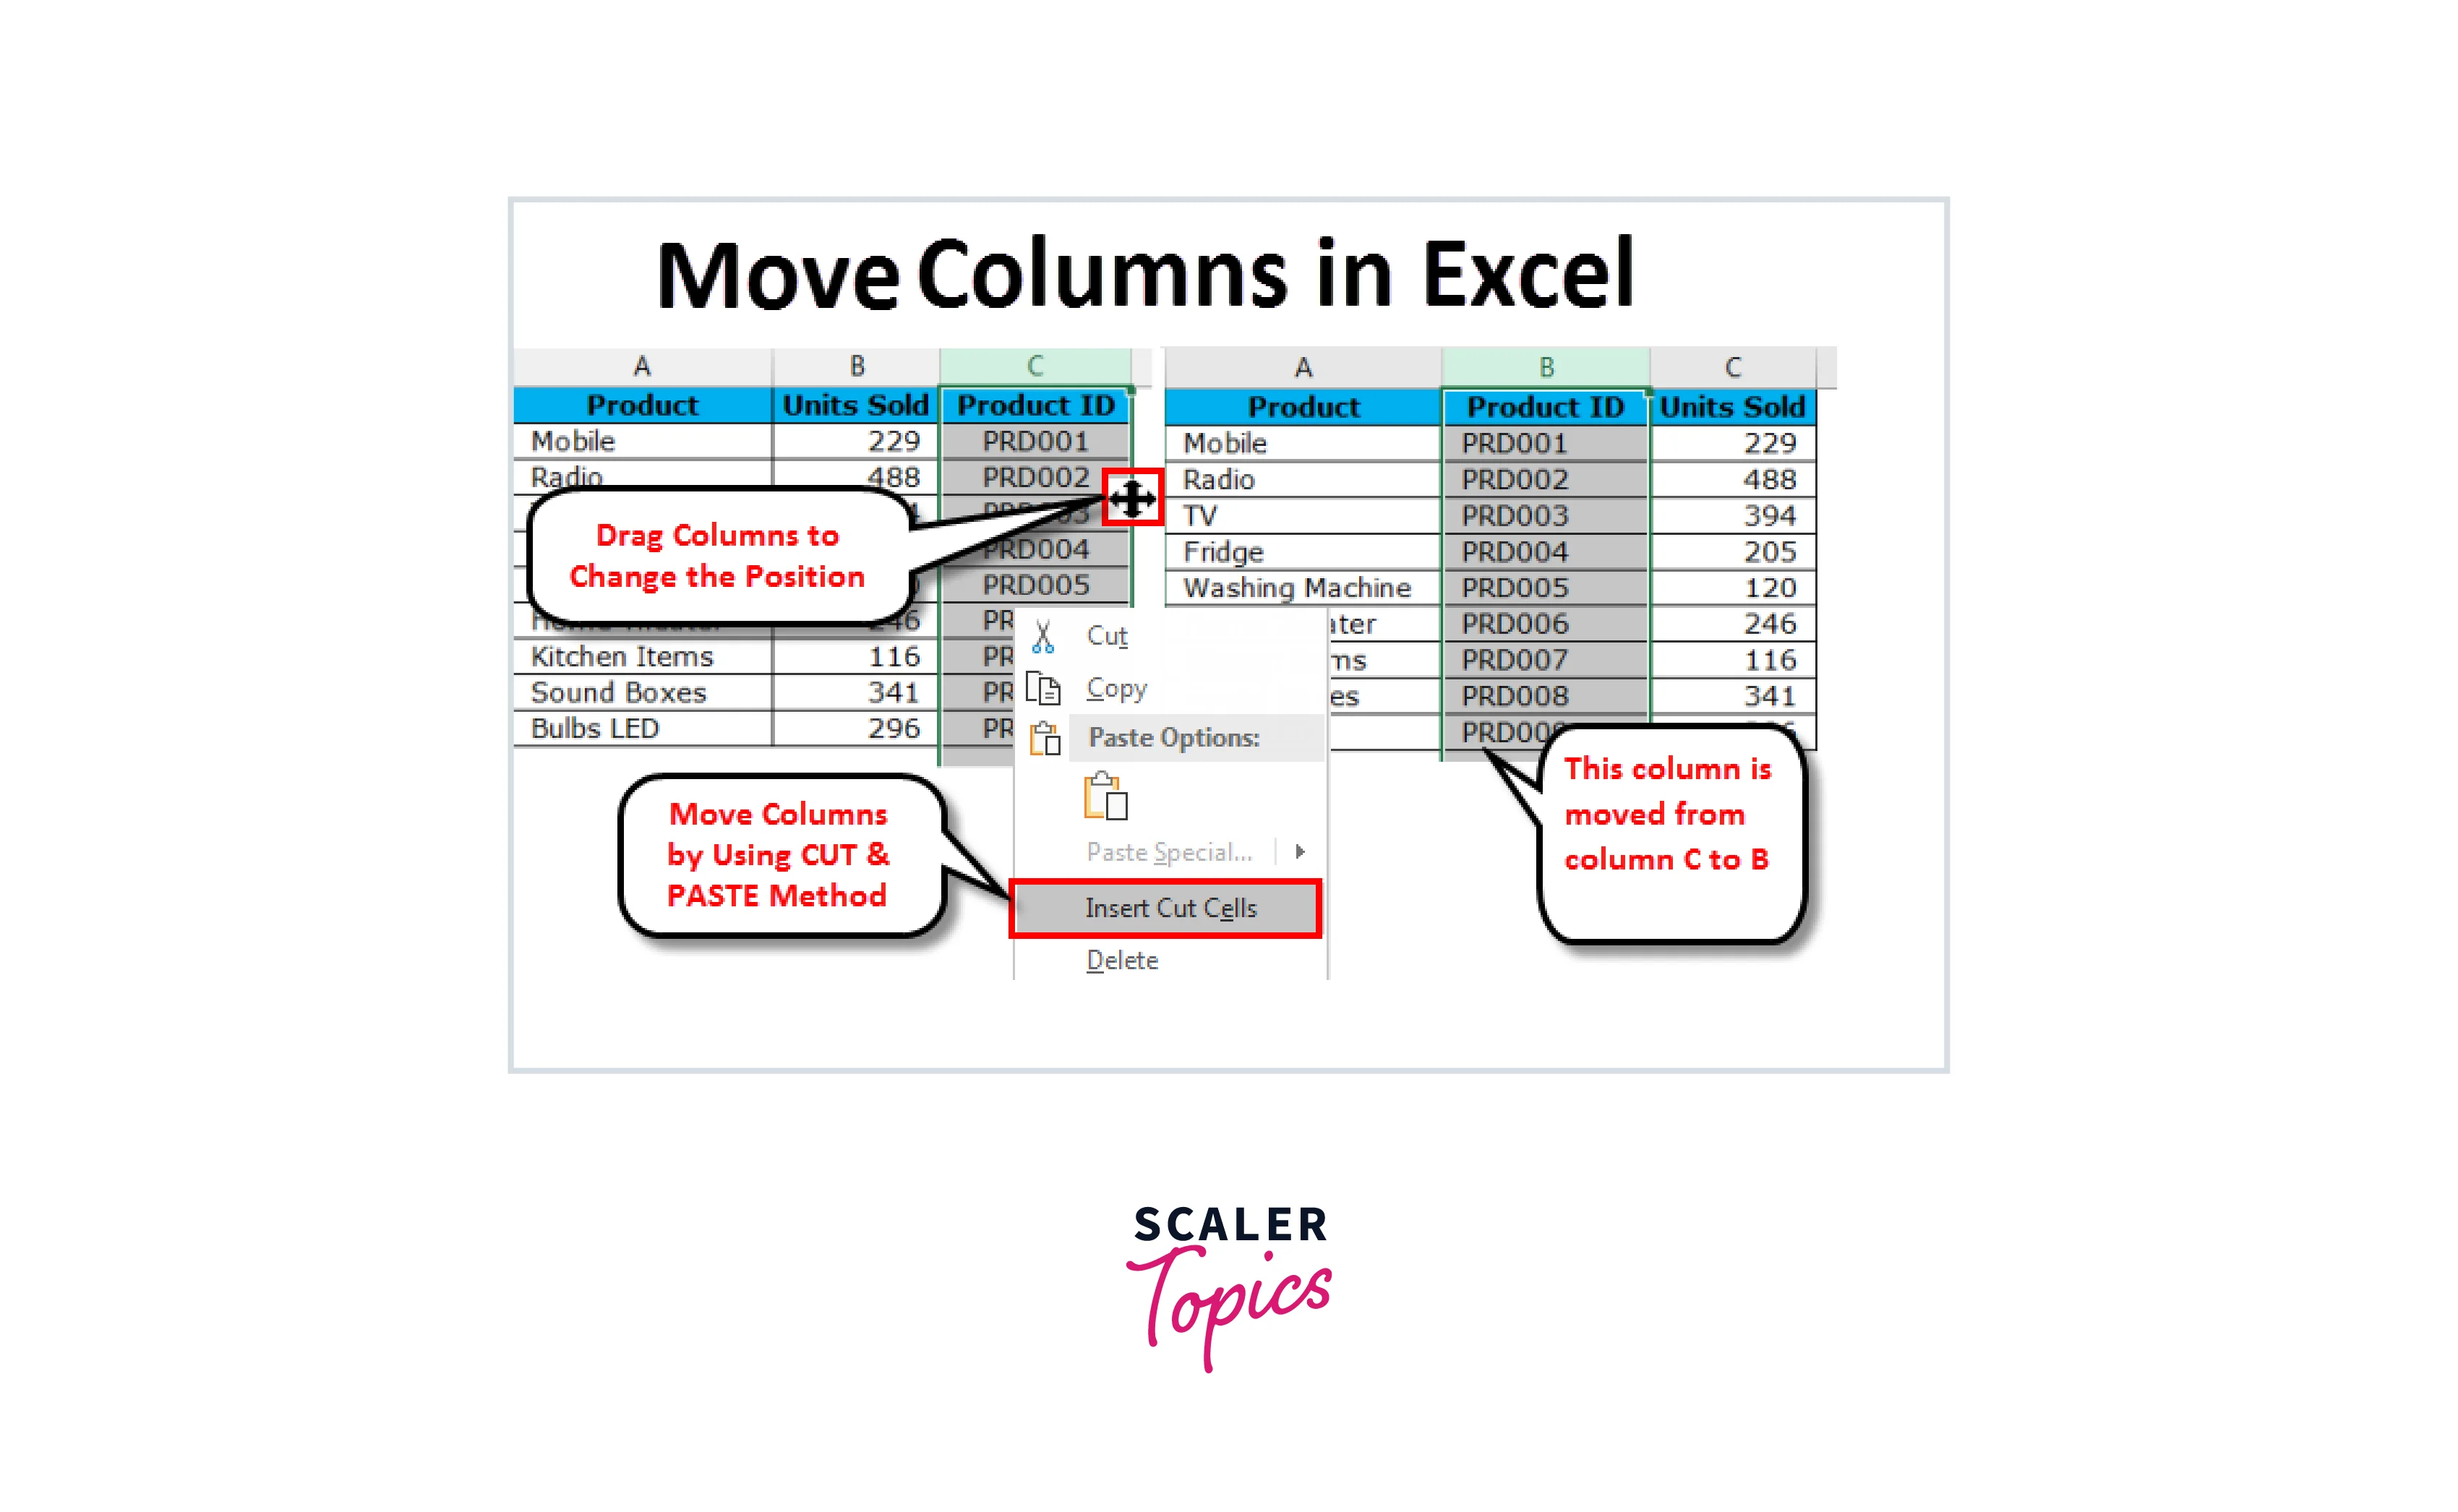
Let us an image for better understanding:

Now let us read about how to Move cells by using Cut and Paste:
Move Cells by Using Cut and Paste
Moving cells in a spreadsheet is a common task that is performed when rearranging data or reorganizing a sheet. One way to move cells is by using the Cut and Paste methods. This method allows you to remove cells from their current location and paste them into a new location. Here are the steps to move cells using Cut and Paste:
1. Step - 1: Select the Cells that you Want to Move
To select cells, click and drag the cursor over the cells you want to move. You can select multiple cells by holding down the Shift key and clicking on each cell.
2. Step - 2: Cut the Cells
Once you have selected the cells, right-click on the selection and choose Cut from the context menu. Alternatively, you can use the keyboard shortcut Ctrl+X (Windows) or Cmd+X (Mac) to cut the cells.
3. Step - 3: Select the New Location
Navigate to the new location where you want to paste the cells. You can do this by clicking on the desired cell or by using the arrow keys to move around the sheet.
4. Step - 4: Paste the Cells
Right-click on the new location and choose Paste from the context menu. Alternatively, you can use the keyboard shortcut Ctrl+V (Windows) or Cmd+V (Mac) to paste the cells.
5. Step - 5: Adjust the Cells
After pasting the cells, you may need to adjust them to fit the new location. For example, you may need to resize the columns or rows or adjust the formatting of the cells.
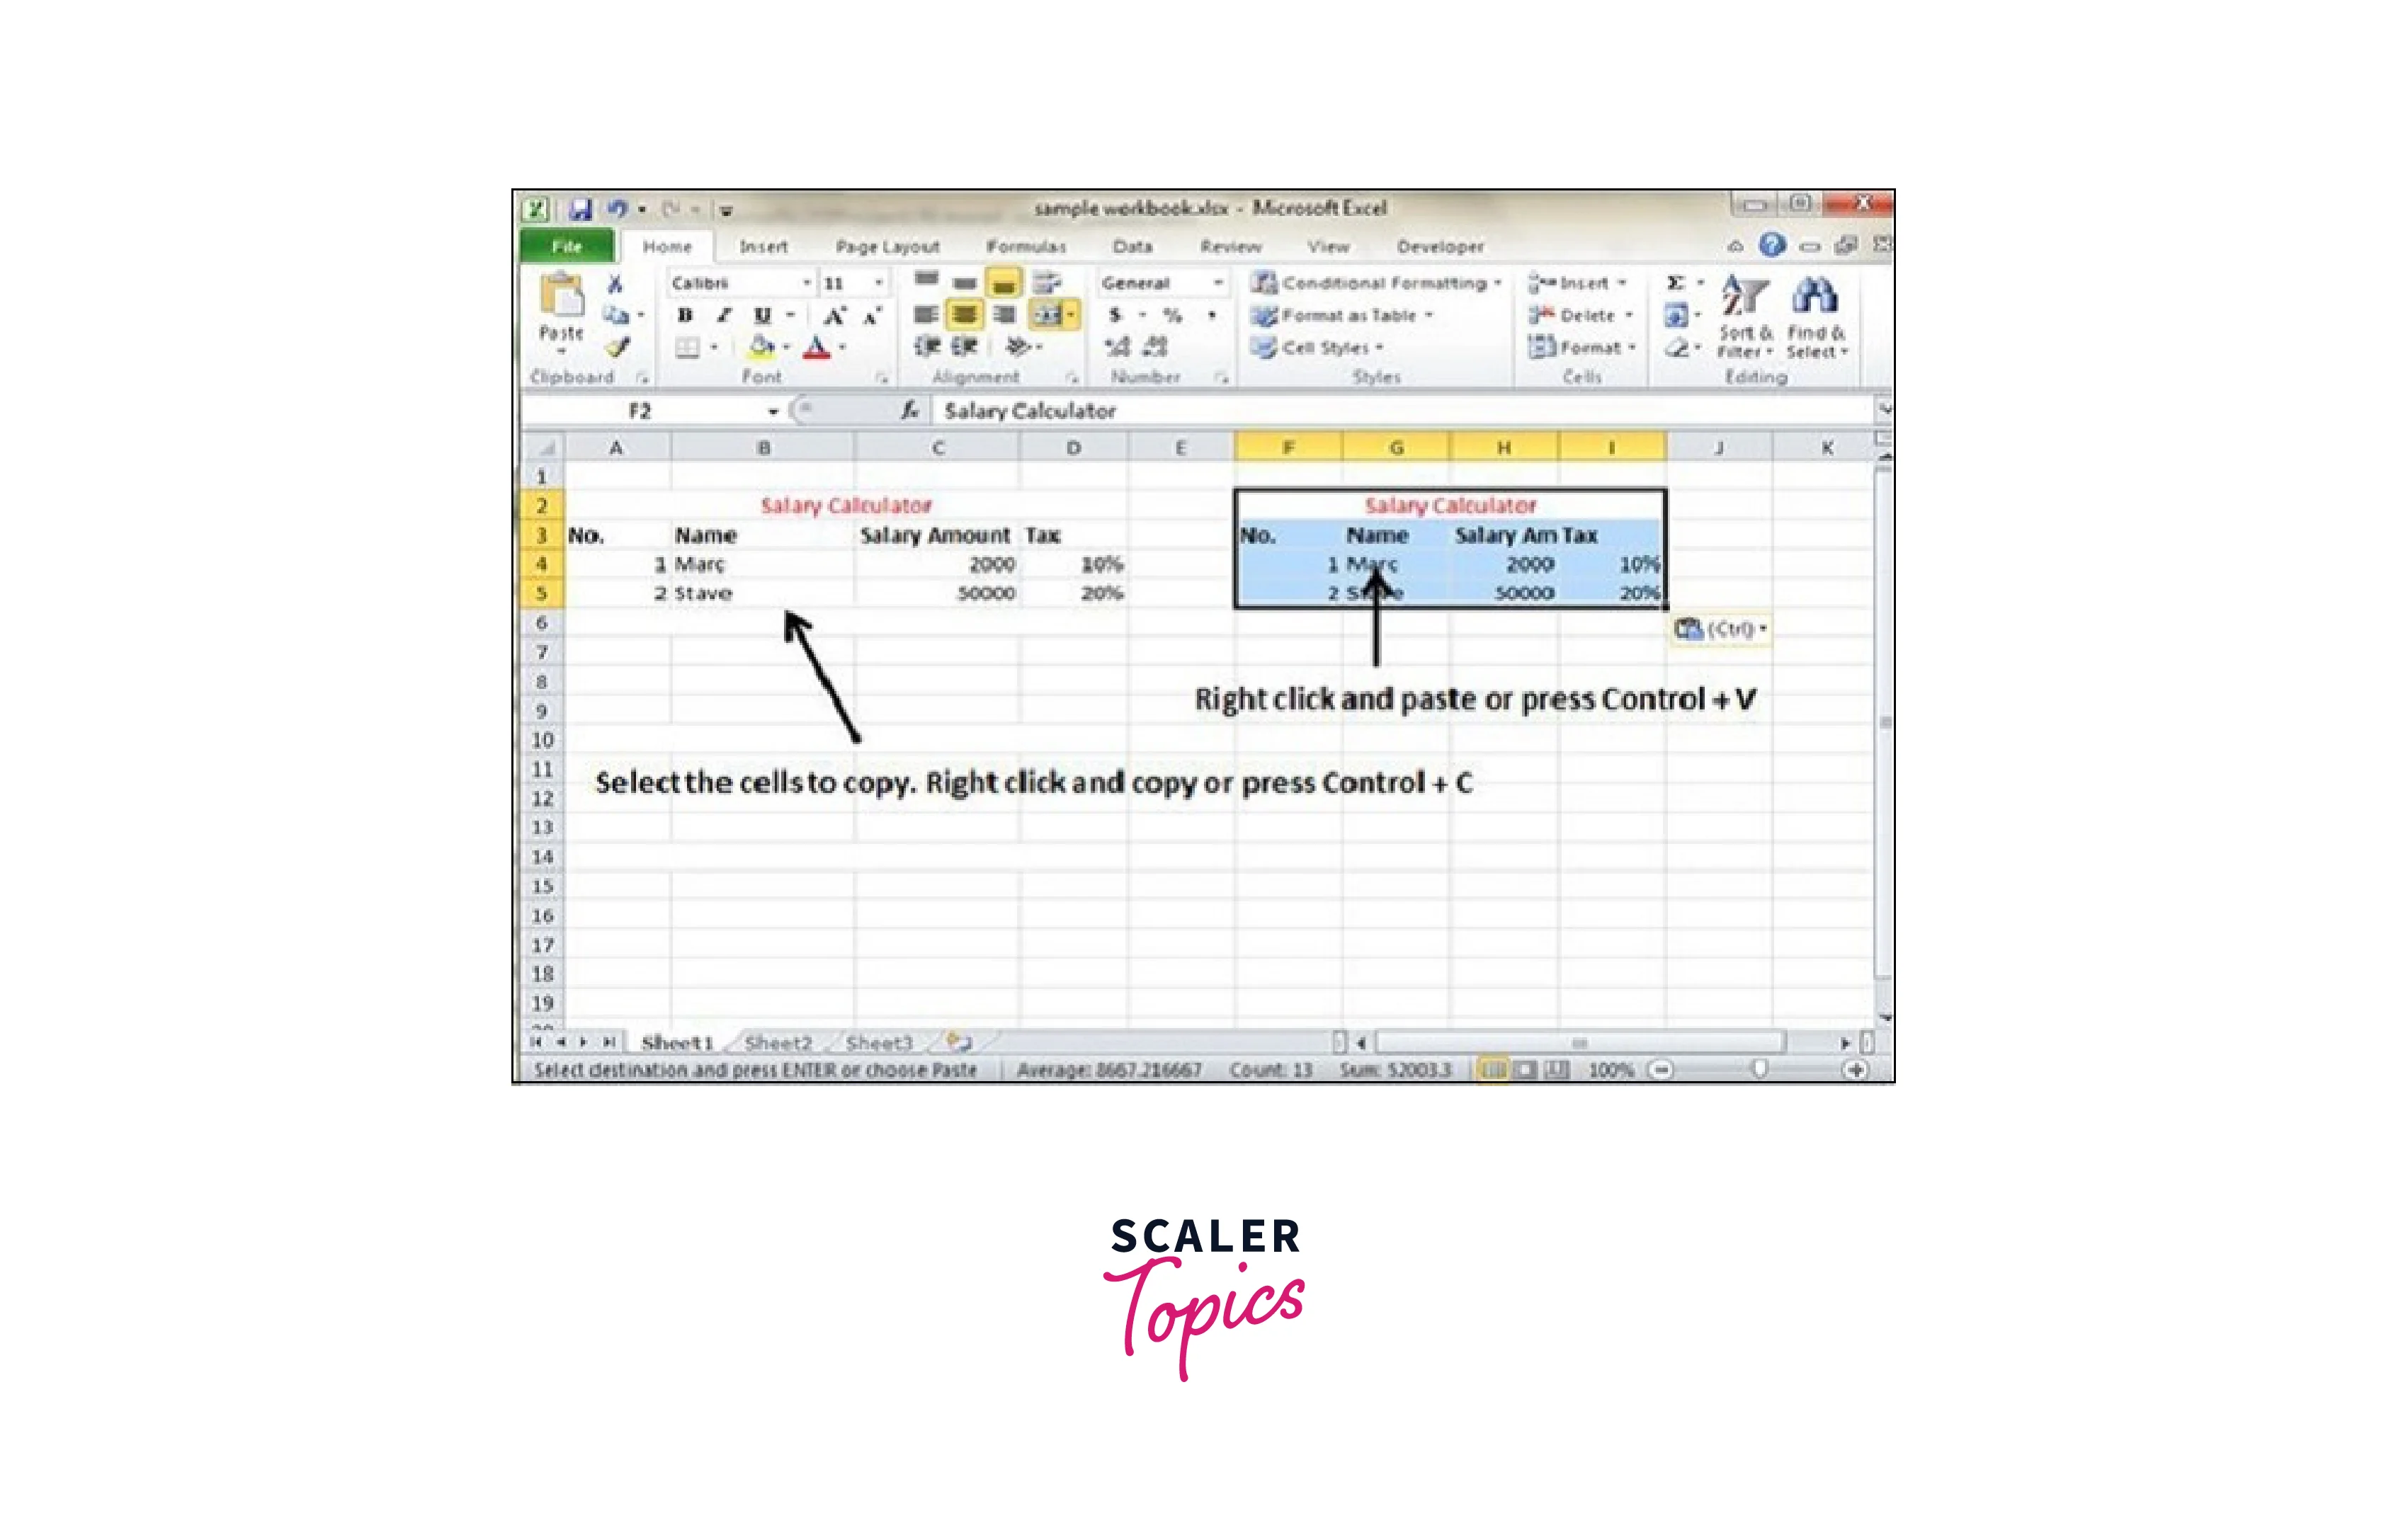
Now let us read about how to Copy cells by using Copy and Paste:
Copy Cells by Using Copy and Paste:
Copying cells is a useful feature in spreadsheet software like Microsoft Excel or Google Sheets, which allows you to quickly duplicate data or formulas without manually typing them out again. The process of copying cells is relatively straightforward and involves the use of copy-and-paste commands.
Let us read about the steps to copy cells using copy and paste:
1. Step - 1: Select the Cells you Want to Copy
The first step is to select the cells you want to copy. You can do this by clicking and dragging your mouse over the cells or by clicking on each cell while holding down the "Ctrl" key (on a PC) or "Command" key (on a Mac) if you want to select non-adjacent cells.
2. Step - 2: Copy the Cells
Once you have selected the cells, you can copy them by using the "Copy" command. To do this, right-click on the selected cells and choose "Copy" from the context menu, or use the keyboard shortcut "Ctrl+C" (on a PC) or "Command+C" (on a Mac).
3. Step - 3: Select the Destination Cells
Next, you need to select the cells where you want to paste the copied data. You can select a single cell or a range of cells, depending on how much data you want to paste.
4. Step - 4: Paste the Cells
With the destination cells selected, you can now paste the copied cells. To do this, right-click on the selected cells and choose "Paste" from the context menu, or use the keyboard shortcut "Ctrl+V" (on a PC) or "Command+V" (on a Mac). The copied data will then be pasted into the selected cells.
Let us see the image below for a better understanding:
Conclusion
- Excel provides us with multiple ways to move or copy data within a workbook or another workbook.
- The most common ways to move or copy data are using drag and drop, using copy and paste commands, or using keyboard shortcuts.
- When moving or copying data, it's important to consider the impact on any formulas, references, or formatting that depend on the data being moved or copied.
- Excel also provides advanced features like Fill Handle, AutoFill, and Paste Special that can help speed up the process of moving or copying data.
- It's important to always double-check the results of moving or copying data to ensure that everything has been copied or moved correctly.