How to Split Cells in Excel?
Overview
You could sometimes face a situation in an Excel spreadsheet where you must combine or divide the cells based on your requirements. One excellent technique to customize your Excel spreadsheet is how to split cells in excel. In this tutorial, we will go over how to combine or how to split cells in excel.
How to Split Cell in Excel?
To divide the contents of a cell, use Split A Cell in Excel, commonly known as Text To Columns and occasionally referred to as delimit. We can split a cell into two or more cells using a variety of characteristics, including space, blank space, commas, and others. Once the data is selected, we can simultaneously press the shortcut keys ALT + A + E. If we want to split a cell at a particular length, we can do so with parallel fixed width.
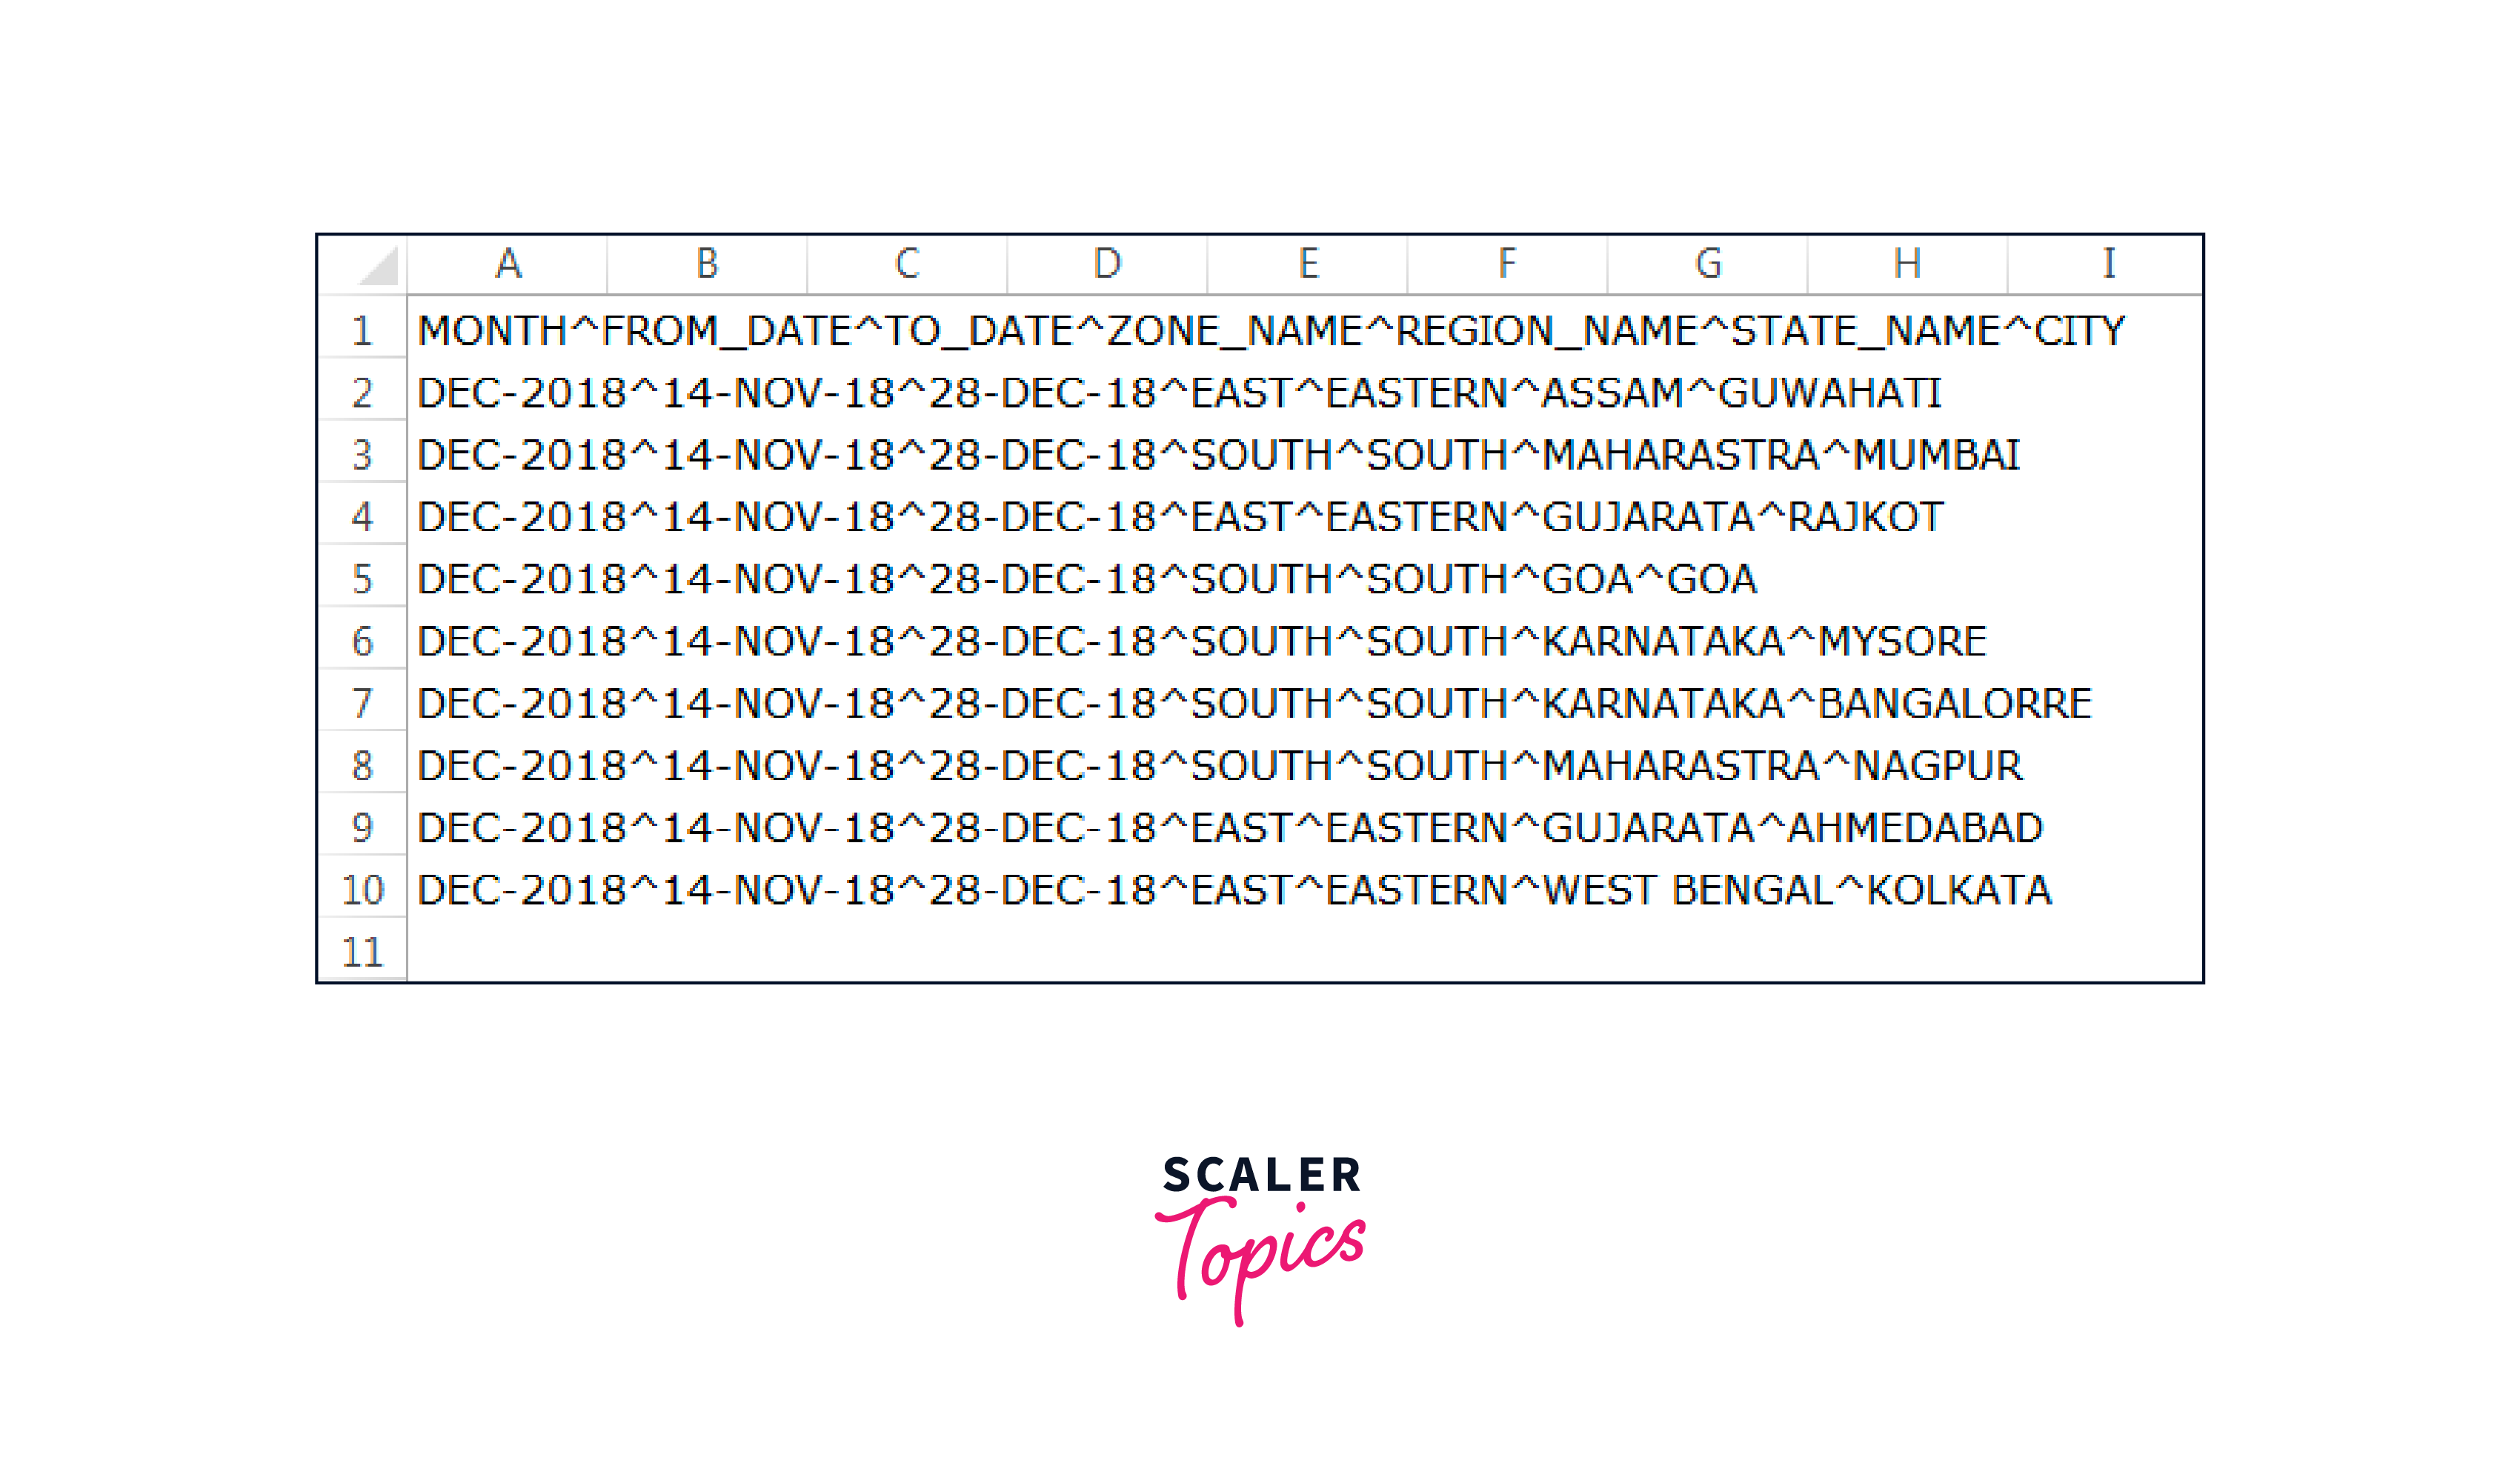
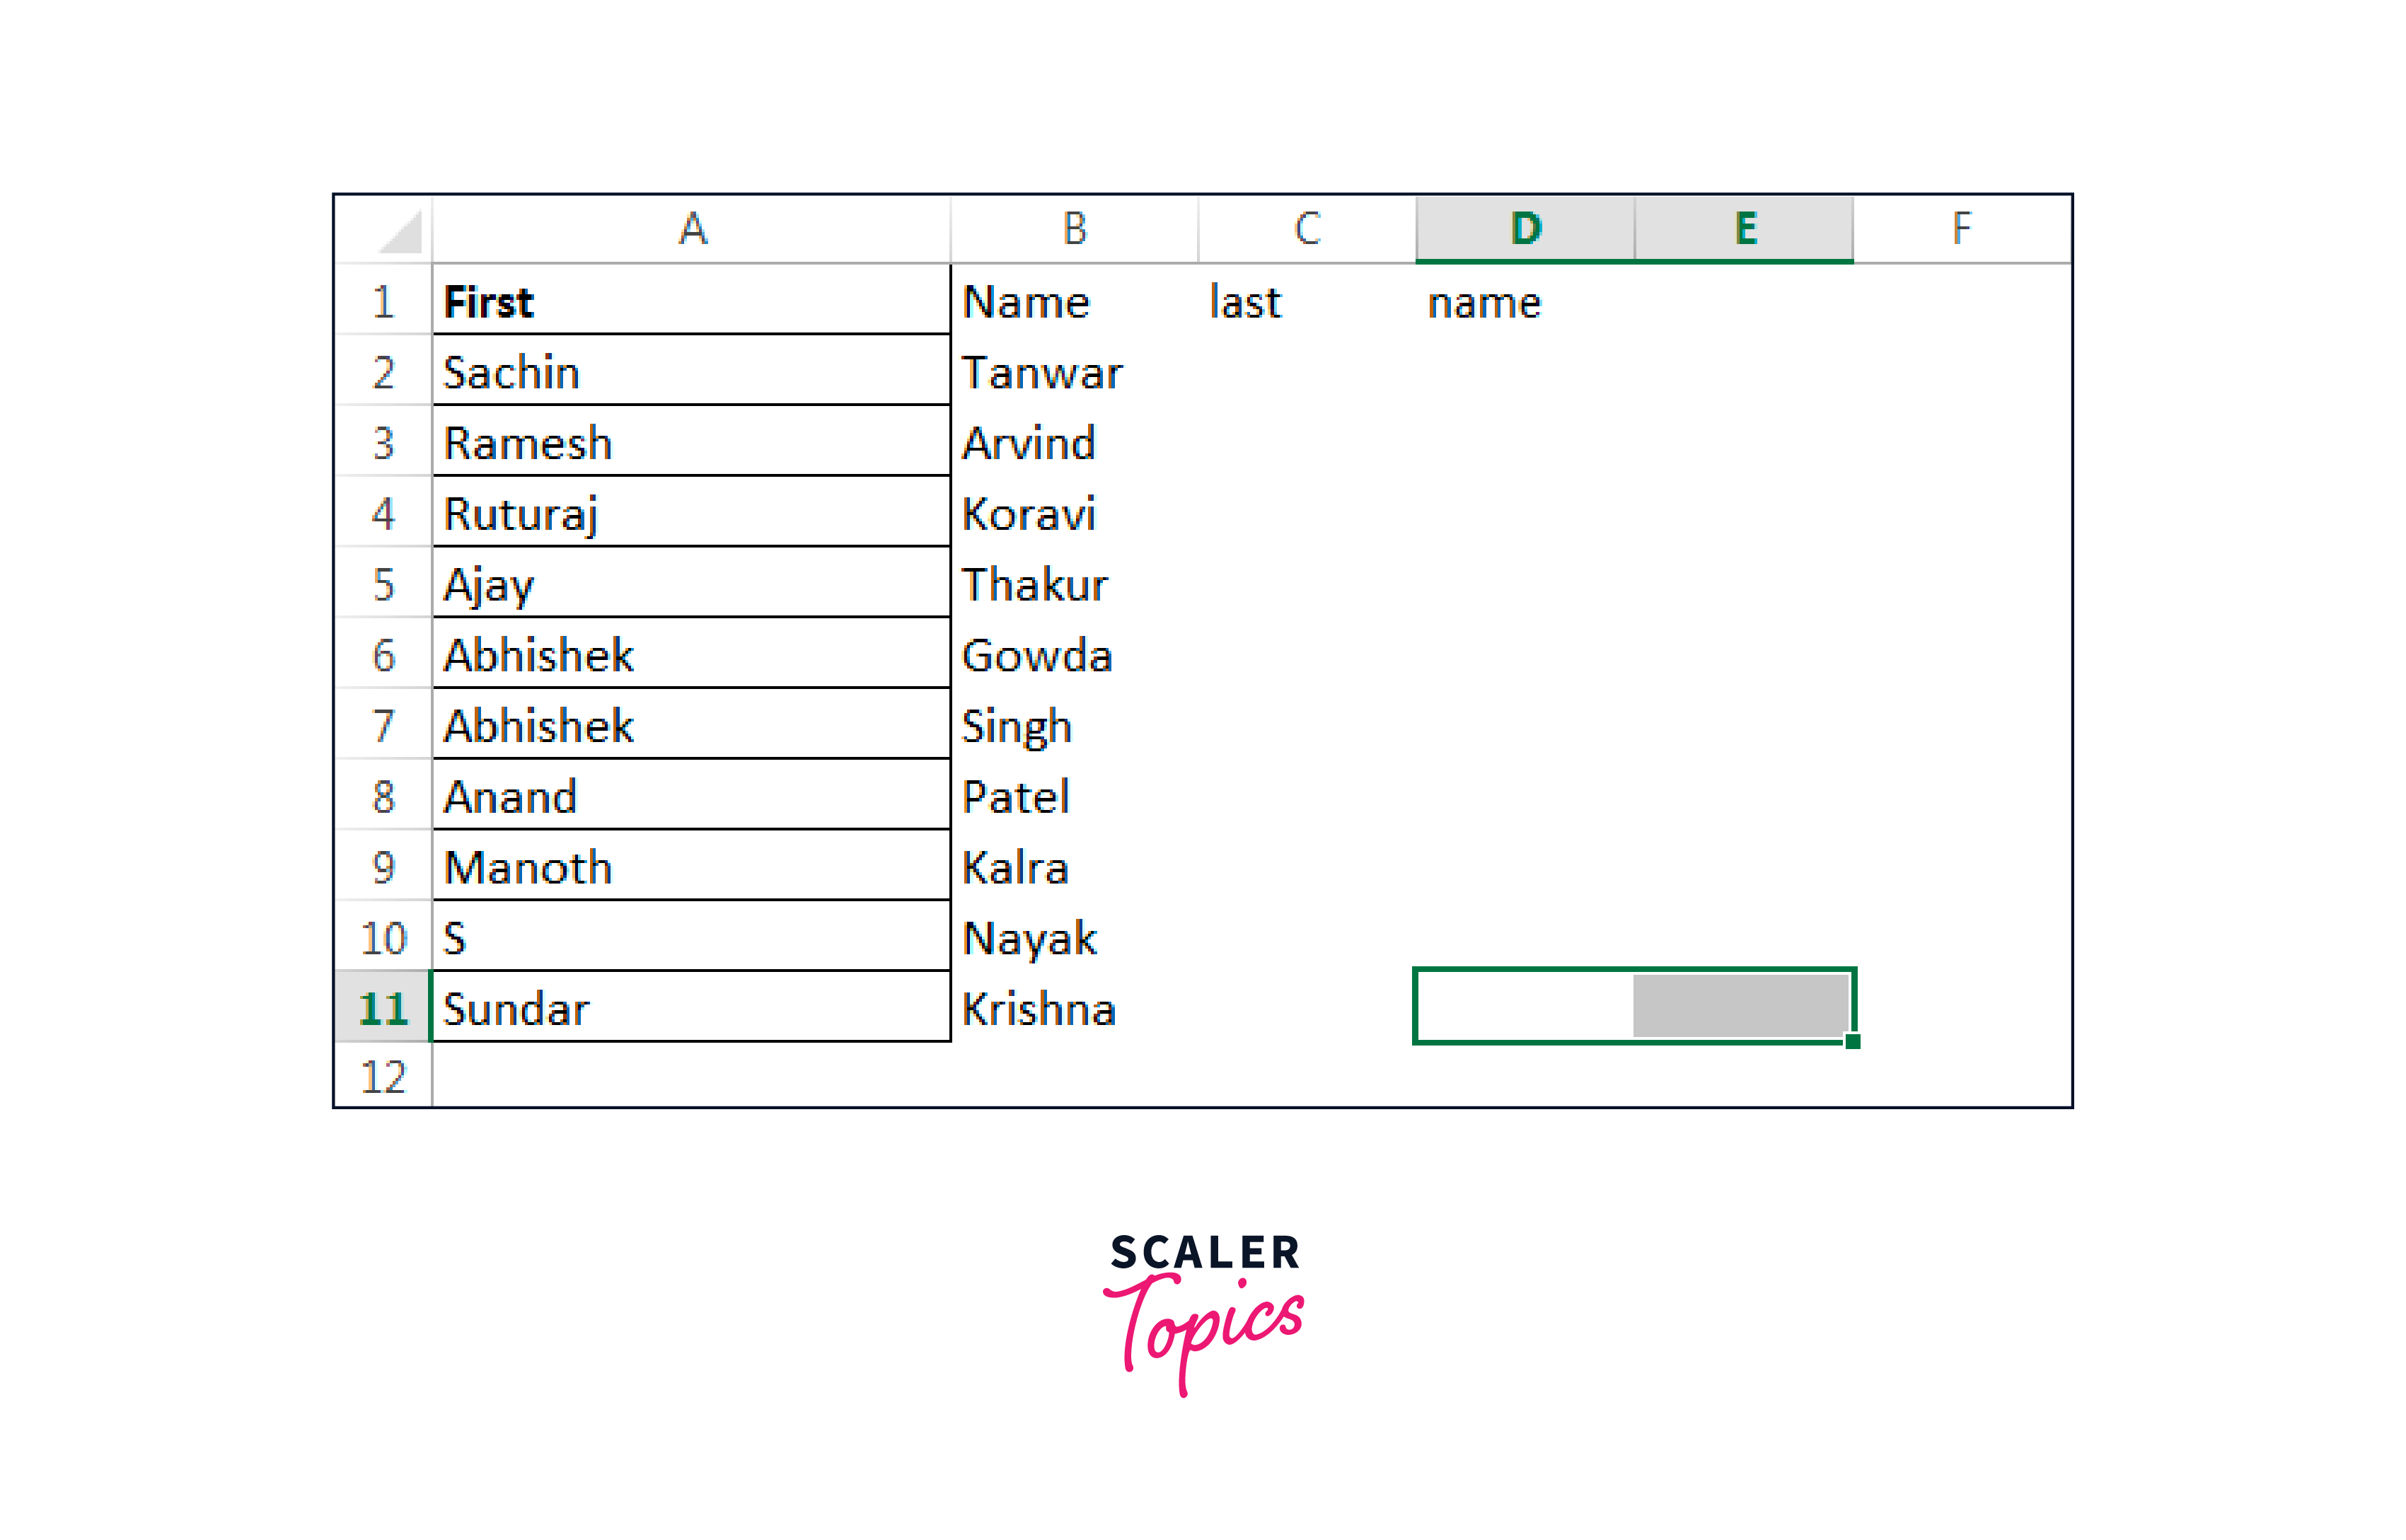
Aren't the above looks ugly? Of course, it looks bad. Yet, that is how the data structure is; we must deal with it if we copy the data from text. While using an excel spreadsheet, data is frequently grouped into each column separately, and each column corresponds to one heading, as shown in the image below.
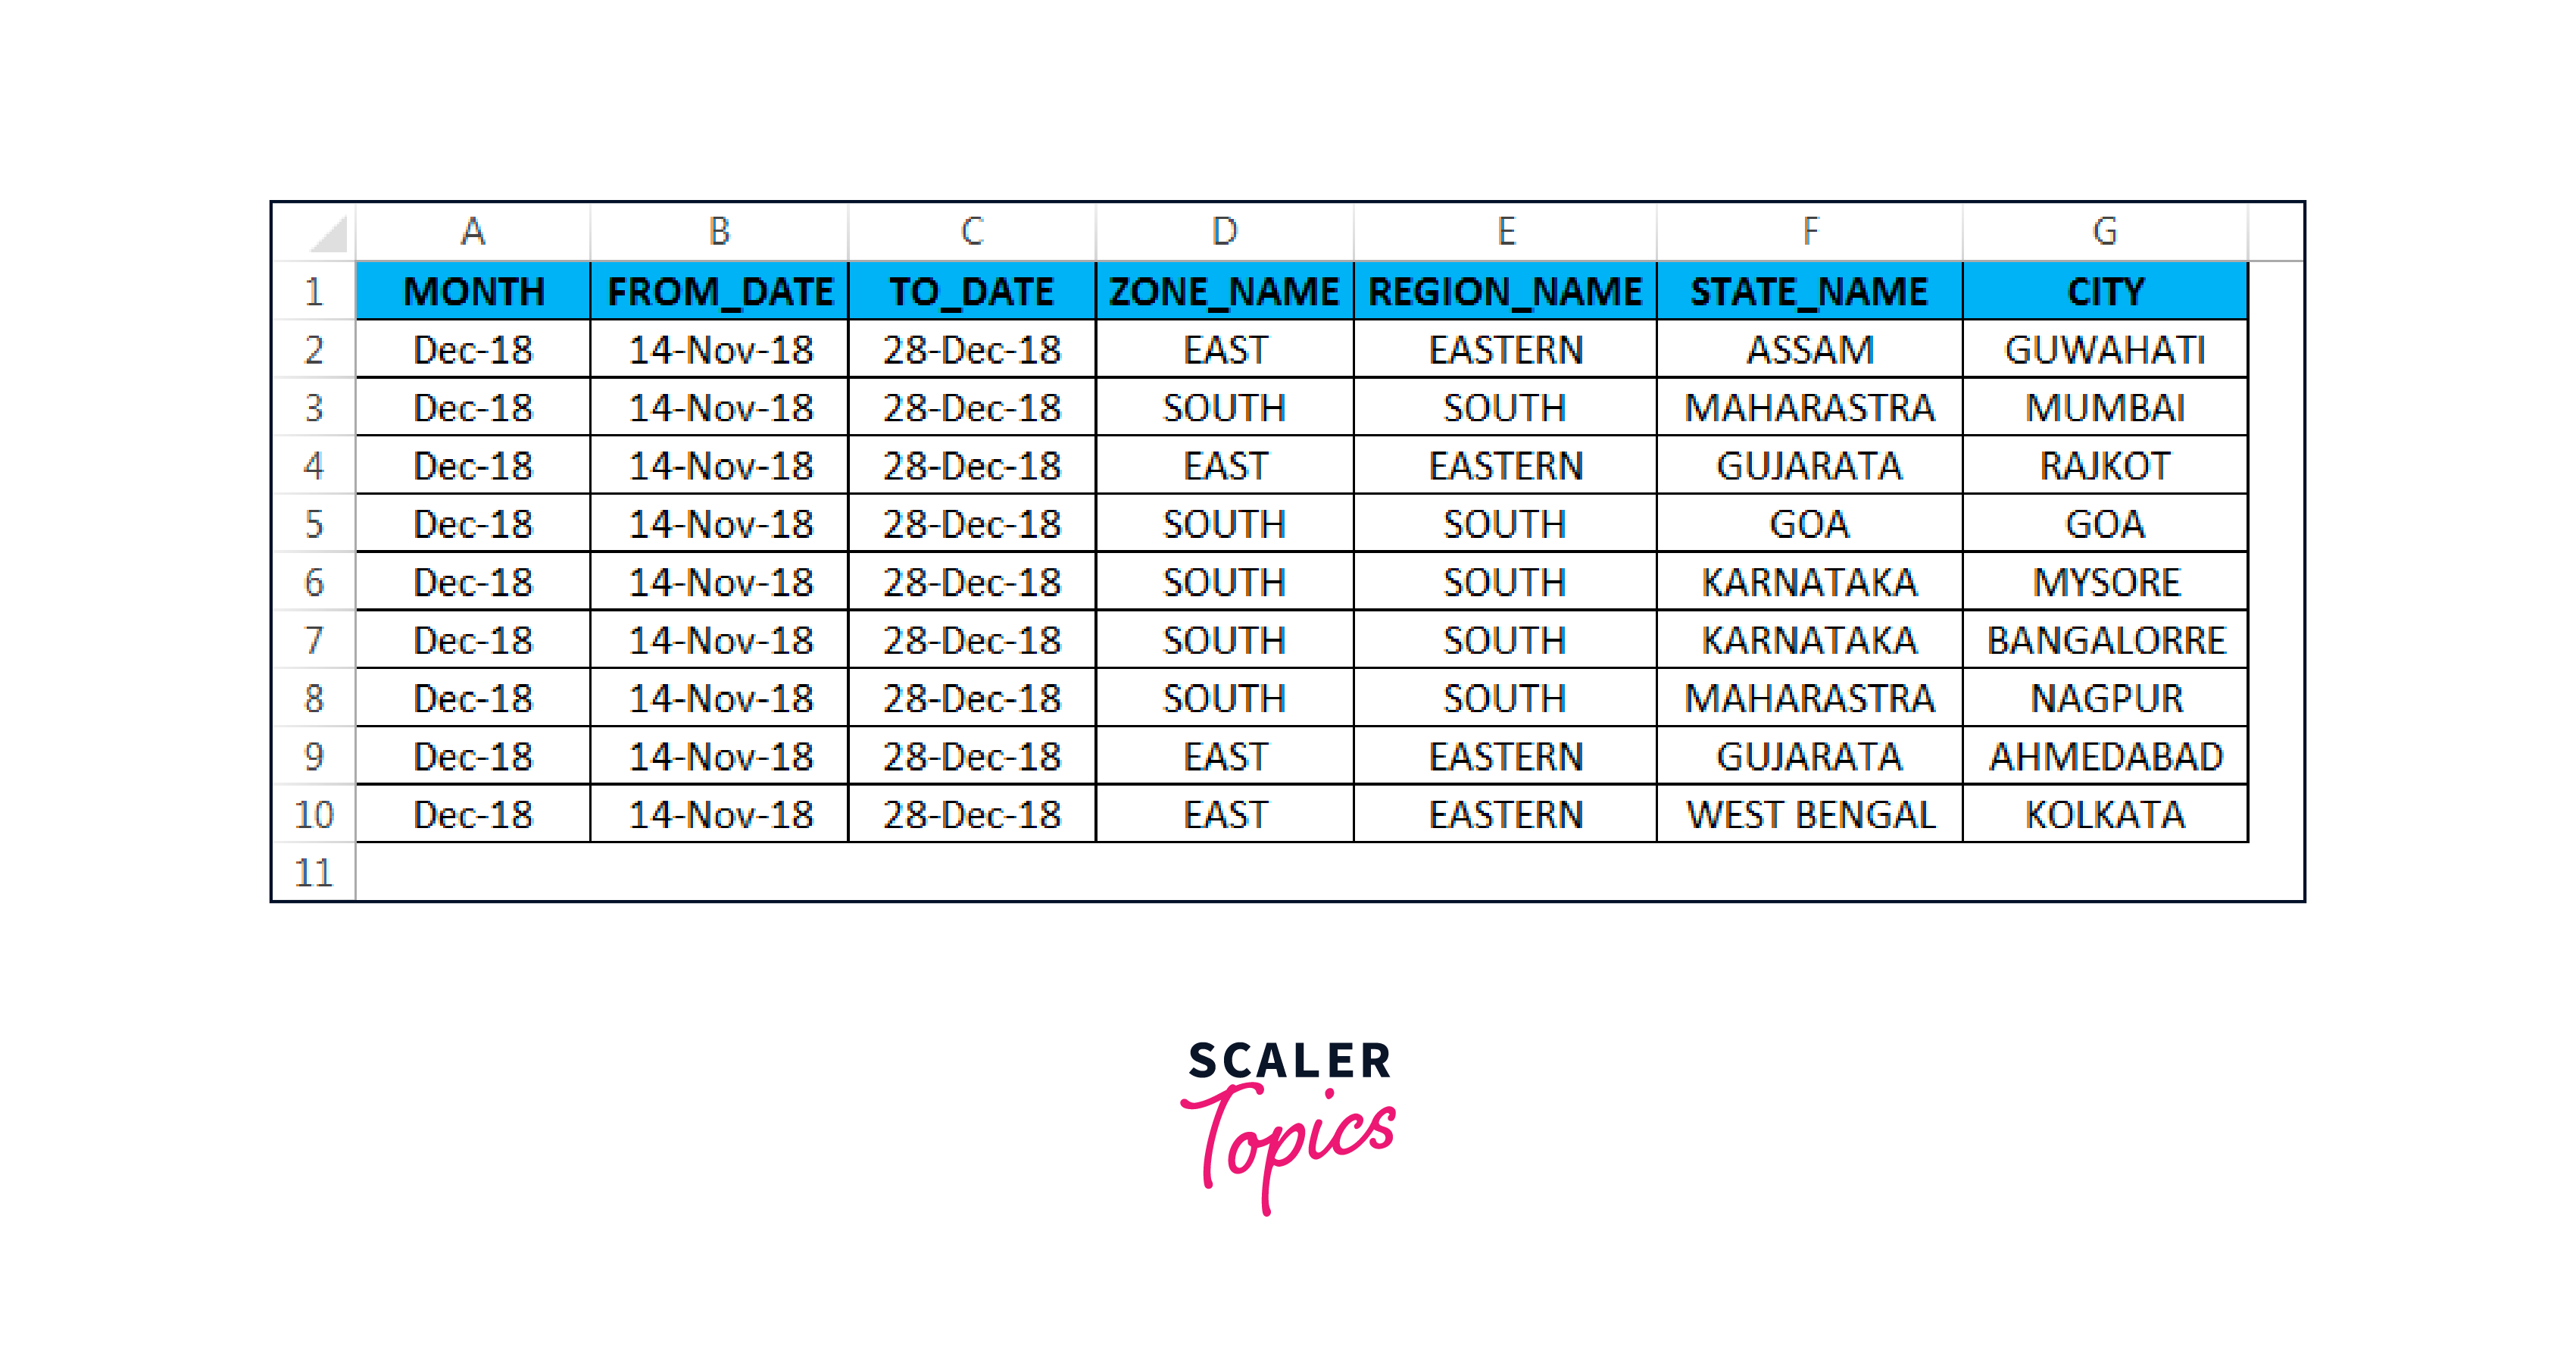
The picture appears amazing. We may divide the cells into various columns using the TEXT TO COLUMN tool in Excel. Finding the common element allows Text to Column to divide the values from a single cell into several cells.
Steps to Split a Cell in Excel
Consider a cell that contains three things, each separated by a comma. There is a feature in Excel called Text to Columns. Using a delimiter that you define, this tool will take columns of cells and divide them into several adjacent cells. Do the following steps for how to split cells in excel:
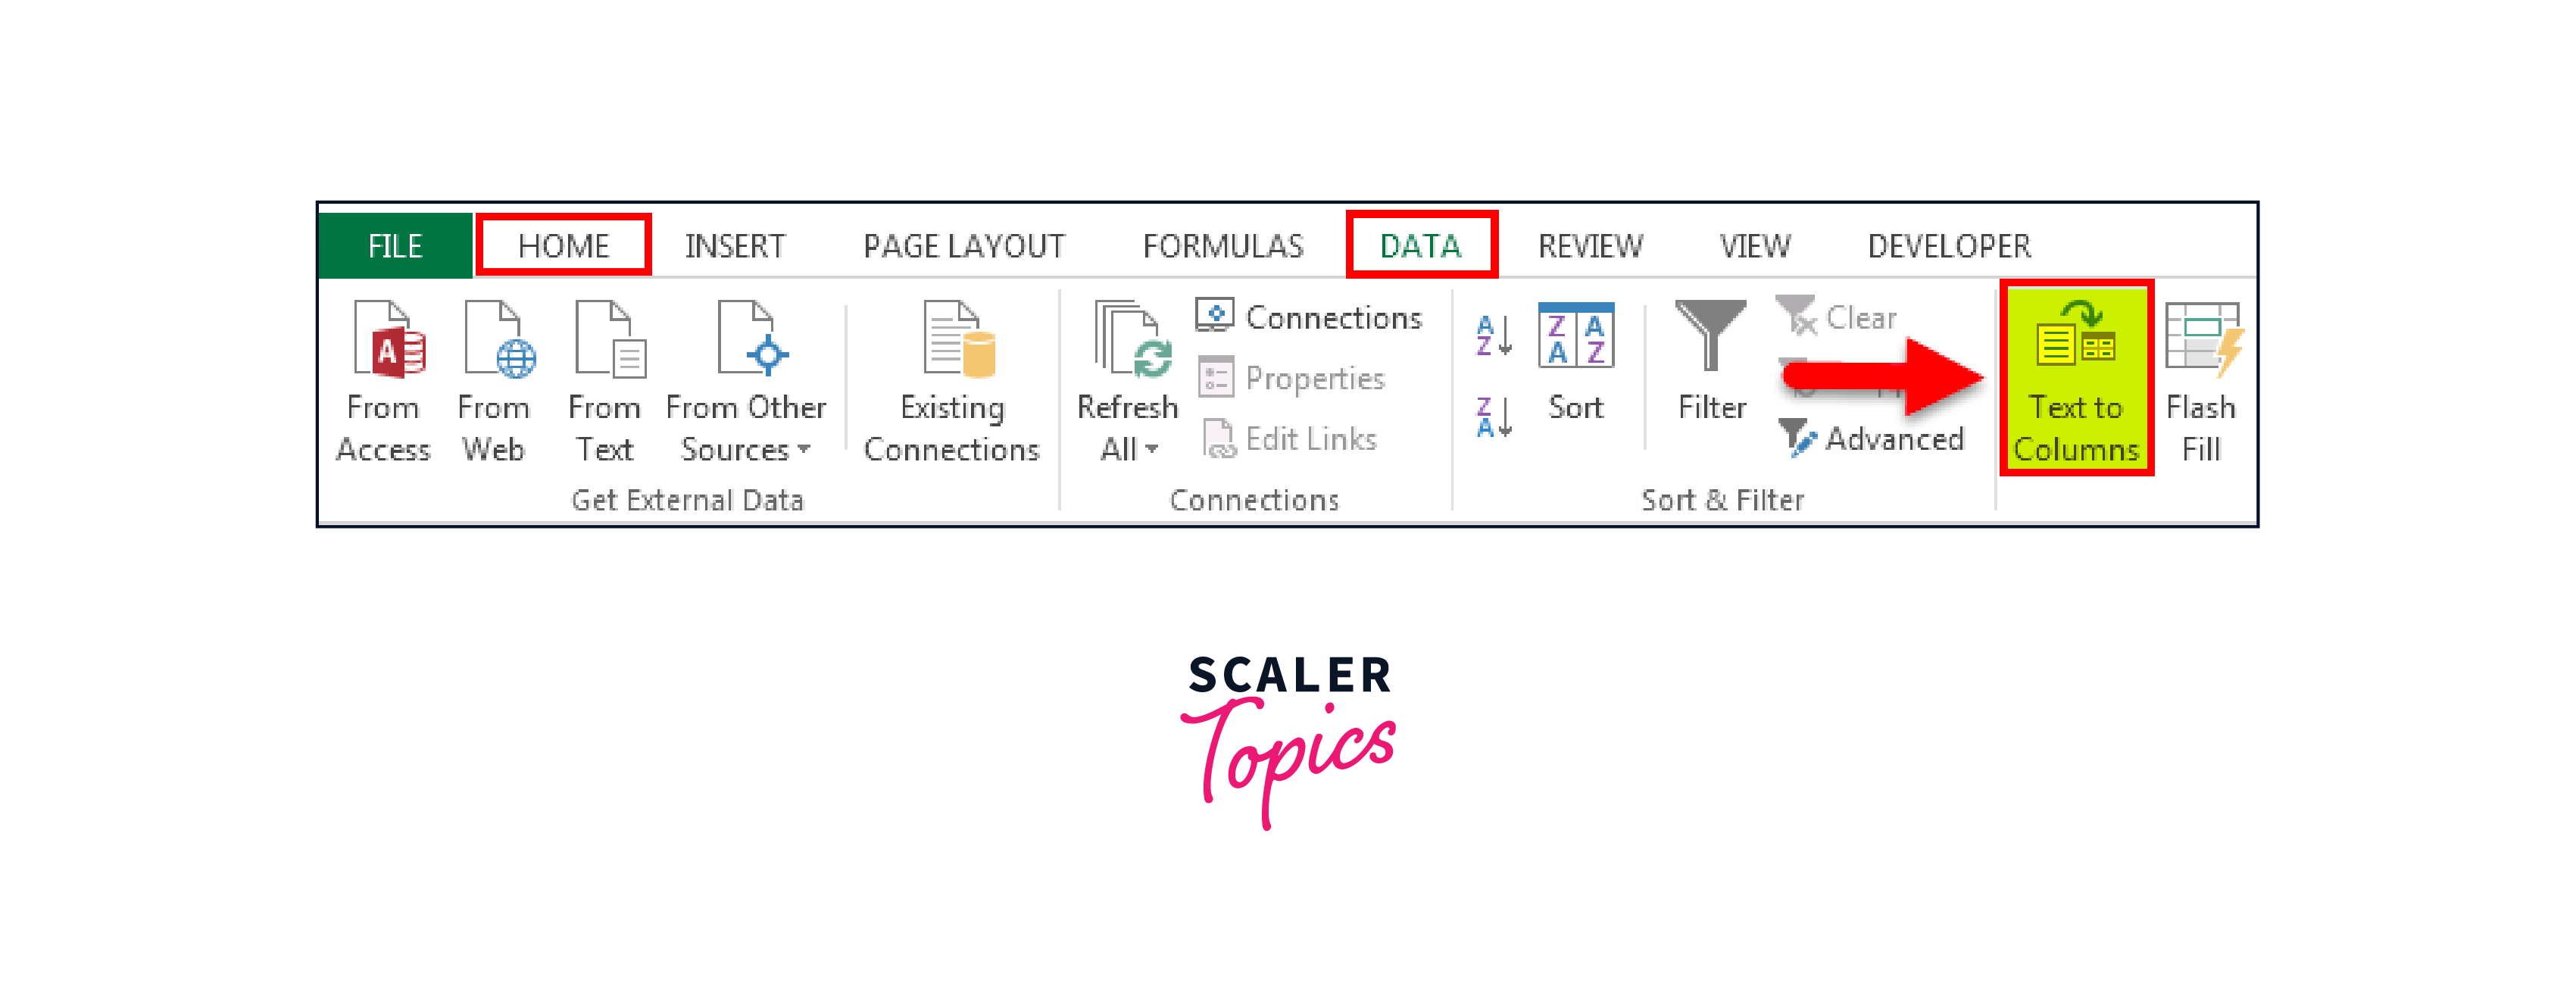
- Choose the cell that you want to divide.
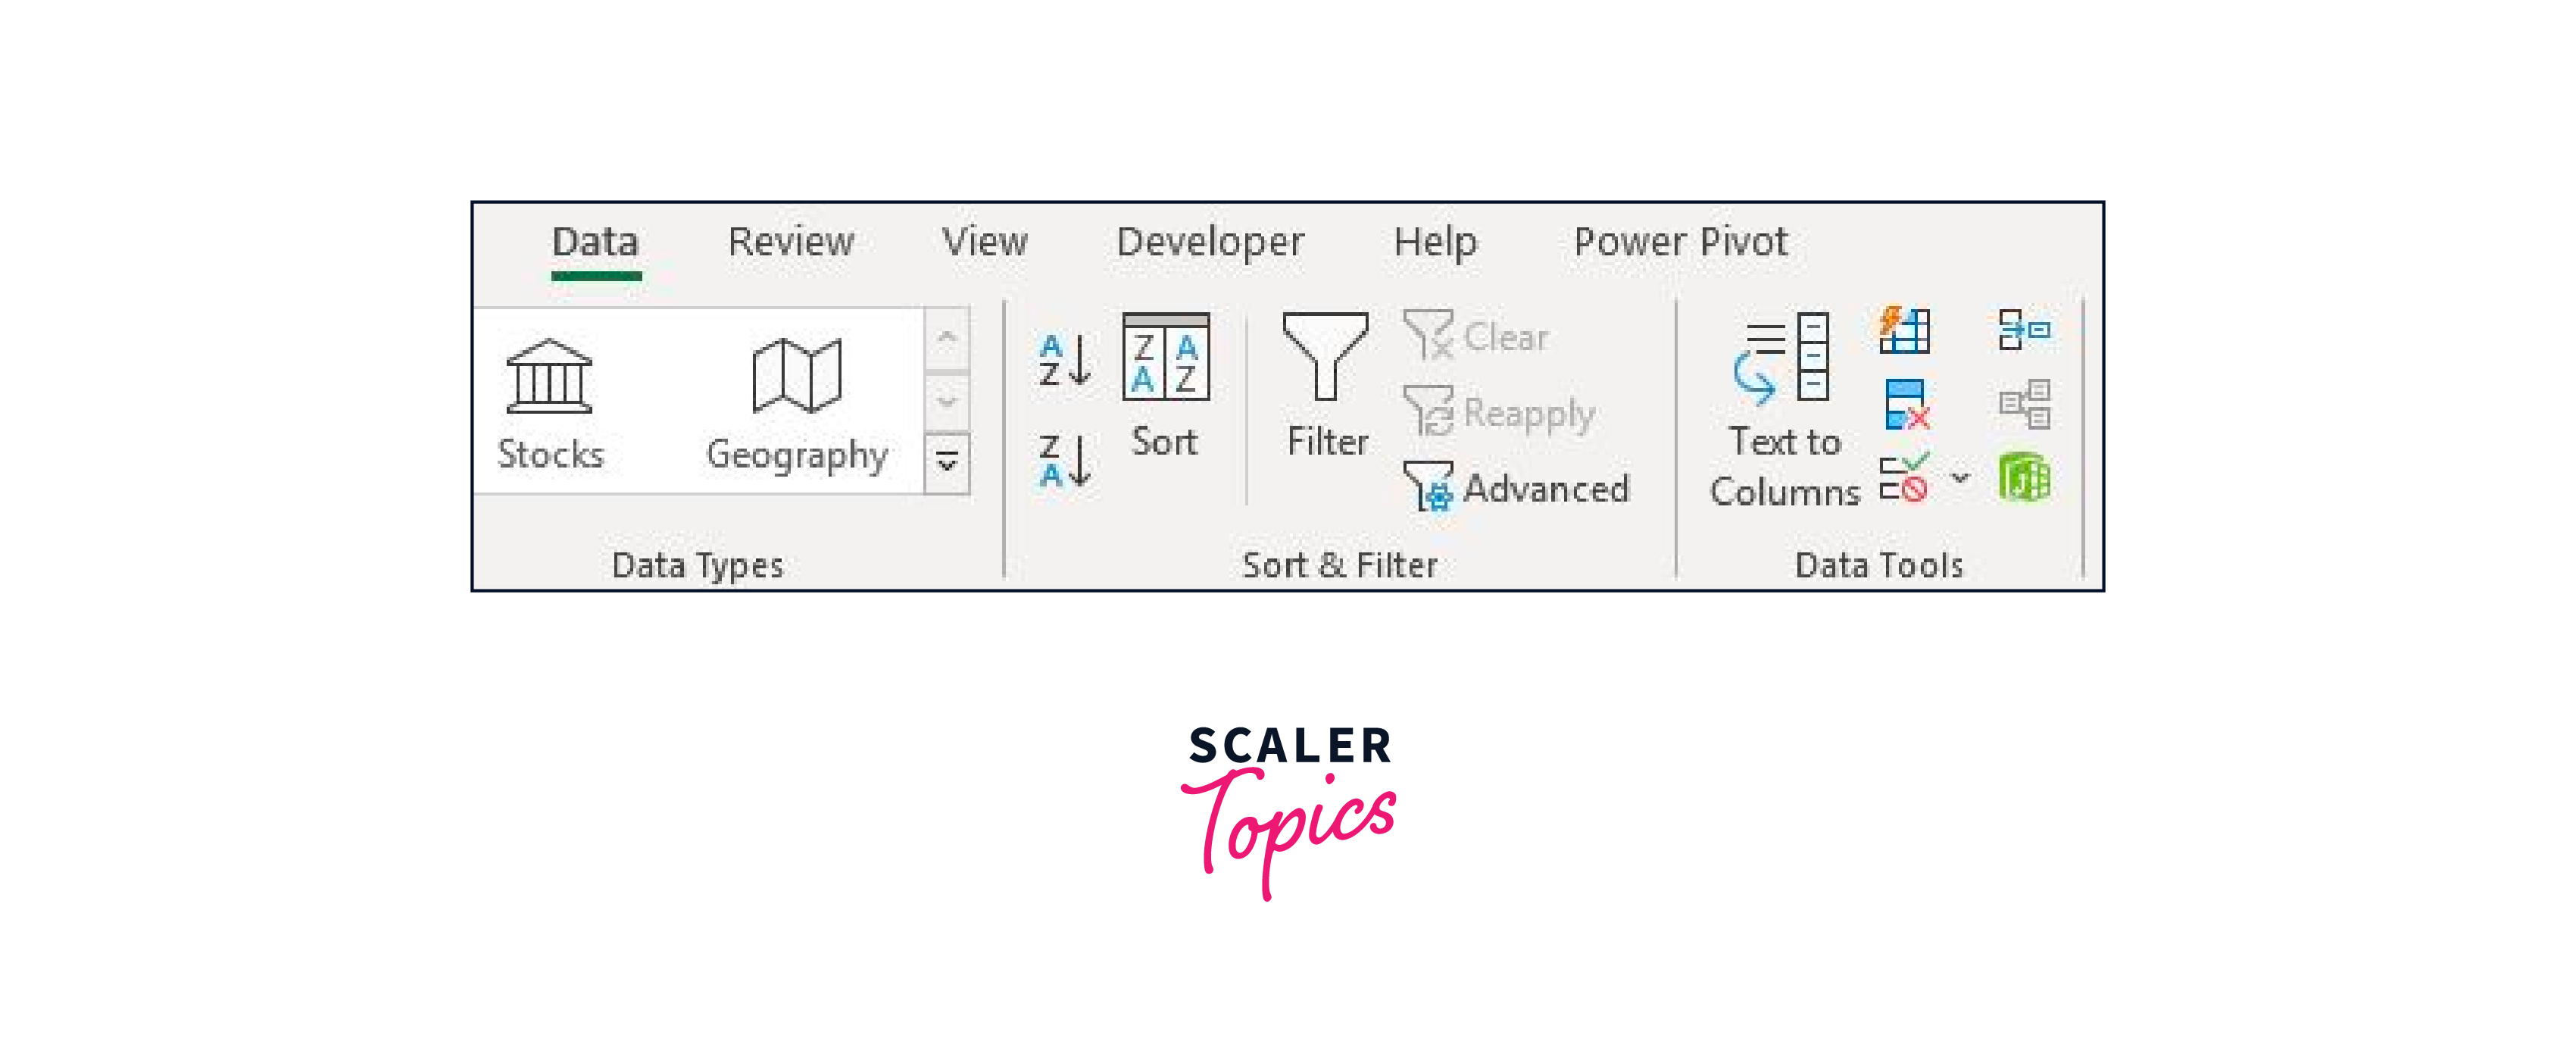
- Choose Text to Columns from the Data tab.
- Choose a file data type.
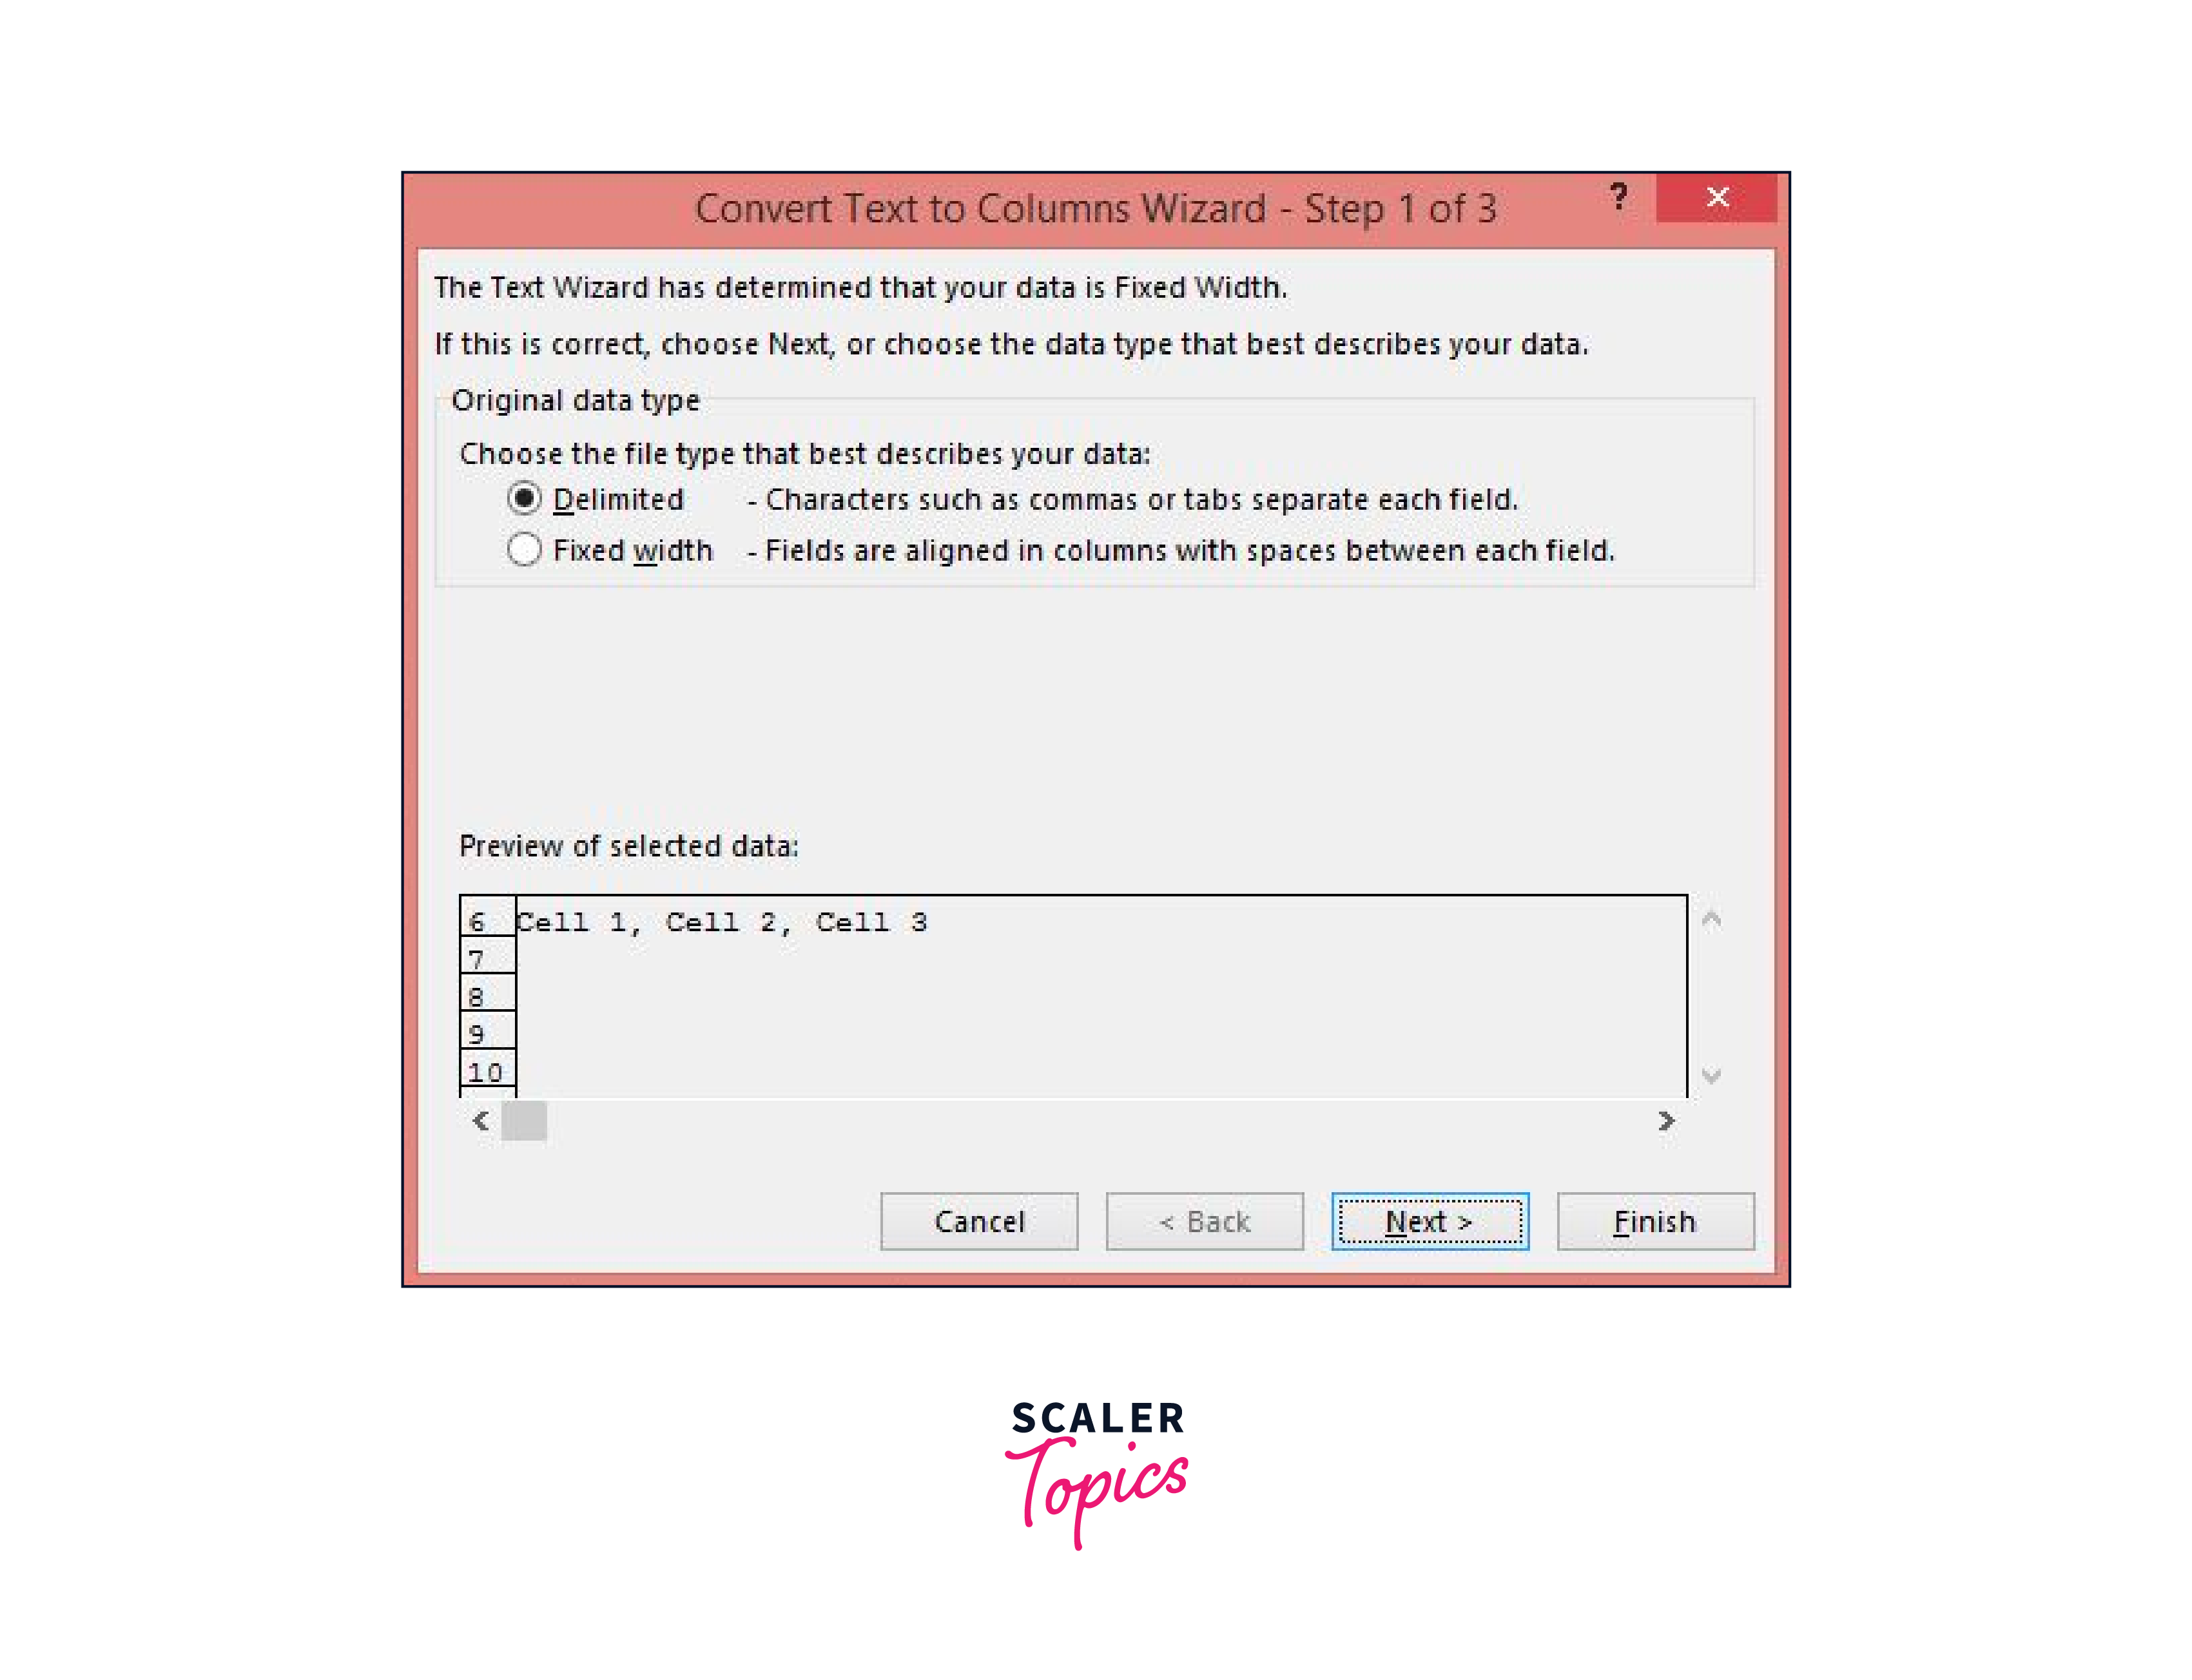
- A Delimiters type should be chosen. It is a comma in this instance.
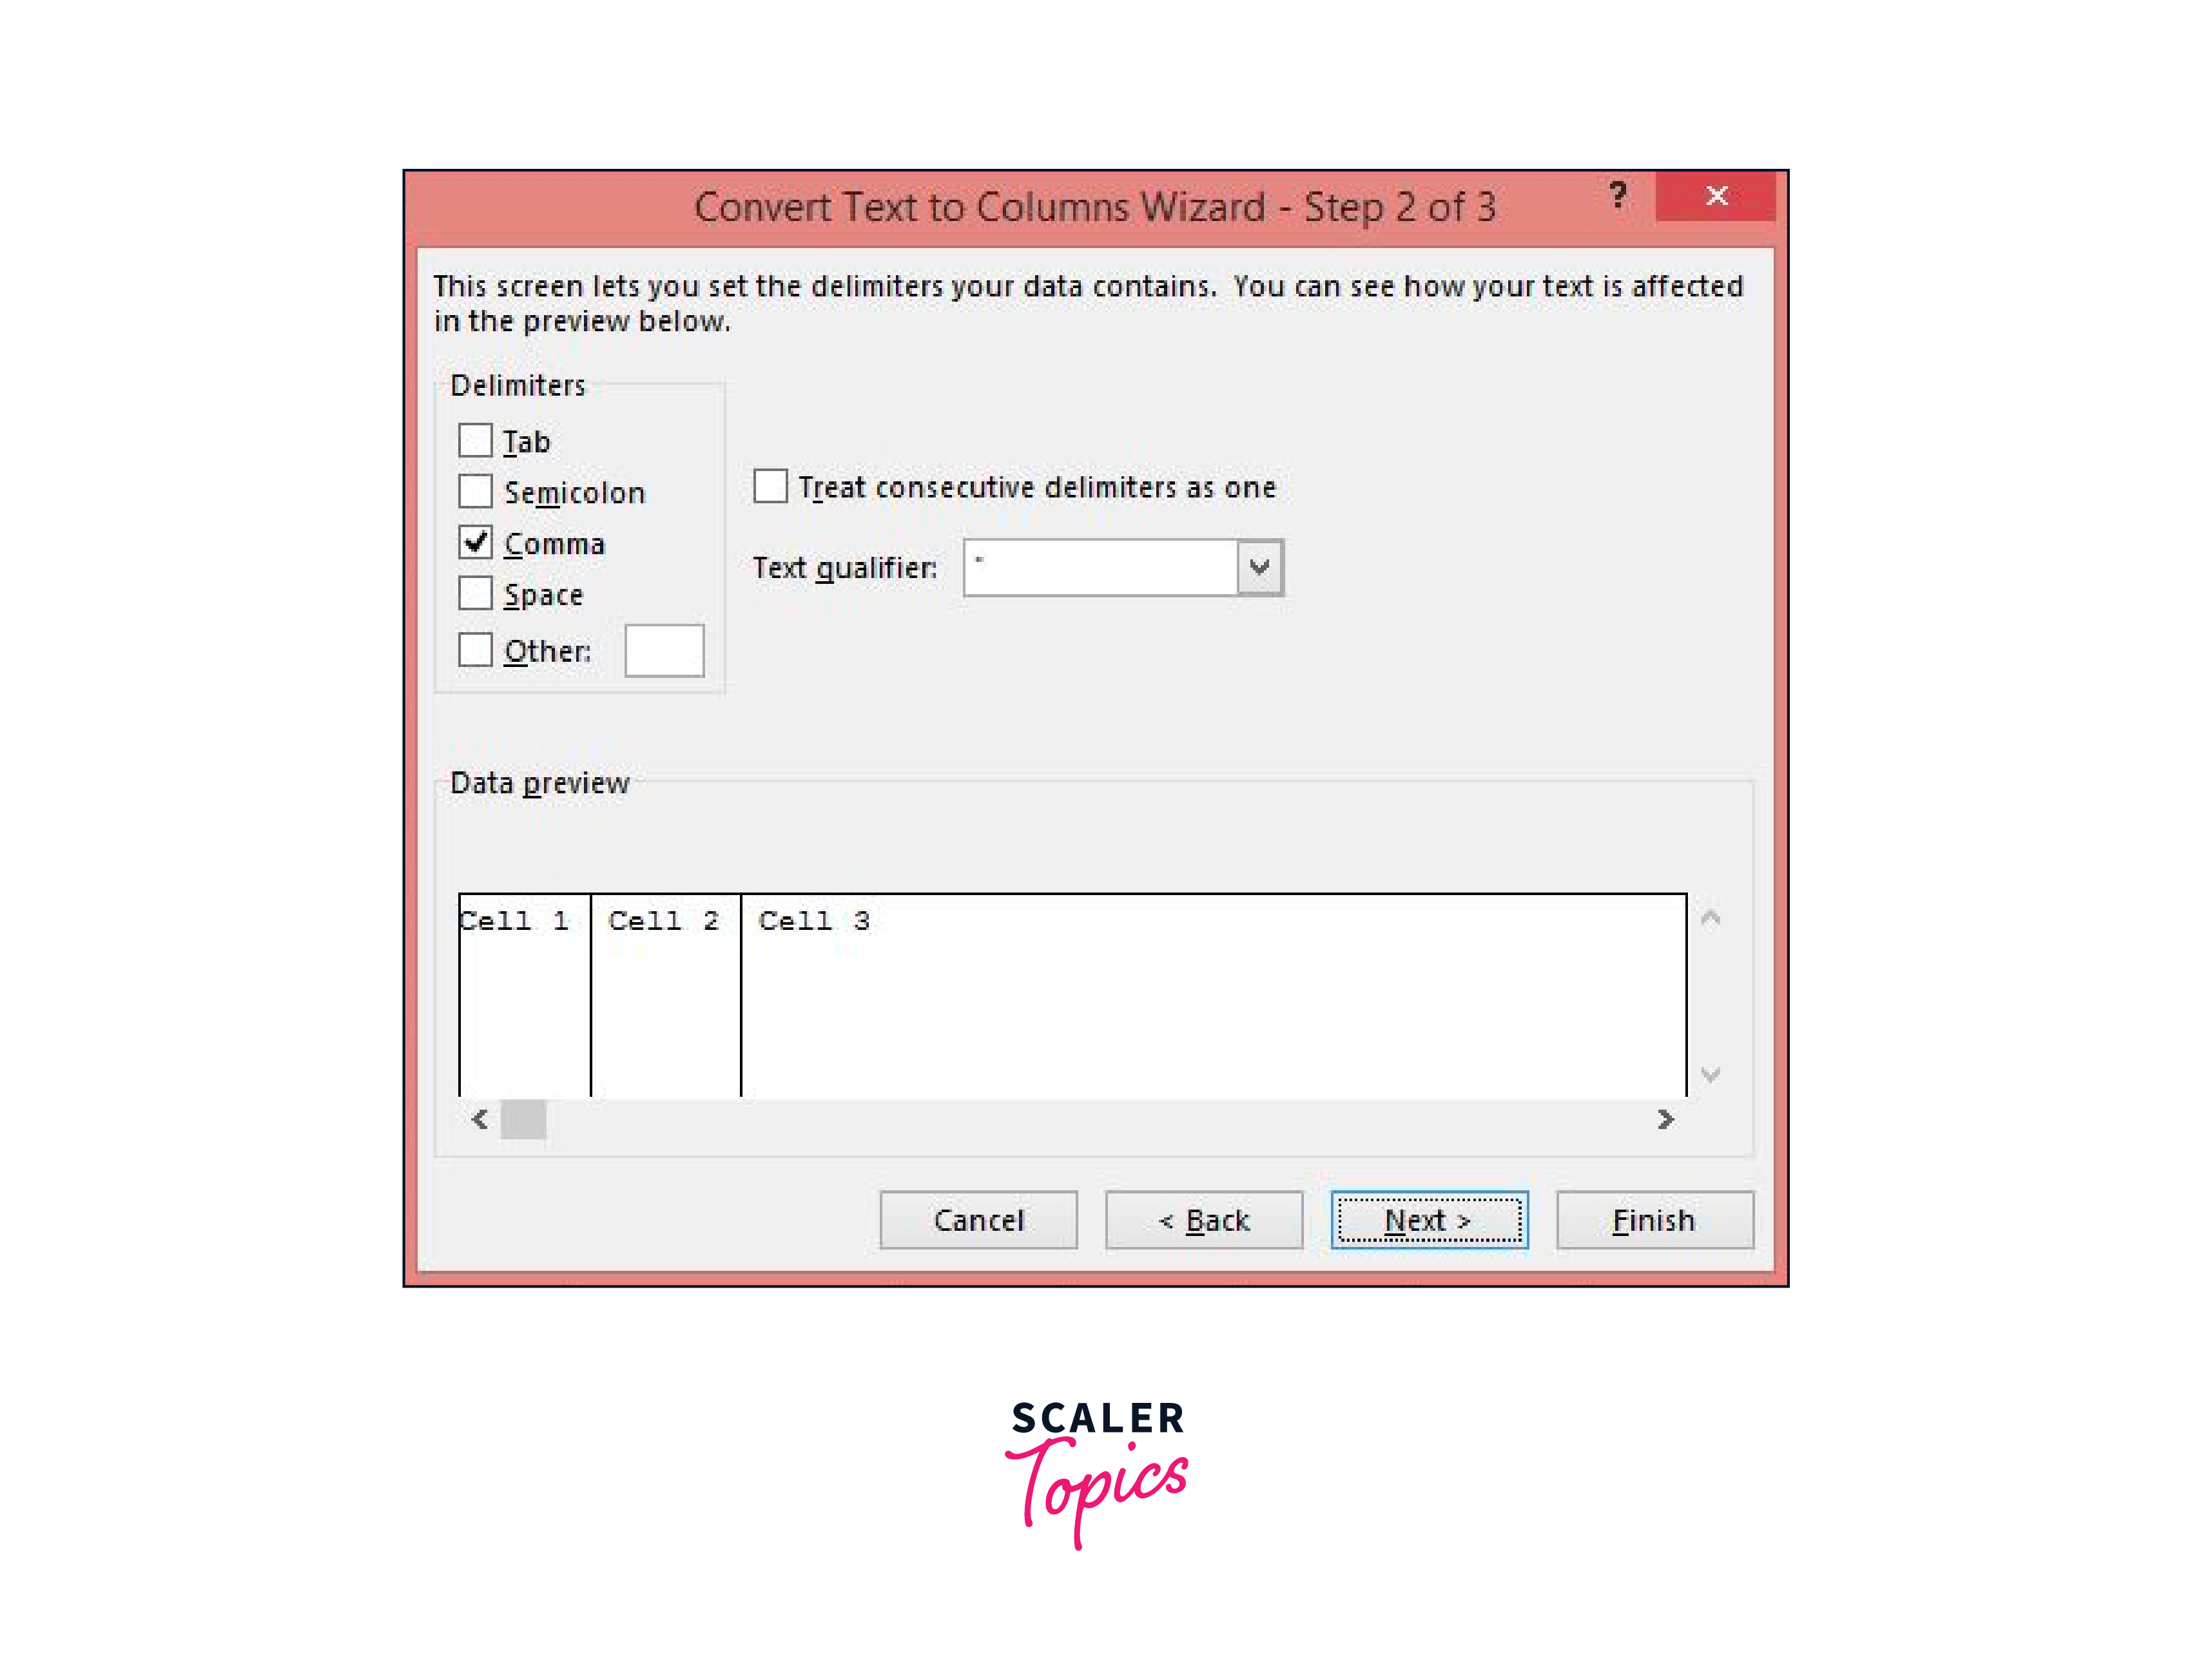
- Click Complete after selecting General for the Column data format.
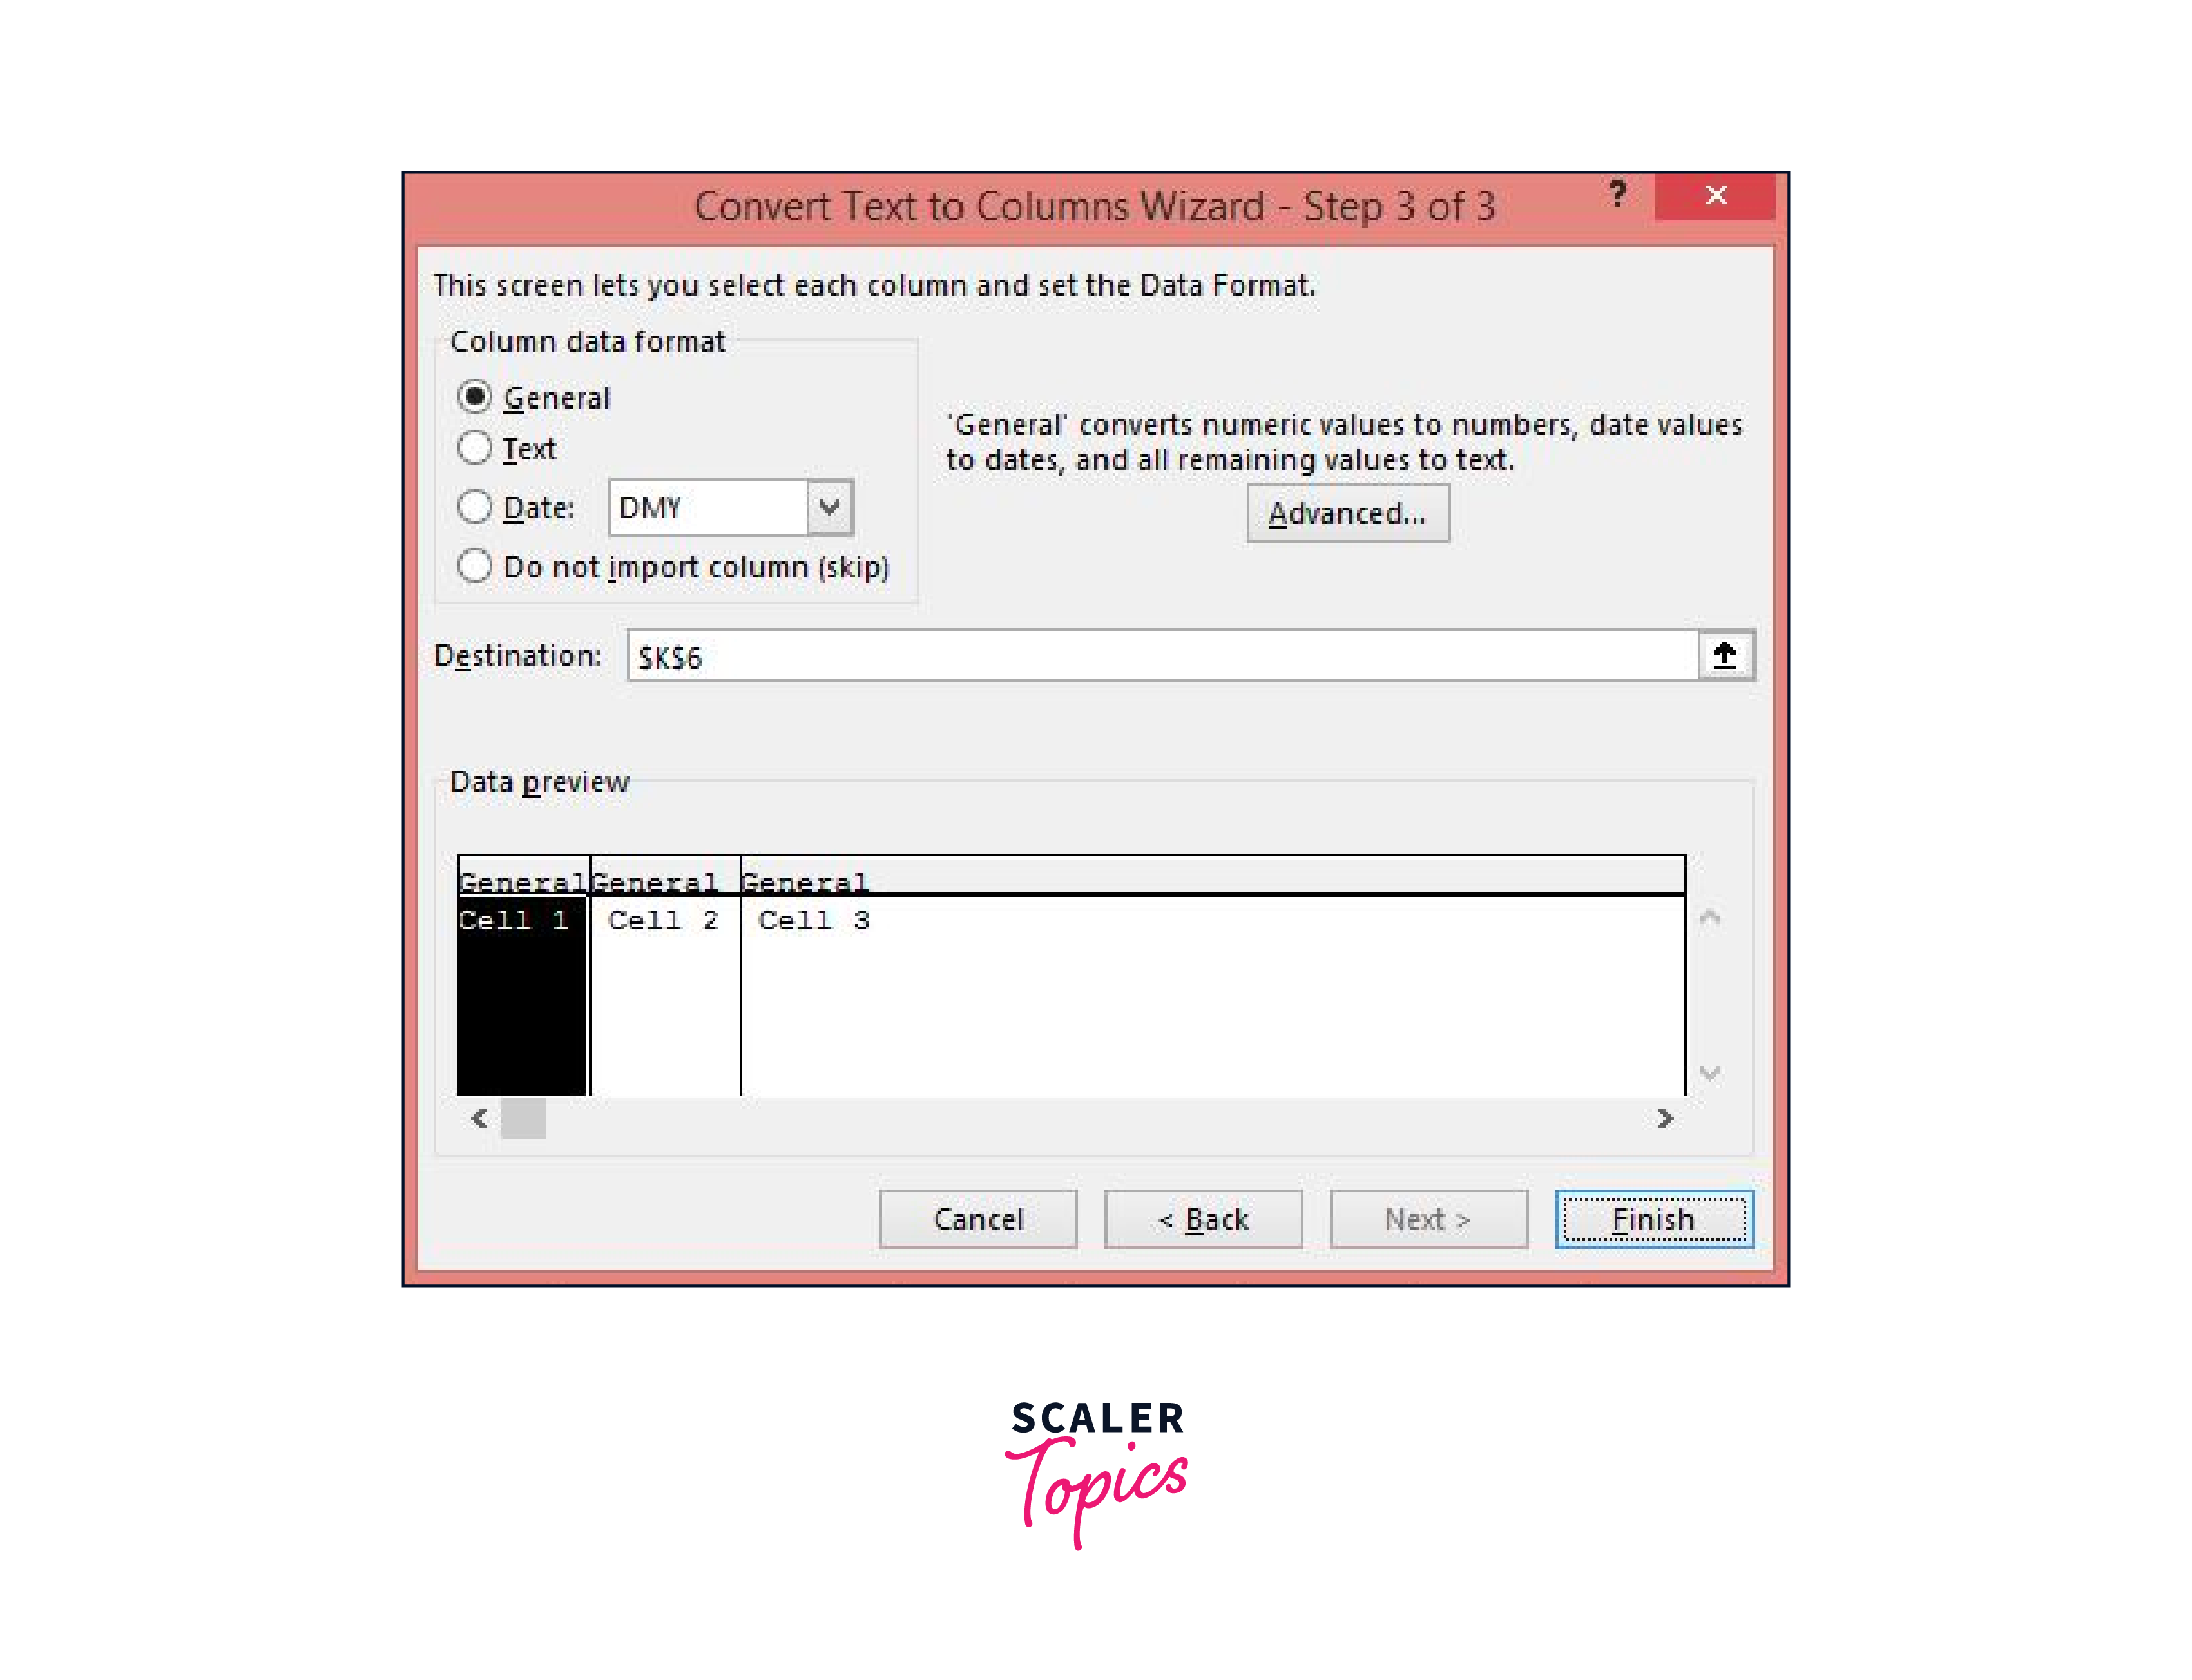
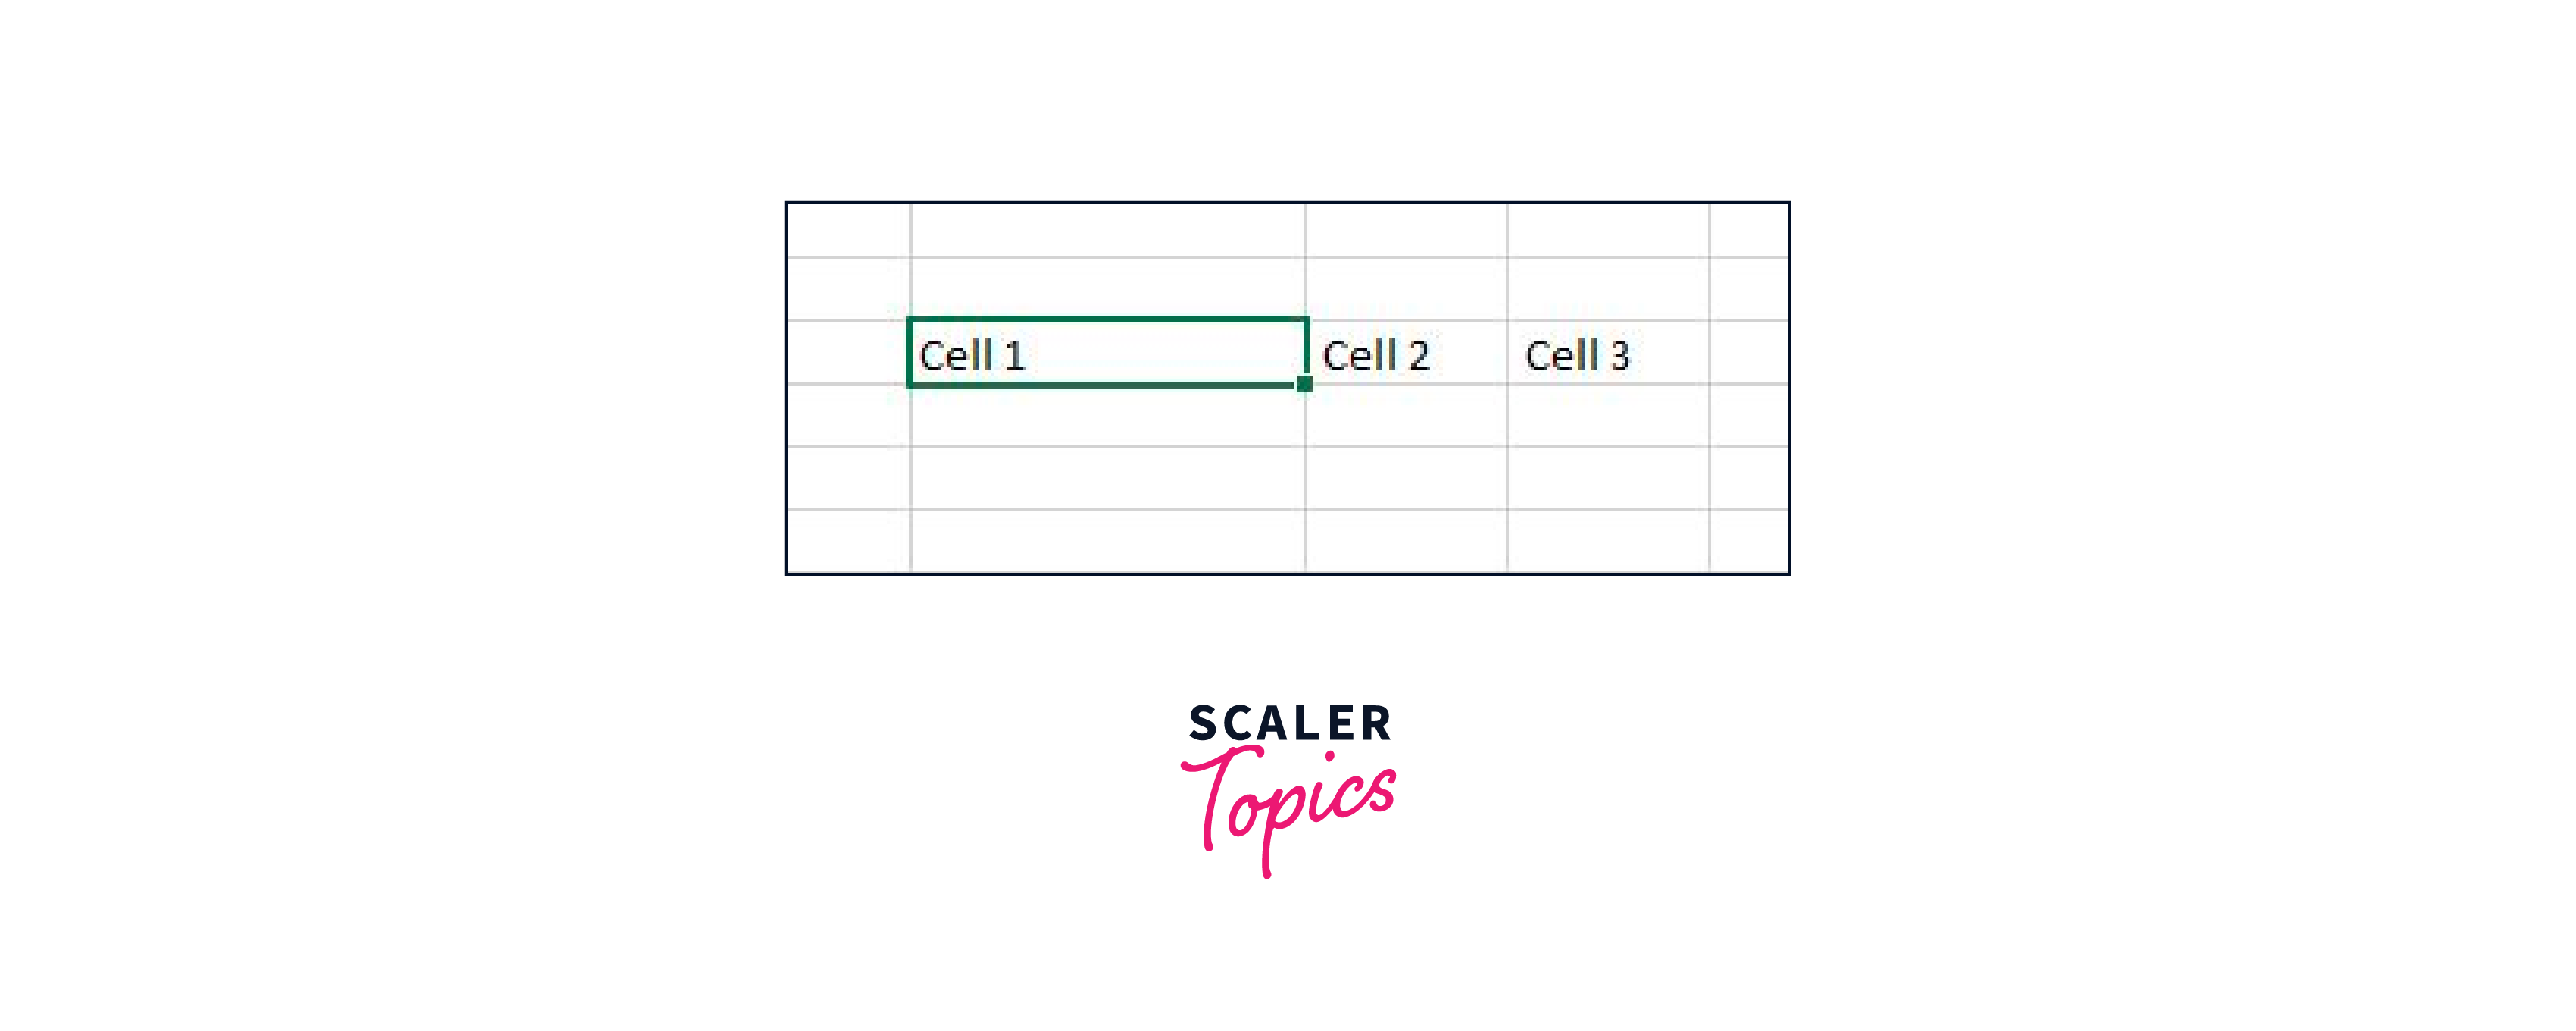
- Three cells are now created and filled with your data.
Text to Columns
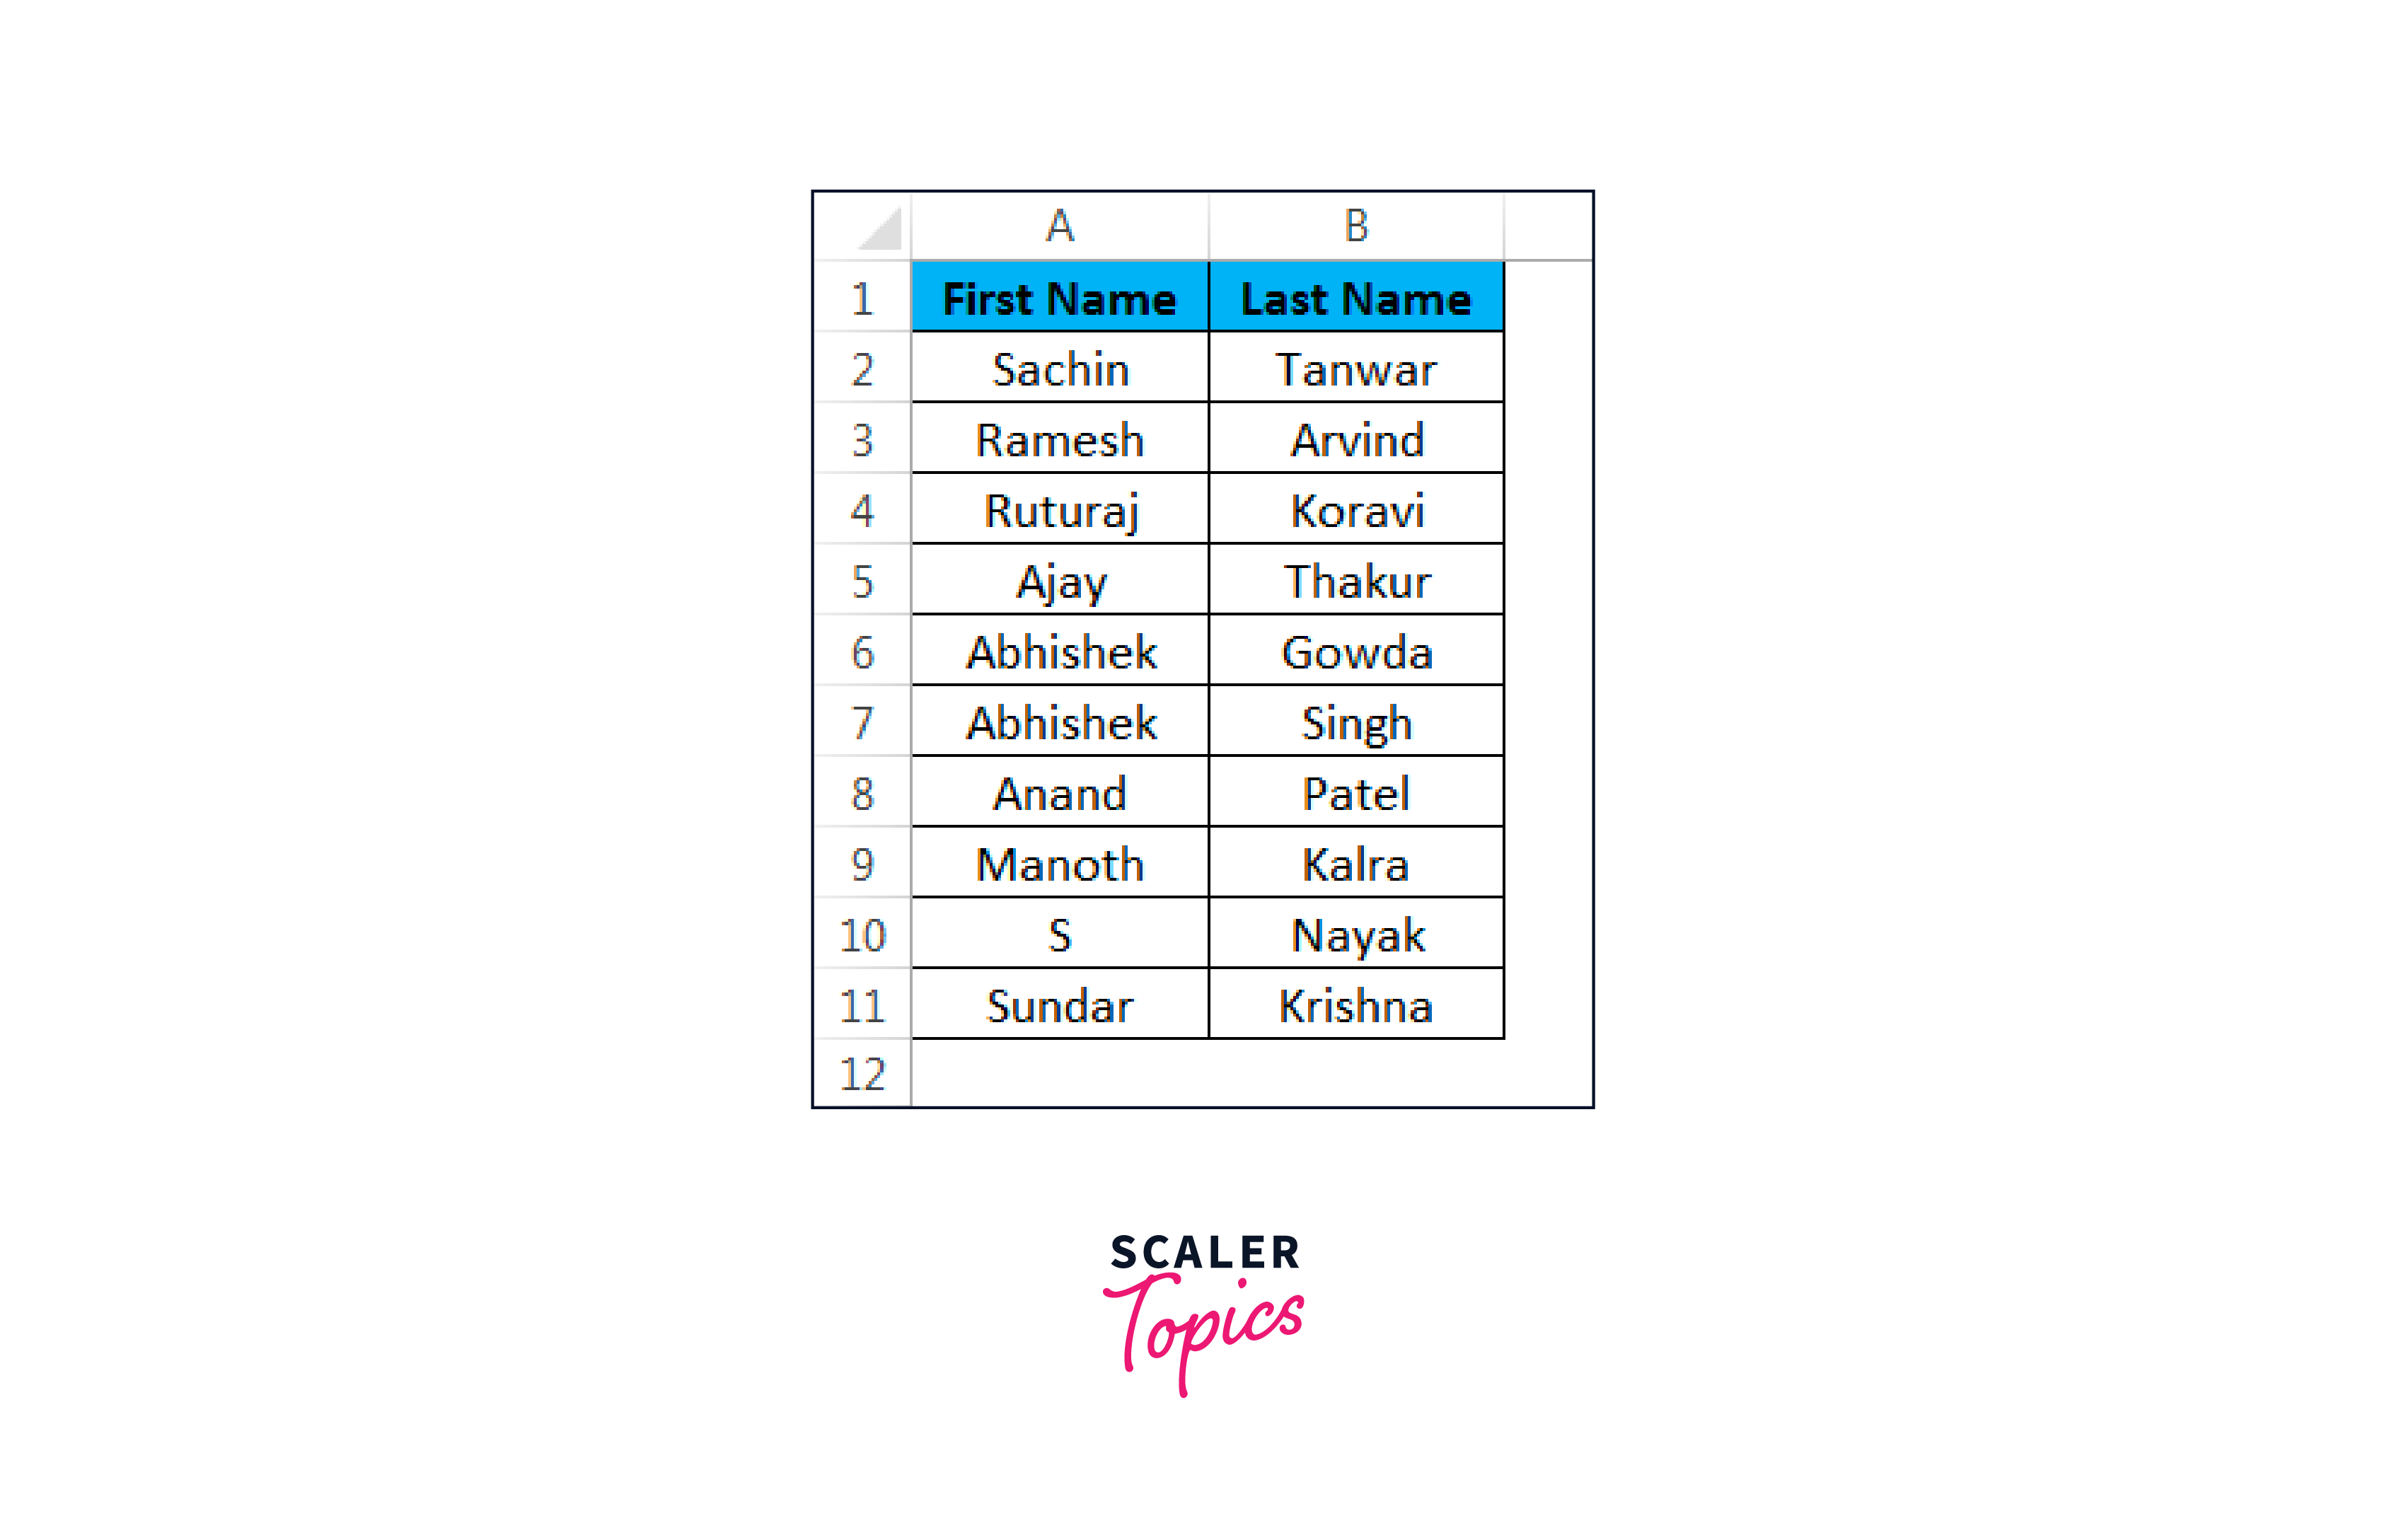
In the single cell itself, I have the First Name and Last Name data.
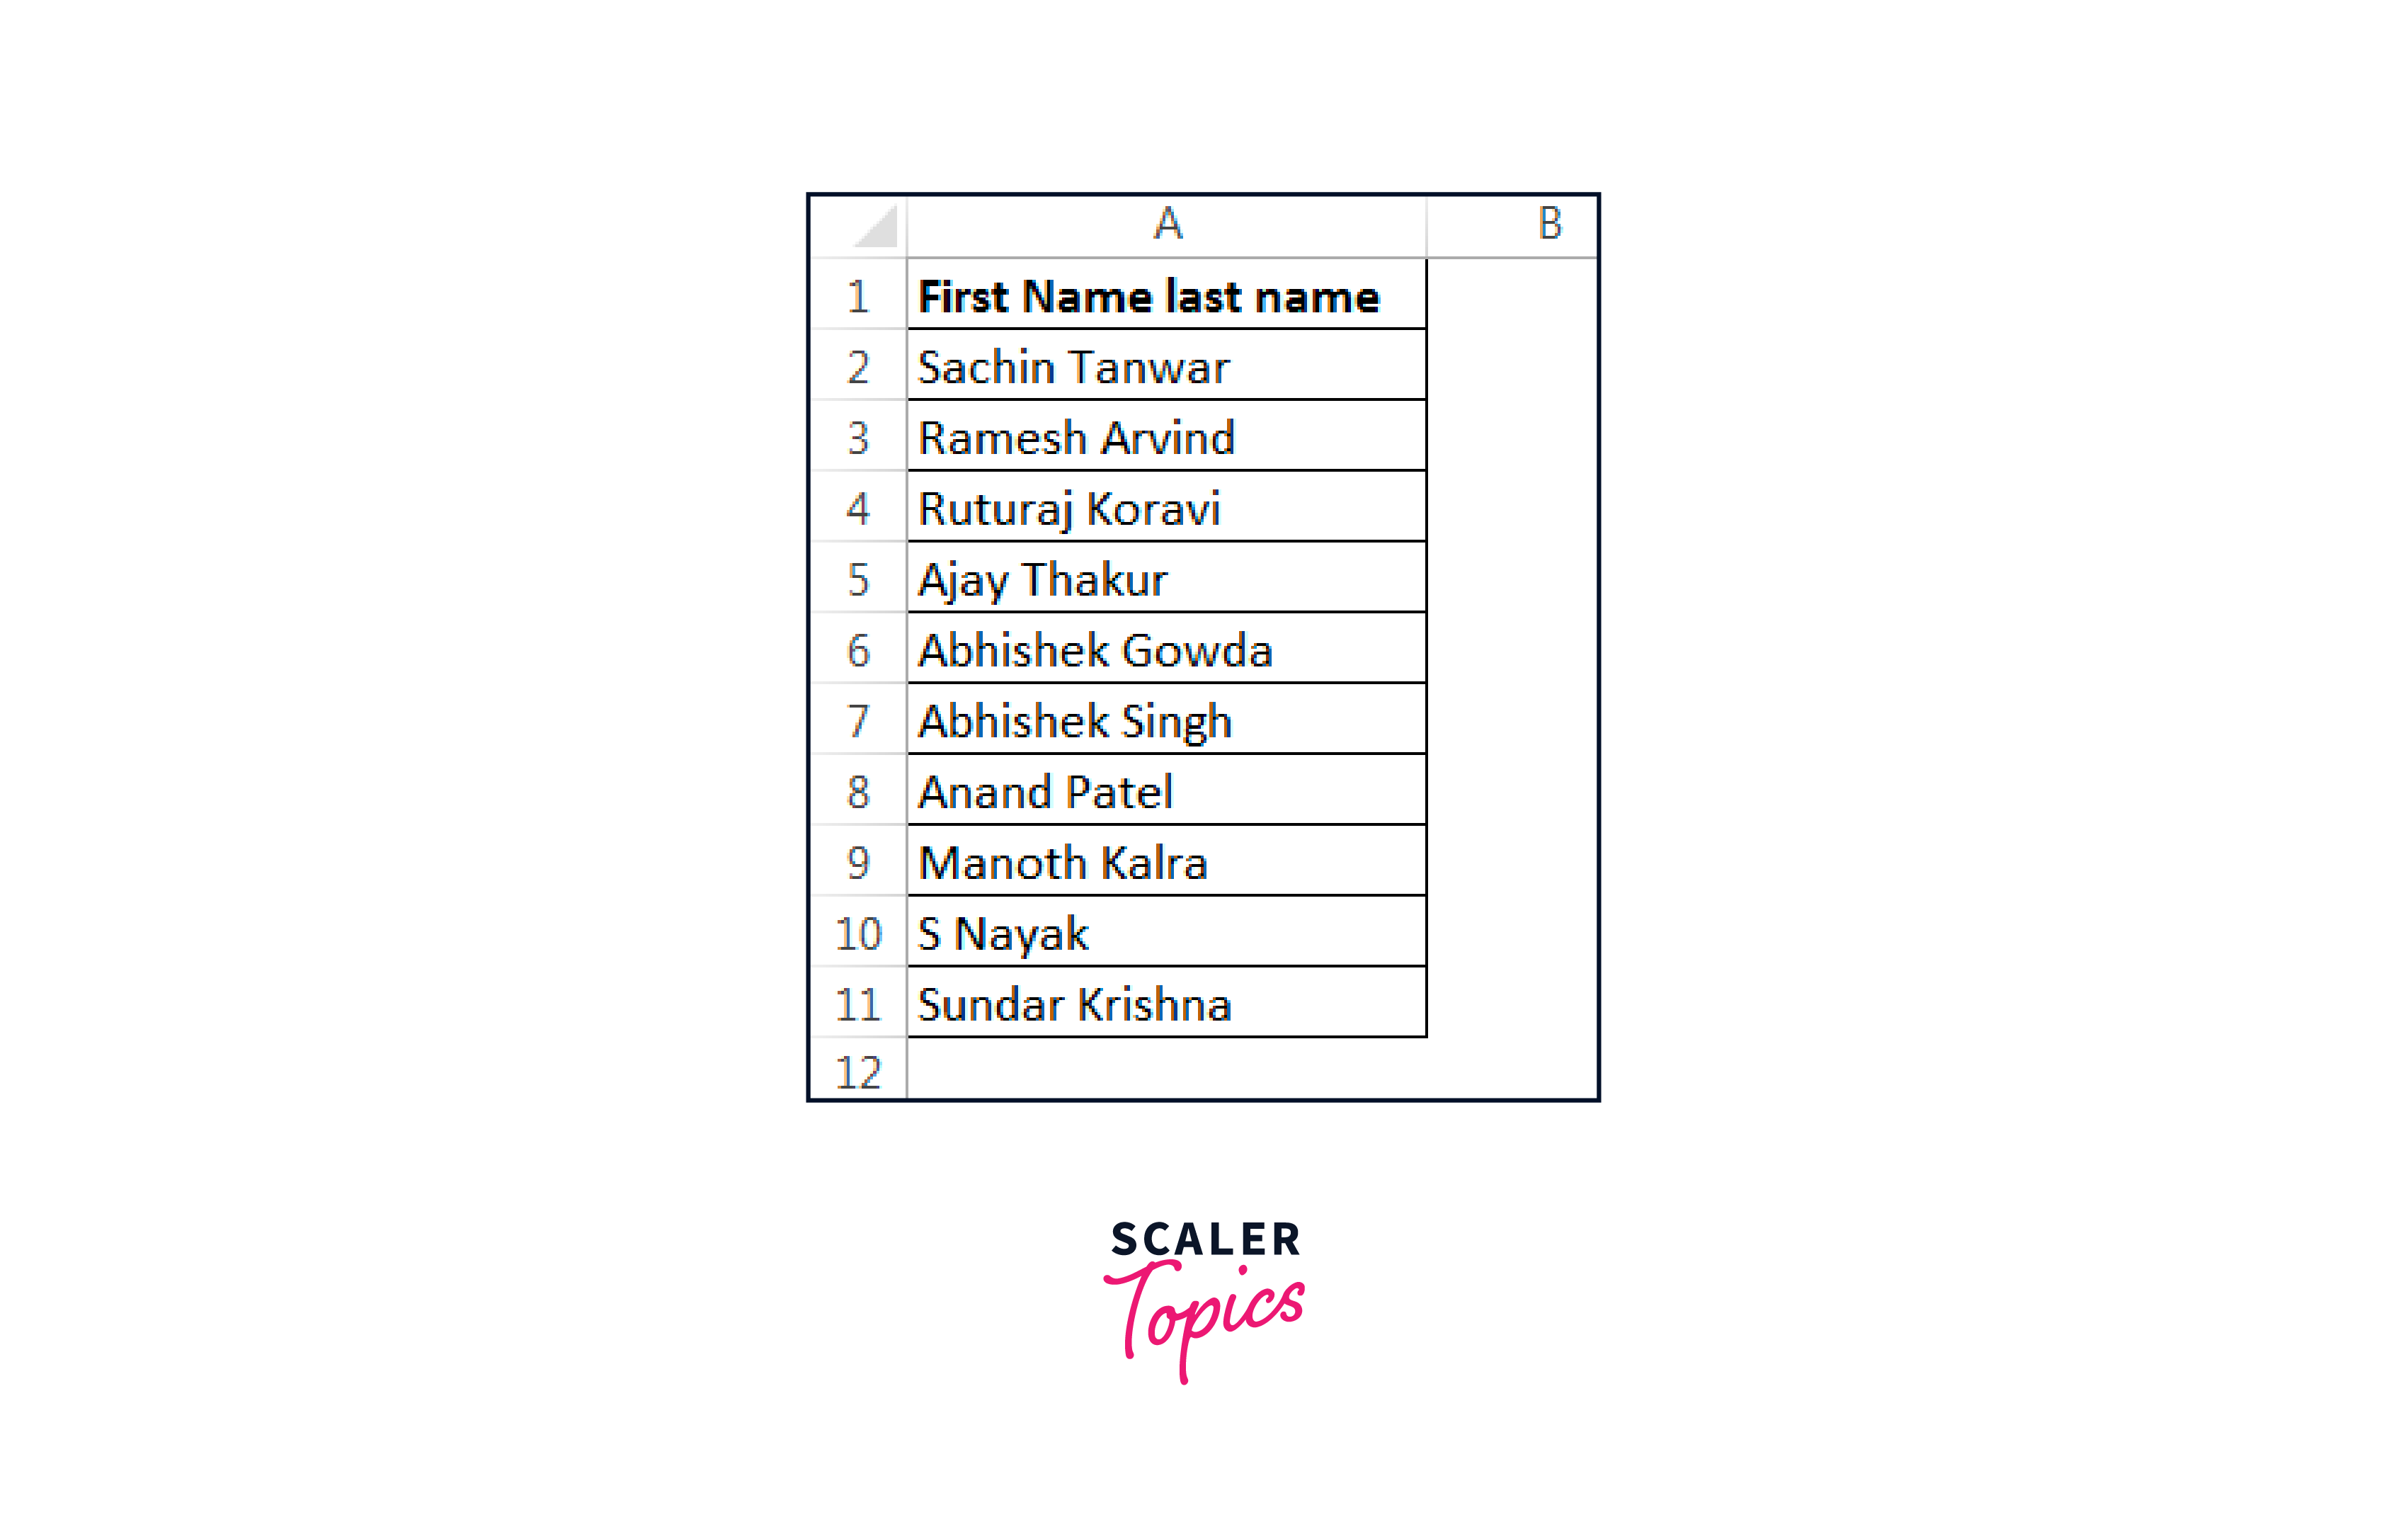
As the single cell contains both the first and last names, I want to separate the first and last names.
The common element is a straight slash (|), but it is the space following the first name in this data. So I'll divide this cell based on available space.
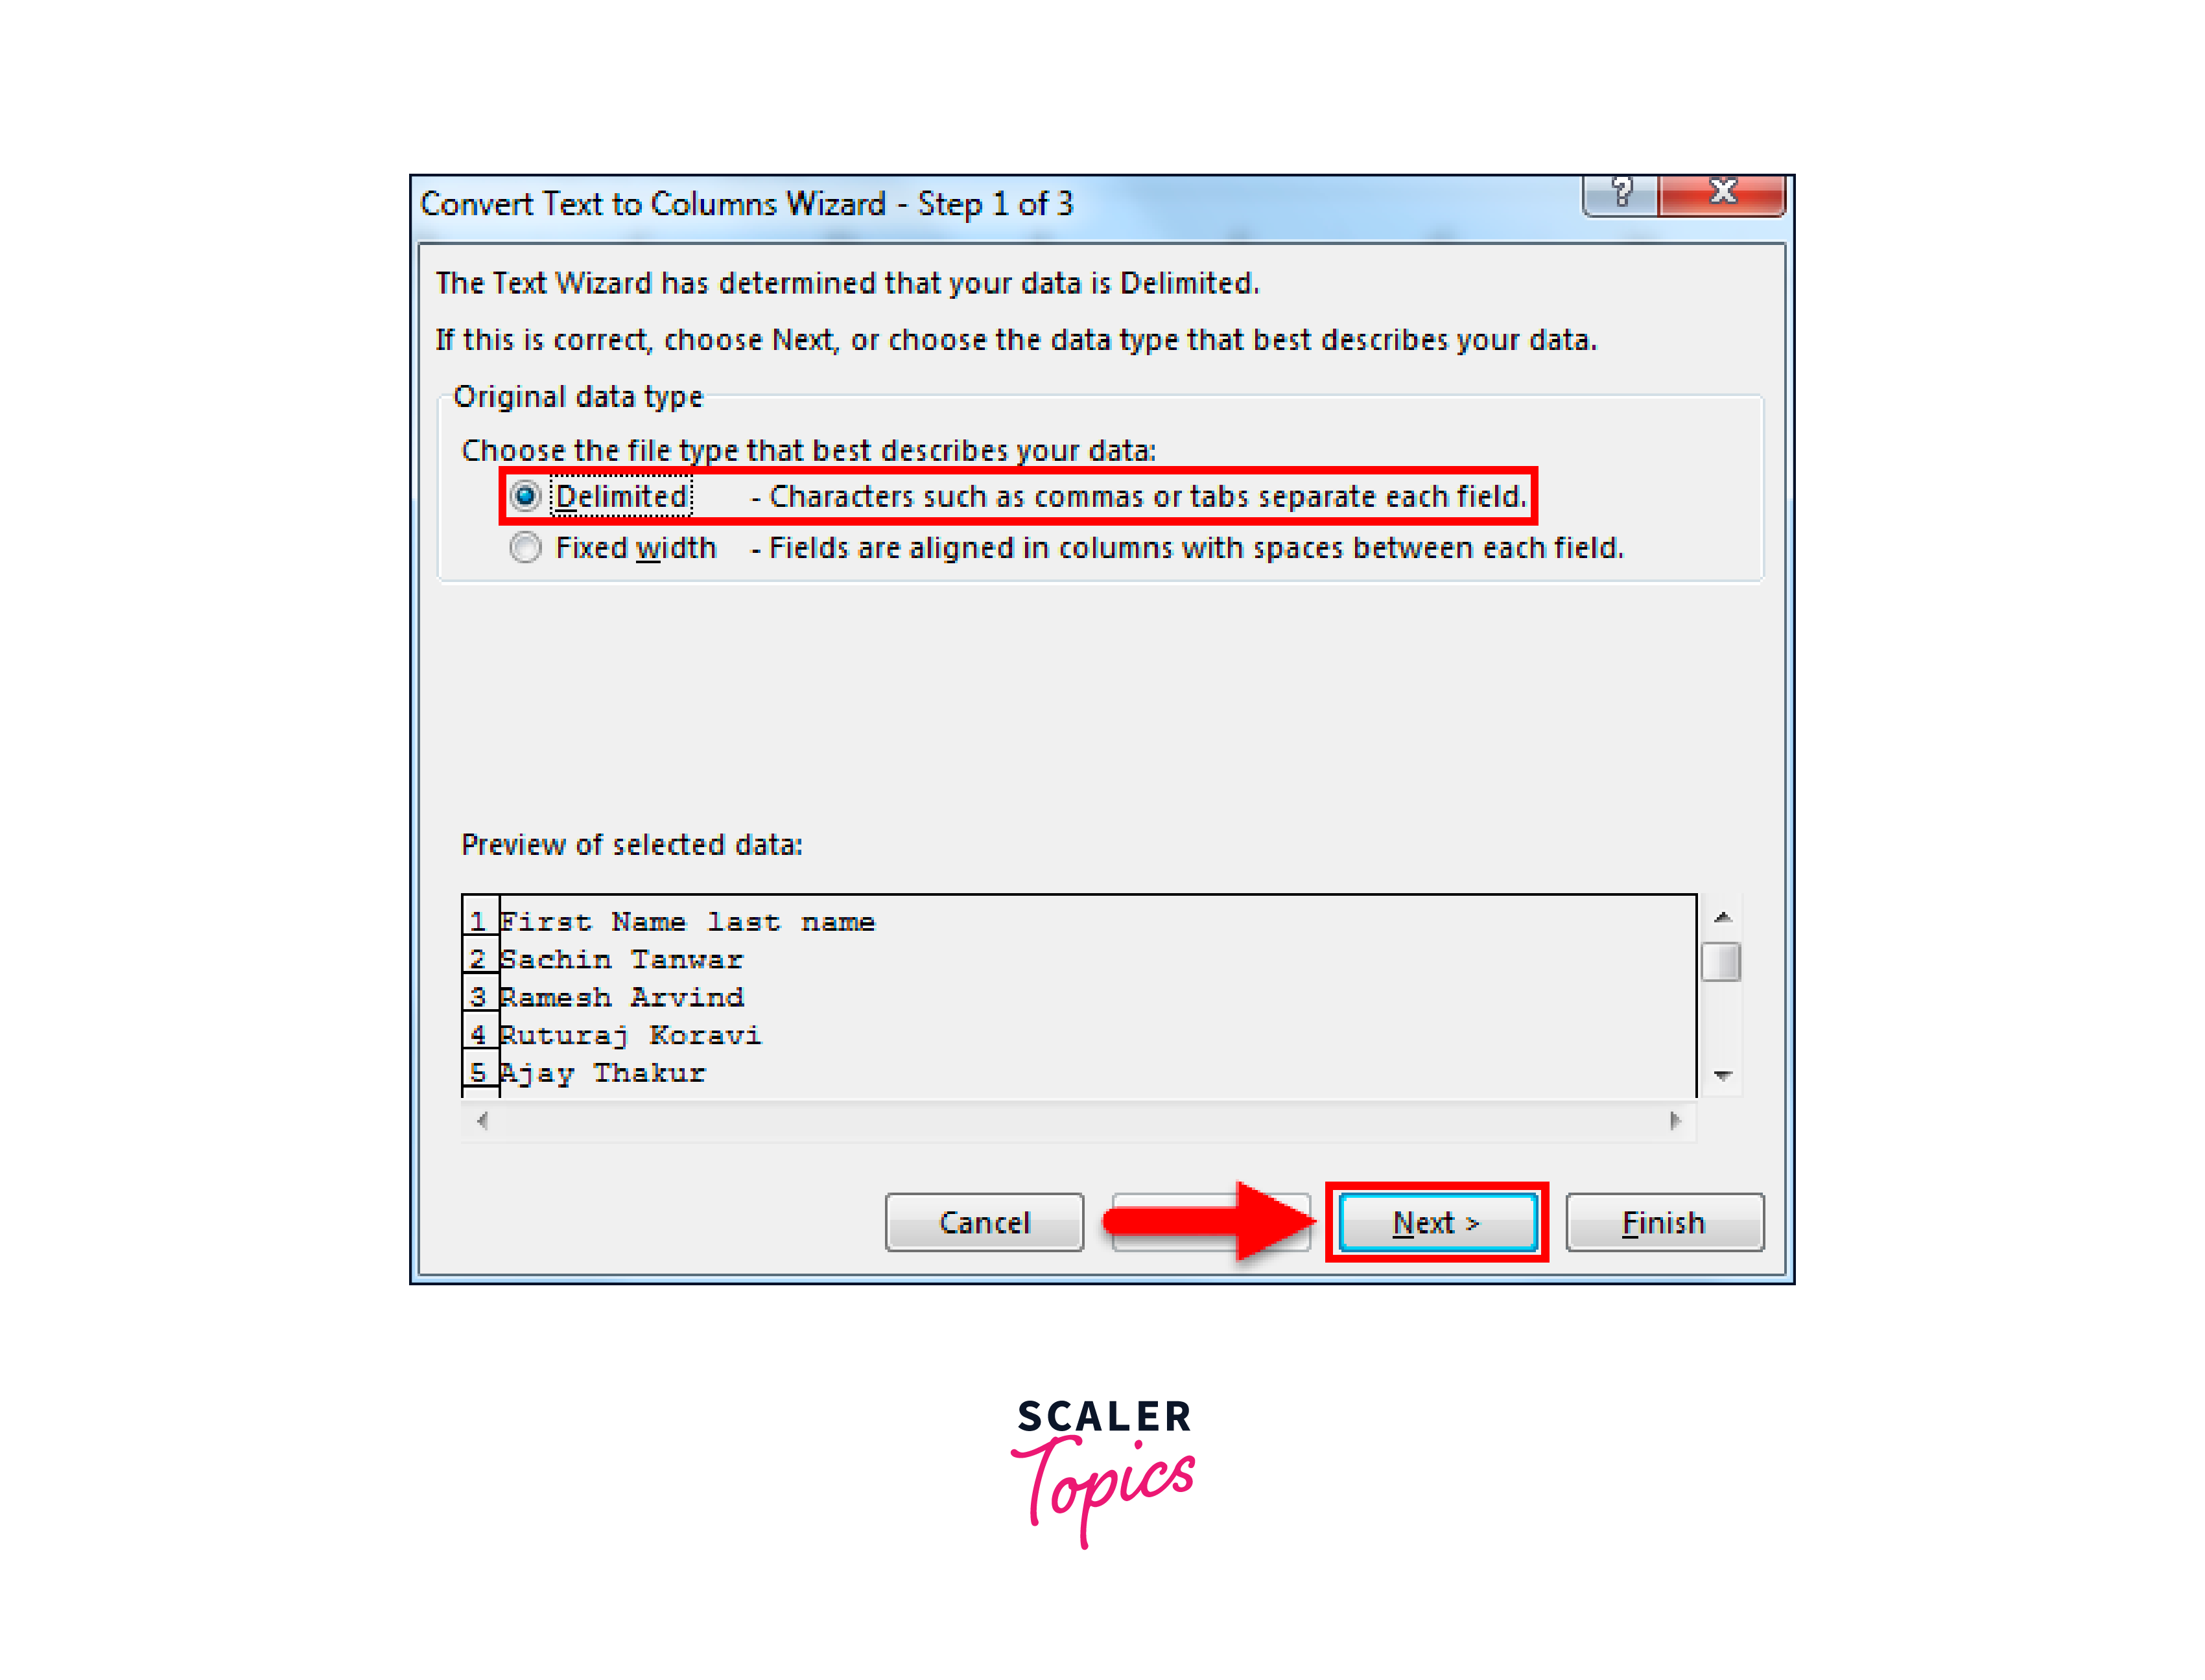
Step 1: is to choose the data.

Step 2: Navigate to Data > Text To Columns.
Step 3: Choose Delimited and press NEXT.
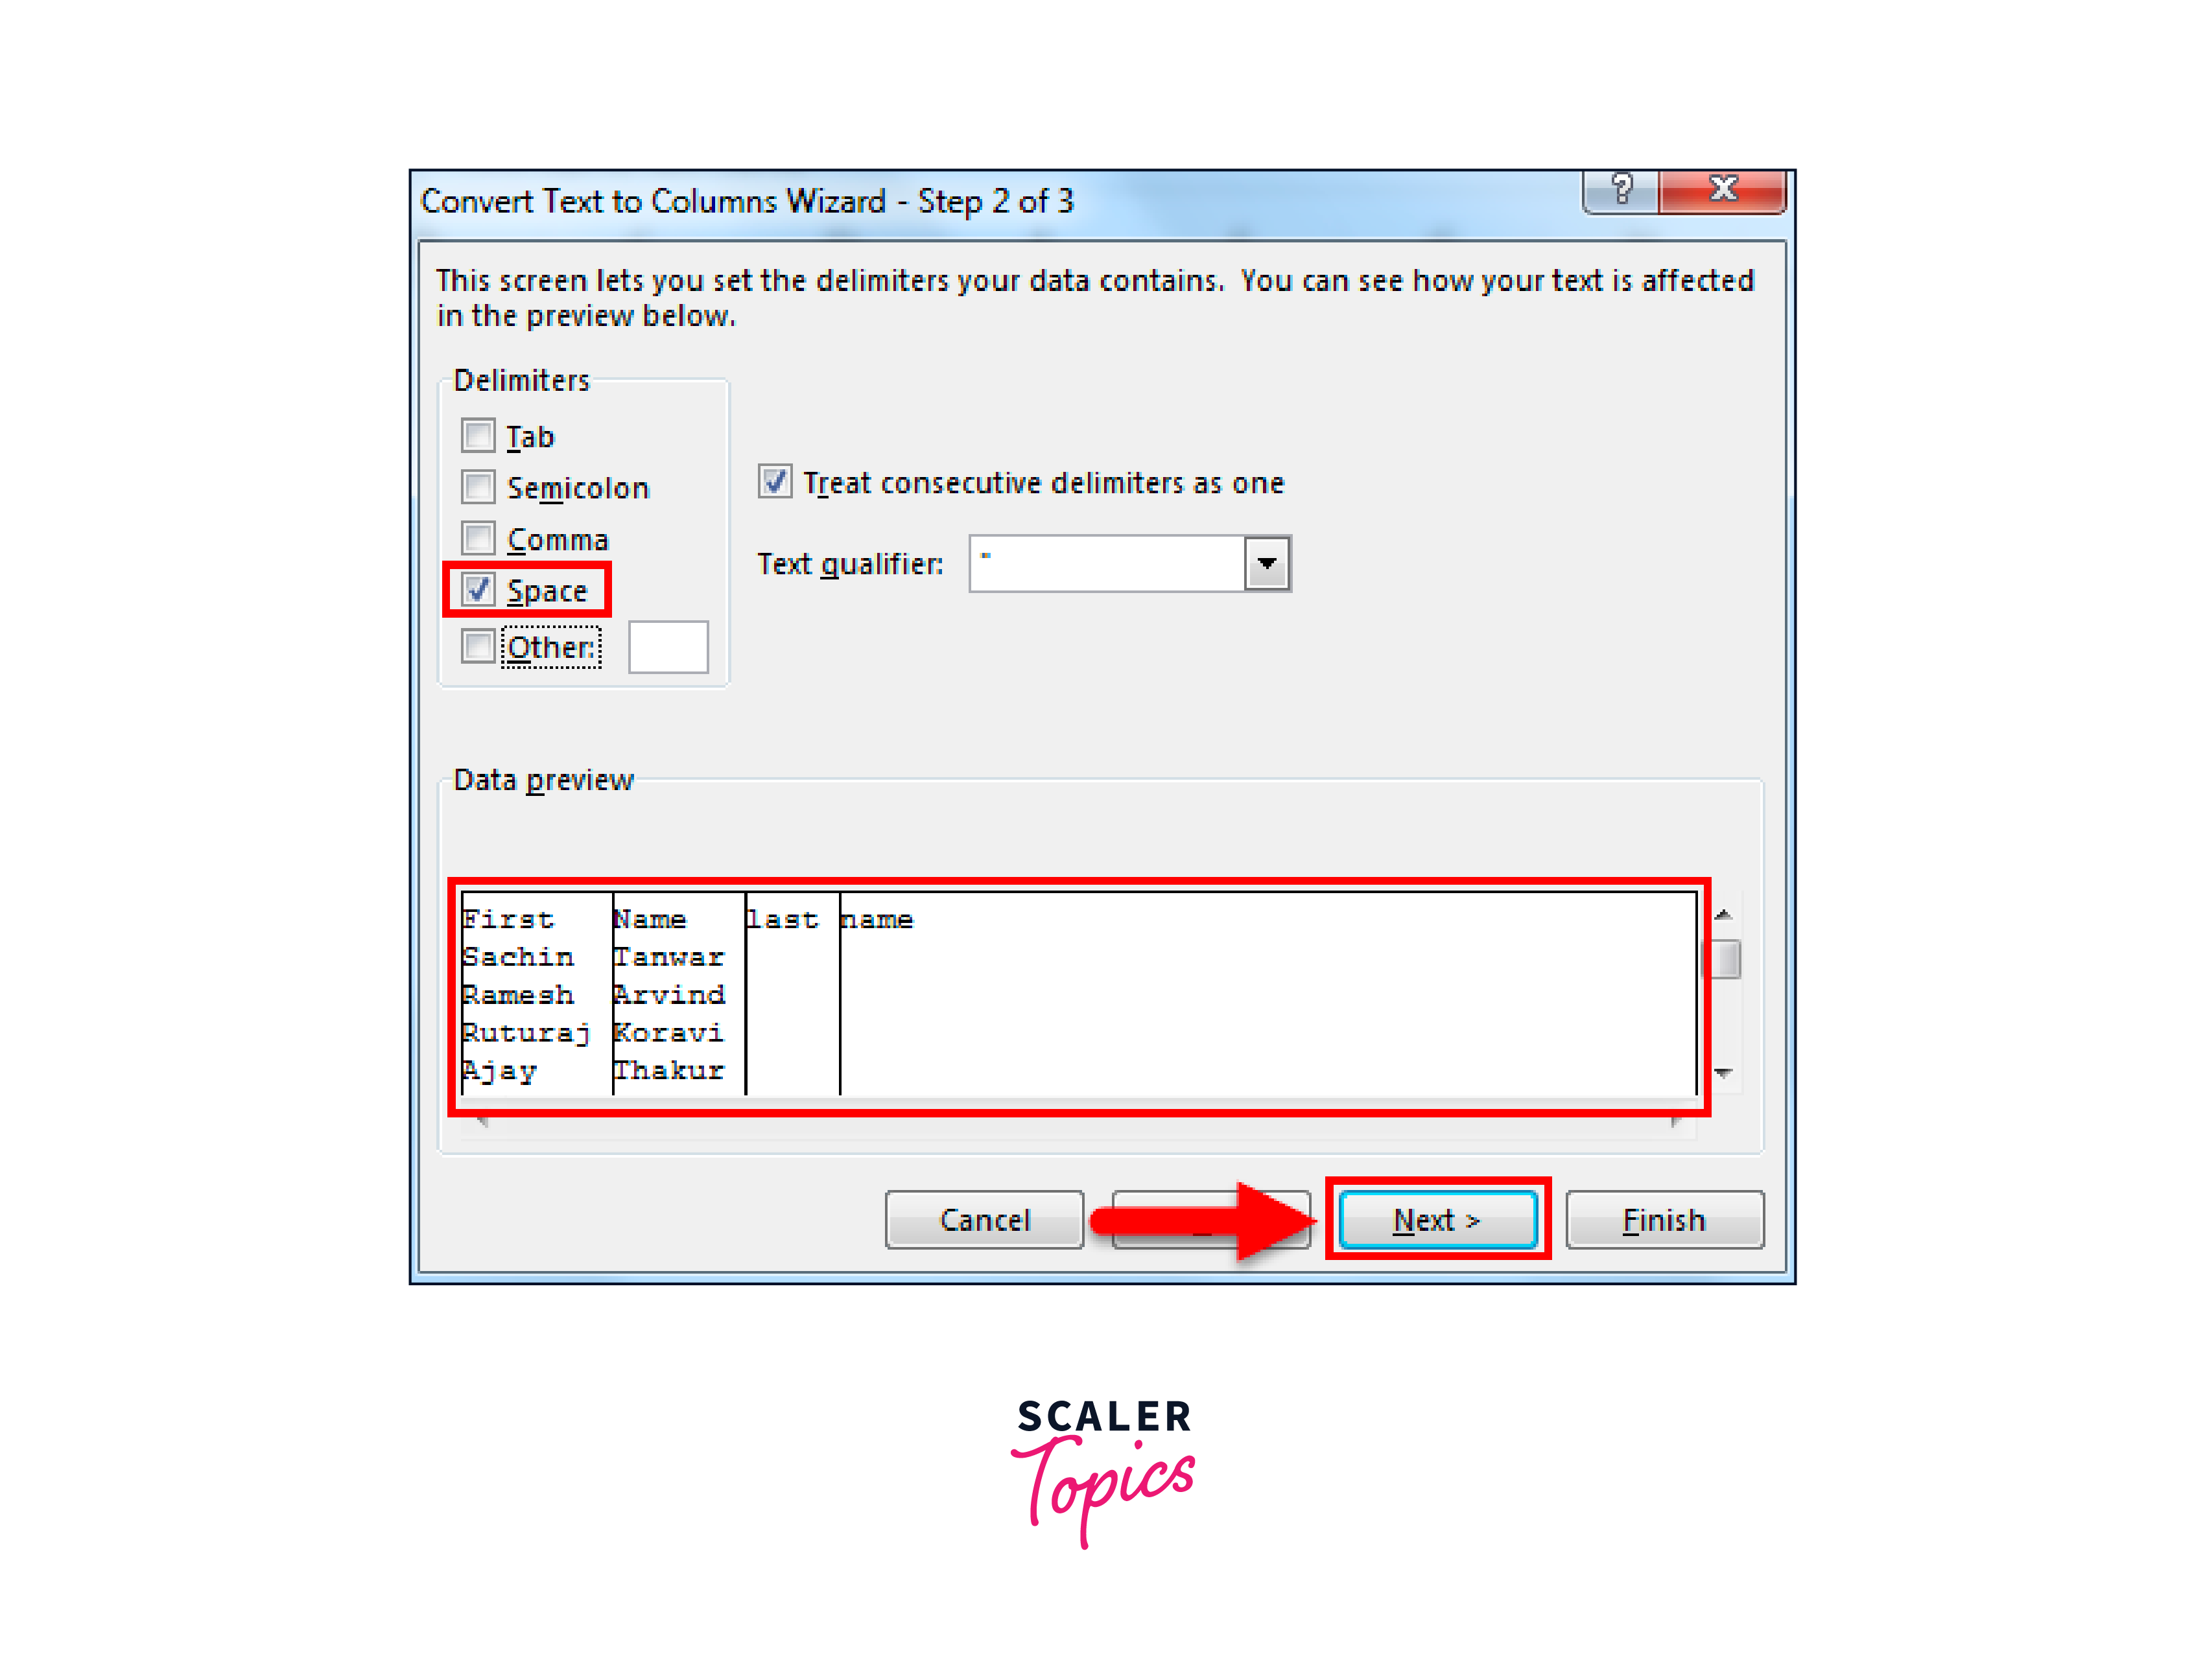
Step 4: Choose the separation foundation in this section. Check the space box to indicate that SPACE is the foundation.
When SPACE is chosen in the preview section, I can see how the data will come together; click NEXT to continue.
Step 5: Choose A1 as the destination cell and press the FINISH button.
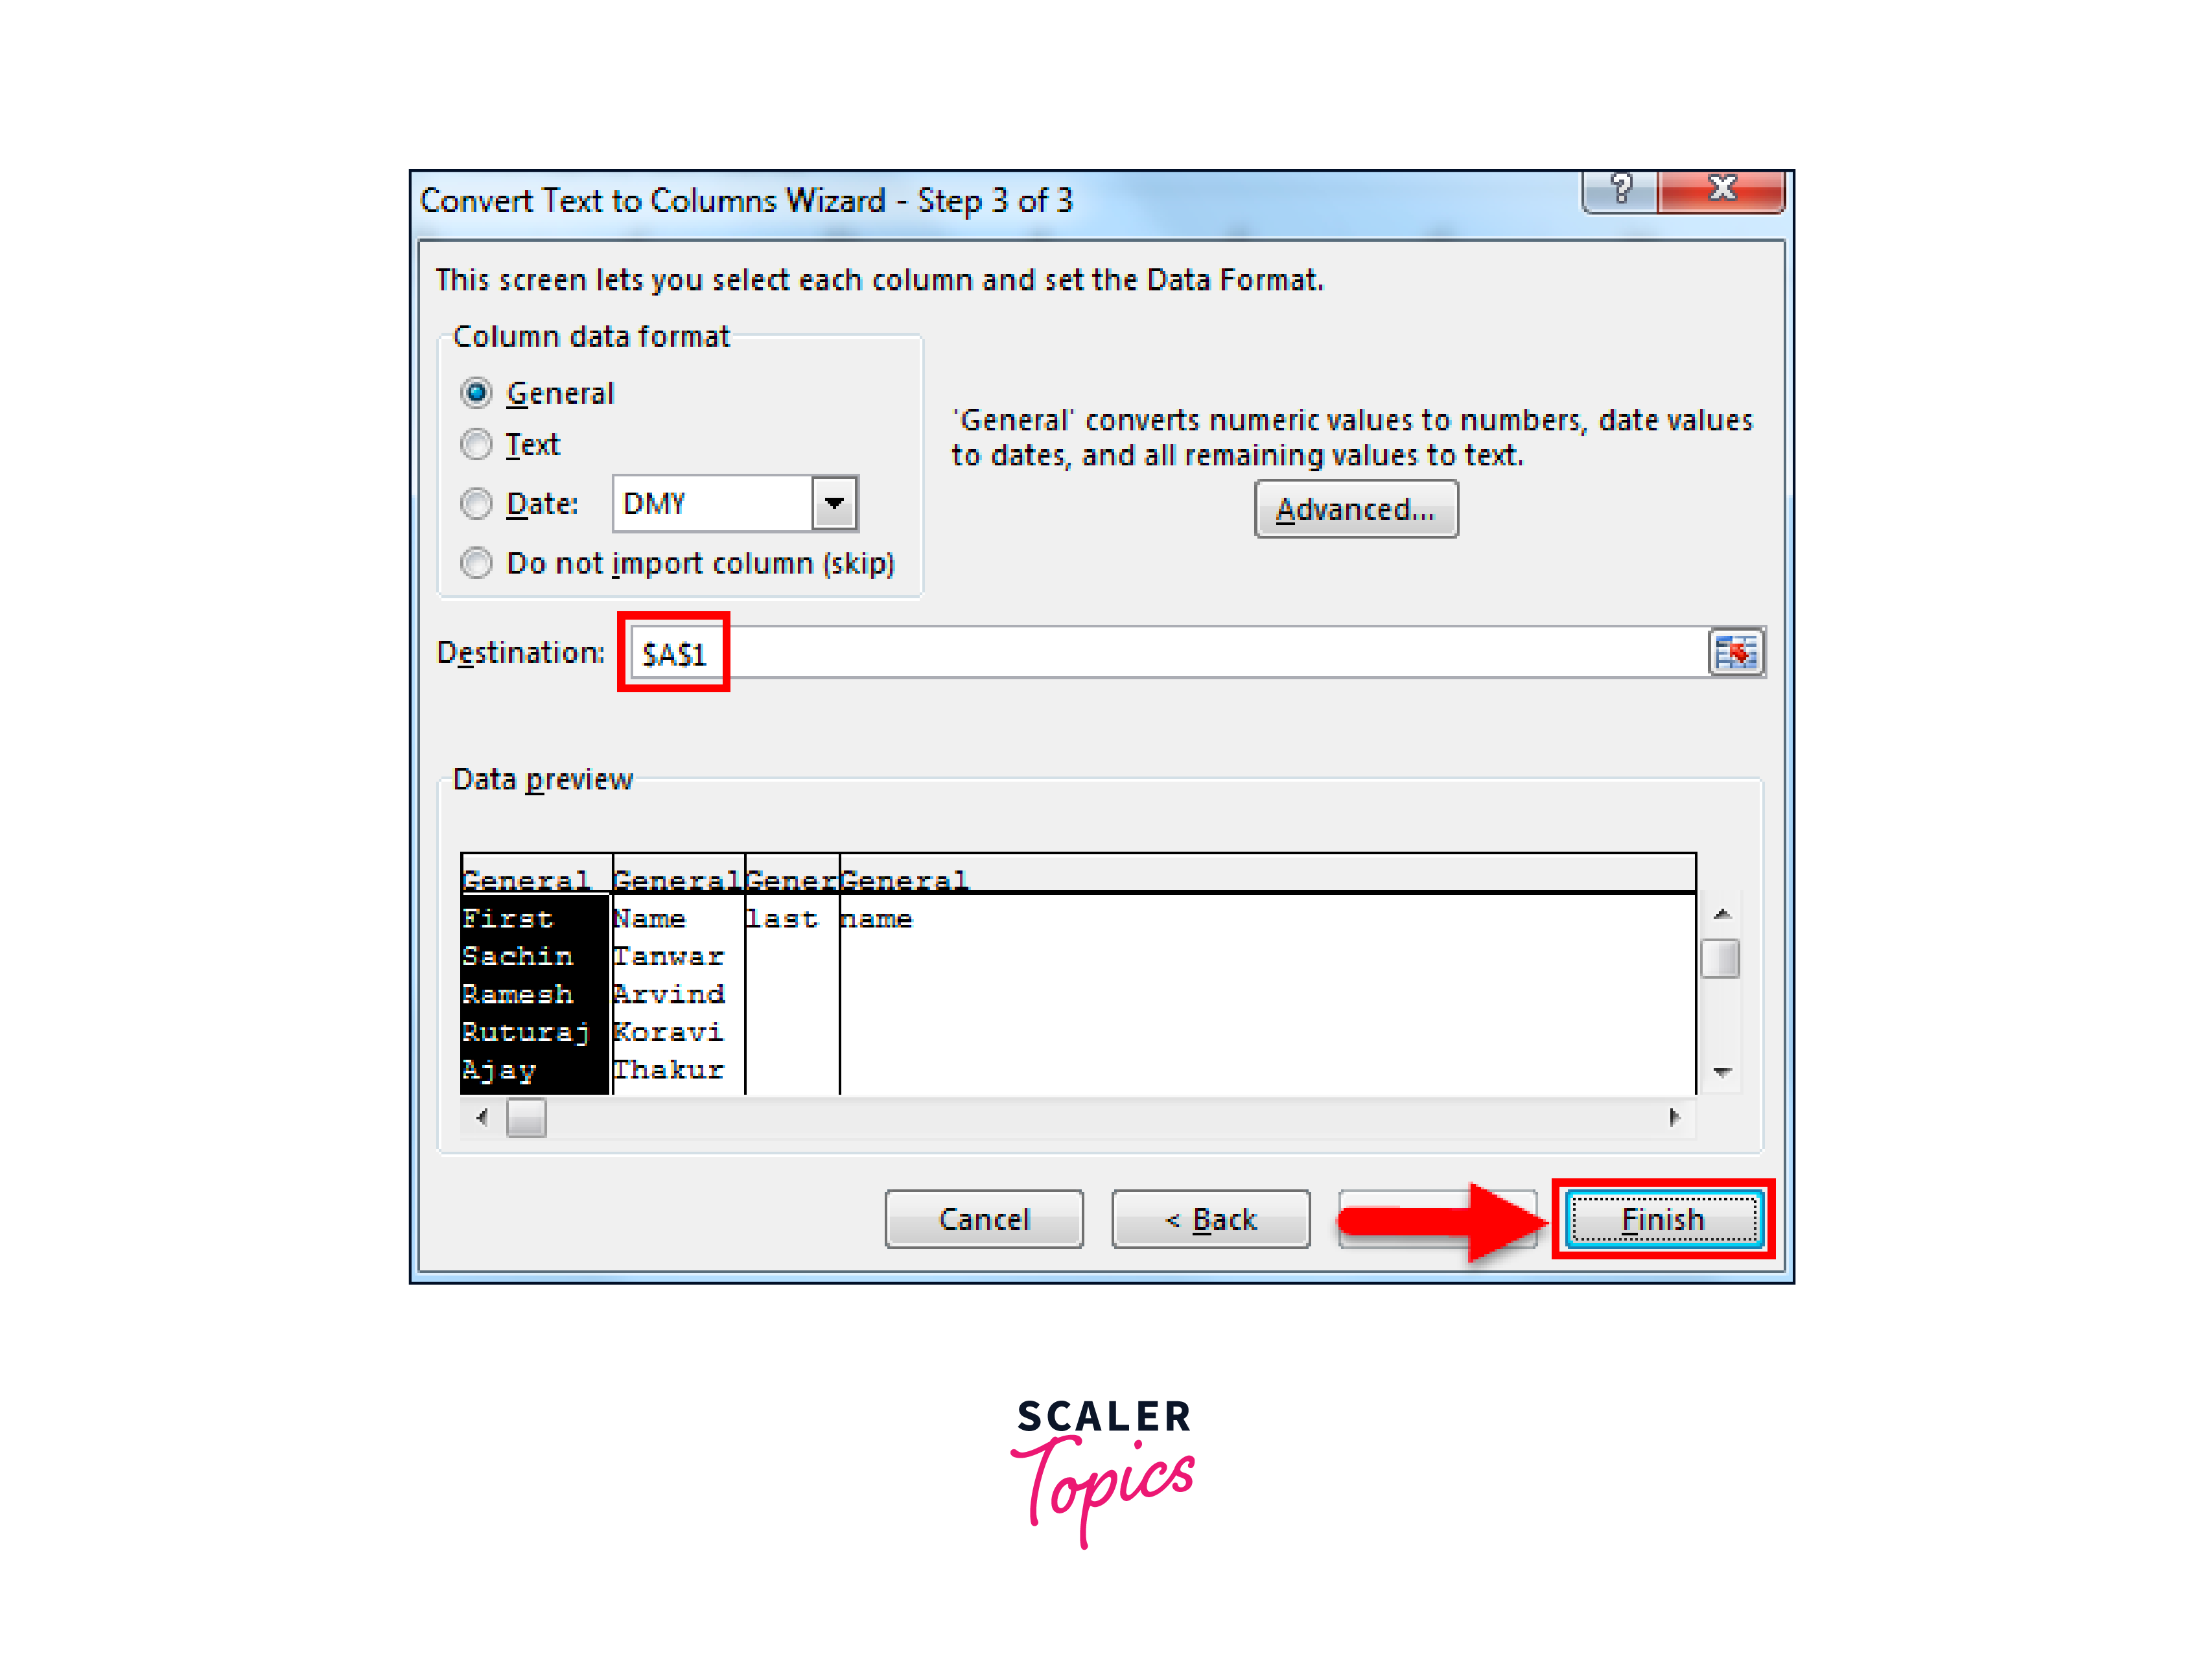
Step 6: We will receive the first and last names in two separate columns.
Step 7: Since there was a space between First Name and Last Name, both of them have been separated. Adjust the headings manually.
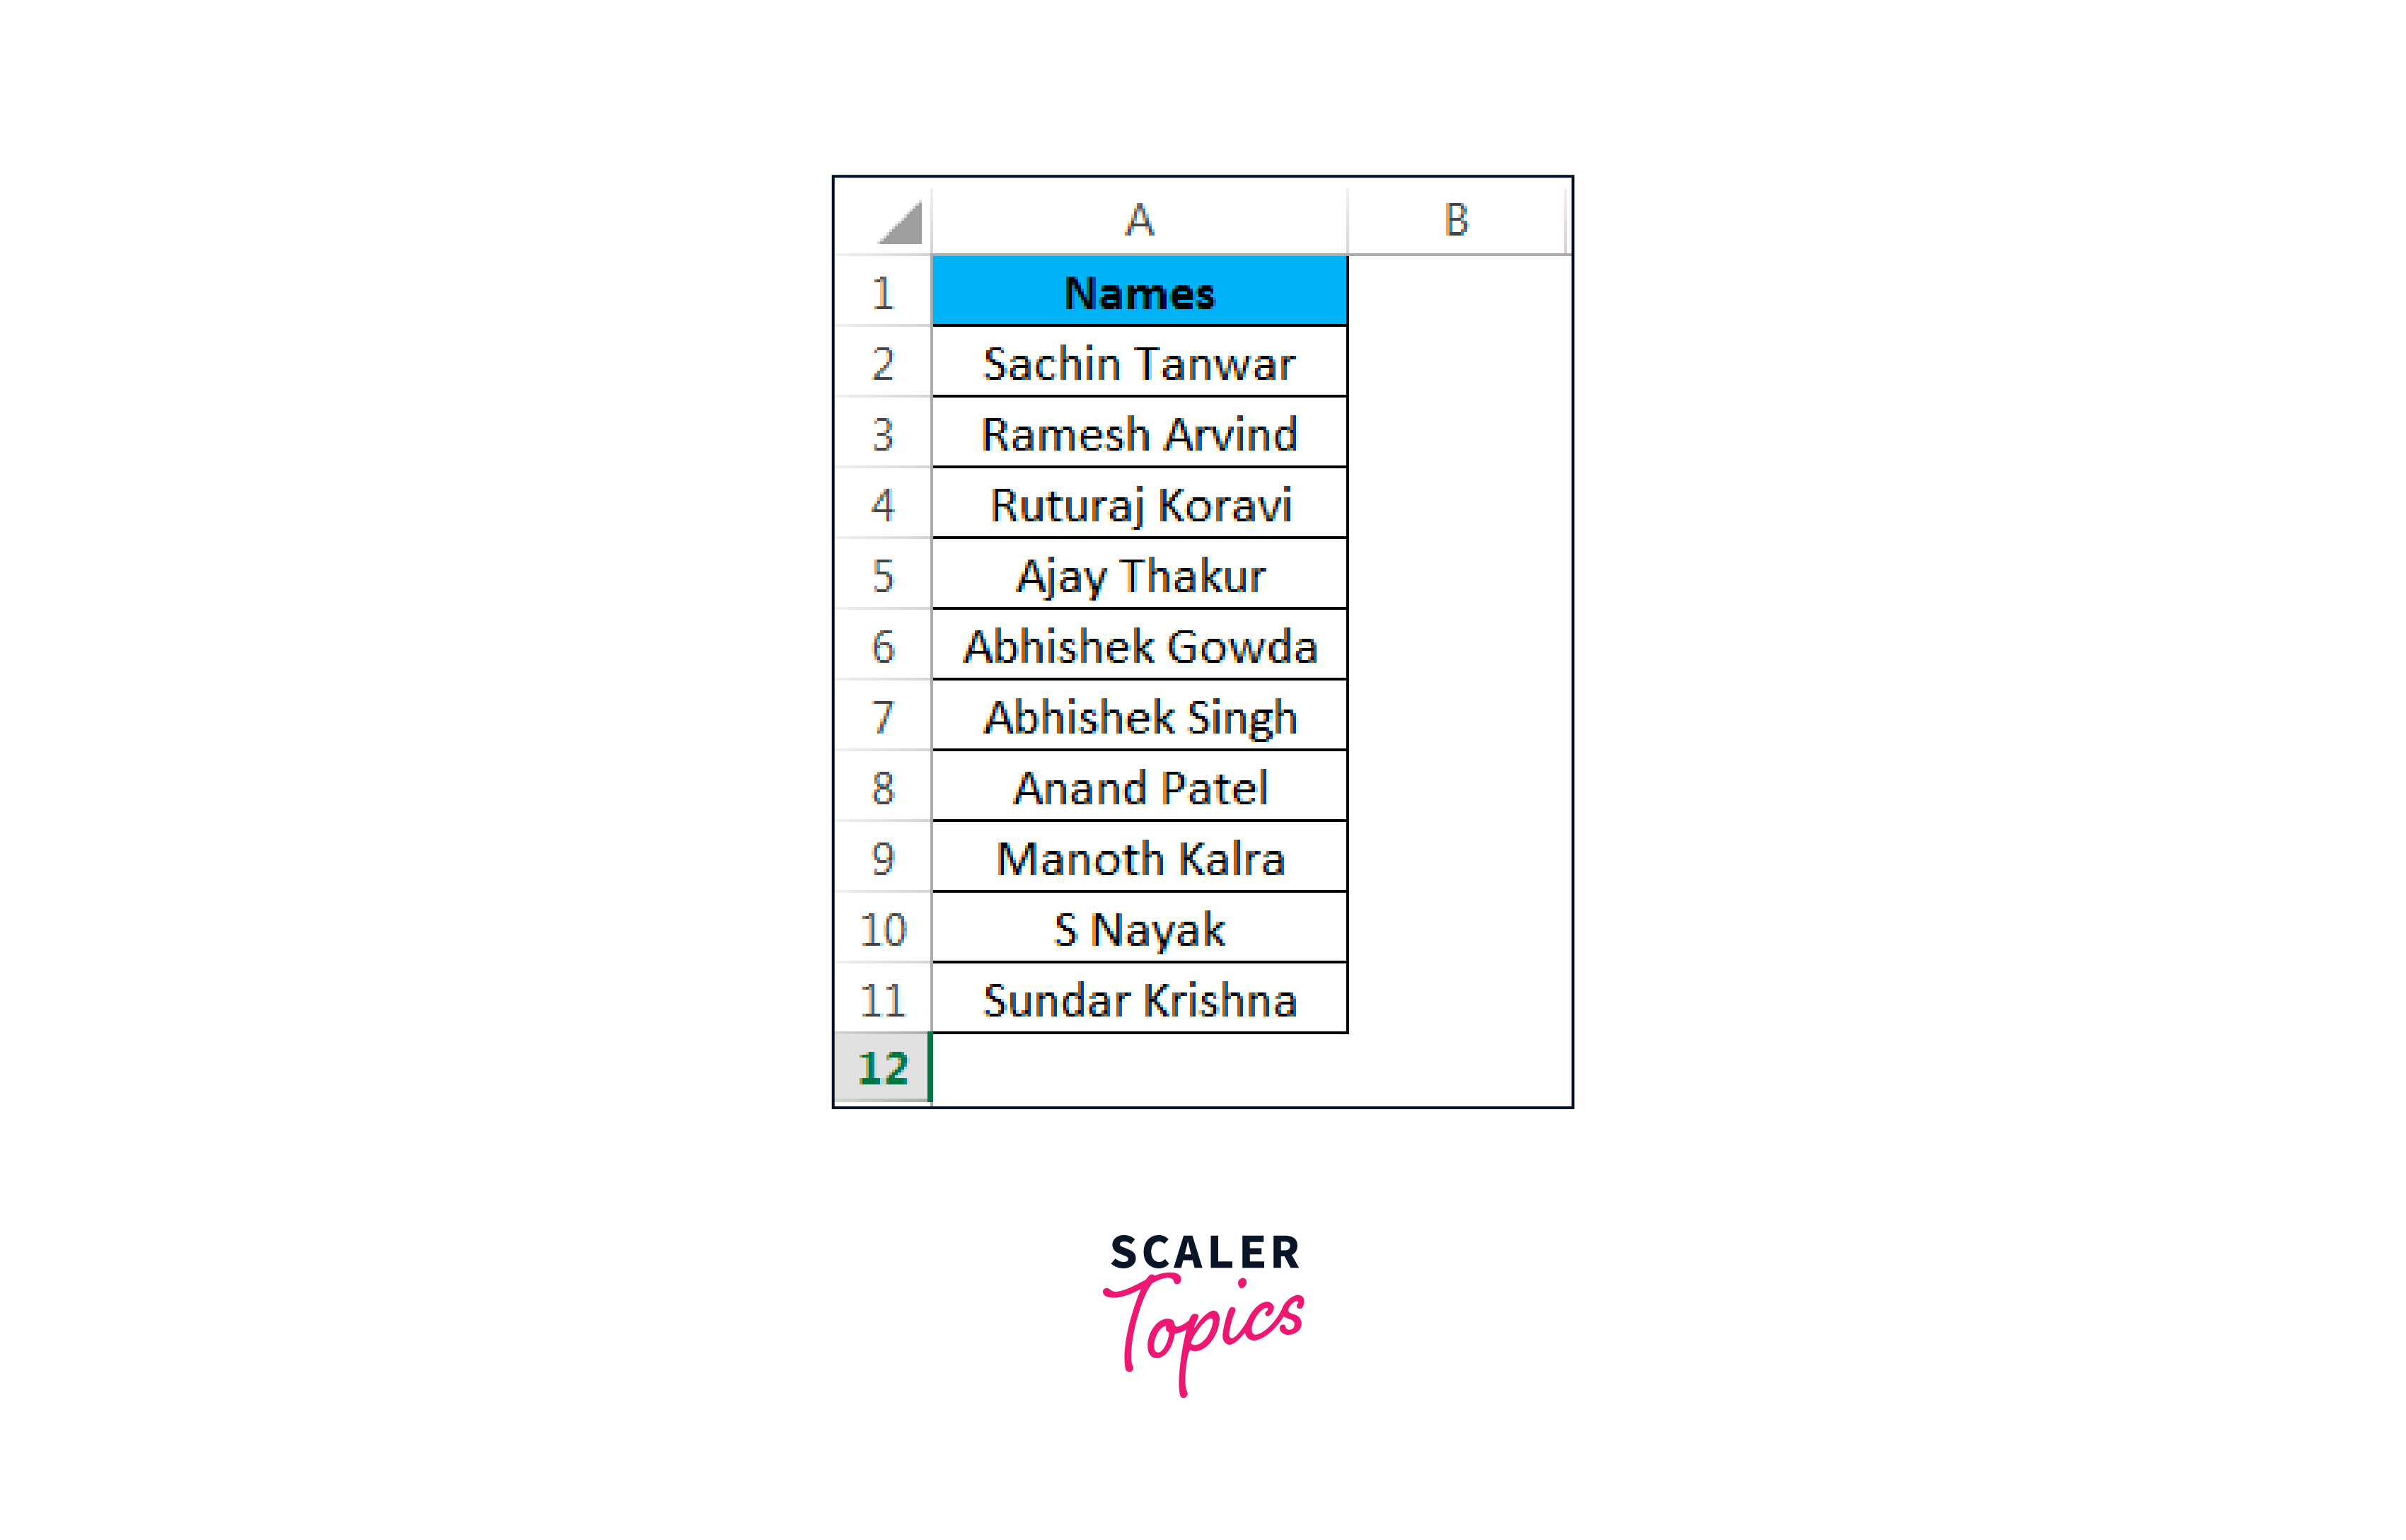
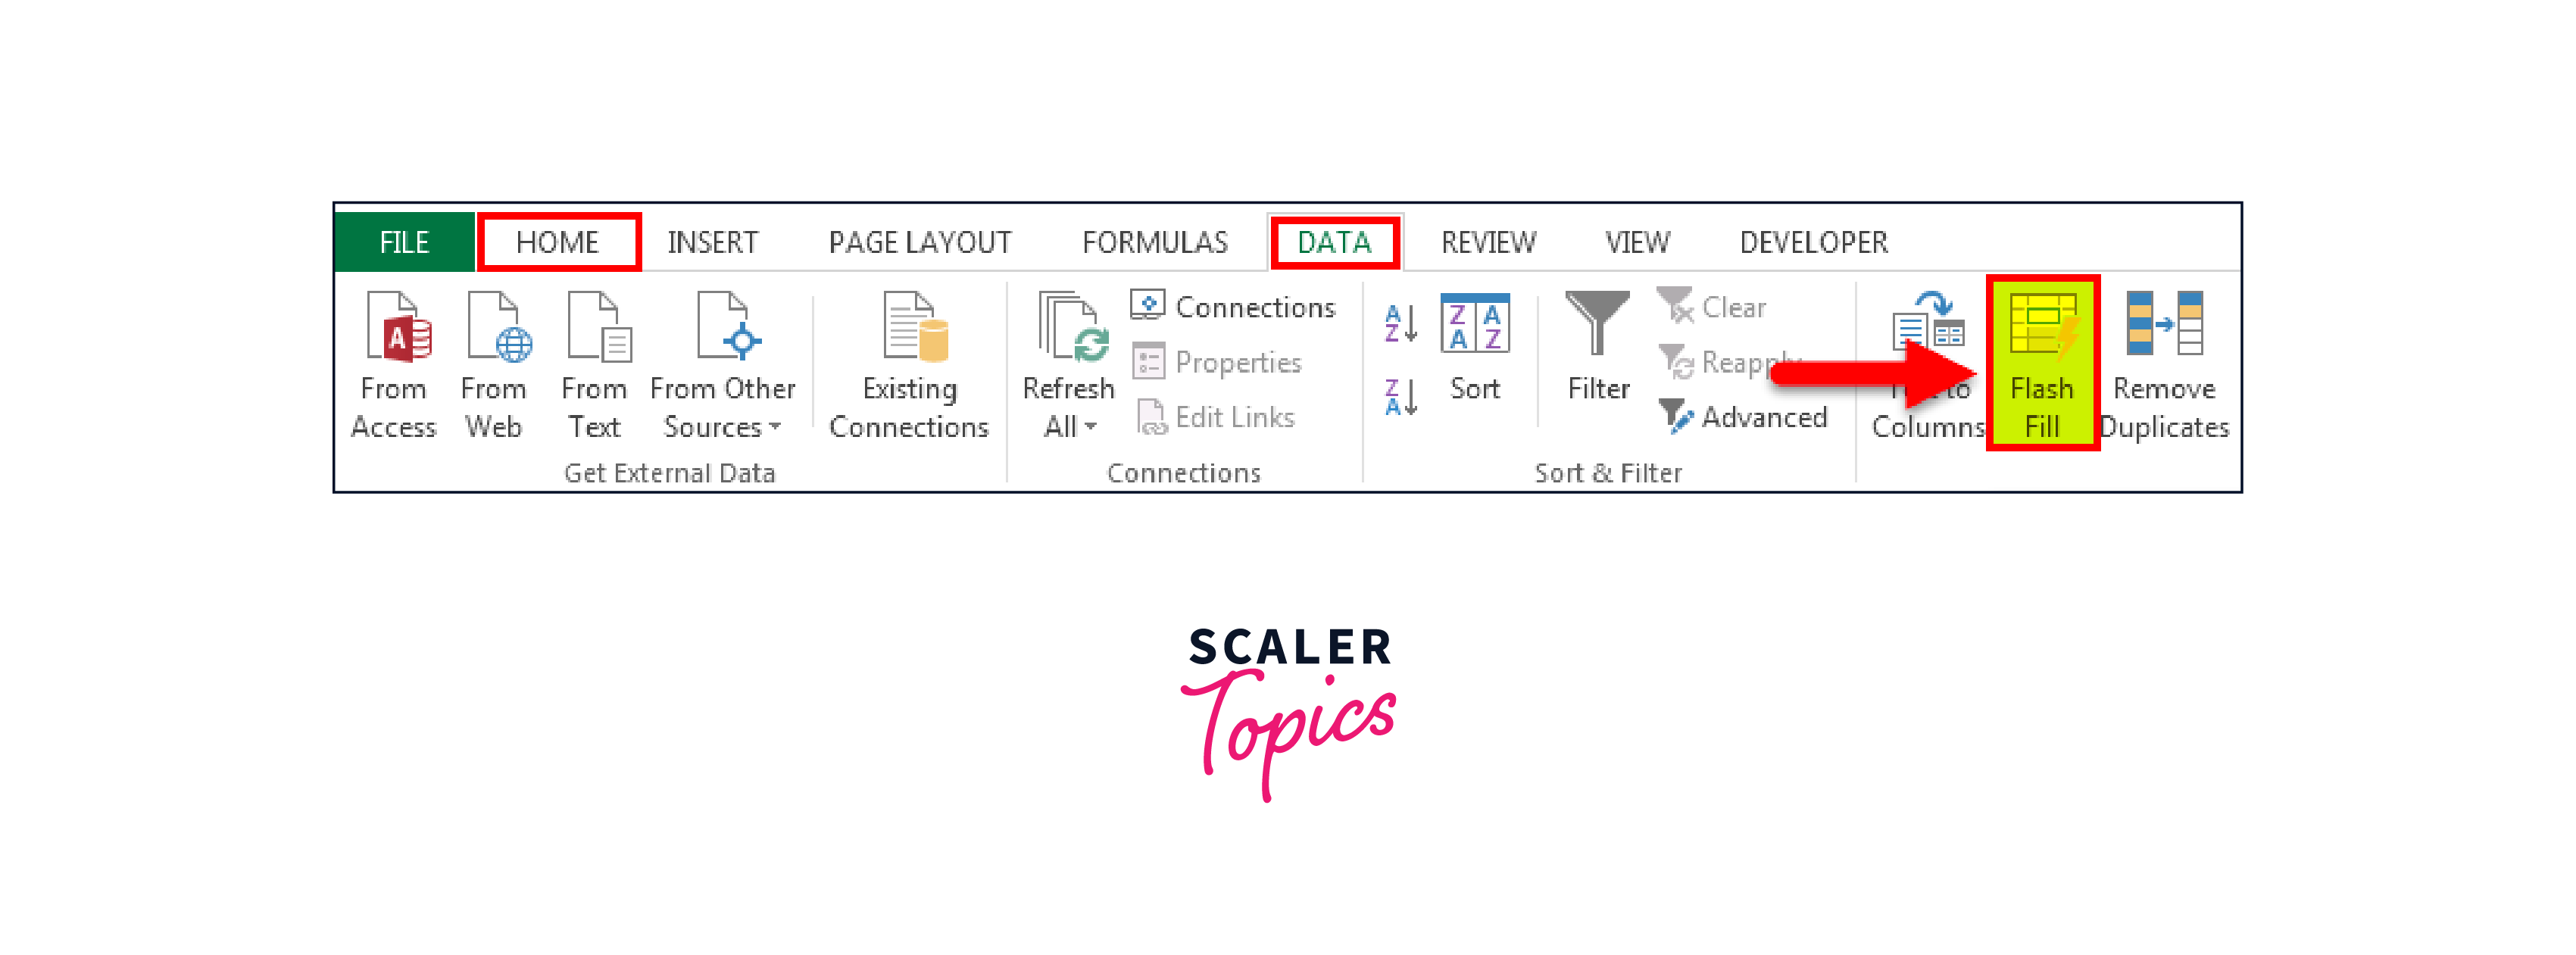
Flash Fill
If you still use Excel 2010 or an earlier version, you should immediately upgrade to 2013 or 2016. The option that was added in the 2013 edition is called Flash Fill. Filling the pattern with data from additional cells is a great idea. It will recognize our data's pattern and extract the info for us.
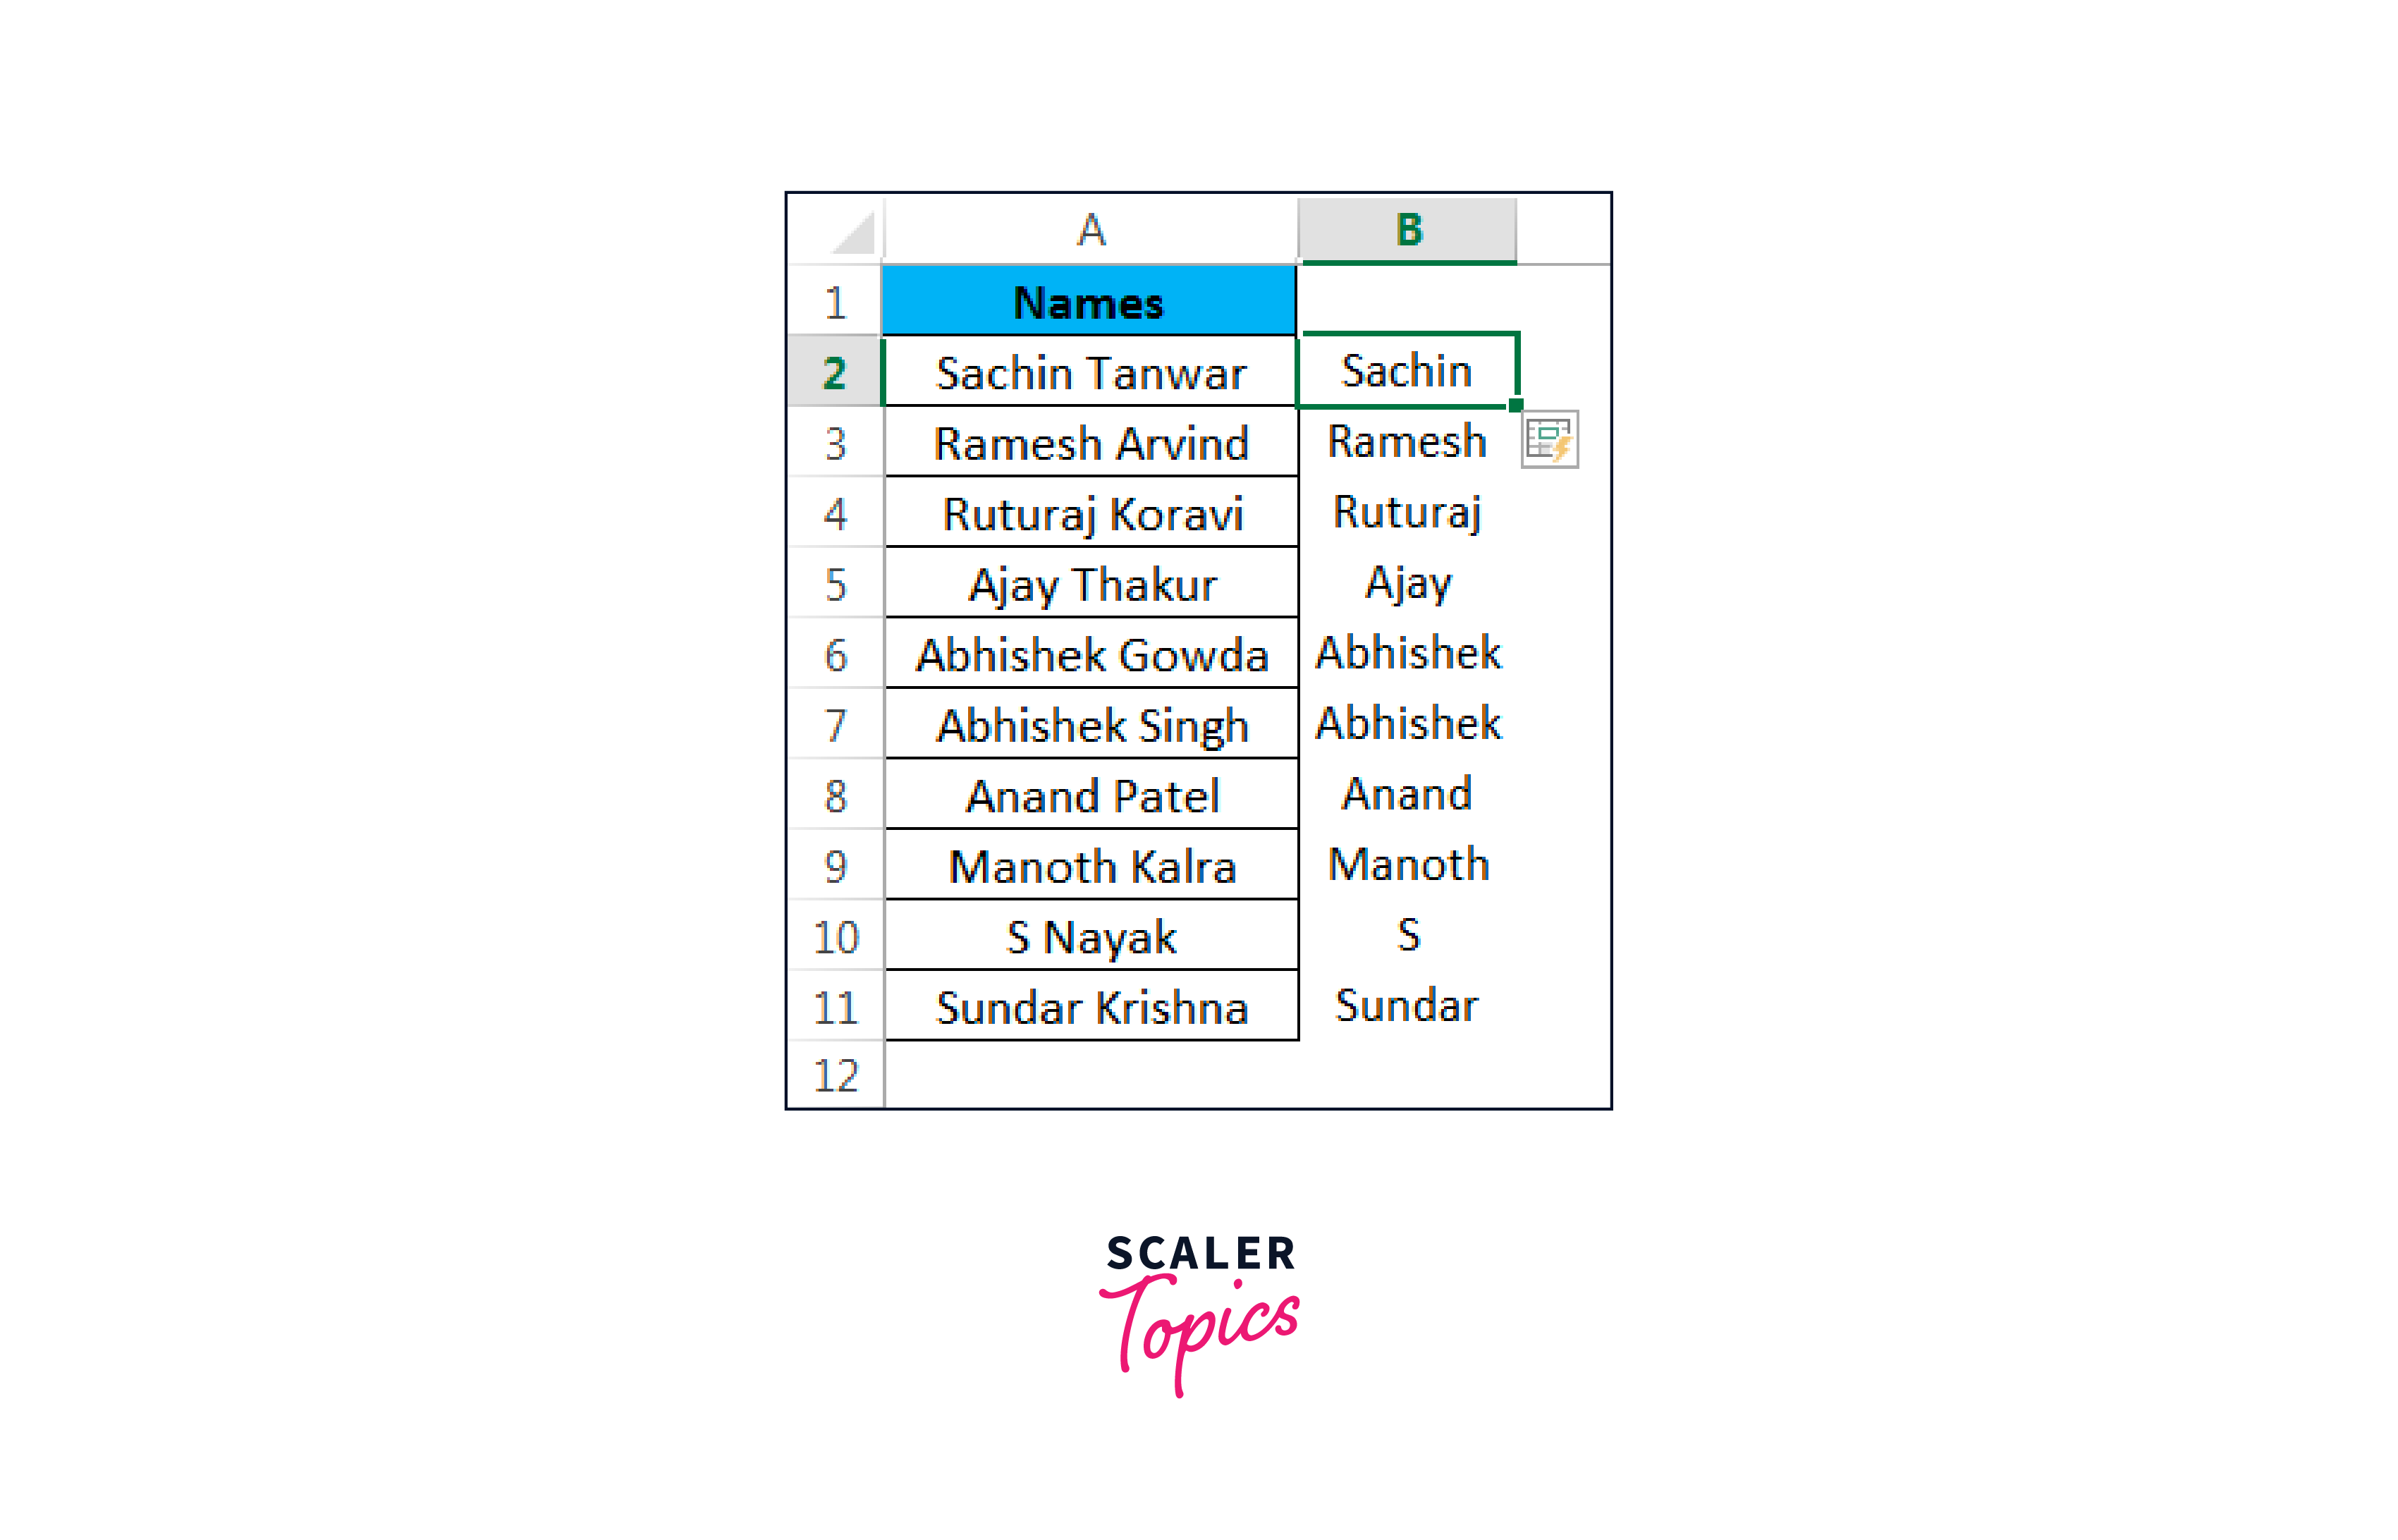
Look at the data from the prior example, for instance.
Enter the first name now in cell B2.
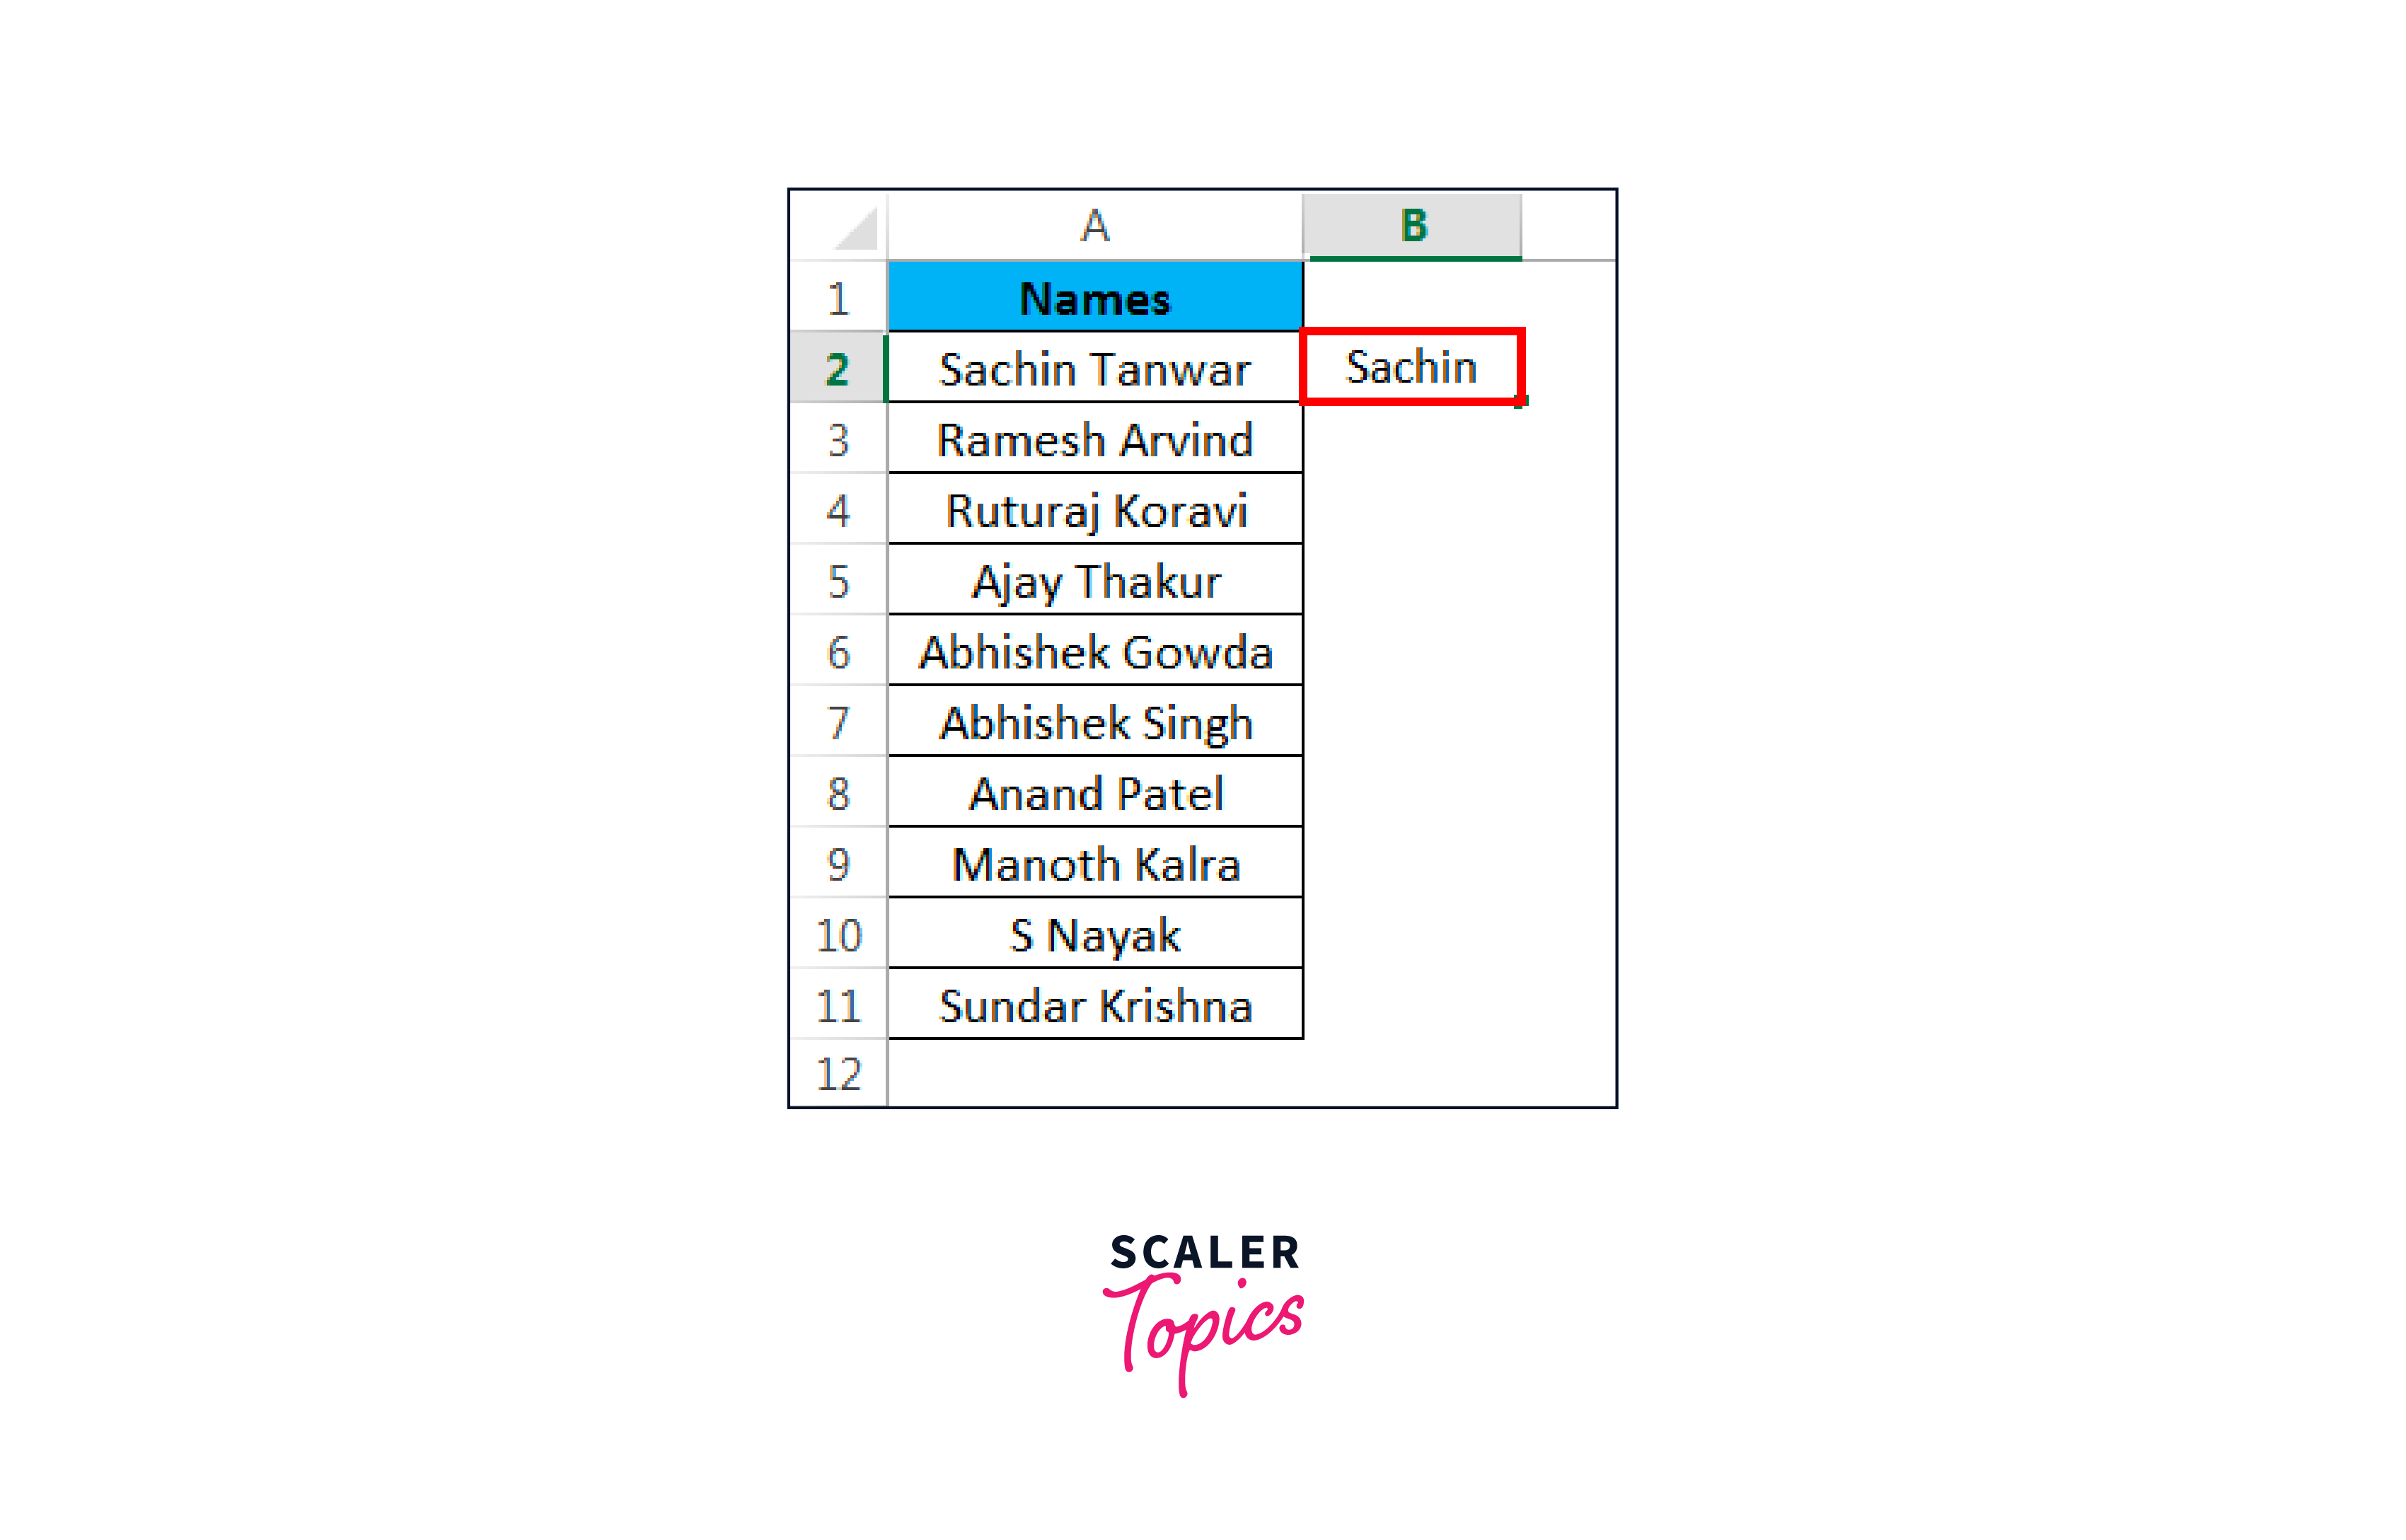
Go to the Data tab now and select Flash Fill by clicking on it or by pressing the shortcut key Ctrl + E.
When this option is selected, all of the First names in the list are separated.
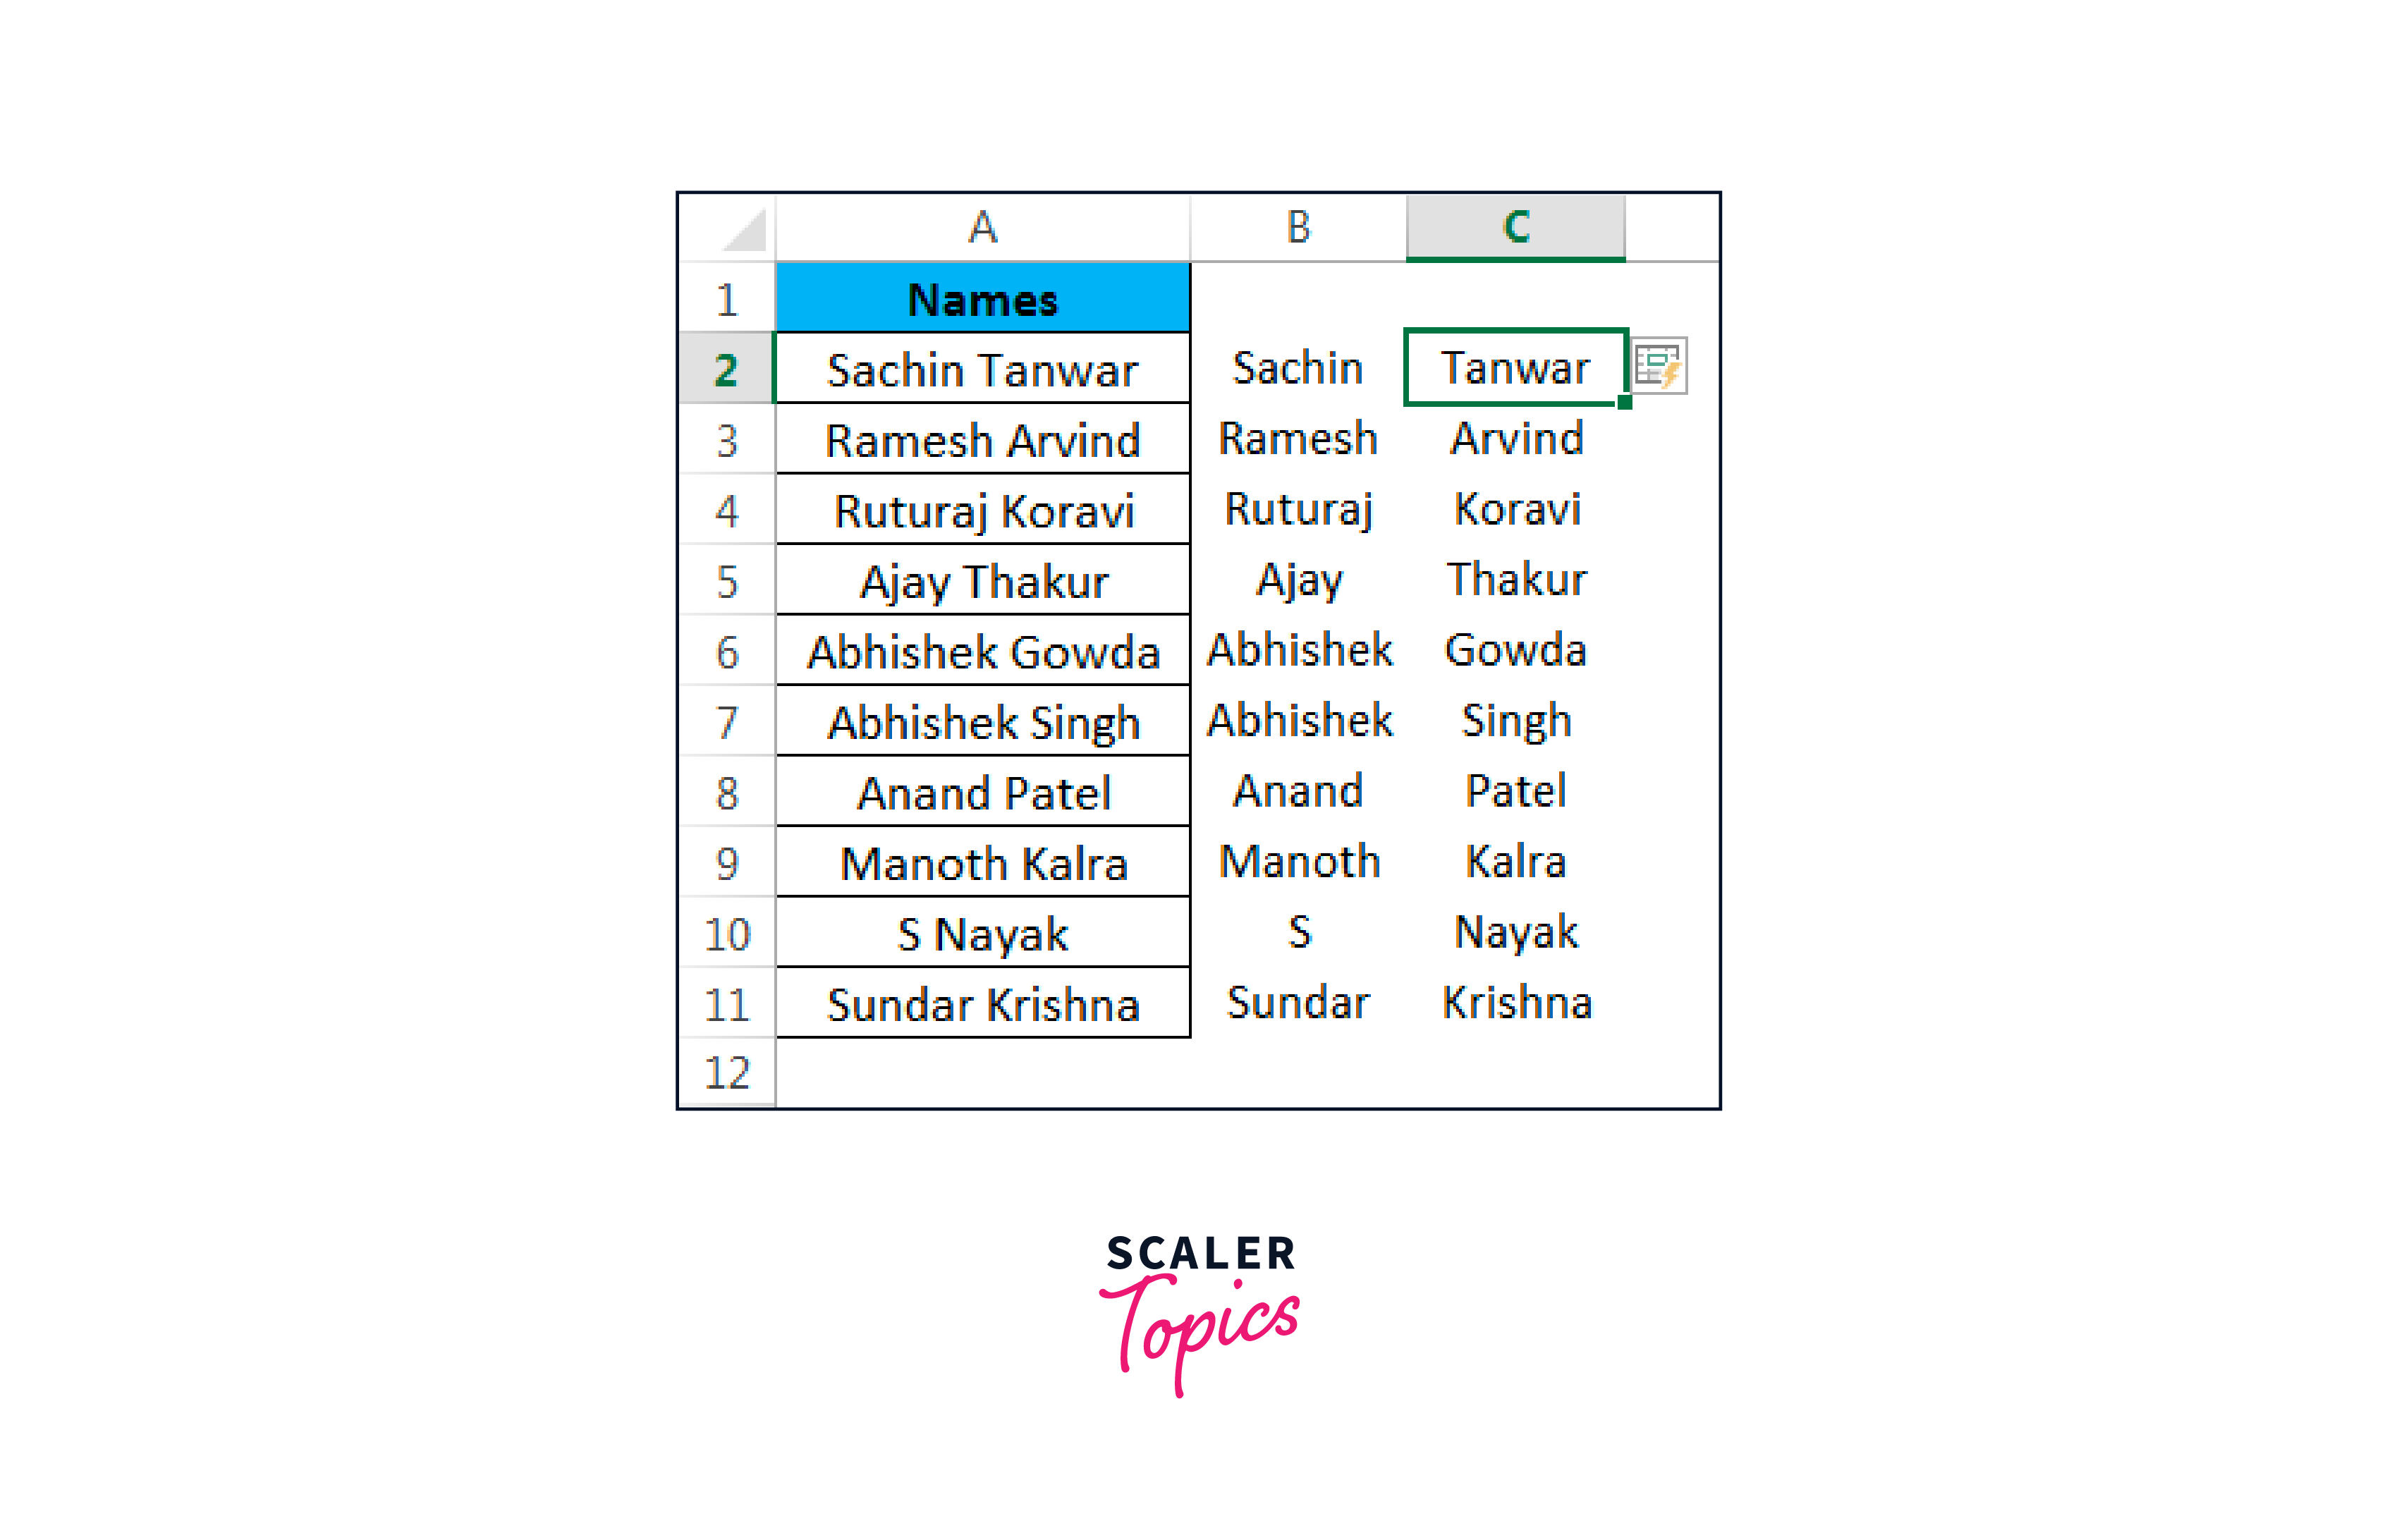
The last name should be equally applied.
Even though flash fill is simple, things can still go wrong. So please be careful when using it.
We now know how to divide a cell into several columns. To divide the cell into multiple columns, locate the common element in the cell value in the Home Worksheet after downloading the attachment.
Formulas to Split Cells
The output of these tools does not update instantly as the source data changes, which is a downside. Create formulas to get around this restriction. Let's separate last and first names from full names.
Step 1: The first name is obtained using the technique below.
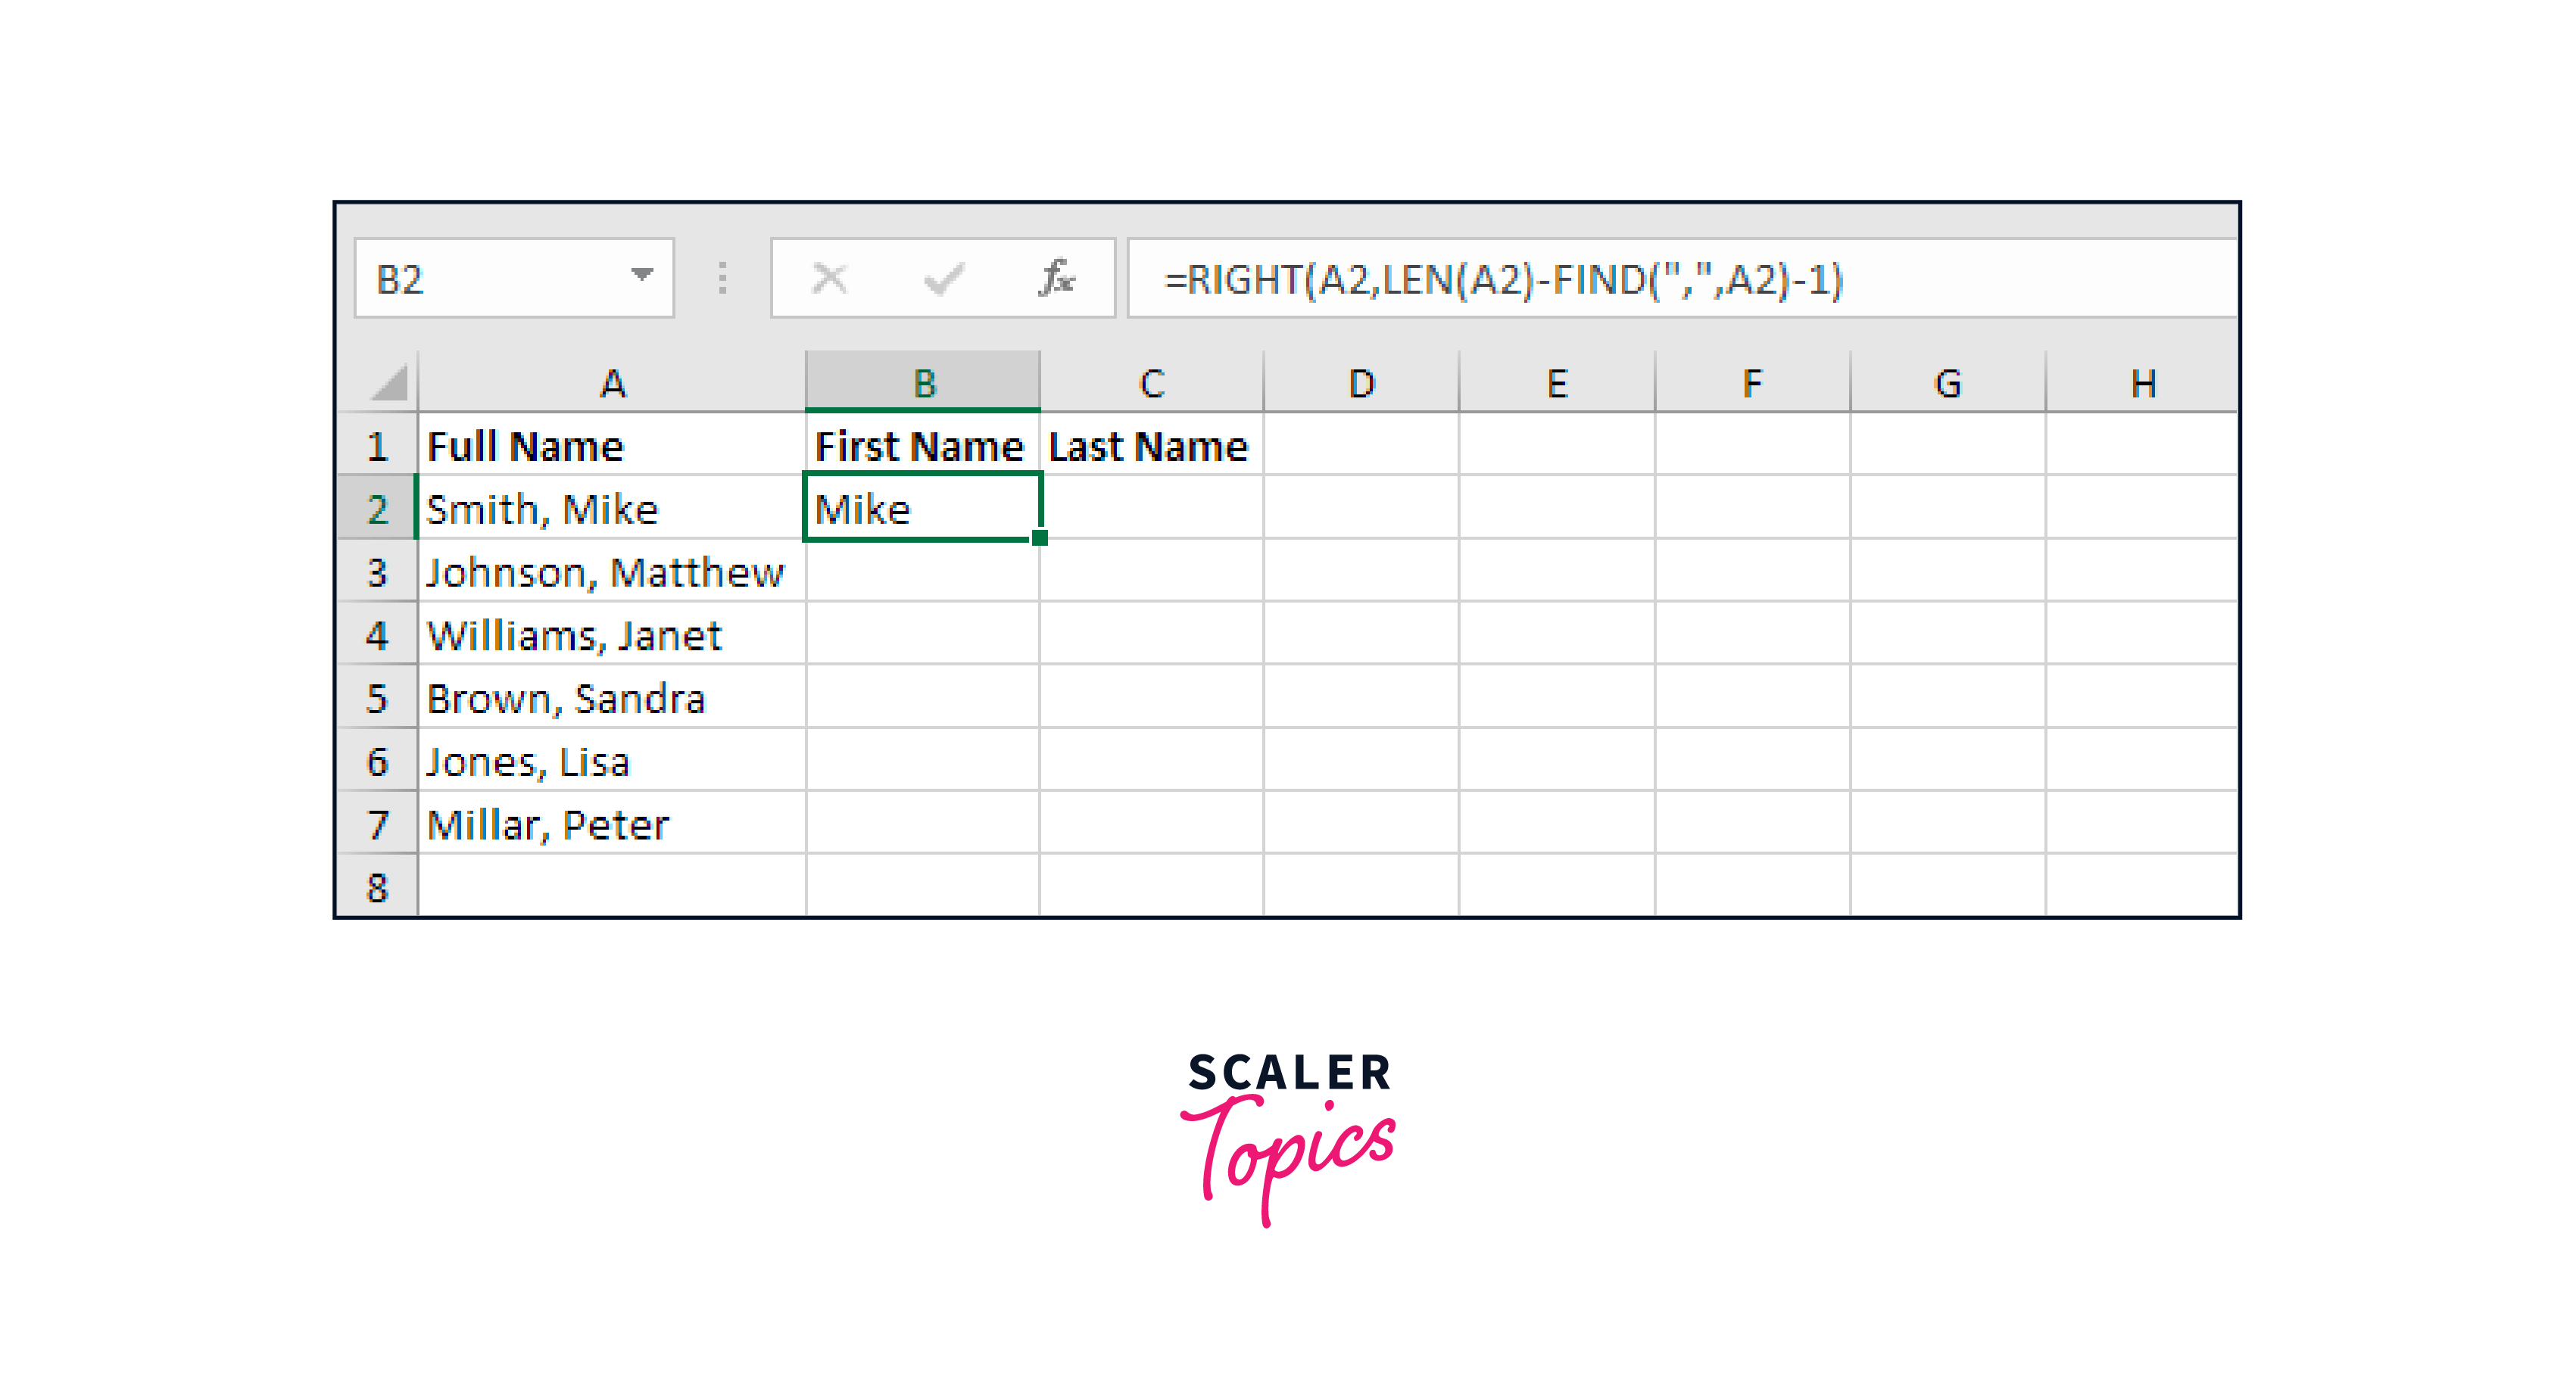
Step 2: In the formula below, the first name is obtained.
Step 3: Drag the B2
Step 4: Use the new TEXTSPLIT function in Excel 365 to separate text using delimiters into rows or columns.
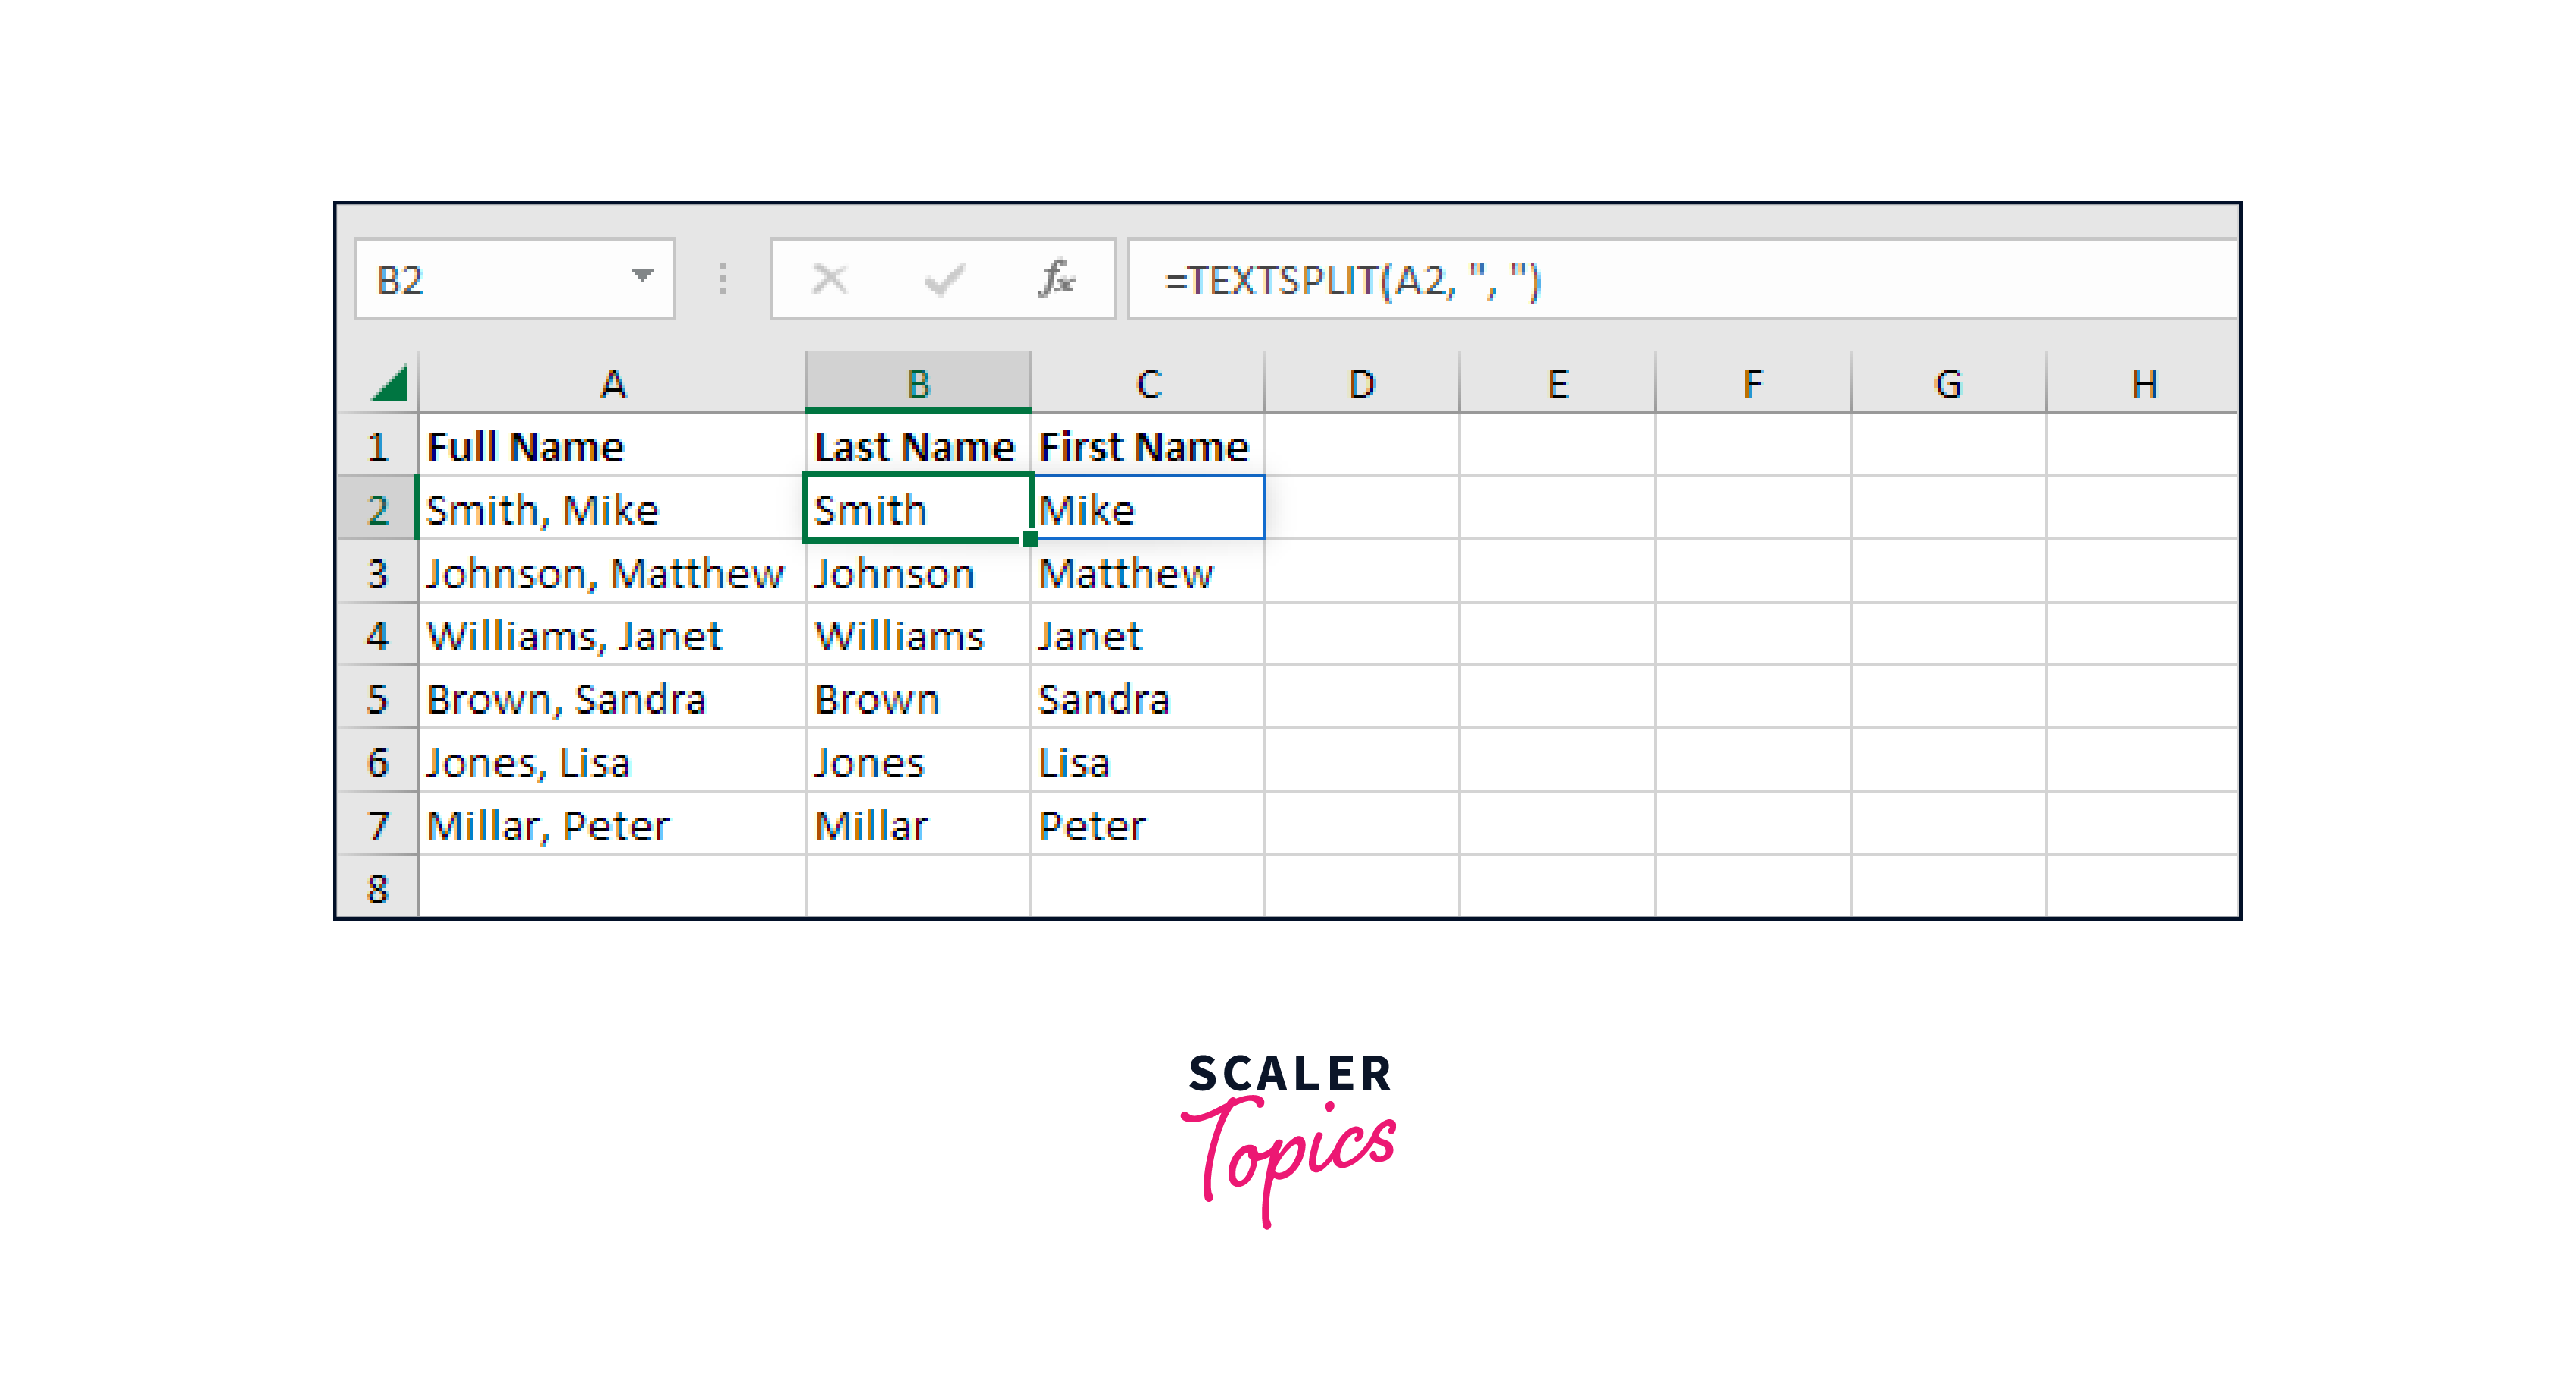
Note that entering the TEXTSPLIT function into cell B2 fills many cells (B2 and C2). Wow! Spilling is the action that causes this.
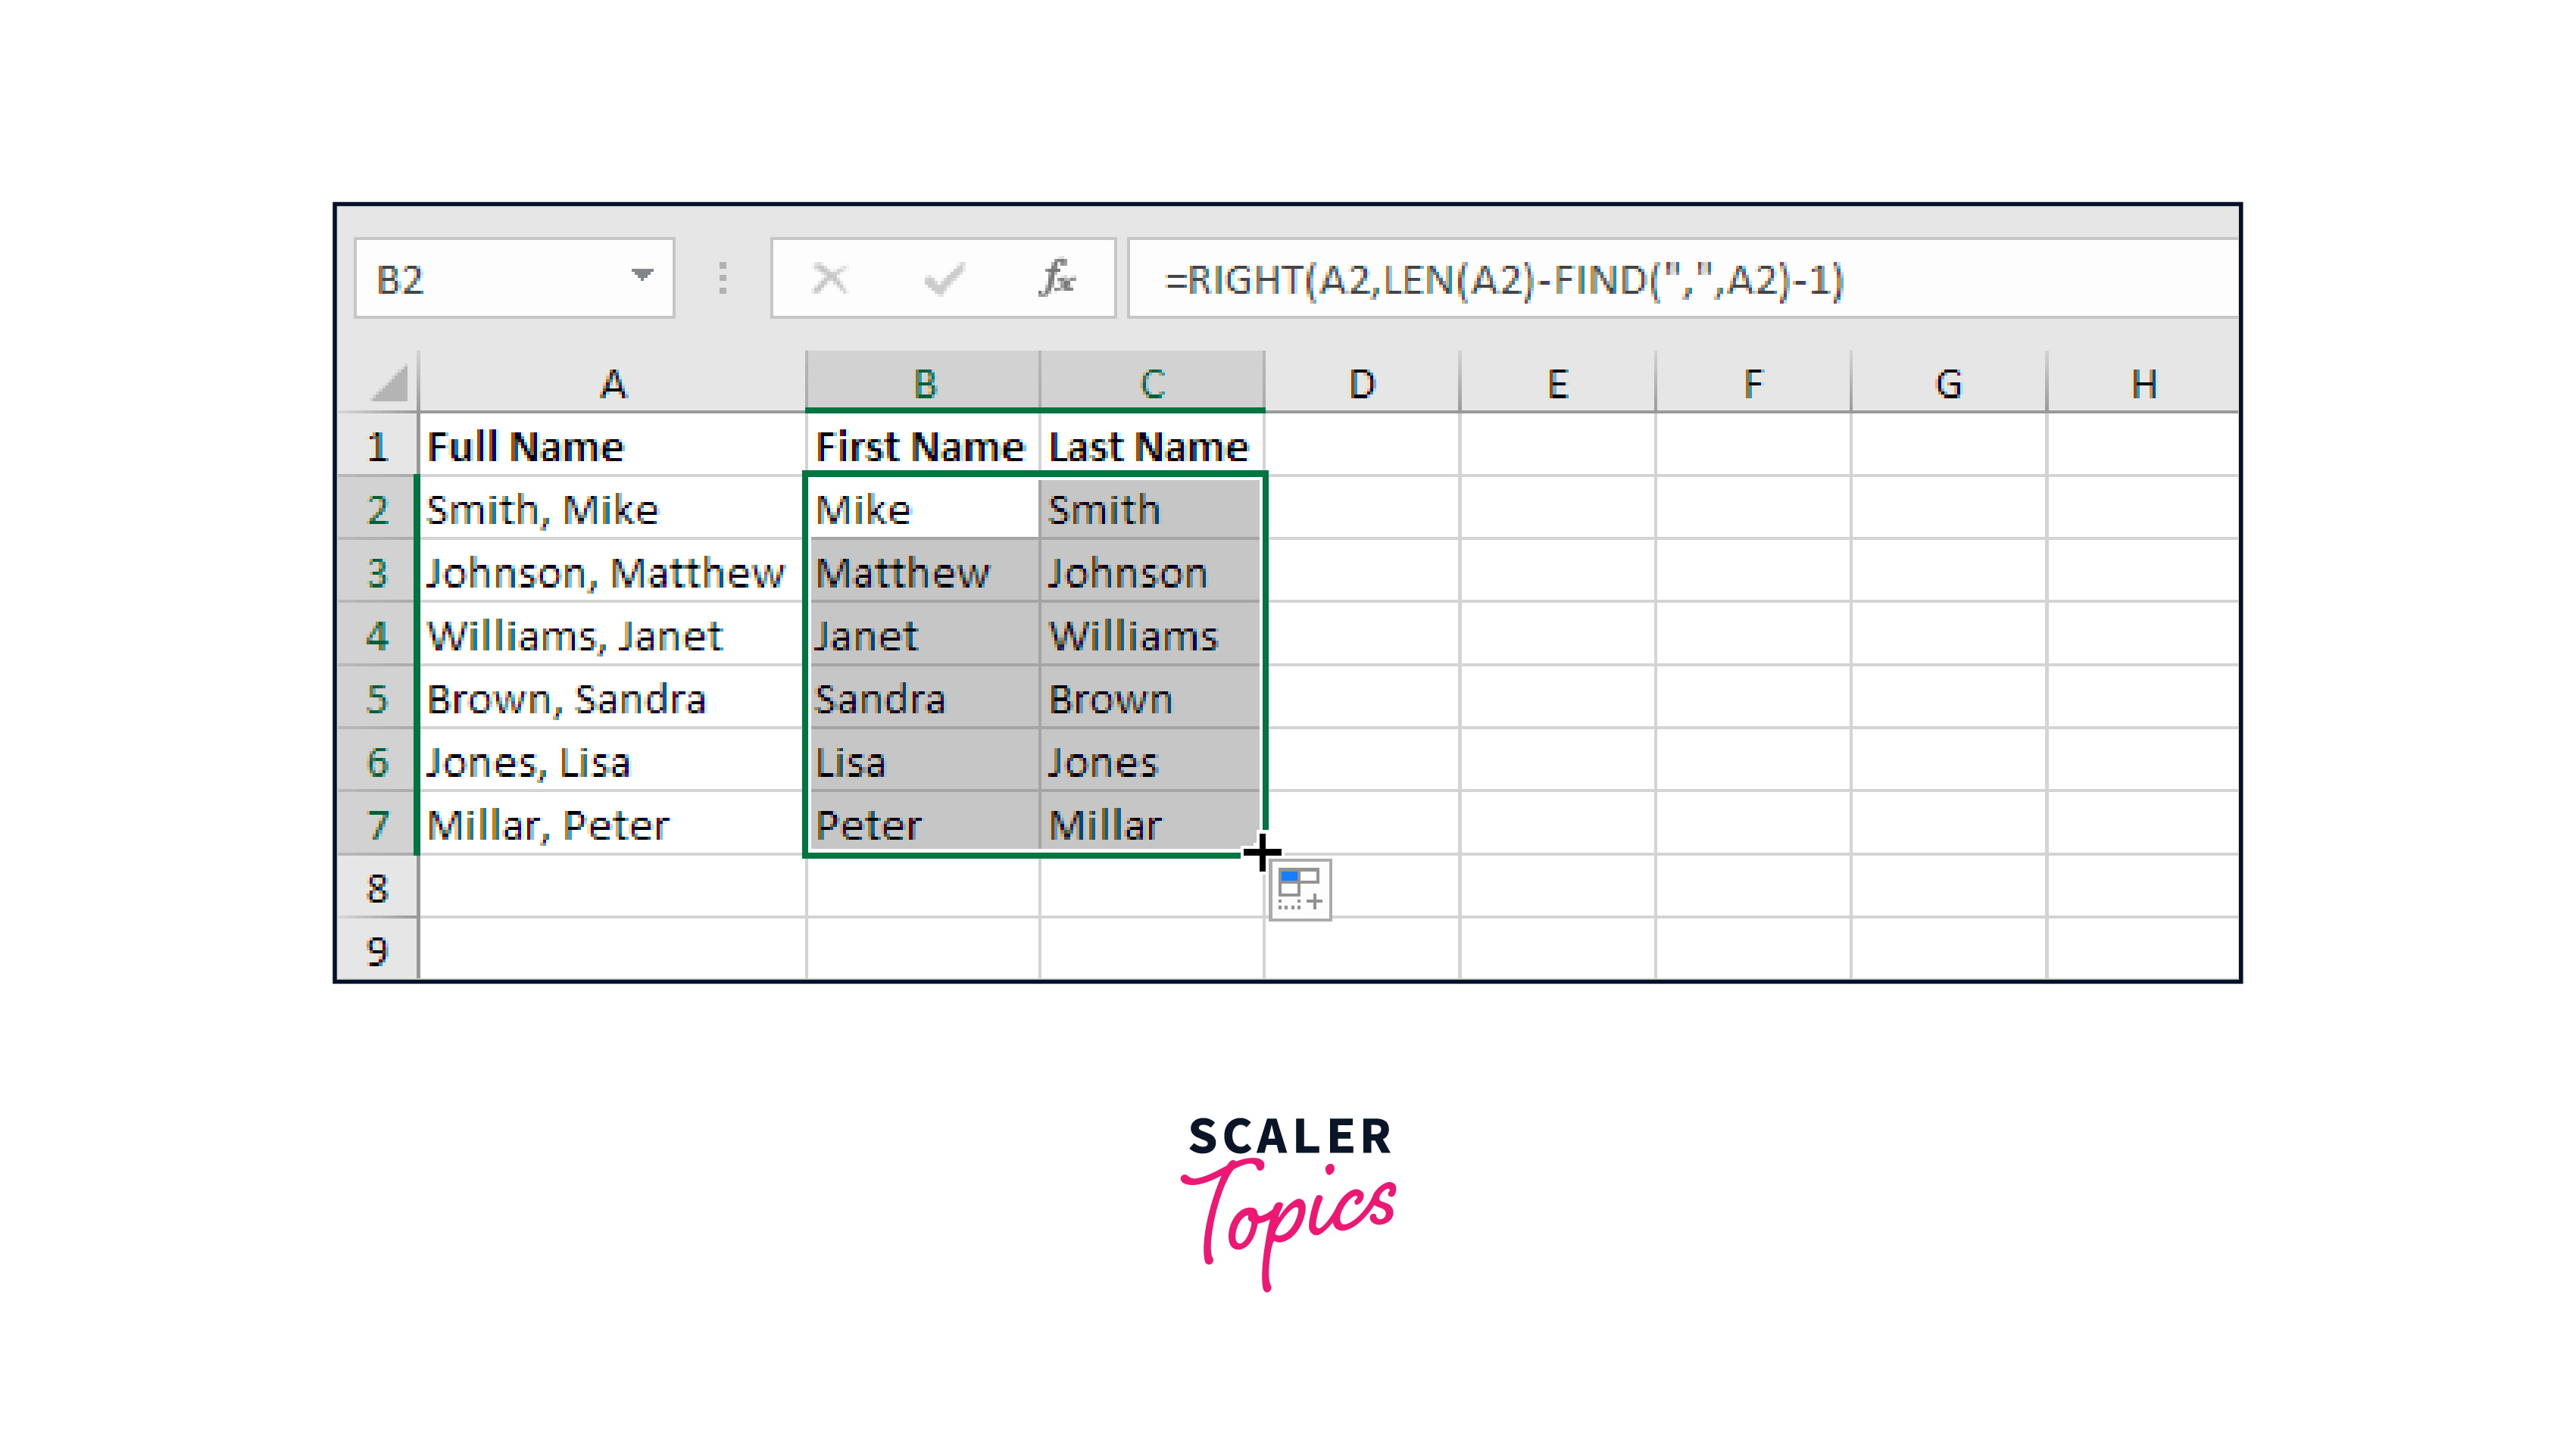
Explanation of the formula for the first name: Reason: Use the FIND function to determine where the comma should be placed (position 6). Use the LEN function to determine a string's length (11 characters). It reduces to =RIGHT(A2,LEN(A2)-FIND(",",A2)-1) (A2,11-6-1). The formula =RIGHT(A2,4) takes the four rightmost characters and produces the desired outcome (Mike).
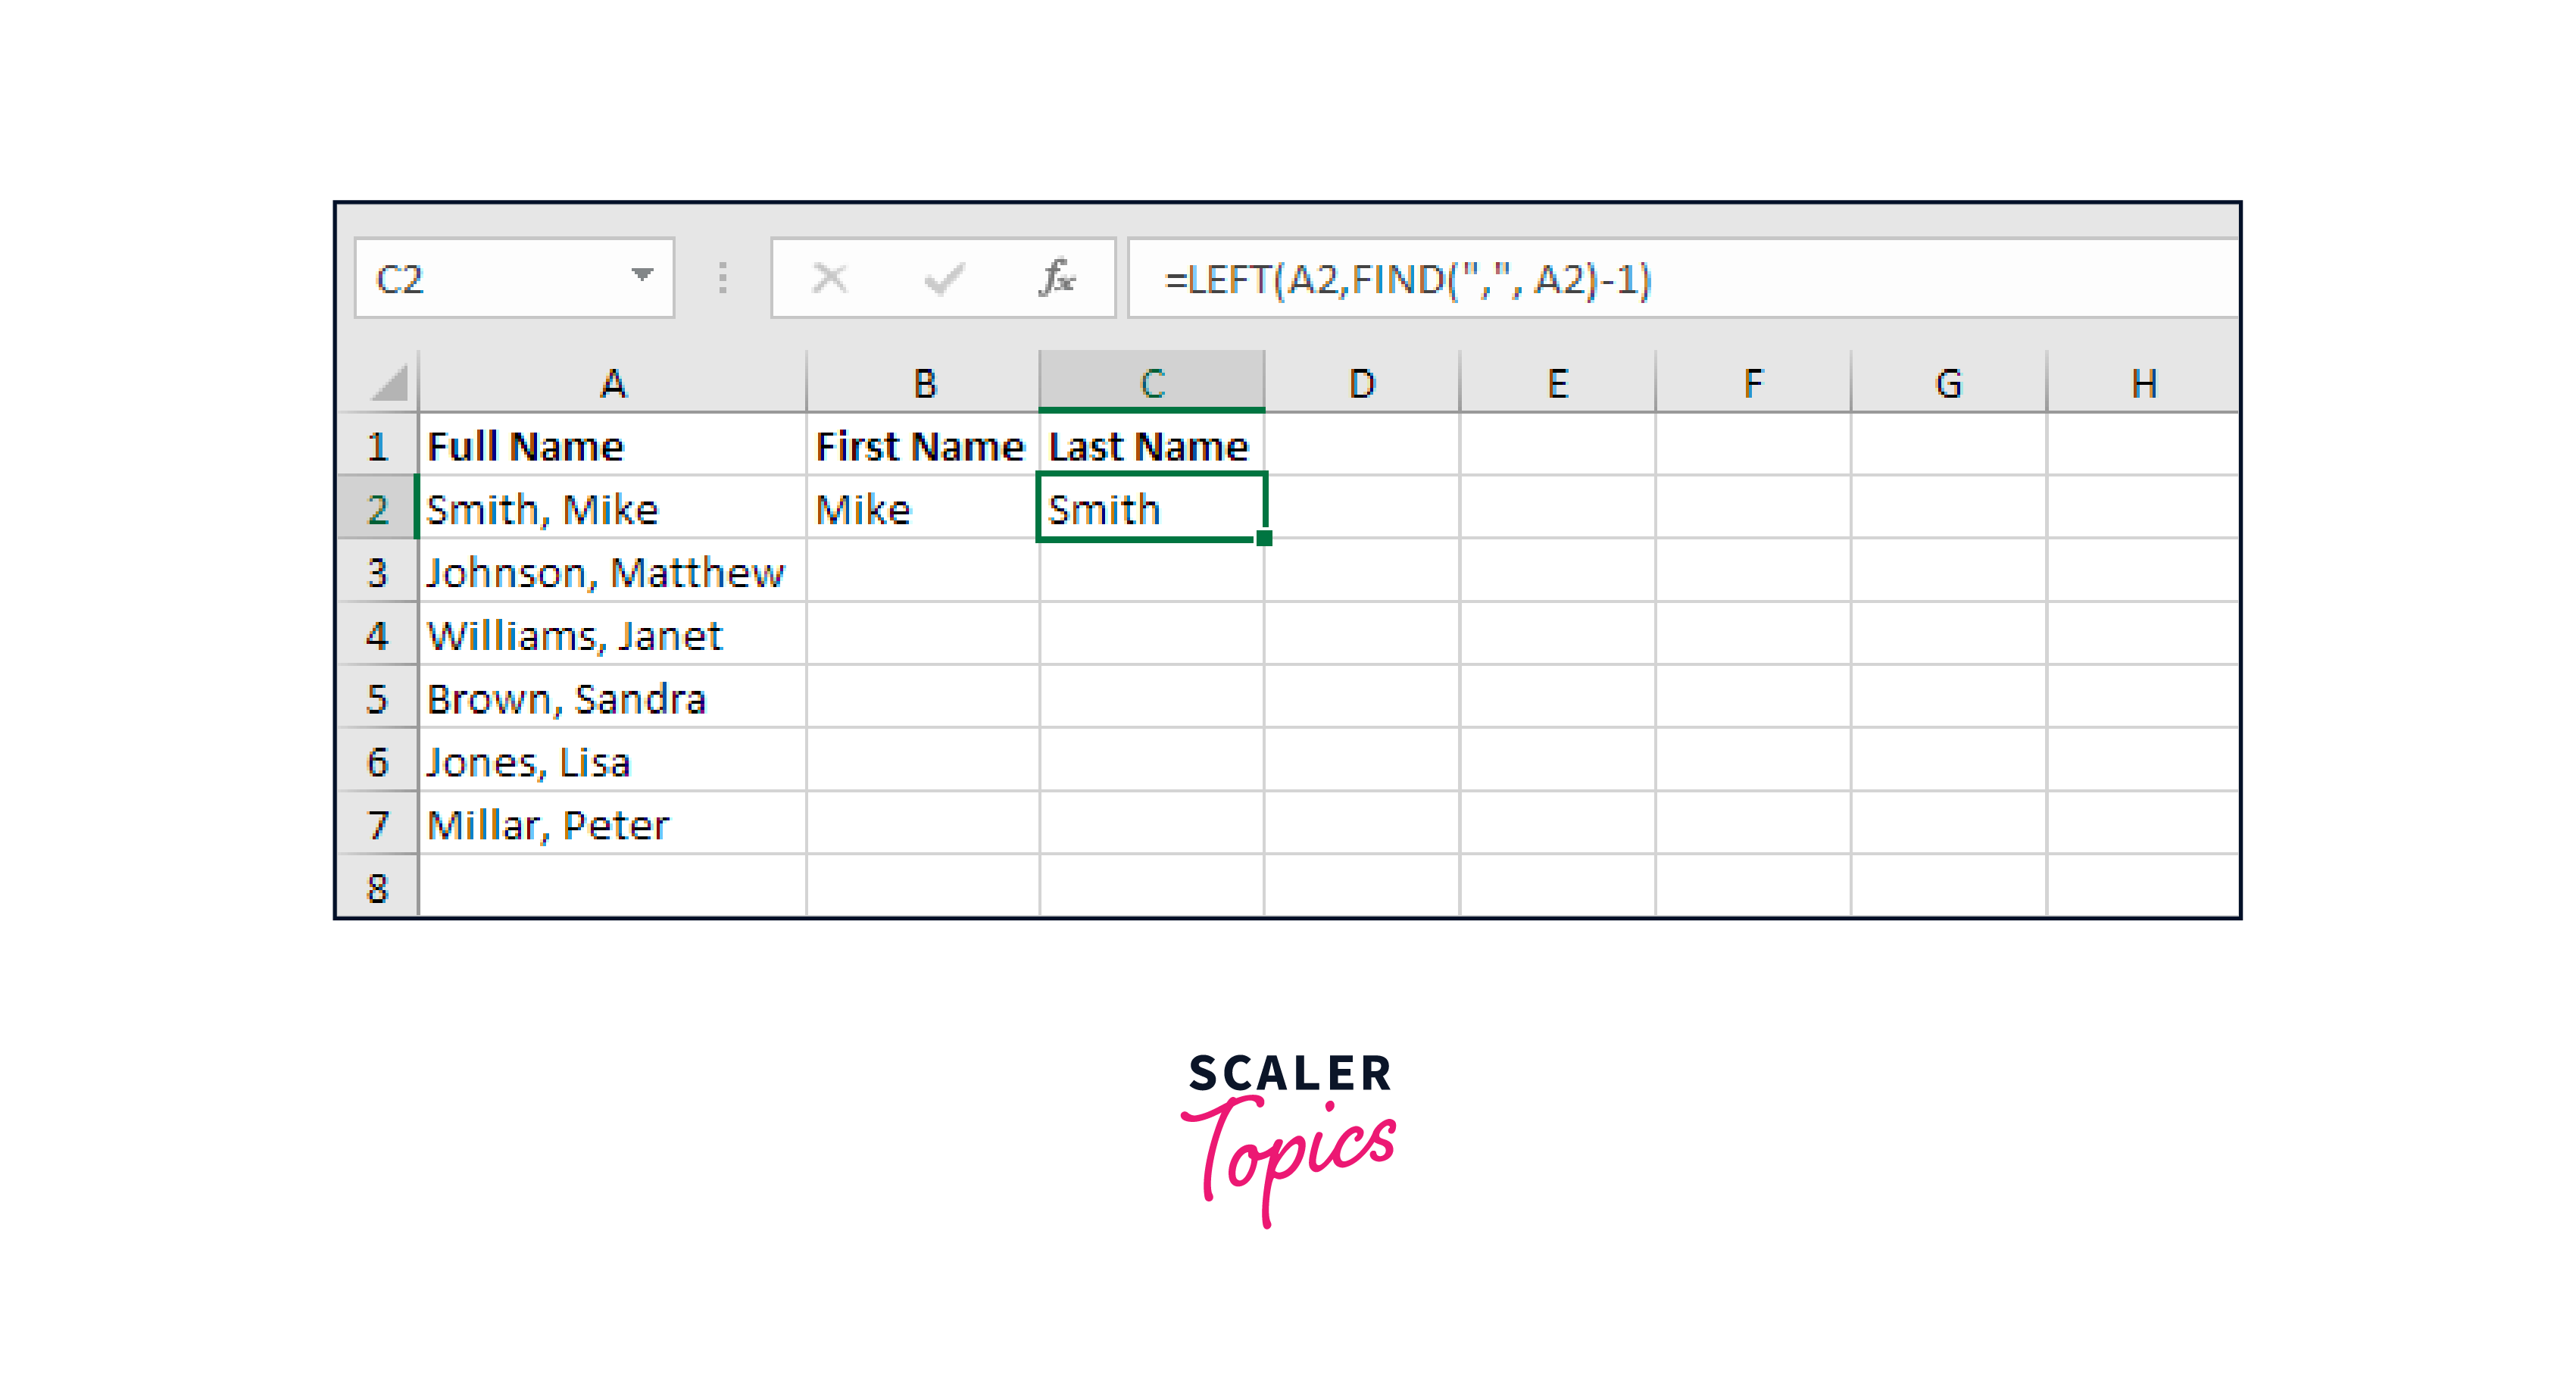
Explanation of the formula for the last name: Use the FIND function to determine where the comma should be placed (position 6). =LEFT becomes =LEFT(A2,FIND(",", A2)-1) (A2,6-1). The formula =LEFT(A2,5) takes the 5 leftmost characters and outputs the desired outcome (Smith).
FAQs
Q. How do I divide cells in Excel so that I may extract data?
A. The three approaches below can be used to split cells in Excel.
- To divide cells with a delimiter, use the Text to Column tool.
- If you require a dynamic split, split cells using Text methods.
- Use the Flash Fill option in the Auto Fill function to separate strings in cells automatically.
Q. Does Excel have a split function?
A. Indeed, Excel has a function called SPLIT that divides strings into smaller substrings using a delimiter.
Conclusion
So, we covered how to split cells in excel and combine cells in our Excel worksheet in this article. It is a very effective method for formatting cells quickly.
Important points for how to split cells in excel:
- The shortcut key for FLASH FILL is Ctrl + E.
- To divide the cells, look for the common element in the data pattern.
- This option also allows us to translate the test series date into actual dates.
- Some typical elements in the data series are semicolons, spaces, tabs, and commas.