How to Uninstall Packages from Linux?
Uninstalling packages from Linux is a straightforward process that can be accomplished using package managers specific to the Linux distribution you're using. In this overview, we'll cover the general steps involved in how to uninstall packages from Linux.
-
Determine the package manager:
The first step is to identify the package manager that your Linux distribution utilizes. The most common package managers are apt for Debian-based distributions (such as Ubuntu), yum for Red Hat-based distributions (such as CentOS), and dnf for newer versions of Fedora.
-
Open the terminal:
Launch the terminal application on your Linux system. This is where you'll enter the necessary commands to uninstall packages.
-
Check package status:
Before uninstalling a package, it's a good idea to verify its status. You can use the package manager's command to check if the package is installed or not.
-
Uninstall the package:
Once you've confirmed the package's status, you can proceed with the uninstallation. In the terminal, use the appropriate package manager command.
-
Confirm the uninstallation:
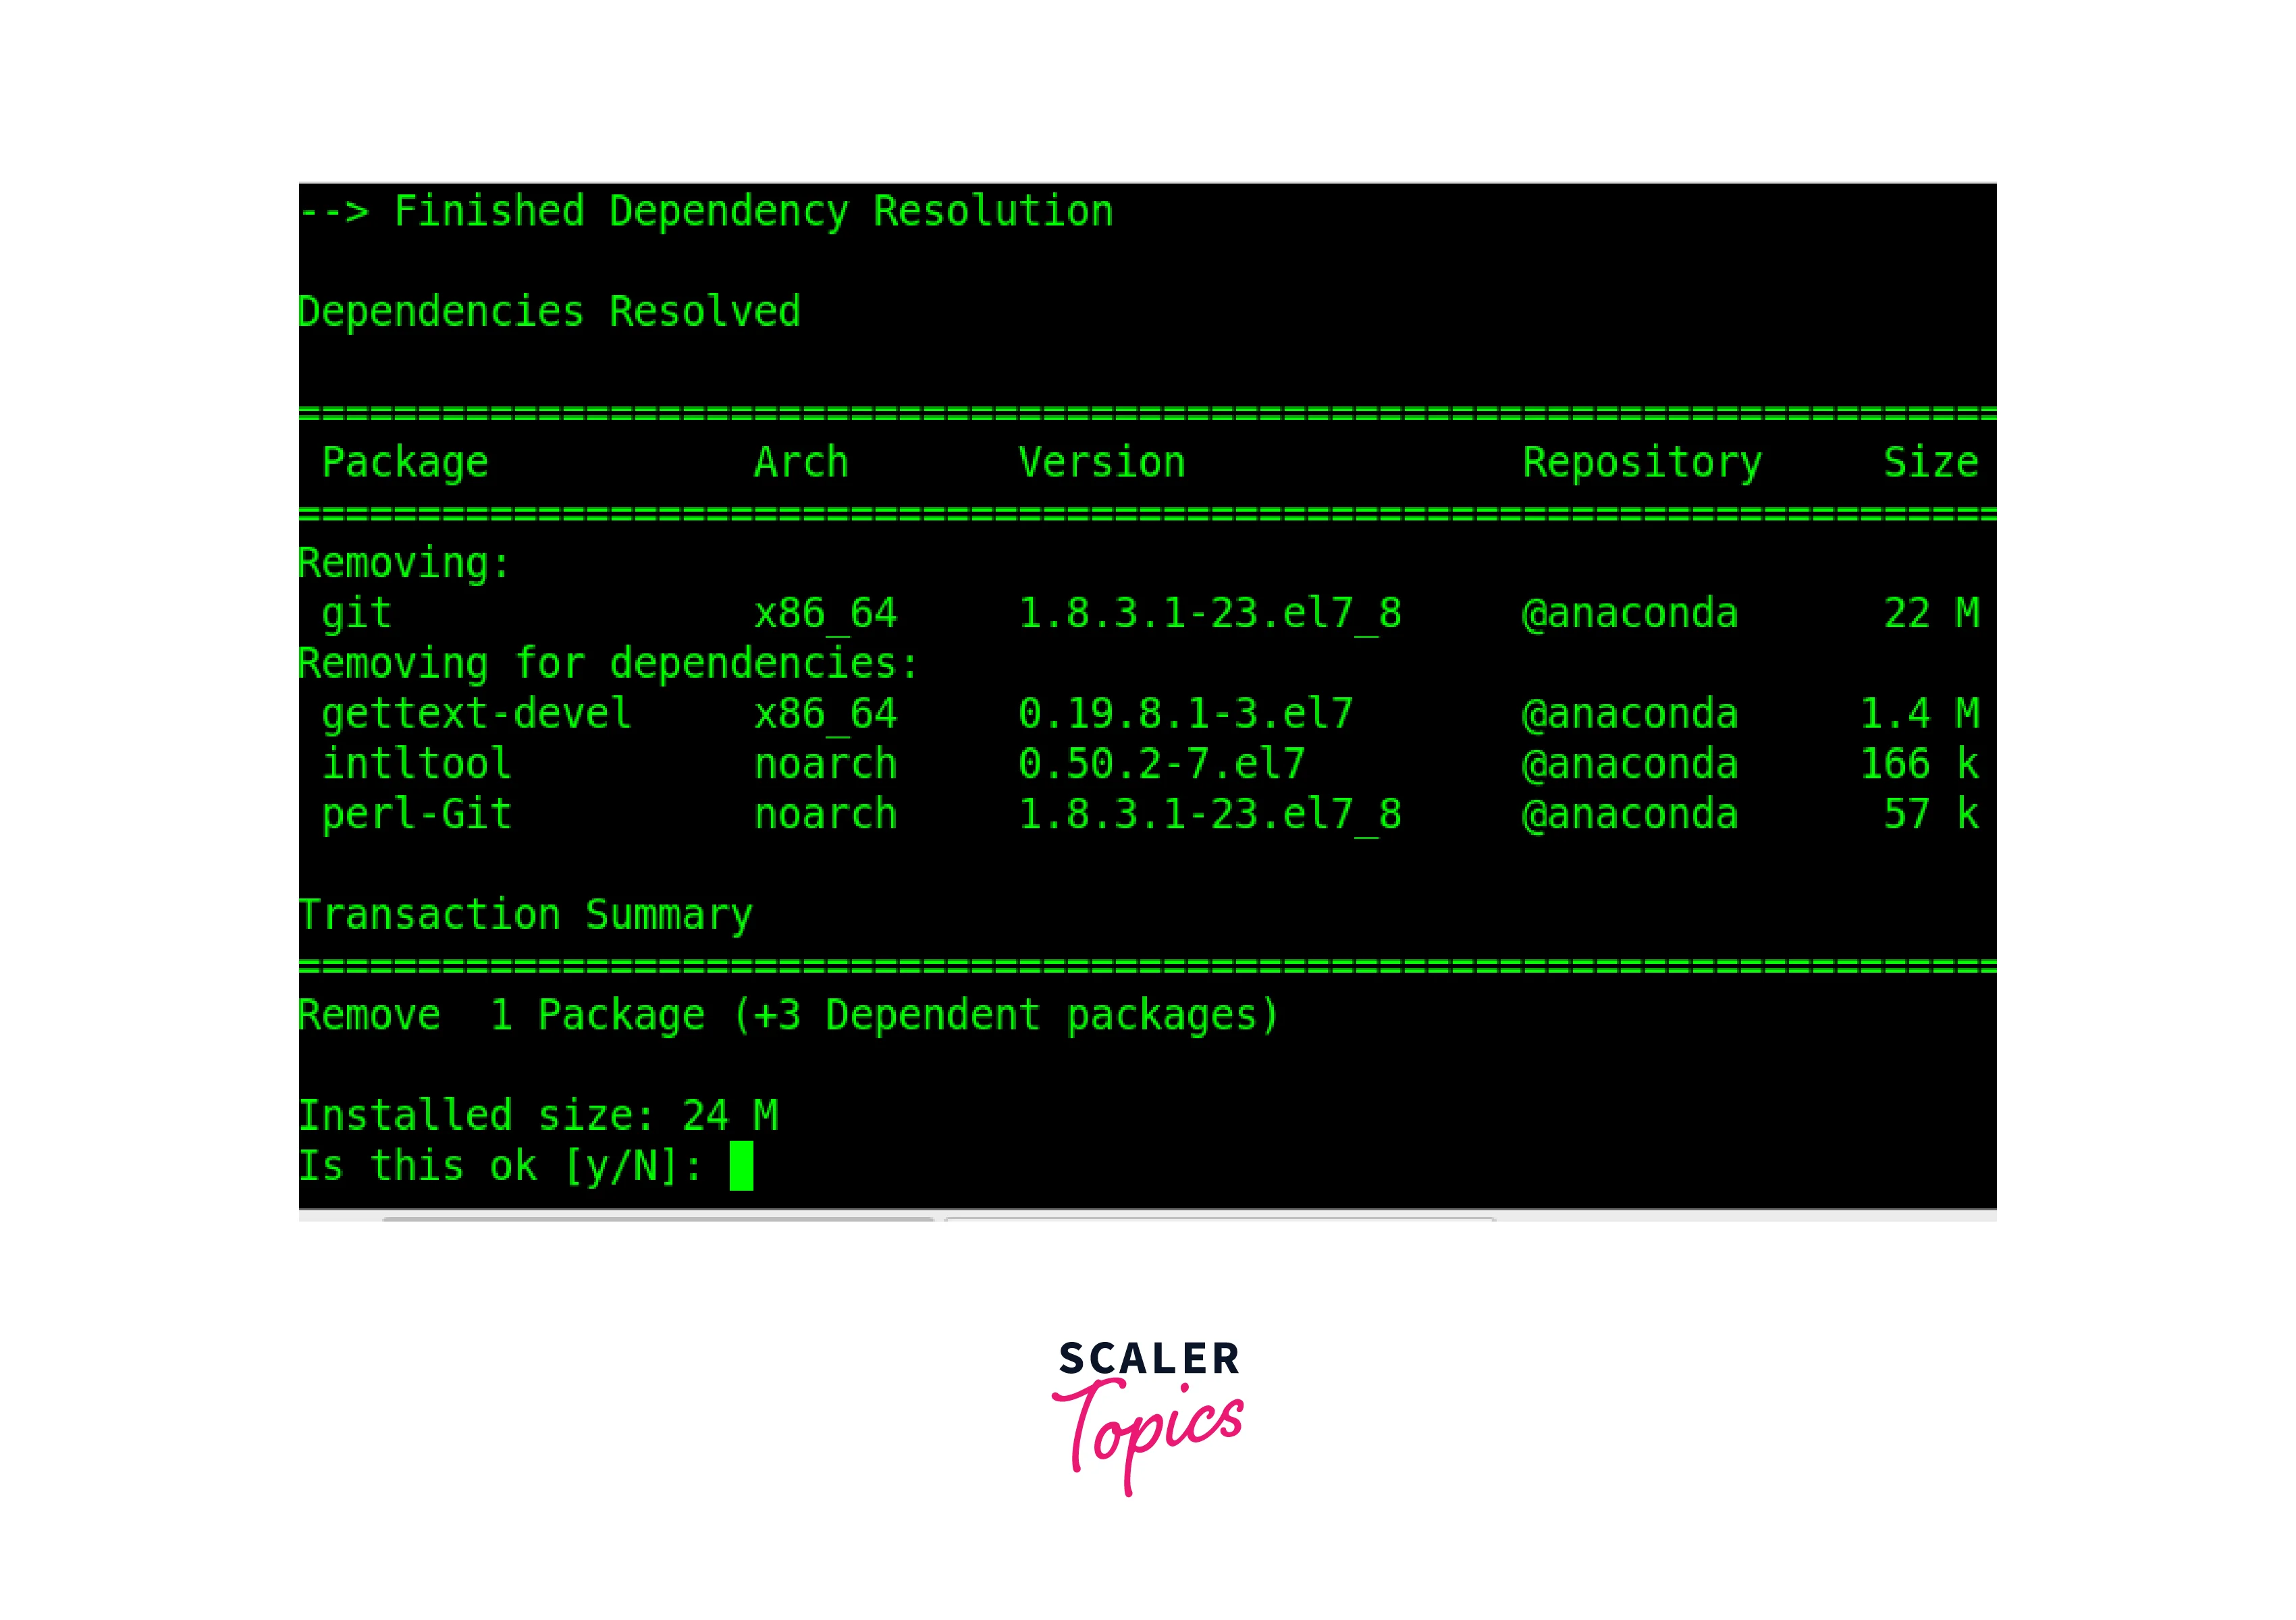
After entering the command, the package manager will display the list of packages that will be removed, as well as the disk space that will be freed up. Review this information carefully to ensure that you're uninstalling the correct package. Type "Y" and press Enter to confirm the uninstallation.
-
Enter your password:
Depending on your system's configuration, you may be prompted to enter your user password or administrator password (root password) to authenticate the uninstallation process. Enter the password and press Enter.
-
Wait for the process to complete:
The package manager will now remove the package and any associated dependencies from your system. The time required for this process may vary depending on the size of the package and your system's performance. Be patient and wait for the process to complete.
-
Verify the uninstallation:
Once the uninstallation process is finished, you can verify that the package has been successfully removed. You can use the package manager's command to check the package's status again or try running any related commands or applications to ensure they no longer function.
Uninstall Packages Using APT
Uninstalling packages using APT (Advanced Package Tool) is a common method in Debian-based Linux distributions like Ubuntu. APT provides a straightforward and efficient way to manage software packages, including uninstalling them. Here's a step-by-step guide on how to uninstall packages in Linux using APT:
-
Open the terminal:
Launch the terminal application on your Linux system. The terminal allows you to enter commands to interact with the system.
-
Check package status:
Before uninstalling a package, it's a good practice to verify its status. You can use the dpkg command to check if the package is installed or not. For example, to check the status of a package called "example-package," use the following command:
dpkg -s example-package
This command will display information about the package, including its status.
-
Uninstall the package:
Once you've confirmed the package's status, you can proceed with the uninstallation. In the terminal, use the following command:
sudo apt remove package_name

Replace "package_name" with the actual name of the package you want to uninstall. The sudo command is used to run the uninstallation process with administrative privileges.
-
Confirm the uninstallation:
After entering the command, APT will display the list of packages that will be removed, as well as the disk space that will be freed up. Review this information carefully to ensure that you're uninstalling the correct package. Type "Y" and press Enter to confirm the uninstallation.
-
Enter your password:
Depending on your system's configuration, you may be prompted to enter your user password or administrator password (root password) to authenticate the uninstallation process. Enter the password and press Enter.
-
Wait for the process to complete:
APT will now remove the package and any associated dependencies from your system. The time required for this process may vary depending on the size of the package and your system's performance. Be patient and wait for the process to complete.
-
Verify the uninstallation:
Once the uninstallation process is finished, you can verify that the package has been successfully removed. You can use the "dpkg" command again to check the package's status:
dpkg -s package_name
If the package is no longer installed, the command will display information stating that the package is not available.
-
Optional: Remove configuration files:
By default, APT does not remove configuration files associated with the uninstalled package. If you want to remove these files as well, you can use the "purge" option instead of "remove" in the APT command. For example:
sudo apt purge package_name

This step is optional and should be exercised with caution, as removing configuration files may impact related settings or data.
-
Repeat if necessary:
If you need to uninstall multiple packages, you can repeat the process for each package, following the steps outlined above.
Uninstall Packages Using SNAP
Uninstalling packages using Snap is a convenient method in Linux distributions that support Snap package management, such as Ubuntu, Fedora, and Debian. Snap provides a self-contained, sandboxed environment for applications, making installation and uninstallation easy. Here's a step-by-step guide on how to uninstall Linux packages using Snap:
-
Open the terminal:
Launch the terminal application on your Linux system. The terminal allows you to enter commands to interact with the system.
-
List installed Snap packages:
To view the installed Snap packages on your system, use the following command:
snap list
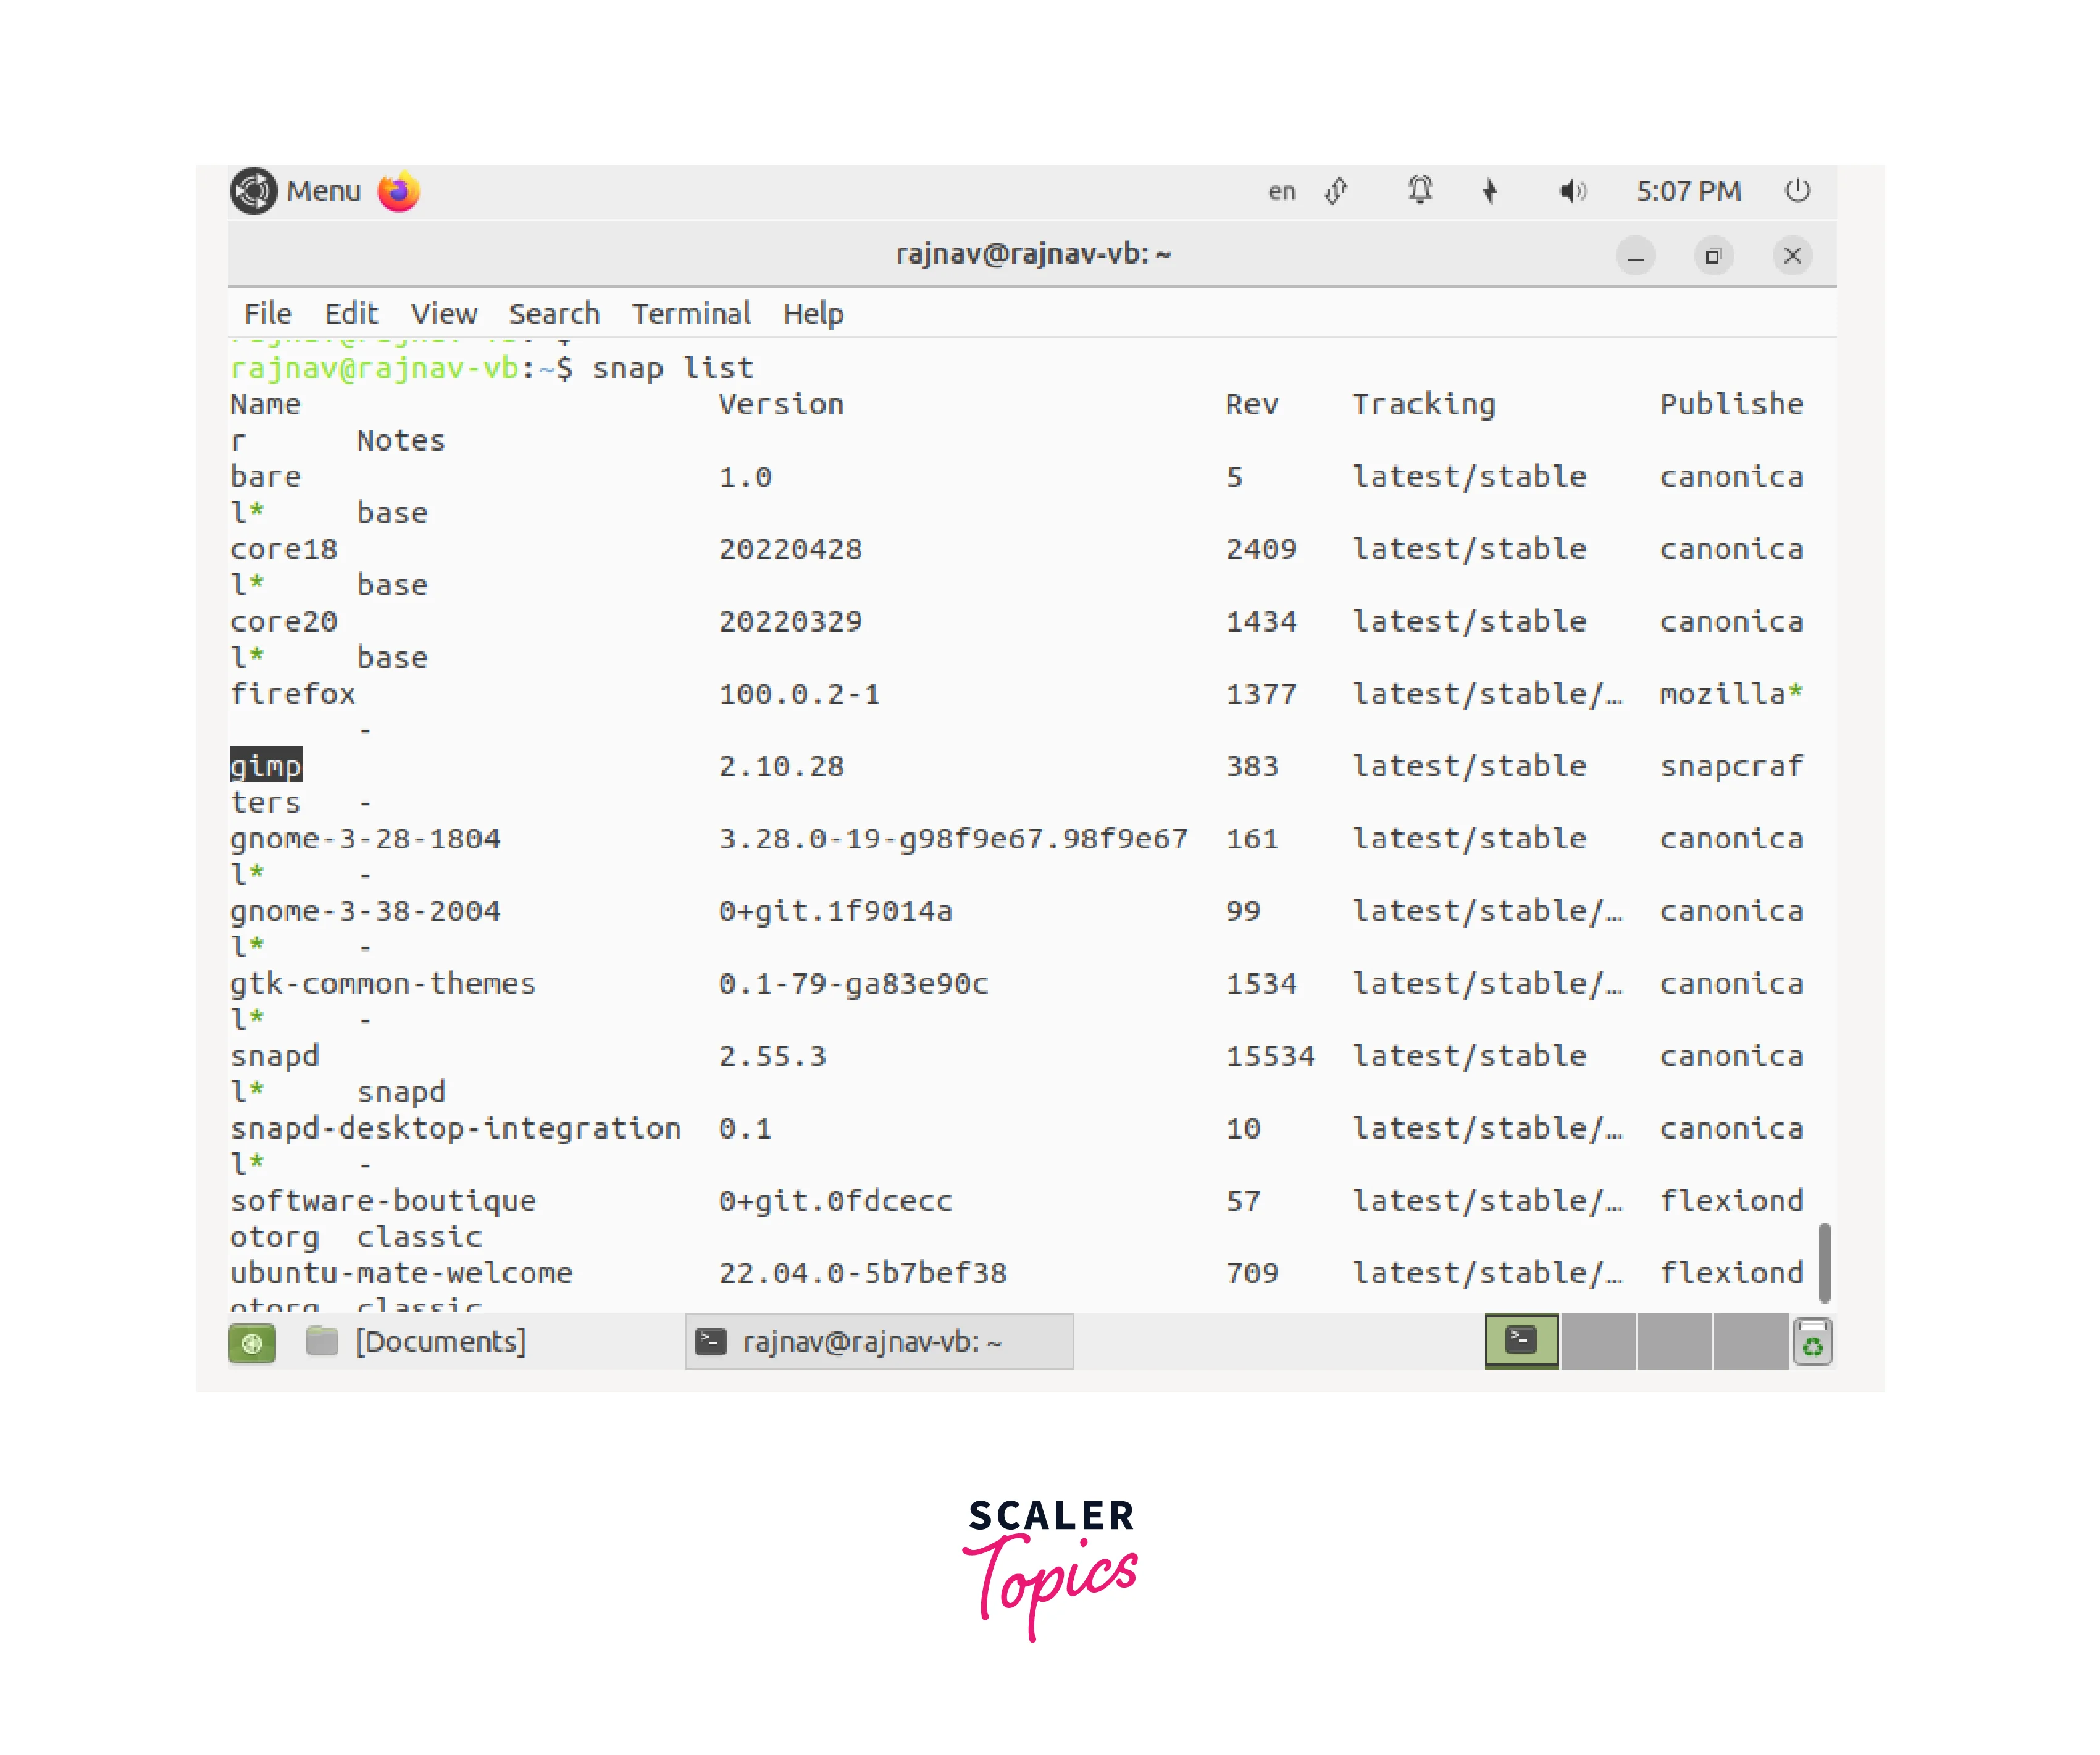
This command will display a list of installed Snap packages along with their version numbers.
-
Uninstall the package:
Once you have identified the package you want to uninstall from the list, use the following command to uninstall it:
sudo snap remove package_name
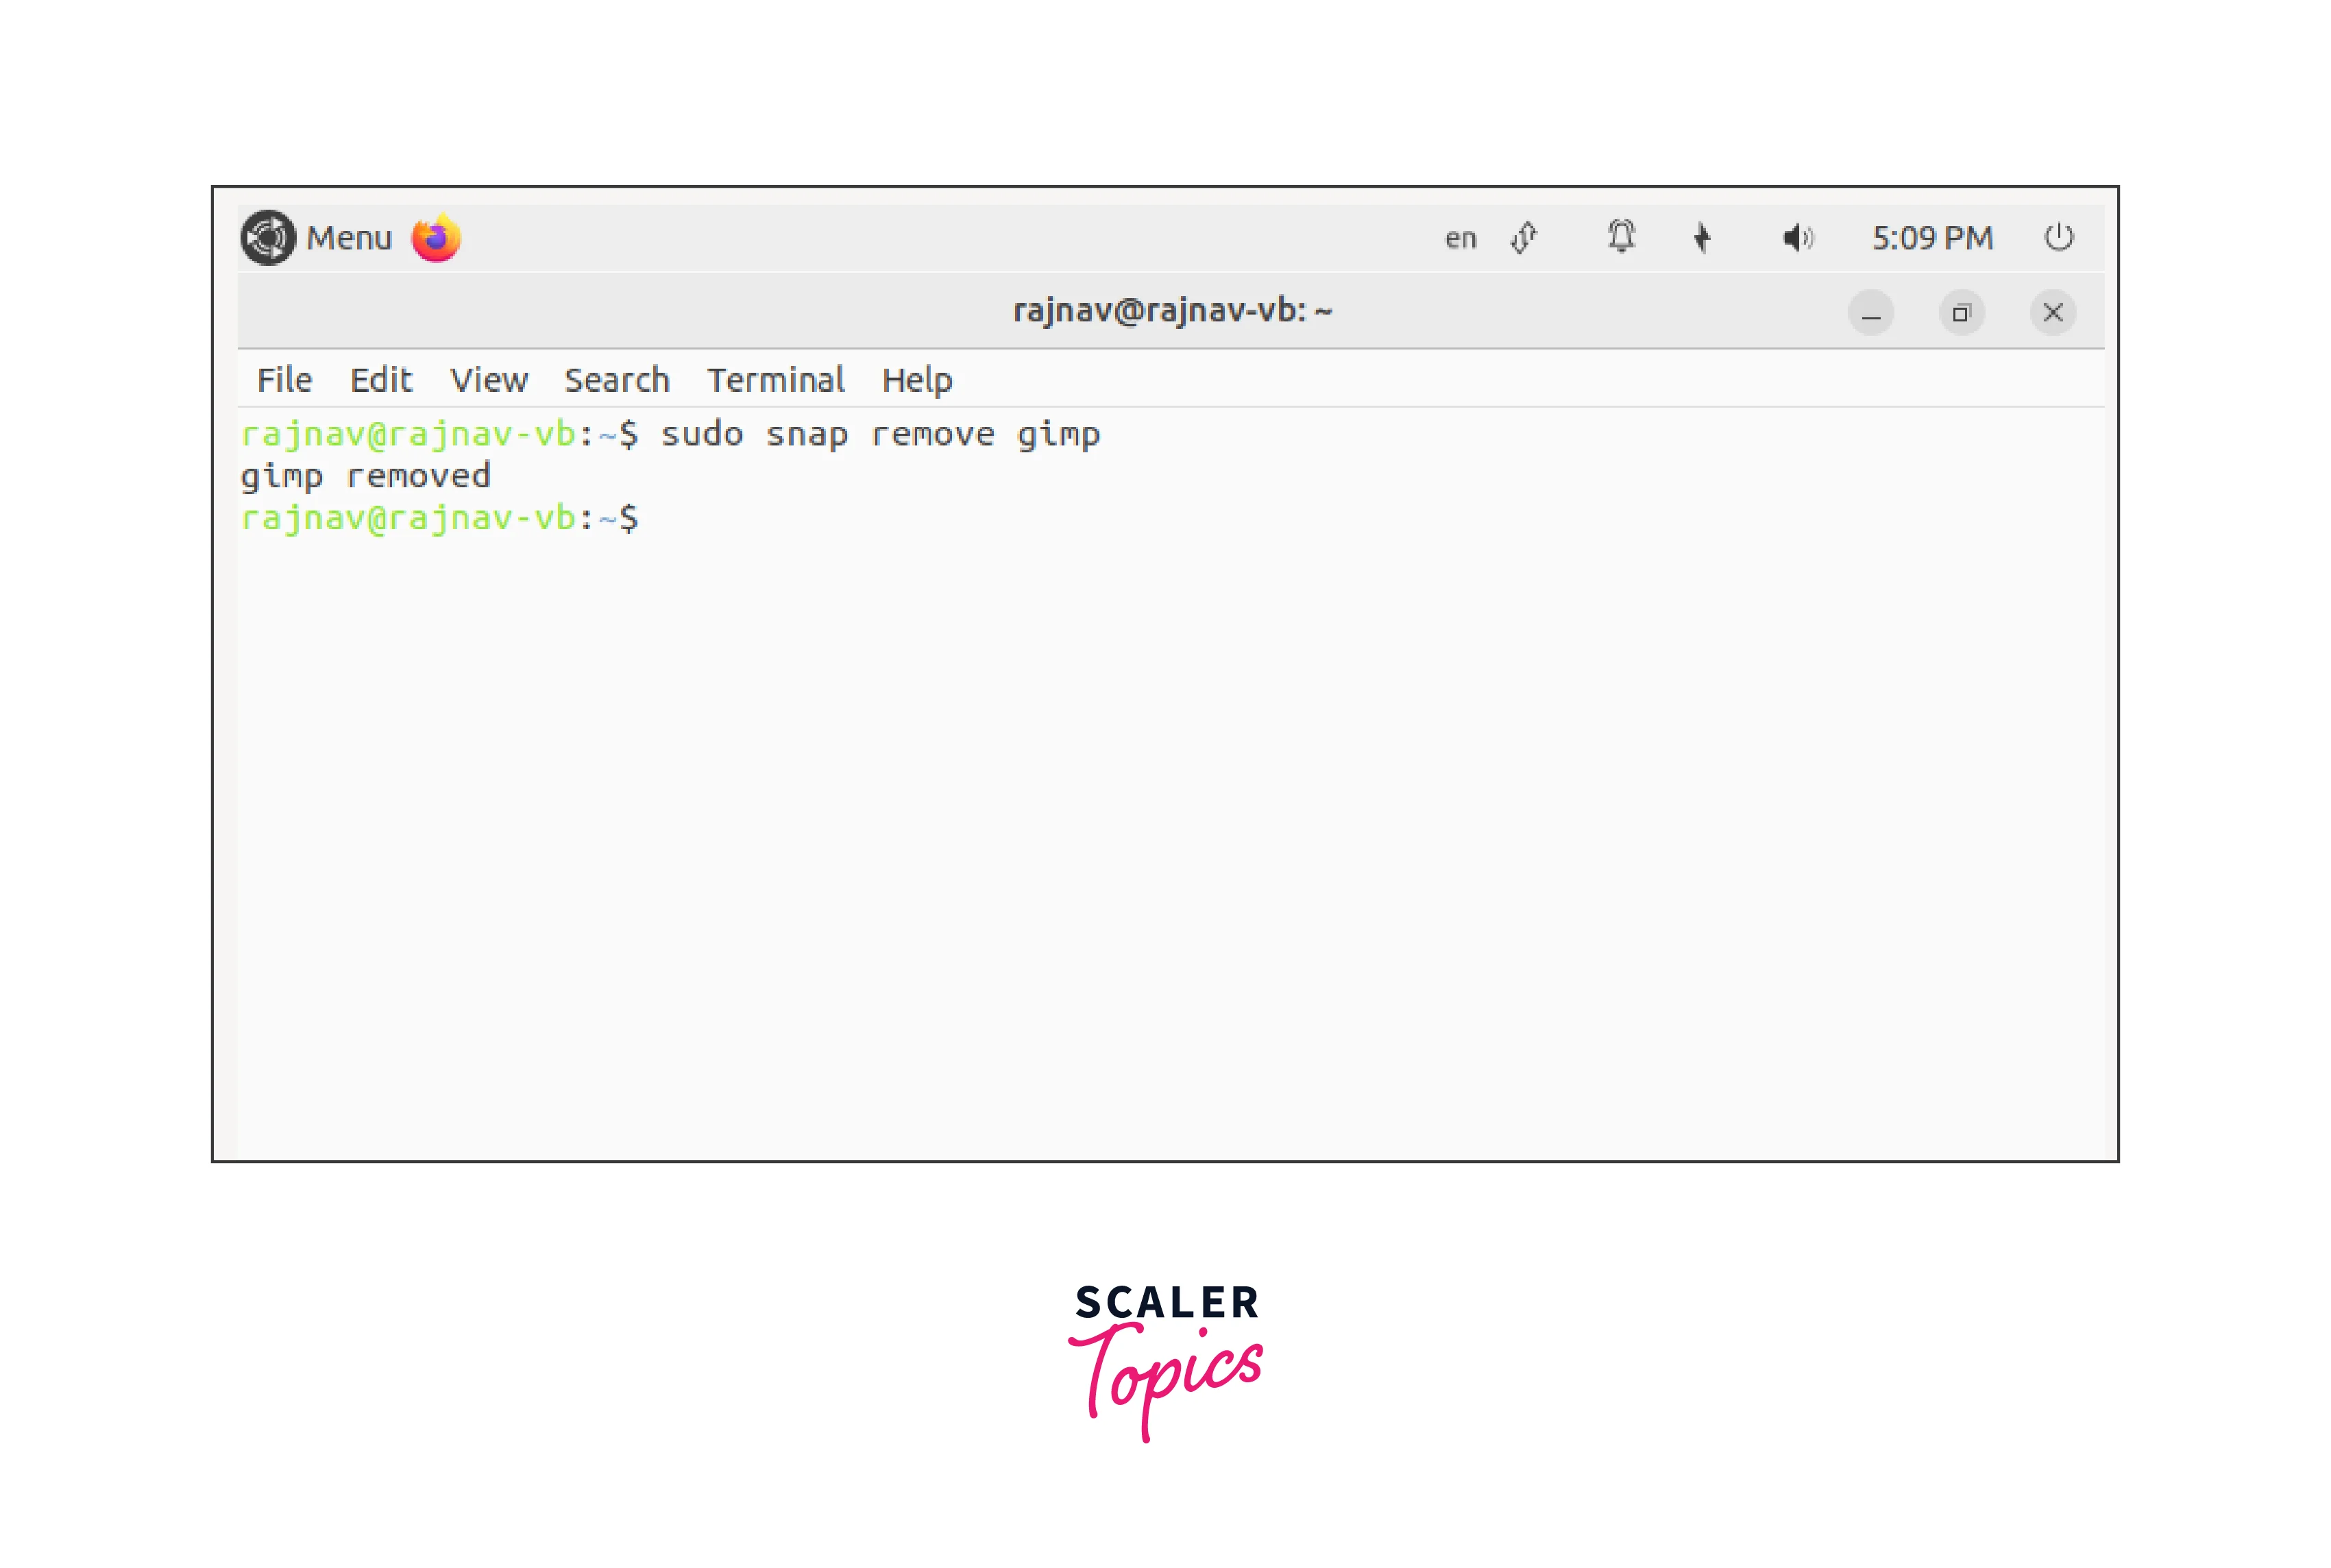
Replace "package_name" with the actual name of the package you want to uninstall. The sudo command is used to run the uninstallation process with administrative privileges.
-
Confirm the uninstallation:
After entering the command, Snap will prompt you to confirm the uninstallation. Type "Y" and press Enter to proceed with the uninstallation.
-
Wait for the process to complete:
Snap will now remove the package from your system. The time required for this process may vary depending on the size of the package and your system's performance. Be patient and wait for the process to complete.
-
Verify the uninstallation:
Once the uninstallation process is finished, you can verify that the package has been successfully removed. To do this, you can use the following command to list installed Snap packages again:
snap list
If the package is no longer listed, it means it has been successfully uninstalled.
-
Optional: Remove configuration files and data:
Uninstalling a Snap package only removes the application itself, but it does not remove any configuration files or data associated with the application. If you want to remove these files as well, you can use the --purge option with the uninstallation command. For example:
sudo snap remove --purge package_name
This step is optional, and you should exercise caution when using it, as it permanently deletes configuration files and data related to the package.
-
Repeat if necessary:
If you need to uninstall multiple Snap packages, you can repeat the process for each package, following the steps outlined above.
Uninstall Packages with Pacman
Uninstalling packages with Pacman is a common method used in Arch Linux and its derivatives. Pacman is a powerful package manager that simplifies software management tasks. Here's a step-by-step guide on how to uninstall packages in Linux using Pacman:
-
Open the terminal:
Launch the terminal application on your Arch Linux system or its derivative. The terminal allows you to enter commands to interact with the system.
-
List installed packages:
To view the installed packages on your system, you can use the following command:
pacman -Q
This command will display a list of installed packages along with their names.
-
Uninstall the package:
Once you have identified the package you want to uninstall from the list, use the following command to remove it:
sudo pacman -R package_name
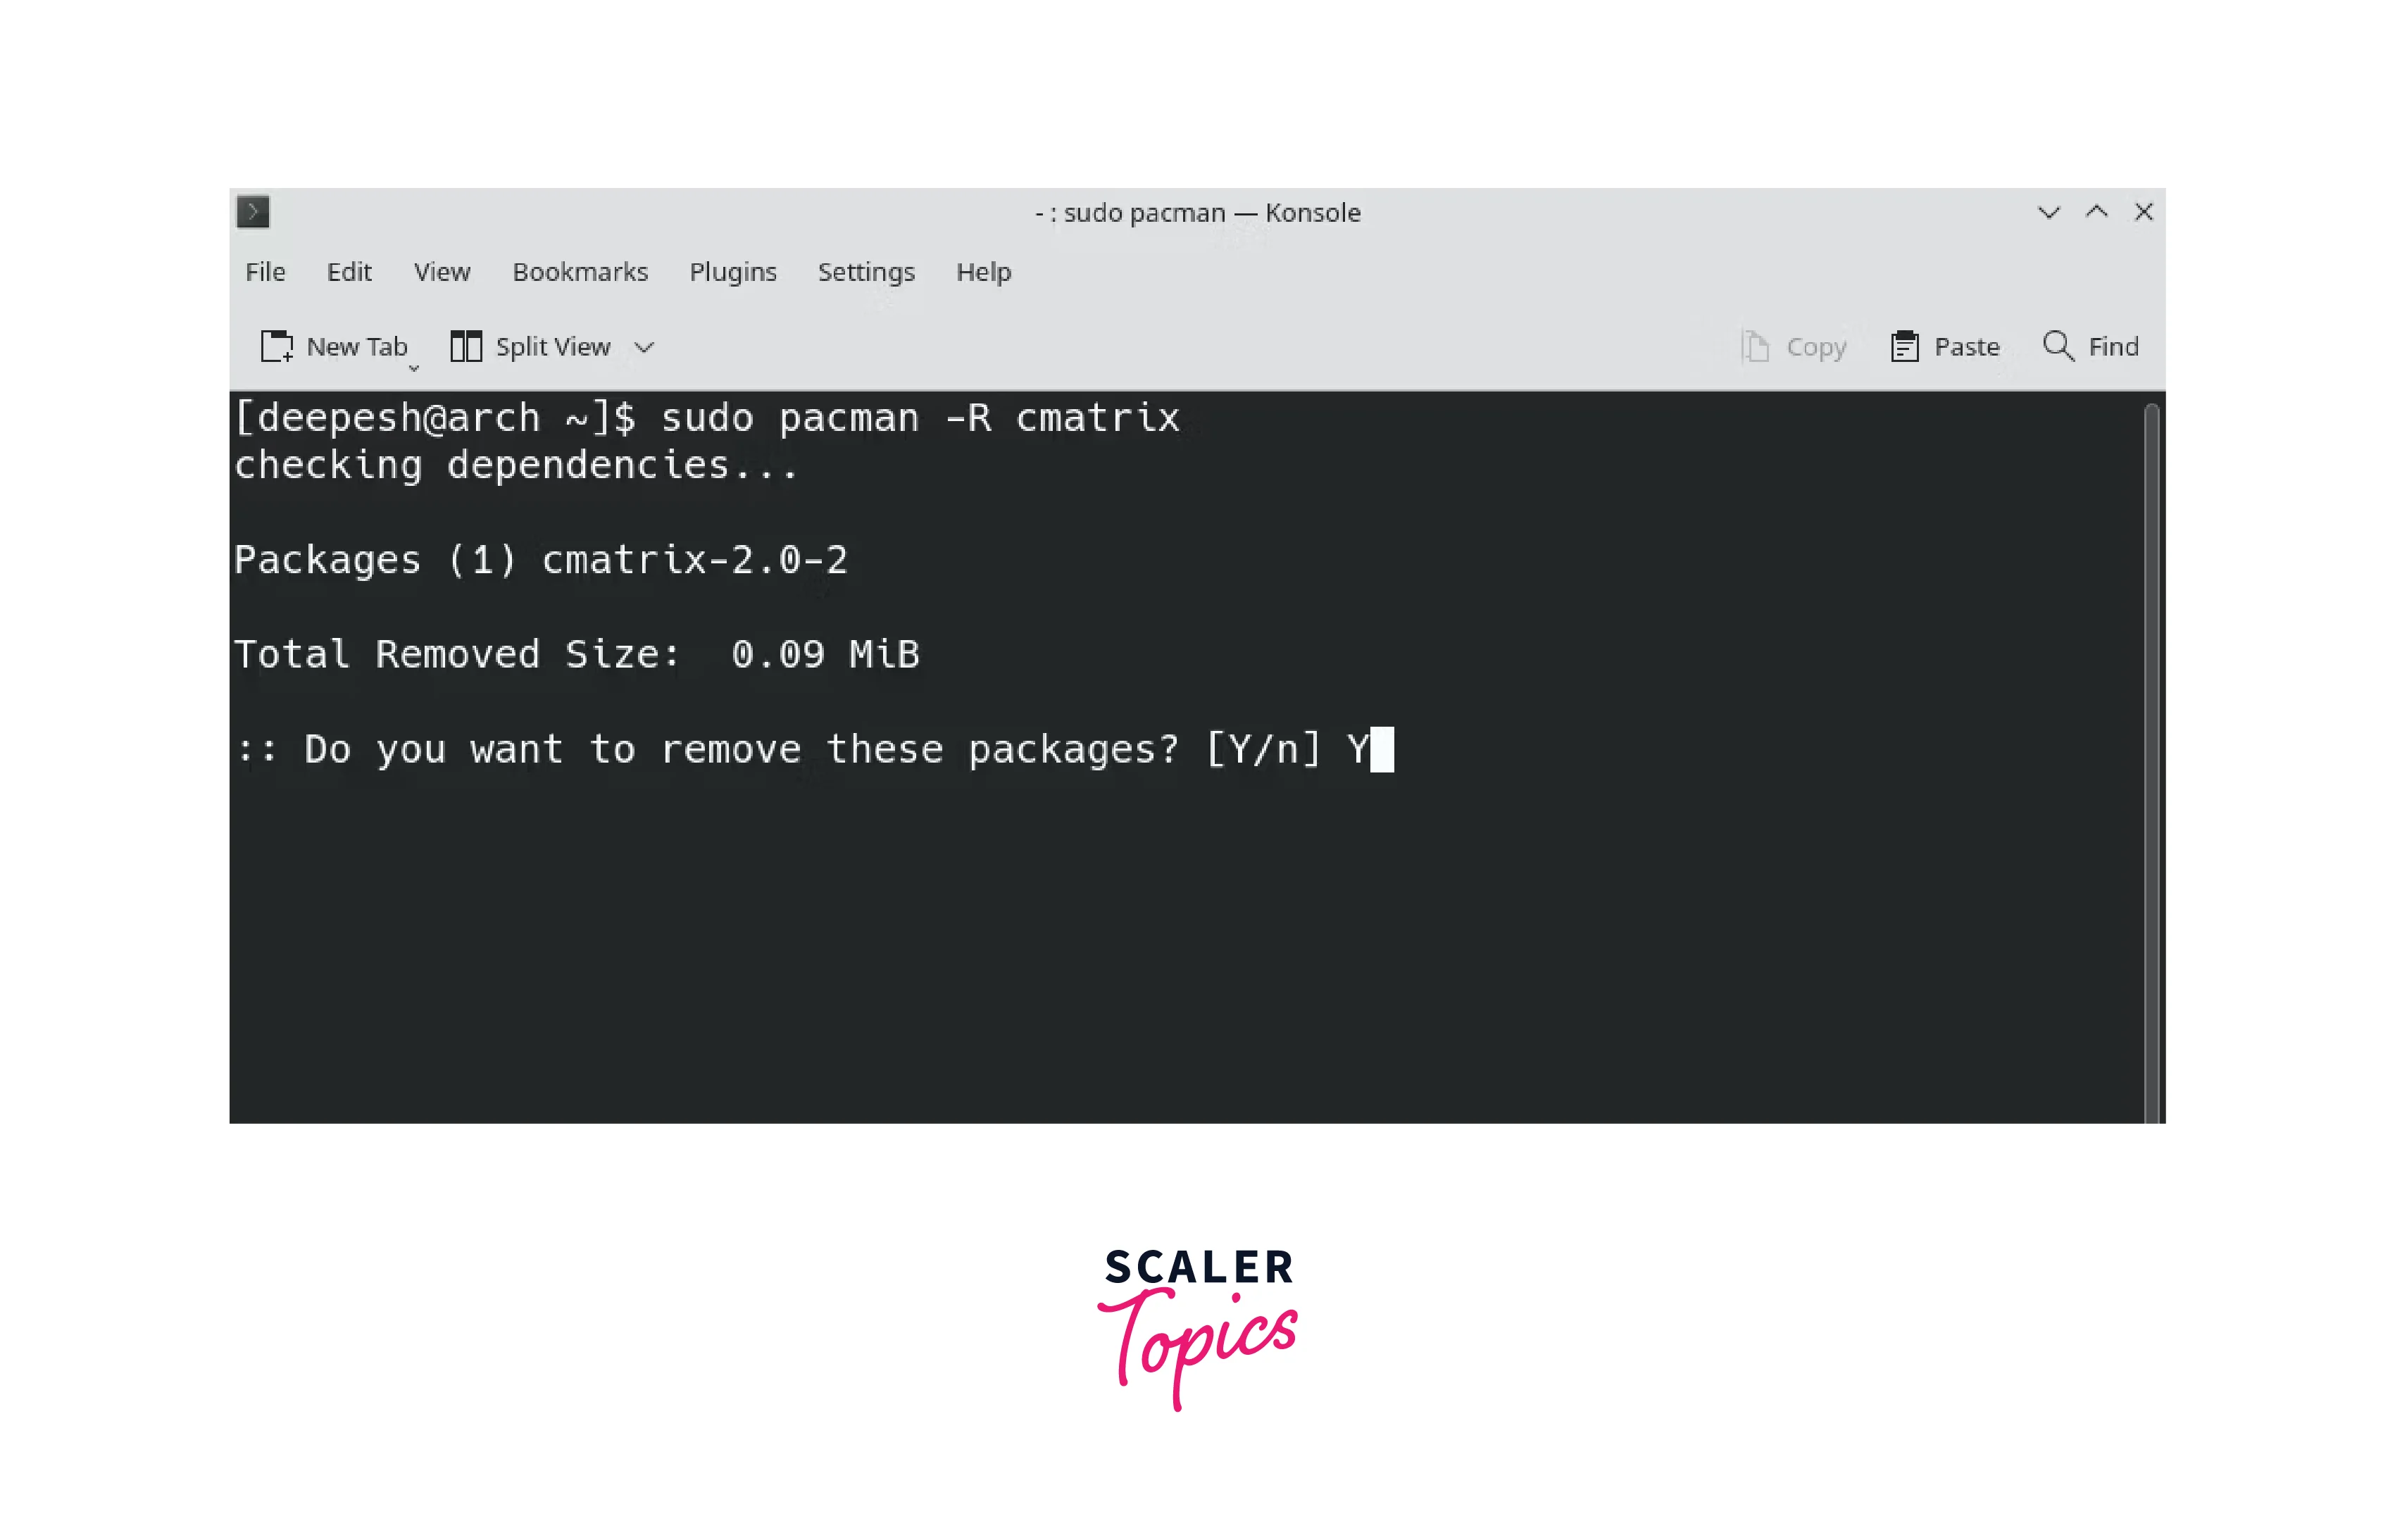
Replace "package_name" with the actual name of the package you want to uninstall. The "sudo" command is used to run the uninstallation process with administrative privileges.
-
Confirm the uninstallation:
After entering the command, Pacman will display a list of packages that will be removed, as well as the disk space that will be freed up. Review this information carefully to ensure that you're uninstalling the correct package. Type "y" and press Enter to proceed with the uninstallation.
-
Wait for the process to complete:
Pacman will now remove the package and any associated dependencies from your system. The time required for this process may vary depending on the size of the package and your system's performance. Be patient and wait for the process to complete.
-
Verify the uninstallation: Once the uninstallation process is finished, you can verify that the package has been successfully removed. You can use the following command to check if the package is still installed:
pacman -Qs package_name
f the package is no longer listed, it means it has been successfully uninstalled.
-
Optional: Remove unused dependencies:
Pacman allows you to remove orphaned dependencies, which are packages that were installed as dependencies but are no longer required by any installed package. To remove these unused dependencies, use the following command:
sudo pacman -Rns $(pacman -Qdtq)
This command removes the orphaned packages, freeing up additional disk space on your system. Exercise caution when using this command, as it removes packages not explicitly installed by the user.
-
Repeat if necessary:
If you need to uninstall multiple packages, you can repeat the process for each package, following the steps outlined above.
Uninstall Packages with RPM
Uninstalling packages with RPM (RPM Package Manager) is a common method used in Linux distributions that utilize the RPM package format, such as Fedora, CentOS, and openSUSE. RPM provides a straightforward way to manage software packages, including uninstallation. Here's a step-by-step guide on how to uninstall packages in Linux using RPM:
-
Open the terminal:
Launch the terminal application on your Linux system. The terminal allows you to enter commands to interact with the system.
-
List installed packages:
To view the installed packages on your system, you can use the following command:
rpm -qa
This command will display a list of installed packages along with their names.
-
Uninstall the package:
Once you have identified the package you want to uninstall from the list, use the following command to remove it:
sudo rpm -e package_name
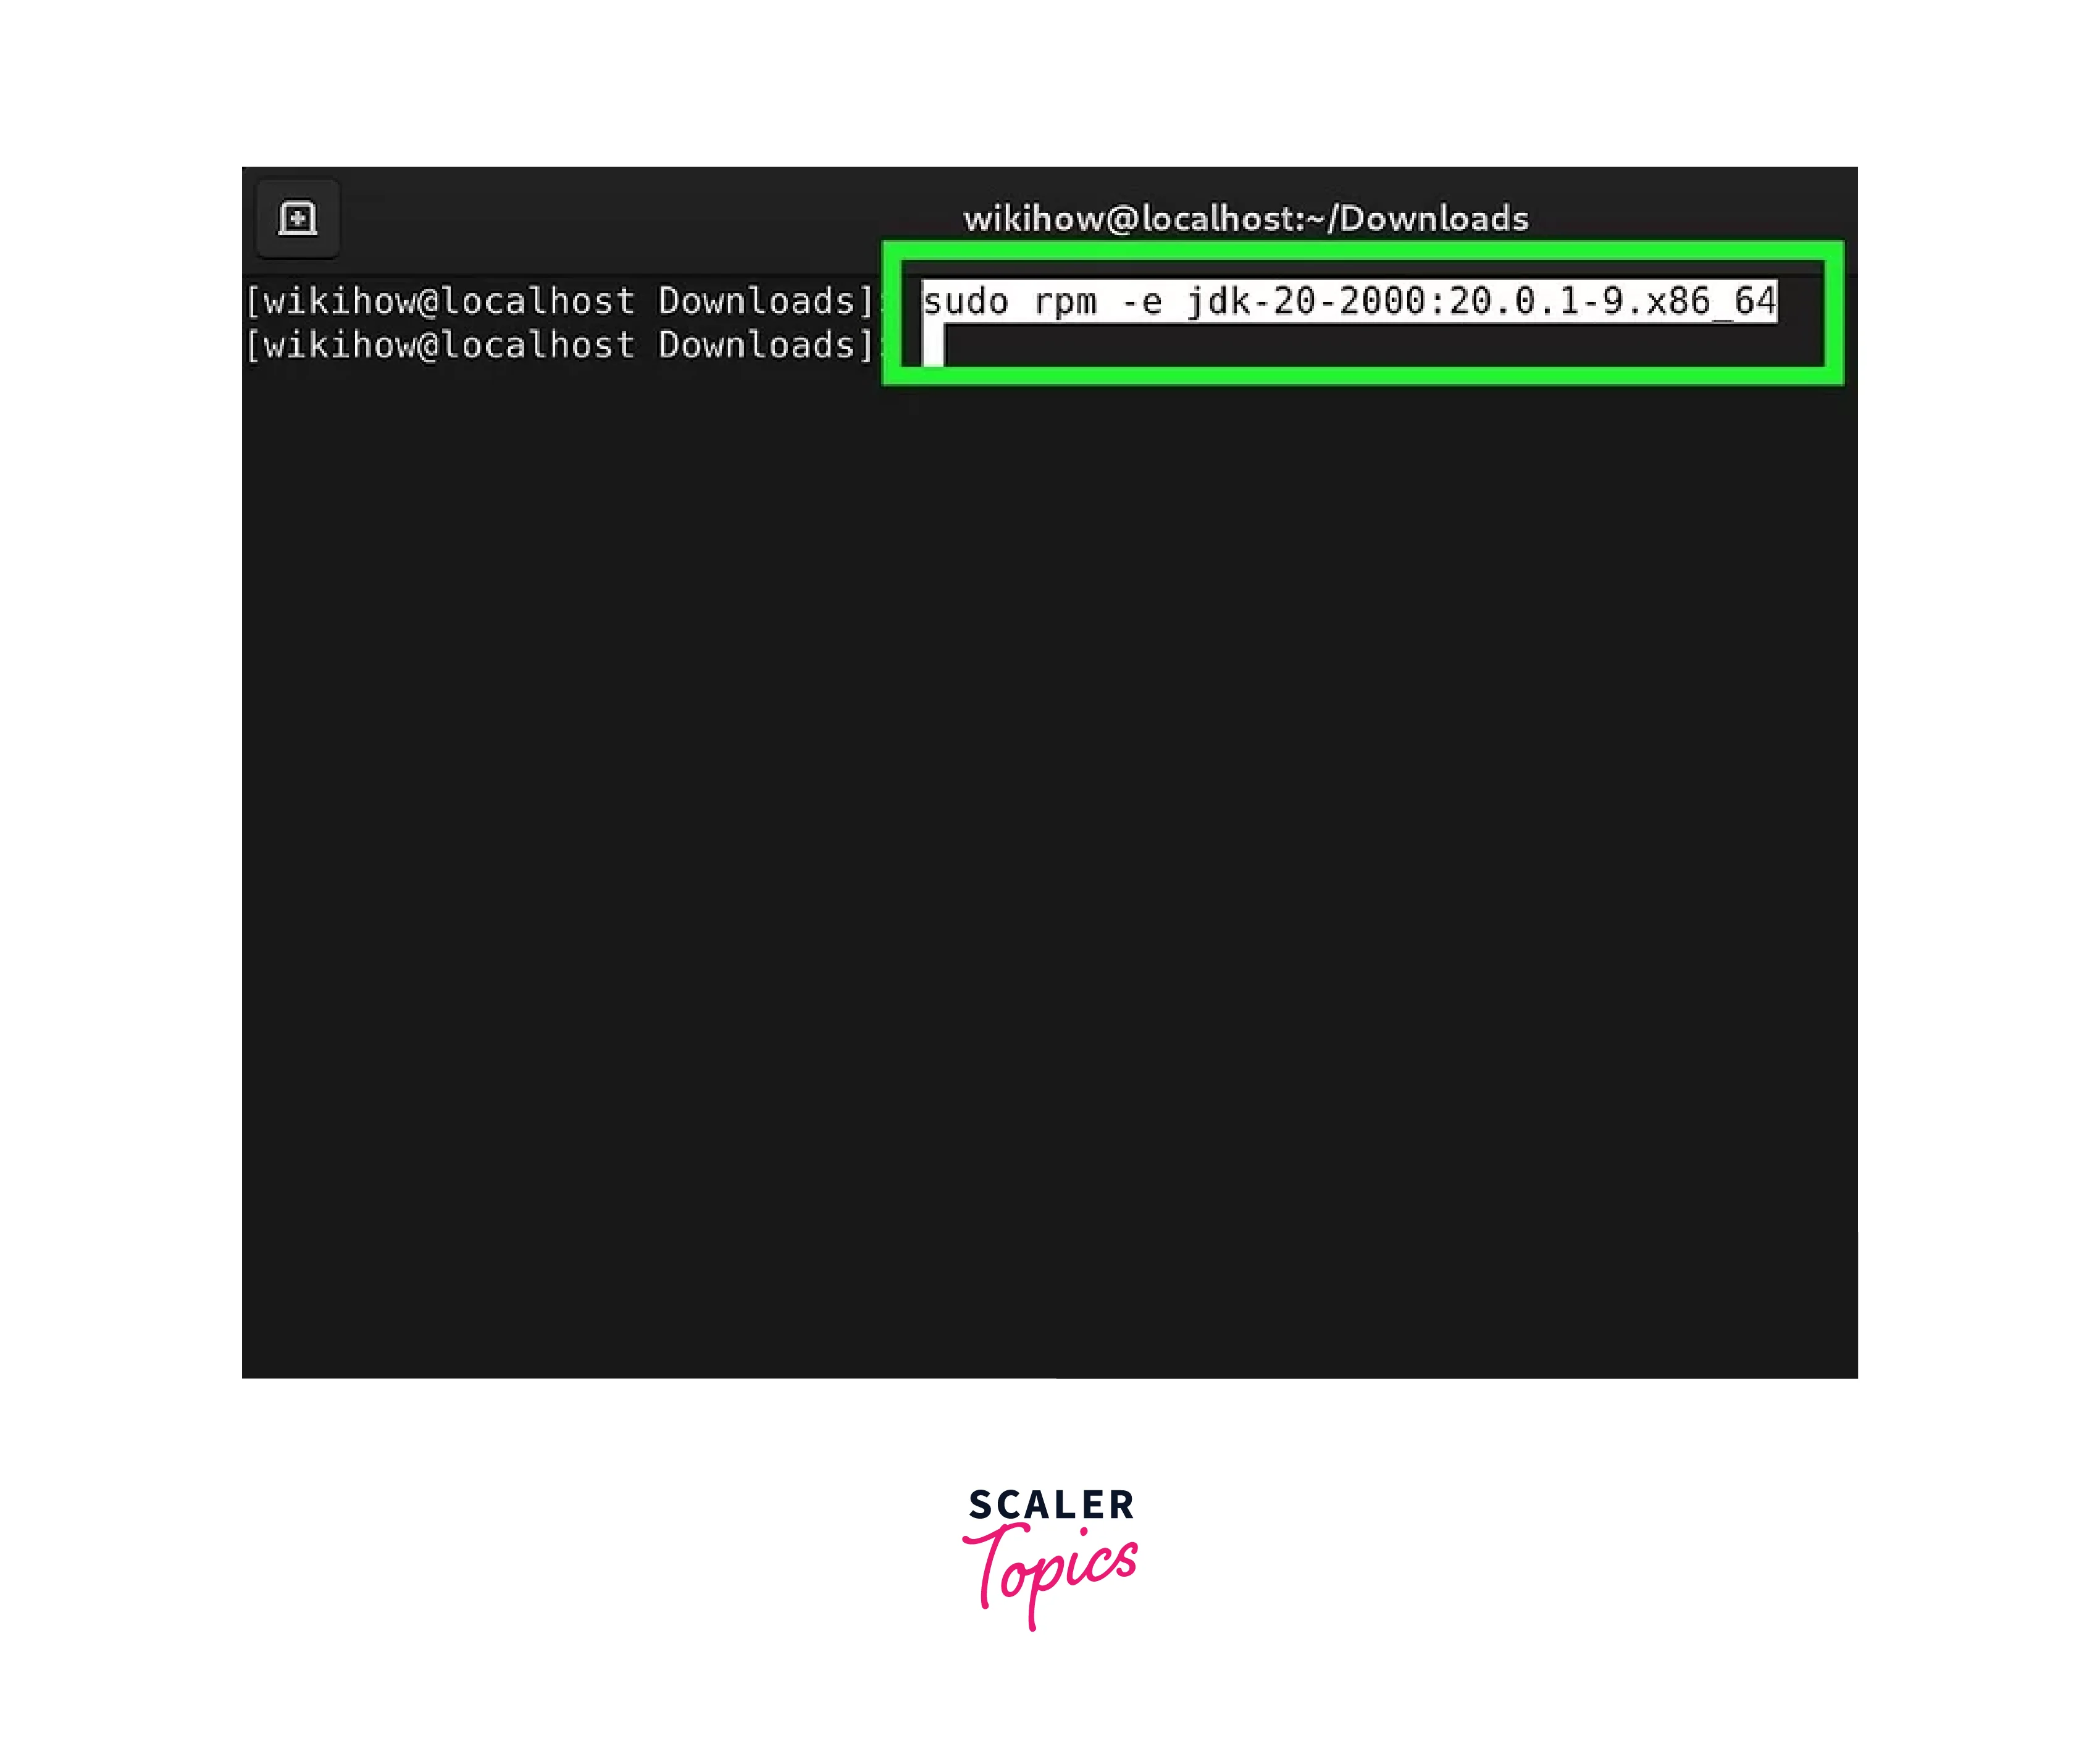
Replace "package_name" with the actual name of the package you want to uninstall. The "sudo" command is used to run the uninstallation process with administrative privileges.
-
Confirm the uninstallation:
After entering the command, RPM will prompt you to confirm the uninstallation. Type "y" and press Enter to proceed with the uninstallation.
-
Wait for the process to complete:
RPM will now remove the package and any associated files from your system. The time required for this process may vary depending on the size of the package and your system's performance. Be patient and wait for the process to complete.
-
Verify the uninstallation:
Once the uninstallation process is finished, you can verify that the package has been successfully removed. You can use the following command to check if the package is still installed:
rpm -qa | grep package_name
If the package is no longer listed, it means it has been successfully uninstalled.
-
Optional: Remove unused dependencies:
RPM does not automatically remove unused dependencies when uninstalling a package. If you want to remove these dependencies, you can use the following command to check for and remove them:
sudo dnf autoremove
This command removes unused dependencies from your system, freeing up additional disk space. Note that the specific command may vary depending on the package manager used in your distribution (e.g., "dnf" for Fedora, "zypper" for openSUSE, etc.).
-
Repeat if necessary:
If you need to uninstall multiple packages, you can repeat the process for each package, following the steps outlined above.
Uninstall Packages with Yum
Uninstalling packages with Yum (Yellowdog Updater Modified) is a common method used in Linux distributions that utilize the RPM package format, such as CentOS, Fedora, and RHEL. Yum provides a powerful package management system that simplifies software installation and removal. Here's a step-by-step guide on how to uninstall packages in Linux using Yum:
-
Open the terminal:
Launch the terminal application on your Linux system. The terminal allows you to enter commands to interact with the system.
-
List installed packages:
To view the installed packages on your system, use the following command:
yum list installed
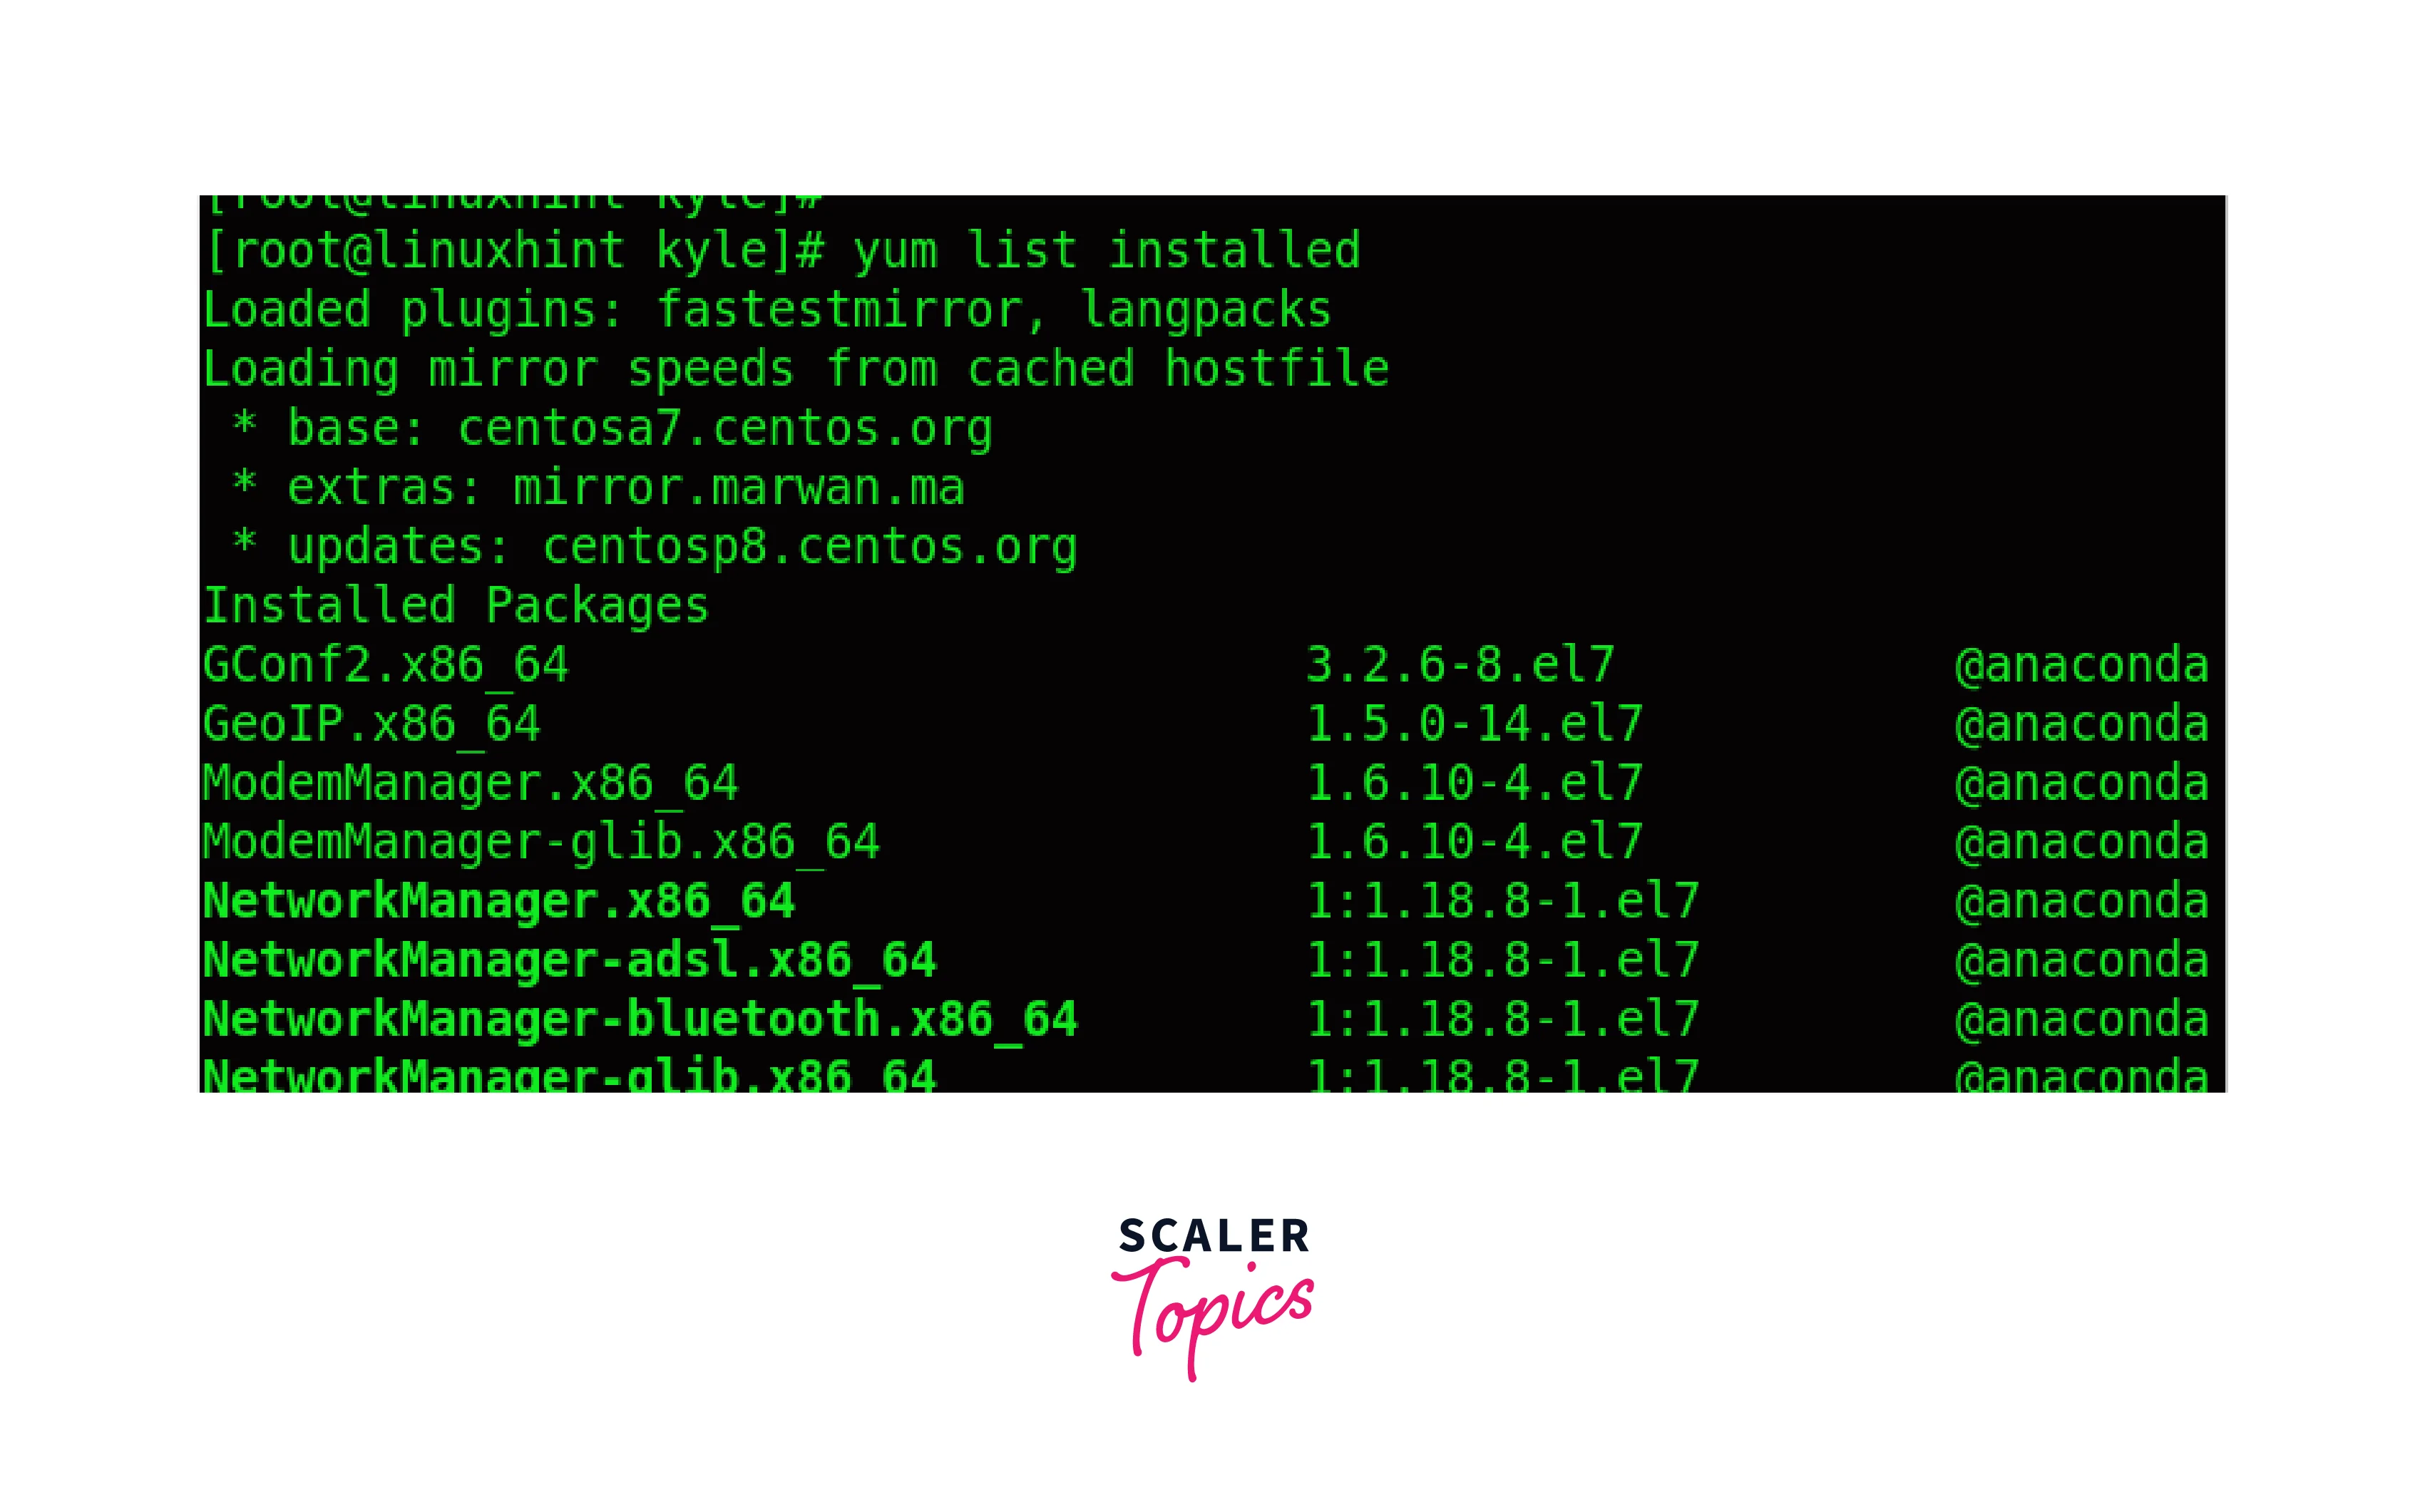
This command will display a list of installed packages along with their names.
-
Uninstall the package:
Once you have identified the package you want to uninstall from the list, use the following command to remove it:
sudo yum remove package_name
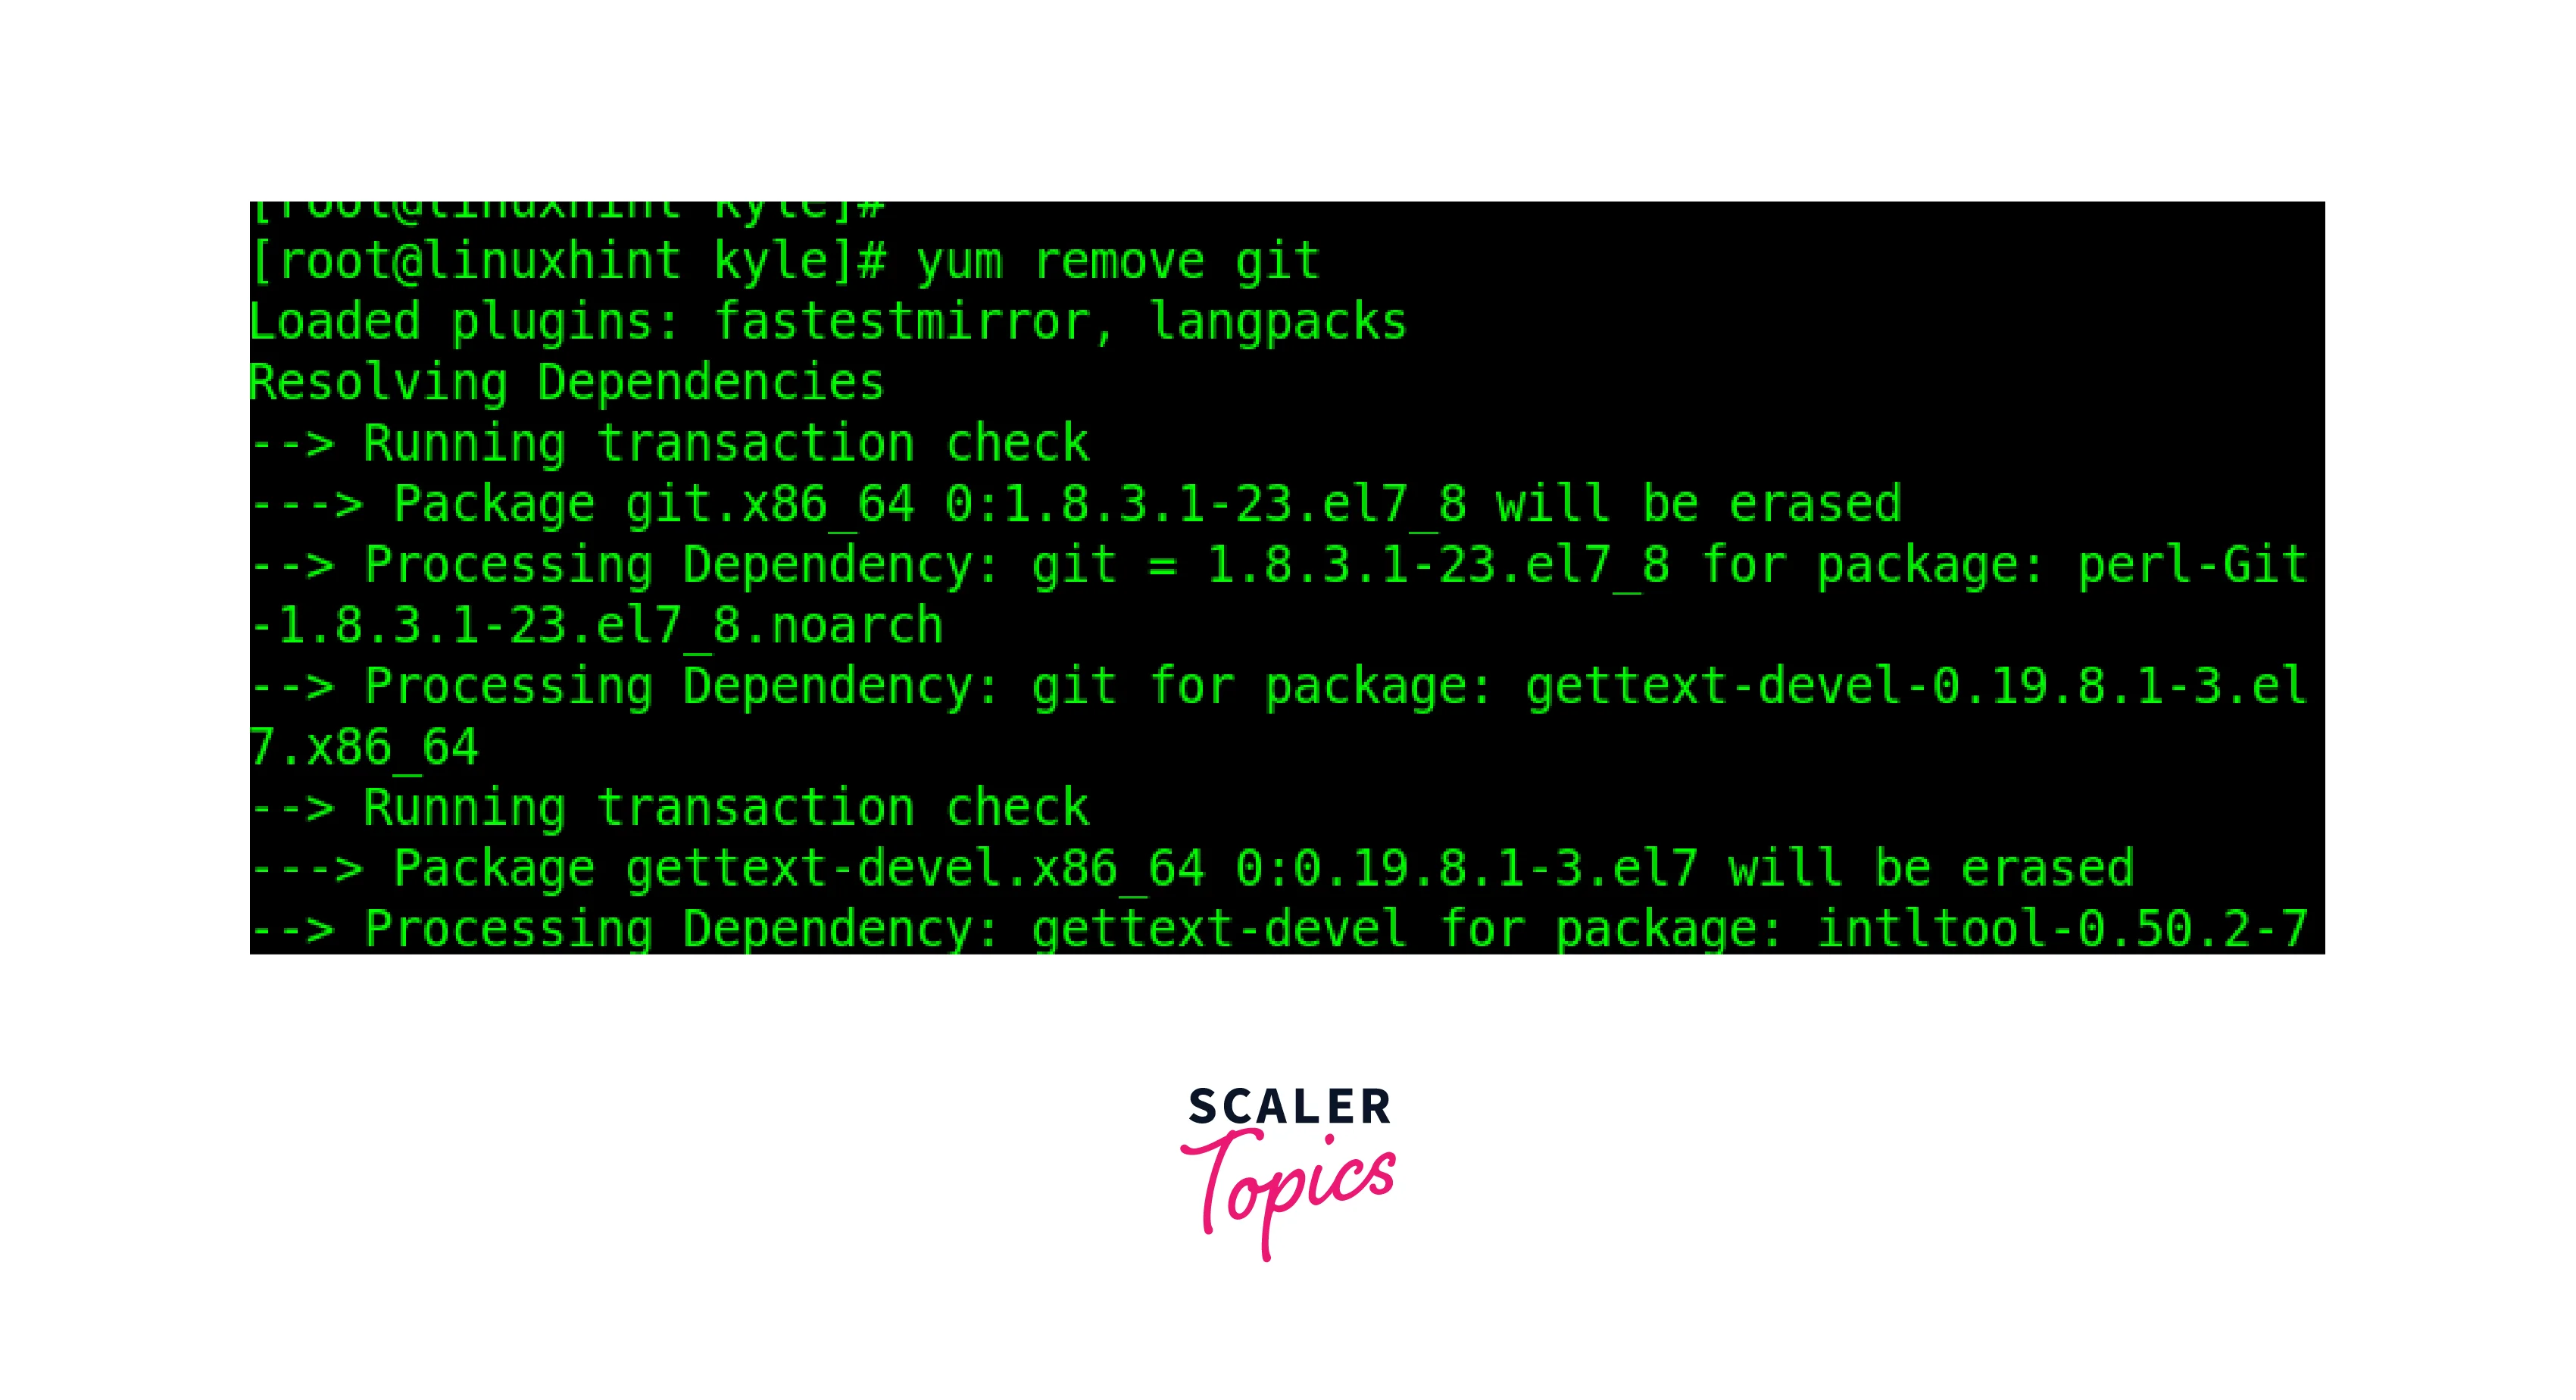
Replace "package_name" with the actual name of the package you want to uninstall. The sudo command is used to run the uninstallation process with administrative privileges.
-
Confirm the uninstallation:
After entering the command, Yum will prompt you to confirm the uninstallation. Type "Y" and press Enter to proceed with the uninstallation.
-
Wait for the process to complete:
Yum will now remove the package and any associated dependencies from your system. The time required for this process may vary depending on the size of the package and your system's performance. Be patient and wait for the process to complete.
-
Verify the uninstallation:
Once the uninstallation process is finished, you can verify that the package has been successfully removed. You can use the following command to check if the package is still installed:
yum list installed | grep package_name
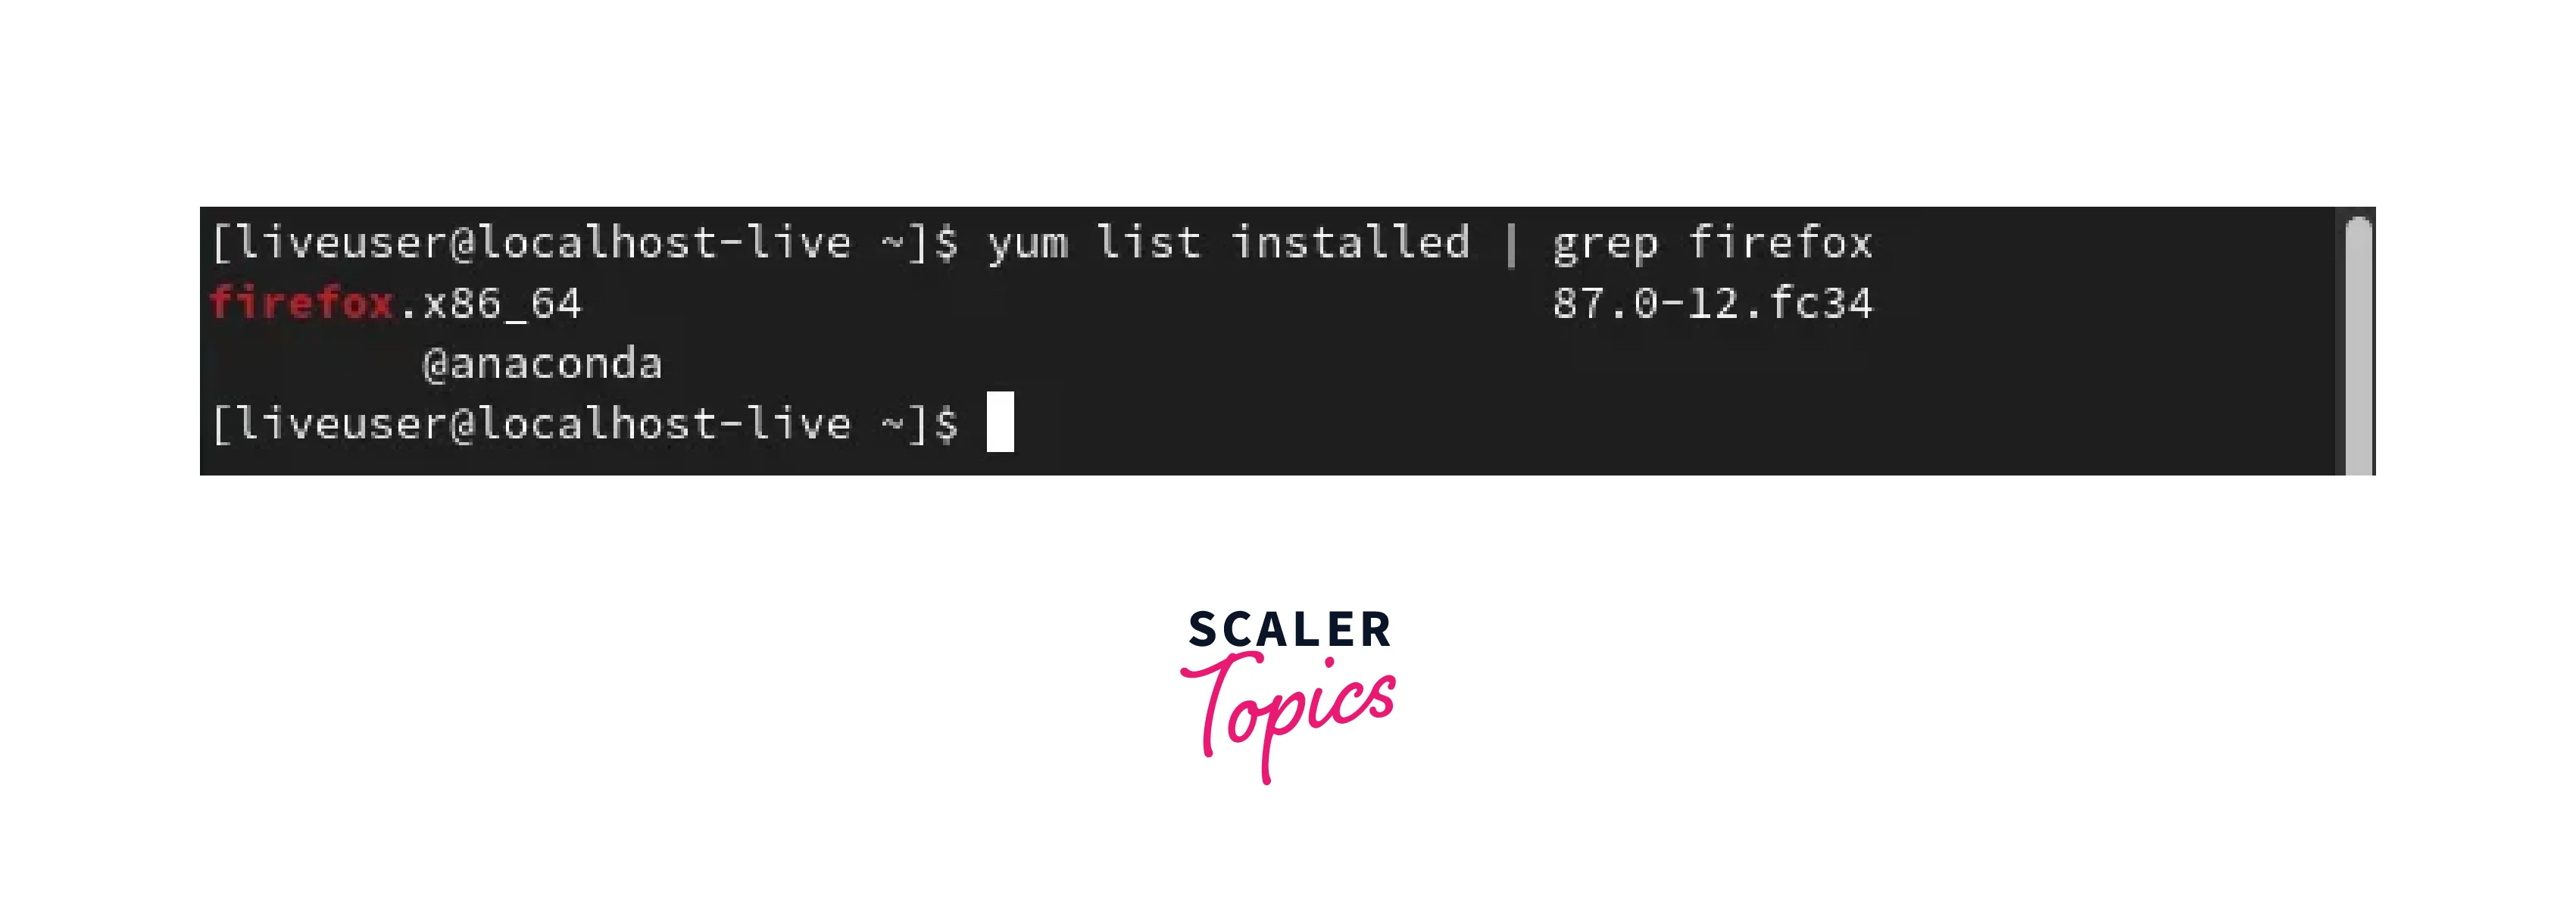
If the package is no longer listed, it means it has been successfully uninstalled.
-
Optional: Remove unused dependencies:
Yum does not automatically remove unused dependencies when uninstalling a package. If you want to remove these dependencies, you can use the following command:
sudo yum autoremove
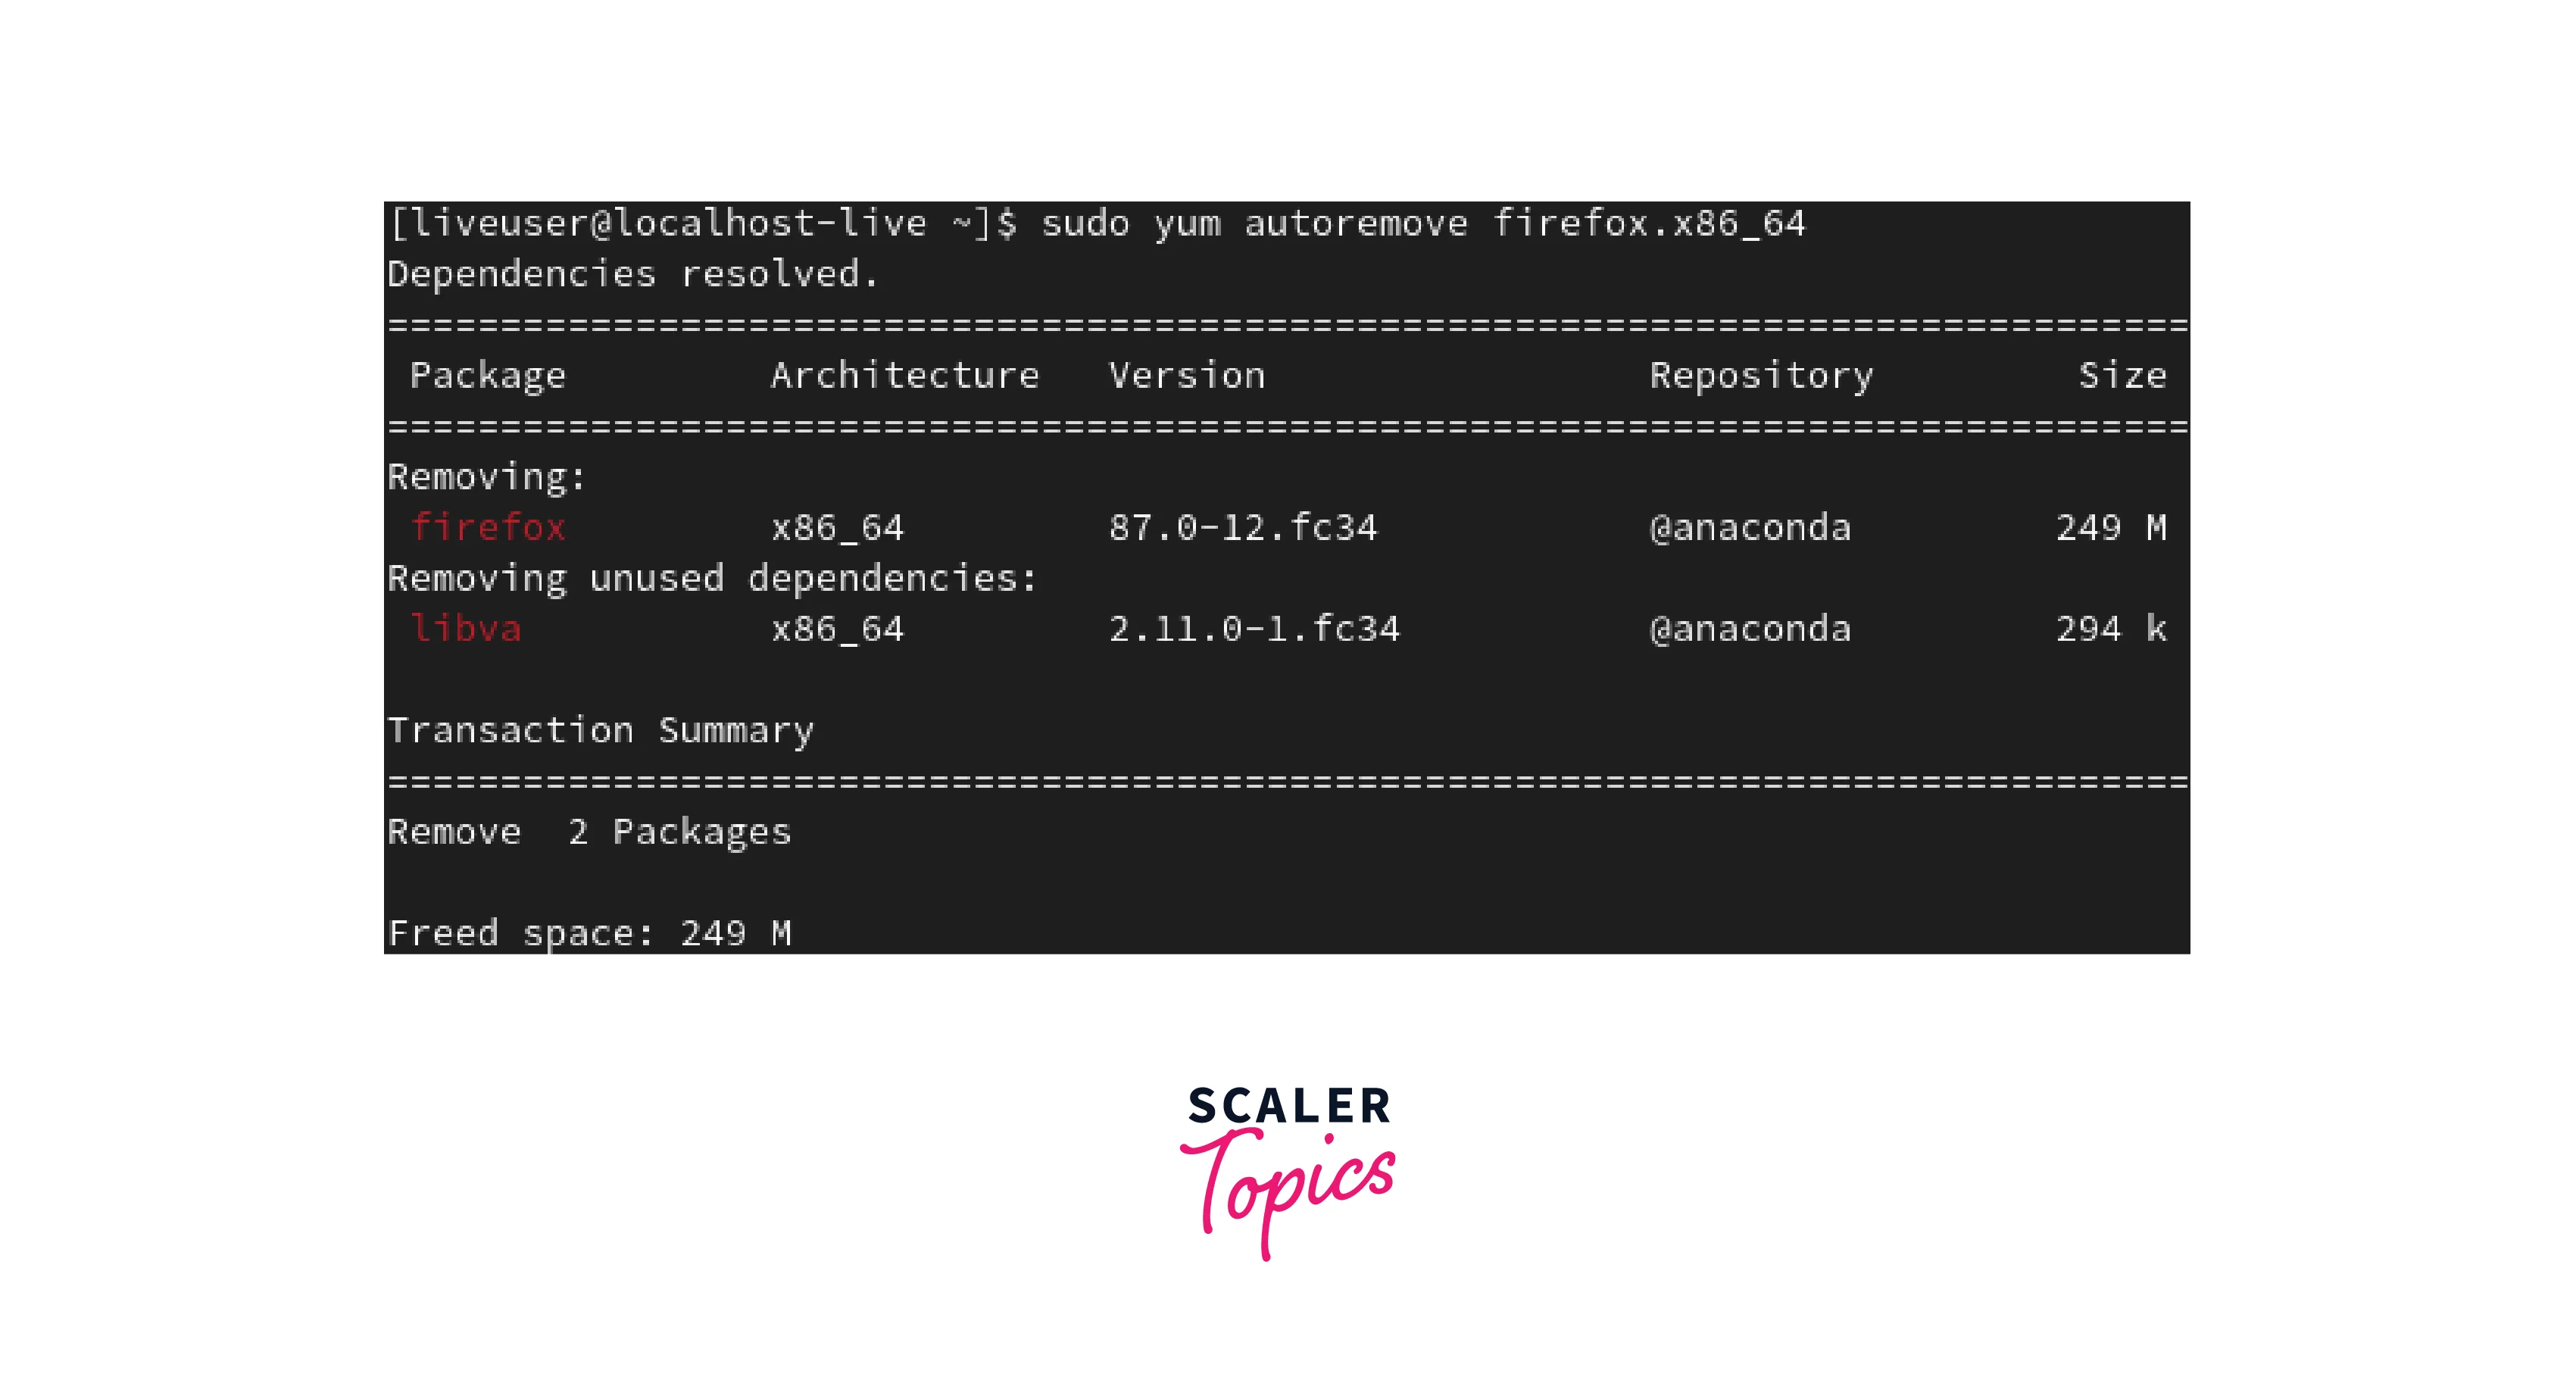
This command removes unused dependencies from your system, freeing up additional disk space.
Uninstall Packages with DNF
Uninstalling packages with DNF (Dandified Yum) is a method commonly used in Fedora and other Linux distributions that utilize the RPM package format. DNF is a next-generation package manager that provides enhanced features and performance compared to Yum. Here's a step-by-step guide on how to uninstall packages in Linux using DNF:
-
Open the terminal:
Launch the terminal application on your Linux system. The terminal allows you to enter commands to interact with the system.
-
List installed packages: To view the installed packages on your system, use the following command:
dnf list installed
This command will display a list of installed packages along with their names.
-
Uninstall the package:
Once you have identified the package you want to uninstall from the list, use the following command to remove it:
sudo dnf remove package_name
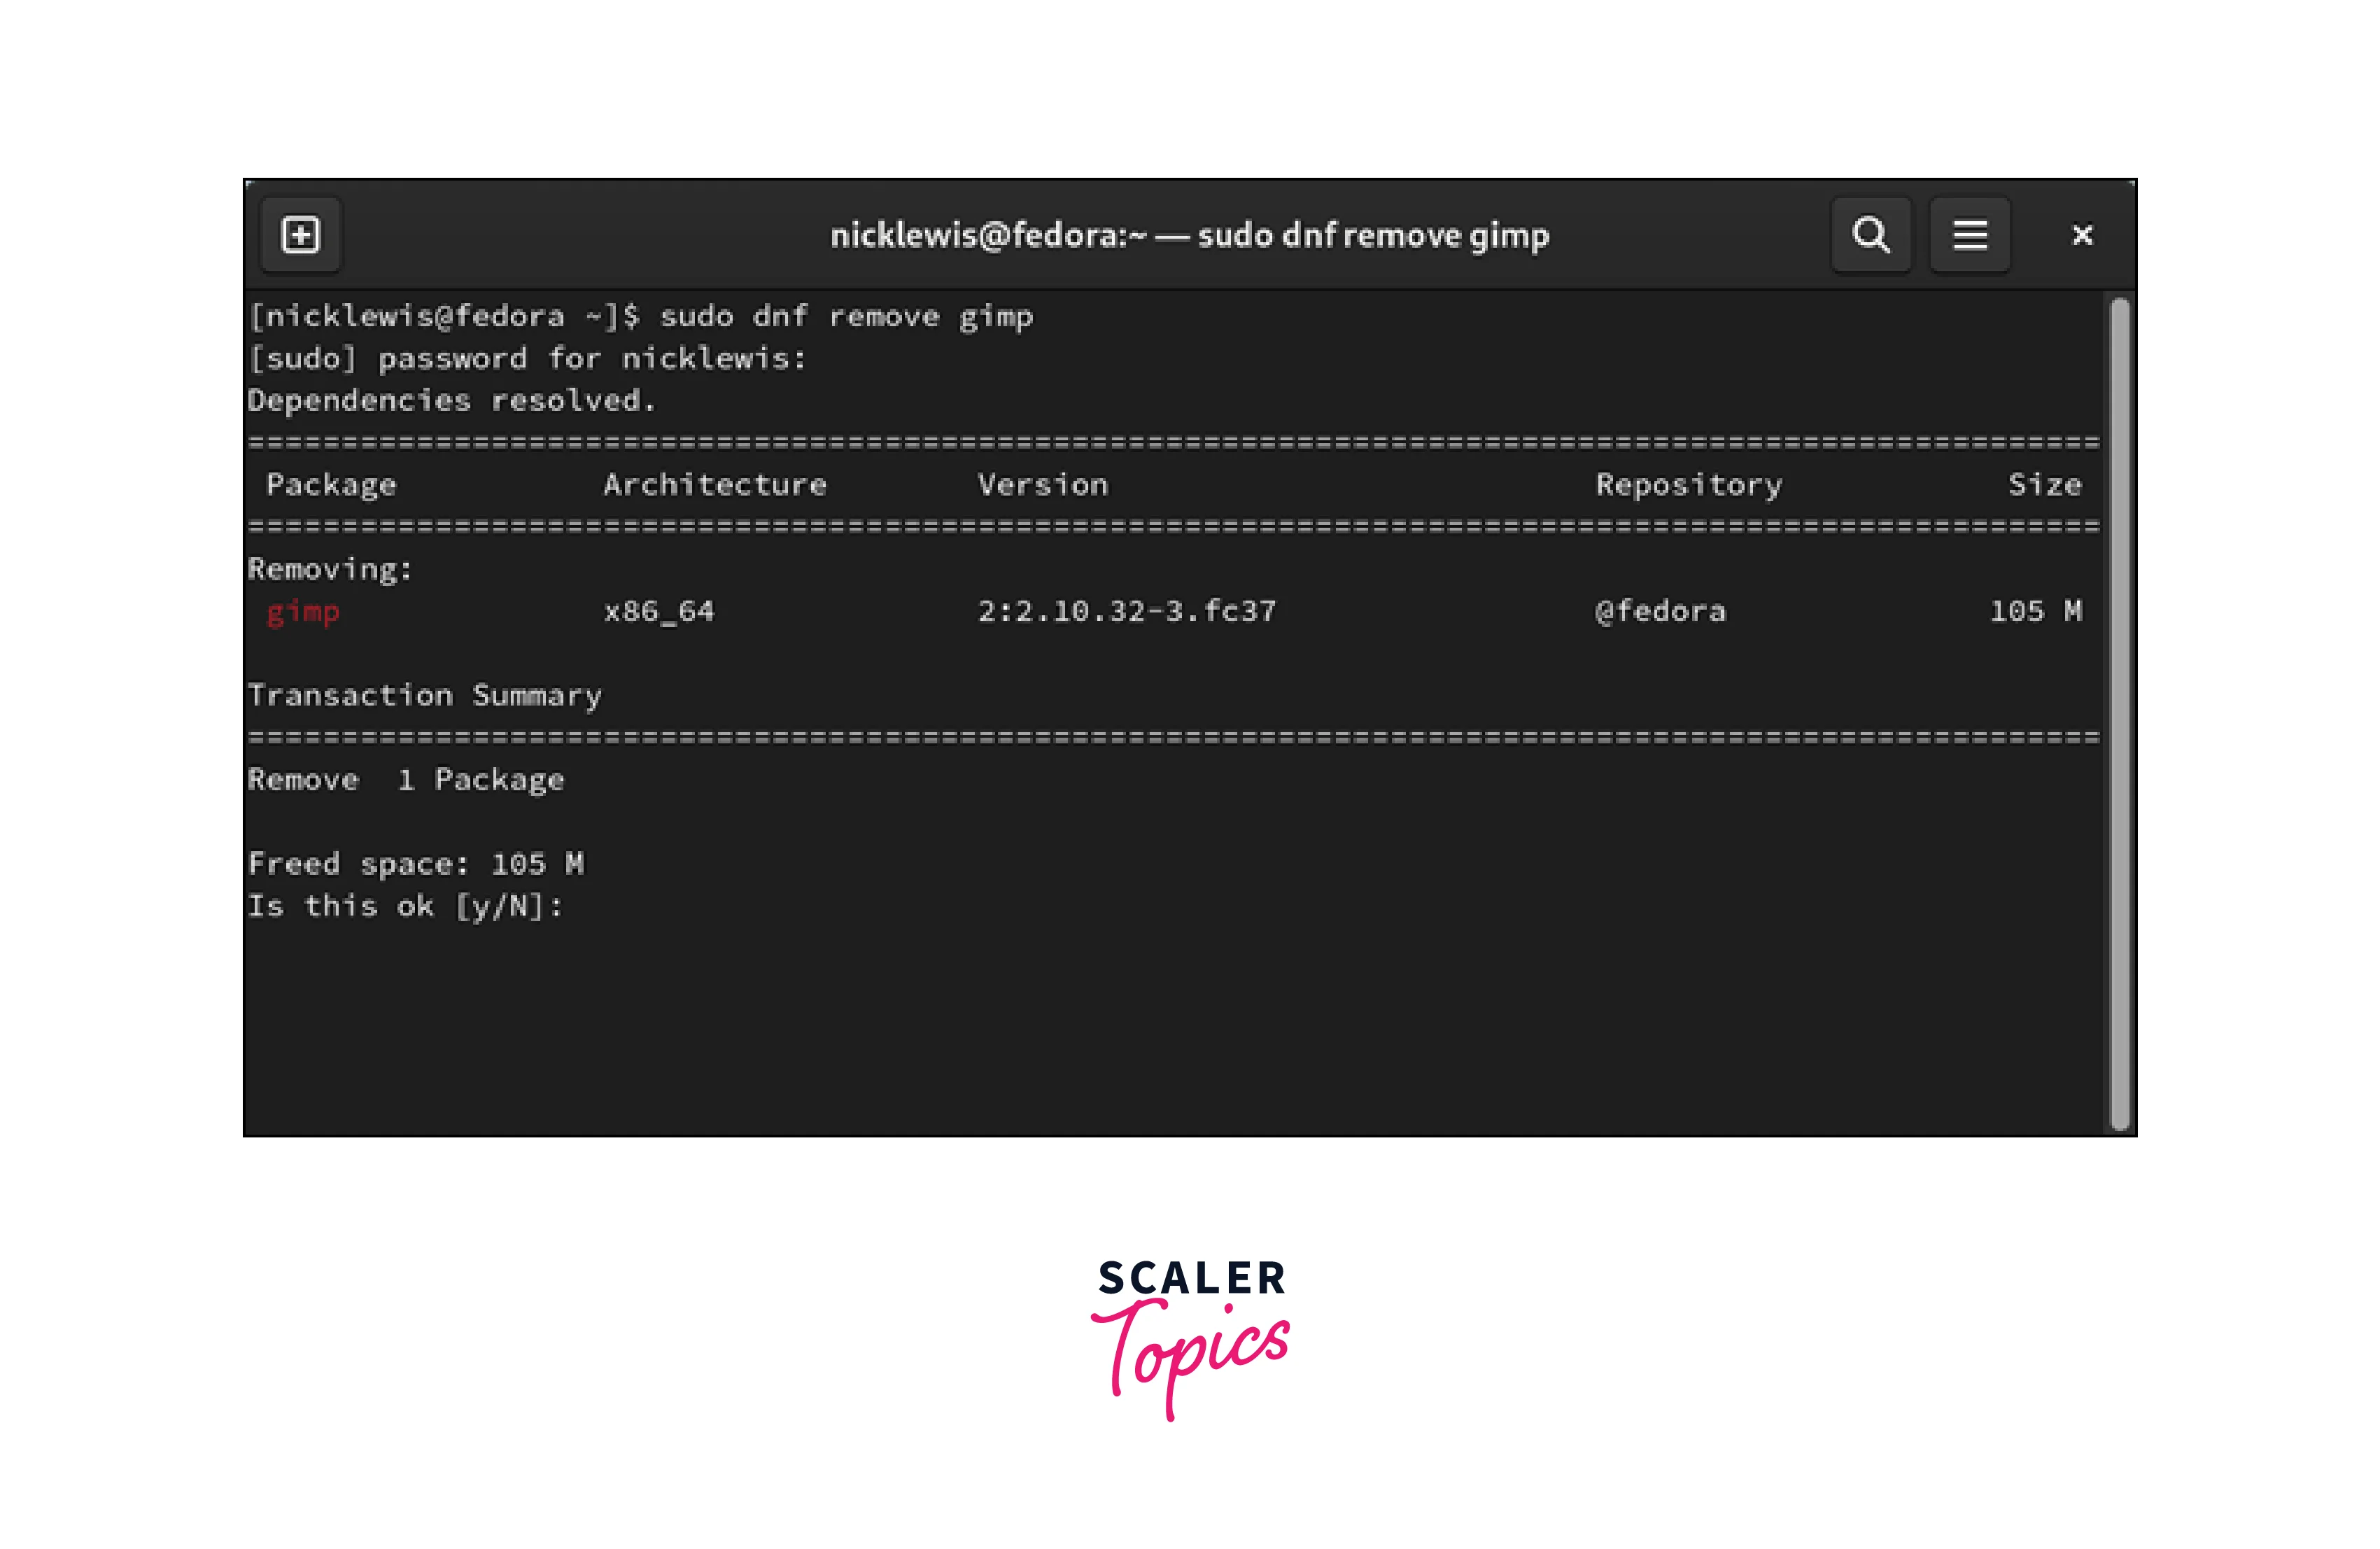
Replace "package_name" with the actual name of the package you want to uninstall. The sudo command is used to run the uninstallation process with administrative privileges.
-
Confirm the uninstallation:
After entering the command, DNF will prompt you to confirm the uninstallation. Type "Y" and press Enter to proceed with the uninstallation.
-
Wait for the process to complete:
DNF will now remove the package and any associated dependencies from your system. The time required for this process may vary depending on the size of the package and your system's performance. Be patient and wait for the process to complete.
-
Verify the uninstallation:
Once the uninstallation process is finished, you can verify that the package has been successfully removed. You can use the following command to check if the package is still installed:
dnf list installed | grep package_name
If the package is no longer listed, it means it has been successfully uninstalled.
-
Optional: Remove unused dependencies:
DNF can automatically remove unused dependencies when uninstalling a package. To remove these dependencies, use the following command:
sudo dnf autoremove
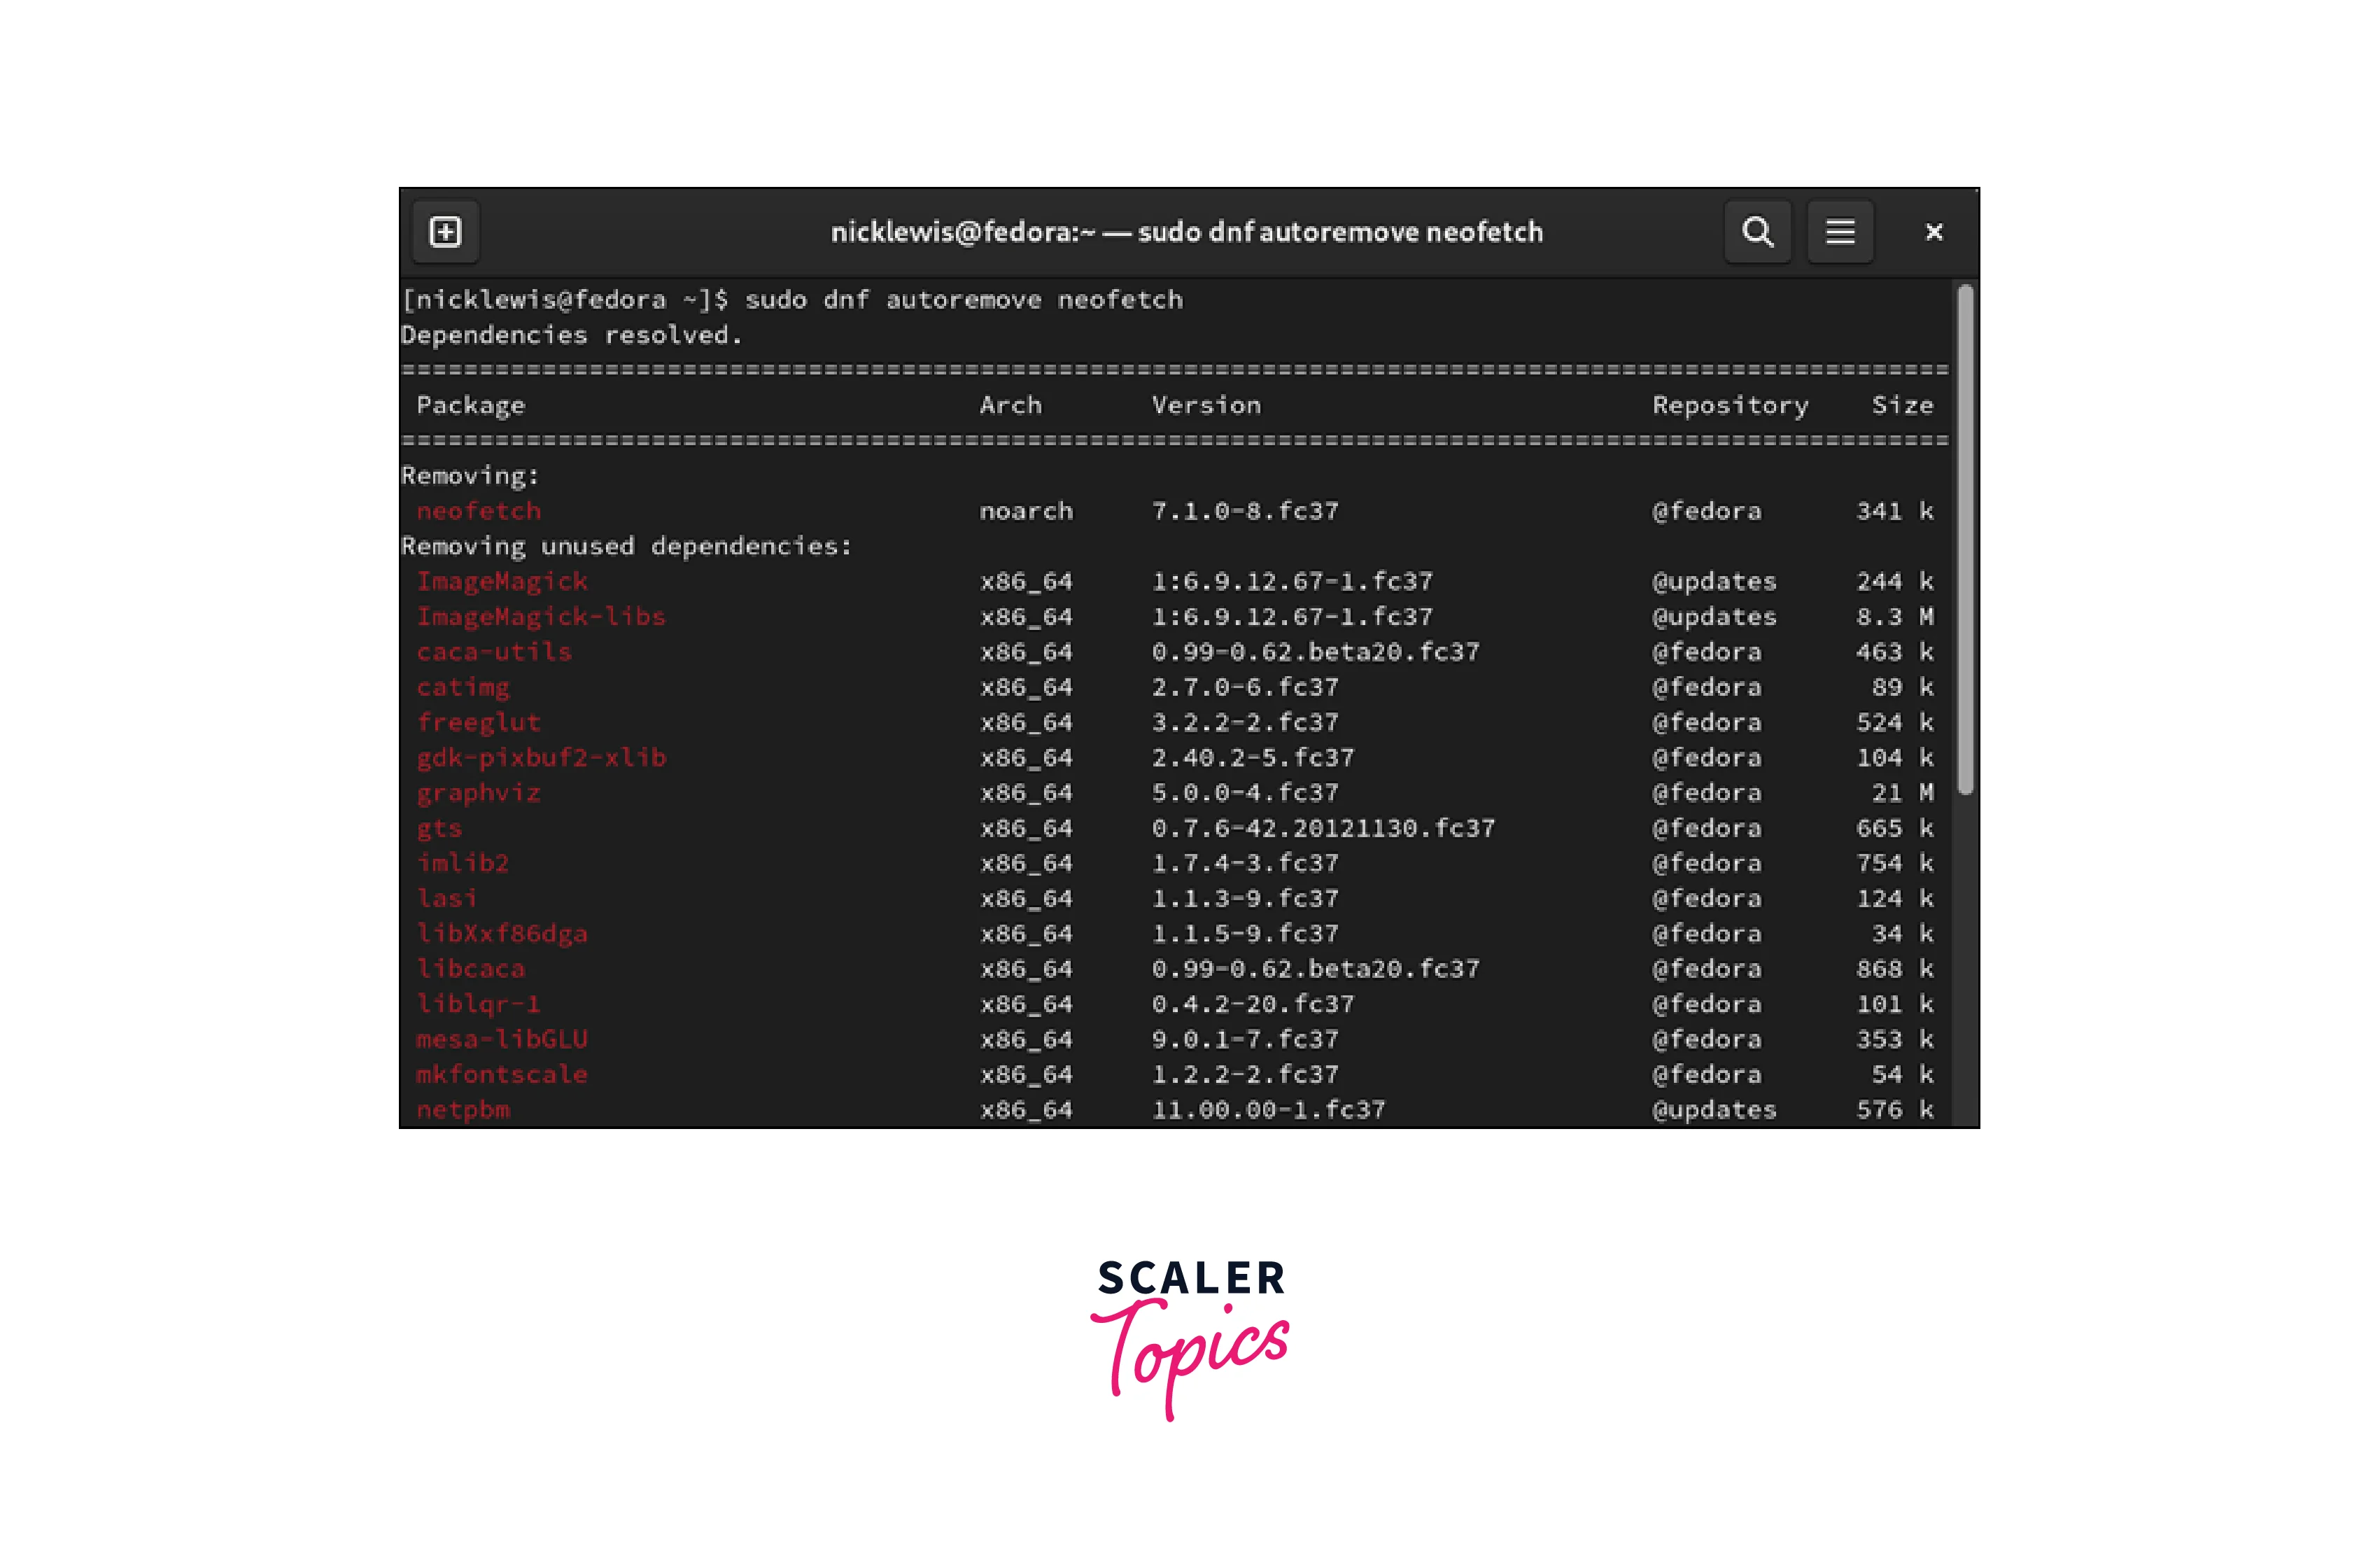
This command removes any dependencies that are no longer required by any installed packages, freeing up additional disk space on your system.
Conclusion
Uninstalling Packages using APT:
- Use the apt-get or apt command to remove packages.
- Use the "remove" or "purge" option to uninstall packages and remove their configuration files.
Uninstalling Packages using Snap:
- Use the snap remove command followed by the package name to uninstall Snap packages.
Uninstalling Packages with Pacman:
- Use the pacman -R command followed by the package name to remove packages.
- Use the --noconfirm option to skip confirmation prompts.
Uninstalling Packages with RPM:
- Use the rpm -e command followed by the package name to uninstall RPM packages.
- Use the --nodeps option to ignore dependencies during uninstallation.
Uninstalling Packages with Yum:
- Use the yum remove command followed by the package name to remove packages.
- Use the --noautoremove option to skip the automatic removal of unused dependencies.
Uninstalling Packages with DNF:
- Use the dnf remove command followed by the package name to uninstall packages.
- Use the --noautoremove option to skip the automatic removal of unused dependencies.
- Always verify the list of installed packages before uninstalling.
- Take care to confirm the uninstallation and review the package removal details.
- Be patient and wait for the uninstallation process to complete.
- Verify the successful uninstallation of packages.
- Consider removing unused dependencies to free up disk space (where applicable).
- Use additional options and functionalities cautiously, such as skipping confirmation prompts or ignoring dependencies.
