Jobs - AWS IoT Core
Overview
An IoT devices batch job in AWS involves processing a large volume of data generated by Internet of Things devices. Leveraging AWS services like EC2 instances, Lambda functions, and IoT Core, the job manages data ingestion, transformation, and analysis in a scalable and efficient manner. This aids in extracting valuable insights, identifying patterns, and making informed decisions. The cloud-based batch job enhances device management, reduces operational overhead, and enables real-time responses for a seamless IoT devices batch job ecosystem.
What is AWS IoT Jobs?
AWS IoT Jobs is a service provided by Amazon Web Services (AWS) that simplifies the management of IoT device lifecycle tasks. It allows you to define and execute tasks or jobs on a fleet of IoT devices. These tasks can include deploying firmware updates, configuration changes, and other software tasks across a large number of IoT devices in a controlled and efficient manner.
With AWS IoT devices batch job, you can create job templates that define the tasks to be executed and the target devices. You can then schedule and manage the execution of these jobs, monitor their progress, and track the success or failure of each task on individual devices. This service helps streamline and automate the process of updating and maintaining IoT devices batch jobs at scale, ensuring consistency and minimizing manual intervention.
Accessing AWS IoT jobs
Accessing AWS IoT devices batch job involves several steps to set up and utilize the service effectively:
- AWS Account Setup: Ensure you have an AWS account. If not, sign up for one.
- IoT Device Registry: Create a device registry in AWS IoT to manage your IoT devices.
- Create IoT Things: Register your IoT devices within the device registry.
- Create IAM Roles: Define AWS Identity and Access Management (IAM) roles with appropriate permissions for accessing IoT Jobs and other necessary AWS services.
- Create IoT Job Executions Role: Set up an IAM role that IoT devices assume when executing jobs. This role should have permissions to access resources required for the tasks in the jobs.
- Job Document: Create a job document that describes the tasks you want to execute on the devices. This document includes details like the action to be performed, parameters, and other relevant information.
- Create a Job: Use the AWS Management Console, AWS CLI, or SDKs to create a job. Specify the target devices, the job document, and other job-related parameters.
- Monitor Job Progress: Keep track of the job's progress through the AWS Management Console, AWS CLI, or SDKs. You can see which IoT devices batch job has started, completed, or encountered errors during job execution.
Create and Run a Job
Creating and running an AWS IoT devices batch job involves several steps.
Below is a simplified guide on how to create and run a job using the AWS Management Console:
-
Sign in to AWS Console: Log in to your AWS account and navigate to the AWS Management Console.
-
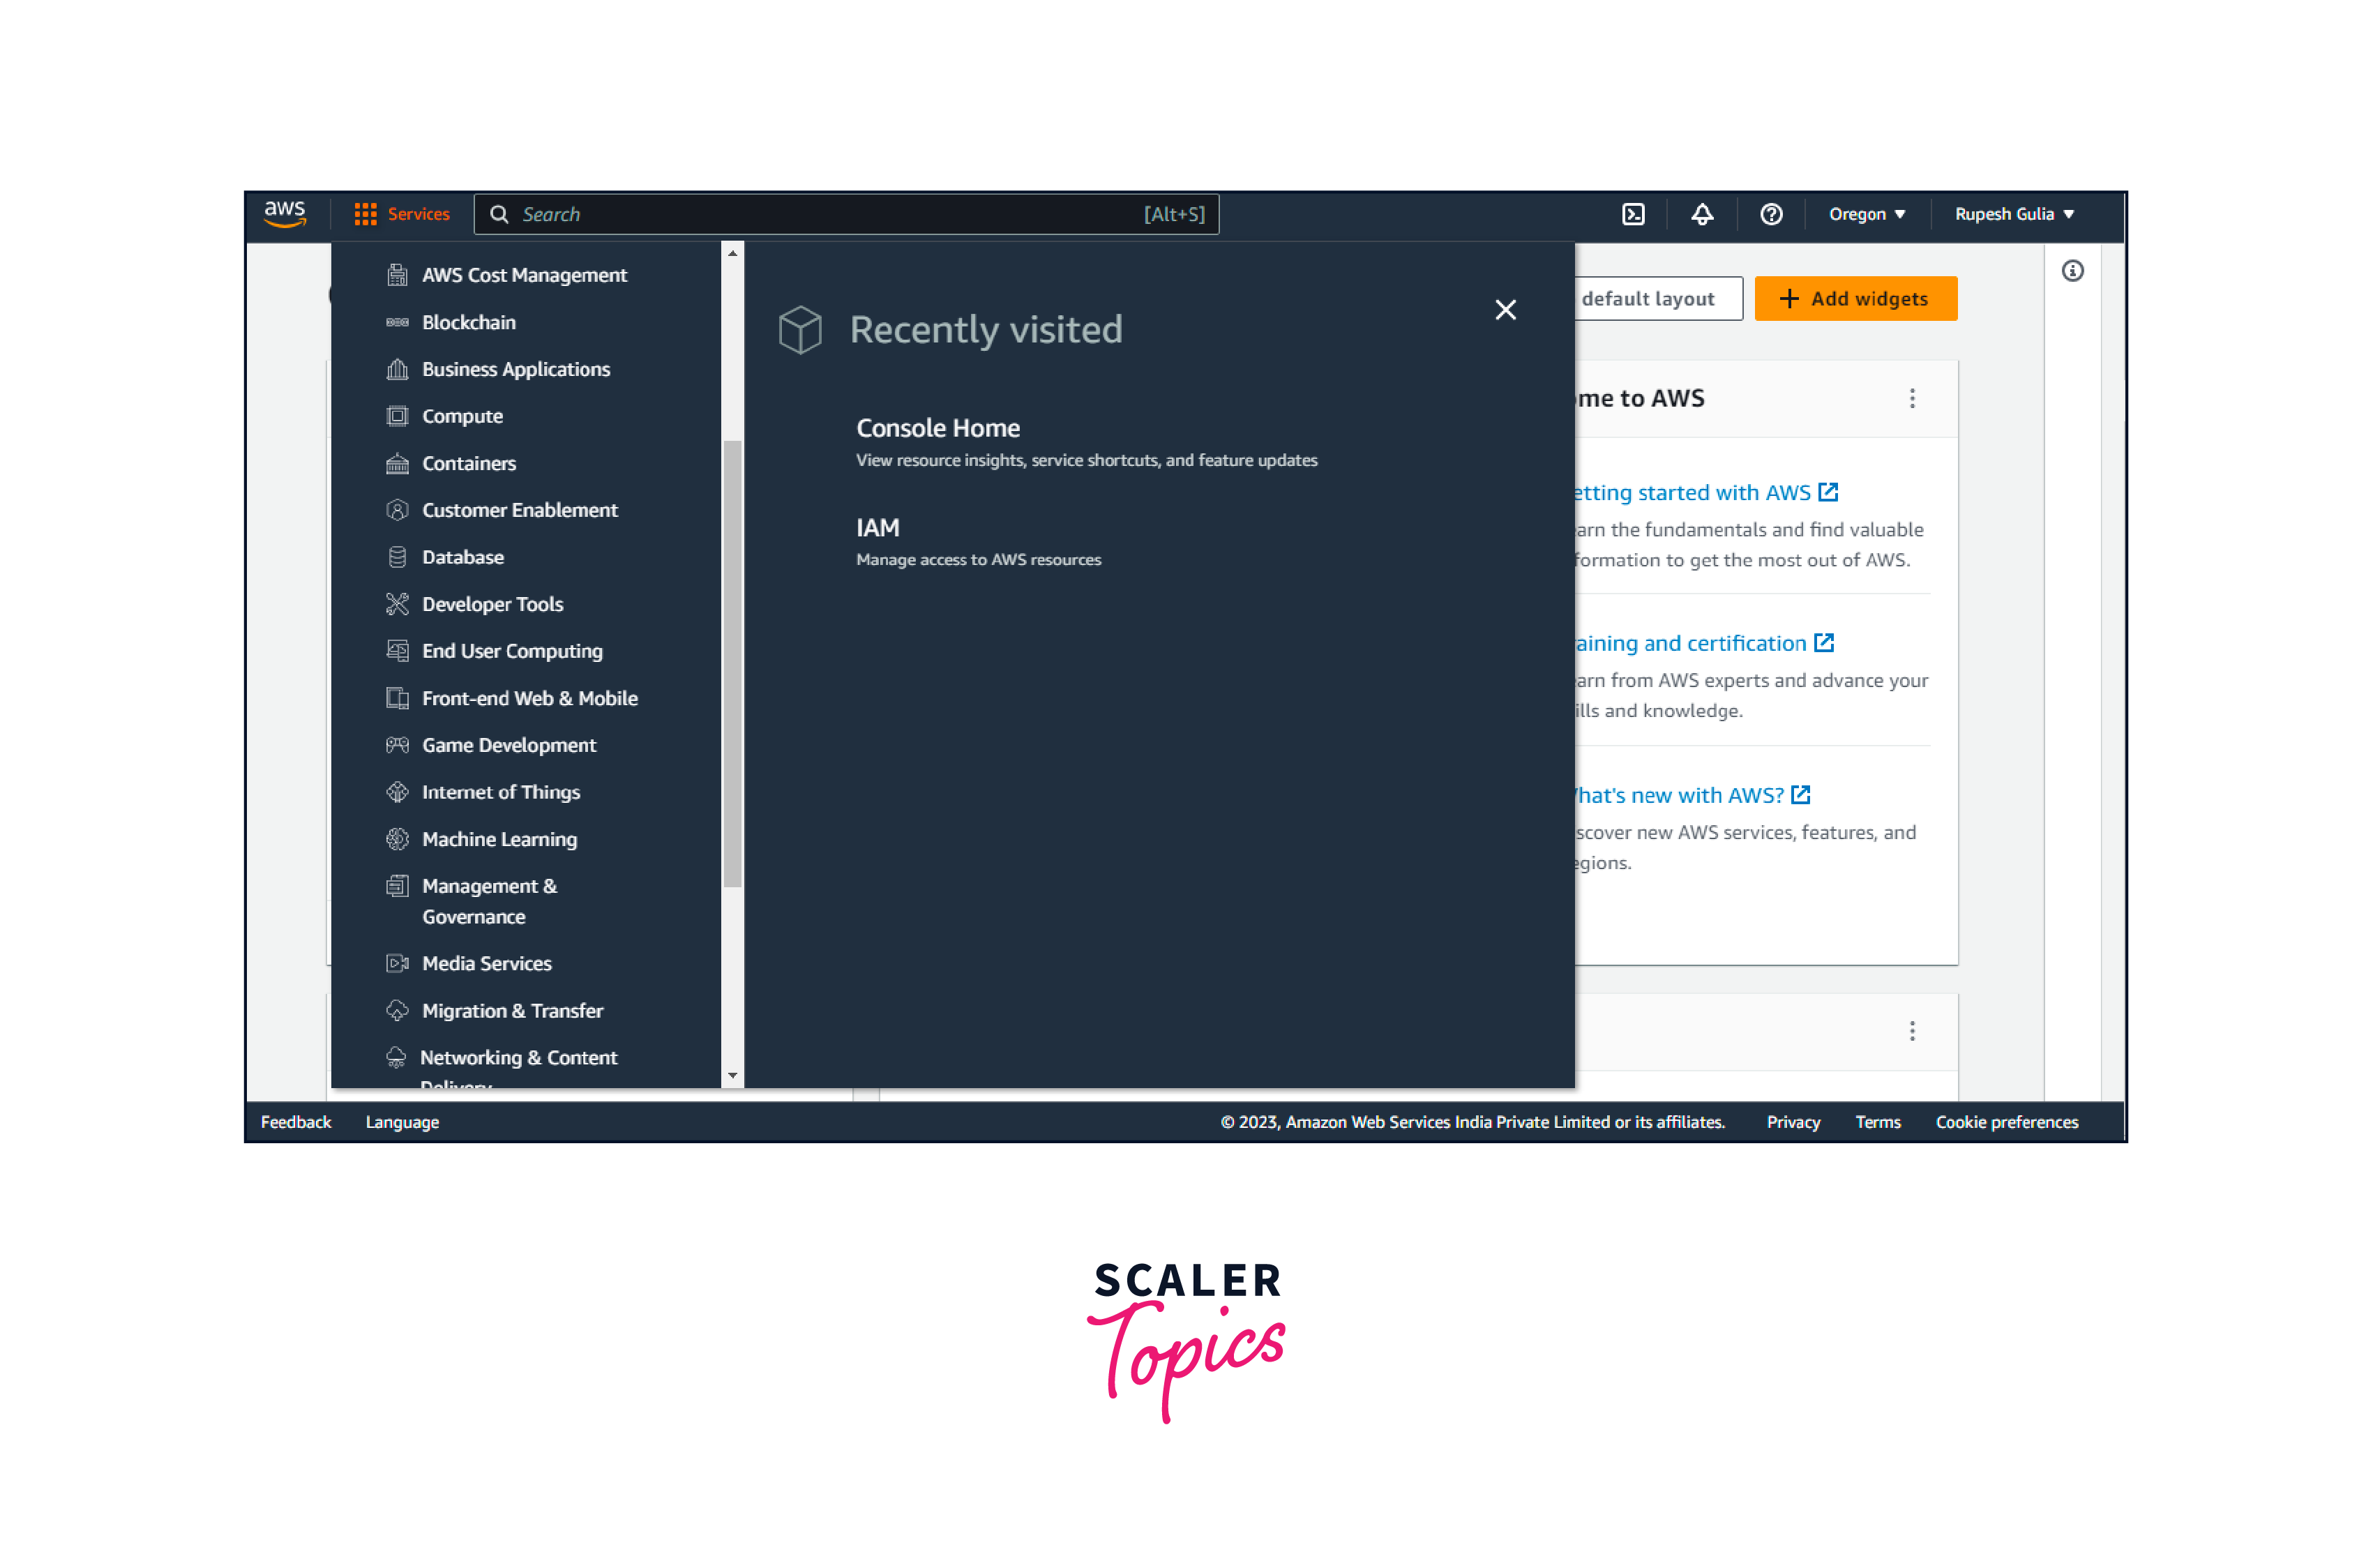
Open AWS IoT Console: Go to the AWS IoT Console.
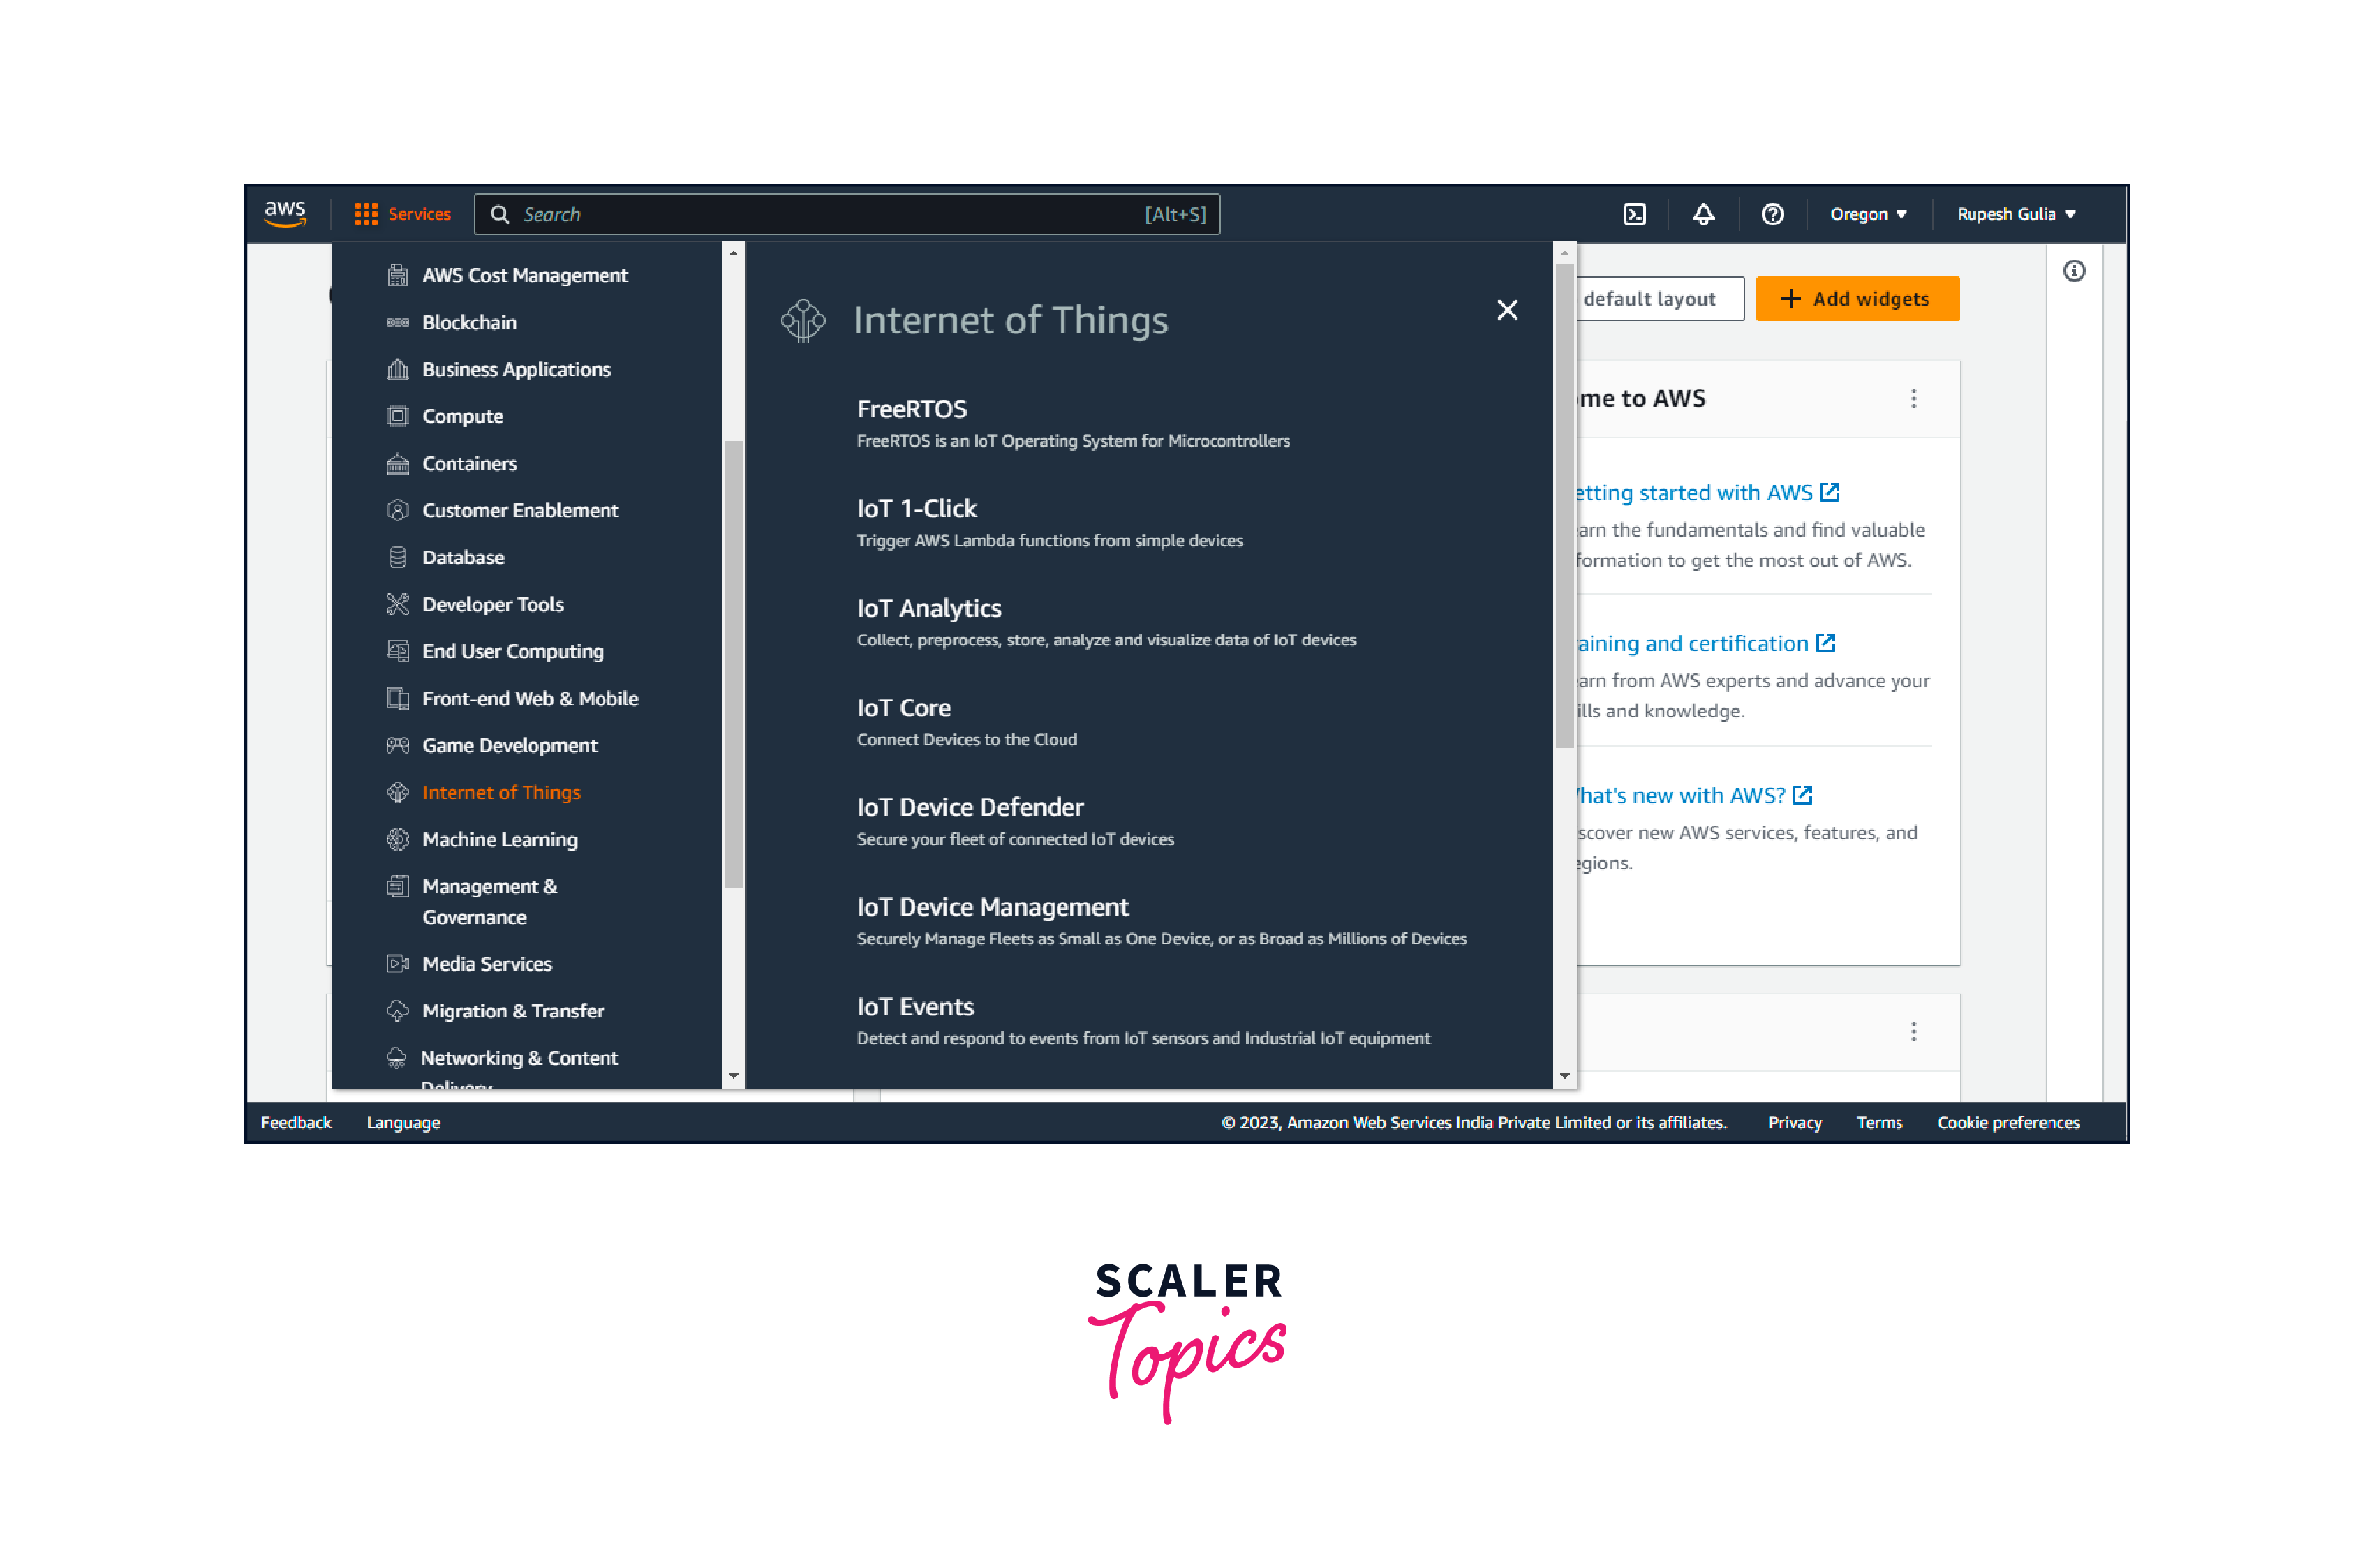
-
Create a Job:
- Click on "Jobs" in the navigation pane on the left.
- Click the "Create Job" button.

-
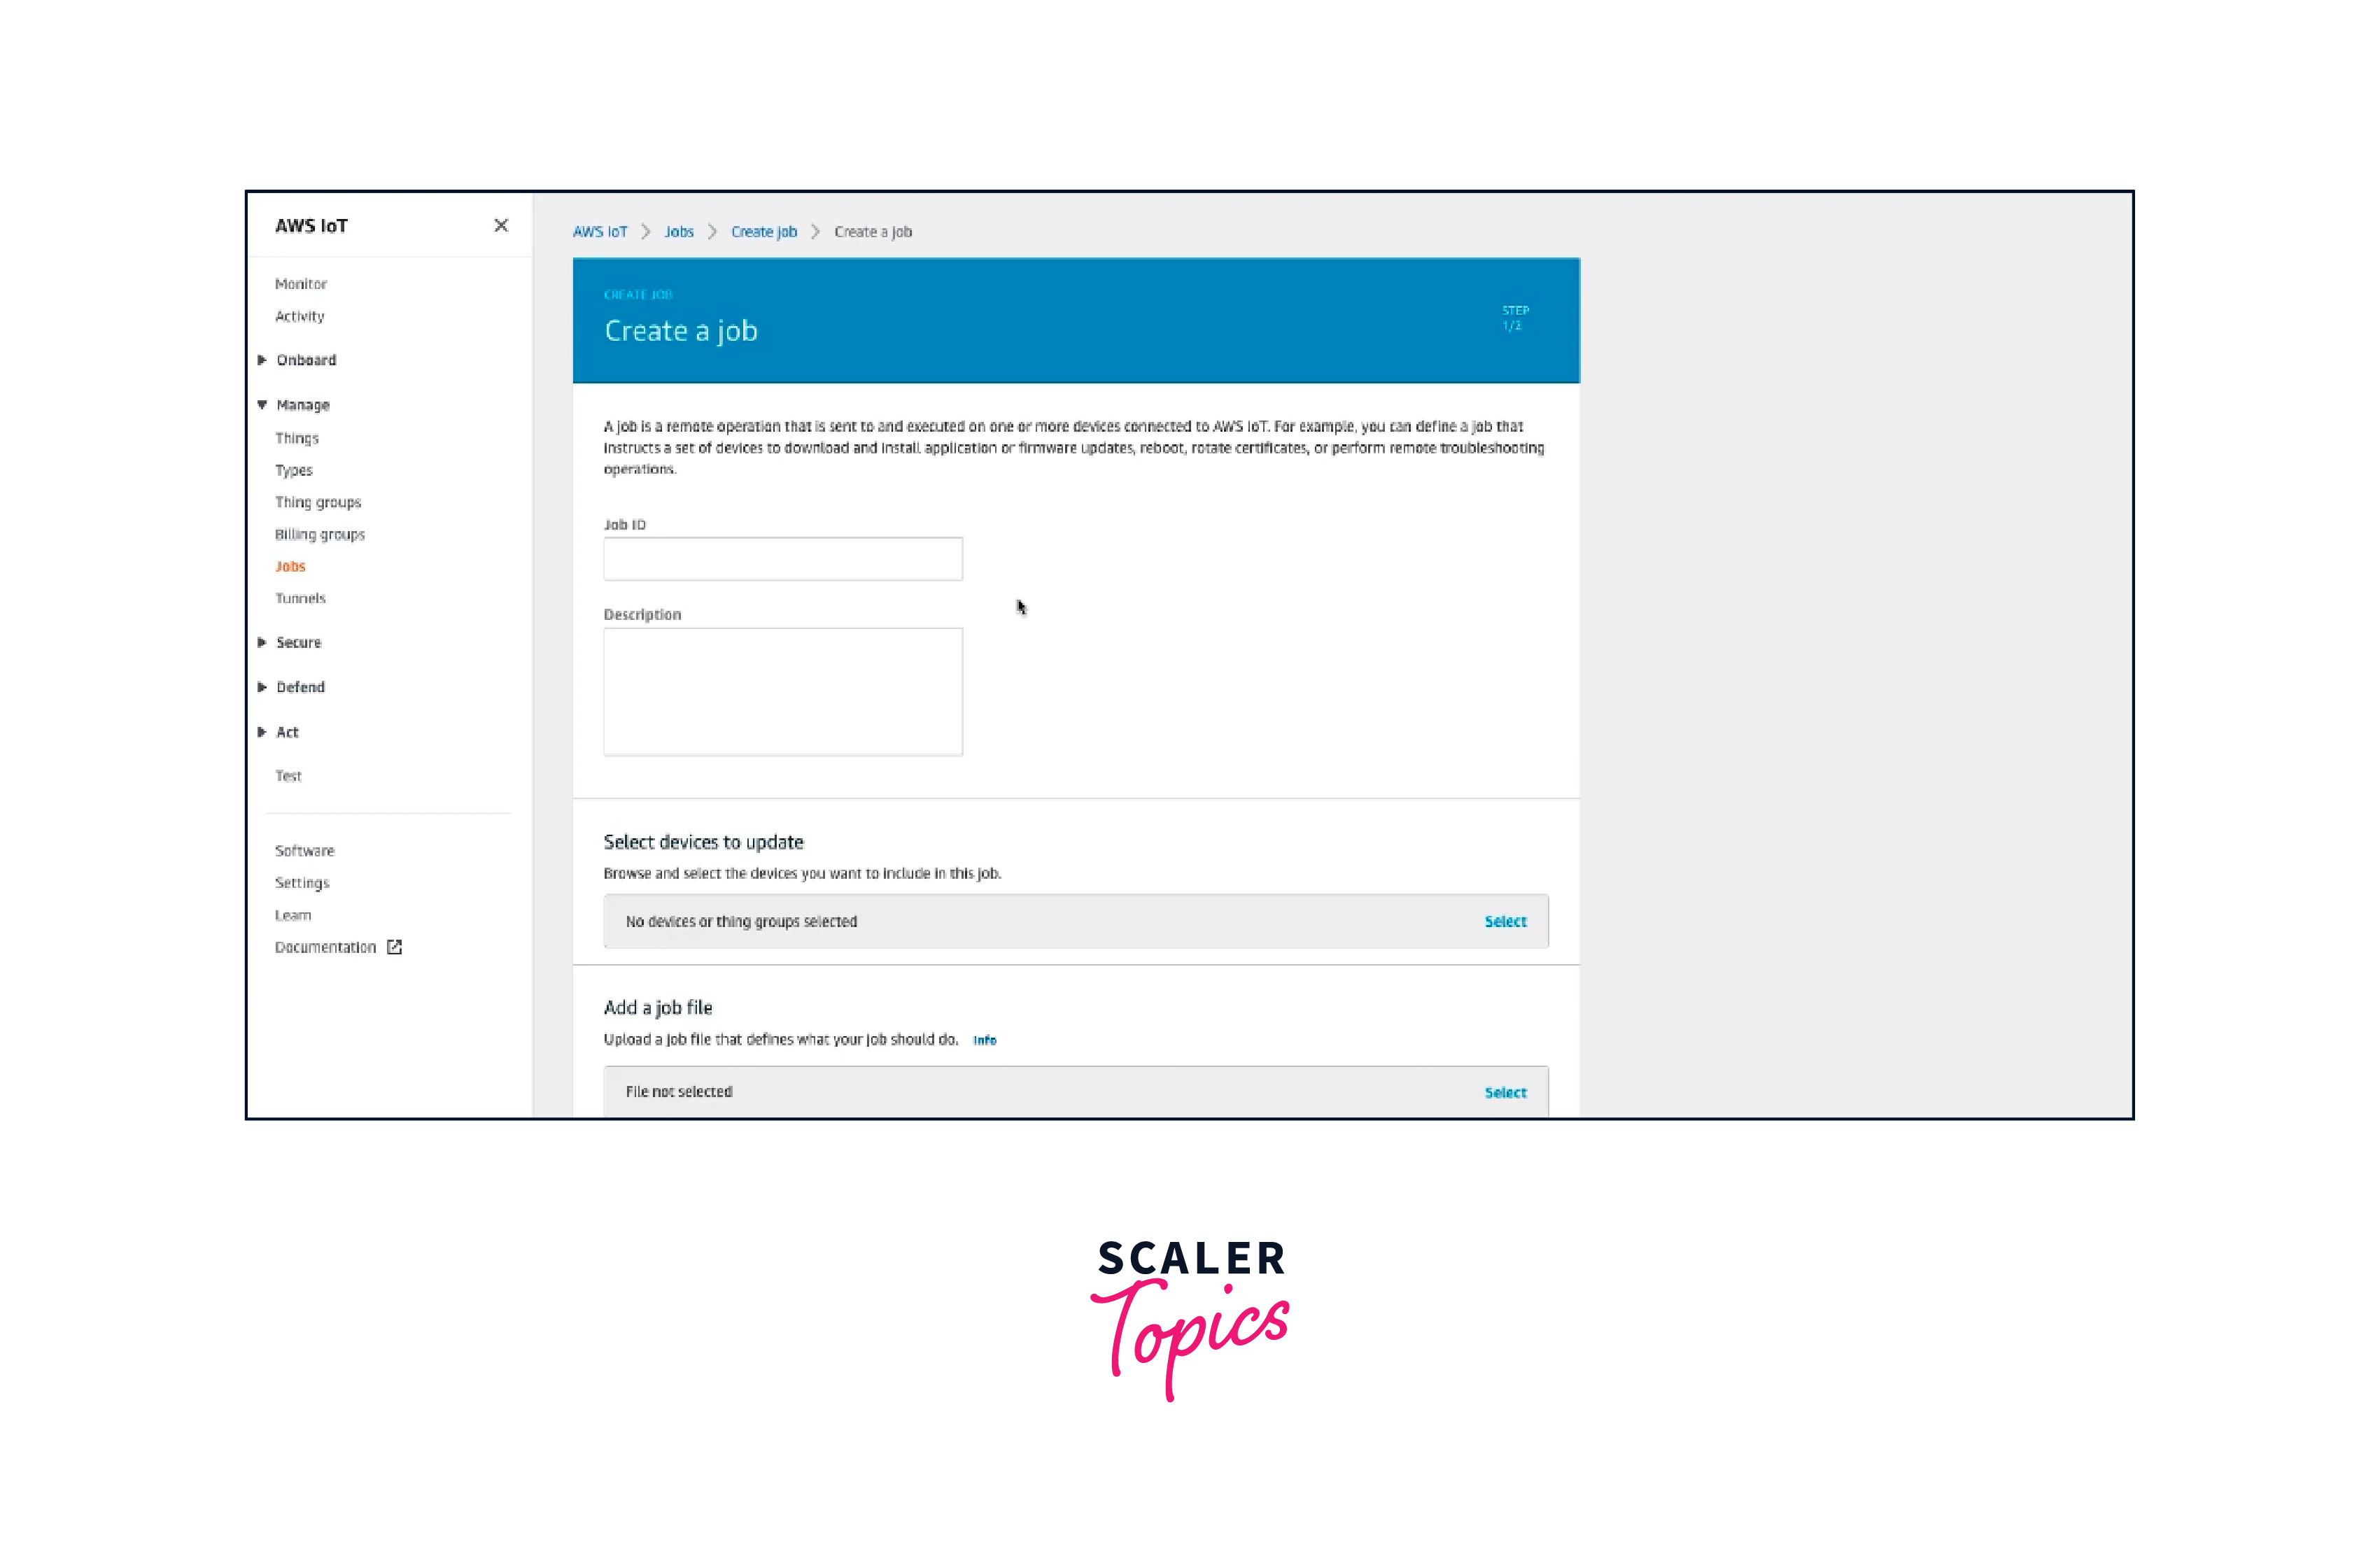
Job Details:
- Enter a unique job ID and a job description.
- Choose a target type (e.g., Thing Group or Thing Type).
- Select the target IoT devices batch job or groups that the job will apply to.
-
Job Document:
- Enter the JSON job document that describes the tasks you want to perform on the devices.
- The job document specifies the action, parameters, and other relevant details.

-
Job Execution Role:
- Choose an existing IAM role or create a new role that IoT devices assume when executing the job. This role should have the necessary permissions for job execution.
- Choose an existing IAM role or create a new role that IoT devices assume when executing the job. This role should have the necessary permissions for job execution.
-
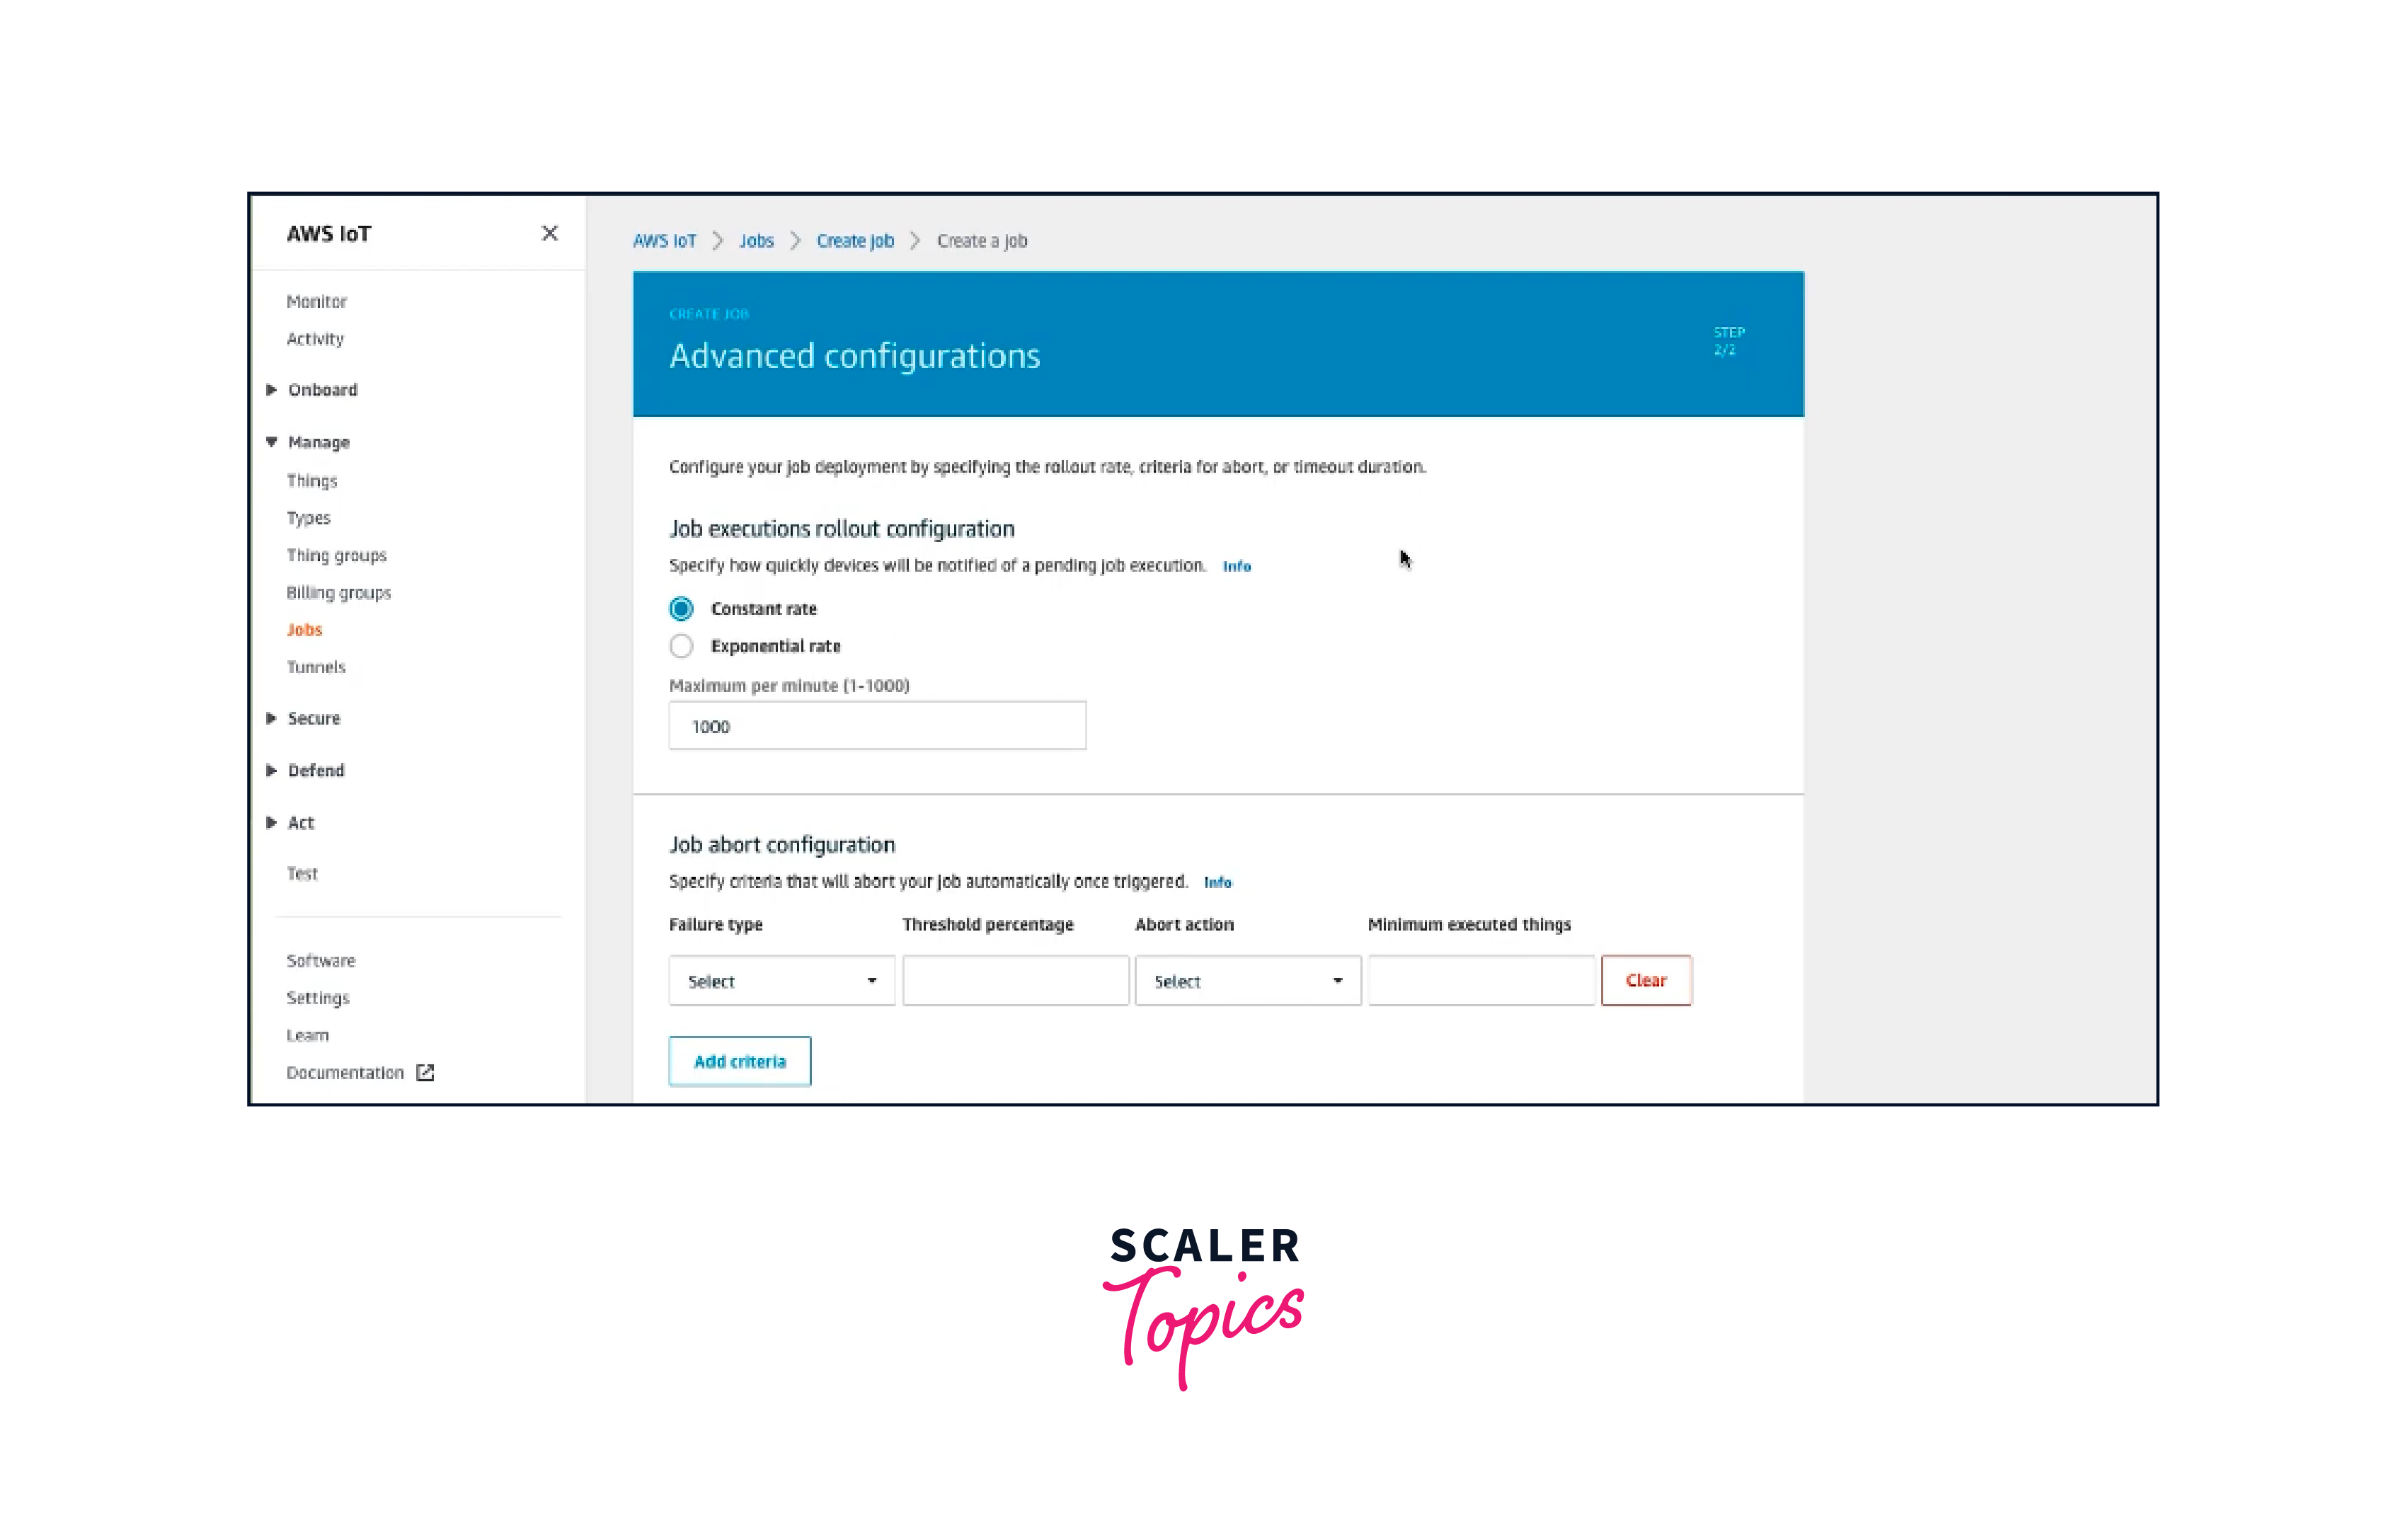
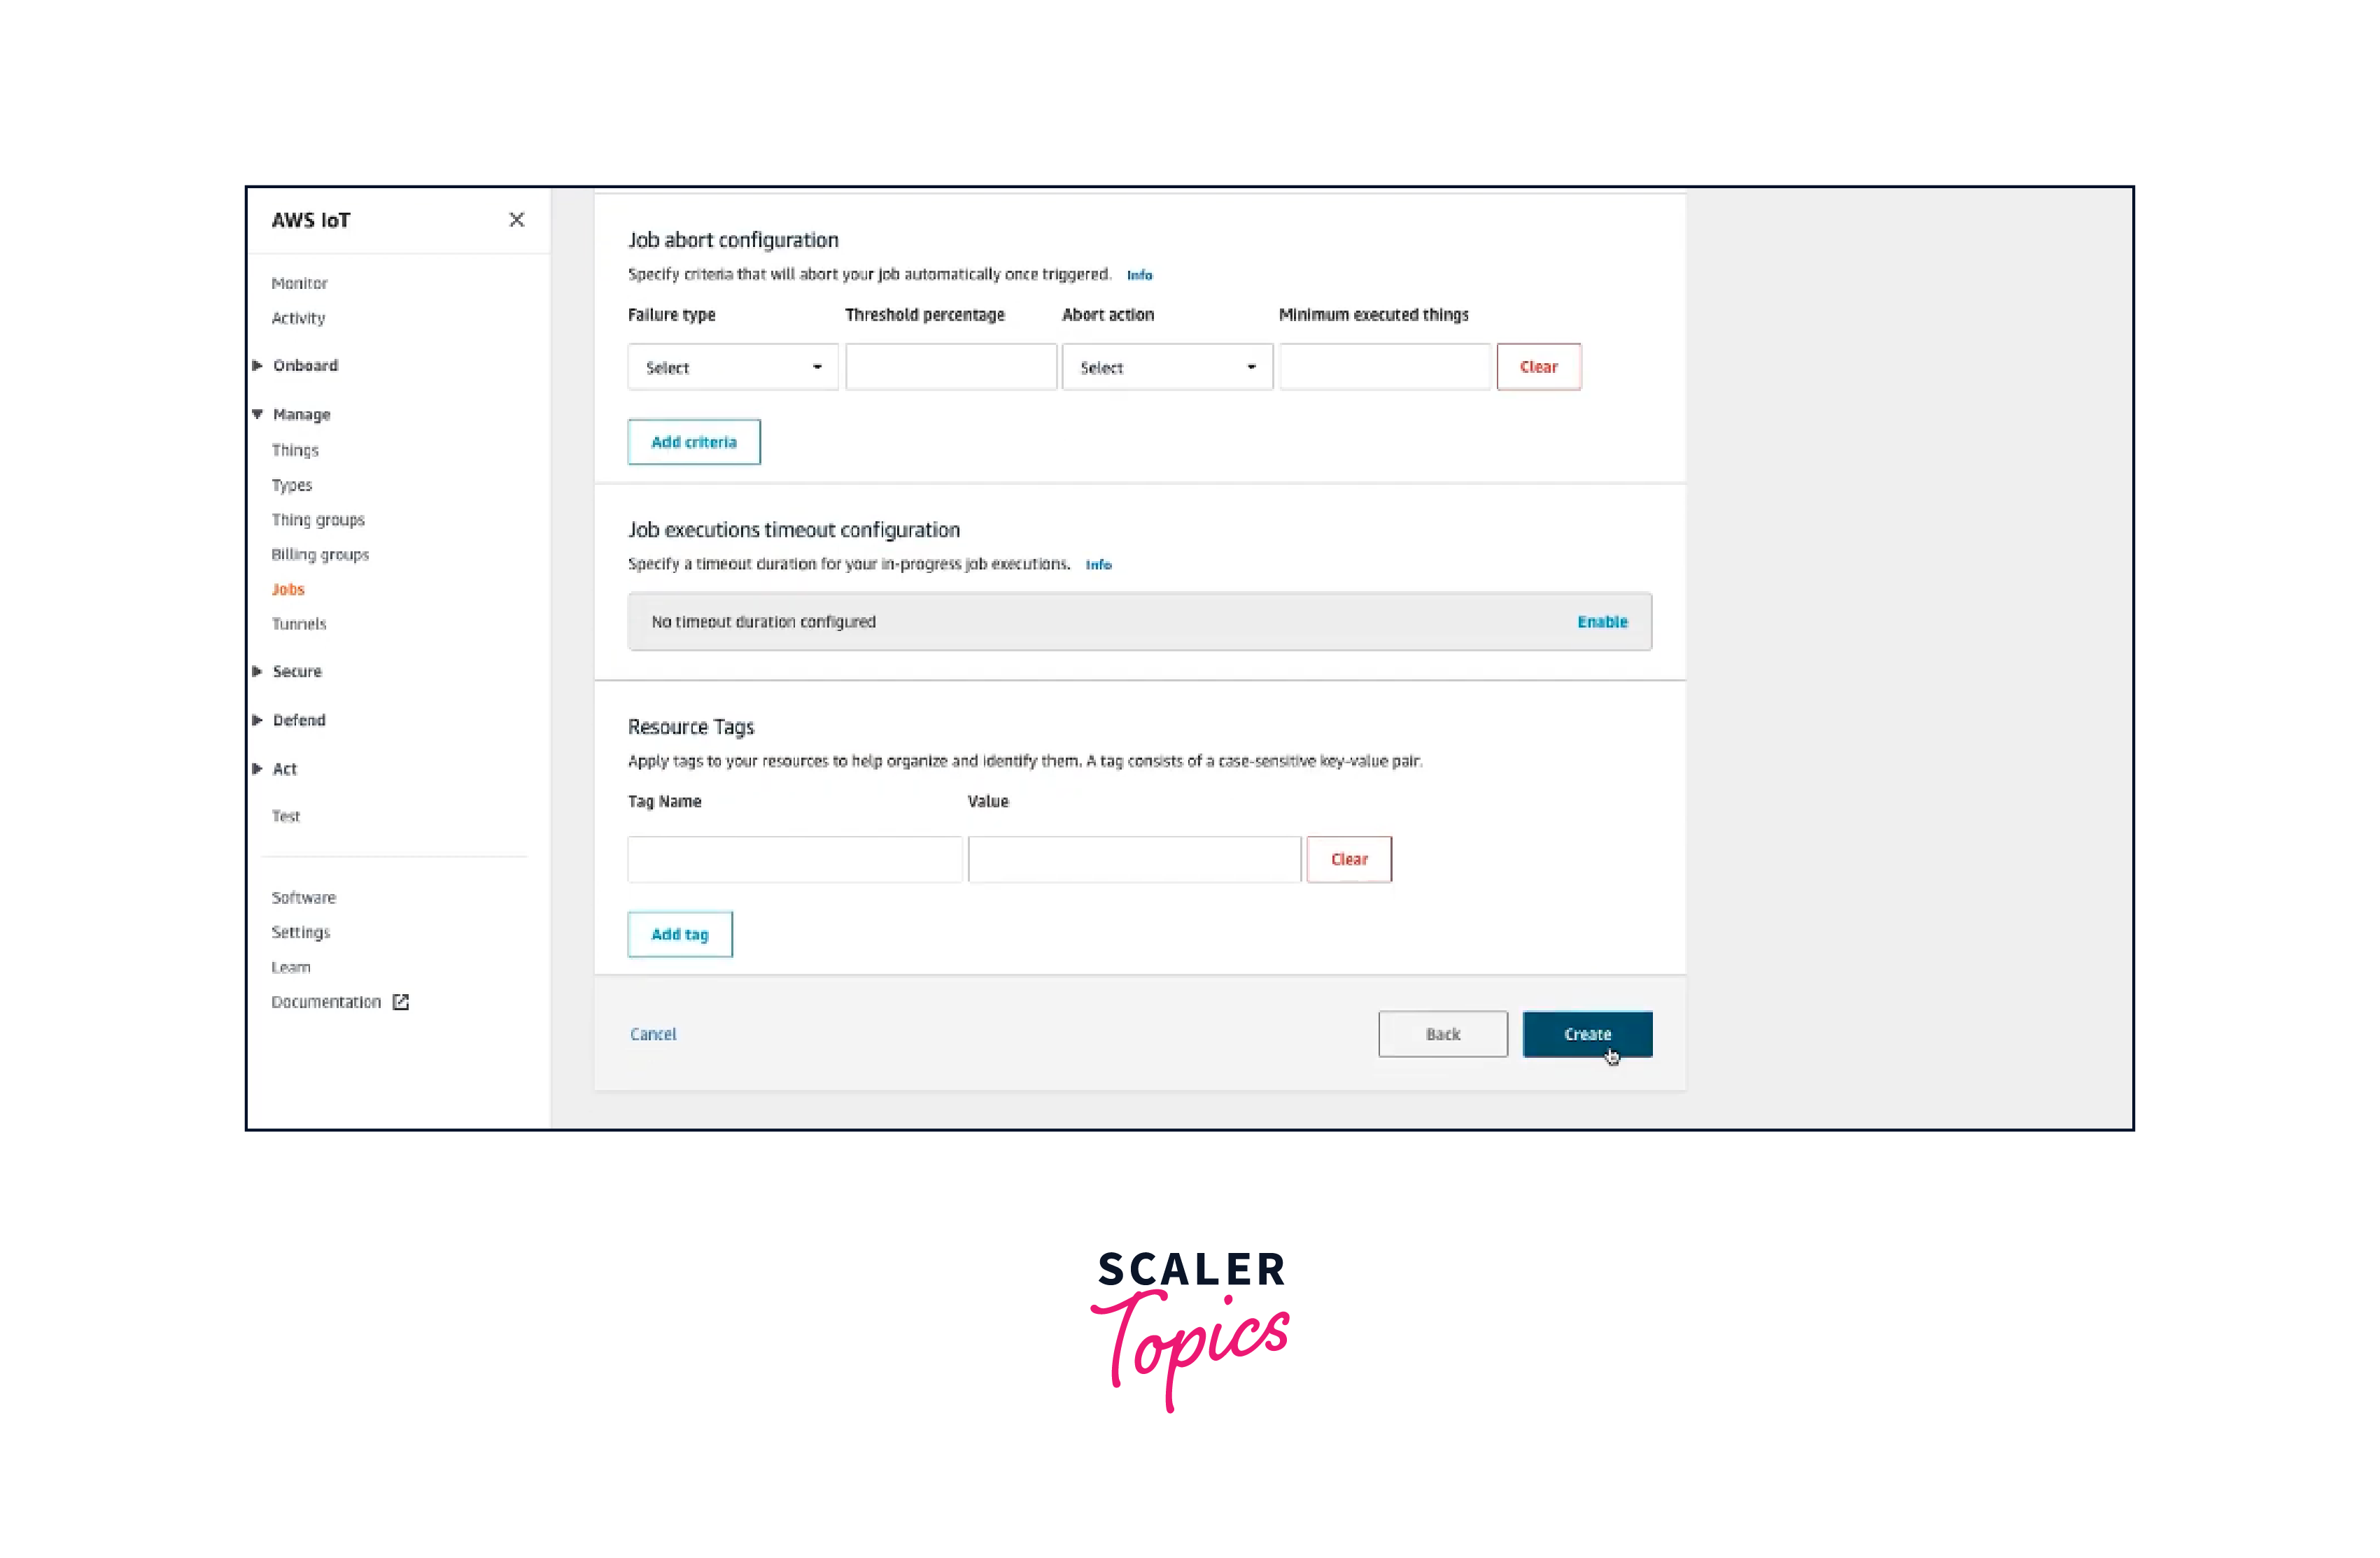
Timeout and Retry Settings:
- Configure the job timeout and retry settings if needed. This determines how long the IoT devices batch job should attempt to execute the job before marking it as failed.
- Configure the job timeout and retry settings if needed. This determines how long the IoT devices batch job should attempt to execute the job before marking it as failed.
-
Create Job:
- Review the job details and settings.
- Click the "Create" button to create the job.
-
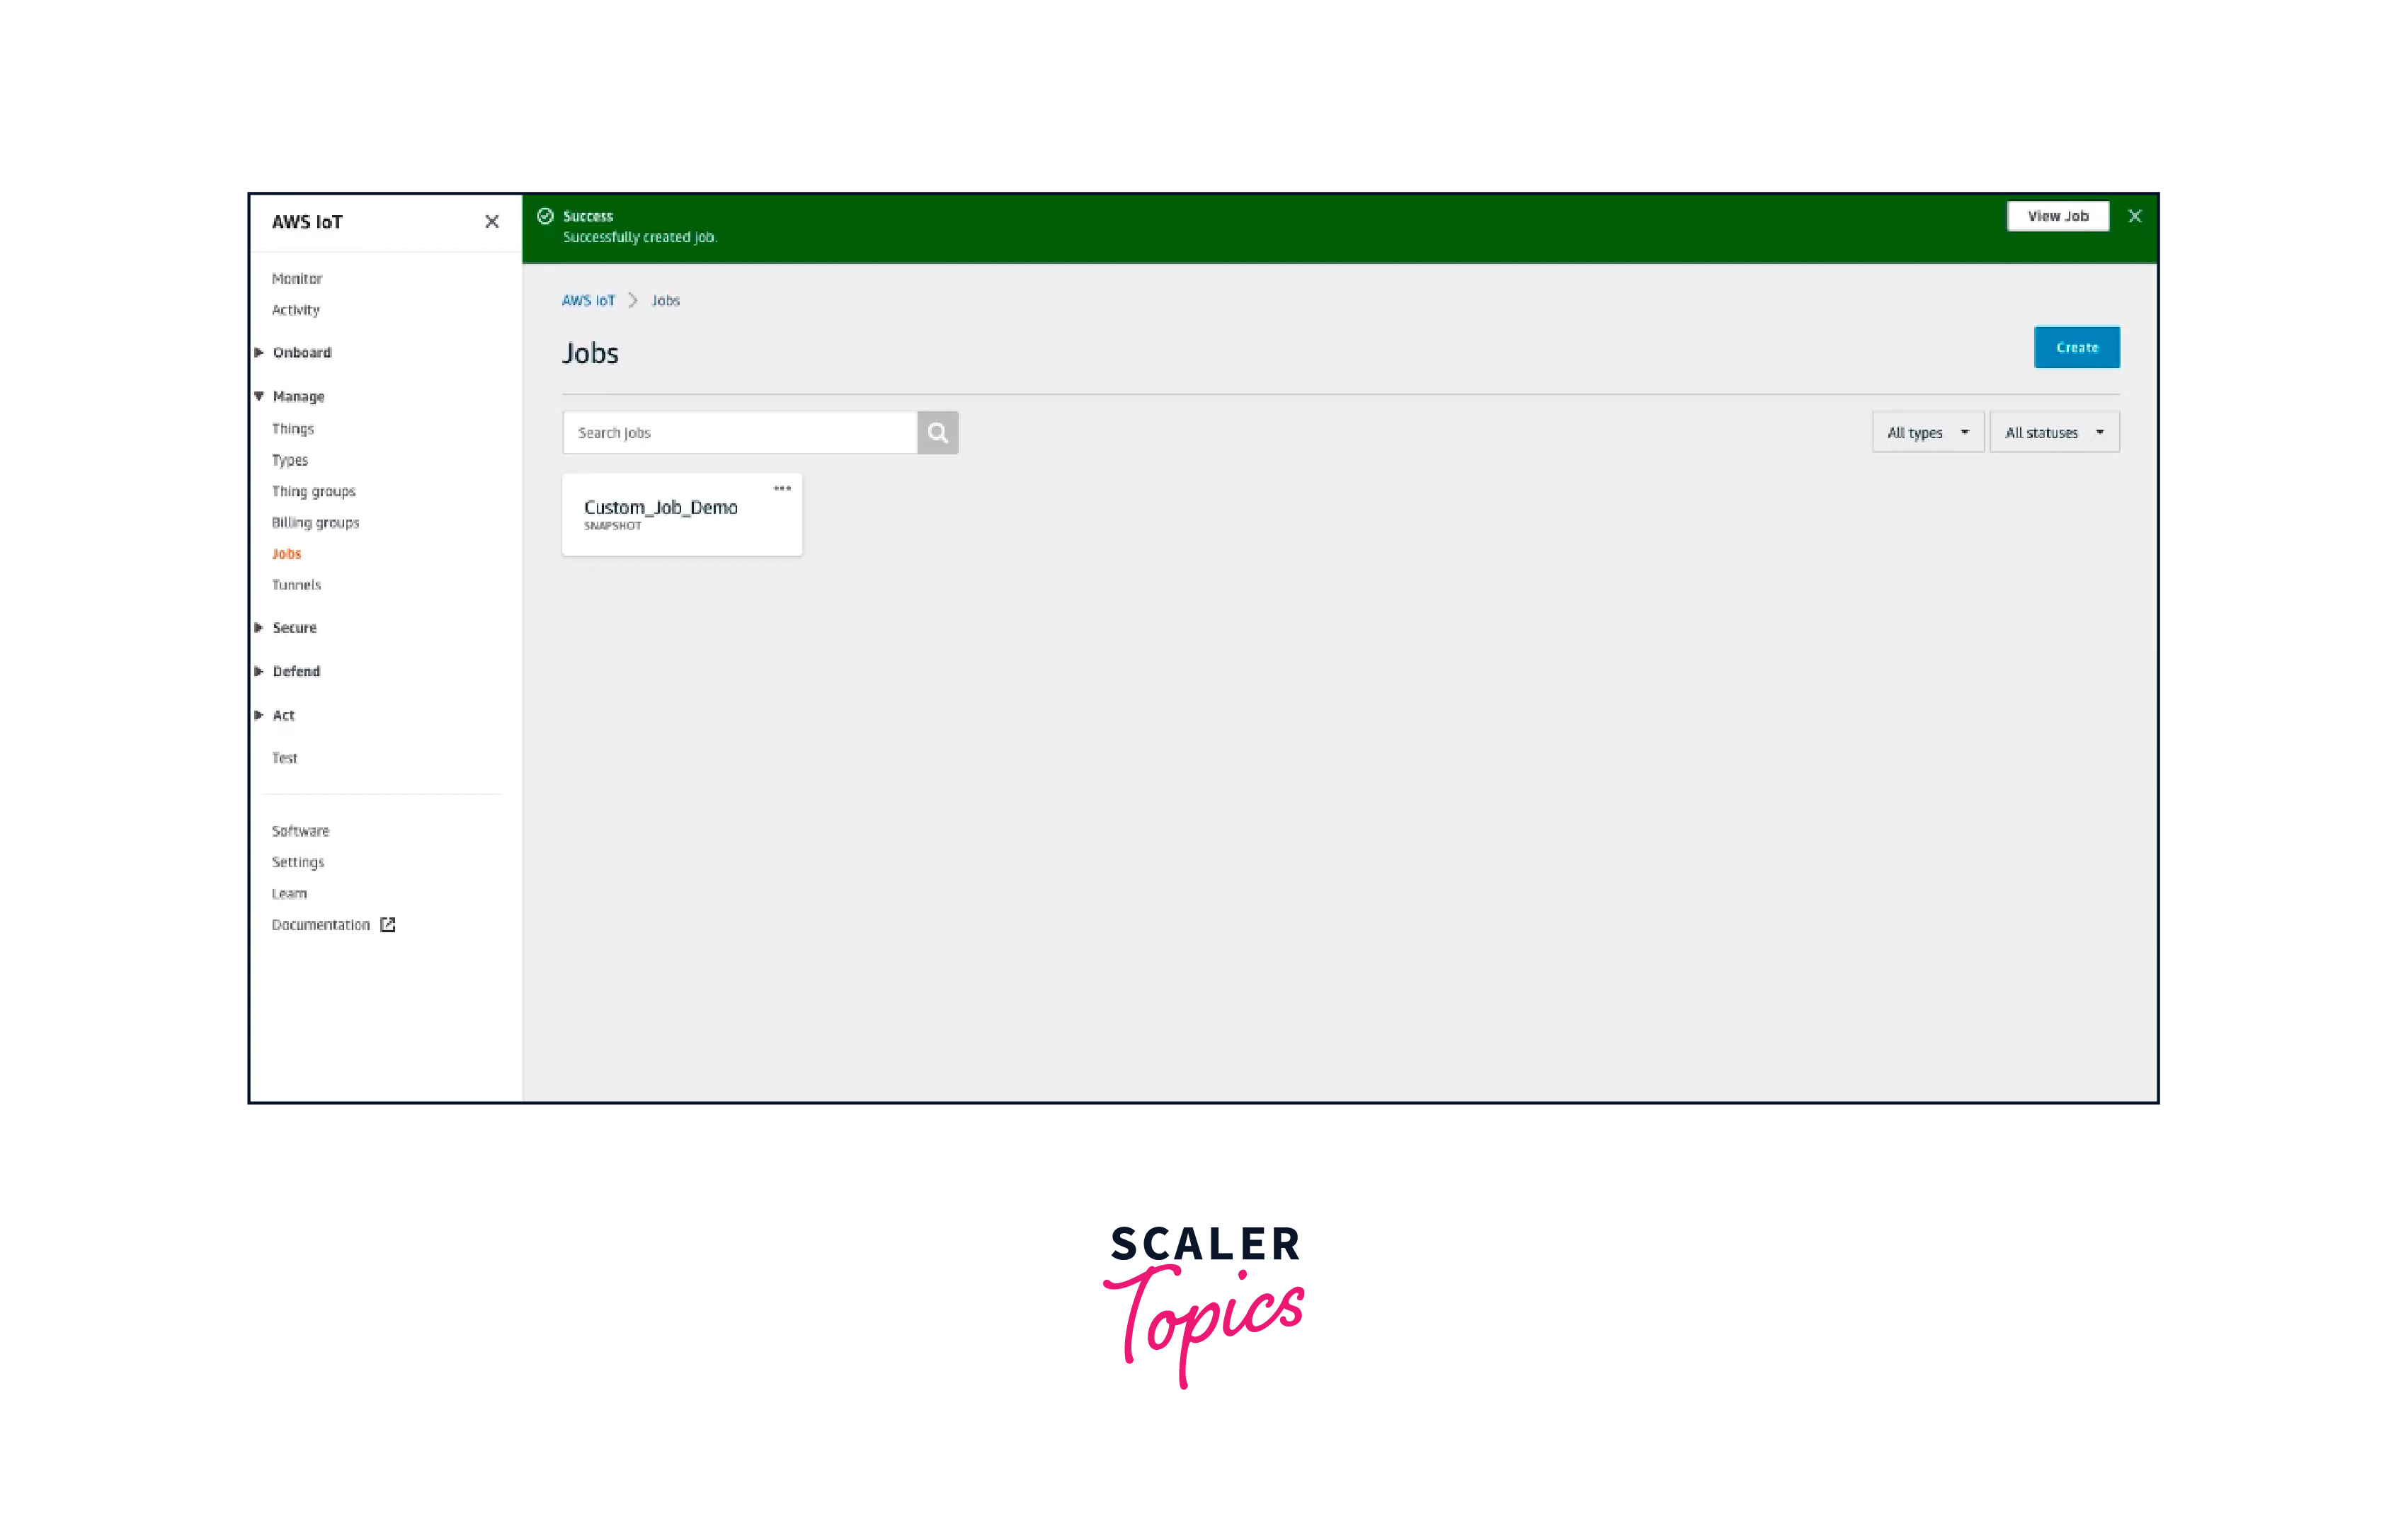
Monitor Job Progress:
- Once the job is created, you can monitor its progress on the Jobs page.
- Check the job status, execution details, and the number of devices that have completed or encountered errors.
-
View Job Execution Results:
- Once the job is completed, you can view the execution results.
- Check the status of each device's execution, whether successful, failed, or cancelled.
-
Cleanup:
- If the job is no longer needed, consider deleting it to free up resources.
Manage Jobs
Managing jobs in AWS IoT devices batch jobs involves tasks like viewing, updating, cancelling, and tracking the progress of jobs.
Here's how you can manage an IoT devices batch job using the AWS Management Console:
- Sign in to AWS Console: Log in to your AWS account and access the AWS Management Console.
- Open AWS IoT Console: Navigate to the AWS IoT Console.
- View Existing Jobs:
- Click on "Jobs" in the navigation pane on the left.
- You'll see a list of existing jobs along with their statuses.
- View Job Details:
- Click on a specific job to view its details.
- You can see information such as the job ID, description, target devices, and execution status.
- Monitor Job Progress:
- Within the job details page, you can monitor the progress of the job.
- Check the overall status, execution status for each device, and any encountered errors.
- Update a Job:
- If needed, you can update certain aspects of a job before or while it's in progress.
- Edit details like the job description, target devices, or job document.
- Cancel a Job:
- To cancel a job, select the job you want to cancel.
- Click the "Cancel" button to stop the execution of the job on devices.
- View Job Execution History:
- Within the job details, you can access the job execution history.
- This provides a timeline of when devices started, completed, or encountered errors during the job.
- Retry Failed Devices:
- For the IoT devices batch job that encountered errors, you can choose to retry only those devices.
- This can help ensure successful execution without re-running the entire job.
Copy a Job
You can create a new job with similar settings as an existing job.
Here's how you can do it:
- Sign in to AWS Console: Log in to your AWS account and access the AWS Management Console.
- Open AWS IoT Console: Navigate to the AWS IoT Console.
- View Existing Jobs:
- Click on "Jobs" in the navigation pane on the left.
- You'll see a list of existing jobs.
- Select the Job to Copy:
- Choose the job you want to copy settings from.
- Create a New Job:
- Click the "Create Job" button to start creating a new job.
- Configure New Job Settings:
- While creating the new job, you'll need to manually enter settings similar to the job you want to copy.
- This includes the job ID, description, target devices, job document, execution role, and other relevant settings.
- Review and Create:
- Review the new job's settings to ensure they match the job you want to copy.
- Once you're satisfied, click the "Create" button to create the new job.
View Job Status
To view the status of an AWS IoT devices batch job, you can follow these steps using the AWS Management Console:
- Sign in to AWS Console: Log in to your AWS account and access the AWS Management Console.
- Open AWS IoT Console: Navigate to the AWS IoT Console.
- View Existing Jobs:
- Click on "Jobs" in the navigation pane on the left.
- Select a Job:
- You'll see a list of existing jobs.
- Click on the specific job you want to view the status of.
- Job Overview:
- On the job details page, you'll find an overview of the selected job.
- This includes information such as the job ID, description, target devices, and execution status.
- Job Execution Status:
- Look for the "Job execution status" section.
- This section provides a summary of the execution status of the job.
- You can see how many IoT devices batch jobs have been completed, how many are still in progress, and if any have encountered errors.
- Individual Device Status:
- Depending on the job, you might also see a list of individual devices and their execution status.
- This will show you which IoT devices batch job is completed, which is still running, and which devices have failed.
Filter the Device List
Filtering the device list in the AWS IoT devices batch job can help you narrow down your view to specific devices based on certain criteria.
Here's how you can filter the device list using the AWS Management Console:
- Sign in to AWS Console: Log in to your AWS account and access the AWS Management Console.
- Open AWS IoT Console: Navigate to the AWS IoT Console.
- View Device List:
- Click on "Things" or "Device Registry" in the navigation pane on the left.
- This will display a list of registered IoT devices.
- Search for Filters:
- Look for a filter or search bar at the top of the device list.
- Depending on the console version, you might see options to filter by device name, type, attribute values, or other criteria.
- Select Filters:
- Click on the filter options you want to apply.
- For example, you might select a specific device type or a certain attribute value.
- Apply Filters:
- After selecting your desired filters, click a button like "Apply Filters" or "Search".
- The device list will then update to display only the devices that match the selected criteria.
- Clear Filters:
- If you want to remove the filters and see the full IoT devices batch job list again, look for a "Clear Filters" option.
Customize Columns in the Device List
To customize columns in the device list using the AWS IoT Console:
- Sign in to AWS Console: Log in to your AWS account and access the AWS Management Console.
- Open AWS IoT Console: Navigate to the AWS IoT Console.
- View Device List:
- Click on "Things" or "Device Registry" in the navigation pane on the left.
- This will display a list of registered IoT devices batch jobs.
- Customize Columns:
- Look for a settings icon or "Customize Columns" option, often located near the top of the device list.
- Select Columns:
- Click on the option to customize columns.
- A pop-up or dropdown menu might appear, showing a list of available attributes or information fields related to devices.
- Choose Columns:
- Select the columns you want to display in the device list.
- You should be able to add or remove columns as needed.
- Apply Changes:
- After selecting your desired columns, there will be a button like "Apply" or "Save Changes".
Rerun Jobs
Here's how you can do it:
- Sign in to AWS Console: Log in to your AWS account and access the AWS Management Console.
- Open AWS IoT Console: Navigate to the AWS IoT Console.
- View Existing Jobs:
- Click on "Jobs" in the navigation pane on the left.
- You'll see a list of existing jobs.
- Select the Job to Rerun:
- Choose the job you want to rerun.
- Create a New Job:
- Click the "Create Job" button to start creating a new job.
- Configure New Job Settings:
- While creating the new job, enter the settings that match the original job you want to rerun.
- This includes the job ID, description, target IoT devices batch job, job document, execution role, and other relevant settings.
- Review and Create:
- Review the new job's settings to ensure they match the original job you want to rerun.
- Once you're satisfied, click the "Create" button to create the new job and run it.
Import and Export Devices
Importing and exporting devices in AWS IoT devices batch job refers to the process of bulk adding or removing devices from your device registry using data files. This can be especially useful when you need to manage a large number of devices efficiently.
Here's an overview of how you can import and export devices in AWS IoT:
Importing Devices
- Prepare the Data File:
- Create a data file (often in CSV or JSON format) containing device information.
- Include attributes like device ID, device type, attributes, and other relevant data.
- Sign in to AWS Console: Log in to your AWS account and access the AWS Management Console.
- Open AWS IoT Console: Navigate to the AWS IoT Console.
- Import Devices:
- Click on "Things" or "Device Registry" in the navigation pane on the left.
- Look for an option like "Import" or "Bulk Upload."
- Upload the Data File:
- Follow the prompts to upload the prepared data file.
- Specify how to handle duplicate devices (e.g., update or skip).
Exporting Devices
- Sign in to AWS Console: Log in to your AWS account and access the AWS Management Console.
- Open AWS IoT Console: Navigate to the AWS IoT Console.
- Export Devices:
- Click on "Things" or "Device Registry" in the navigation pane on the left.
- Look for an option like "Export" or "Bulk Export."
- Select Export Format:
- Choose the desired format for the export file (e.g., CSV or JSON).
- Specify Export Criteria:
- Define the criteria for exporting devices.
- You might choose to export all IoT devices batch job or specific IoT devices batch job types, attributes, or groups.
- Initiate Export:
- Start the export process.
- The console will provide a download link when the export is ready.
Conclusion
- In the realm of AWS IoT, effectively managing and orchestrating a network of connected devices is essential for a seamless and efficient Internet of Things ecosystem.
- With AWS IoT devices batch job Jobs, you can streamline tasks and updates across your device fleet, enhancing device lifecycle management.
- By creating, executing, and monitoring jobs, you enable firmware updates, configuration changes, and other critical tasks with ease.
- This not only optimizes device performance but also enables you to gather valuable insights from your IoT device's batch job data.