How to Connect MongoDB with Java : Complete Tutorial
Overview
In this article, we are going to learn about how we can connect MongoDB with Java. Before getting started with the topic, let us get a short overview of the topic.
How to Connect MongoDB with Java: MongoDB is a popular NoSQL database that provides a flexible and scalable solution for managing large volumes of unstructured data. When combined with Java, it offers developers a powerful platform to build robust and efficient applications. The MongoDB Java driver serves as the primary interface between Java applications and the MongoDB database, enabling seamless integration and interaction. With its comprehensive API, the Java driver allows developers to perform various operations such as CRUD (Create, Read, Update, Delete) operations, indexing, aggregation, and more.
Pre-requisites
To work with MongoDB using Java, there are a few prerequisites that you should consider:
- MongoDB: You need to have MongoDB installed and running on your system or have access to a remote MongoDB server. You can download MongoDB from the official website of MongoDB.
- Java Development Kit (JDK): Ensure that you have Java Development Kit installed on your machine. MongoDB Java driver supports Java 8 and above, so make sure you have an appropriate JDK version installed.
- Java IDE: You will need a Java Integrated Development Environment (IDE) to write and run your Java code. Popular options include Eclipse, IntelliJ IDEA, and NetBeans. Choose the IDE that you are comfortable with or prefer.
- Maven: Maven is a widely used build automation tool primarily used for Java projects. It provides a comprehensive framework for managing project dependencies, compiling source code, running tests, and packaging applications into executable JAR files or other distribution formats.
- MongoDB Java Driver: The MongoDB Java driver is essential for connecting your Java application with the MongoDB database. You can download the driver from the official MongoDB website or include it as a dependency in your project using a build tool like Maven or Gradle.
- Understanding of Java Programming: Familiarity with Java programming language is crucial to work with MongoDB using Java. You should have a good understanding of Java concepts, including object-oriented programming, classes, interfaces, and basic data structures.
- Knowledge of MongoDB Query Language (MQL): Having a basic understanding of MongoDB Query Language (MQL) will be beneficial. MQL is similar to SQL but specifically designed for MongoDB, and knowing how to write queries will help you retrieve and manipulate data effectively.
Having these prerequisites in place will set you up to start working with MongoDB using Java, allowing you to develop applications that interact with MongoDB and leverage its features for data management.
Why Should We Use Java with MongoDB?
There are several reasons why using Java with MongoDB can be advantageous:
-
Strong Integration: Java has excellent support for MongoDB through the official MongoDB Java driver. The driver provides a comprehensive API that allows seamless integration between Java applications and MongoDB, enabling efficient data storage, retrieval, and manipulation.
-
Object-Oriented Programming: Java is an object-oriented programming language, and MongoDB's document-oriented nature aligns well with Java's object model. This makes it easy to map Java objects to MongoDB documents, facilitating smooth data operations and reducing the impedance mismatch between the application code and the database.
-
Scalability and Performance: MongoDB is known for its scalability, allowing you to handle large volumes of data and high traffic loads. Java, being a mature and highly performant language, complements MongoDB's scalability by providing robust concurrency support, multithreading capabilities, and efficient memory management. This combination enables the development of high-performance, scalable applications.
-
Ecosystem and Libraries: Java has a vast ecosystem with a wide range of libraries, frameworks, and tools that can be leveraged in conjunction with MongoDB. These include popular frameworks like Spring and Hibernate, which provide seamless integration with MongoDB and offer additional features such as data mapping, caching, and transaction management.
-
Community and Support: Both Java and MongoDB have large and active developer communities. This means you can find plenty of resources, documentation, tutorials, and community support when working with Java and MongoDB together. It also ensures that both technologies continue to evolve and improve with frequent updates and releases.
-
Flexibility and Adaptability: Java is a versatile language that can be used to develop various types of applications, ranging from web applications to enterprise software. MongoDB's flexible schema allows you to store and manage diverse data structures, making it suitable for a wide range of use cases. Together, Java and MongoDB offer the flexibility to adapt to changing requirements and handle complex data scenarios efficiently.
To put it briefly, the combination of Java and MongoDB offers a potent blend of a strong programming language and a versatile, scalable database system. It offers seamless integration, performance, a rich ecosystem, and a supportive community, making it an excellent choice for developing data-driven applications.
Getting Started
To get started with MongoDB using Java, follow these steps:
-
Install MongoDB: Download and install MongoDB from the official website of MongoDB. Make sure you have MongoDB running on your system or have access to a remote MongoDB server.
-
Set Up Java Development Environment: Install Java Development Kit (JDK) on your machine. Make sure you have a compatible JDK version (Java 8 or above) installed. You can download JDK from the Oracle website.
-
Choose a Java IDE: Select a Java Integrated Development Environment (IDE) for writing and running your Java code. Popular IDE options include Eclipse, IntelliJ IDEA, and NetBeans. Install and set up the IDE of your choice.
-
Spring Initializr: Create a new Spring Boot project using the Spring Initializr website or from within your IDE. You can follow Getting Started with Spring Boot Project to create a project with Spring Initializr.
-
Project Structure: After you have created your project with Spring Initializr, you can open the project in your IDE, it will be similar to this structure:

-
Add MongoDB Java Driver Dependency: After creating a new Java project in your IDE or opening an existing one. Add the MongoDB Java driver dependency to your project by including the appropriate JAR file or by using a build tool like Maven or Gradle. You can find the latest MongoDB Java driver from the official MongoDB website or through Maven Central Repository.
-
Connect to MongoDB: In your Java code, import the necessary classes from the MongoDB Java driver. Use the MongoClient class to establish a connection to your MongoDB server by providing the connection details such as the host, port, and optional authentication credentials.
Here's an example:
-
Perform MongoDB Operations: Once connected, you can use the MongoDB Java driver's API to perform various operations on your MongoDB database. These operations include inserting documents, querying data, updating documents, deleting documents, creating indexes, and executing aggregations. Refer to the MongoDB Java driver documentation for detailed information on using the API effectively.
-
Run and Test Your Application: Run your Java application within the IDE or using the command line. Make sure MongoDB is running and accessible. Verify that your application connects to MongoDB and performs the desired operations correctly.
This is just a basic starting point to connect Java with MongoDB. As you progress, you can explore advanced features, such as object mapping frameworks like Morphia and Spring Data MongoDB, to simplify data mapping and manipulation. Additionally, consider learning about MongoDB's querying capabilities and best practices to optimize your application's performance.
Creating Document Database
To create a document database in MongoDB Atlas, you need to follow these steps:
-
Sign in to MongoDB Atlas: Go to the MongoDB Atlas website and sign in with your MongoDB account. If you don't have an account, you can create one for free.

-
Set up a new MongoDB cluster: Once you're logged in, click on the Build a Cluster button to create a new cluster. Follow the prompts to select your preferred cloud provider, region, cluster tier, and other settings. You can choose the M0 Sandbox cluster (which is free) or a paid cluster depending on your requirements.

-
Configure cluster settings: After selecting the cluster tier, you can customize additional settings such as cluster name, disk size, backup options, and more. Review the settings and make any necessary changes based on your needs.
-
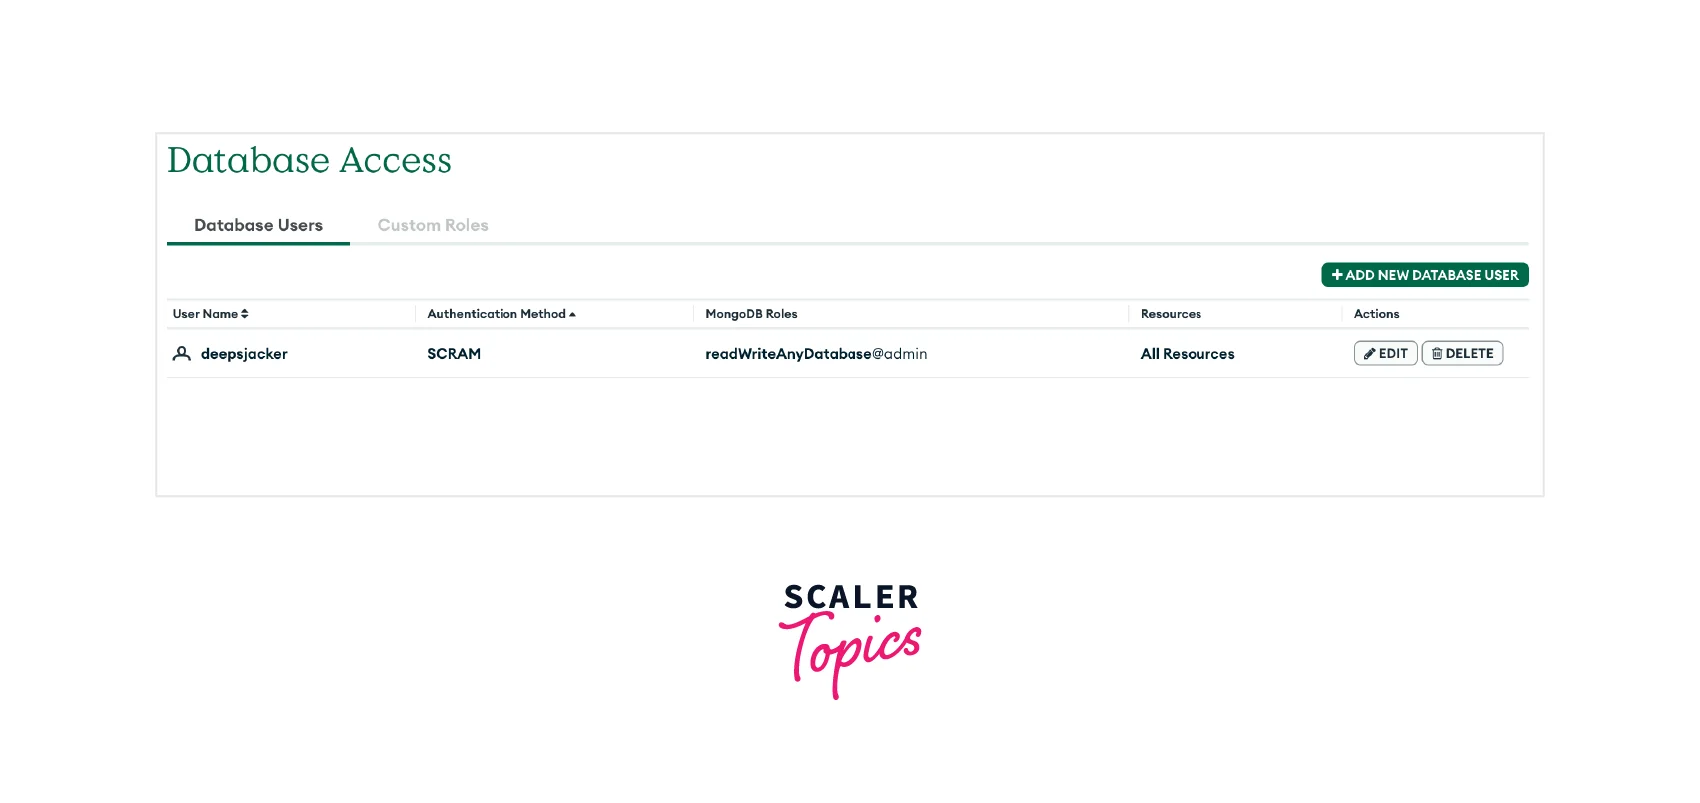
Create a database user: To access your database, you need to create a database user with appropriate privileges. Click on the Database Access tab in your cluster settings and then click on the Add New Database User button. Provide a username, password, and select the desired user privileges (e.g., read-write access, read-only access). Make sure to remember the username and password for later use.
-
Whitelist IP address: In the Network Access tab of your cluster settings, you need to whitelist the IP address from which you'll be accessing the database. You can add your current IP address or specify a range of IP addresses for increased security. This step ensures that only authorized IP addresses can connect to your database.

-
Connect to your cluster: Once your cluster is ready, go to the Clusters tab and click on the Connect button for your cluster. From the connection options, choose Connect your application and select the programming language and driver version you'll be using.

-
Get the connection string: MongoDB Atlas provides you with a connection string that includes the necessary information to connect to your cluster. This string contains the username, password, server addresses, and other details required for the connection. Copy the connection string to use it in your application.
-
Connect to MongoDB Atlas from your application: In your application code, use the MongoDB driver for your chosen programming language to connect to MongoDB Atlas using the connection string. Replace the placeholders in the connection string with your actual username, password, and other details.
Replace <username>, <password>, <cluster-url>, and <database> with the appropriate values from your MongoDB Atlas account.
-
Create a document database: Once your application is connected to MongoDB Atlas, you can create a document database by performing CRUD (Create, Read, Update, Delete) operations on collections and documents. Use the MongoDB driver's API to create a new collection, insert documents, query data, update documents, and delete documents as needed.
That's it! You have now created a document database in MongoDB Atlas and can start working with your data. Remember to manage your collections, indexes, and security settings appropriately for your application's needs.
Creating Collections
To create collections in MongoDB using Java, you need to follow these steps:
- Set up MongoDB Java Driver: Make sure you have the MongoDB Java Driver added to your project dependencies. You can include the driver by adding the following Maven dependency to your project's pom.xml file:
- Connect to the MongoDB database: You can follow the above section to understand how we can connect to the MongoDB database.
- Create a collection: In MongoDB, a collection is a group of related documents. Once you have connected to the MongoDB database, you can create a collection using the createCollection() method.
- Now go to your MongoDB Atlas database, and click on collections, you will see your database and collection over there.

CRUD Operations
The four fundamental operations performed on a database are known as CRUD, which stands for create, read, update, and delete. When working with MongoDB, these operations involve inserting documents, querying for matching documents, updating existing documents, and deleting documents. MongoDB Query Language (MQL) is used to execute these operations. Unlike SQL statements, MQL utilizes a syntax that closely resembles document structure, ensuring ease of use and intuition even for complex queries.
For comprehensive guidance and code examples illustrating each of the CRUD operations using the Java driver, detailed tutorials can be accessed in the MongoDB Developer Center. These resources provide a thorough understanding of how to effectively create, read, update, and delete data within a MongoDB database.
Connecting MongoDB with Java
With our Maven project set up and dependencies resolved, we can now utilize MongoDB Atlas in our Java application. If you have imported the recommended sample dataset mentioned in the Quick Start Atlas blog post, the Java code we're about to create will enable you to view a list of databases included in the sample dataset.
To begin, we need to instantiate a MongoClient by supplying a MongoDB Atlas connection string to the MongoClients.create() static method. This connection string establishes a connection to MongoDB Atlas. Subsequently, we can retrieve the list of databases within the cluster and print them for testing the MongoDB connection.
Please create the Connection.java file in src/main/java/com/mongodb/quickstart to implement the following code:
As you can see, the MongoDB connection string is retrieved from the System Properties, so we need to set this up. Once you have retrieved your MongoDB Atlas connection string, you can add the mongodb.uri system property into your IDE which is used to specify the connection string or URI (Uniform Resource Identifier) that contains all the necessary information to establish a connection to a MongoDB database. Here is my configuration with IntelliJ for example.

In case if you want to run Maven in the command line, we can execute this command line in our root directory:
The standard output of the above setup should look like this:
Operations of MongoDB with Java
After setting up MongoDB Atlas, and creating a connection with it in Java, let us now perform different operations in the database.
Here we will have a database as College, and we will be performing the operations in a collection called Students.
Insert
In MongoDB, the insert operation adds new documents to a collection. Each document is a JSON-like structure storing data in a flexible, schema-less format. You can use insertOne() to insert a single document or insertMany() to insert multiple documents at once. The inserted documents can have varying structures and field types, as MongoDB allows flexible schema. An _id is assigned as a unique identifier to each document if not explicitly provided, serving as the primary key within the collection.
Here's an example of an insertion() and insertMany() operation in MongoDB:
Example:
Let us look at its example
Explanation:
In the above example, we establish a connection to the MongoDB server running on Atlas. We access the College database and the students collection. Then, we create a Document object representing the student data we want to insert. In this case, we have a student with a name, age, and grade. We use the insertOne() method of the collection to perform the insertion.
Output:
If the insert operation is executed successfully, the data will be inserted into your Students collection of the College database.

Read
In MongoDB, a read operation is used to retrieve data from a collection. It allows you to query the database for documents that match specific criteria or retrieve all documents in a collection. MongoDB provides various methods and query operators to perform read operations.
Here are some commonly used read operations in MongoDB:
The find() method is used to retrieve documents from a collection that match specified query criteria. It returns a cursor pointing to the result set, which can be iterated to access each document. The findOne() method is used to retrieve a single document from a collection that matches the specified query criteria. It returns the first matching document or null if no document is found.
find() and findOne() Example:
Explanation:
In this example, we establish a connection to the MongoDB server and access the "school" database and "students" collection. We create a query document to find documents where the "age" field is greater than or equal to 25. The find() method returns a cursor, which we iterate over using the iterator() method. We then perform a findOne() operation to retrieve a single document from the "students" collection where the "grade" field is equal to "B" and then we print the JSON representation of both results we got from the find() method and findOne() method.
Output:
Once you execute the code, it will fetch those documents that match the query, and return this:
Update
To perform an update operation in MongoDB using Java, you can use the updateOne() or updateMany() method to modify one or multiple documents in a collection. The update operation allows you to update specific fields within a document or replace the entire document.
Here's an example of how to use the updateOne() method in MongoDB with Java:
Explanation:
In the above example, we perform an update operation using the updateOne() method.
We define the query document to specify the criteria for selecting the document(s) to update. In this example, we want to update the document(s) where the name field is equal to "Jessy Pinkman".
Next, we create an updated document using the $set operator to specify the field(s) to update and their new values. In this case, we update the "grade" field to "A".
We pass both the query and update documents as arguments to the updateOne() method, which returns a result object. The result object contains information about the modification operation, such as the number of documents matched and modified.
Finally, we print the updated document, in the console.
Note that you can also use the updateMany() method if you want to update multiple documents that match the query criteria.
Output:
Delete
To perform a delete operation in MongoDB using Java, you can use the deleteOne() or deleteMany() method to remove one or multiple documents from a collection based on specified criteria.
Here's an example of how to use the deleteOne() method in MongoDB with Java:
Explanation:
In the above example, we perform a delete operation using the deleteOne() method.
We define the query document to specify the criteria for selecting the document to delete. In this example, we want to delete the document(s) where the name field is equal to John Doe.
We pass the query document as an argument to the deleteOne() method, which returns a DeleteResult object. The DeleteResult object contains information about the deletion operation, such as the number of documents matched and deleted.
Finally, we print the deleted count from the DeleteResult object to see the number of documents that were deleted.
Note that you can also use the deleteMany() method if you want to delete multiple documents that match the query criteria.
Output:
FAQs
Here are frequently asked questions (FAQs) about connecting MongoDB with Java:
Q: Can I connect to MongoDB using Java without installing MongoDB locally?
A: Yes, you can connect to a remote MongoDB server using Java without installing MongoDB locally. You only need the MongoDB Java driver and the necessary connection details, such as the server address and port number.
Q: What is the recommended version of the MongoDB Java driver to use?
A: The recommended version of the MongoDB Java driver depends on the version of MongoDB you are using. It is generally advisable to use the latest compatible version of the driver. You can check the MongoDB documentation or the official MongoDB website for the appropriate driver version for your MongoDB version.
Q: How do I handle authentication when connecting to MongoDB with Java?
A: To handle authentication, you need to provide the username and password while establishing the connection. You can use the MongoCredential class from the MongoDB Java driver to create the credentials and pass them as parameters when creating a MongoClient instance.
Q: Is it possible to connect to a specific database in MongoDB using Java?
A: Yes, once you have established a connection using the MongoClient class, you can access a specific database using the getDatabase() method. Provide the name of the database as a parameter to the method, and you can perform operations on that database.
Conclusion
- MongoDB is a popular NoSQL database that provides a flexible and scalable solution for storing and retrieving data.
- Java is a widely-used programming language that offers robust tools and libraries for developing applications.
- Integrating MongoDB with Java allows developers to leverage its document-oriented database model. This involves setting up dependencies and configuring connection parameters. The official MongoDB Java driver is the primary tool for connecting and interacting with MongoDB in Java applications.
- The MongoDB Java driver provides a high-level API that simplifies the process of connecting to a MongoDB database, executing queries, and handling data.
- You can use the MongoDB Java driver to perform various operations, such as inserting documents, updating data, deleting documents, and querying for specific data.
- The Java driver also supports advanced features like indexing, aggregation pipelines, and transactions, allowing for efficient and robust data manipulation.
- When connecting to MongoDB, you typically specify the host, port, and authentication credentials (if required) in the connection string.
- Once the connection is established, you can use Java objects and the MongoDB driver's APIs to interact with the database, perform CRUD operations, and retrieve data.
- It's good practice to manage resources properly, such as closing database connections and releasing resources, to ensure efficient and reliable database access.
- When working with MongoDB and Java, you can use various frameworks and libraries, such as Spring Data MongoDB, which provide higher-level abstractions and simplify database operations.