Jenkins on AWS
Overview
In the rapidly evolving landscape of software development, organizations are constantly seeking ways to optimize their CI/CD processes for efficient and rapid application delivery. The combination of Jenkins on AWS, an industry-leading automation server, with a robust infrastructure, provides a winning formula for achieving seamless software delivery. This blog post provides an overview of the powerful integration between Jenkins on AWS, highlighting the benefits and capabilities it offers to development teams.
Create an IAM User
To create an IAM user for using Jenkins on AWS, follow these steps:
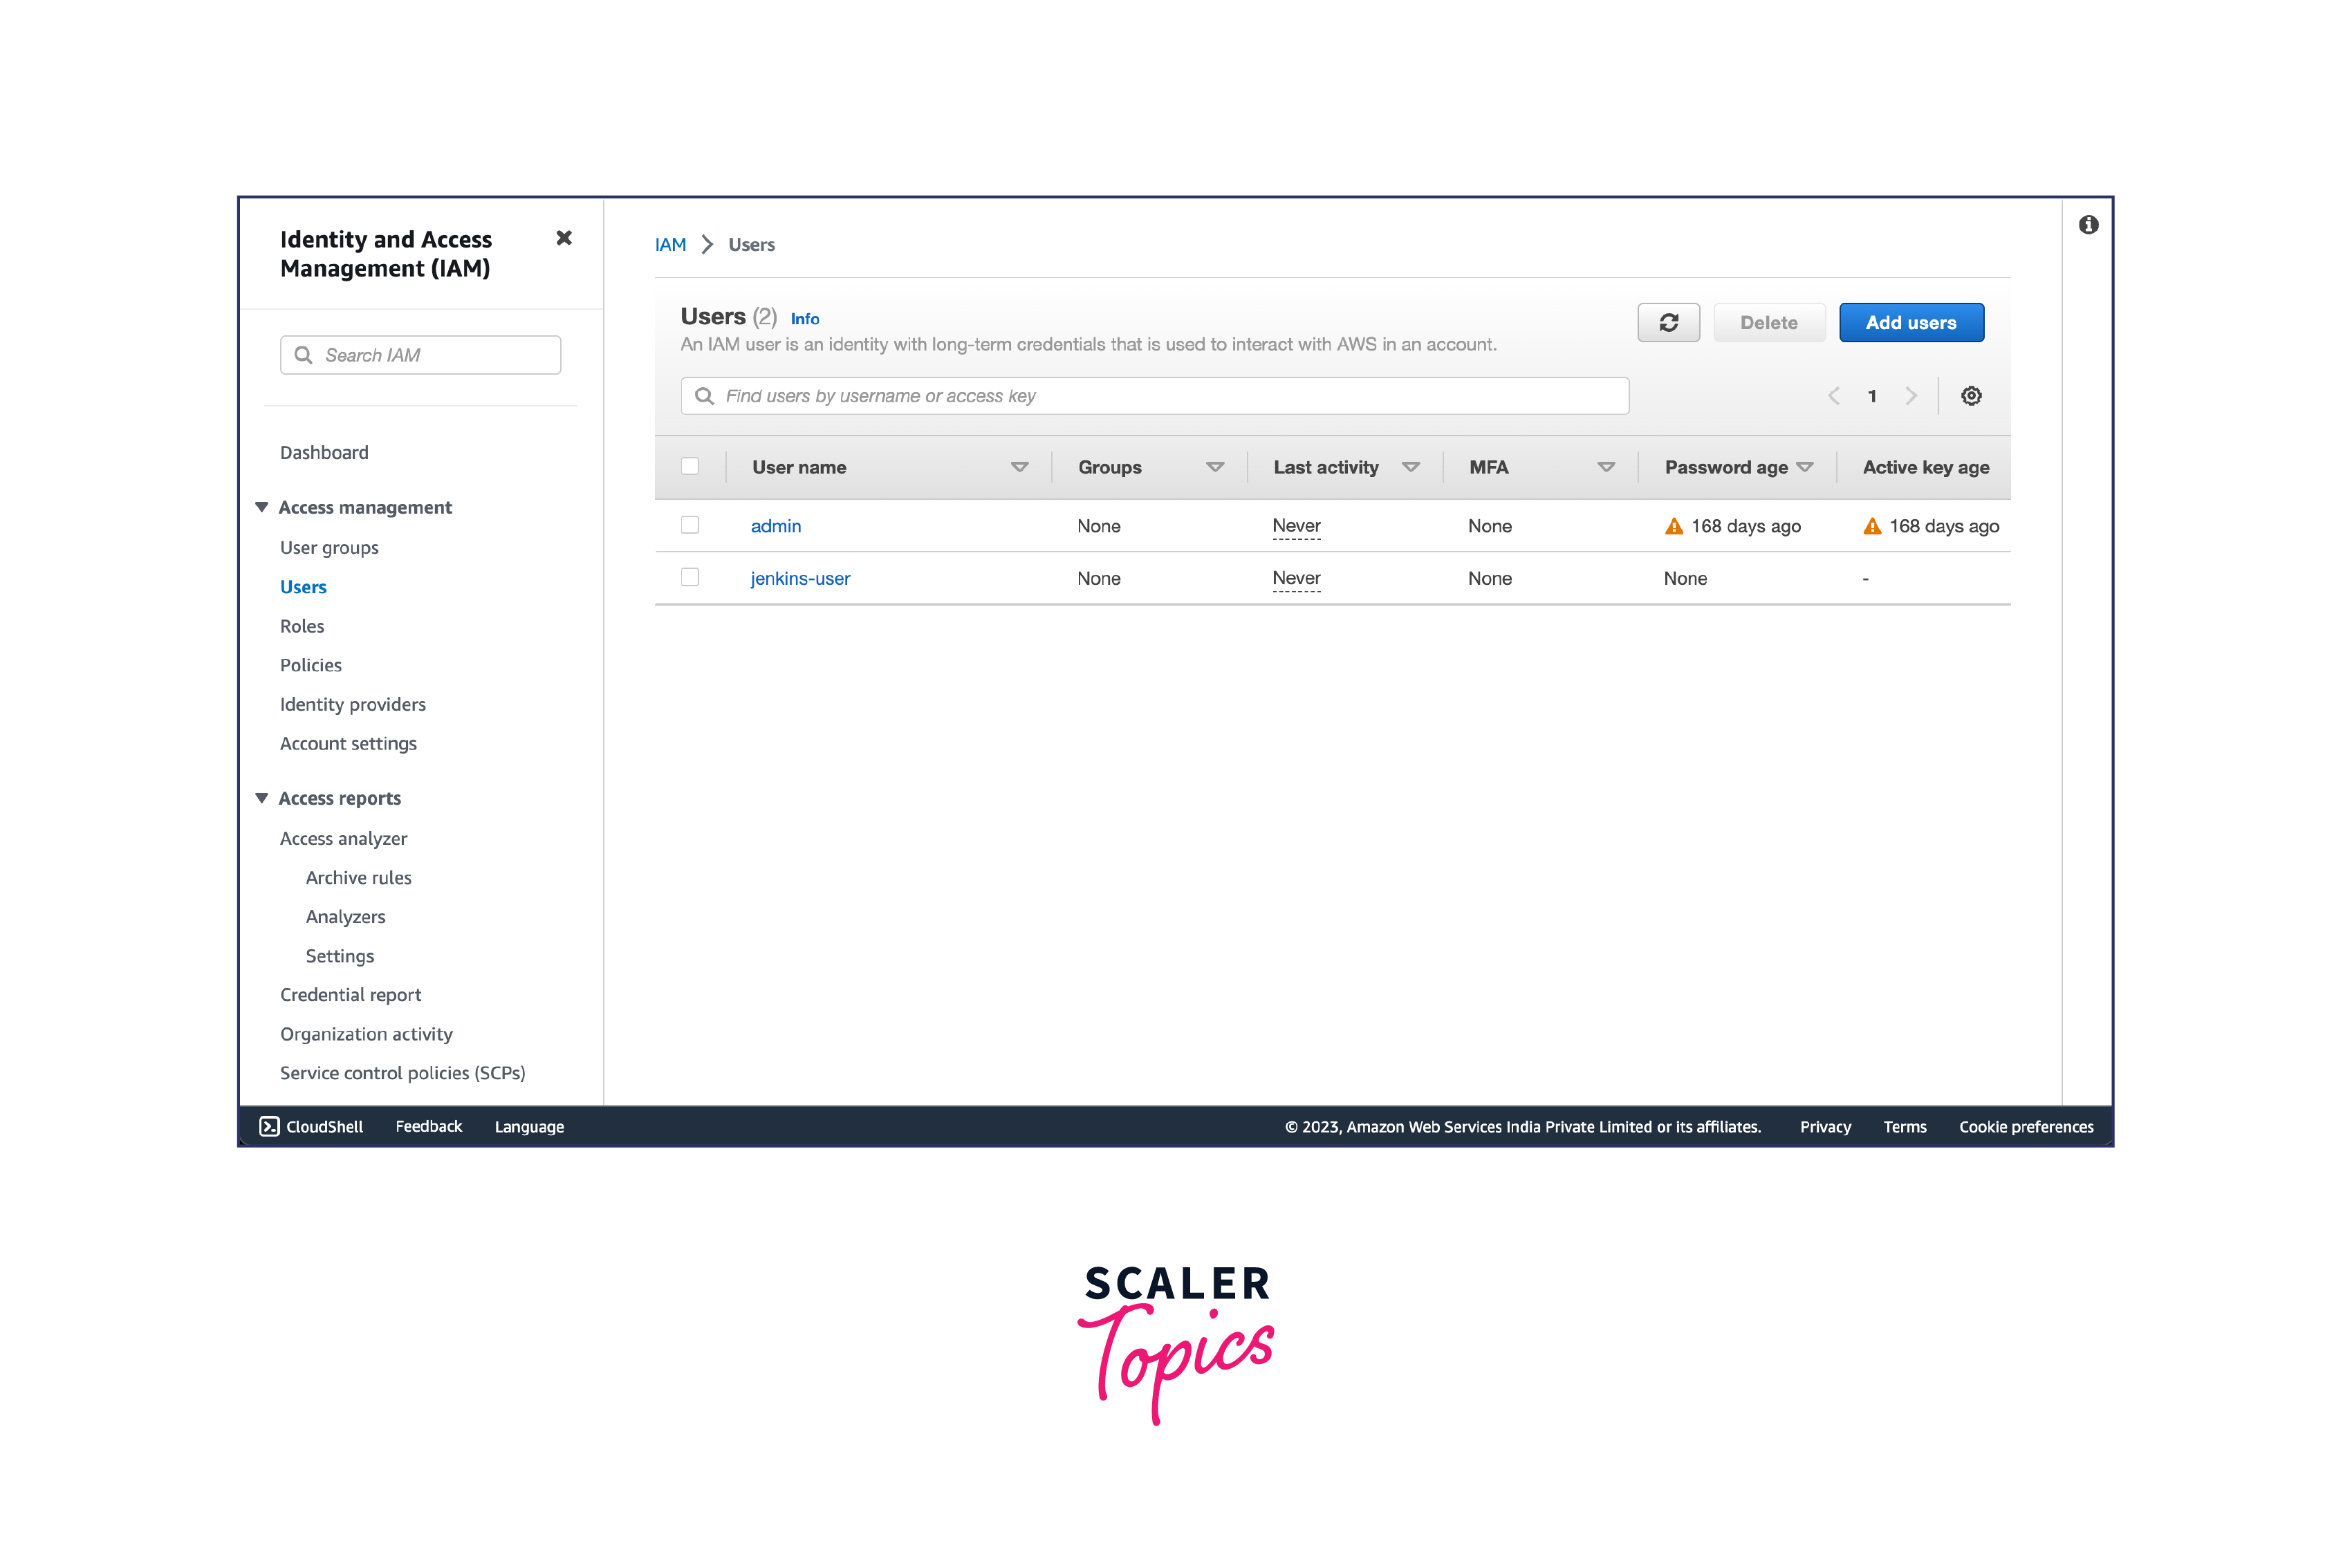
- Log in to the AWS Management Console using your credentials and navigate to the IAM (Identity and Access Management) service.
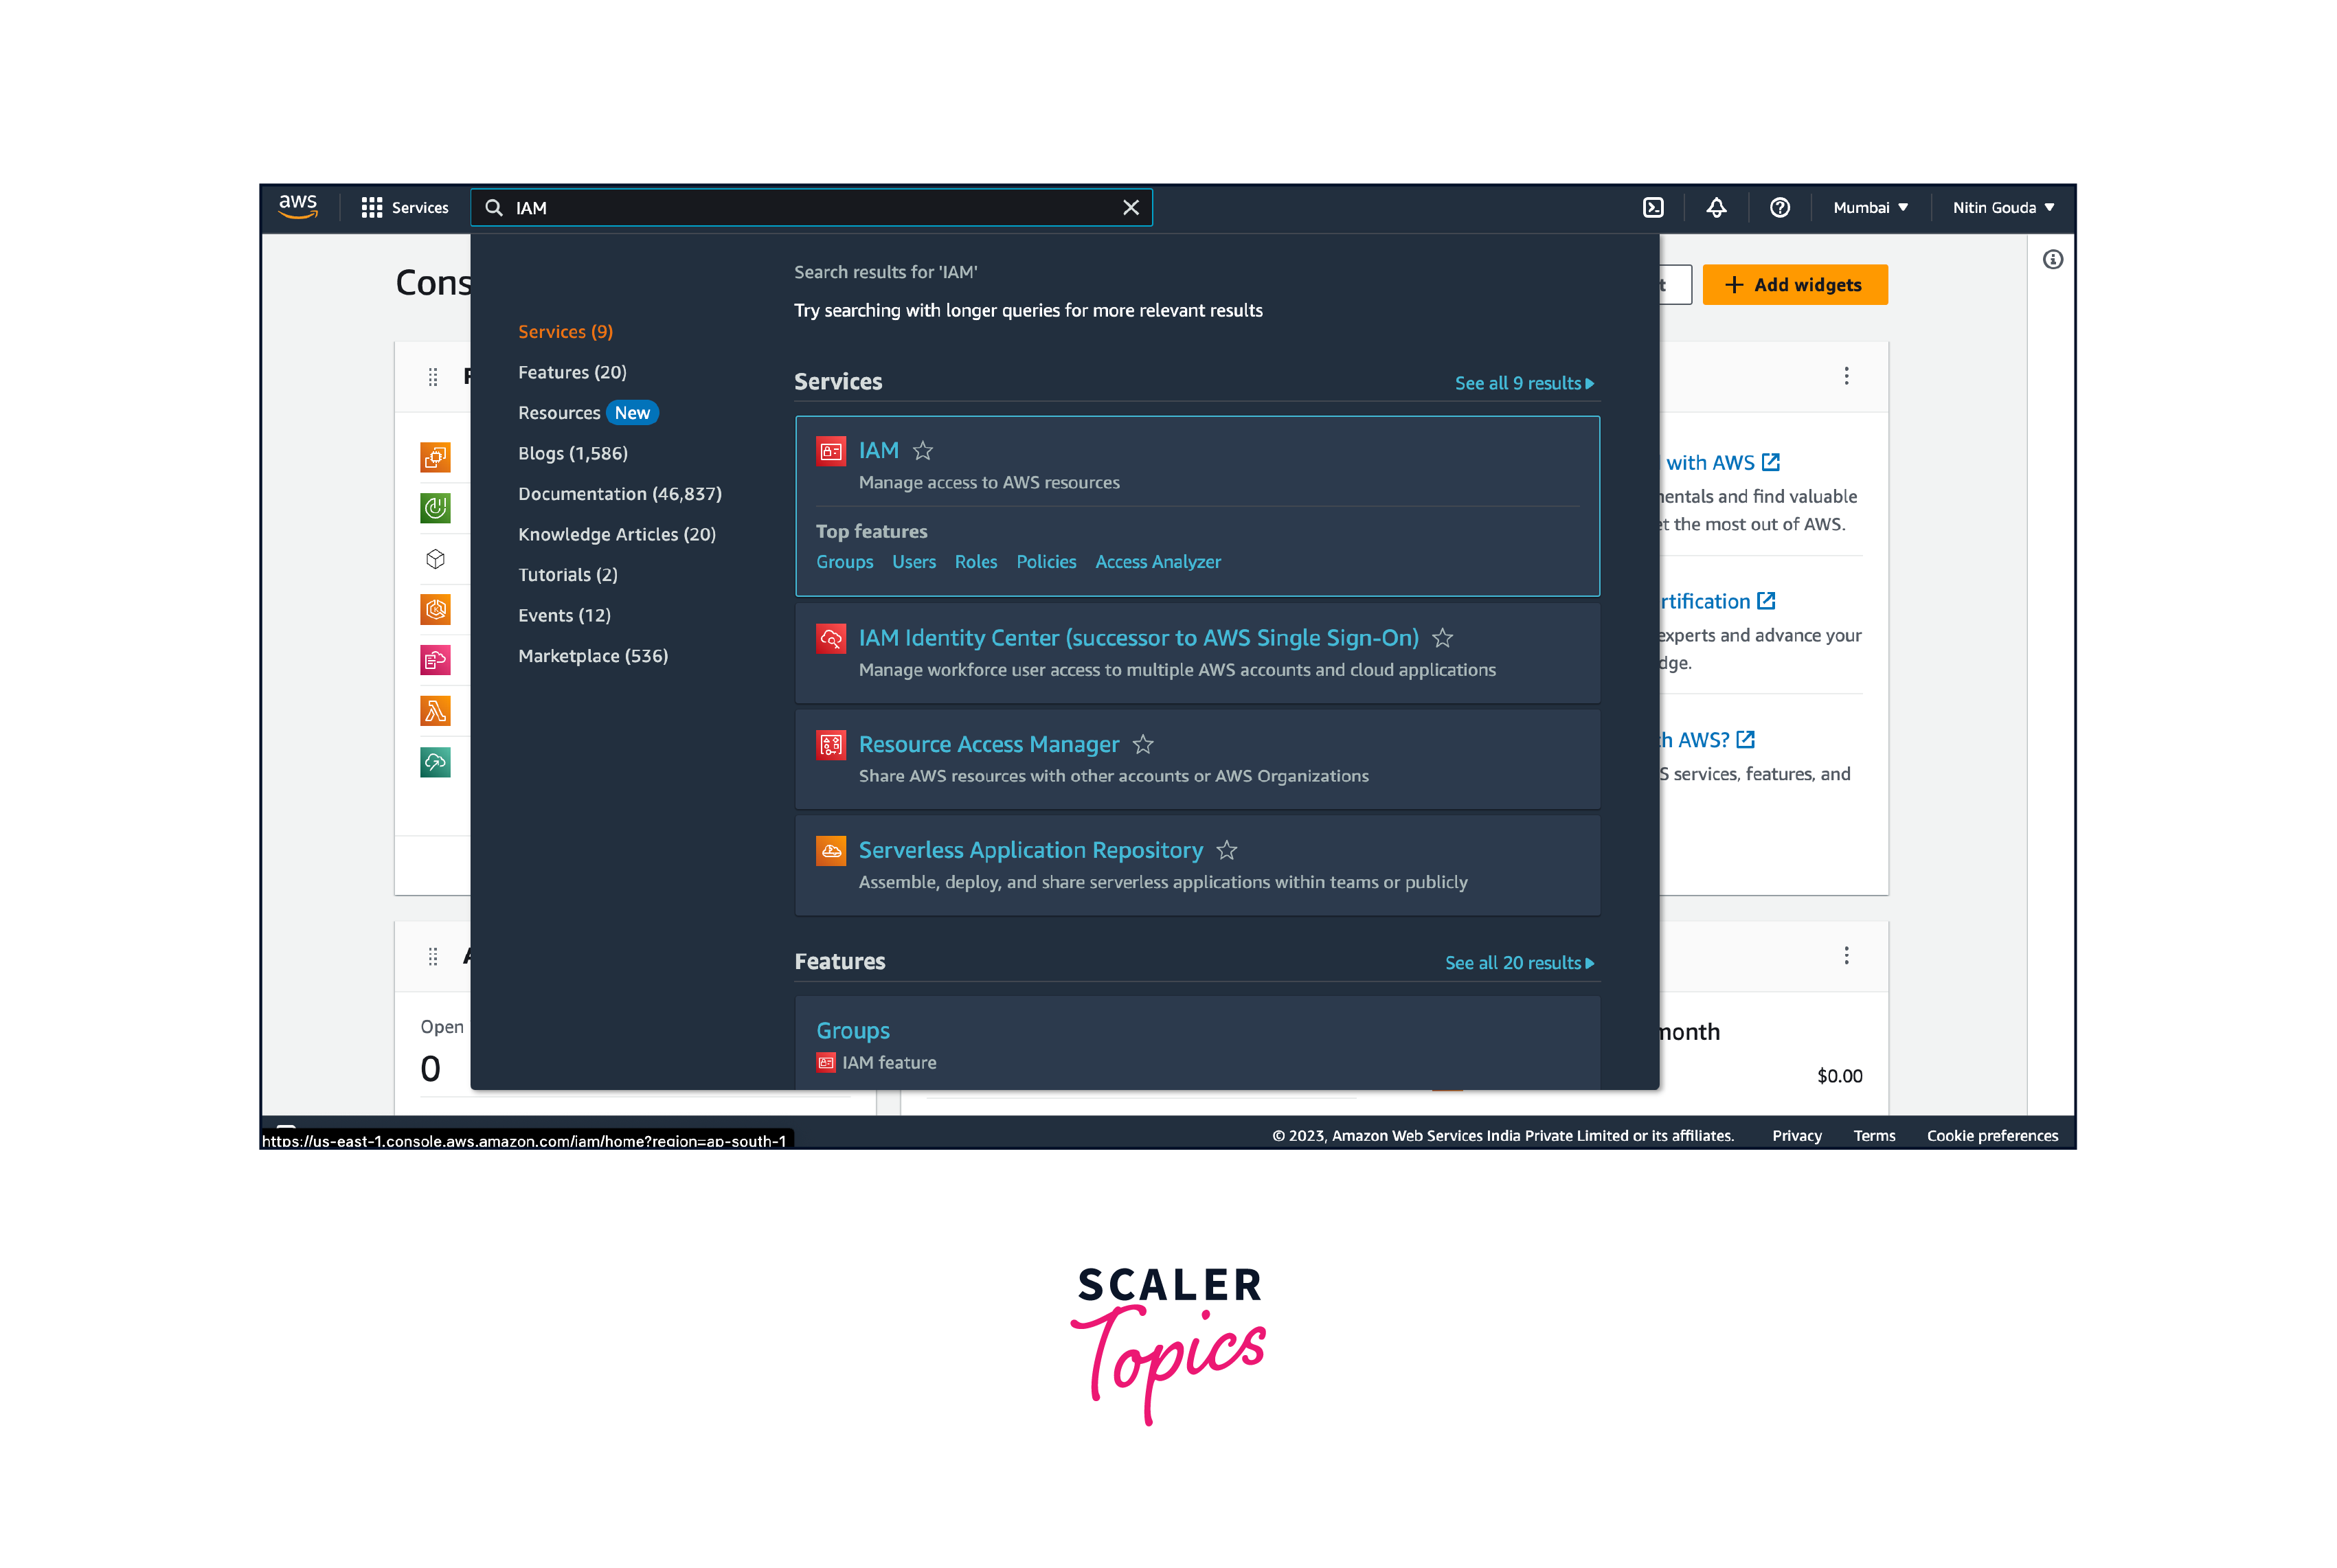
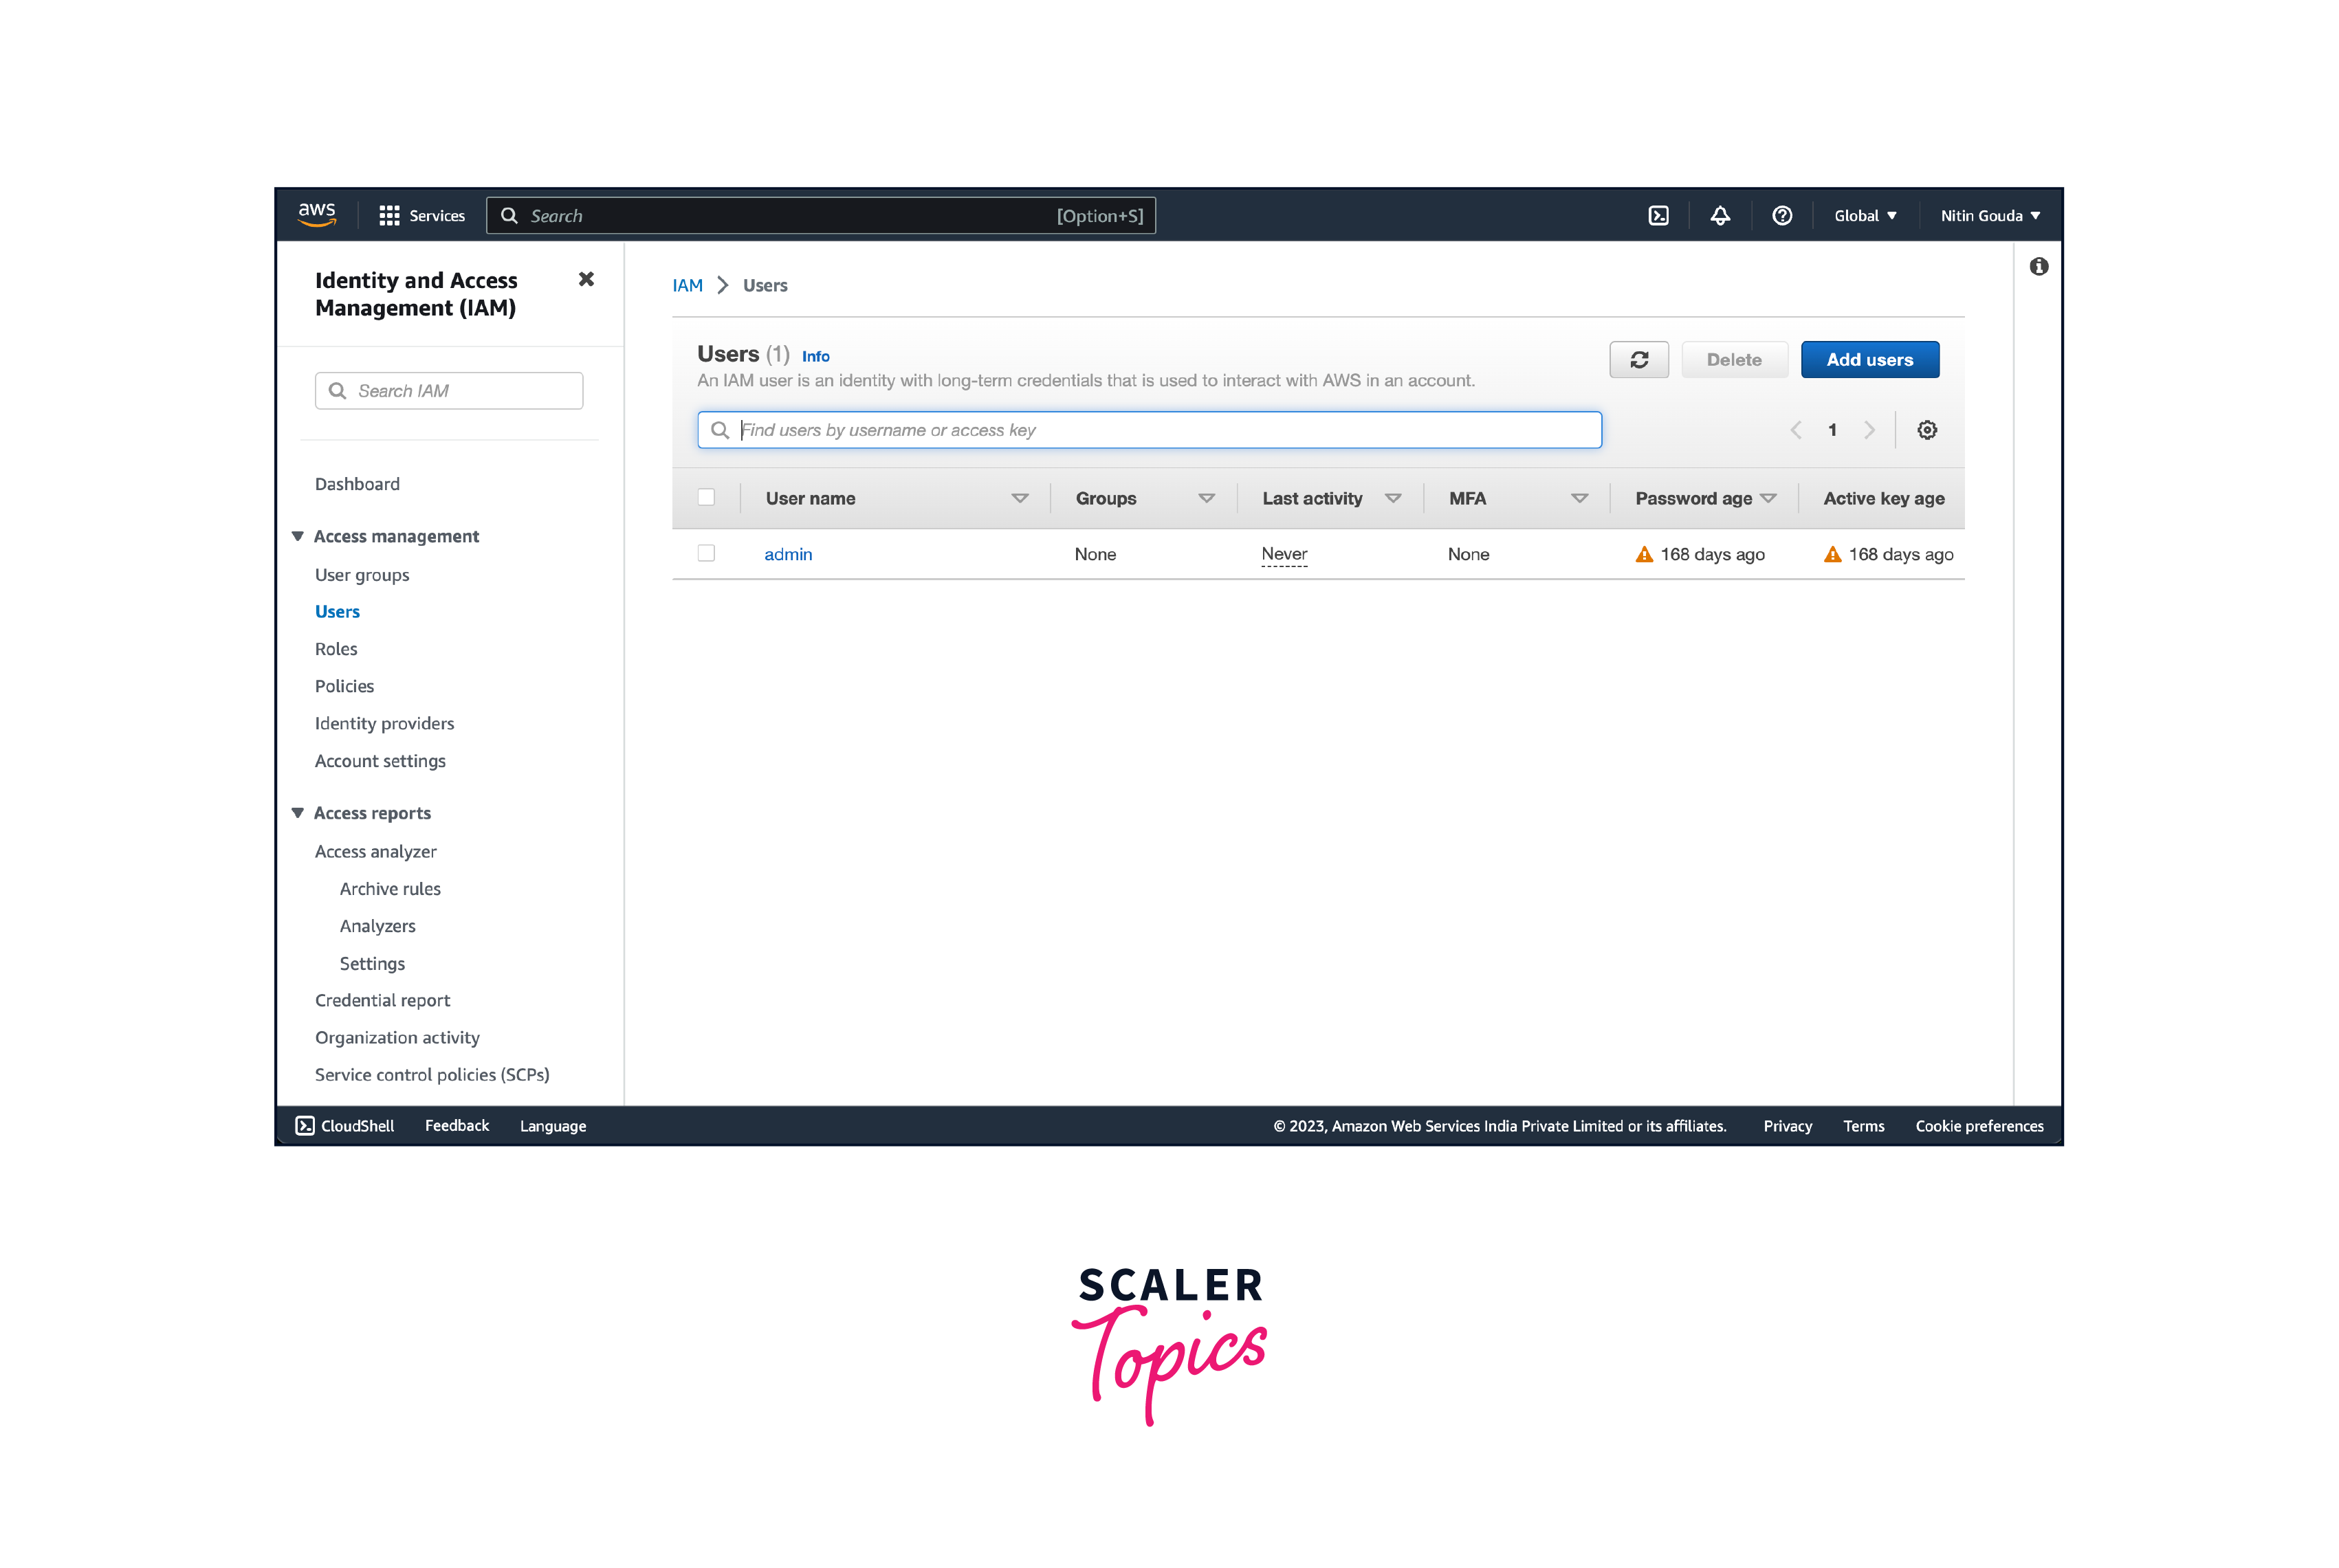
- In the IAM dashboard, click on "Users" in the left-hand menu. Click on the "Add user" button to create a new IAM user.
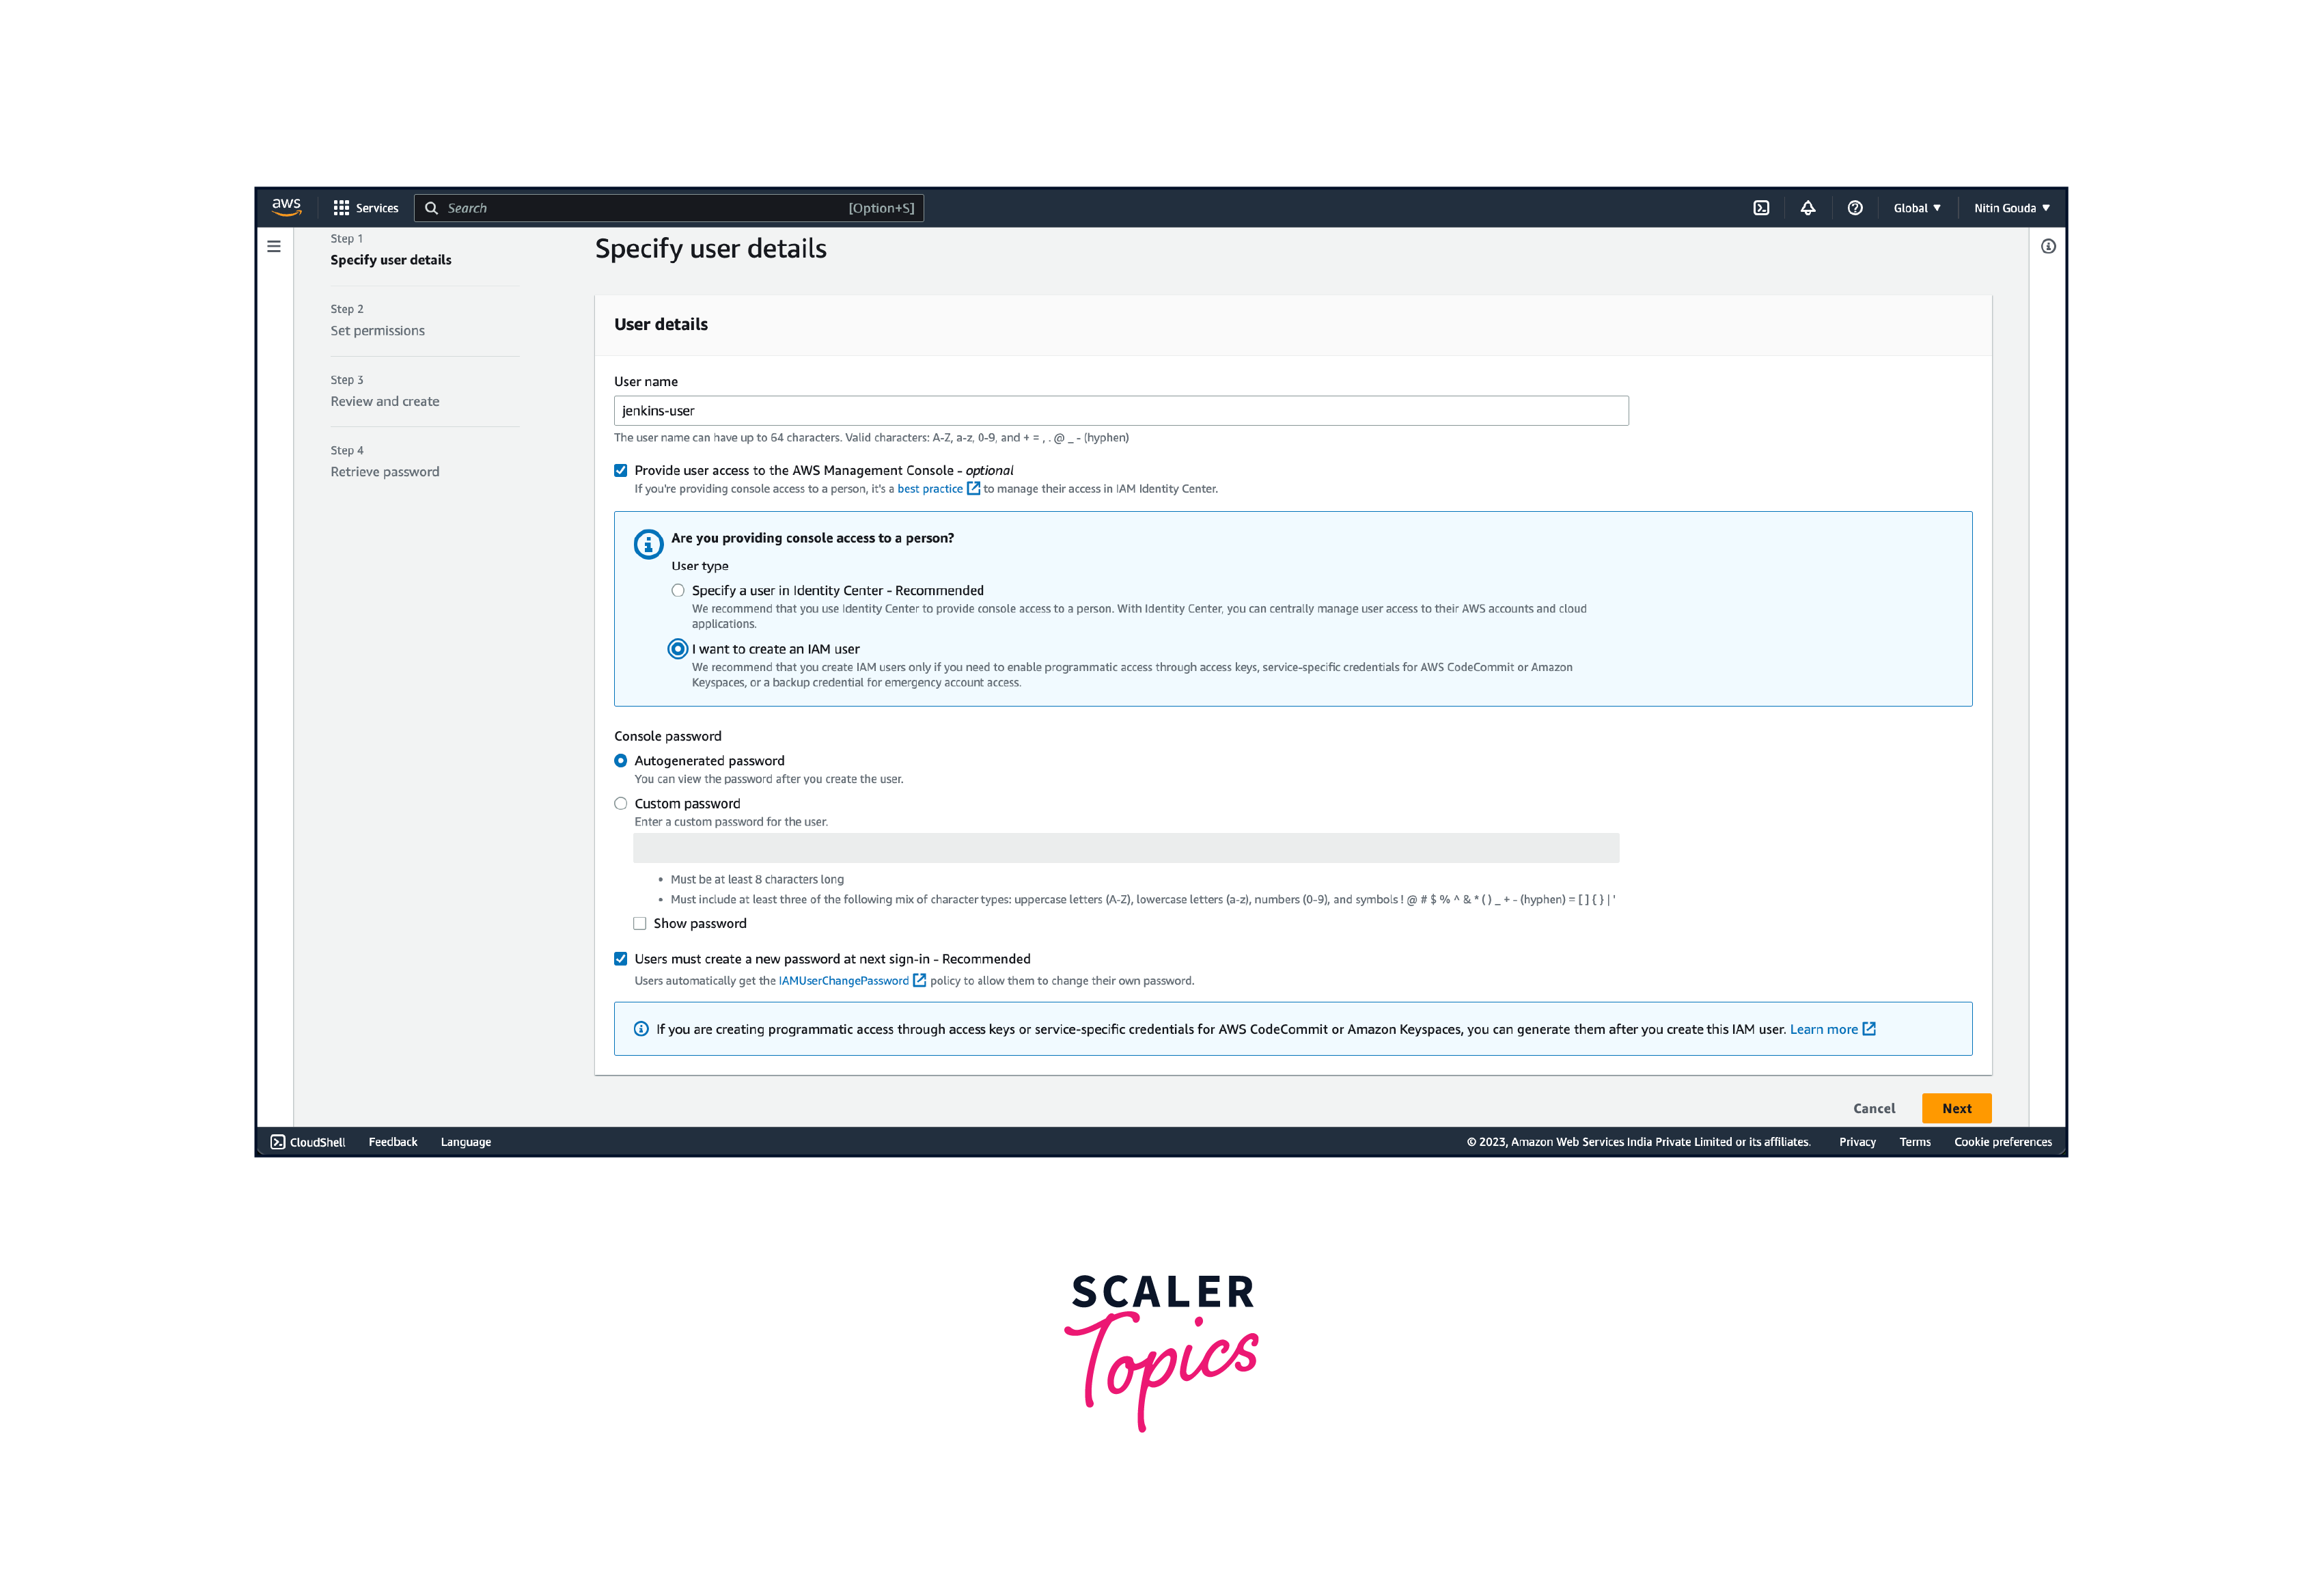
- Provide a username for the new user (e.g., "Jenkins-user"), and under that choose I want to create an IAM user. You can set up the password now or you could set it up as Autogenerated password. Check "Users must create a new password at next sign-in"
- Click on "Next: Permissions" to proceed to the permissions configuration. In the "Set permissions" section, select "Attach existing policies directly."

- Search for and select the policies that align with the specific AWS services and resources your Jenkins setup will require. For example, you may want to consider policies like "AmazonEC2FullAccess" for EC2 instances or "AmazonS3FullAccess" for accessing S3 buckets. Click on "Next: Tags" if you want to add any tags for the user. Otherwise, you can proceed to the next step.
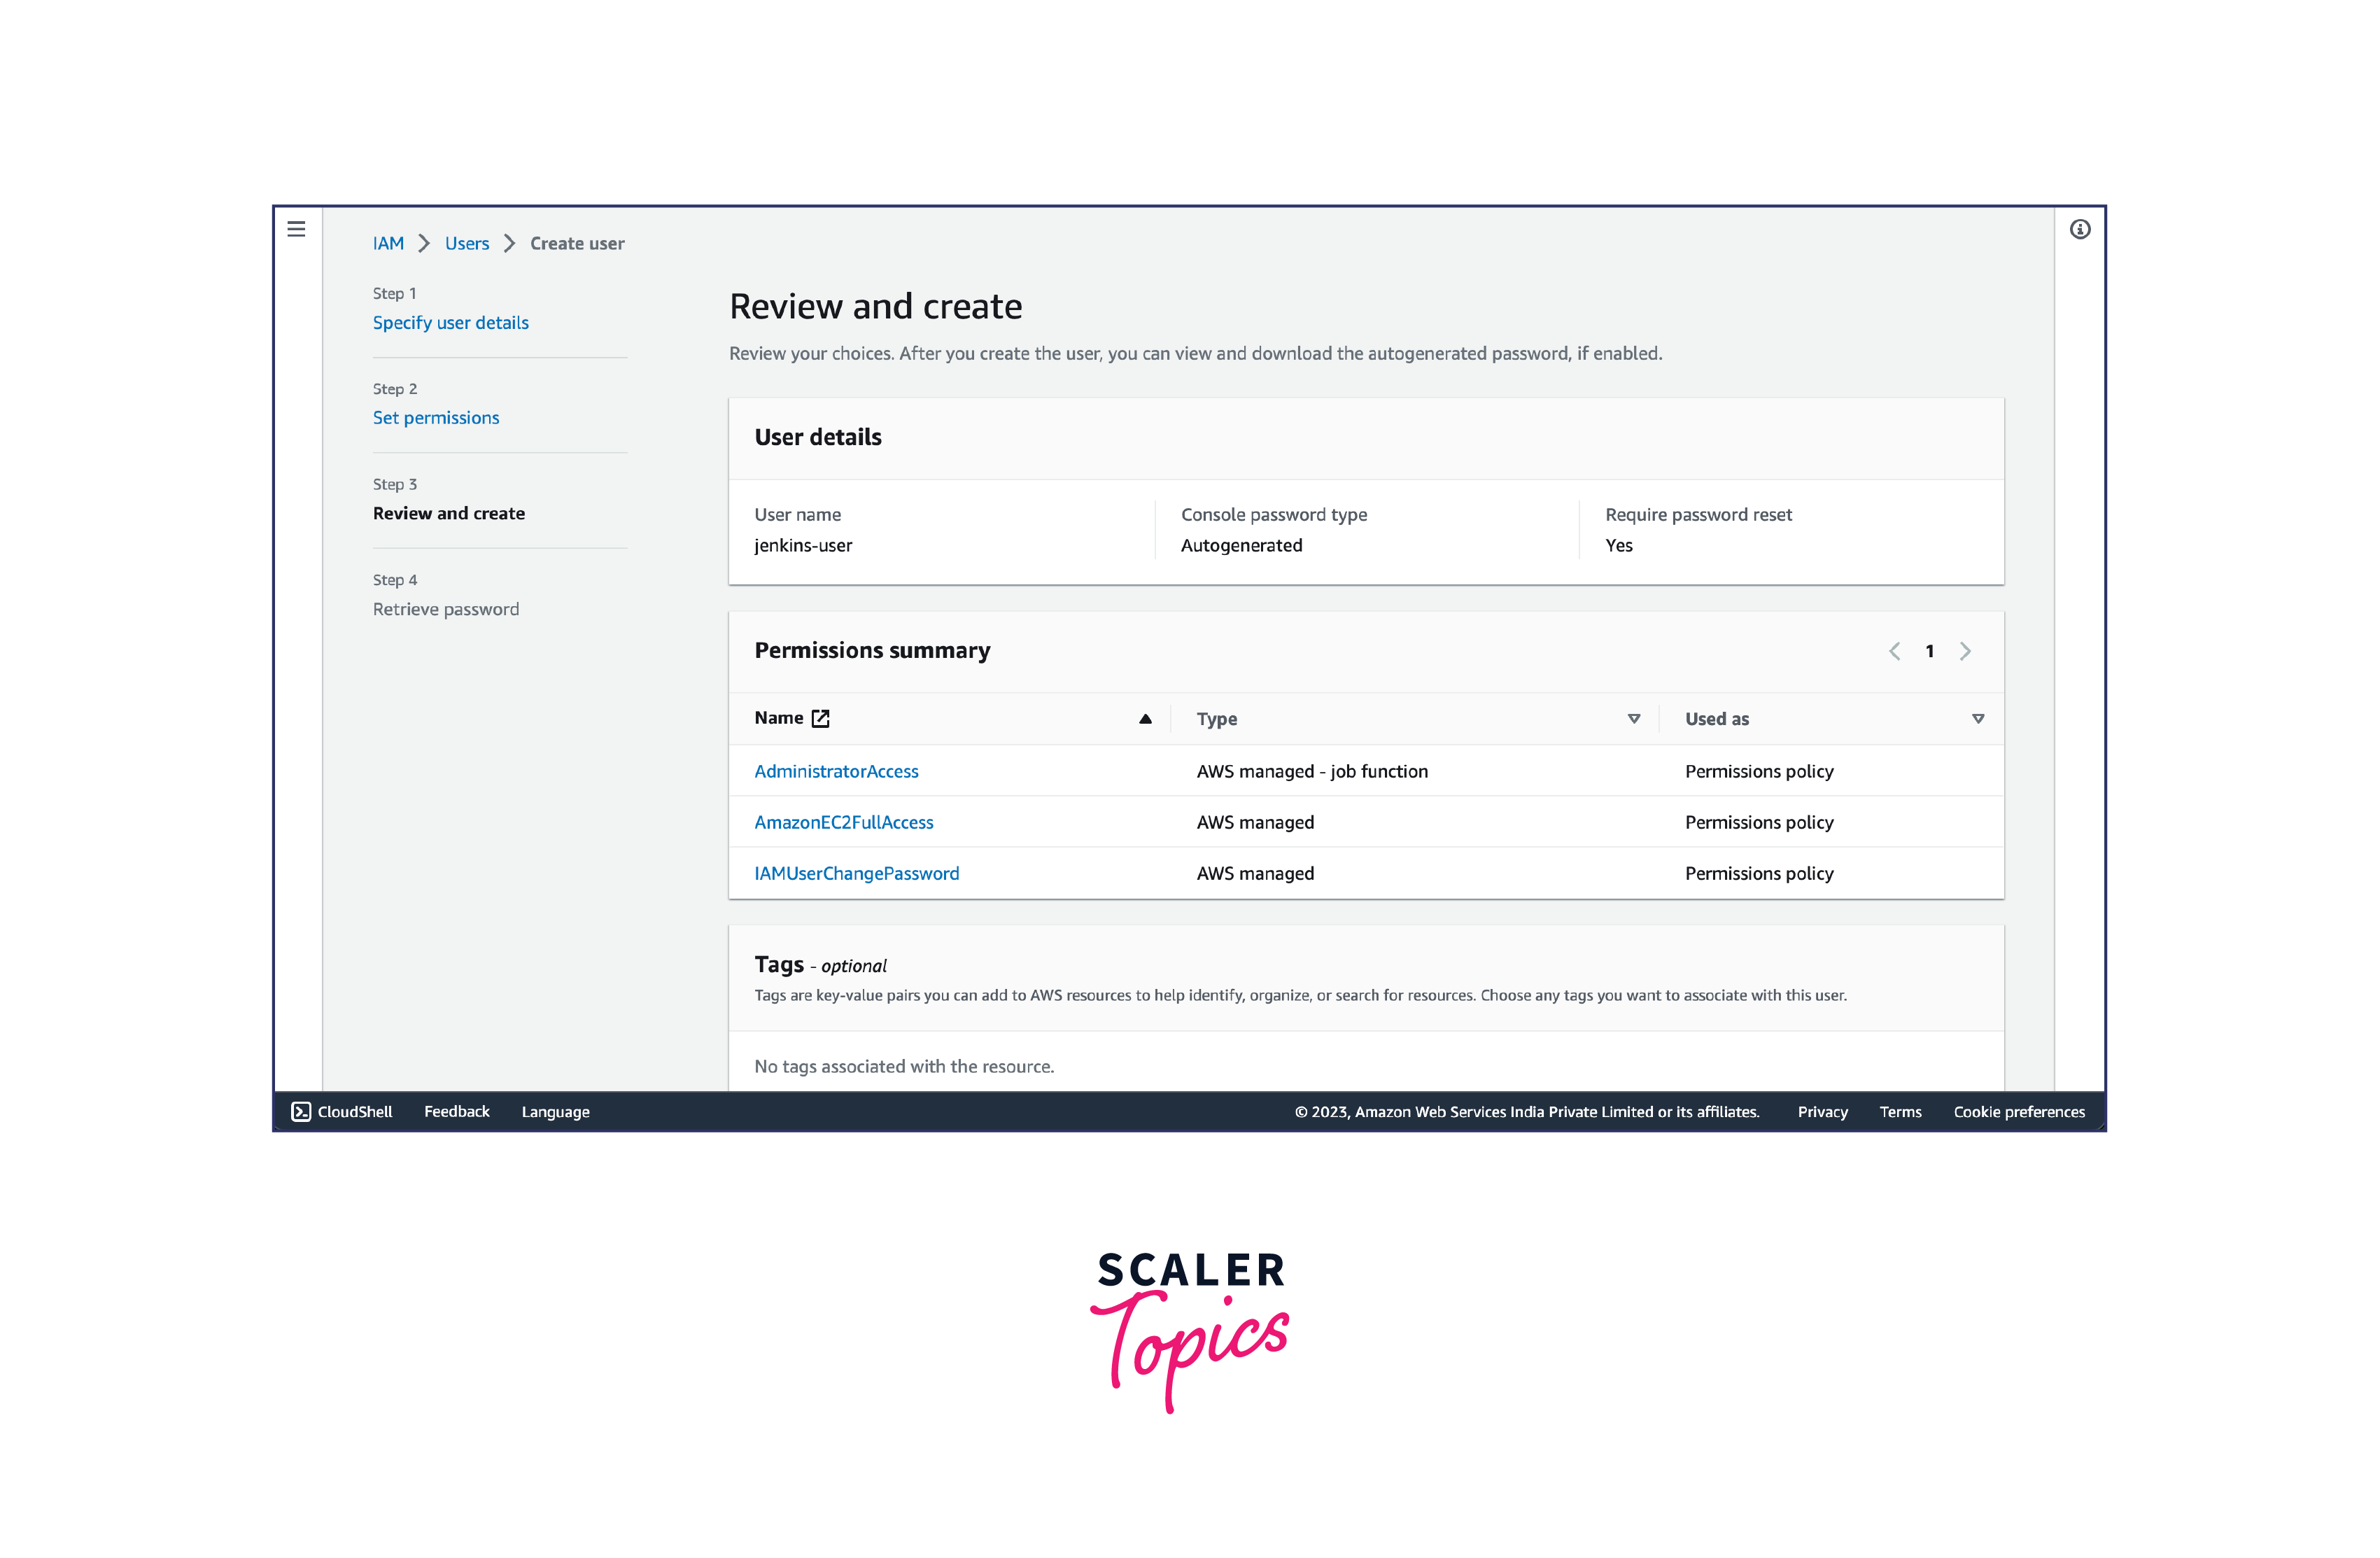 6. Double-check the details and permissions assigned to the user. If everything looks correct, click on the "Create user" button.
- On the success page, you will see the newly created IAM user along with their access key and secret access key.
Note: It is important to securely store these credentials, as they will be required to configure Jenkins AWS to interact with AWS services.
- After creating the IAM user, you can assign additional settings, such as enabling multi-factor authentication (MFA) or setting up a password policy, to enhance the security of the user account.
By creating an IAM user with appropriate permissions, you can ensure that Jenkins AWS has the necessary access to AWS resources, allowing it to perform various automated tasks as part of your CI/CD pipeline. Remember to securely manage the access keys and regularly review and update the user's permissions based on your project requirements.
Create a Key Pair
To create a key pair in AWS, follow these steps:
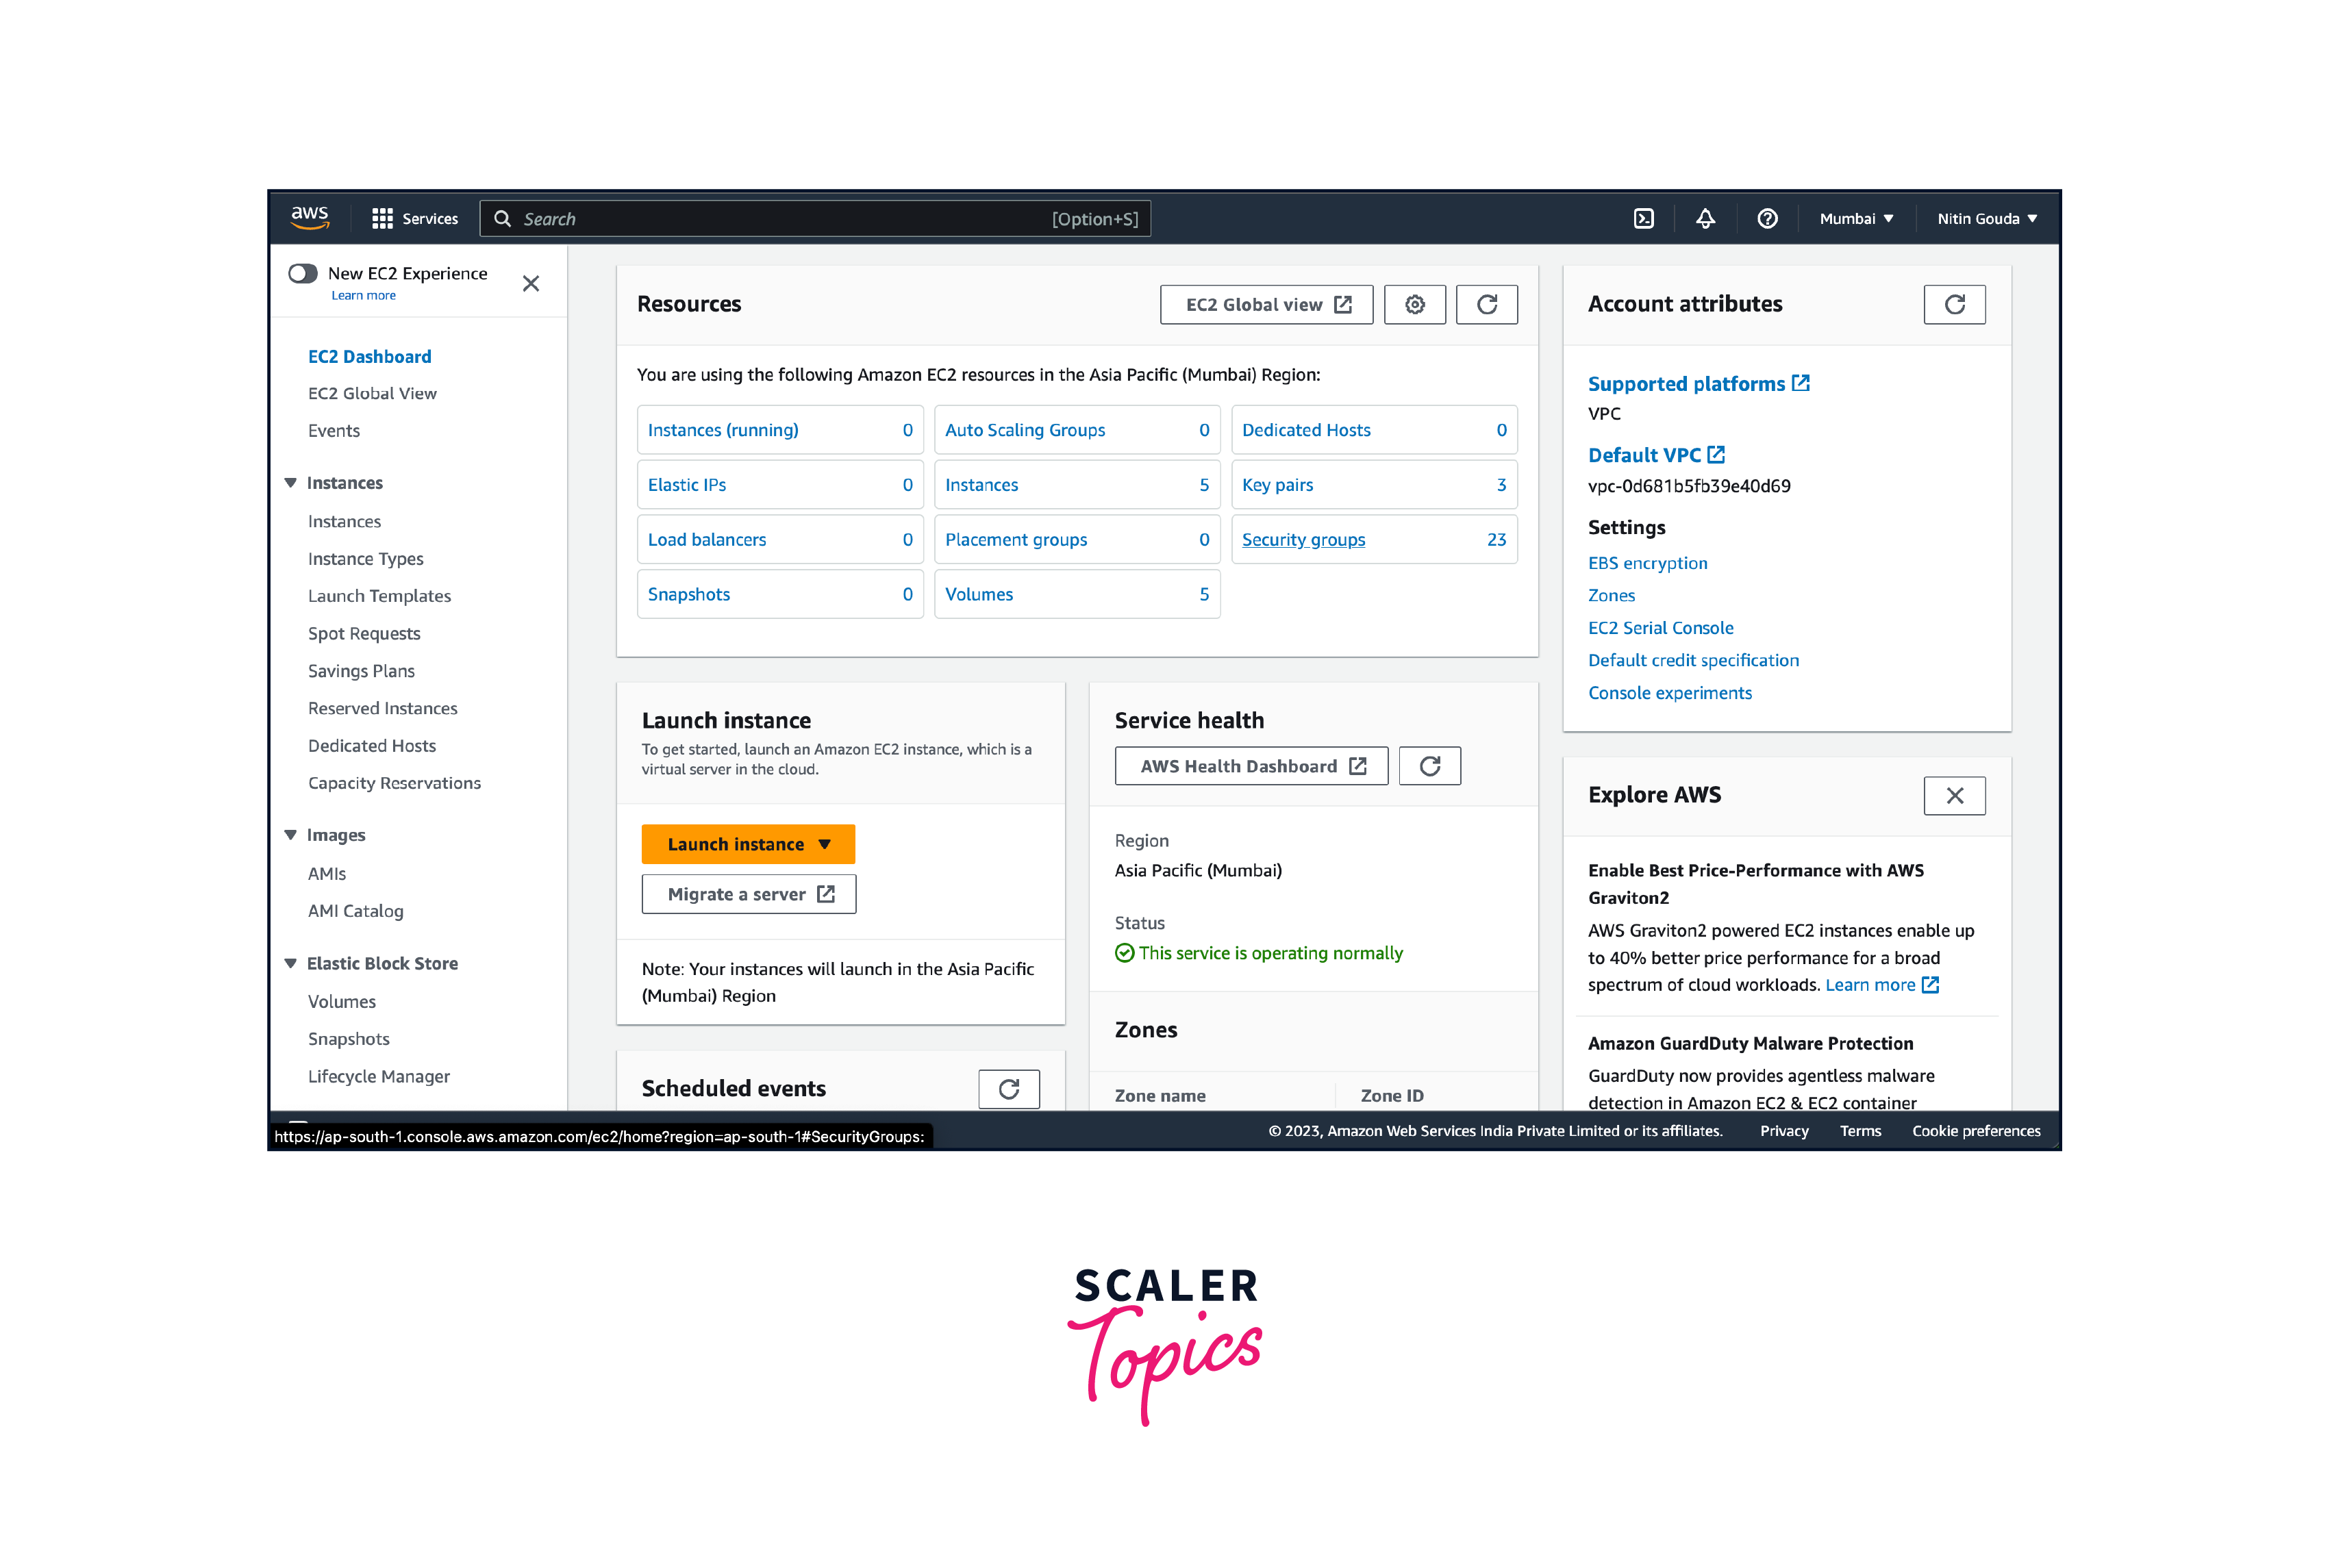
- Navigate to the EC2 (Elastic Compute Cloud) service.
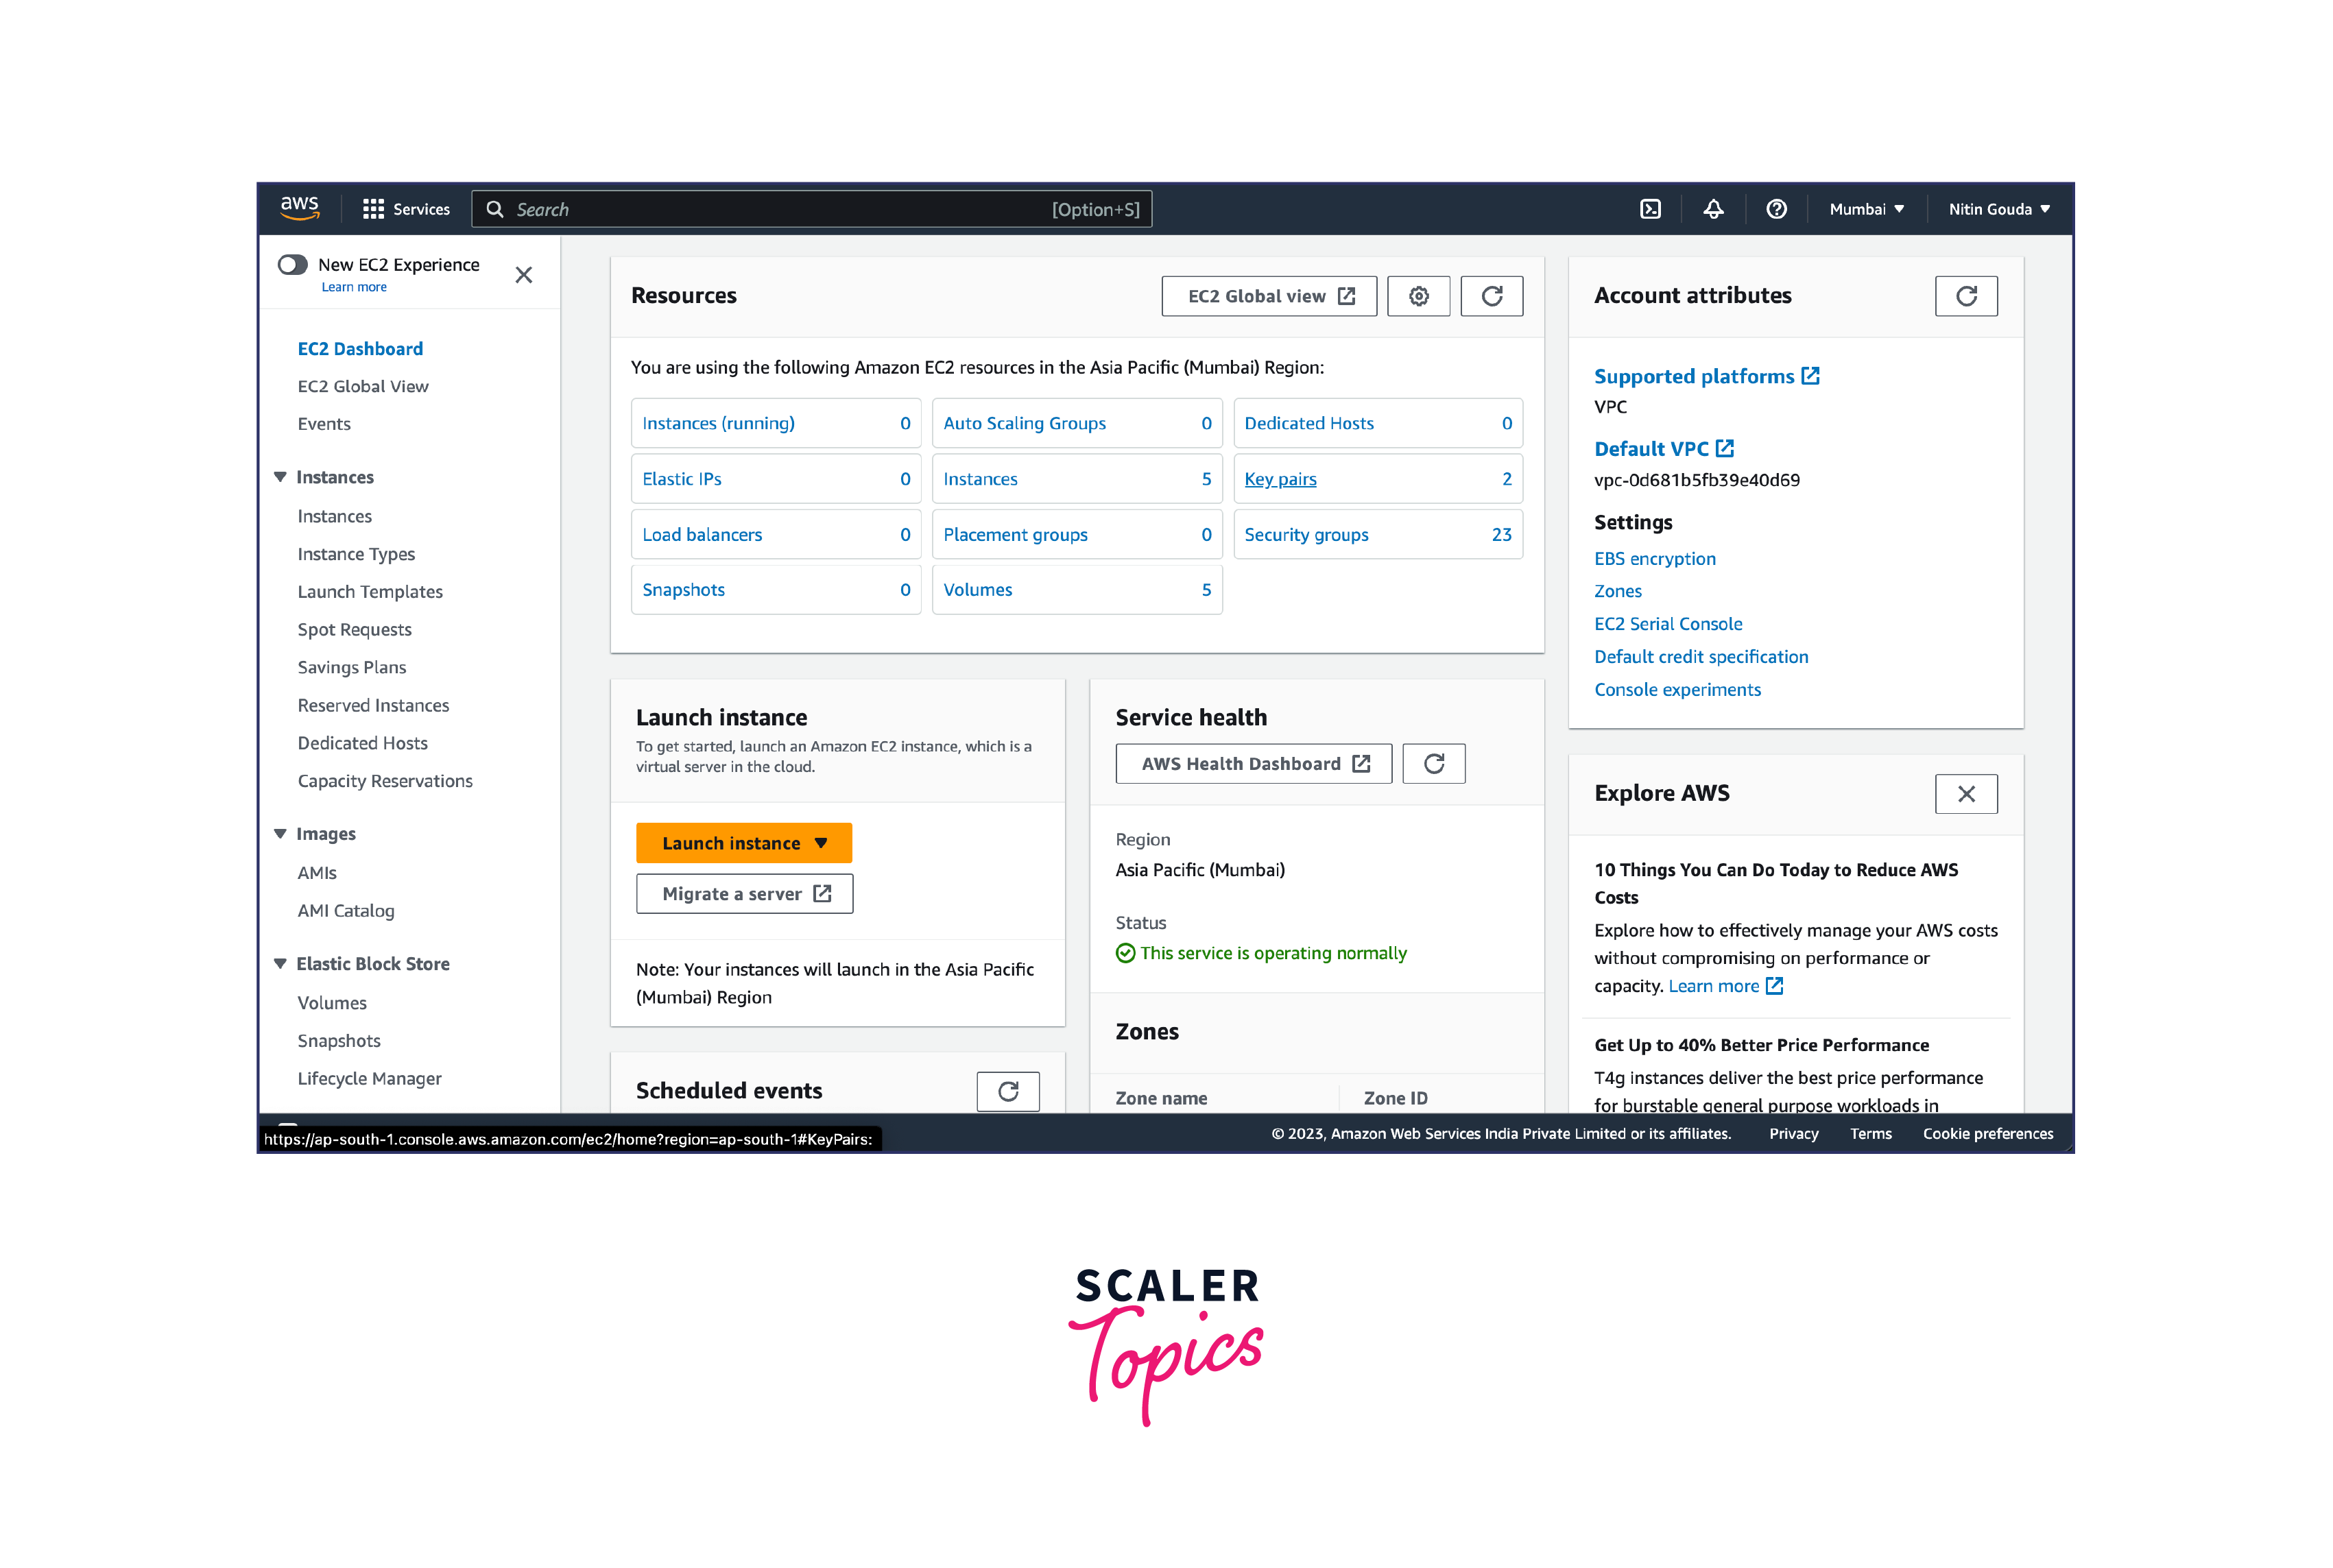
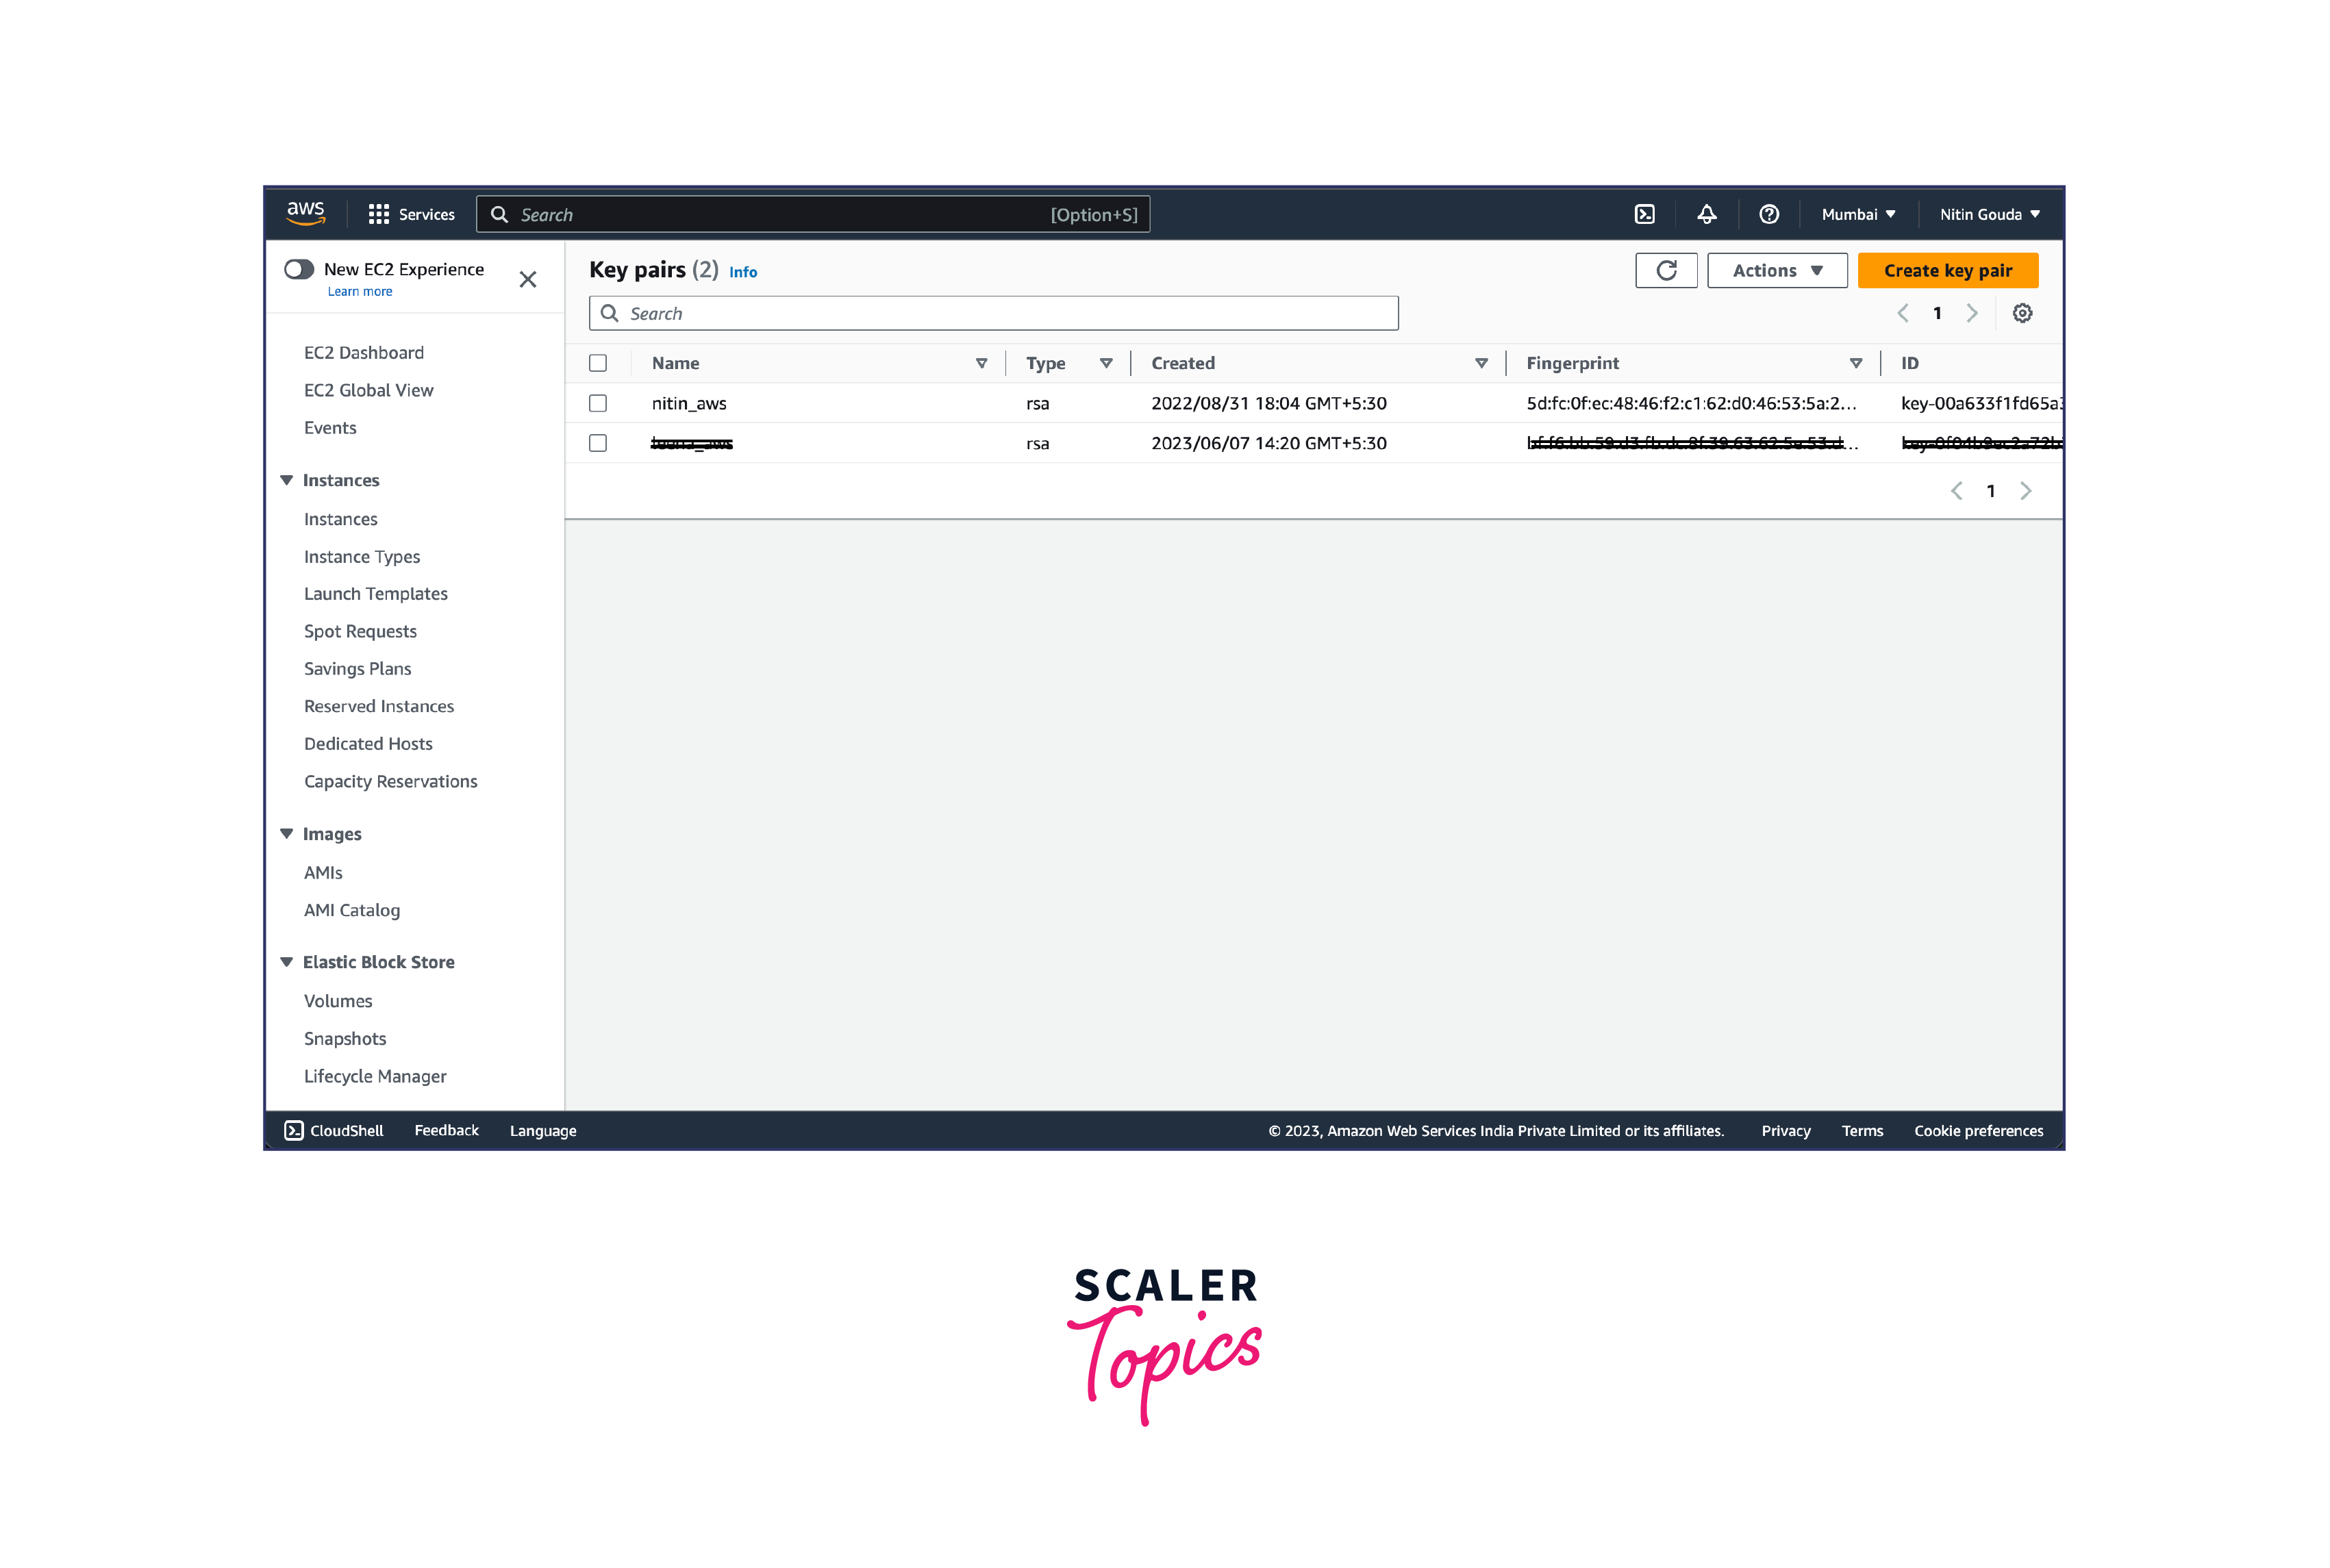
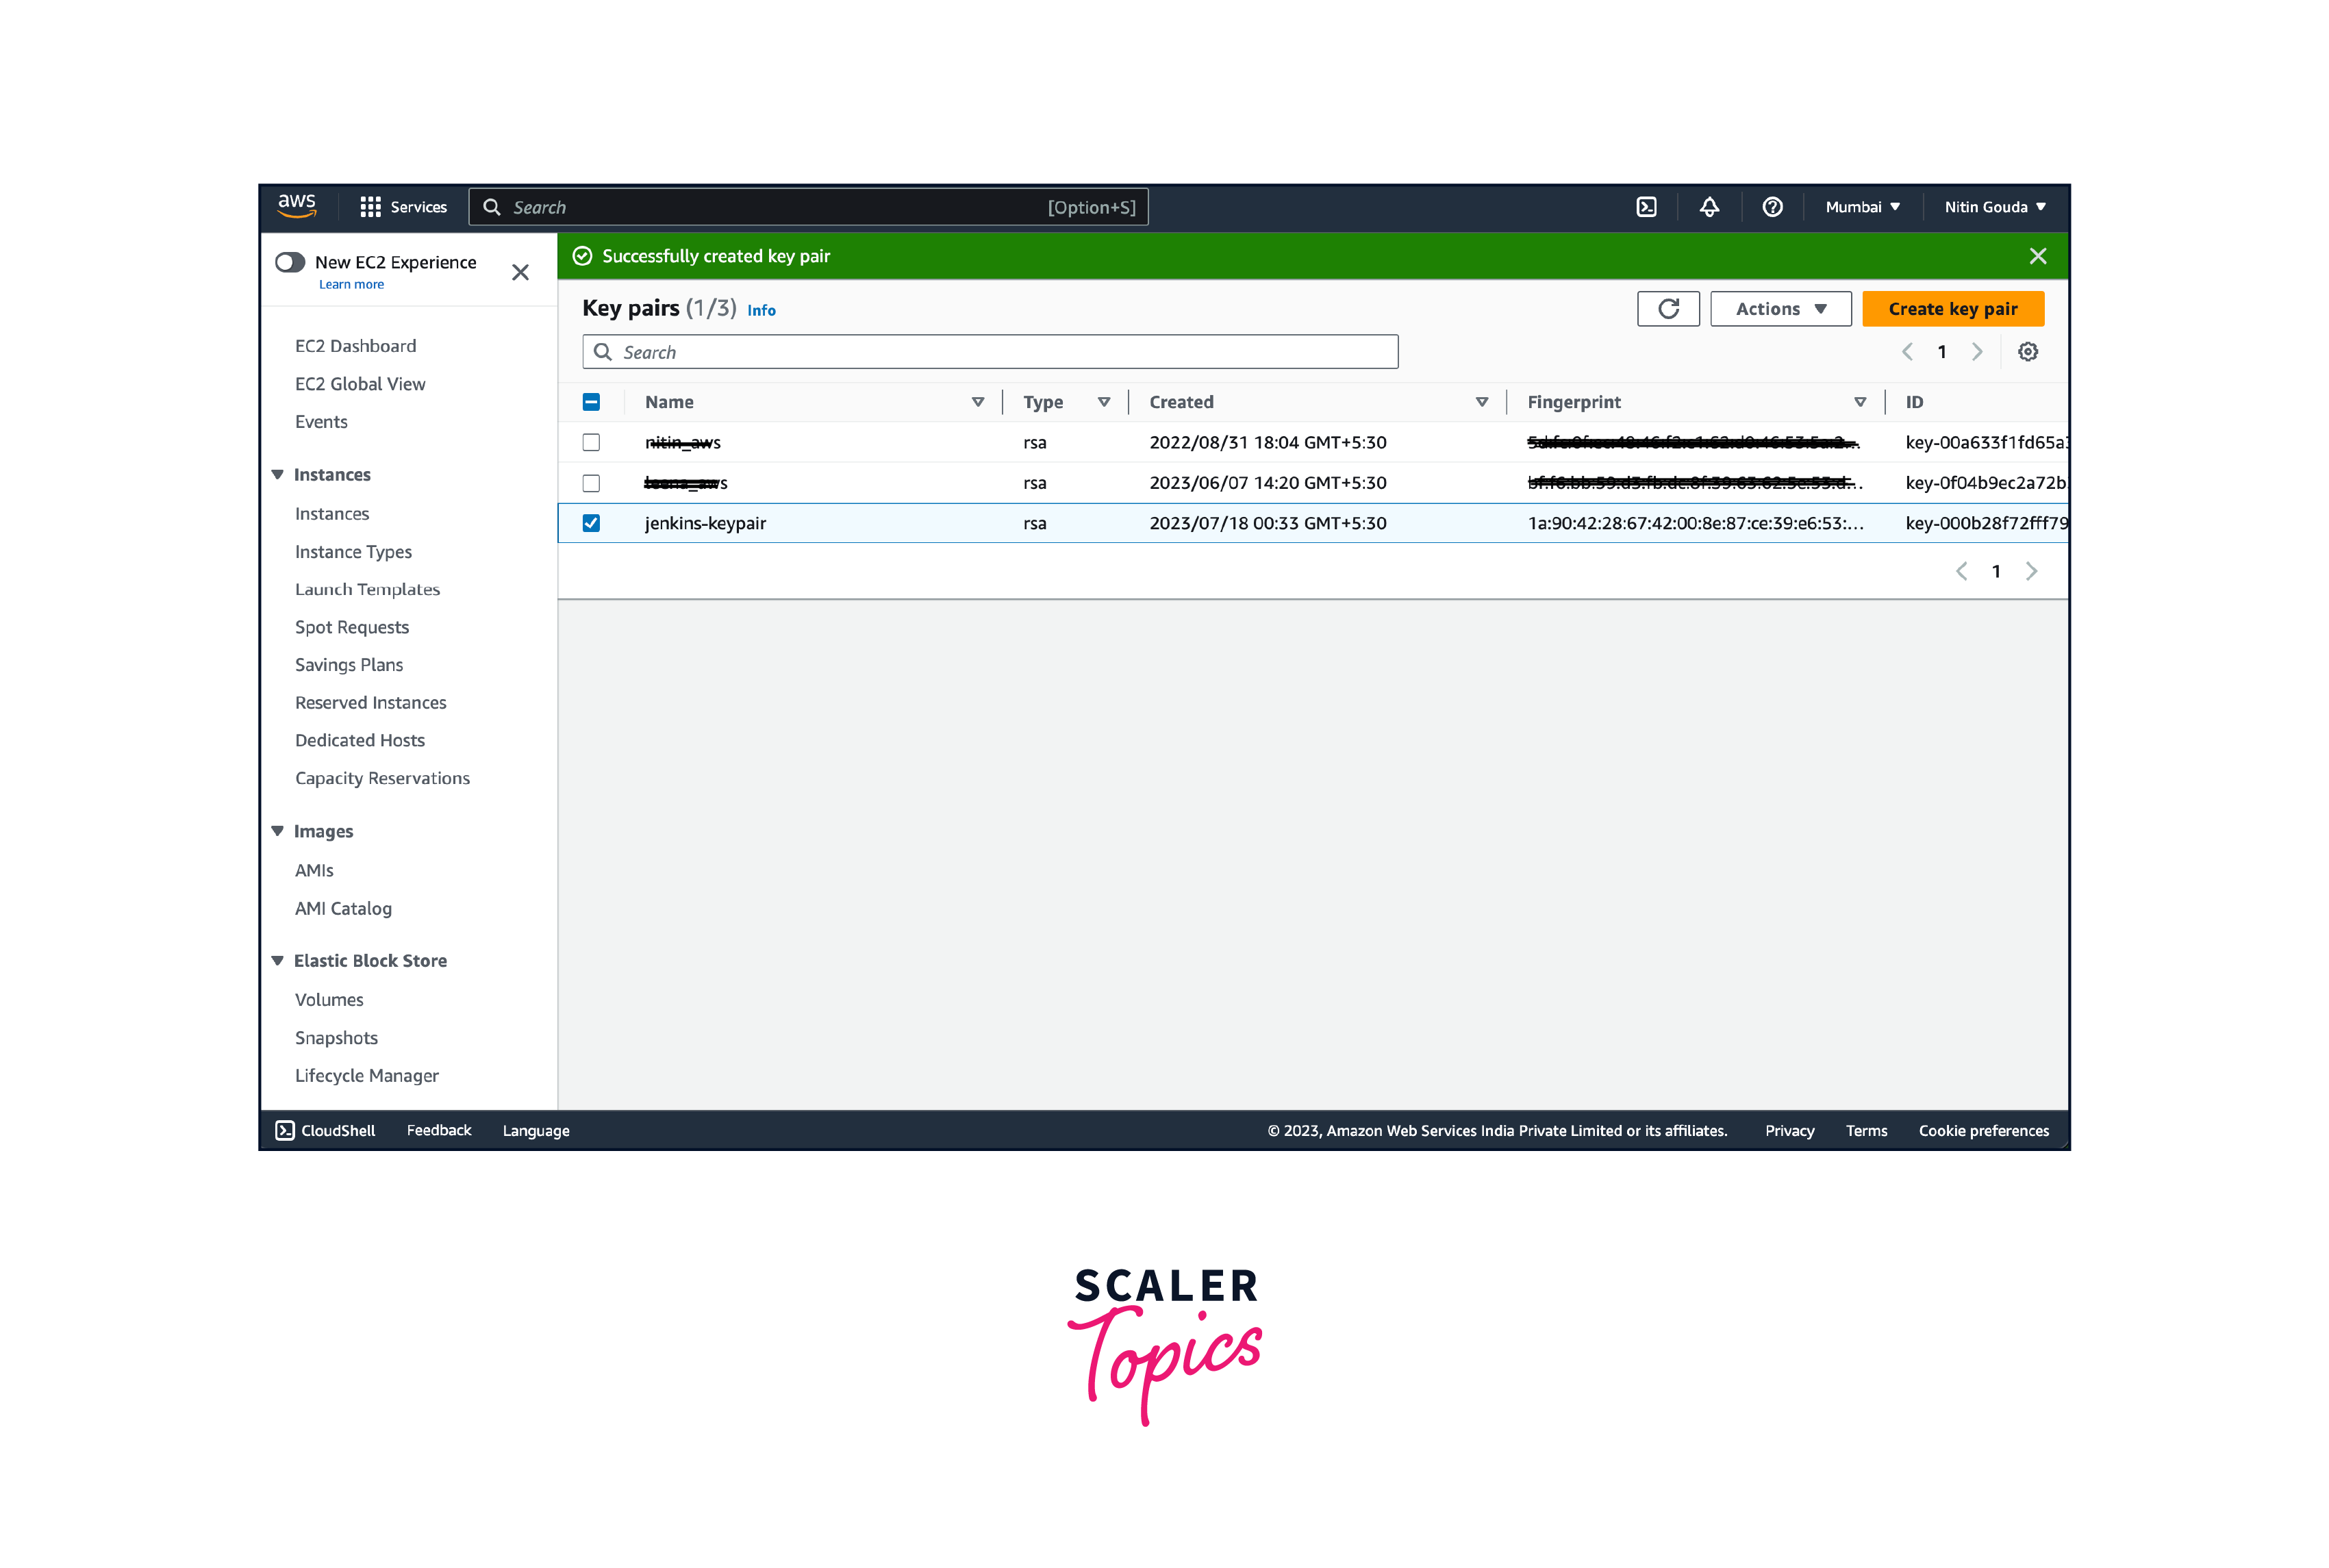
- In the EC2 dashboard, click on "Key Pairs" in the left-hand menu. Click on the "Create Key Pair" button.
- Provide a name for your key pair (e.g., "jenkins-keypair"). Choose the key pair file format. The recommended format is "pem" as it can be used with most SSH clients and then click on the "Create Key Pair" button.
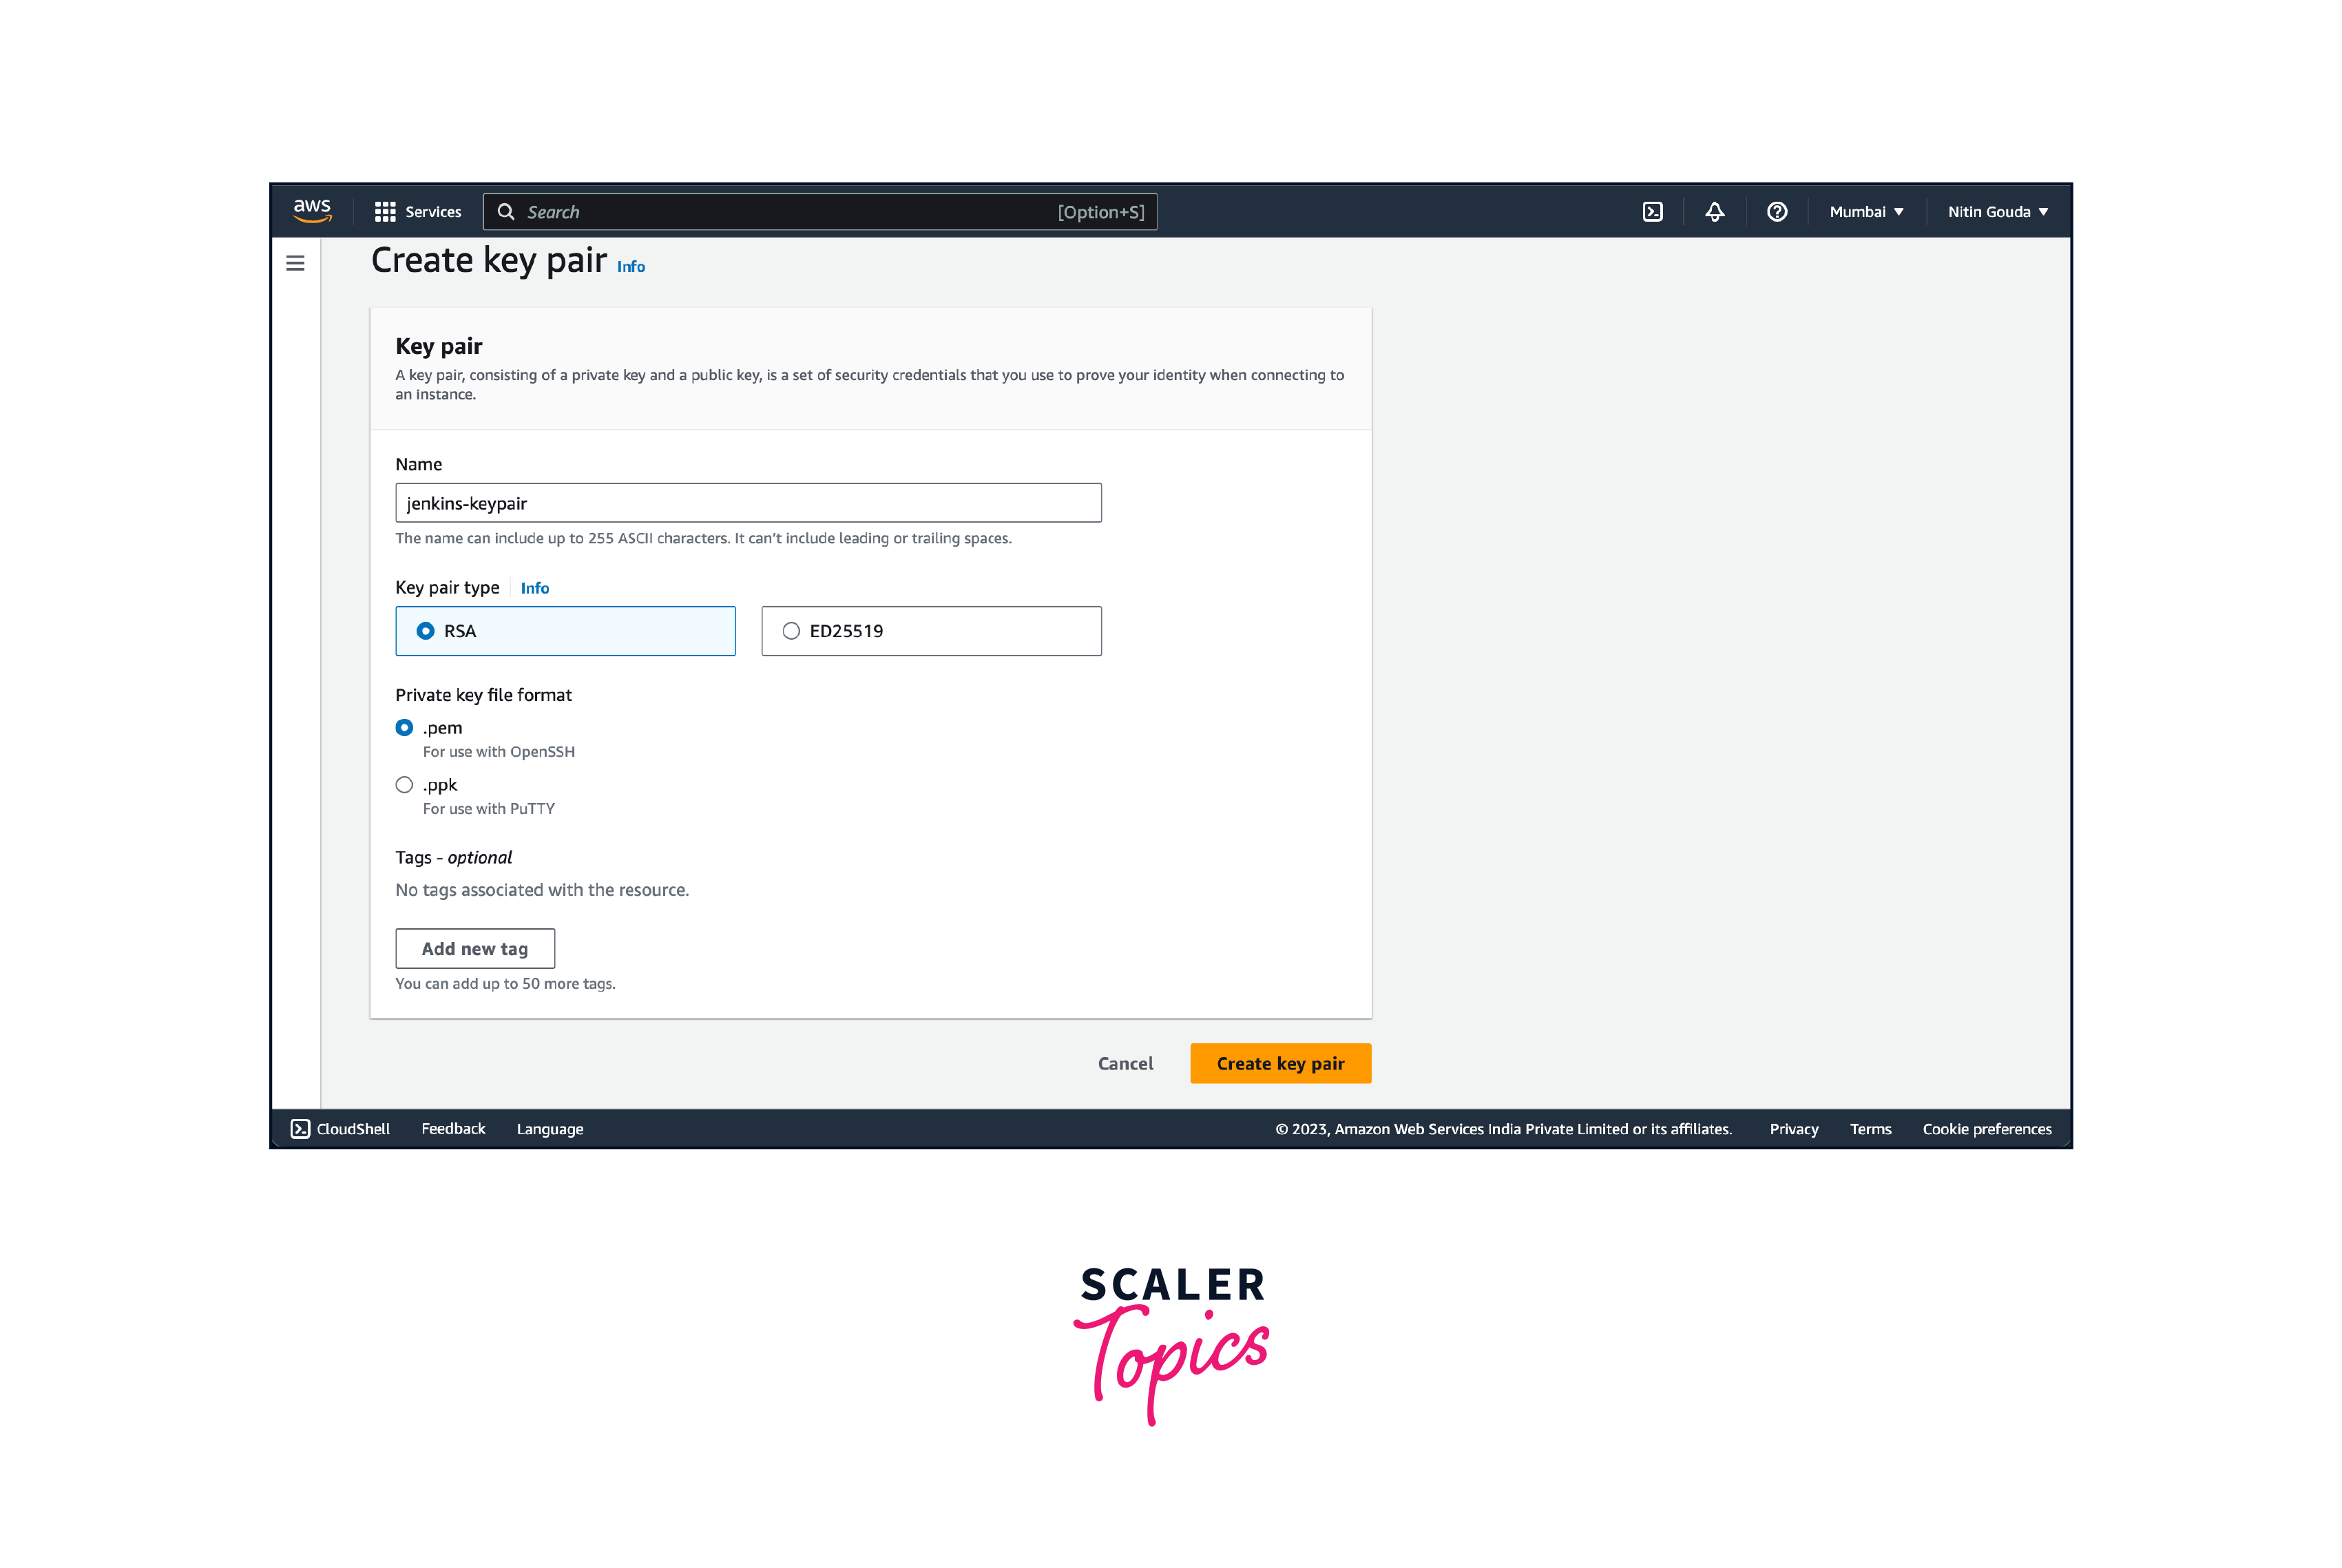
- The key pair will be created, and the private key file will be downloaded automatically. Make sure to save the private key file (.pem) in a secure location as you won't be able to download it again. Once the private key file is saved, you can use it to authenticate and access your EC2 instances securely.
It is crucial to protect the private key file and keep it confidential. Only share the public key associated with the key pair when required. The private key is used to authenticate and access instances launched with this key pair.
Note: If you're using a Windows-based client, you can use tools like PuTTYgen to convert the .pem file to a .ppk format, which is compatible with PuTTY SSH client.
Create a Security Group
To create a security group (also referred to as a security pair) in AWS, follow these steps:
- Log in to the AWS Management Console using your credentials. Navigate to the EC2 (Elastic Compute Cloud) service. In the EC2 dashboard, click on "Security Groups" in the left-hand menu. Click on it.
- Click on the "Create Security Group" button. Provide a name for your security group (e.g., "jenkins-security-group") and a description to help identify its purpose. Select the desired VPC (Virtual Private Cloud) for your security group. If you're unsure, the default VPC is usually selected by default.
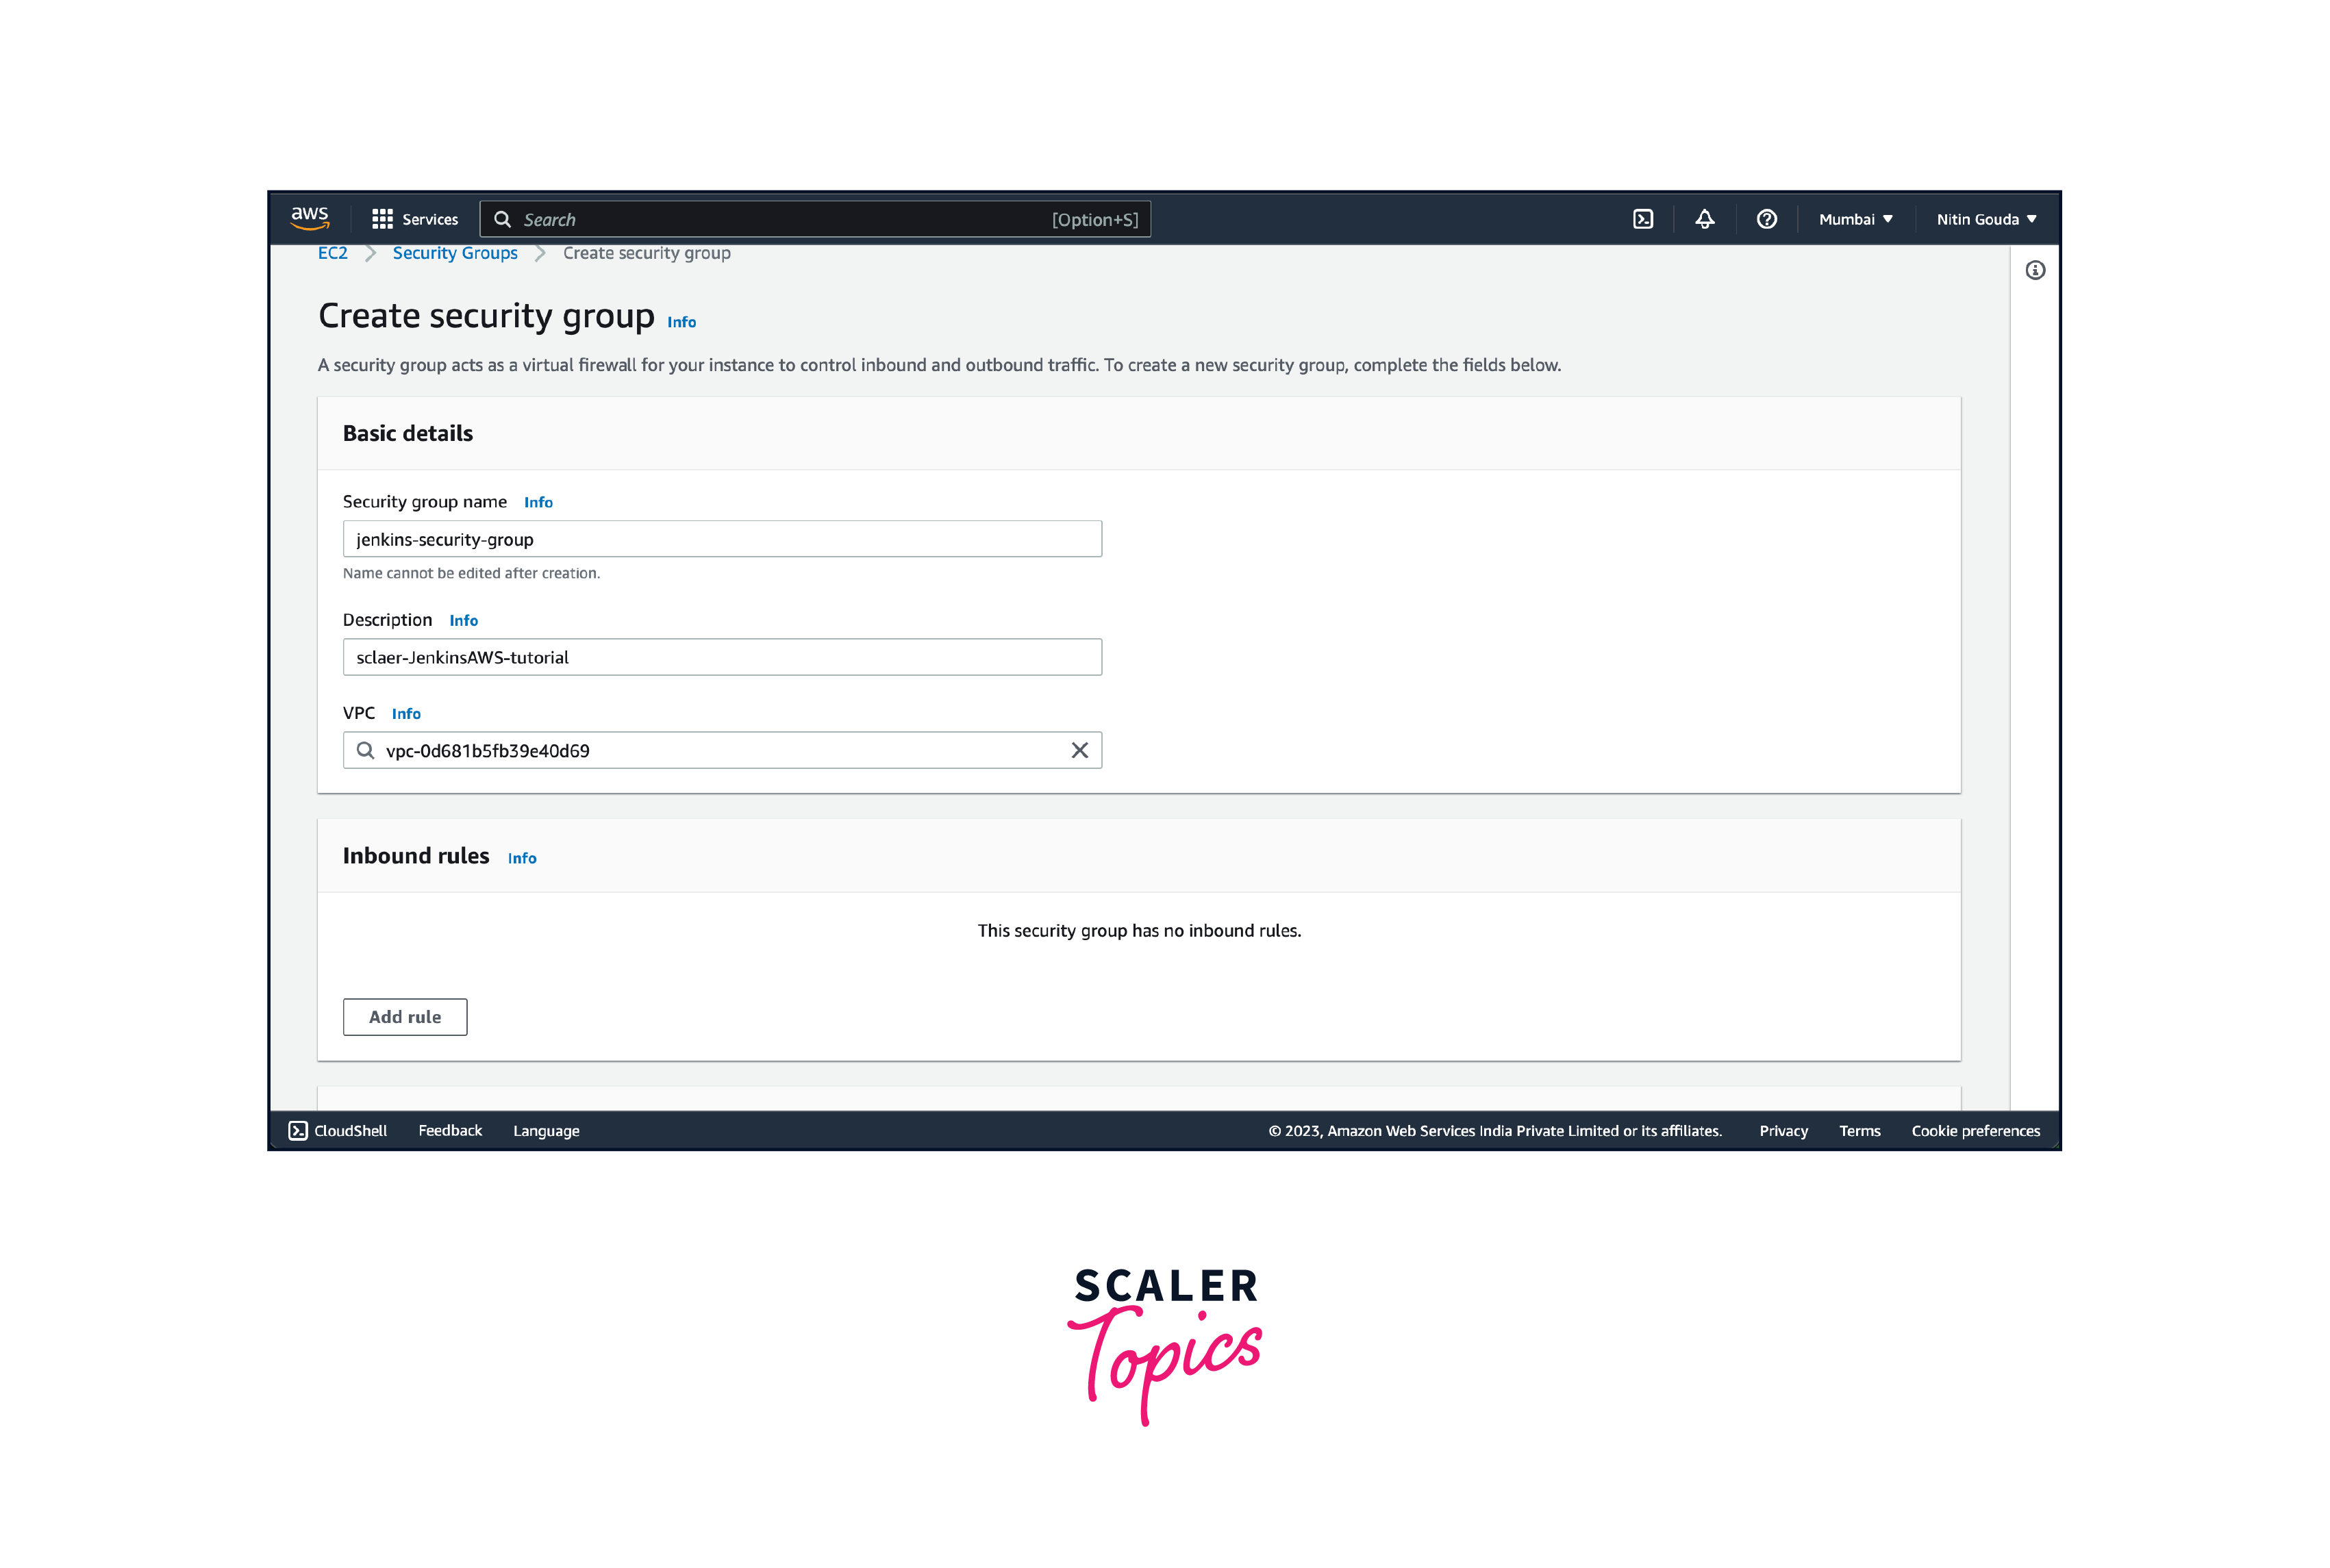
- Click on the "Add Rule" button to define inbound and outbound traffic rules for your security group. Specify the inbound rules to control incoming traffic to your instances. For example, you can add rules to allow SSH access (Port 22) for administration purposes or HTTP access (Port 80) for web applications. Specify the protocol, port range, and source IP or range for each rule.
-
Specify the outbound rules to control outgoing traffic from your instances. By default, all outbound traffic is allowed, but you can customize it based on your requirements.
-
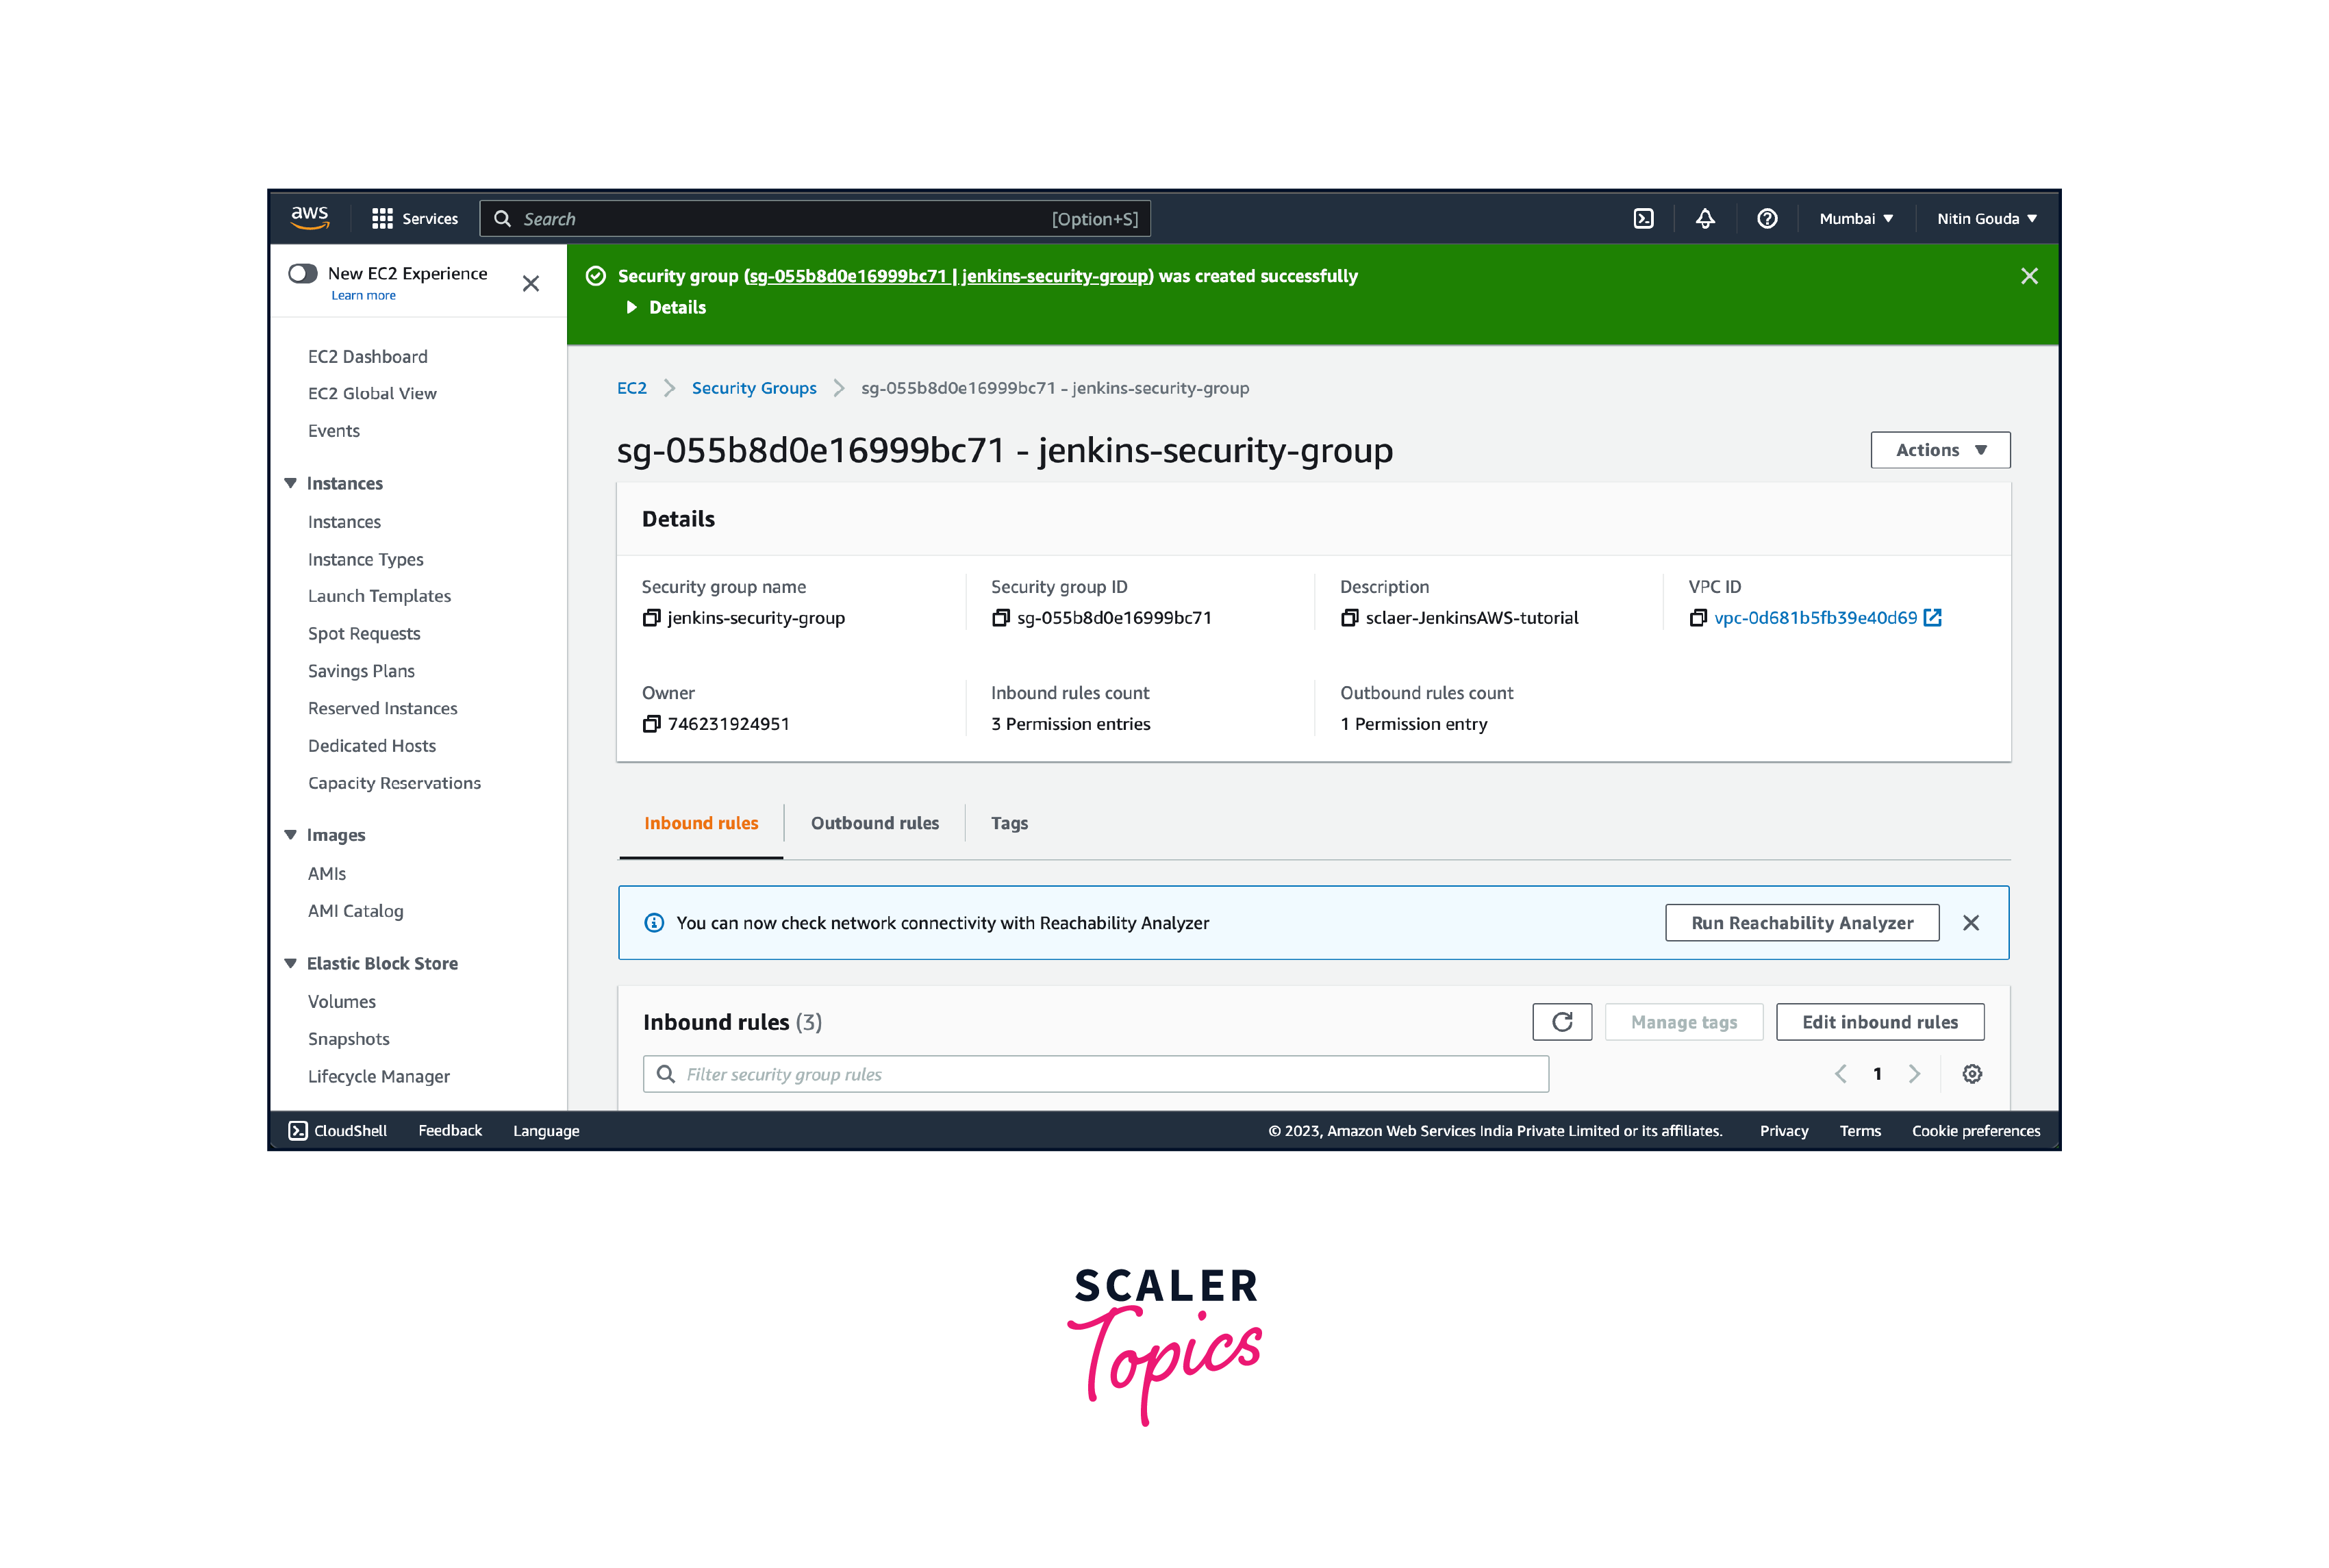
Review the rules you've configured to ensure they match your intended security posture. Click on the "Create" button to create the security group.
-
The security group will be created, and you will be redirected to the security groups list. You can see your newly created security group along with its ID, description, and assigned VPC.
After creating the security group, you can associate it with your EC2 instances to control their inbound and outbound traffic. Remember to review and update your security group rules as needed to ensure the appropriate level of access and security for your applications and resources.
Security groups act as virtual firewalls and are an essential part of securing your AWS infrastructure by allowing you to define granular access rules for your instances.
Launch an Amazon EC2 Instance.
To launch an Amazon EC2 instance, follow these steps:
- Log in to the AWS Management Console using your credentials. Navigate to the EC2 (Elastic Compute Cloud) service. In the EC2 dashboard, click on the "Launch Instance" button.
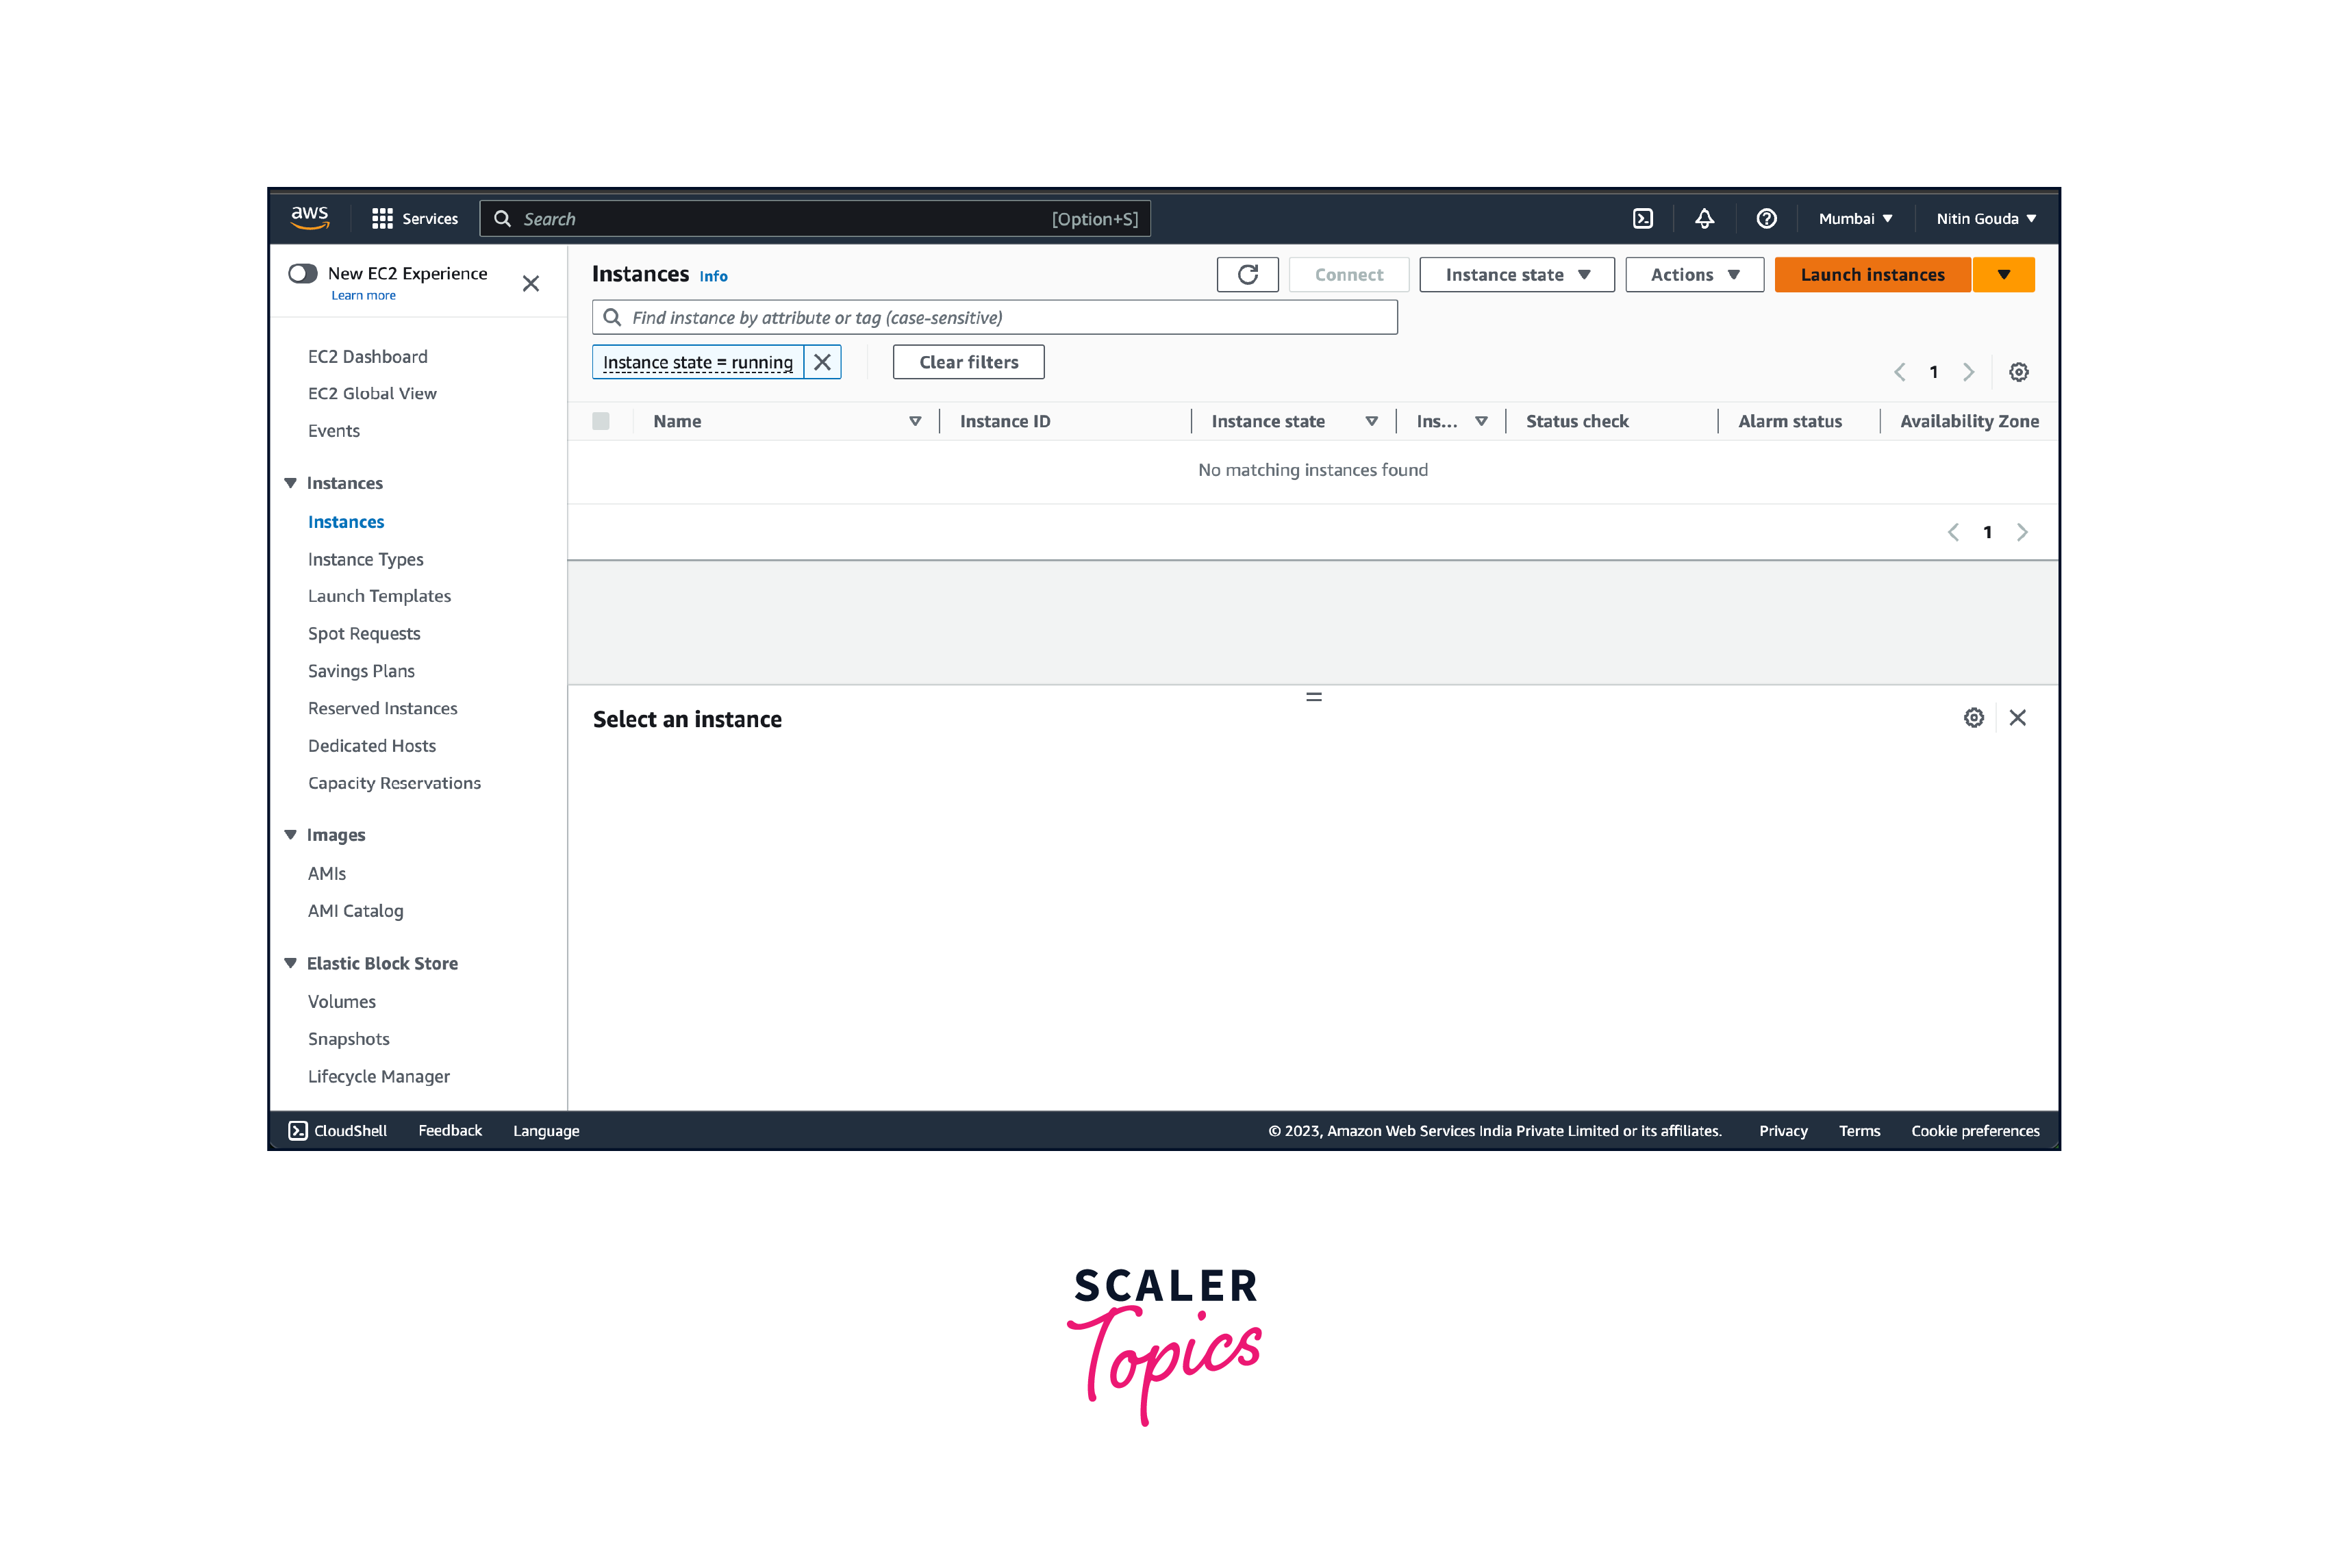
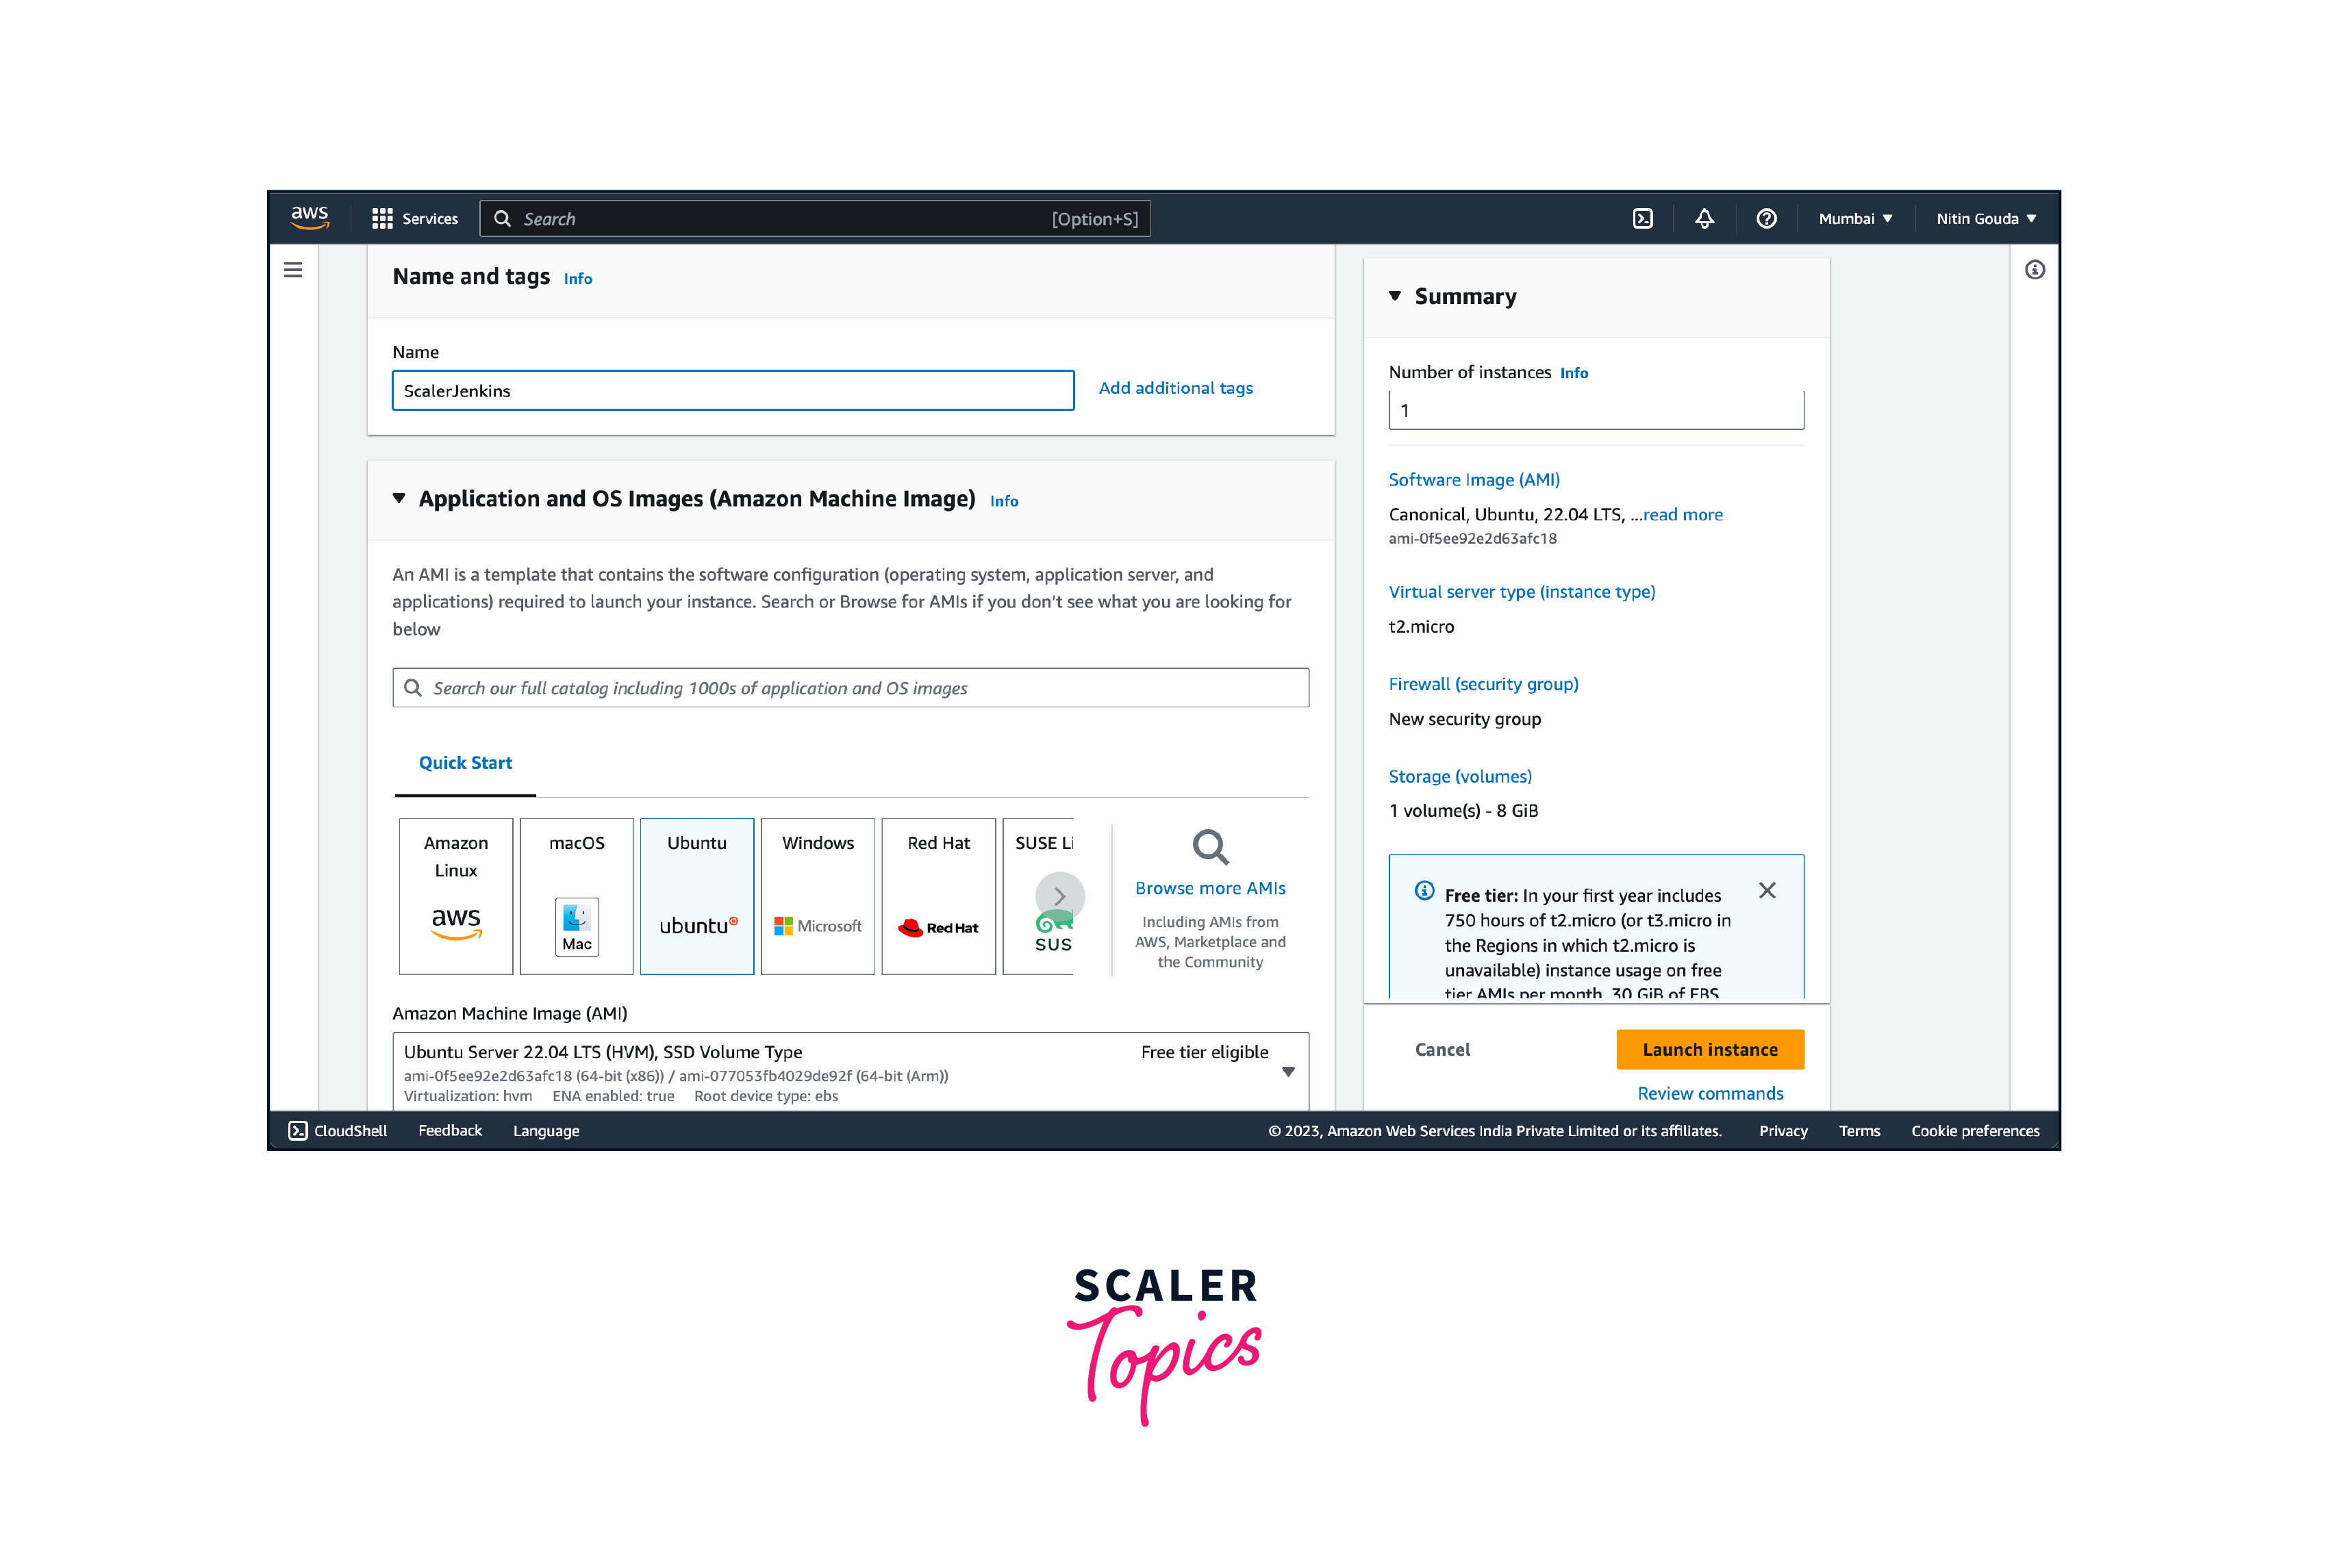
- Choose an Amazon Machine Image (AMI) for your instance. AMIs contain the operating system and pre-installed software configurations. You can select from a wide range of options provided by AWS or choose your custom AMI. Select an instance type based on your application requirements. The instance type determines the hardware of the host computer used for your instance.
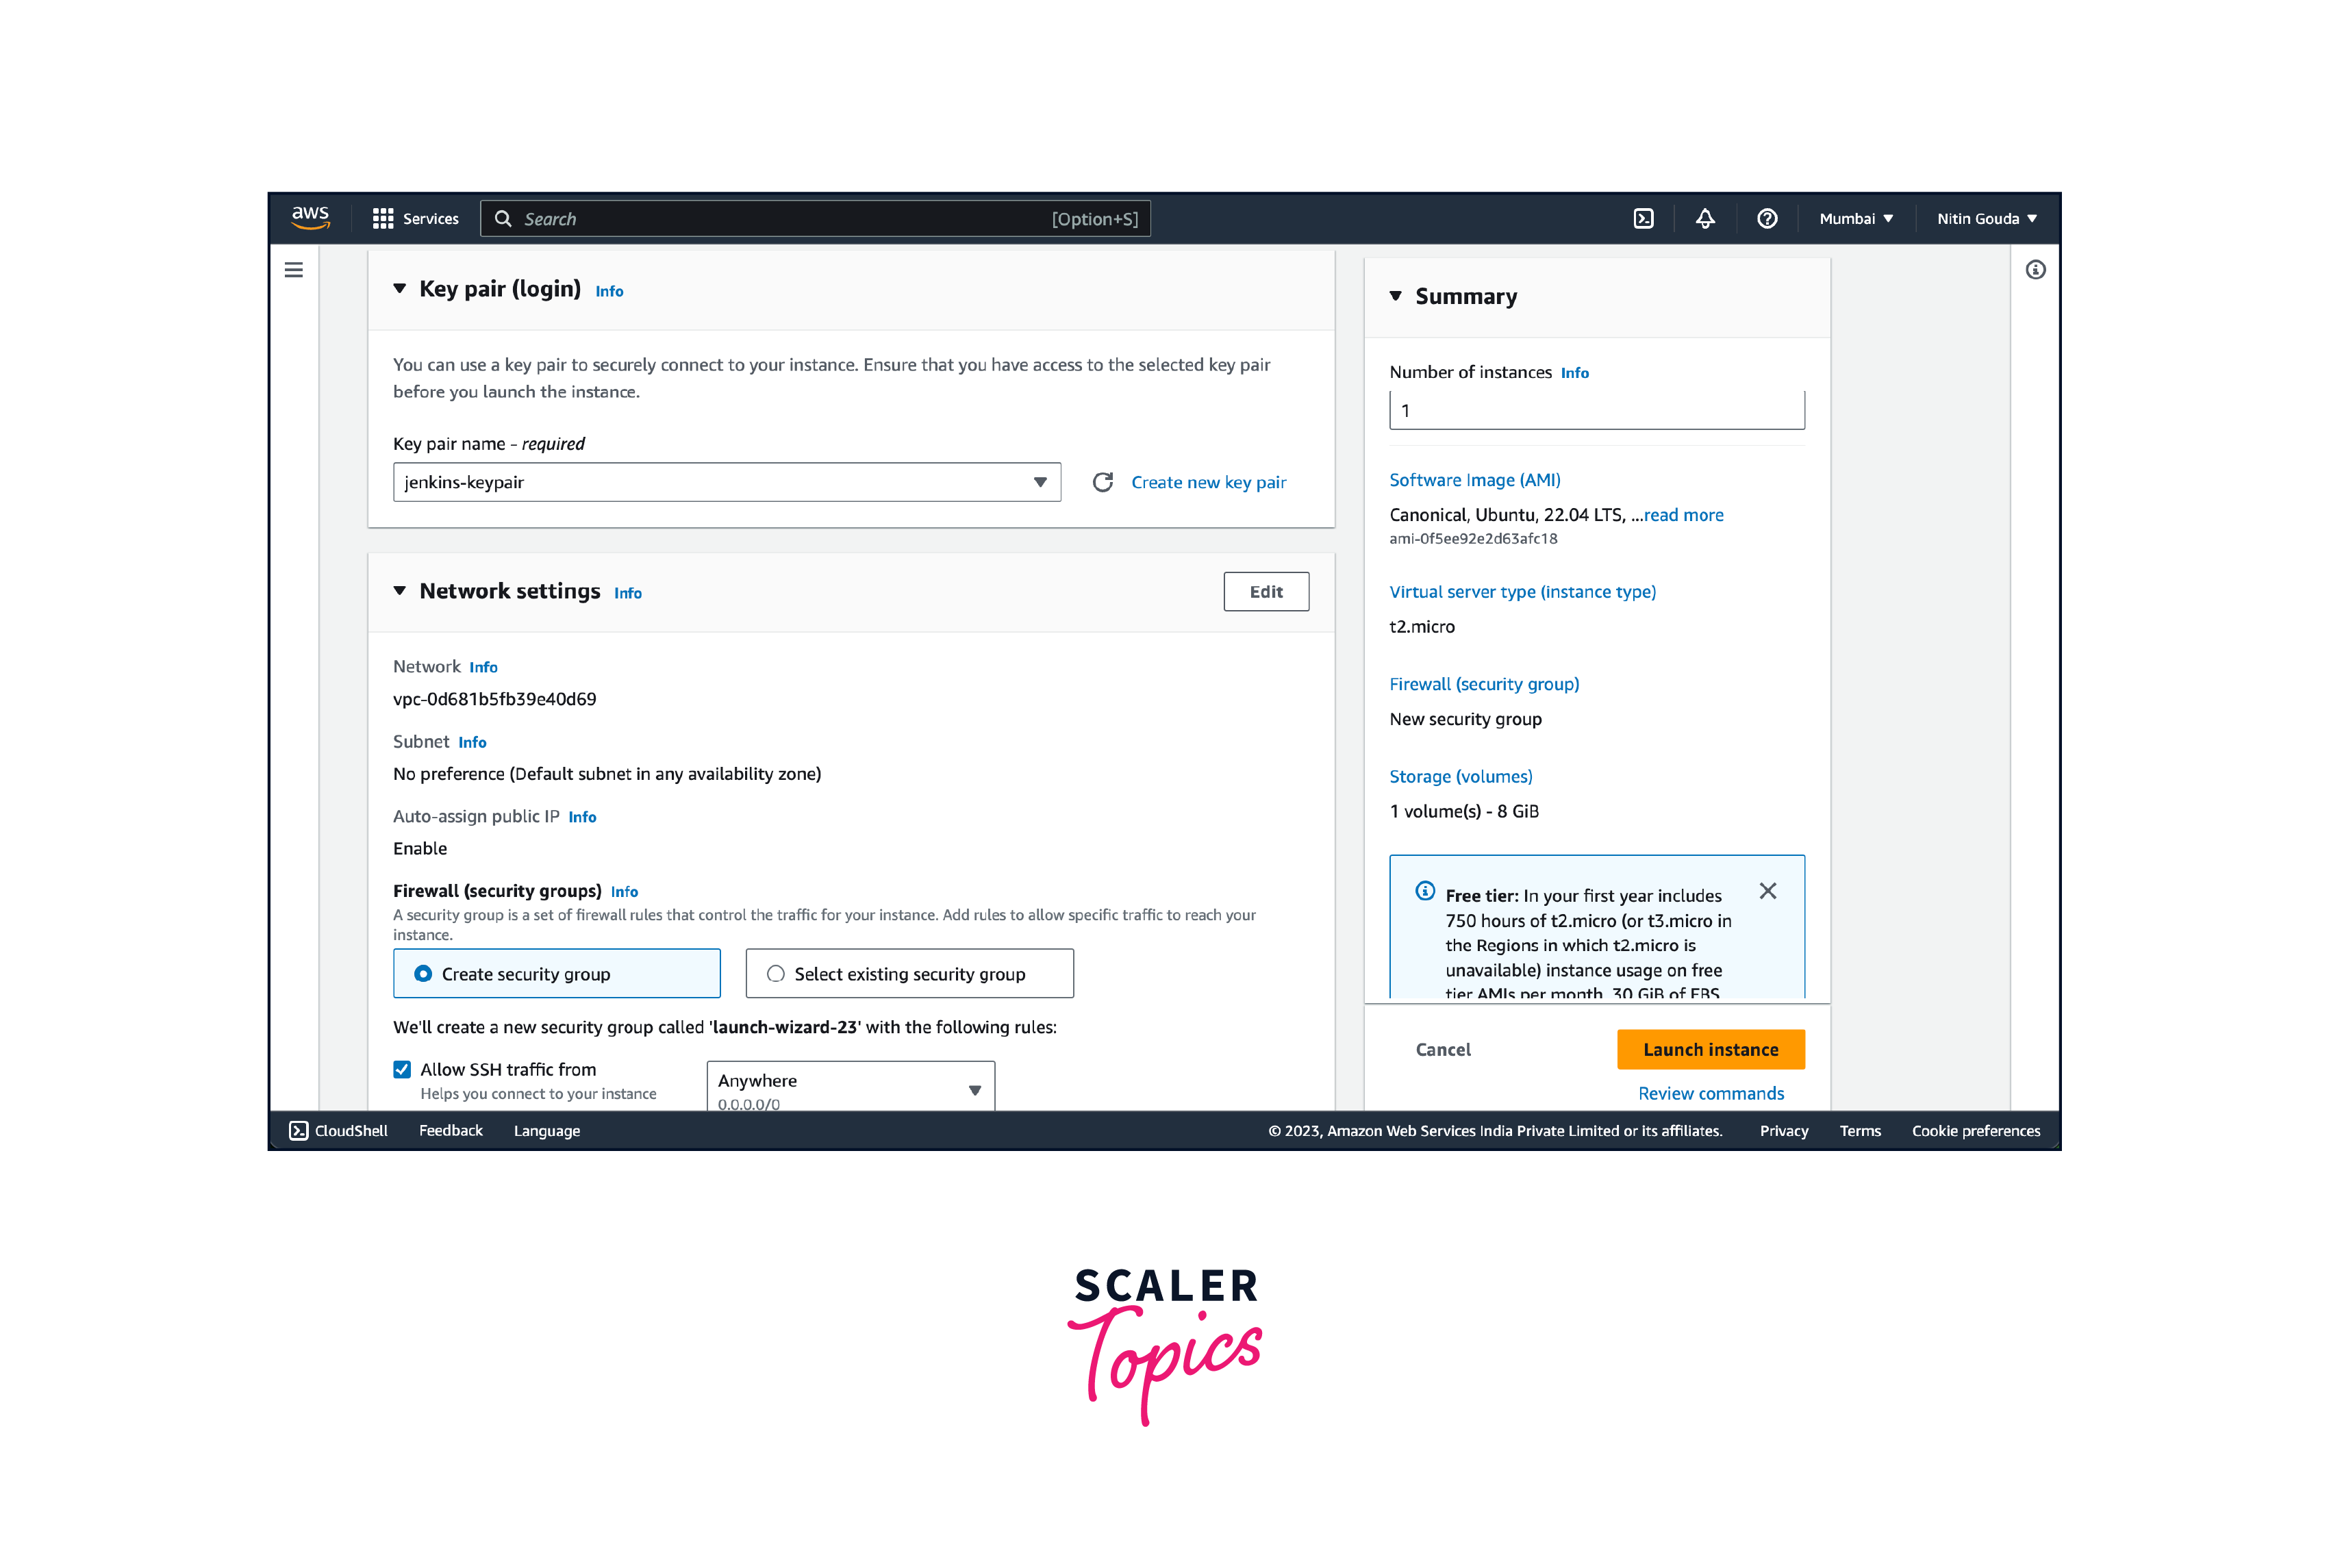
- Configure the instance details, including the number of instances to launch, network settings, and storage options. You can choose the VPC (Virtual Private Cloud) and subnet, enable public IP assignment, and configure storage volumes as needed. We will be using the security group we recently created.
- Review the configuration details and click on the "Launch" button.

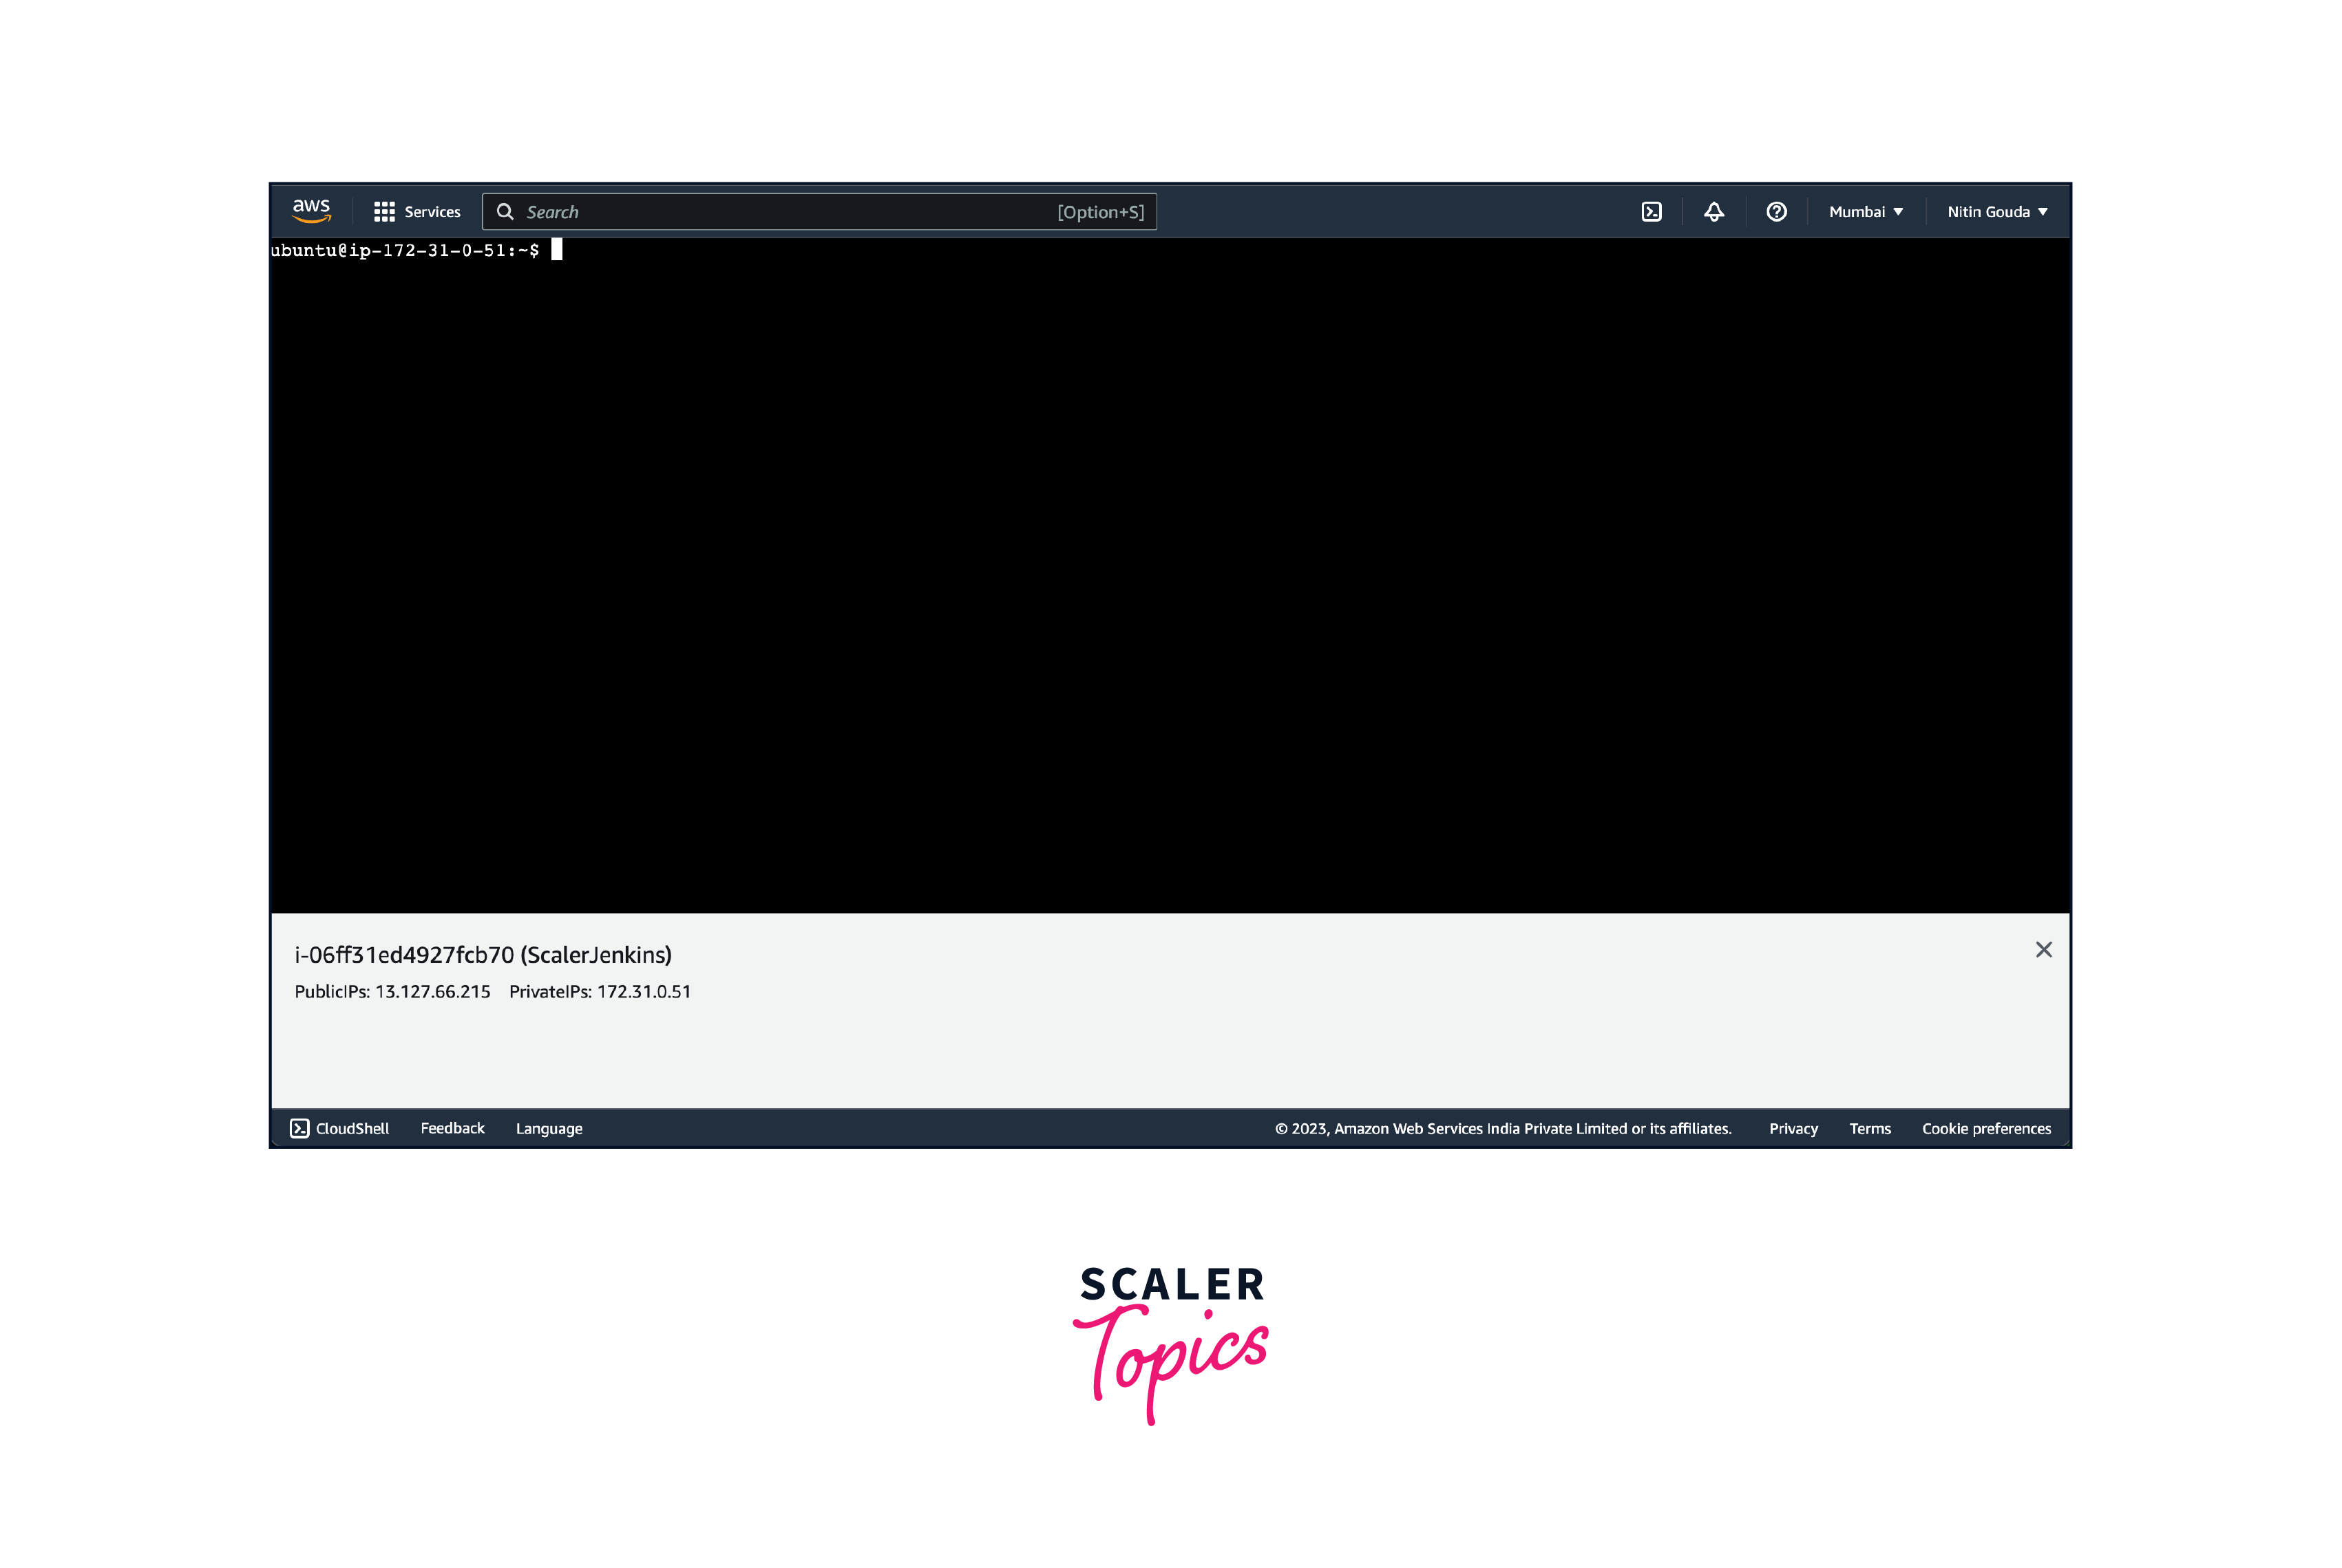
Once the instance is running, you can access it using SSH or other remote access methods depending on the operating system and configurations you chose during the instance launch. You can also perform further configurations, such as attaching additional storage volumes or associating Elastic IP addresses with your instance.
Launching an EC2 instance is a fundamental step in setting up your compute resources in AWS. It provides you with scalable, on-demand virtual servers to run your applications and services.
Install and Configure Jenkins on AWS
- SSH into the AWS Jenkins EC2-instance that we just created using the key pair (.pem file).
- Jenkins requires Java to run, yet certain distributions don’t include this by default and some Java versions are incompatible with Jenkins.
- There are multiple Java implementations that you can use. OpenJDK is the most popular one at the moment, we will use it in this guide. Update the Debian apt repositories, install OpenJDK 17, and check the installation with the commands:
To check if installed properly use the following command:
To Install Jenkins on AWS Ubuntu/Debian follow the following steps:
Here we are using the curl command to download the Jenkins GPG key from the specified Jenkins URL:
In this part we are adding the Jenkins repository to the system's package sources list by echoing the repository information and writing it to the /etc/apt/sources.list.d/jenkins.list file.
Once done update the system and packages installed.
In this, we are using the apt-get package manager to install Jenkins by retrieving and installing the Jenkins package from the configured package sources.
You can enable the Jenkins service to start at boot with the command:
You can start the Jenkins service with the command:
You can check the status of the Jenkins service using the command:
If installed properly it will prompt the following with active(running).
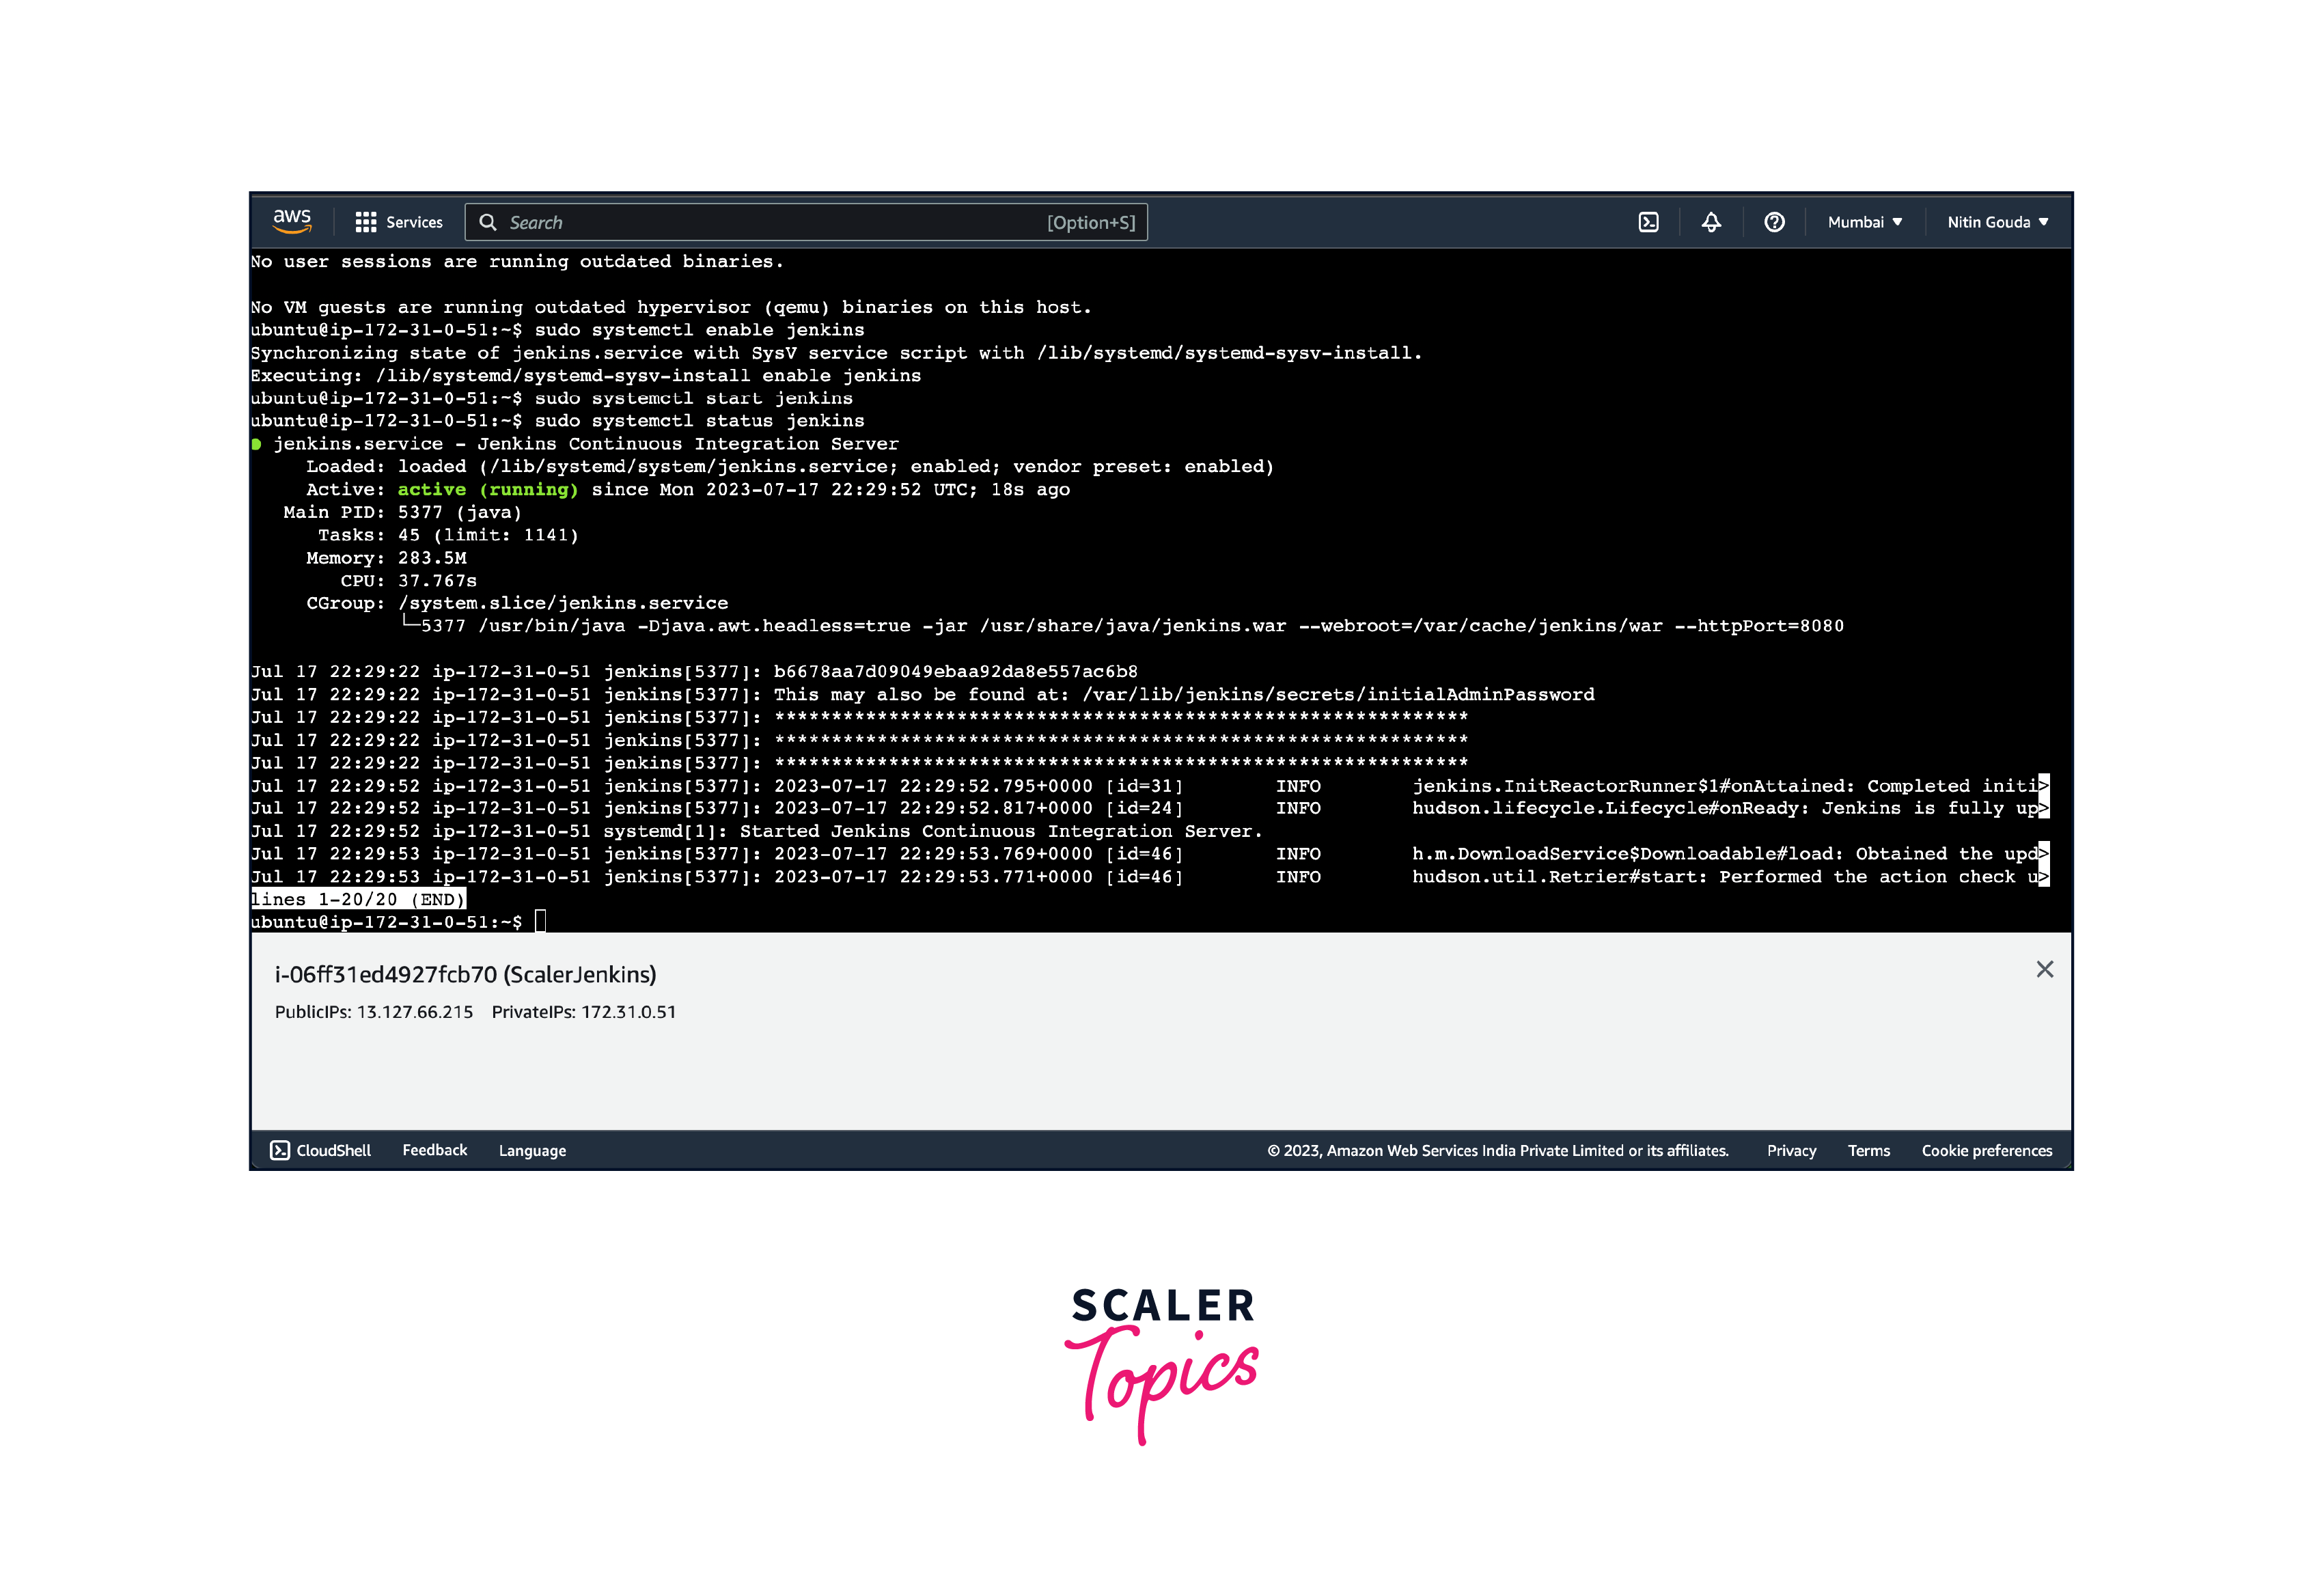
To access the UI we will use the Public IP Address of the EC2 instance and specify the port where Jenkins is running. The default port number for Jenkins is 8080.
Output:
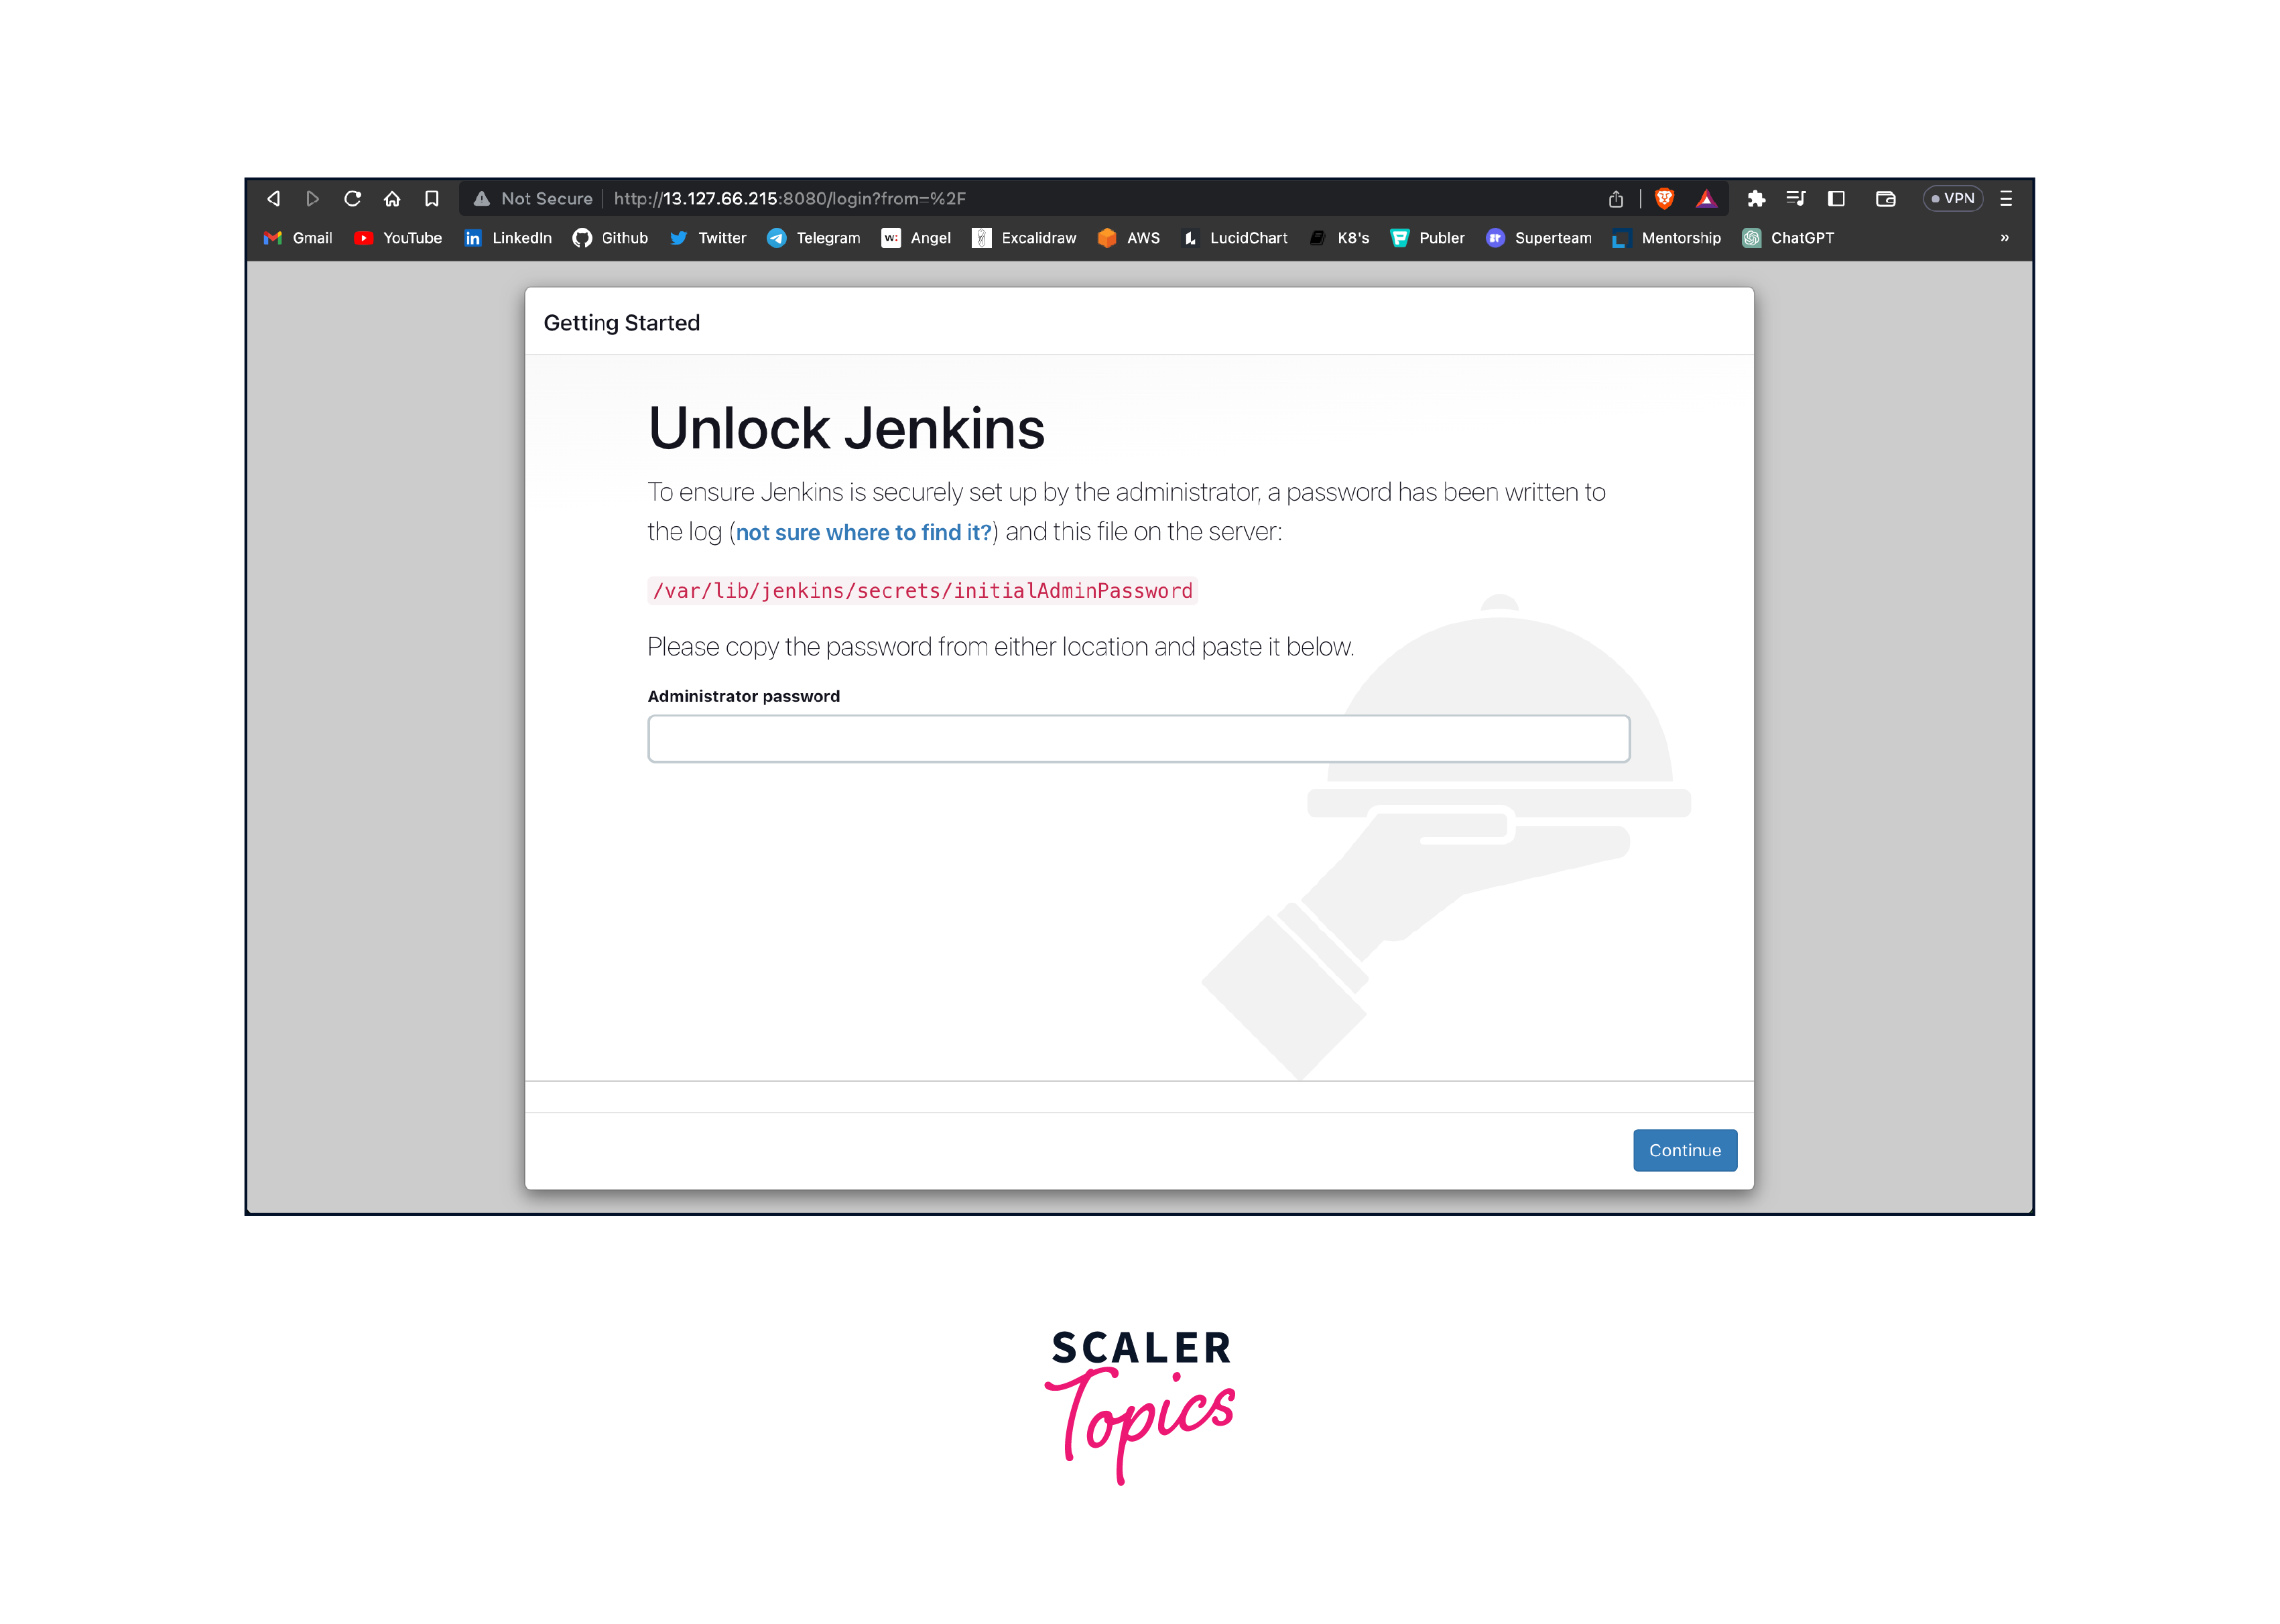
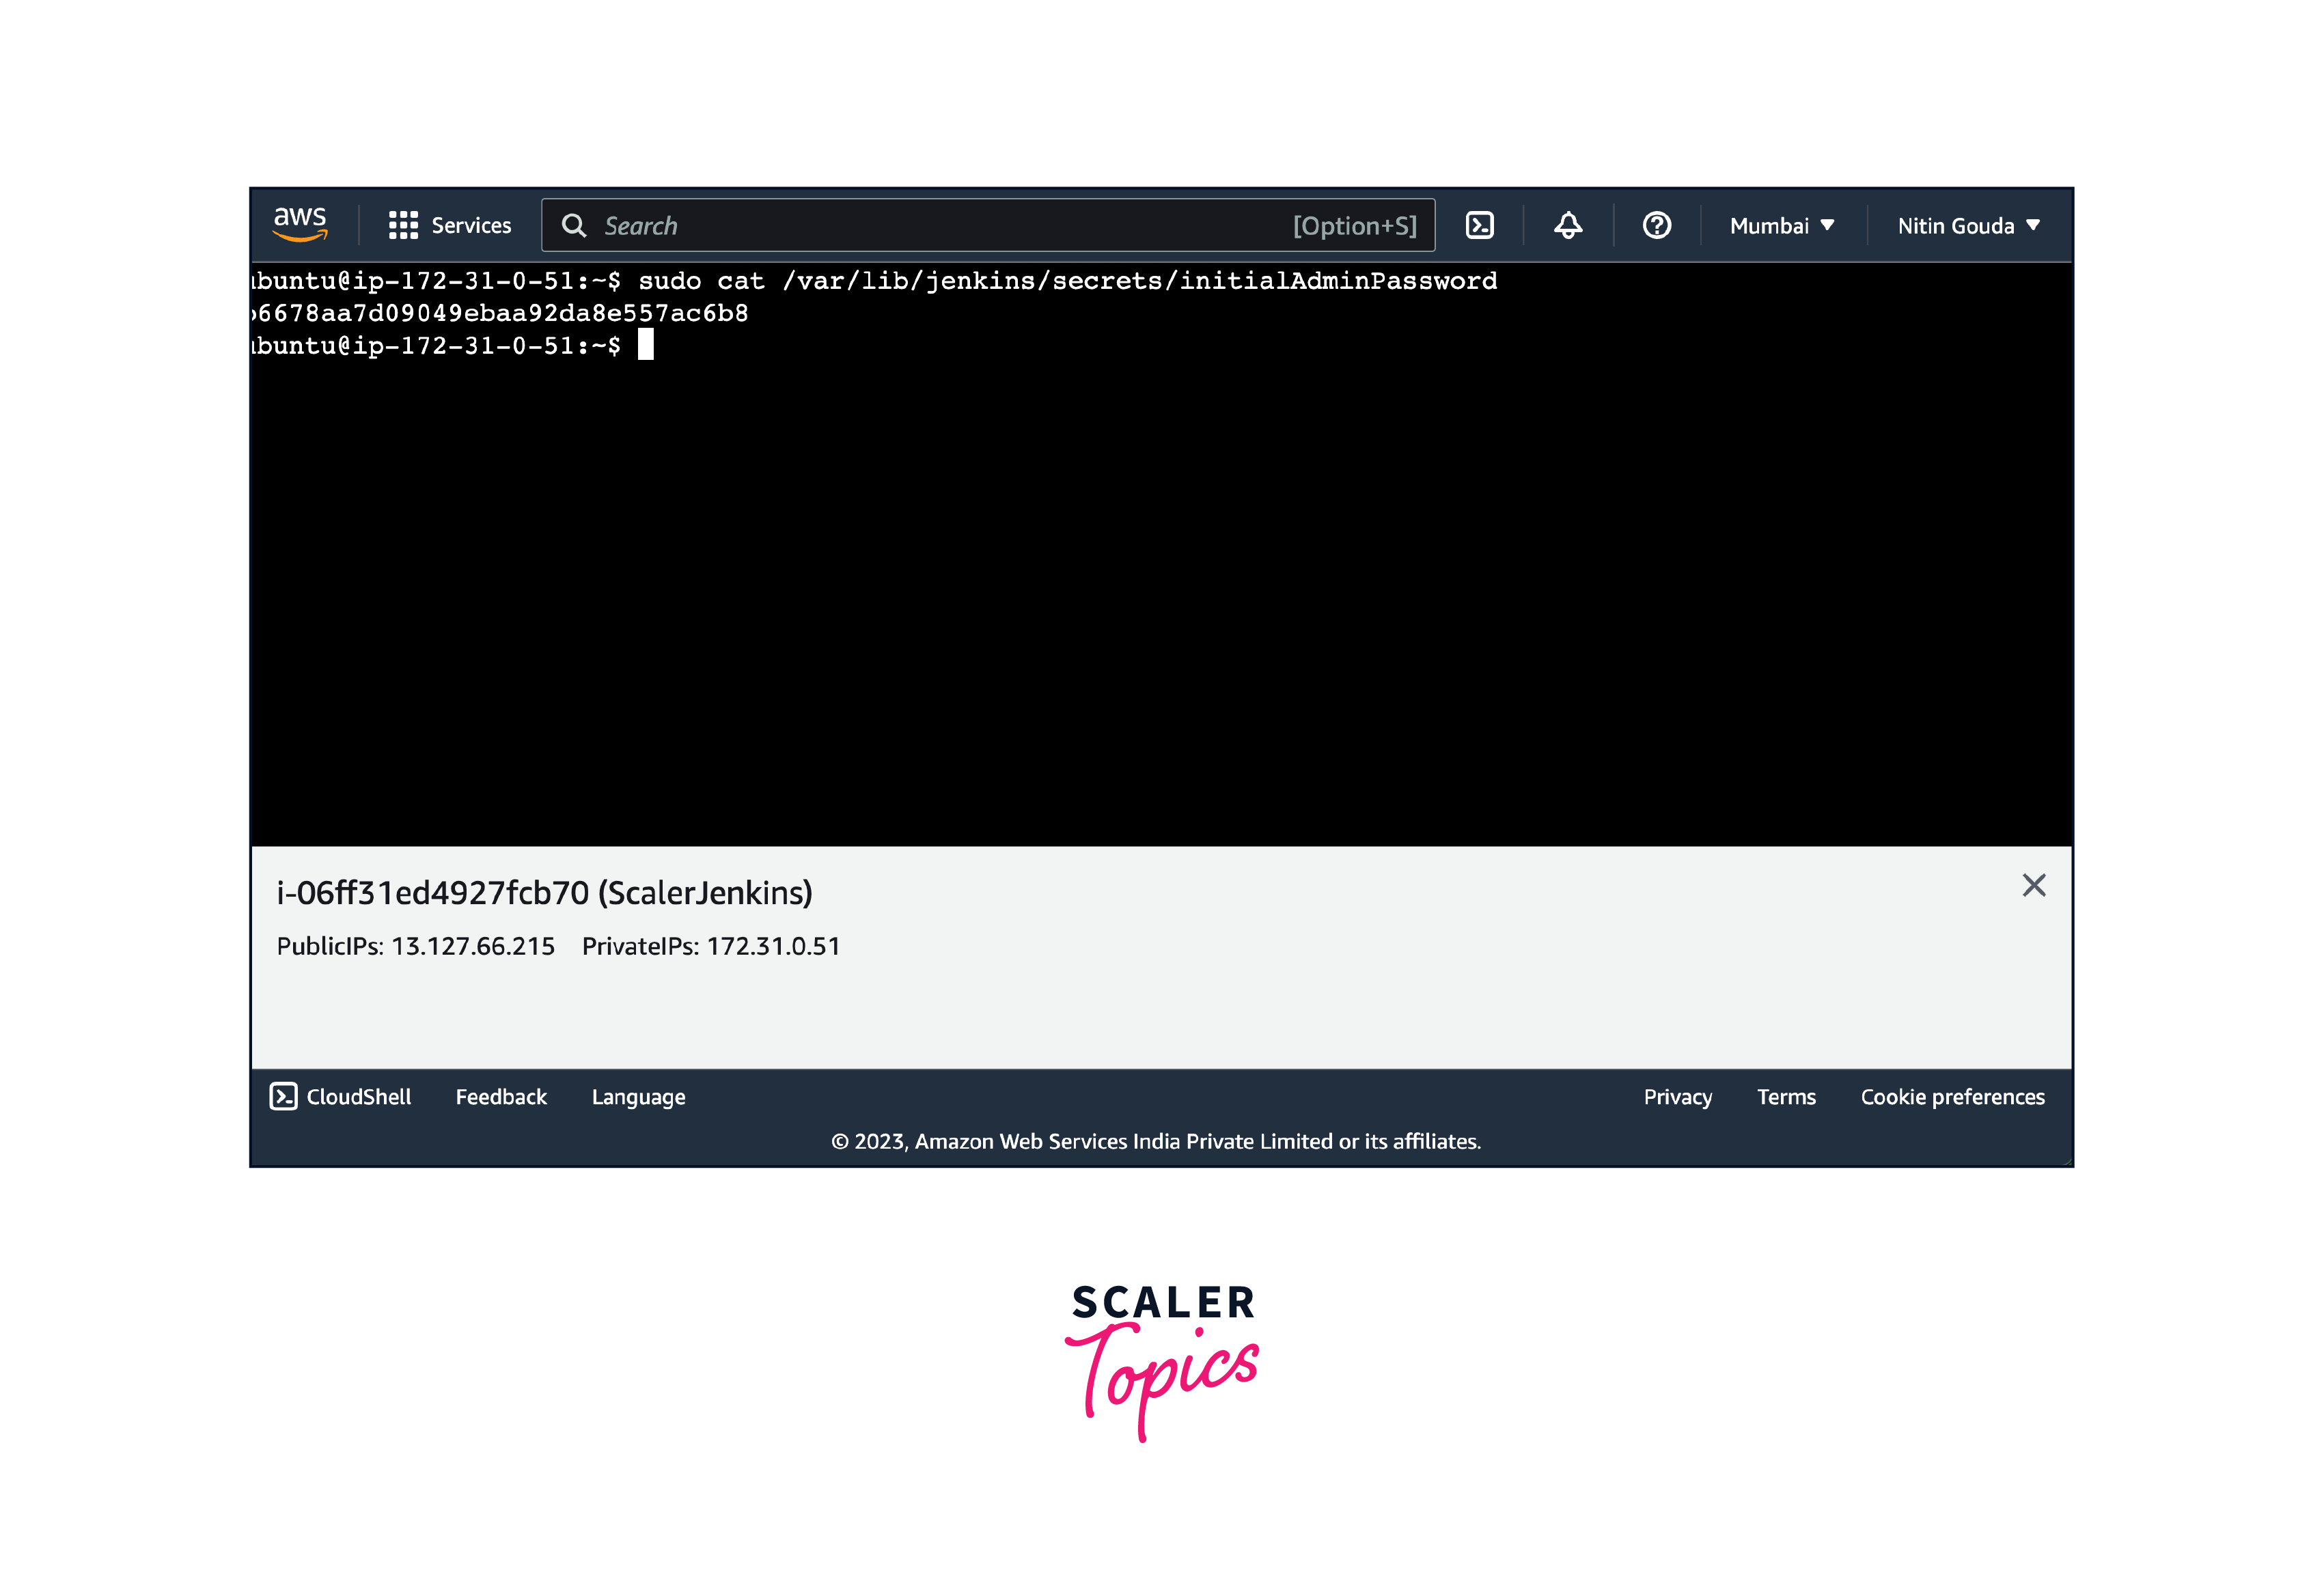
To unblock Jenkins we will be needing the initialAdminPassword which is downloaded when we installed Jenkins and is kept in a file. On Ubuntu/Debian to access the file paste this command
- By using this following command it will paste your initialAdminPassword onto your screen. Copy and Paste it on the JenkinsPassword
- Jenkins offers extensive customization options to tailor it to your specific needs. We can customize Jenkins while setting it up or we can change it inside Manage Jenkins.
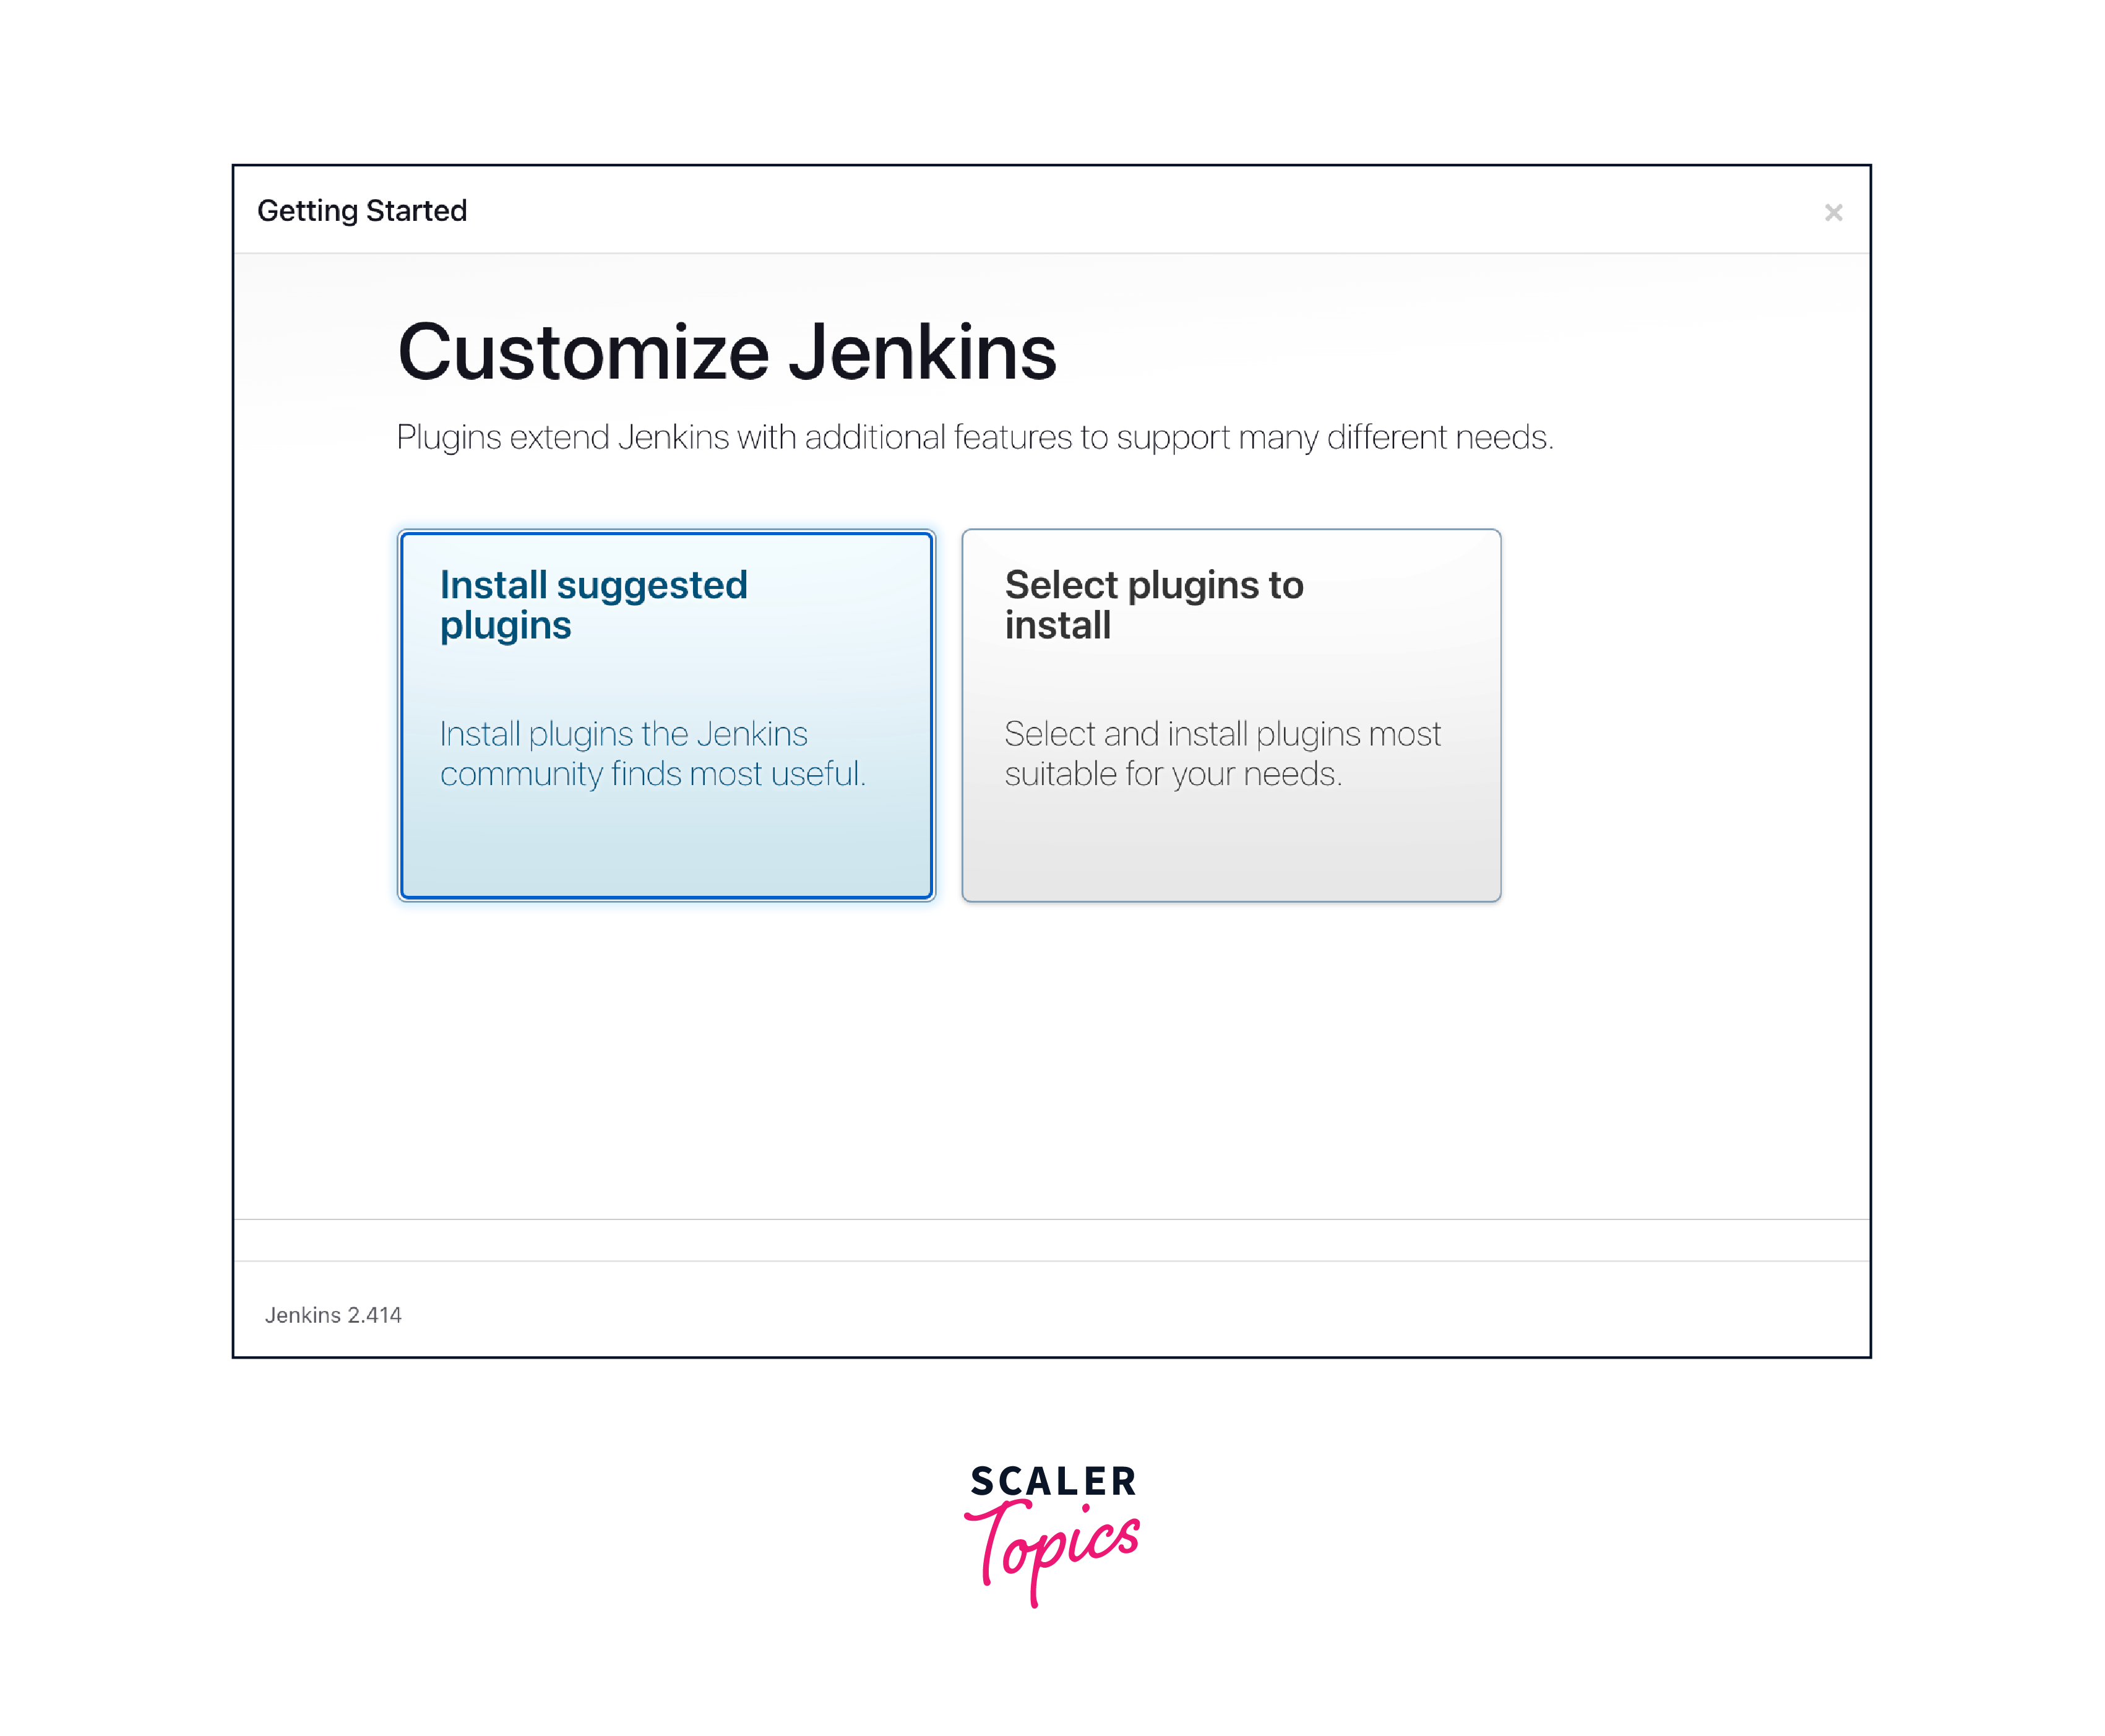
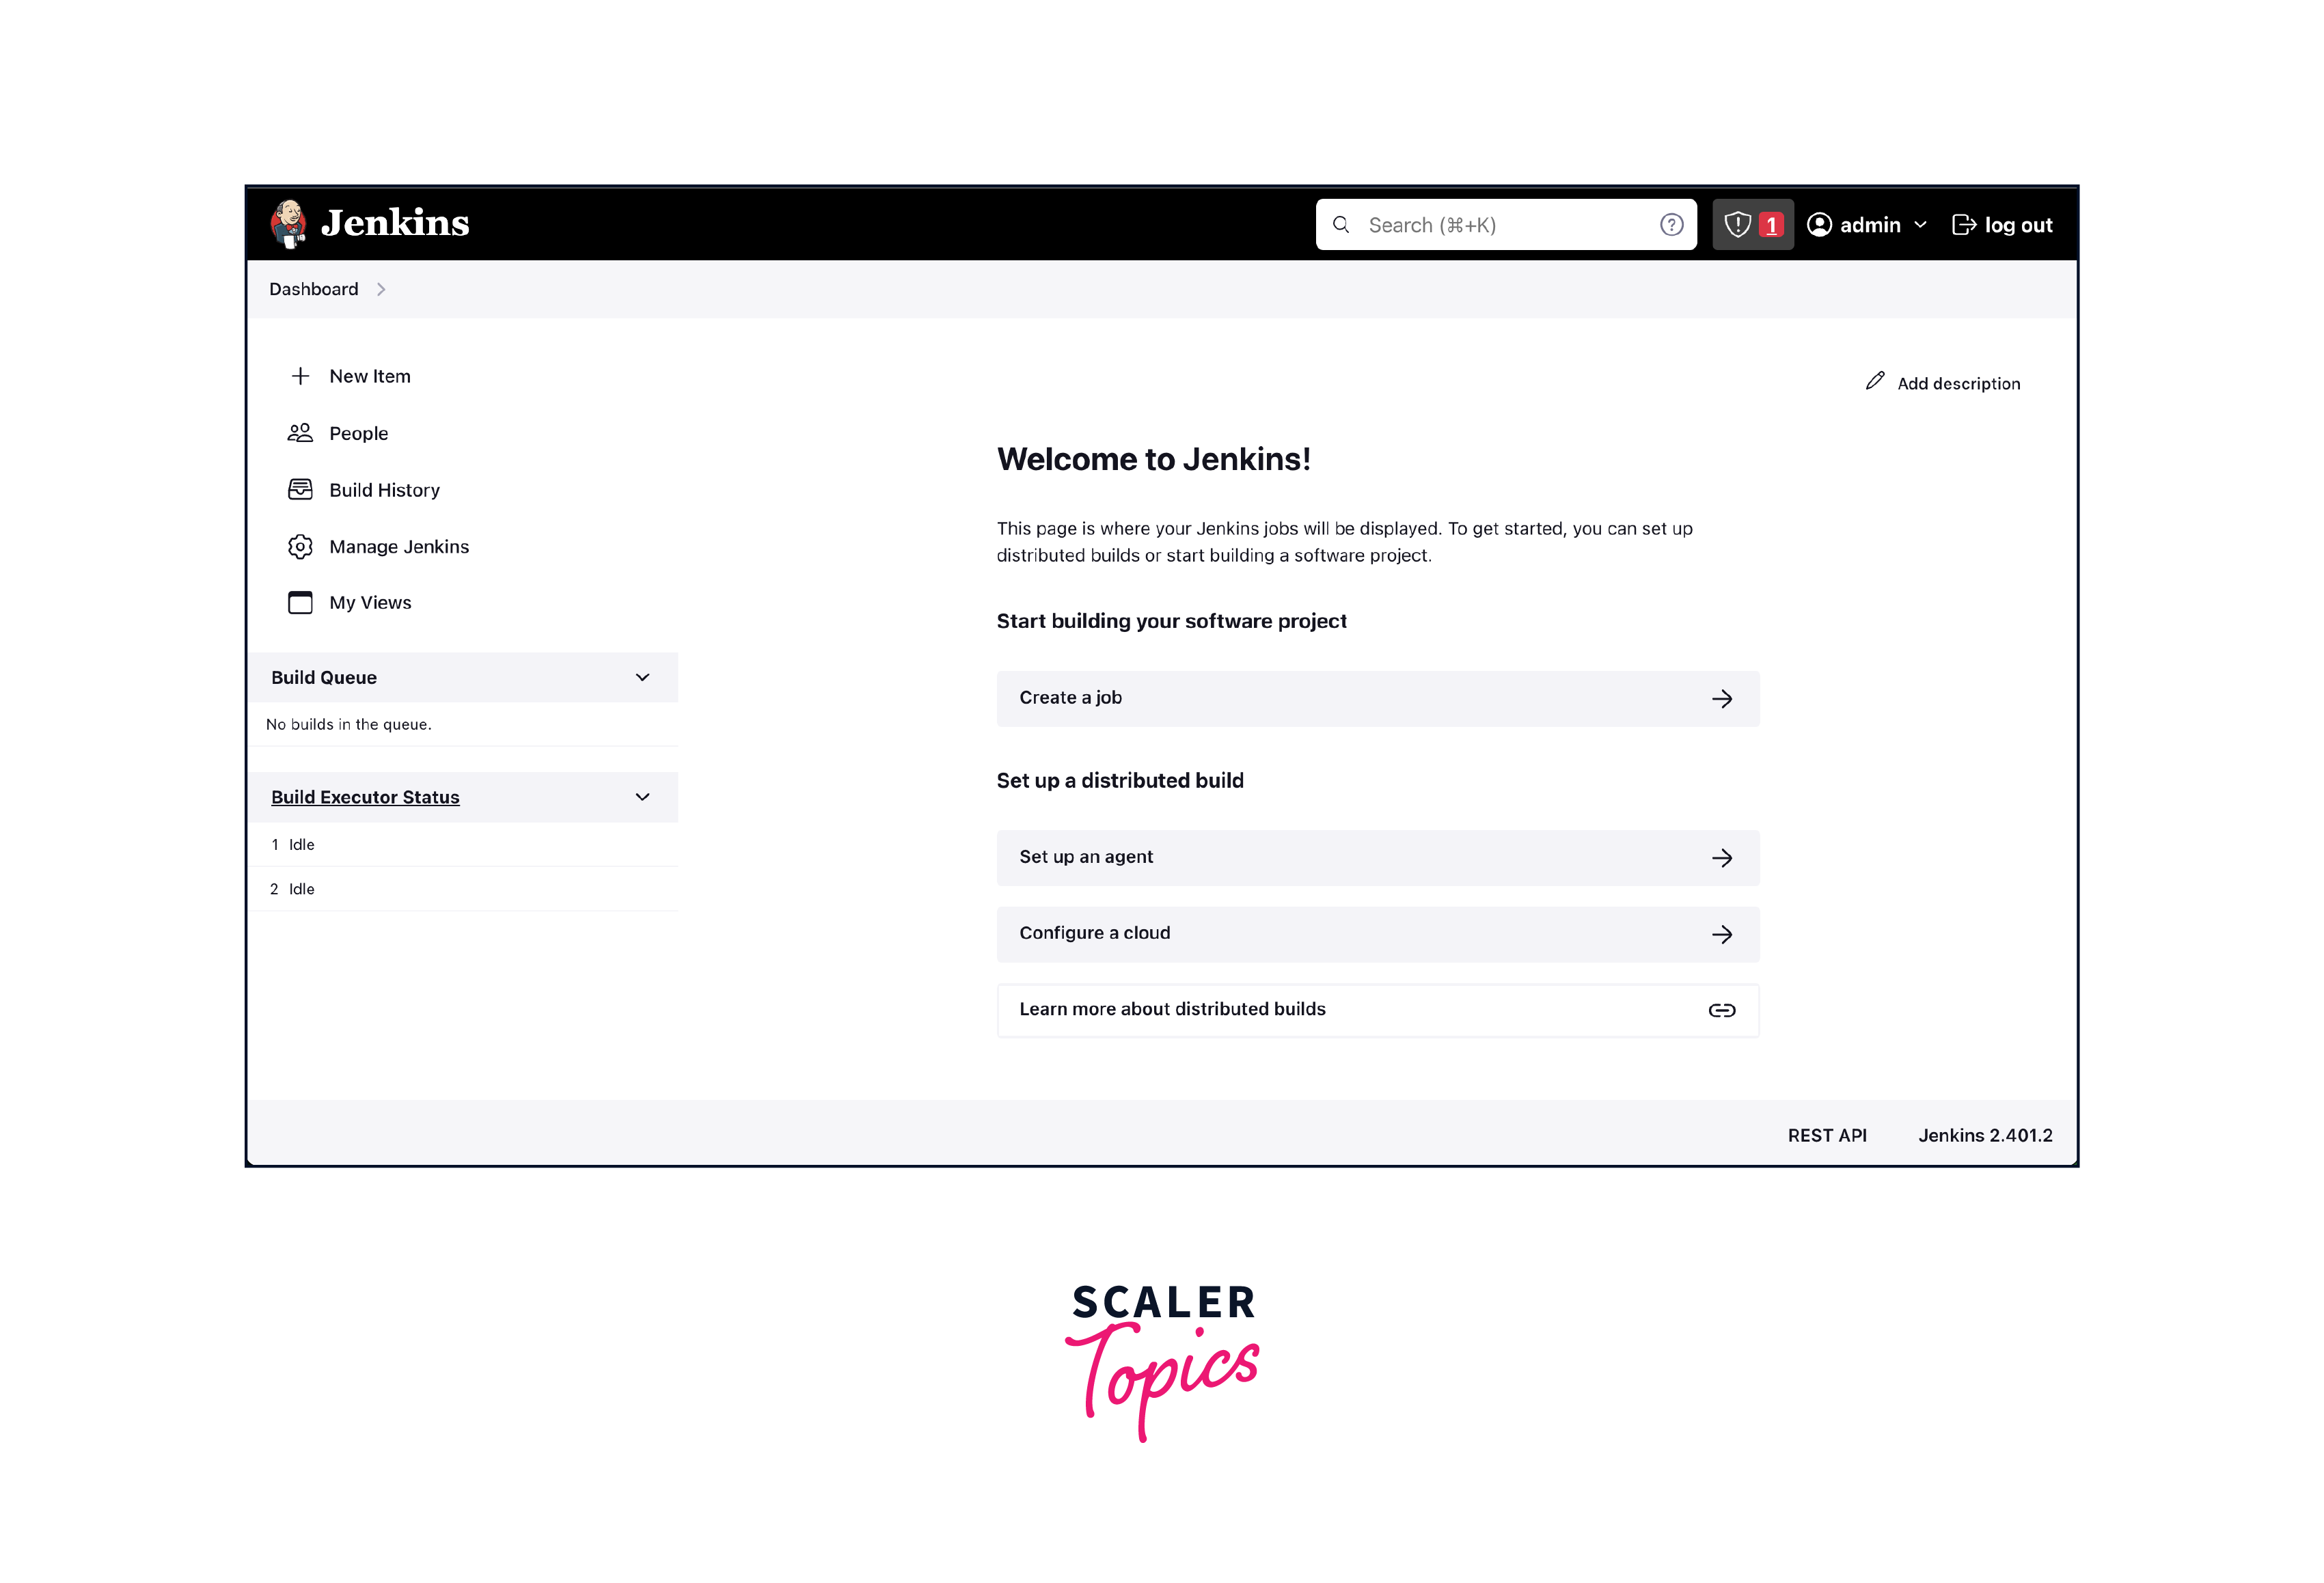
- Install the suggested plugins and continue by signing up and setting up the profile. Once done this is what we will see. Feel free to explore and see around other functionalities.
Create a Pipeline
To Create a Pipeline click on New Item and enter the name of the Job and then select which type of pipeline you have to set up. For now, we will be using Pipeline which is mostly used in production and organizations.
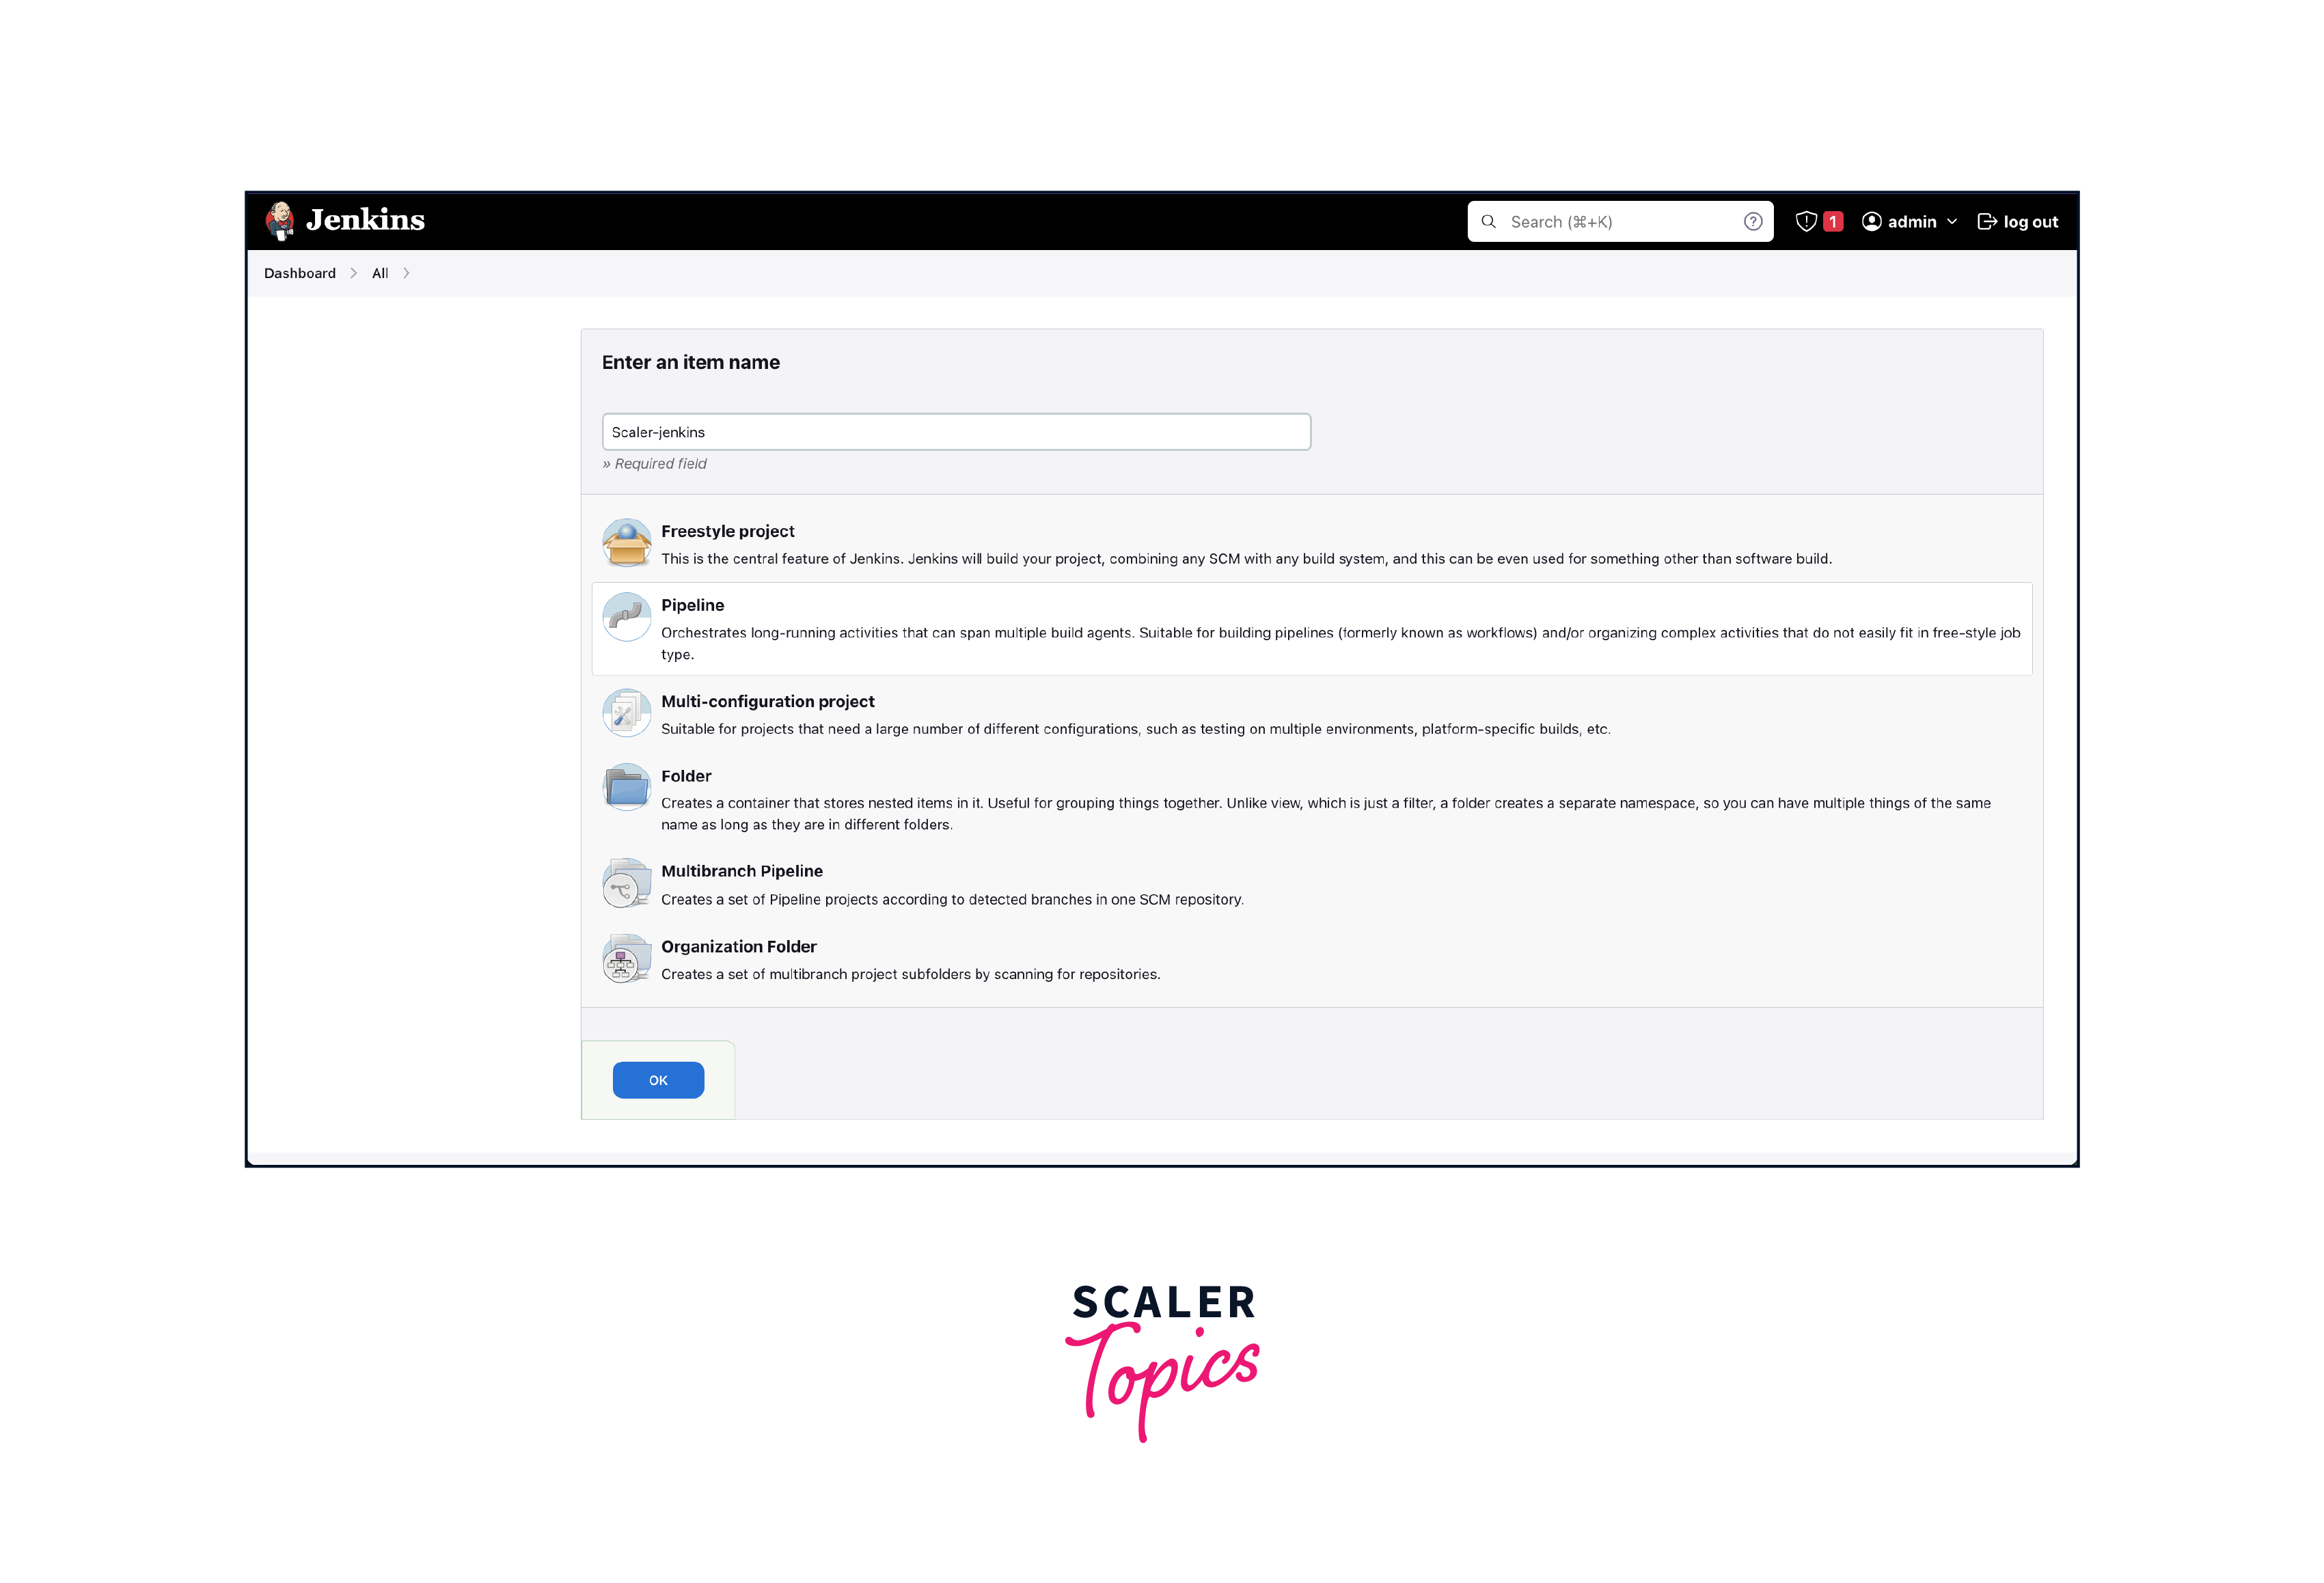
- Click OK. After that, we will need to give a pipeline script to execute the job in AWS Jenkins. Since this is our first time we will try to print "Hello World" on our console.
Here's our pipeline script which we are going to execute:
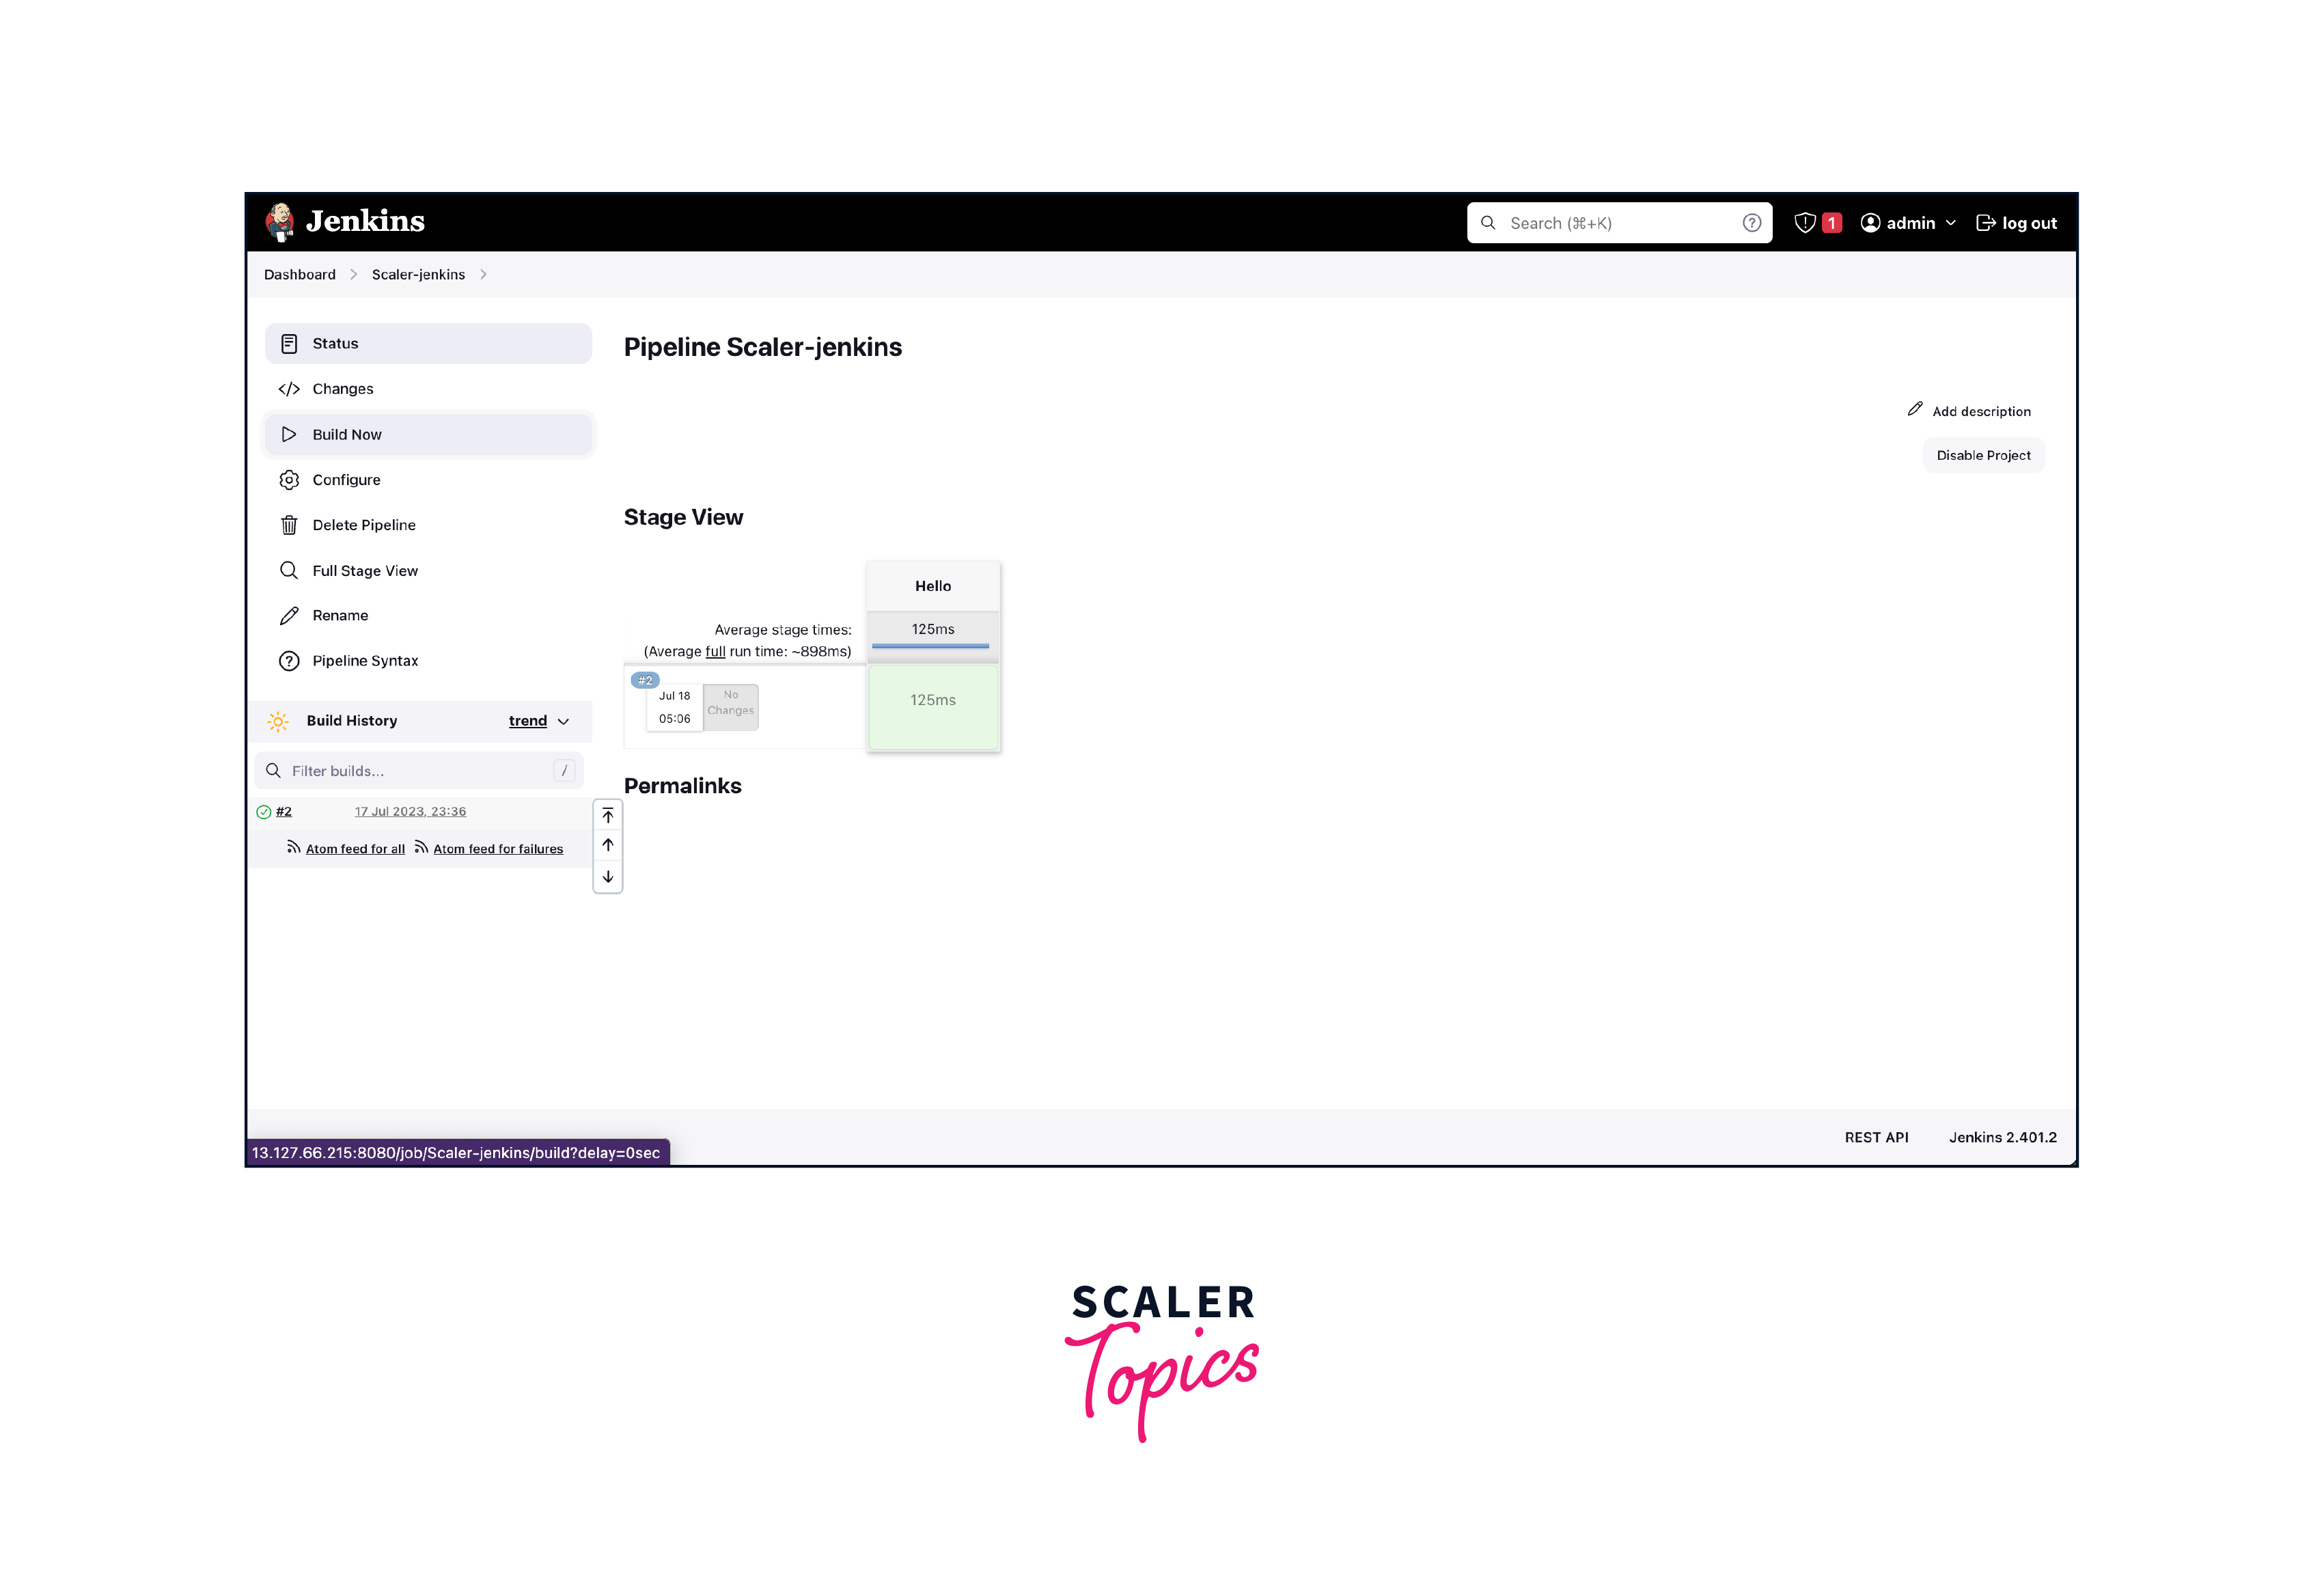
Once done click Apply and Save. We have successfully configured our first AWS Jenkins process. To see if it's working click on Build Now to execute the Jenkinsfile we have written.
If it runs without error we will get something like this which indicated that our Job executed without any errors.
- Click on logs to check the output:

Conclusion
- The integration of Jenkins with AWS empowers development teams to accelerate their CI/CD workflows, increase productivity, and deliver high-quality software applications efficiently.
- By combining the automation capabilities of Jenkins with the scalability and reliability of AWS, organizations can achieve seamless software delivery and gain a competitive edge in the rapidly evolving software development landscape.
- AWS Jenkins leverages the scalability, reliability, and flexibility of AWS infrastructure, Jenkins enables organizations to achieve faster and more efficient CI/CD workflows.
- Integration with version control systems like AWS CodeCommit, GitHub, or Bitbucket enables Jenkins to automatically trigger build and deployment processes whenever changes are pushed to the repository.
- AWS services like AWS Elastic Beanstalk, AWS Lambda, and AWS ECS can be seamlessly integrated with AWS Jenkins to automate the deployment of applications to different environments.
- Monitoring and logging with AWS CloudWatch provide insights into the performance and health of your Jenkins infrastructure, enabling proactive decision-making.
- Leveraging AWS services like Amazon EC2 Auto Scaling, Elastic Load Balancing, and Amazon RDS enhances the high availability and fault tolerance of your Jenkins setup.