Android UI Layouts
Overview
Android layouts are XML files that determine the structure and appearance of UI elements in an app. They play a crucial role in creating user interfaces. With different types of layouts like LinearLayout, RelativeLayout, and ConstraintLayout, developers can organize and align views according to their design requirements. These layouts provide flexibility and responsiveness, adapting to various screen sizes and orientations.
View
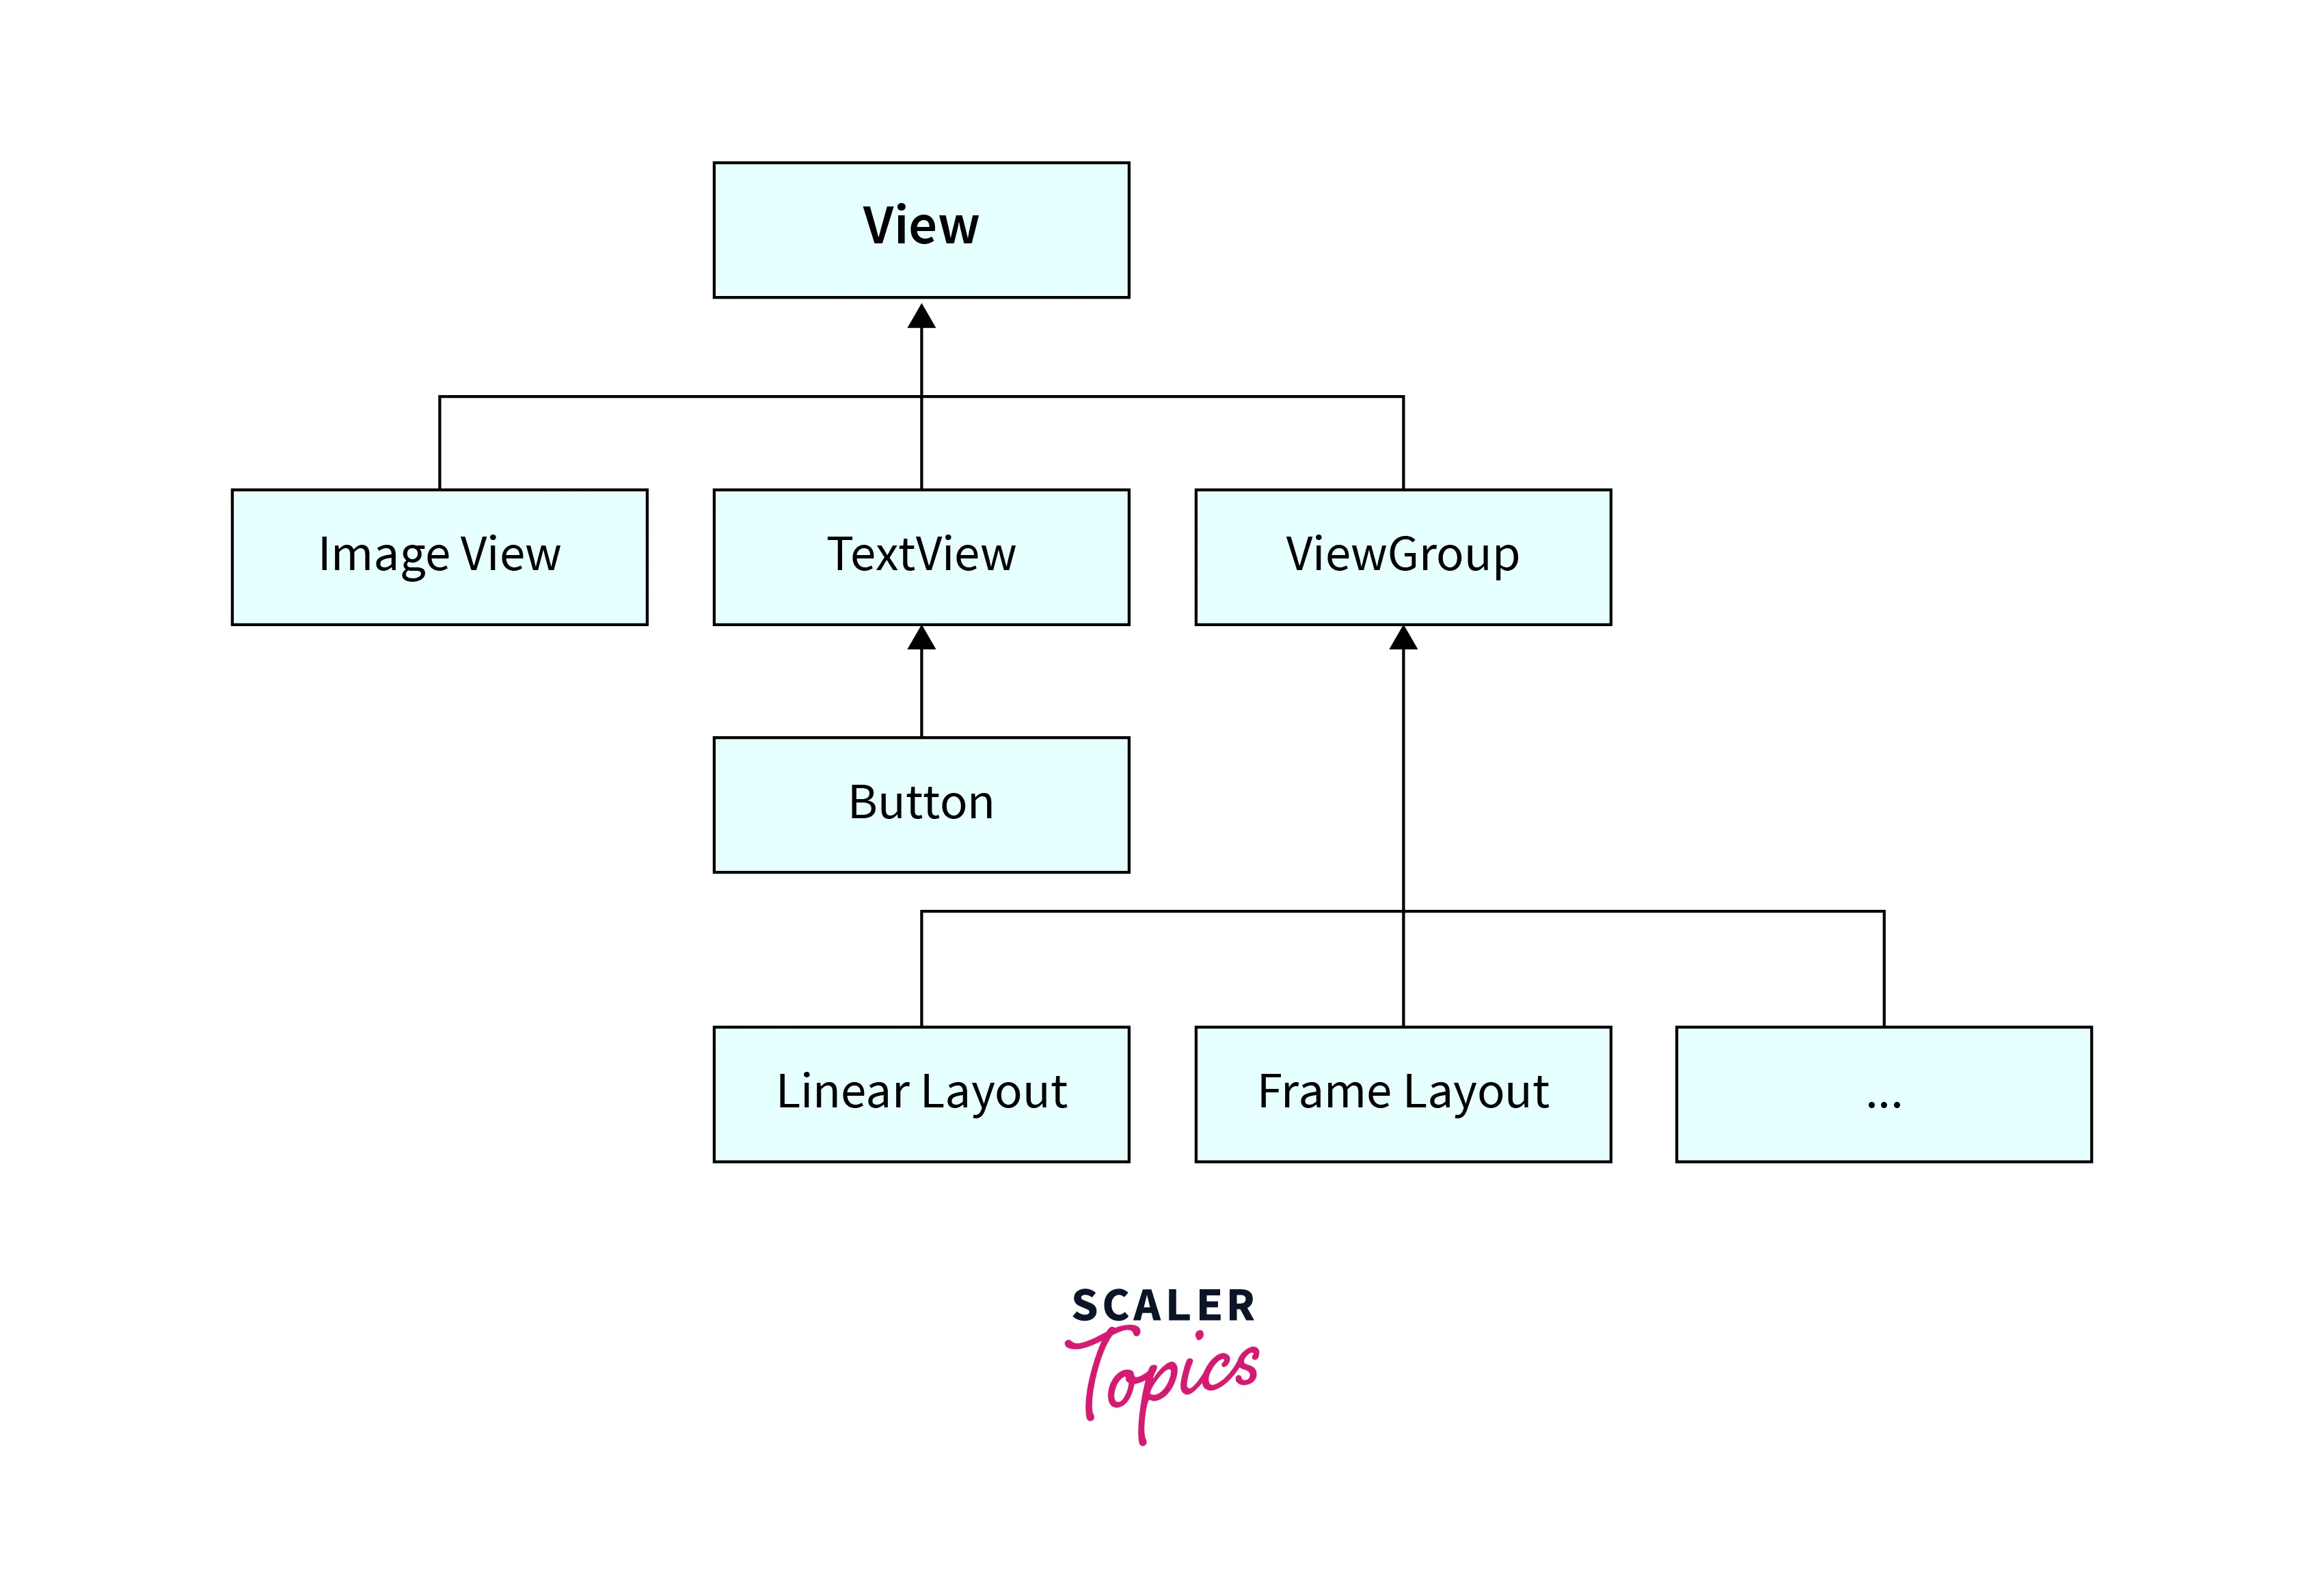
Views in Android are essential components of the user interface (UI) layout. They represent interactive elements like buttons, text fields, and images that users can see and interact with on the screen. Views are defined in XML layout files and can be customized with attributes to control their appearance and behavior. Each view has a unique ID that can be used to reference it in the code. Views can be arranged and nested within different layout containers, such as LinearLayout or RelativeLayout, to create complex UI designs. They can also be dynamically created and modified programmatically using Java or Kotlin code. Views enable developers to create engaging and user-friendly Android applications.
ViewGroup
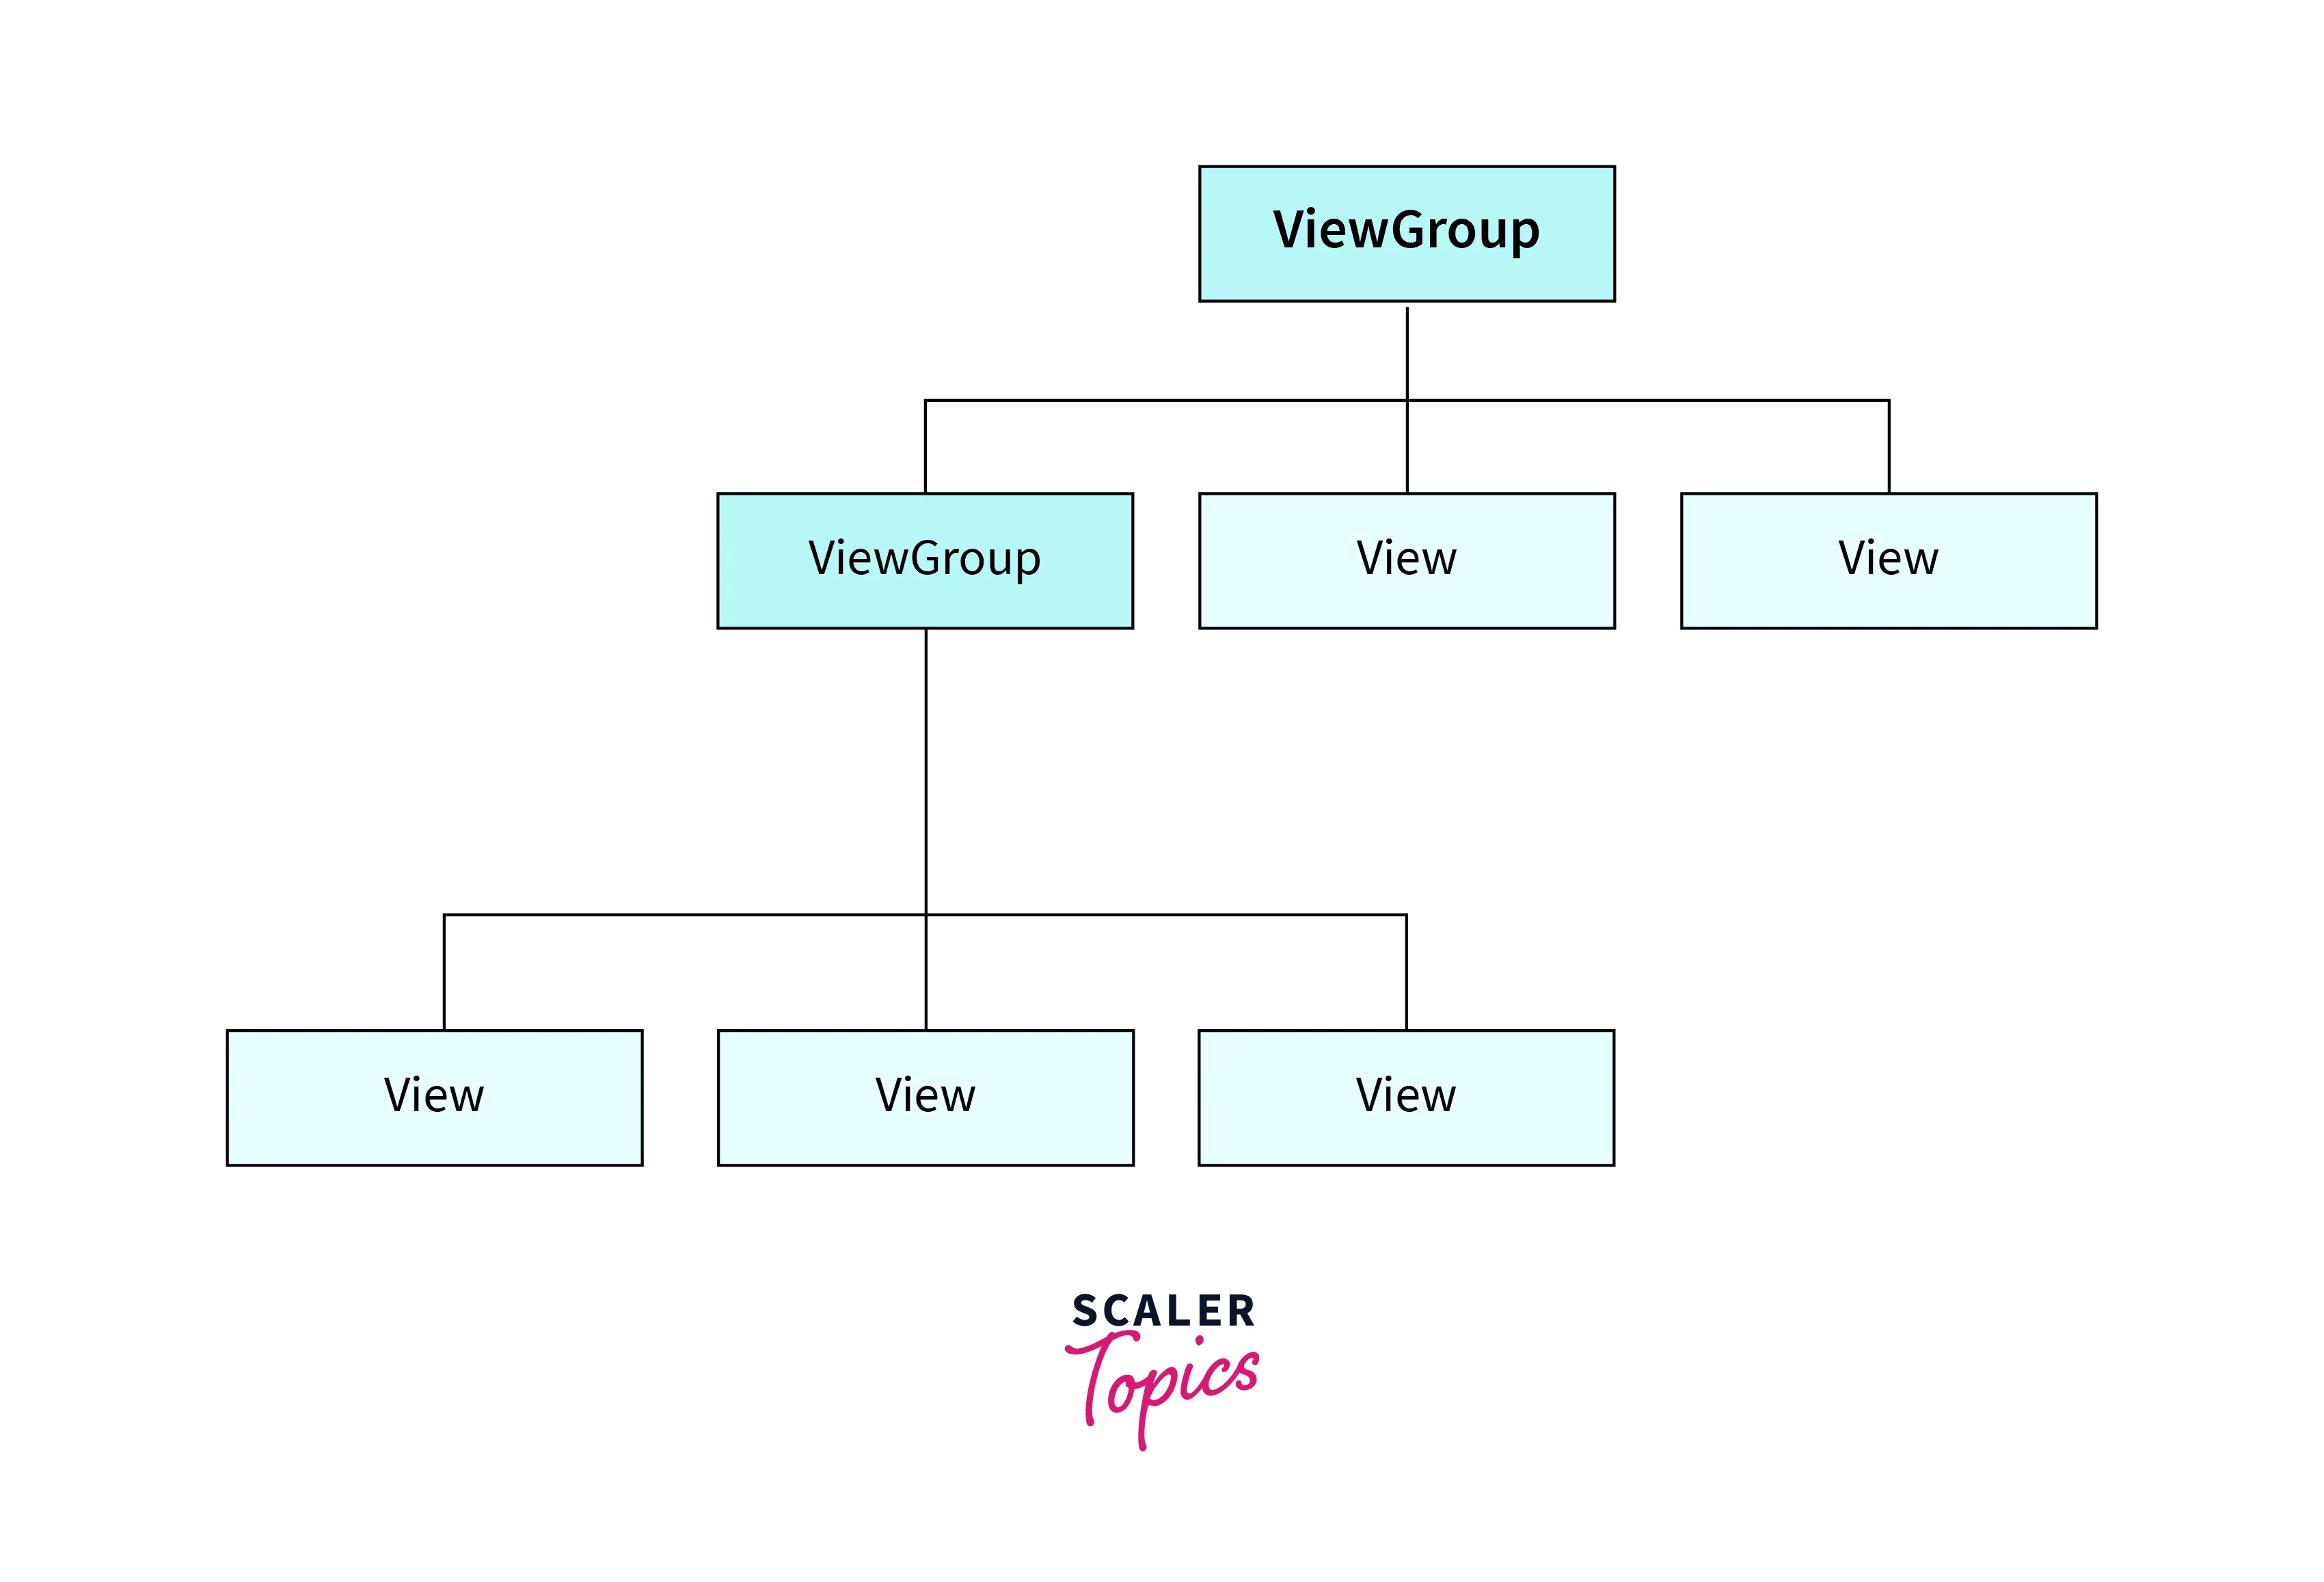
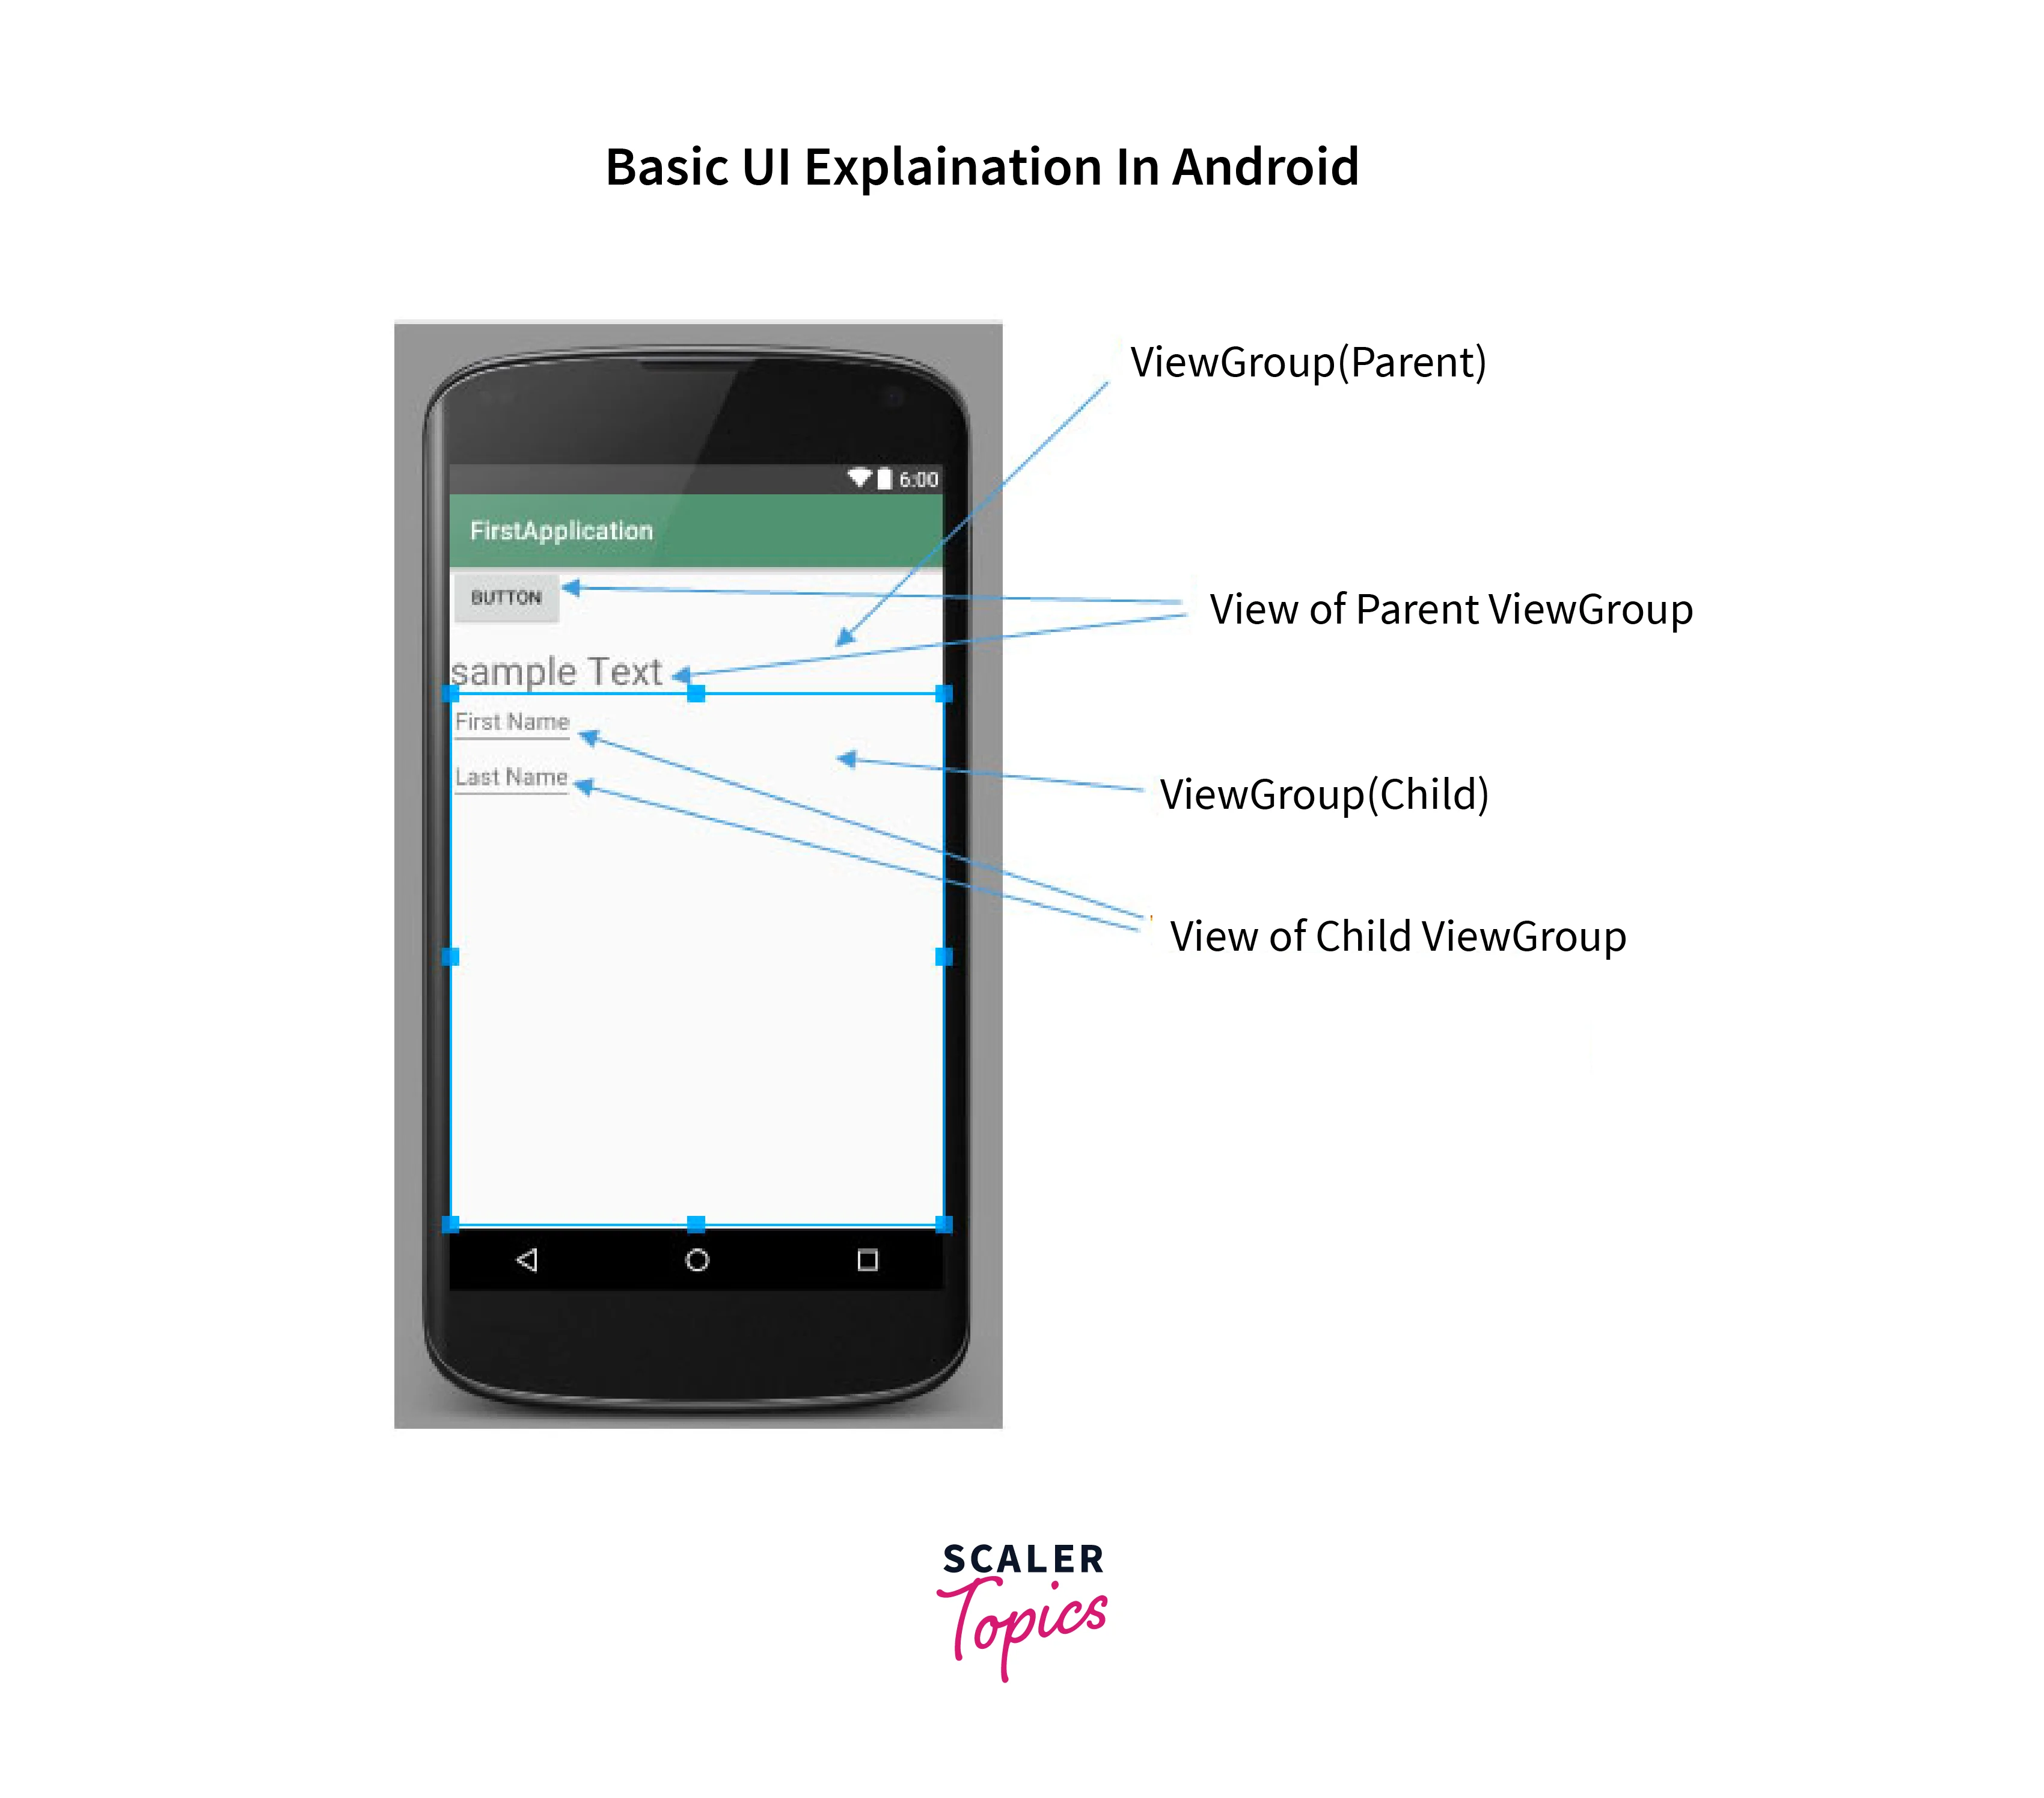
In Android, a ViewGroup is a special type of view that acts as a container for other views. It helps organize and manage the layout of multiple views within a UI screen. Examples of ViewGroup subclasses include LinearLayout, RelativeLayout, and ConstraintLayout. These subclasses provide different layout algorithms for positioning and sizing child views. By using ViewGroup, developers can create complex and flexible UI layouts by nesting multiple views within each other. They can control the positioning, alignment, and sizing of child views using layout parameters and rules.
Android Layout Types
| Layout Type | Description |
|---|---|
| LinearLayout | Arranges child views in a single line either horizontally or vertically. |
| RelativeLayout | Positions child views relative to each other or to the parent view. |
| ConstraintLayout | Provides flexible positioning and sizing options using constraints. |
| FrameLayout | Places child views on top of each other, allowing only one view to be visible at a time. |
| GridLayout | Organizes child views in a grid-like structure with rows and columns. |
| TableLayout | Organizes child views in a table-like structure with rows and columns. |
| CoordinatorLayout | Manages the behavior and interactions between child views, often used with Material Design components. |
| ScrollView | Allows scrolling of a single child view that is larger than the screen size. |
| CardView | Provides a styled container for other views, often used for displaying content in a card-like format. |
Use UI Elements in the XML File
To use UI elements in an XML file in Android, you can define them using XML tags. Each UI element corresponds to a specific XML tag, such as TextView, Button, EditText, etc. You can specify attributes for these elements to customize their appearance and behaviour.
For example, to add a TextView in your XML layout file, you can use the following code:
In this code, we define a TextView with an ID of myTextView. We set its width and height to wrap_content, meaning it will adjust its size based on the content. We also set its text attribute to display "Hello, World!".
You can add more UI elements and customize them as needed by specifying different attributes. Once you have defined your UI elements in the XML file, you can then reference them in your Java or Kotlin code to interact with them programmatically.
Load XML Layout File and its Elements from an Activity
Here's a short example with steps and code to load an XML layout file and its elements from an activity:
-
Create an XML layout file (e.g., activity_main.xml) in the res/layout directory of your Android project. Define the UI elements you want to include in the layout.
-
In your activity class (e.g., MainActivity), set the content view to the XML layout file in the onCreate() method using setContentView(R.layout.activity_main).
-
To access the elements in the XML layout file, use the findViewById() method, passing in the ID of the element defined in the XML layout file. For example, if you have a TextView with an ID of "textView", you can access it like this: TextView textView = findViewById(R.id.textView).
-
You can now use the textView object to manipulate the TextView in your activity code. For example, you can set its text using textView.setText("Hello, World!").
Here's the code snippet for reference:
Remember to replace activity_main with the actual name of your XML layout file and "textView" with the ID of the element you want to access.
By following these steps and code, you can load an XML layout file and its elements from an activity in Android.
Create Elements in the Kotlin File Dynamically
- Create a New Android Project: Start by creating a new Android project in Android Studio or your preferred IDE.
- XML Layout (activity_main.xml): Create an XML layout file with a LinearLayout that will serve as the container for the dynamically created ImageView. Give it an ID, e.g., containerLayout.
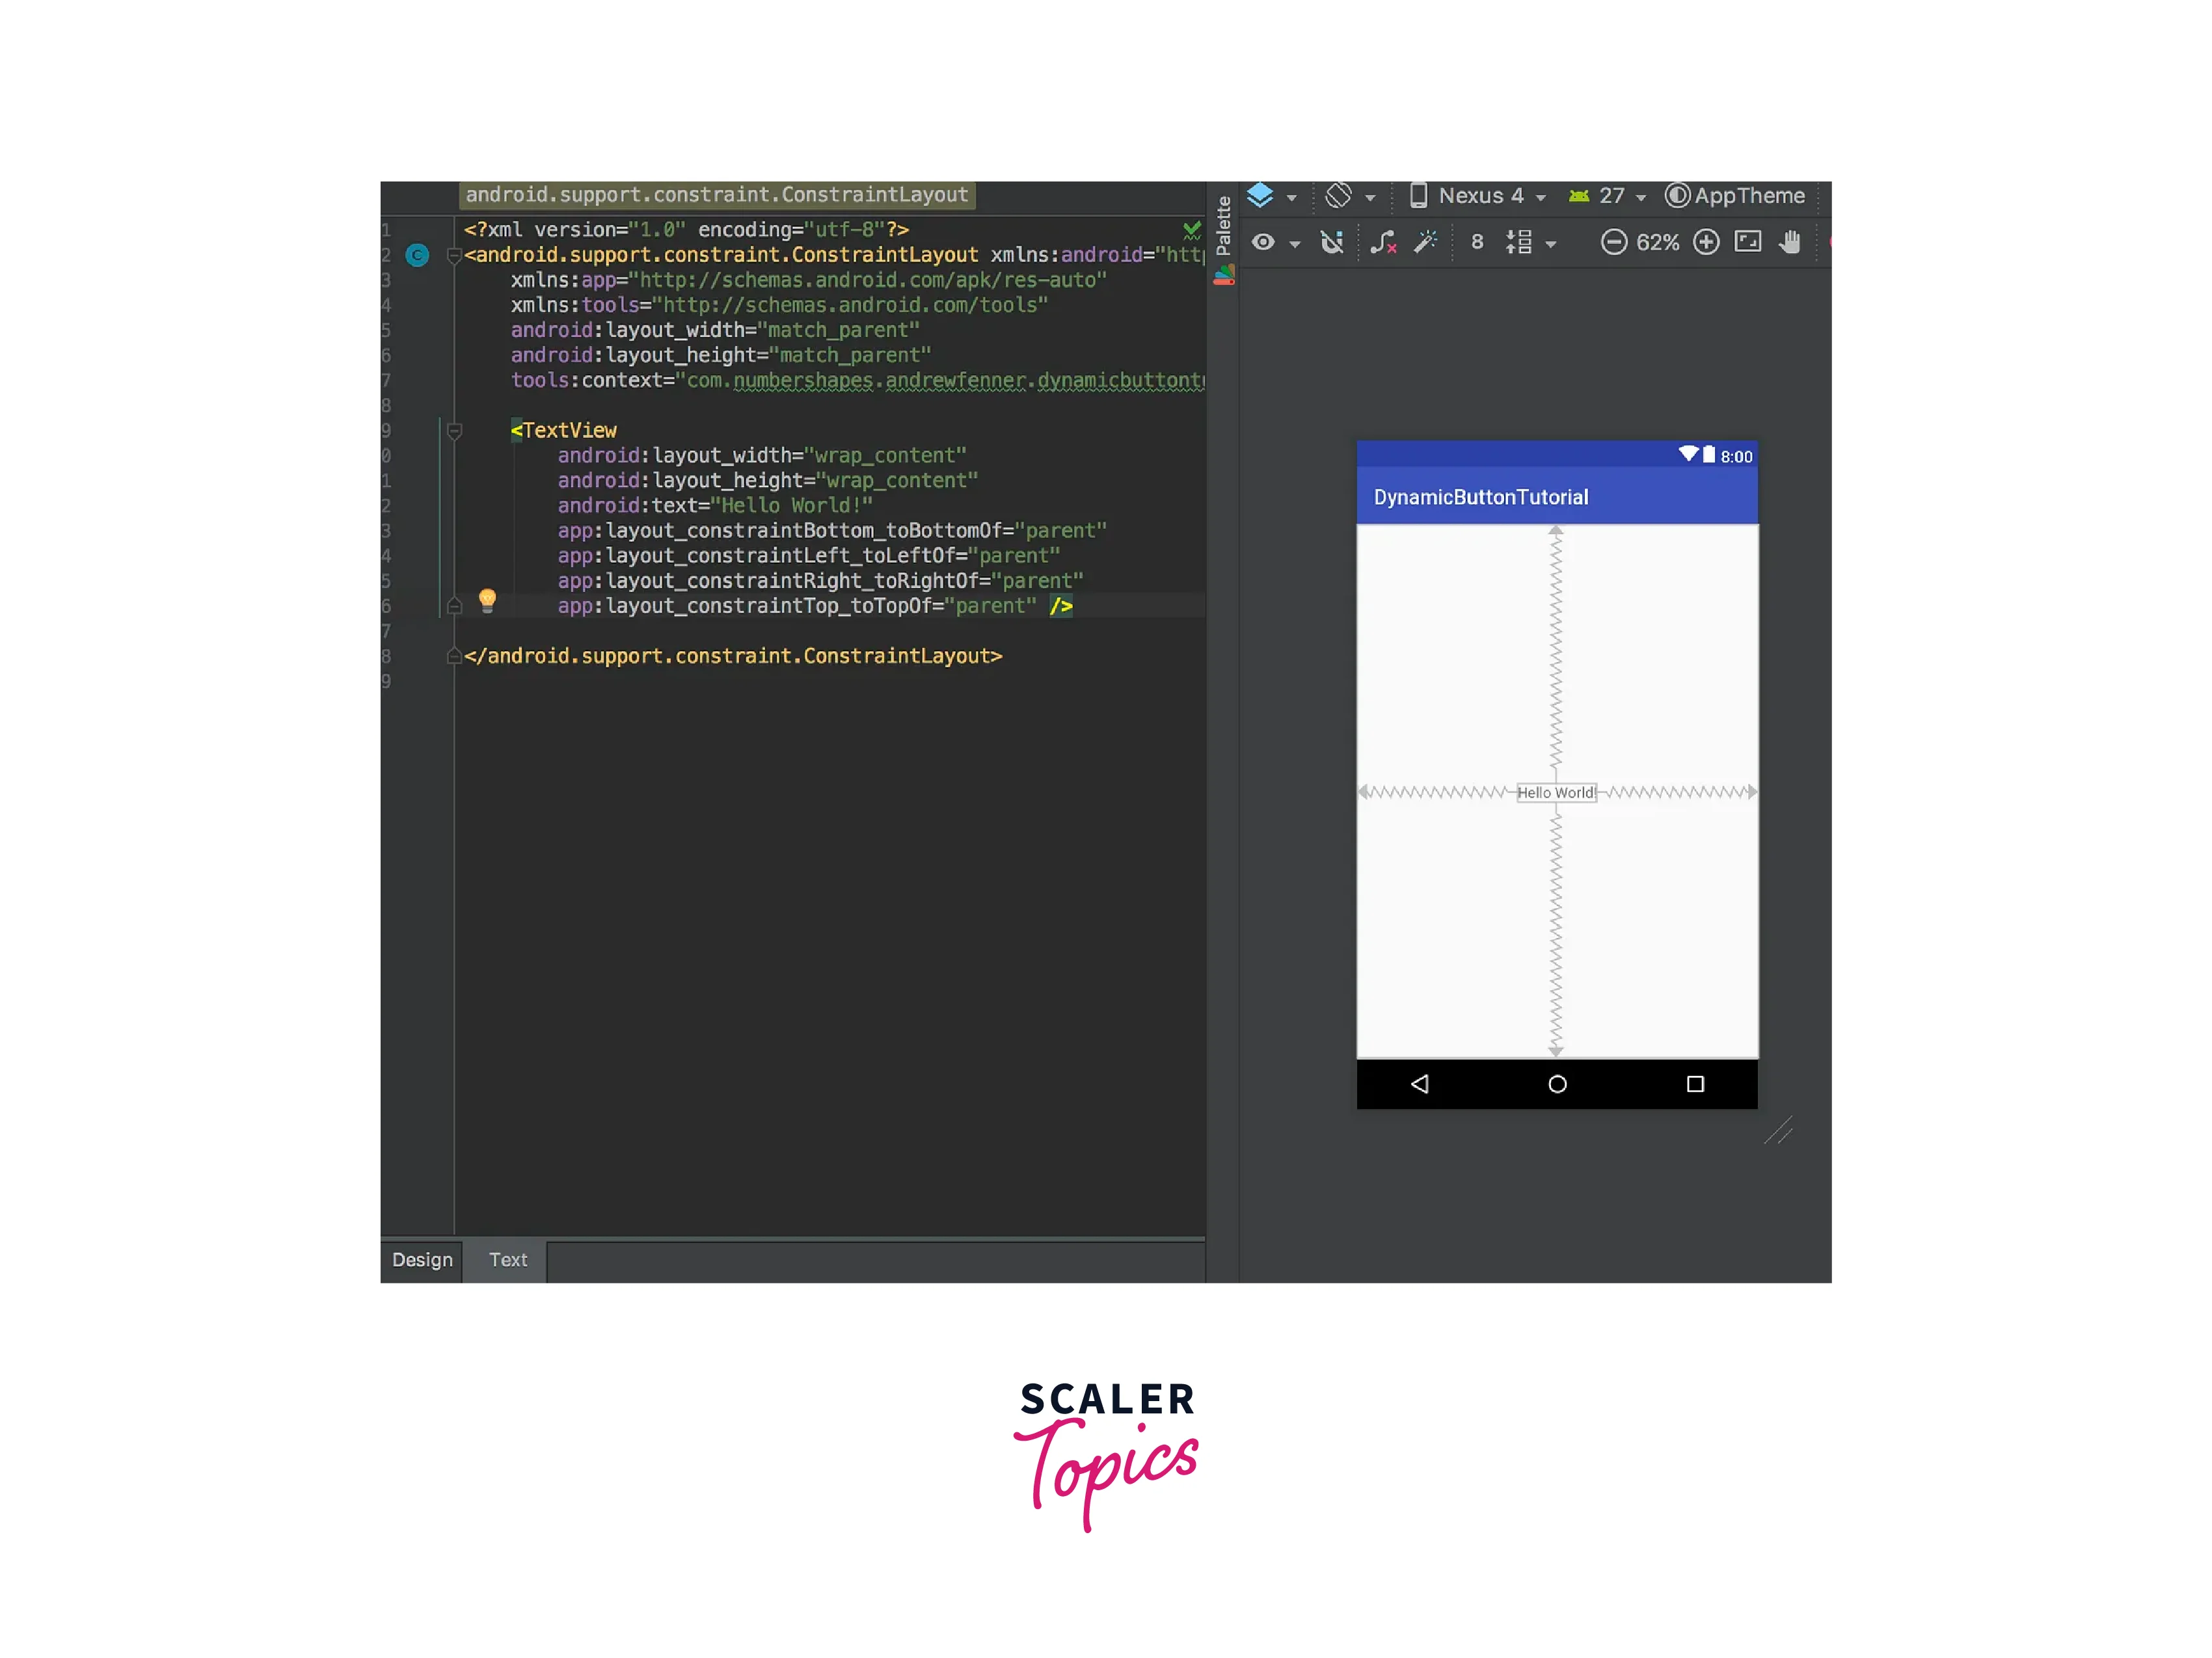 3. Kotlin Activity File (MainActivity.kt):
In your Kotlin activity file, dynamically create ImageView instances during runtime and add them to the LinearLayout container. Here's a simplified example:
- Customize ImageView: You can customize the ImageView as needed, such as setting image resources, layout parameters (width and height), and other attributes.
- Run Your App: Build and run your Android application. When the app starts, it will dynamically create an ImageView and add it to the specified LinearLayout.
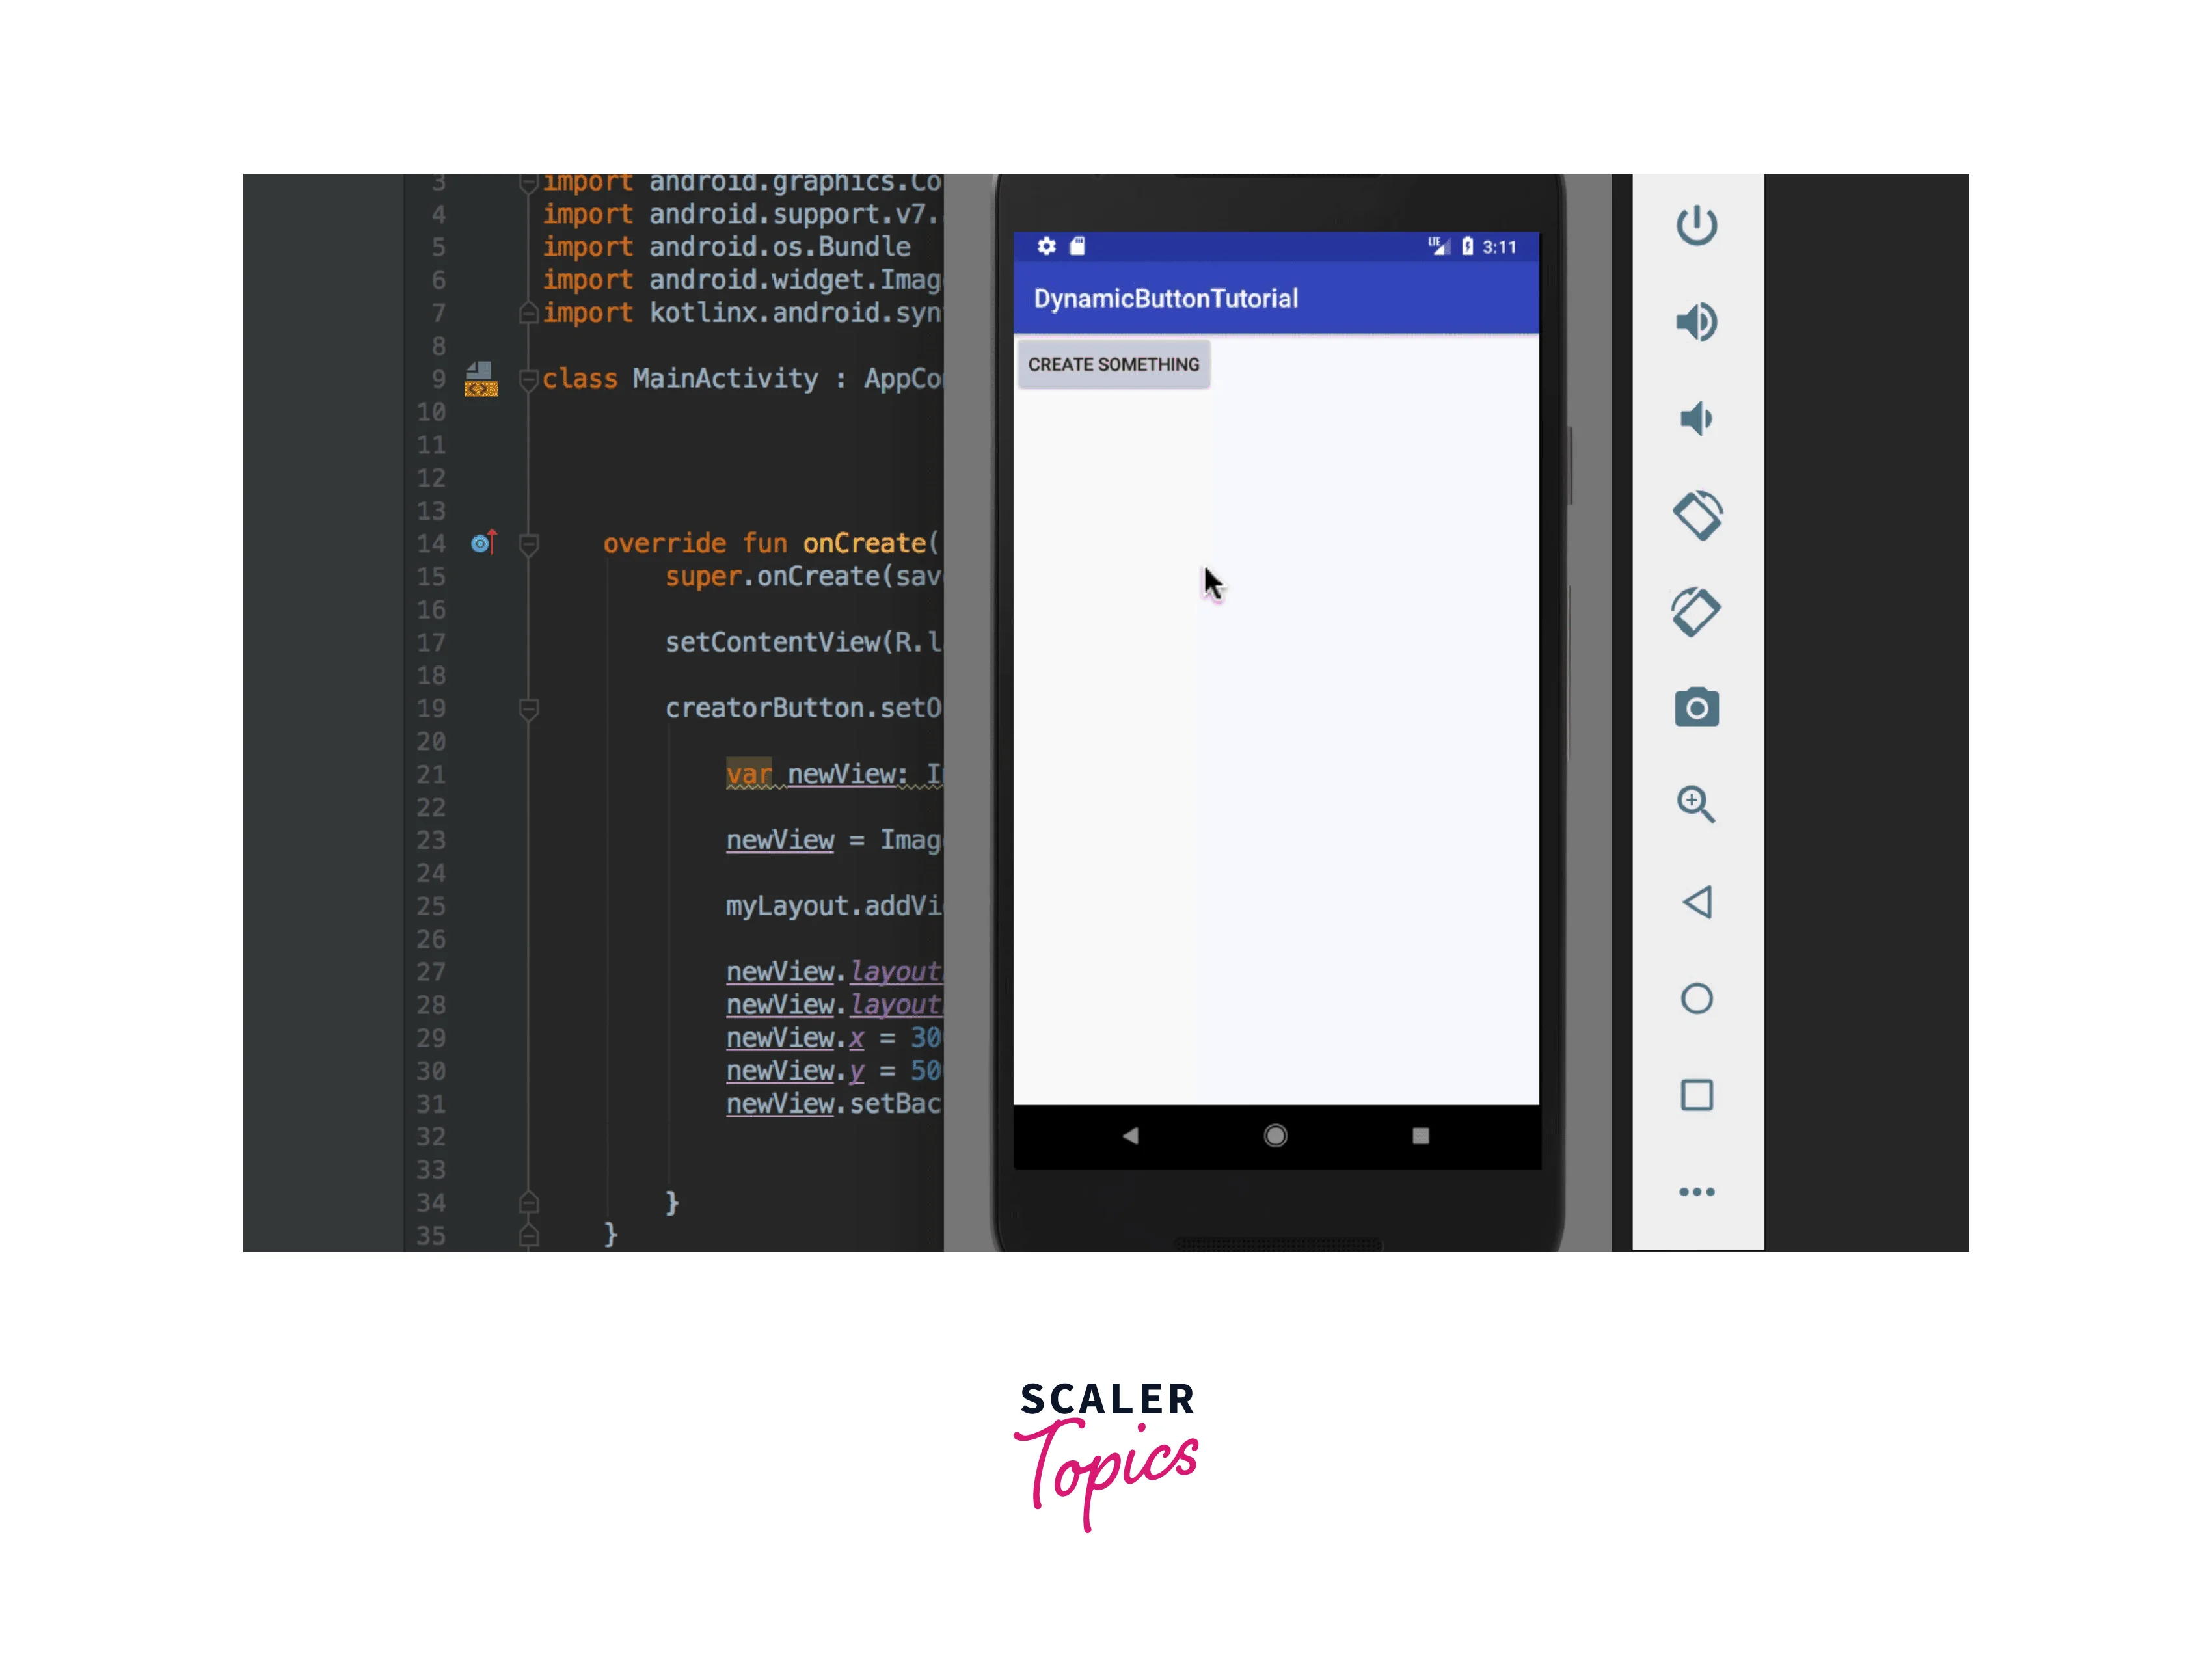
- Further Customization: You can add more dynamic ImageViews or apply different customization based on your app's requirements. The linked article provides additional details on more advanced use cases, such as creating multiple images dynamically.
Layout Attributes
Here are some commonly used layout attributes in Android:
| Attribute | Description |
|---|---|
| layout_width | Specifies the width of the view. It can be set to match_parent, wrap_content, or a specific dimension. |
| layout_height | Specifies the height of the view. It can be set to match_parent, wrap_content, or a specific dimension. |
| layout_gravity | Specifies how the view should be positioned within its parent layout. It can be set to centre, start, end, top, bottom, etc. |
| layout_margin | Specifies the margin around the view. It can be set to a specific dimension or auto for automatic margin calculation. |
| layout_padding | Specifies the padding within the view. It can be set to a specific dimension. |
| layout_weight | Specifies how the view should be distributed in a LinearLayout when using weight. |
| layout_below | Specifies that the view should be positioned below another view with a specific ID. |
| layout_alignParentStart | Specifies that the view should be aligned to the start of its parent. |
| layout_alignParentEnd | Specifies that the view should be aligned to the end of its parent. |
| layout_alignTop | Specifies that the view should be aligned to the top of another view with a specific ID. |
| layout_alignBottom | Specifies that the view should be aligned to the bottom of another view with a specific ID. |
These are just a few examples of layout attributes. There are many more attributes available depending on the type of layout and view you are working with.
View Identification
When working with views in Android, you have a few options for identifying them in your code. In your XML layout file, you can assign an ID to a view using the android:id attribute. This ID can then be used to reference the view in your Java or Kotlin code. Another way is by using the findViewById() method in your Java or Kotlin code, which allows you to find a view by its ID. Additionally, views have a setTag() method that lets you assign a tag object to the view, which can be useful for storing additional information. If you're using the Data Binding library, you can directly access views without the need for findViewById().
- XML ID: In your XML layout file, you can assign an ID to a view using the android:id attribute. This ID can then be used to reference the view in your Java or Kotlin code.
- findViewById(): In your Java or Kotlin code, you can use the findViewById() method to find a view by its ID. This method takes the ID as a parameter and returns the corresponding view object.
- View Tags: Views also have a setTag() method that allows you to assign a tag object to the view. This can be useful if you need to store additional information about the view.
- Data Binding: If you're using the Data Binding library, you can use the generated binding classes to directly access views without the need for findViewById(). This provides a more type-safe and efficient way to work with views.
Conclusion
- Android layouts, represented as XML files, define the structure and arrangement of UI elements in an app.
- Different layouts like LinearLayout, RelativeLayout, and ConstraintLayout offer various approaches to organizing views.
- Views are the building blocks of the app's interface, responsible for displaying and interacting with content.
- Layouts enable responsive design, adapting the UI to different screen sizes, orientations, and resolutions.
- Developers customize view appearance and behaviour through XML attributes, allowing fine-grained control over the UI.
- Layouts support different types of view groups, such as ScrollView and RecyclerView, for scrolling and displaying lists of items.
- Layouts can be dynamically modified at runtime using Java or Kotlin code, allowing for interactive and responsive UIs.
