MySQL to Excel
How To Export/Import MySQL Data To Excel?
Exporting/Importing data from MySQL to Excel can be a very useful task when we talk about data transferring and analyzing. We can easily export/import data from MySQL to Excel using one of the many available methods. In this article, we'll go over a few approaches to export/import between MySQL and Excel. Understanding these techniques will help us to choose the approach that best suits the requirements and work with MySQL and Excel data effectively.
While working with MySQL there can be cases where you have to get all the MySQL data into Excel form. In that case, it is not feasible to manually create rows and columns and manually put data into an Excel file. Instead of that, we can use the functionalities of MySQL for exporting the data to an Excel file. We will be using the following methods:
- Export/Import MySQL data to Excel using the SELECT INTO … OUTFILE statement
- Export/Import MySQL data to Excel using the From Database feature
- Use MySQL for Excel add-in
- Export to Excel using a third-party software
Now, let's see each of the methods in detail.
Export/Import MySQL Data to Excel Using the SELECT INTO … OUTFILE Statement
We can easily export MySQL data to Excel using the SELECT INTO … OUTFILE statement. This statement allows you to write the query result to a file, which can be in CSV format, and then import it into Excel. Let's discuss the Syntax of the above-mentioned command:
In this Syntax
- column refers to the name of the column or columns that we want to export to the CSV/txt file.
- file_path specifies the path along with the filename of the output file where we want to save the SQL data.
- table_name is the name of the table from which we want to export the data.
- condition is an optional parameter that allows us to filter the data based on certain conditions.
So let's use the above statement for Exporting the SQL data to the CSV file, we will be using the import functionality of Excel to import that created CSV file. For doing the same, follow the below steps:
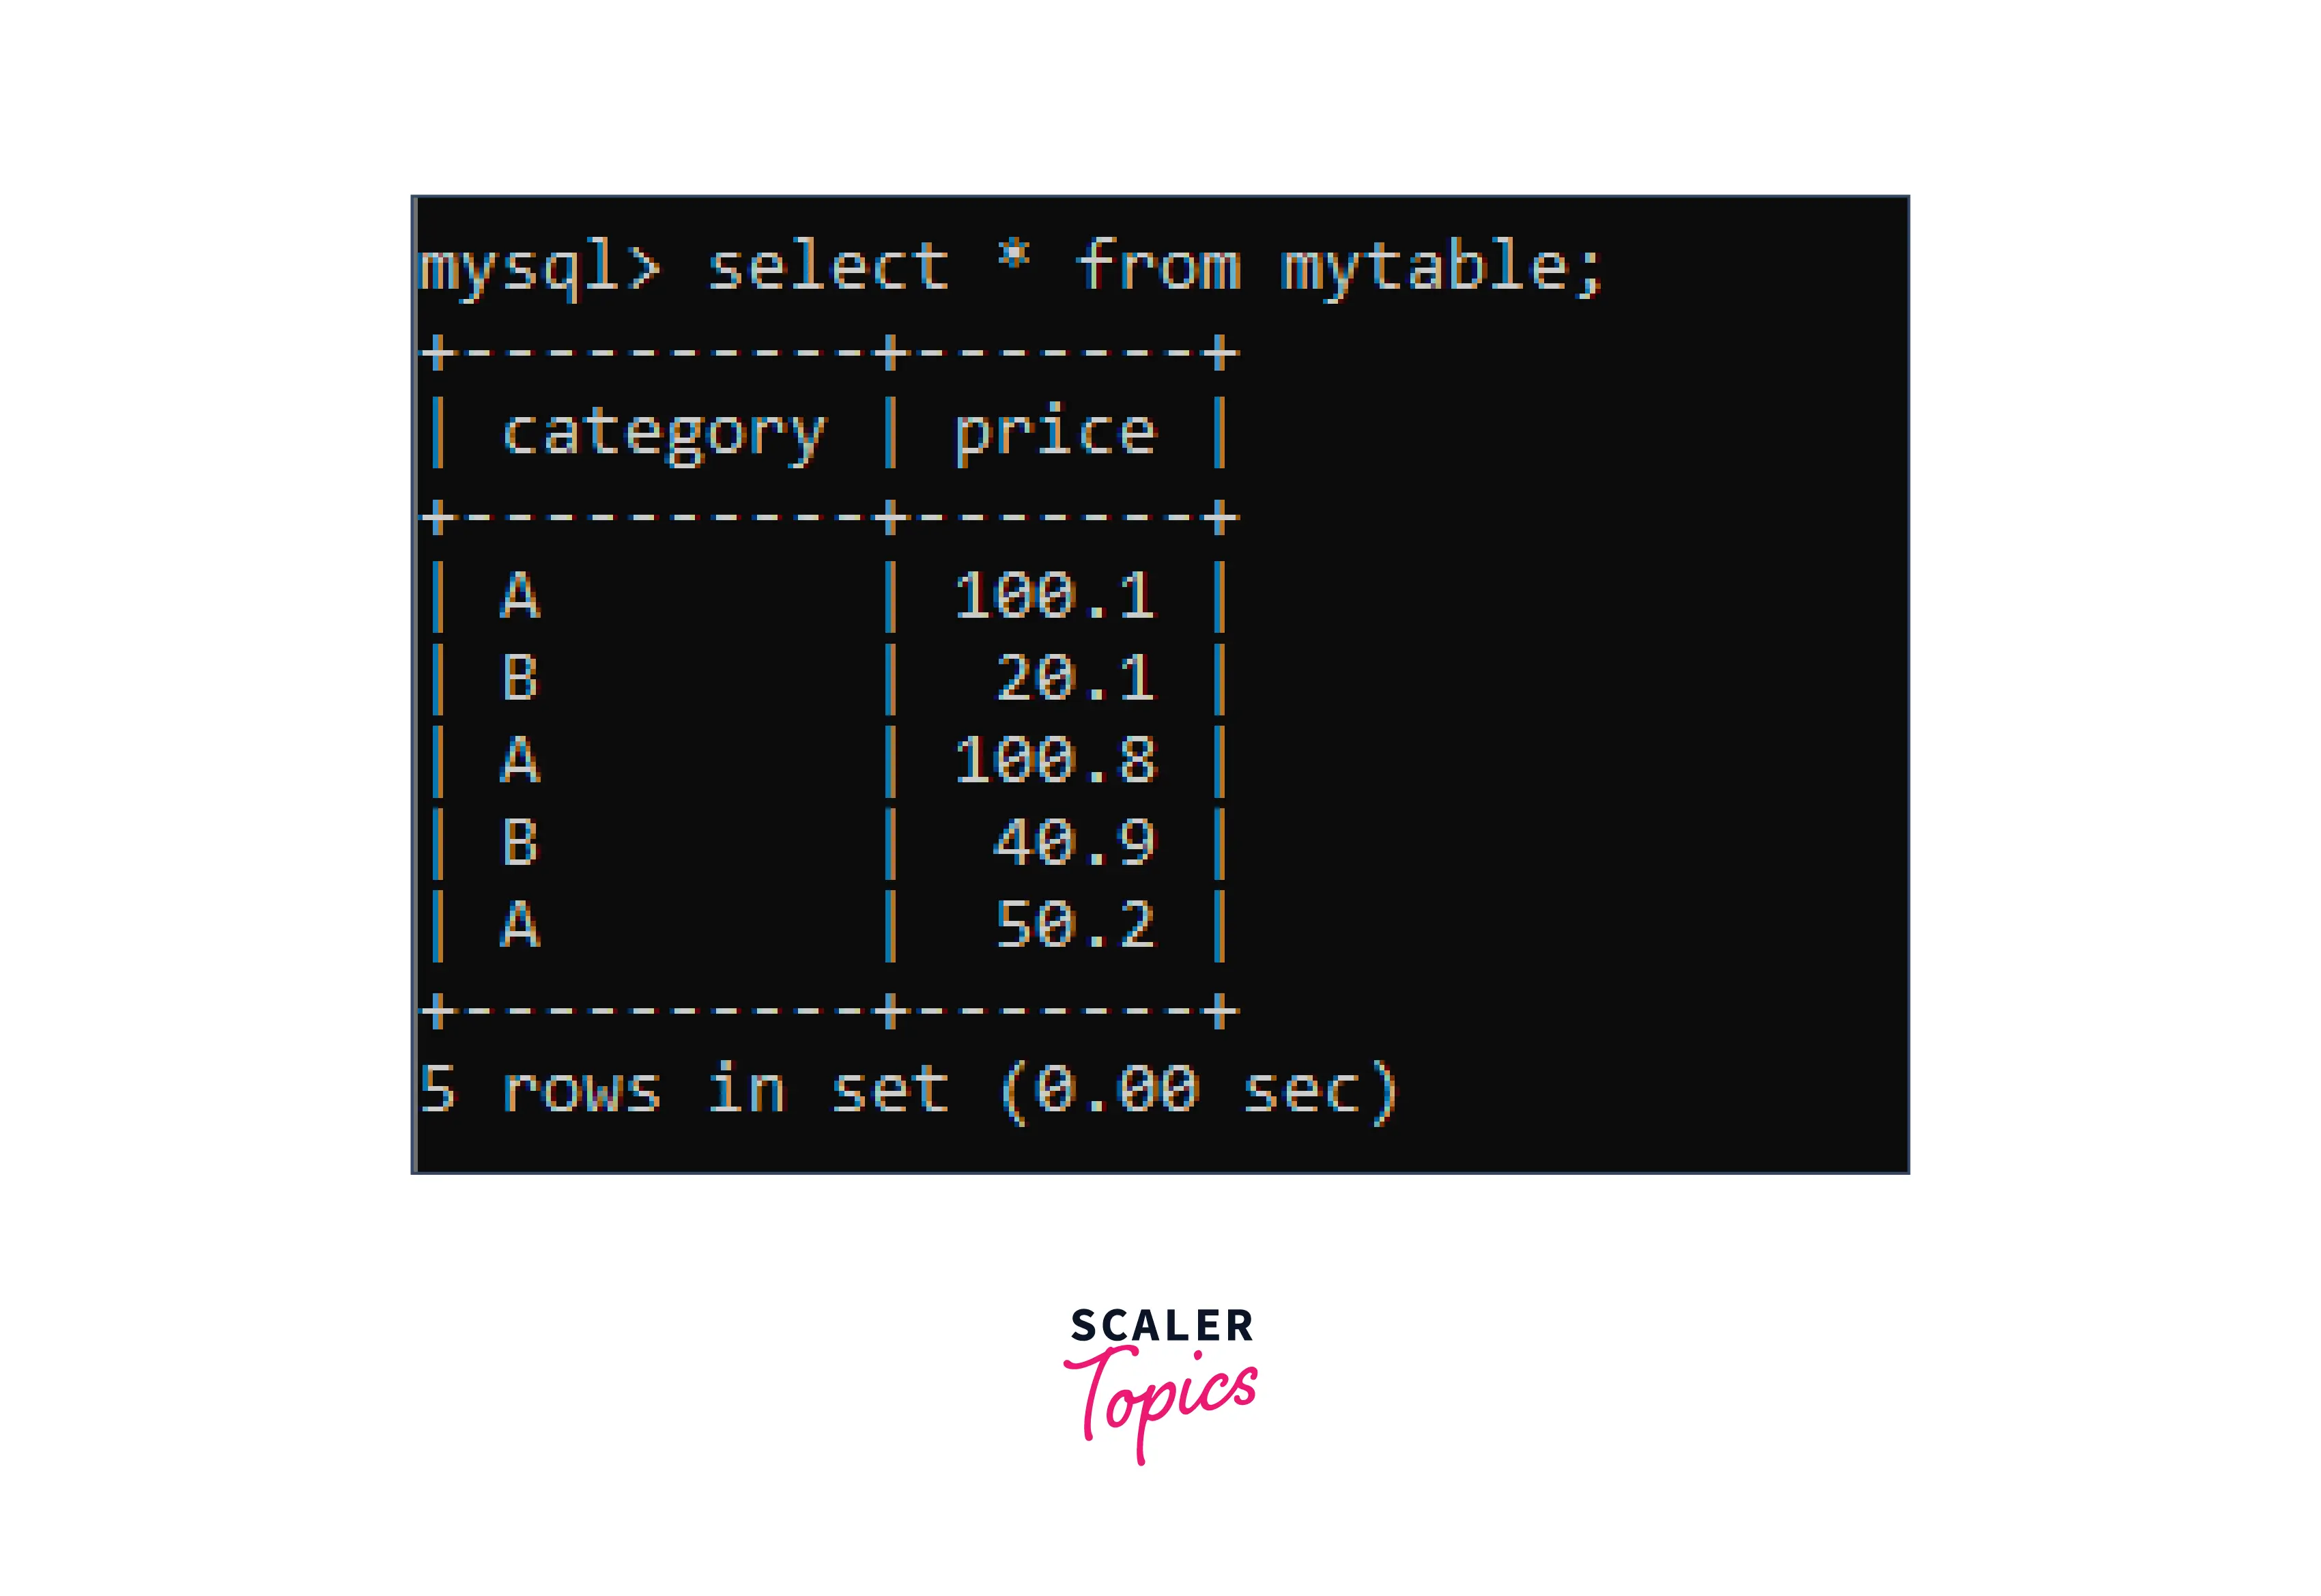
- First create a new Table named MyTable from which we will export the data to the CSV file, for that we can use the following data and syntax:
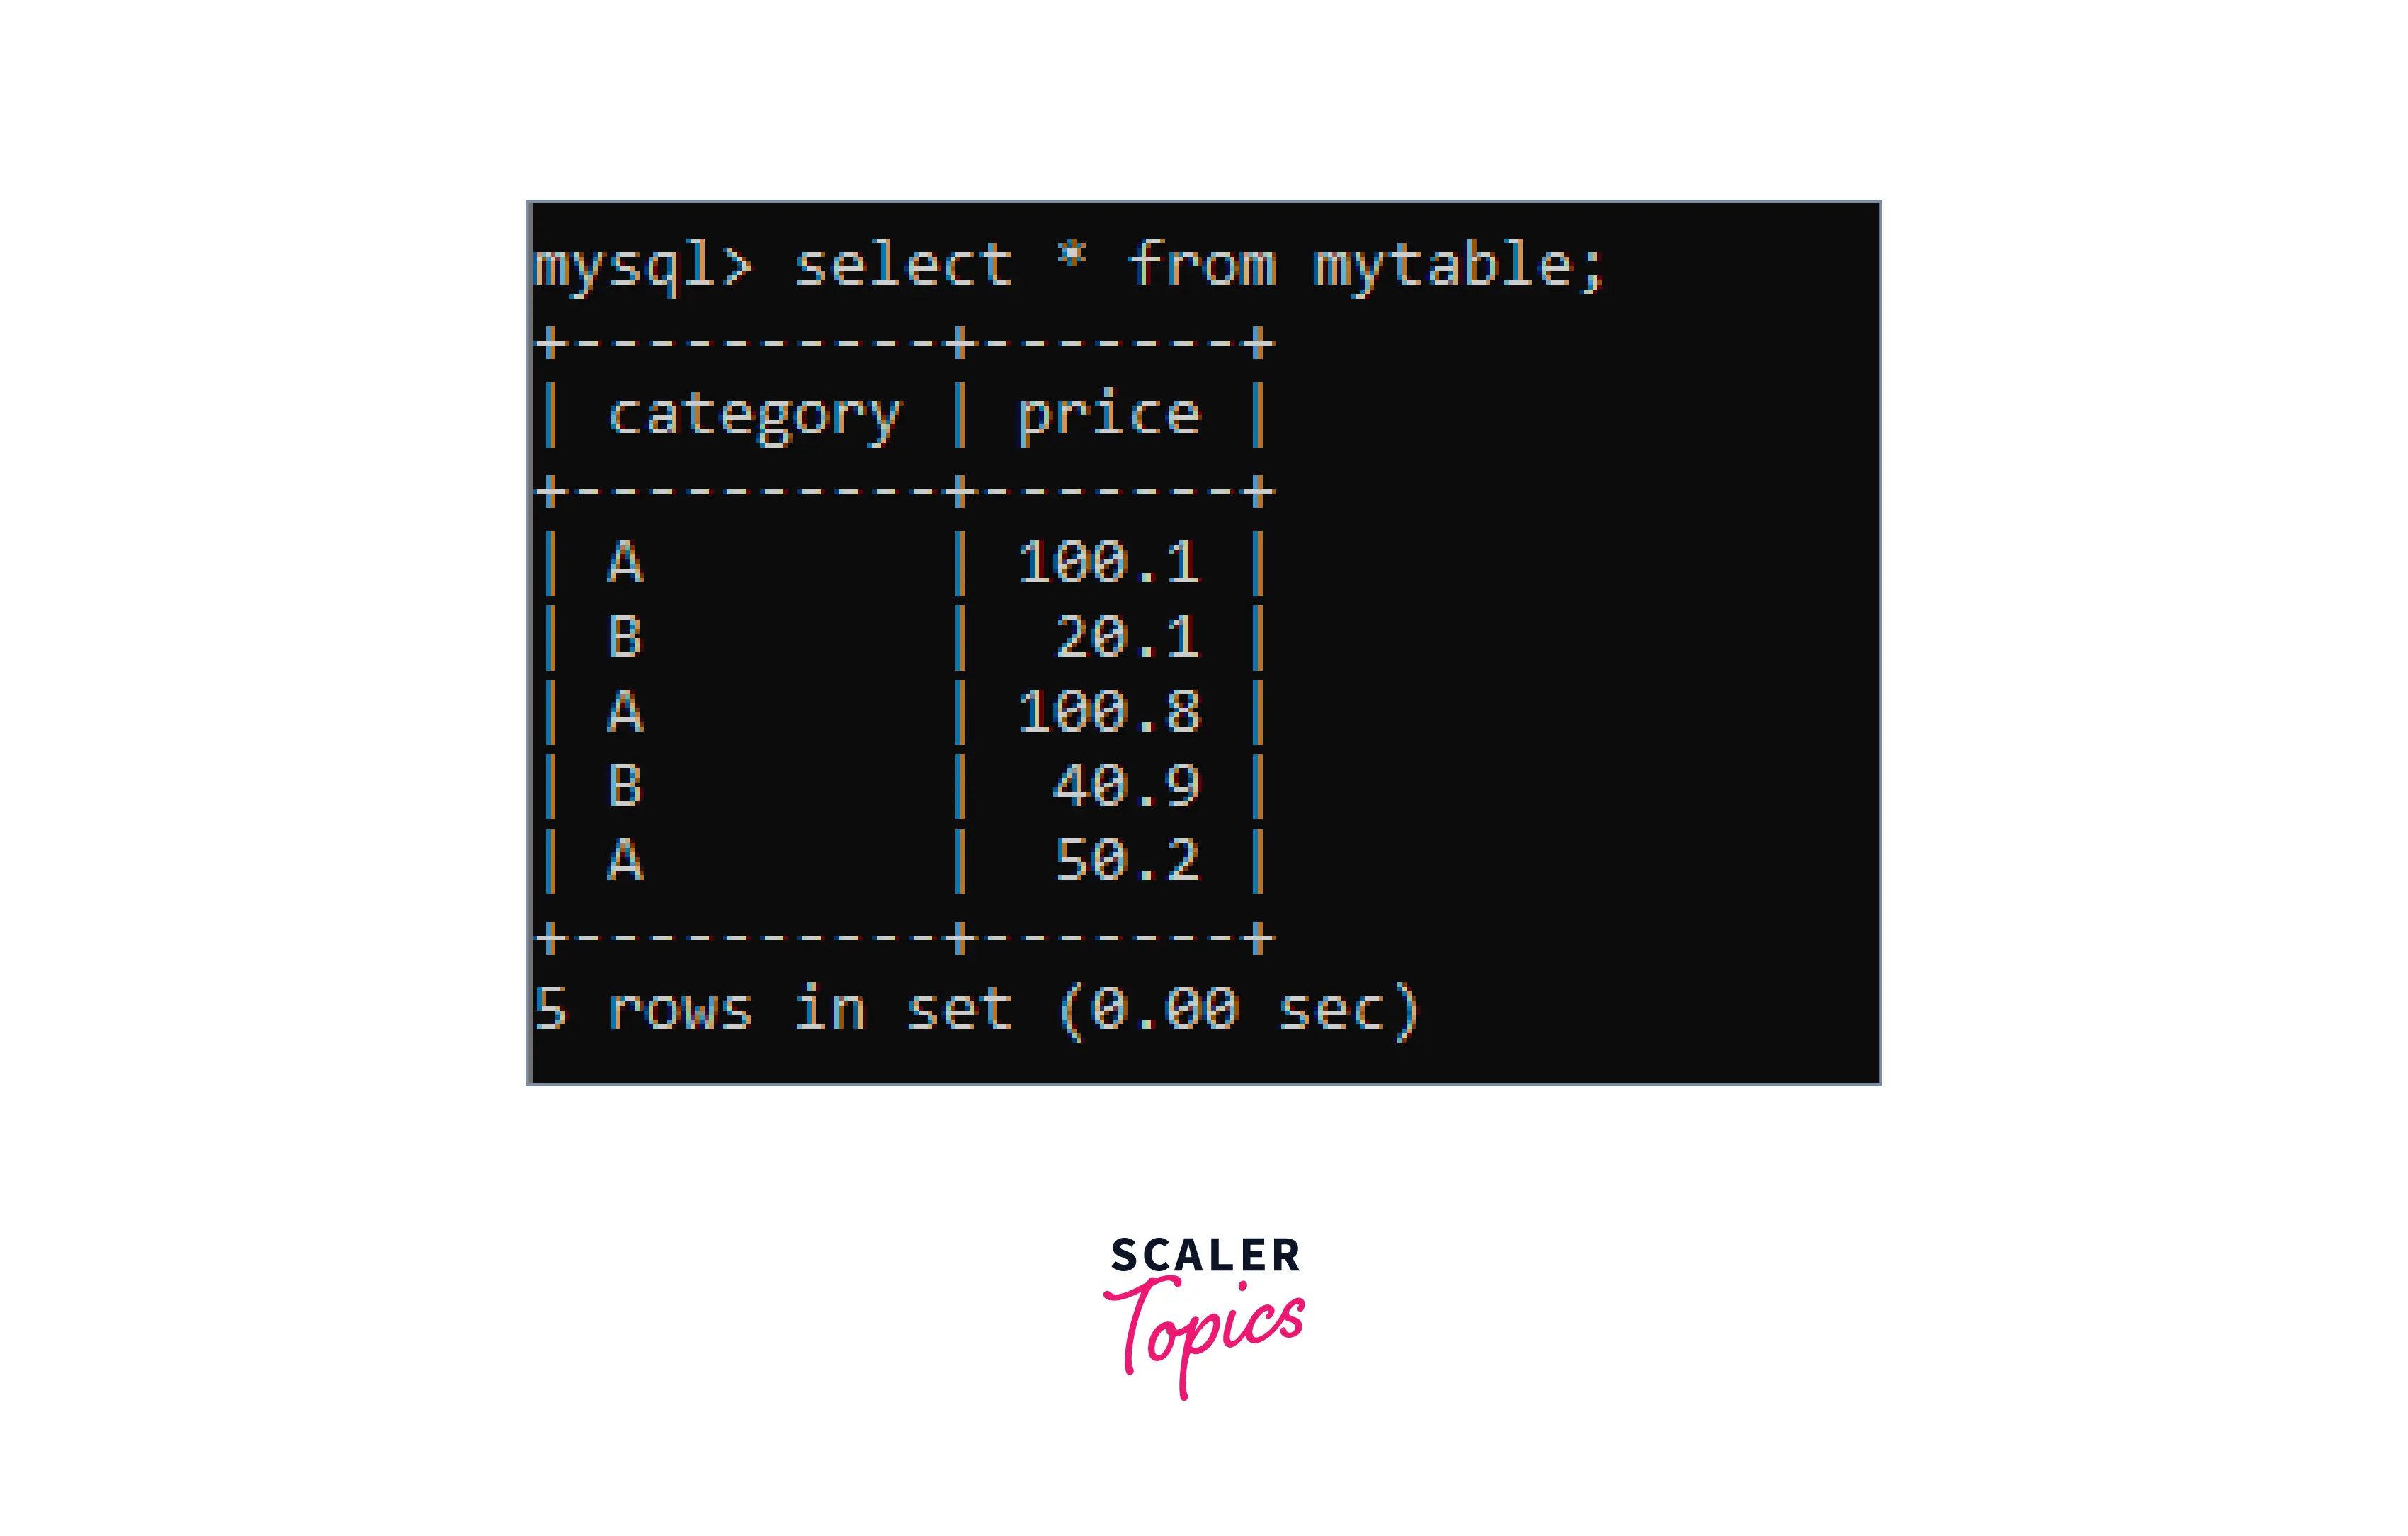
The table will be having the following data:
- Now, we will be using the SELECT INTO … OUTFILE statement to export the table to a CSV file which can further be imported to Excel.
- After running this command, we will be having a CSV file exported at the given location.

- Now, let's see if the data is exported properly in the CSV file.
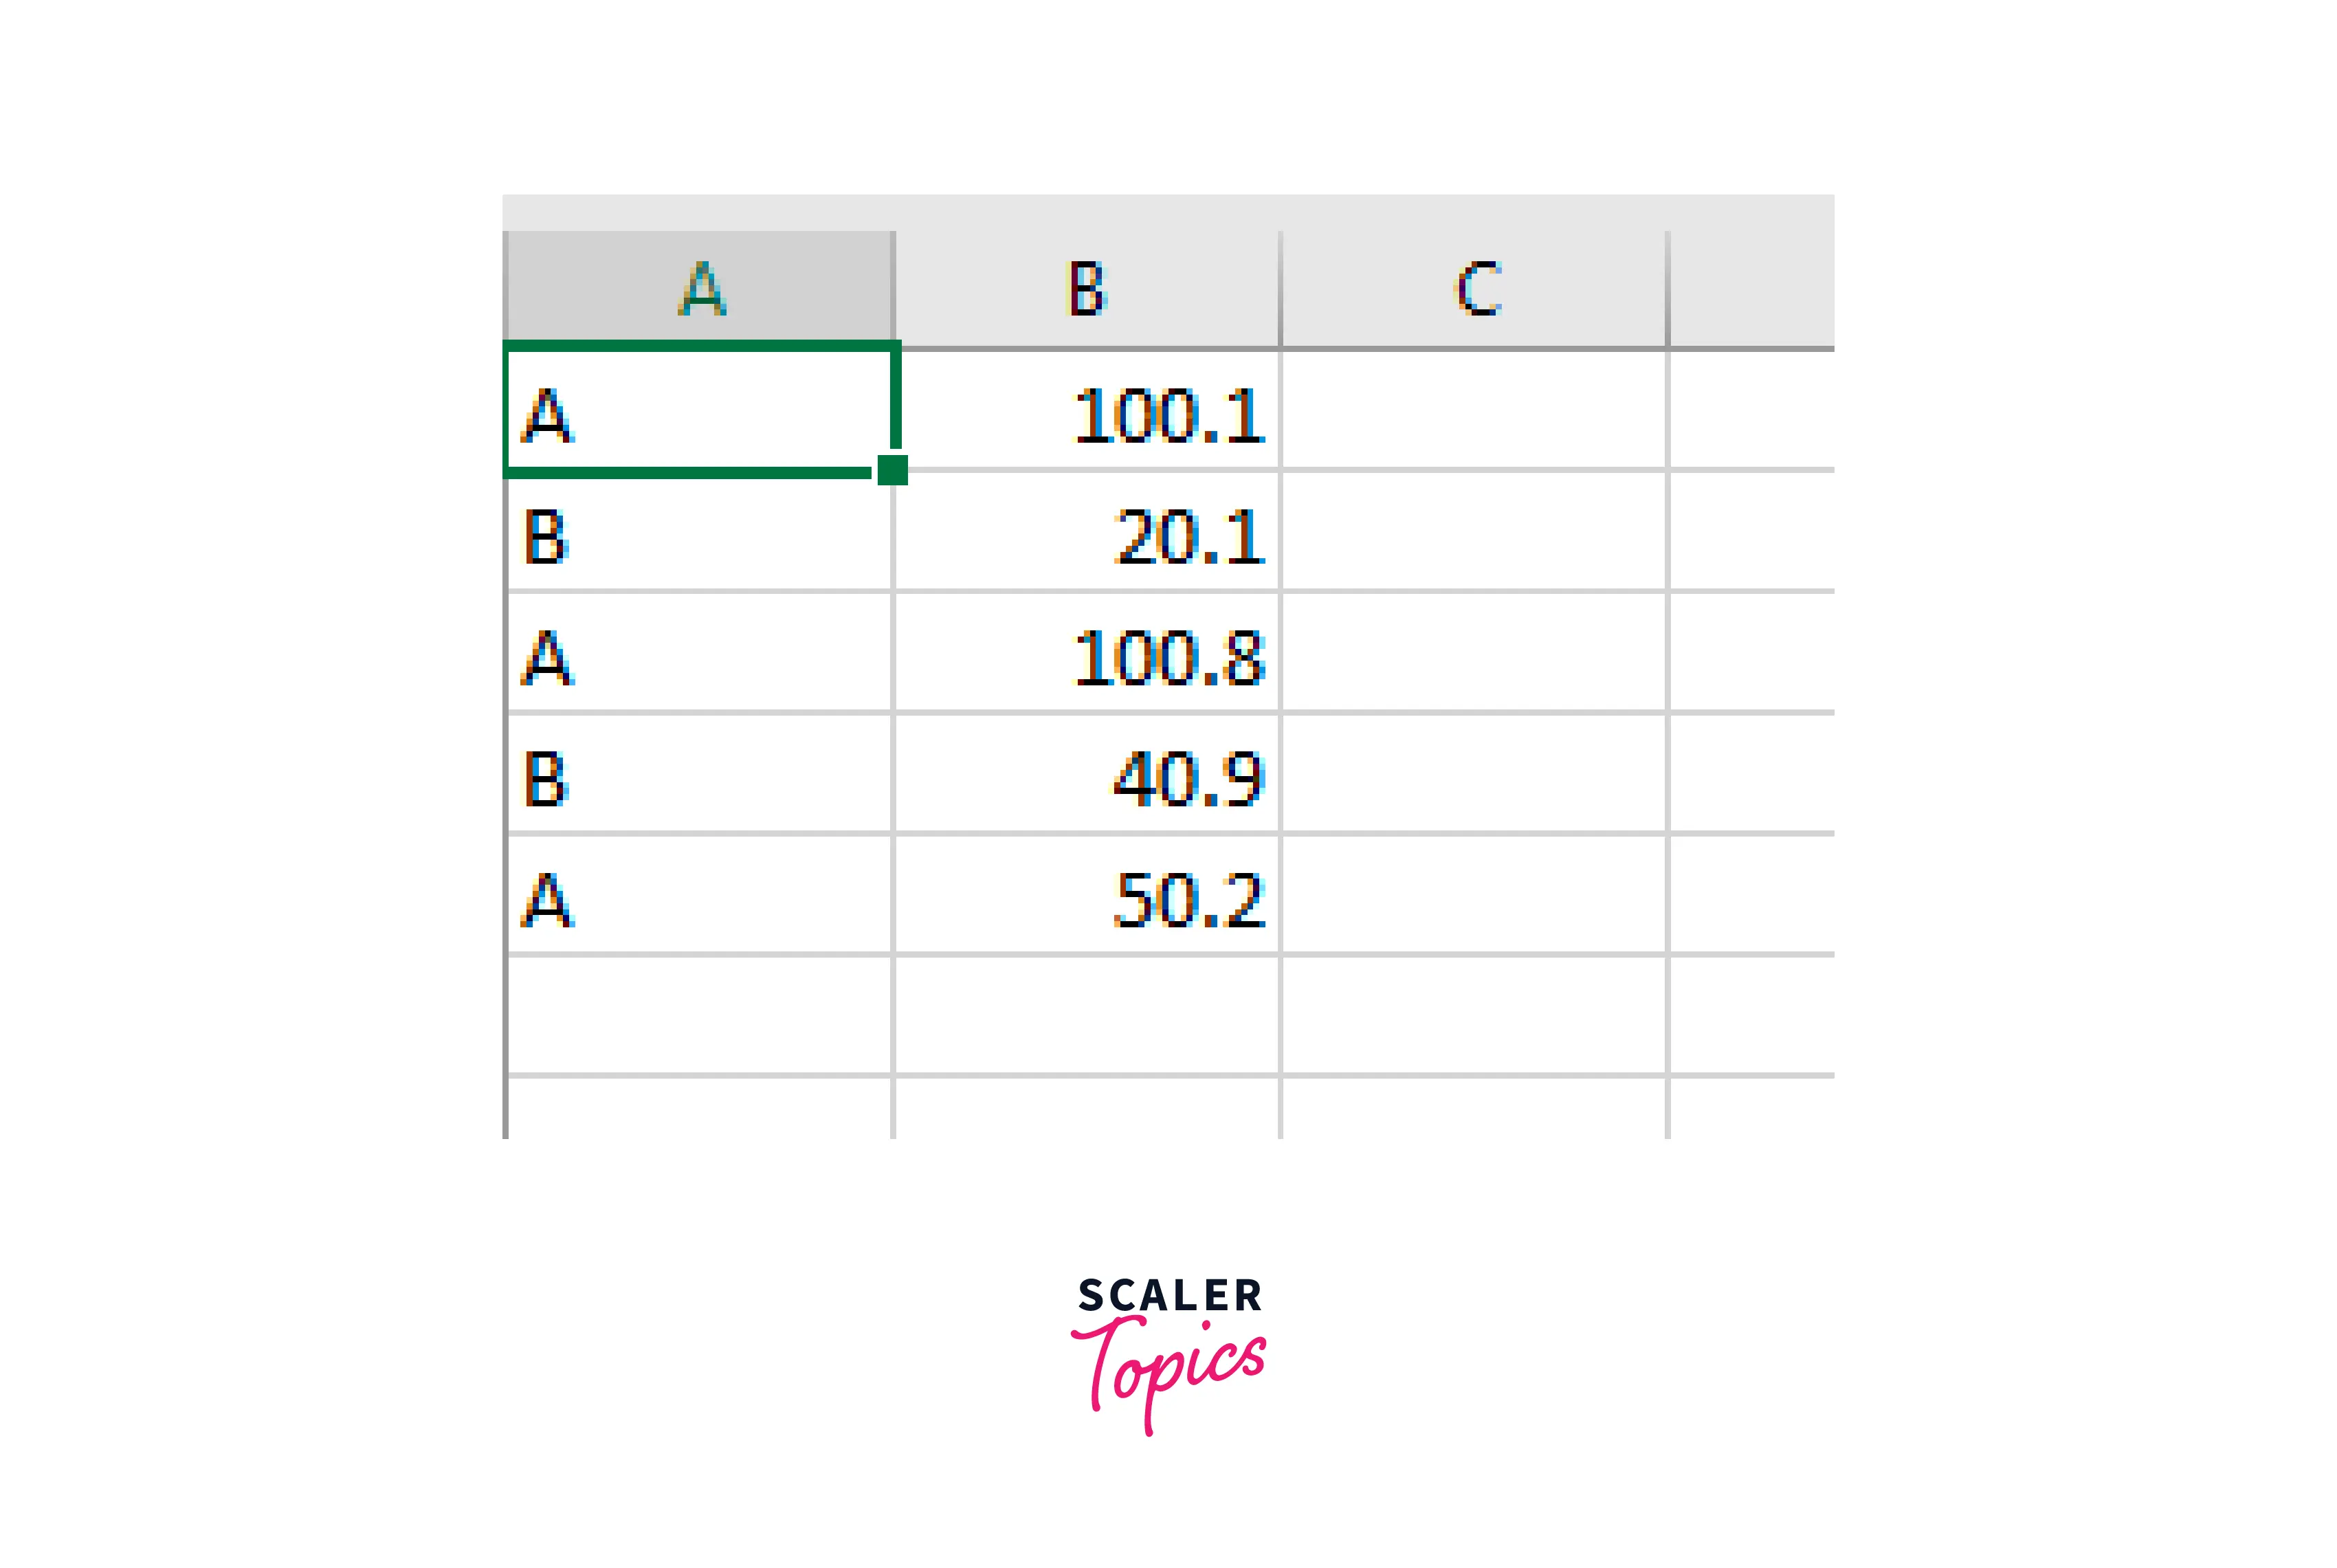
- But this is a CSV format file, let's import this file into an Excel file.
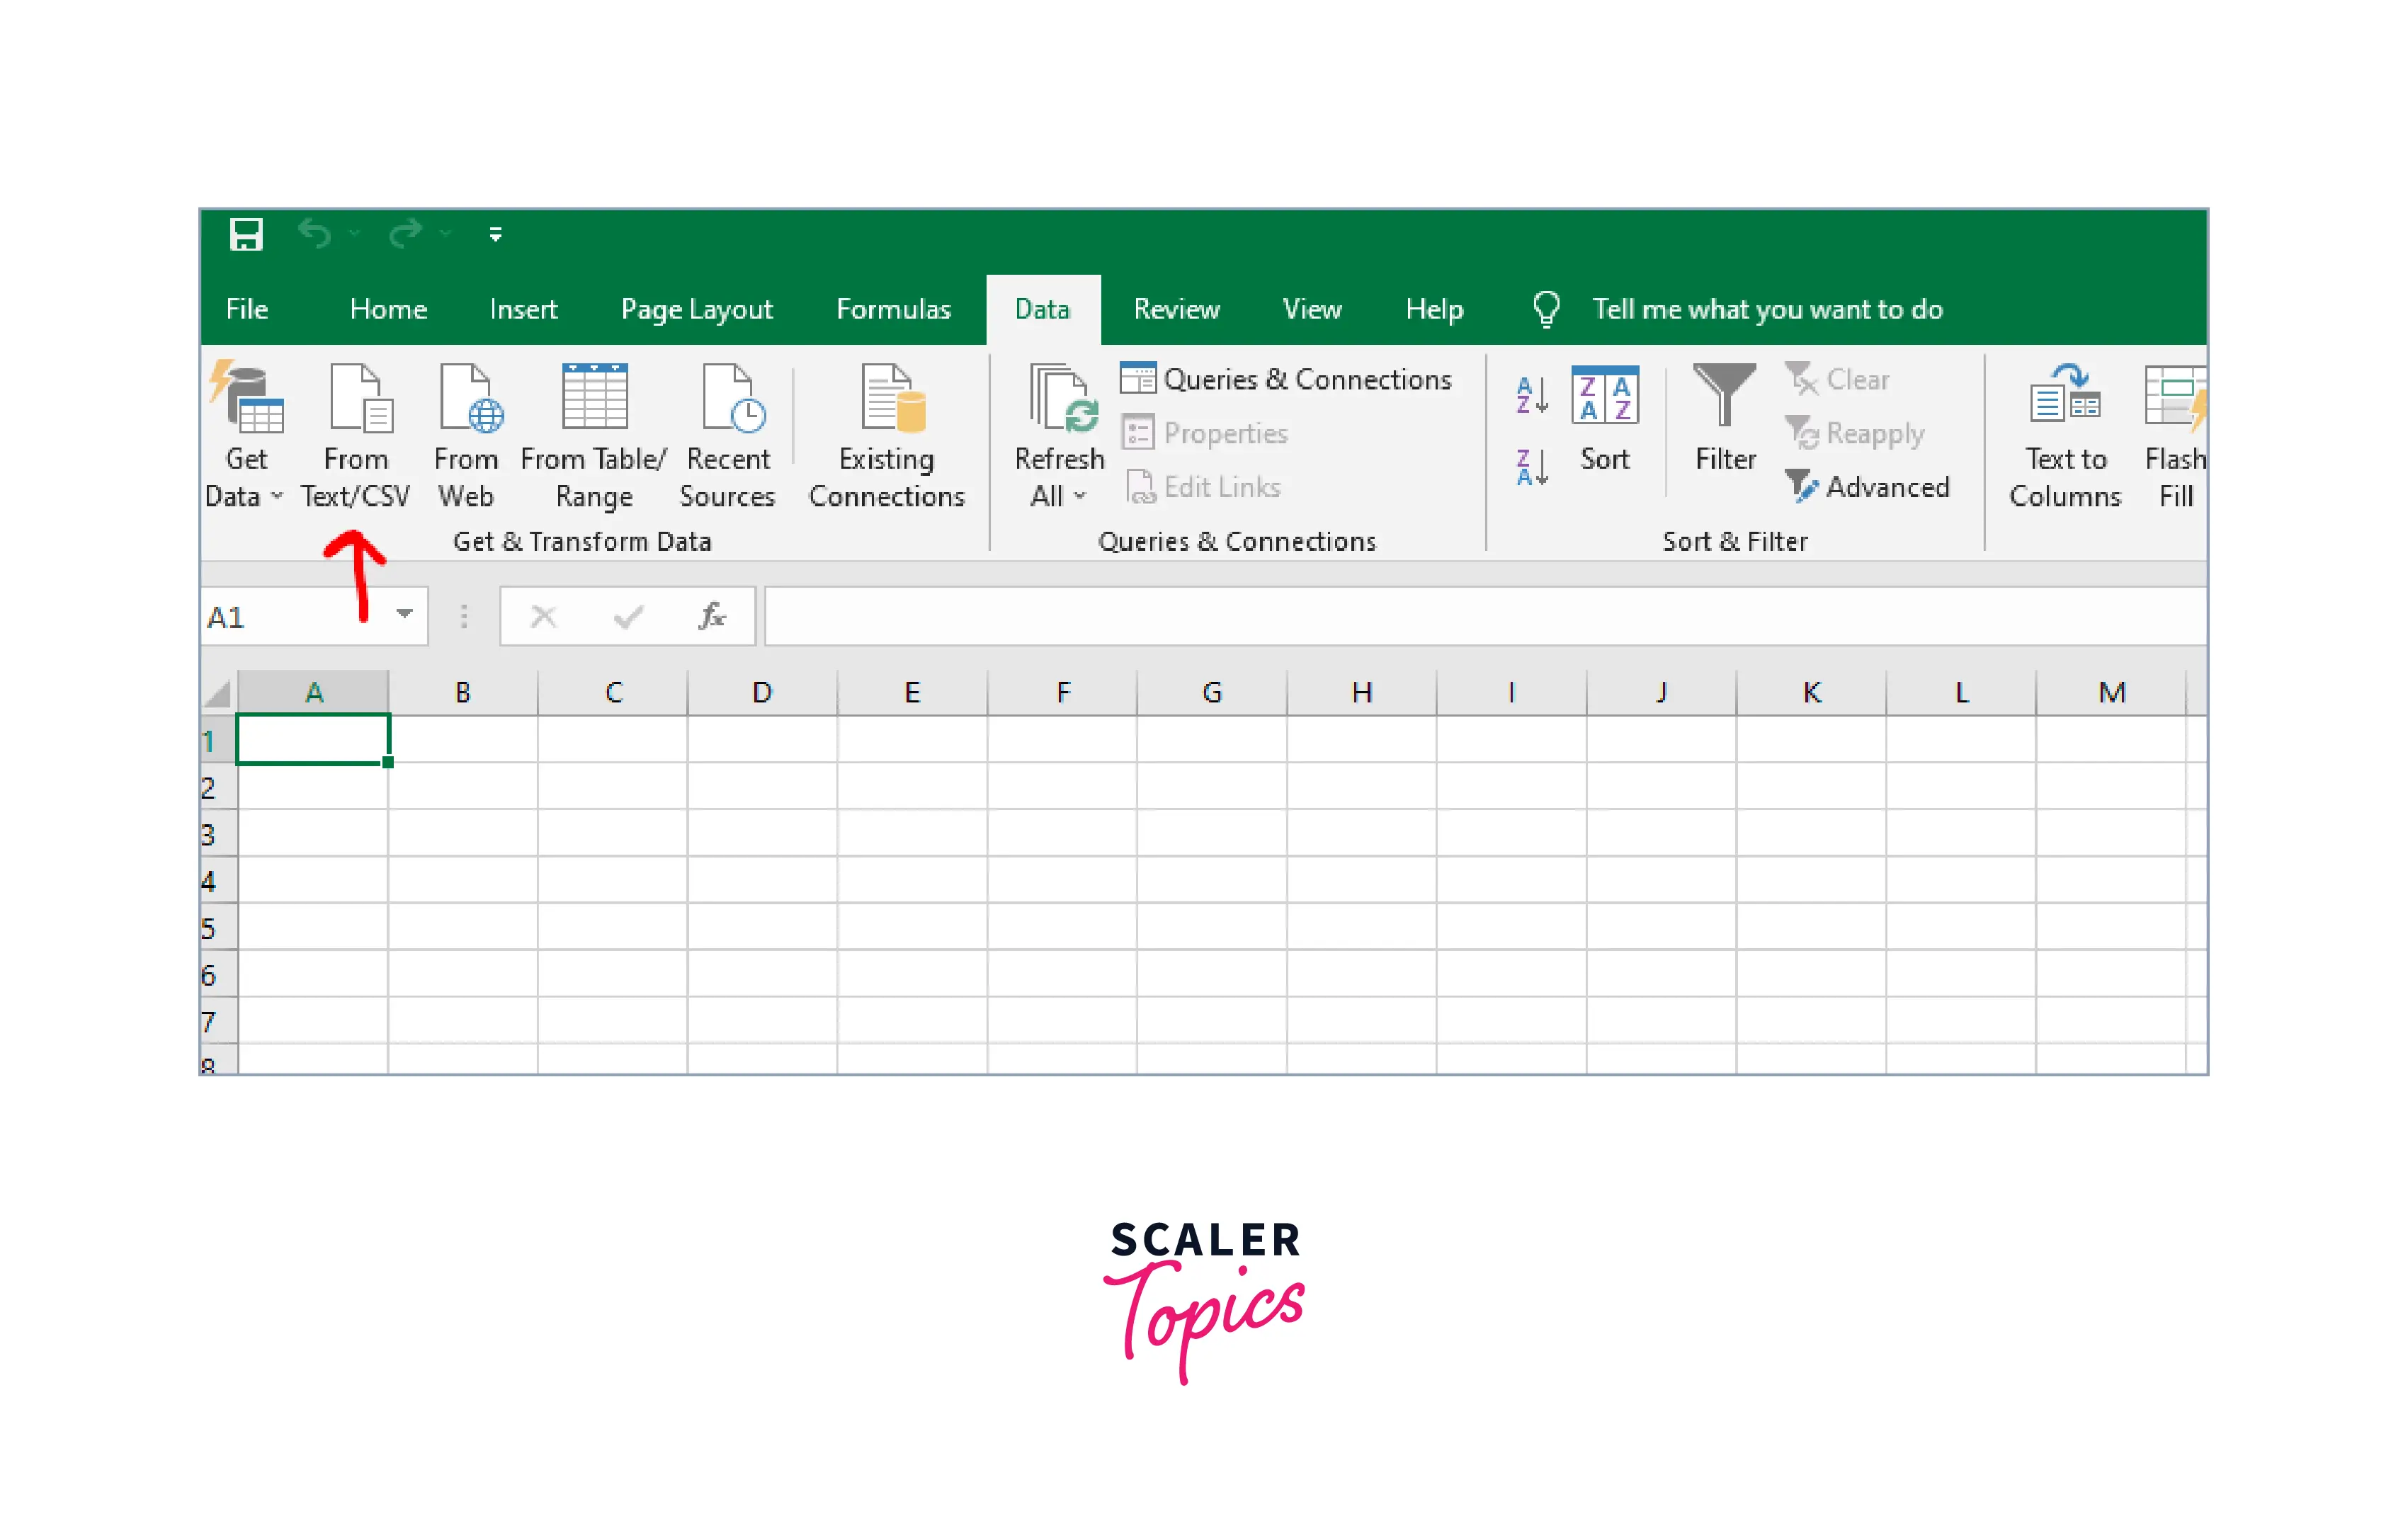
- For that, create a .xlsx file and under Data tab choose From Text/CSV button:
- Browse to the location and click on Import
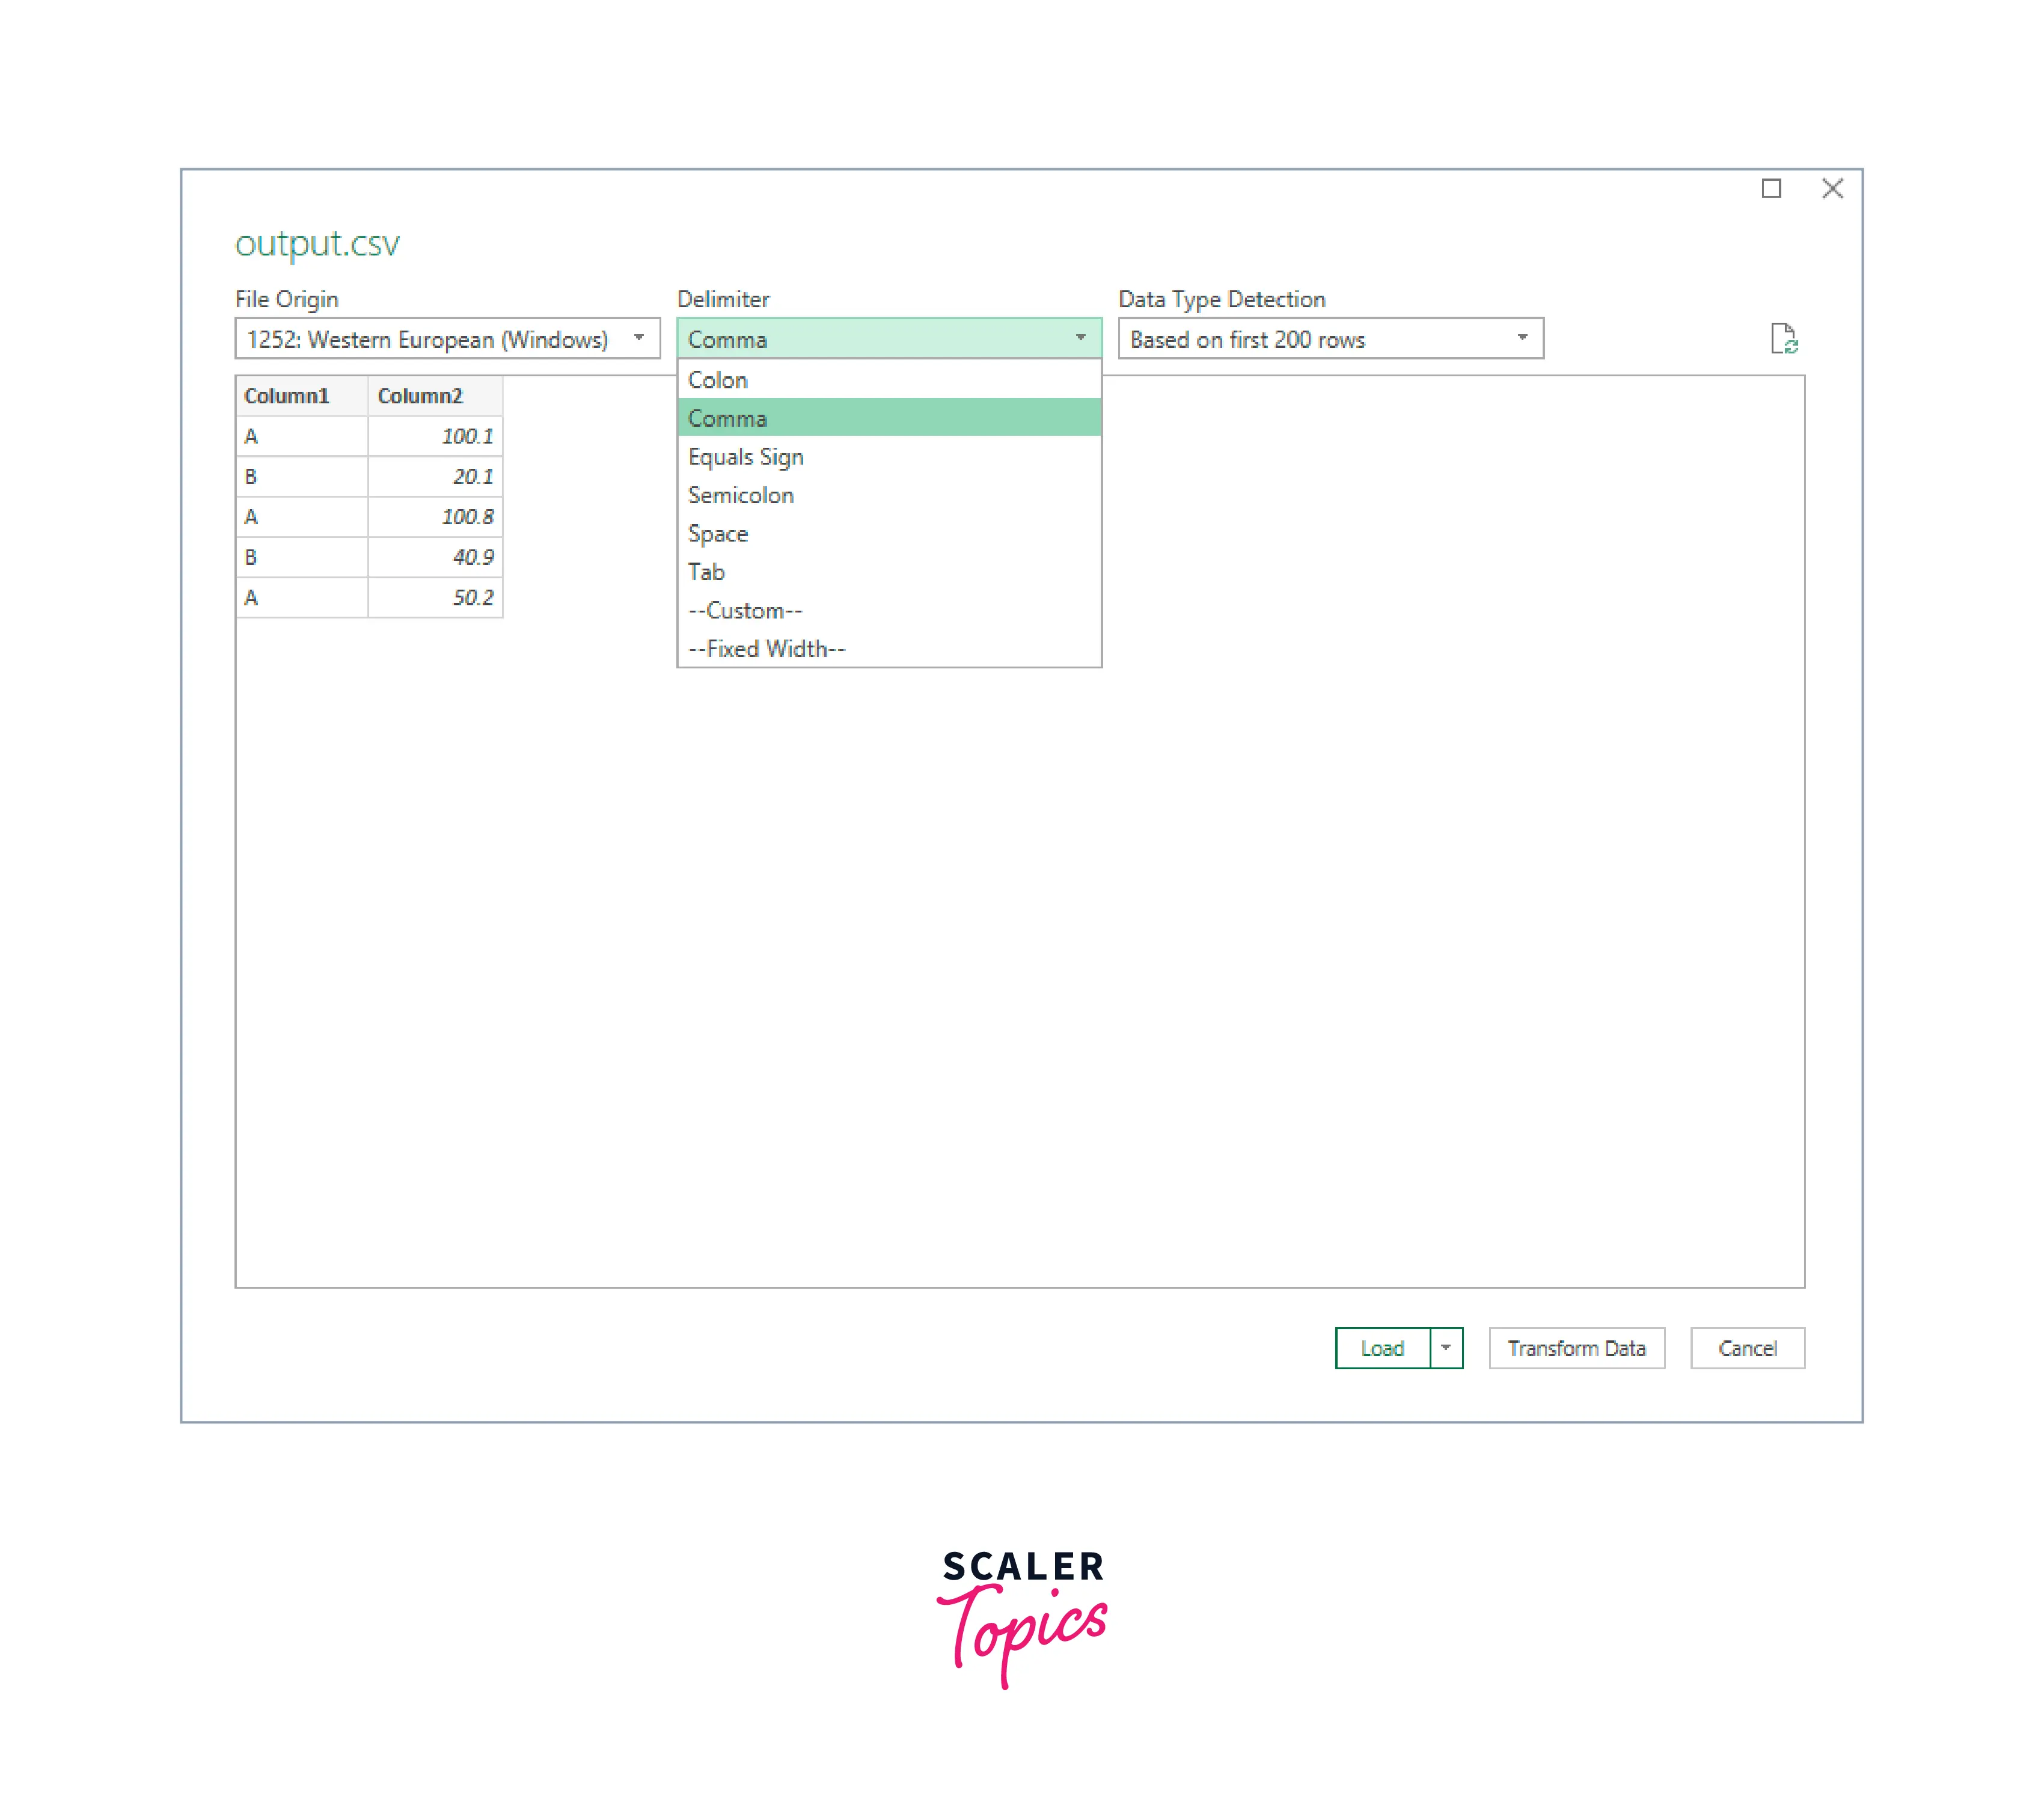
- In the dialog opened after importing, choose the appropriate delimiter and click Transform Data:
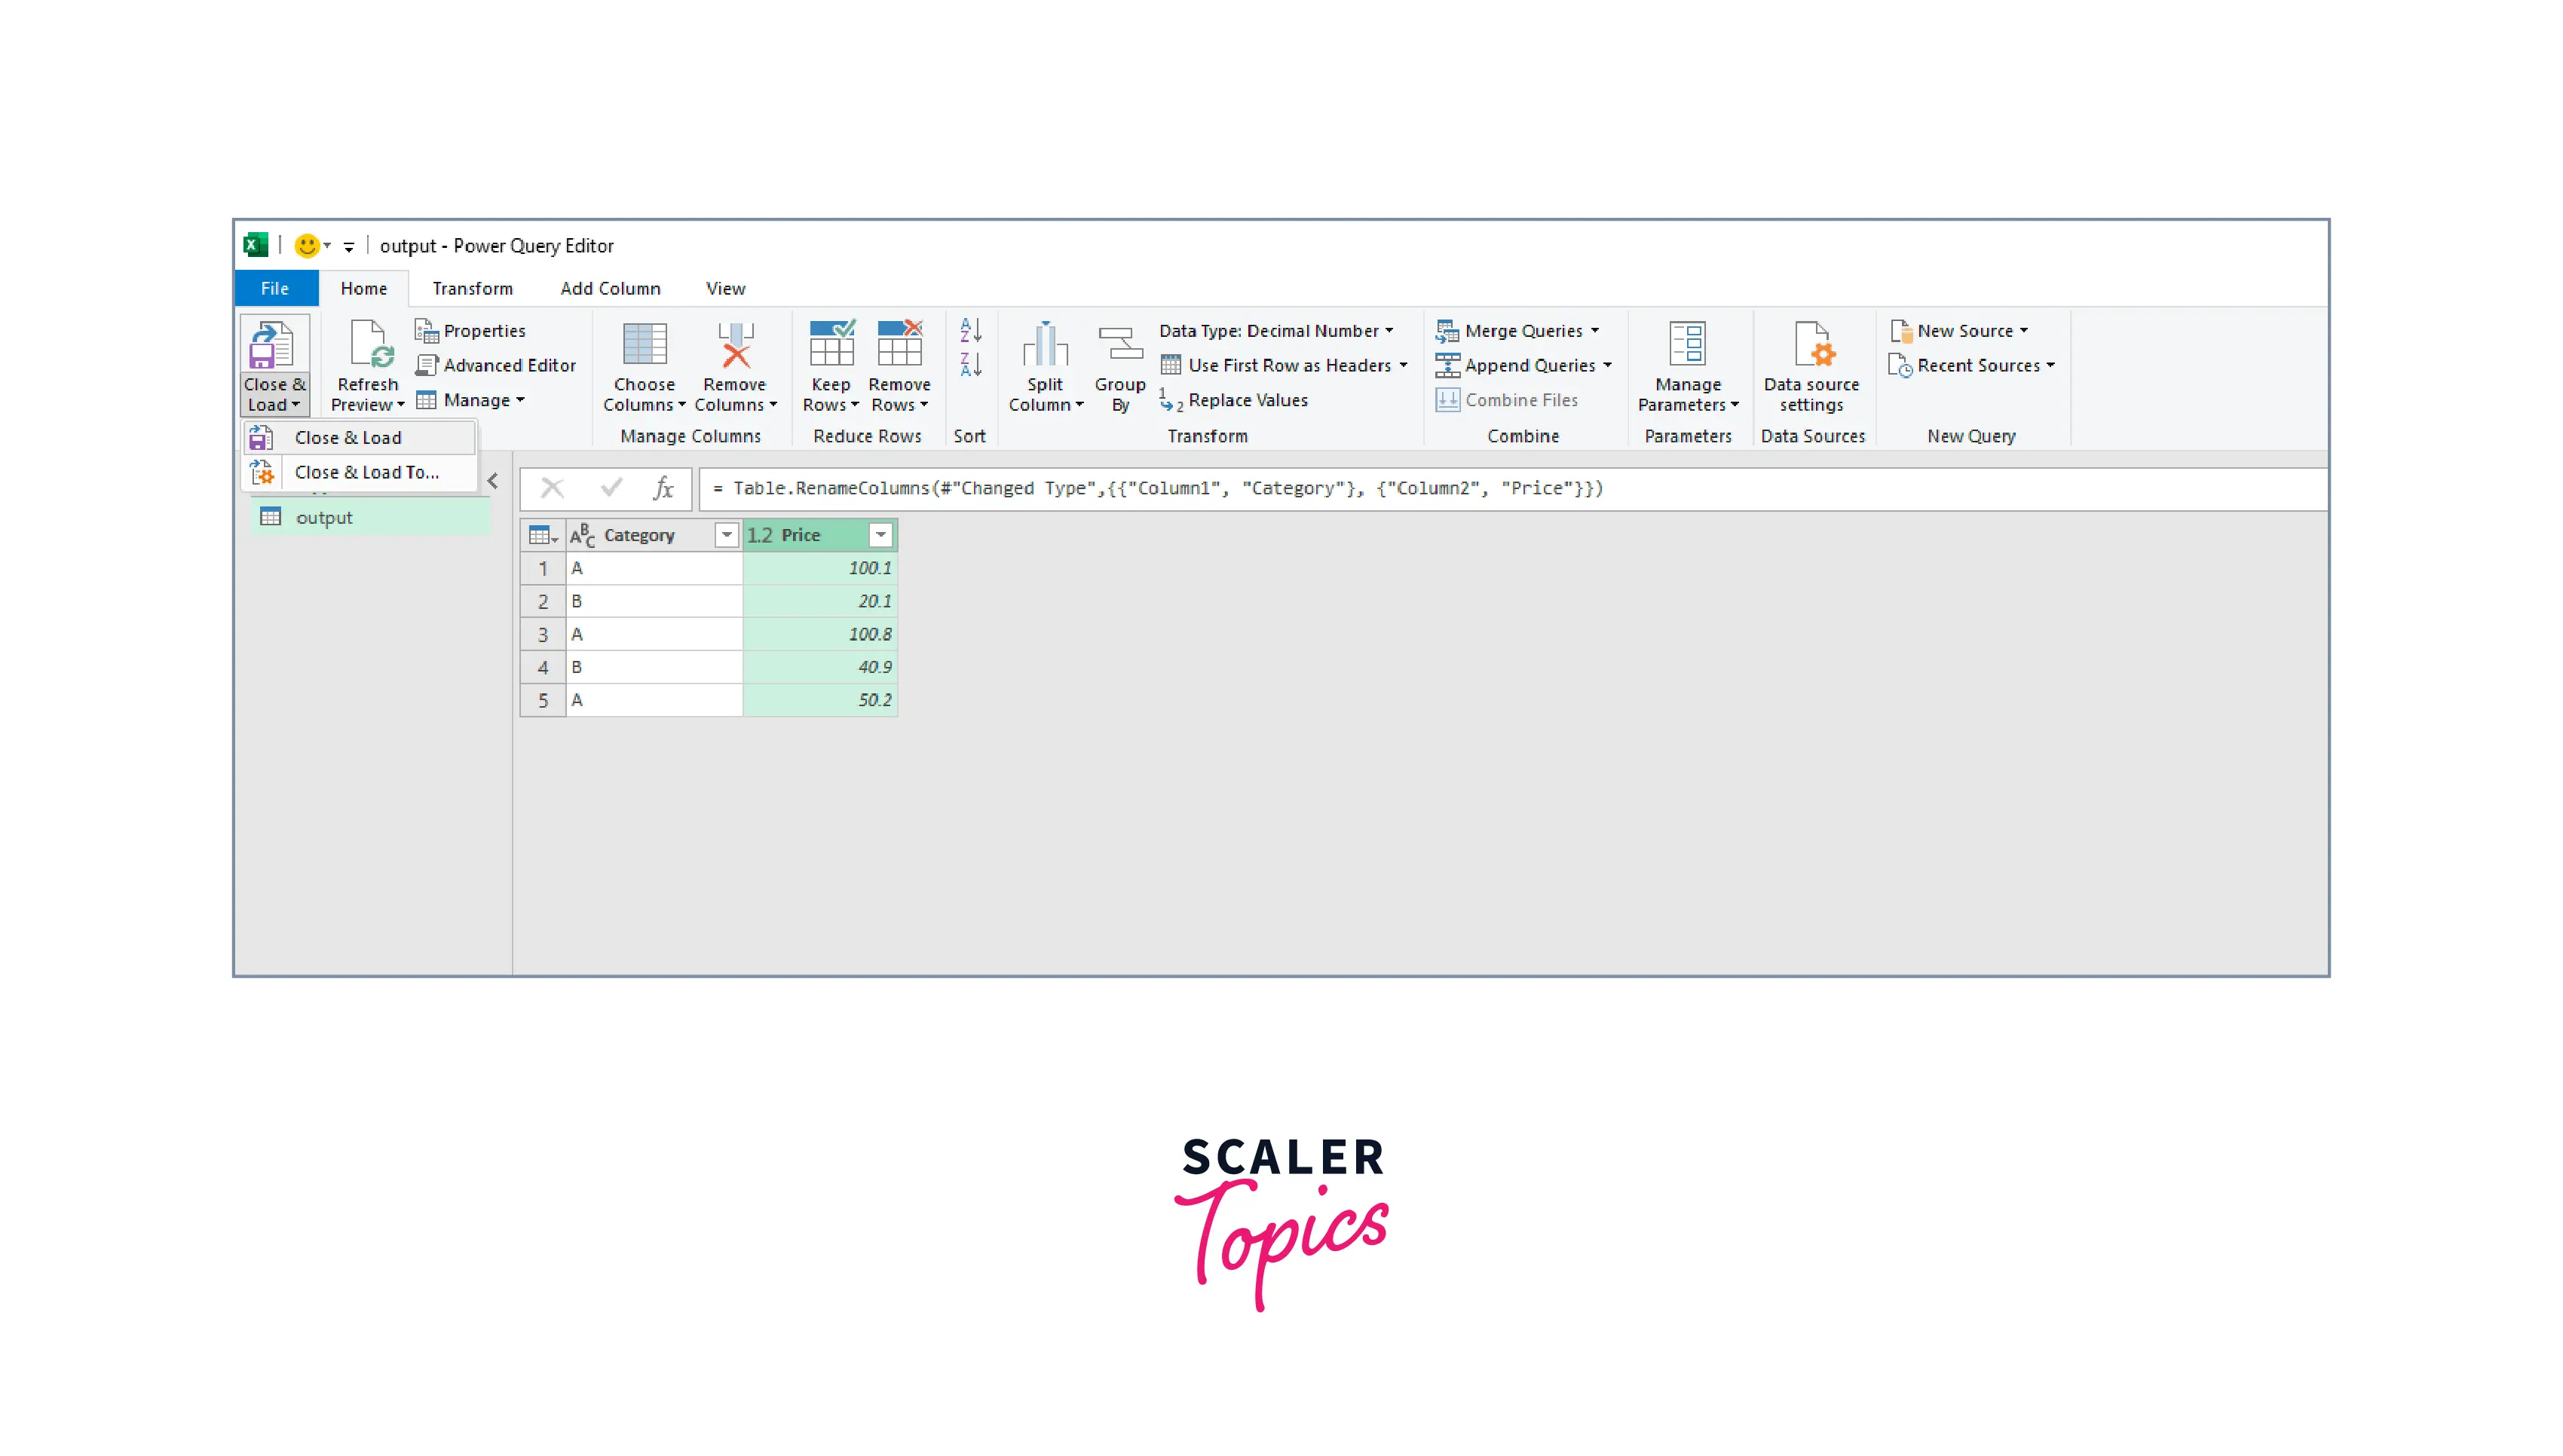
- Now, the Power Query Editor window will open up, add the column names to the data there and click Close & Load.
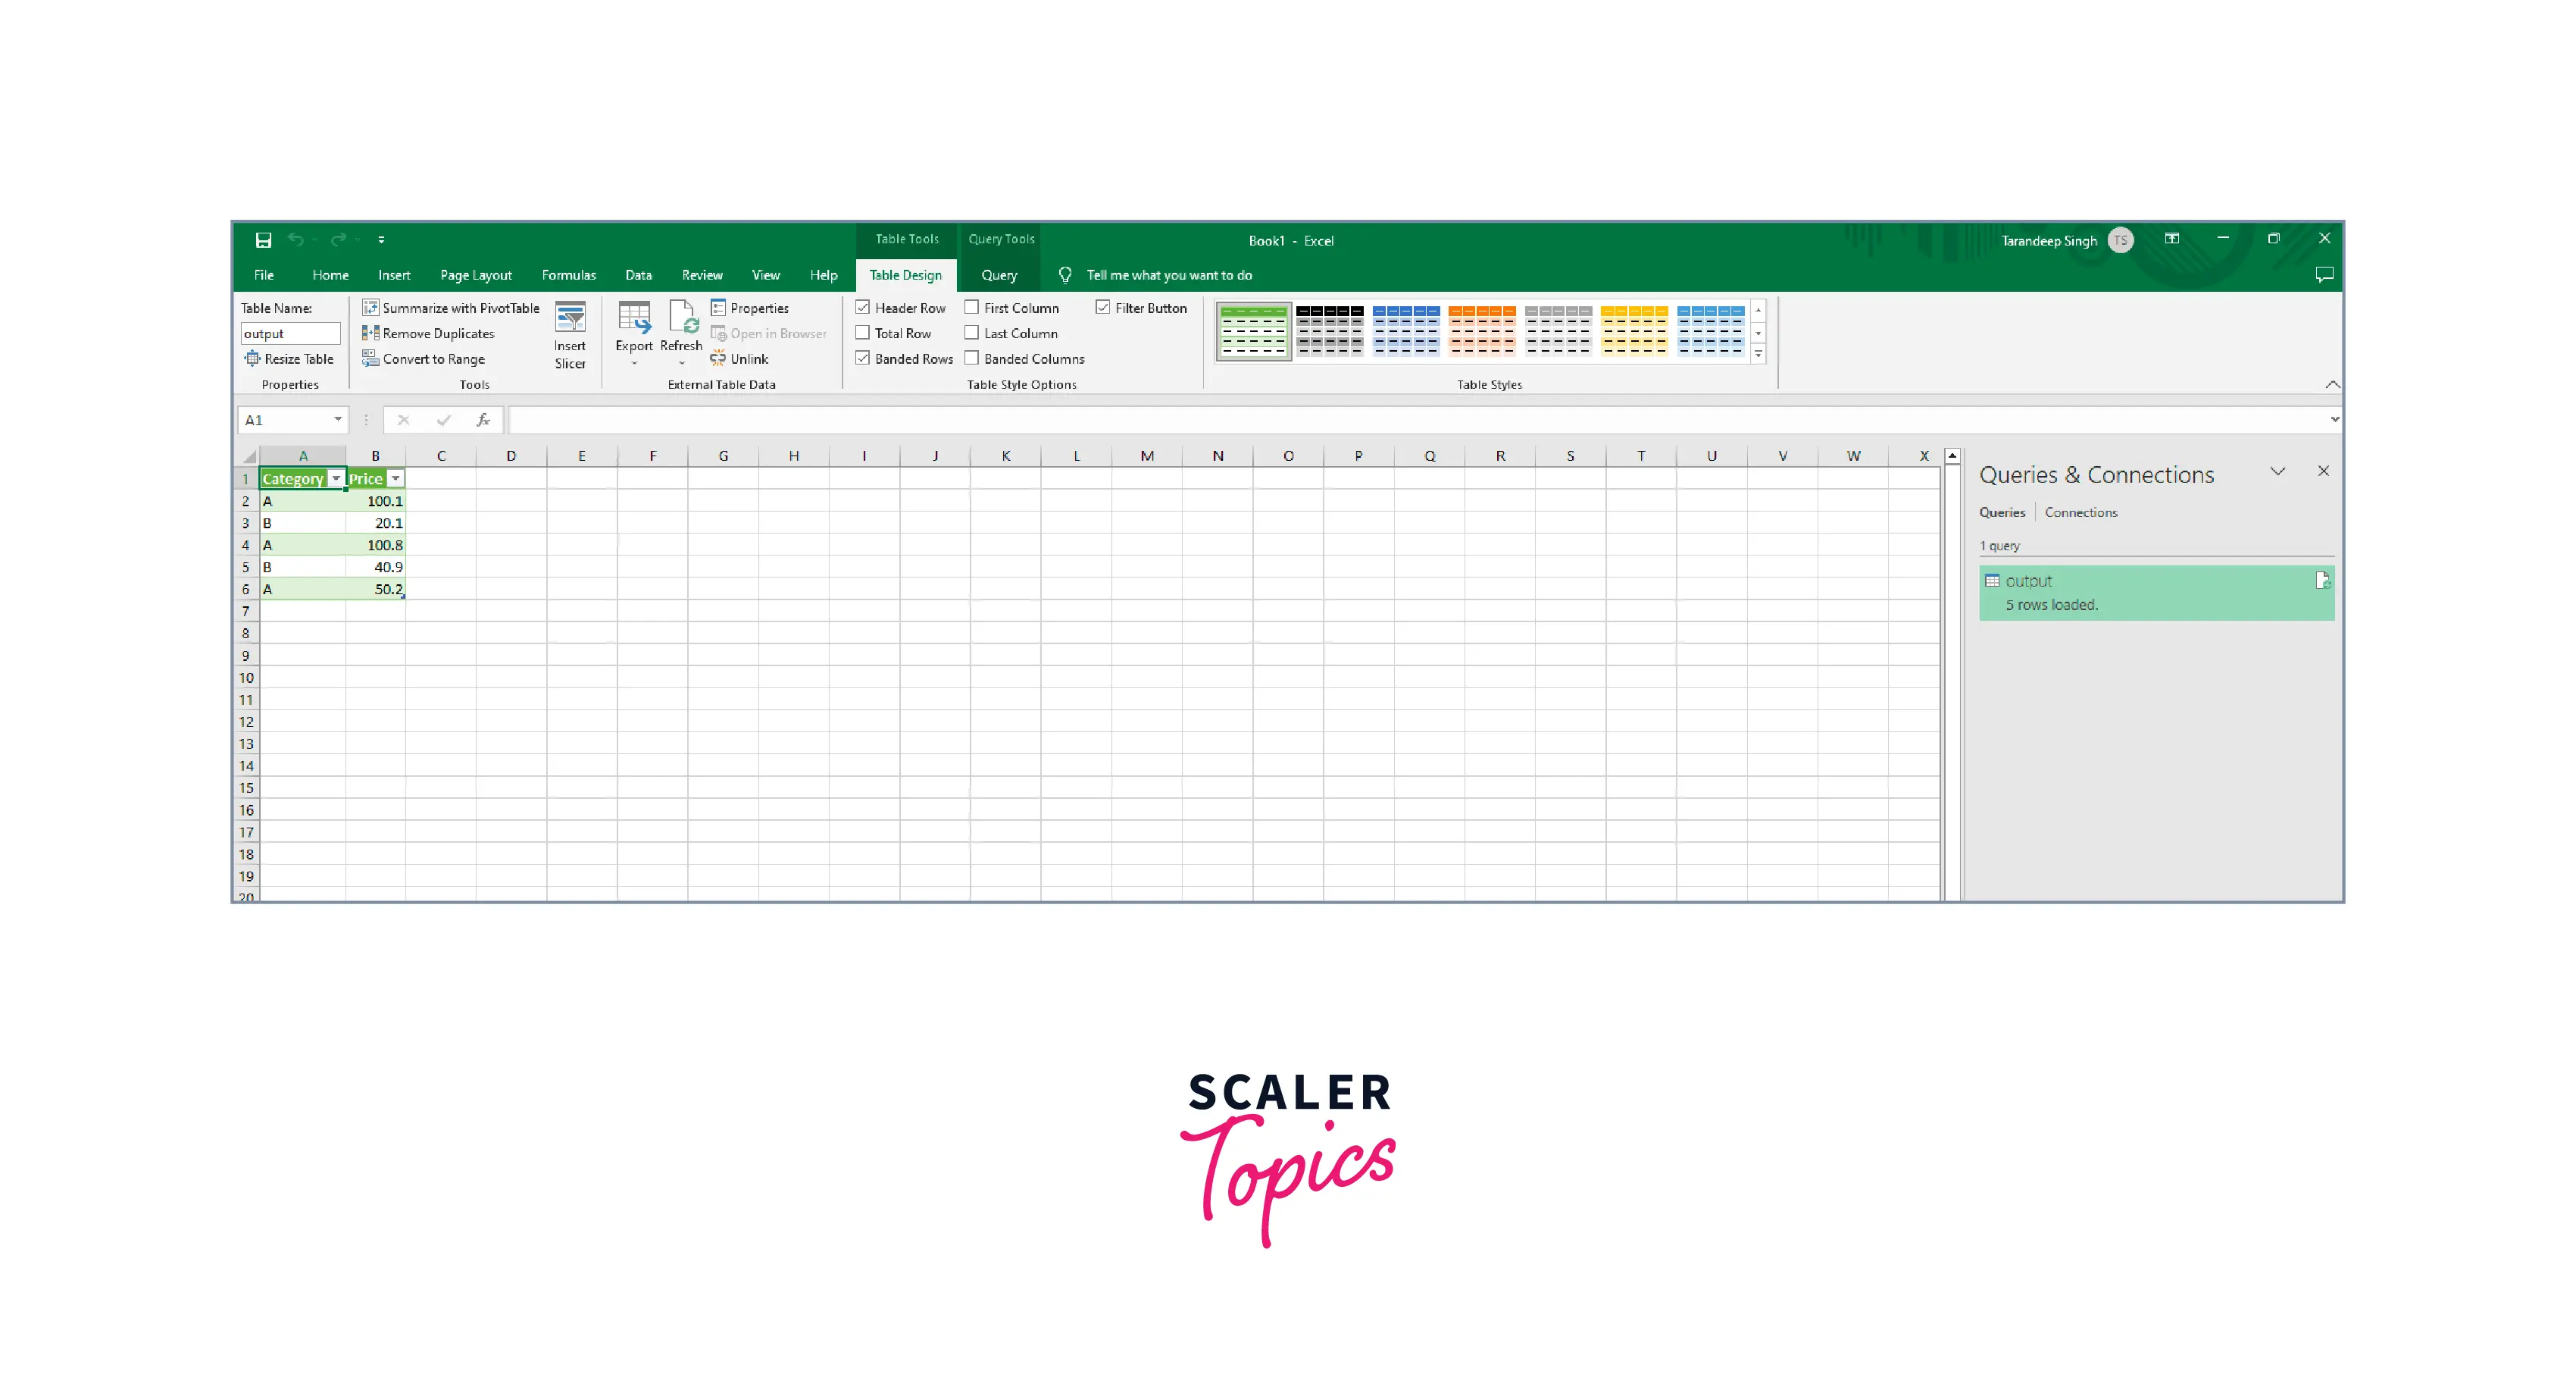
- Hence, data is loaded to the sheet:
Export/Import MySQL Data to Excel Using the From Database Feature
We can easily export MySQL data to Excel by using the "From Database" feature in Excel. This feature allows you to connect to a MySQL database and retrieve data directly into Excel. Here are the steps to import the below table using this feature:
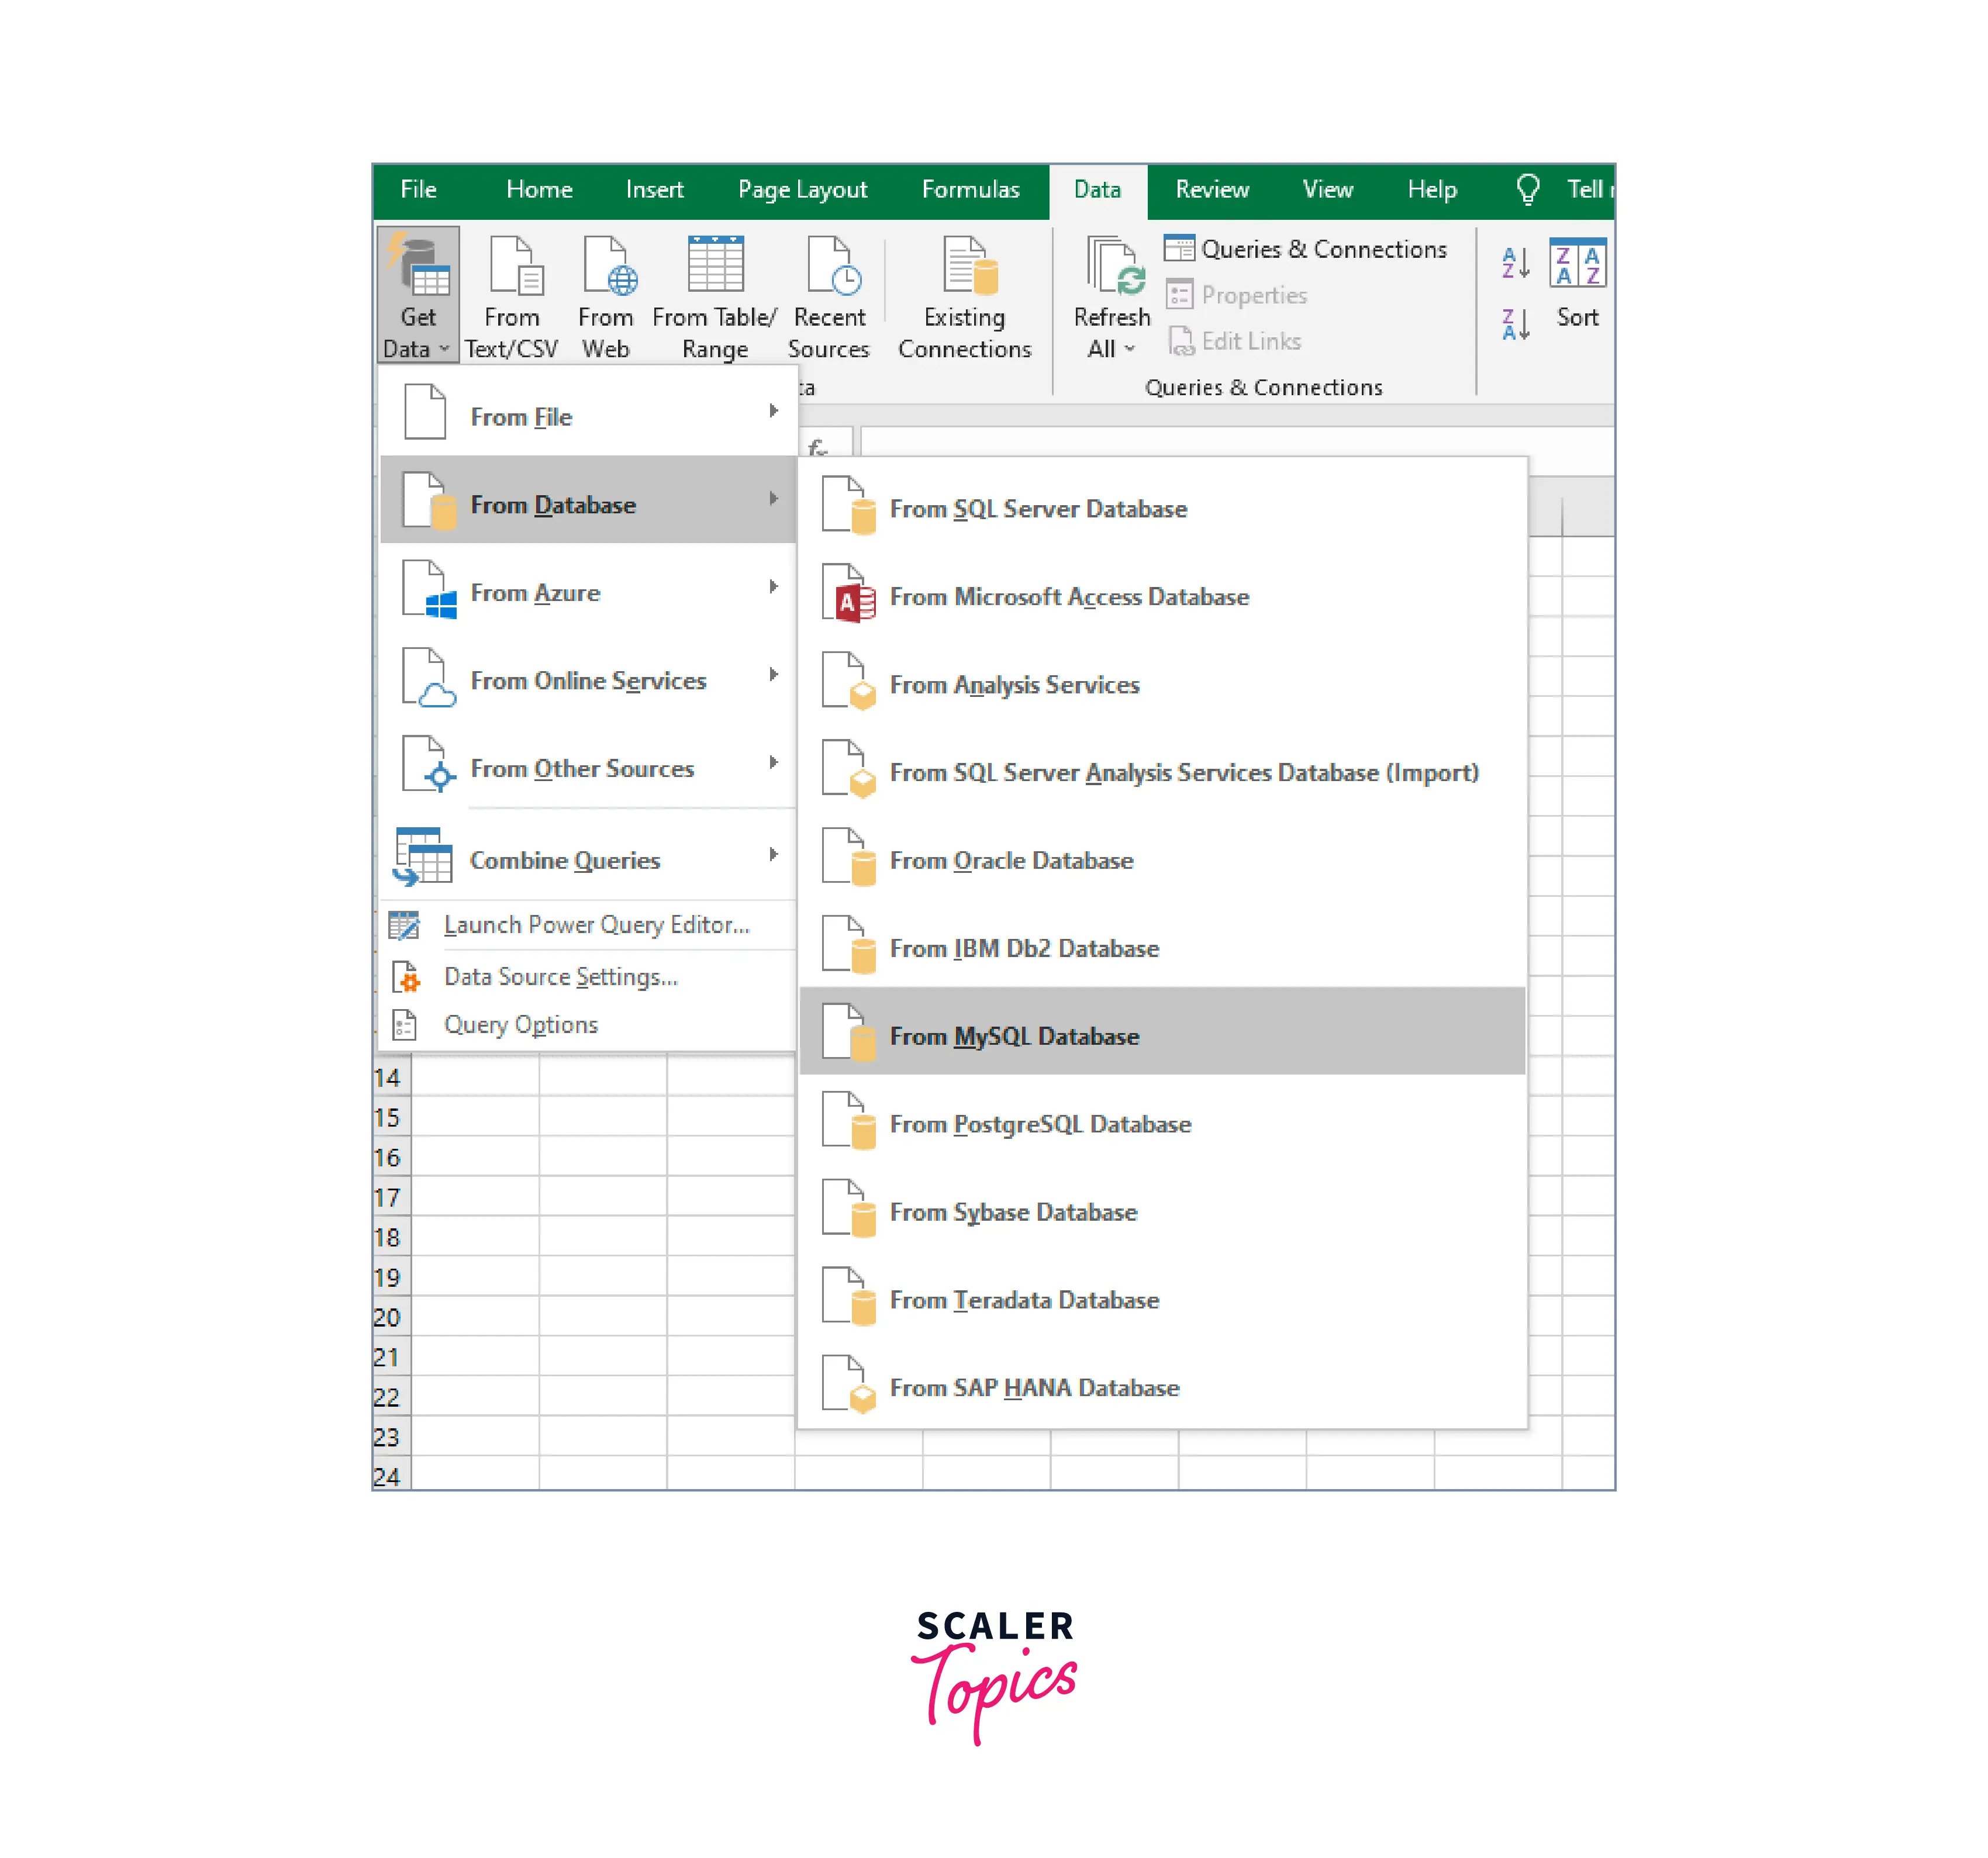
- For that, create a .xlsx file and under Data tab and choose Get Data option
- under the Get Data list, choose the From MySQL Database command:
- In the dialog opened Enter the server and the database from which the data has to be imported:
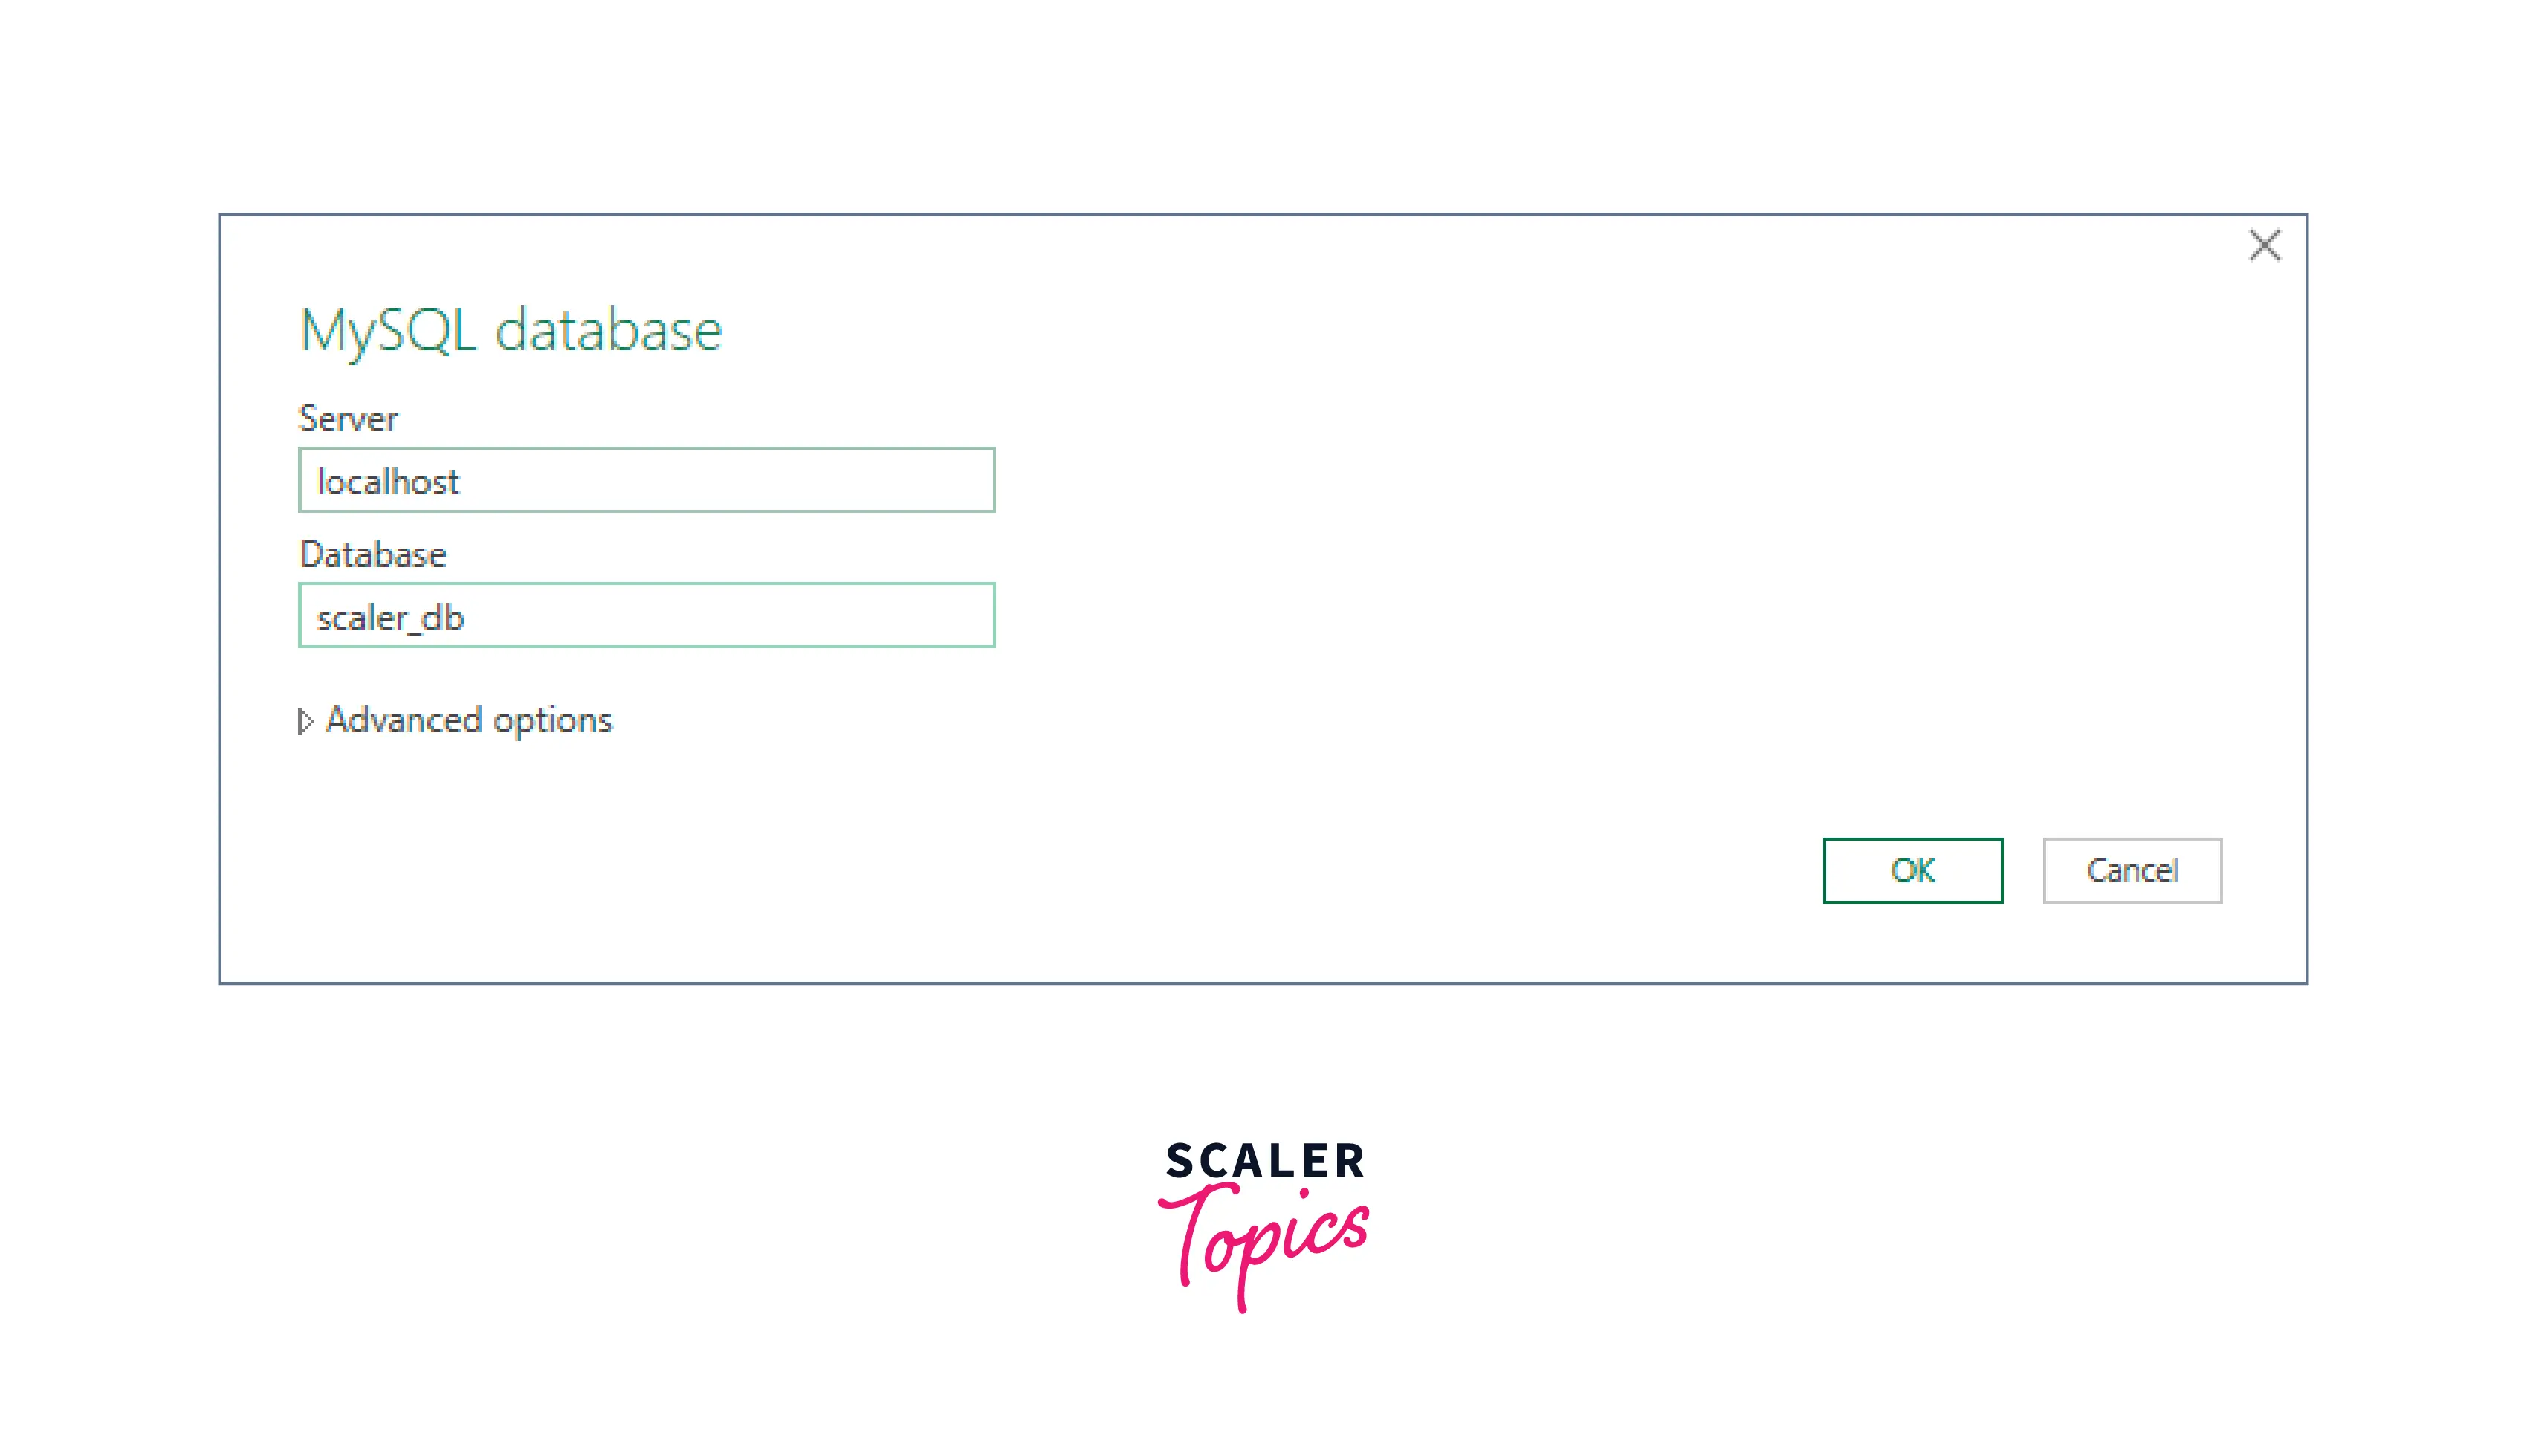
- Under the Database tab of the new dialog window, enter credentials for the user that is having permission to access the targeted database and click the Connect button:
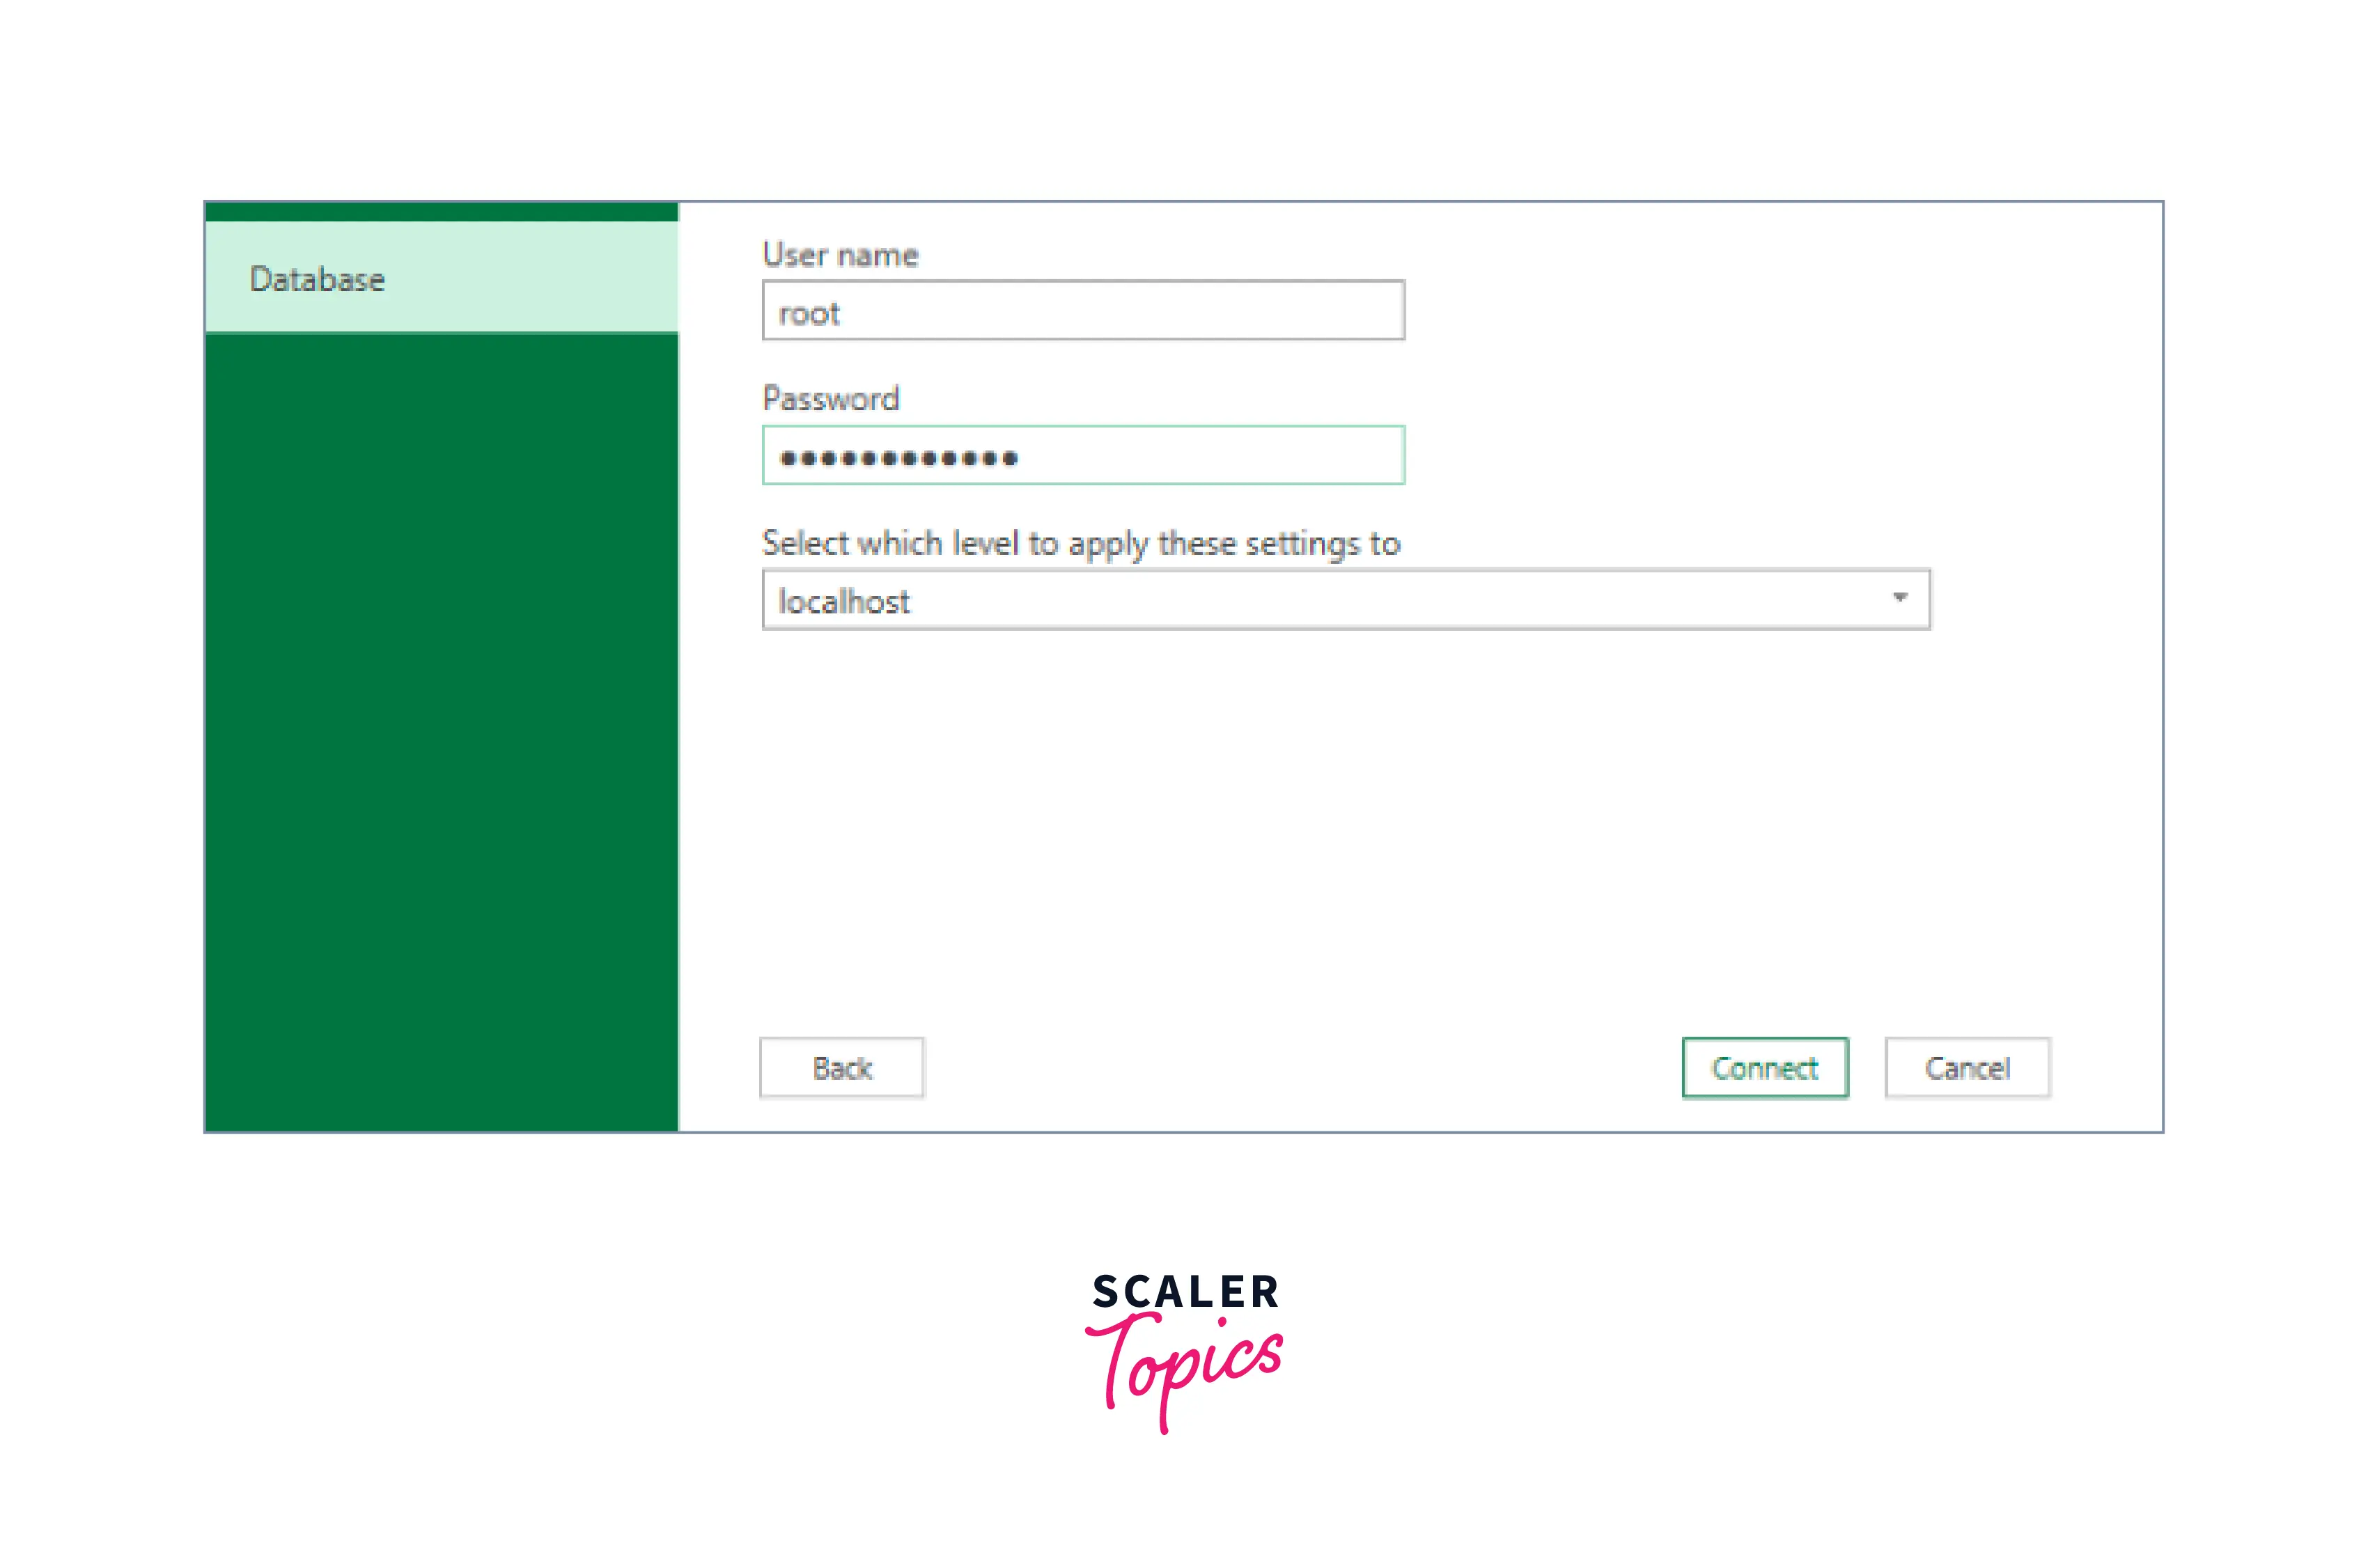
-
Choose the Table from which you want to import the data and click Transform.
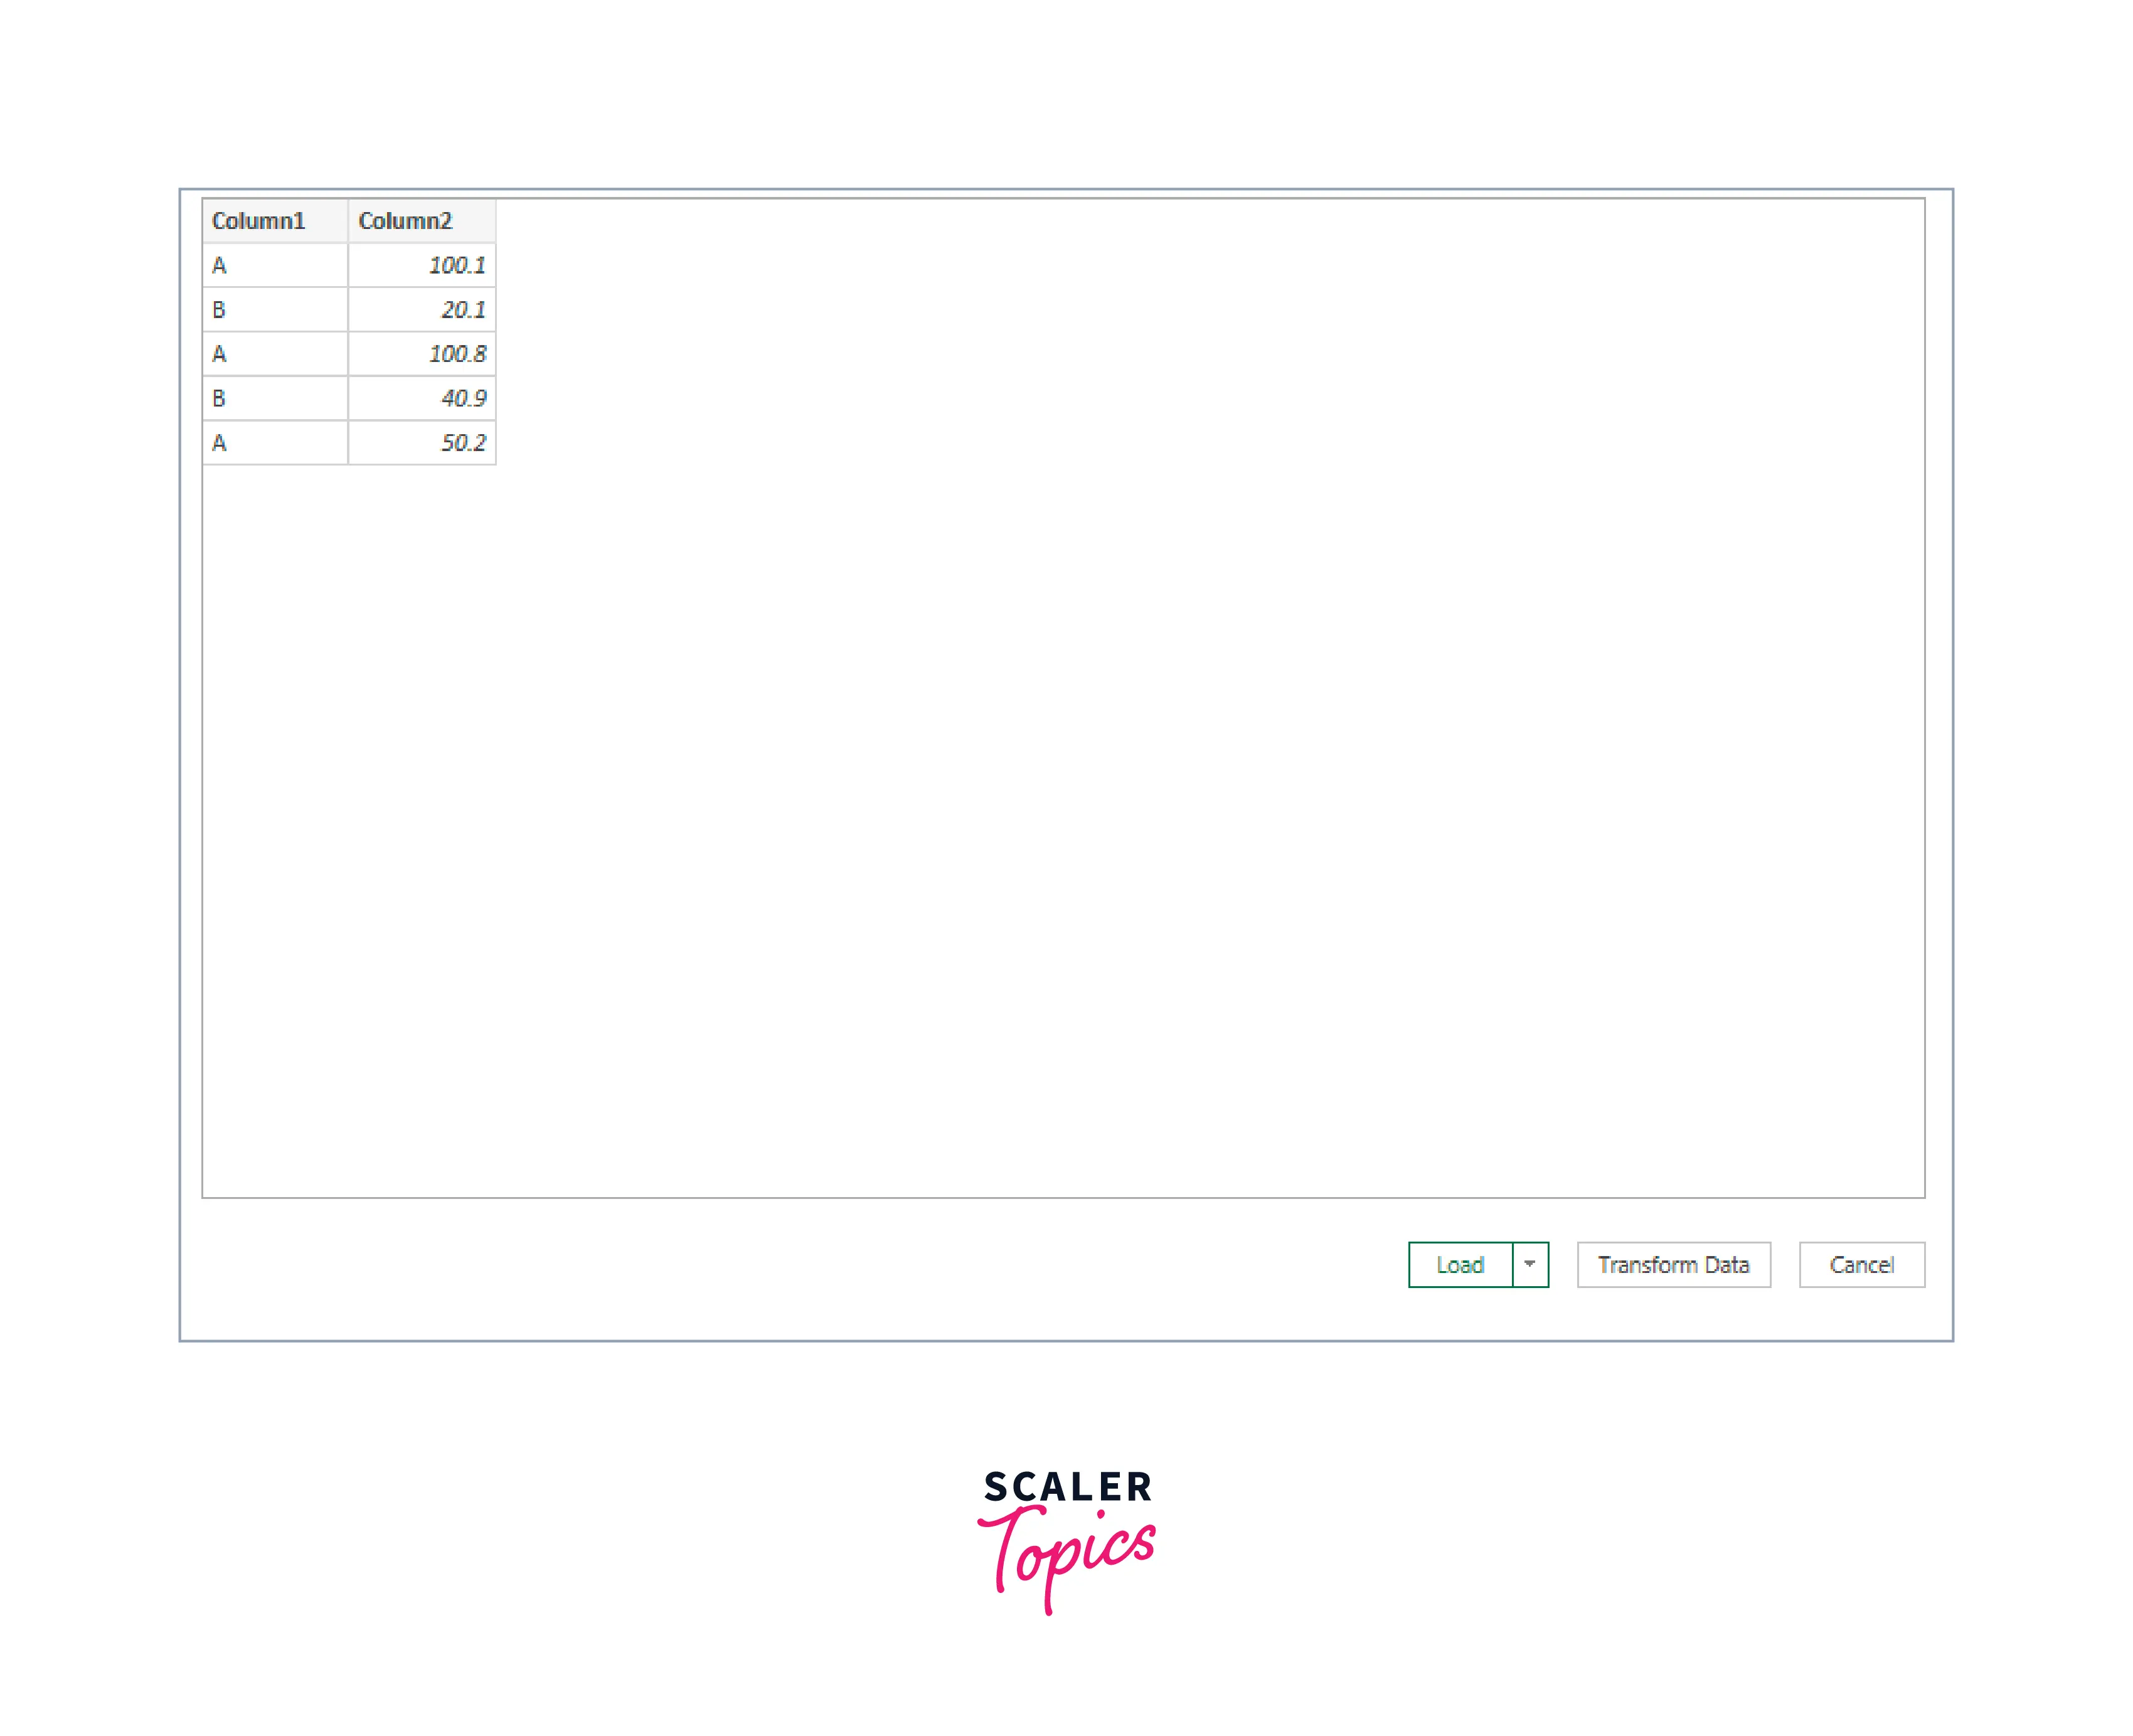
-
Now, the Power Query Editor window will open up, add the column names to the data there and click Close & Load.
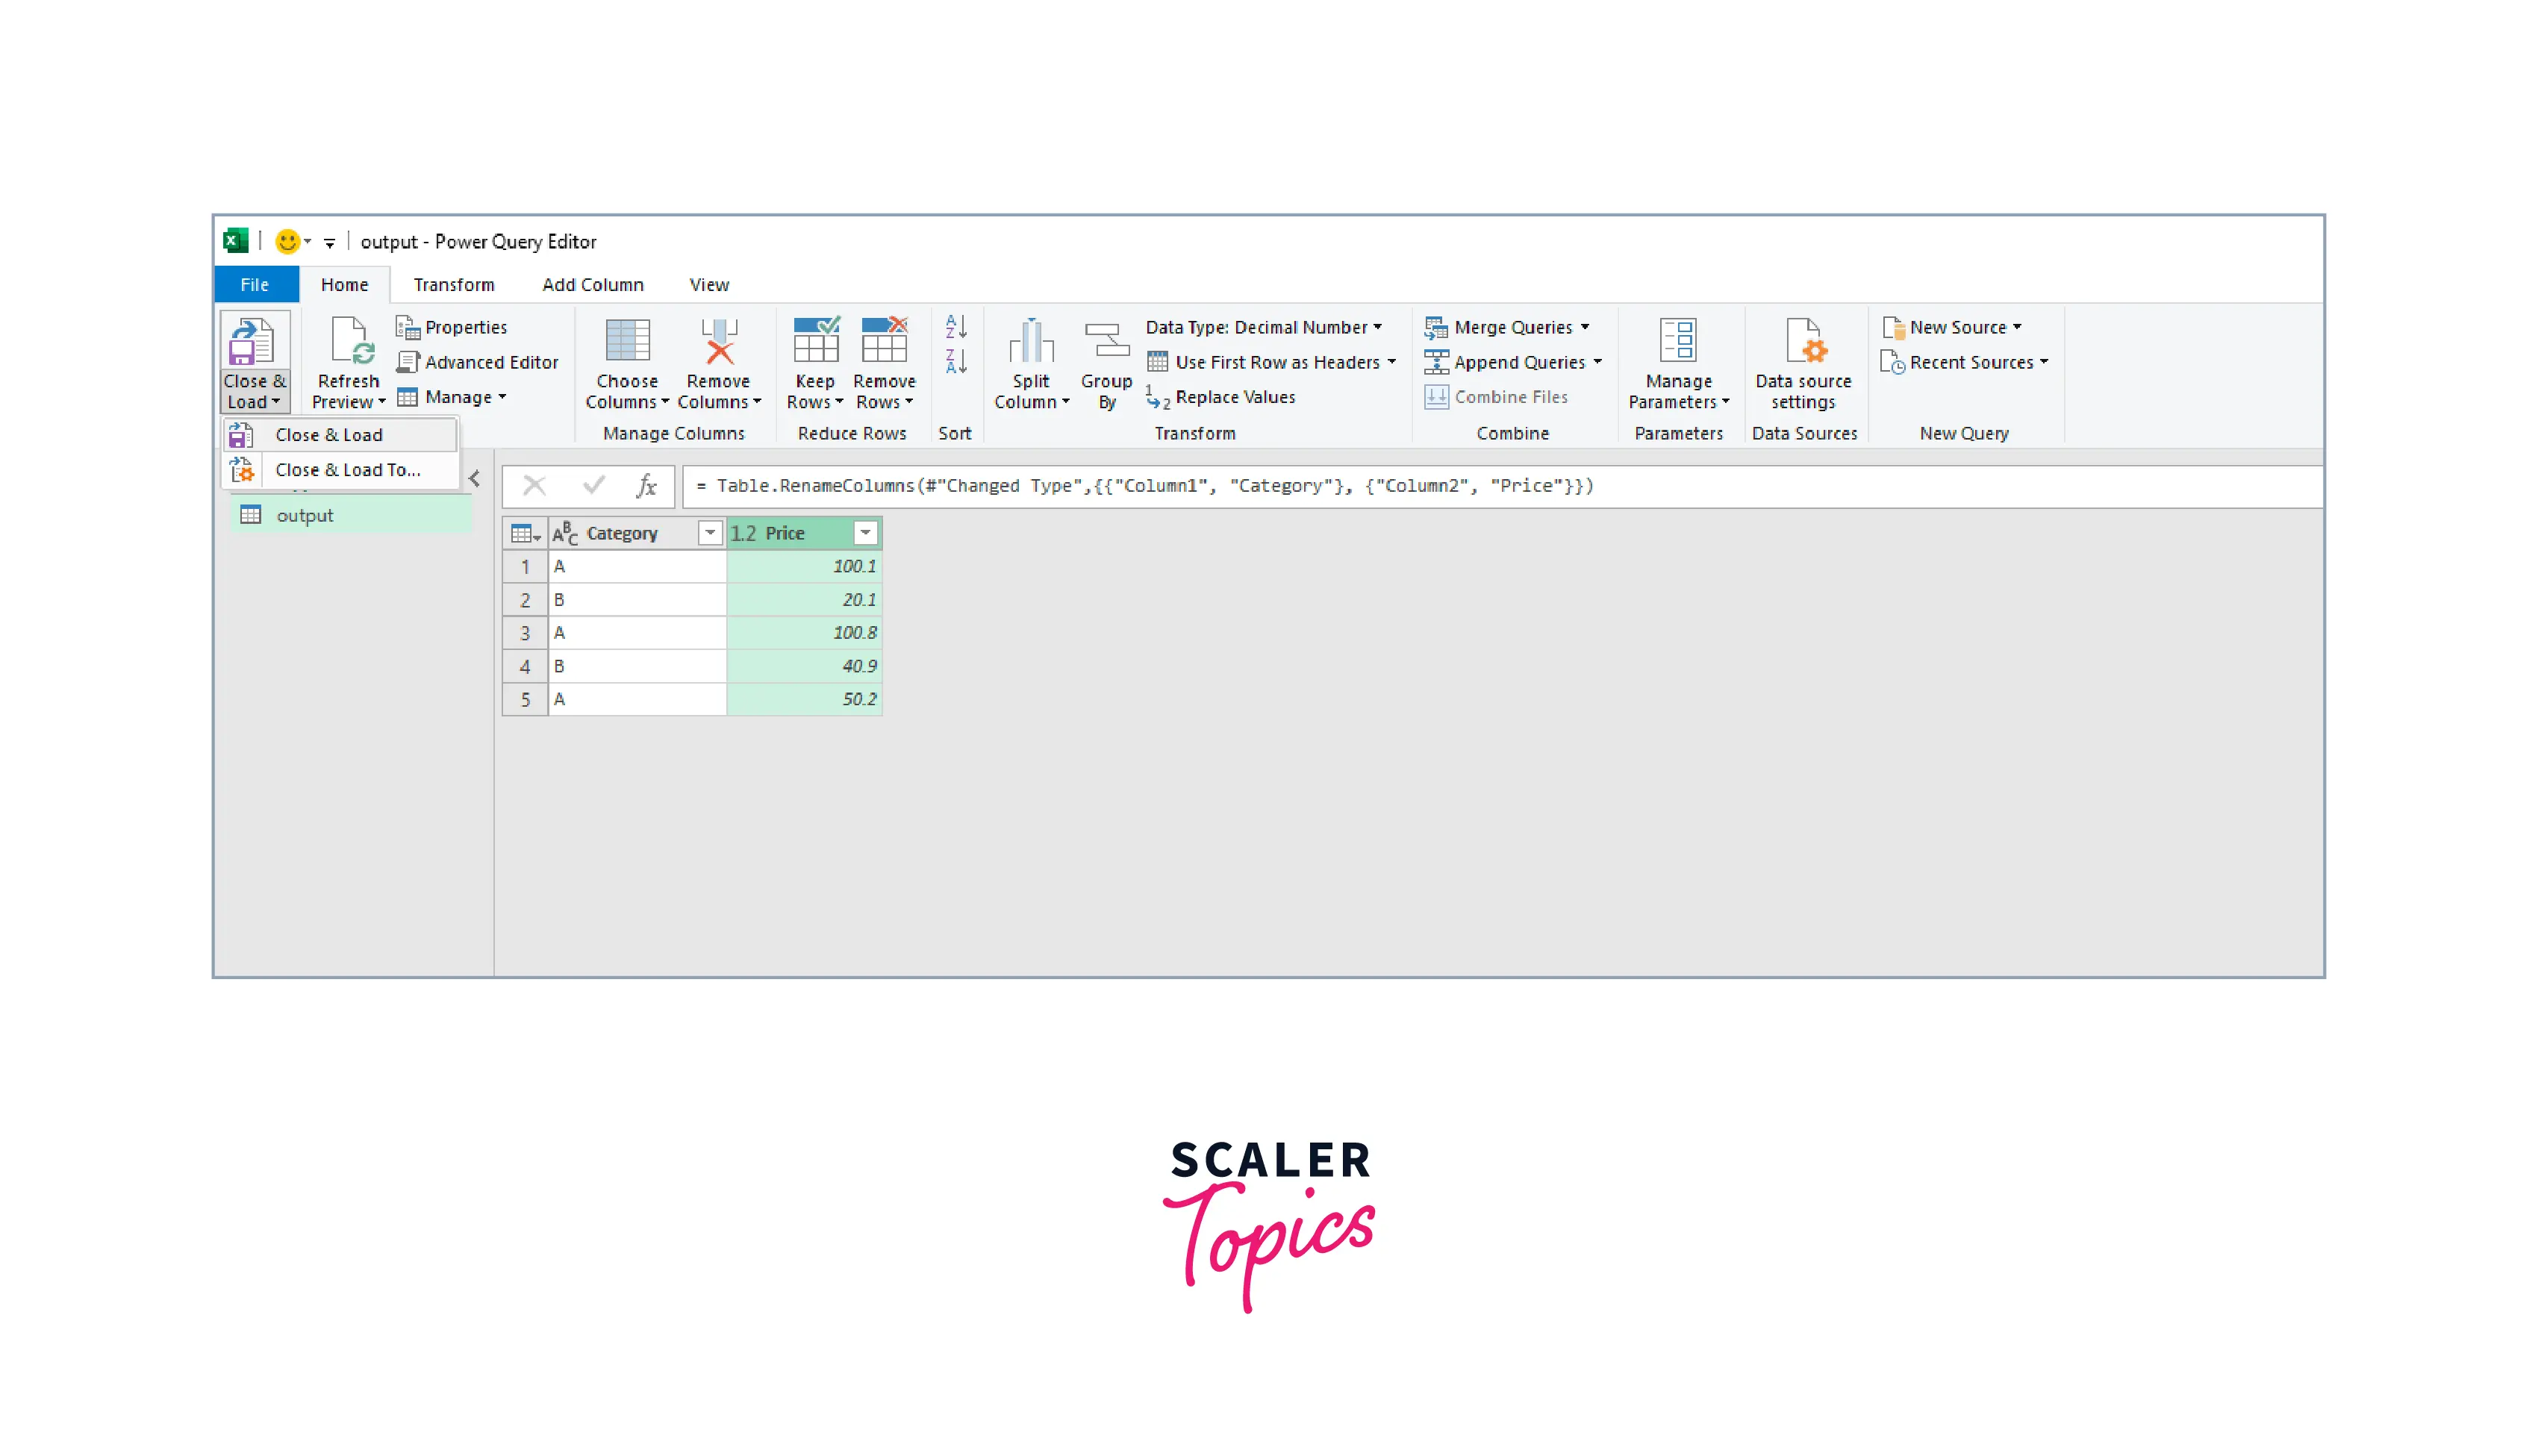
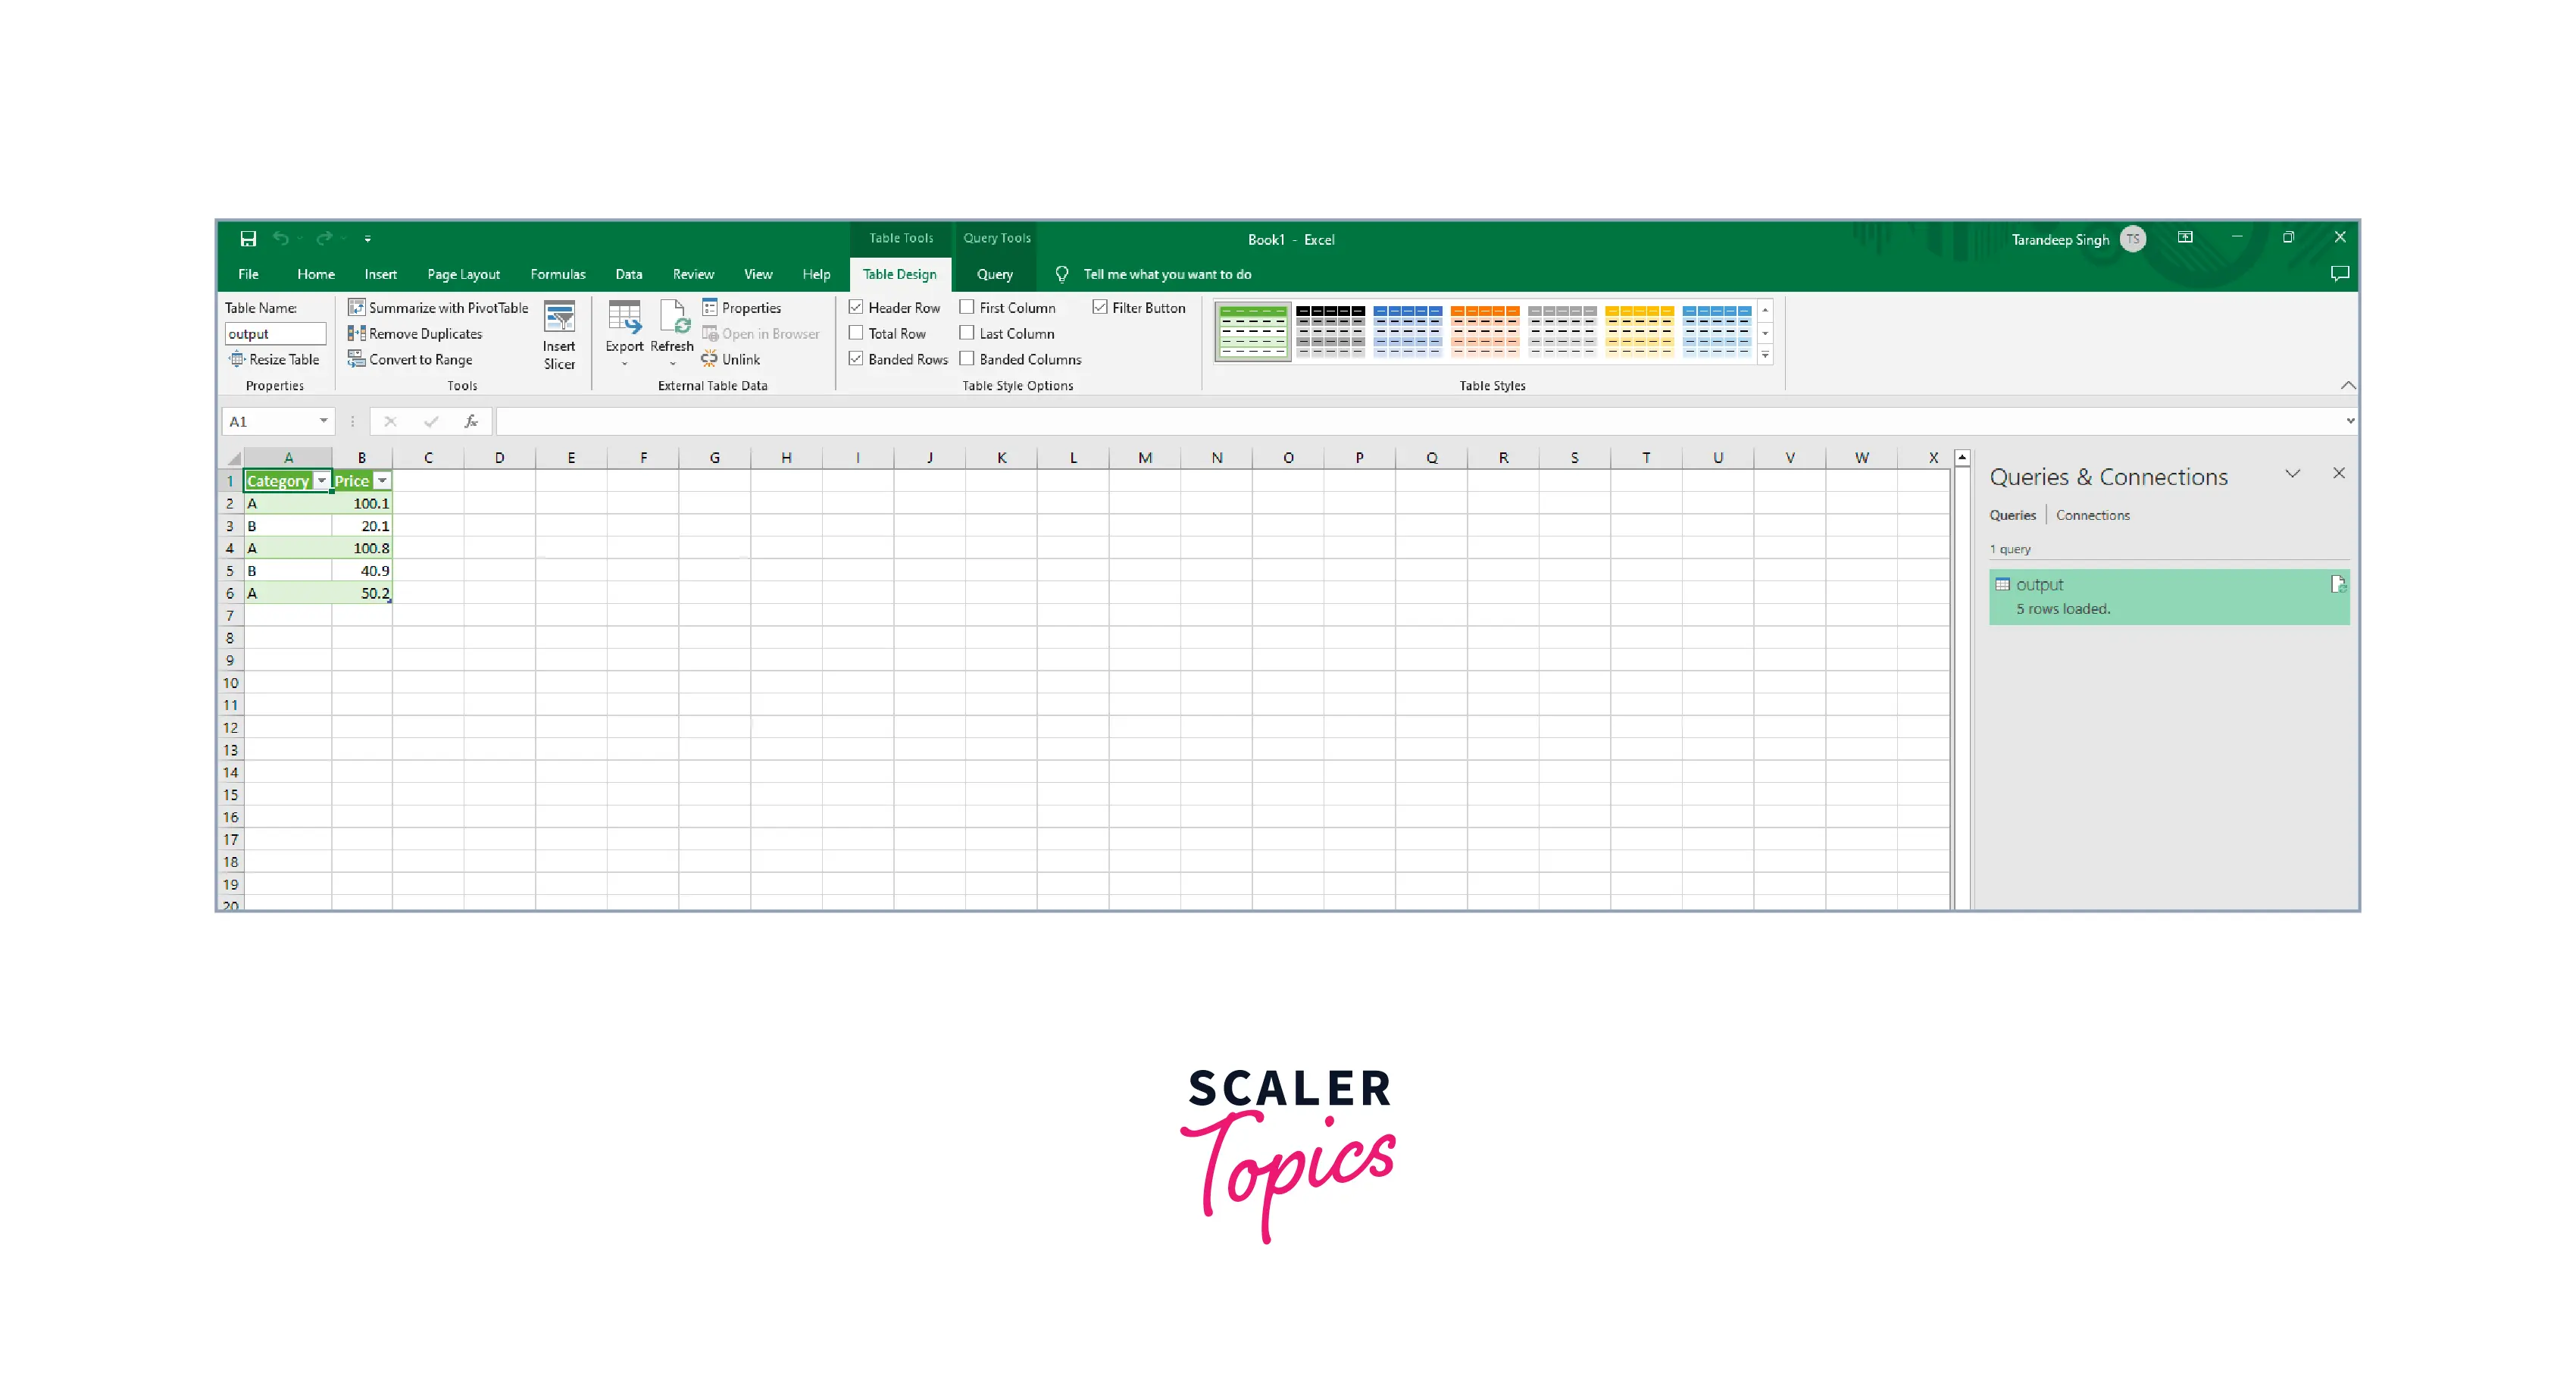
- Hence, data is loaded to the sheet:
Use MySQL for Excel Add-in
MySQL for Excel is an add-in for Excel that allows you to interact with MySQL data. It makes it simple and easy to import and export data between Excel and MySQL. The add-in can be downloaded and installed from the MySQL website.
To begin installing the MySQL for Excel add-in, download the MySQL for Excel MSI file. Please ensure that the following conditions are met before beginning installation:
- .NET Framework 4.5.2 (Client or Full Profile)
- Microsoft Office Excel 2007 or later (for Microsoft Windows)
- Visual Studio 2010 Tools for Office Runtime. This is a dependency for installing the plugin
- An active MySQL server connection
Once installed, you can use the add-in to import data from MySQL to Excel or export data from Excel to MySQL by following the below steps:
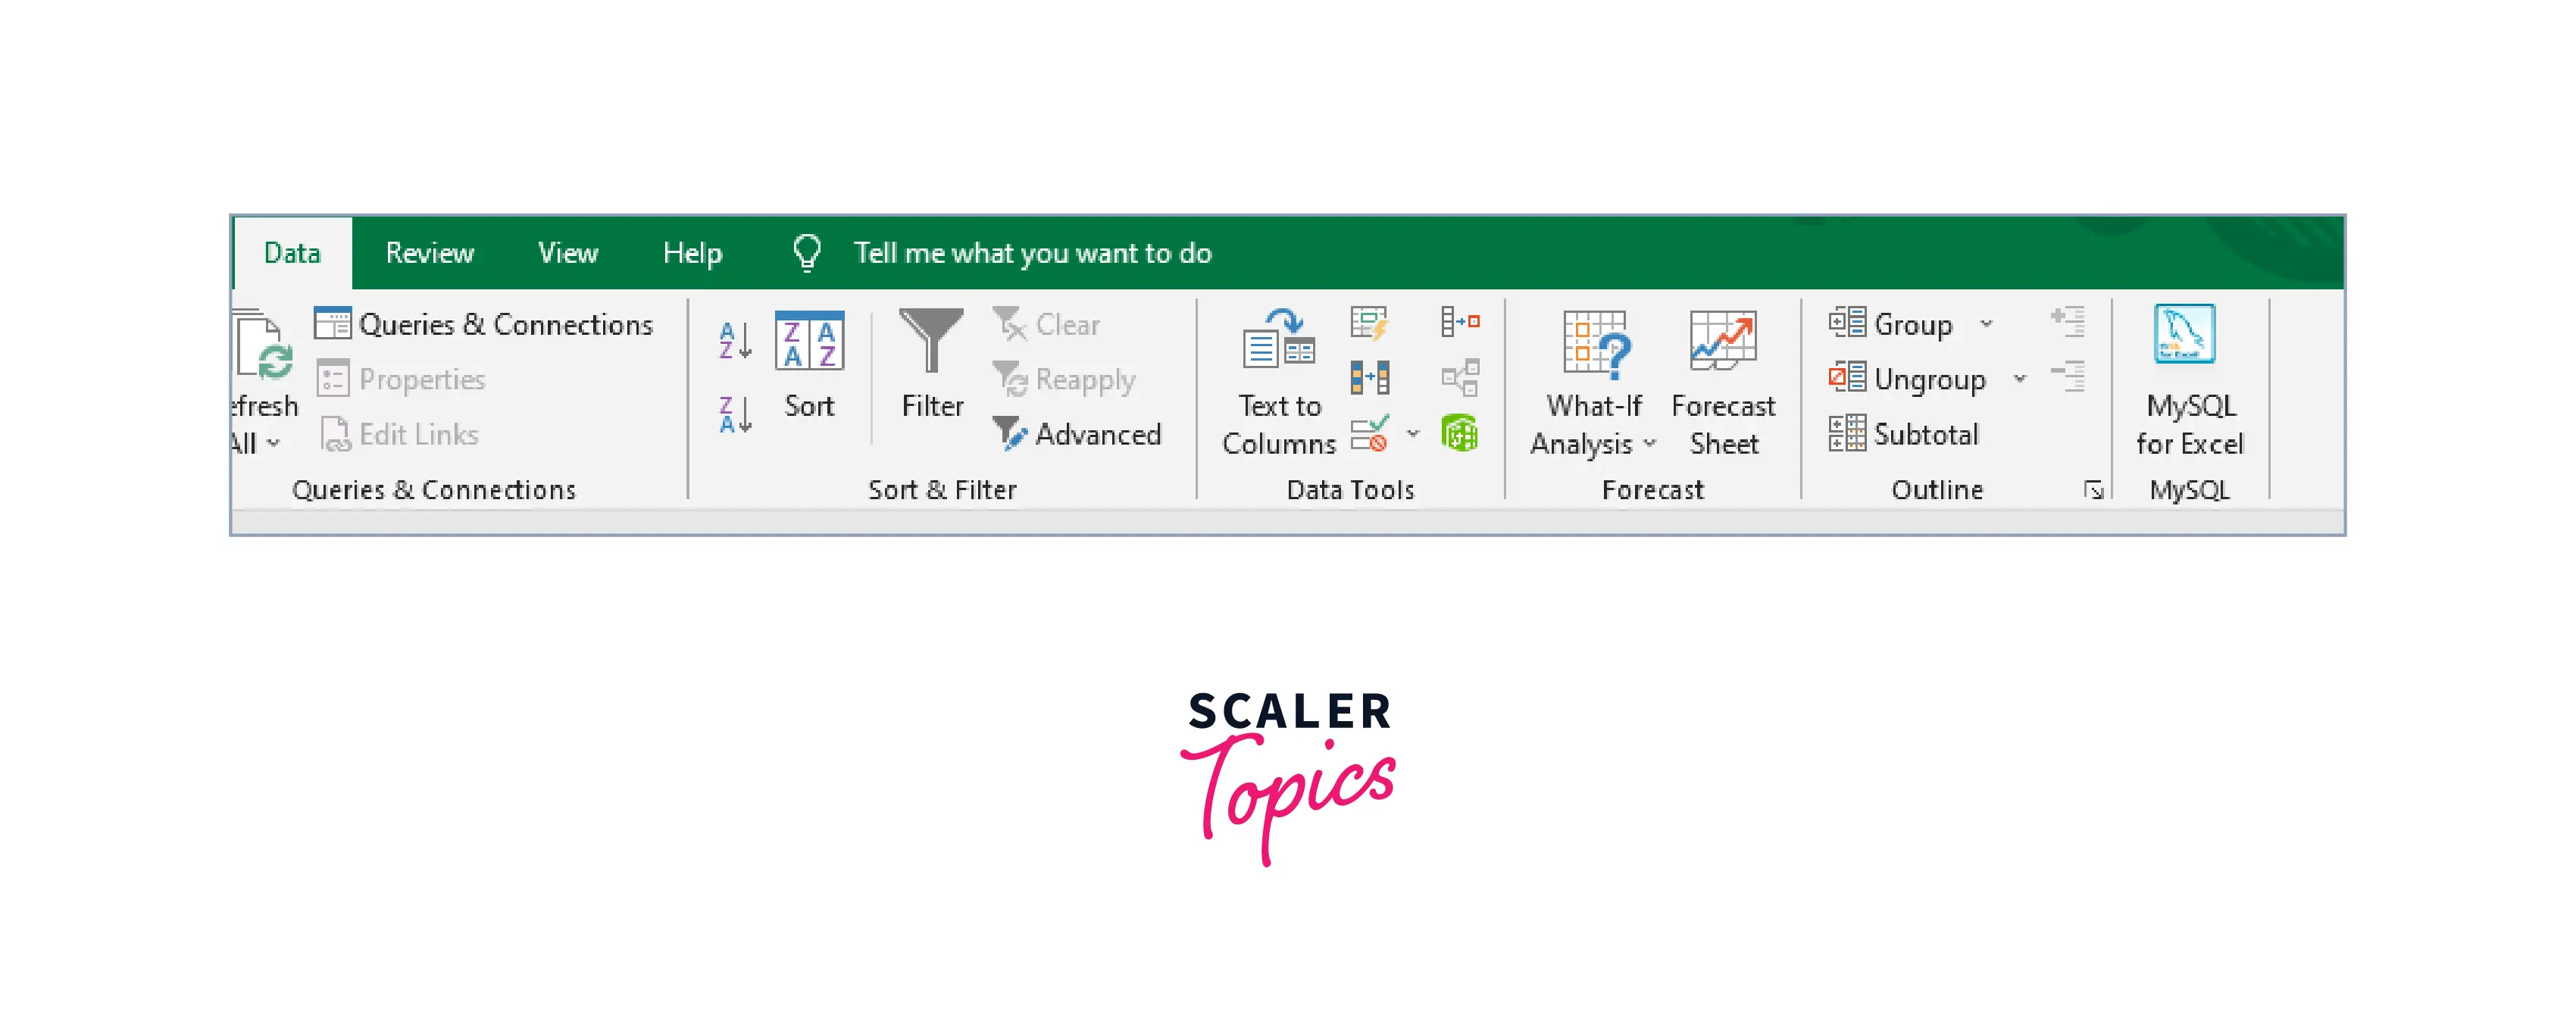
- Now, when we launch the Microsoft Office Excel, under the Data tab, the MySQL for Excel plugin can be seen:
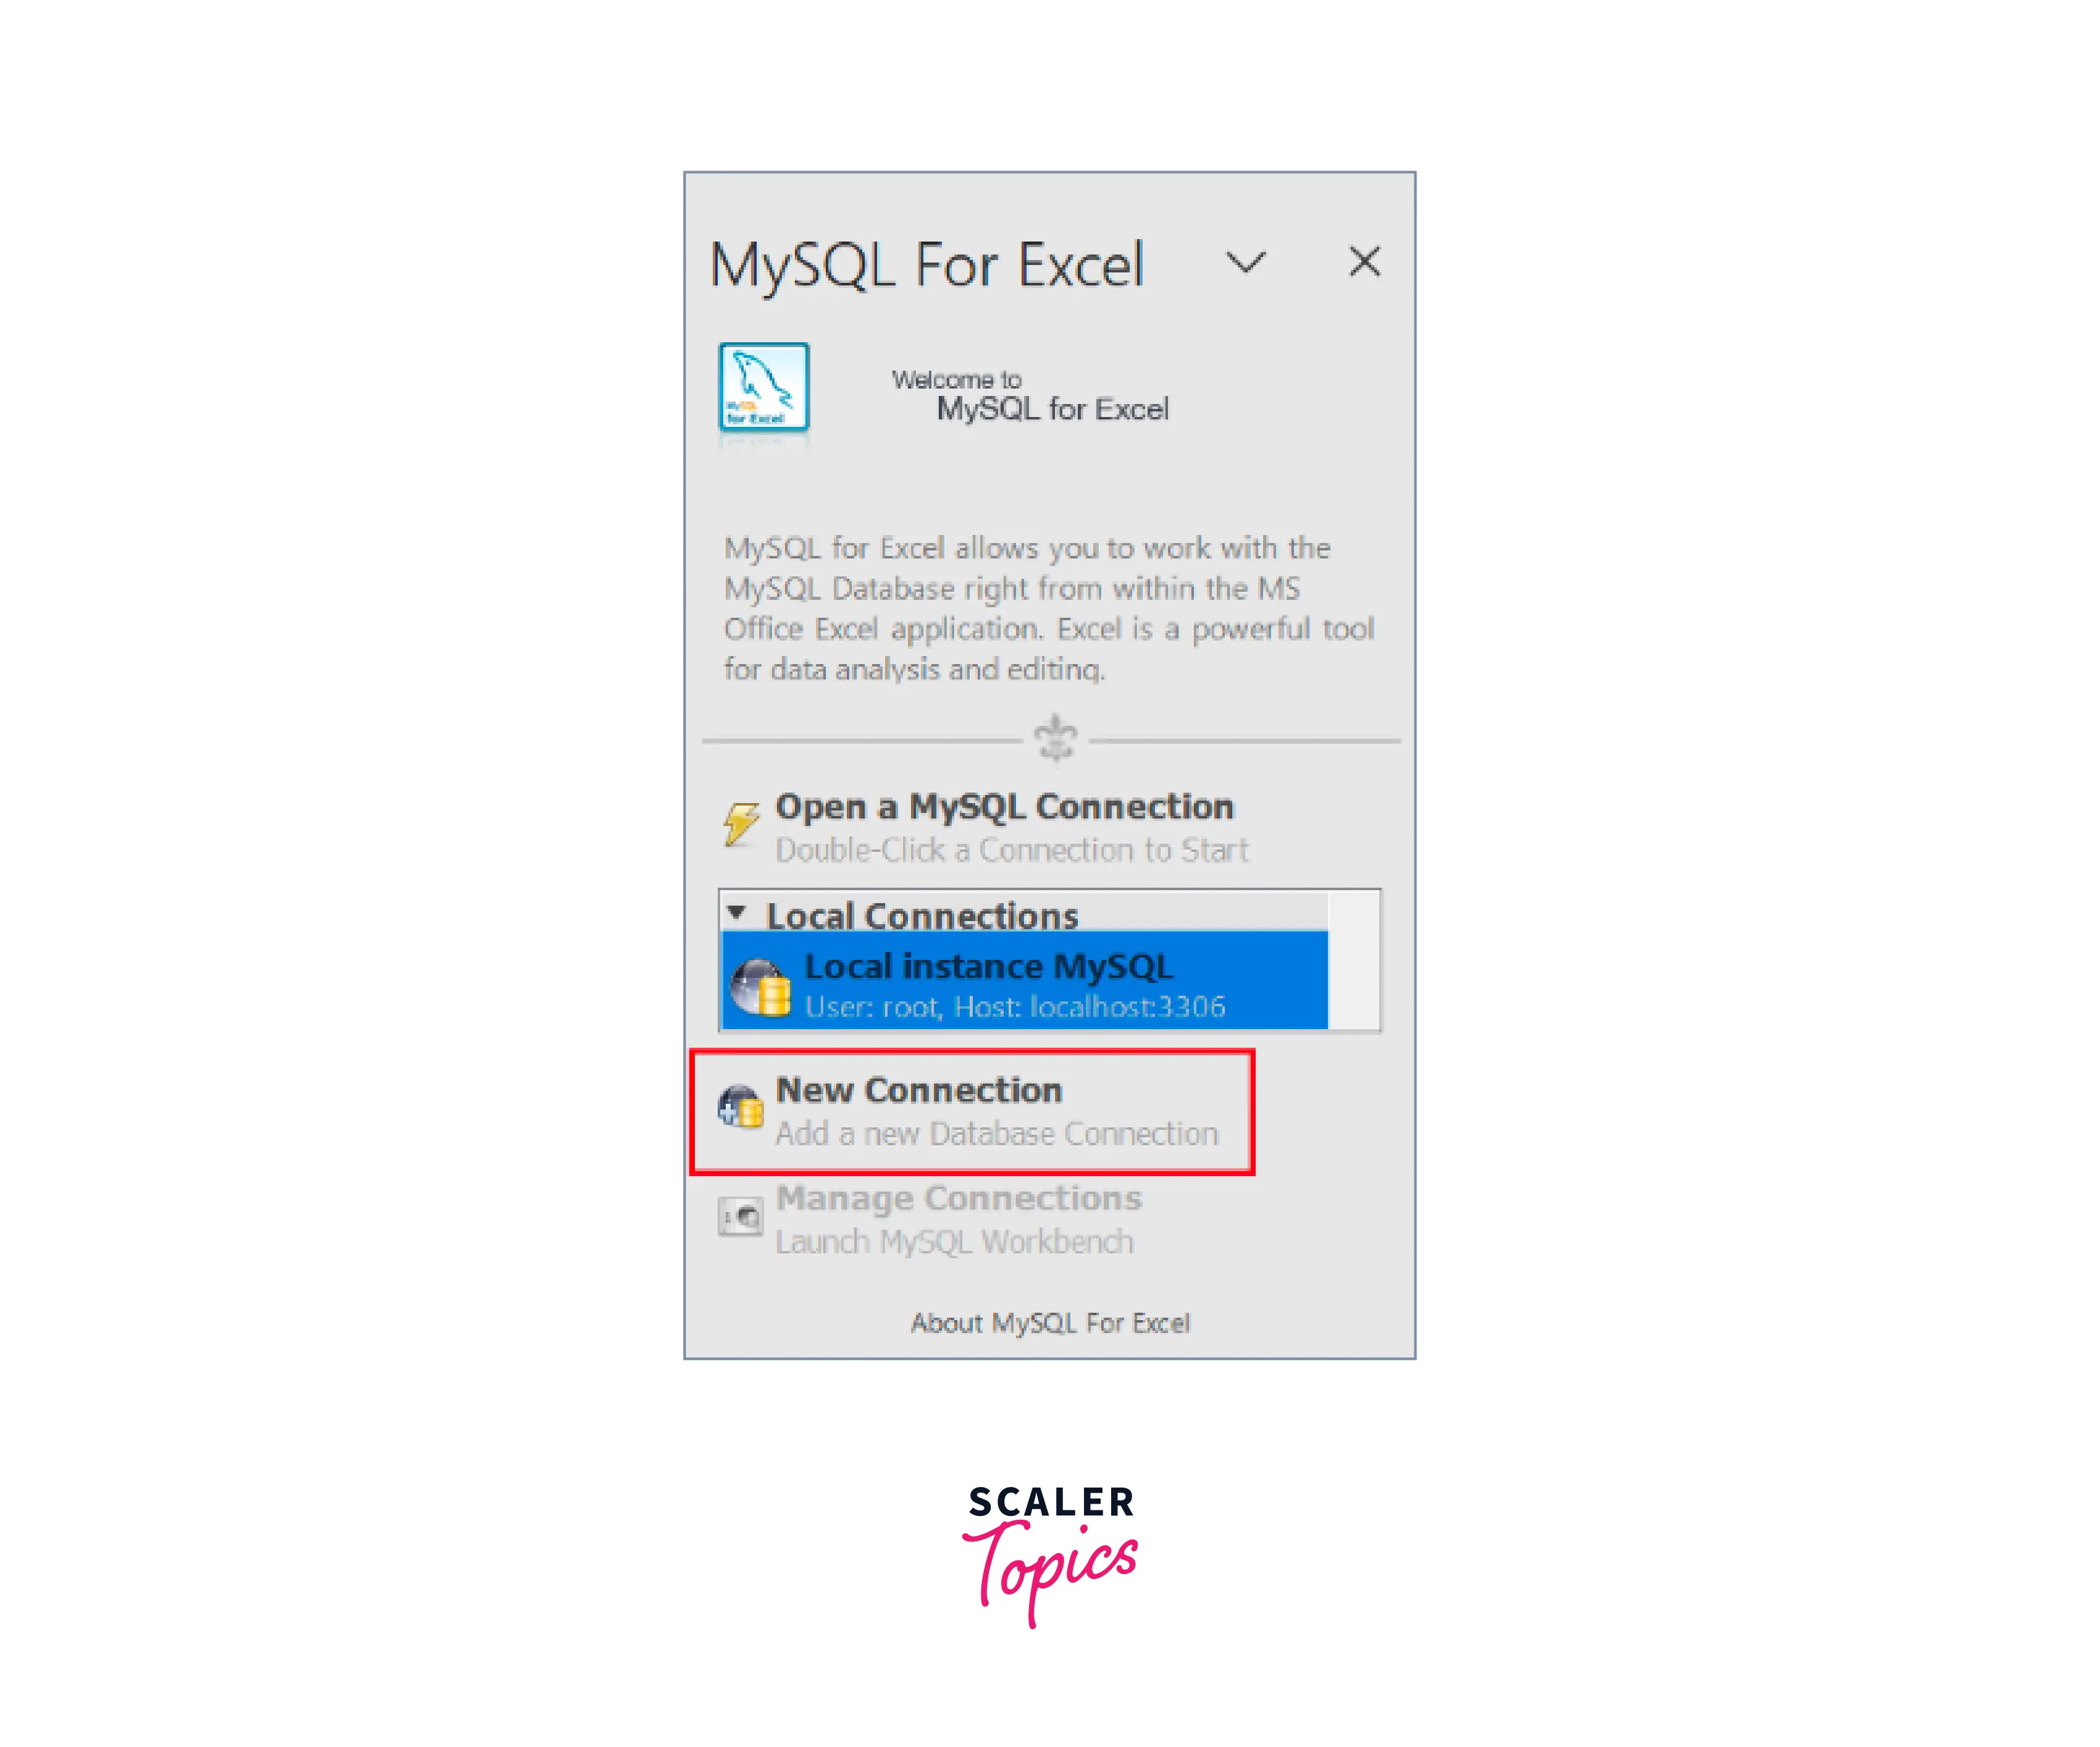
- Open the plugin and connect to the Database by clicking on the New Connection button.
- Provide the following fields, for making a new connection:
- Connection Name
- Connection Method
- Hostname, localhost in our case
- Port, which is 3306 here
- Finally Username and Password.
- Default Schema is an optional field here.
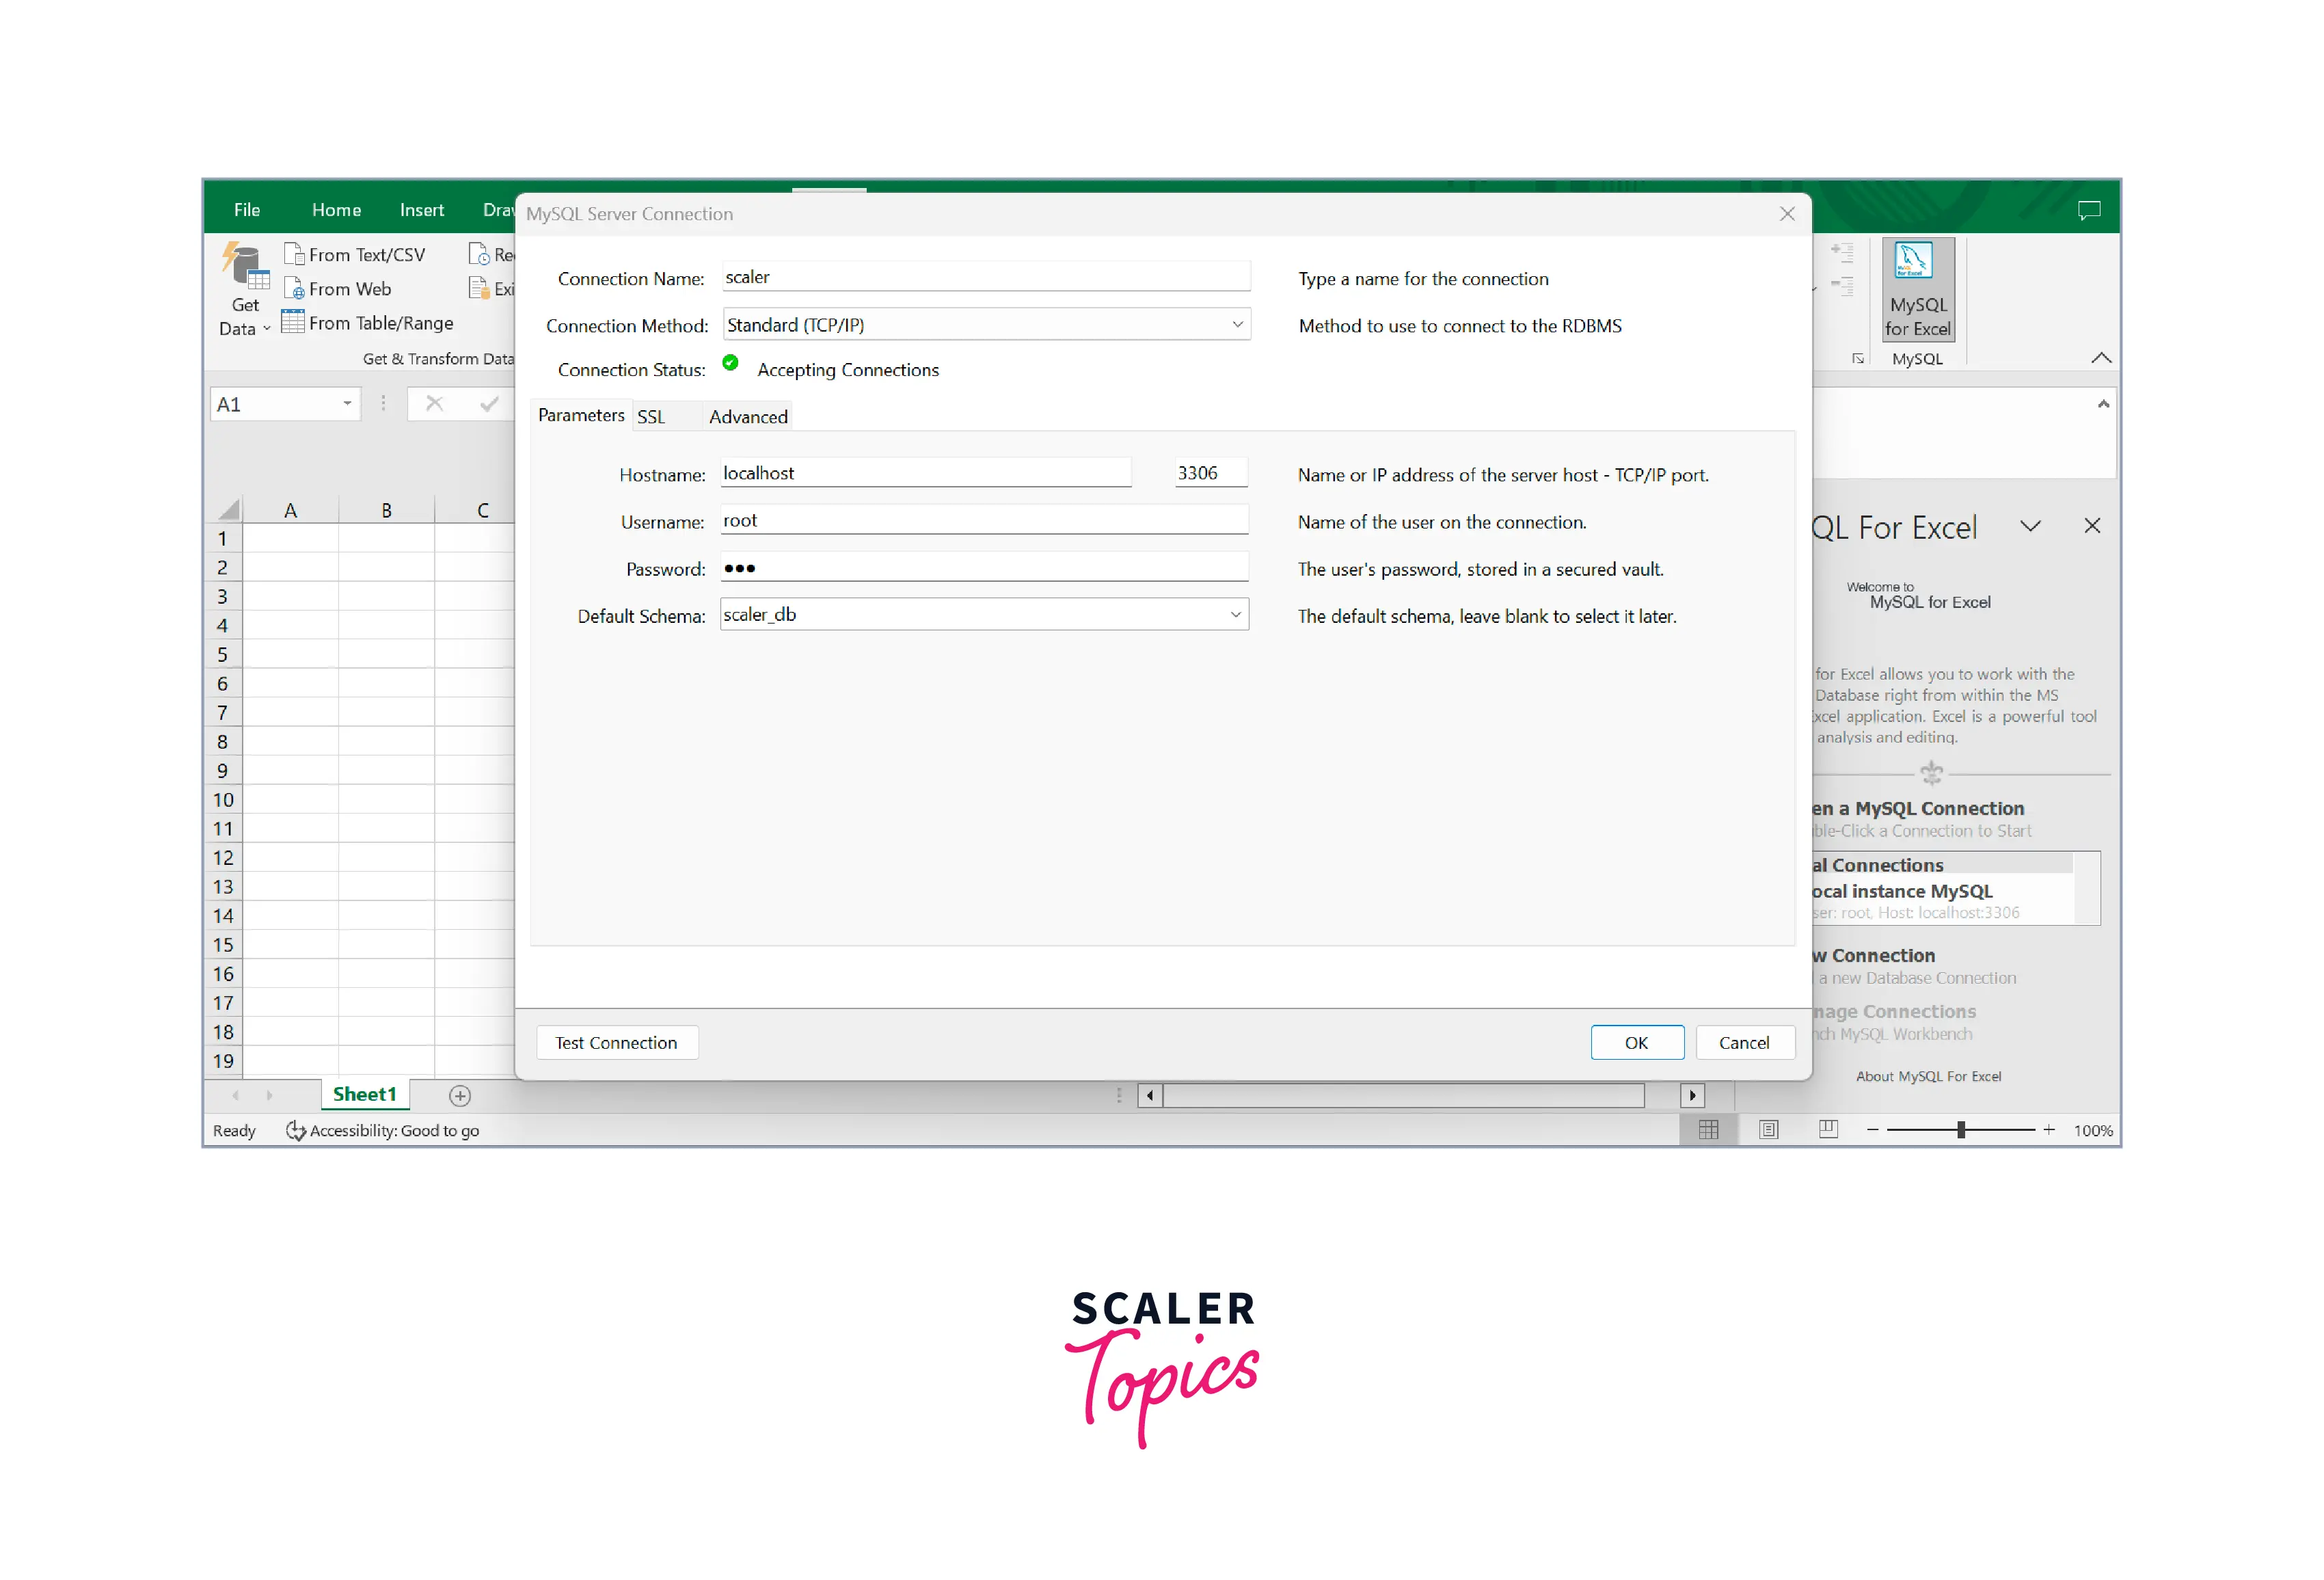
- To verify the connection click on Test Connection Option.
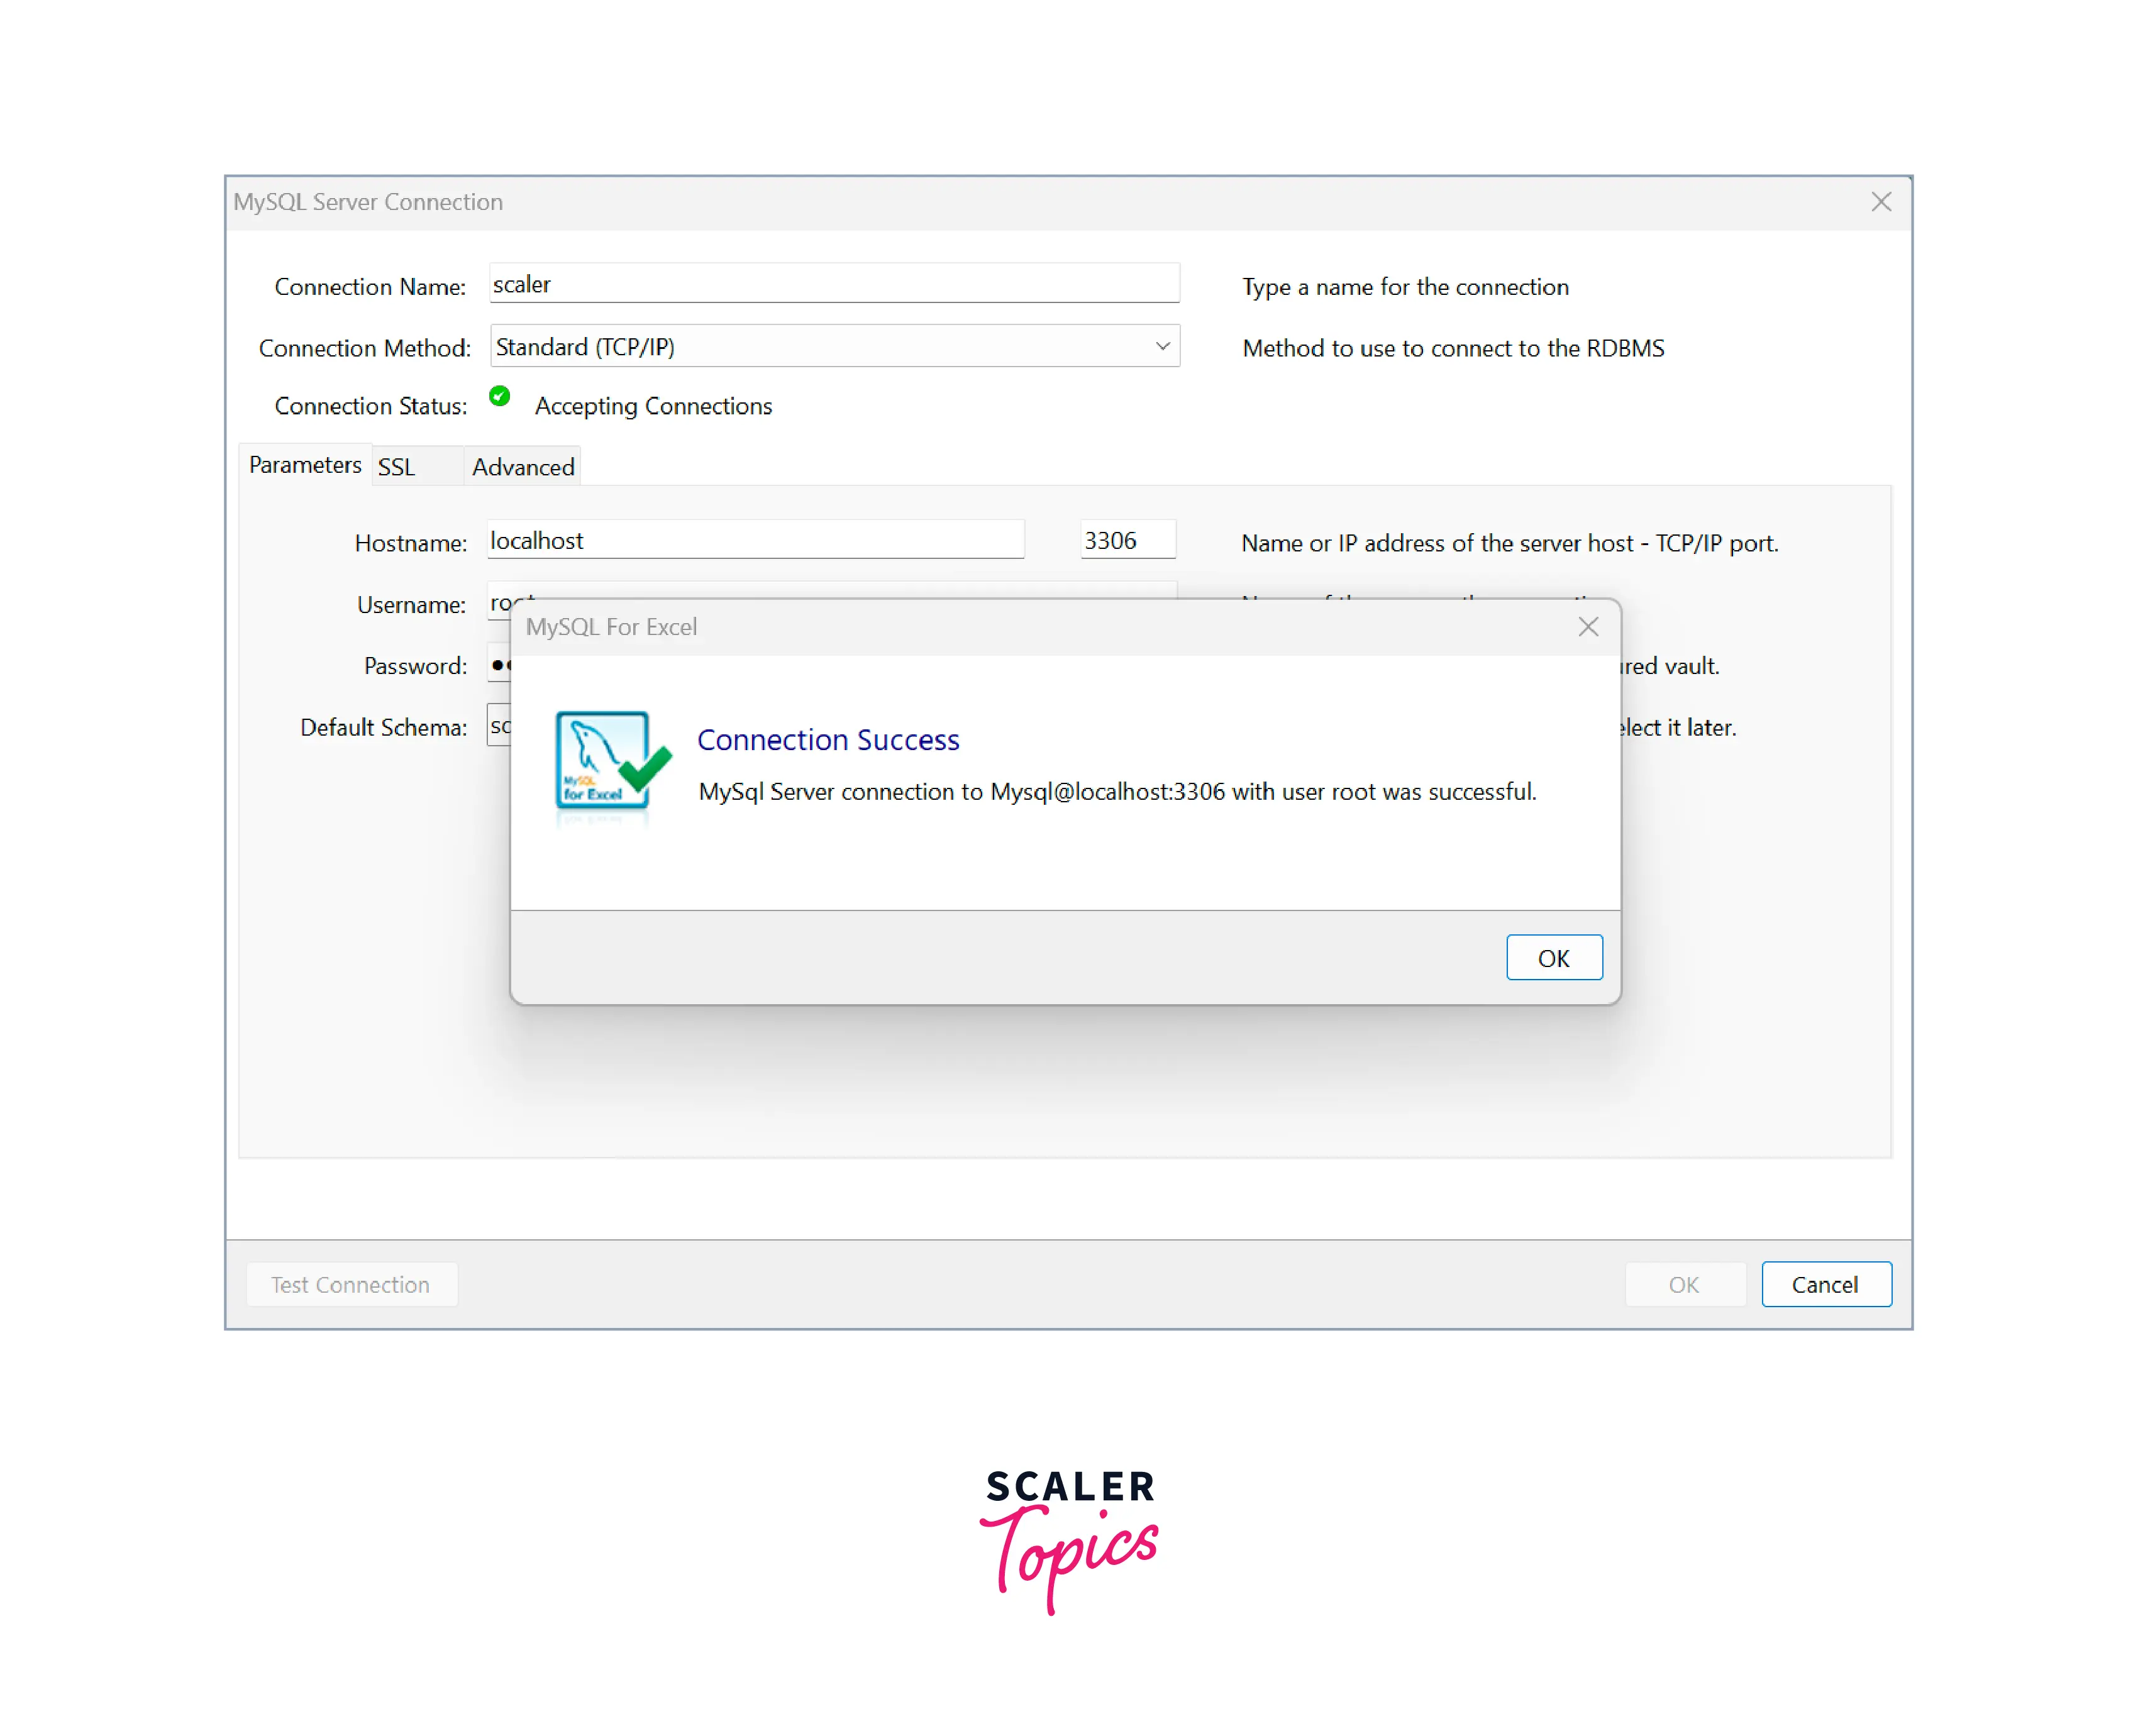
- Click on OK to verify the connection we have created. All the databases under the connection will be shown. Click on the database to use for importing.
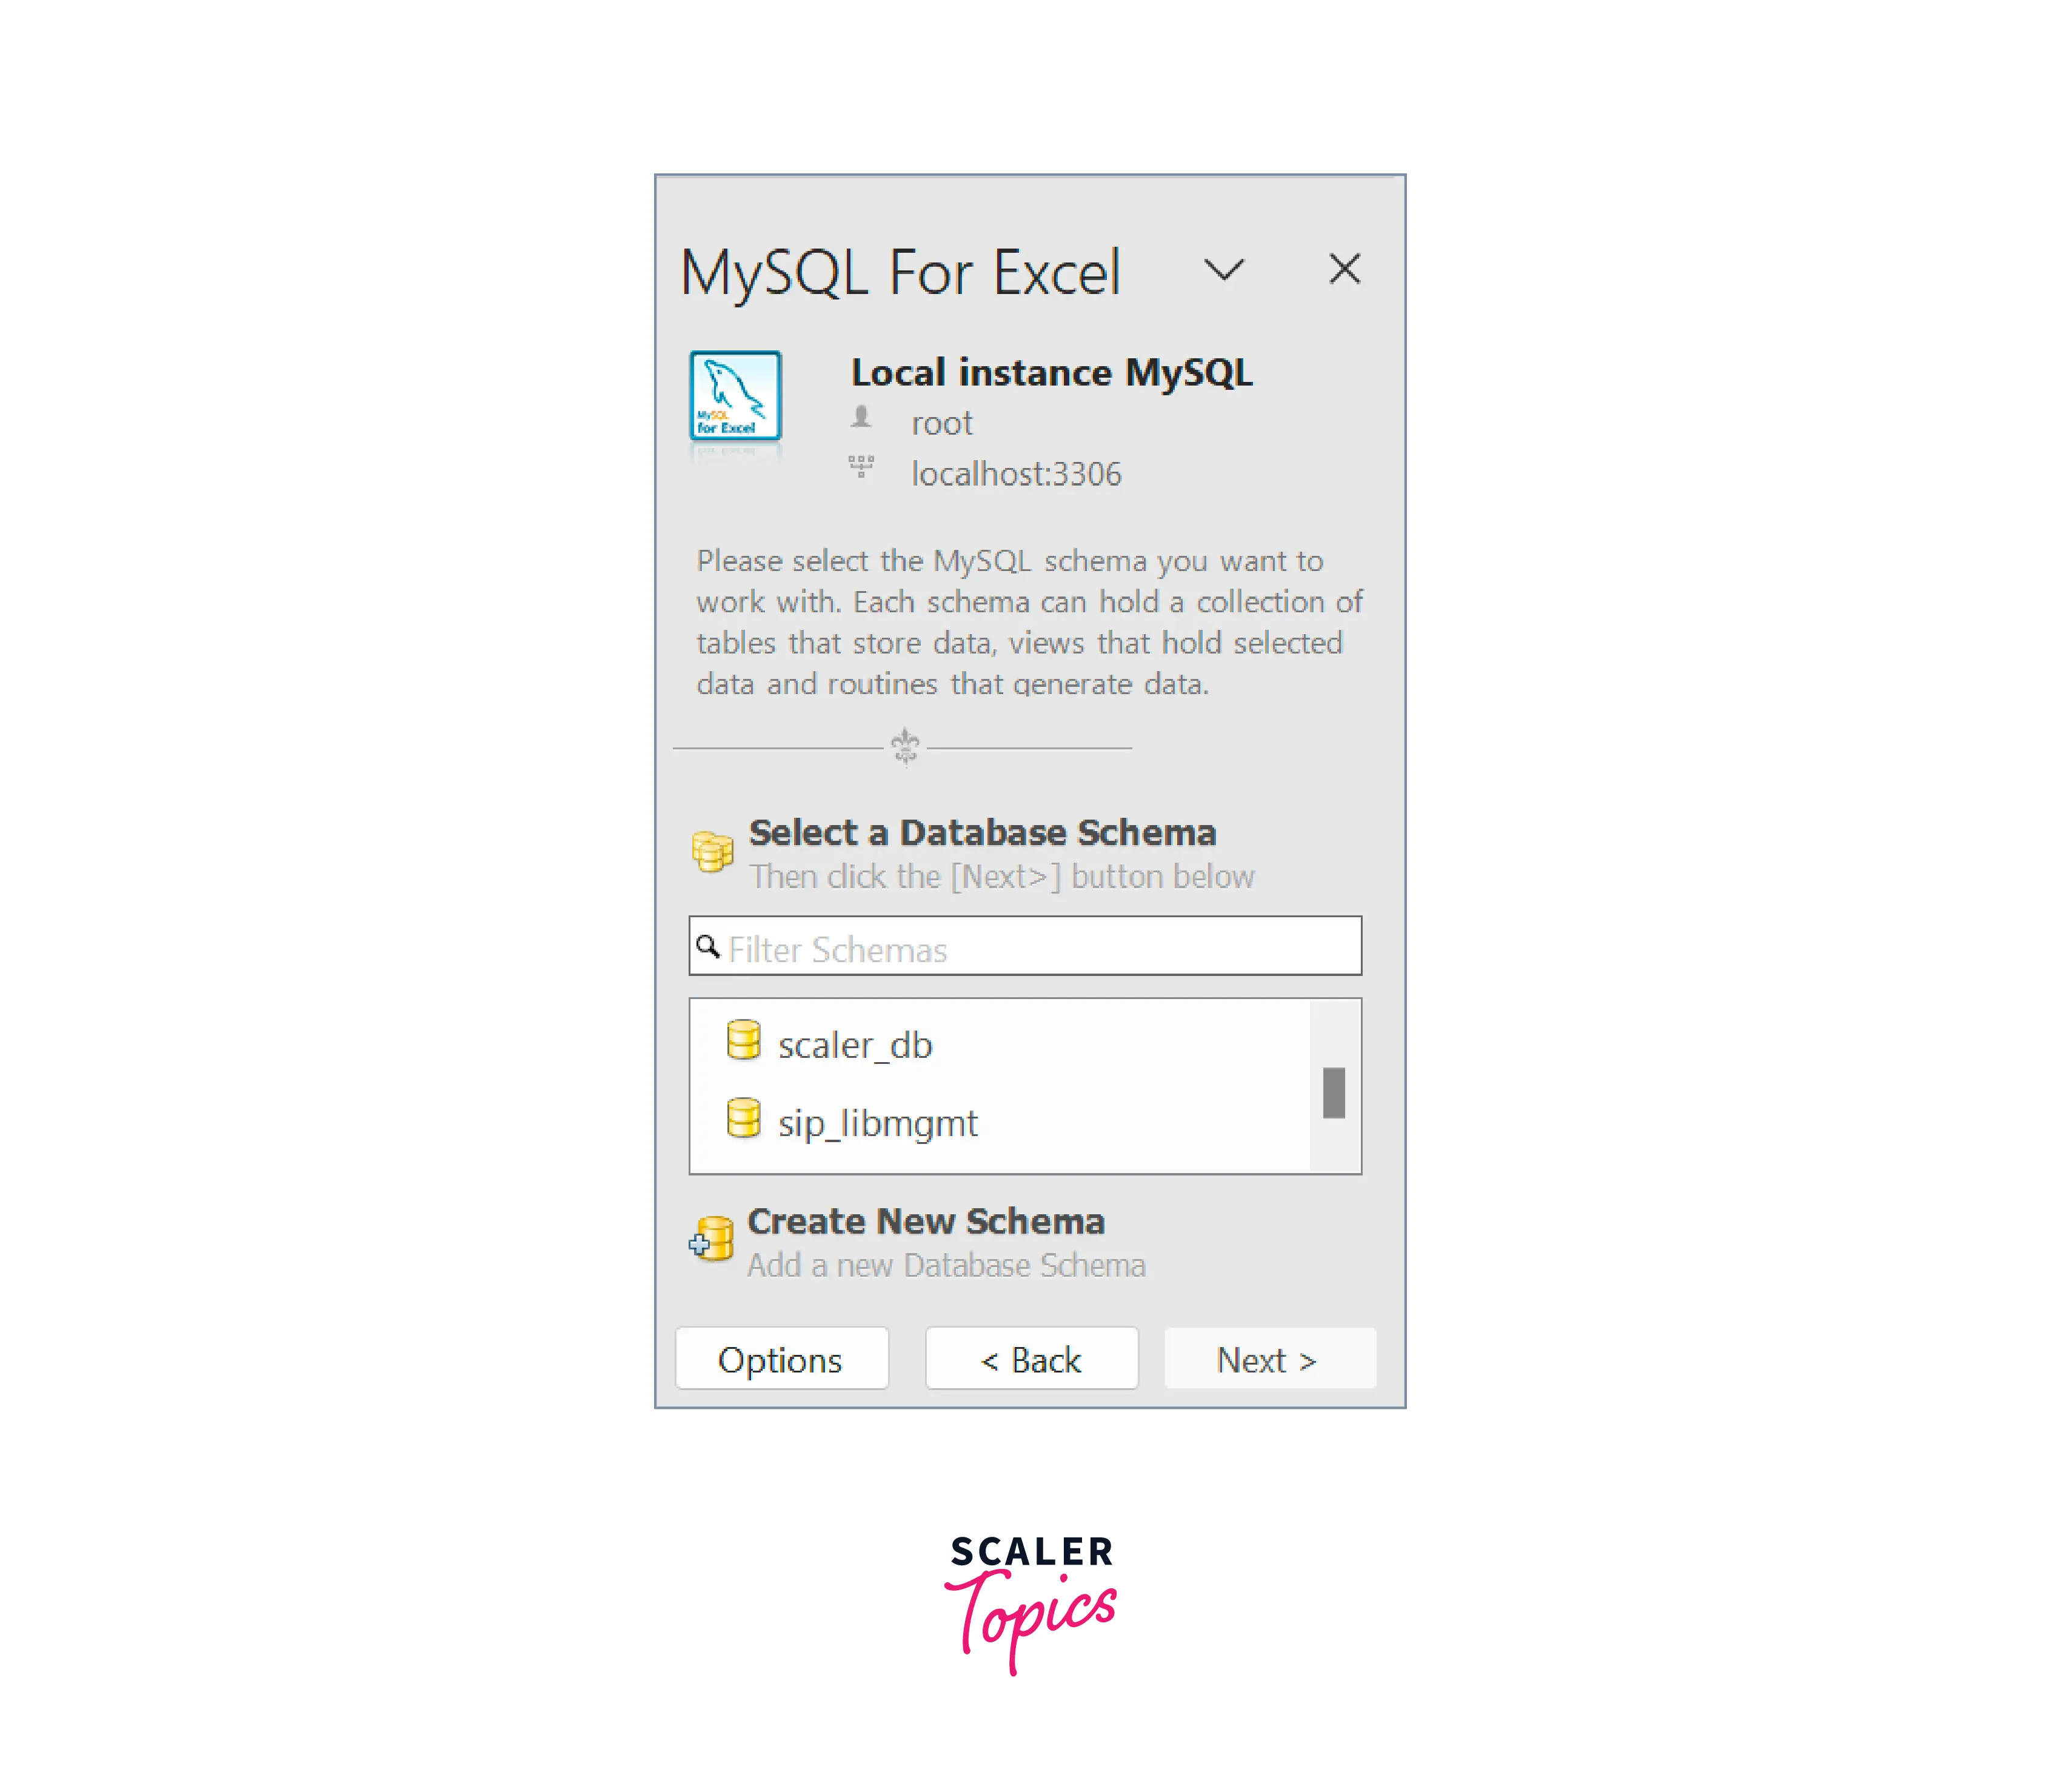
- Now MySQL for Excel panel will list all tables, views, and procedures from that database. Click on the table you want to import and Click on Import MySQL Data.
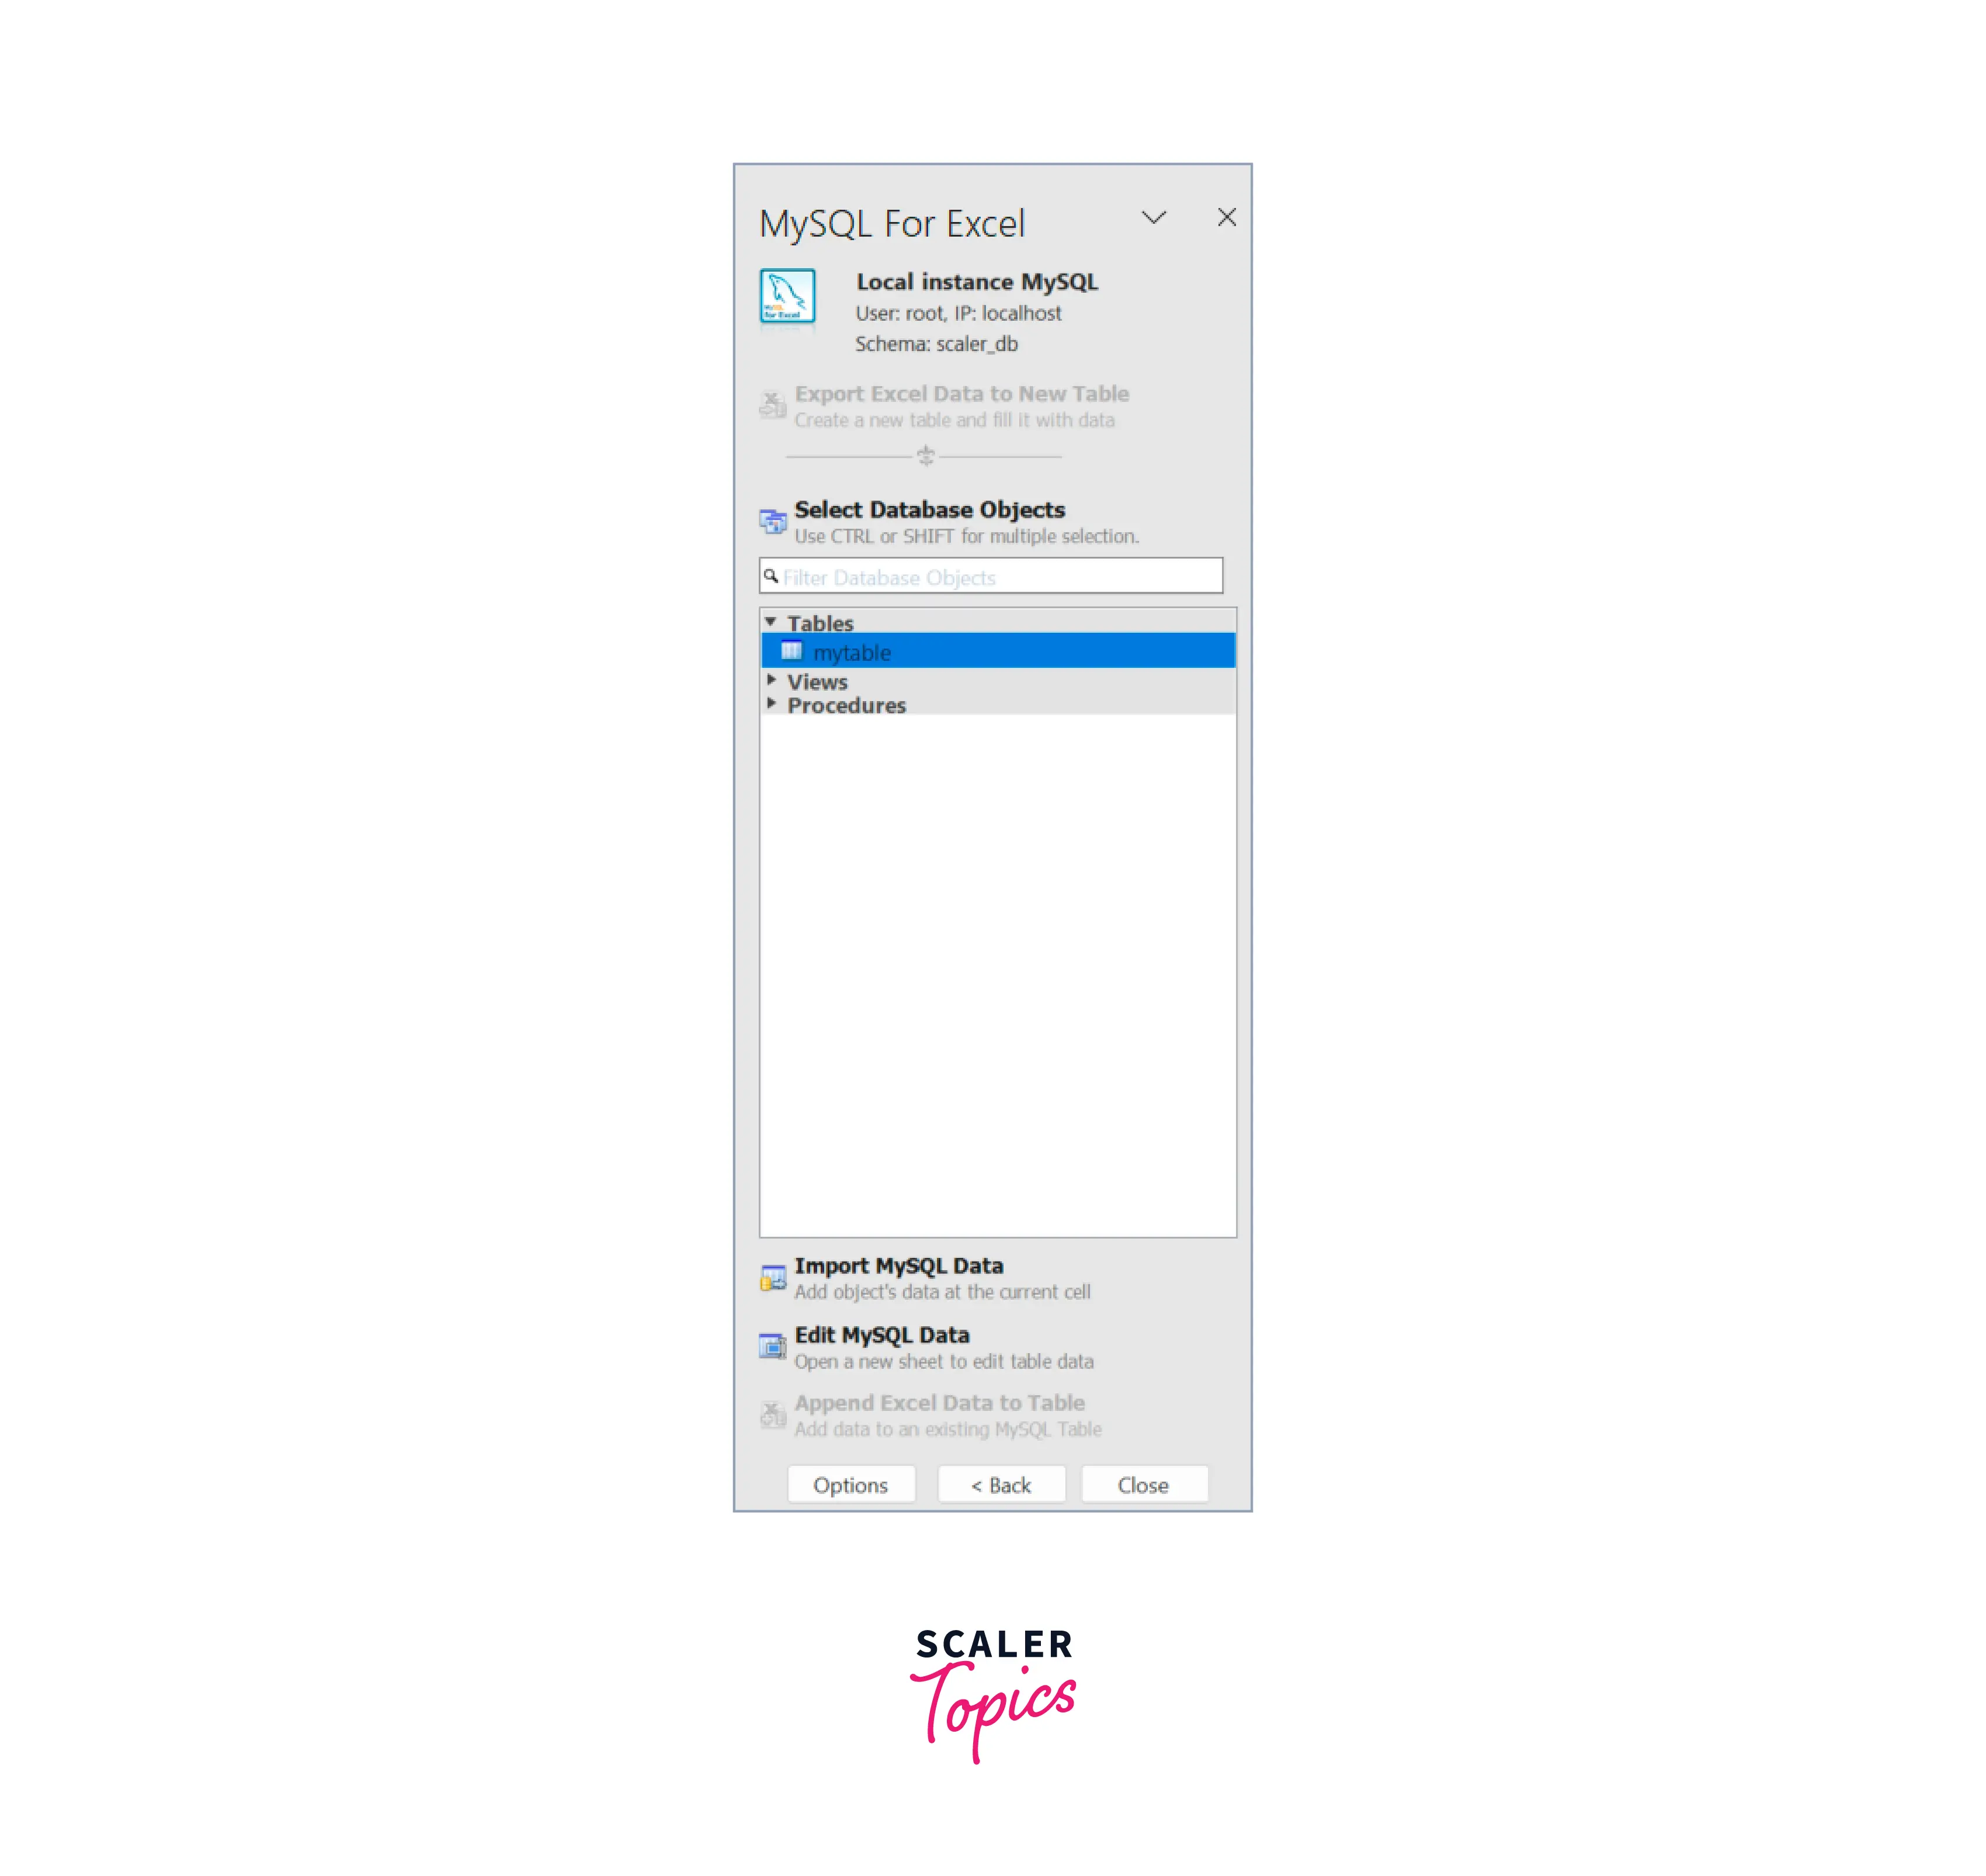
-
The Import Data window will appear, after checking everything click on Import
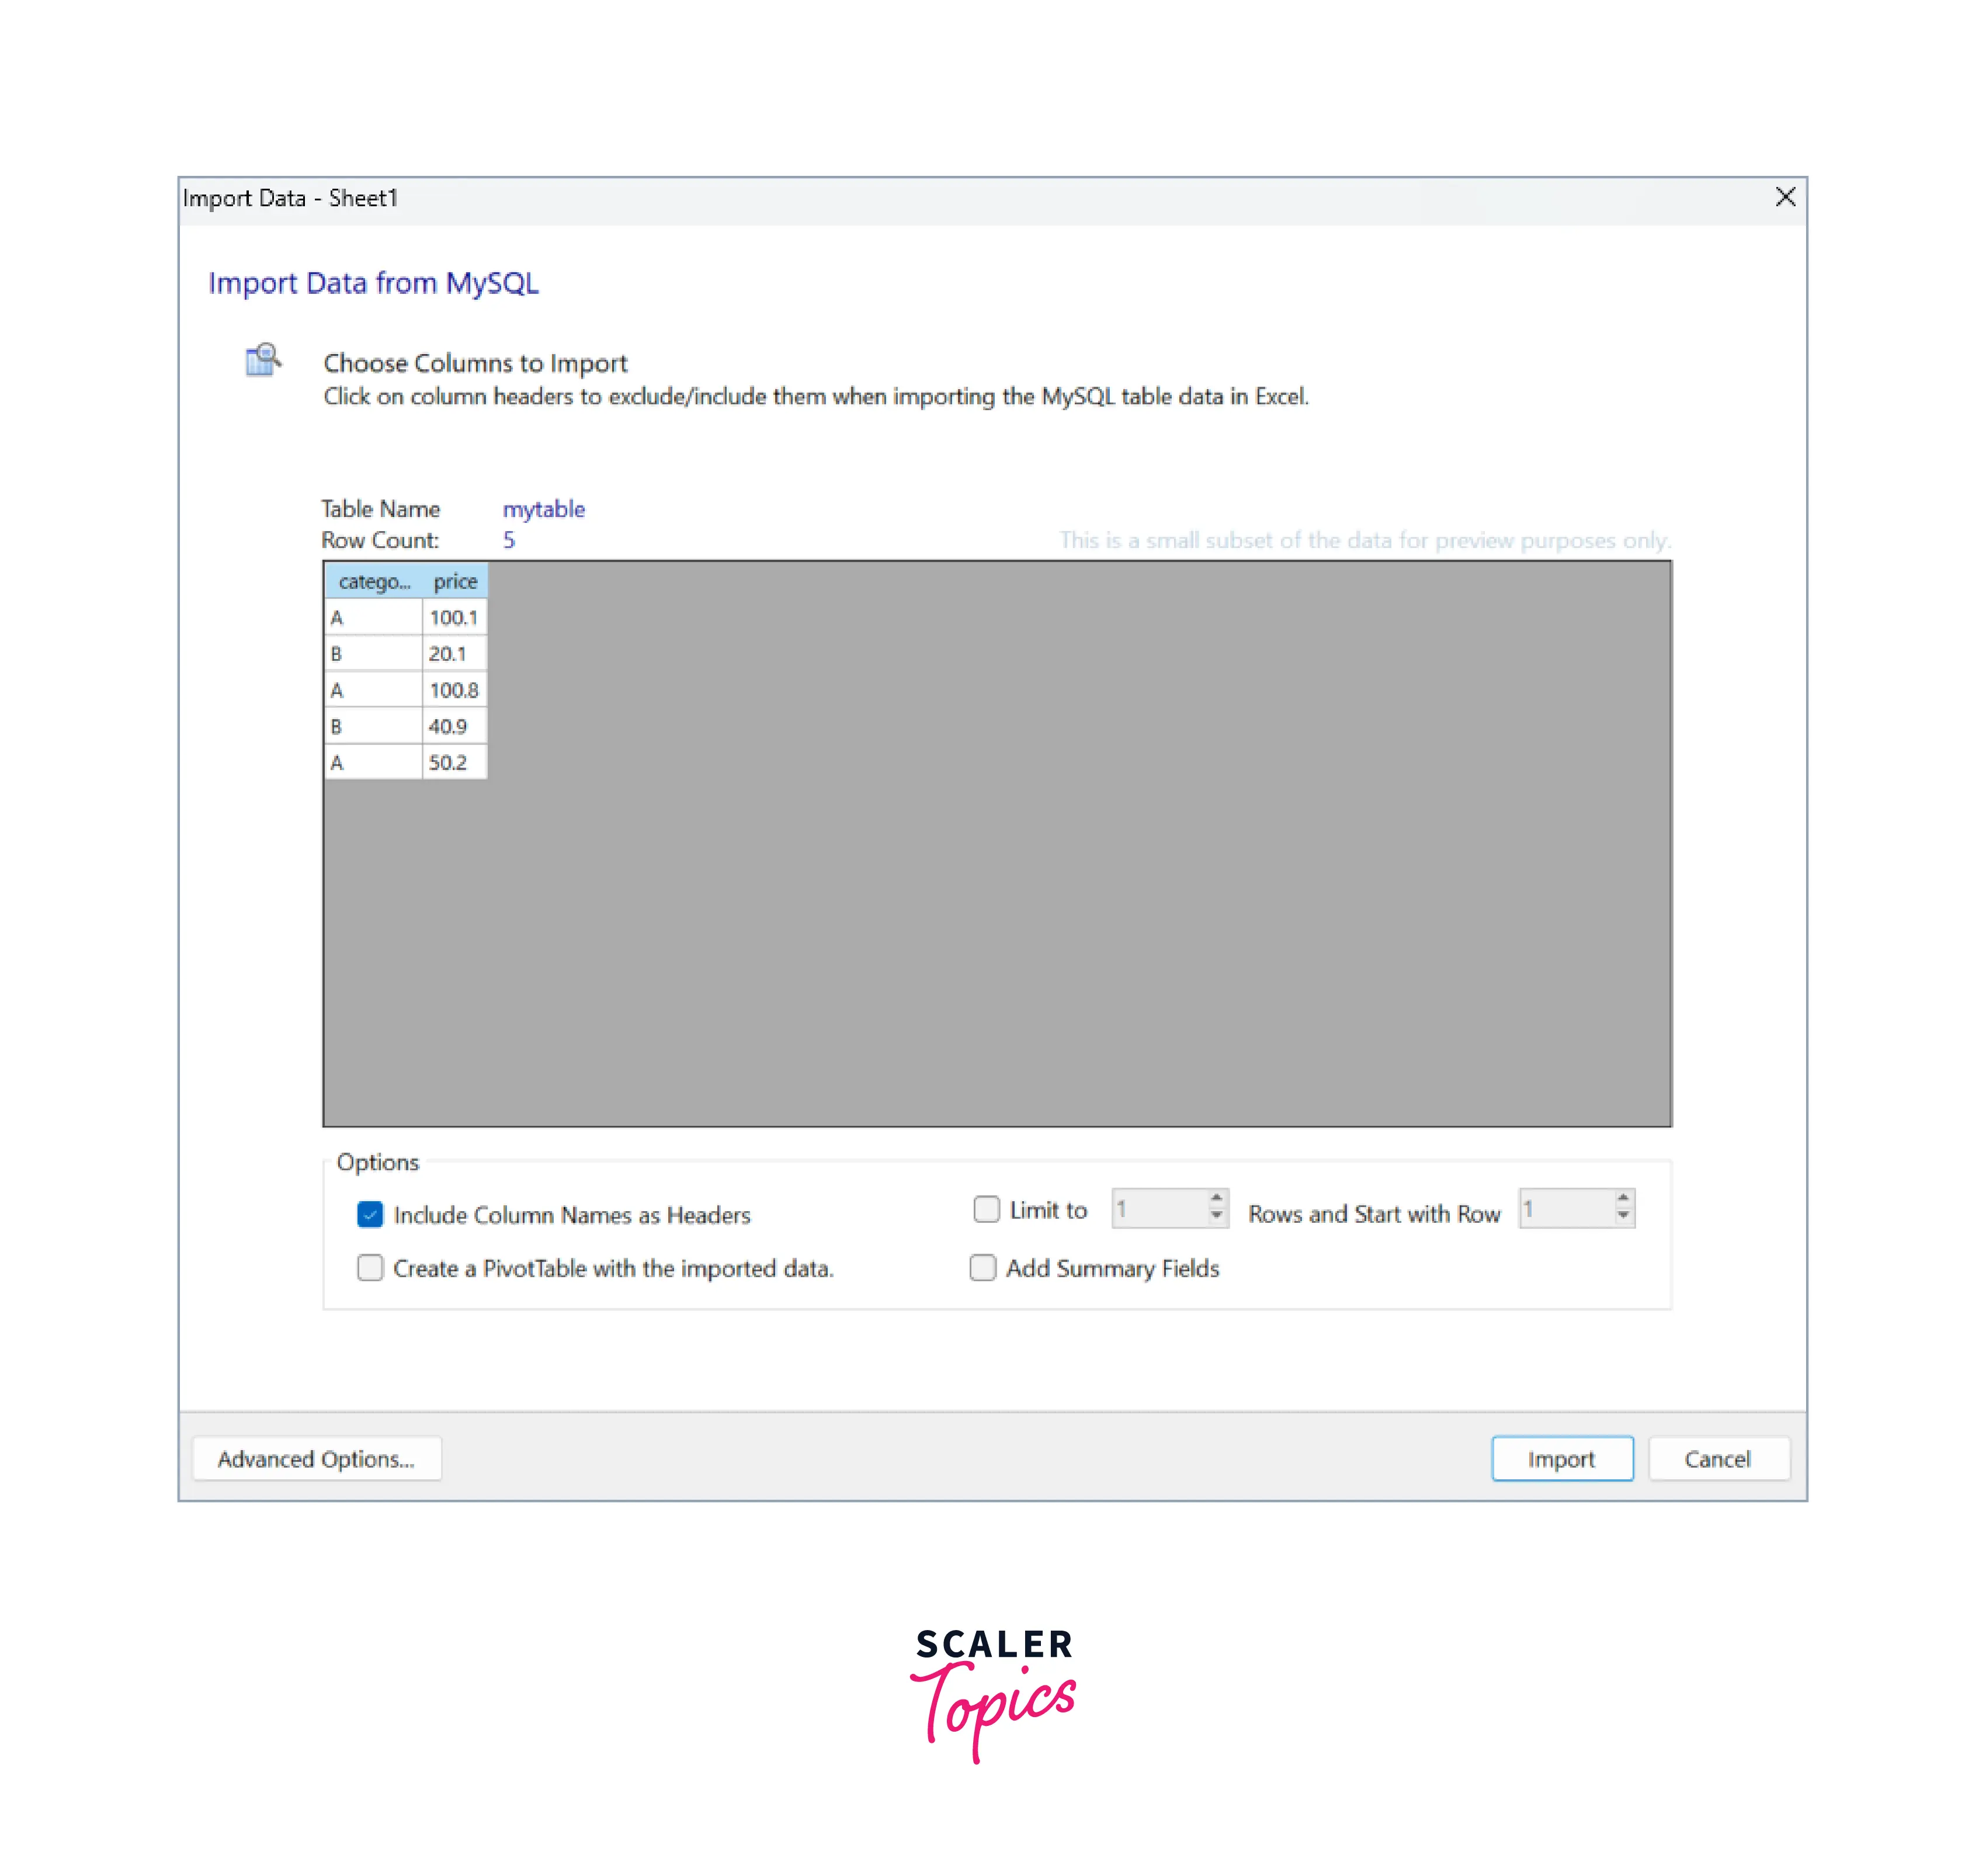
-
After that we can see the Data being successfully imported:
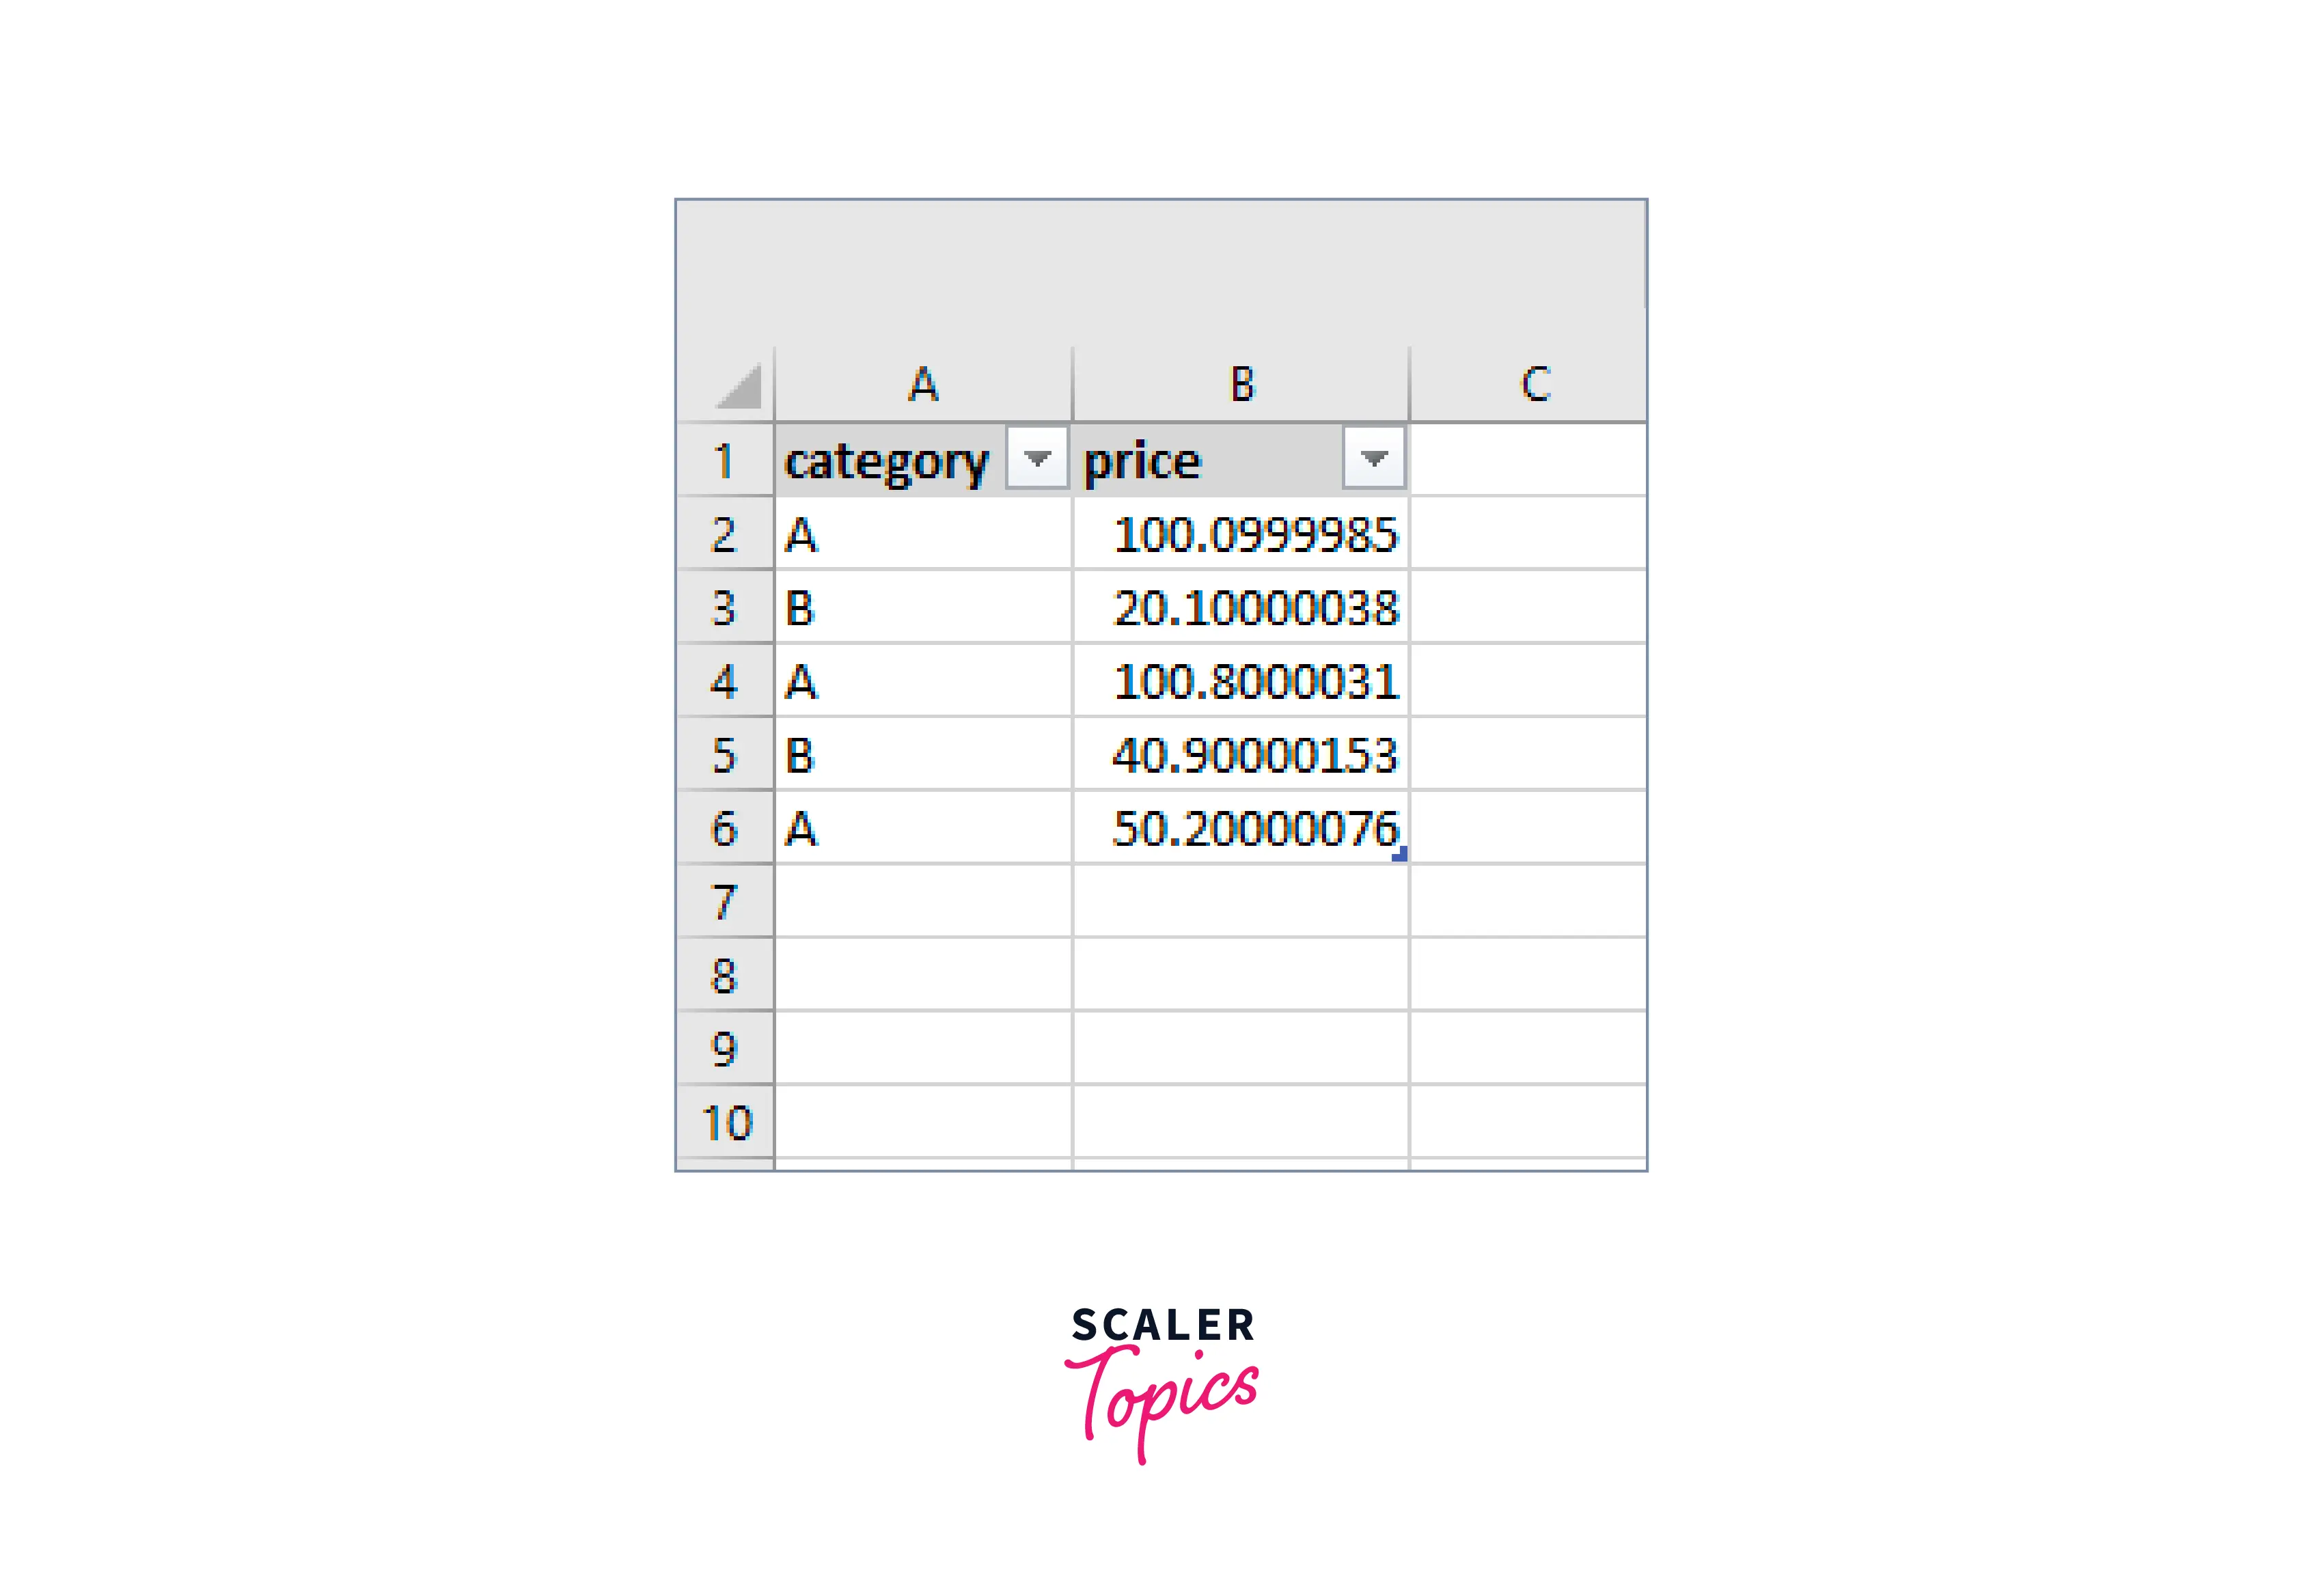
Export to Excel Using a Third-Party Software
We can also Export MySQL data to Excel using some third-party software like MySQL Workbench or any other editor. Here, we are using MySQL Workbench for doing our task.
We will be using the same table as we have used in the above examples. So let's see the step-by-step process:
- First open the MySQL workbench and create a new connection under MySQL Connections tab to create a connection to our desired database.
- Provide the following fields, for making a new connection:
- Connection Name
- Connection Method
- Hostname, localhost in our case
- Port, which is 3306 here
- Finally Username and Password.
- Default Schema is an optional field here.
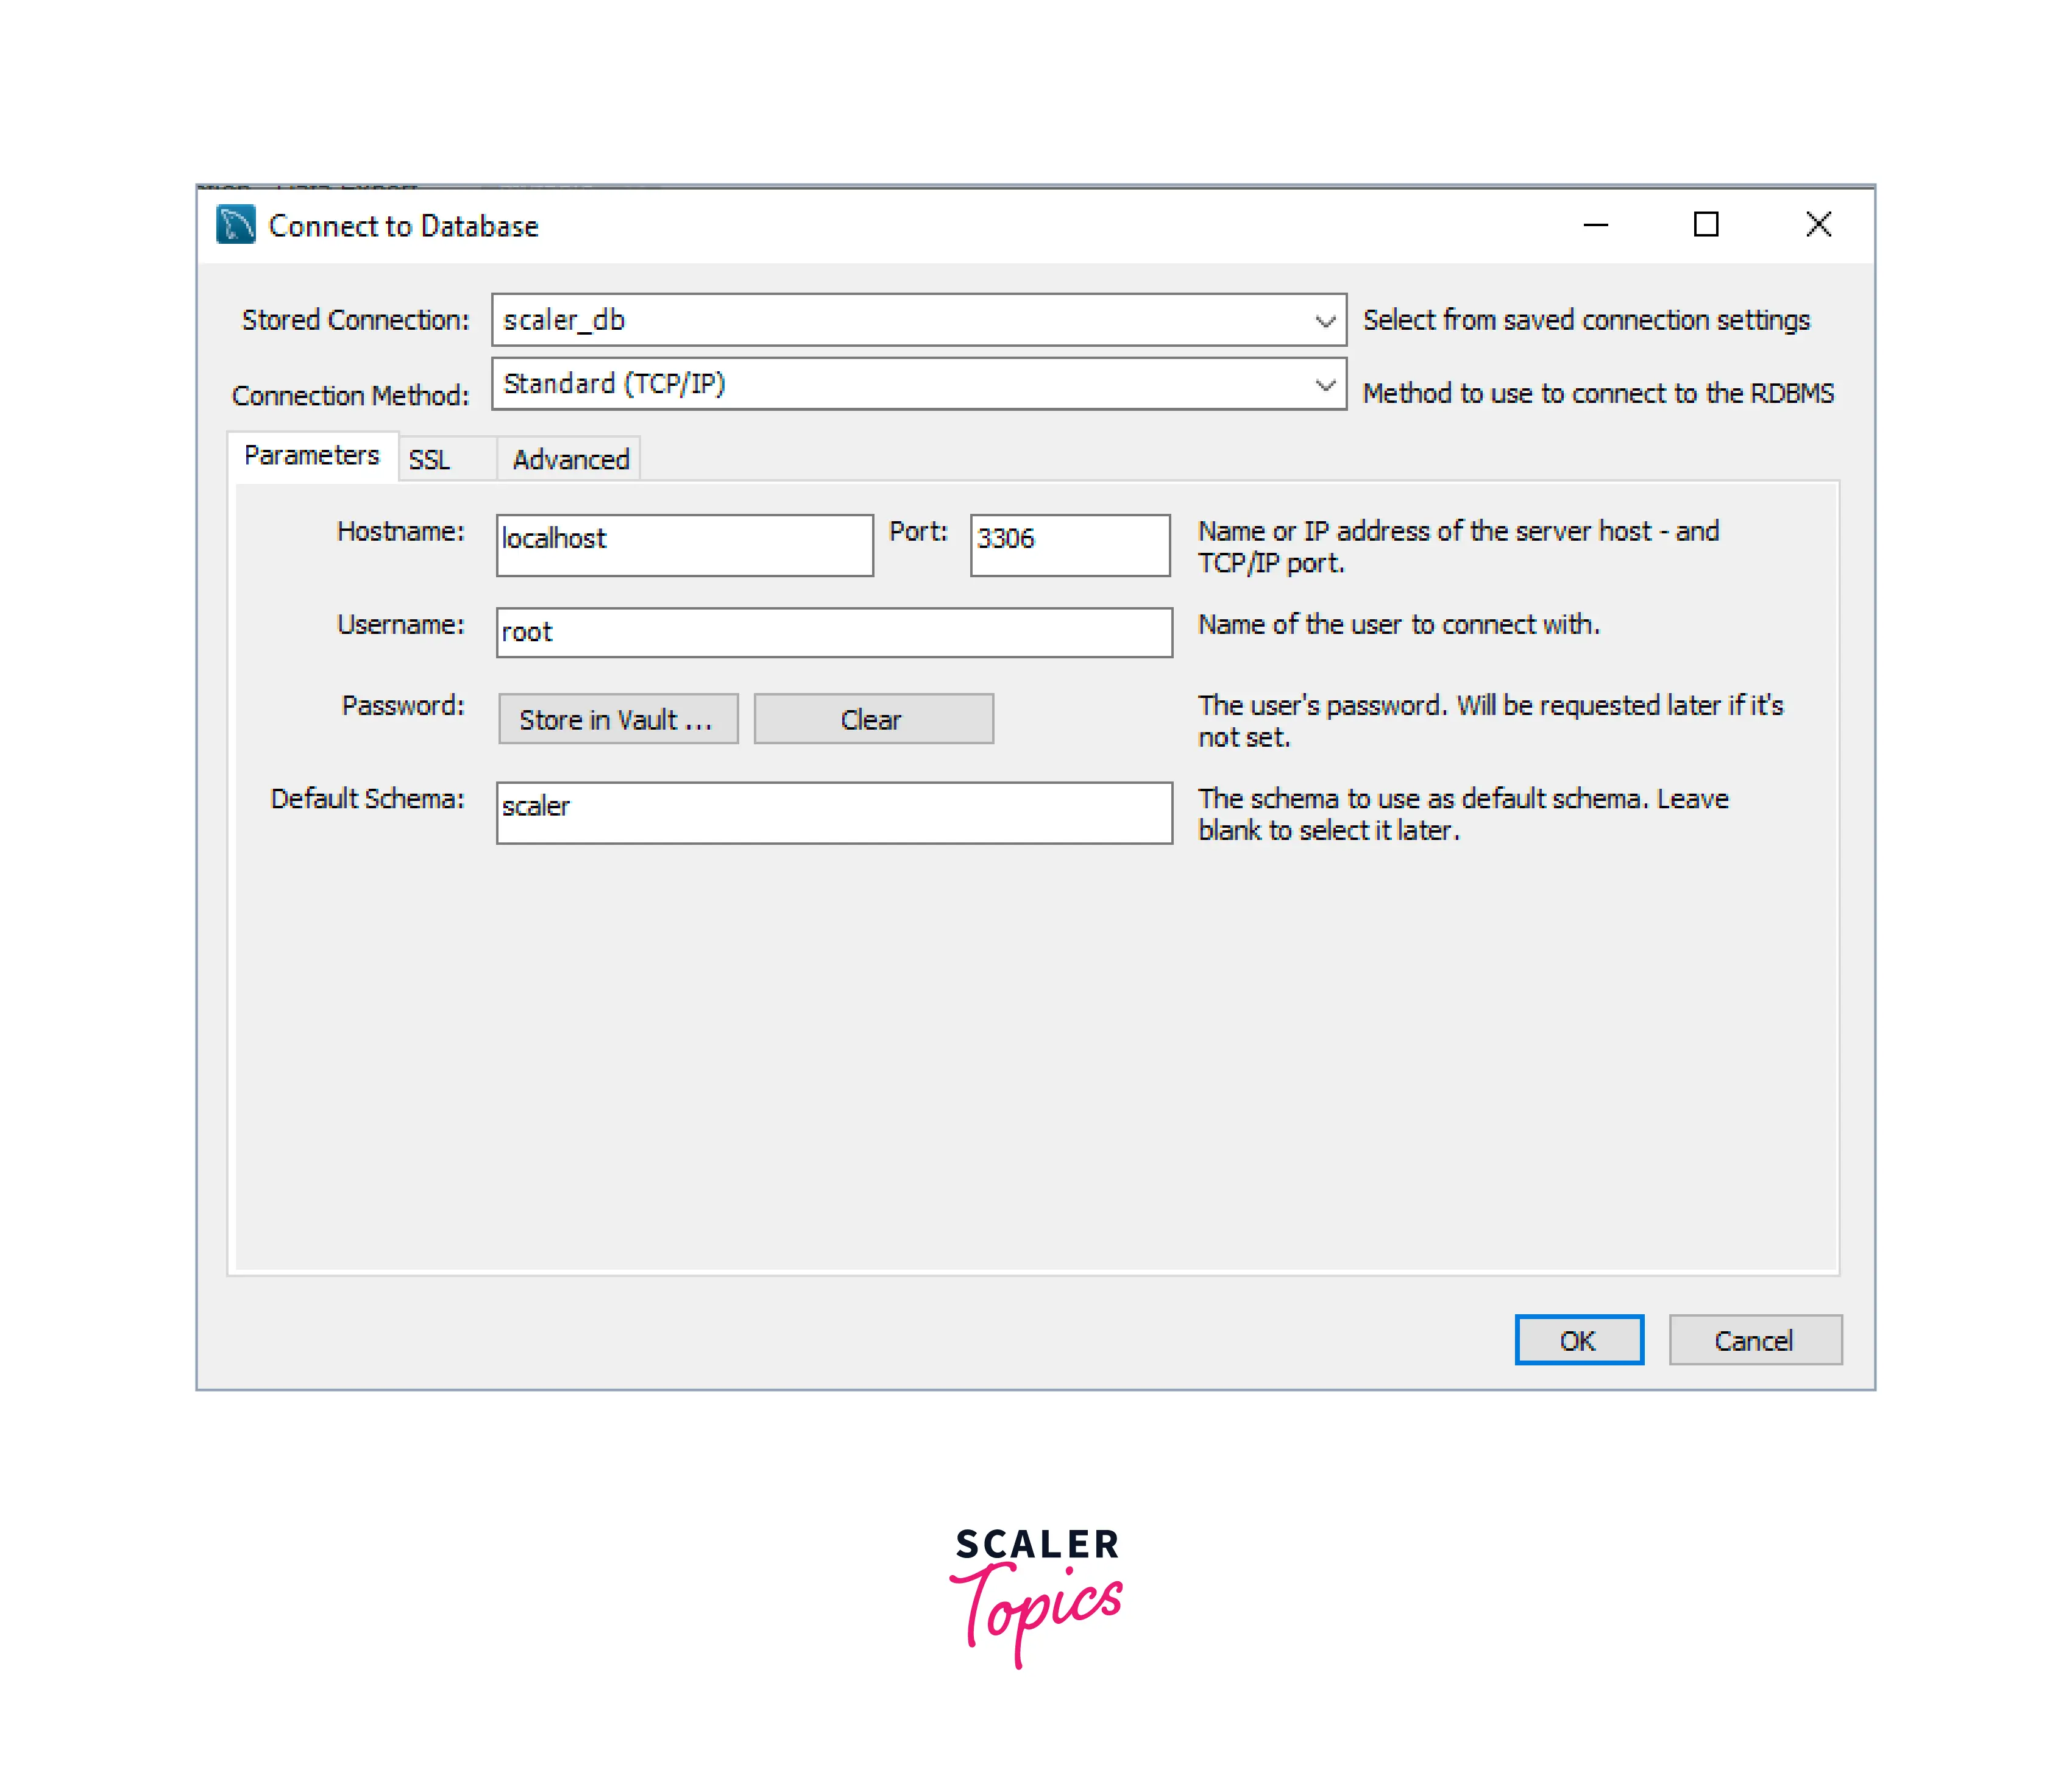
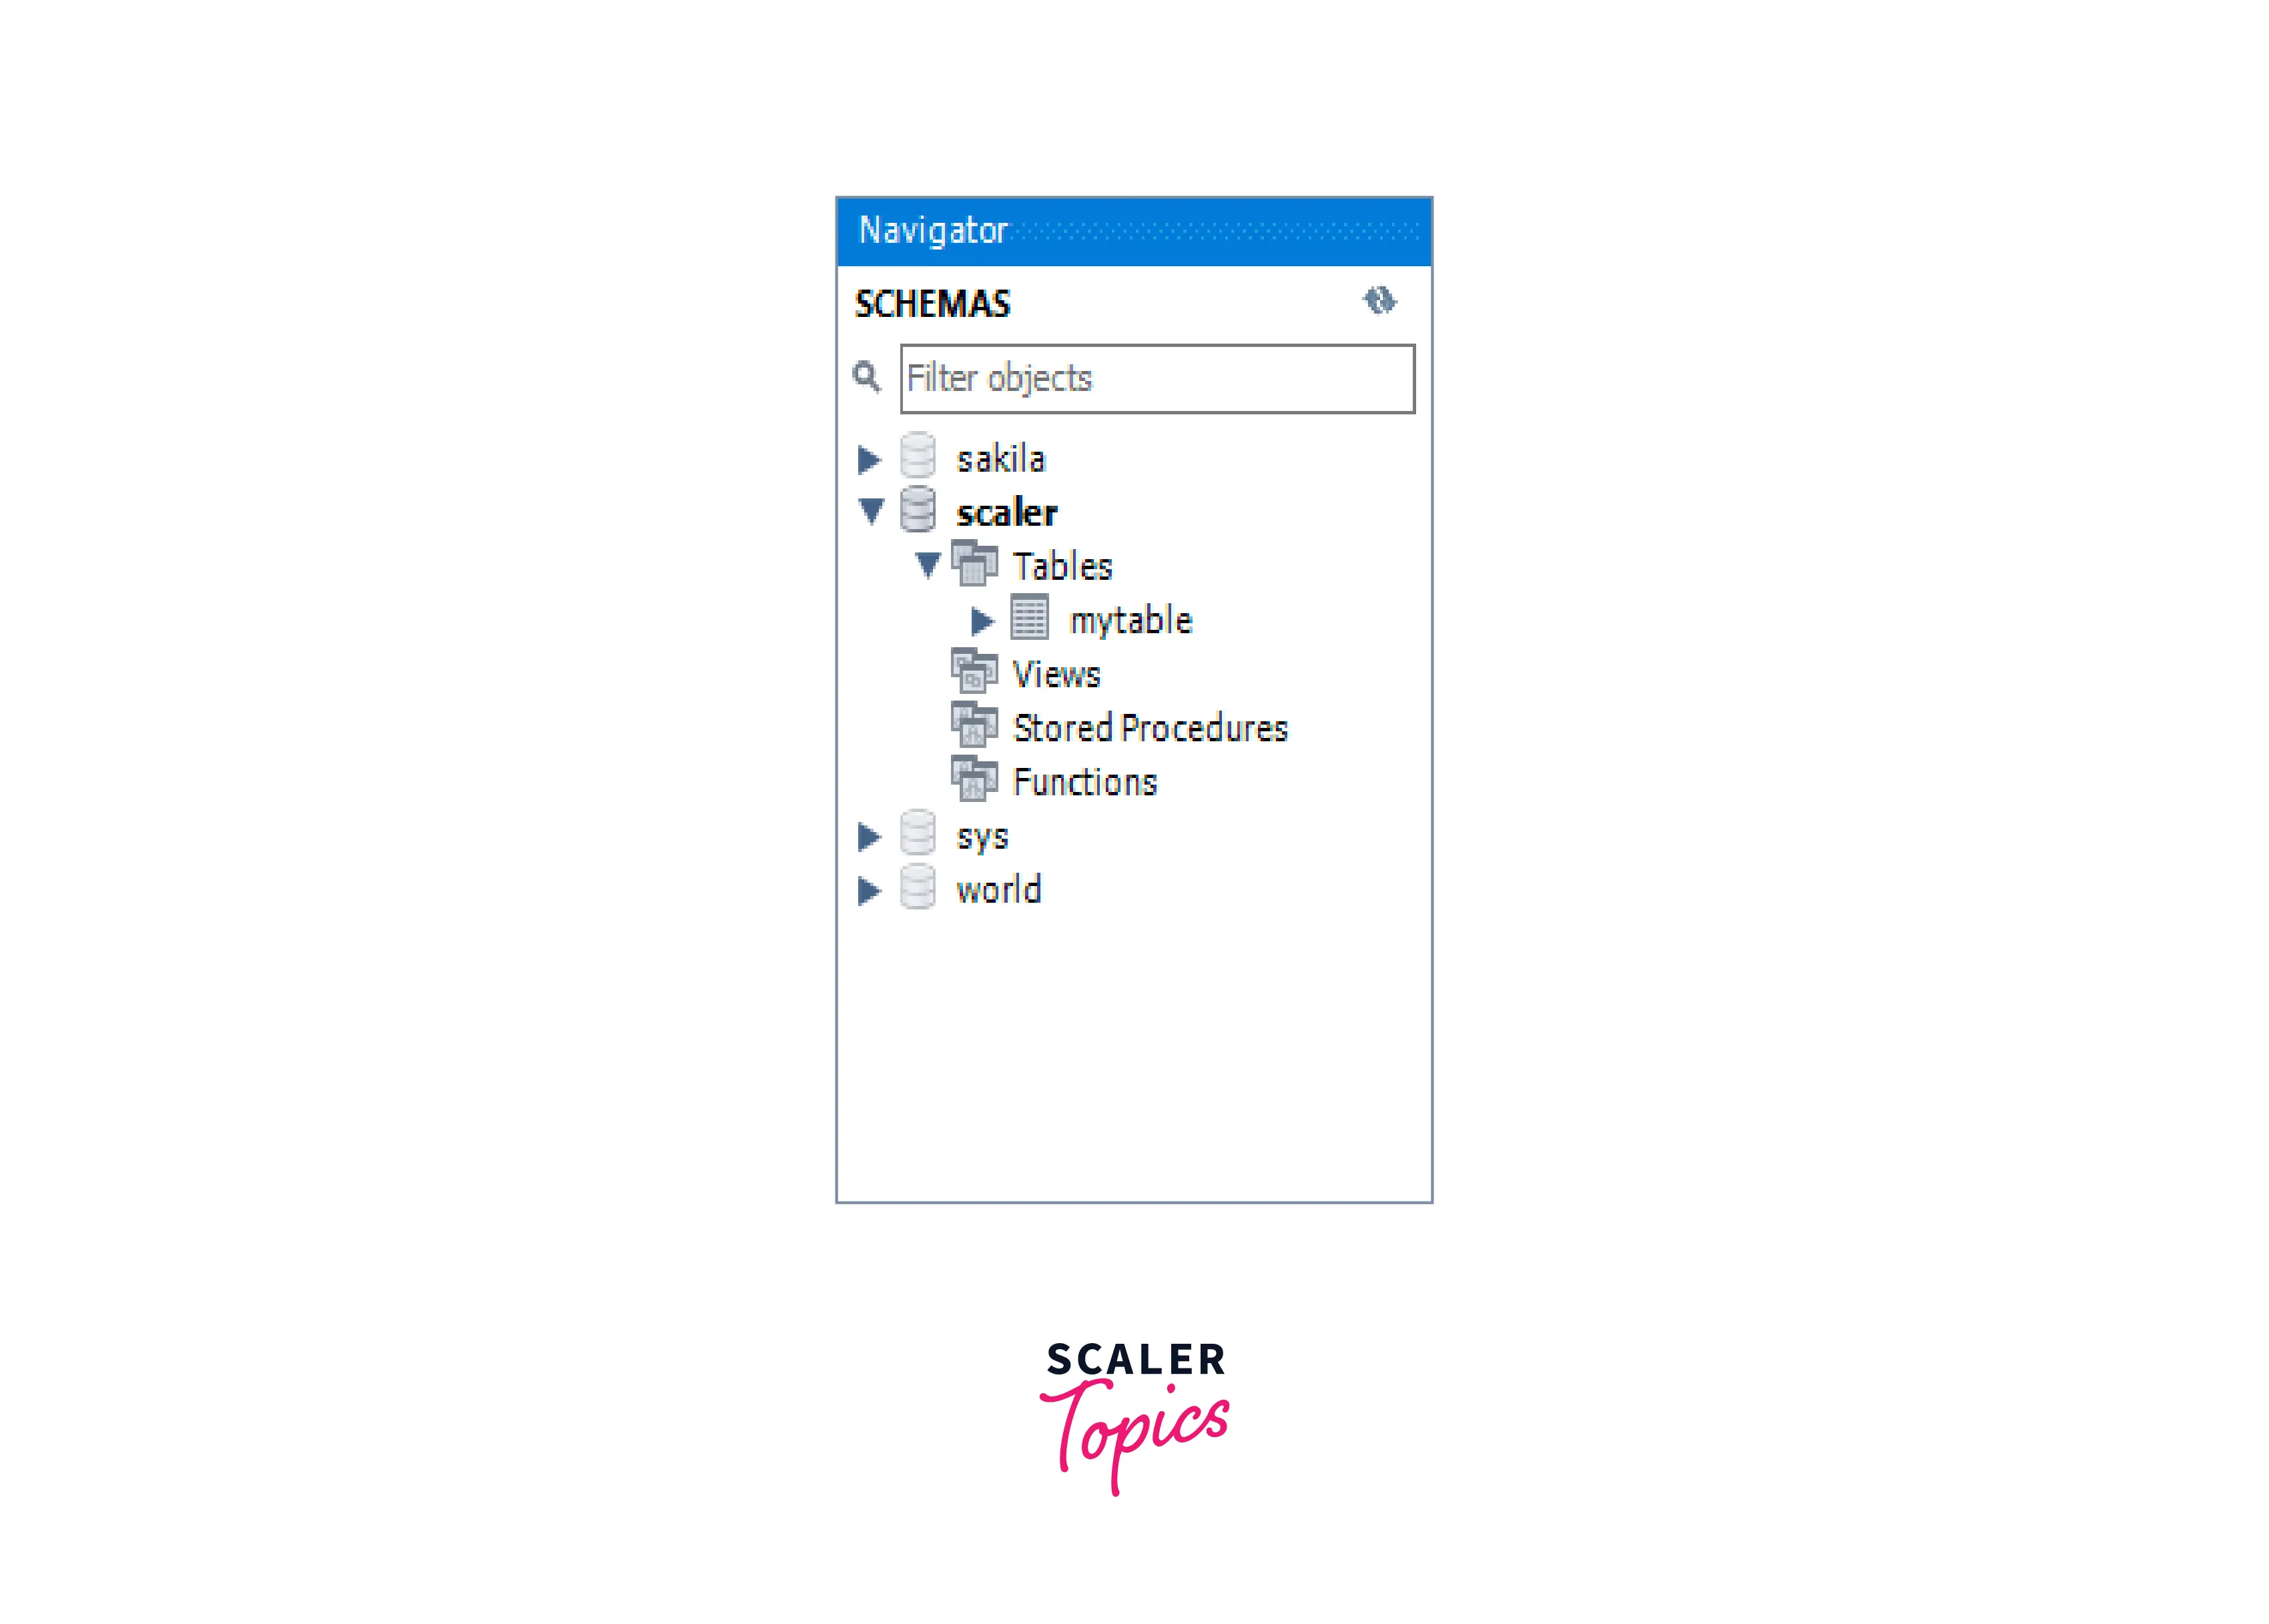
- After creating the connection successfully, we can see all the databases present in that connection under the Schemas tab.
- Now expand the desired schema to see the available tables:
- Right-click on the desired table to see the Table Data Export Wizard option, then click on it:
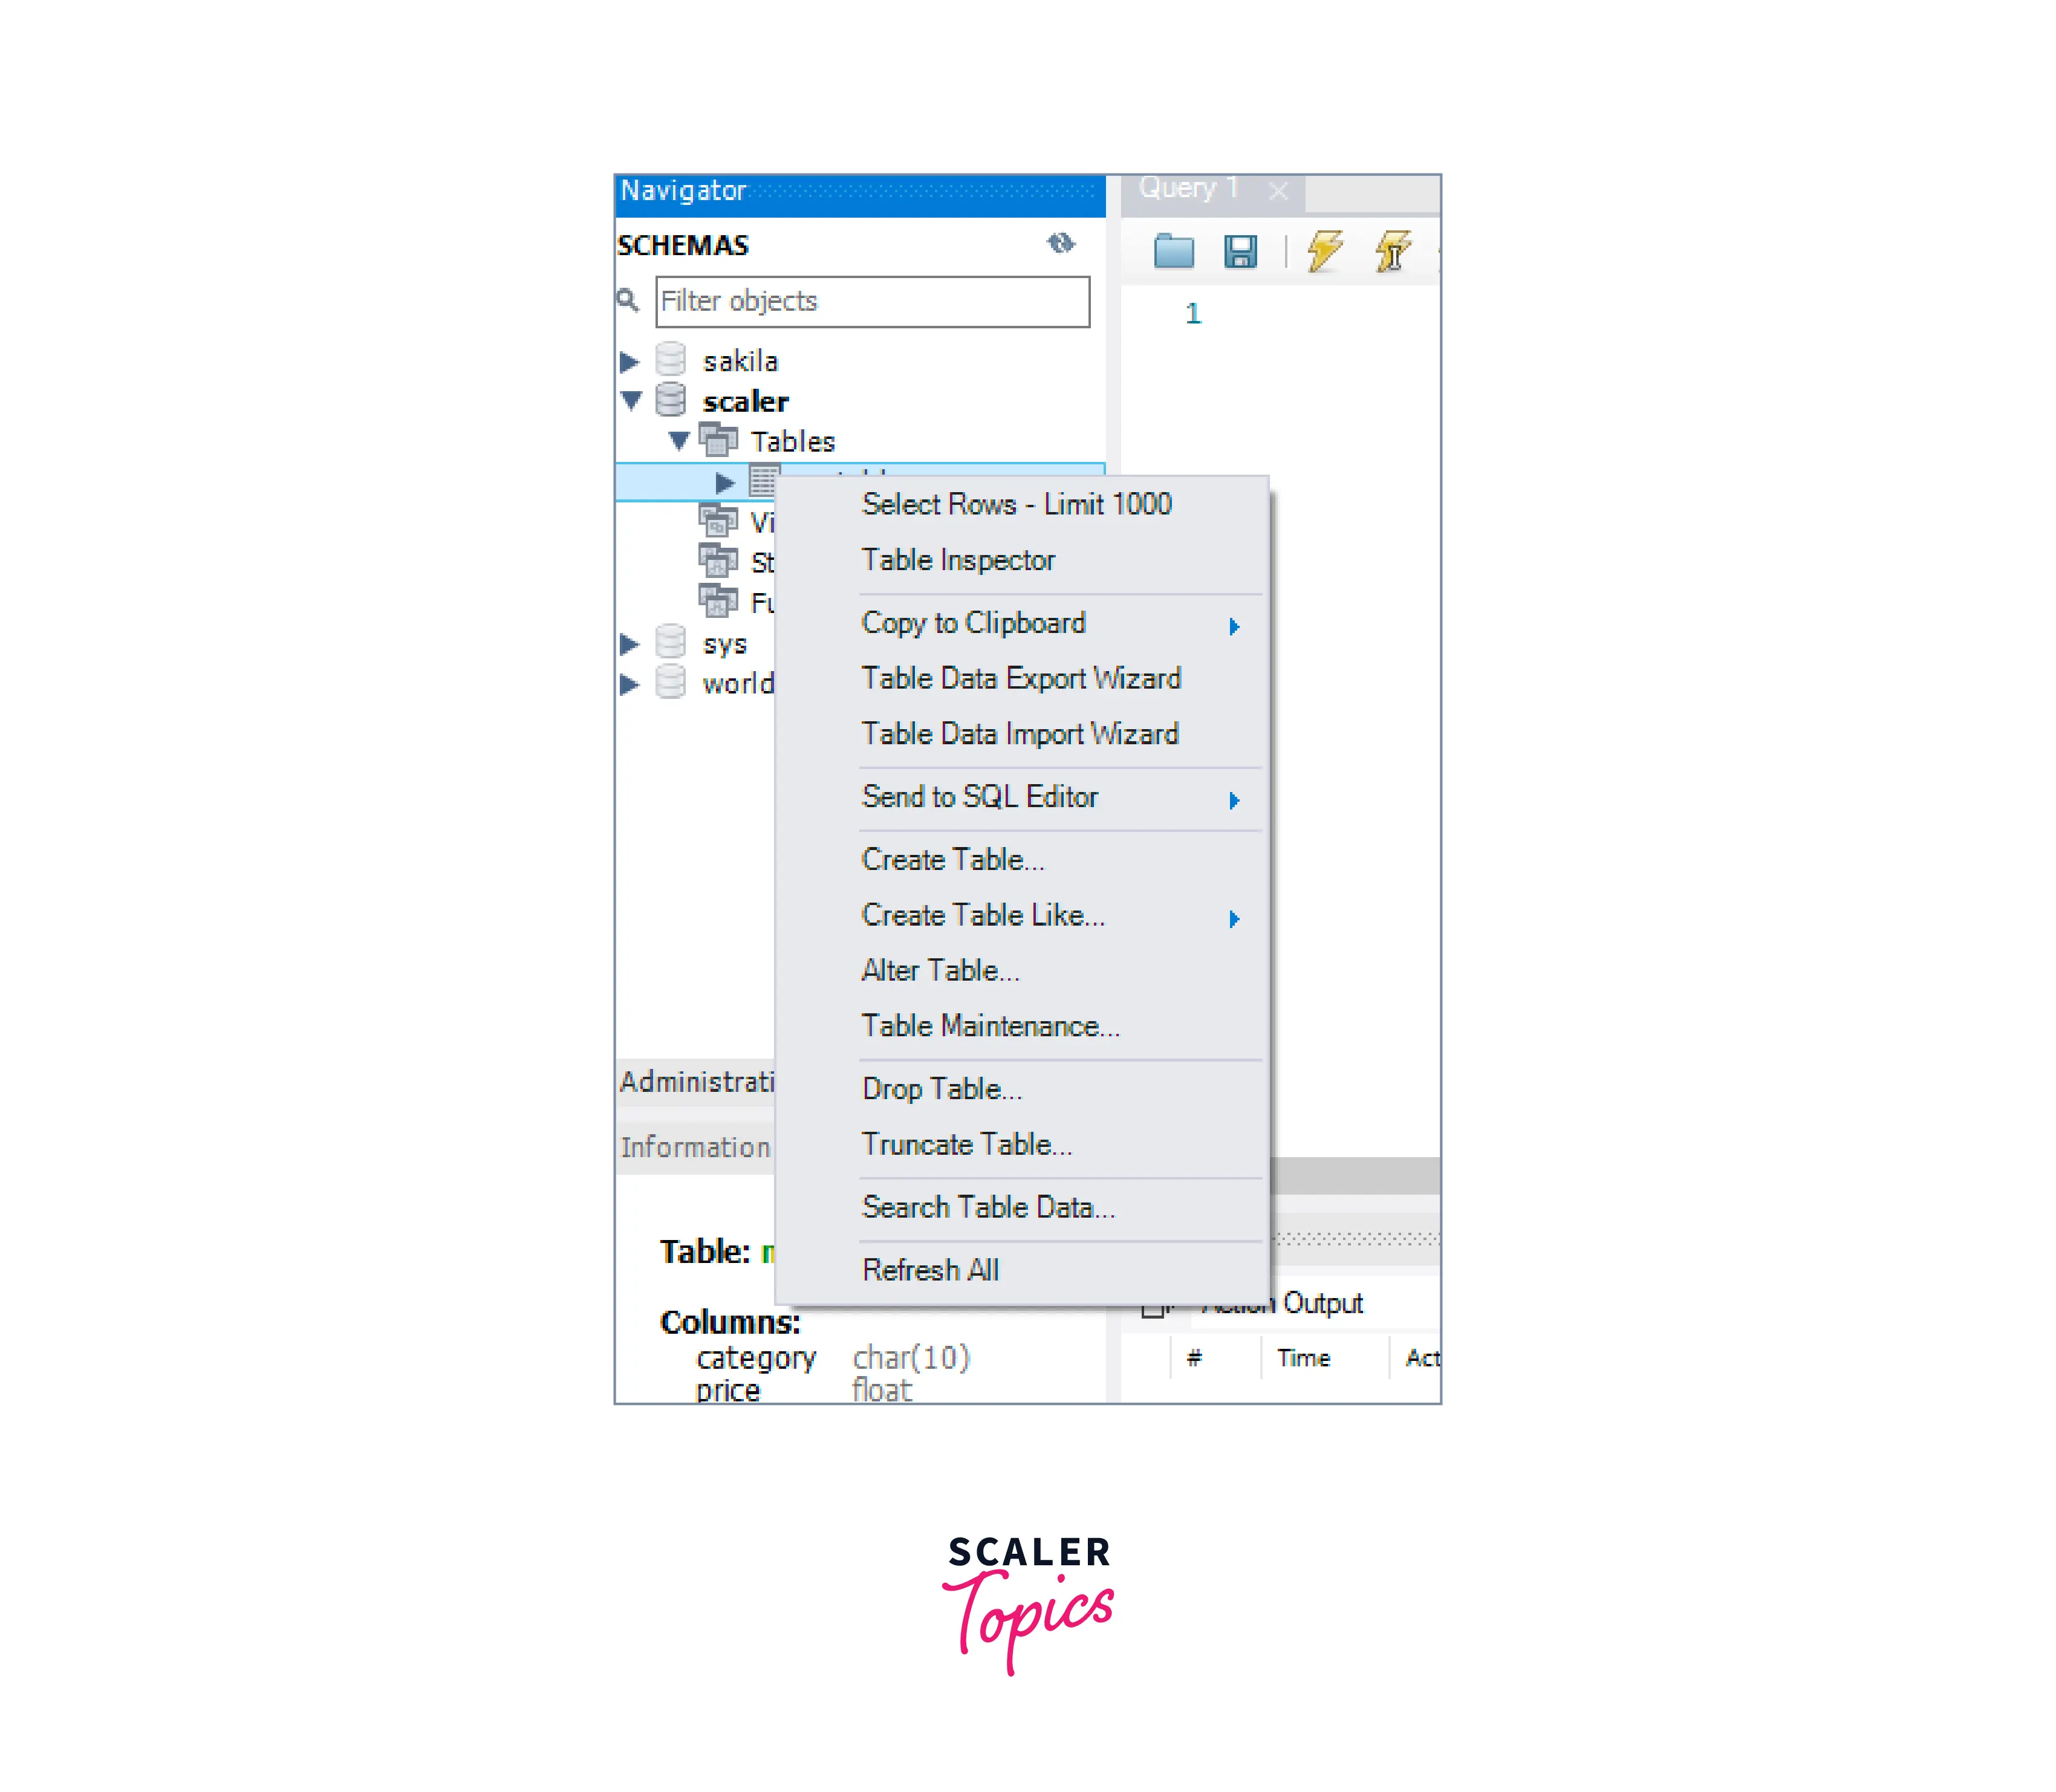
- Wizard will open up displaying available columns, we can also select only desirable columns for export by unselecting the columns we don't want.
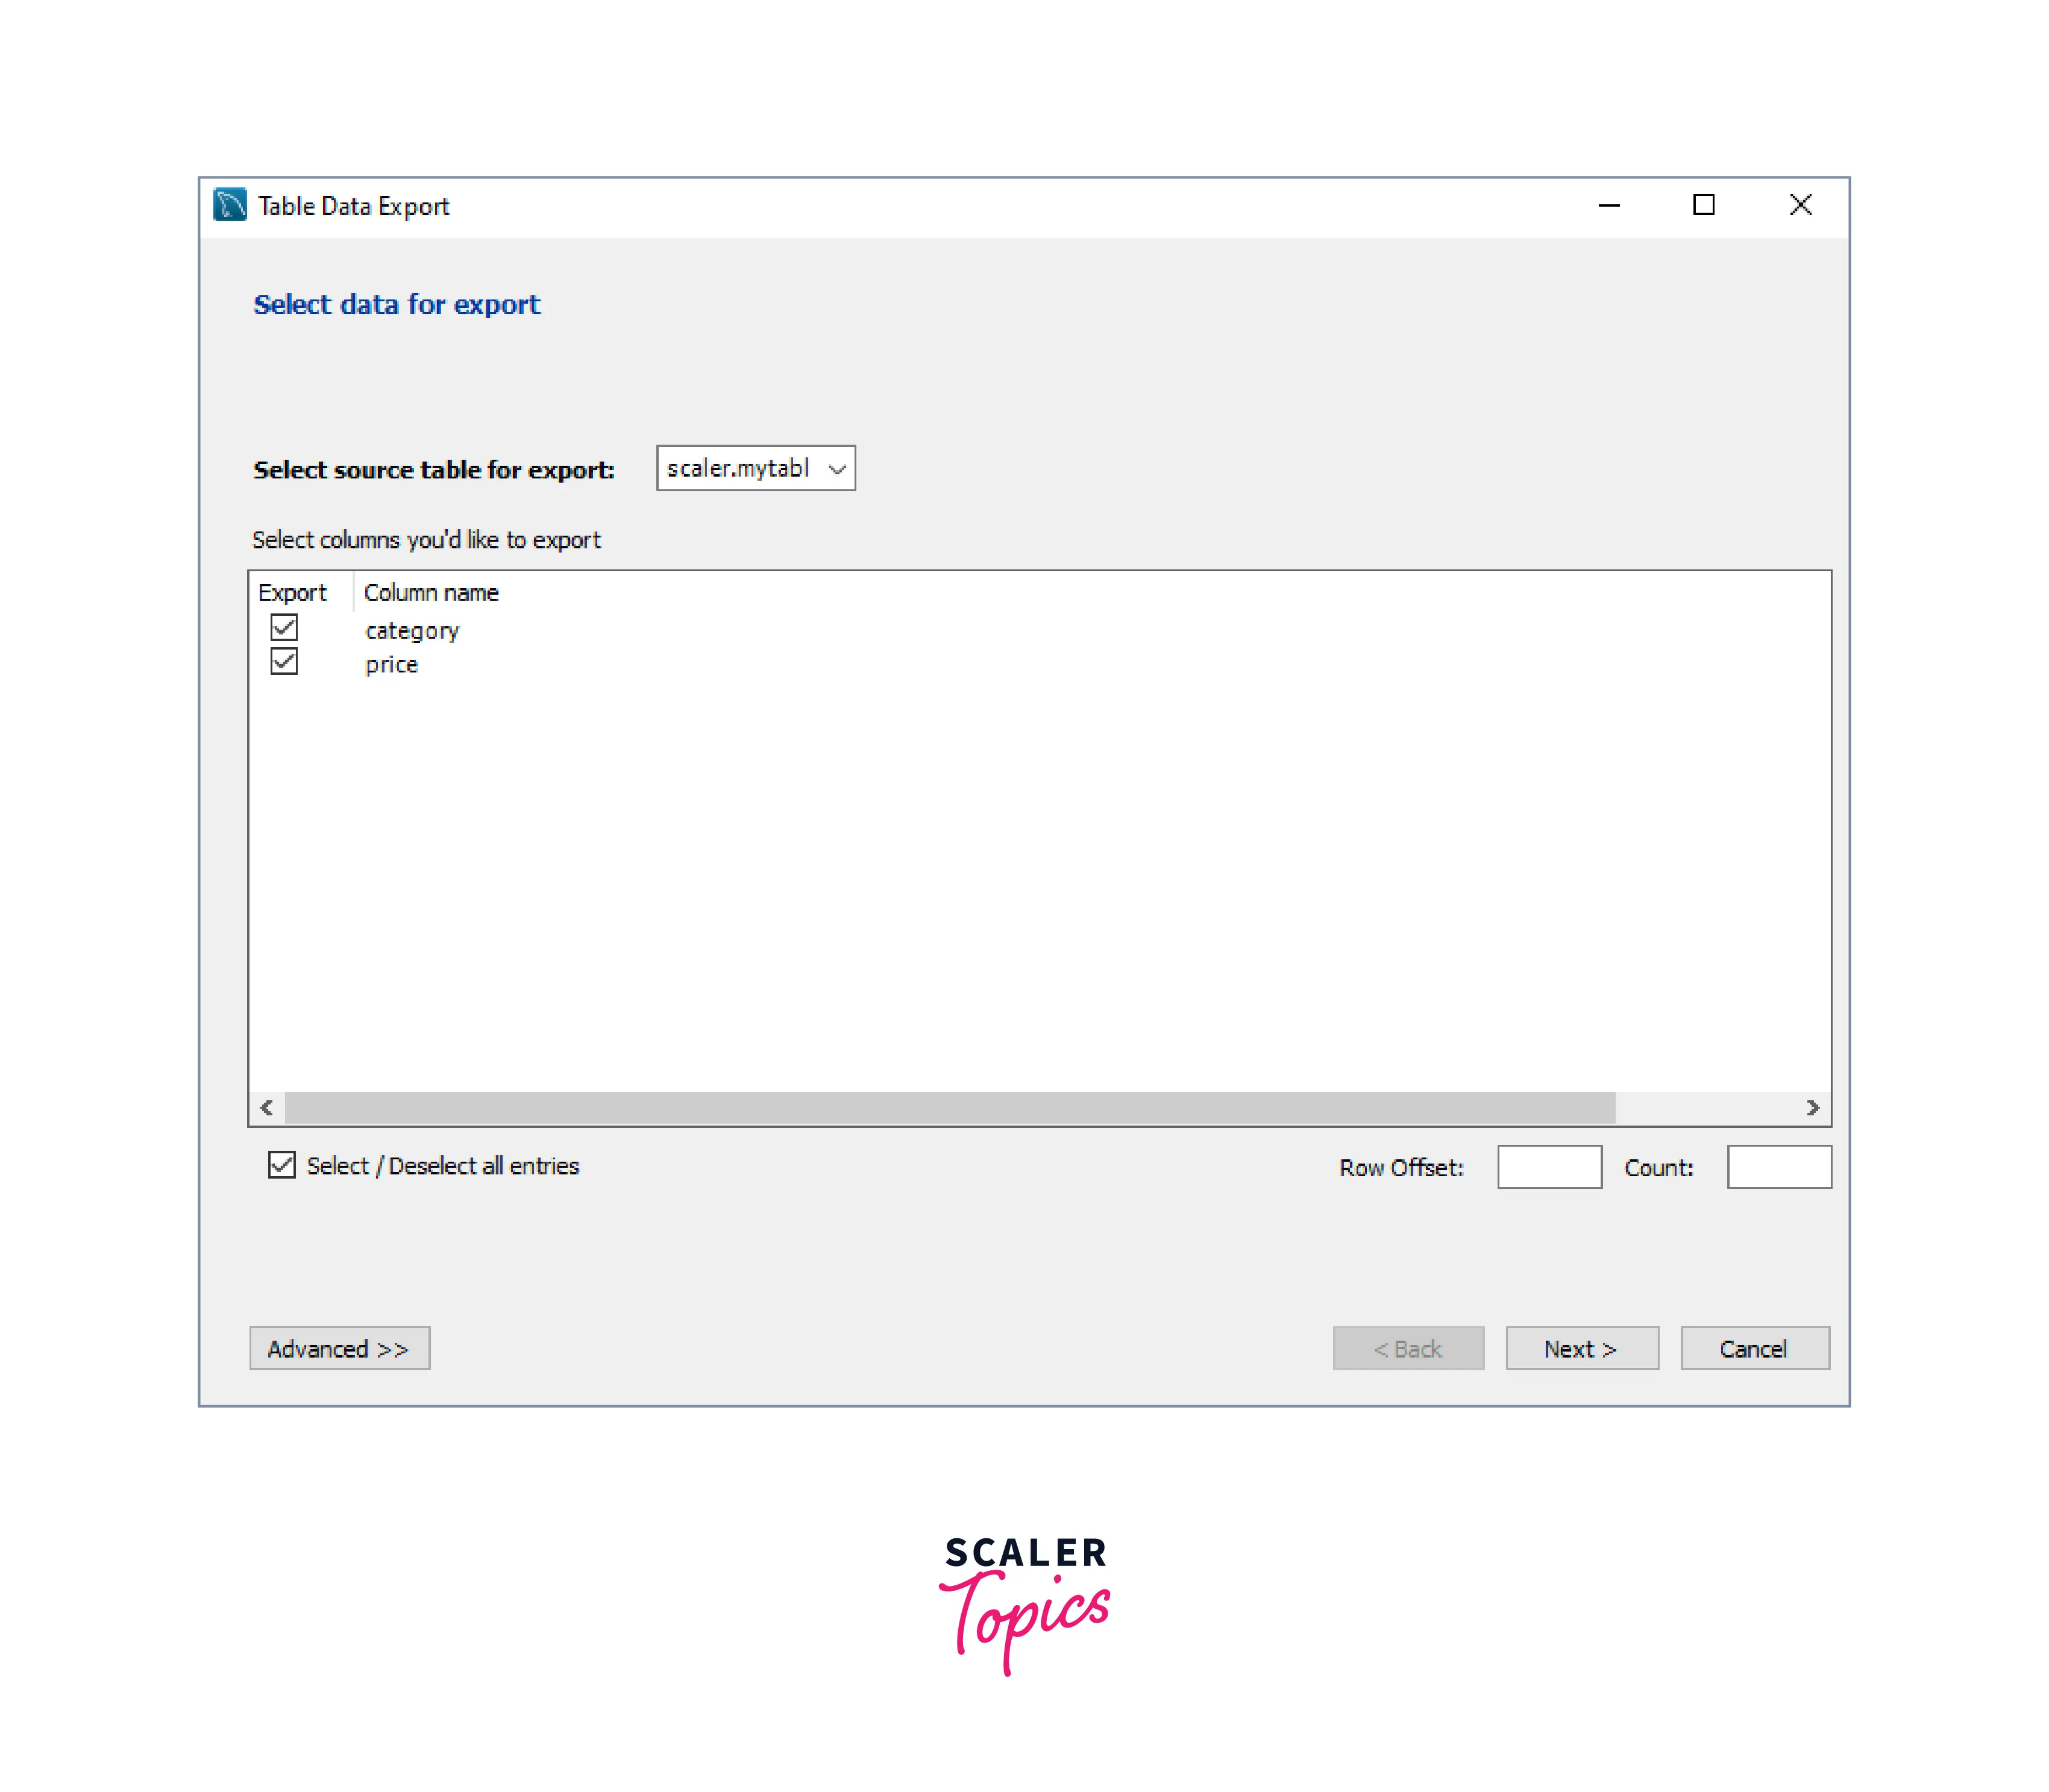
- After selecting columns click Next >.
- In the next window, give the file path, csv radio button, set the field separator as , and then click Next >.
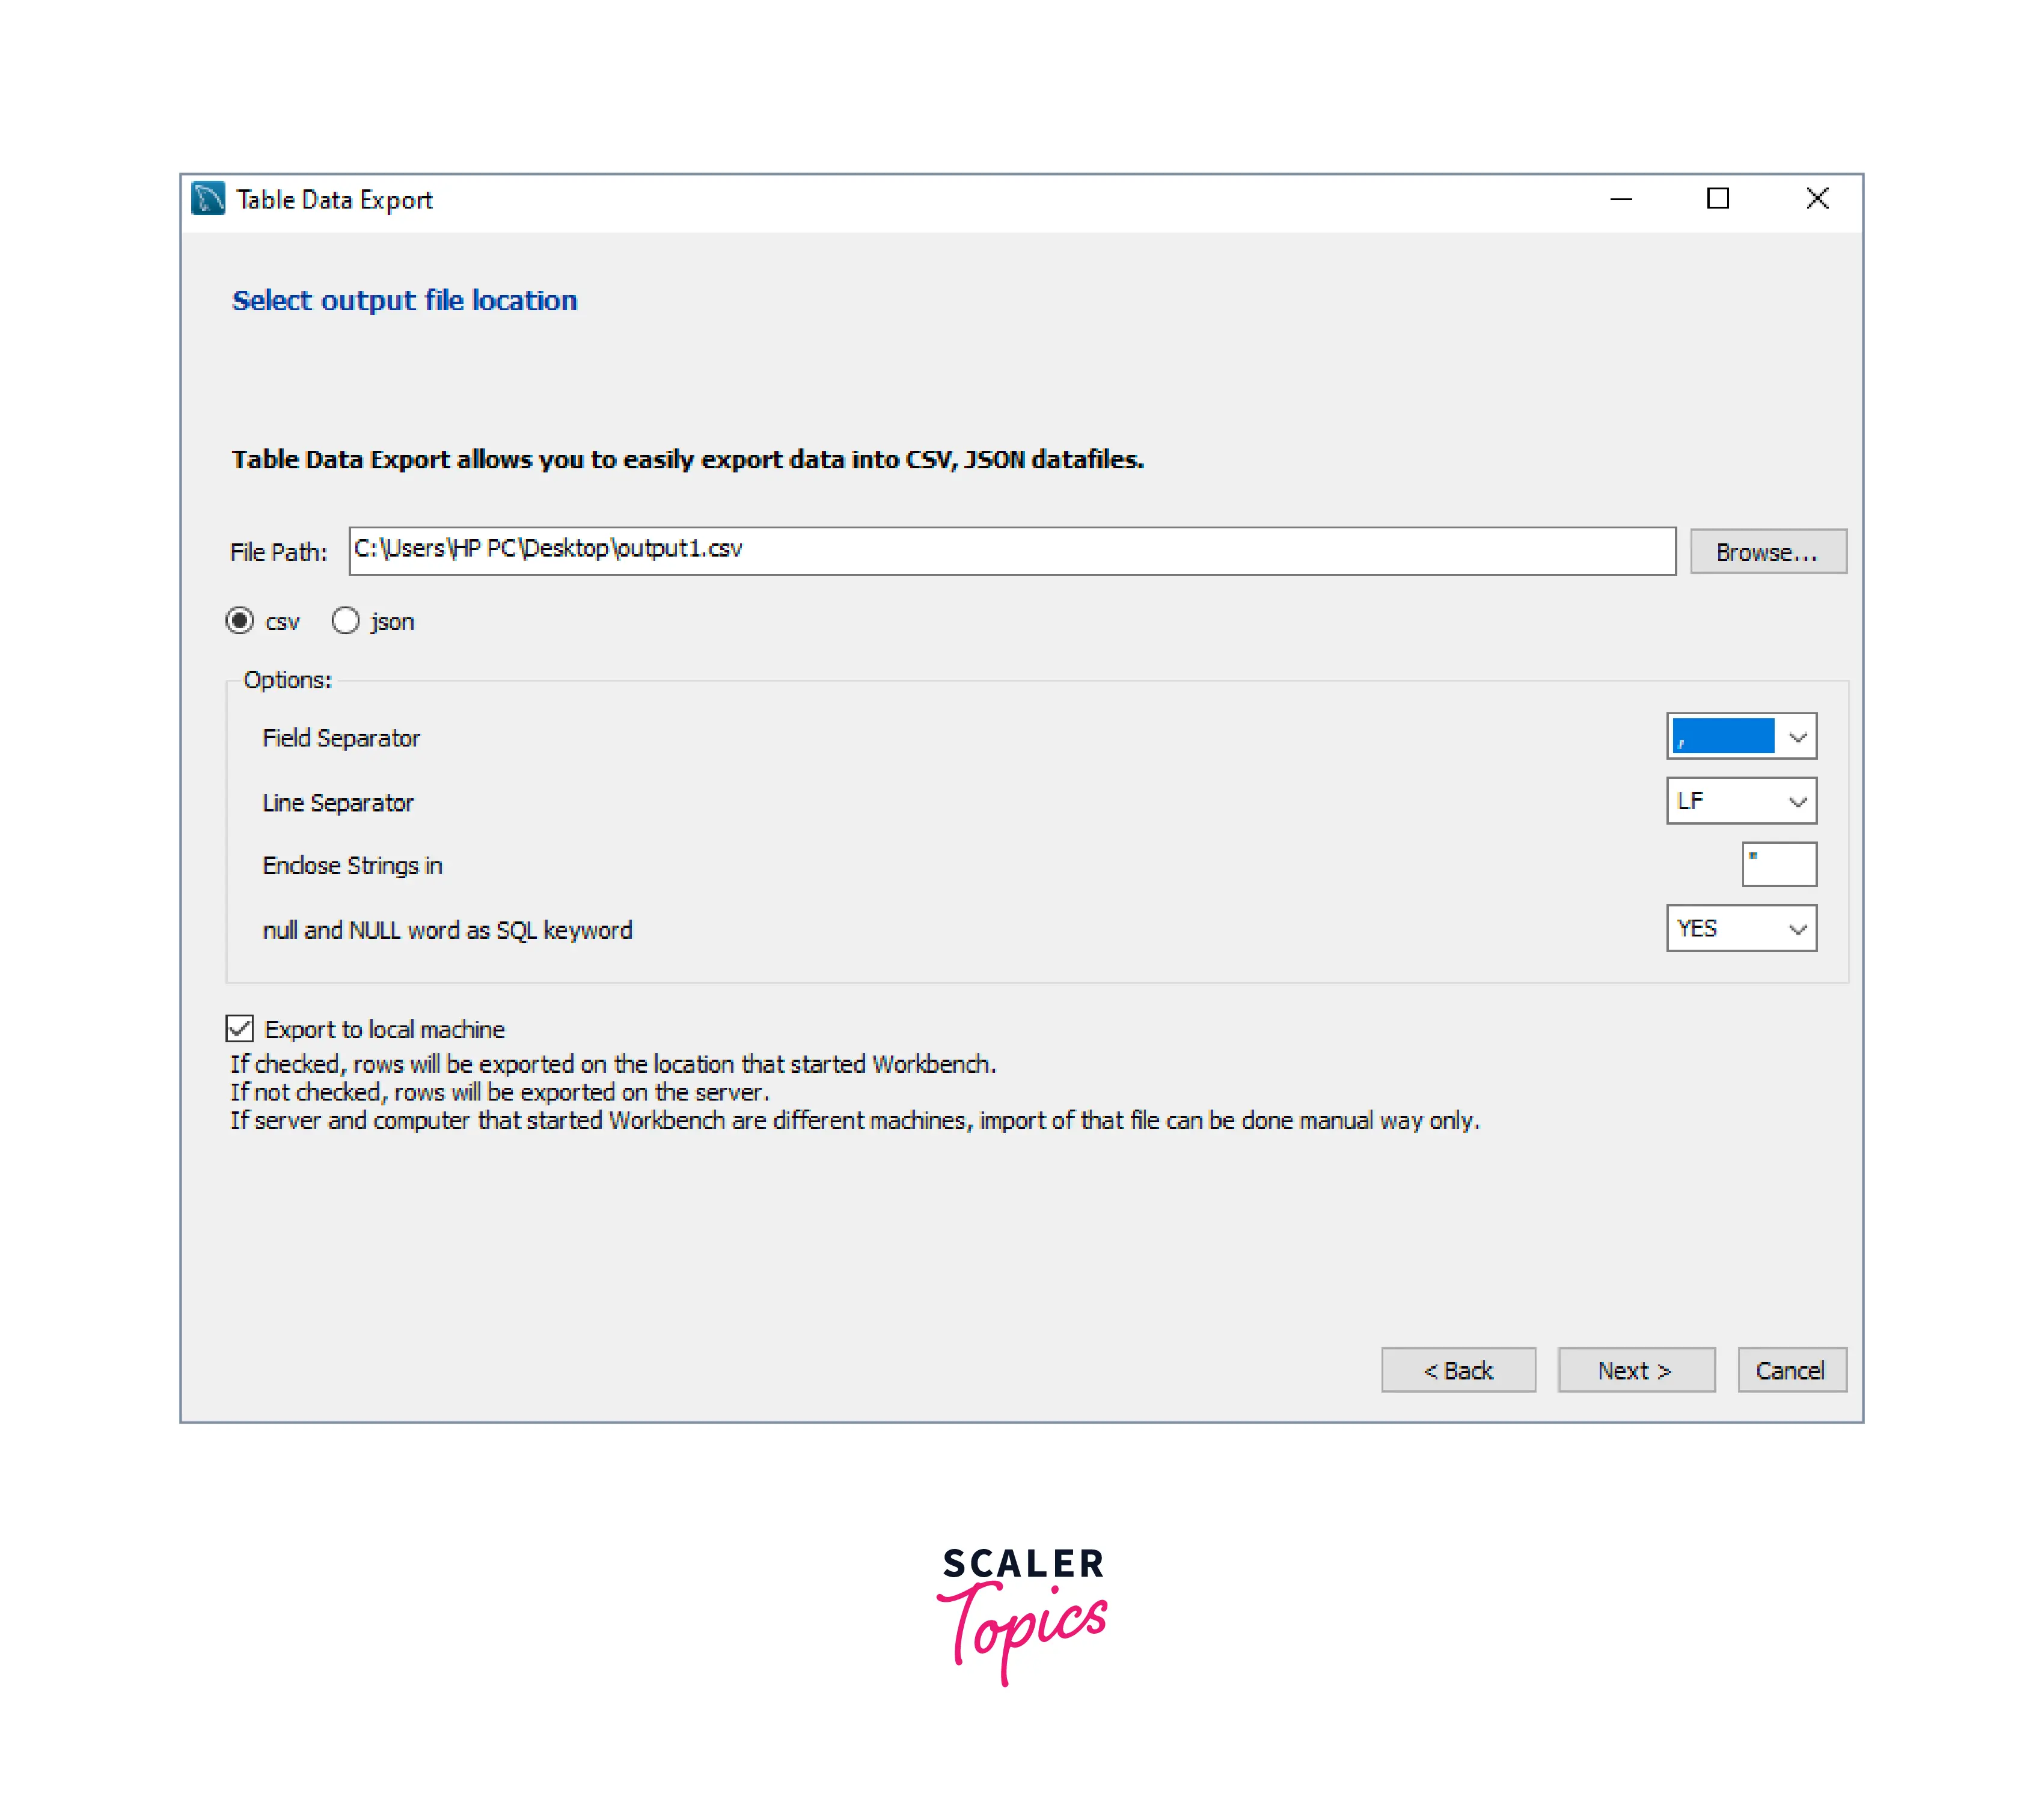
- Now, the window will show the operations that will be getting performed, click on Next >
- After performing the operations, the window will look like this, click Next > after that.
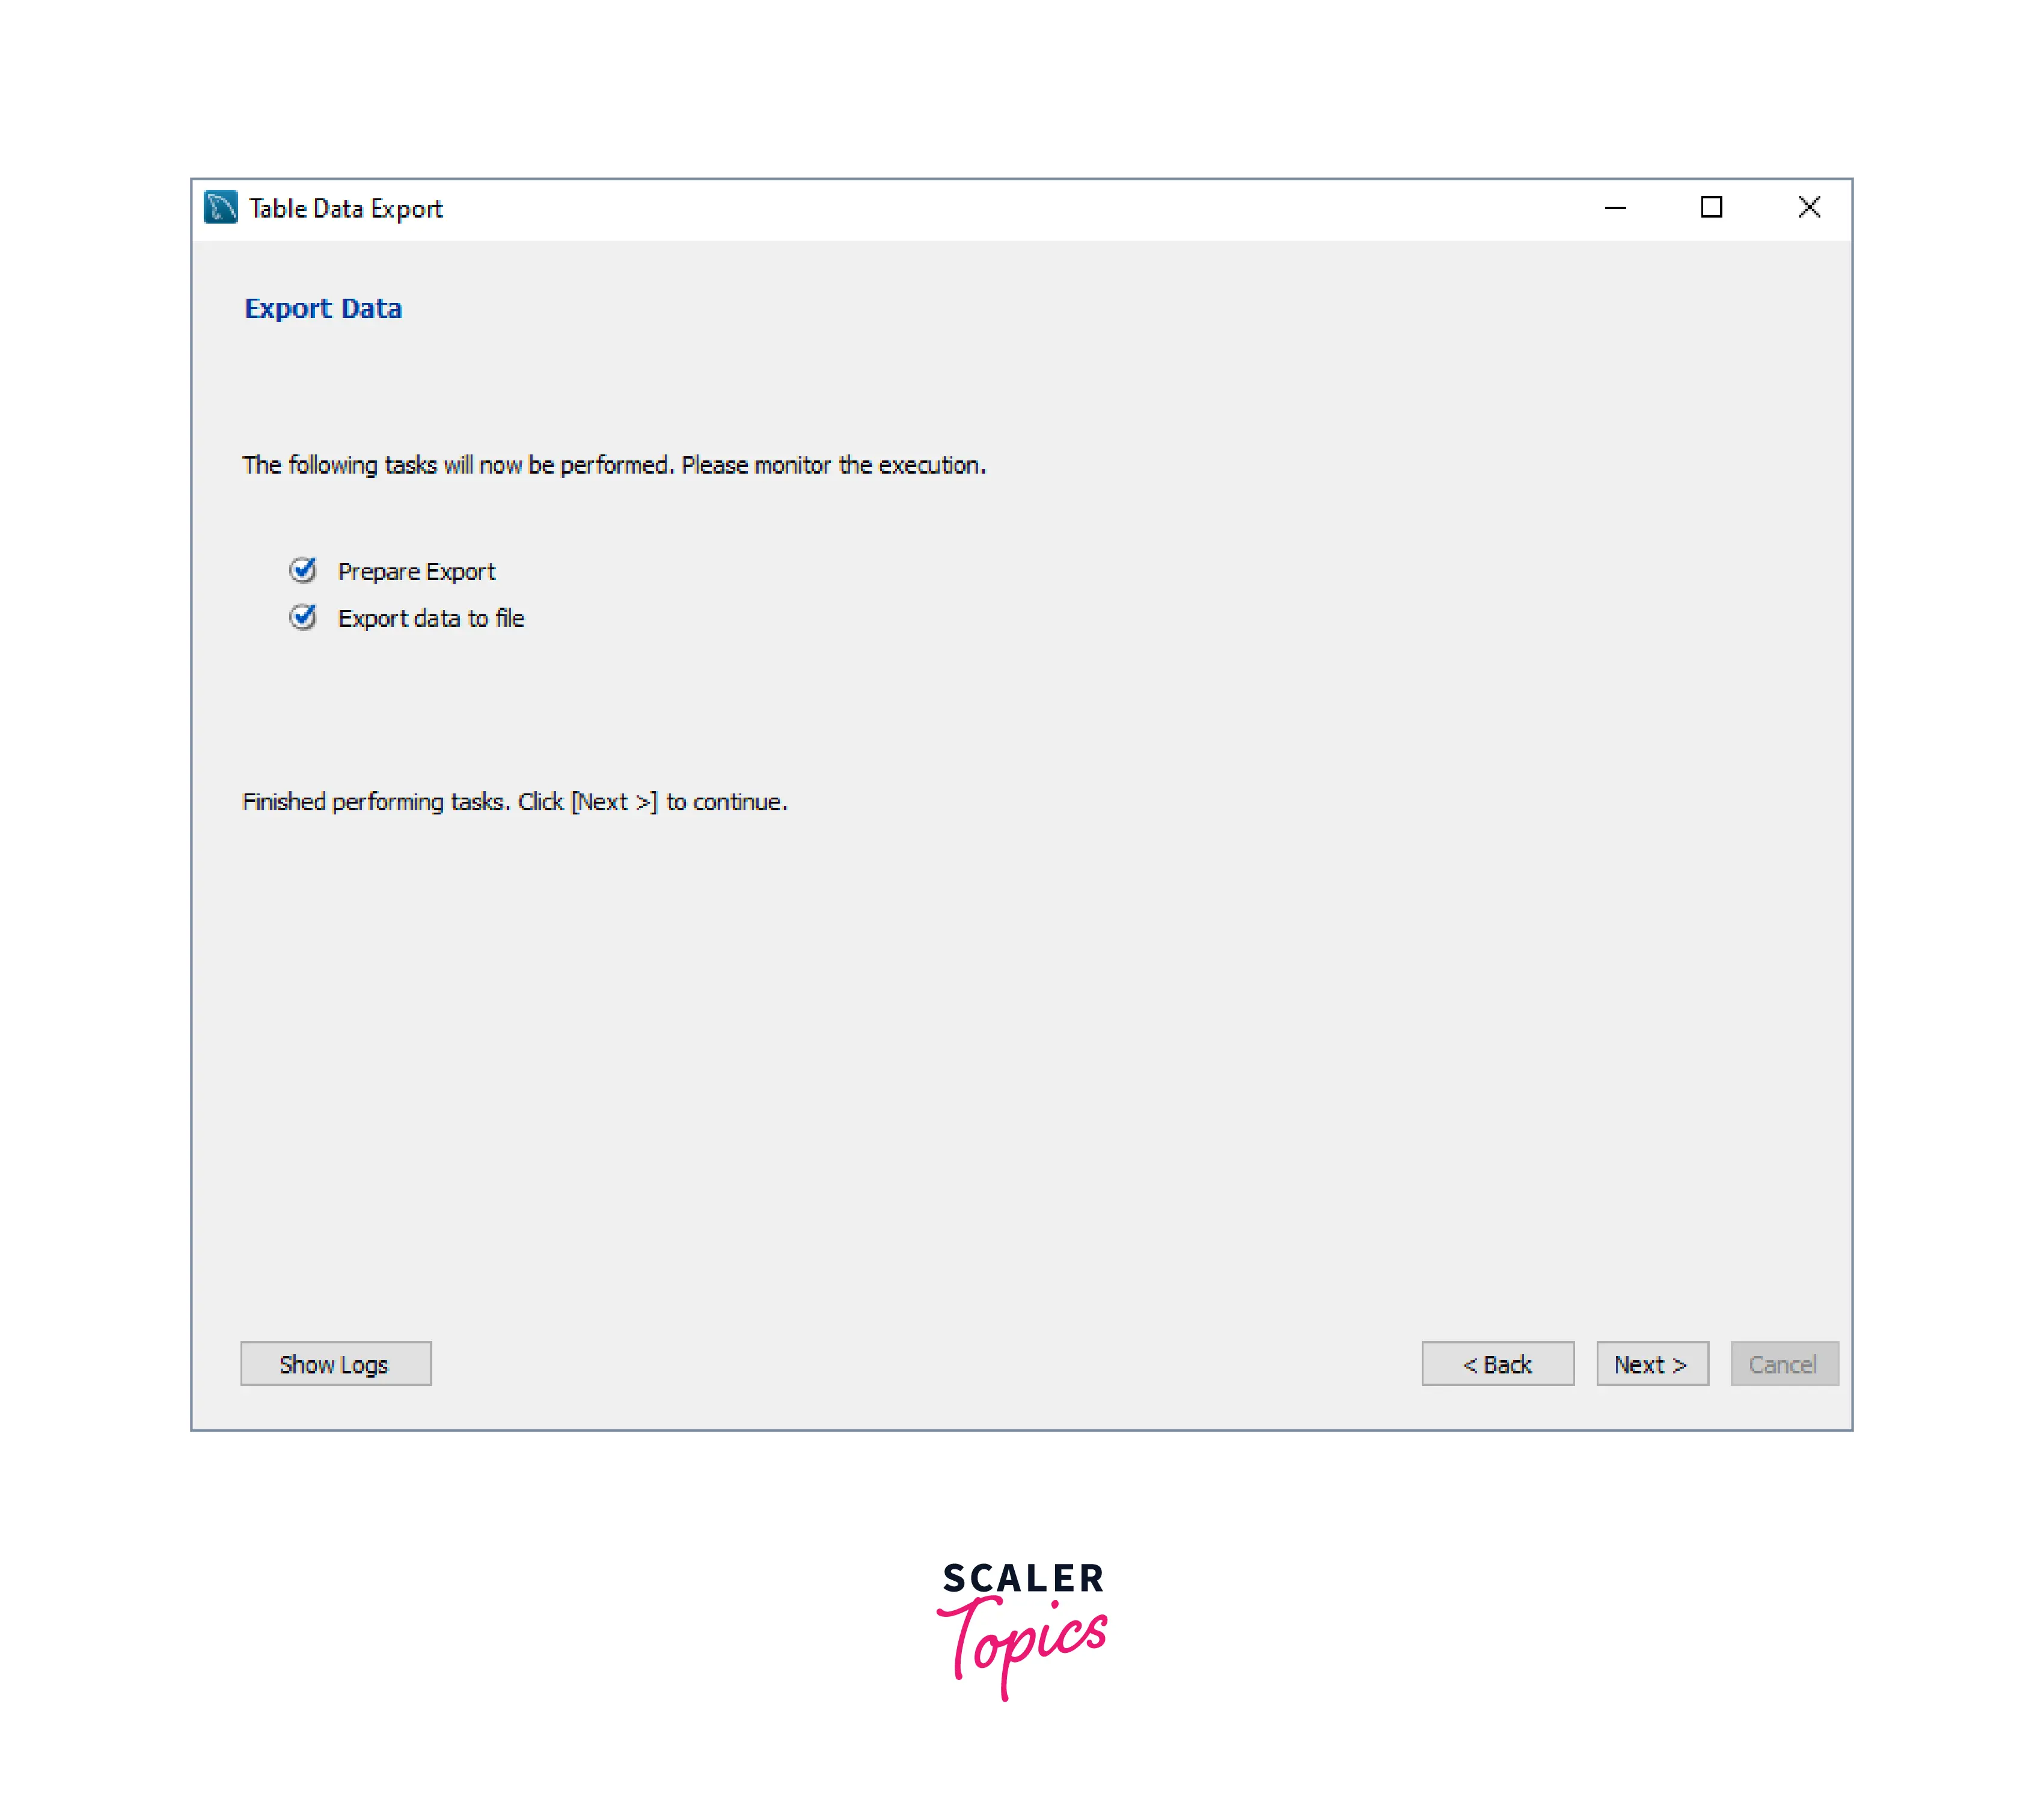
- Now the wizard will show the file path along with what it took to complete the process.
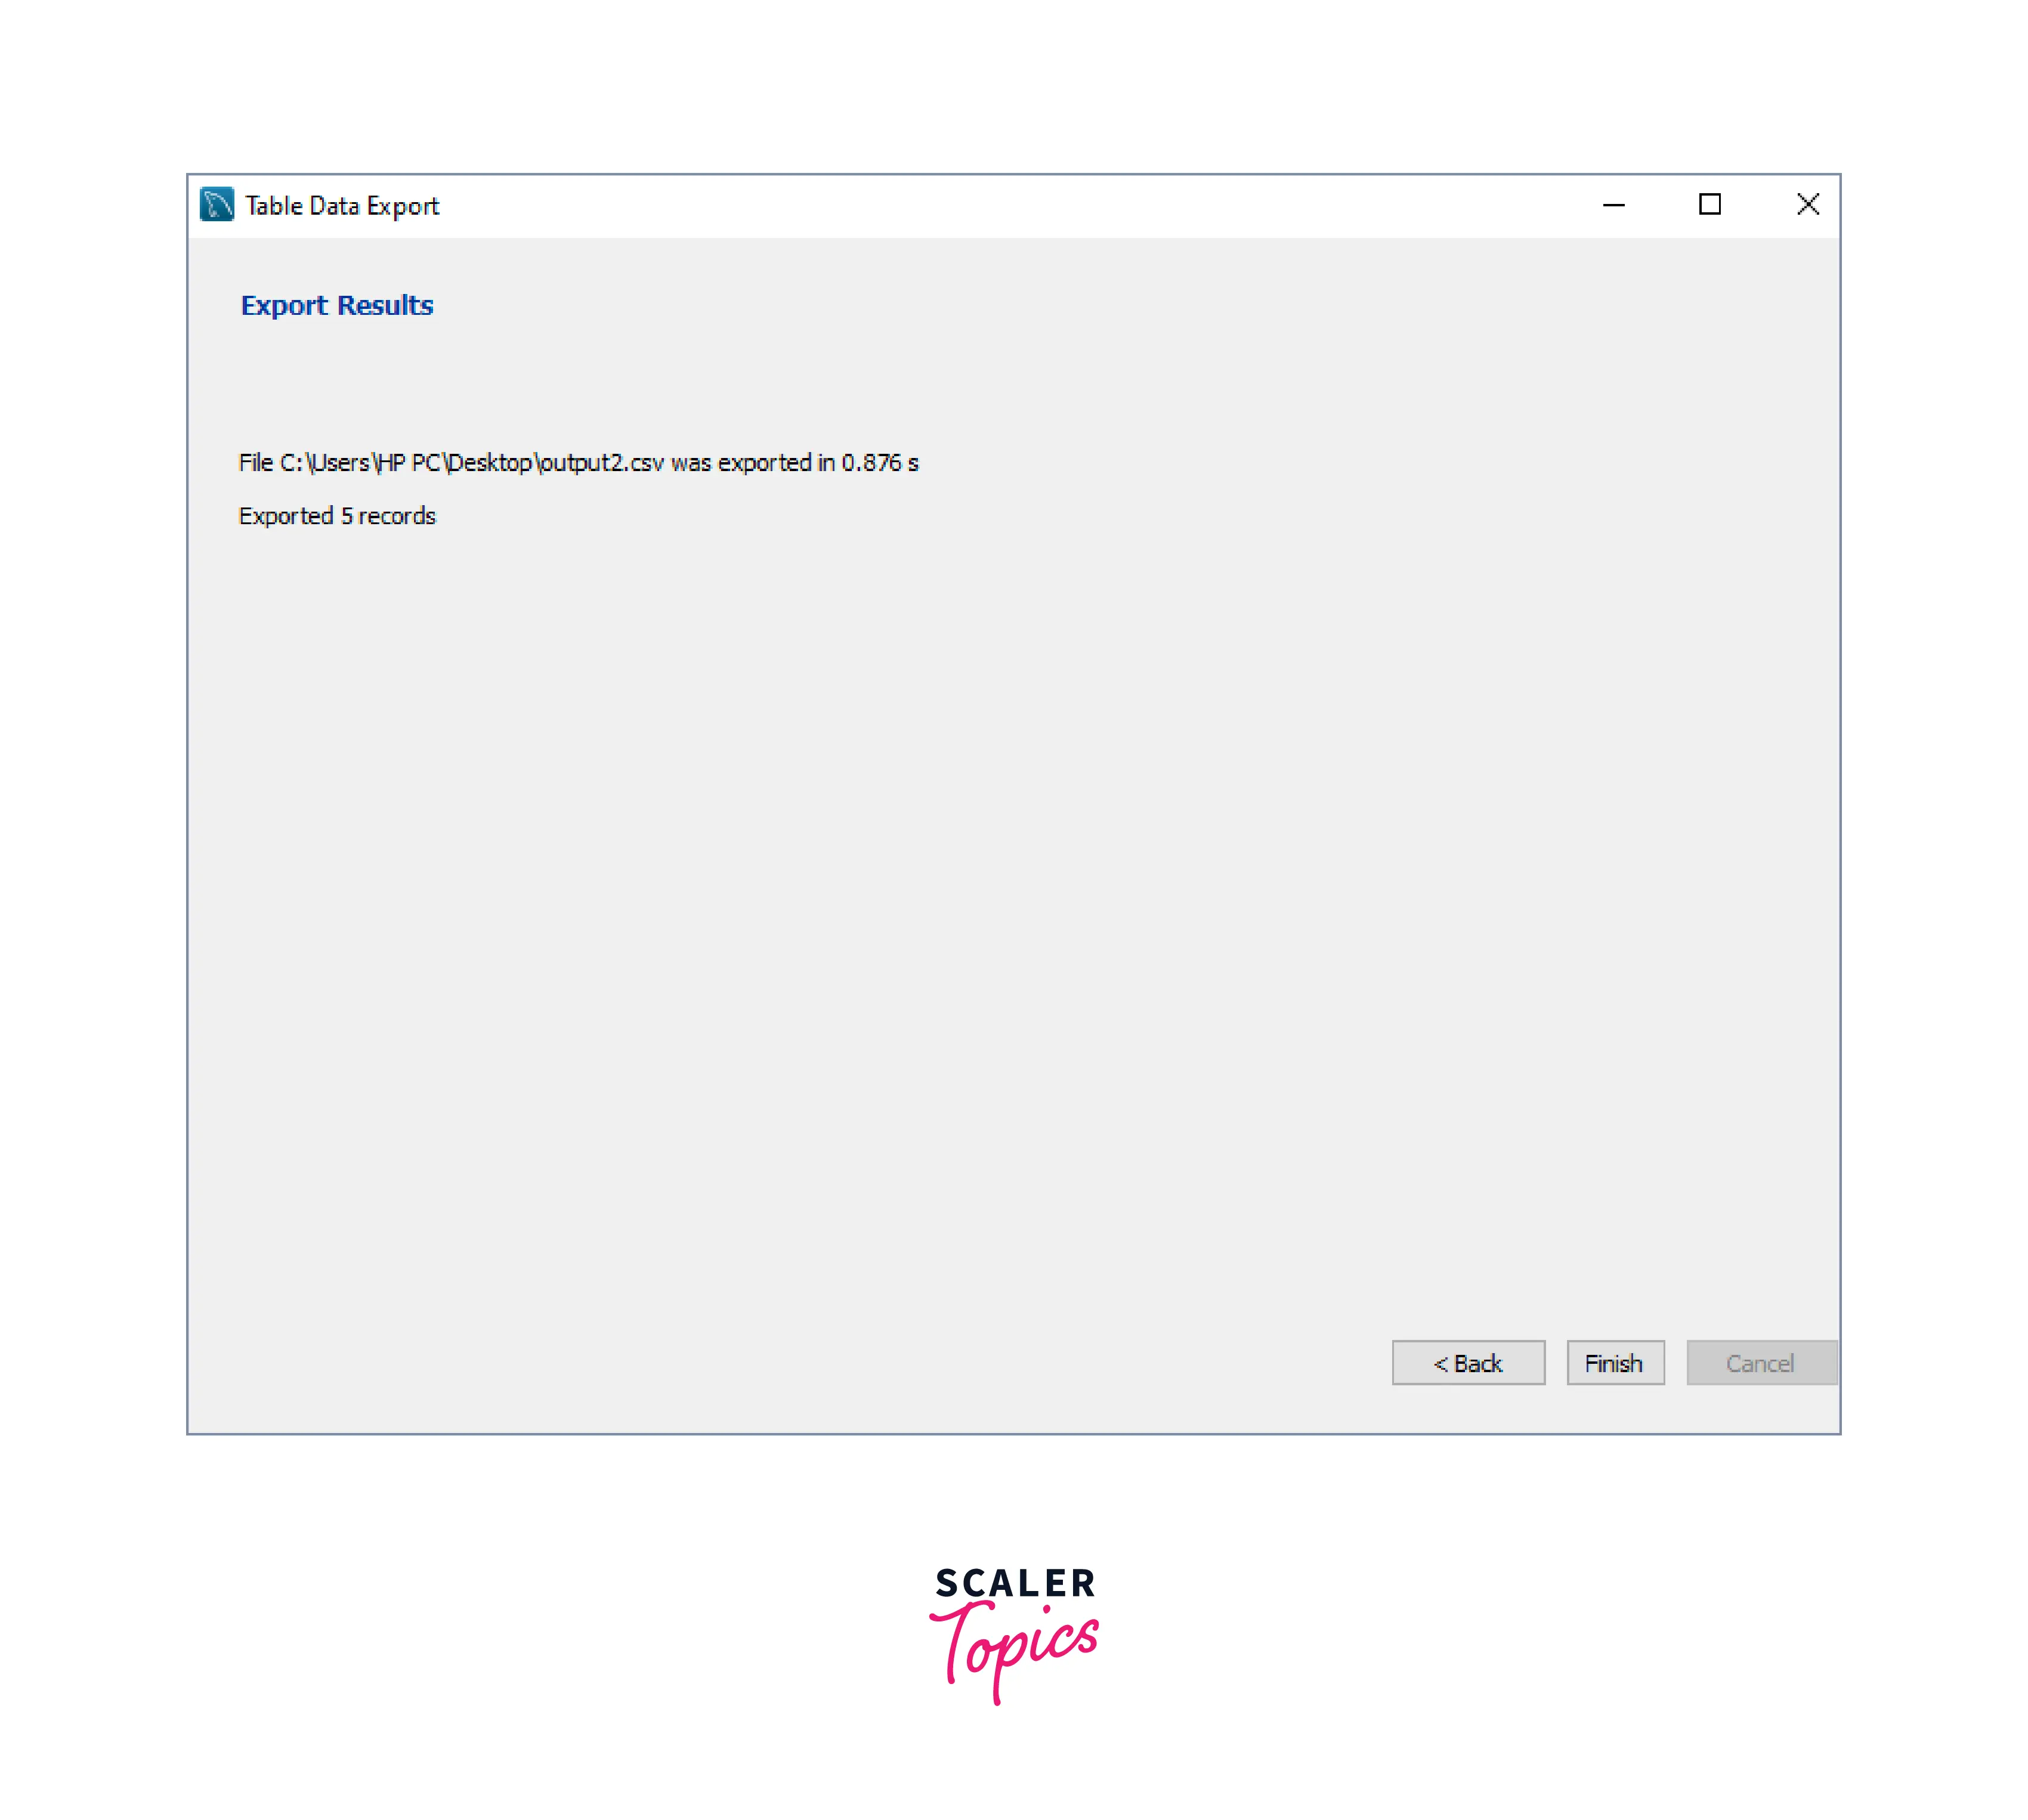
- Click on Finish.
- Output CSV file will be generated on the given path, make sure to check the data once:
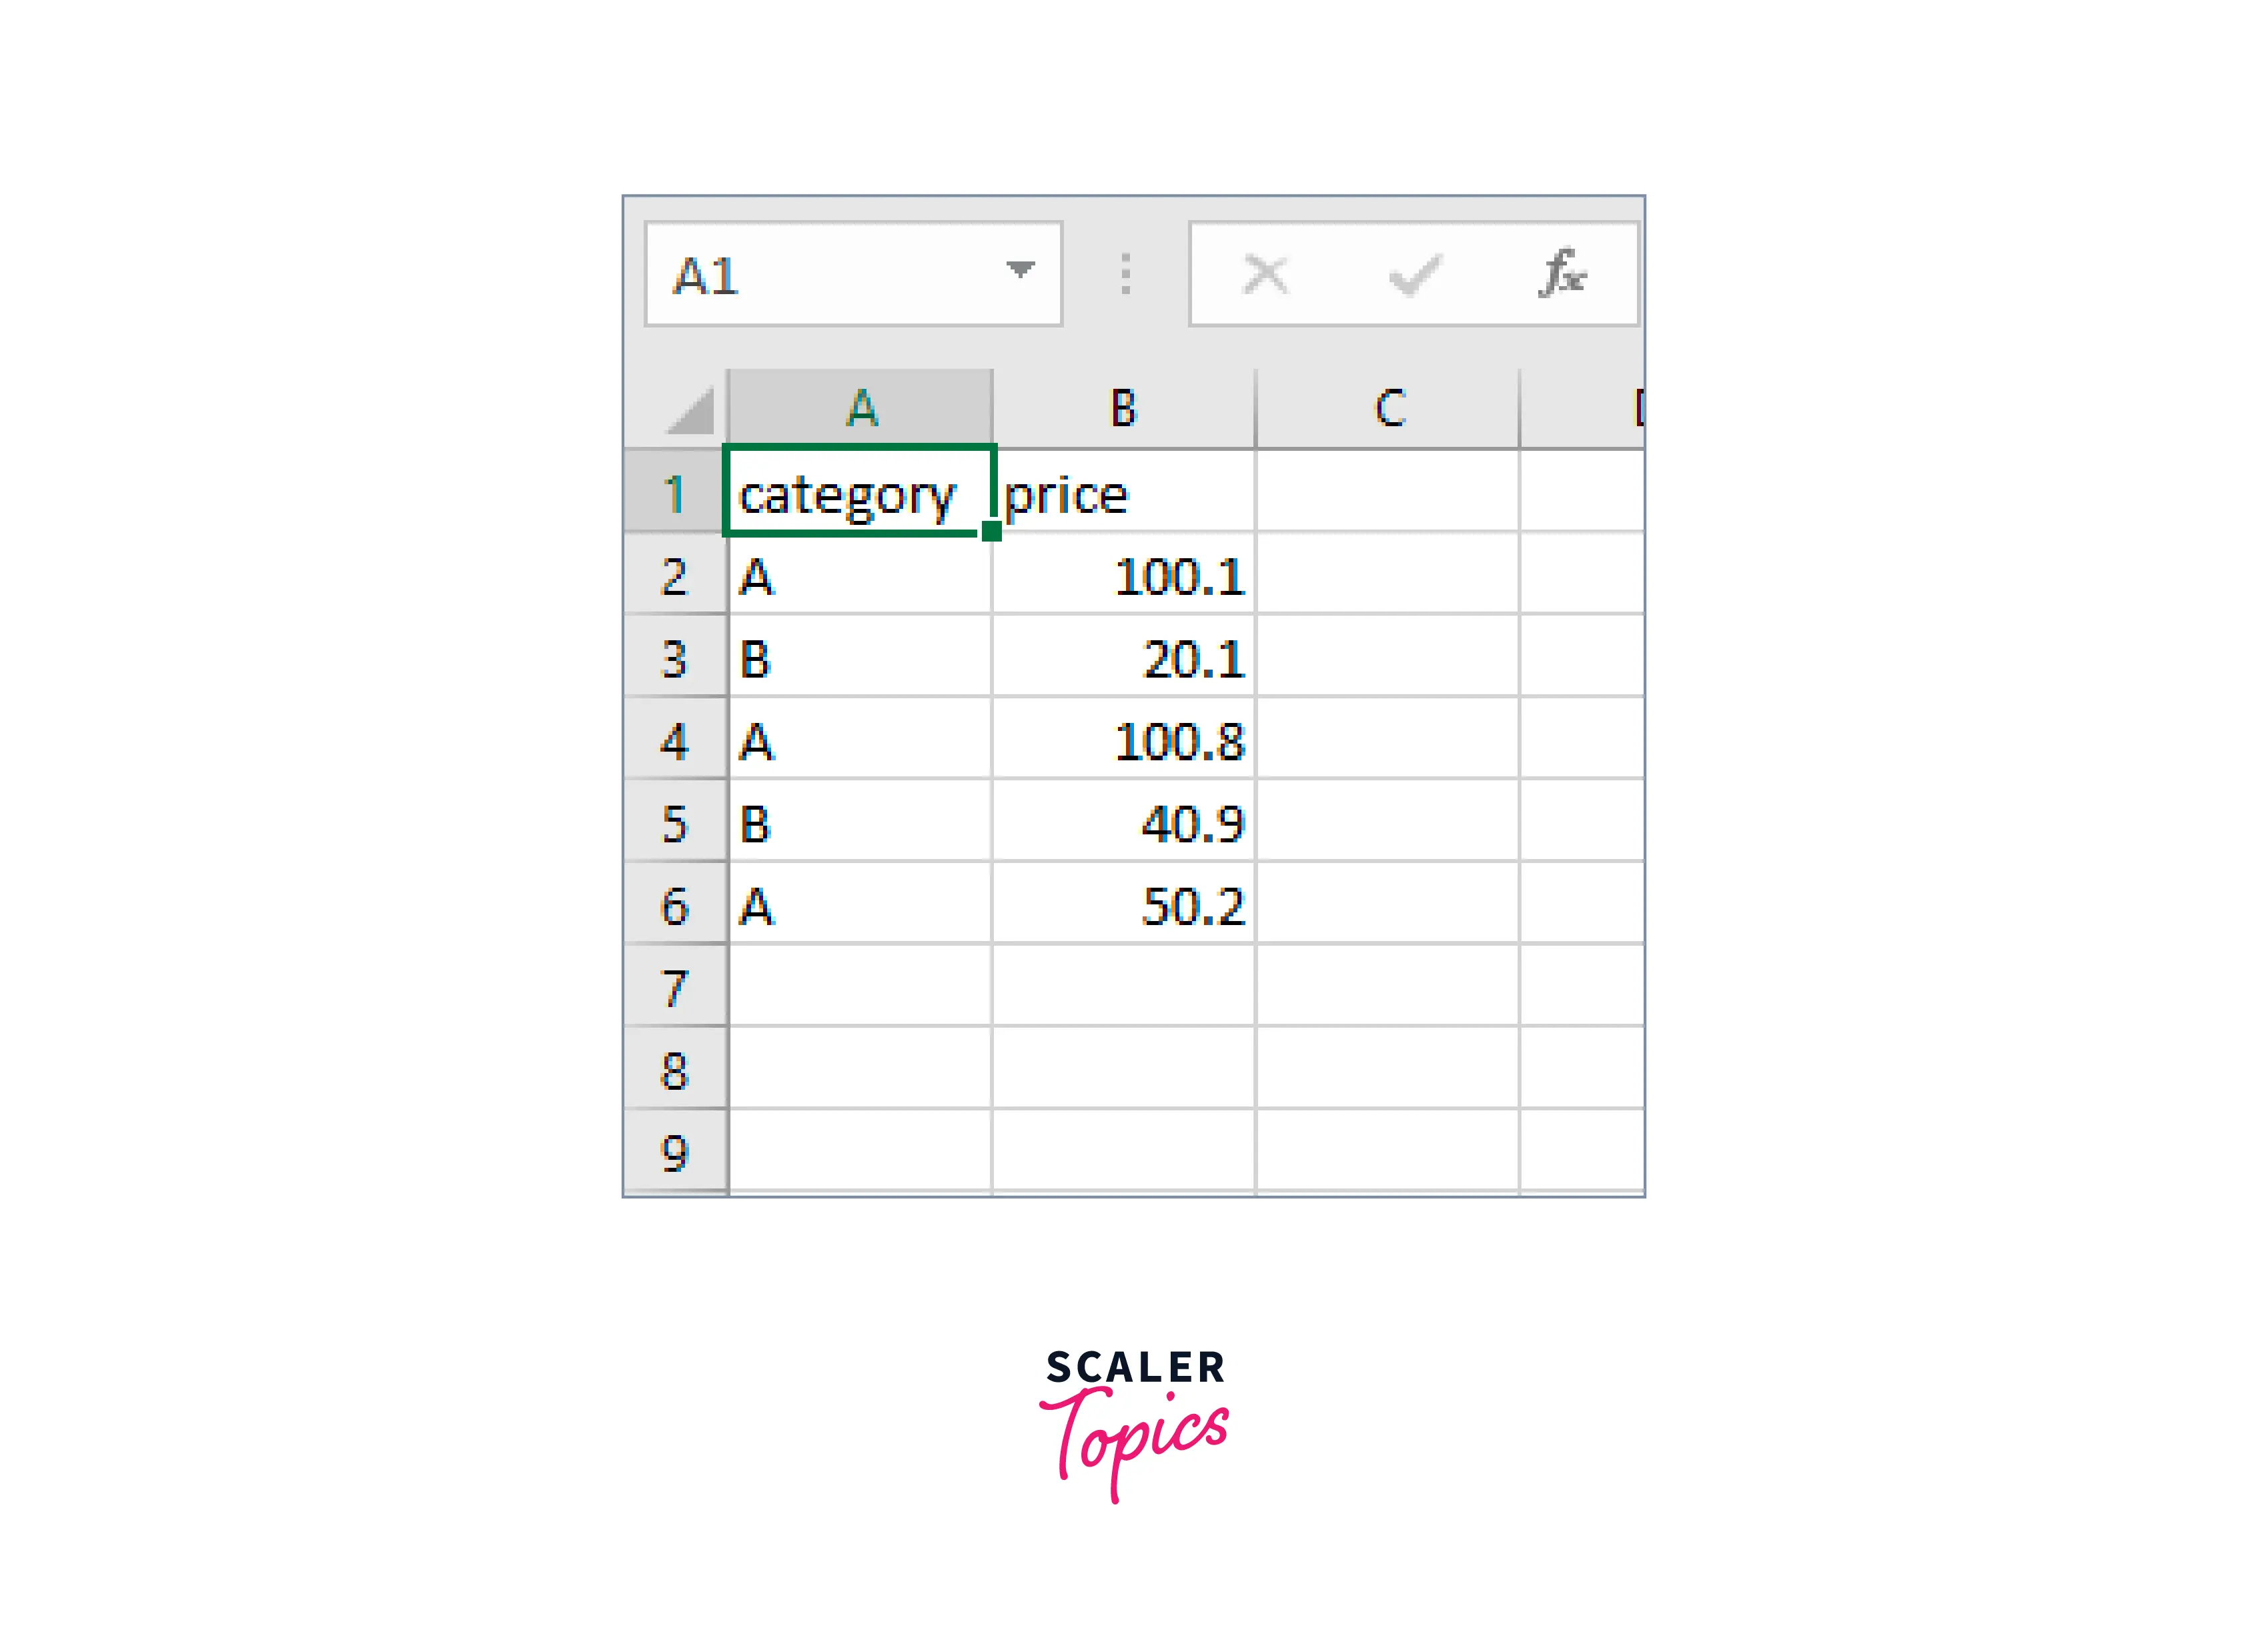
- But this is a CSV format file, so we can do the same process as we did above by importing this CSV file into an Excel file.
Conclusion
- Exporting/Importing data from MySQL to Excel can be a very useful and important task when we talk about data transferring and analysis.
- In this article, we got to know about 4 methods of Importing/Exporting MySQL data to Excel:
- Export/Import MySQL data to Excel using the SELECT INTO … OUTFILE statement
- Export/Import MySQL data to Excel using the From Database feature
- Use MySQL for Excel add-in
- Export to Excel using a third-party software
- Knowing these methods can be very important in handling Data and maintaining database backups.
