Node.js Websocket Server
Overview
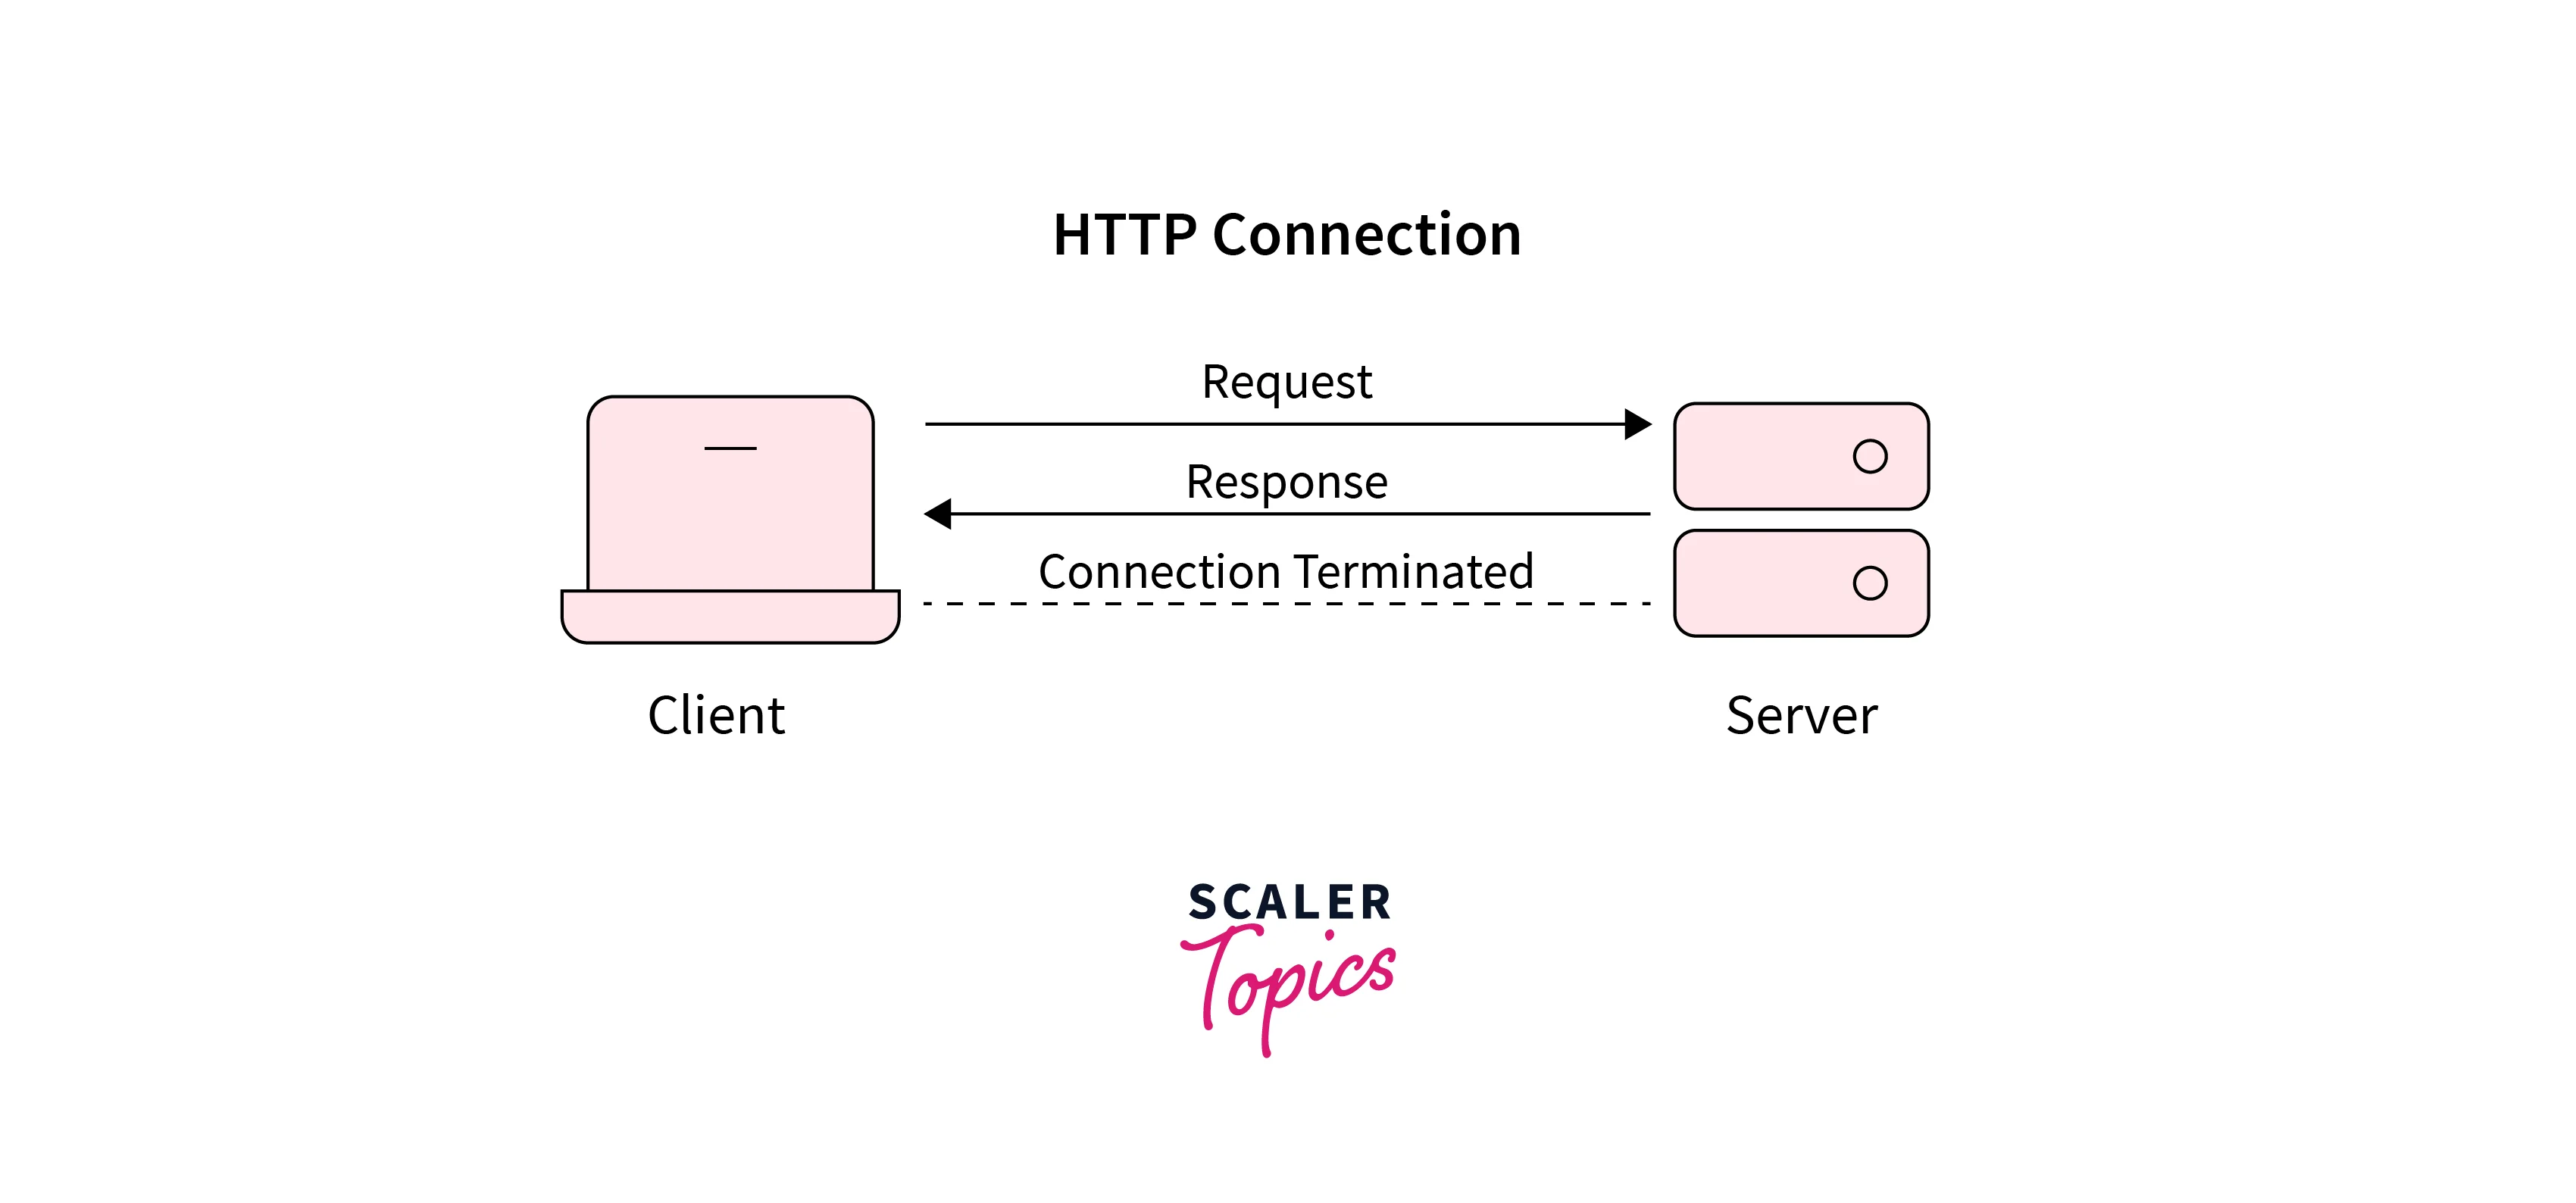
A more significant number of applications today run on the concept of real-time communication to deliver information. For example, chatting apps and video conferencing. The traditional HTTP is slow and is dependent on client requests. Real-time communication needs the server also to communicate with the client without any client request. This brought the concept of web sockets into the picture. Web socket helps create persistent real-time communication between the client and the server.
What is a Web Socket?
Web sockets can be called an upgrade of the traditional HTTP. A web socket is a protocol that provides the full-duplex or bi-directional line of communication between the client and the server.
It is a continuous connection that allows the following:
- The data can be sent from server to client whenever any event happens, without the need for the client to send any request. This is known as server push. The socket can be thought of as a postman. Whenever there is any post with your address on it, the postman delivers the post to you without you constantly calling the post office if you have any posts. This is very helpful in applications where the client has to be informed about any event on the server. This can’t be done efficiently on HTTP without polling.
- Data can be sent in any direction very efficiently after the establishment of connection because the nodejs WebSocket data frame is very well organized and does not require headers every time.
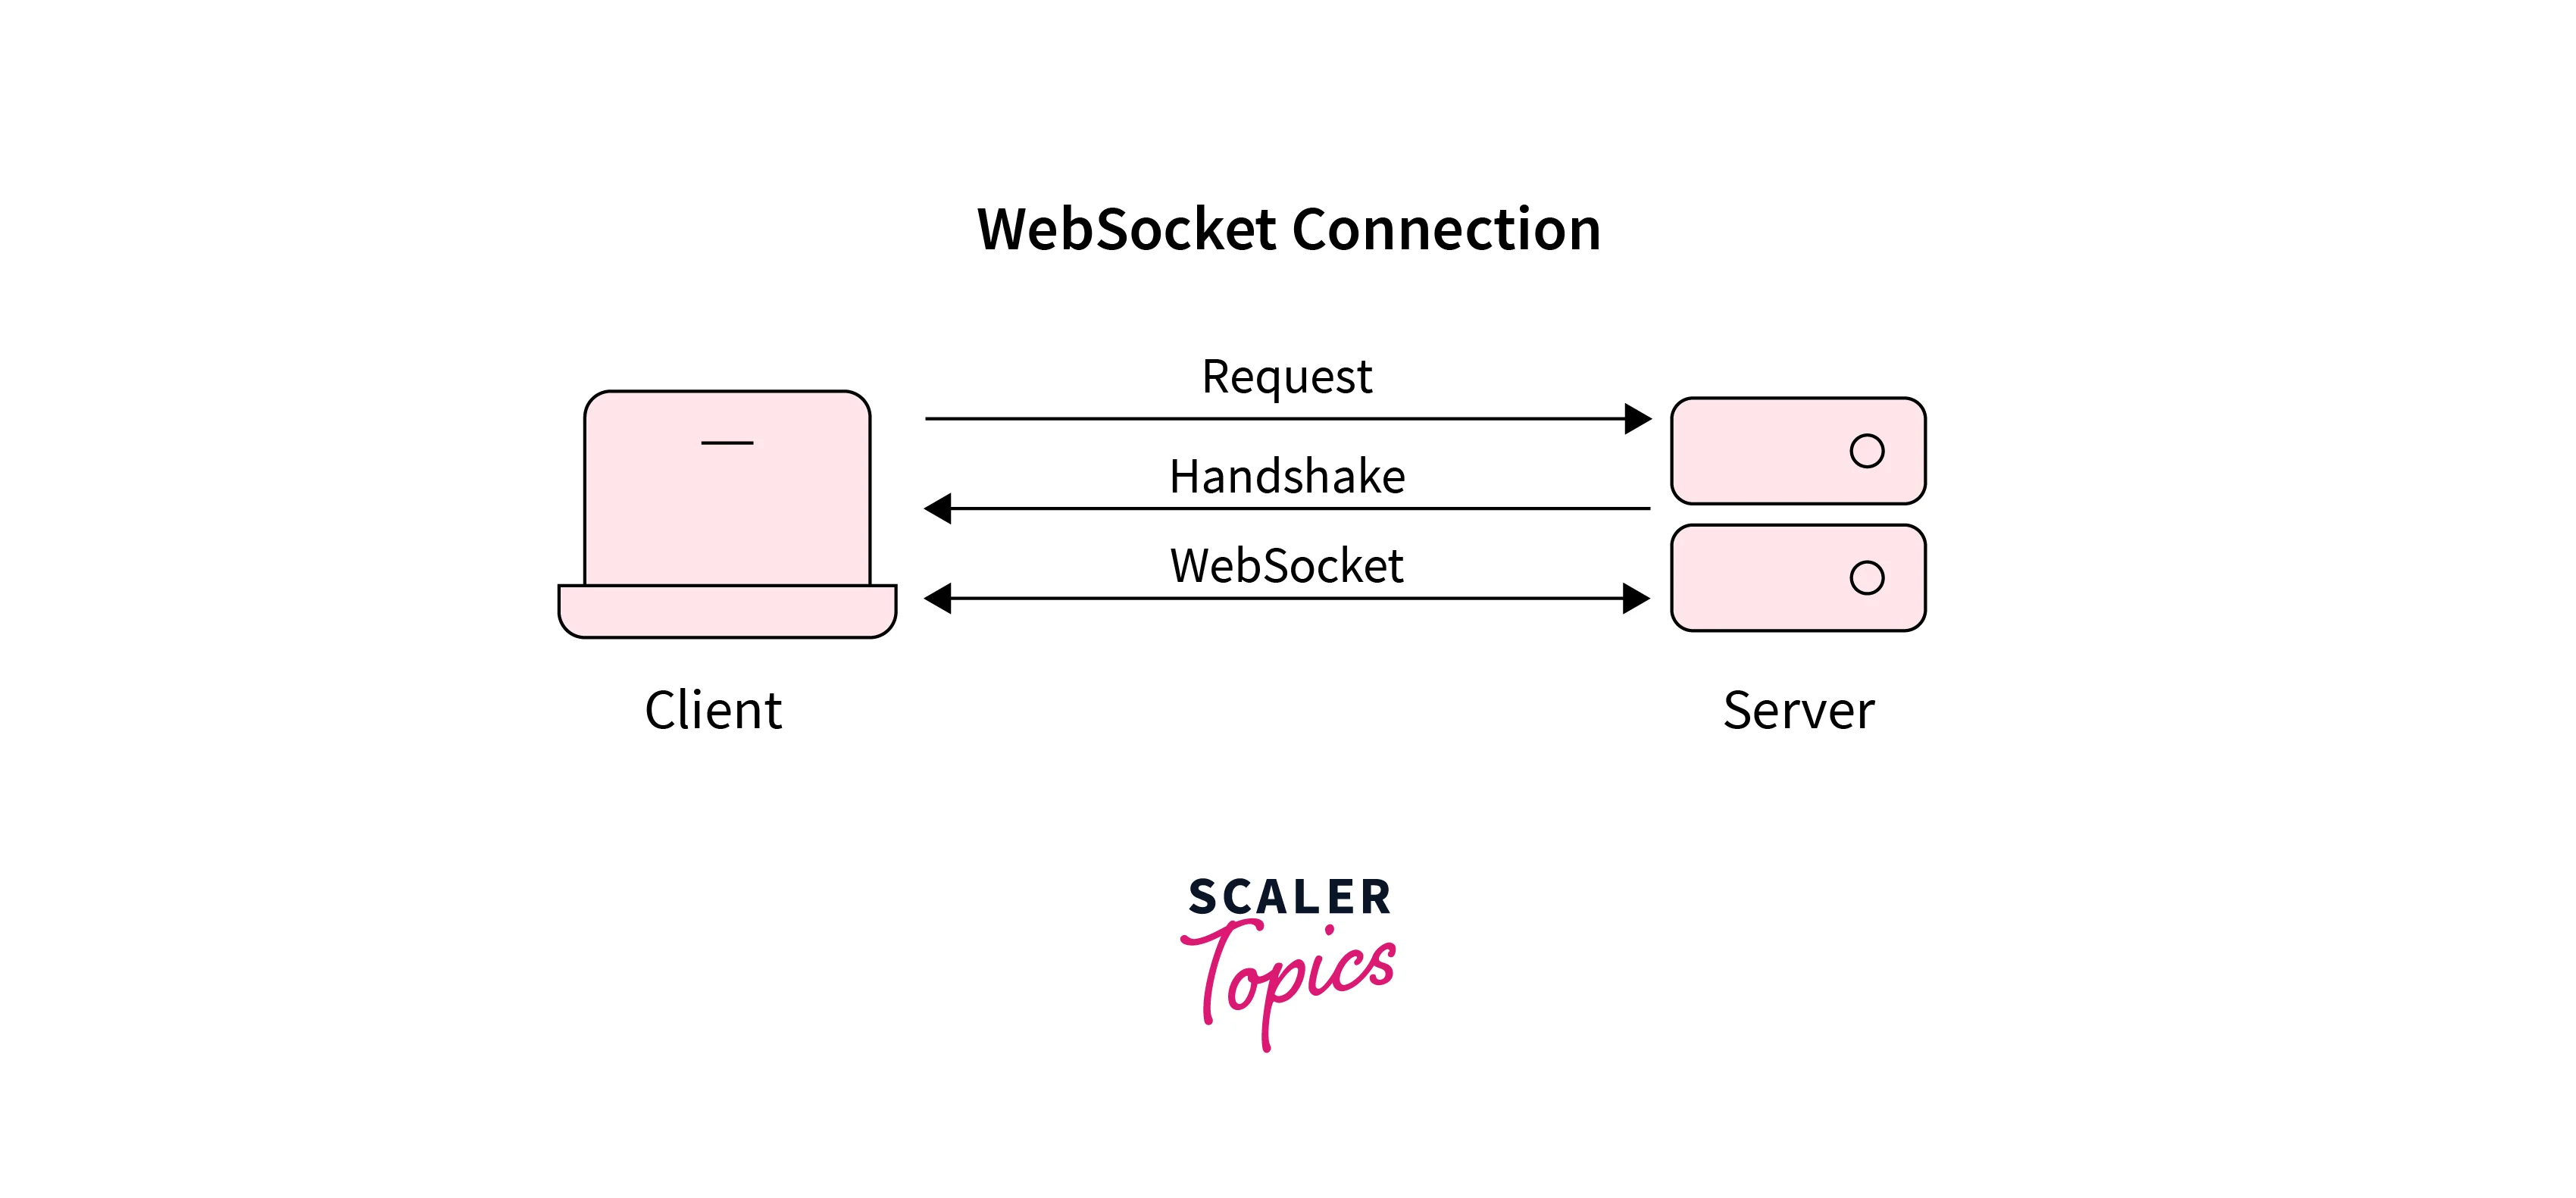
Setting up a WebSocket connection requires the following steps:
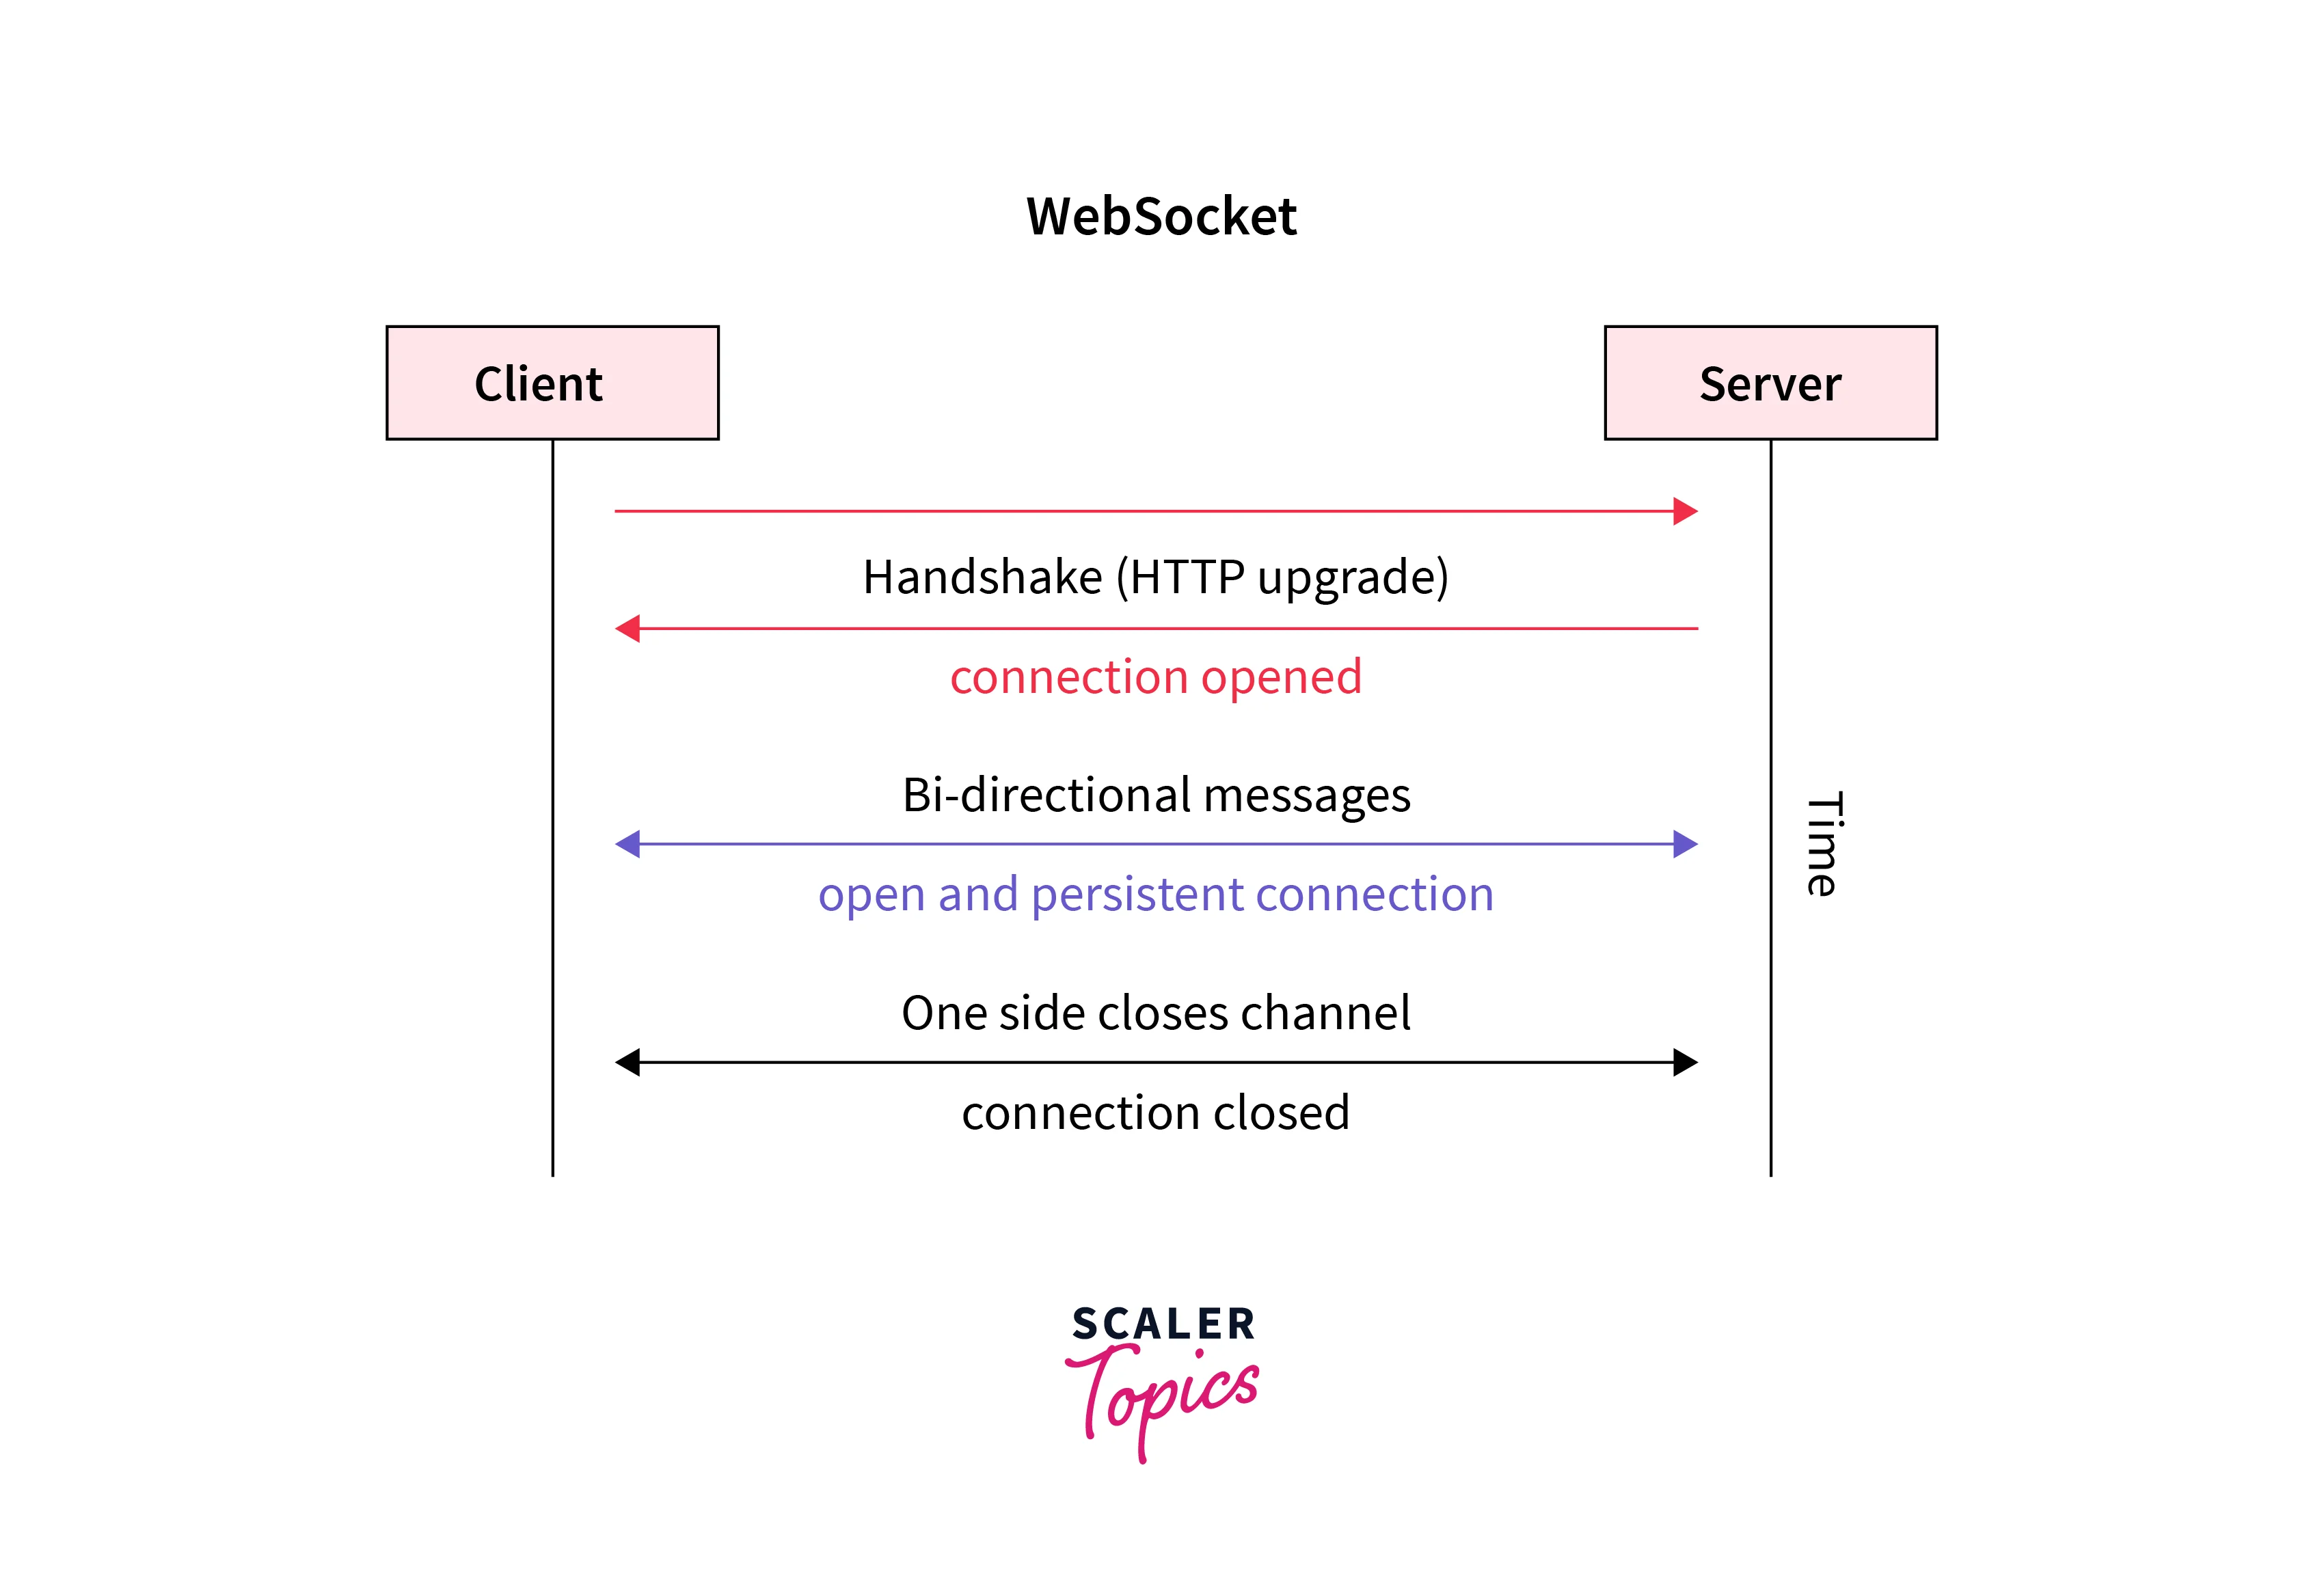
- The client sends a connection upgrade request to the server. This nodejs WebSocket handshake is like a normal HTTP GET request, but it has an upgrade header that asks the server to switch to the binary protocol. In other words, the client asks the server to enable the use of nodejs WebSockets. Here are some additional headers sent in this request :
- If the server supports web sockets, the request is accepted, and the connection is switched to WebSockets. The server sends a 101 header response to tell that it is switching protocol. Here are the additional headers sent by the server :
- Once the switching of the protocol is done, a continuous and persistent connection is created.
- Now the client can send some message to the server, or the server can send some message to the client on the happening of some event.
- The channel is closed by either side to disconnect.
How Can We Implement WebSockets?
There are a bunch of ways in which we can implement web sockets. RFC 6455 is the latest specification of Websockets protocol standardized by W3c that is supported by various browsers like Opera, Safari, Google Chrome, Internet Explorer, and Mozilla Firefox.
The nodejs WebSocket API provides asynchronous communication between the client and the server that takes place over a TCP socket using ws (unsecure) or wss (secure) and can be used by both the client and server. The API allows cross-domain messages without any issues.
One of the libraries that can be said to be a preferred way of working with sockets is socket.io. The library allows bi-directional, real-time, and event-based communication between the server and the client. It was created by Guillermo Rauch, CTO of LearnBoost and lead scientist of LearnBoost Labs. It consists of a Node.js server and a javascript client library. It is a wrapper around the nodejs WebSocket API and is very simple to work with. It makes working with sockets very easy.
The socket.io also provides several extra features like Broadcasting, long polling fallback (a method of creating close to persistent connection between the client and the server), automatic reconnection, and easy handling of load balancers and proxy. The socket.io library can be used on 97% of the browsers available to date. There is no element like a proxy or firewall that prevents the nodejs WebSocket link between the server and the client.
Let us have a look at the basic terminology Of Socket .io:
- Server creation :const io = socketio(server) Here server is the HTTP server created. This is used to create a socket server.
- io.on() method : io.on(‘connection’, () => {}) This binds the passed callback function to the connection event. On connection establishment, the function is called.
- socket.emit() method : socket.emit(‘name of event’, () => {}) This can be used at both client and server end to emit or create an event that is listened to by both client and server.
- socket.on() method : socket.on(‘name of event’, () => {}) Used to listen to and handle the event emitted by the socket.emit() method. The callback code gets executed whenever the event occurs.
- socket.broadcast.emit() method : To emit events to all the clients except itself which is the user who is emitting the events.
- io.emit() method : io.emit() It used to emit to all clients without any no exception.
- Disconnect method : socket.on(‘disconnect’, () => {}) internal socket function use it when you want to know when a client disconnects.
Installation
To start working with web sockets with the help of the socket.io library, let us first set up our development environment. To create a server, you must have Node.js installed in your system. You can easily install Node.js by the installer provided on the Node.js official website.
In your project directory, initialize a Node.js project by running the following command in the terminal :
A set of questions will be asked about the project, and after you have answered them, a package.json file will be created containing all the information about the project.
Now you need to install a few dependencies before you start working. Execute the below command to install express. Express is needed to create an HTTP server over which the nodejs WebSocket will run.
Now to install socket.io, run the below command in the terminal.
Now in the package.json file, you must have express and socket.io mentioned under the dependencies with their corresponding versions.
Server-side Code Example
Now, after installing all the dependencies, you can start writing the server-side code in Node.js. The server is the central point in the connection. The data from one client is transferred to another through the server. The data sent to the server is handled by the server, and it is then forwarded to other clients.
Here we will be creating an HTTP server with the help of express. We will make a variable whose value can be increased by all clients, and the updated value will be sent by the server to every client.
Create a file server.js and write the below code in it.
In the above code, first, we have imported the express module with the help of the require() function. Then an express app has been created by making an instance of express. An HTTP GET endpoint for the / route is made that returns the response Working with Web Sockets. The app is made to listen on PORT 3000.
On running the above code using node server and opening localhost:3000 you will see the message - Working with Web Sockets.
Now, we have created an HTTP server. Now to integrate websockets, you need to make the changes as shown in the below code.
In the above code, a count variable is made with an initial value of 0. The socket.io library has been imported, and the HTTP server has been passed to its instance. The .on listener has been created for the connection event to handle the new client connection. The socket parameter in the callback function can be thought of as a link to the client.
We have also added another GET endpoint in which the user will receive an HTML file. We will create this file in the next section. When the client connects, the server emits a welcome event to the client. In this, an object is passed containing a message msg and the value of the count variable.
Now some event handlers have been created for the socket connection :
- increment: When the increment event is fired by some client, then the value of the count is incremented, and the new value is sent to all the clients.
- disconnect: When some client disconnects, then the associated callback code for the disconnect is executed.
On running the server using the command node server.js you will get the following output in the terminal :
Hence we have created a server that supports nodejs WebSocket with the help of the socket.io library. Now in the next section, we will have a look at how you can connect clients to this server.
WebSockets on the Client Side
Now for working on the client side, we will have a look at two ways. First is the use of socket.io in HTML files, and the second is the socket.io-client library.
Socket.io in HTML file :
Make an index.html file in the project directory and write the following code in it.
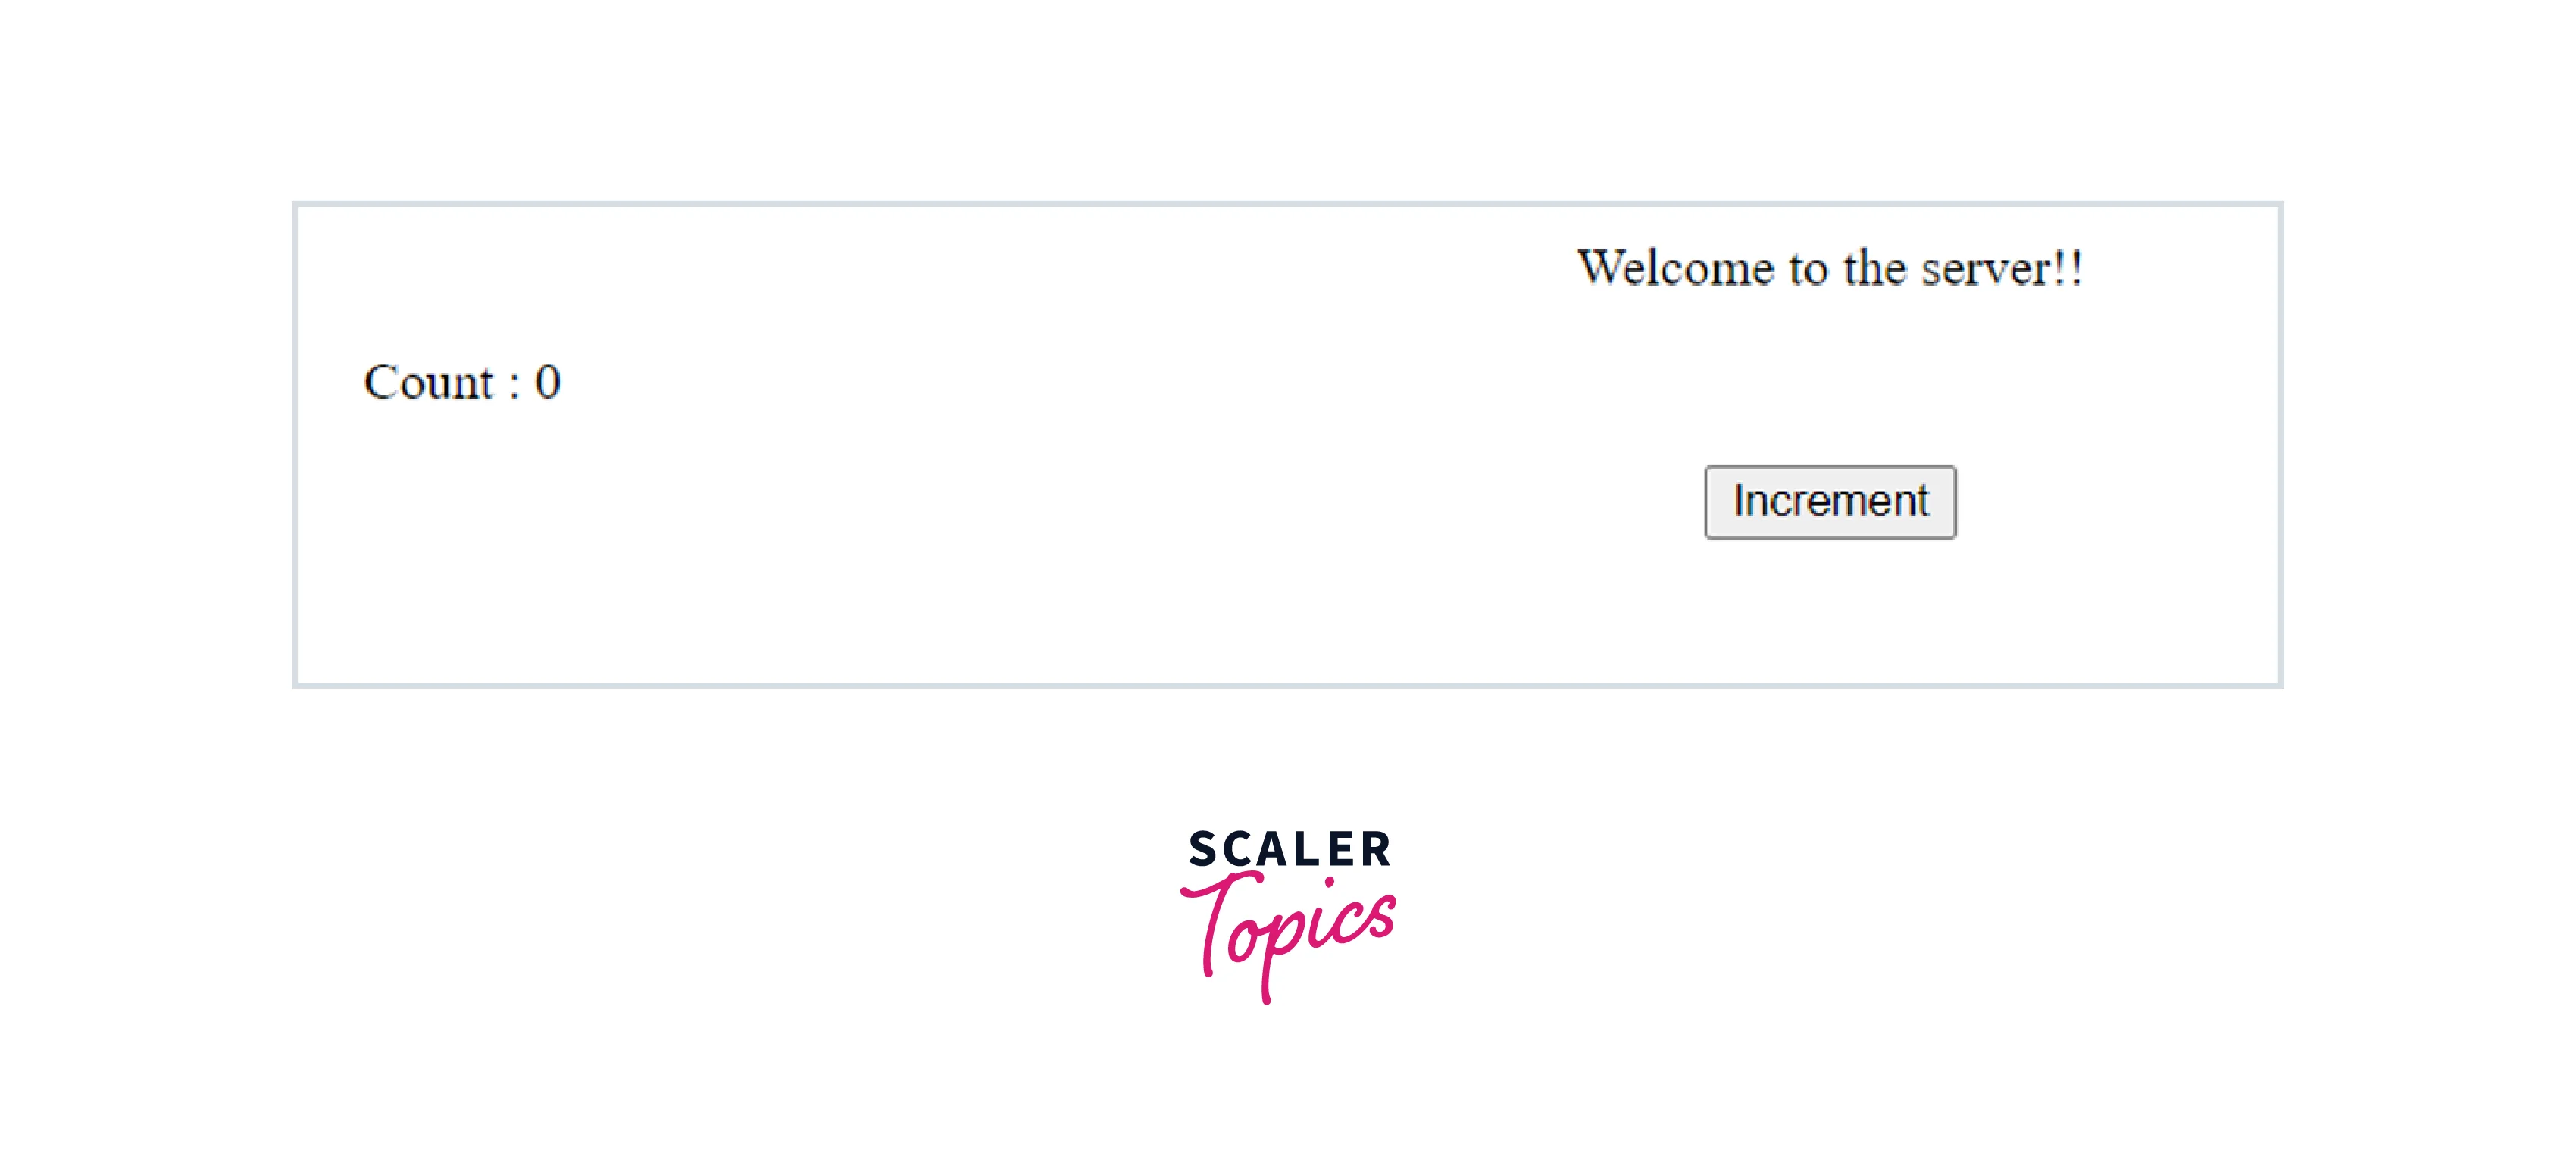
In the above code, the socket.io has been included in the head tag. In the script tag towards the end, the button click is bound to a function in which the increment event is fired. On receiving this message, the server will increment the value of the count and fire an event count. The on() handler for count updates the value of the count for clients. The on() listener for welcome initializes the message and the value of the count.
The output of the above code is as shown when you will open localhost:3000/connect:
On the server’s terminal :
Now open localhost:3000/connect on some other tab and from any of the tabs click the Increment button. Now the value of count on both tabs will become 1. This happened because the server sent a message to all the clients to update the value of the count.
Using Socket.io-client library
Now let us try to make use of the socket.io-client library that we had installed. In the project directory, make a new file, client.js and write the below code in it:
In the above code, the library socket.io-client is imported, and an instance of the client is created by providing the URL of the server that is to be connected. In our case, it is localhost:3000 as our server is running on localhost:3000. The handlers for welcome and count events are made to log the data sent by the server. We have emitted the increment event twice at a delay of five seconds.
On connection establishment, the server will give the welcome message. Then the value of count will change twice because of the two socket.emit(). The output in the terminal on running the client.js file will be :
The above code was an example of how sockets work.
Advantages of Using socket.io Library
Socket.io uses Engine.io under the hood to provide long polling-based bi-directional communication between the client and the server. Engine.io creates a low-level-based connection and handles the transport, upgrade, and disconnection detection. The high-level Socket.io and the low-level Engine.io can be called the two layers of the Socket.io codebase. The various other advantages of Socket.io are:
- Reliability: Firewalls, proxies, antiviruses, and load balancers do not affect the establishment of socket communication using socket.io.
- Auto-reconnect Support: If disconnected and not explicitly told, the client tries to reconnect to the server if it is available on the other side.
- Disconnection detection: When the client or the server closes the bidirectional communication, the other party is informed when the connection close is detected.
- Multiplexing support: One underlying connection can support several communication channels.
- Binary Streaming support: Serializable binary data like an array, buffer, and blobs can also be easily emitted in socket.io.
What Makes WebSockets Hard to Scale?
Applications that do not require non-persistent communication are scaled with the help of load balancers that route traffic to some available node. This approach may not work for nodejs WebSocket for several reasons.
WebSockets require each user can see other users, and hence they should be connected to the same nodejs WebSocket server. The number of active users depends on how much hardware is capable of handling. Javascript Runtime environments can handle concurrency very well, but if the number of users starts becoming large, vertical scaling is required to handle user synchronization. Scaling can be vertical or horizontal. Horizontal scaling is much more difficult.
In the case of web sockets, when we have scaled the application, we need to provide some data-sharing mechanism among the nodes. This is required so that all the nodes have the same view of the application state. Clients of one node should also be able to communicate with the clients of other nodes.
Broadcasting information to the clients also becomes difficult if a node knows about the clients connected to it and not the other nodes. This needs adding a backplane by use of some direct communication mechanism between the nodejs WebSocket nodes of a cluster. Handling of the cluster may be done by some external publish-subscribe mechanism. But all this is not easy to set up, and hence scaling becomes a very difficult process in the case of WebSockets.
Conclusion
- Web sockets can be called an upgrade of the traditional HTTP.
- Web socket is a protocol that provides the full-duplex or the bi-directional line of communication between the client and the server.
- RFC 6455 is the latest specification of nodejs Websockets protocol standardized by W3c that is supported by various browsers
- The client sends an upgrade request to the server, and the server accepts it by sending a 101 response. After this, both the client and server can send messages without the client requesting them.
- Socket.io, created by Guillermo Rauch, CTO of LearnBoost, is a preferred library for implementing web sockets.
- Socket.io is like a wrapper over the WebSockets API that makes using the WebSockets easy.
- Socket.io contains two parts: a JavaScript client library that runs on browsers and a Node.js server.
- Socket.io uses Engine.io under the hood to provide features like reliability, multiplexing support, disconnection detection, binary data streams, broadcasting, and automatic reconnection.
- It is very difficult to scale nodejs WebSockets because one client must be able to see all the other clients. This is difficult to implement in multiple WebSocket nodes.