How to Install Python on Windows?
Introduction
Python, renowned for its simplicity and efficiency, is a programming language that has garnered widespread popularity across diverse sectors. Python's design emphasizes code readability and a syntax that allows programmers to express concepts in fewer lines of code. This makes Python an ideal language for both beginners and experienced developers. It's extensively used in web development, data analysis, artificial intelligence, and more. Installing Python on Windows marks the beginning of an exciting journey into the world of programming, offering a blend of simplicity, versatility, and power.
Pre-requisites
You will need certain prerequisites to be met before you successfully know how to install Python in Windows.
They are –
- A system running Windows 10 or Windows 7, having all the appropriate admin privileges.
Note – Python can run on any Operating System and other compatible versions of Windows. However, in this article, we will focus on installation for Windows 10 and Windows 7 only. - A Command Prompt, which comes pre-installed with a Windows system.
Download and Install Python on Windows
To install Python, we first need to download the relevant files. All versions of Python for Windows are available on the official website and can be downloaded from there.
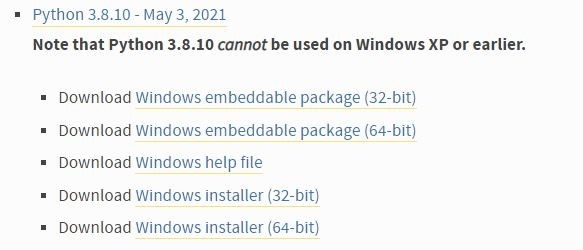
The list would look something like this –
 You can download the relevant version compatible with your version of Windows. In this article, we learn to install Python for Windows 10 and Windows 7.
When this article was published, the latest Python 3 release was Python 3.9.6, and the latest Python 2 release was Python 2.7.18. So, we will walk you through the installation process of Python 3.8.10, which is compatible and supported by both Windows 10 and Windows 7.
Steps to Install Python on Windows 10 and 7
Step 1 – Select the Version of Python to Install
As seen in the image above, the list of available versions of Python is pretty long. You, as a user, will have to install the version that is the most relevant to you –
- You can choose based on which Operating System you use. For example - Windows 10 or Windows 7.
- You may also choose based on the fact that you are already working on a project that supports Python 2 or Python 3. Hence, once you make a satisfactory choice, download the relevant python.exe file to start installing Python.
Step 2 – Download Python Executable Installer
The steps to install the Python Executable Installer are as follows –
- On your web browser, navigate to the Windows downloads section.
- Locate Python 3.8.10. Click on the link to download either the Windows installer (64-bit). In this case, we will choose the one available for Python 3.8.10.

Step 3 – Run Executive Installer
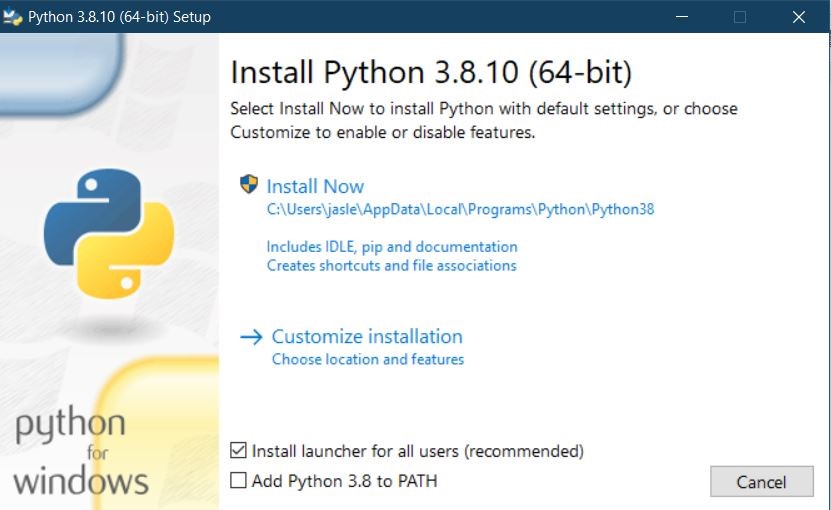
- You need to run the Python Installer once it has downloaded successfully.
- Remember to check the following checkboxes: install it for all users and Add Python 3.8.10 to PATH.
- Click on Install Now with the recommended settings.

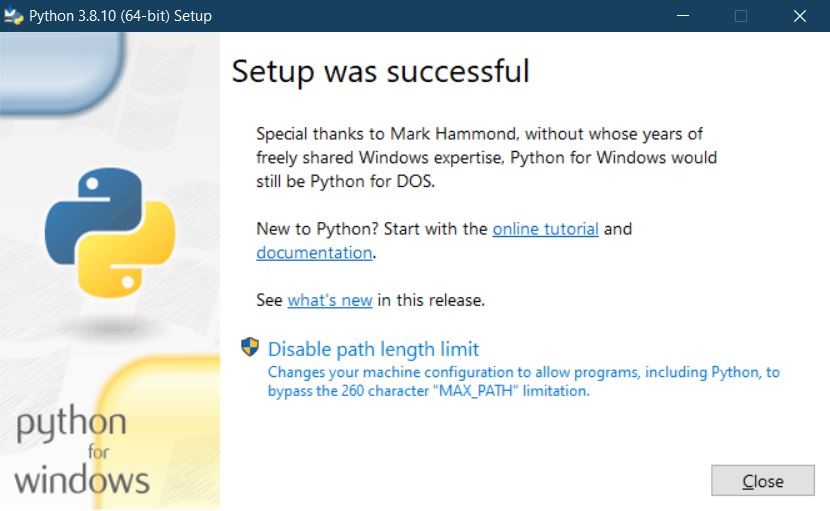
- Once installation is complete, you will see the following screen-

Step 4 – Verify Python was Installed on Windows
- Now that the installation is complete, you need to verify it before proceeding further.
- Navigate to the directory where Python was installed.
- Locate and click on python.exe
- You should see similar output when you do this –

Step 5 – Verify Pip was Installed
Now, the last and final step is to check whether the pip was installed or not. For the unaware, pip is Python’s very own package management system used to install and manage software related to Python.
Clearly, it is essential to have pip installed with Python to ensure a smooth and efficient Python workspace.
We can verify the installation of the pip in the following way –
- Launch the Command Prompt window.
- Type pip-V in the Command Prompt window.
- If you receive a similar output, then it means pip has been installed successfully –
 Congratulations! You have successfully installed Python and completed the first step of becoming a Pythoneer or Pythonista 😀
How Do You Know If Python is Already Installed?
Before actually trying to install Python in Windows 10 or Windows 7, we must ensure it is not already installed.
We can follow these steps to check whether Python is already installed or not –
- Launch the Command Prompt directly or by typing cmd after pressing Windows Key+R.
- Run the following Command: python –version If Python is already installed, you will get the following output in the Command Prompt window-
 The Command prompt window will look something like this if Python is not installed on your system –
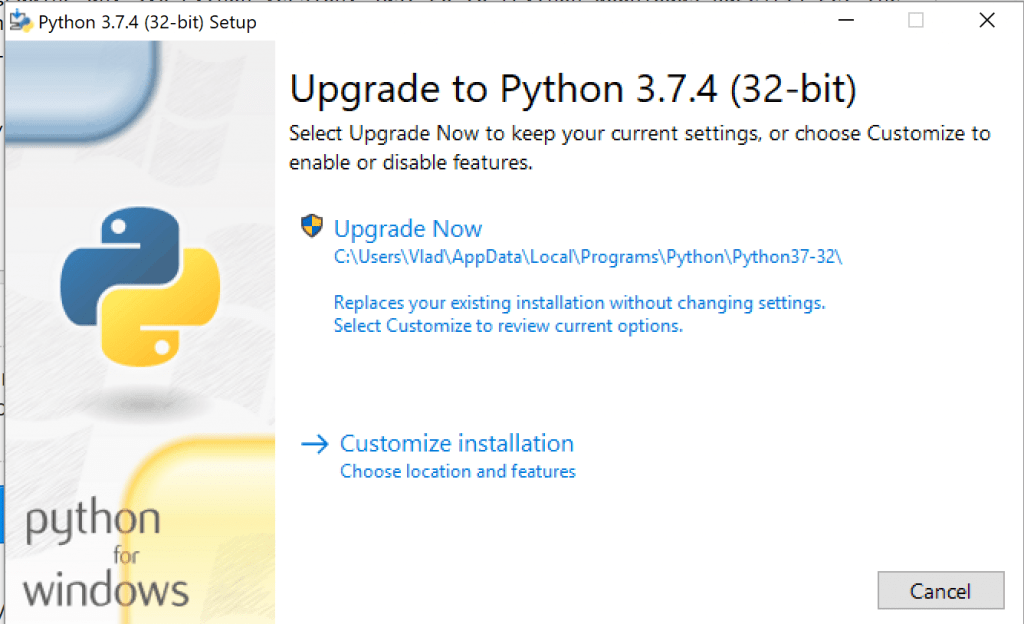
 In some cases, if you already have Python installed and the current version is giving you some issues, or if you wish to delete and reinstall it, you can follow the following steps –
- You can go to the Control Panel and simply uninstall the particular version.
- Download the required/latest version and run the installer.
- You will get the following screen –

- You can now follow the remaining installation steps given in the next section of the article.
Conclusion
In this article, we went over how to install Python in Windows 10 and Windows 7. The process will remain the same even if you opt for a different version of Python.
Important things to remember while installing Python –
- Be sure always to check the version you are installing and its compatibility with your system's operating system.
- After setup is done, always verify if Python is successfully installed.
- Always verify pip installation. If not installed, follow the relevant steps to do so.
Now, you are all set to start your Python journey! Install your favorite IDE and get coding!

