Generating the Release Build APK in React Native
Overview
Building a release React native build apk (Android Package) is an essential step in the development process of a React Native project. The release APK is a compiled version of the app that can be installed on Android devices. In this article, we will explore two different methods for generating a release APK: using the CLI with React Native and utilizing Android Studio.
Using CLI React Native
Make sure your React native project is error-free first. This indicates that it is successfully building and executing on the emulator or an Android device. So, launch the Android project from the command line or open it in Android Studio. You are ready to proceed if everything compiles as planned.
Keystore Generation
To generate a React Native executable binary for Android, you will need to create a keystore file, which serves as a Java-generated signing key. This can be accomplished by utilizing the keytool command in the terminal with the following syntax:
After executing the keytool utility, you will be prompted to set a password. It is crucial to remember the password you choose:
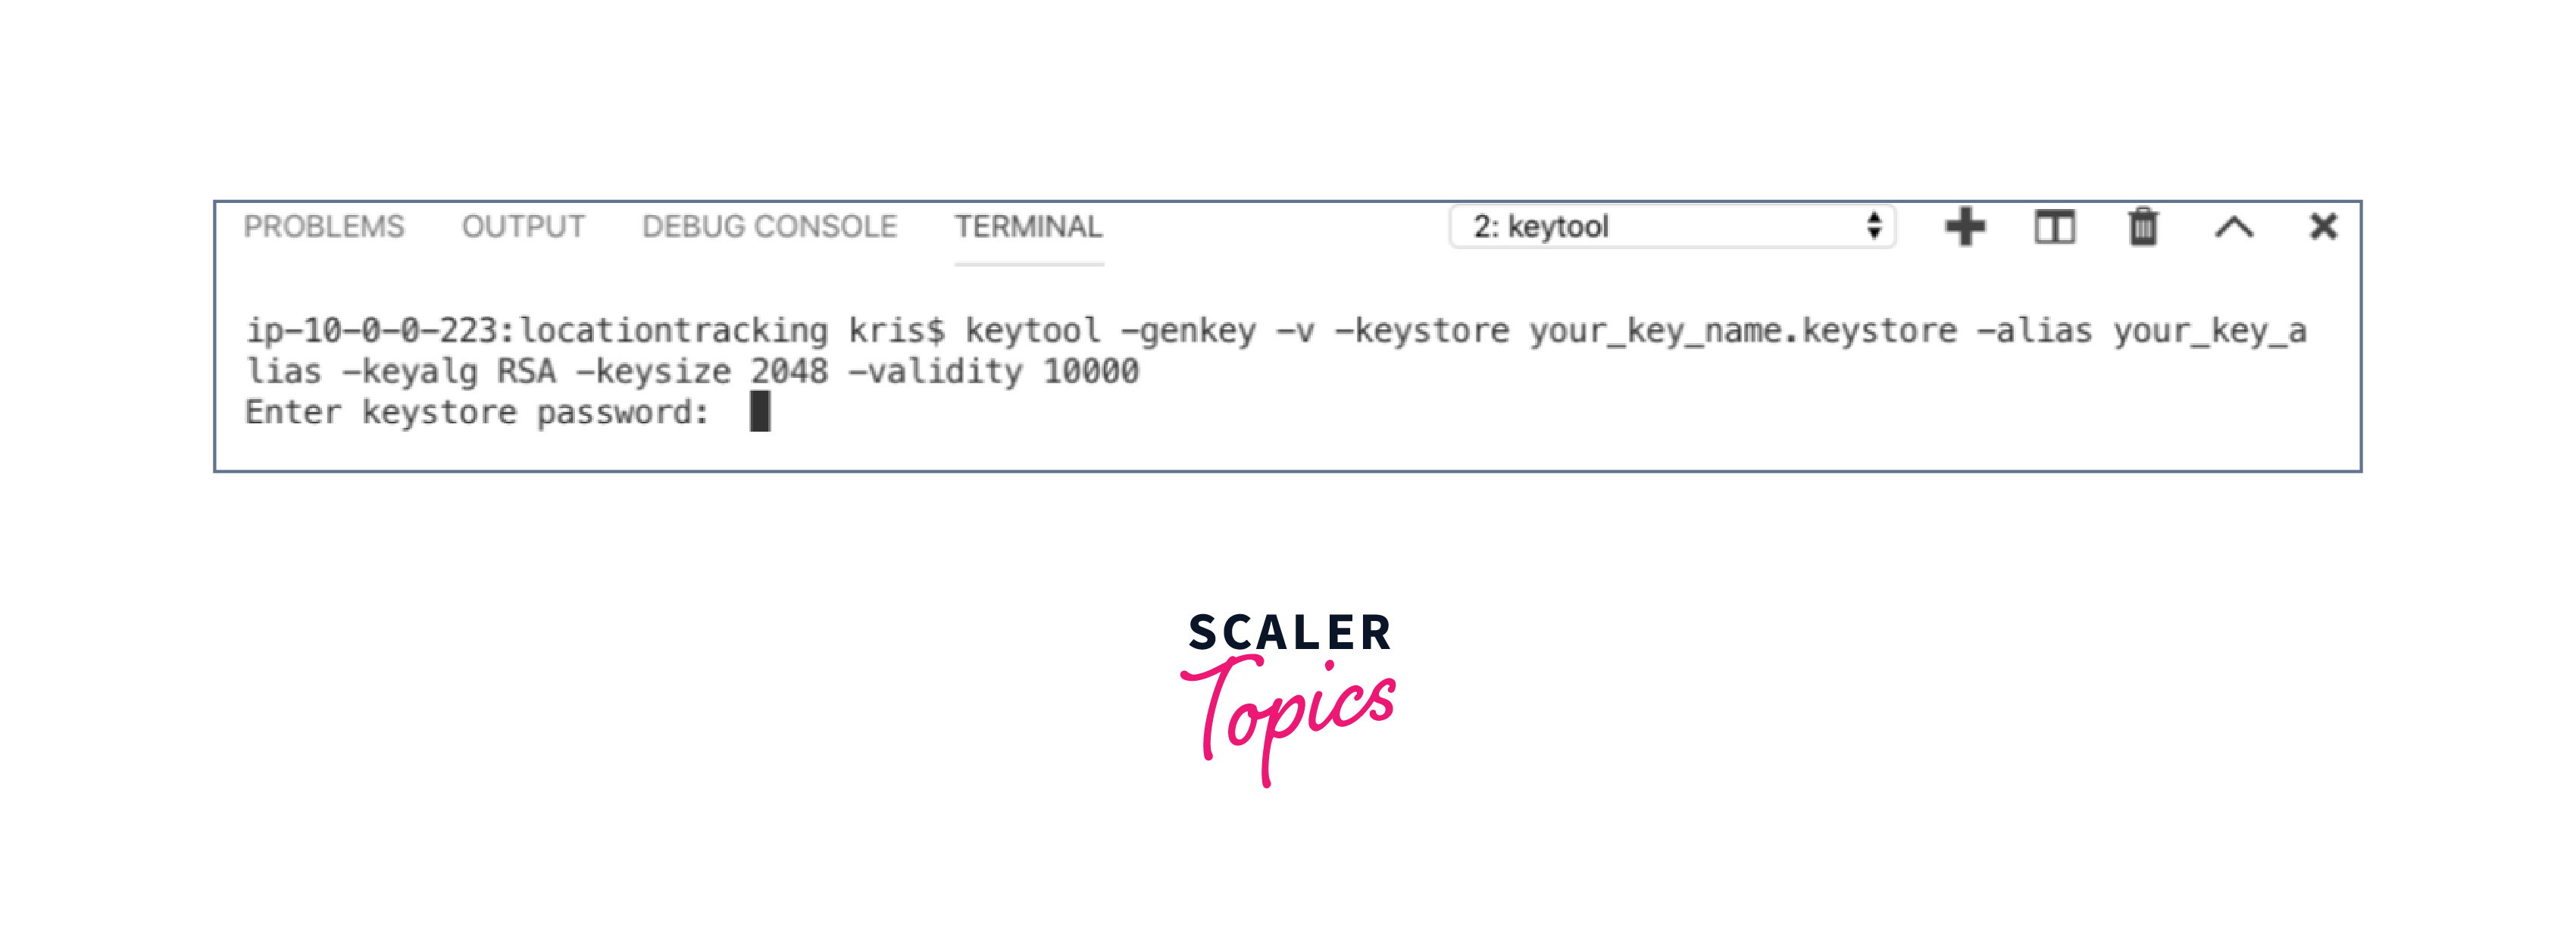
You have the flexibility to choose any desired name for "your_key_name" and "your_key_alias". To enhance security, this key is configured with a key size of 2048, as opposed to the default 1024.
As a result, when executing this command, you will be asked to provide the password for the keystore, the actual key, and the distinguished name fields for your key. It is crucial to input all the information accurately and manually.
When prompted to enter the password for <my-key-alias>, simply press Enter. Please note that if you wish to set a new password for the key, you can enter it at this prompt.
This process will generate a key-store file named my-release-key.keystore in your project directory. The generated key-store file is valid for a duration of 10000 days. It is crucial to create a backup of this keystore file and securely store its credentials, including the store password, alias, and alias password. These credentials will be necessary for future use.
Keystore Addition to the Project
To begin, you should copy the file named your_key_name.keystore and then paste it into the android/app directory within your React Native project folder.
open the terminal and copy the following command:
To configure the project with the keystore, you should open the build.gradle file located in the android/app directory. There are two methods of configuring the project with the keystore. The first method is the common and less secure approach:
Storing the keystore password in plain text within the .gradle file is not recommended due to security concerns. Instead, it is advisable to configure the build process to prompt for the passwords during the command line build.
To prompt for the password using the Gradle build file, modify the above configuration as follows:
To prevent any unnecessary errors, it is important to ensure that the signingConfigs block is placed before the buildTypes block. Additionally, before proceeding, verify that you have an assets folder located at android/app/src/main/assets. If the folder does not exist, create it. Once done, execute the following command to build the bundle:
Please note that if you have a different entry file name, such as index.android.js, you should modify it accordingly within the command.
Releasing APK Generation
Put Android in your terminal directory by using:
then execute the subsequent instruction.
In Windows,
For Mac OS X and Linux:
The process of creating the React native build apk is now complete. You can locate the generated APK at android/app/build/outputs/apk/app-release.apk. This APK file represents the actual application and can be installed on your device or uploaded to the Google Play Store. Congratulations on successfully generating a React Native Release Build APK for Android.
During this process, it is common to encounter errors, as React Native is an evolving framework. To save you time and frustration, we have compiled a list of the most common build errors that you may encounter while working with React Native.
If your build fails with the following error:
You may always execute the following command to fix this React Native Android build error:
These are the procedures to create a Release Signed React native build apk for Android applications using React Native that can be uploaded to the Google Play Console.
Using Andriod Studio
Make sure your React native project is error-free first. This indicates that it is successfully building and executing on the emulator or an Android device. So, launch the Android project from the command line or open it in Android Studio. You are ready to proceed if everything compiles as planned.
Development Environment Setup
To generate the APK, which is the format required for uploading the app to the Google Store, it is necessary to install Android Studio. It is crucial to ensure that you have SDK version 27 installed, as this is the version utilized by React Native.
JDK Installation
It is important to have a recent Java Development Kit (JDK) installed, preferably version 8. The installation process may vary depending on your platform. You can choose to install Oracle's Java SDK or utilize SDKMAN to install alternative options like OpenJDK.
Using Andriod Studio to Generate Release APK
Go to the App Release sidebar and locate the list of tracks corresponding to different testing phases. Select the MANAGE option within the production track. From there, click on CREATE RELEASE to initiate the creation of a React Native Android build APK.
During this process, you will encounter a message regarding the usage of App Signing by Google Play. This feature enables Google to manage the keys for your app. It is a crucial feature because if you manage your keys and happen to lose them, you will no longer be able to release updates for your app. In such cases, you would be required to create a new app with a different name. To proceed, you will need to generate an upload key.
-
Step - 1:
To access your app in Android Studio, navigate to the Android folder within your React Native project and open it in Android Studio.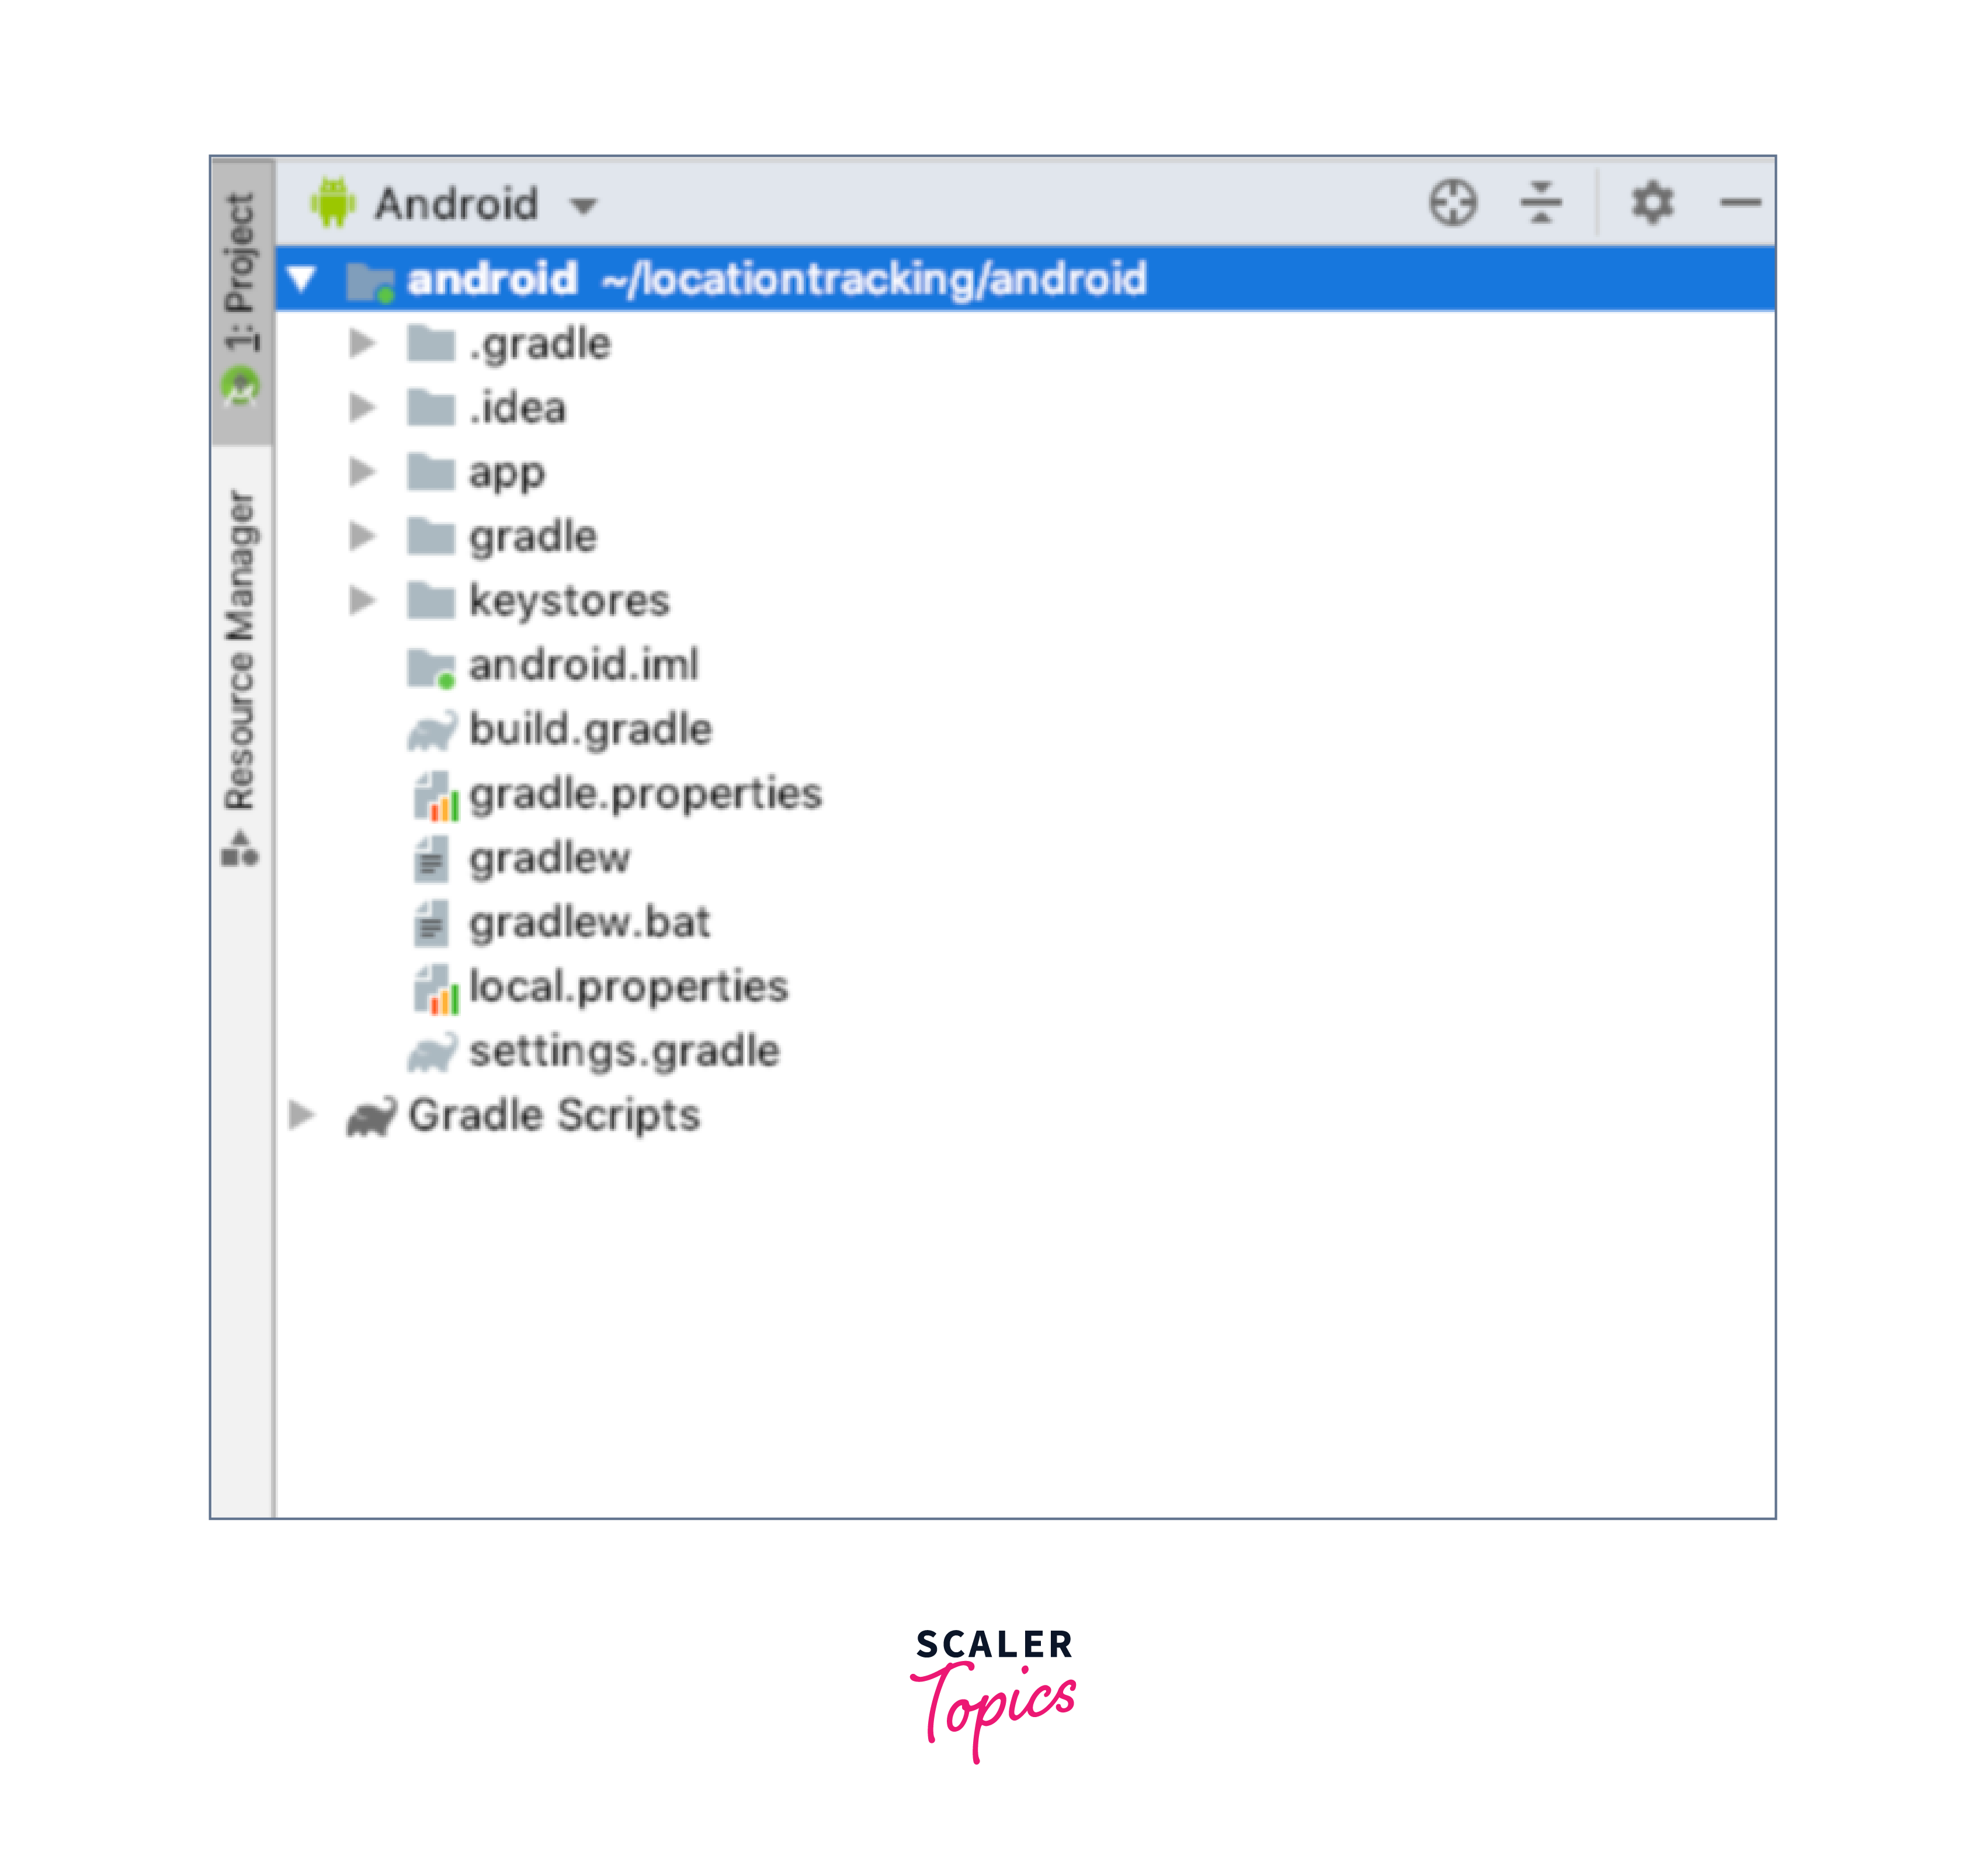
-
Step - 2:
Go to the Build tab and select the option "Generate signed bundle / APK" to proceed.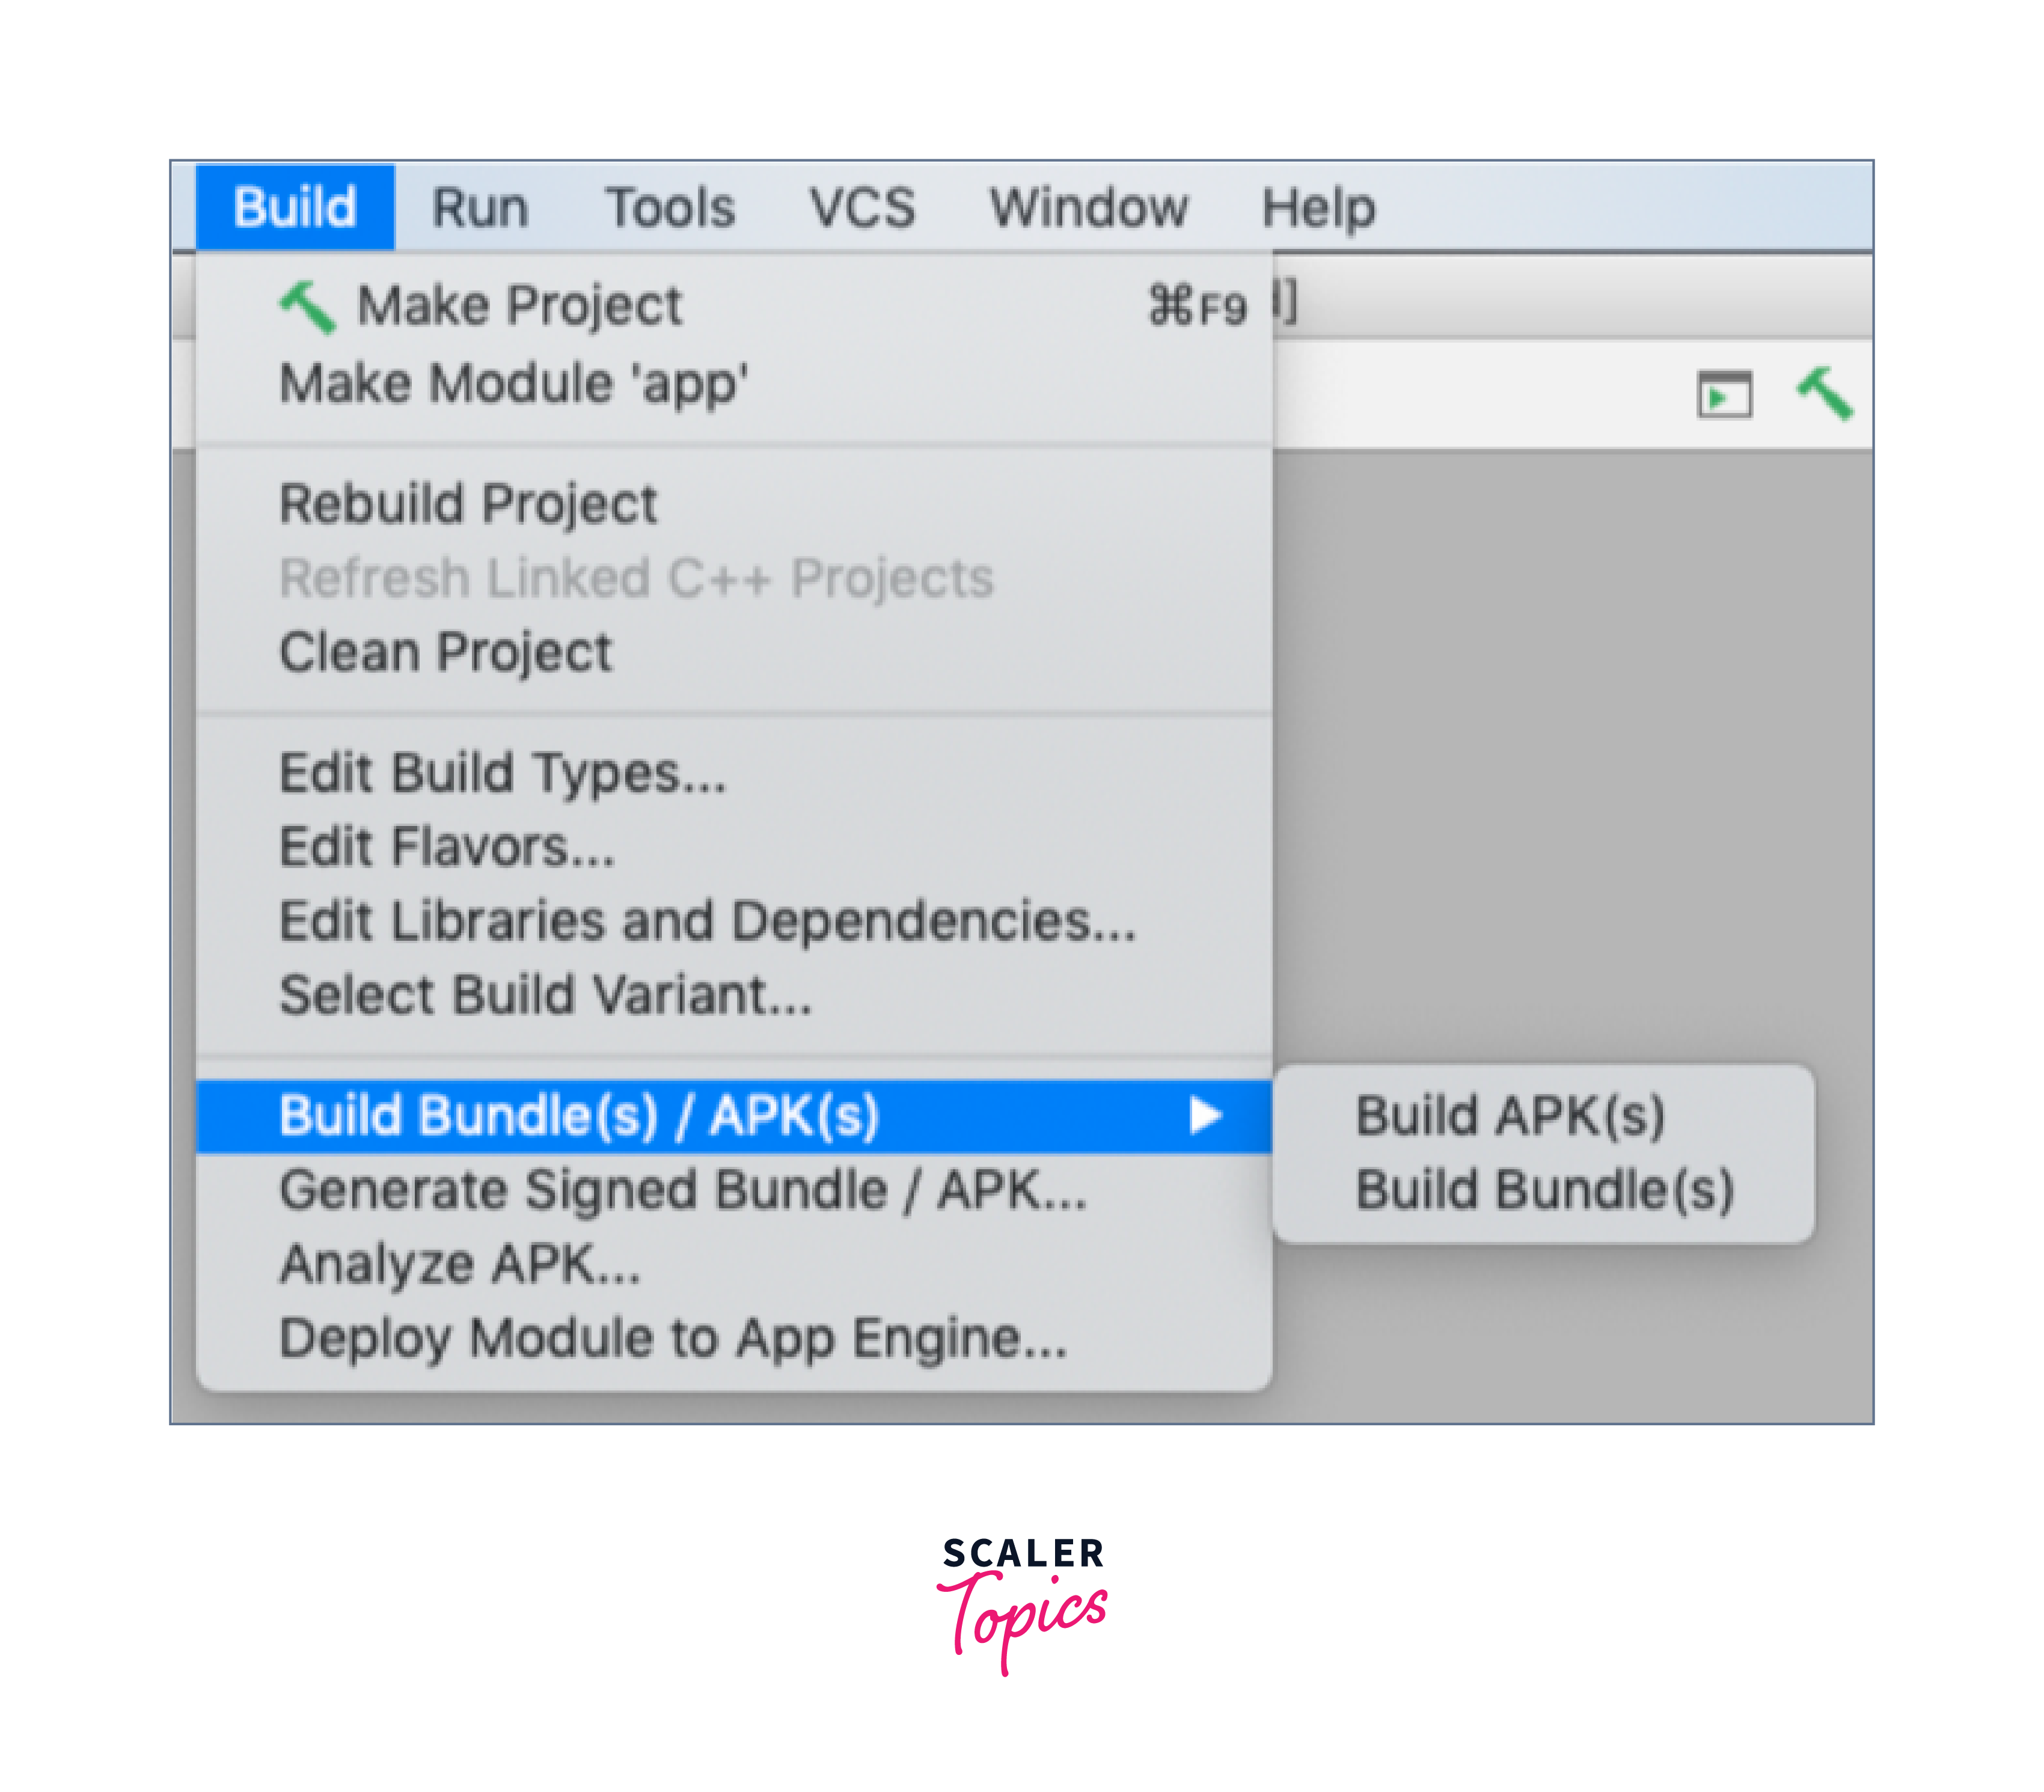
-
Step - 3:
Choose the APK option to generate a release APK for your React Native Android project. Proceed by clicking on the Next button.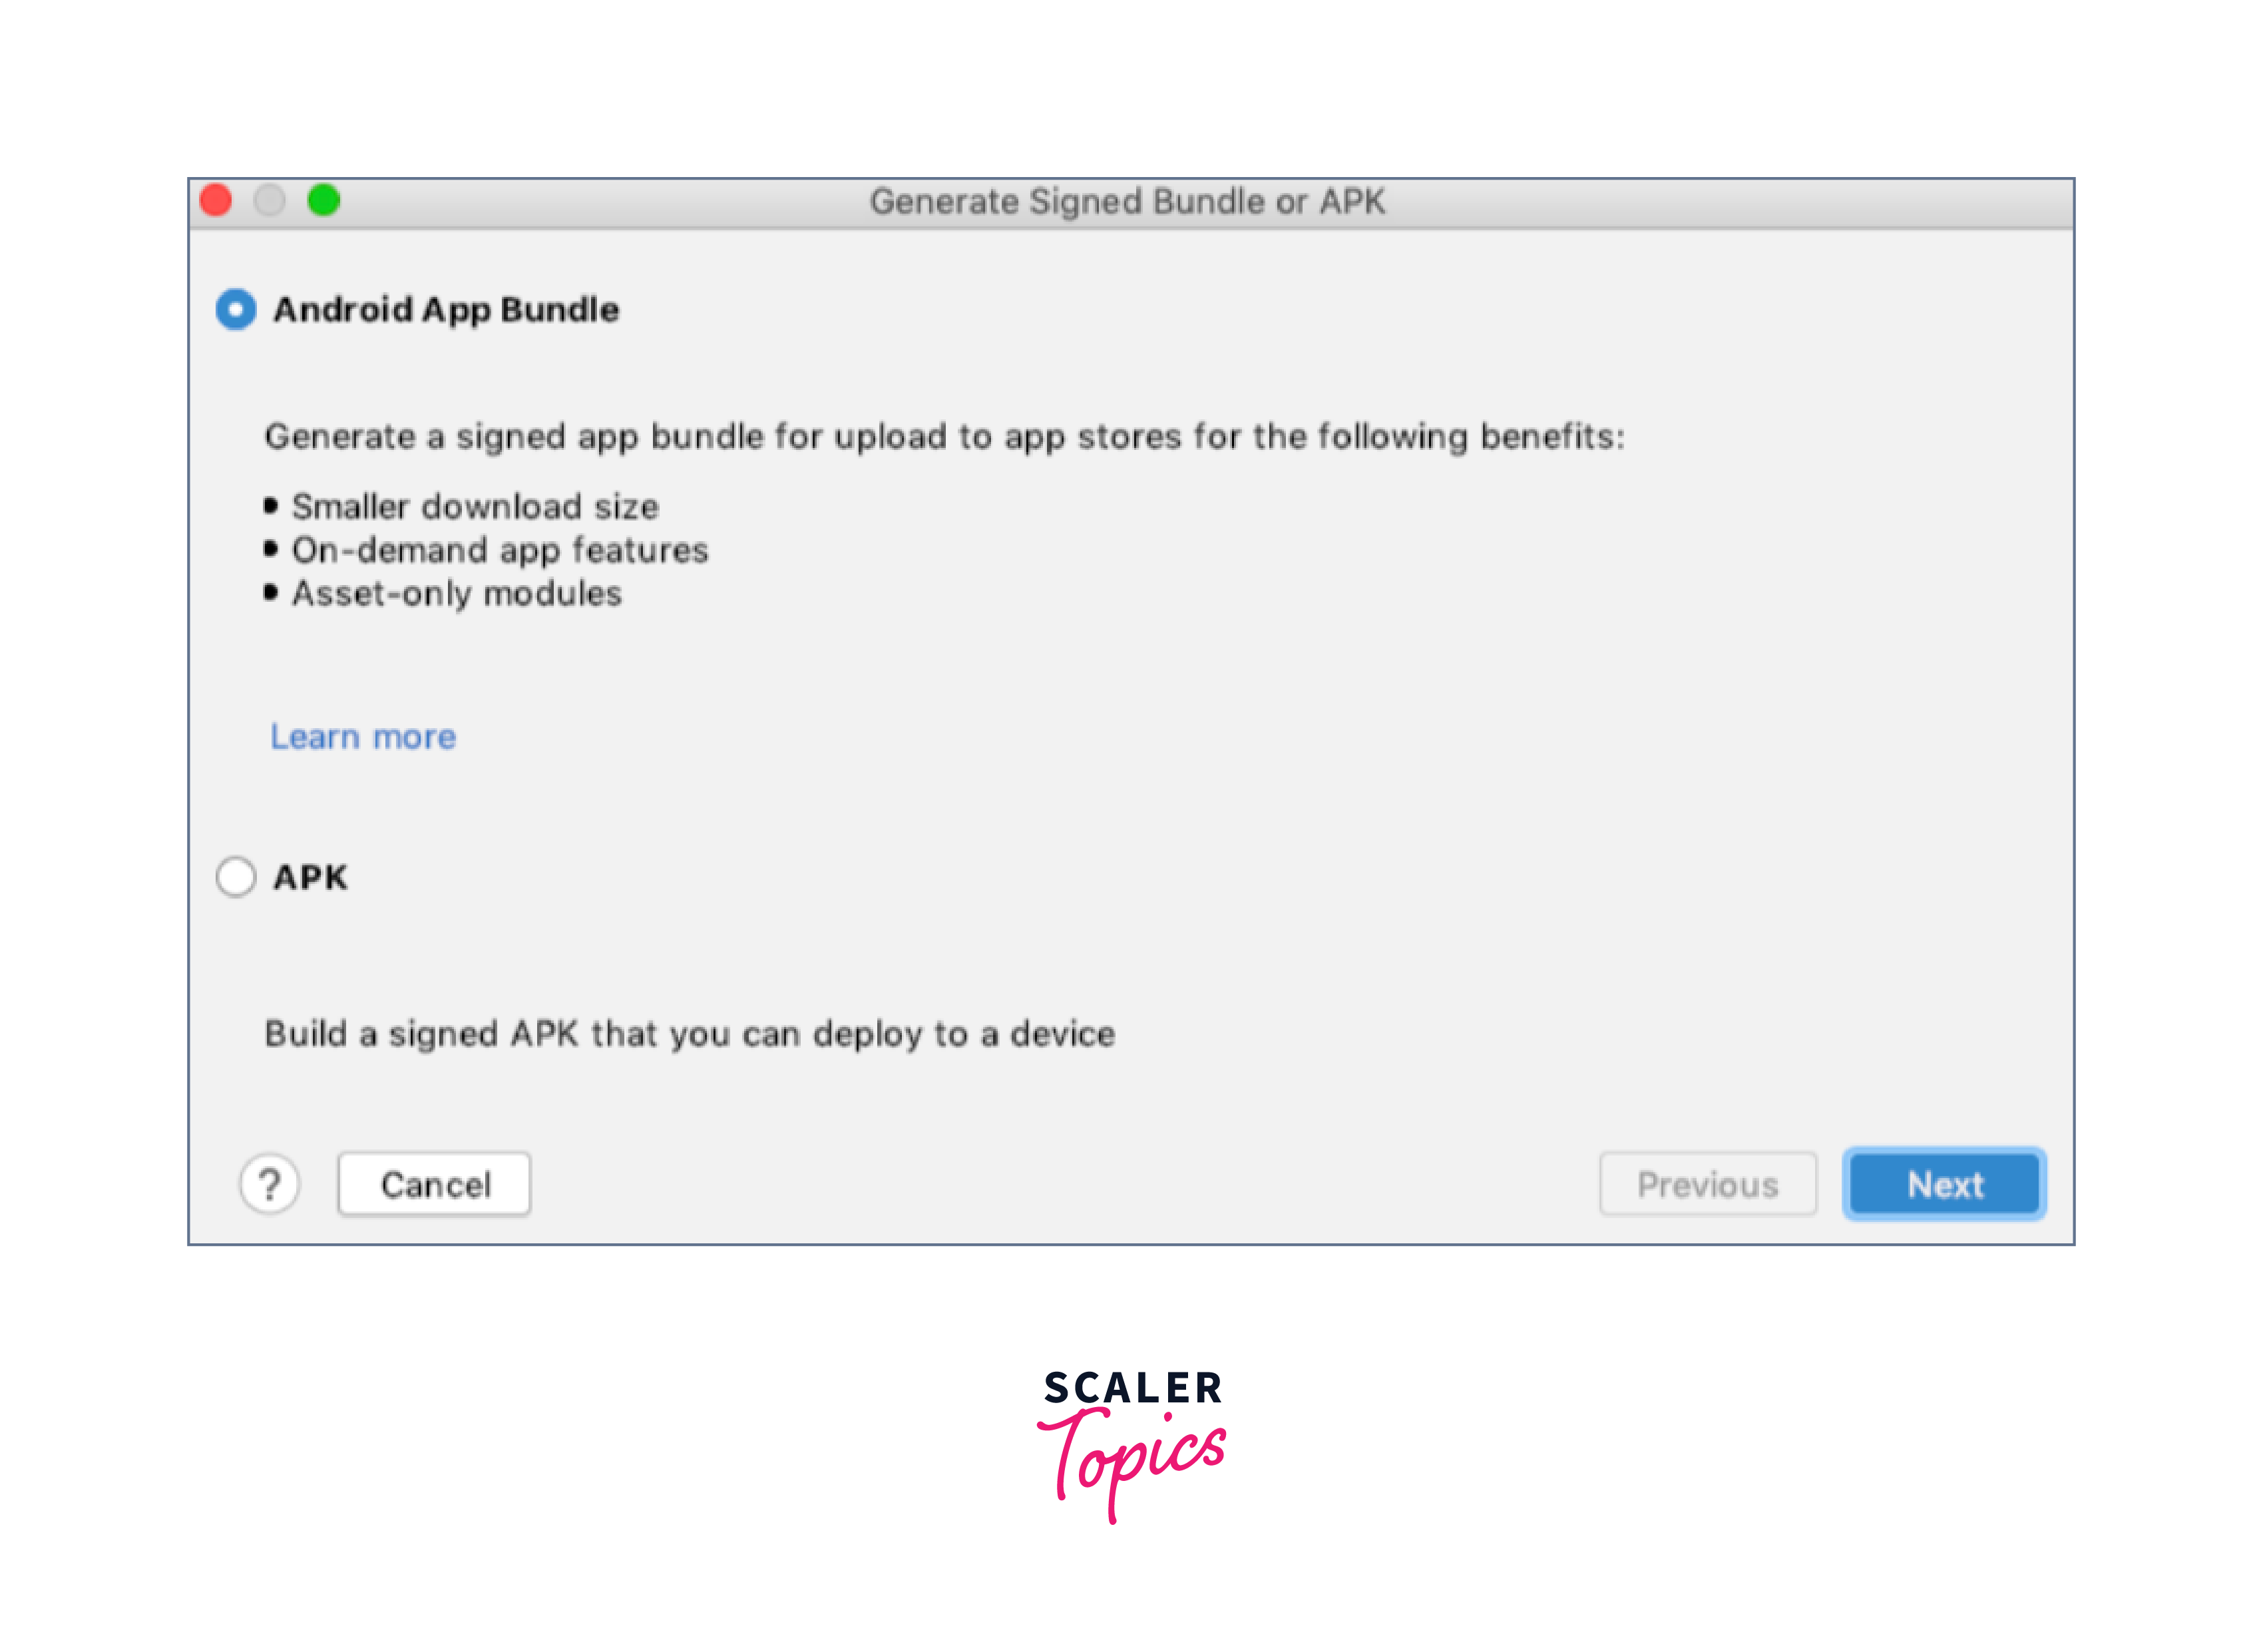
-
Step - 4:
Under Key store path click Create new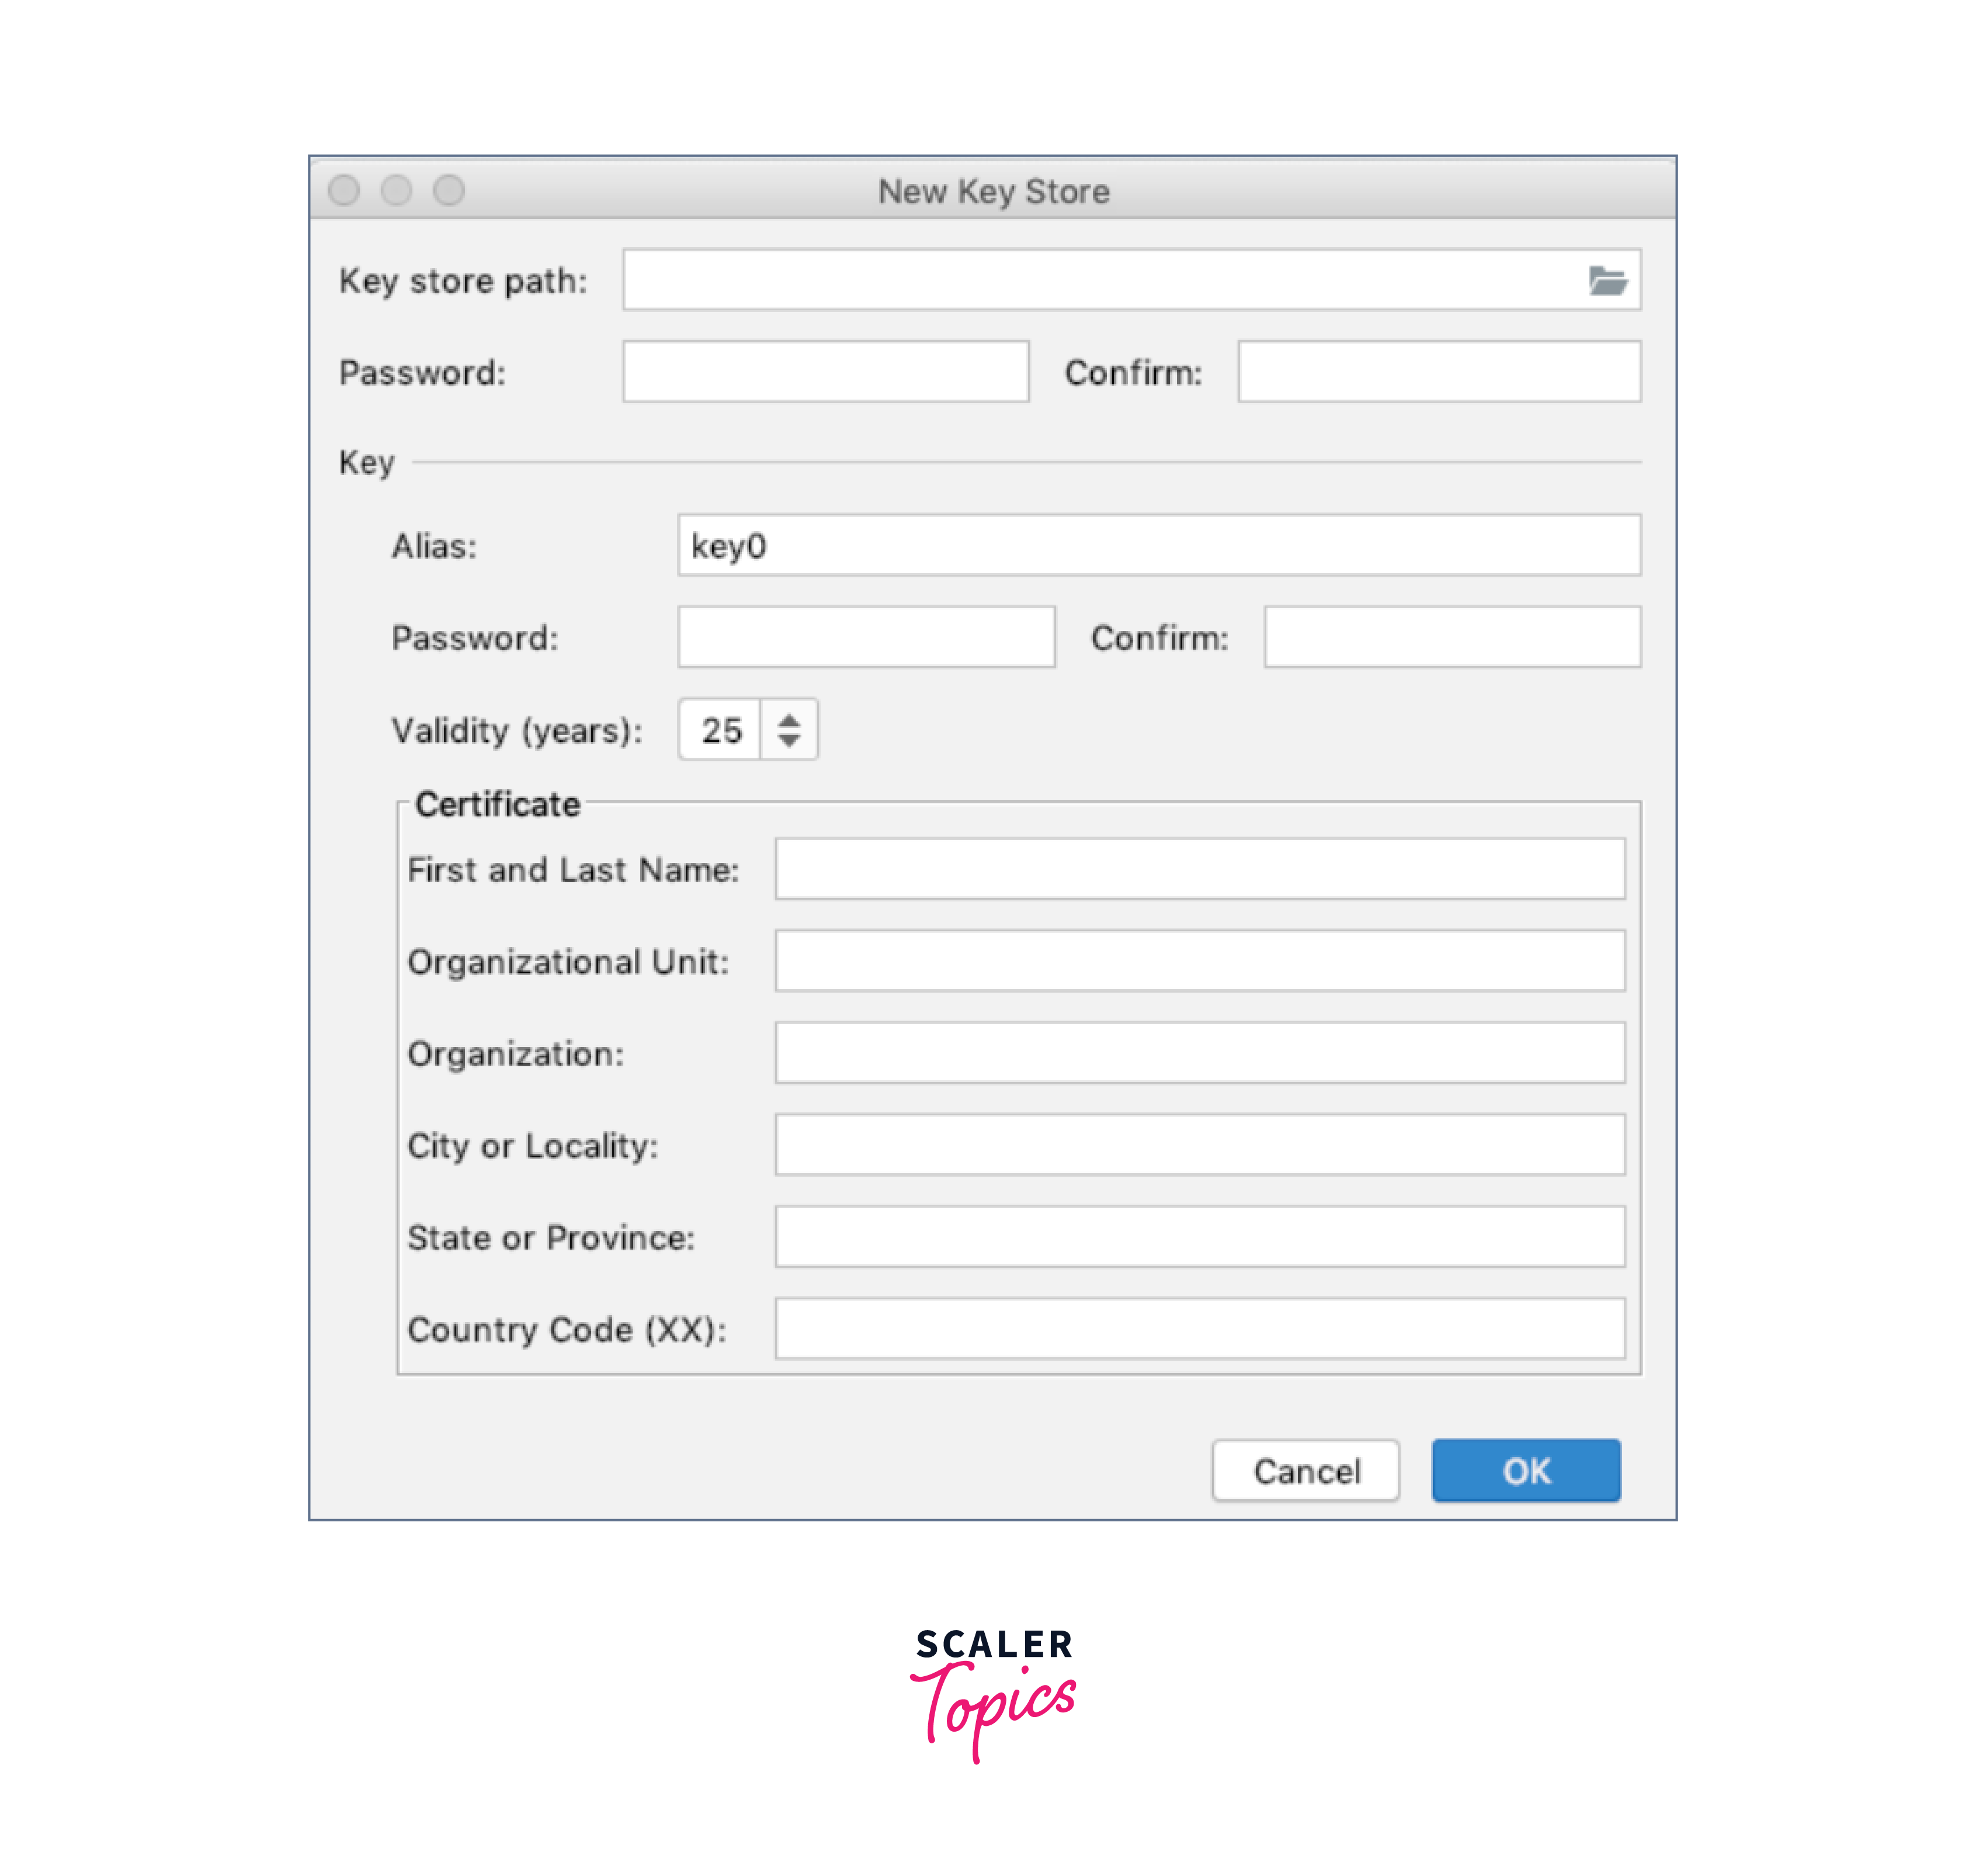
-
Step - 5:
Pick a path like /home/User/keystores/android.jks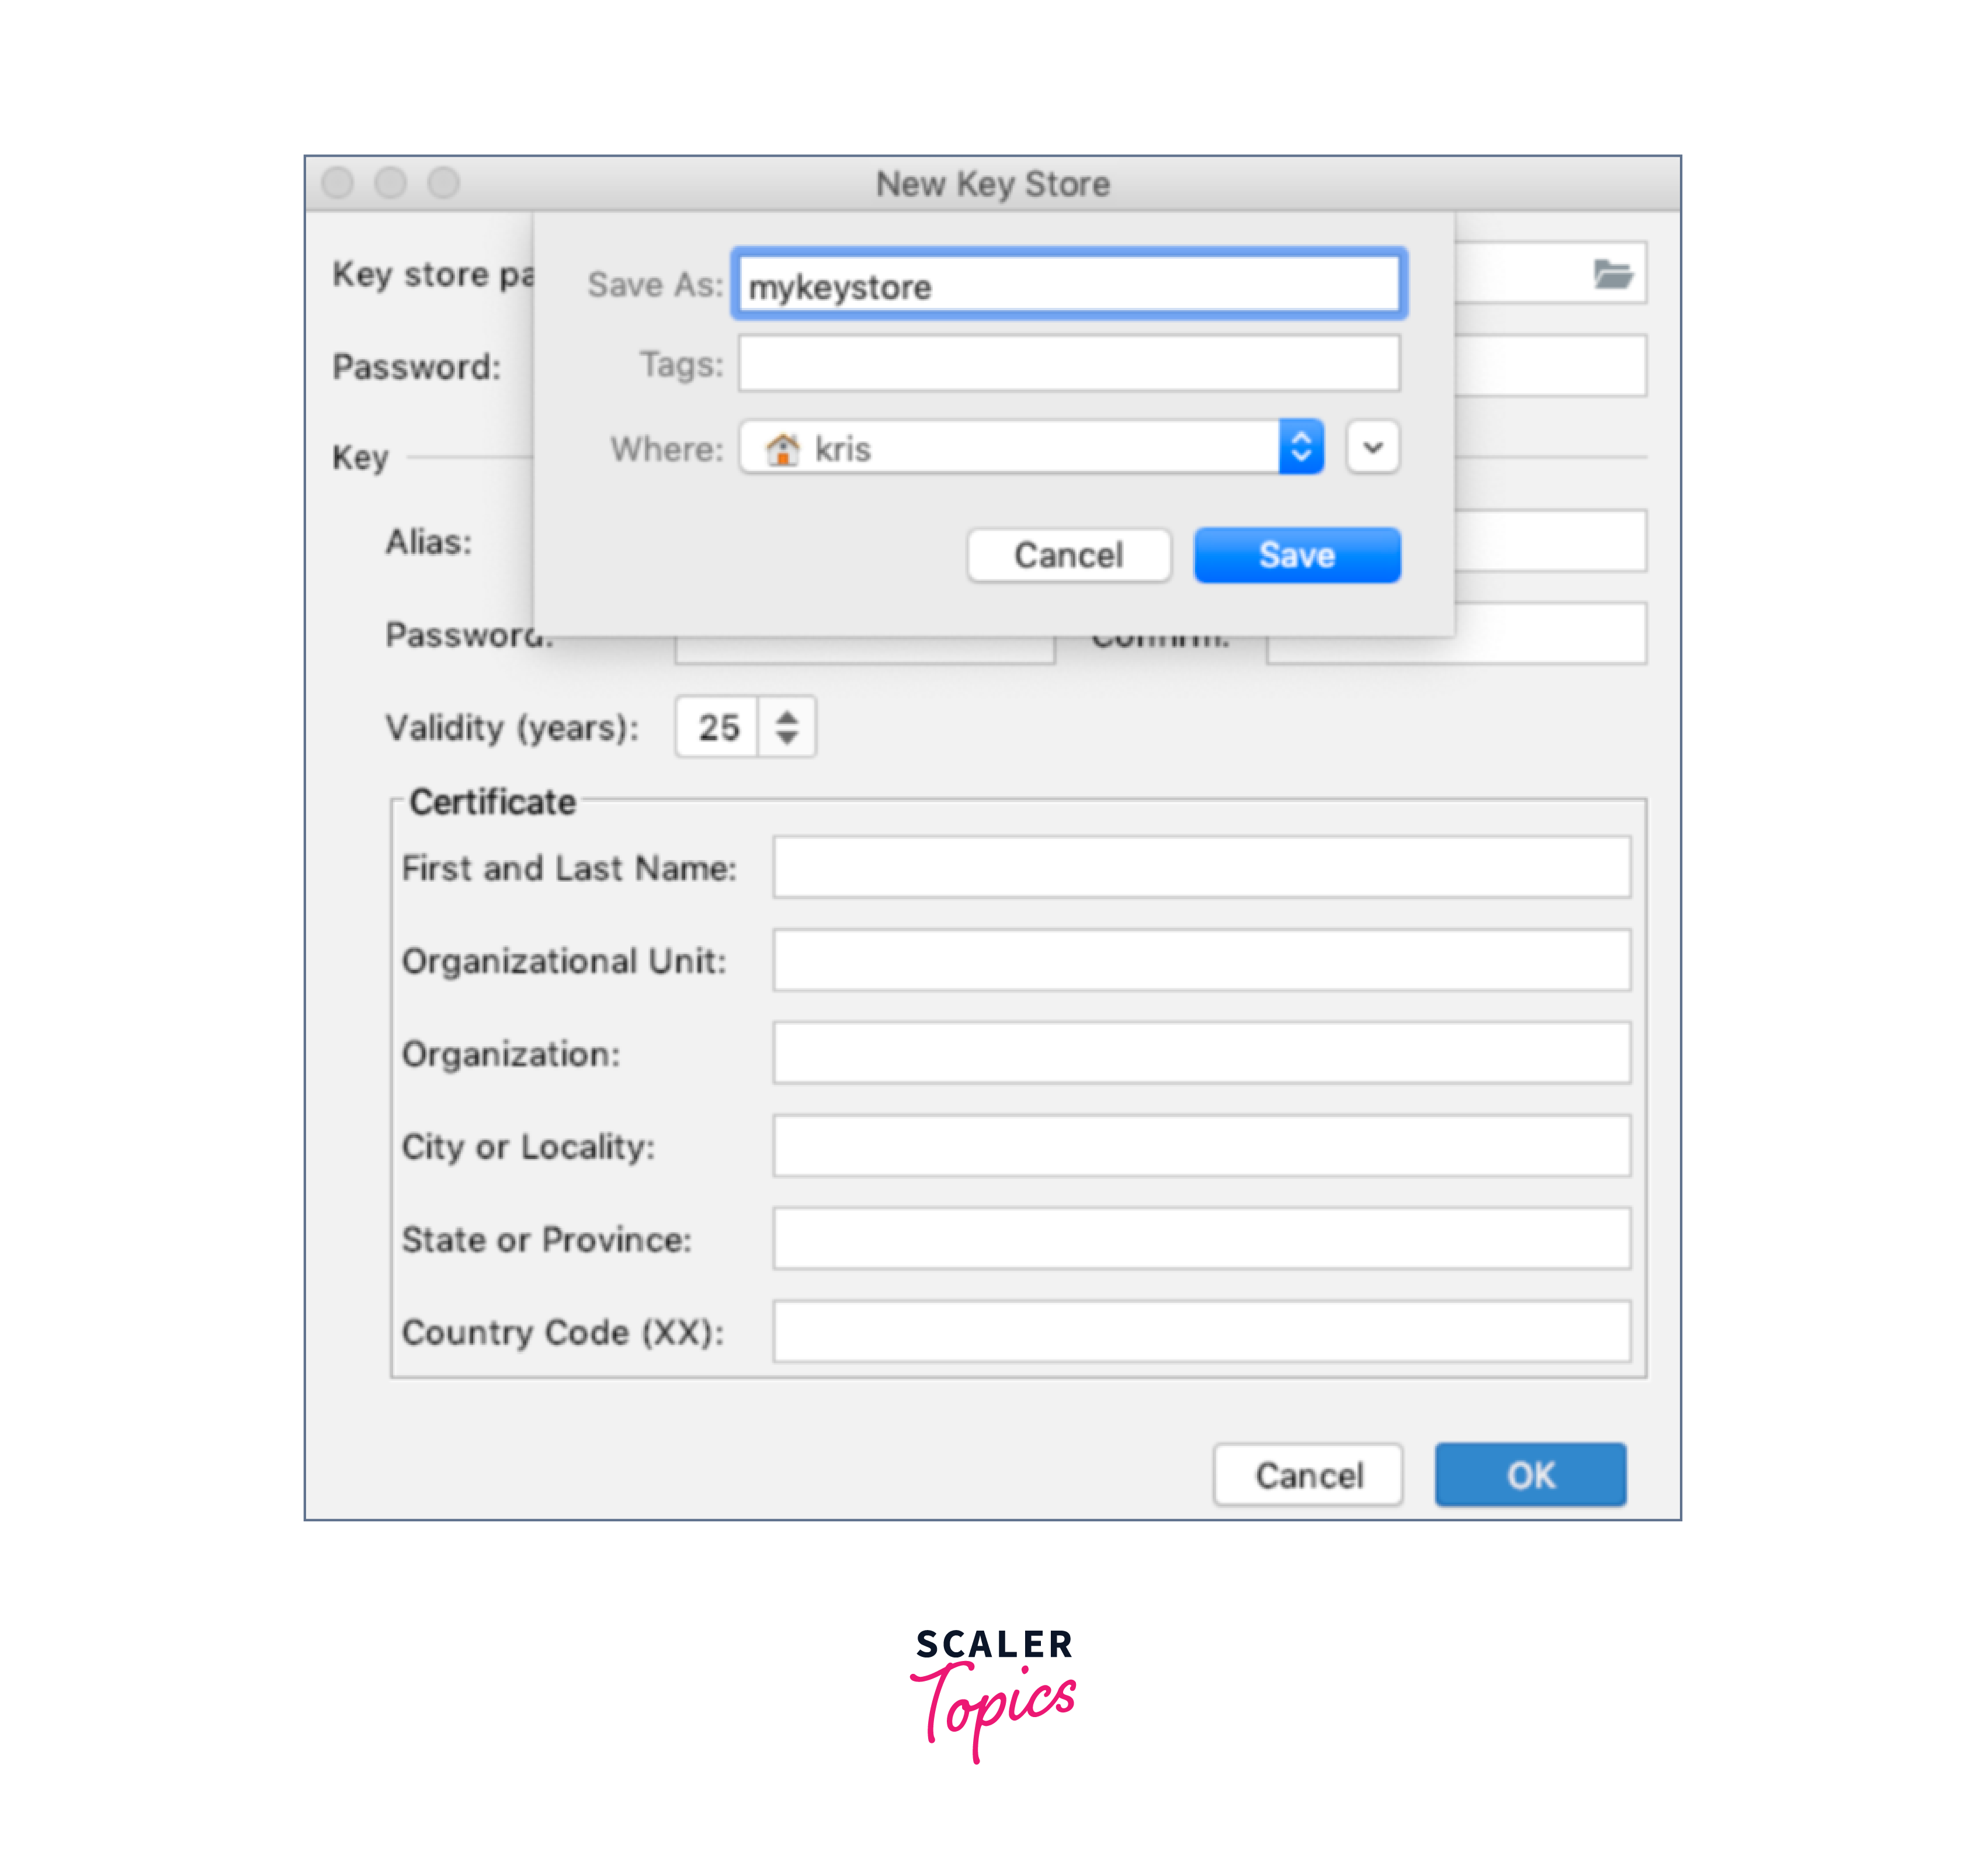
-
Step - 6:
Choose passwords for the keystore and key, and provide the required certificate information.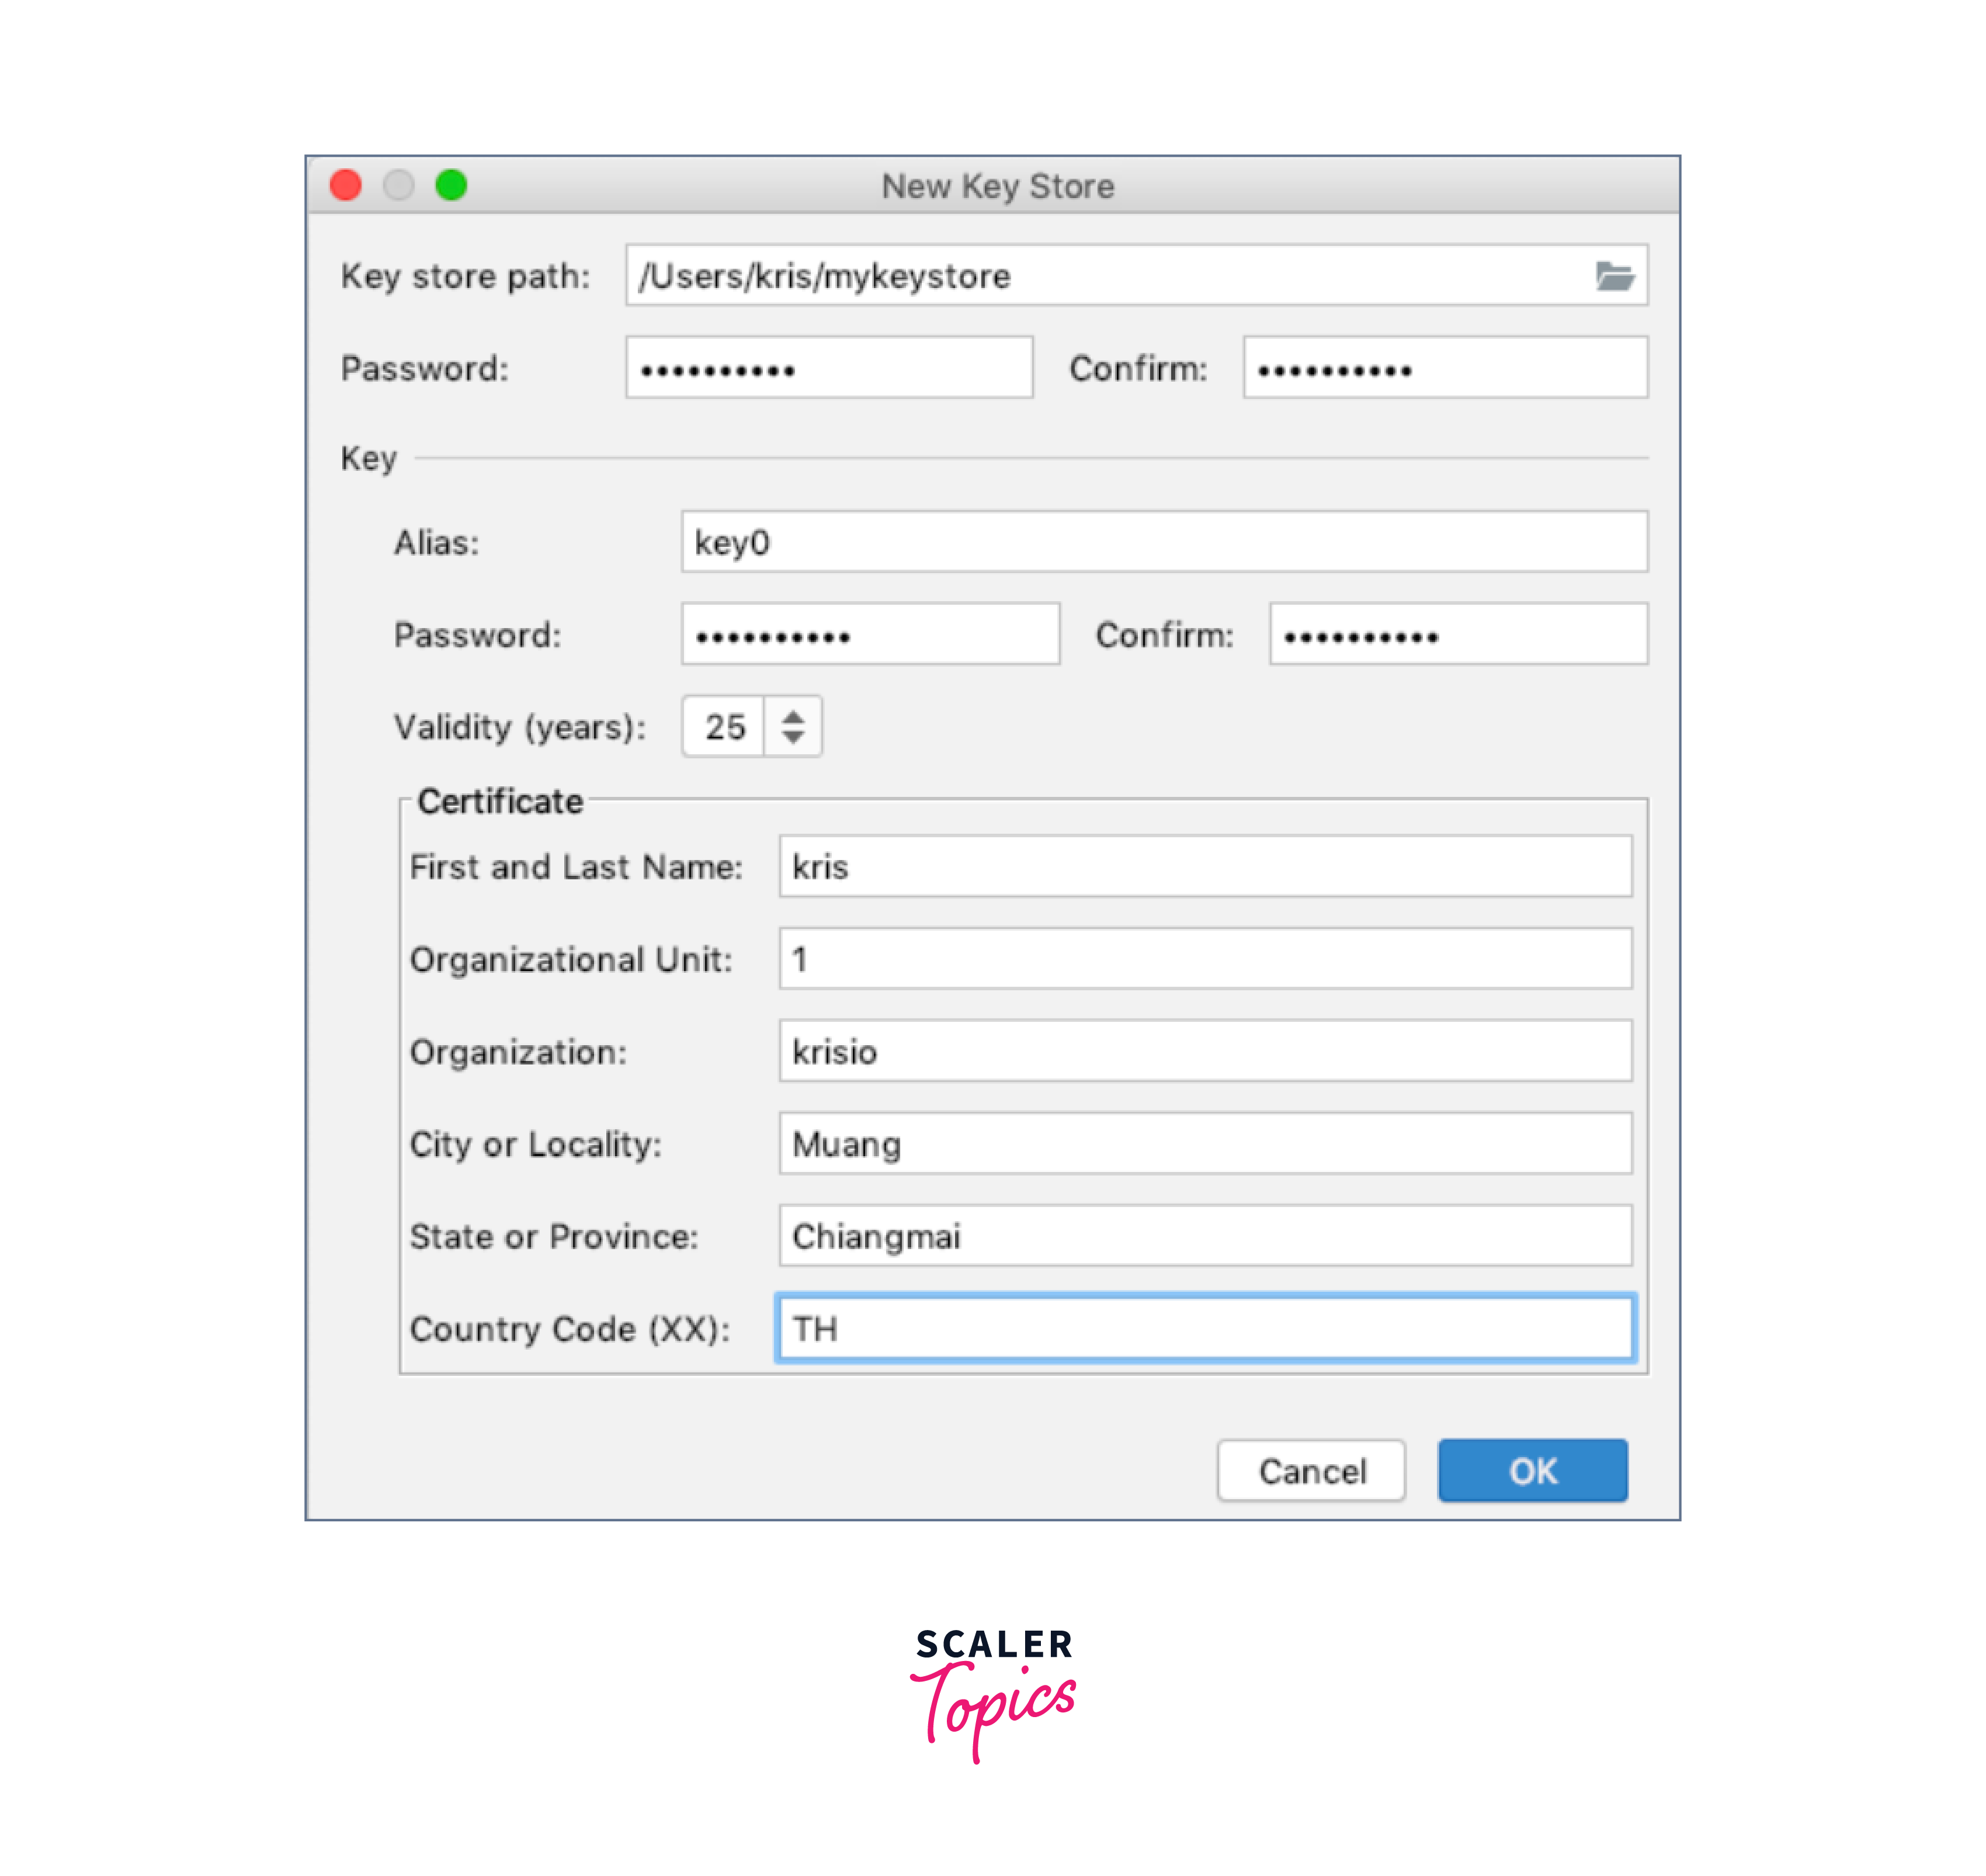
-
Step - 7:
Therefore, select OK before selecting Next. Click Finish after selecting both the V1 and V2 signature versions.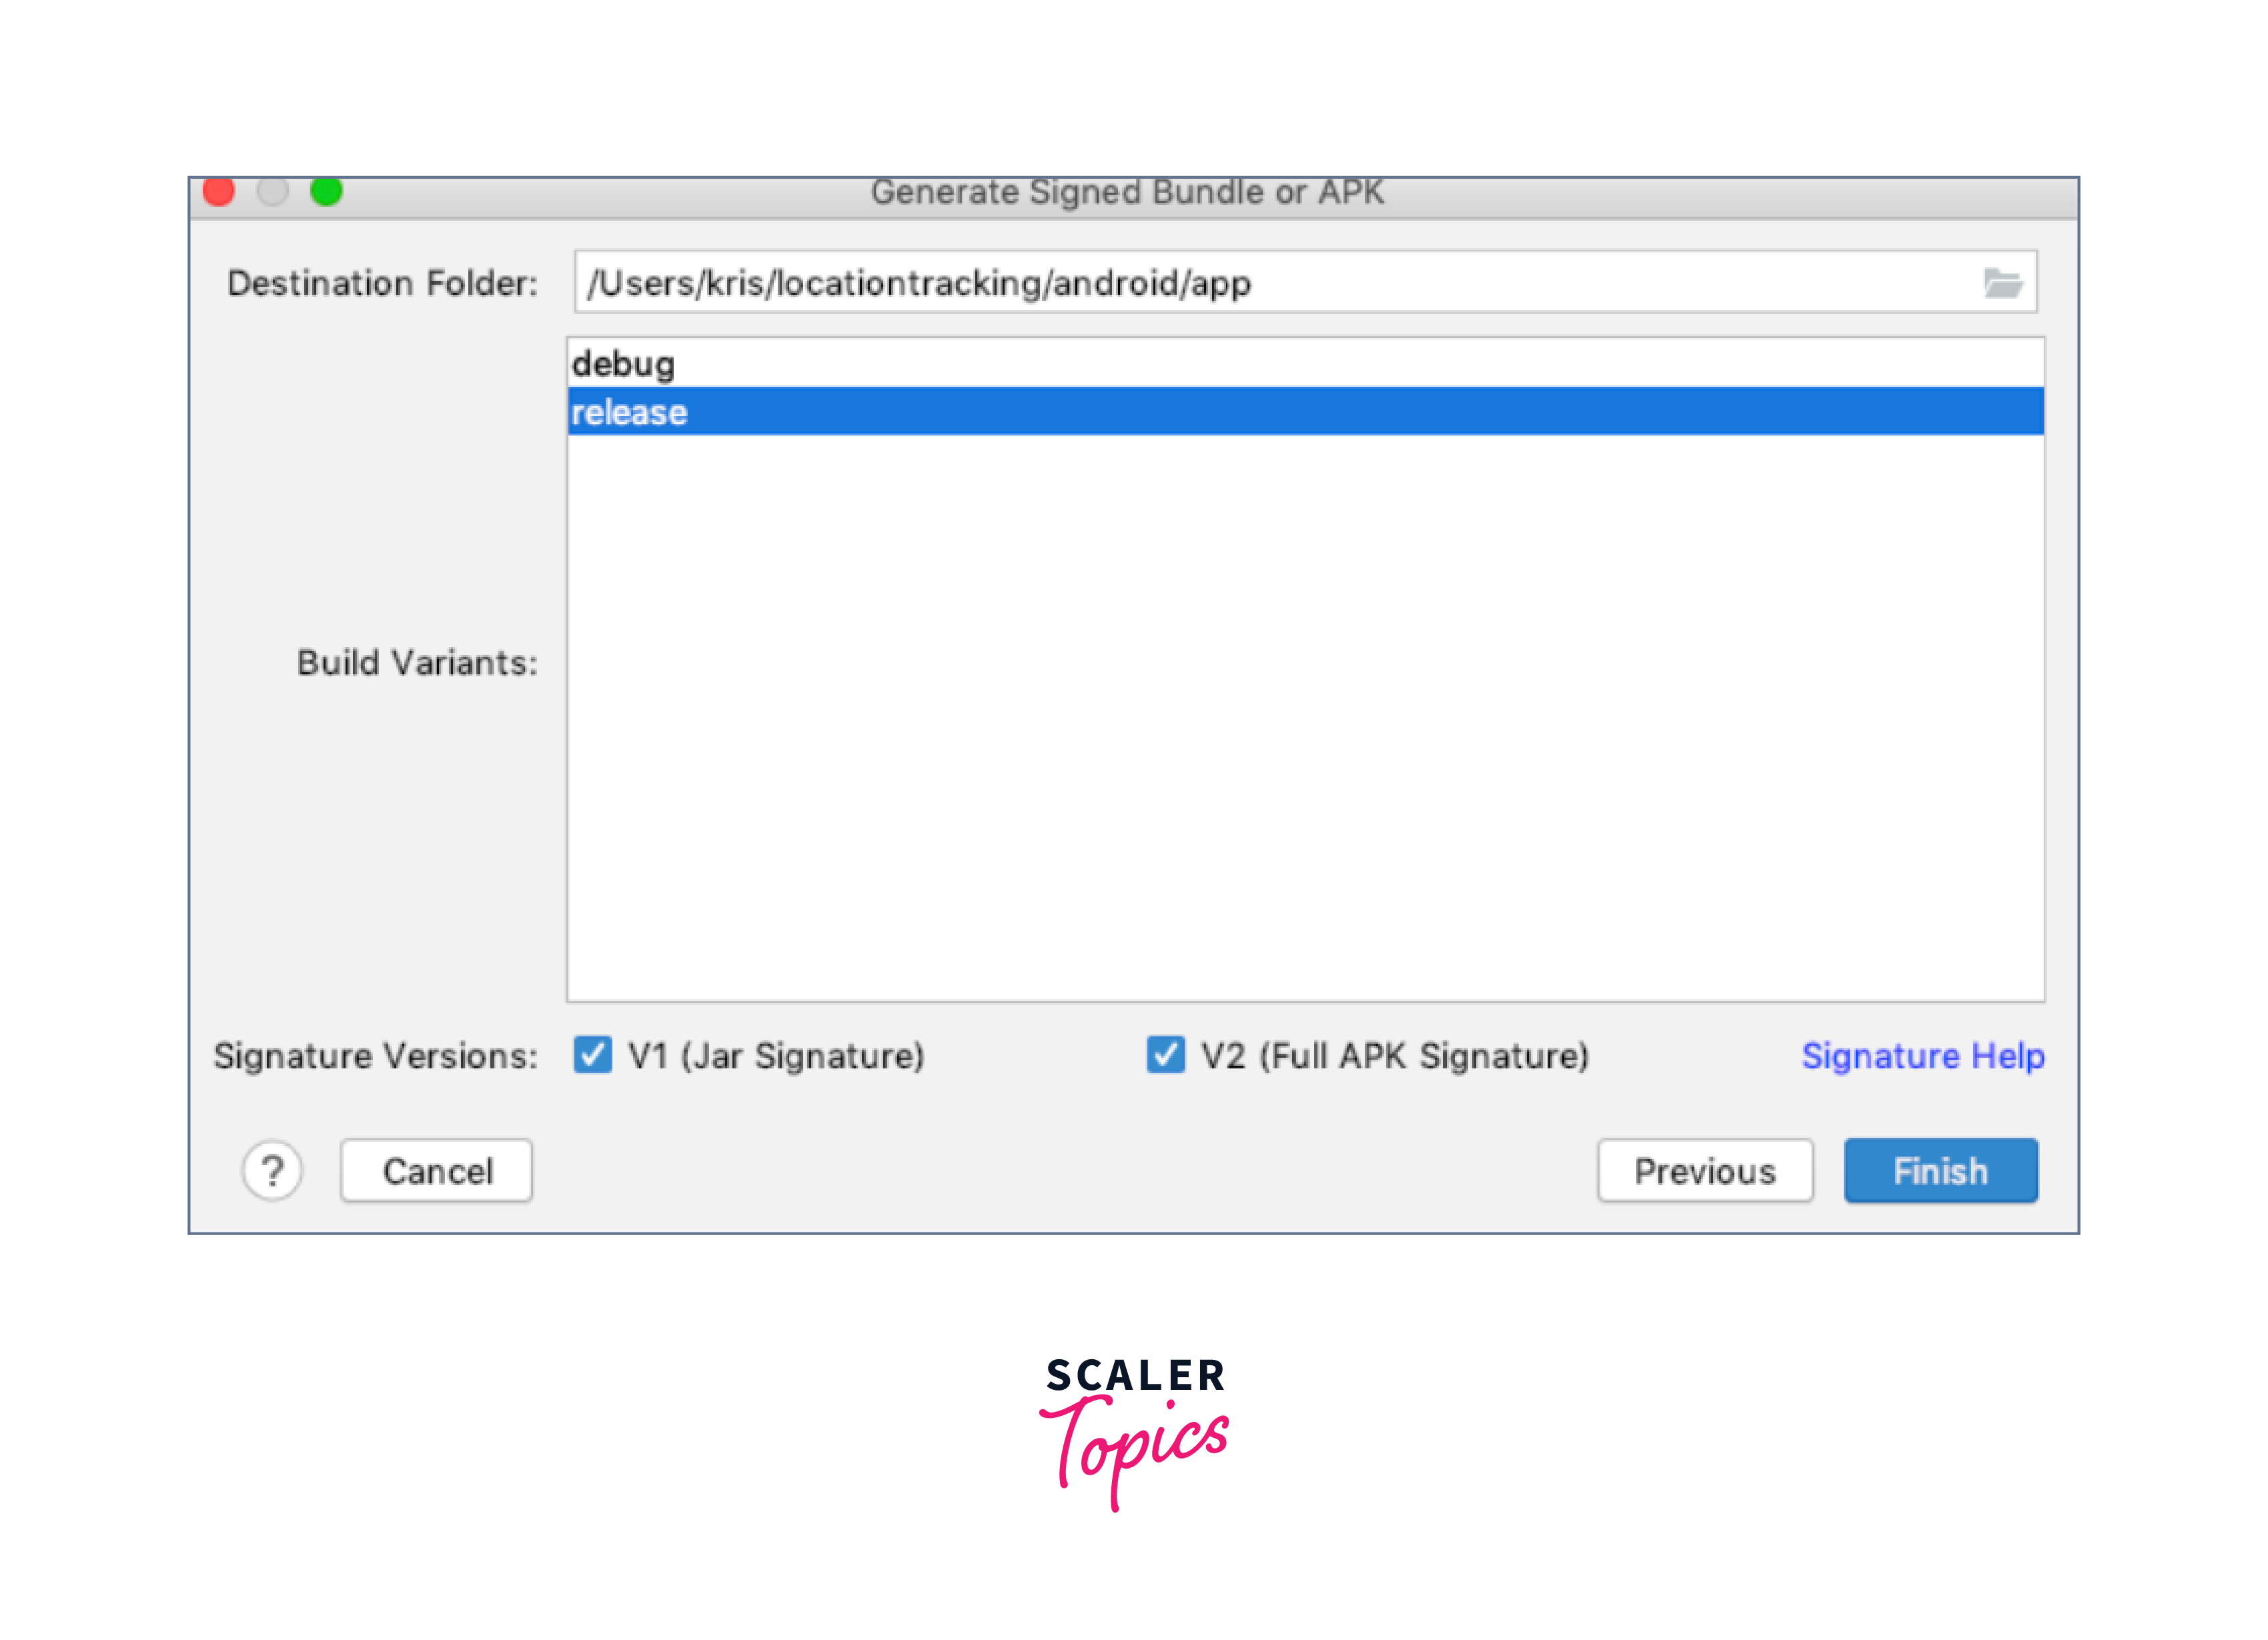
-
Step - 8:
After initiating the build process, you should observe the generation of two APK files, namely app-x86-release.apk and app-armeabi-v7a-release.apk. These APK files will be located within the android/app/release directory of your project.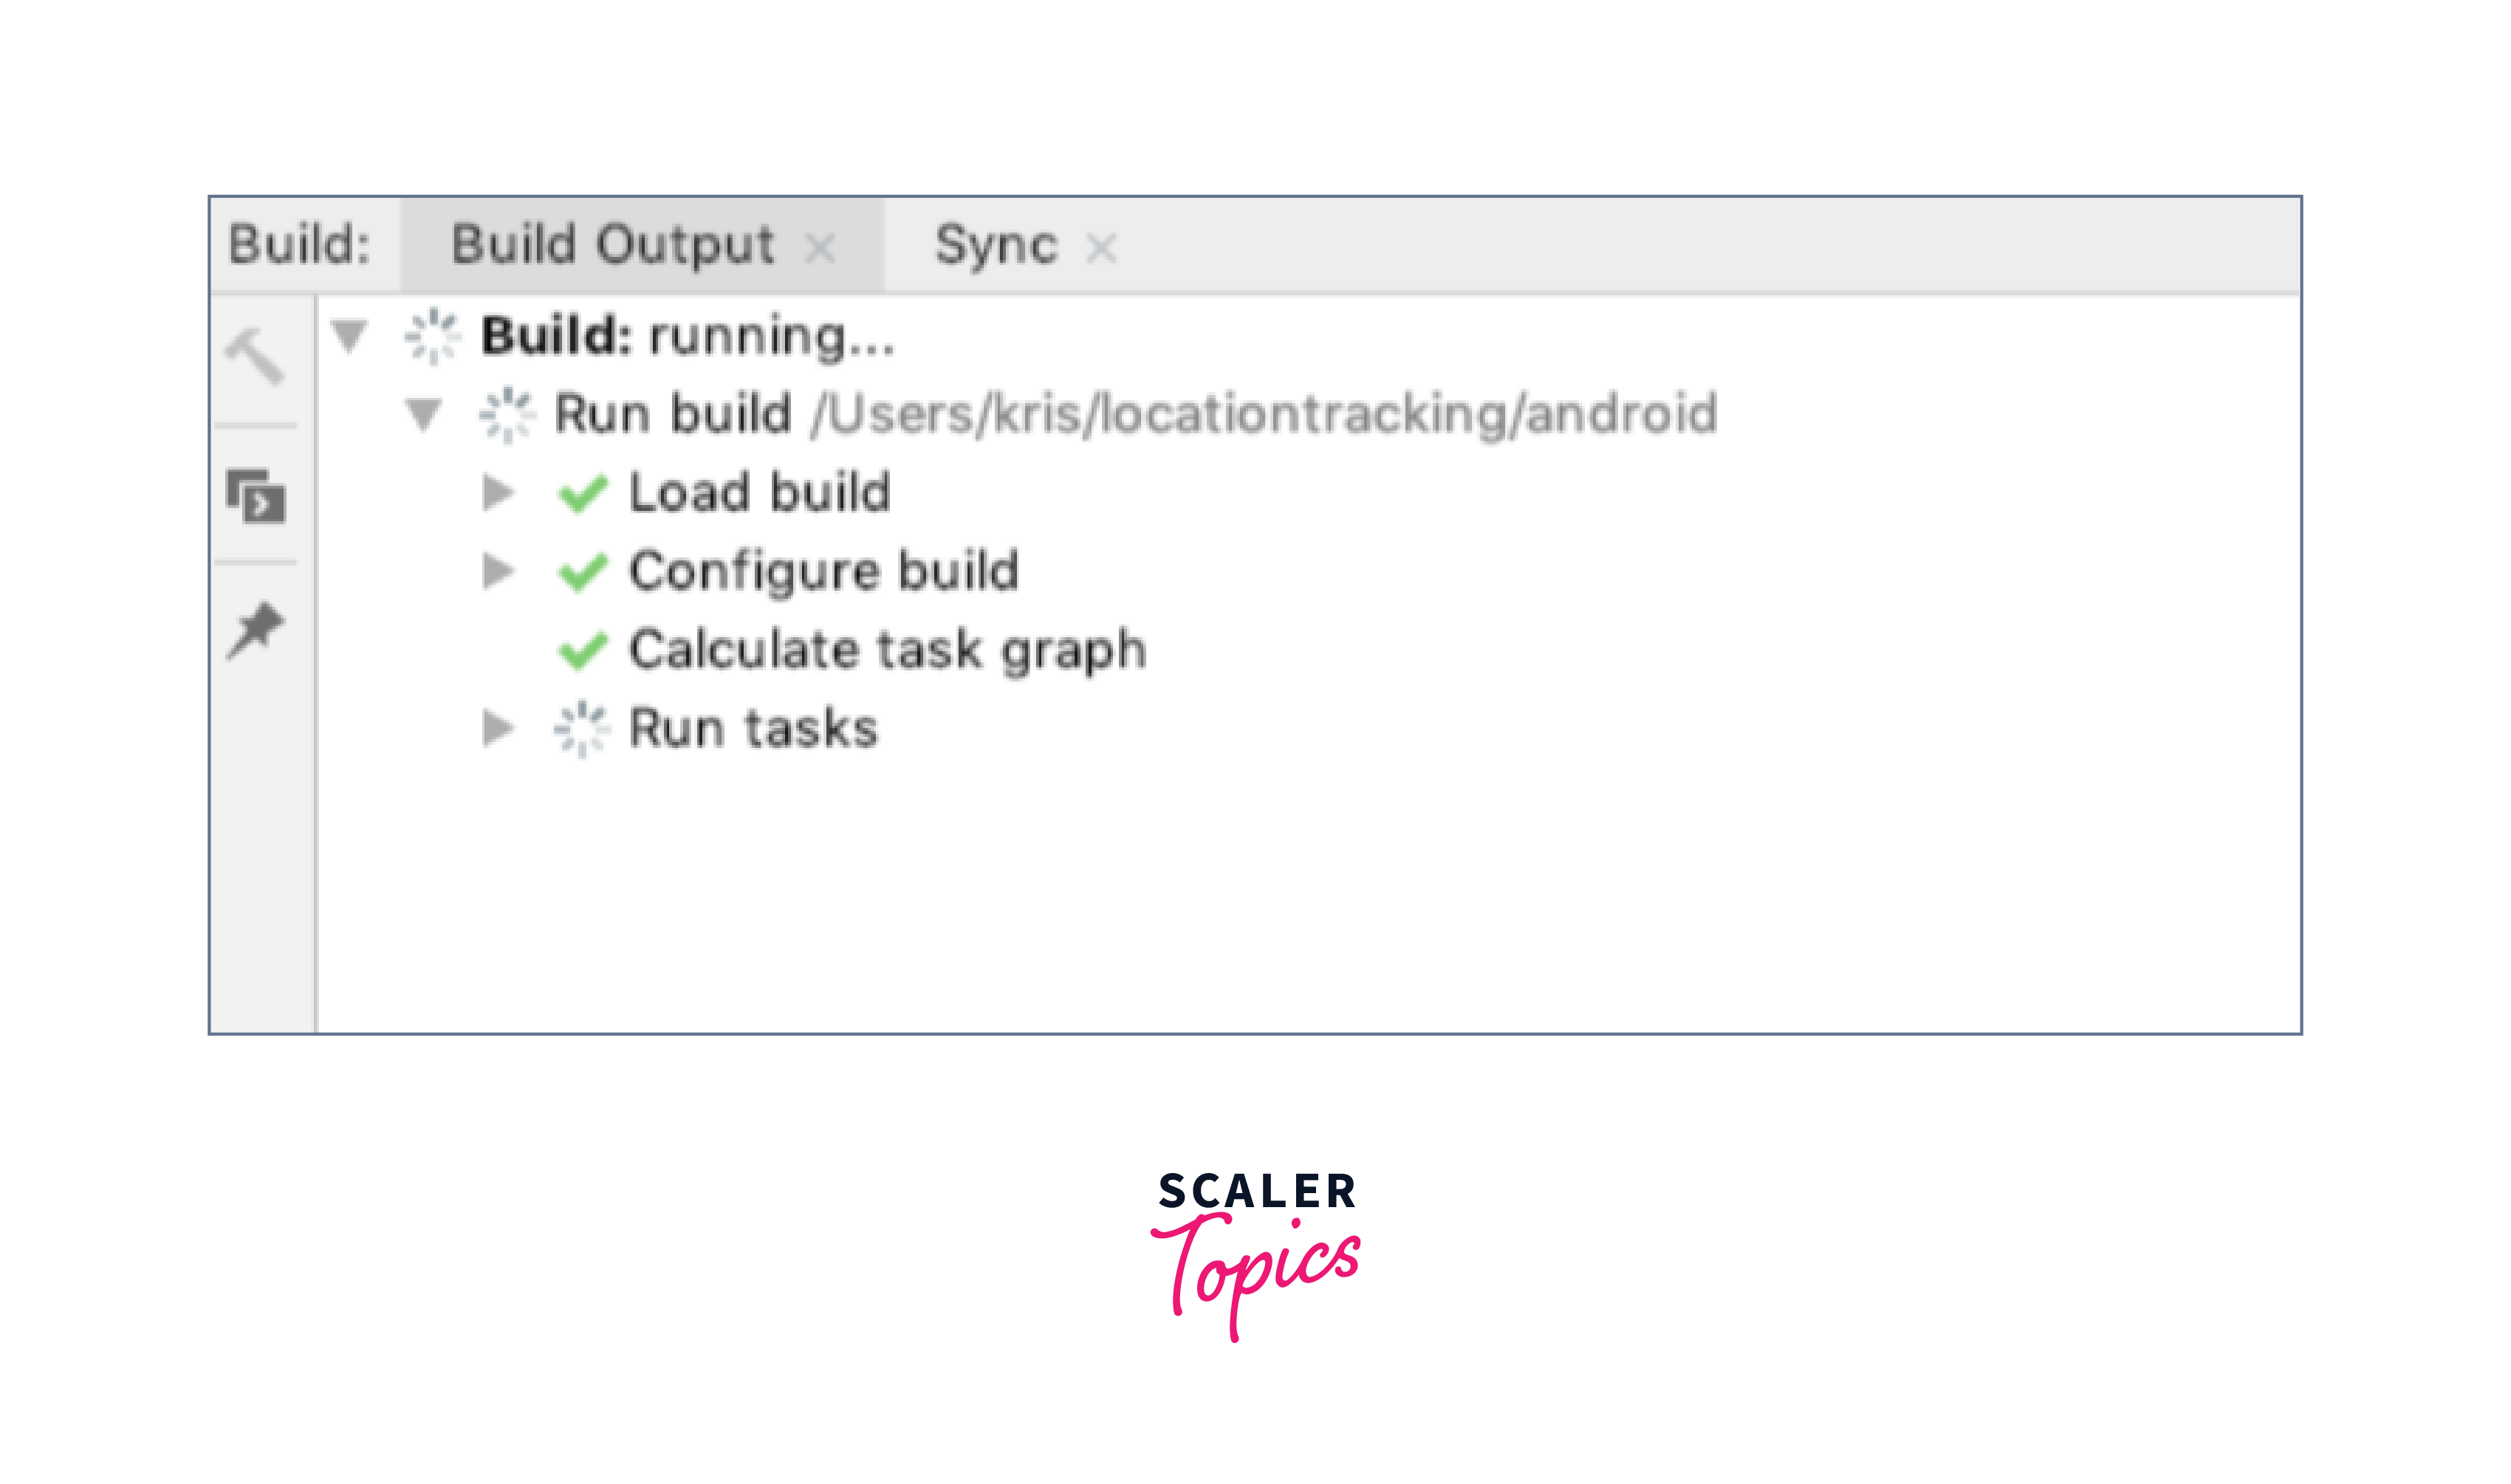
You may create the release version React Native build apk for your Android React Native project in this way. This completes the process of creating an Android React Native Release Build. Your app is now ready to be uploaded to Google Play.
FAQs
Q: How can I generate a keystore file for my React Native project?
A: You can generate a keystore file using the keytool utility, which is provided by the Java Development Kit (JDK). The keytool command allows you to create a keystore file with the necessary cryptographic keys.
Q: How can I troubleshoot errors encountered during the release build APK generation?
A: It is recommended to carefully review the error messages and check for any misconfigurations in the keystore, build.gradle file, or project dependencies. Additionally, checking online forums and documentation for specific error messages can provide helpful insights and solutions.
Q: Is it possible to generate multiple release build APKs with different configurations?
A: Yes, you can generate multiple releases React Native build apk with different configurations by creating different build variants in your React Native project. This allows you to customize aspects such as application flavors, signing configurations, and resource configurations. Please note that the FAQs provided here are for general guidance, and it is always recommended to refer to the official documentation and community resources for more specific and up-to-date information on generating the release build APK in React Native.
Conclusion
- A keystore file is essential for signing the release React native build apk, ensuring its integrity and security.
- The keystore file can be generated using the keytool utility provided by the Java Development Kit (JDK).
- The keystore file should be stored securely, and its credentials (passwords, alias) should be backed up for future use.
- The keystore configuration needs to be added to the build.gradle file in your React Native project.
- The release React native build apk can be generated using either the CLI (Command Line Interface) or Android Studio.
- Android Studio provides a graphical interface that simplifies the process of generating the APK.
- Multiple releases of React native build apks can be generated with different configurations by creating build variants in your React Native project.
