React Native Permissions
Overview
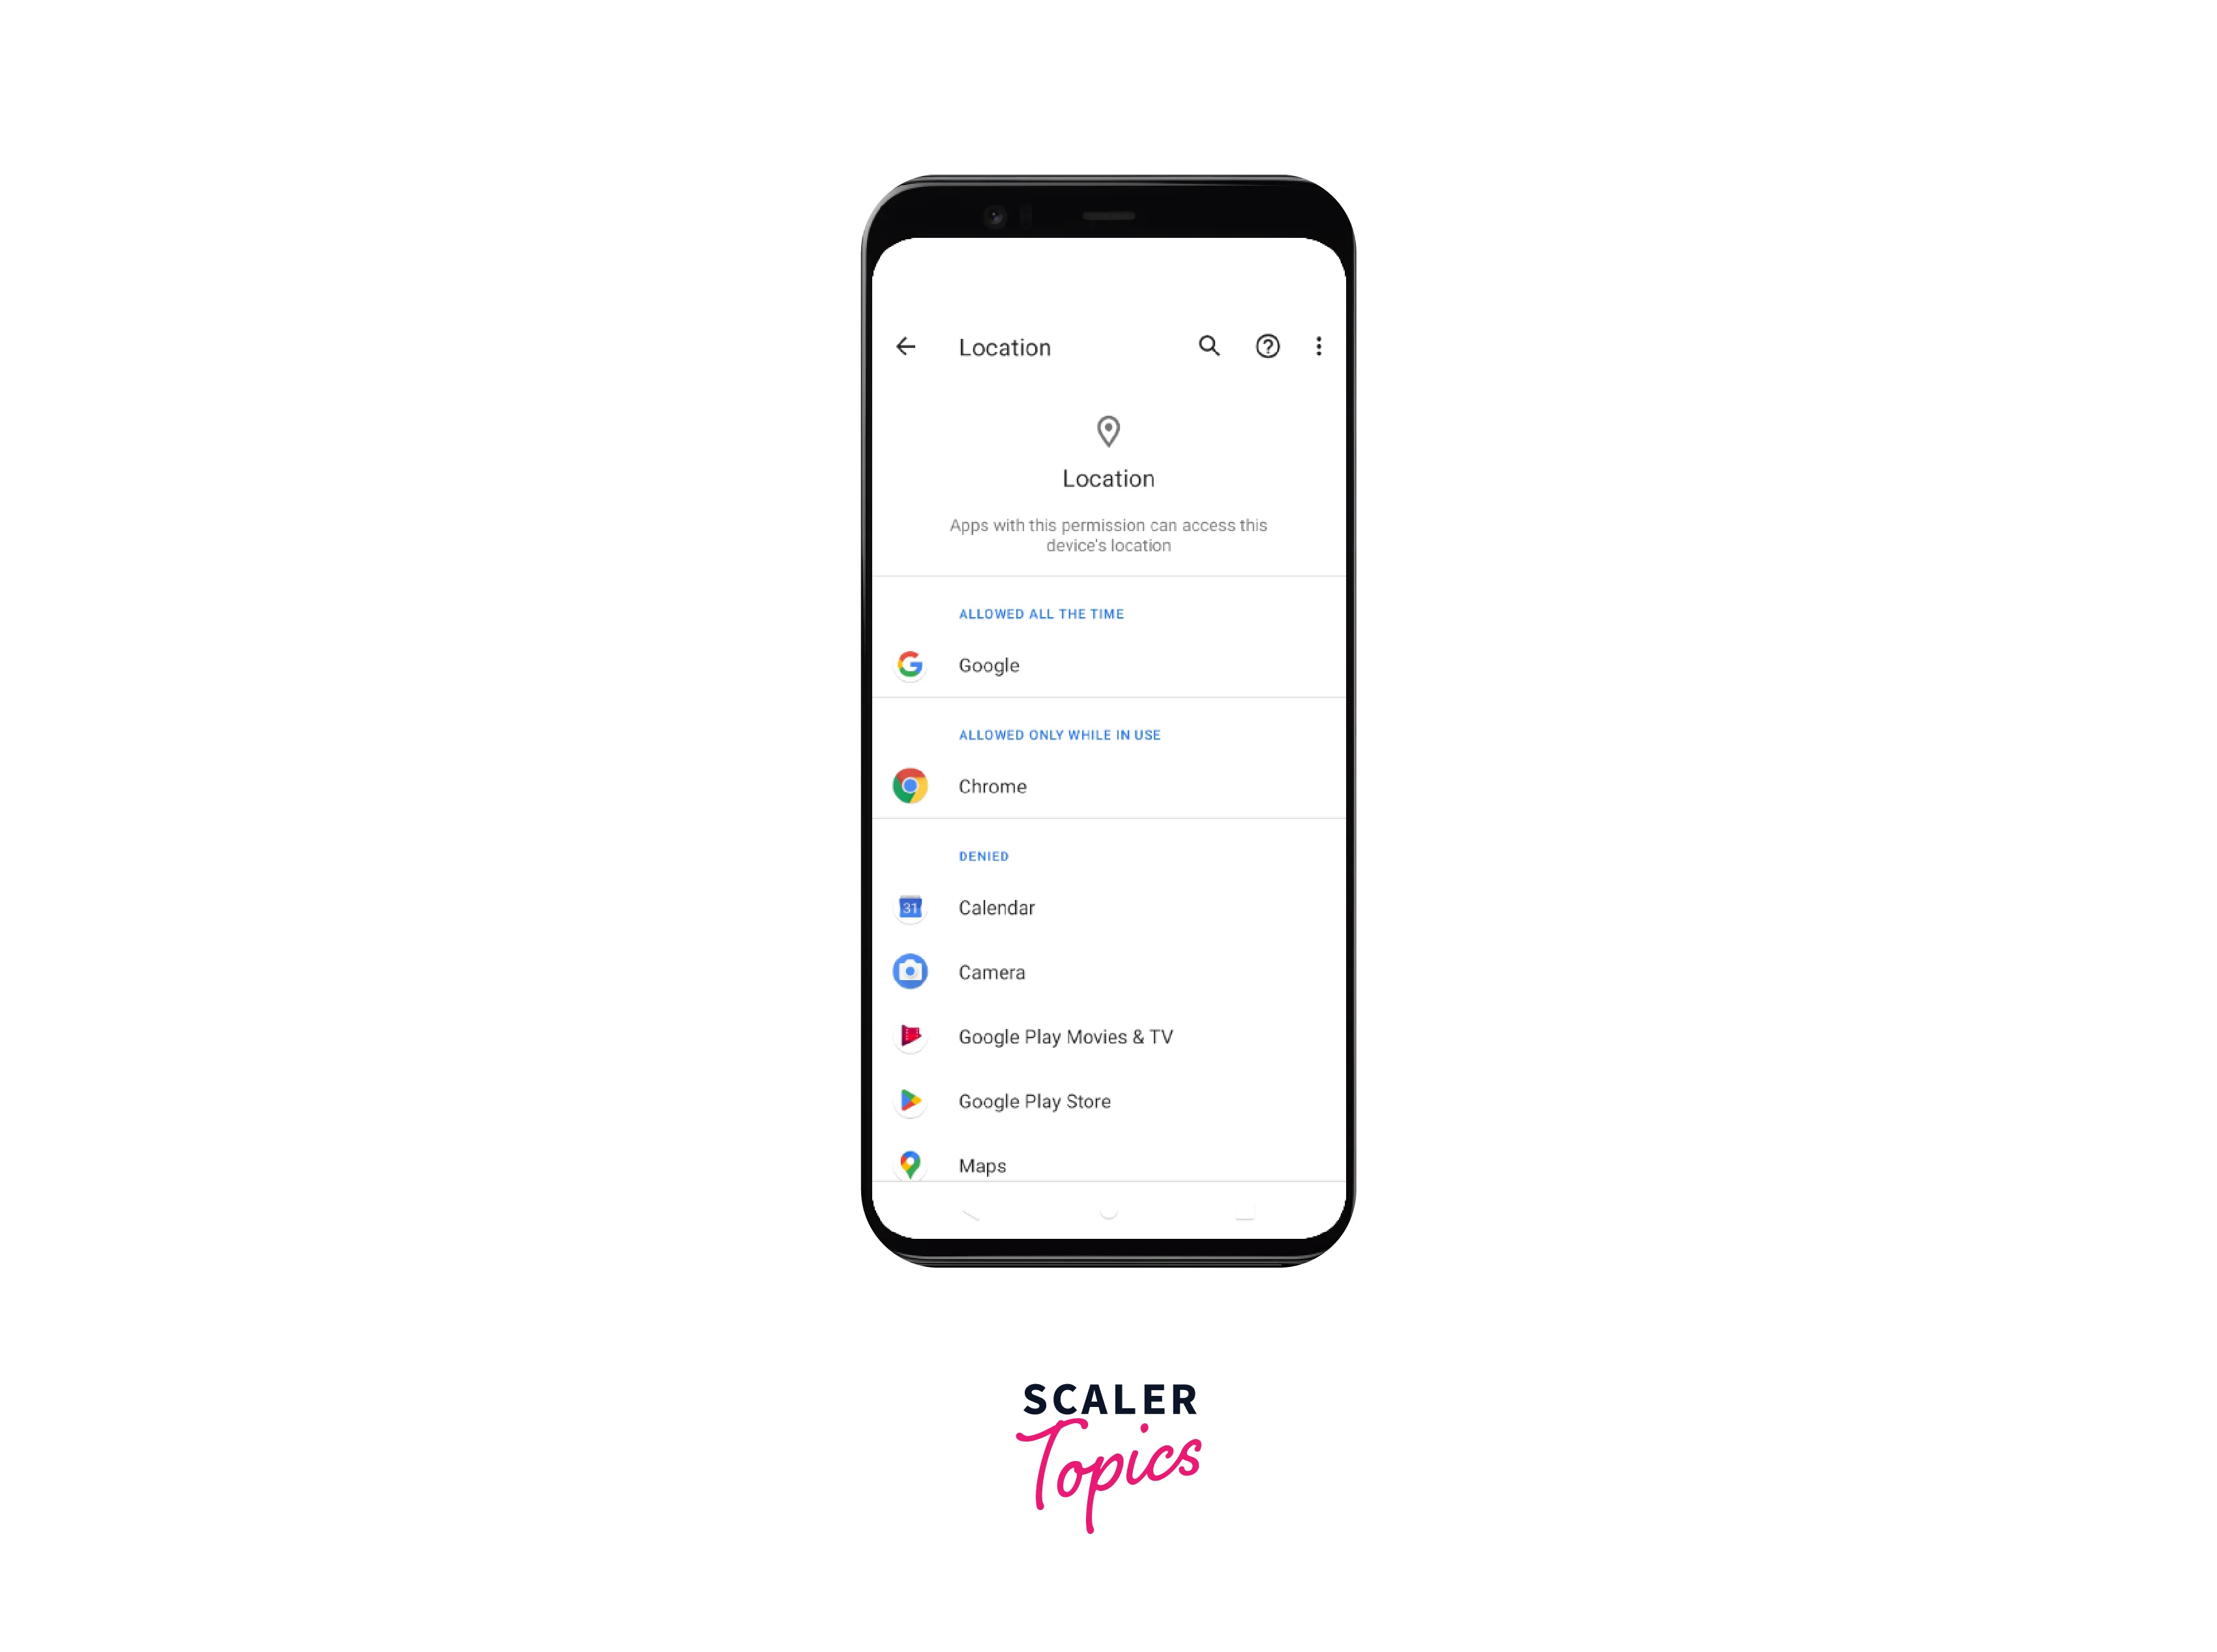
In React Native, permissions are like asking for permission to use certain features or information on a user's device, such as the camera or location. Developers use libraries like React Native Permissions to set up these permissions, which is important for making apps that work well and respect user privacy. It might require some extra steps, like setting up Google Maps or location services. Permissions are an essential part of creating good user experiences in React Native.
Introduction to React Native Permissions
React Native Permissions is a library that simplifies the process of requesting permissions from users in React Native applications. With this library, developers can easily integrate permission requests into their applications for features such as accessing the camera, microphone, contacts, location services, and more.
React Native Permissions supports both iOS and Android platforms and provides a consistent API across both platforms. This makes it easy for developers to write platform-independent code that can be easily ported to both iOS and Android platforms.
The library also provides a set of predefined permissions that can be requested by the application, such as a camera, microphone, contacts, location services, and more. These predefined permissions are abstracted away from the underlying platform-specific APIs, making it easy for developers to request the necessary permissions without having to write platform-specific code.

Setting Up React Native Permissions
Setting up React Native Permissions is a straightforward process that involves installing the library and configuring it in your React Native project. Here's a step-by-step process on how to set up React Native Permissions in your project:
Install the library:
You can install React Native Permissions by running the following command in your project's root directory:
To enable permission handling in your React Native app, you need to first update your package.json file by specifying the permissions your app requires. By default, no permission handler is linked, so this step is necessary to ensure proper functionality.
iOS
-
Once you have updated the package.json file, you can run the command npx react-native setup-ios-permissions to add a permission handler to your app. Finally, run pod installs to install the necessary dependencies.
-
Then update your Info. plist with wanted permissions usage descriptions like this:
The NSCameraUsageDescription is a key-value pair that is used in the Info. plist file of an iOS app. The purpose of this key is to describe why your app needs to access the user's device camera.
When a user installs an app on their iOS device that requires access to their device camera, they will see a prompt asking for permission to grant the app access. This prompt will display the message provided in the NSCameraUsageDescription key-value pair to inform the user why the app needs access to their device camera.
Using React Native Permissions, you can easily request permission from the user to access their device camera in your app.
For example, the "YOUR TEXT" value could be replaced with a description of the specific functionality of the app that requires access to the user's device camera, such as "To take photos and videos to create a personalized profile picture".
Providing a clear and concise message in the NSCameraUsageDescription key-value pair can help to build trust with your users and improve the likelihood of them granting your app permission to access their device camera.
Android
To add permissions to your app on Android, you should specify the desired permissions in the AndroidManifest.xml file located in the android/app/src/main directory of your app.
Windows
To specify the capabilities that your app supports on Windows, you can open the Package. appxmanifest file in your app project. This file is located in the app project within the Windows folder of your project solution file. From there, you can select the abilities that you want your app to have.
Manual Linking Steps for react-native-permissions
iOS
-
Open your project's Podfile located in ios/Podfile.
-
Add the following line to your Podfile, right after target YourProjectName do:
-
Save the Podfile and close it.
-
Open Terminal, navigate to your project's ios directory, and run the following command:
This command installs the RNPermissions pod and adds it to your Xcode workspace.
-
Open your project's .xcworkspace file in Xcode and make sure that RNPermissions is listed under "Pods" in the left-hand panel.
-
In your app's Info. plist file, add the necessary keys to specify the permissions that your app requires. The required keys depend on the permission you are requesting.
-
Import the react-native-permissions package into your code using the following statement:
-
Finally, use the Permissions API to request the permissions that your app requires.
Android
-
Open your project's settings.gradle file and add the following lines:
-
Open your project's android/app/build.gradle file and add the following line to the dependencies block:
-
Open your project's MainApplication.java file and add the following import statement:
-
In the MainApplication class, add the RNPermissionsPackage to the list of packages in the getPackages method:
-
Save your changes and rebuild your app.
-
Import the react-native-permissions package into your code using the following statement:
-
Finally, use the Permissions API to request the permissions that your app requires.
Windows
- Add RNCConfig Project to Your Solution:
- Open your solution in Visual Studio/VSCode.
- Right-click on the Solution icon in Solution Explorer and select "Add" > "Existing Project".
- Browse to node_modules/react-native-permissions/windows/RNPermissions/RNPermissions.vcxproj and select it.
- Add a Reference to RNPermissions:
- In your main application project's .vcxproj file, add a reference to RNPermissions.
- From Visual Studio/VSCode, right-click on your main application project and select "Add" > "Reference".
- Check RNPermissions from Solution Projects.
- Include RNPermissions in Your Code:
- In "pch.h", add #include "winrt/RNPermissions.h".
- In "app.cpp", add PackageProviders().Append(winrt::RNPermissions::ReactPackageProvider()); before InitializeComponent();.
Understanding the Permission Flow in React Native
Since permissions are handled differently on iOS and Android, the react-native-permissions library offers an abstraction over the behavior of both platforms. By using the React Native Permissions library, developers can ensure a consistent user experience across both platforms.
To get a better understanding of how it works, let's see the diagrams below:
iOS Flow
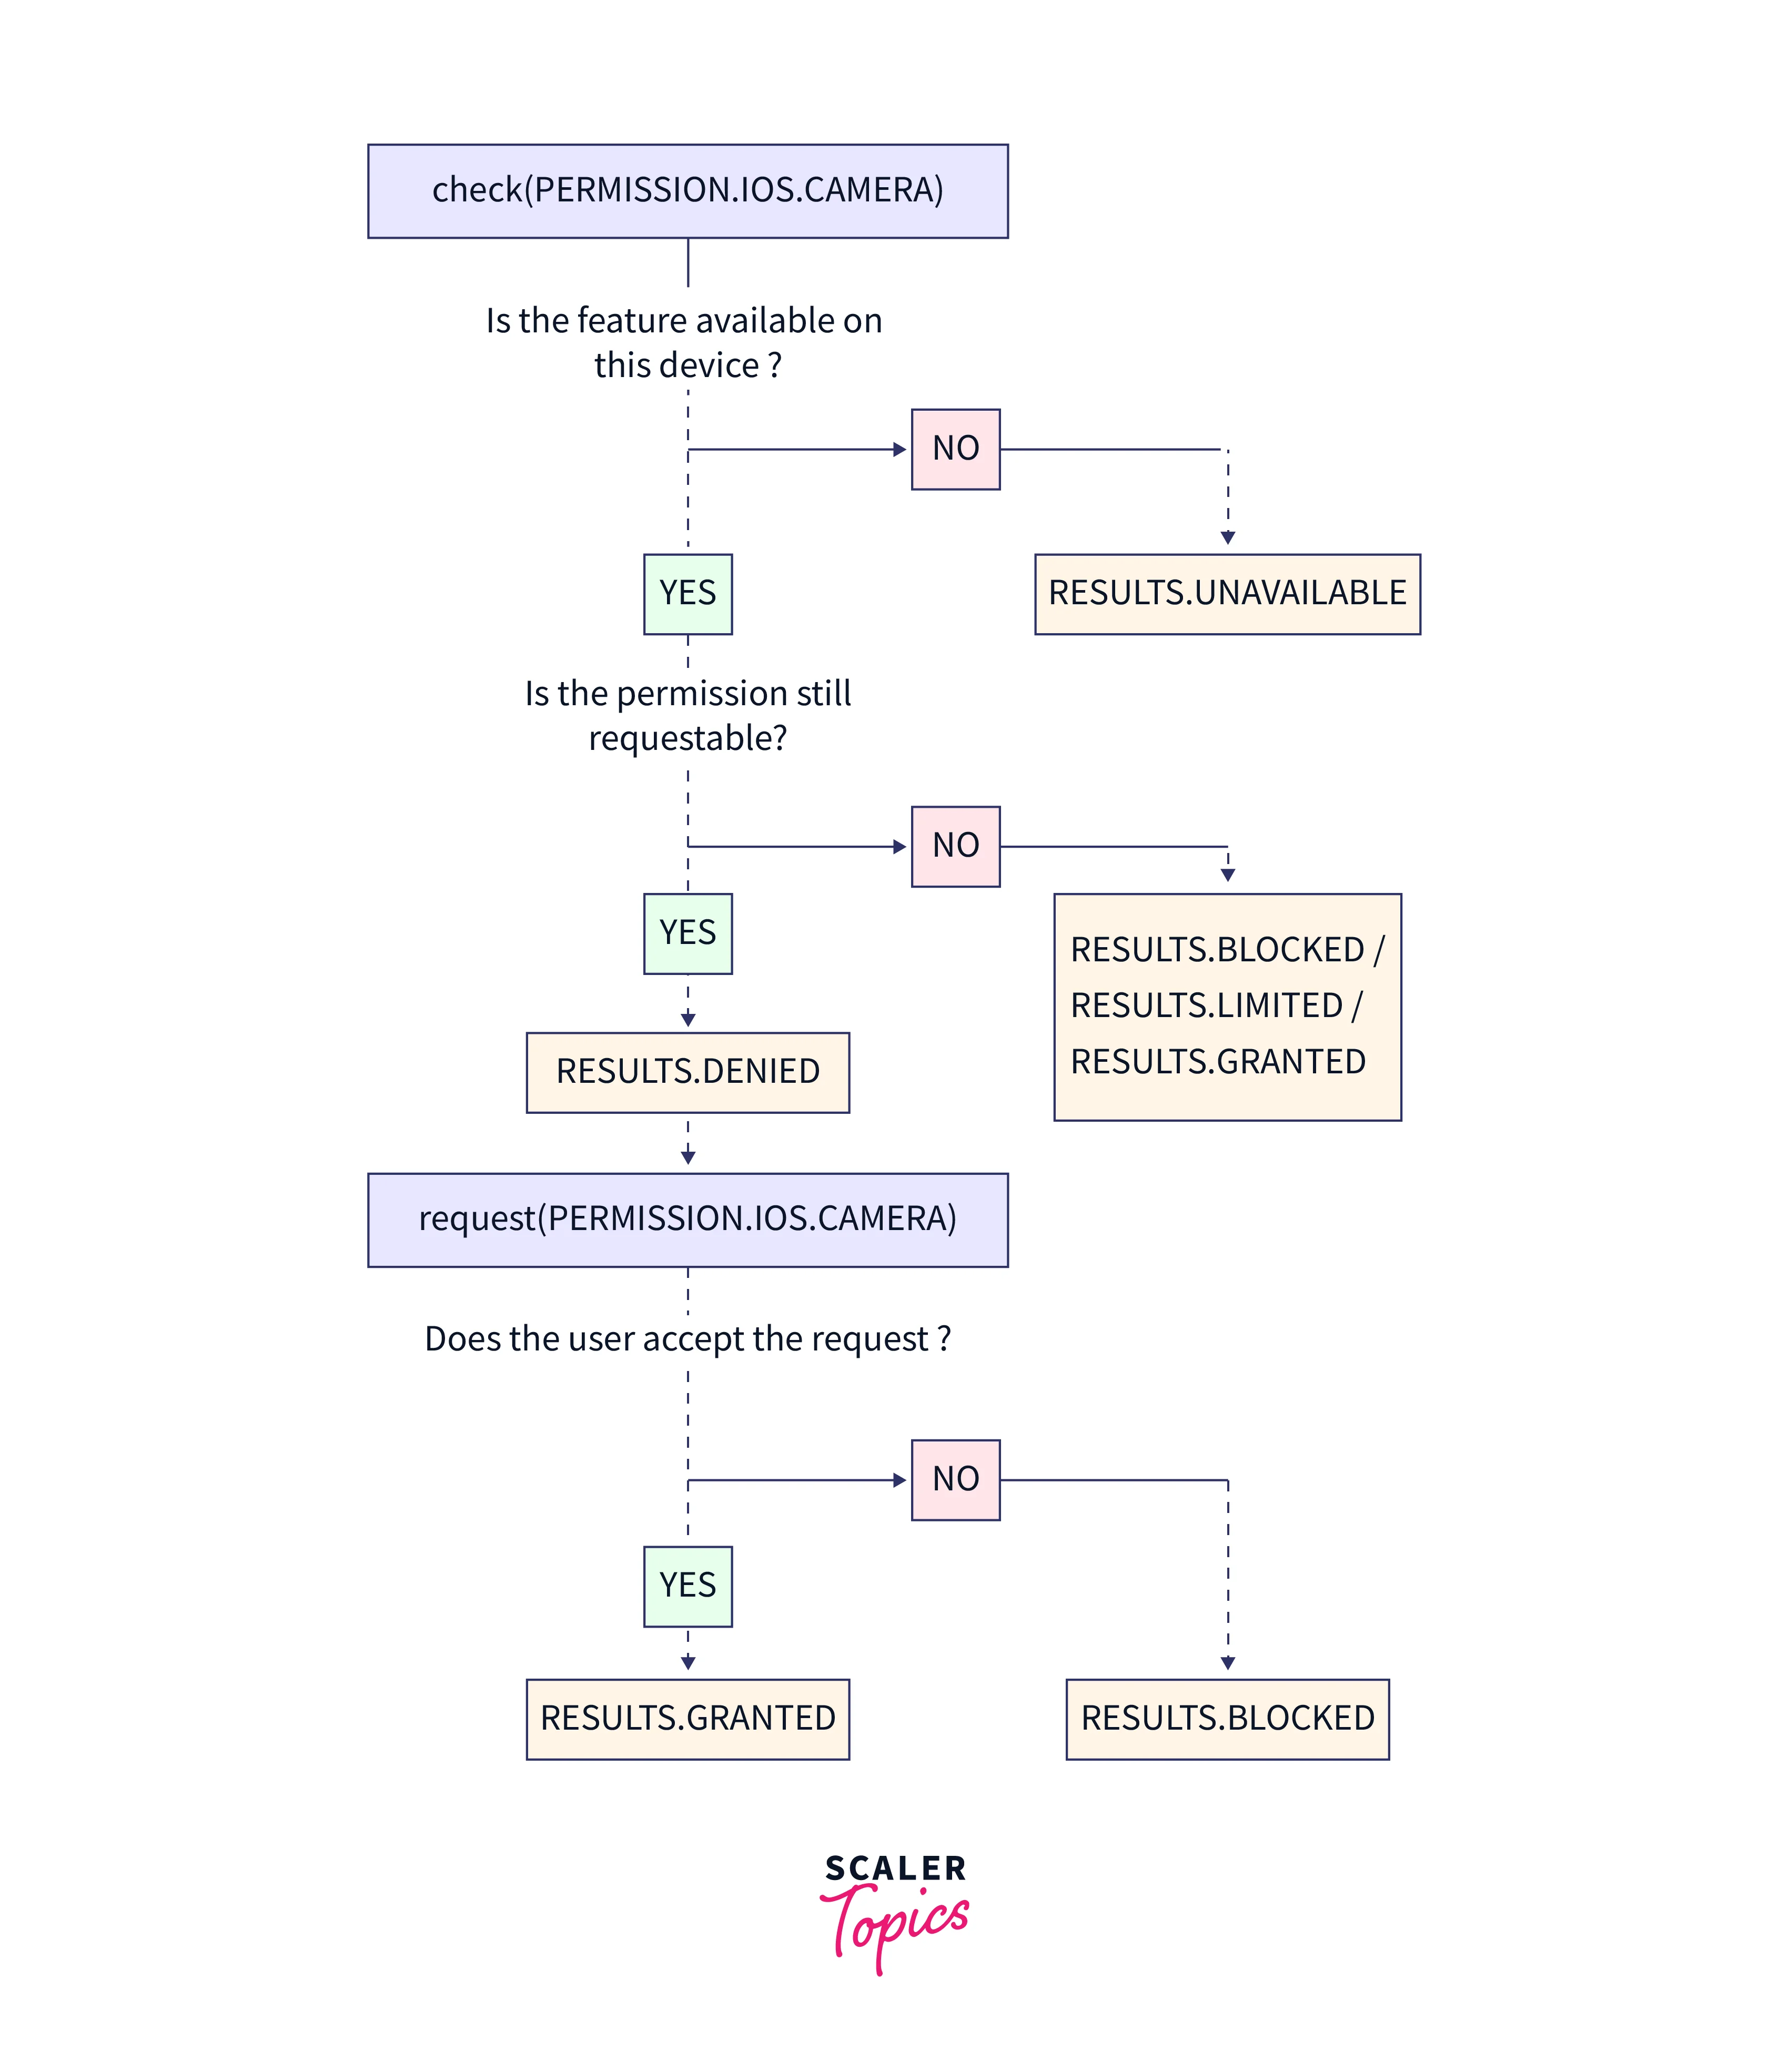
This flowchart explains the permission flow in React Native for iOS when checking and requesting camera permissions.
1. Check if the camera feature is available on the device.
- If it's not available, the result is unavailable.
- If it is available, move on to the next step.
2. Check if the camera permission is requestable.
- If it's not requestable, the result can be one of three things: blocked, limited, or granted.
- If it is requestable, move on to the next step.
3. Check if the camera permission is granted.
- If it's not granted, the result is denied.
- If it is granted, the process is complete.
4. Request permission to use the camera.
- If the user declines the request, the result is blocked.
- If the user accepts the request, the result is granted.
Android Flow
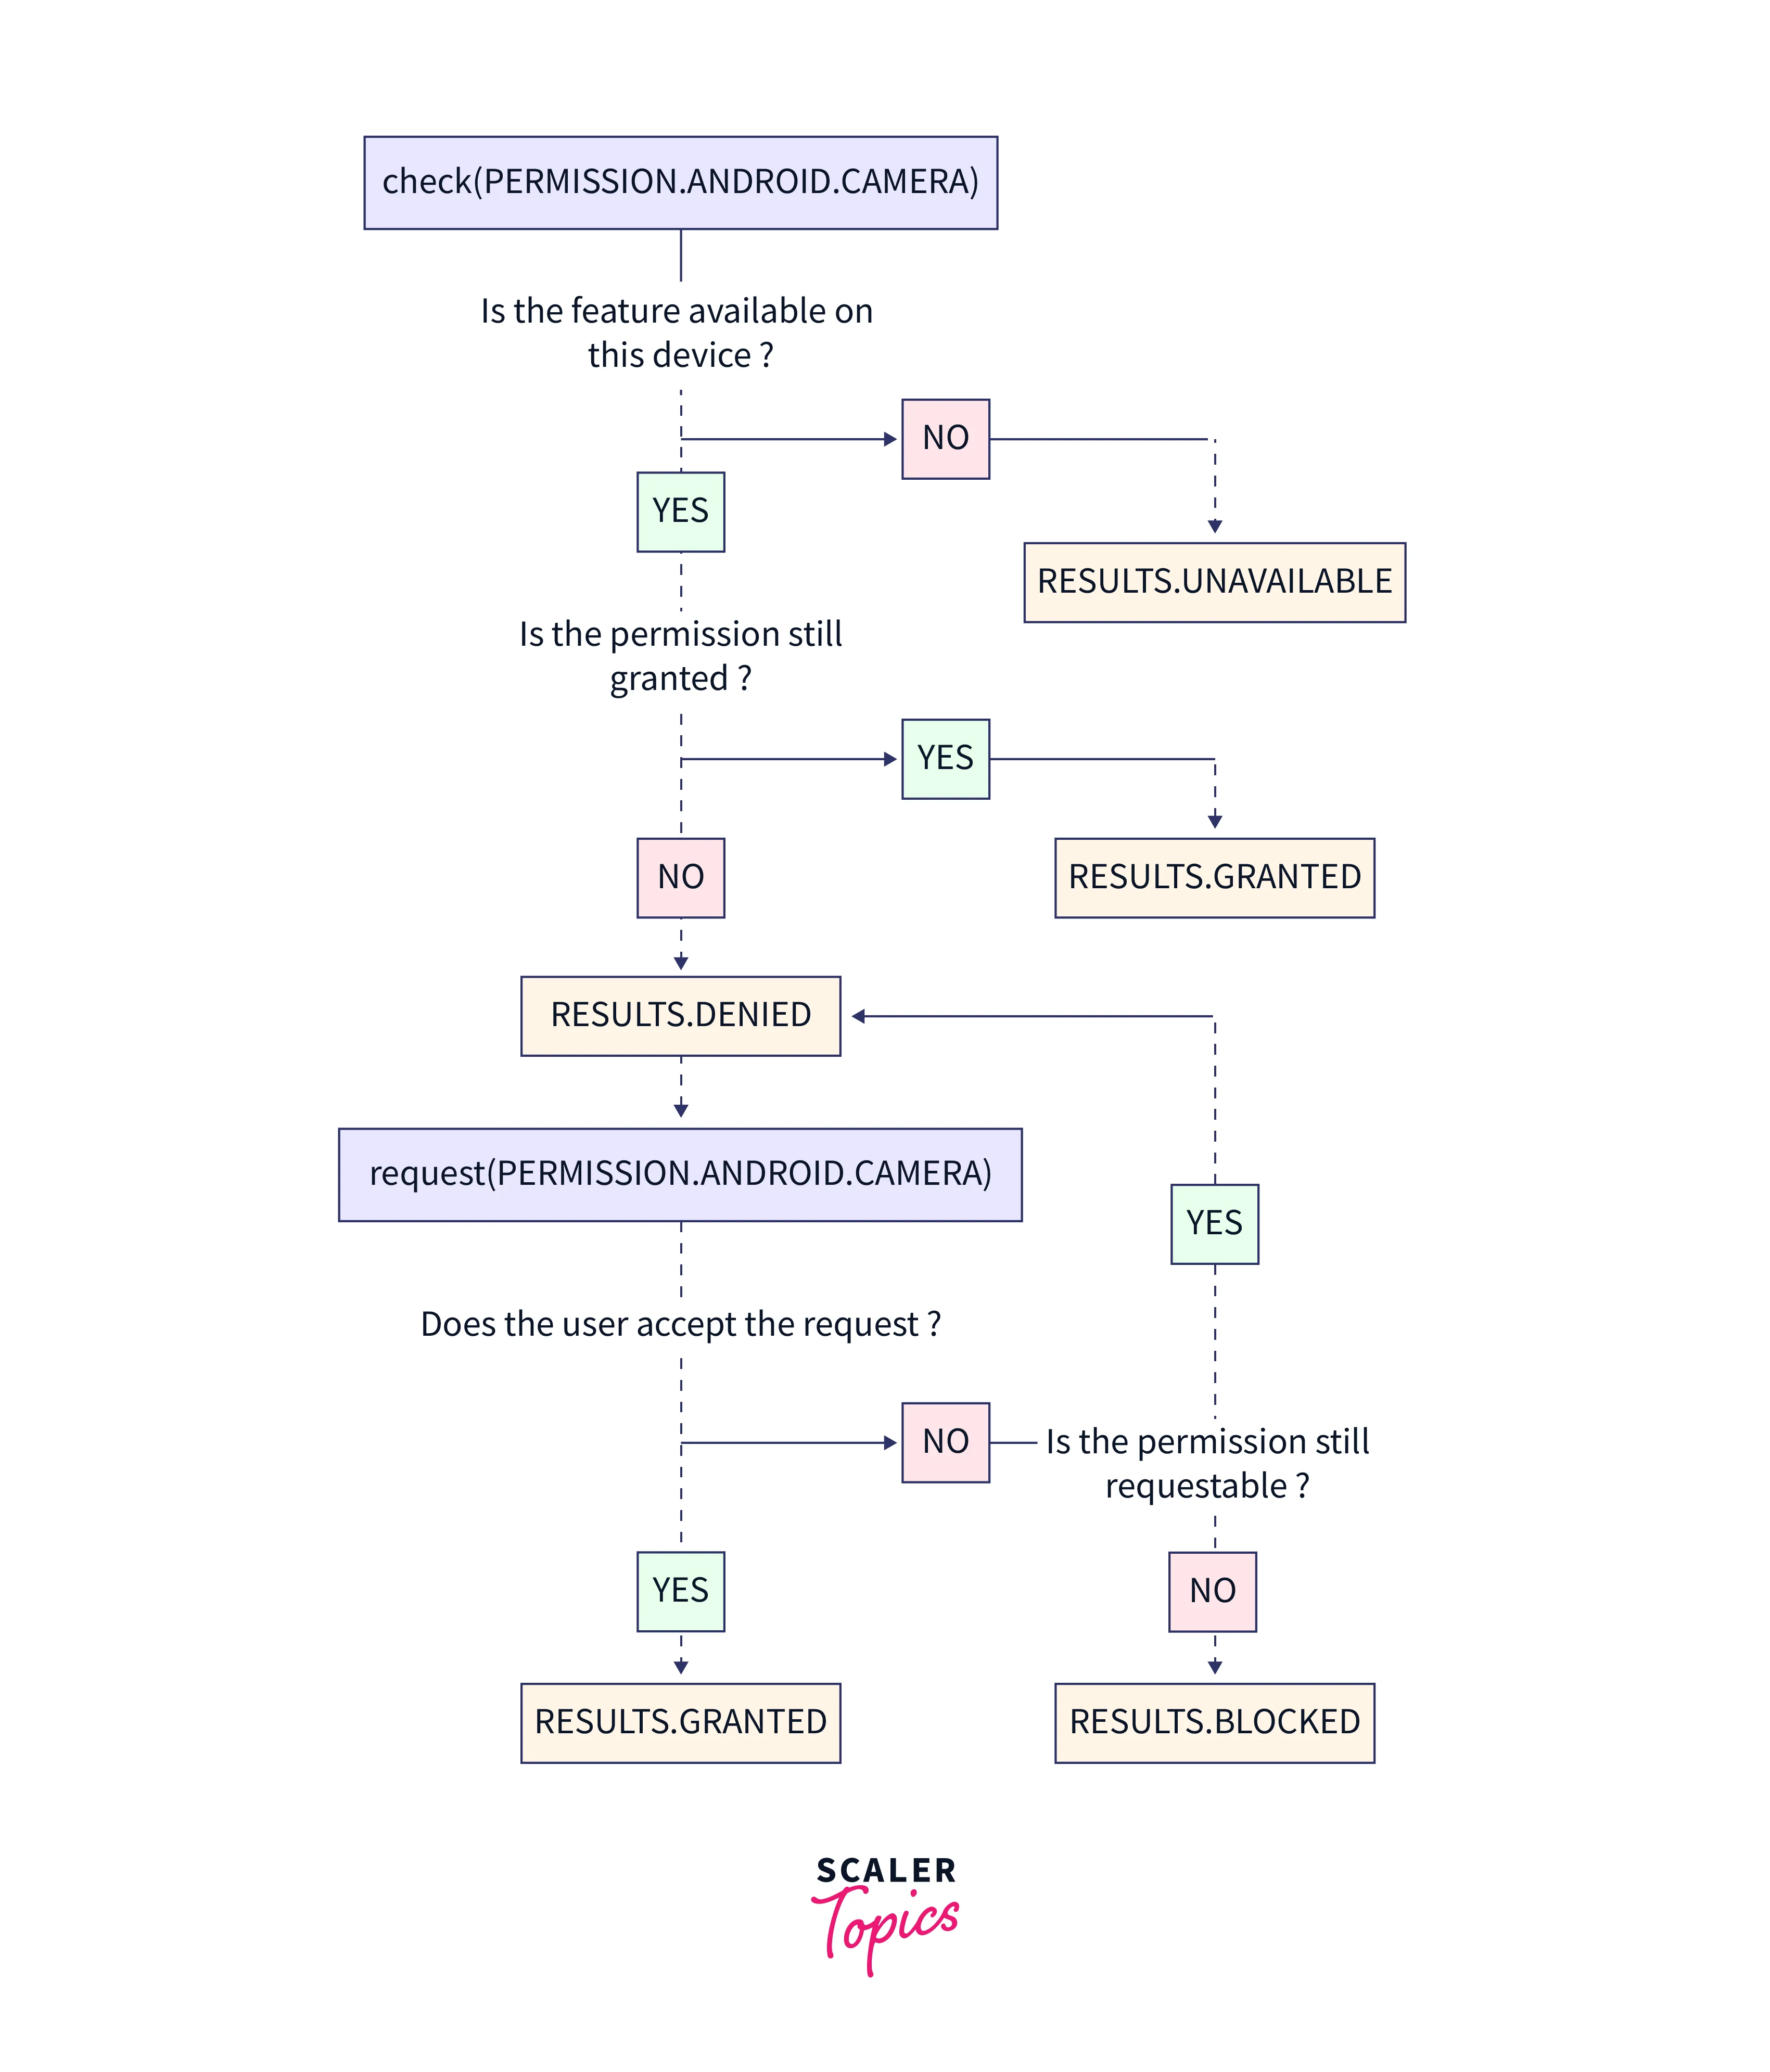
This flowchart explains the permission flow for checking and requesting camera permission on Android.
1. Check if the camera feature is available on the device:
- If not available, the result will be RESULTS.UNAVAILABLE.
2. Check if the permission is already granted:
- If granted, the result will be RESULTS.GRANTED.
3. If the permission is not granted, request permission from the user:
- If the user denies the request, the result will be RESULTS.DENIED.
- If the user accepts the request, check if the permission is still requestable:
- If requestable, the result will be RESULTS.GRANTED.
- If not requestable, the result will be RESULTS.BLOCKED.
Windows Flow
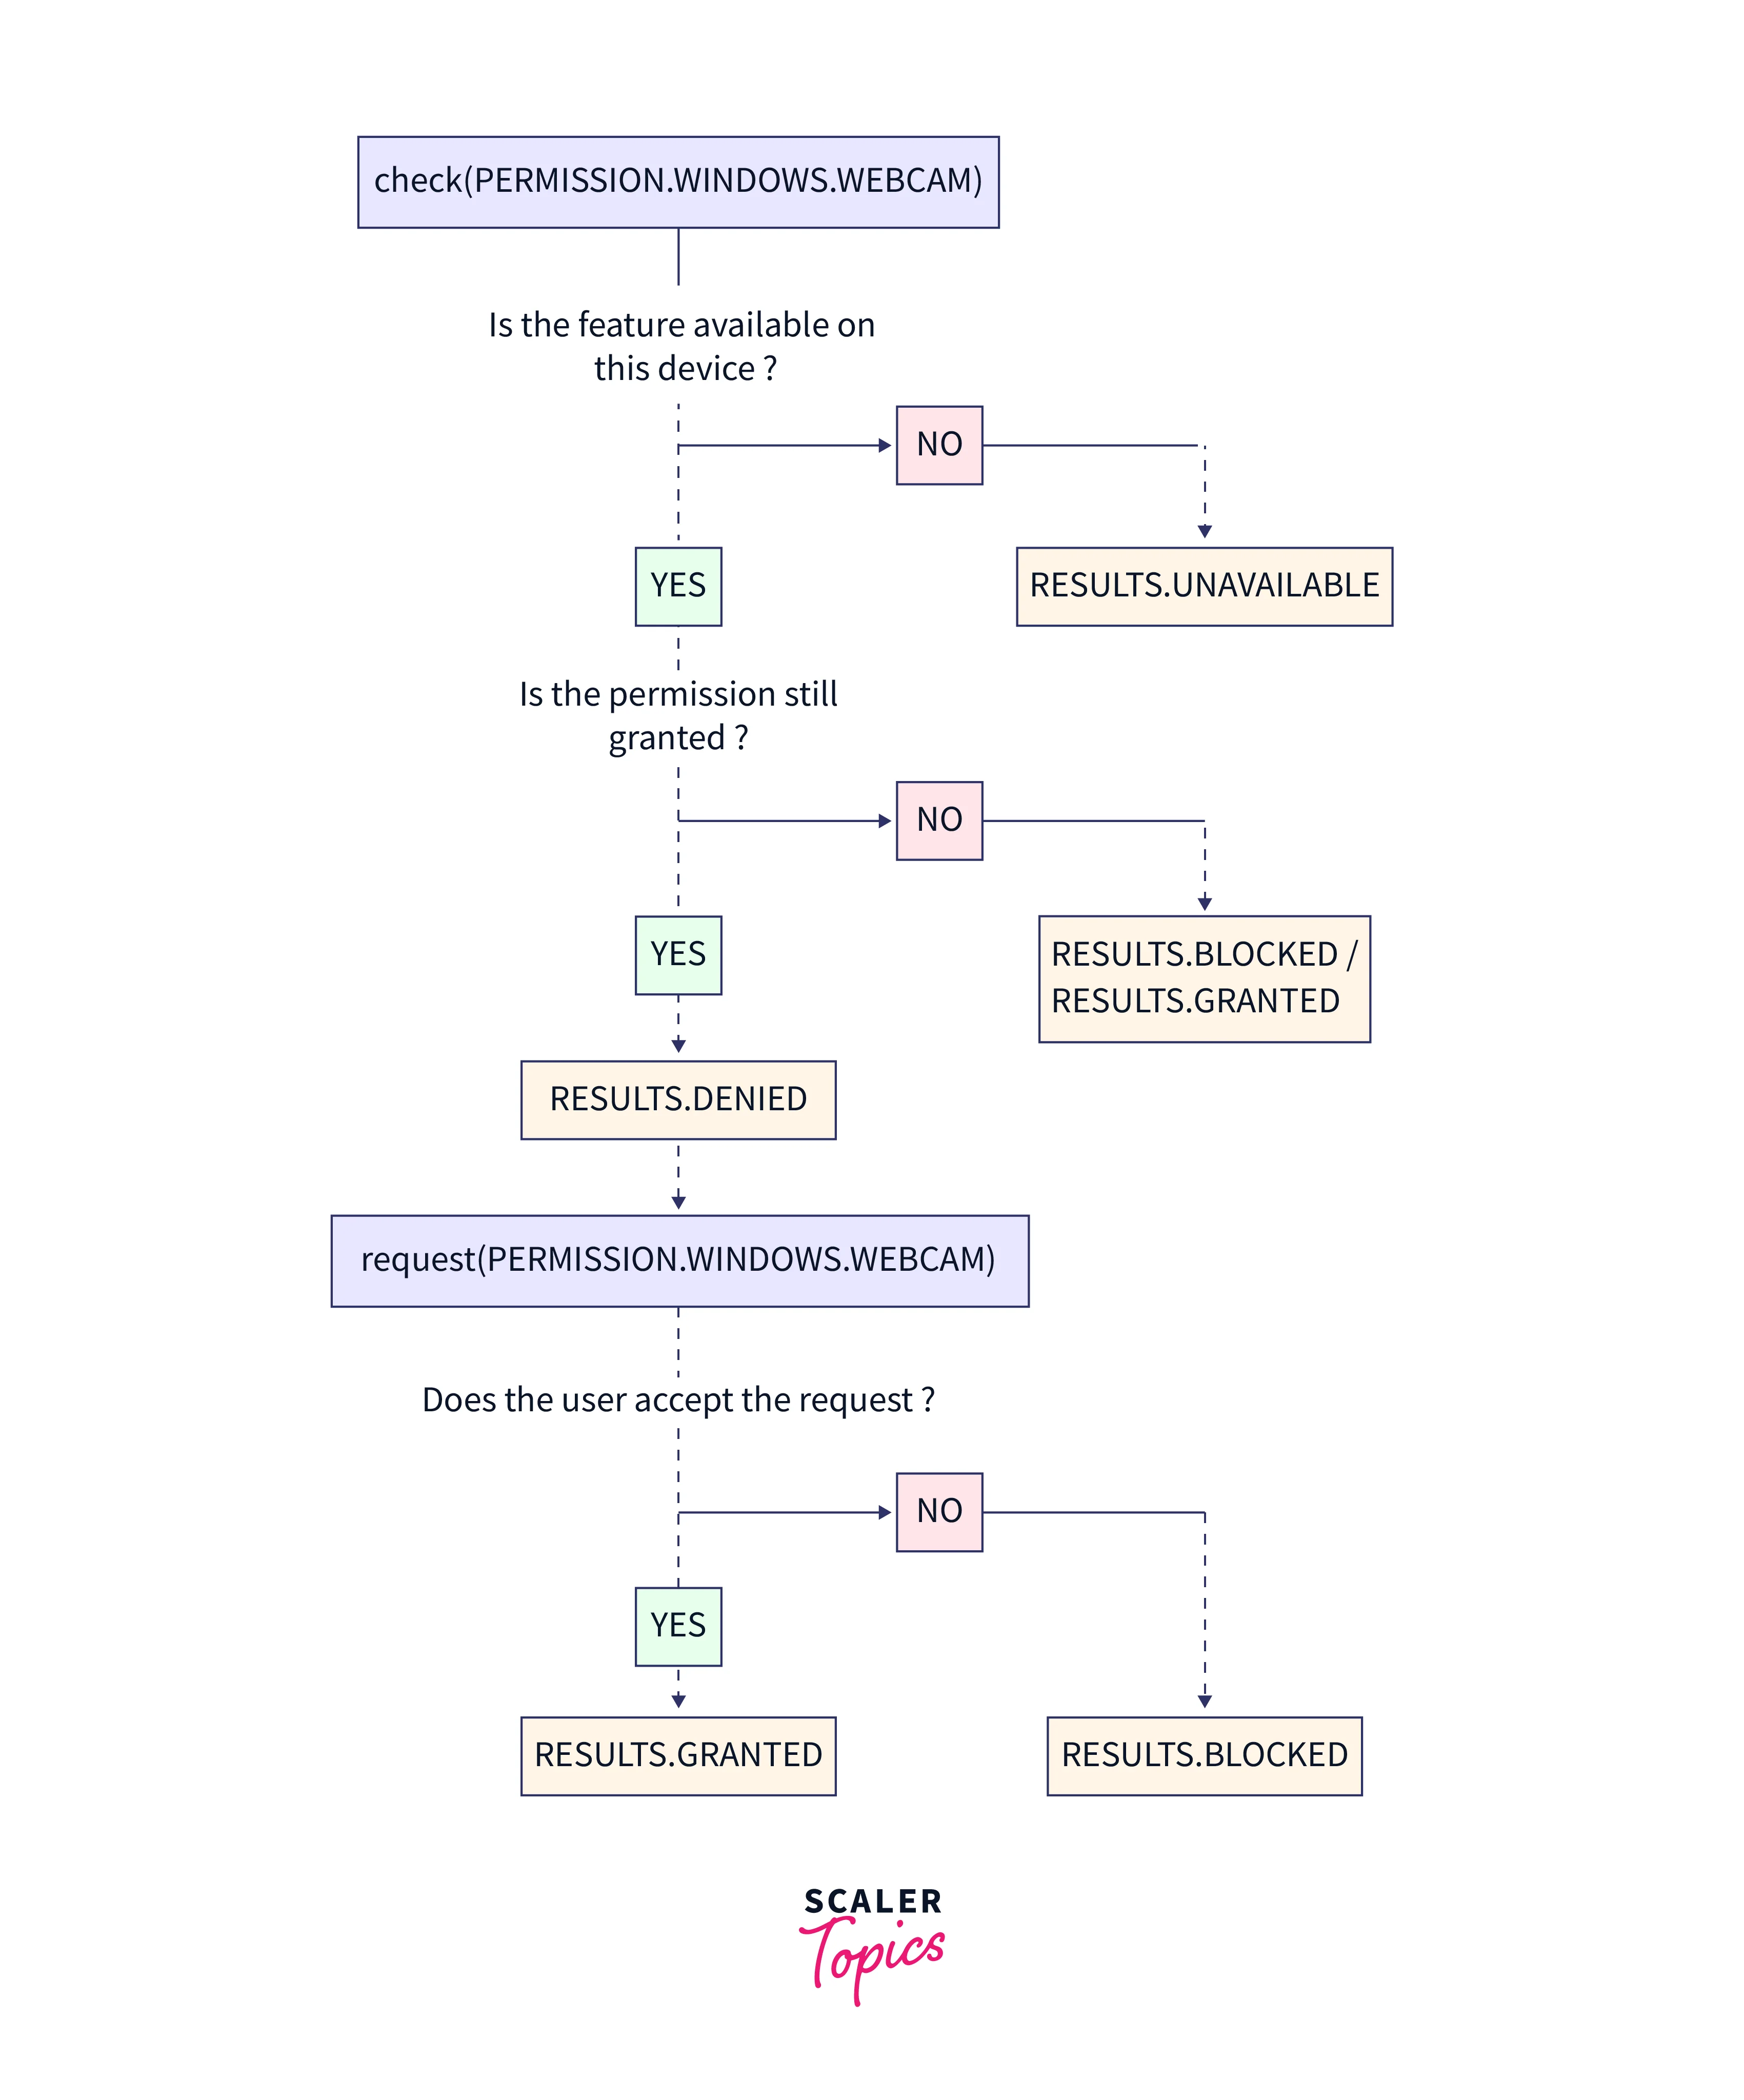
This flowchart explains the permission flow for checking and requesting camera permission on Windows.
1. Check if the device has the feature (webcam) available:
- If not, return unavailable as the result.
- If yes, move to step 2.
2. Check if the permission for the feature is requestable:
- If not, return blocked or granted as the result.
- If yes, move to step 3.
3. Request permission for the feature:
- If the user denies the request, return blocked as the result.
- If the user accepts the request, return granted as the result.
iOS Location Permissions
iOS offers three levels of location permissions that an app can request: When In Use, Always, and Denied. These permissions determine when and how an app can access the device's location data.
By using the React Native Permissions library, developers can ensure that their app requests the appropriate level of location permissions, depending on the app's use case and functionality.
PERMISSIONS.IOS.LOCATION_ALWAYS
PERMISSIONS.IOS.LOCATION_ALWAYS is a programming constant that refers to the "Always" level of location permission on iOS devices. When an app requests this permission, it asks the user to allow the app to access its location data at all times, even when the app is not actively being used.
PERMISSIONS.IOS.LOCATION_WHEN_IN_USE
PERMISSIONS.IOS.LOCATION_WHEN_IN_USE is another programming constant that refers to the "When In Use" level of location permission on iOS devices. When an app requests this permission, it asks the user to allow the app to access its location data only when the app is in use or in the foreground. Once the user exits the app or puts it in the background, location access is revoked.
Examples
Implementing Permissions for Camera
Here's an example code snippet for handling camera permissions in React Native using the react-native-permissions library:
In this code, we define a state variable cameraPermission which can have one of the following values: null, RESULTS.UNAVAILABLE, RESULTS.DENIED, RESULTS.GRANTED, or RESULTS.BLOCKED. We also define two functions requestCameraPermission and checkCameraPermission which respectively request and check the camera permission using request and check functions from the react-native-permissions library.
If the camera permission is RESULTS.DENIED, we render two buttons to allow the user to either grant or deny the permission. If the user grants permission, we call the requestCameraPermission function. If the user denies the permission, we set the cameraPermission state to RESULTS.DENIED.
If the camera permission is RESULTS.BLOCKED, we inform the user that the permission is blocked and they need to go to the settings to unblock it.
Implementing Permissions for Location
Here's an example of a more complex use case where we check for multiple permissions and handle them based on the user's response:
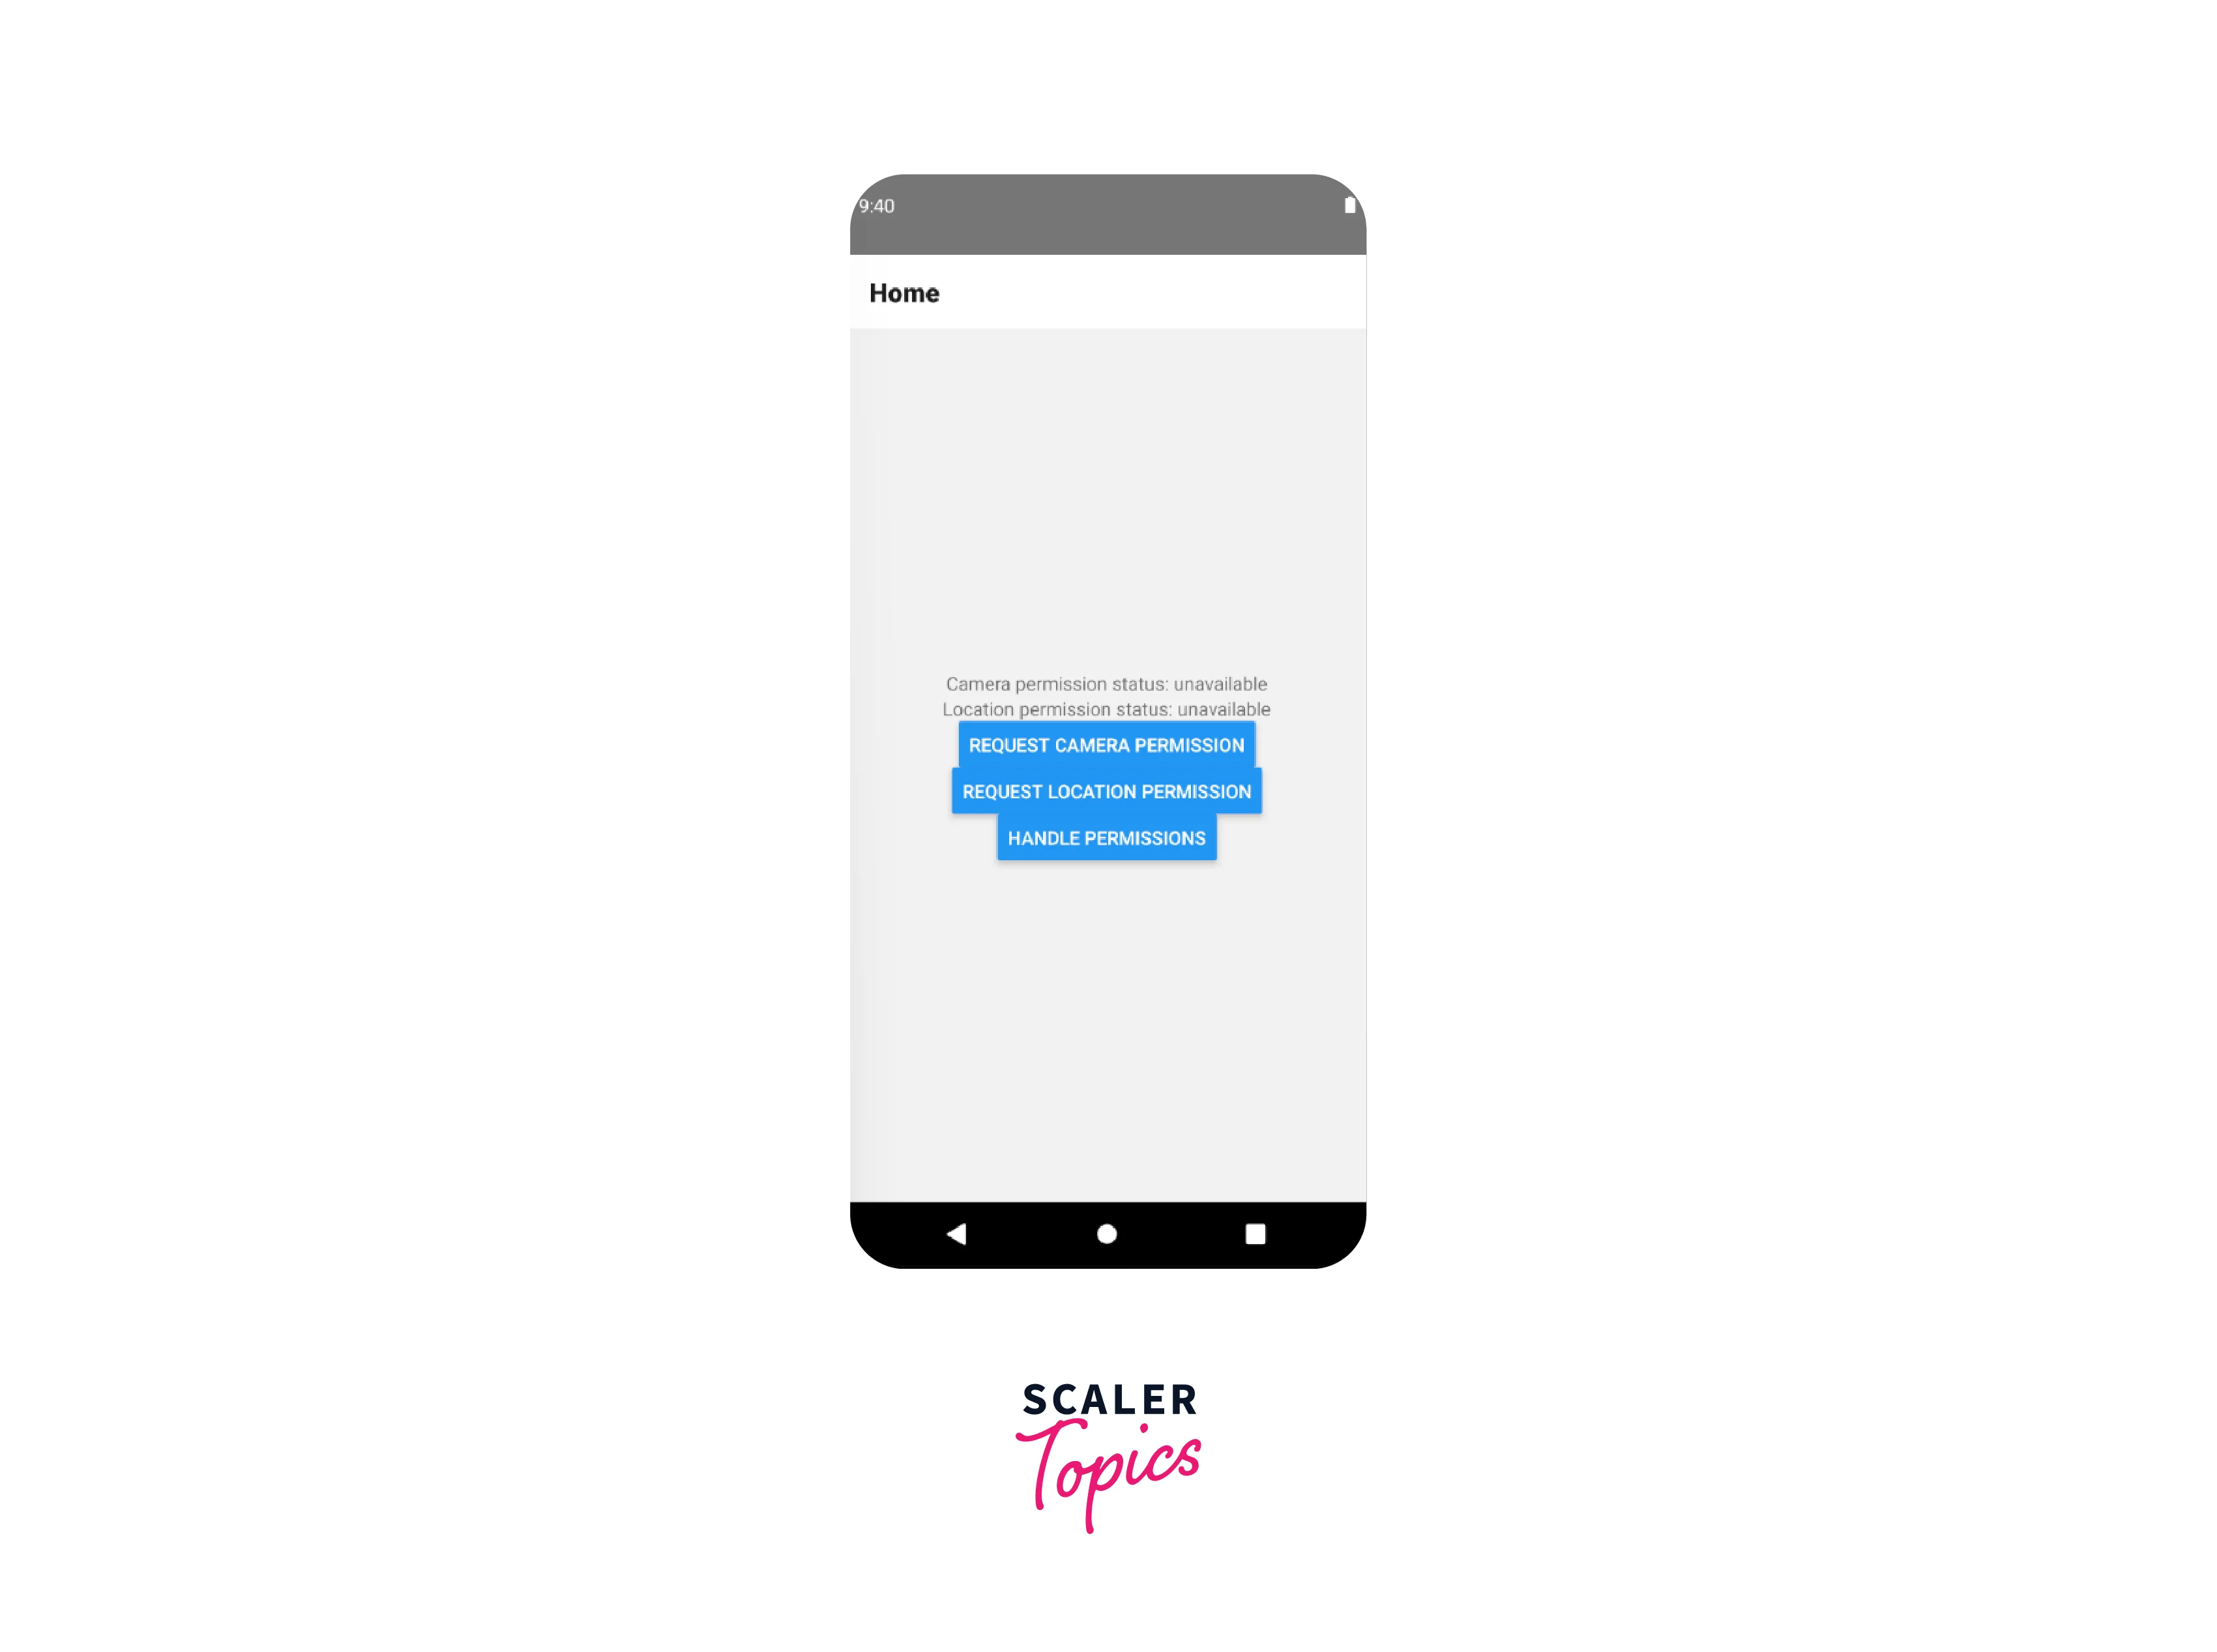

In this example, we check for both camera and location permissions using the check method when the component mounts. We then have separate functions to request each permission using the request method, which updates the state with the new permission status. Finally, we have a function called handlePermissions that checks if both permissions are granted, some permissions are undetermined, or some permissions are denied and logs the appropriate message to the console.
FAQs
Q: What is react-native-permissions, and what does it do?
A: react-native-permissions is a library that allows you to check and request various permissions in a React Native app, such as camera, location, and microphone permissions. It provides a simple and consistent API across both Android and iOS platforms.
Q: How do I use React Native Permissions to check and request permissions?
A: To check, you can use the check method provided by the library, passing in the name of the permission you want to check (e.g. Permissions.check('camera')). To request, you can use the request method, passing in the name of the permission you want to request (e.g. Permissions.request('location')). You can also handle the results of these.
Q:. What should I do if a user denies a permission request?
A: If a user denies a permission request, you should handle this gracefully in your app by providing clear messaging to the user about why the permission is needed and how they can manually grant the permission in their device's settings. You can also use the openSettings method provided by the library to open the app settings screen directly from your app.
Q: Can I use react-native-permissions to check or request custom permissions?
A: Yes, you can use react-native-permissions to check and request custom permissions that are not included in the library by passing in the name of the custom permission as a string. However, keep in mind that custom permissions may not be available or behave differently across different platforms and devices.
Q: Can I use react-native-permissions to automatically grant permissions without user interaction?
A: No, react-native-permissions does not allow you to automatically grant permissions without user interaction. This is because granting permissions without the user's explicit consent is a security risk and can be considered a violation of the user's privacy. Users must always have control over which permissions are granted to an app.
Conclusion
- The react-native-permissions library provides a simple and consistent way to check and request various permissions in a React Native app.
- It is cross-platform compatible and offers an easy-to-use API, making it a valuable tool for developers to ensure their app has the necessary permissions for optimal user experience while respecting the user's privacy.
- By following best practices for handling permission requests, such as clear messaging and allowing users to manually grant permissions, developers can create an app that is both functional and user-friendly.
- Incorporating react-native-permissions into a React Native app is essential for any developer looking to integrate permissions into their application.
- With its robust functionality and streamlined approach to managing permissions, react-native-permissions is an indispensable tool for creating high-quality React Native apps that prioritize user privacy and experience.
MCQs
1. What are react-native-permissions used for?
- a. managing user authentication
- b. managing user notifications
- c. managing user permissions
- d. managing user settings
Answer: c) managing user permissions.
2. What is the first step in checking for specific permission using React Native Permissions?
- a. calling the request method
- b. calling the check method
- c. calling the openSettings method
- d. calling the canOpenSettings method
Answer: b) calling the check method.
3. What is the benefit of using react-native-permissions for managing permissions in a React Native app?
- a. it automatically grants all permissions to the app
- b. it simplifies the process of requesting and checking for permissions
- c. it allows the app to bypass Android's permission system
- d. it provides additional features such as user authentication
Answer: b) it simplifies the process of requesting and checking for permissions.
