React Native- Setting Up Development Environment
Overview
Meta Platforms, Inc. invented React Native, an open-source UI software framework. It allows developers to leverage the React framework alongside native platform features to create applications for iOS, Android, Web, Windows etc. In this article, we will learn how to set up the React Native environment setup and development environment for react native.
Ideal Development Environment for React Native Development
Expo Go is the best place to start if you're new to mobile development. Expo is a collection of React Native-based tools and services. You might wish to utilise React Native CLI if you're already experienced with mobile programming. To get started, you'll need Xcode or Android Studio.
Required Installations
The first thing is Node.js. You can download it from their official website and npm package manager.
Expo Go Quickstart
The easiest method to get started with a React Native project is with Expo CLI, which is built on top of React Native. You just create the project and begin coding. Expo CLI can be installed globally using the following npm command :
Using Expo to create and execute a React Native app is as simple as :
CLI Quickstart
React native environment setup step-by-step procedure :
-
Step 1 : After successfully installing NodeJS and NPM on your machine, execute the below command
-
Step 2 : Now go to your preferred directory and make a new project using the command below:
Note : Make sure that JDK8, python, Nodejs, and NPM are present on your machine; if not, install them.
-
Step 3 : On your terminal, use the npm install -g react-native-cli command to install the react native command line interface, as demonstrated below.
-
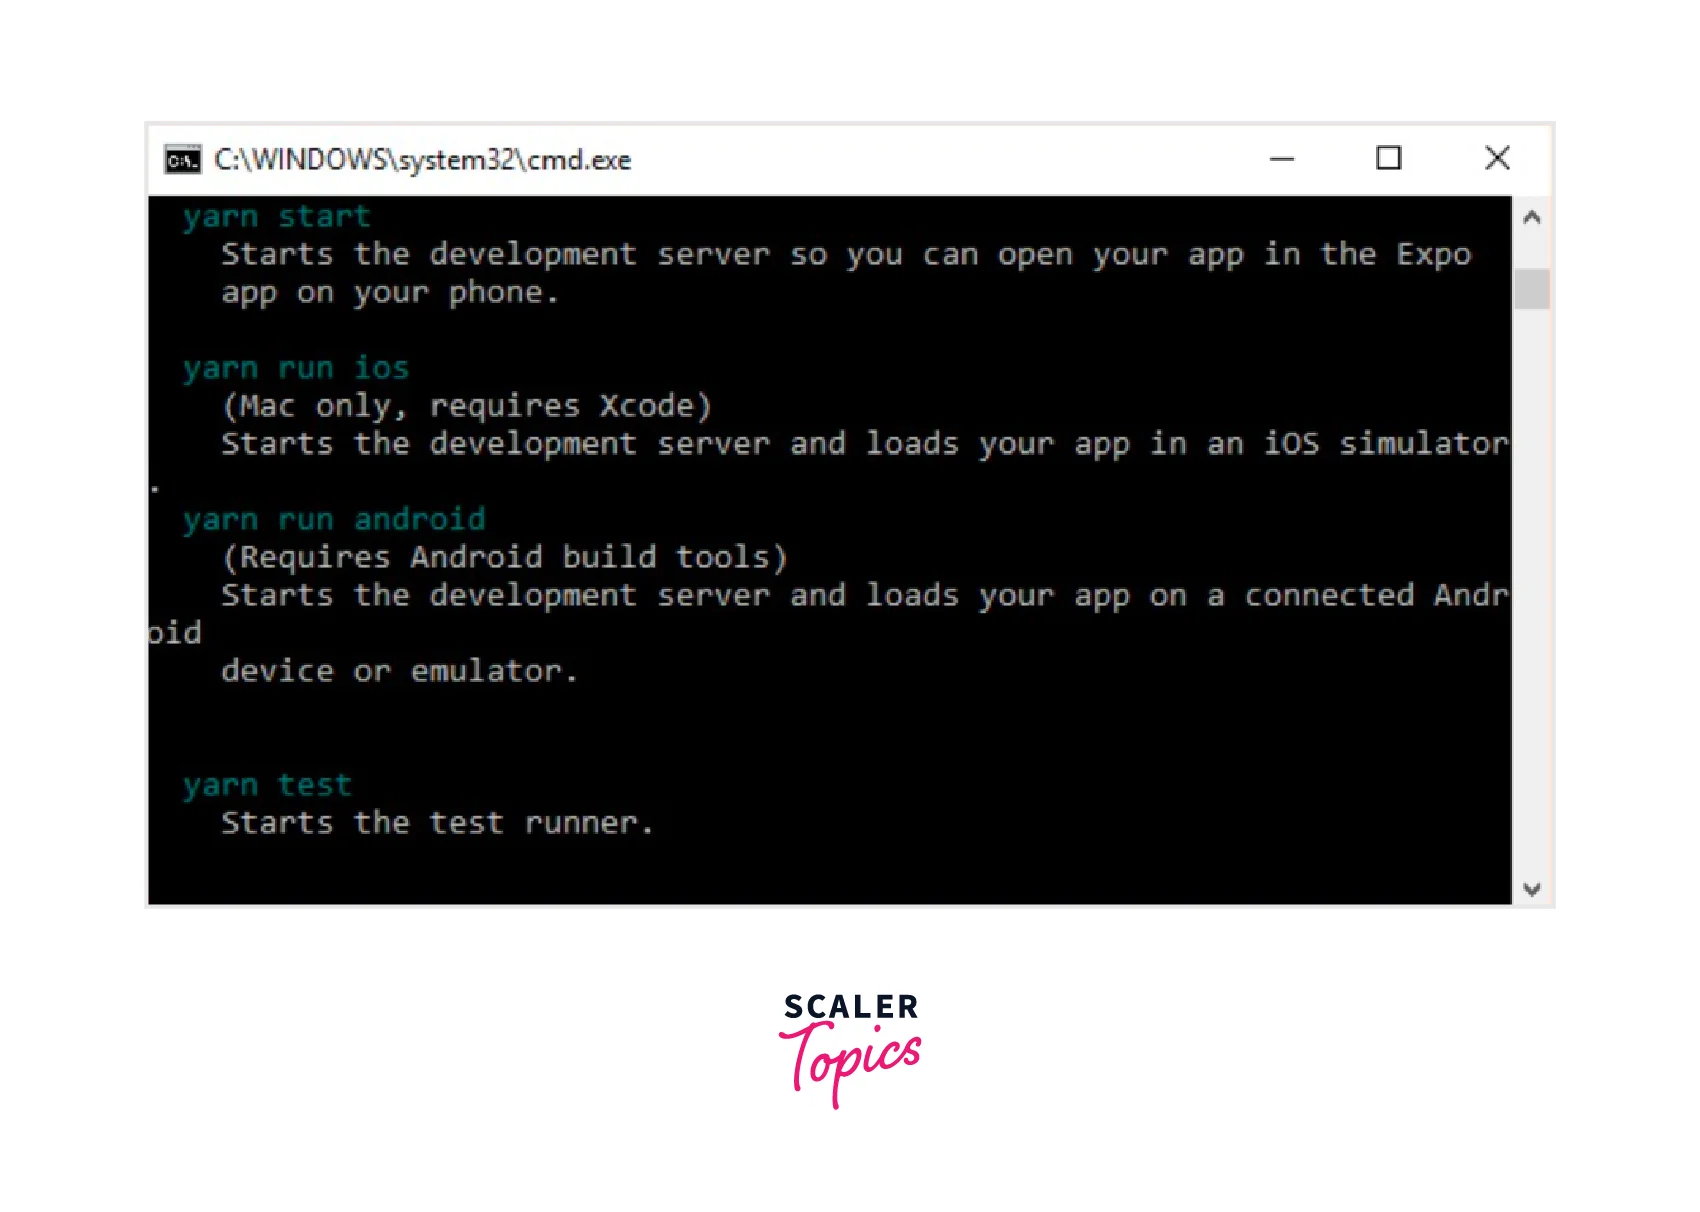
Step 4 : To test the installation, navigate to the project folder and launch the project with the start command.
If everything went properly, you should have received the QR code displayed below.

Expo CLI Vs React Native CLI
React Native CLI :
Pros :
- Native modules written in Objective-C or Java can be added.
- We can add native dependencies easily.
- It is considerably easy to add .apk and .ipa files than it is with Expo.
Cons :
- The projects require Xcode and Android Studio for execution.
- iOS development is not possible without a Mac.
- To utilise a device for testing, a USB connection is required.
- In Xcode, fonts must be manually imported.
- Sending of the entire .apk /.ipa file if you wish to share the app.
Expo CLI :
Pros :
- It is simple and takes only a few minutes to set up a project.
- While working on the project, you (and others) can open it.
- It is simple to share an app (through a QR code or link); you do not need to give the entire .apk or .ipa file.
- Some of the Expo capabilities may be used when ejecting it to ExpoKit and integrating native code, but not all of them.
- Expo has the ability to create .apk and .ipa files, making distribution to shops possible.
Cons :
- No native modules can be added.
- Libraries that employ native code cannot be used in Objective-C or Java.
- The size of the default Hello World program is around 25MB, which is very large.
- You must eject it to ExpoKit to utilise FaceDetector, ARKit, or Payments.
- You lose several ExpoKit features by ejecting it, such as the inability to share through a QR code.
Running React Native Application
If you are using Expo Go, then Connect to the same wireless network as your PC and download the Expo Go app on your iOS or Android device. Use the Expo Go app for Android to access your project by scanning the QR code from your terminal. Utilise the native iOS Camera app's built-in QR code scanner.
And for React Natve CLI, go through the following steps given in the following sections to understand how to set up a simulator in Android and iOS environments.
Running App on a Simulator
React native environment setup for Android :
-
Step 1 : Installing Android Studio. Make sure to add the ANDROID_HOME environment variable in your system.
-
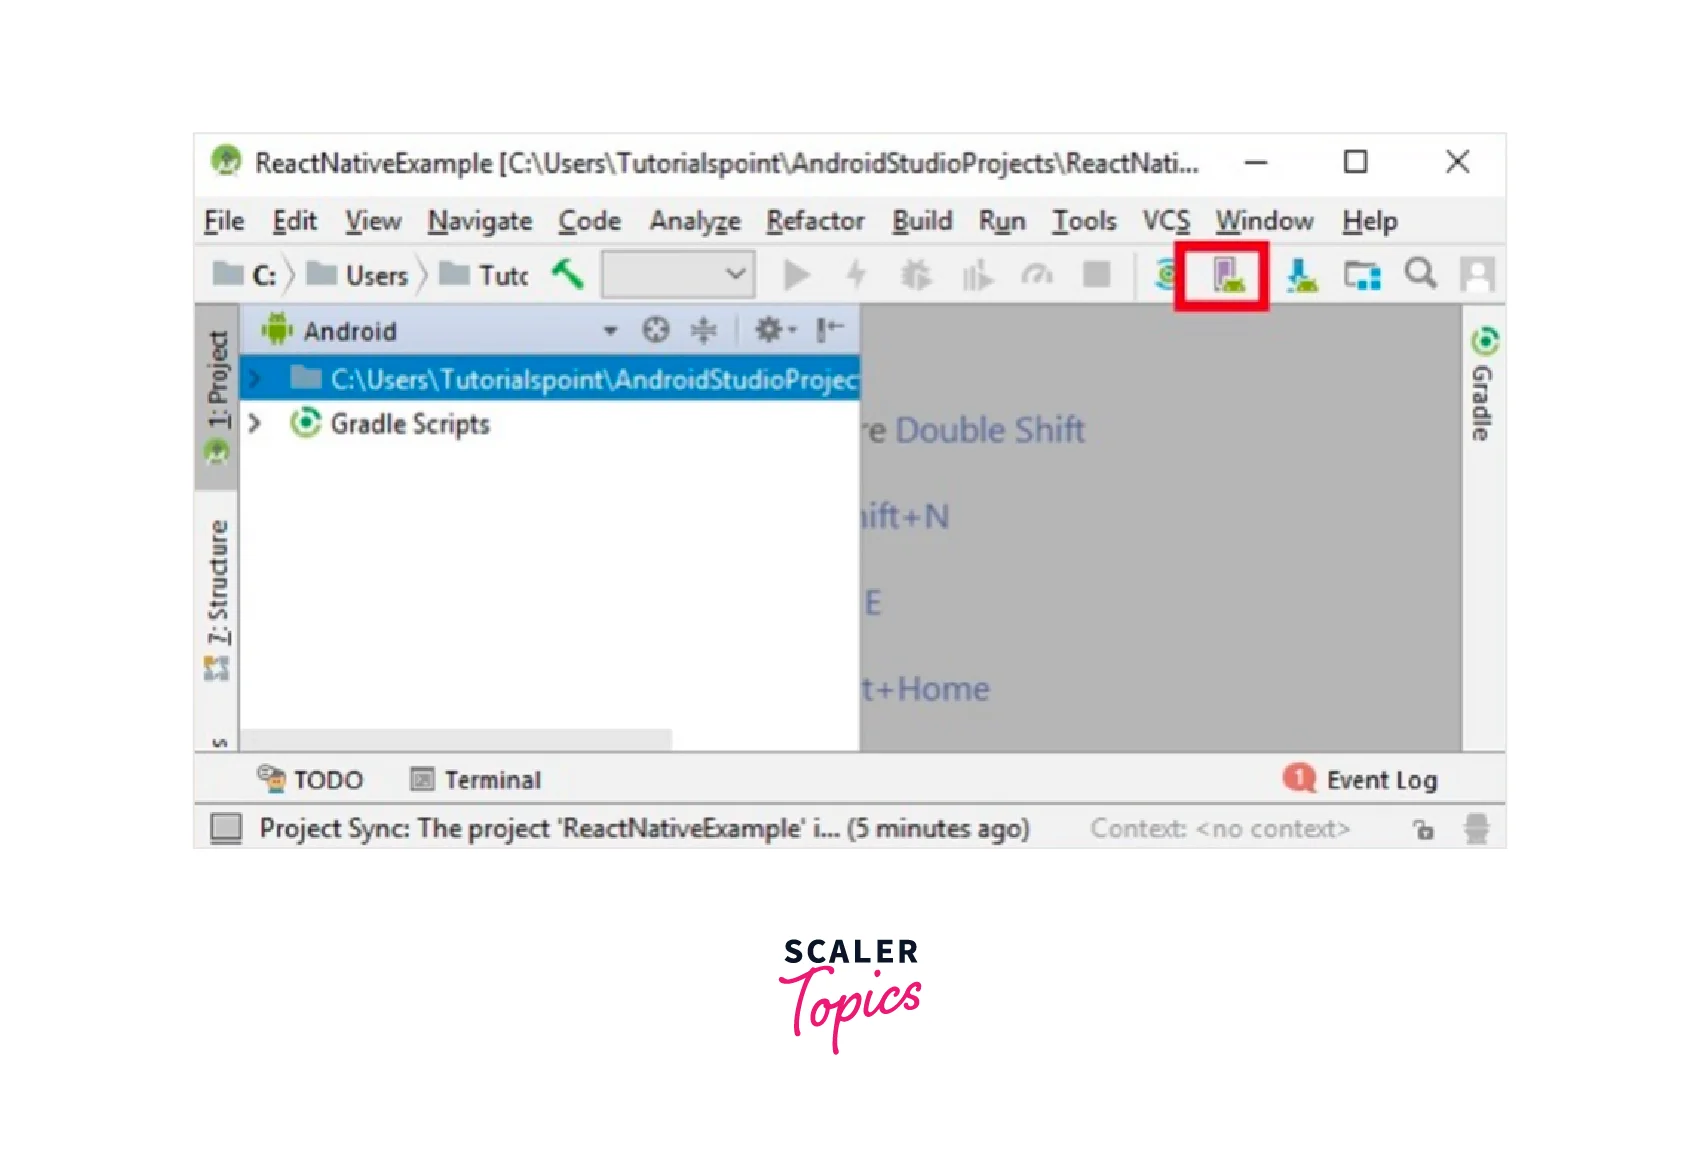
Step 2 : Configuring AVD Manager. Click on the appropriate icon in the menu bar to set up the AVD Manager.
-
Step 3 : Configuring AVD Manager by choosing the appropriate device definition.
-
Step 4 : Launch the command prompt, navigate to the project folder, and type react-native run-android.
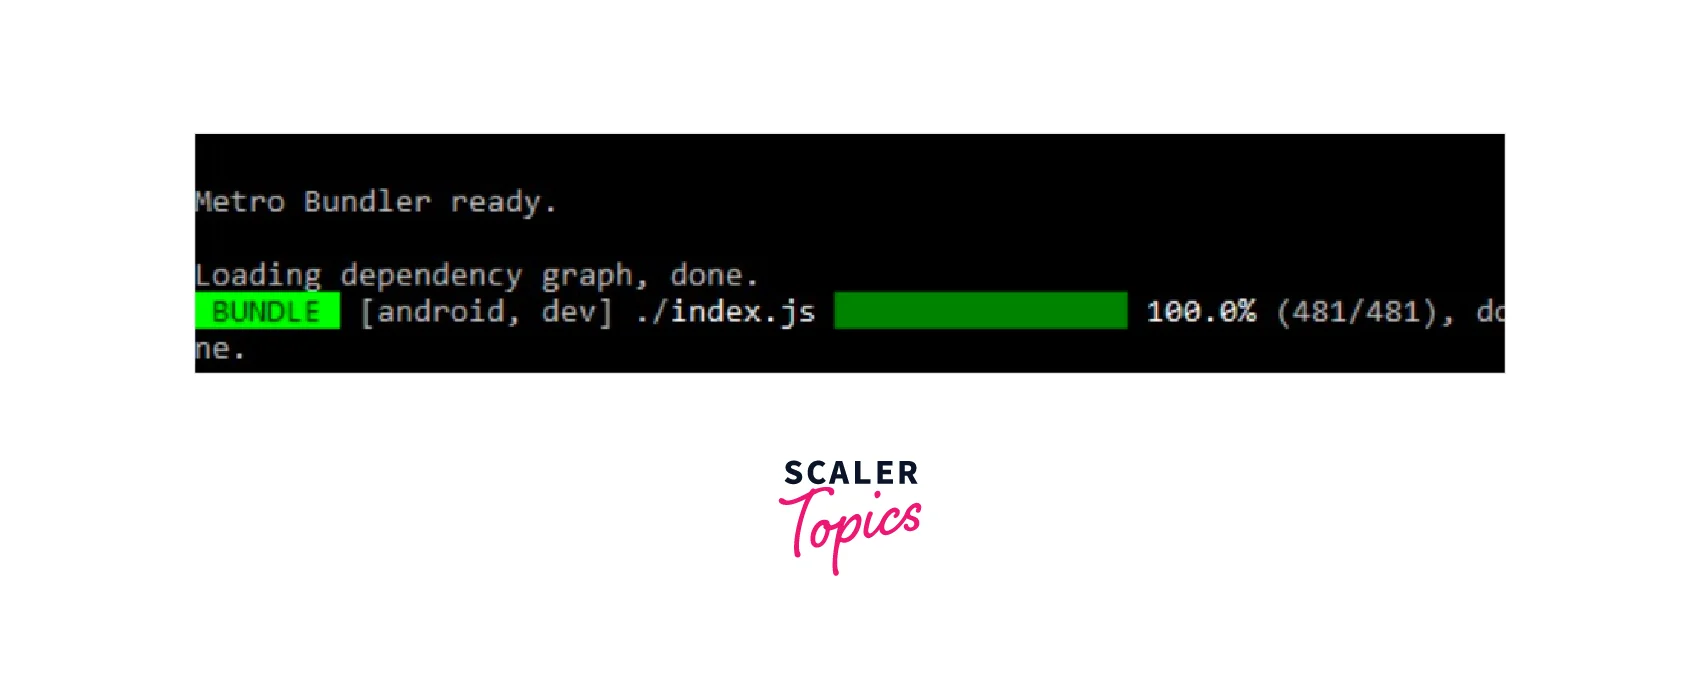
After this, your emulator will start up.
React native environment setup for iOS :
-
Step 1 : Make sure that Ruby(2.7.6) is installed in your system, as React Native, uses some of its scripts related to the iOS dependency management.
-
Step 2 : Installing Xcode from the Mac app store.
-
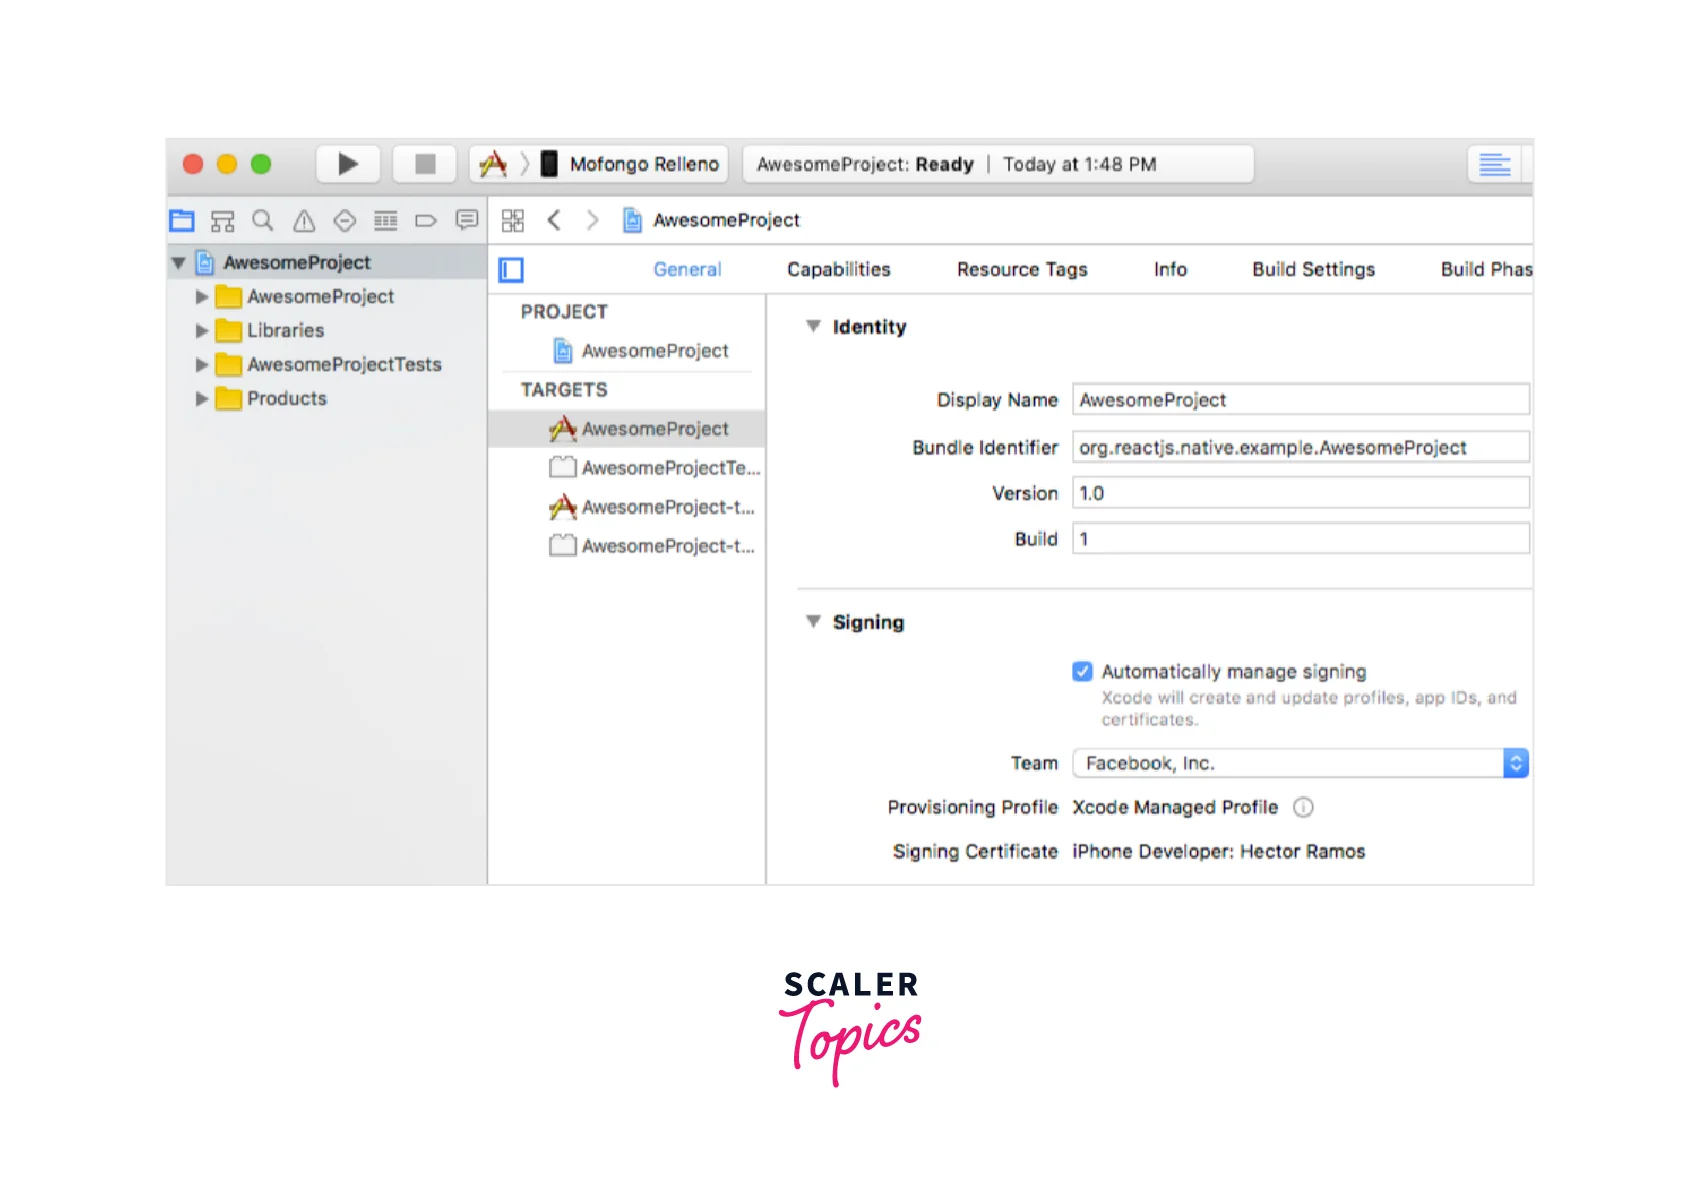
Step 3 : The Xcode Command Line Tools also need to be installed. Select "Preferences..." from the Xcode menu after starting Xcode.

-
Step 4 : Move to the project directory and run the following command to run the app.
After this, your emulator will start up. You can also run it directly from within Xcode.
Running React Native App on Real Device
Using Expo Go CLI
If you are using Expo go (that is create-expo-app), then connect to the same wireless network as your PC and download the Expo Go app on your iOS or Android device. Use the Expo Go app for Android to access your project by scanning the QR code from your terminal. Utilise the native iOS Camera app's built-in QR code scanner.
Using React Native CLI
React native environment setup for Android :
- Step 1 : Enable Debugging over USB.
- Step 2 : Connect your device using USB.
To check if your device is connected properly to ABD, run the given command.
- Step 3 : Now move into your project directory and run the following command.
React native environment setup for iOS :
-
Step 1 : Connect your device using USB.
-
Step 2 : Configure code signing. For your project's test goal, repeat this procedure.
-
Step 3 : Build and execute your app.
Caveats React Native
An excellent starting point is the Expo Go app, which was created to make it easier for developers to share their work with others and get projects off the ground quickly. All you have to do to utilise a module is install the package using npx expo install and refresh your app since Expo Go has a feature-rich native runtime made up of every module in the Expo SDK.
The trade-off is that you can only utilise native modules included in the Expo SDK and cannot contribute your native code to the Expo Go app. Outside of the Expo SDK, there are a tonne of excellent libraries you can use, and you could even wish to create your native library.
You can utilise the Expo SDK and development builds to integrate React Native into an existing project, but you'll also need to set up a native development environment. For information on setting up a native build environment for React Native, choose "React Native CLI Quickstart" from the menu above.
FAQs
How do We Run Expo Go Apps?
With JavaScript and React, Expo is an open-source framework for creating universal native apps for Android, iOS, and the web. If you are using Expo go (that is create-expo-app), then connect to the same wireless network as your PC and download the Expo Go app on your iOS or Android device. Use the Expo Go app for Android to access your project by scanning the QR code from your terminal. Utilise the native iOS Camera app's built-in QR code scanner.
Conclusion
- React native allows developers to leverage the React framework alongside native platform features to create applications for iOS, Android, Web, Windows etc.
- Expo Go is the best place to start if you're new to mobile development. Expo has a collection of React Native-based tools and services.
- The easiest method to get started with a React Native project is with Expo CLI, which is built on top of React Native.
- Native modules written in Objective-C or Java can be added easily when using React native CLI.
- Expo CLI makes it simple to share an app (through a QR code or link); you do not need to give the entire .apk or.ipa file.