How to Create an Issue and Sub-Task in JIRA ?
Overview
Efficient project management is essential for successful collaboration and timely deliverables of the software which can easily be achieved by JIRA, a widely used project management tool offering a platform for organizing and tracking tasks, issues, and sub-tasks. In this article, we deep dive into how to create subtasks in JIRA providing step-by-step guidance to help you achieve the full potential of this powerful tool to effectively navigate JIRA's features, optimize team productivity, and drive project success.
Introduction
JIRA, a leading project management tool developed by Atlassian has revolutionized the way teams collaborate and handle complex projects. With its powerful features and intuitive interface, JIRA offers a comprehensive solution for planning, tracking, and executing tasks. At the core of JIRA's functionality lie two crucial elements which are issues and sub-tasks.
Issues refer to individual units of work, while sub-tasks break down larger tasks into more manageable components. By leveraging the power of issues and sub-tasks in JIRA, project teams can streamline their workflows, enhance communication, and achieve greater efficiency. By understanding how to use these features effectively, project managers and team members can unlock the full potential of JIRA for seamless project management.
Create an Issue
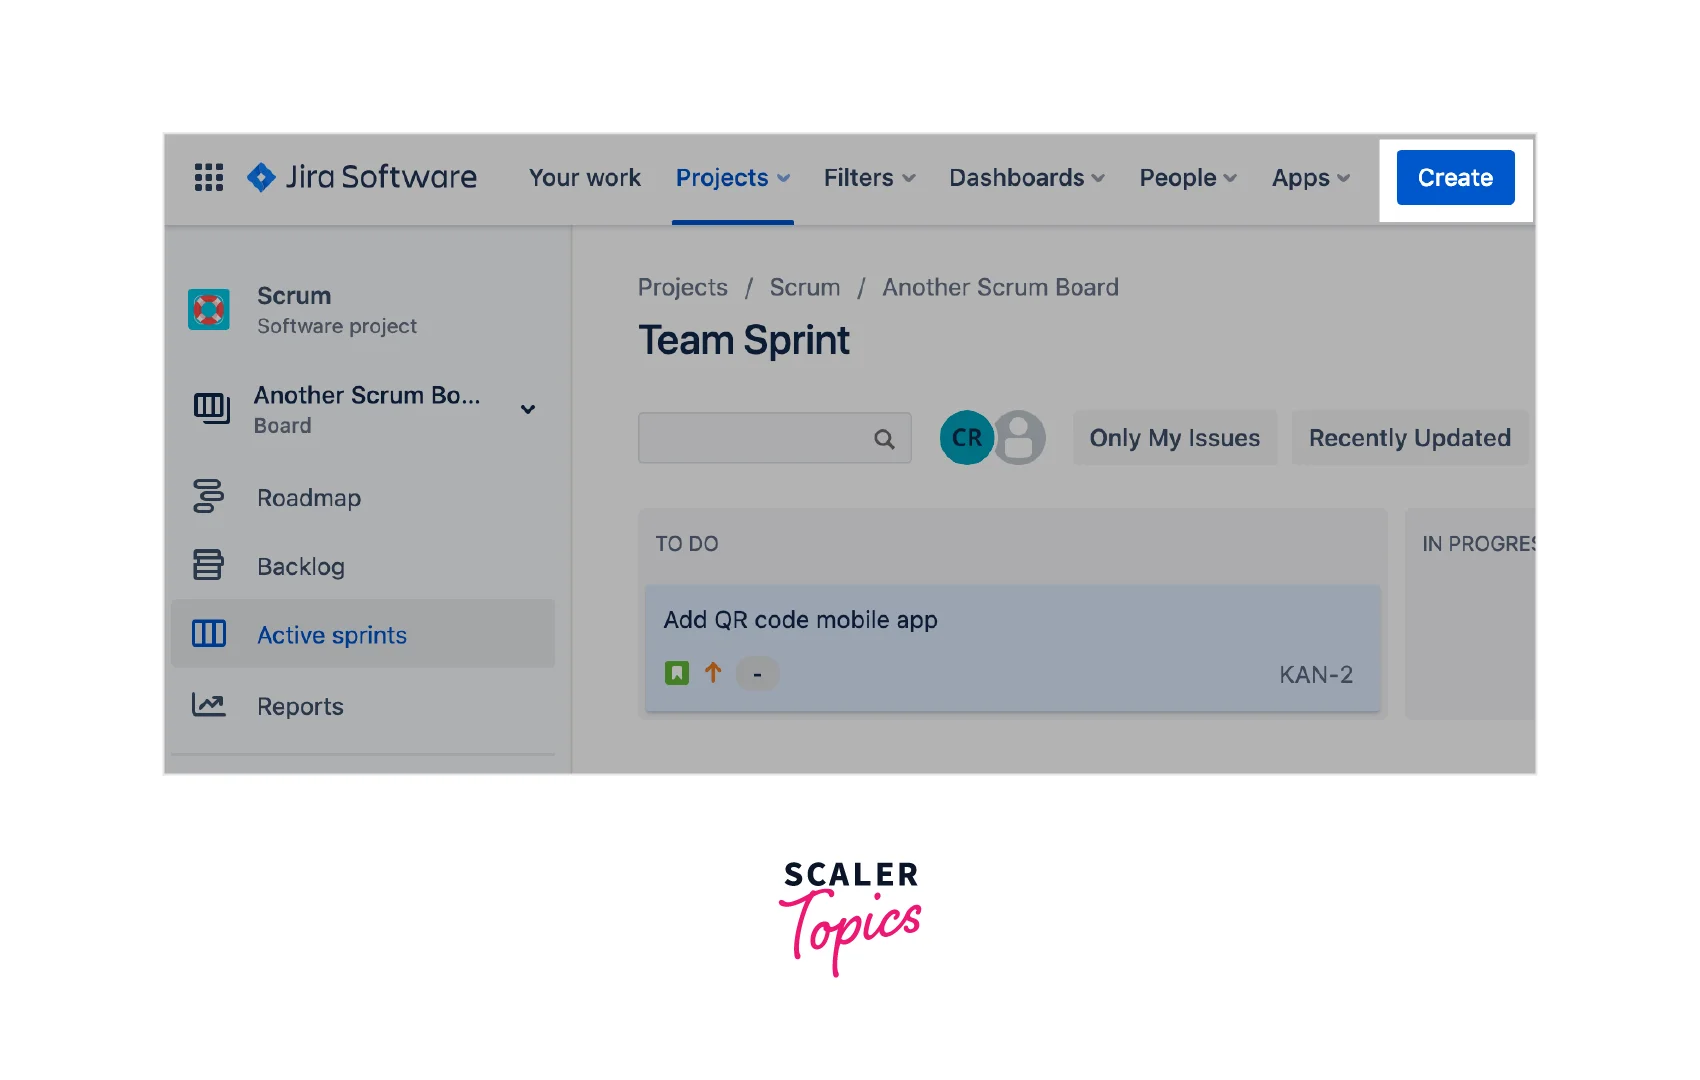
To create an issue within Jira, follow these steps:
-
Click on the Create button (+) located in the Jira interface.
-
Enter a brief and descriptive Summary of the issue.
-
Fill out all the required fields and any additional fields as needed.
-
If you wish to customize the fields that appear while creating subsequent issues, click on Configure Fields, and then you can deselect or select the fields accordingly.
-
To create multiple issues with the same Project and Issue Type, select the Create another checkbox and then review/update these fields before proceeding.
-
Once all the necessary information has been provided, click on the Create button to finalize the creation of the issue.
Clone an Issue
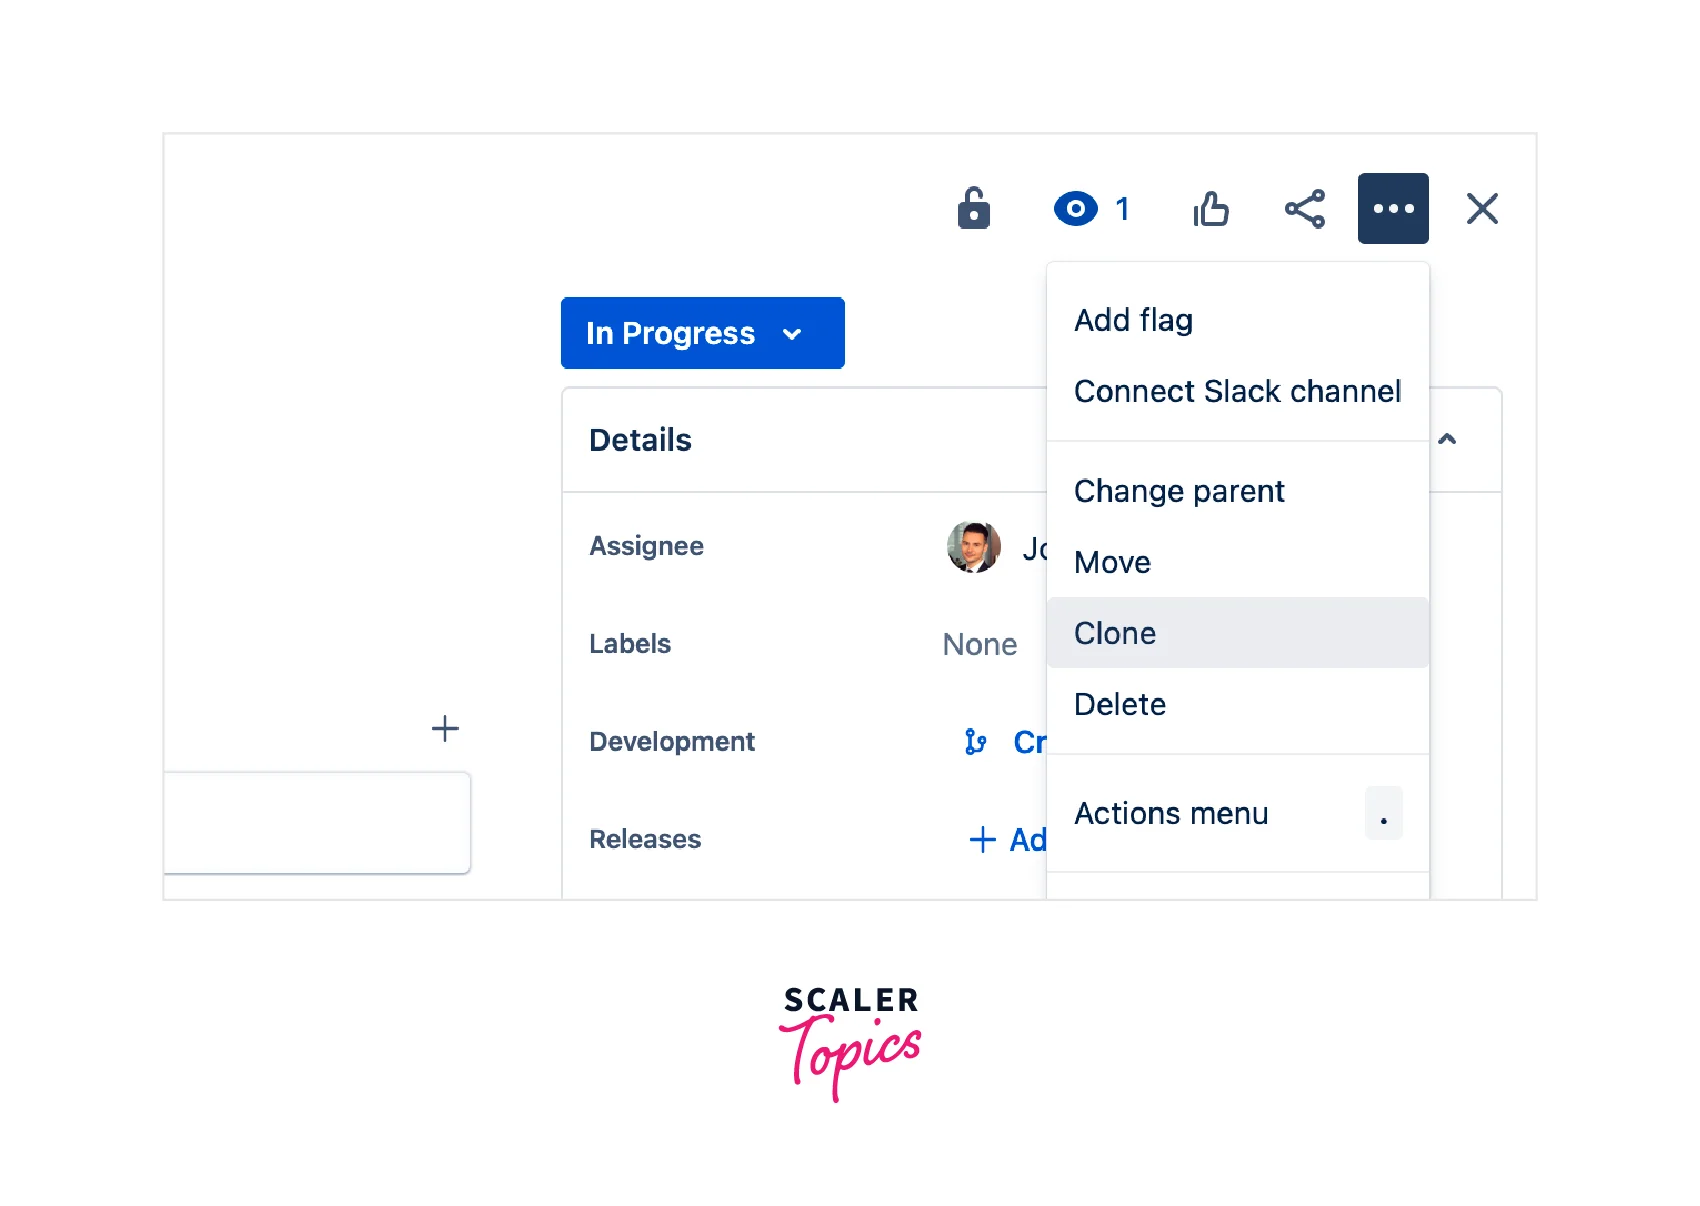
To clone an issue in JIRA, follow these steps:
-
Open the specific issue you want to clone.
-
Click on the More Actions button (•••) and choose the Clone option.
-
If desired, modify the Summary of the cloned issue.
-
If applicable to the issue being cloned, you have the following additional options:
- Clone subtasks: This allows you to duplicate any existing subtasks associated with the issue.
- Clone attachments: Selecting this option will include any attachments from the original issue in the cloned version.
- Clone links: This option enables you to replicate any linked issues associated with the original issue.
- Clone sprint values: If the issue is linked to a sprint, selecting this option will carry over the current and closed sprint values to the cloned issue.
-
Finally, click on the Create button to create the cloned issue.
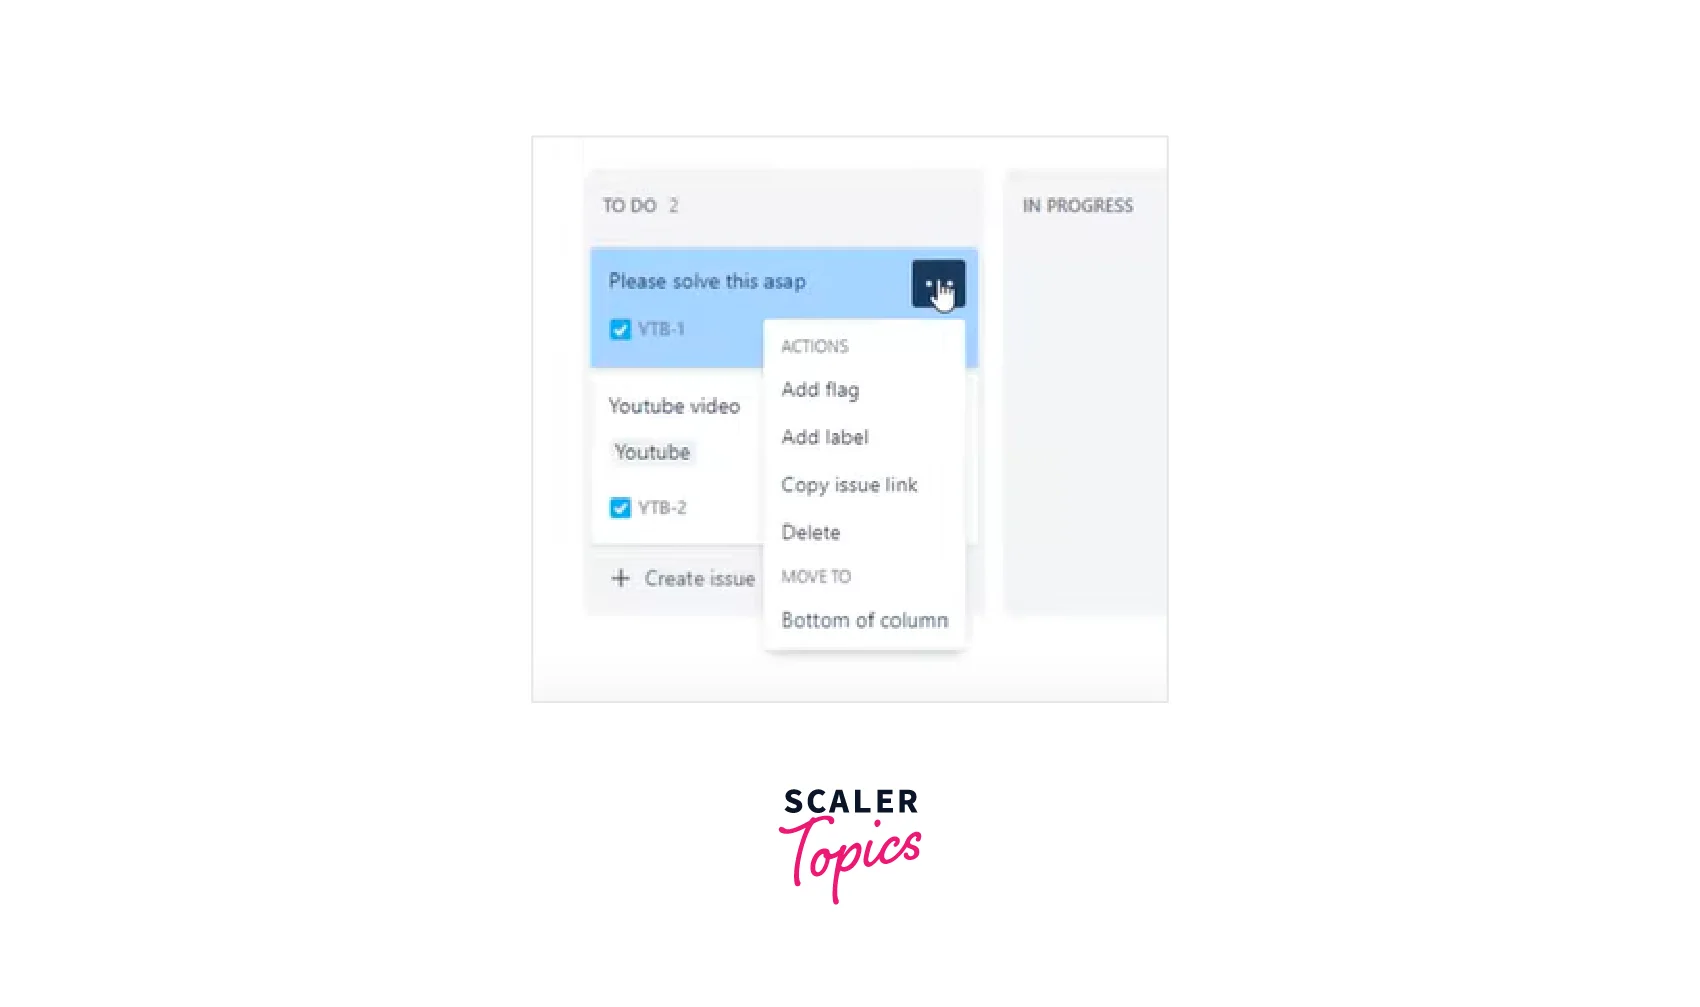
Split an Issue
Splitting an issue into smaller parts can greatly enhance manageability, especially when dealing with large and complex software.
To split an issue, follow these steps:
- Navigate to the Backlog of the Scrum/Kanban project from the left navigation tab.
- Right-click on the specific issue you wish to split.
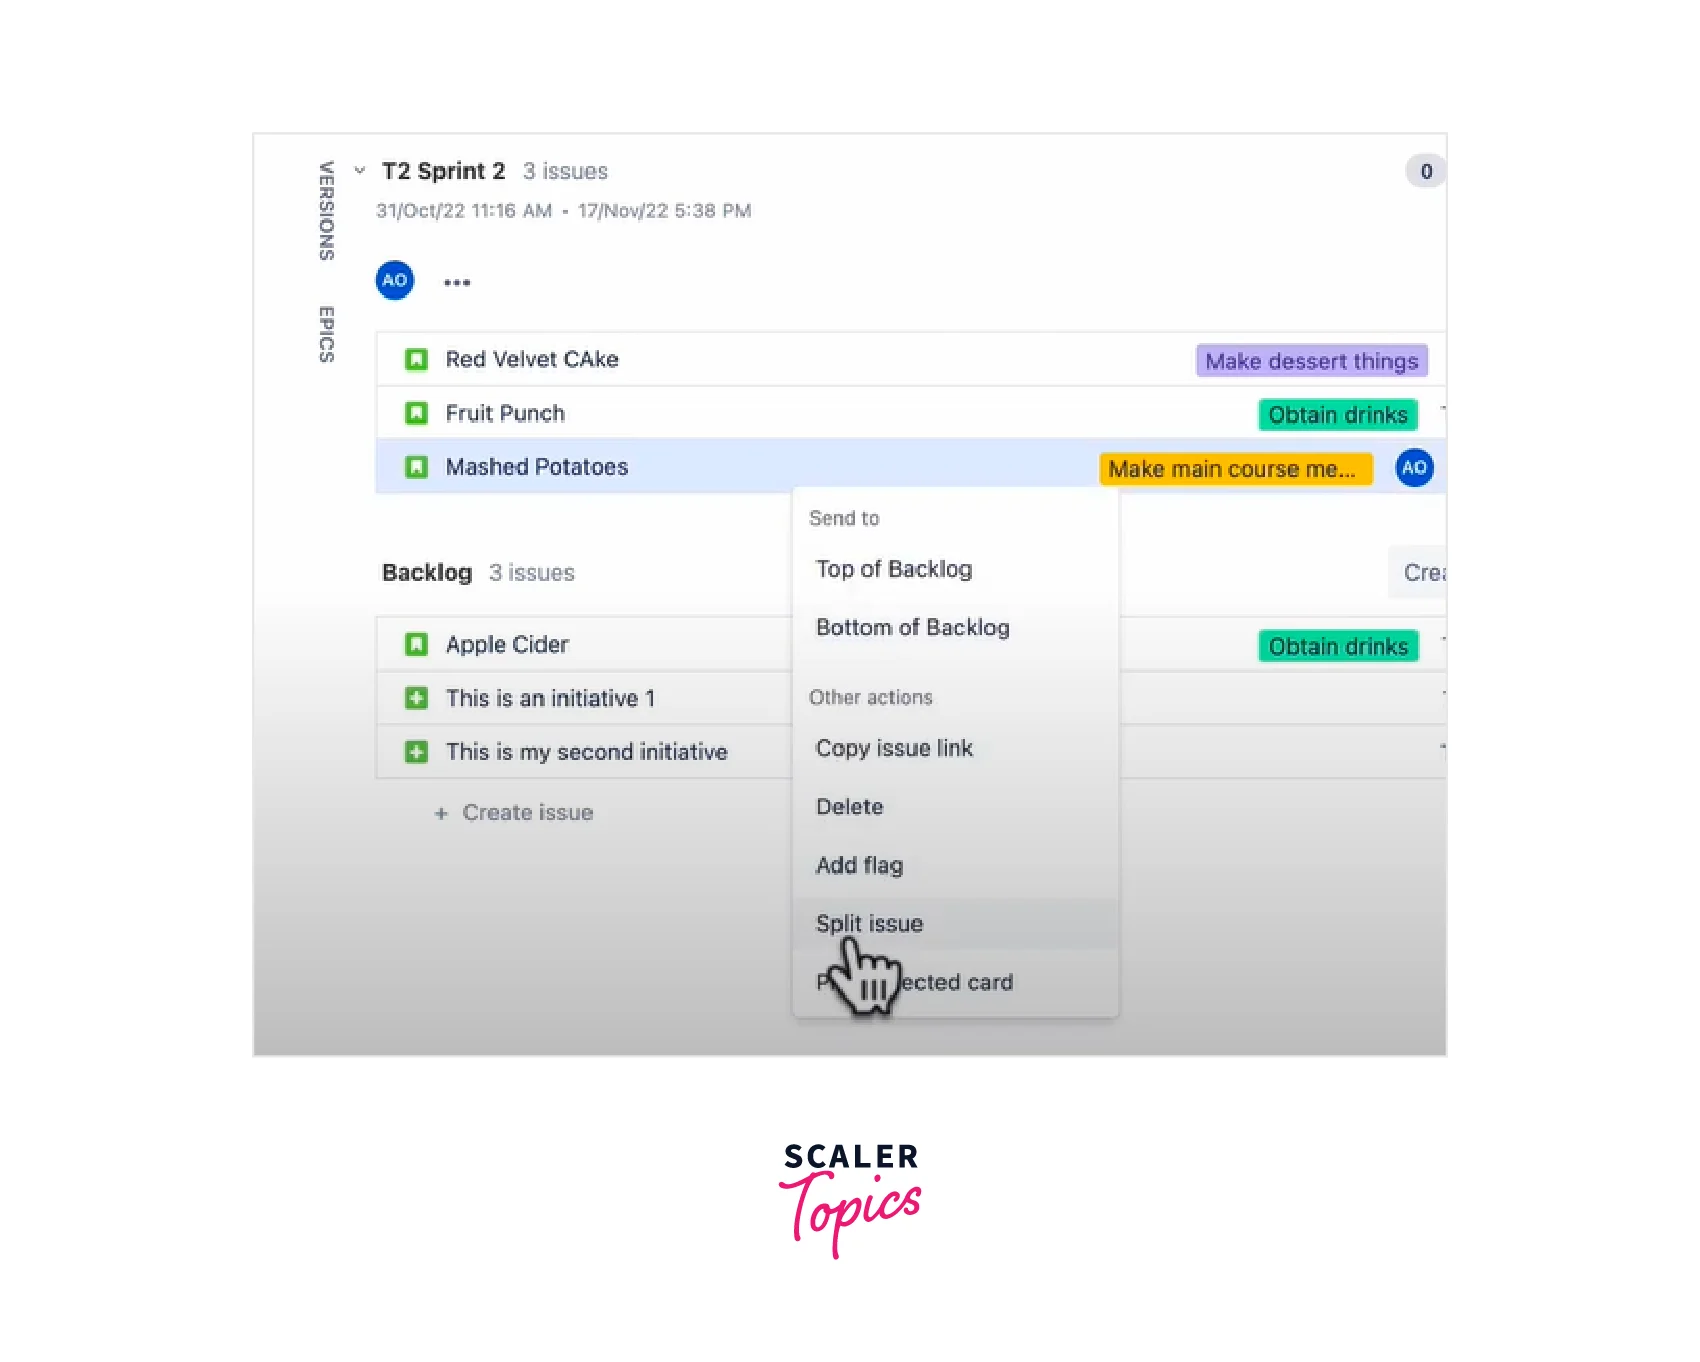
- From the options presented, select Split issue.
Create a Subtask
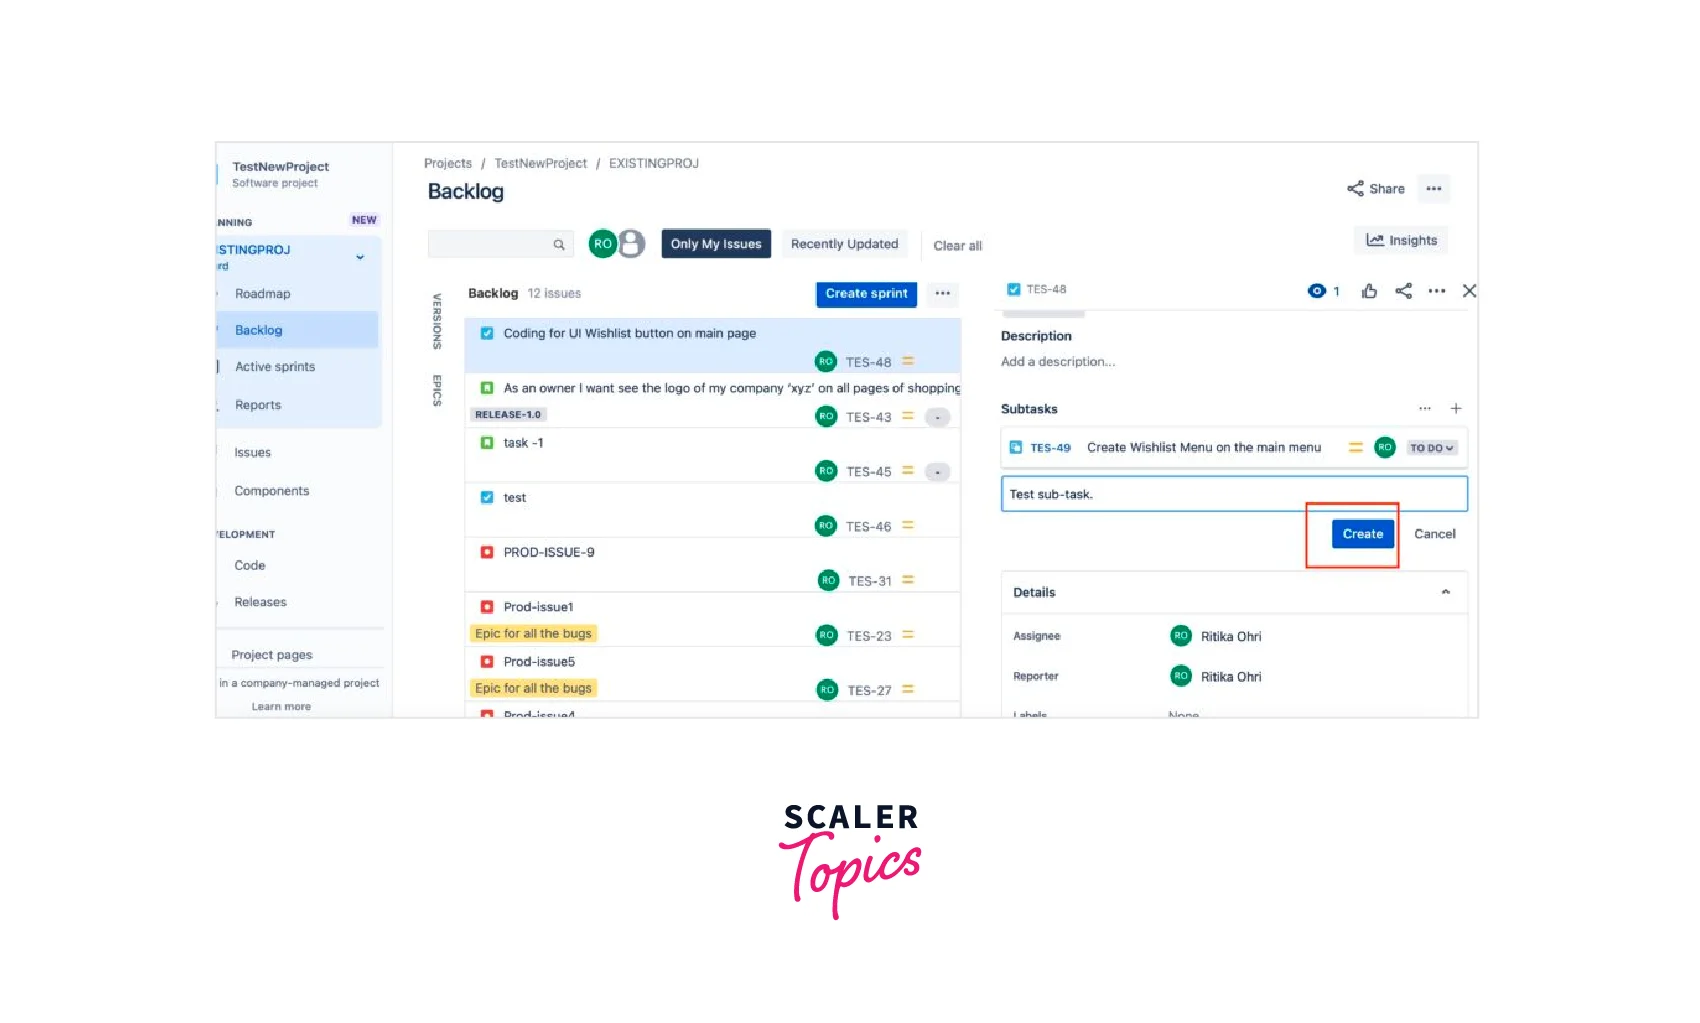
Now, let's focus on how to create subtasks in JIRA. To create a subtask, it is important to follow the steps outlined below:
-
Begin by opening the main issue for which you intend to create subtasks.
-
Navigate to the More menu and choose the Create Subtask option. This action will direct you to the subtask creation page.

-
Proceed by filling out the necessary information in all the required fields.
-
Once completed, click on the Create button.
Upon successful creation, the subtask will be visible in the Subtask section located within the main issue's page.
Work with Issue Types
Working with different issue types provides flexibility in representing the nature of the work to be performed. Here are the steps to change the issue type or convert subtasks to issues and vice versa:
Change the Issue Type in the New Issue View
-
Open the specific issue you want to modify.

-
Click on the issue type icon located in the top-left corner beside the issue key.
-
Choose the desired new issue type.
Convert a Subtask to an Issue
- Open the subtask to be converted.
- Choose the More option (represented by the ellipsis •••) and select Convert to Issue.
- In the Step 1: Select Issue Type, choose a new type for the issue from the available options, and click Next.
- If the current status of the subtask is incompatible with the new issue type, you will be directed to the Step 2: Select New Status. From there, please select an appropriate new status and continue by clicking the Next button.
- Next step is Step 3: Update Fields where you may be required to provide any additional required fields. Click Next to continue.
- The Step 4: Confirmation window will appear. Review the updated issue details and if checked all is correct, click Finish.
- The converted issue will be shown without the parent issue number indicating that it is not a subtask now.
Convert an Issue to a Subtask
-
Open the issue you want to convert.
-
Select the issue type icon at the top-left corner of the issue.

-
From the available issue types, choose Subtask.
-
Select the parent issue to which the new subtask will be associated.
It should be noted that if an issue already has existing subtasks, it cannot be directly converted into a subtask. In this situation, the existing subtasks must be converted into standalone issues before they can be converted into subtasks of another issue.
If the existing subtasks of an issue are removed or unlinked, the issue can then be directly converted into a subtask without the need to convert the subtasks into standalone issues first.
Restrict Access to an Issue
While it is a general practice to have open collaboration, there may exist instances when one may need to limit access to specific work items. For example, tasks involving sensitive financial information, confidential hiring details, or security-related software engineering work might require restricted visibility.
It is possible to restrict who can view an issue in both company-managed and team-managed projects, although the procedures differ between them.
Restrict Access to an Issue in a Company-Managed Project
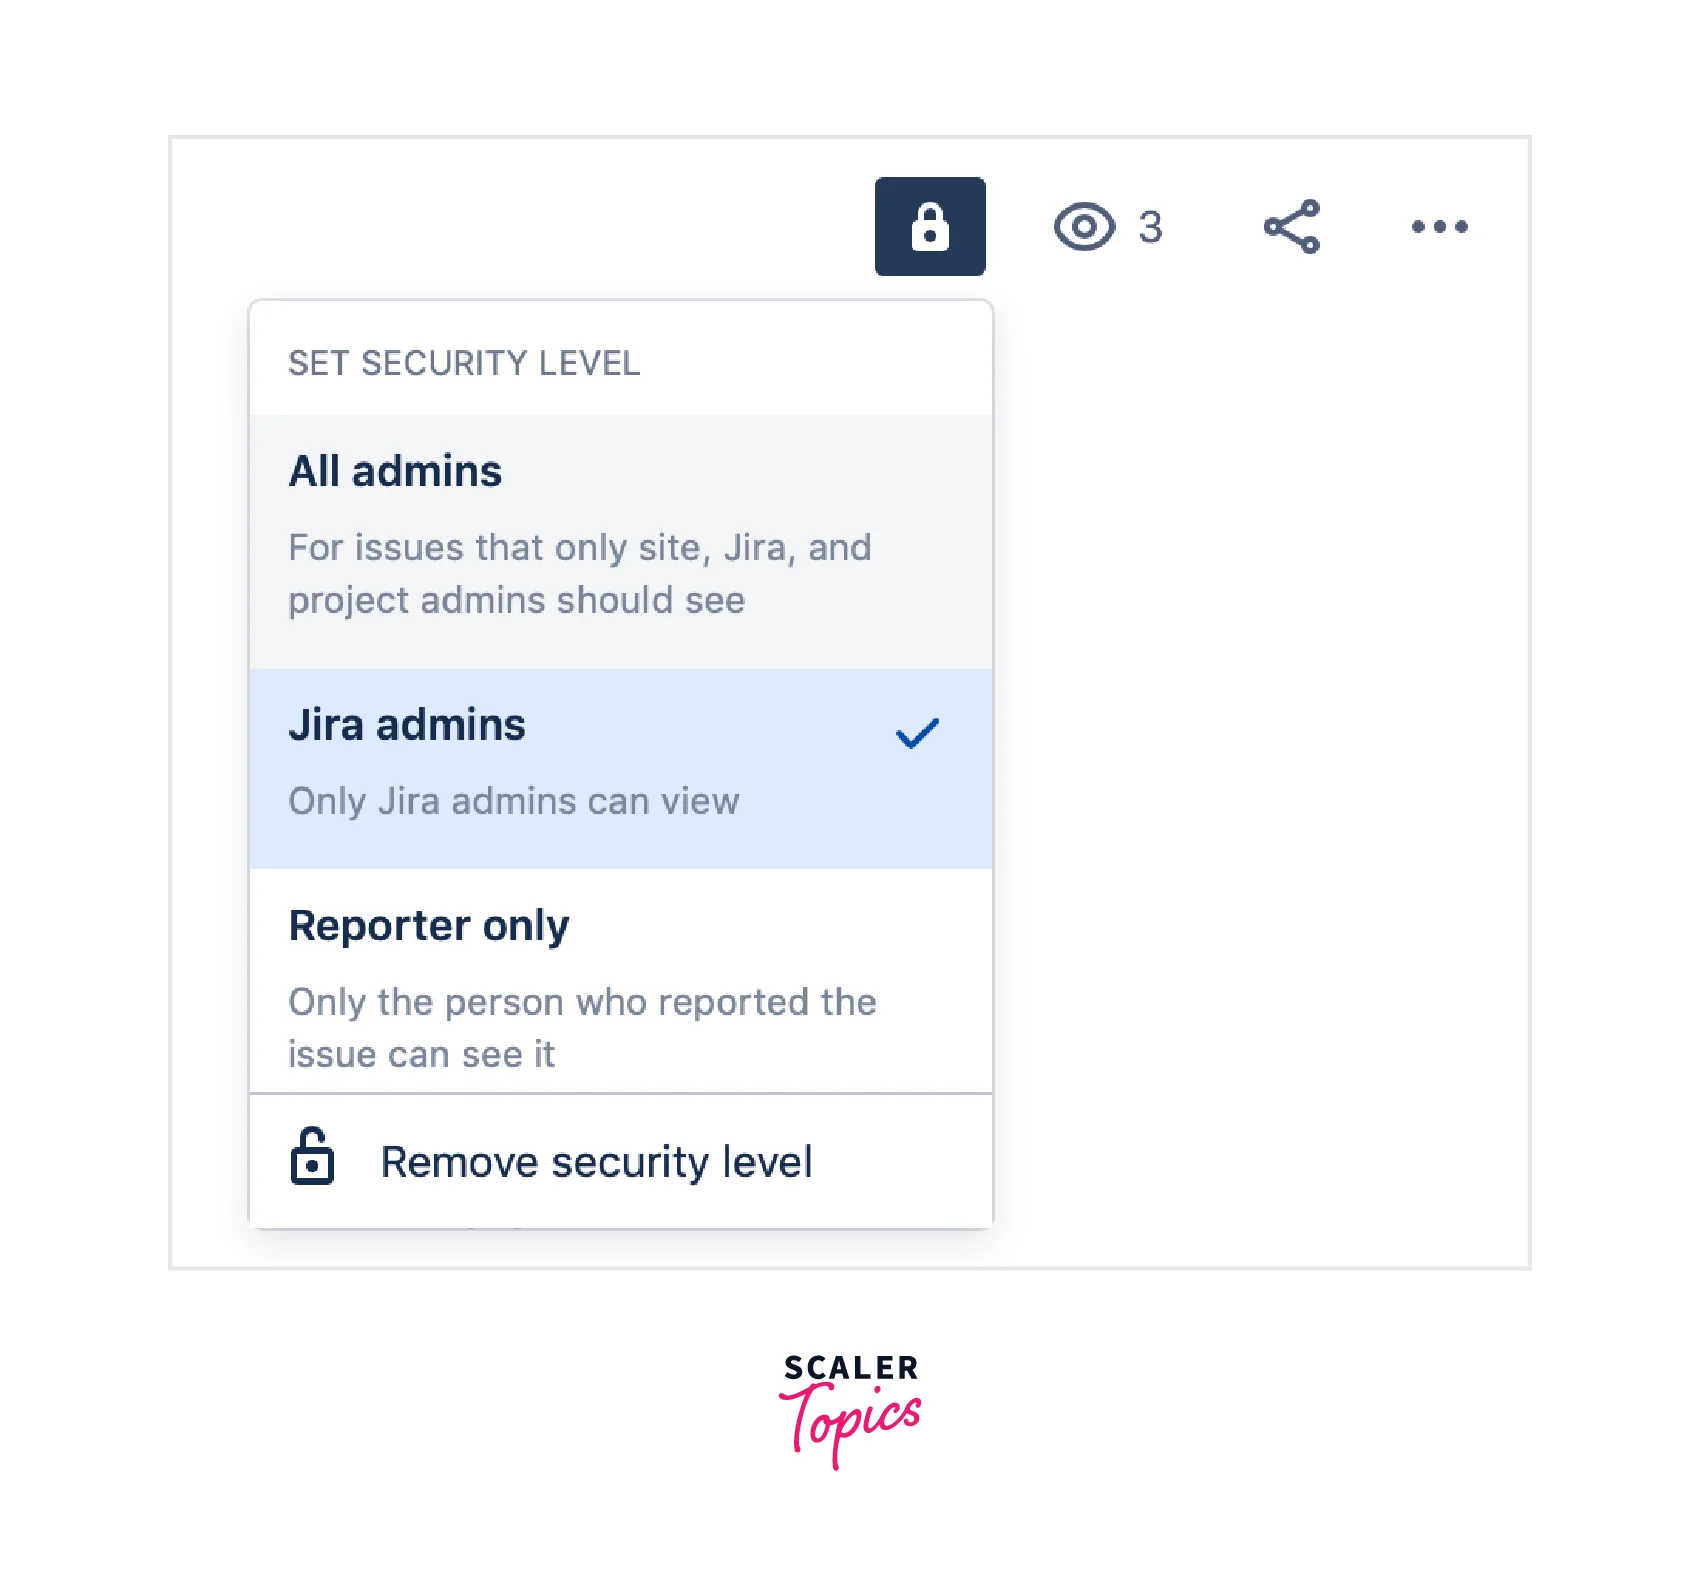
- Click on the lock icon located at the top-right of the issue. Note that this icon is only visible if the project has a configured security scheme.
- Choose the desired security level from the available options.
- To remove the security level from an issue, select the lock icon and click on Remove security level.
- Jira administrators can manage security levels and their memberships by issuing security schemes.
Restrict Access to an Issue in a Team-Managed Software Project
- Select + Create from the navigation bar.
- Fill in the necessary fields for the issue.
- Locate the Restrict to field in the list of fields for the issue.
- From the dropdown menu, choose the roles that should have visibility of the issue.
- Finally, click Create to create the issue.
Delete an Issue
To delete an issue, it is essential to have the appropriate permissions for deleting issues within the project where the issue was created.
To proceed with deleting an issue, follow these steps:
-
Locate and access the specific issue for deletion.
-
View the details of the issue.
-
Click on the ellipsis (...) icon.
-
From the options presented, select Delete.
Conclusion
- Creating subtasks in JIRA can help streamline workflows and enhance communication by breaking down complex tasks into smaller/manageable units and promoting better coordination within the team.
- Users can create issues in JIRA by providing a summary, filling out required fields, and finalizing the creation process.
- Cloning an issue allows for duplication while maintaining options to clone subtasks, attachments, links, and sprint values.
- Splitting issues into smaller parts improves manageability, especially in complex software development projects.
- Subtasks can be created within the main issue to enhance task organization and visibility.
- Issue types can be changed or subtasks converted into issues, providing flexibility in representing different types of work.
- Access to specific work items can be restricted in both company-managed and team-managed projects in JIRA.
- Deleting an issue requires the appropriate permissions and can be done by accessing the issue details and selecting the delete option.