Kanban Board in JIRA
Overview
Kanban is a framework for agile methodology. Kanban board in Jira where all the tasks are mentioned giving visualization on the tasks that need to be completed. Since Kanban is an agile method, it follows basic principles of frequent delivery of the task, small teams working together, and business analysts and developers working on the same goal.
What is a Kanban Board in Jira?
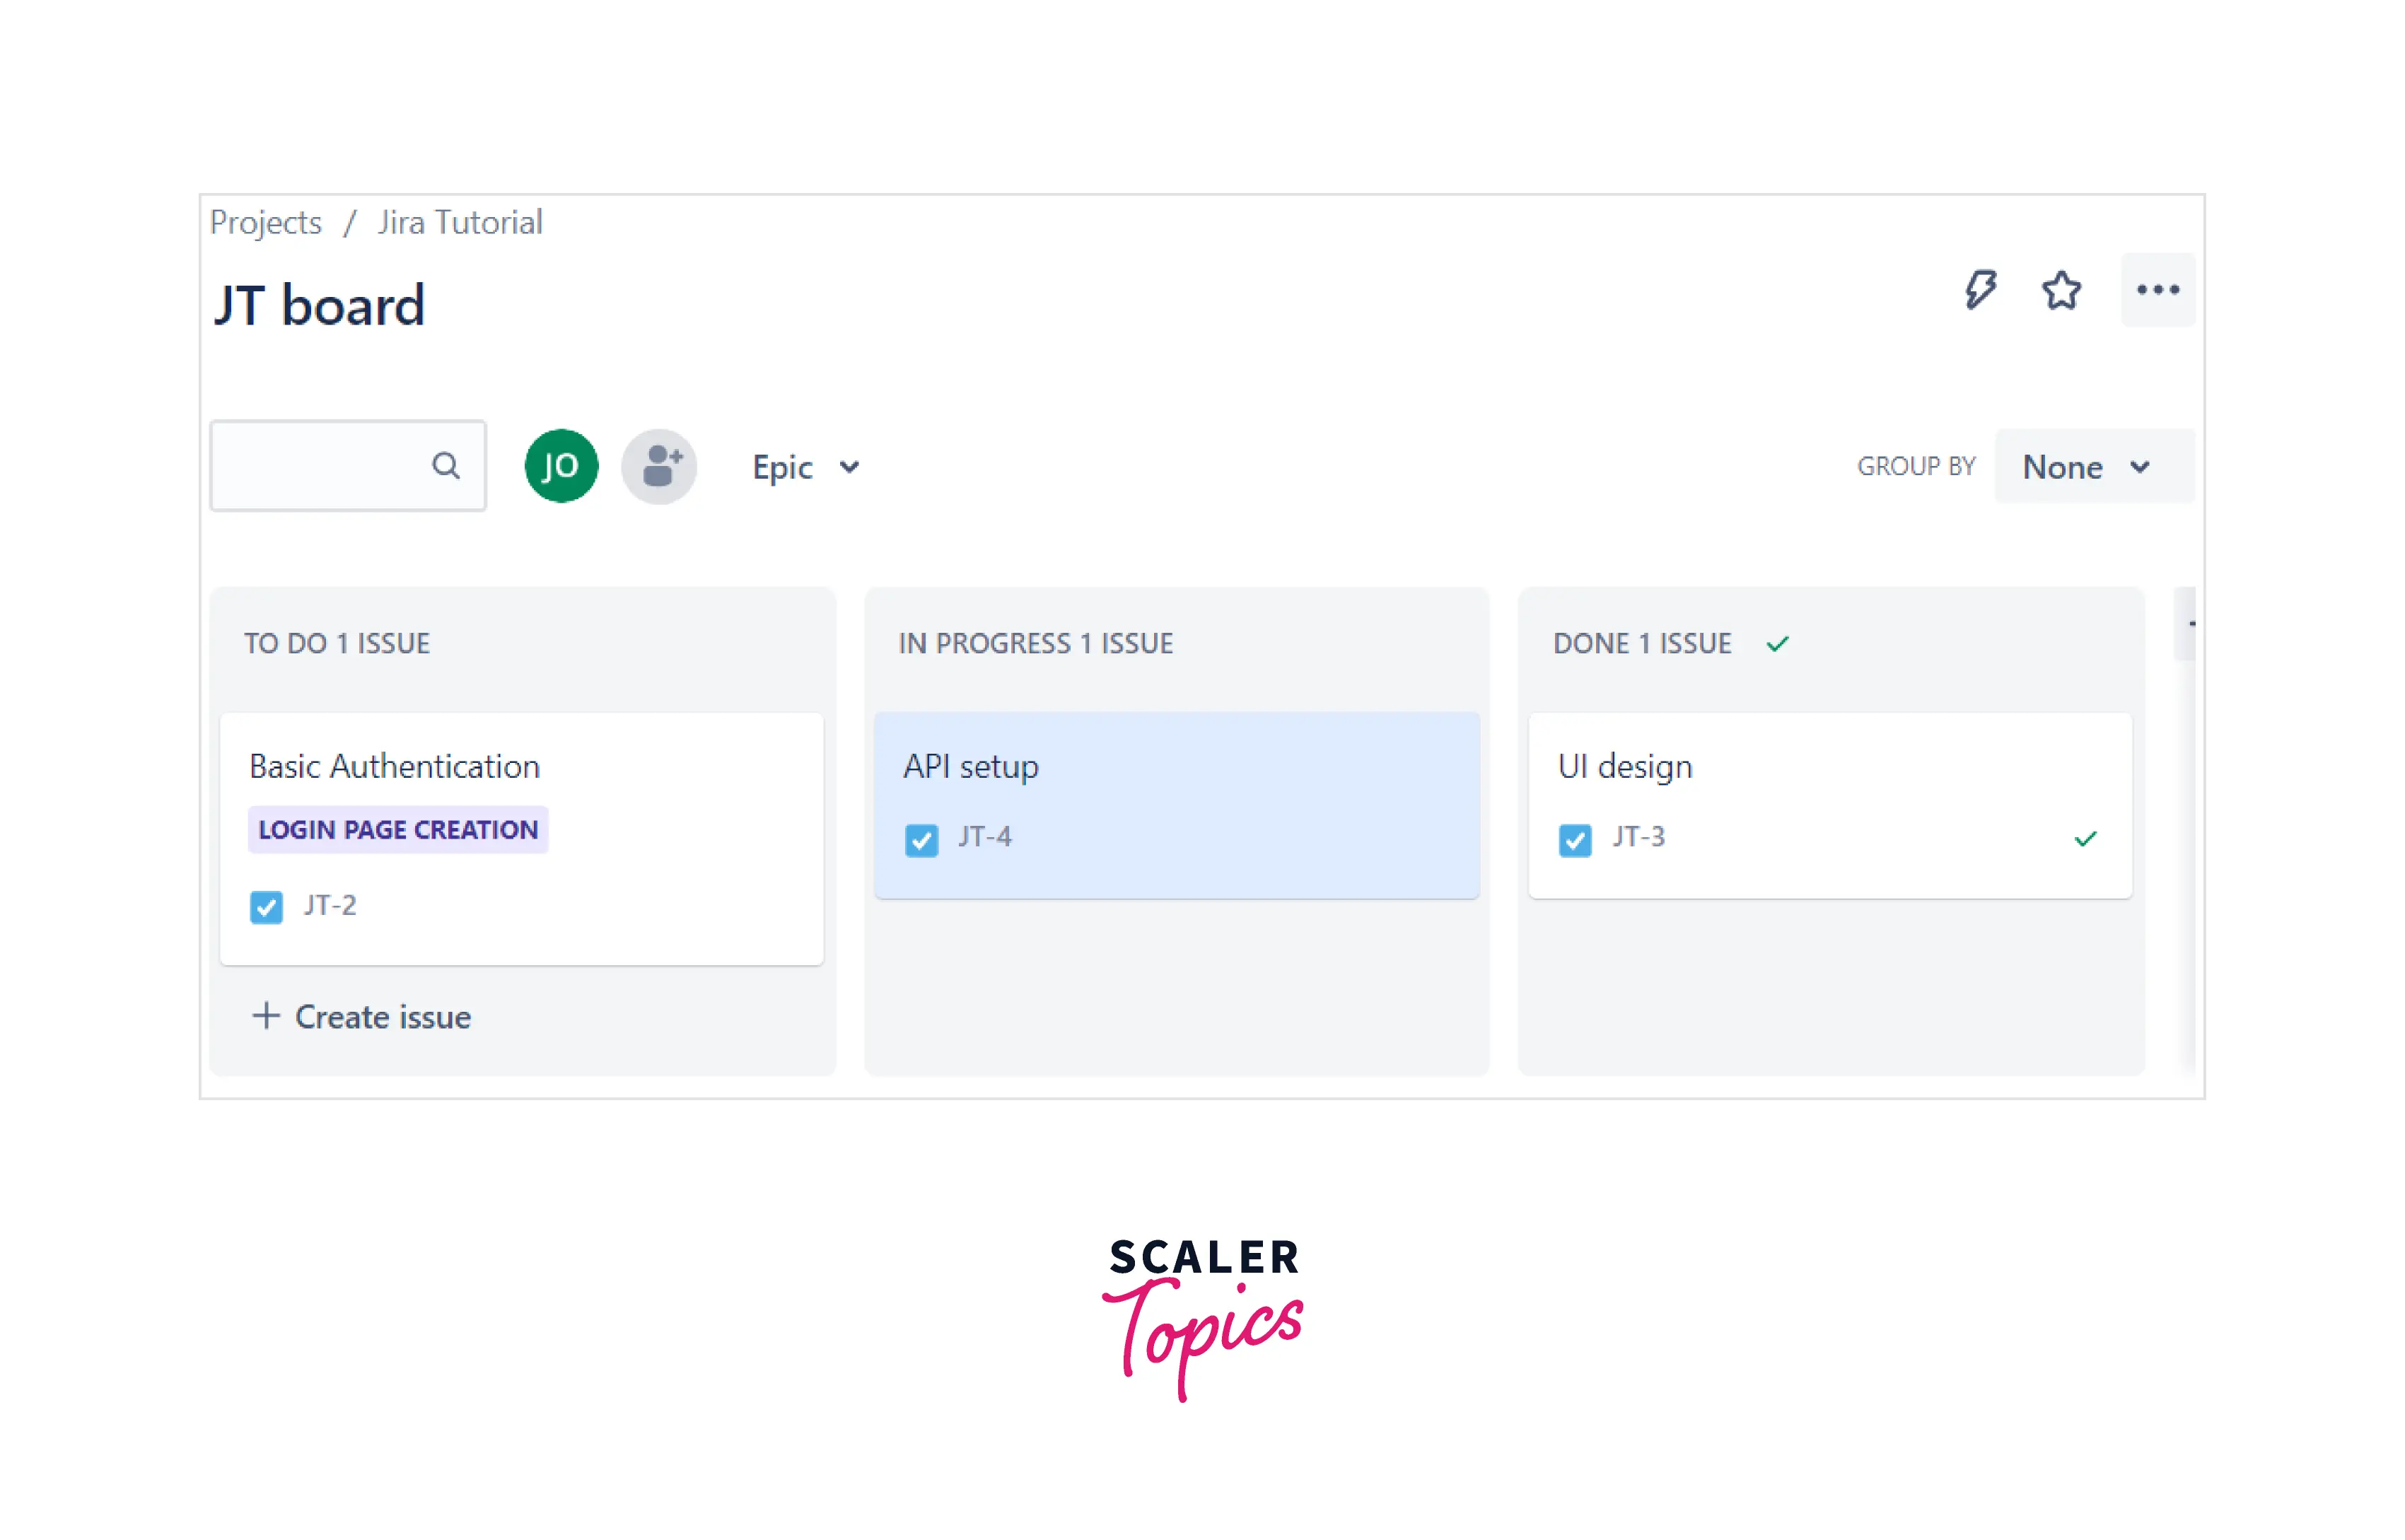
Kanban board in Jira has all the tasks written in a board structure with the details of the assignee, reporter, priority, etc. The board has filters like in progress, to do, and done. Cards get a position on the board based on status. In the cards, one can attach screenshots, sub-task, links, source codes, etc.
What is Kanban Methodology?
The term Kanban is a Japanese term used during the production process of Toyota in 1940. The entire work gets listed in the form of boards by the team, which can be completed in a given time. Since Kanban is an agile model, frequent delivery of work to the client, business unit, and development team working together and adapting to newer incoming changes are primary objectives.
Types of Kanban Boards
Since Kanban originates from manufacturing units, physical Kanban boards are still in practice. The other one the IT industry uses as an agile methodology is the digital one used in JIRA.
-
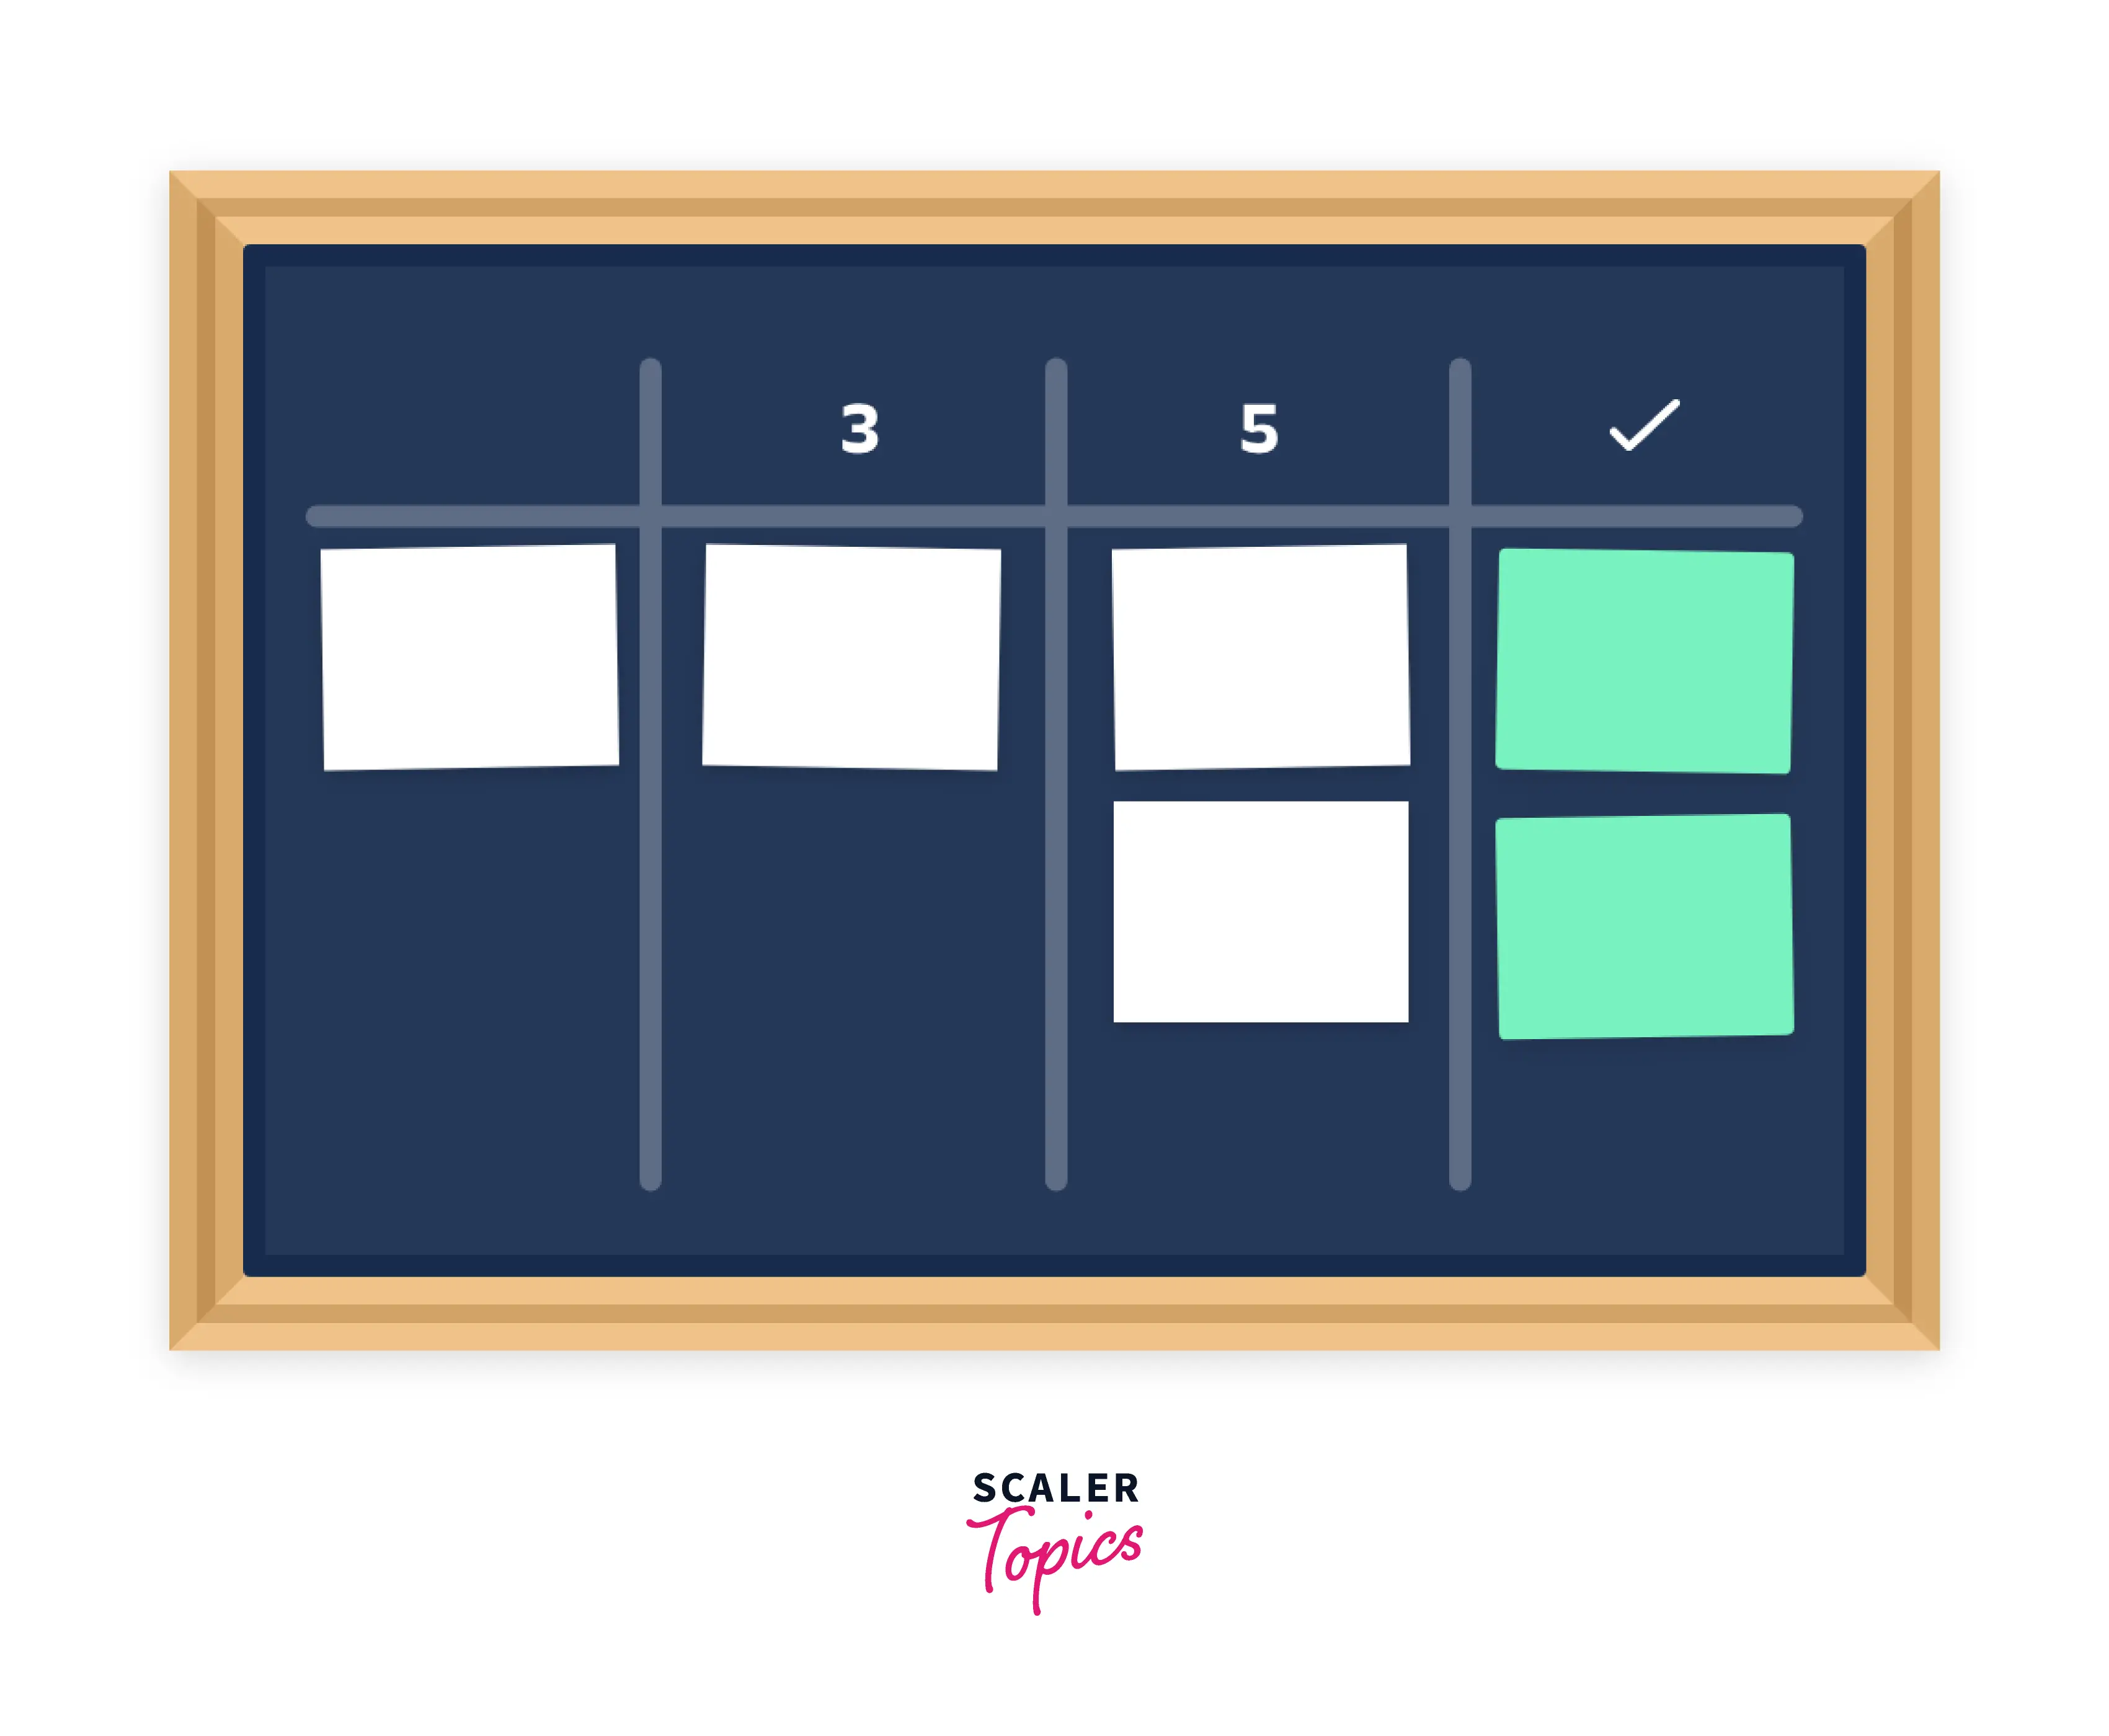
Physical Boards: The physical boards used in manufacturing units are where people place sticky notes to list the priority task. Who needs to do the deadline everything is written. The workers know on a daily basis the tasks that need to be done.
-
Digital Boards: Tools like Jira brought the physical board template alive as digital boards. They have the core agile functionalities, backlog, assignee, priority, status, and reports. The beauty of the Kanban board in Jira is that you can choose the tasks to do from the board. And with Jira, you can integrate your board with tools like bitbucket, slack, teams, etc.
Elements of a Kanban Board
-
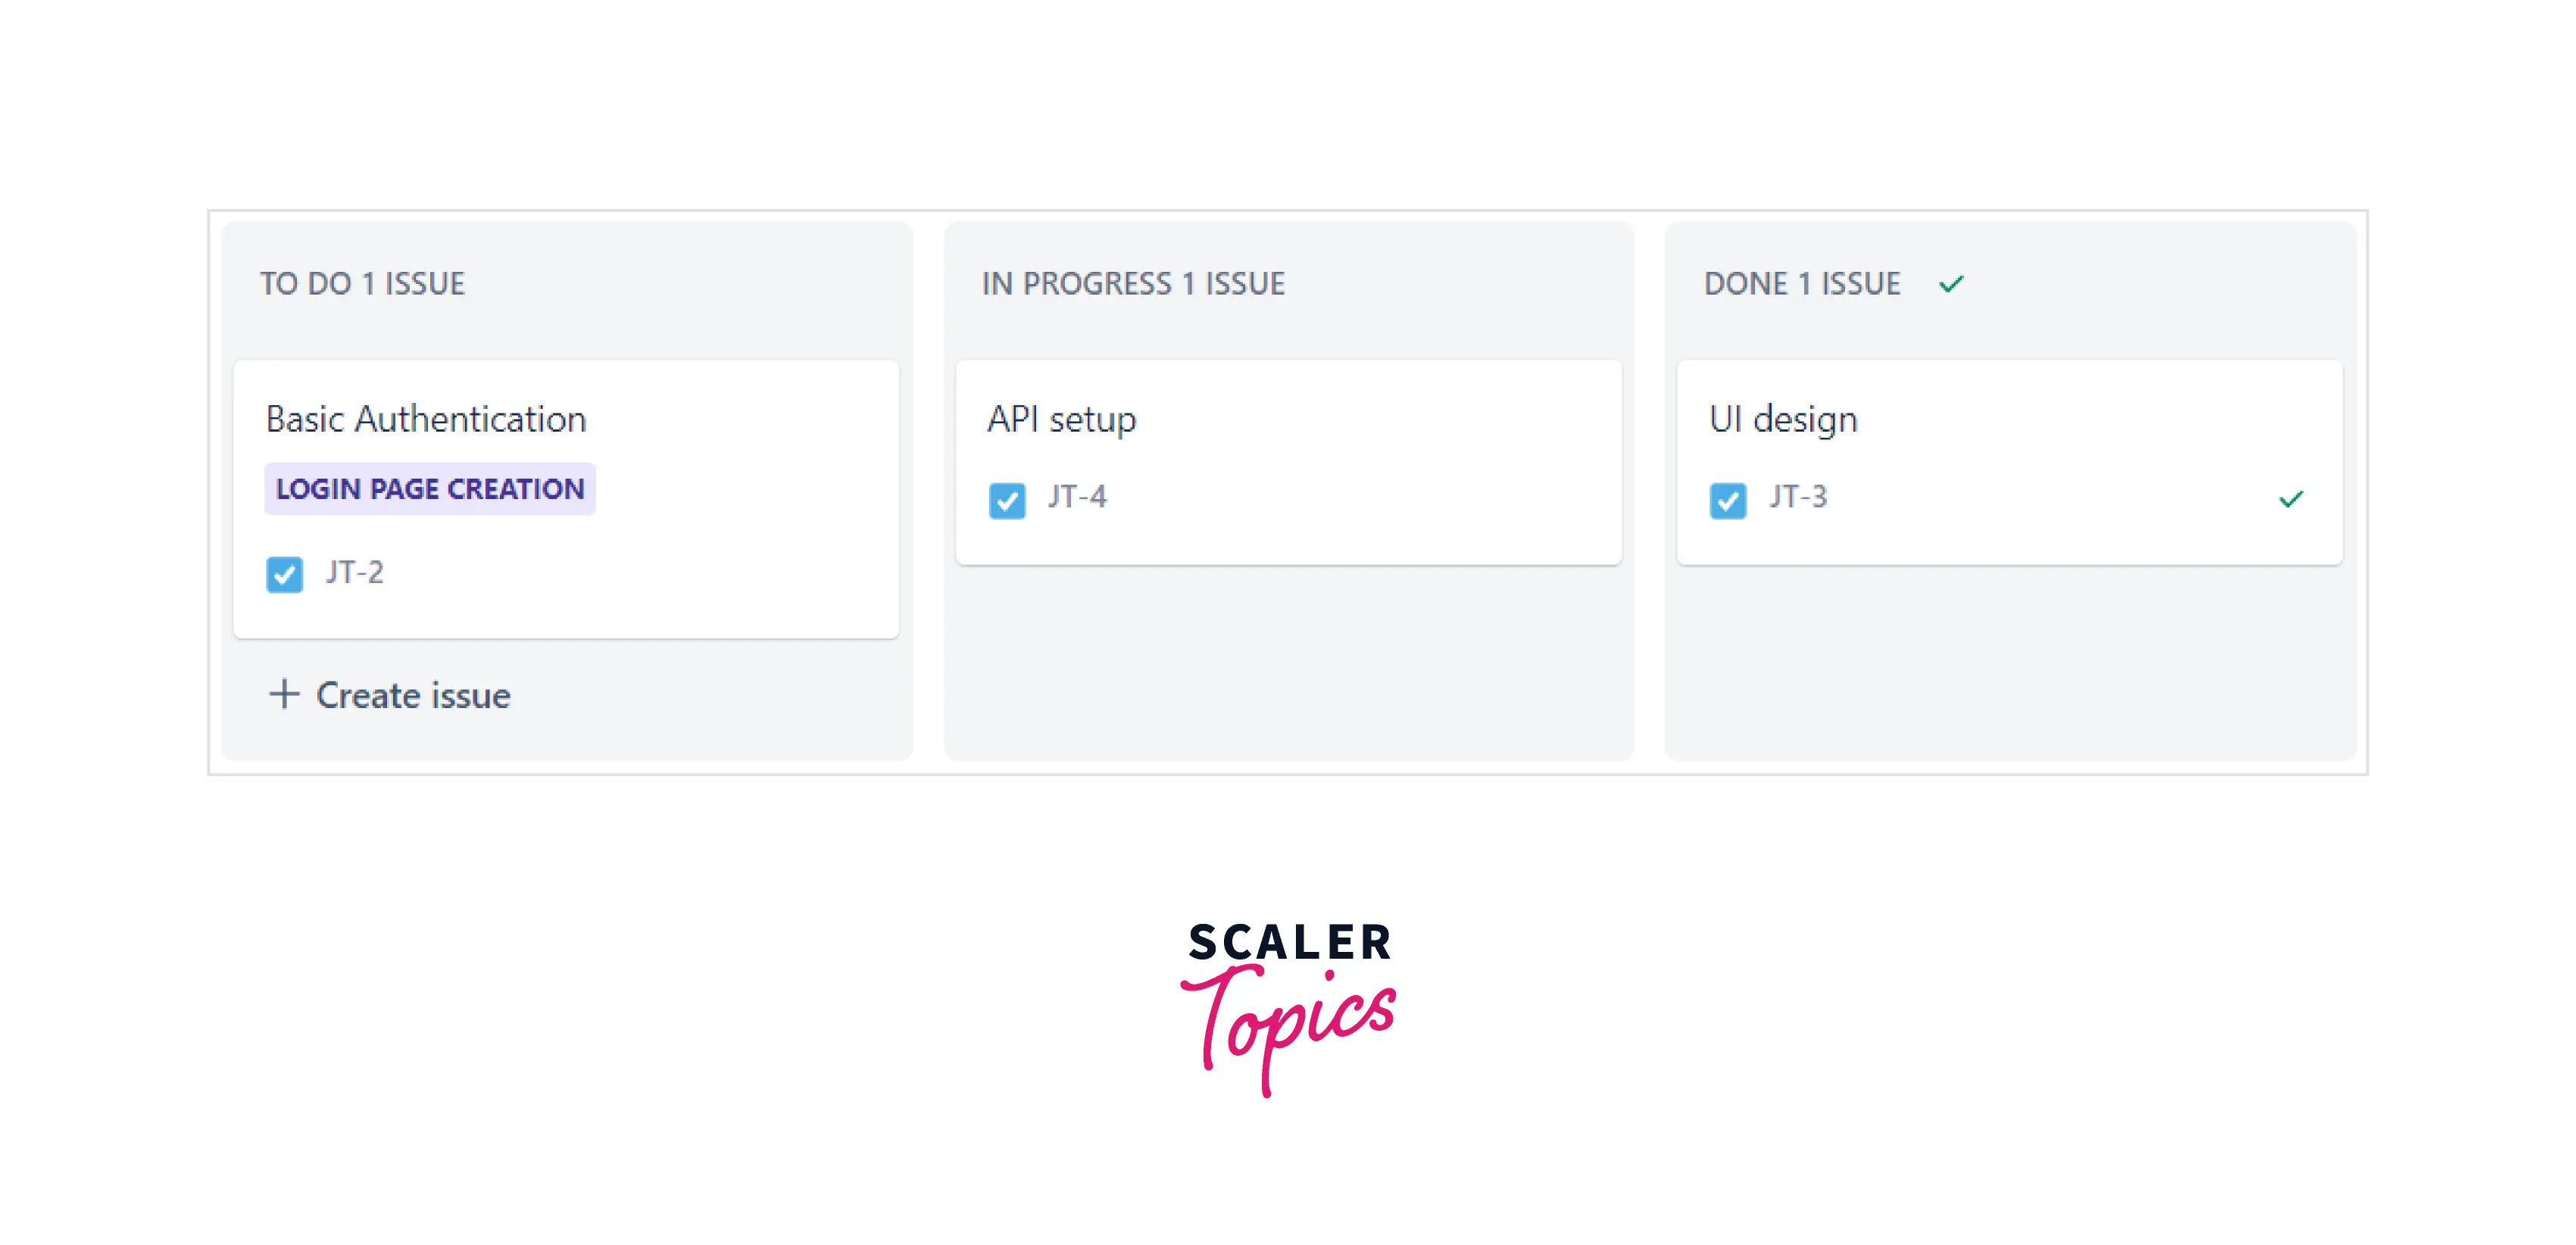
Visual Signals: The cards displayed on the board are among the crucial element of the Kanban board. Cards have all the information about the task written on them. The visual cards display the assignment, priority, story points, status, and workflow.
-
Columns: The status of the card is displayed in the column. The cards flow from one column to the other till they reach the last column, which signifies the task is done. This help to identify the pending task or the task taking longer to reach the last column.
-
Work In Progress (WIP) Limits: This is one of the critical aspects of the Kanban board called WIP limit where say, if you define the maximum limit of column one as 3, then column one cannot contain more than three tasks. This is done to ensure no overburden or excess tasks at once.
-
Commitment Point: On the Kanban board, tasks are all displayed. But the moment when the task is adopted by the team and work on it starts is the commitment point. Many backlogs are written on the kanban board, and they come in the in-progress column when work starts.
-
Delivery Point: When the task is set for the release or is available for the customer, and no longer the team would work on it is the delivery point. Since Kanban is an agile framework, it follows the principle of multiple and frequent delivery points. In short, the task travel from the commitment point to the delivery point.
Benefits of Kanban Boards
- Kanban boards provide transparency in the team. Everyone is aware of the tasks that need to be done.
- Digital Kanban boards have reports and WIP limits to add more dimensions to the boards.
- Bottlenecks and overwork can be prevented by setting WIP limits
- Control charts and workflows help to make the development cycle better. They help to monitor team progress better.
How to Create a Kanban board in JIRA?
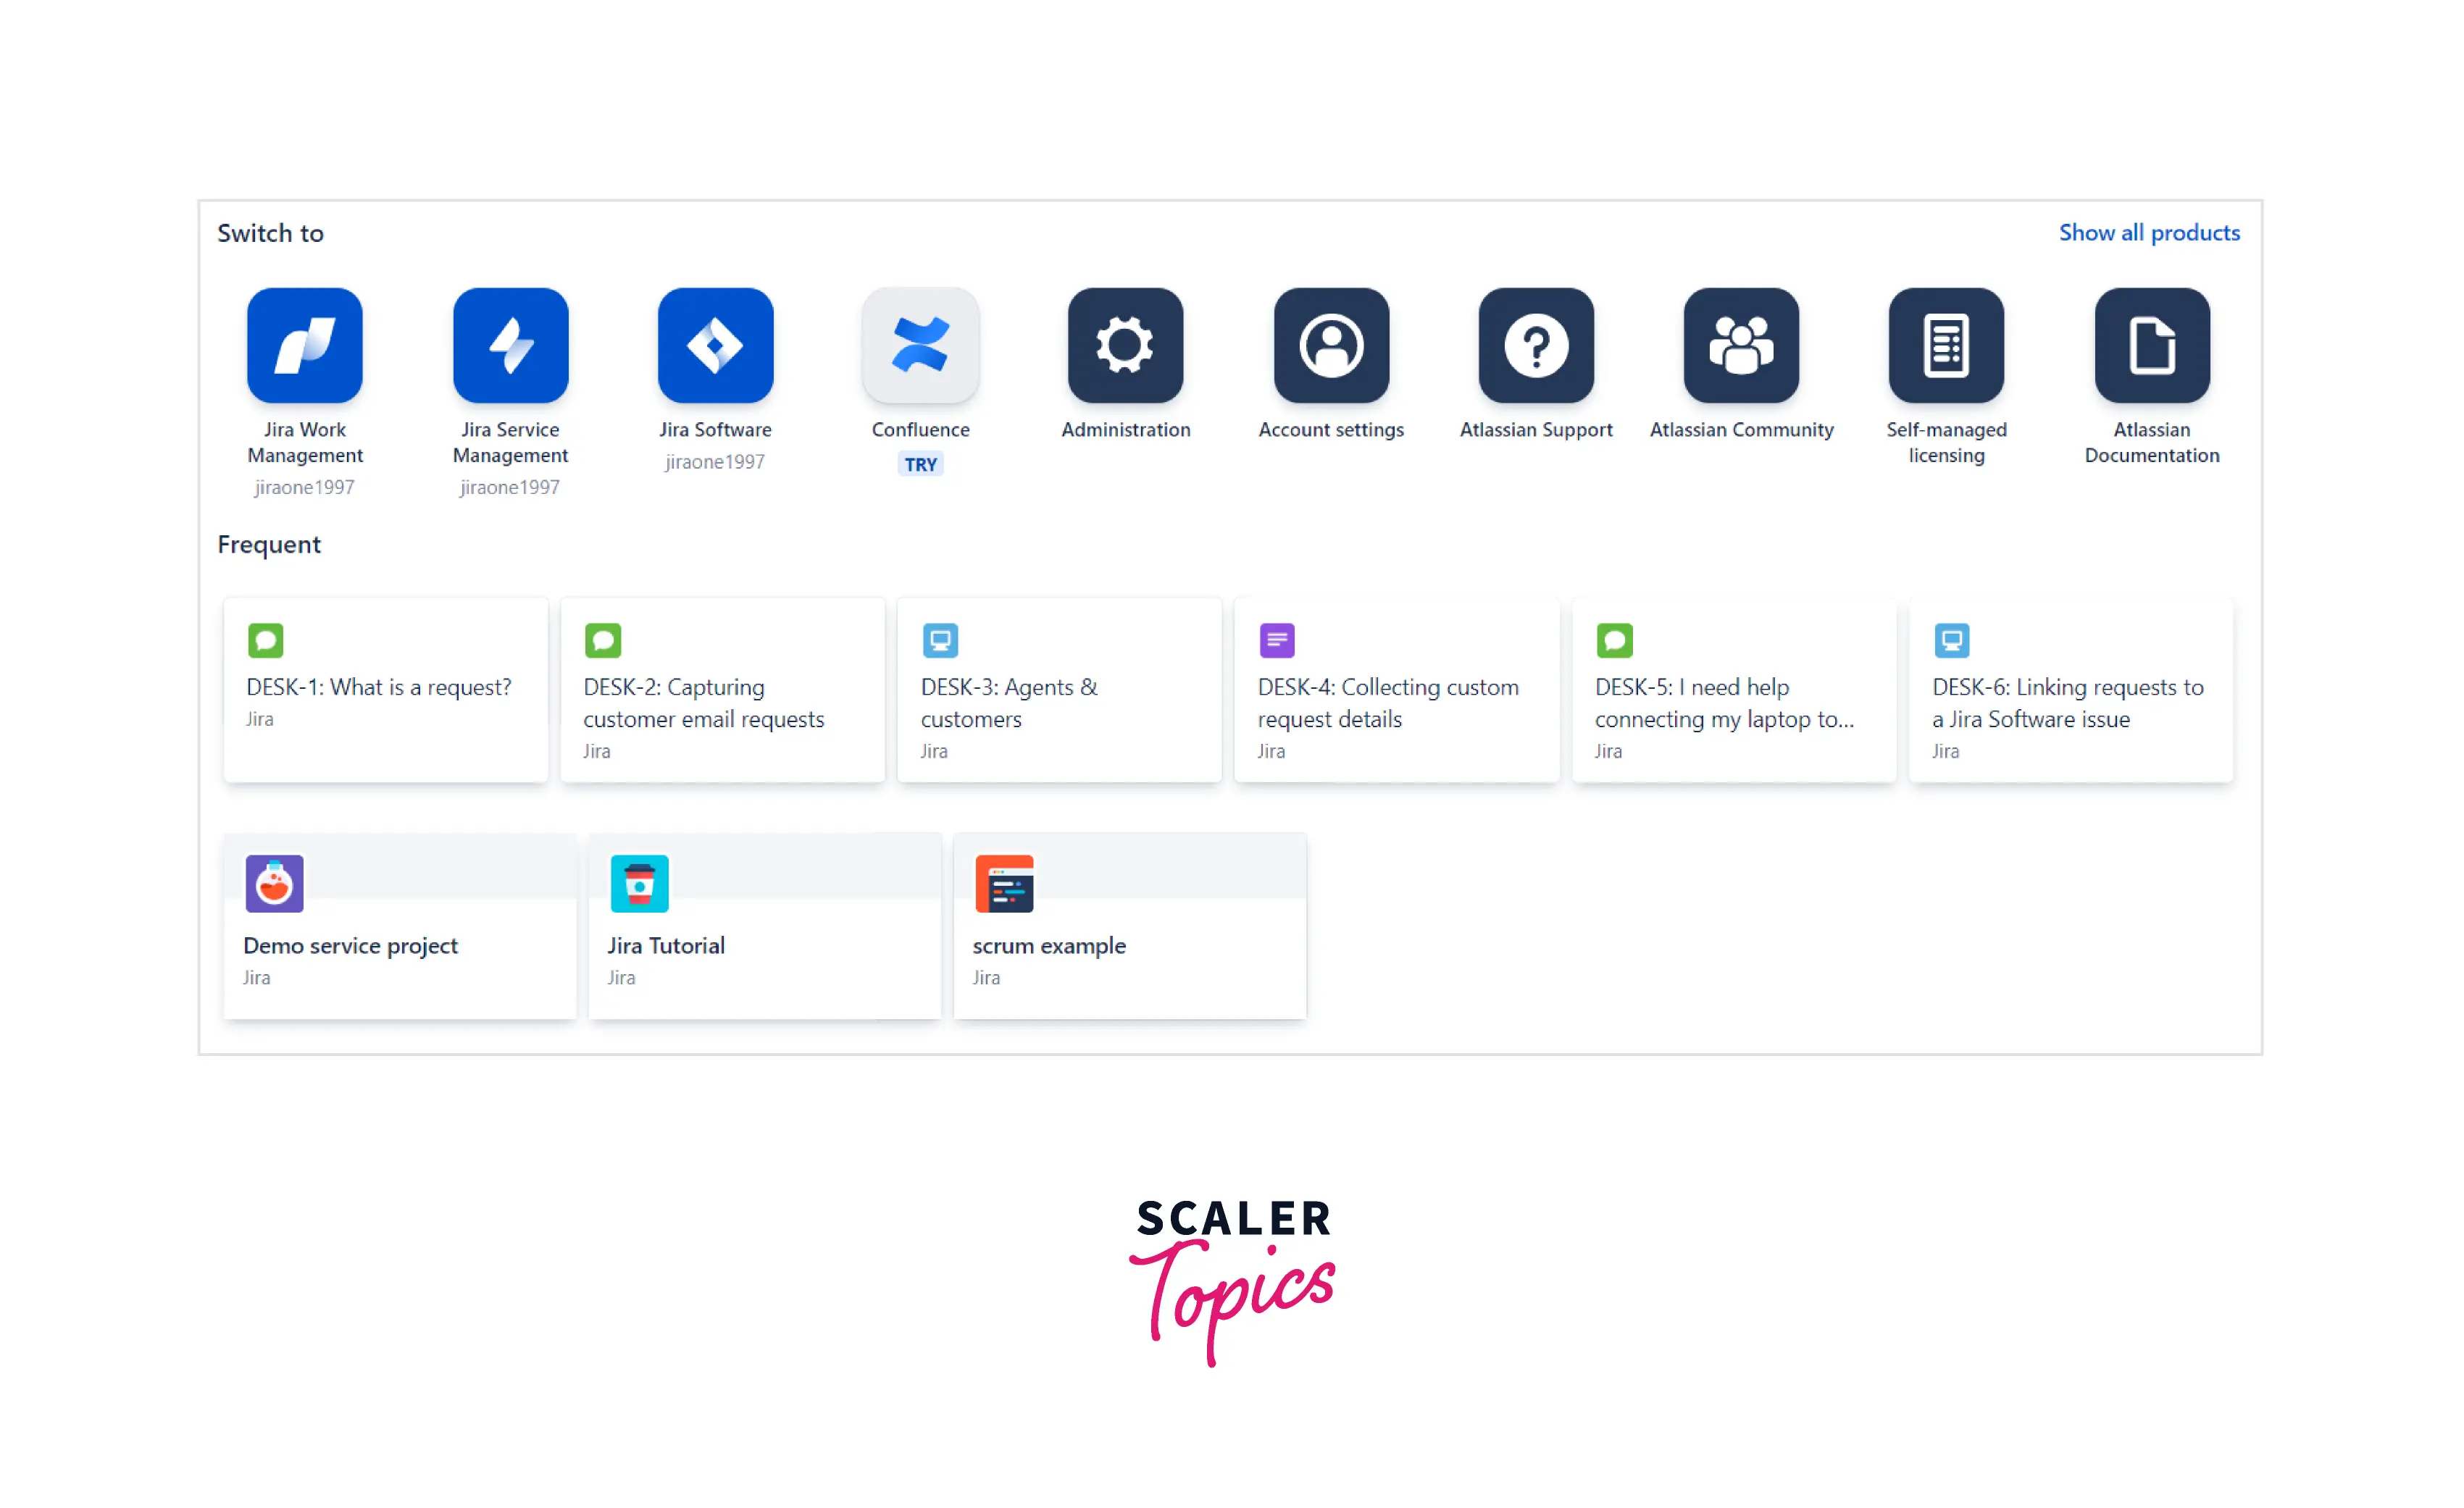
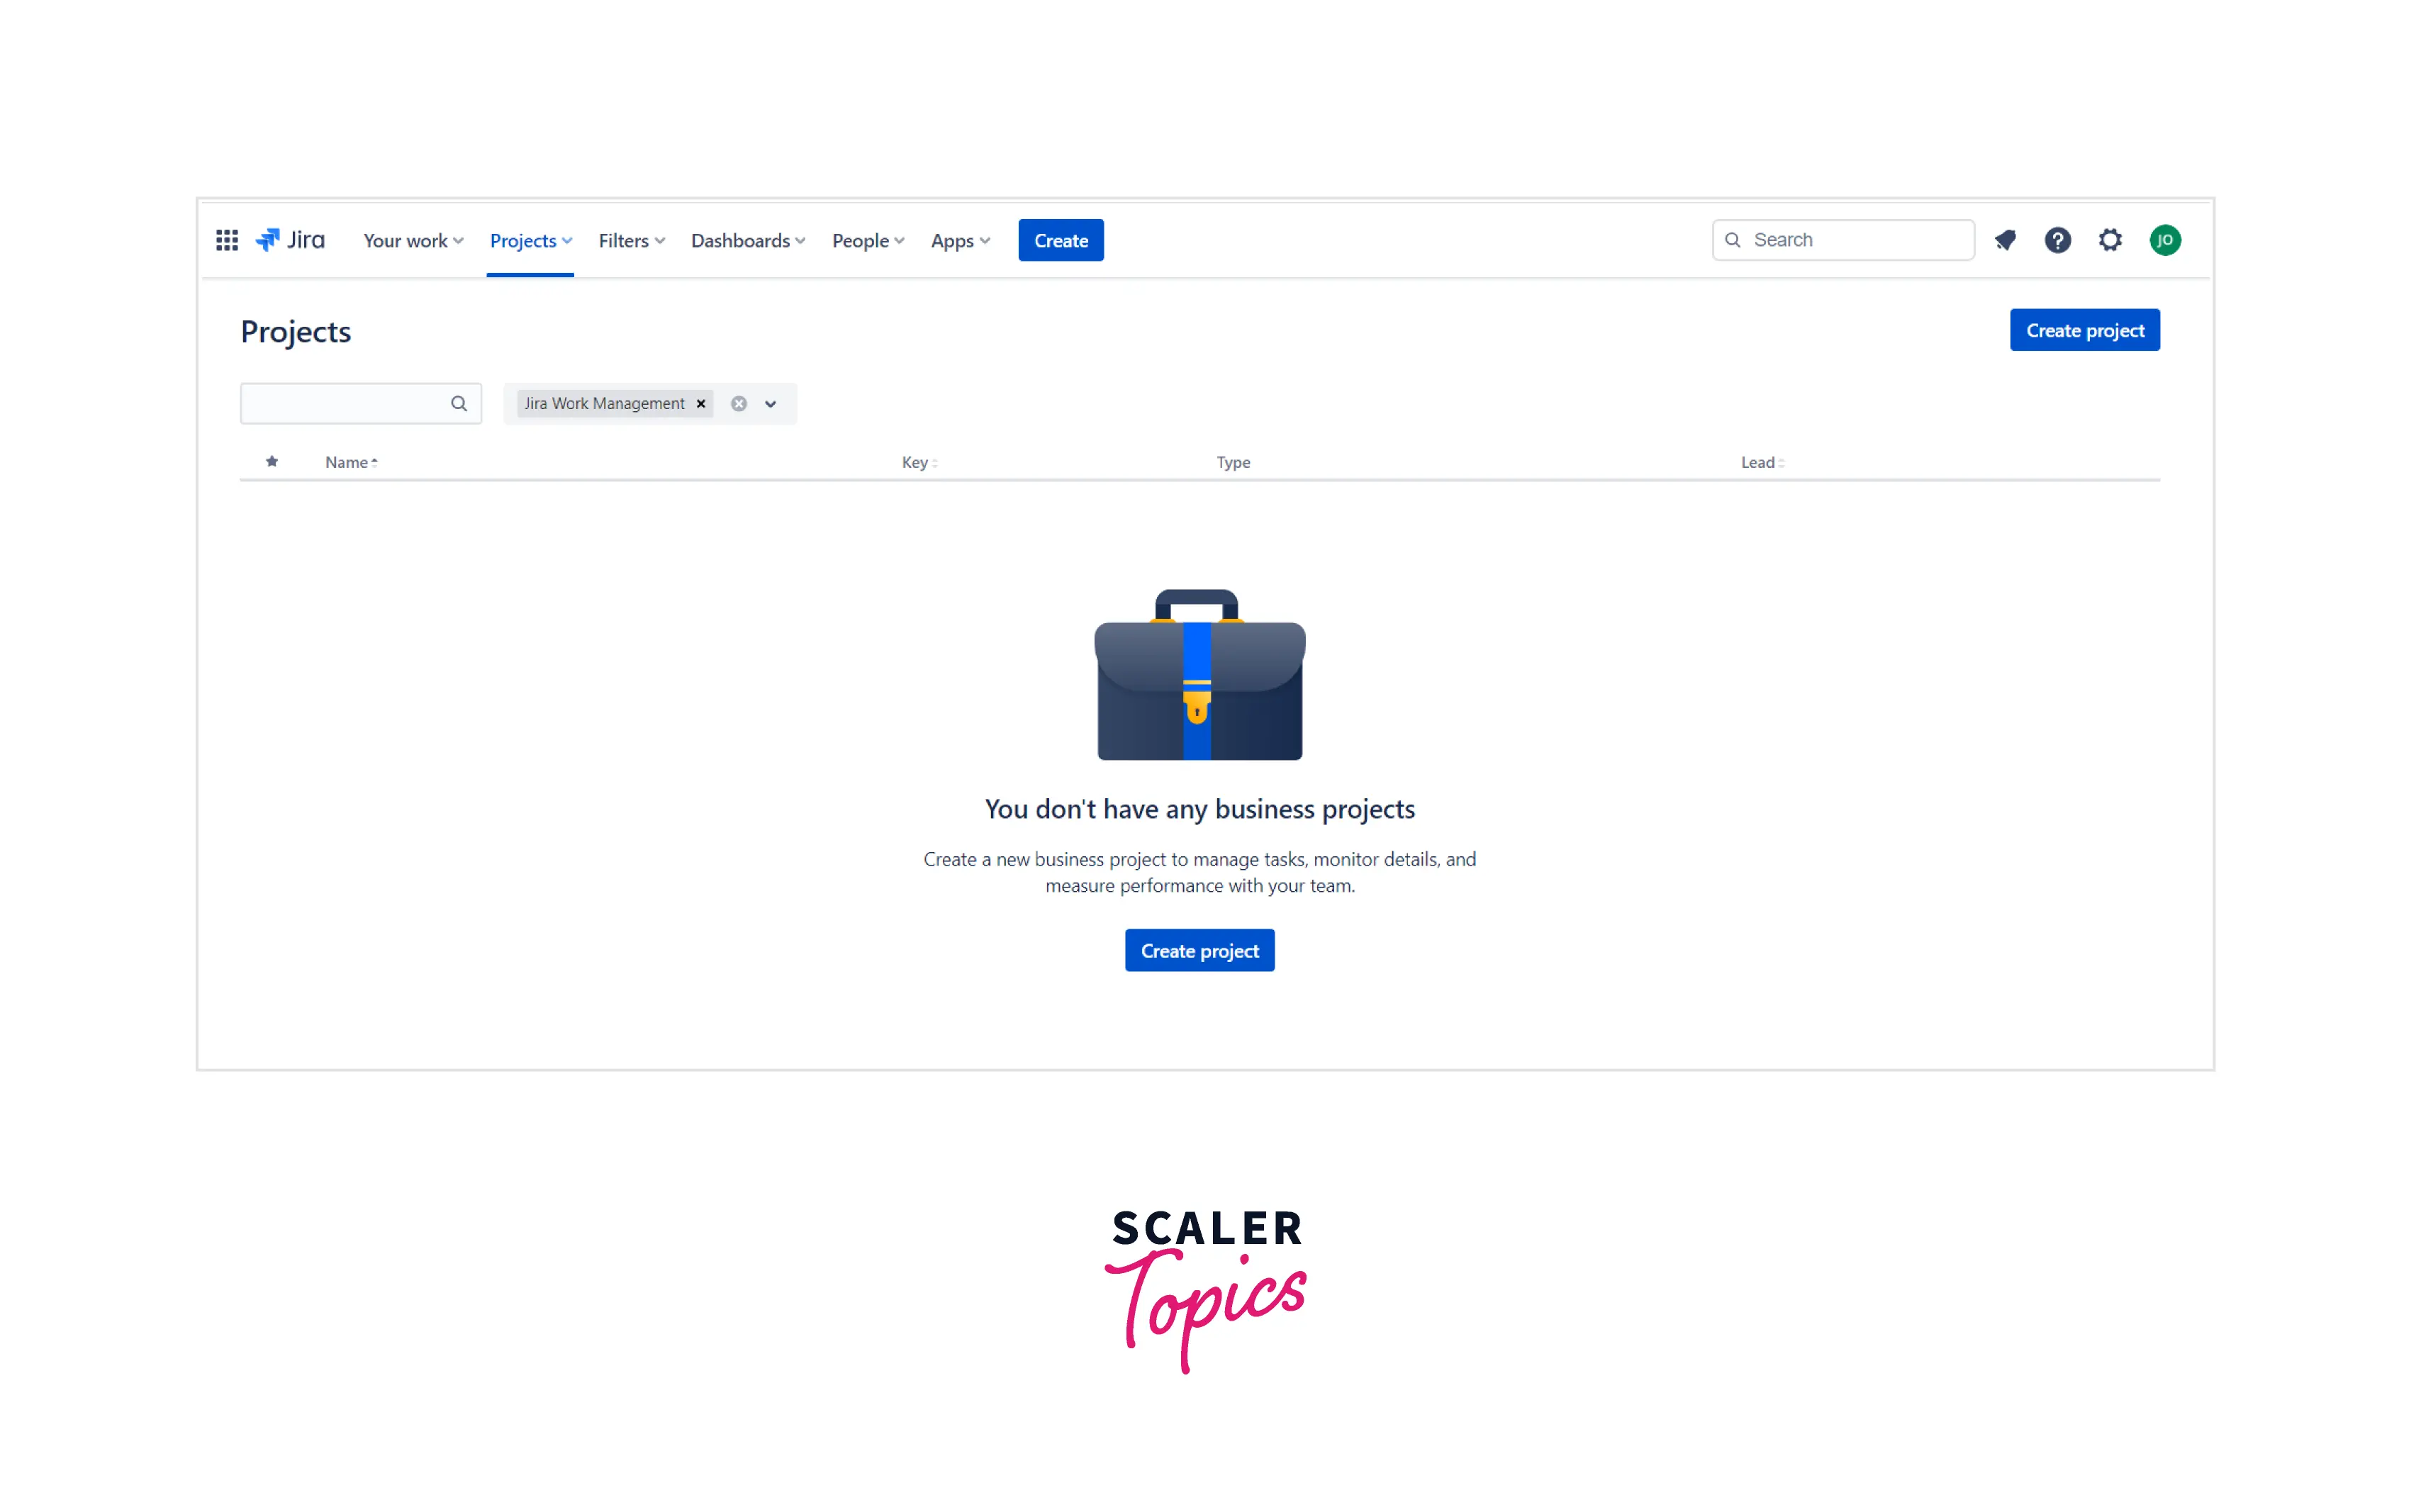
Step 1: Once you login into the Atlassian site with credentials. Select the Jira Work Management option to get started. Jira tool is used to manage all the project workflow.
Step 2: Click on create the project. Create project is going to ask you to choose the template of desire.
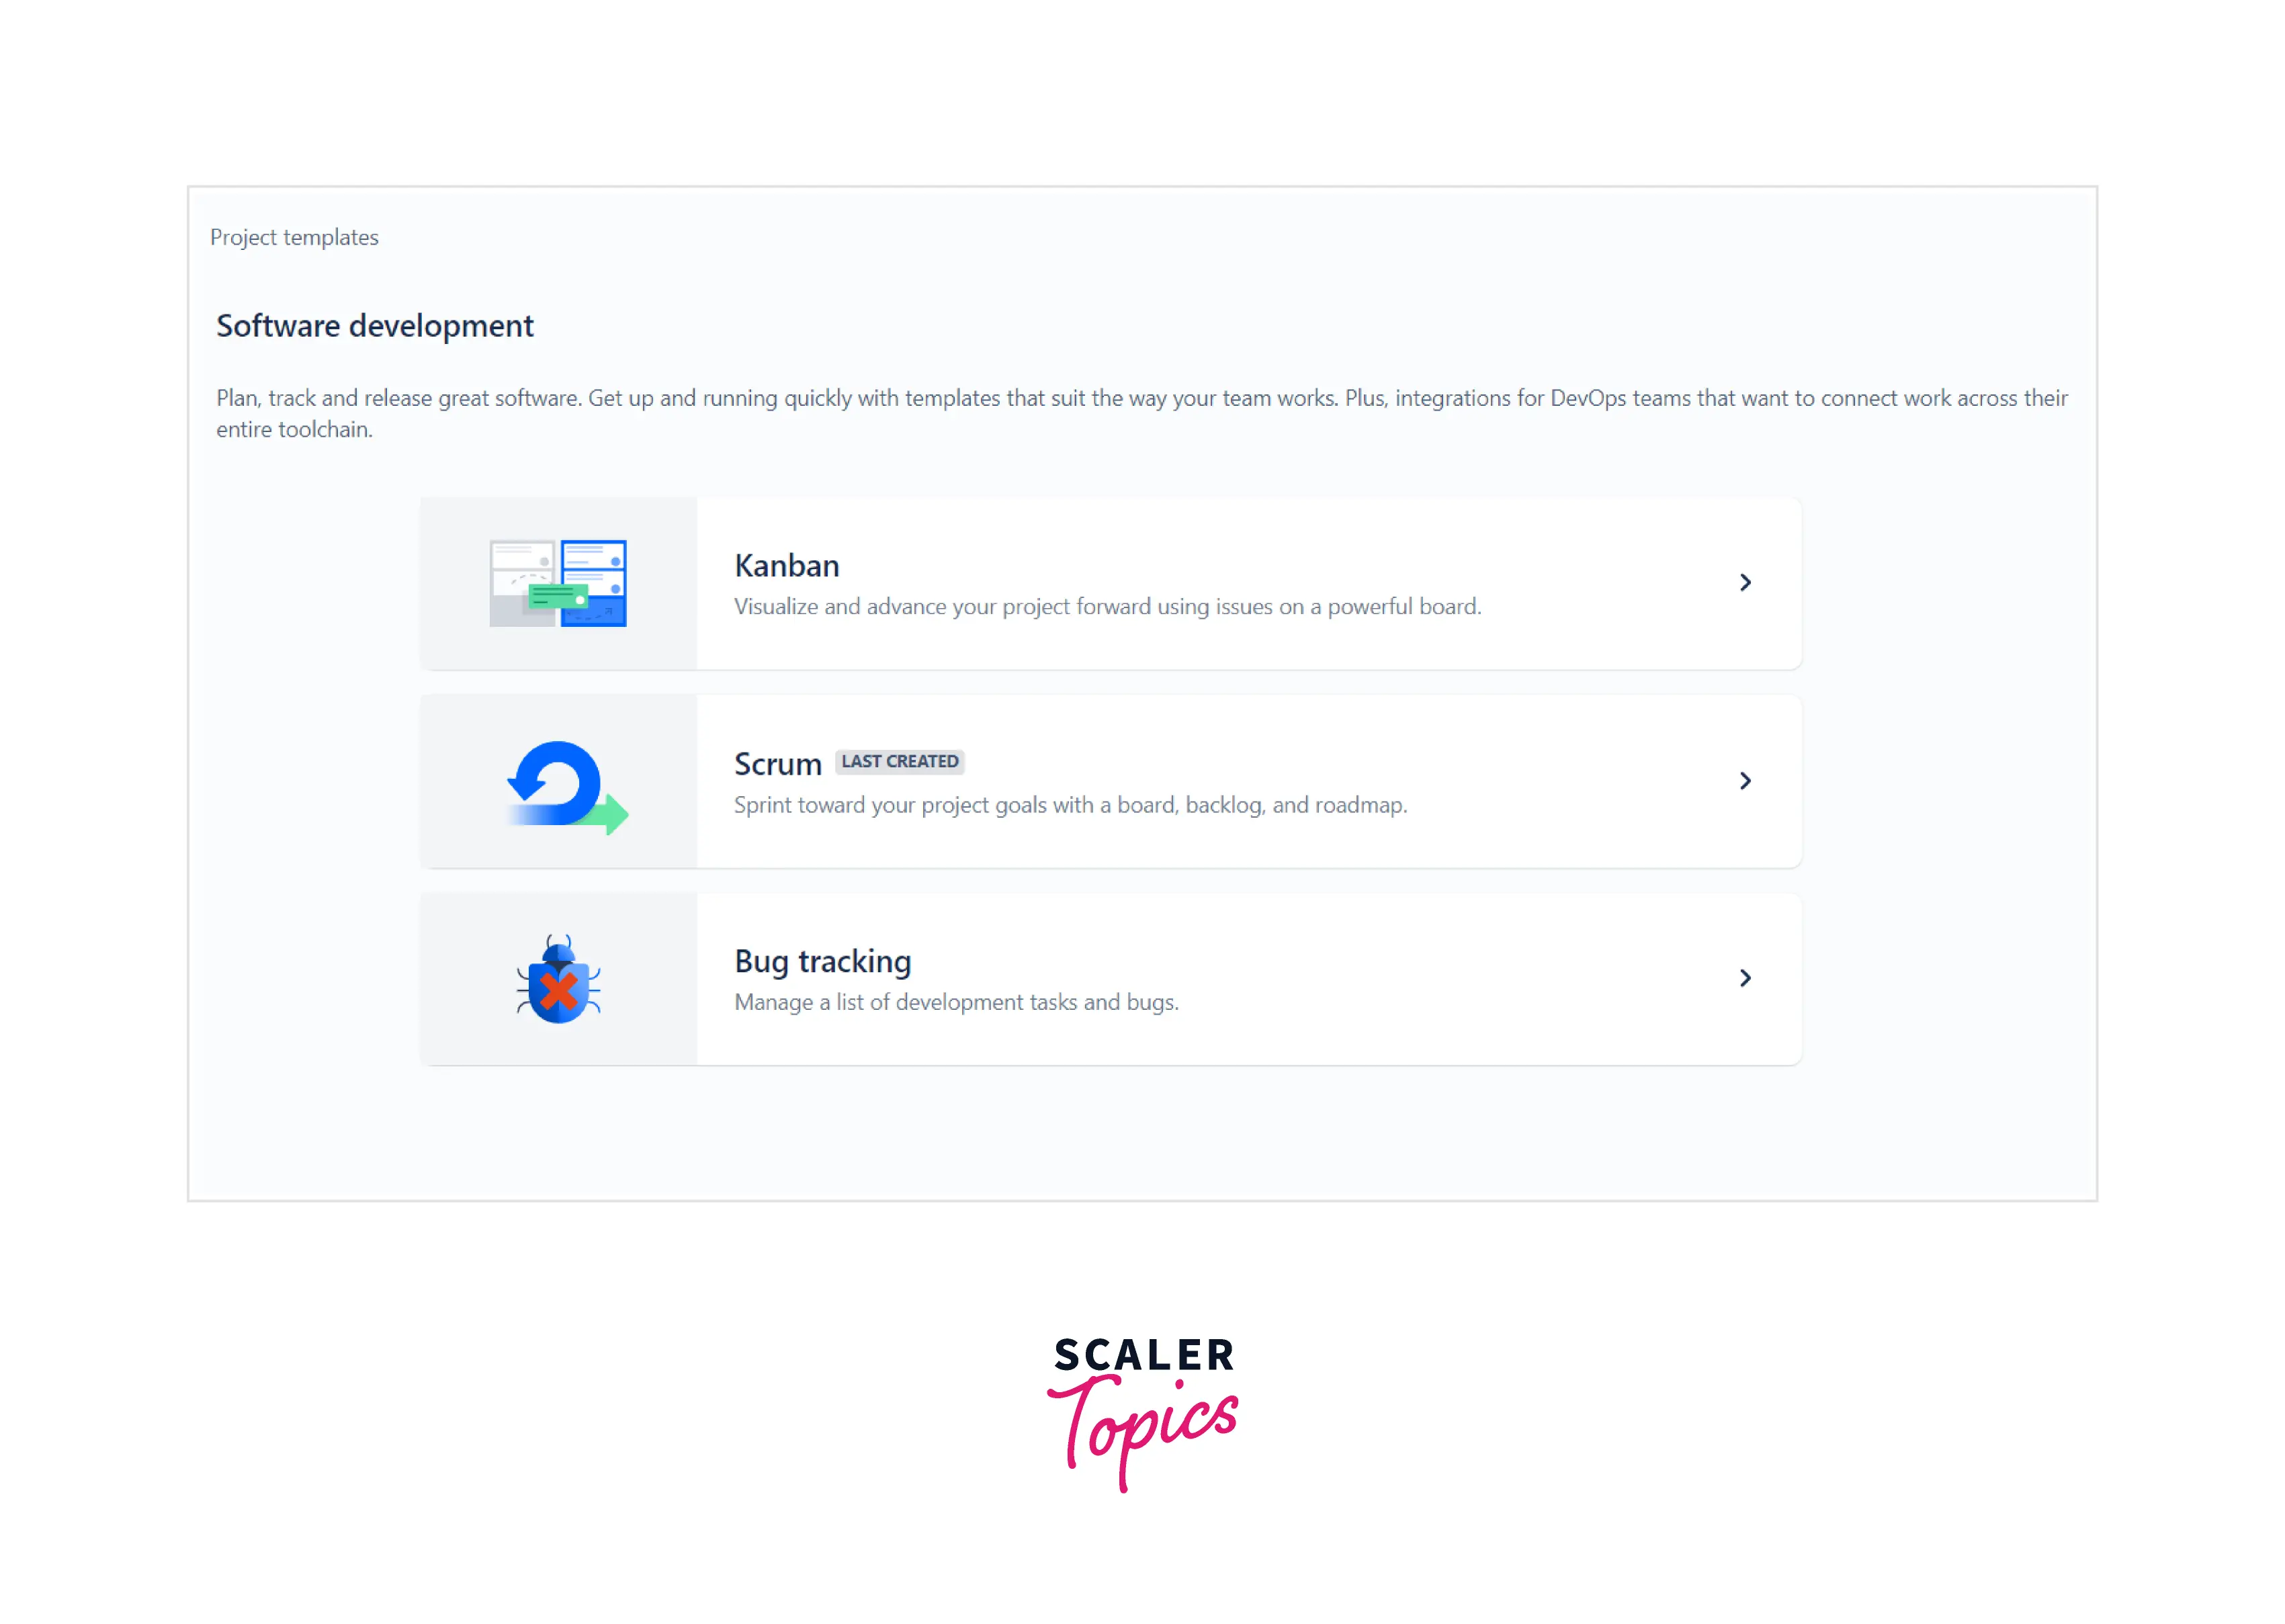
Step 3: Select the Kanban option. It would create an empty Kanban template. Kanban is used to manage the project using the Kanban board. It does not have the option of the sprint. You can only choose one option.
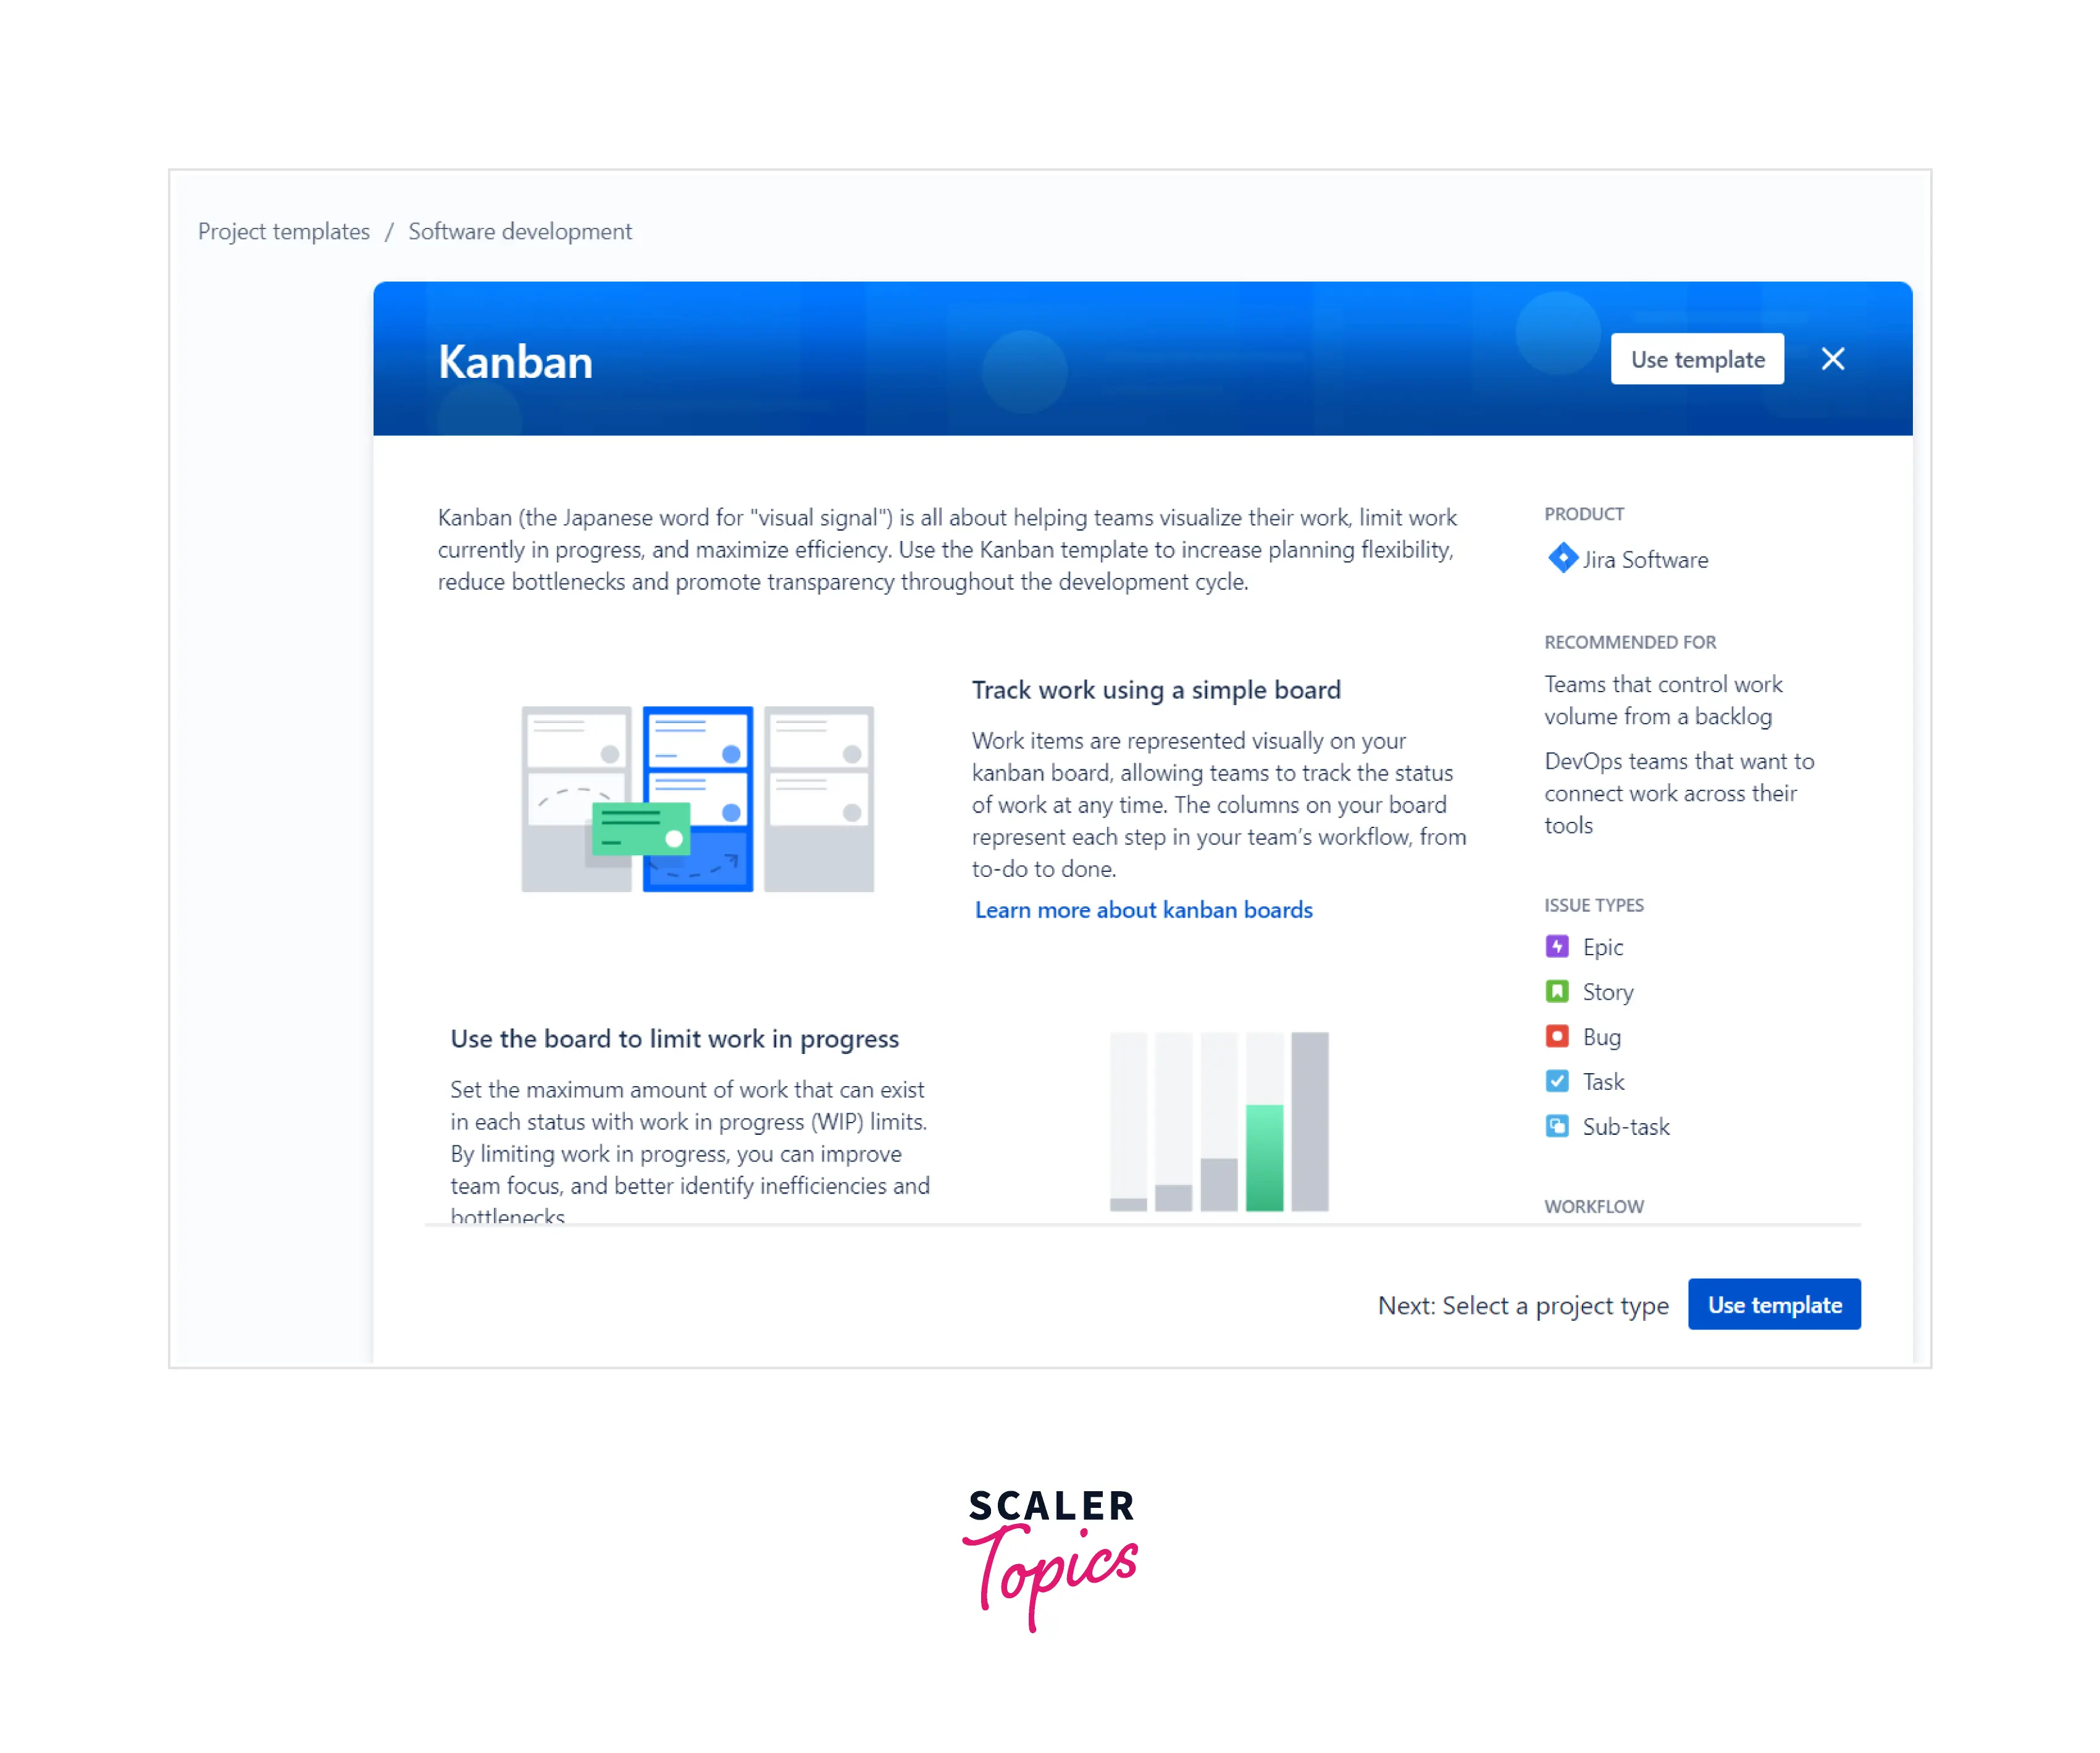
Step 4: This screen will explain the Kanban board and the concept of WIP limits. Click on Use Template to proceed to the next screen to select the project type.
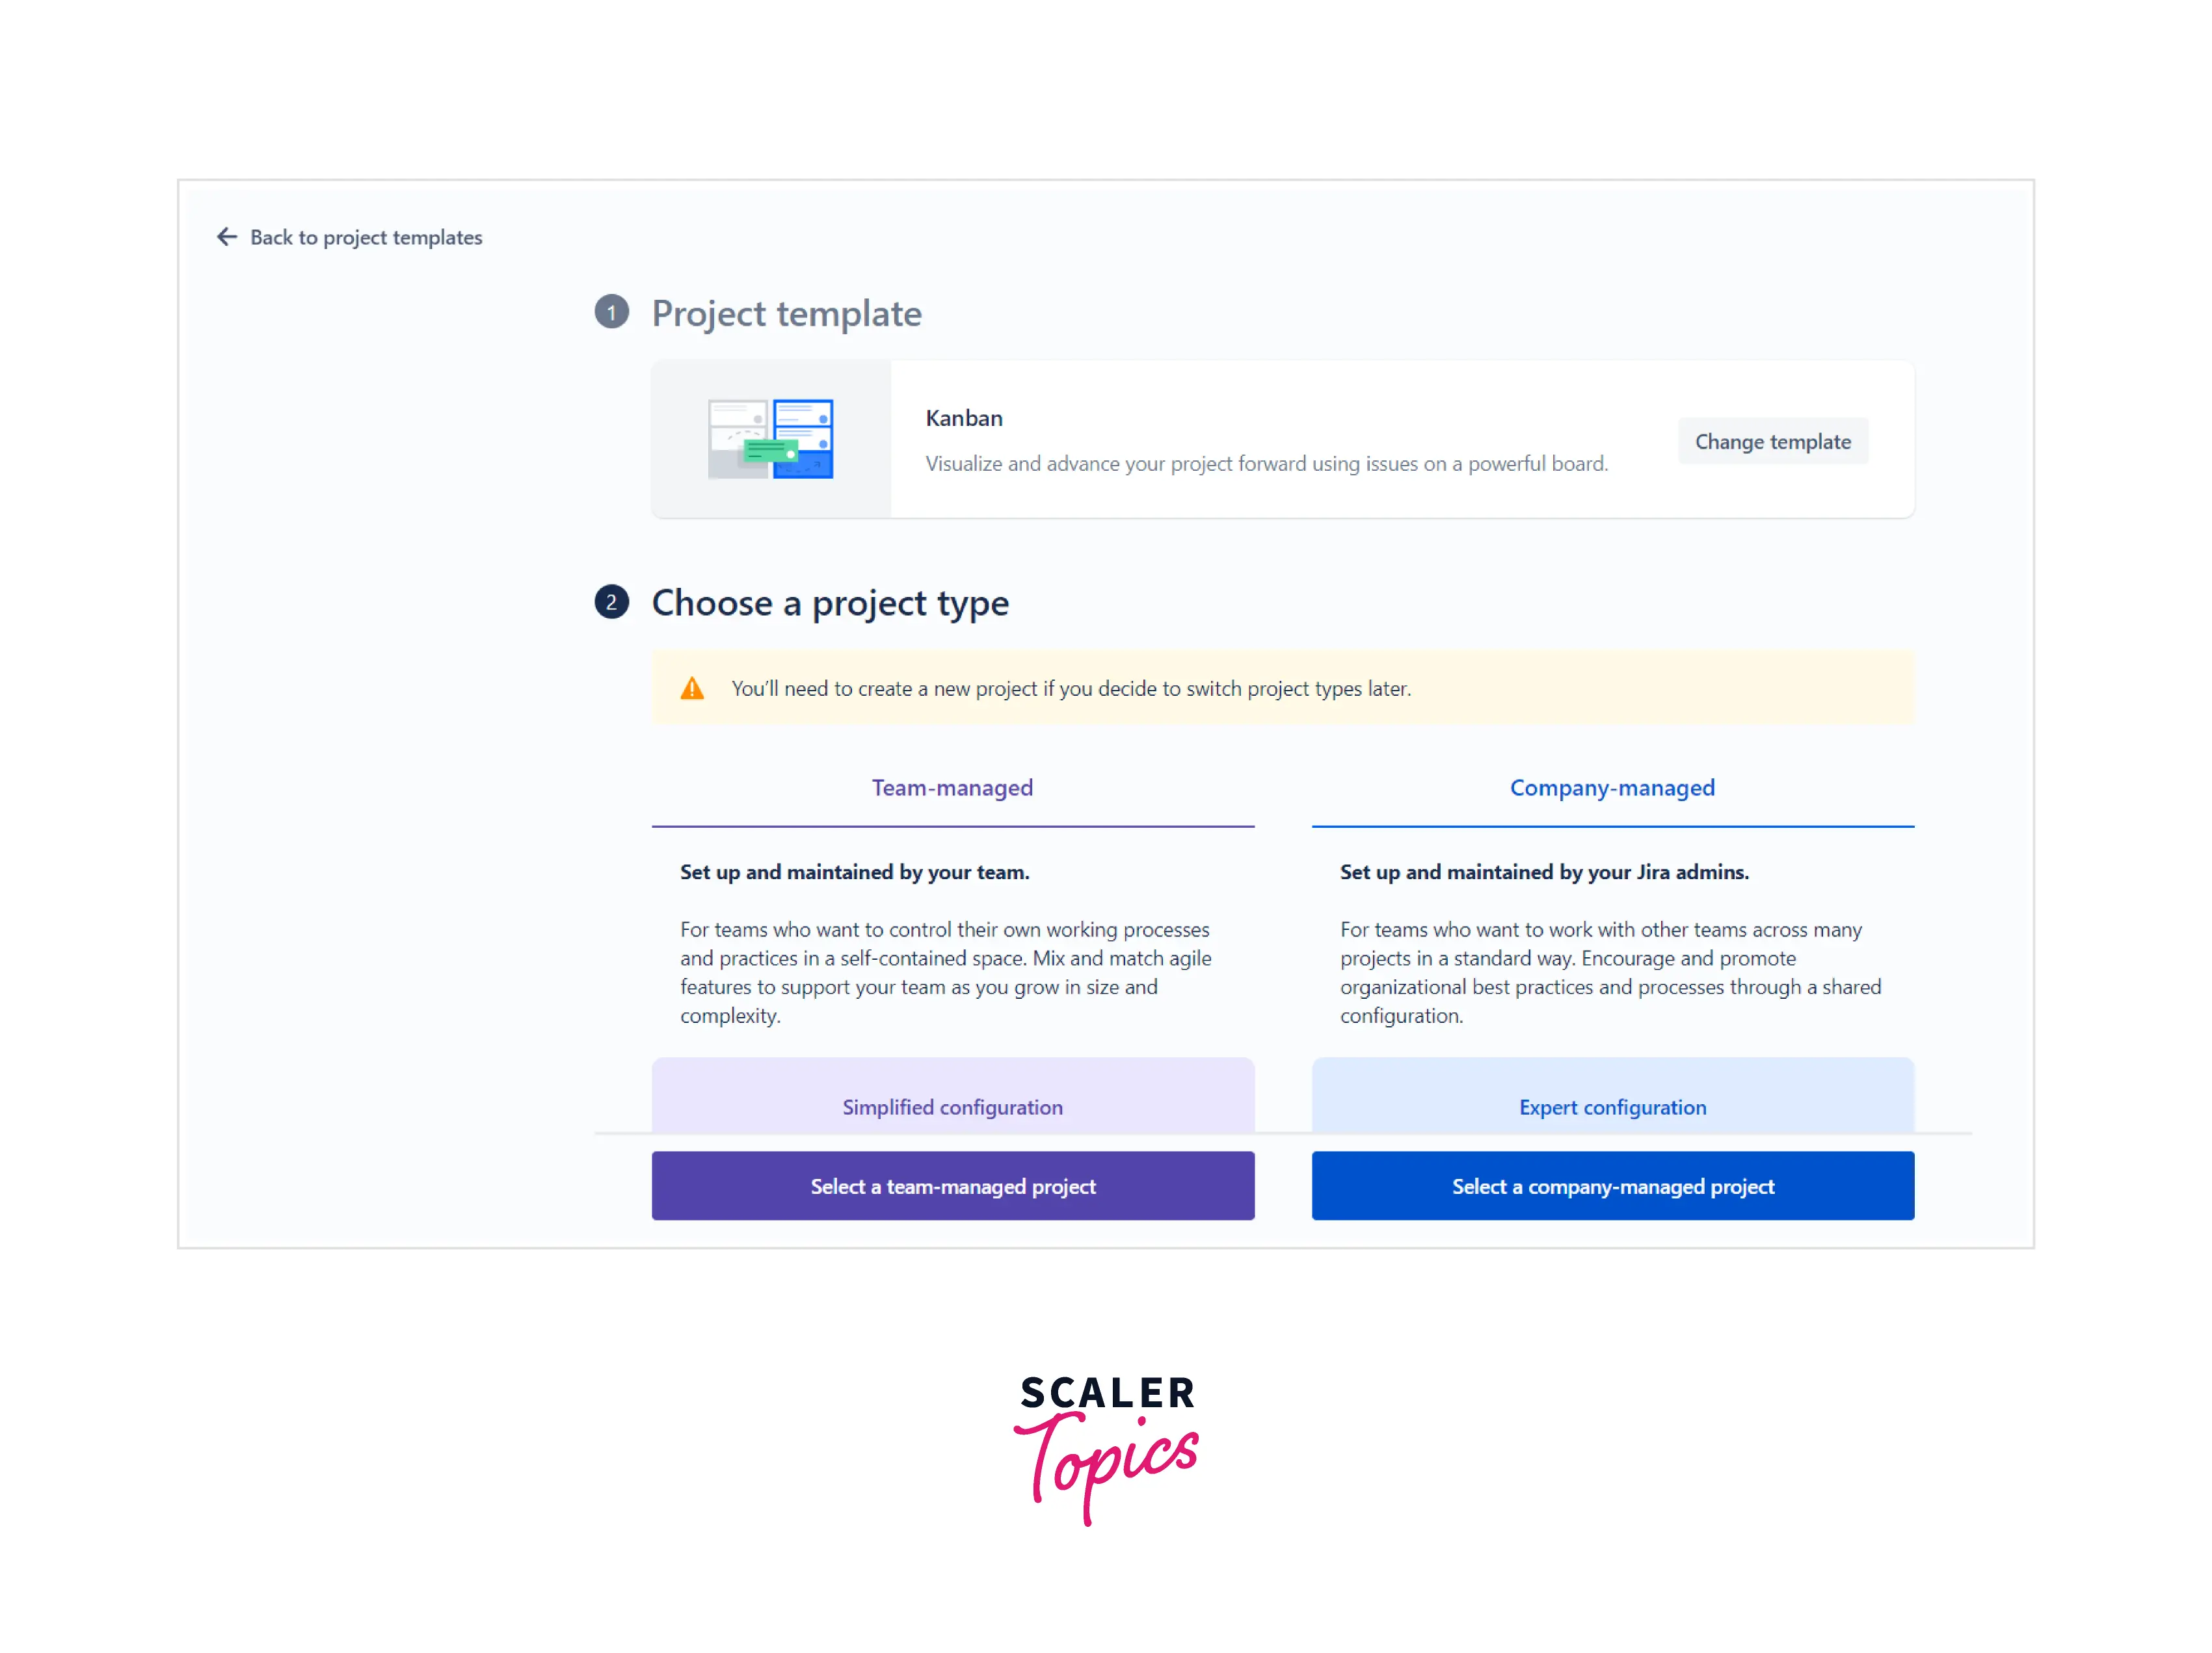
Step 5: Here, you can select the project type. The project is controlled by the team or by the organization. In this tutorial, we are using managed by the team.
Step 6: Enter the name of the project, and you are good to go. The project would be created in a few seconds.
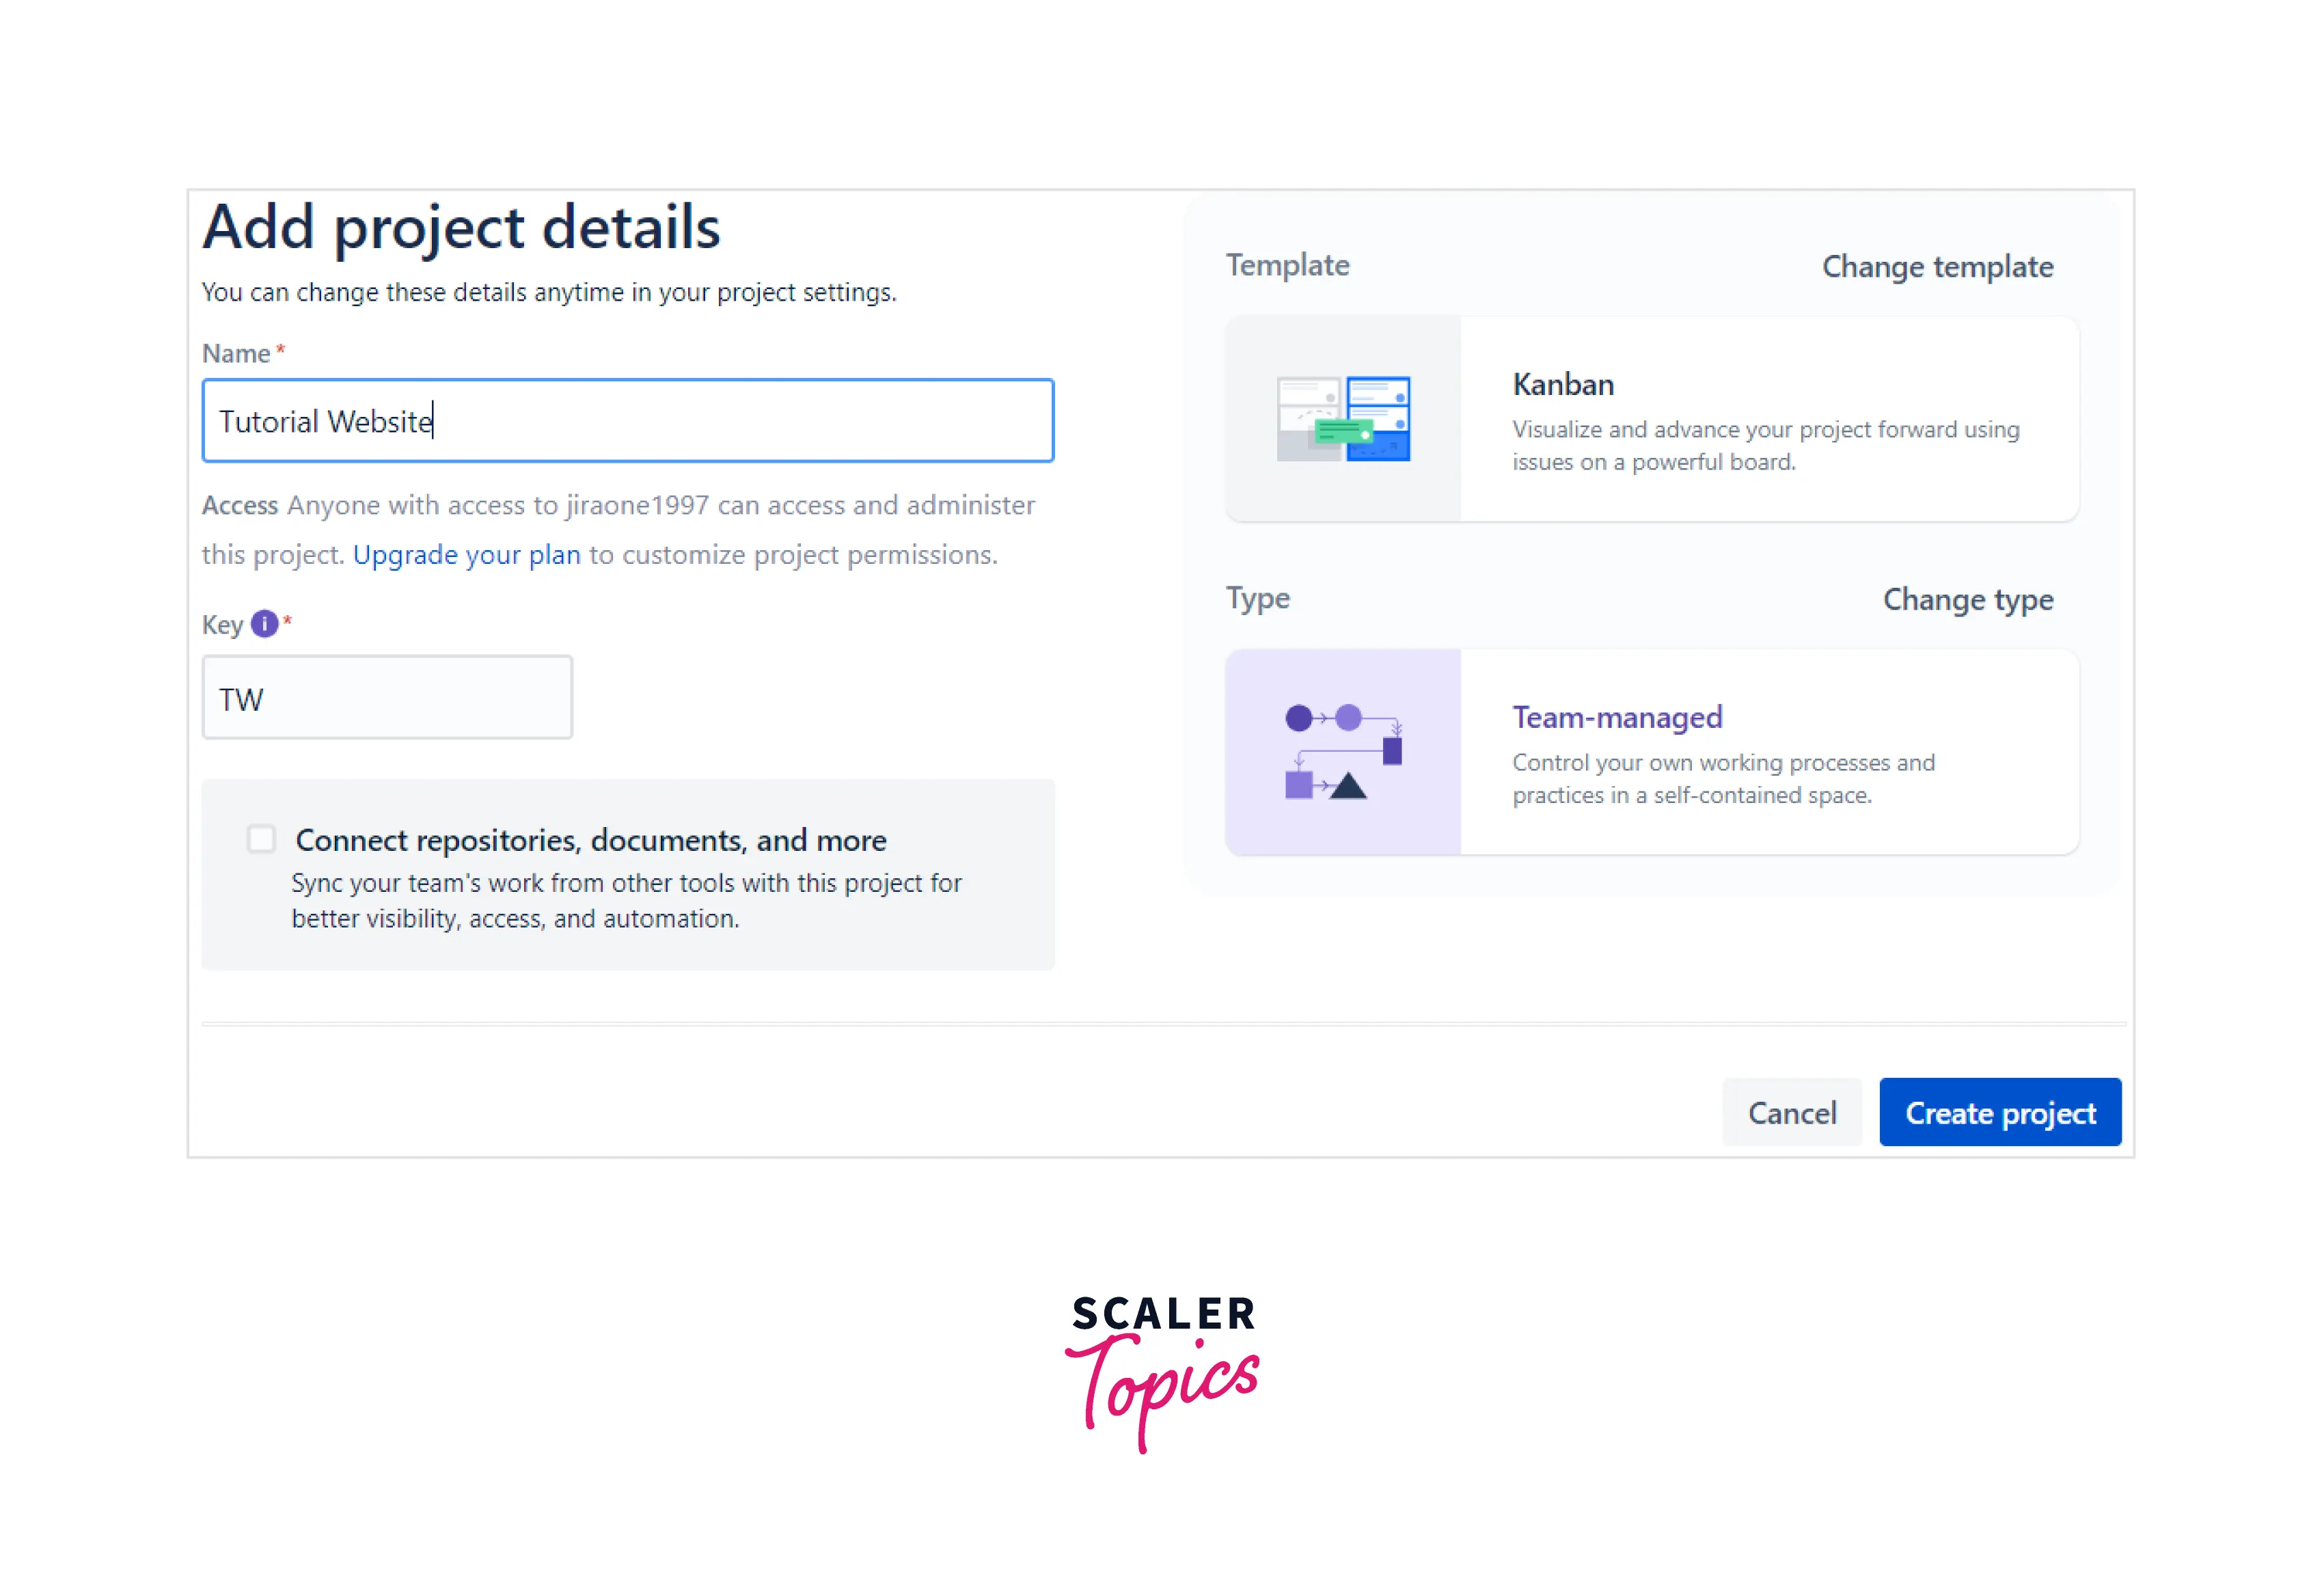
Step 7: Now your Kanban board is set up. Create and add issues. Configure them based on status, assignee, priority, WIP limit, etc., and your board will start looking more organized.
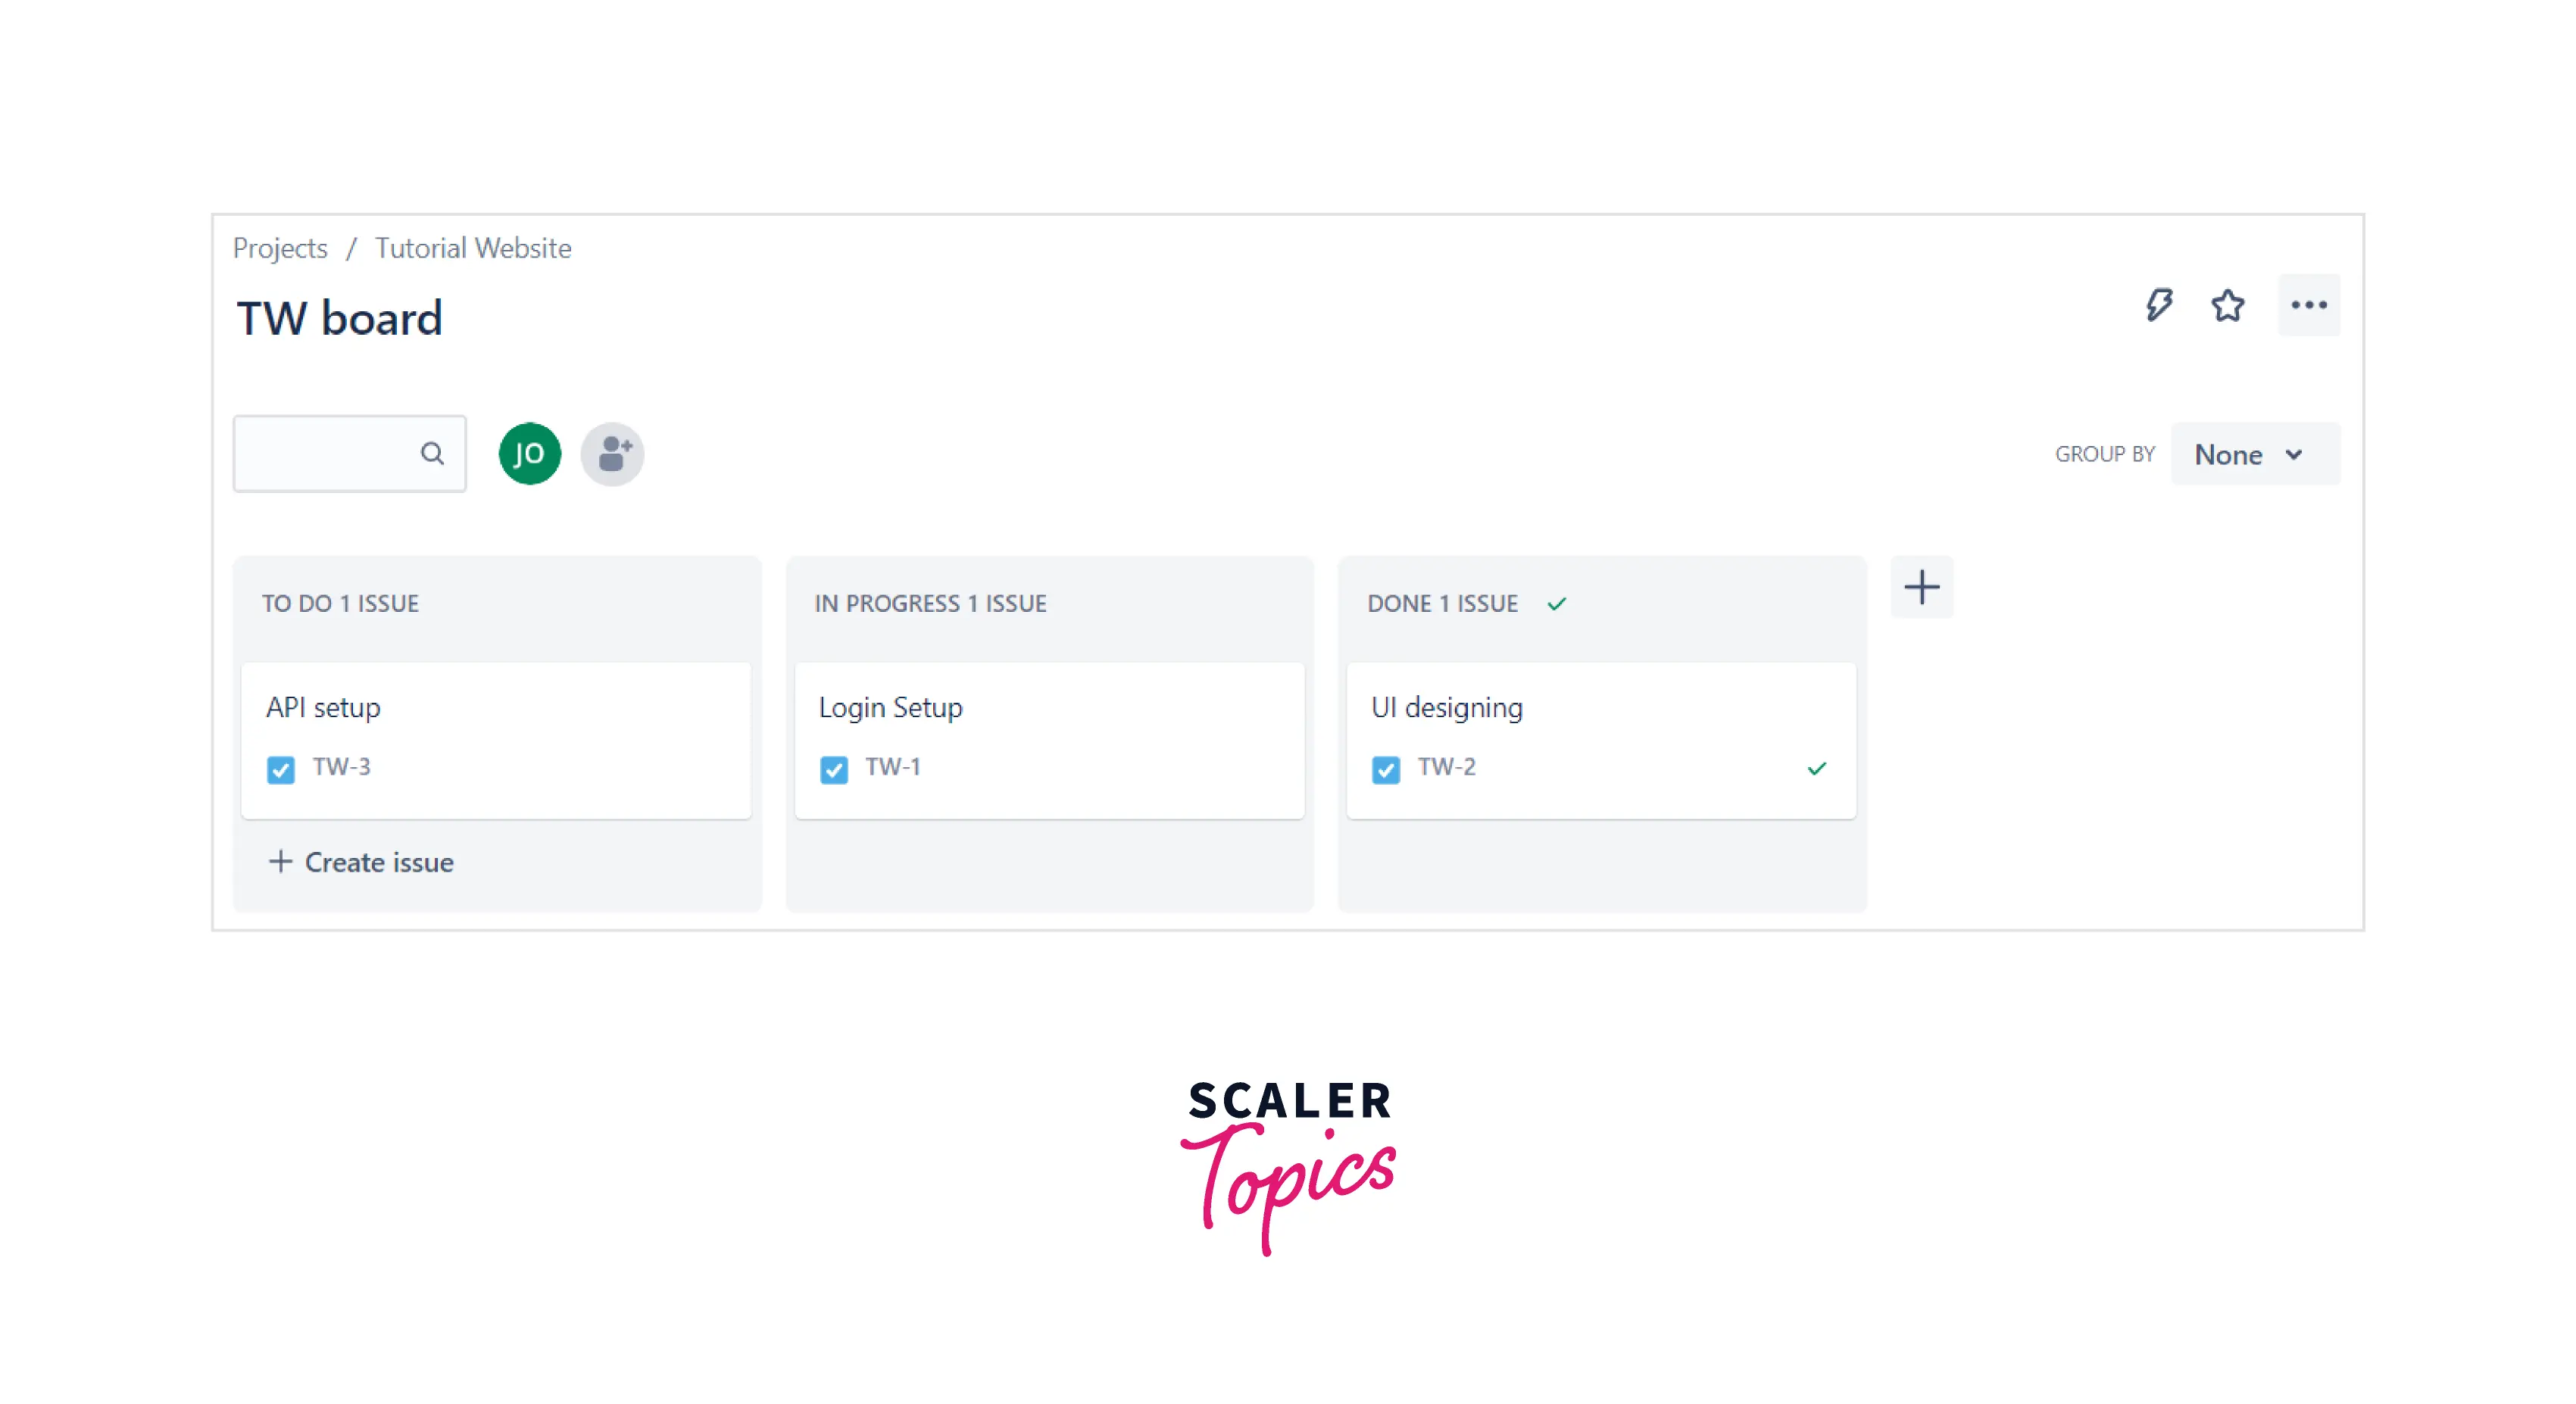
Configuring your Jira Kanban Board
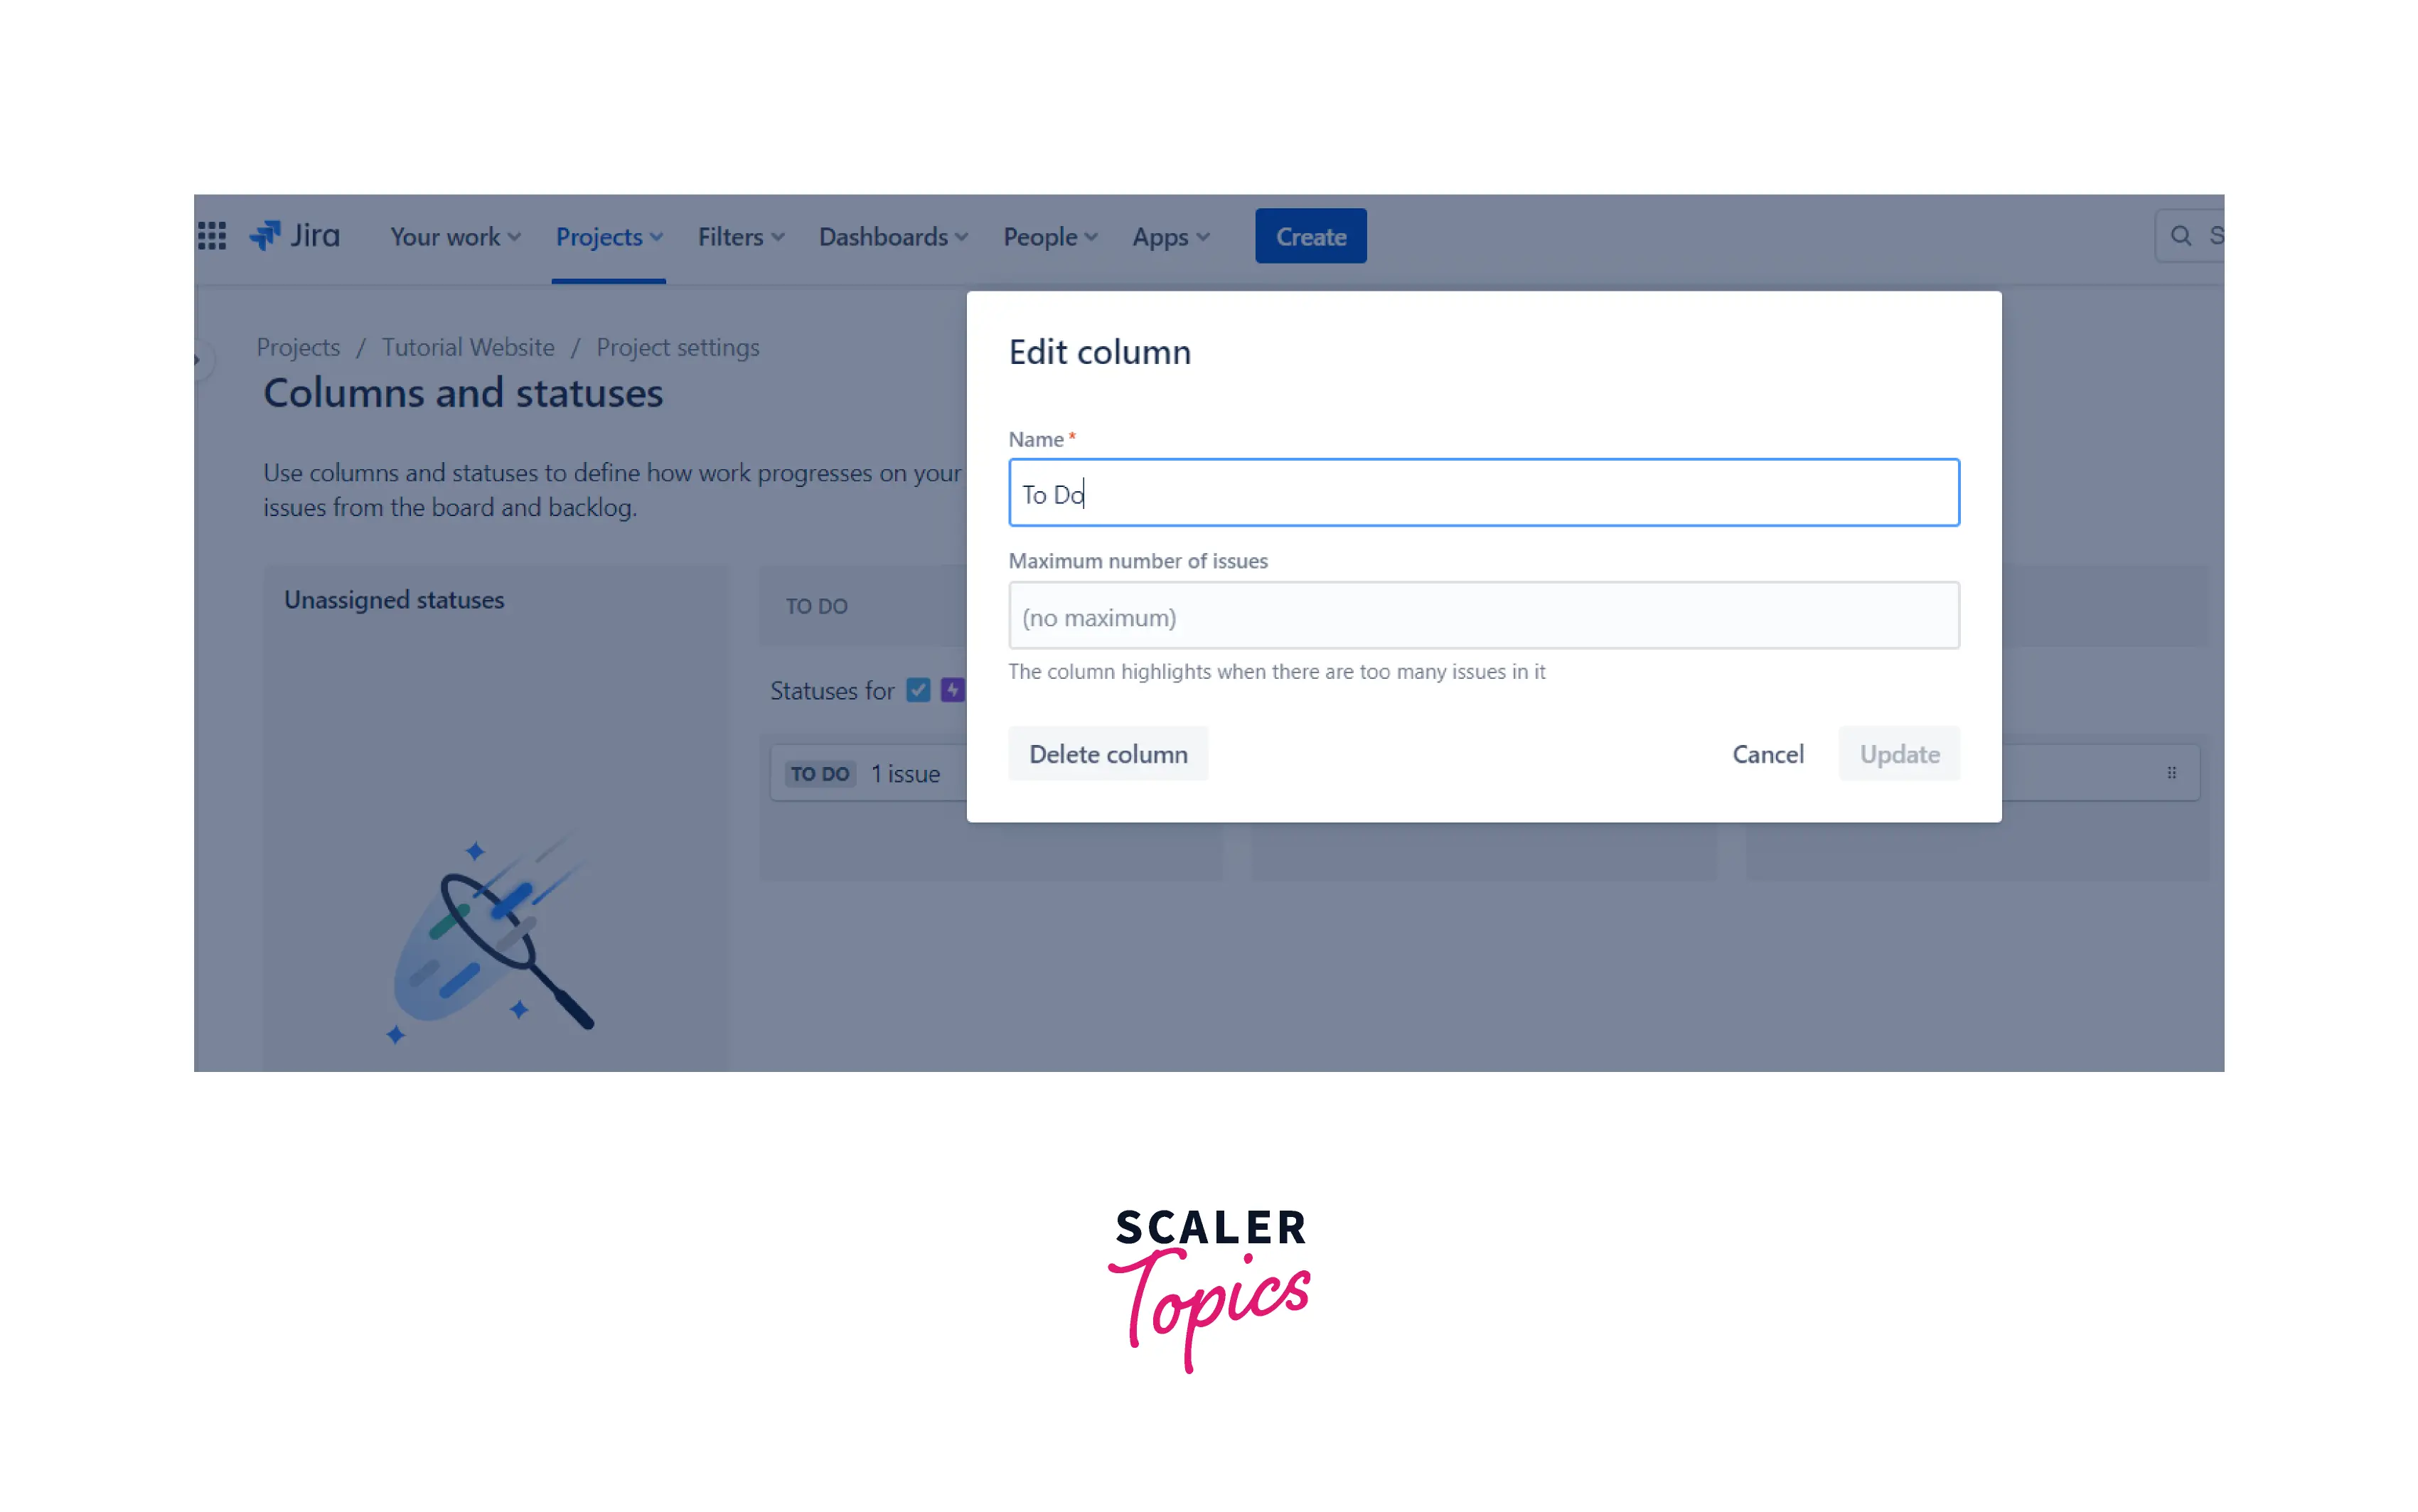 When you configure the board, you can edit columns, WIP limits in the column, and swimlanes. Using WIP limits, one can set the upper limit for each column, with includes both minimum and maximum tickets. Once the configuration is done, items can be added again to the backlogs. One can set the status in progress, to do, and done as shown.
Adding Jira Issues to Your Backlog
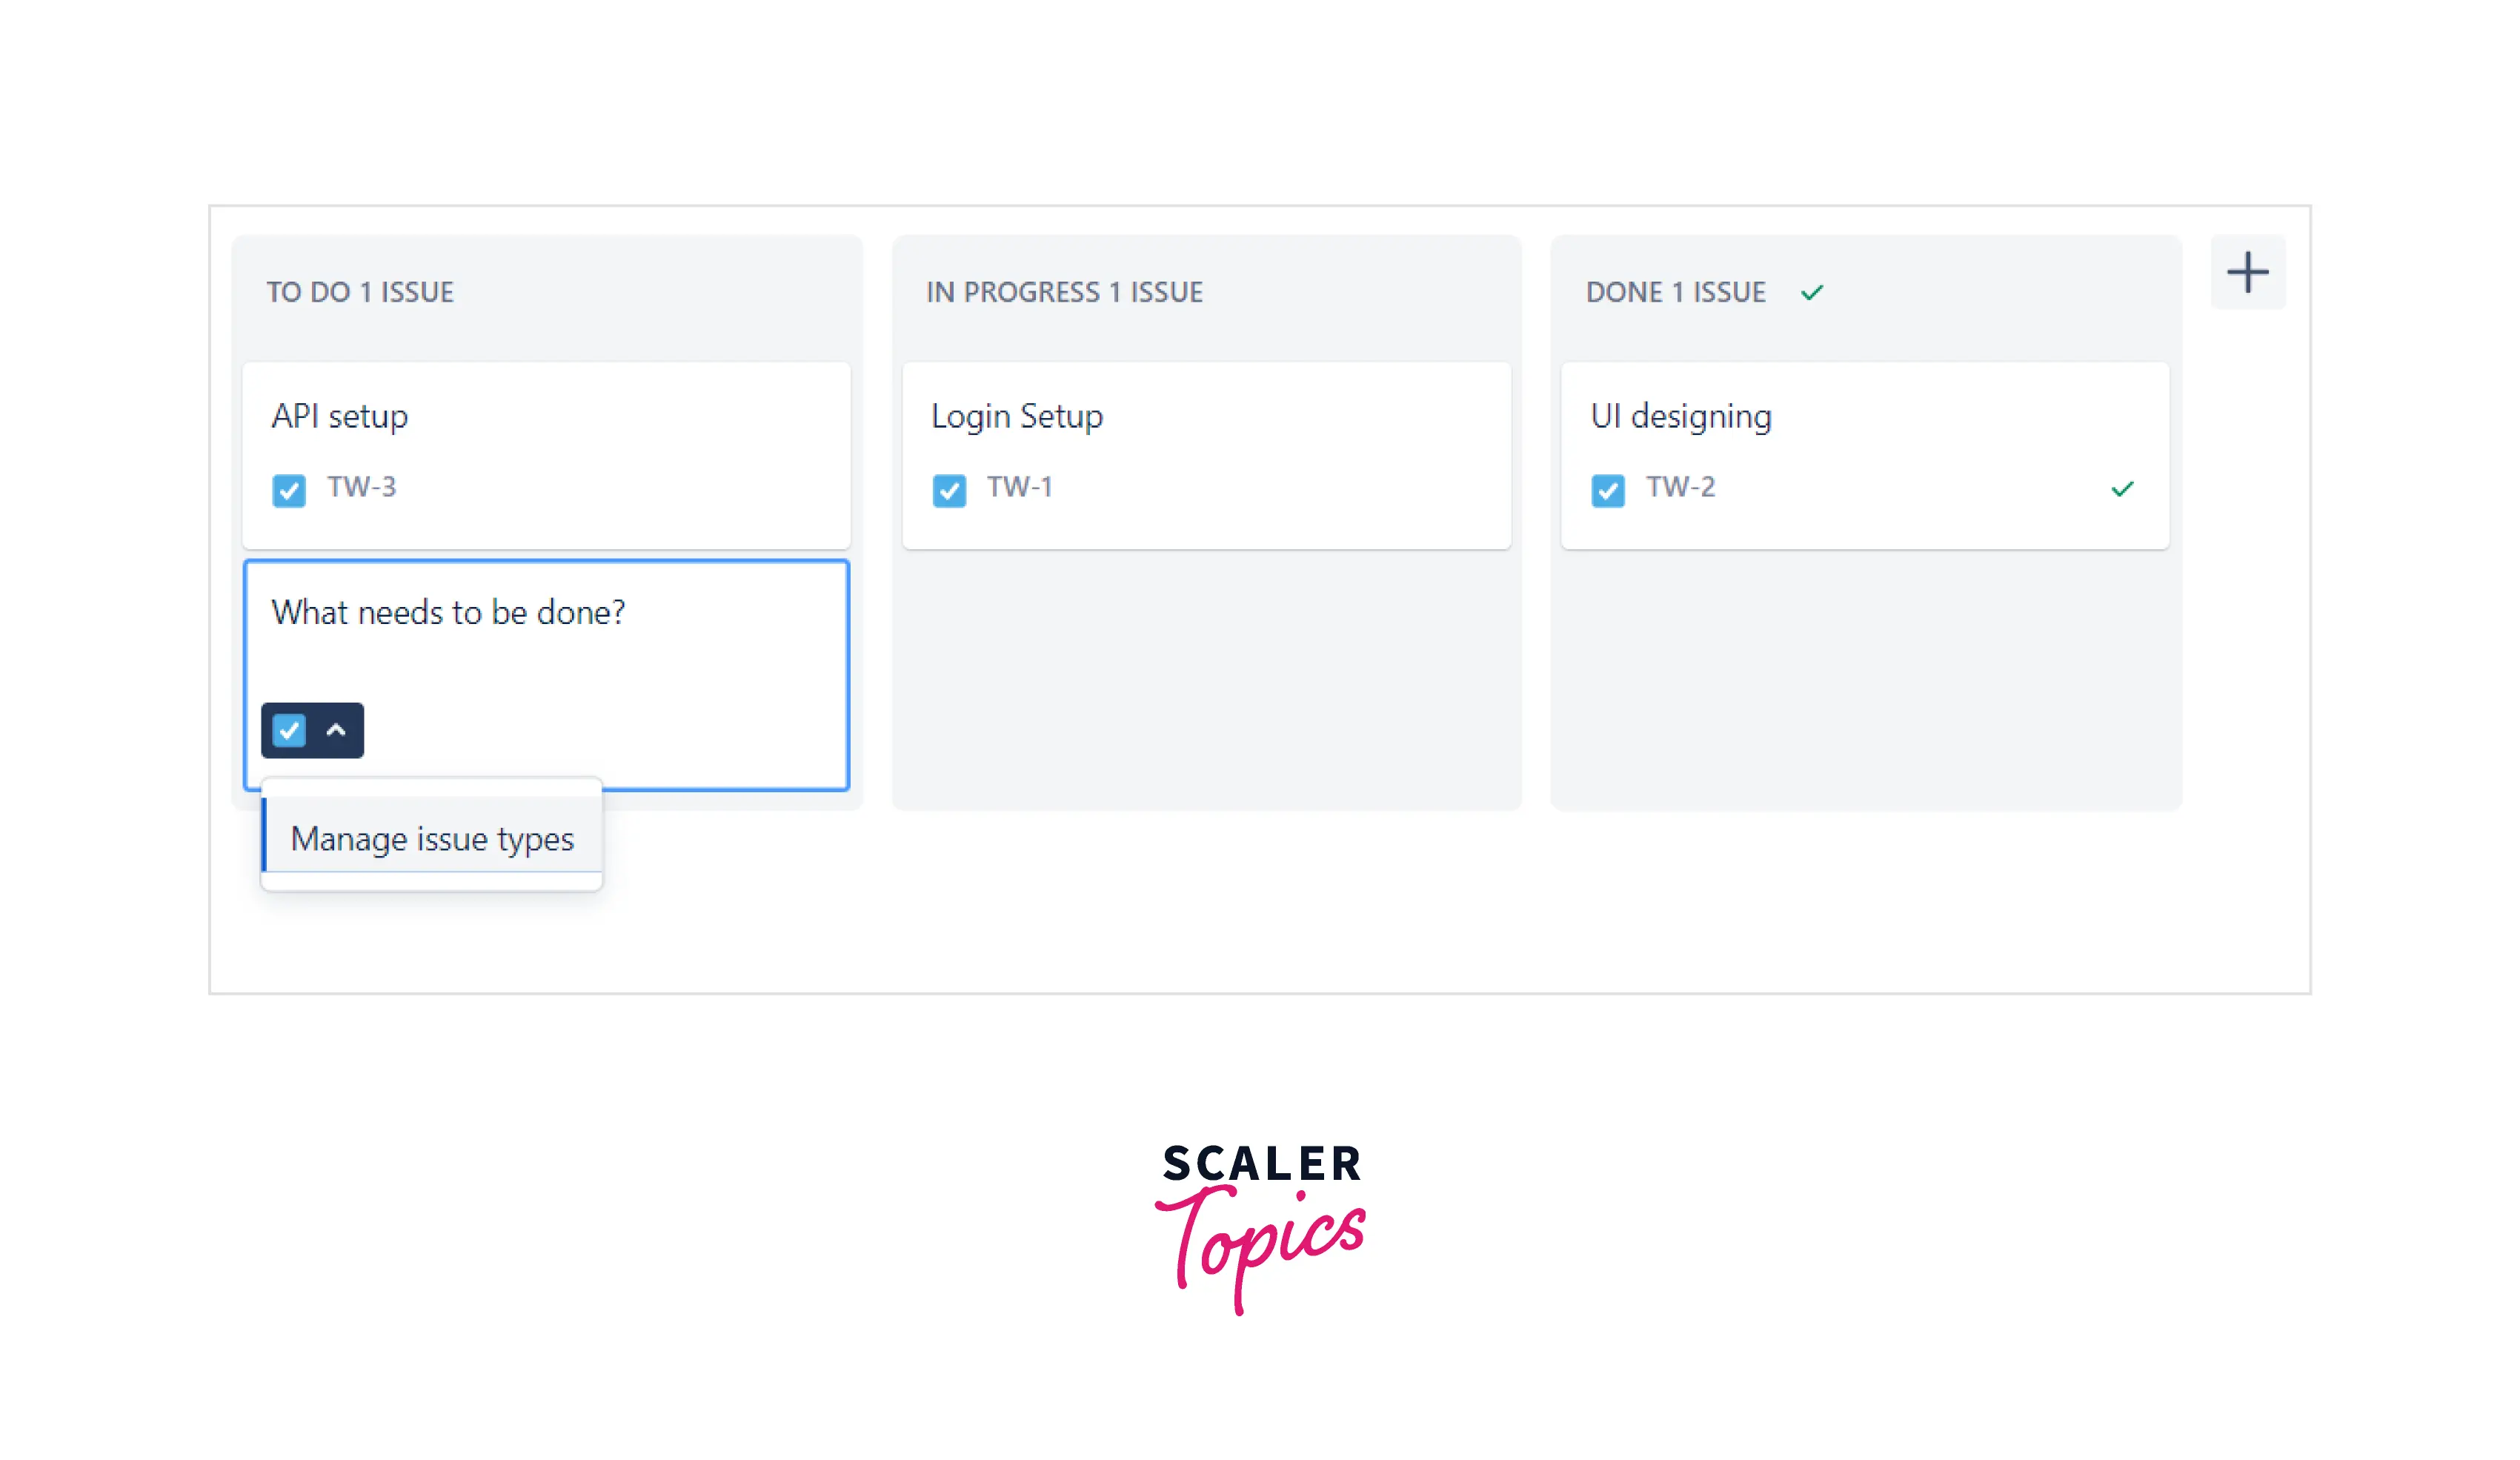
When creating an issue, one of the most crucial aspects is to carefully select the issue type, which is bug, story, task, etc. One can add a screenshot, long description, steps, and other parameters on the Jira issue.
Things to Consider When Creating a Jira Issue
- Description should always be written in steps than long paragraphs.
- Issue type, whether a bug, story, or task, should be chosen with clear intent.
- Assignee must be chosen so that who is responsible for the task remains transparent.
- Screenshots and files for reference must be attached for future clarity.
- Priority level must be assigned to know the urgency of the task.
Tracking Progress with Reports
Control charts for the cumulative result of the week's performance and reports can be generated to check the project's status. Control charts use the concept of cycle time, which shows how quickly the processes are moving in the kanban board. There is an agile team meeting every week where the work status is discussed, and these graphs come in handy during them.
Using the Advanced Settings
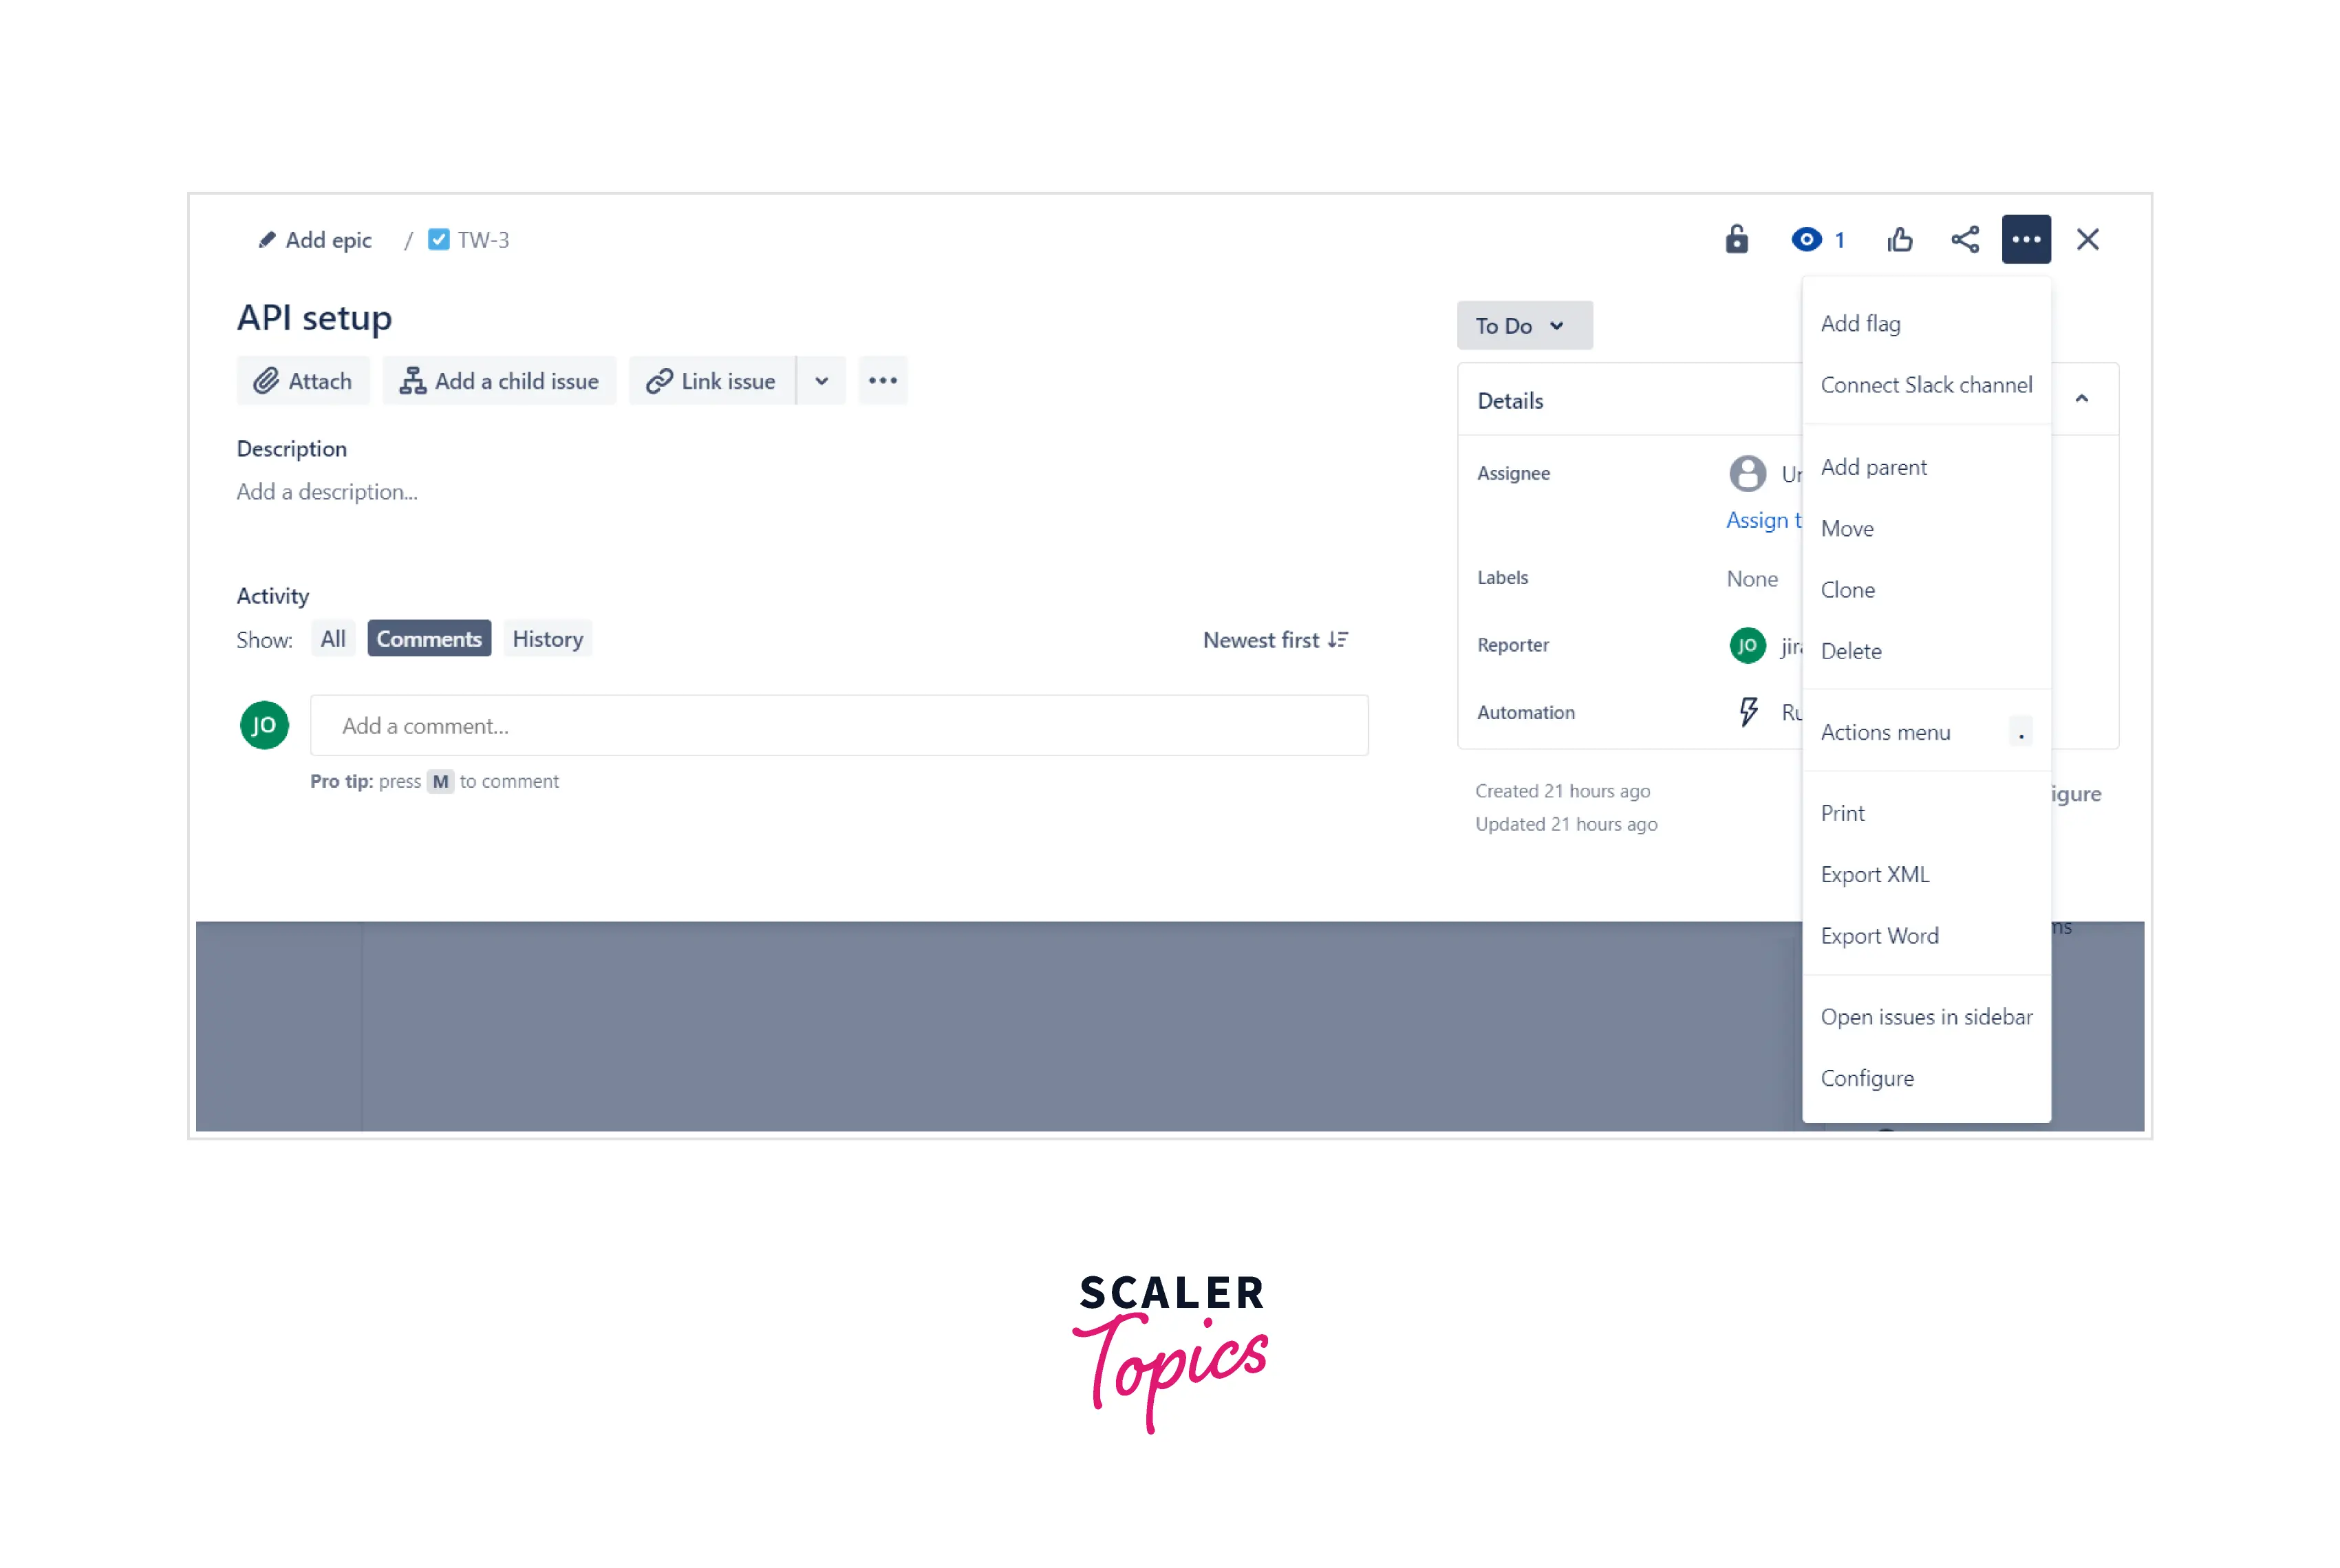
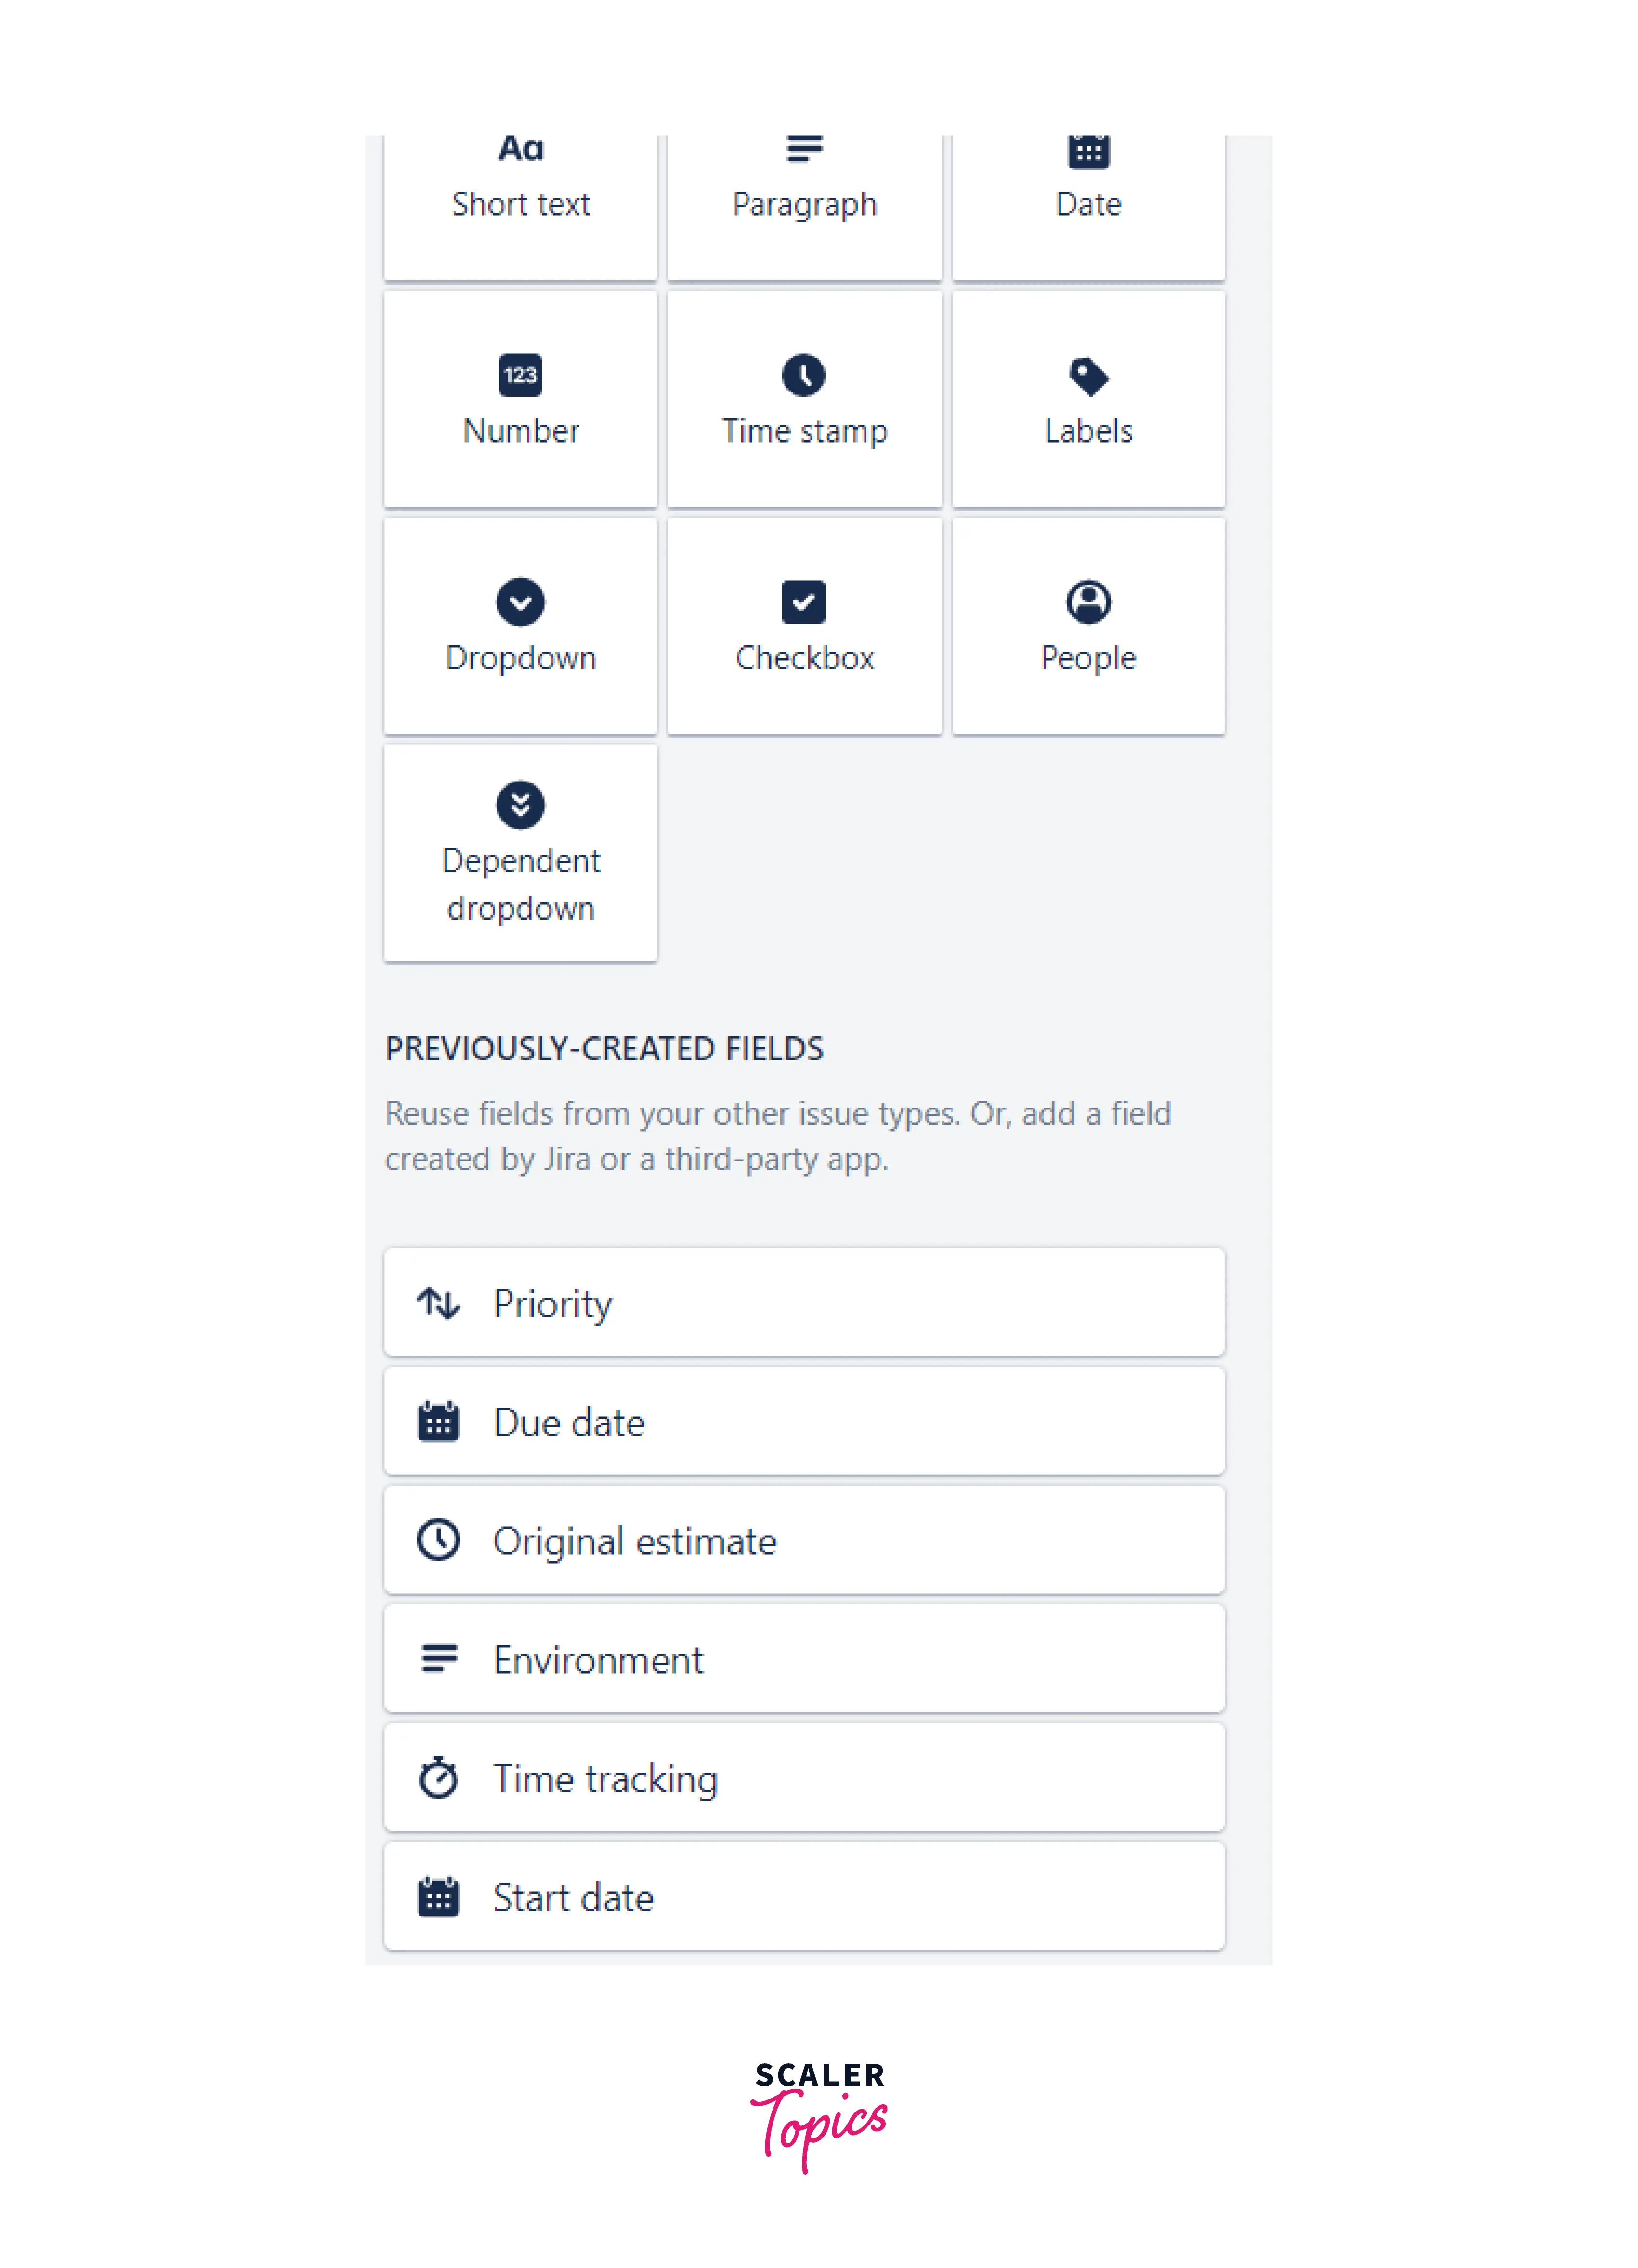
In advanced settings, you can set more to the issues. Add parent and child issues. Add screenshots, link issues together, and export the issues in XML, word format. One can create customized headings of different customizable types and attach a reporter, label, or assignee.
Create a Separate Backlog
The backlog column, by default, becomes long and cluttered. So, Kanban does provide a separate column to manage the backlog. A separate backlog space would get created using this. It appears in a separate tab as well. The product owner uses this feature to create their backlogs without affecting the entire team's task. Once the task is ready for the team, it can be moved to selected for development.
Add Atlassian Marketplace Apps to Jira
The beauty of Jira is that you can integrate other Atlassian apps into the project without disturbing the workflow. Slack, git, bitbucket, and GitLab all these apps can be integrated into the ongoing project. Stories and bugs become committed. All these have been integrated into the Jira workflow.
Conclusion
- Kanban board in Jira is quick to set up, doesn't require much planning, and does have loads of functionalities similar to Scrum.
- Columns, WIP limits, and Commitment Points are some crucial elements Kanban provides.
- There are two types of Kanban boards,physical boards and digital boards.
- WIP limits on a column helps to reduce overburden and identify the bottlenecks.
