Wikis and Watchlists in JIRA
Overview
JIRA Wikis are collaborative spaces for creating and sharing project information, enabling rich text editing, attachments, version history, and permissions. They act as a database. JIRA Watchlists allow users to track specific issues, projects, or wiki pages and receive notifications of updates. They offer customizable notification settings and facilitate joint monitoring. Together, these features improve collaboration, knowledge sharing, and communication within Jira projects. Wikis and watchlists improve collaboration, information sharing and communication within teams, promoting transparency and effective project management.
Introduction
Wikis and watchlists are two key Jira features that improve collaboration, knowledge sharing, and communication within projects. Wiki functionality provides a centralized platform for creating and sharing project documentation, and watchlists allow users to stay up-to-date and participate in specific topics of interest. Together, these features promote effective teamwork, facilitate information sharing, and keep your team abreast of project updates and discussions. This overview provides an overview of Jira's wikis and watchlists and their importance in supporting project management and collaboration.
Create or Edit a Wiki Page
To create or edit a wiki page in Jira, do the following:
- Sign in to your Jira account and navigate to the project where you want to create or edit a wiki page.
- In the project sidebar, find and click the Wiki or Documentation option. Note that the exact name and location may vary depending on your Jira configuration and setup.
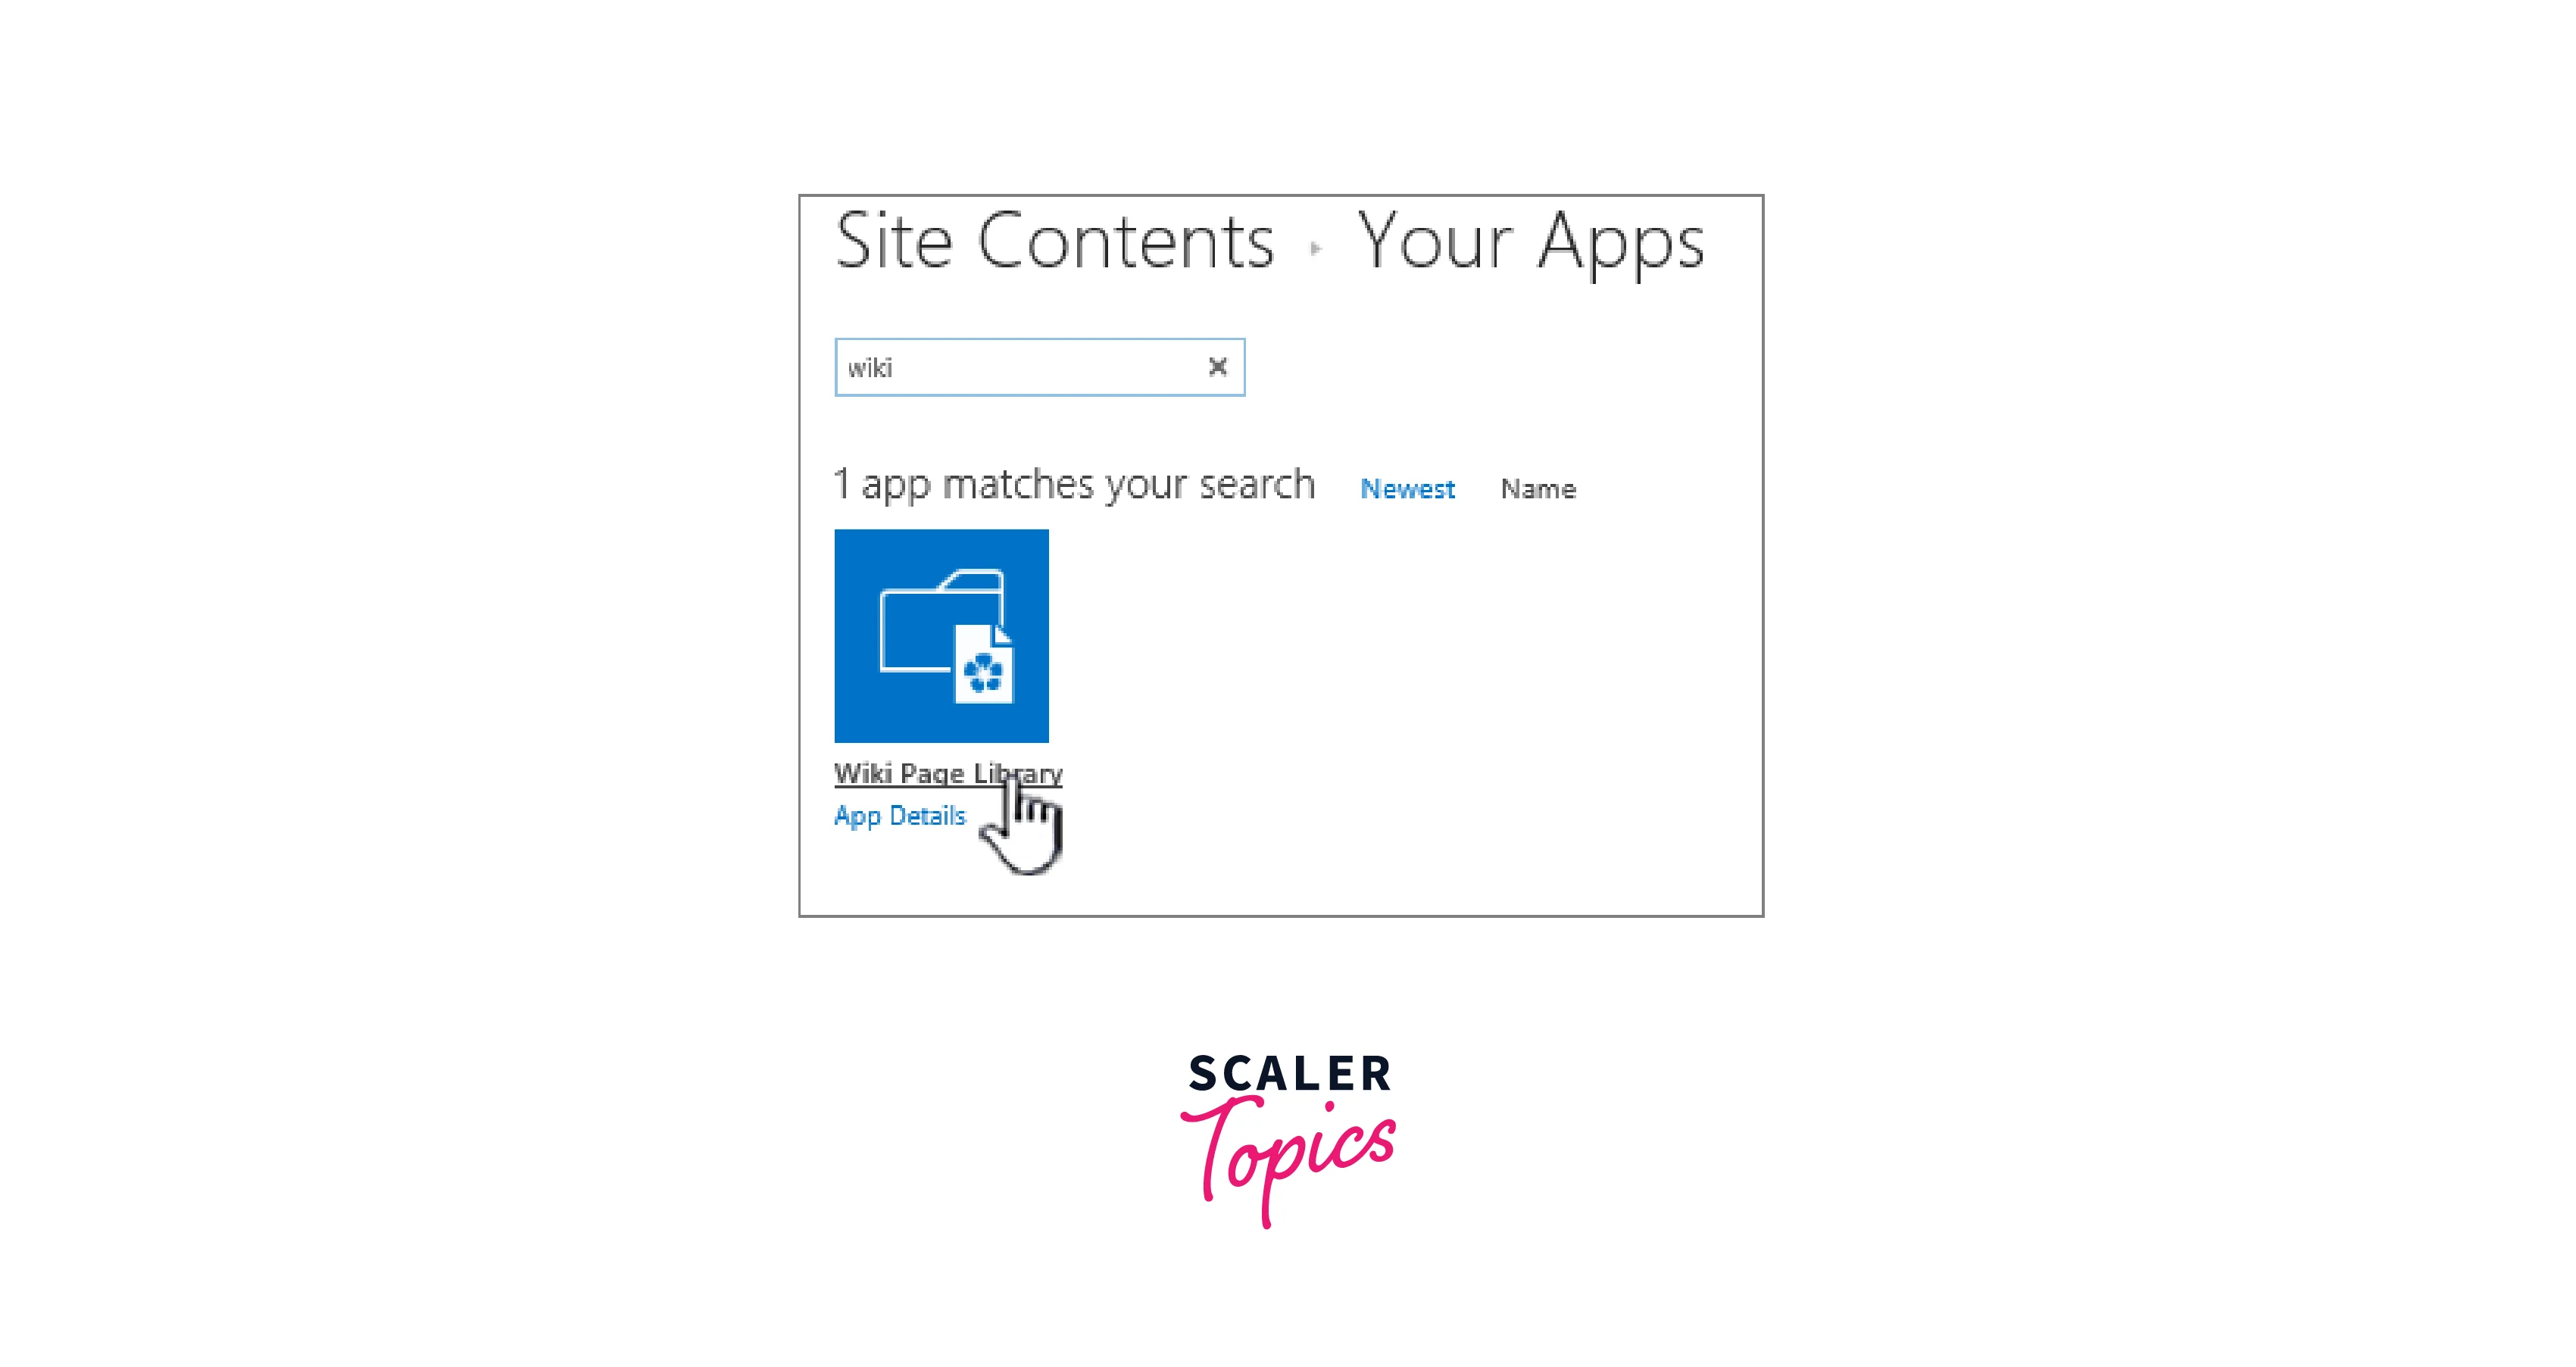
- When creating a new wiki page, look for the option to 'create' or 'add' a new page. Click it to start creating a new page. If you are editing an existing page, find the page you want to edit and click the Edit or Edit Page option.
- The wiki editor presents a text area where you can enter and format the content of your page. The editor may offer options for basic text formatting. Headings, lists, bold, italics, links. See the editor toolbar or documentation for specific formatting options and syntax.
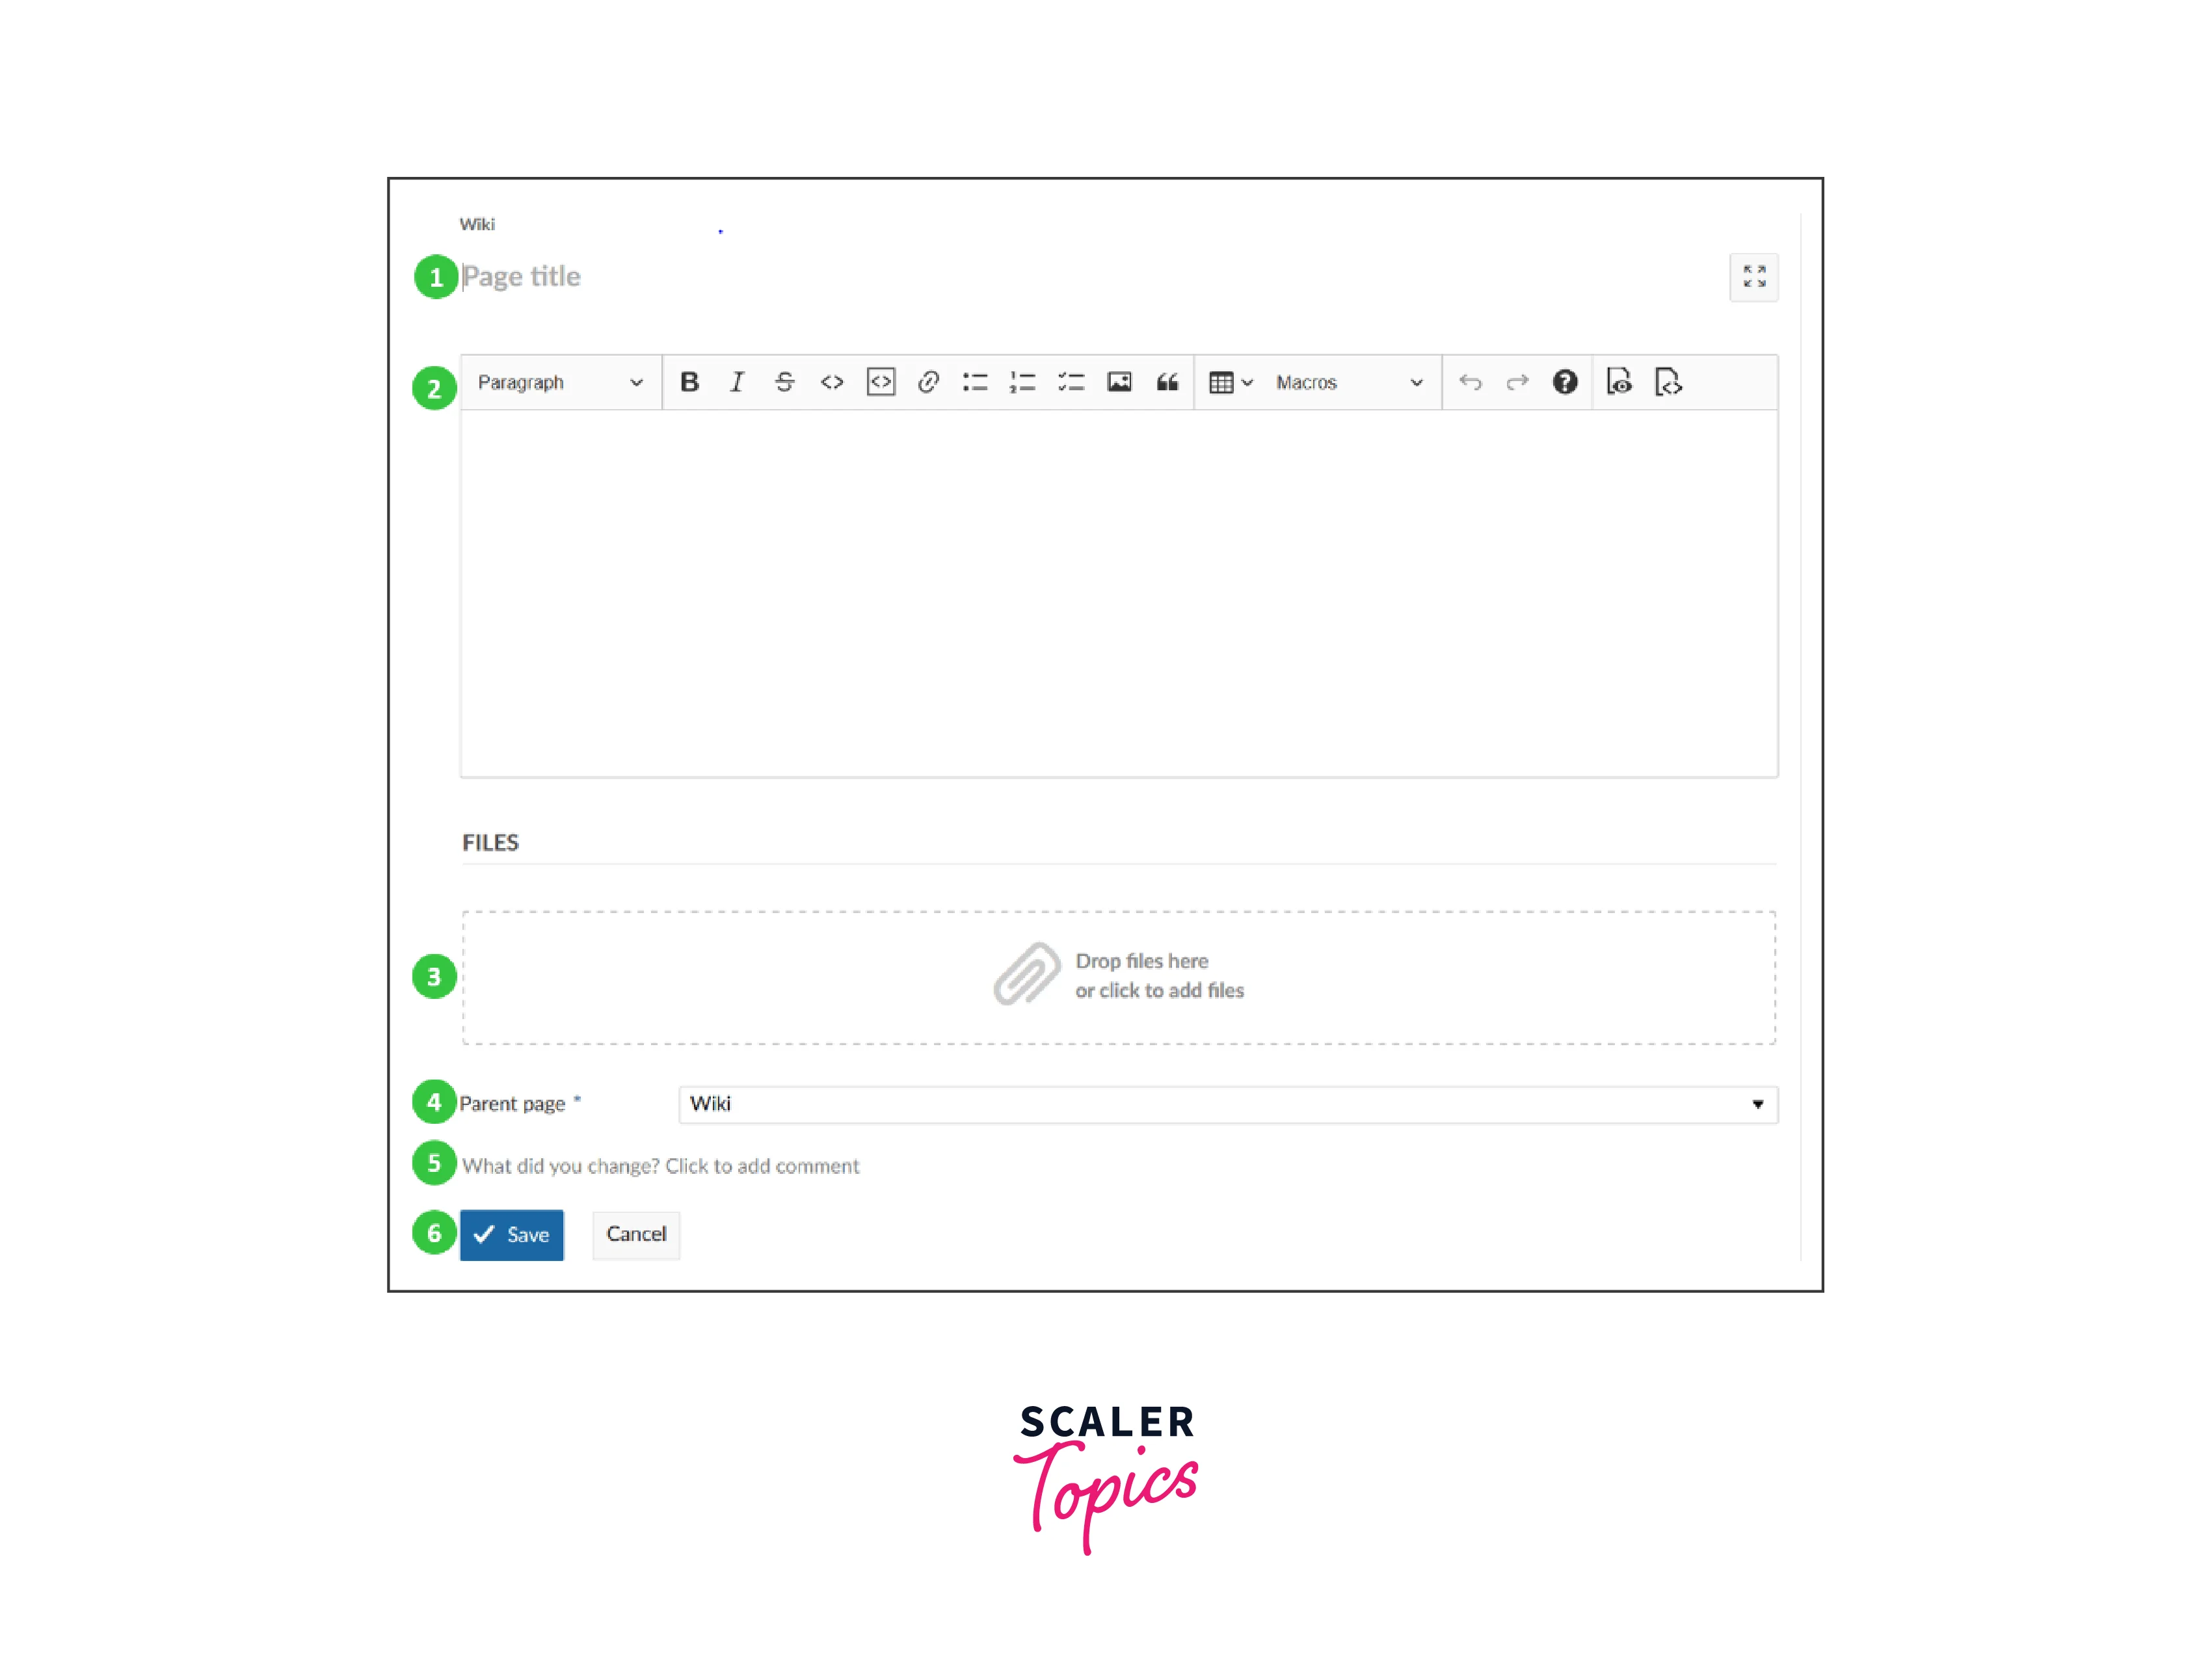
- Create or modify the content of the wiki page as needed. You can add text, images, tables, code snippets, and other relevant information to your page.
- Optionally, use the editor's preview feature to see how the page will look after it's published.
- Once you are happy with the content and formatting, save your changes or create a new page. In the editor interface, look for a Save, Publish, or Submit button and click it to save your changes.
- The wiki page will be created or updated for other team members in your Jira project to view and collaborate on.
Always follow the guidelines and conventions established by your team or organization when creating or editing wiki pages in Jira. This helps ensure consistency and usability across project documentation.
, For example,, software projects use Wikis to document user stories and technical information, while marketing campaigns use them for content calendars and branding guidelines. JIRA watchlists allow the team to track critical issues, competing strategies, customer feedback, or related releases. By using wikis and watchlists, project teams can improve collaboration, improve information, and stay informed in real time, leading to better project outcomes.
Make a Wiki Private or Public
If you want to make a wiki page private or public in Jira, you can change the page's permission settings. This can be done as follows.
- Log in to your Jira account and navigate to the project that contains the wiki page, which you can make private or public.
- Find the wiki page you want to edit and access its settings or features. This can usually be done by clicking on the page title or the ellipsis menu (...) next to the page.
- Look for an option related to access rights or access control in the settings or features menu. The exact name and location may vary depending on your Jira configuration and version.
- Go to the access settings of the wiki page. Depending on your Jira settings, you may see options like "Permissions", "Restrictions" or "Access Control".
- Check the page's current access settings. By default, Jira can have a set of default permissions that determine who can view or edit a wiki page.
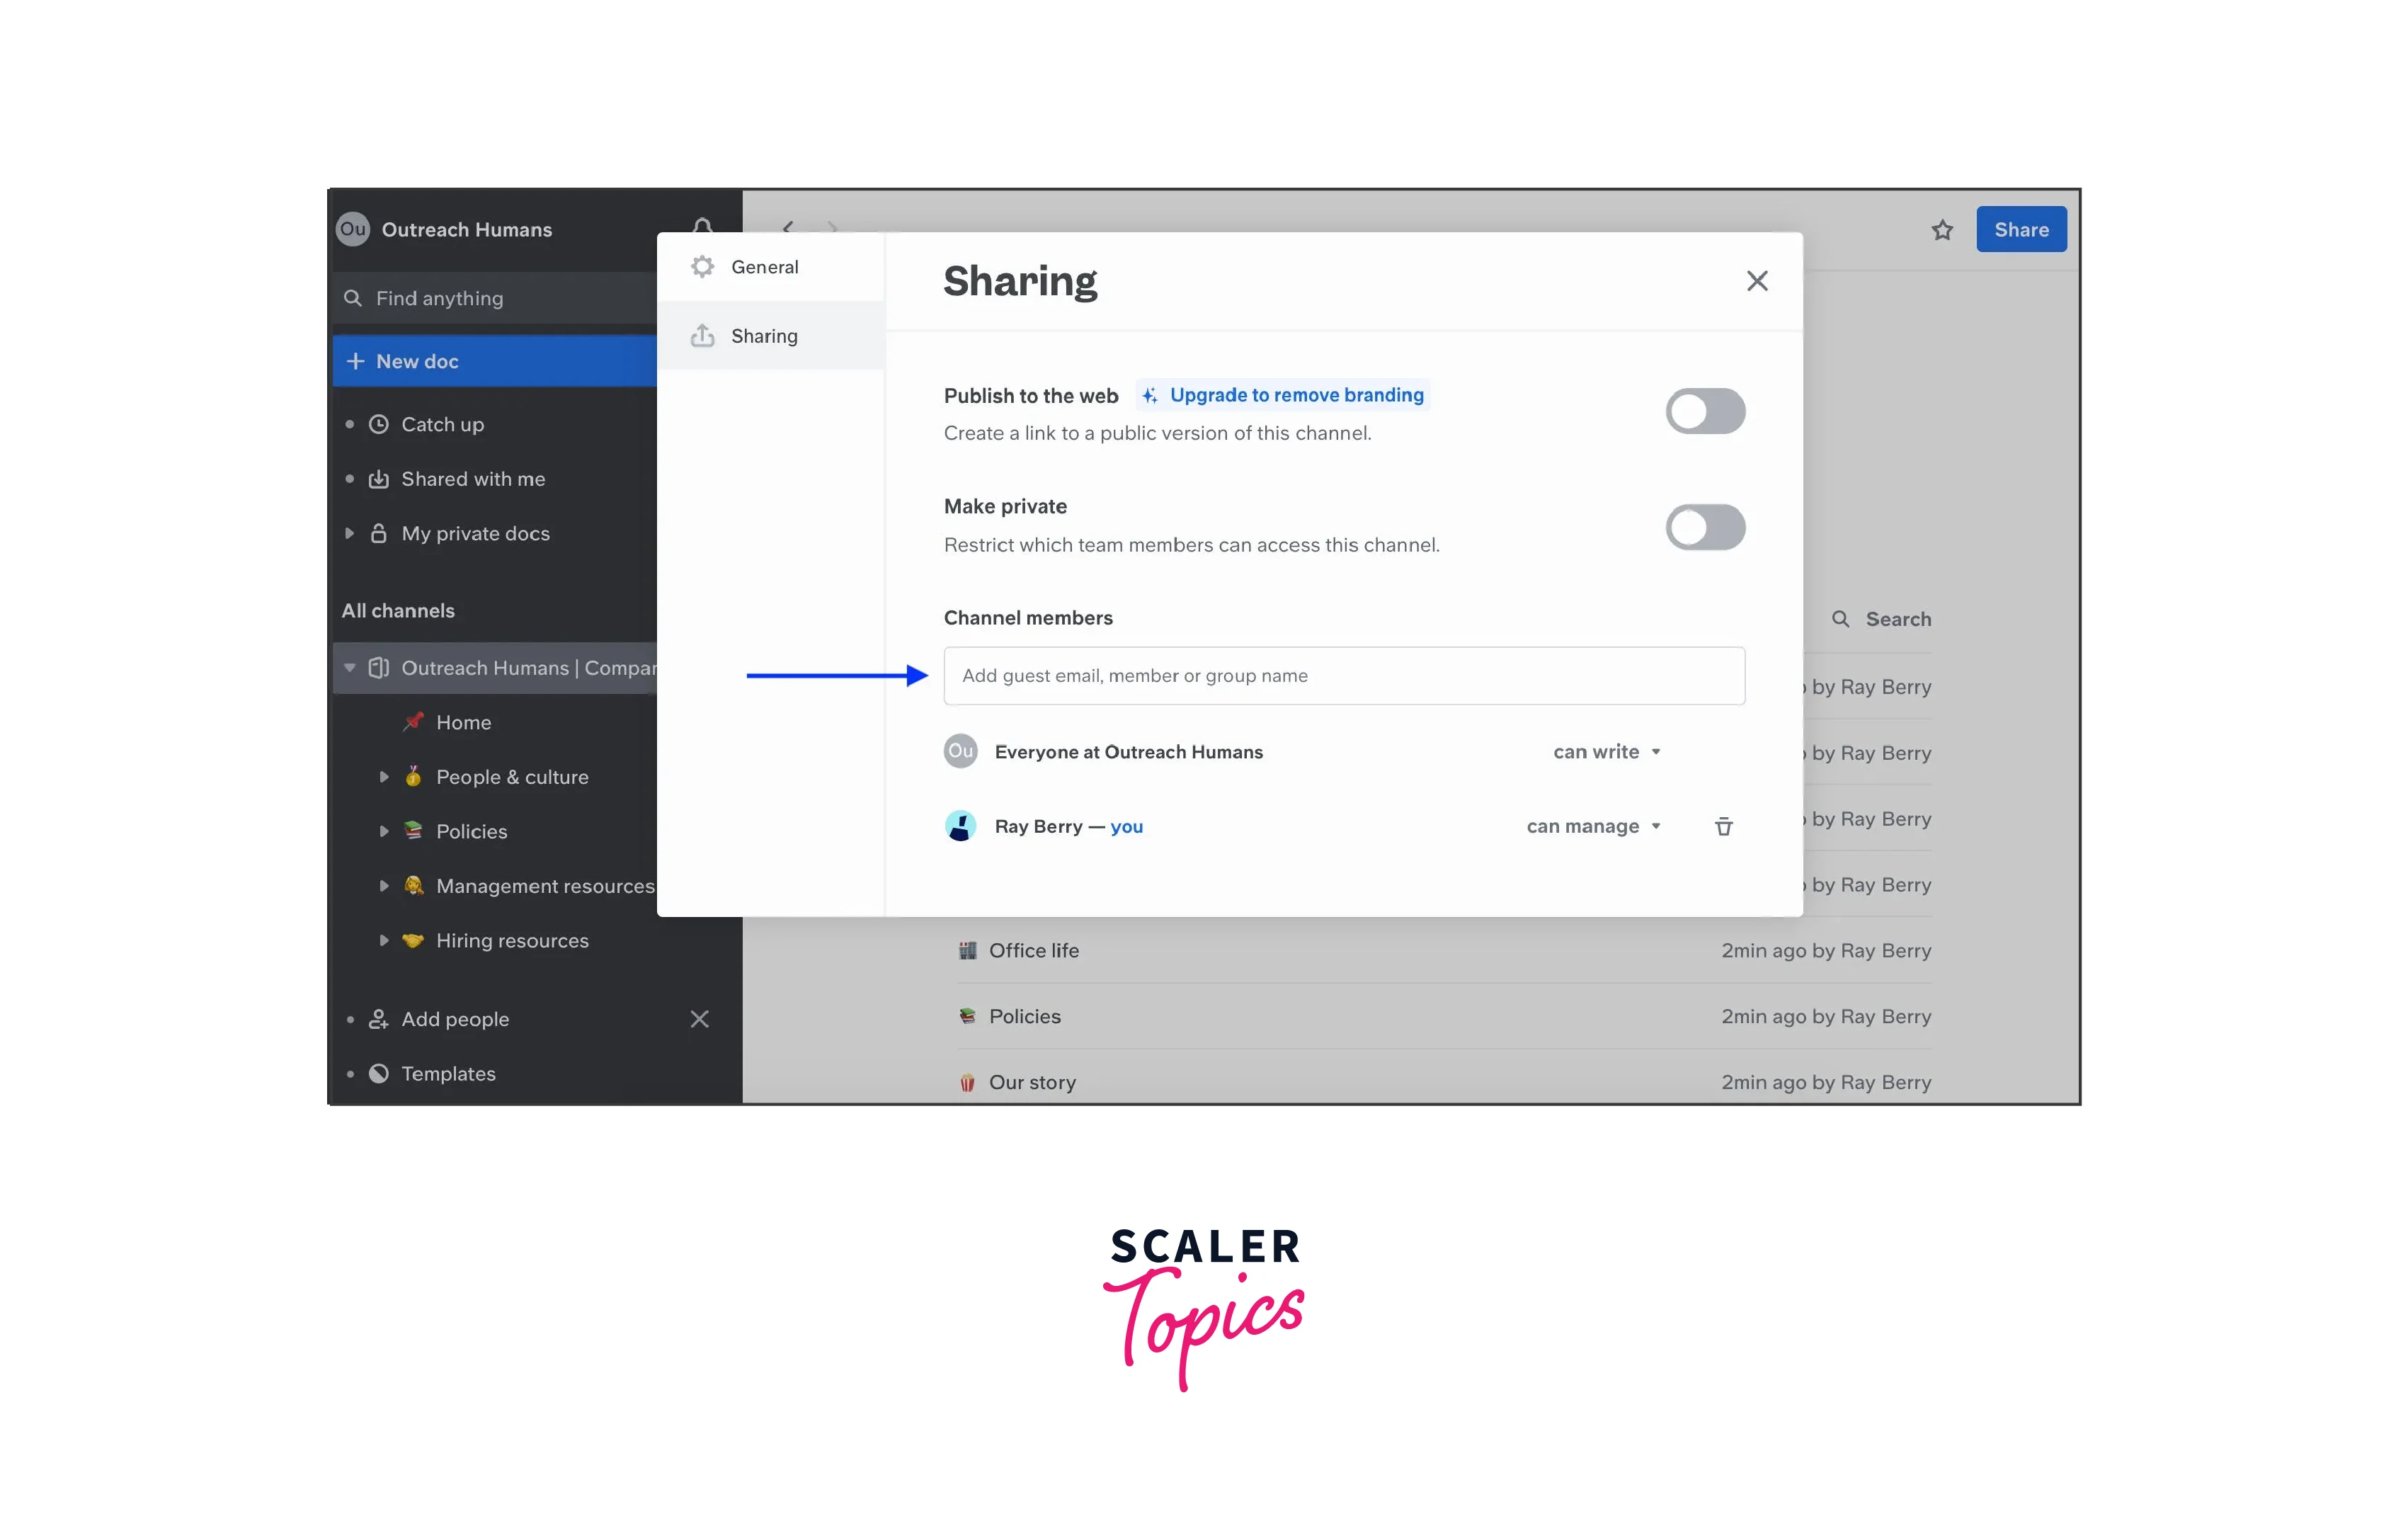
- If you want to make the wiki page private, change the permissions to restrict access. You can remove or restrict access rights for certain user groups or individual users. Make sure that only authorized people or groups can access the page.
- If you want to publicise the wiki page, adjust the permissions to allow wider access. You can grant access rights to other user groups or allow public access to the page. Be careful when you publish a page and make sure it does not contain sensitive or confidential information.
- Save changes to access settings.
Note that the exact steps and options may vary depending on your Jira version, configuration, and permissions. You must have the appropriate administrative privileges, and for specific instructions on your Jira instance, consult your Jira administrator or system documentation.
Watchlist in Jira
The Jira Watchlist is a feature that allows users to track and stay updated on specific Jira issues, projects, or wiki pages. When you add items to your watchlist, users will receive notifications of any updates, changes, or discussions related to them. Alerts help users stay up-to-date on Jira progress and events.
Here's how the Watchlist feature works in Jira:
- Adding Items to a Watchlist: Users can add questions, projects, or wiki pages to their watchlist by clicking "View" or "Add to Watchlist". This feature shows their interest in receiving notifications about updates related to their items.
- Notifications and Updates: Once an item is added to the watchlist, users will be notified of any changes, updates, or discussions related to those items. Notifications may be delivered via email, in-app notifications, or both, depending on the user's notification settings.
- Set Notification Preferences: Users can set their notification preferences to determine the type and frequency of notifications. They can choose to receive notifications about all updates, certain types of updates, or only important changes.
- Manage Watchlist Items: Users can manage their watchlist by adding or removing items based on their interests and importance. They can access their watchlist and make changes in the corresponding section of Jira, usually accessible from the user profile or the settings menu.
 Jira watchlists help users stay informed, participate, and stay informed about progress, discussions, and changes to items that matter to them. It facilitates collaboration, ensures timely feedback, and allows users to effectively contribute to the project. or publishes an activity in Jira.
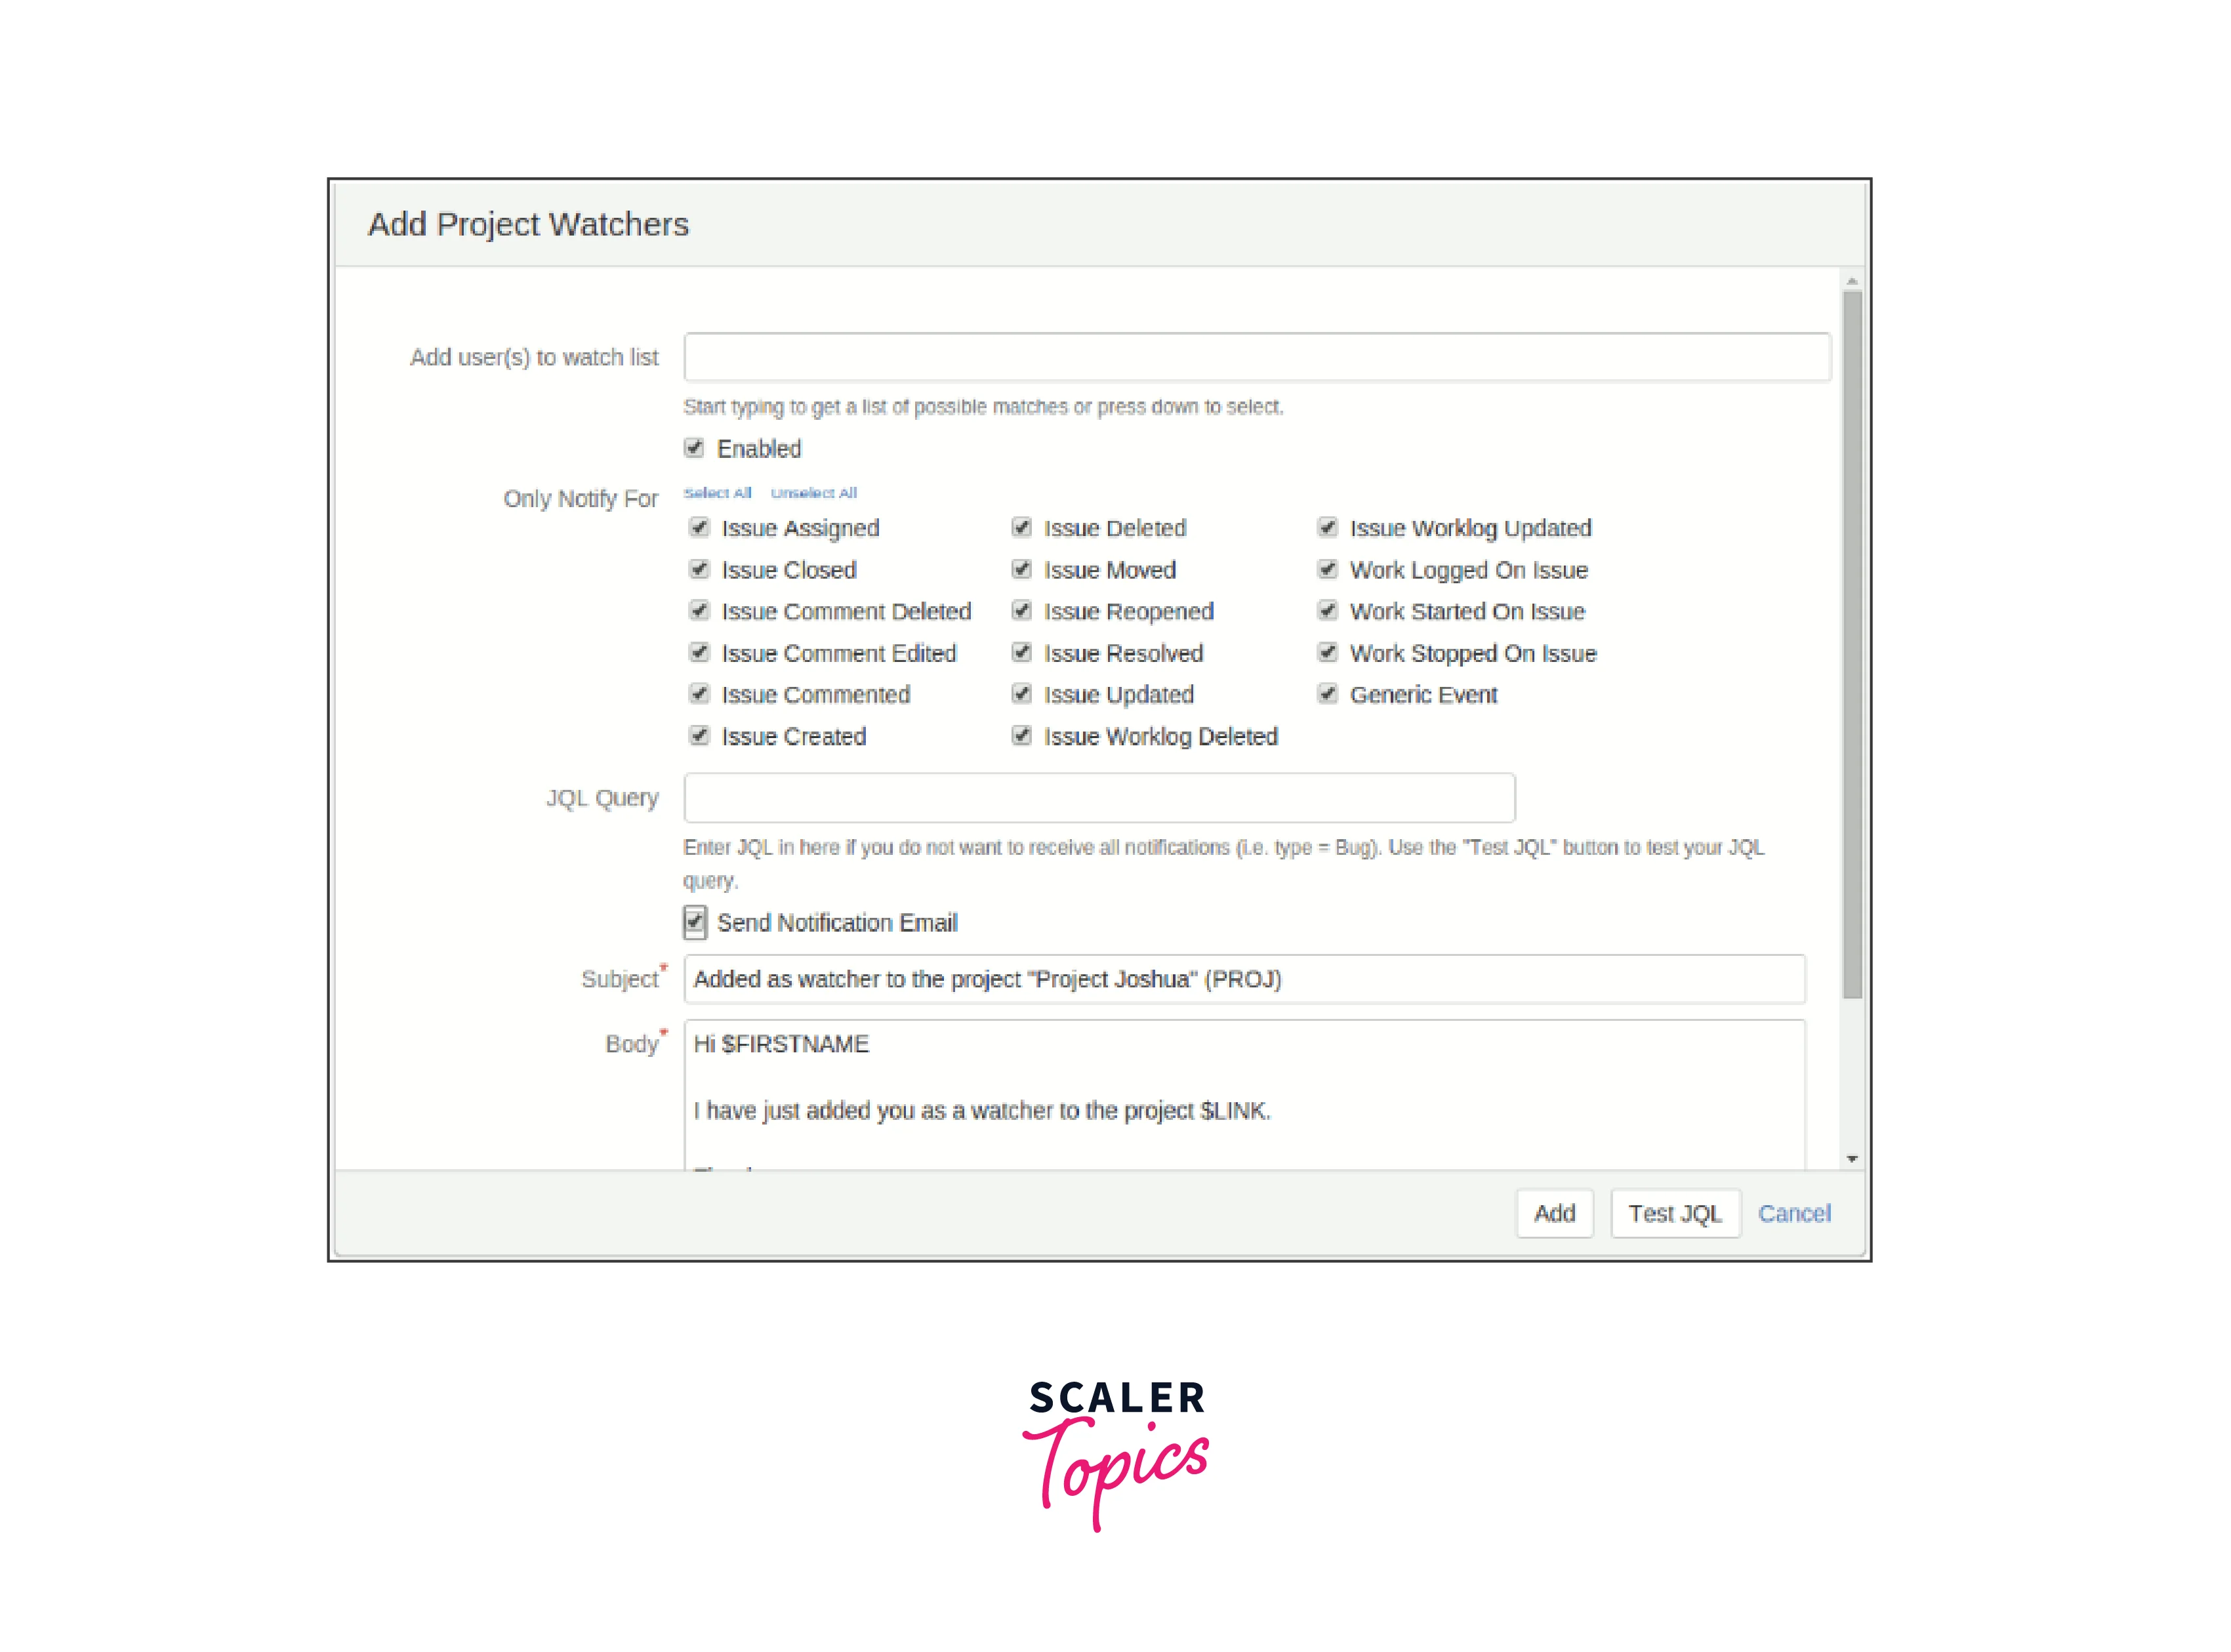
Assign Watchers to Project
Here's how you can assign observers to a project in Jira:
- Log in to your Jira account and go to the project you want to assign observers to.
- Open the project and go to the project settings. The location of the project settings may vary depending on your Jira version and configuration.Look for options like "Project Settings", "Project Management" or the ellipsis menu (...) next to the project name.
- Open the project settings and find the "Notifications" or "Viewers" section.
- The exact name may vary depending on your Jira settings. Under "Notices" or "Viewers" you should find an option to manage project members.
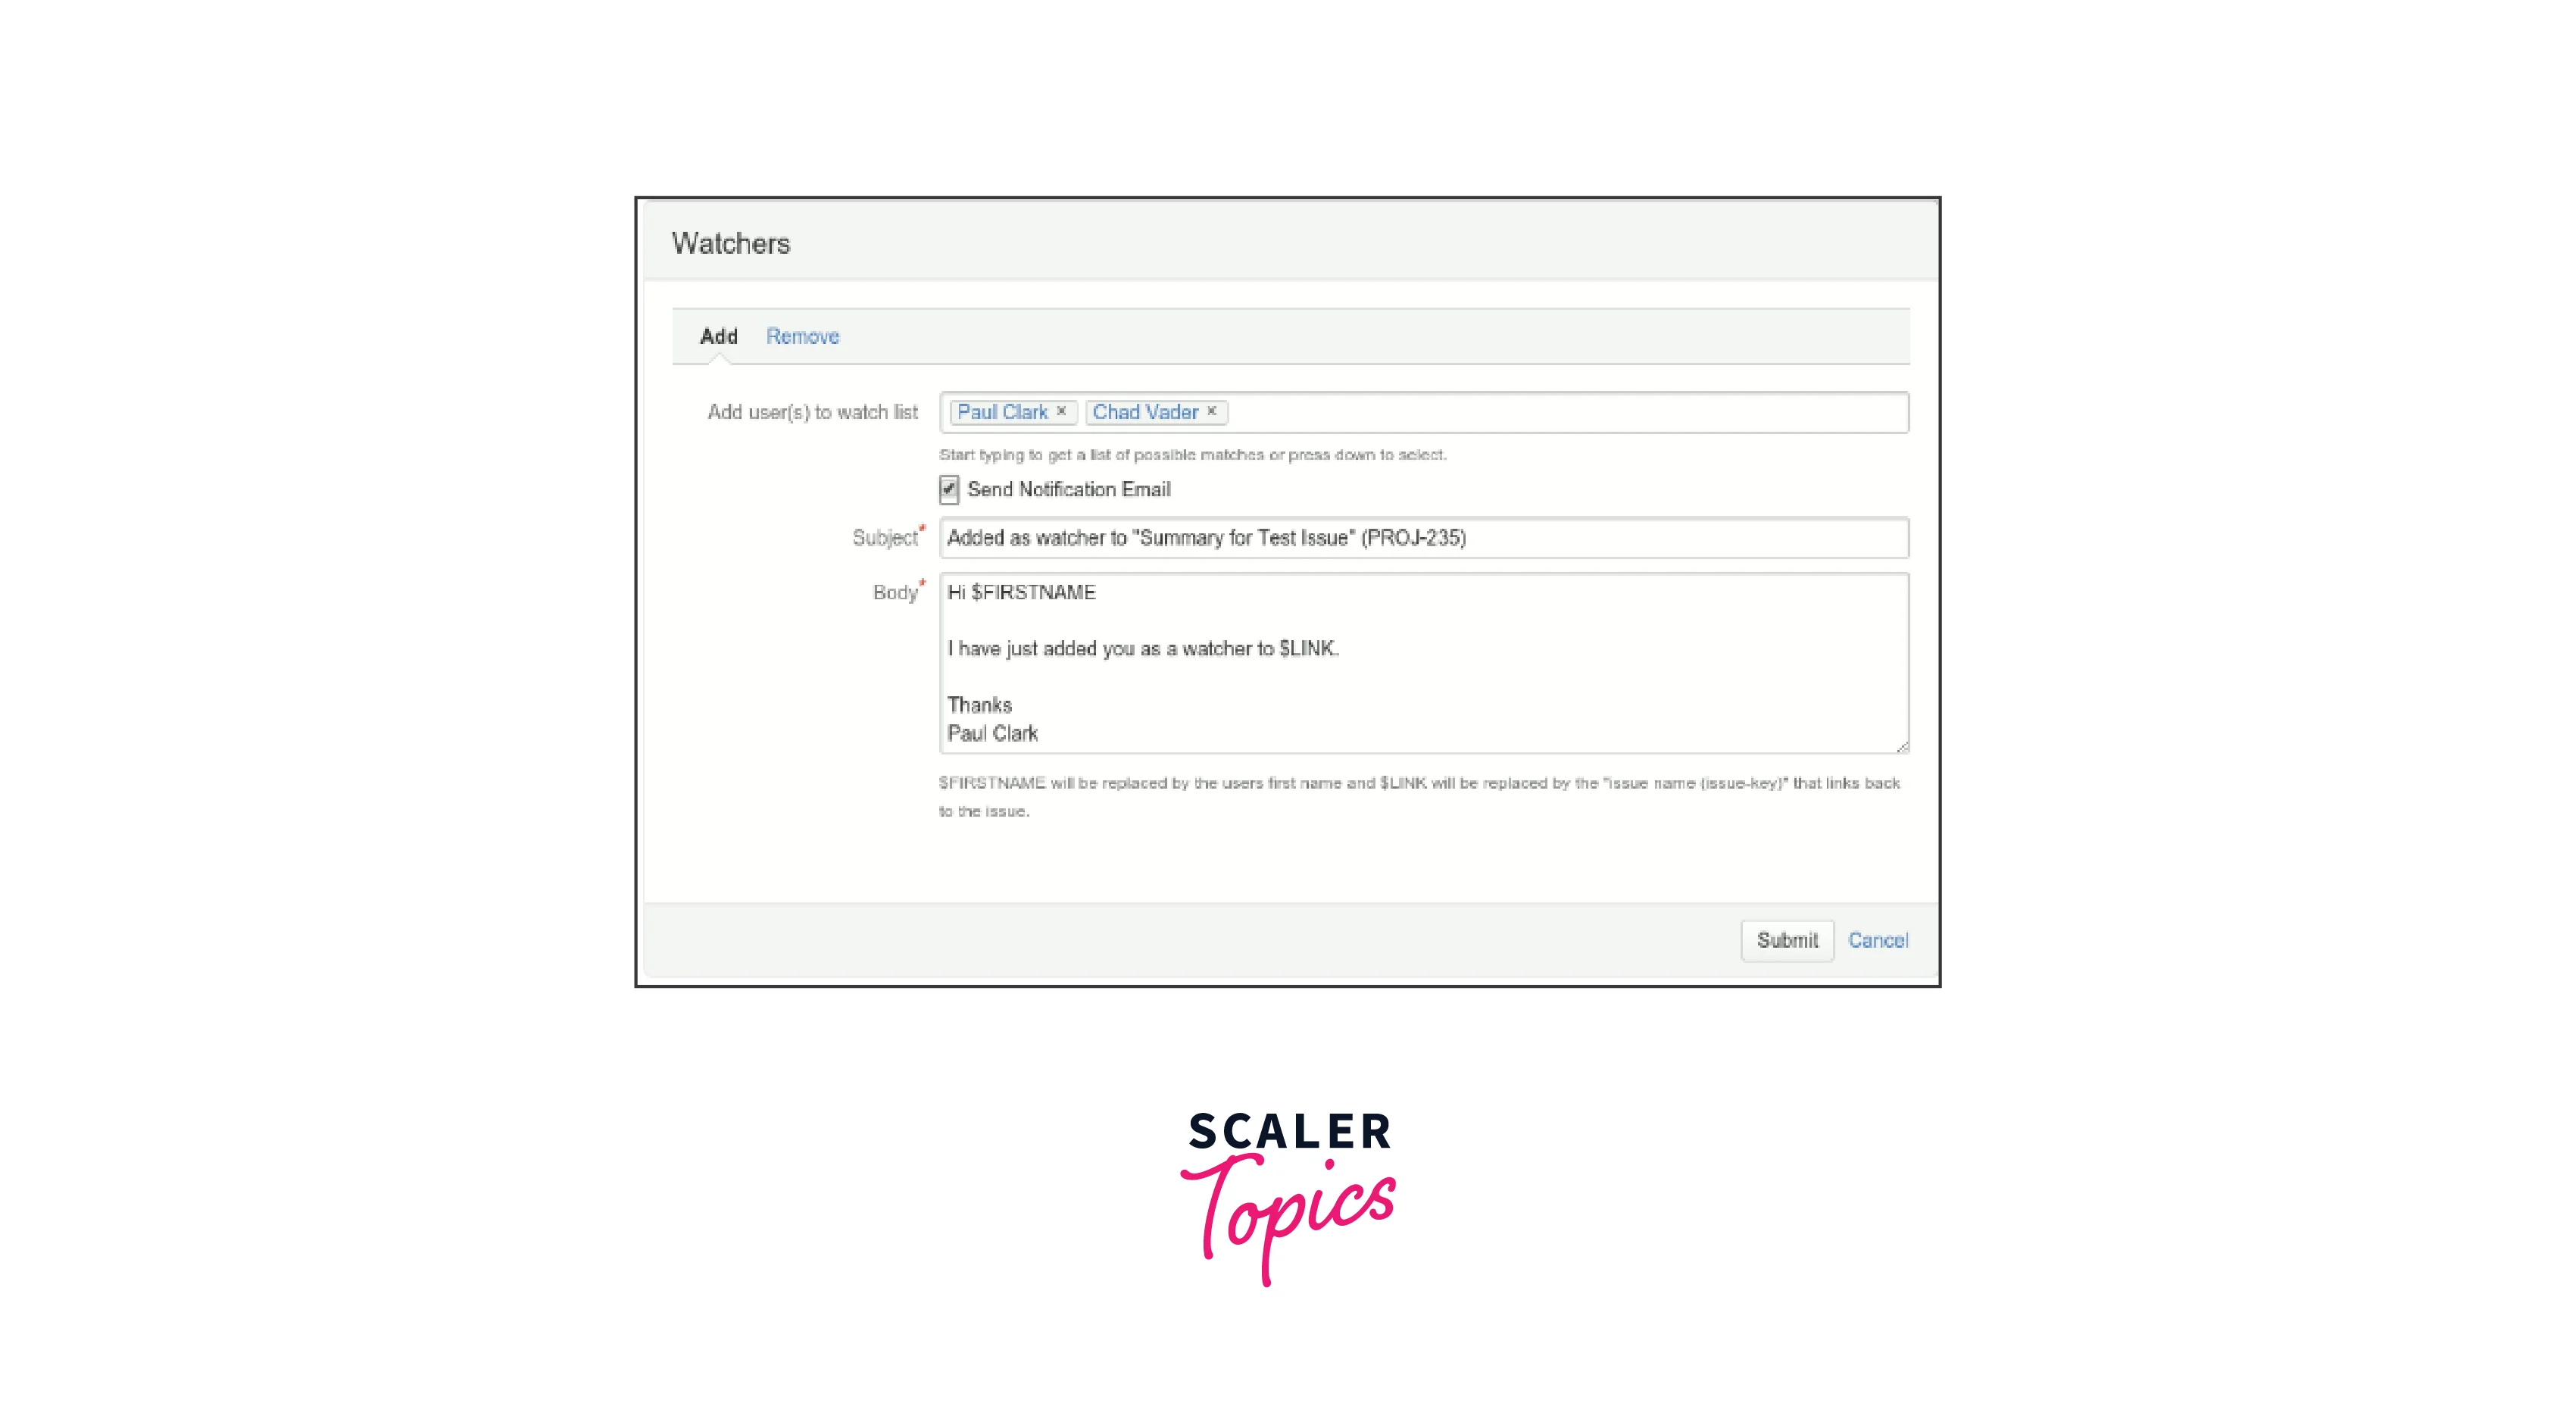
- Click "Add Observers" or a similar option to assign observers to the project.
- A dialogue box or input field will appear where you can enter the usernames or email addresses of the users you want to designate as observers. You can add multiple observers by separating usernames or email addresses with commas.
- After adding the desired observers, save the changes and paste them into the project.
- Selected observers will now receive notifications about project updates, changes, and discussions.
Note that the ability to assign observers to a project may depend on your user rights and the configuration set by your Jira administrator. Make sure you have the necessary permissions to manage project settings and configure watchers.
Limitations
Limitations of JIRA wikis:
- Lack of Real-time Collaboration: JIRA Wikis do not offer real-time co-editing, which means that multiple users cannot edit a Wiki page at the same time. Users should switch to or rely on version control to avoid conflicts.
- Limited Formatting Options: While JIRA Wikis support rich text editing, the formatting options can be limited compared to dedicated documentation tools. Advanced formatting features such as advanced tables or complex layouts may not be available.
- The Complexity of Large Documentation: JIRA Wikis can degrade when managing extensive documentation with a large number of pages. Navigating and organizing large amounts of information within a wiki structure can be difficult.
- Lack of Advanced Search Features: JIRA Wikis have basic search features, but may lack advanced search features such as filtering, sorting, or full-text search across multiple pages. This can make it difficult to find specific information in a large wiki.
Limitations of JIRA Watchlists:
- Limited Granularity: JIRA watchlists are limited to integers, projects or wiki pages. Users cannot selectively control certain sections or parts of a publication or page, which may result in notifications of changes that are not relevant to their interests.
- Notification Overload: When users add too many items to their alert list or receive frequent updates, it can lead to notification overload, making it difficult to identify and prioritize critical updates.
- Lack of Contextual Notifications: JIRA alert notifications provide general information about changes, but may not provide detailed context. Users may need to go to a specific topic or wiki page to fully understand the changes.
- Dependency on Manual Setup: Users must manually add items to their watchlist, which can be time-consuming and requires constant maintenance as project dynamics change.
Conclusion
- Jira Wikis provide a centralized platform for creating, sharing, and organizing project documentation and information.
- Wikis improve collaboration, information sharing, and access to important information within a project.
- Jira Watchlists allow users to track specific issues, projects, or wiki pages and receive notifications of updates and changes.
- Alerts help users stay informed, engaged, and involved in project activities and discussions.
- Watchlists in JIRA allow users to monitor specific issues, projects, or wiki pages.
- Together, Jira wikis and watchlists improve communication, collaboration, and information management within a project.
- They promote transparency and efficient project management in JIRA.