Caching in Spring Boot
Overview
Whenever you visit a website and request certain information from the server, how long do you wait for the response?
5 seconds? 10? … 15 seconds? … 30? and still no response.
The next thing you will do is leave the website and look for information elsewhere.
We are impatient creatures, and we want our answers quickly. Therefore, a website must serve users quickly and with minimum latency for two reasons.
- Retain customers.
- Improve user experience.
There are various techniques to lower the latency, and caching is one.
What is Caching?
Definition from Wikipedia, A cache is a hardware or software component that stores data so that future requests for that data can be served faster.
The only reason for caching is to provide fast data access and quick response. Using a cache improves the performance of an application.

Measuring Cache Performance
Cache hit ratio is a measurement of the performance of the cache. The formula for calculating the cache hit ratio is as follows:
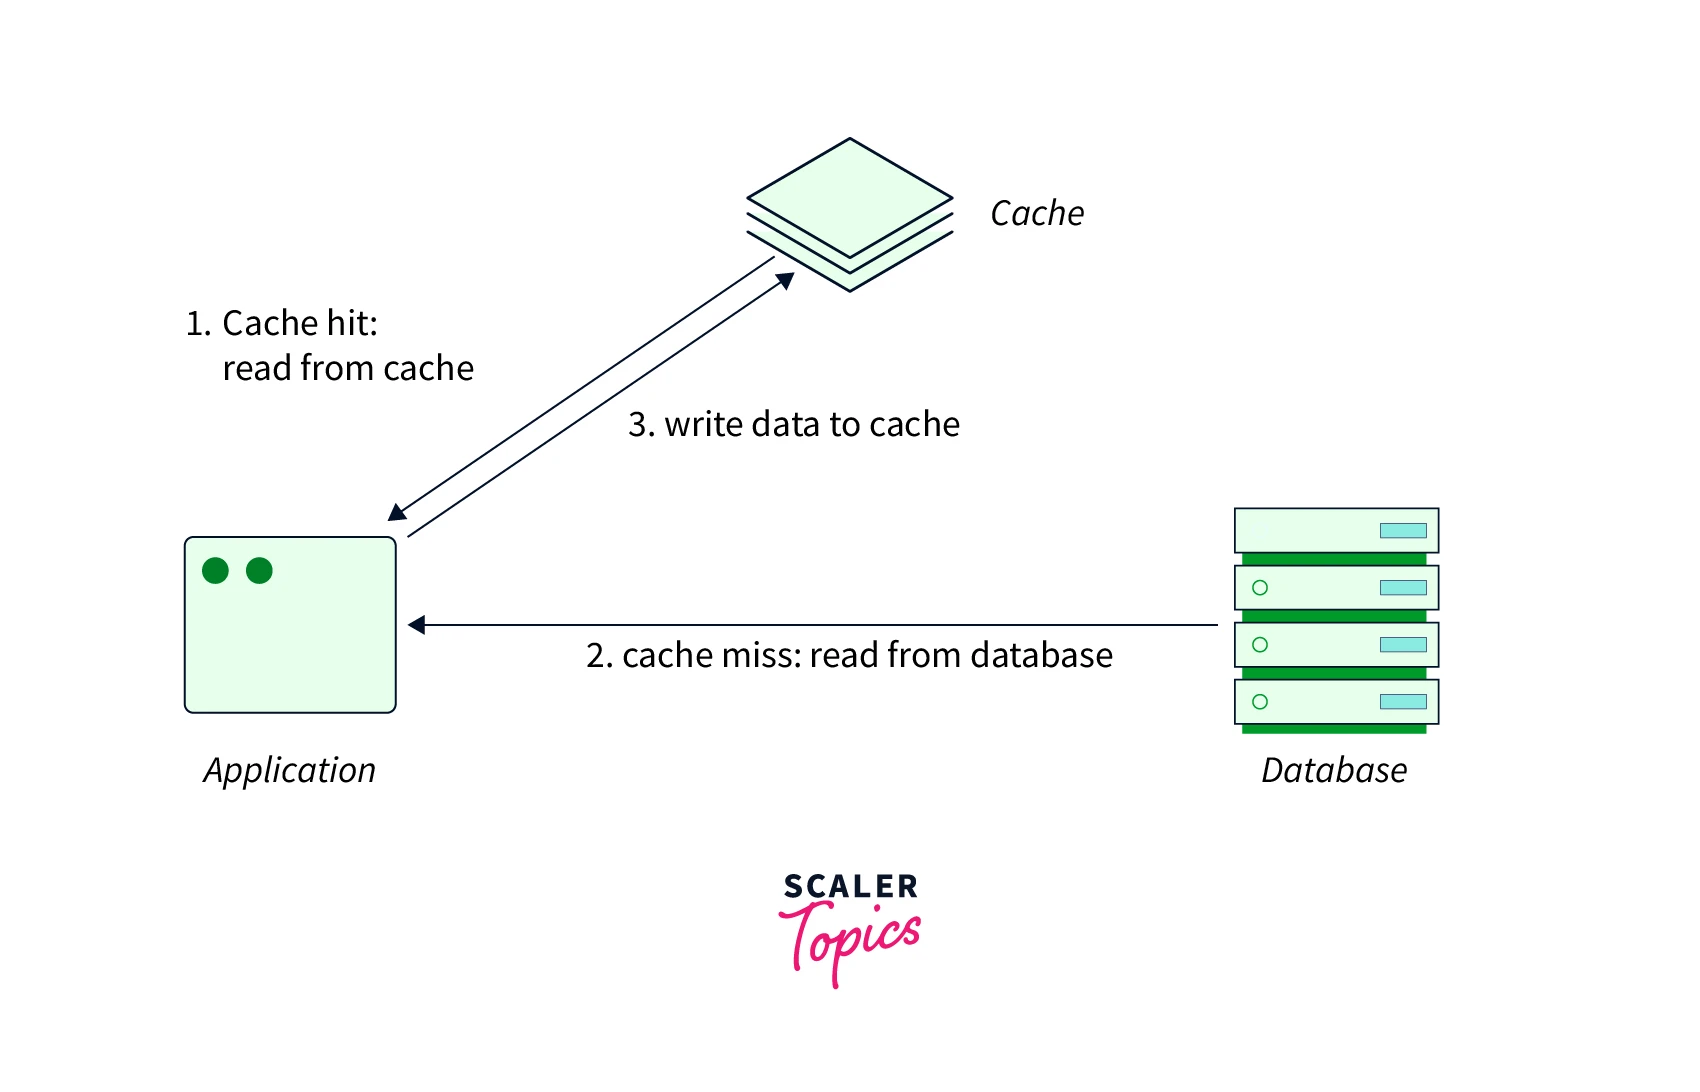
- Cache hit - A cache hit occurs whenever requested information is found and returned from the cache.
- Cache miss - When information is unavailable in the cache and loaded from the source of data, a cache miss occurs.
A range of 90-95% is an extremely good ratio.
Types of Caching
Various components in an architecture where caching are applied and applicable.
CDN Caching
CDN stands for content delivery network. These are servers geographically distributed and replicated all over the world. They are mainly used to serve static content.
Akamai, Cloudflare is one of the leading CDN.
Web Server Caching
The web server caches the pages for reuse. For example, whenever a web server serves a web page. It is loaded for the first time, and if the user requests the same next time, the cache serves a copy of the page.
Application Level Caching
Application-level caching stores frequently used information in the main memory of the application. This improves the performance of the application by serving content directly from memory.
Enable Caching in Spring Boot
We will build a simple application and observe the behavior of spring caching.
Spring boot offers integration with the following cache providers.
- JCache (JSR-107) (EhCache 3, Hazelcast, Infinispan, and others)
- EhCache 2.x
- Hazelcast
- Infinispan
- Couchbase
- Redis
- Caffeine
- Simple Cache
Depending on the jar in the classpath corresponding provider will be used, which gets resolved by CacheResolver. If no provider is specified, spring boot defaults to Simple Cache, backed by ConcurrentHashMap.
Interact With Cache
Spring boot offers below @Cache annotation to interact with the cache.
- @Cachable - It is a method-level annotation—it specific a cache for a method's return value. The @Cacheable annotation handles storing the result of the method call into the cache. Underlying its GetOrElse operation.
- @CachePut - It is a method-level annotation. It is used to update the cache without interfering with the method execution. Underlying its PUT operation
- @CacheEvict - It is a method-level annotation. CacheEvict is used to delete unused data from the cache. Underlying its DELETE operation.
Step 1 Add Aependency
Add the below dependency in the pom.xml.
Step 2 Enable Caching
Caching in spring boot is enabled using the @EnableCaching annotation. It does two things.
- It automatically configures a suitable CacheManager based on the jar in the classpath.
- It runs a bean post-processor that inspects every Spring bean for the presence of caching annotations on public methods. If such an annotation is found, a proxy is automatically created to intercept the method call and handle the caching behavior accordingly.
Step 3
We will now enable caching in our MathService#factorialOf method.
The above code will store the result of the factorialOf method on the factorial cache.
Step 4 Verification
Let's verify the behavior by two successive invocations of the method. The first invocation of the method should invoke the method; however, the 2nd invocation should return the result from the cache.
On line number 26, we are verifying the behavior. Even though we invoked mathService.factorialOf two times but in actuality, it's invoked once.
Integration with Caffeine
Until now, we have been using simply cached backed by concurrenthashmap as no external provider was supplied. But for enterprise applications simple cache may not suffice.
Let's integrate caffeine with cache expiry and verify the behavior.
Step 1 - Add Dependency
Dependency we need to add in pom.xml.
Step 2 - Configure Cache
We can configure the cache from application.properties or yml.
The above configuration gives the name to the cache, which should match with provided in the @Cachable annotation and set the expiry to 10 seconds.
Verification
To verify the behavior, we will add another unit test that will stop the thread for more than expiry and verify the actual method's invocations.
We have configured cache expiry to 10 seconds.
Line number 69 stops the thread for 12 seconds. Line number 72 verifies the invocation count, which is two now, as the item in the cache should be expired already.
The source code of this article is available at GitHub and caffeine integration under branch caffine_sample.
Conclusion
In this article, we covered
- Caching is used to improve the application performence and overall response time.
- In software architecture content can be cached in differe places where cache is present like CDN cache, Database Cache, Web server cache, Hibernate level 1 and level 2 cache and application level cache.
- Spring boot offers cache abstraction to interact with diffent cache provider.
- Spring boot cache abstraction provides different annotation @Cachable, @CachePut and @CacheEvict to interact with the cache.
- Abstraction covers caching from simplest form (ConcurentHashMap) to the as complex as redis and memcache.
