Spring Boot Auto-Configuration
Overview
Auto-configuration is the most powerful feature of the spring boot. As the name suggests, Spring Boot auto-configuration is the framework's intelligence to automatically configure a Spring application based on the dependencies on the classpath.
Introduction to Spring Boot Auto-configuration
Spring boot auto-configuration automatically configures applications based on JAR available on the classpath.
For example
- Configure a DispatcherServlet, if the Spring MVC JAR is on the classpath.
- An EntityManager, if JPA JAR is on the classpath.
This intelligence is provided by spring boot as auto-configuration.
Need for Auto-configuration in Spring Boot
The plain spring-based application requires lots of manual configuration. To use the web MVC feature of spring we have to pre-configure the dispatcher servlet, view resolver, component scan, serializer, deserializer, etc.
If we want to use JPA we need to configure a Datasource, entity manager, transaction manager, etc.
The pattern is the same for all the applications. Can we do this more smartly? Think of configuring:
- A DataSource, if the Hibernate JAR is on the classpath.
- A DispatcherServlet, if the Spring MVC JAR is on the classpath.
- An EntityManager, if JPA is on the classpath.
- Logback or log4j, if the corresponding dependency is on the classpath.
With its auto-configuration feature, this is exactly what Spring Boot does… Spring Boot looks at the following:
- Dependency available on the CLASSPATH
- Existing configuration for the application. Based on these, Spring Boot configures those frameworks without the need of configuring them explicitly. This is called auto-configuration.
Let's uncover logs from the bootstrapped application startup
Logs clearly show that the application has configured the dispatcher servlet and entity manager without manual configuration, which shows auto-configuration in action.
How does Spring Boot Auto Configuration Work?
To understand how auto-configuration works internally let's explore the ServletWebServerFactoryConfiguration class. The ServletWebServerFactoryConfiguration contains three inner classes—one for each web server supported in spring boot.
- EmbeddedUndertow: Configures Undertow if the corresponding JAR is on the classpath
- EmbeddedJetty: Configures Jetty if the corresponding JAR is on the classpath
- EmbeddedTomcat: Configures Tomcat if the corresponding JAR is on the classpath
Let’s see the code of the inner class, EmbeddedTomcat. This will give us a full perspective on how Spring Boot configures Tomcat.
The class has extremely important annotation: @ConditionalOnClass({ Servlet.class, Tomcat.class, UpgradeProtocol.class })
This annotation instructs spring boot to process the EmbeddedTomcat configuration if Tomcat.class and other required classes are on the classpath.
Where does the Tomcat.class come from? It came from transitive dependency when the starter web was included.
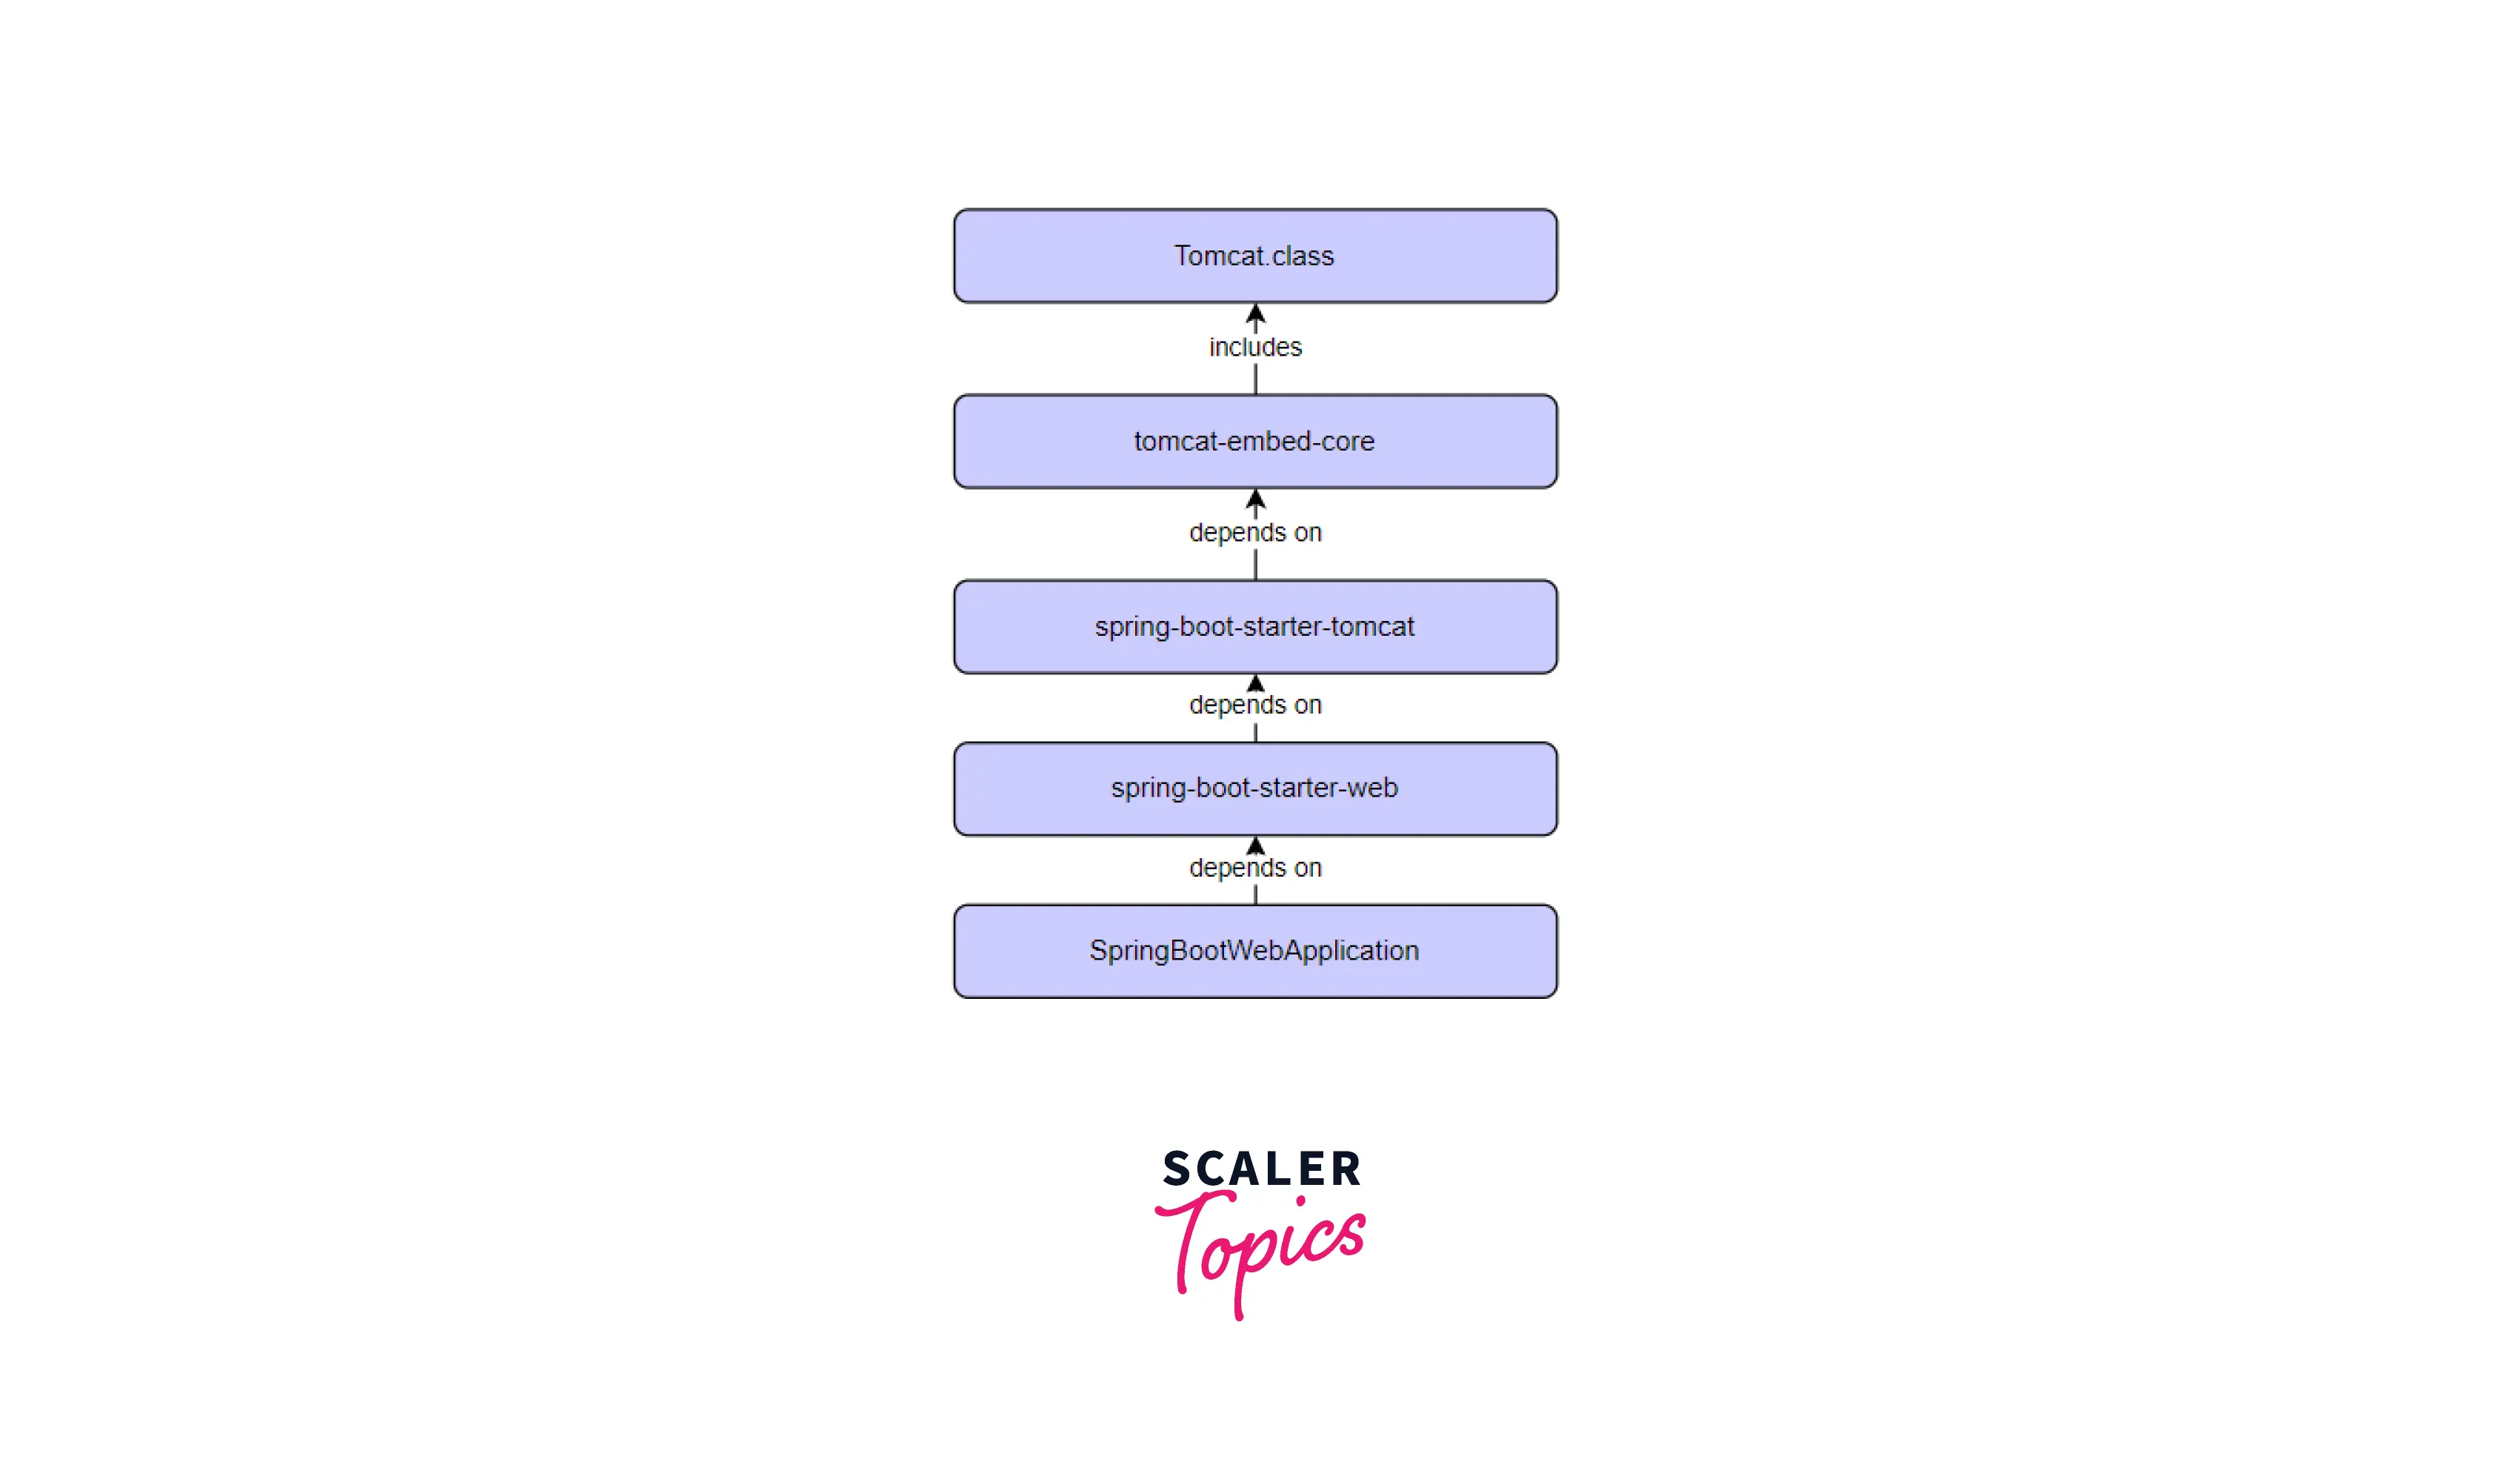
This is how Spring Boot discovers Tomcat auto-configuration and runs with it.
A similar conditional configuration exists for EmbeddedJetty and EmbeddedUndertow. We can verify it from the full source either by decompiling the class inside IDE or from the GitHub source.
If you want to use the jetty web server instead of tomcat. Two things are required.
- Exclude starter tomcat
- Include a starter jetty
The above arrangement will trigger EmbeddedJetty auto-configuration as required conditions are met.
Where does Auto-configuration comes from?
All auto-configuration comes from spring-boot-autoconfigure.jar
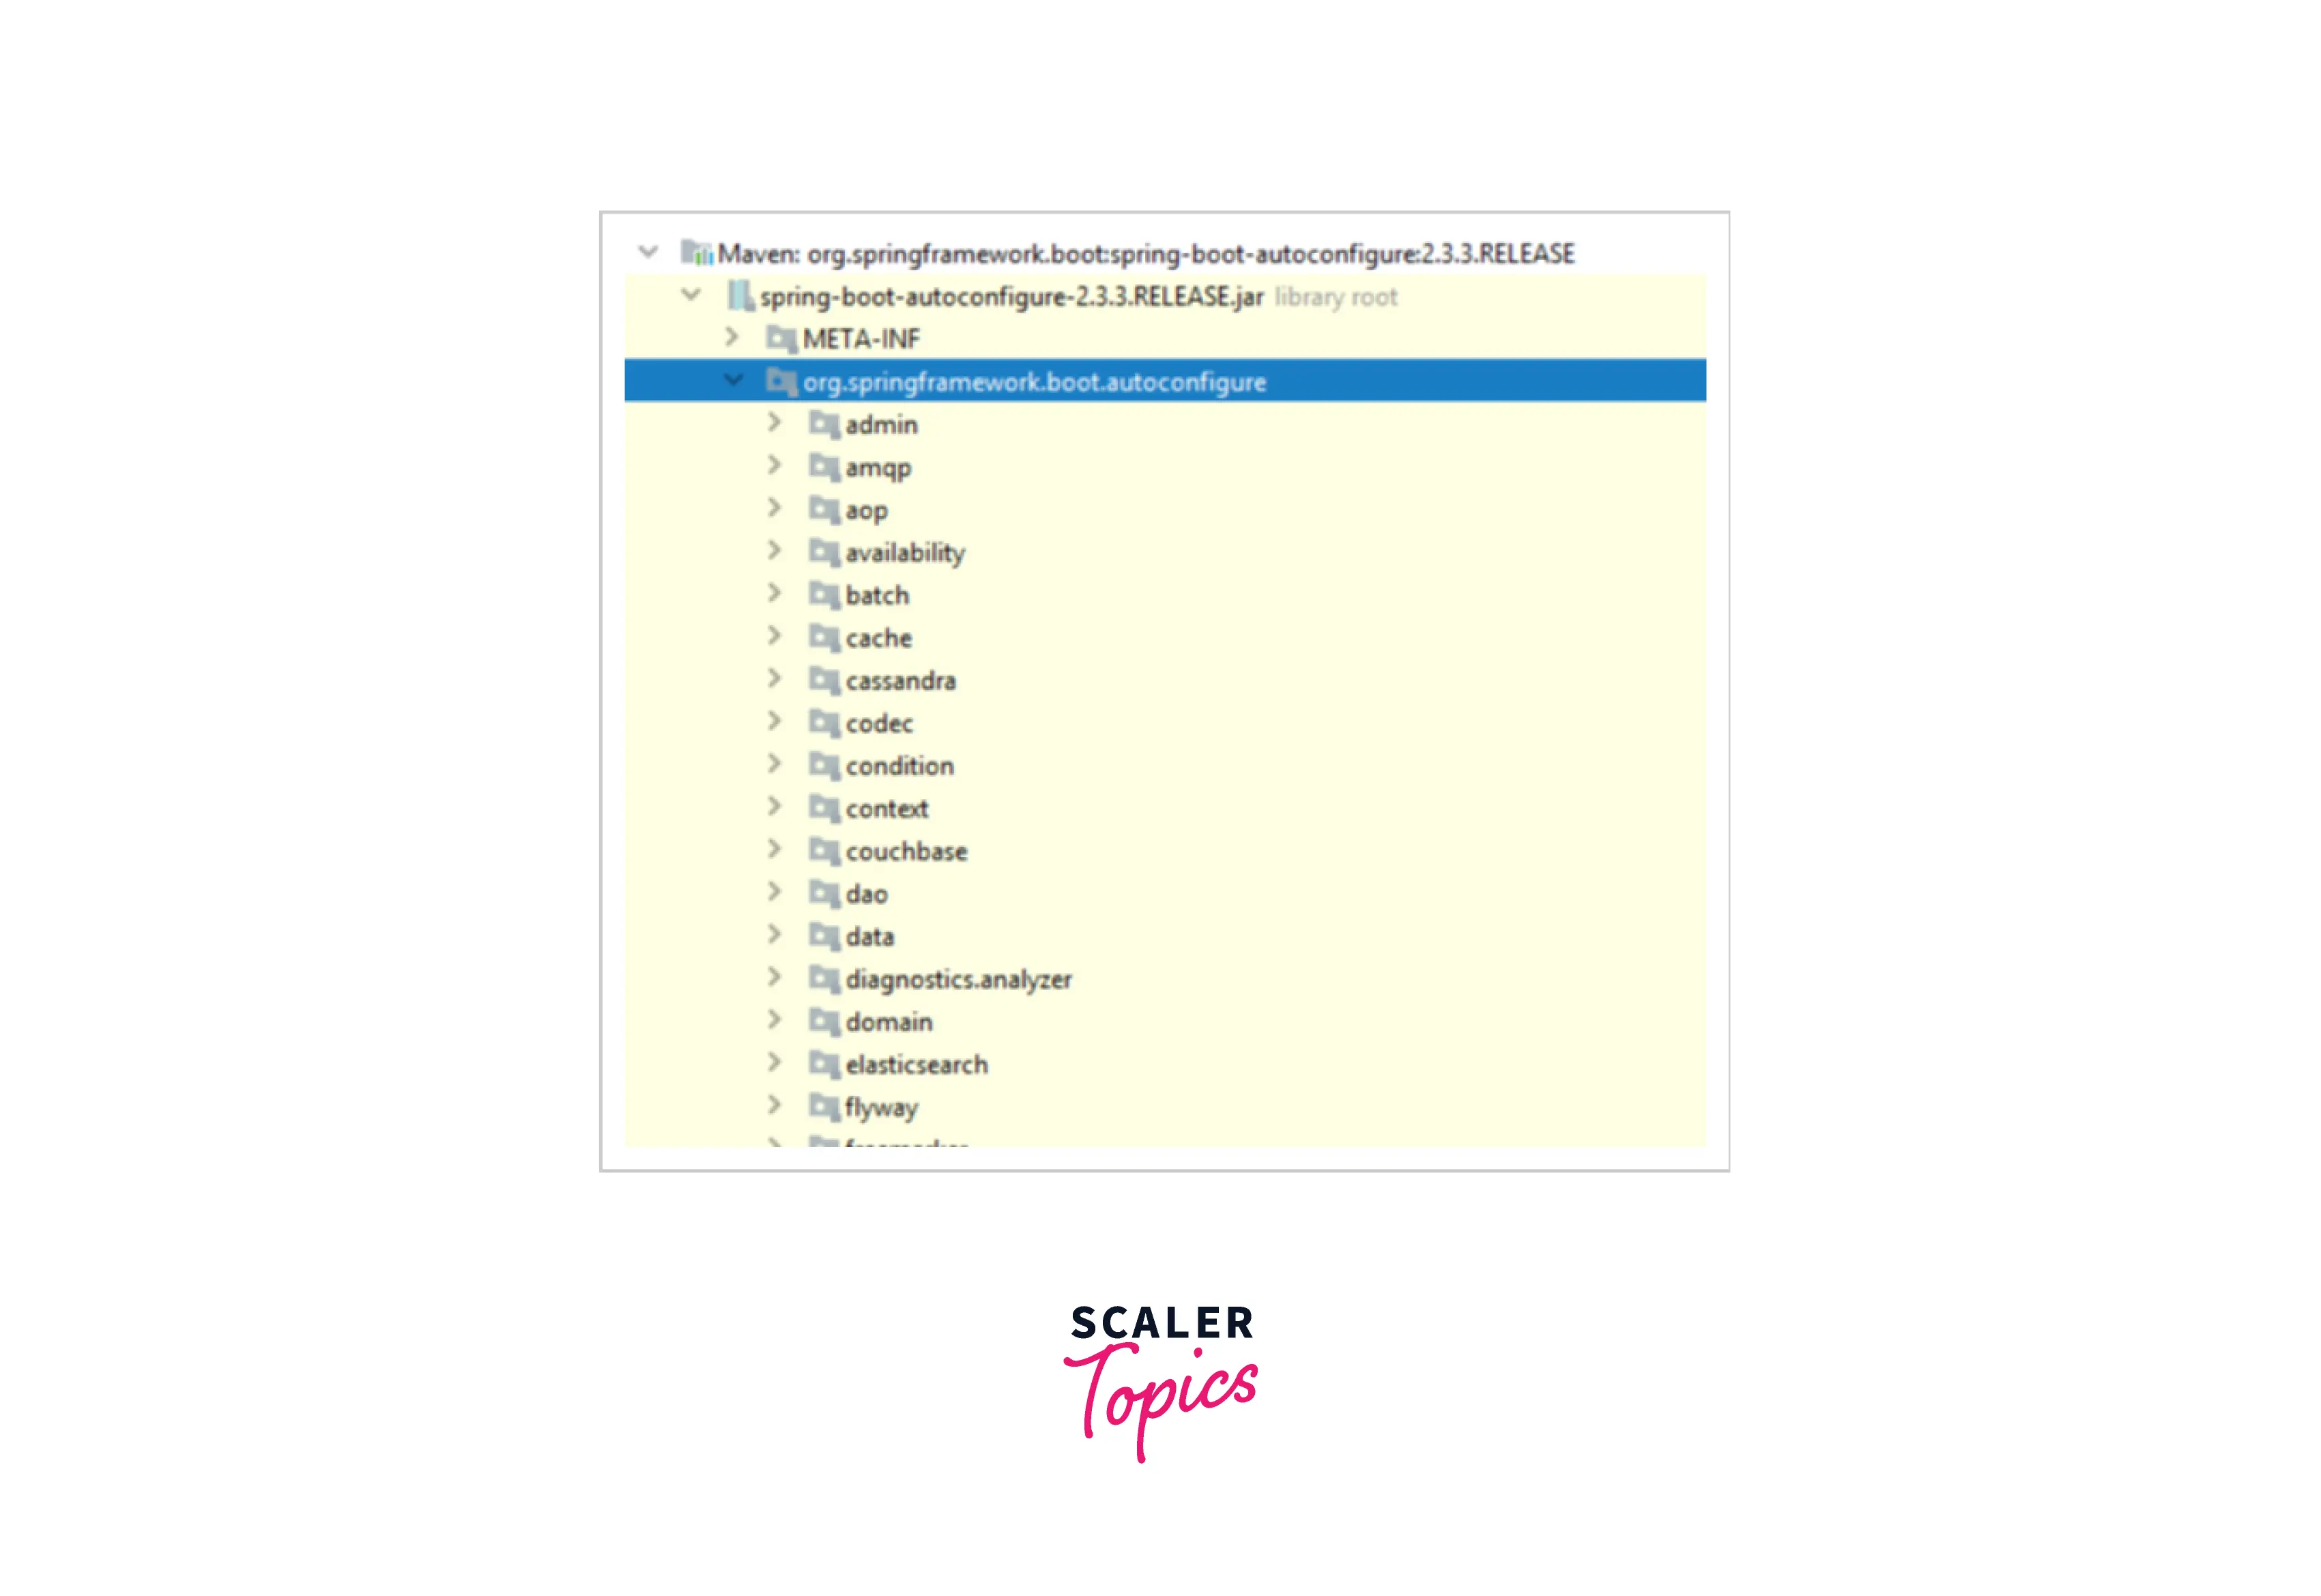
Another important class inside the JAR is META-INF/spring.factories. This file lists all the auto-configuration classes that should be enabled under the framework.
A few of the important auto-configurations are listed below:
What do we mean by @Conditional Configuration?
Now that we know auto-configuration works with the help of @Conditional annotation. Spring has introduced the @Conditional annotation that allows us to define conditions to apply to the configuration to load only a subset of beans in the application context for which conditions are met.
Spring boot provides different types of conditional annotation.
- @ConditionalOnMissingBean - A bean will be configured only if there is no other bean configured with the same name.
- @ConditionalOnClass - Process the underlying configuration if the class supplied in the annotation parameter is present in the classpath.
- @ConditionalOnProperty - Processes configuration only when the supplied property is available.
- @ConditionalOnBean - Processes and creates the bean only when some bean is present in the classpath (the opposite of the @ConditionalOnMissingBean annotation)
- @ConditionalOnMissingClass - Processes configuration if some class is not available on the classpath (the opposite of the @ConditionalOfClass annotation)
Creating a Custom Auto-Configuration
As a developer, you may come across situations where you need to write your auto-configuration. Let's build a system where the payload serialization format defaults to XML if no custom bean is created by the developer.
Let's code it!
- Serializer interface
- XML implementation
- JSON implementation
- Serialization auto-configuration We will implement auto-configuration with the scenario. If the JSON serializer bean is defined and registered in the application context, then the application will use it otherwise it will use XML serialization by default.
- Register auto-configuration with the framework. Now we have the code ready we need to tell the spring boot framework about our new auto-configuration. All the framework provided auto-configuration are pre-registered in the spring.factories file. We need to register ours also.
Create a spring.factories file under /resources/META-INF and add the below entry.
Voila! The next step is to verify our auto-configuration
Testing the Auto-Configuration
- Scenario 1 - In this use case, We will not define our custom bean for JSON serialization. In that case, an XML serialization bean should be used. Verify from logs by running the application.
It prints below the log on the c console.
- Scenario 2 - Create a custom bean JSONSerializer and make it primary.
Now we should see the log which indicates JSONSerializer in action.
How to Disable Auto-configuration
Let's say you want to disable some autoconfiguration. We can do it either from the @SpringBootApplication annotation or from application properties
OR
This instructs spring boot not to auto-configure the data source for the application. The developer then needs to configure it manually in the application.
Looking to build cutting-edge Java applications? Our Free Spring Boot course is your gateway to success. Sign up today and transform your coding skills.
Conclusion
- Spring boot auto-configuration is framework intelligence to configure beans based on JAR available on the classpath.
- To use Spring MVC plain spring framework requires manual configuration of beans dispatcher servlet, view resolver, etc.
- Spring boot auto-configures all the required beans as soon as it detects starter-web on the classpath.
- Developers don’t need to spend time working on the initial setups in every application.
- Spring boot auto-configurations are listed in spring-boot-autoconfigure.jar and registered in the spring-factories file.
- Auto-configuration makes use of @Conditional annotation.
- Spring boot @ConditionalOn* annotation variant allows developers to specify the condition in which the bean will be created.
- We can create our auto-configuration as well.