Building a Survey Form using HTML - HTML Projects

Overview
A form is an essential component of a website that helps in logging in, signing up, sending orders, pieces of information, queries, uploading files, and carrying out online transactions. In other words, forms are the stepping stone to making a website interactive.
Creating an HTML form is a simple yet critical project. In this project, you'll create a standard survey form through which information can be captured and sent to the database.
What are We Building?
In the survey form project, you will build a website for taking surveys using HTML form from scratch. All the elements of the form can be created using basic HTML.
Pre-requisites
How are We going to Build the Survey Form?
- Use the <form> element to create an HTML form for user input.
- The form element contains different options name, email, age, etc. The different input elements have different tasks assigned to them like
- name for taking name input
- email for taking email input
- text-area for taking a large message
- radio buttons to select one of the multiple options
- checkbox to select zero or more values for submission.
- The form includes the following buttons:
- reset button to reset form to initial values
- submit button to submit the form data to a form handler.
Final Output
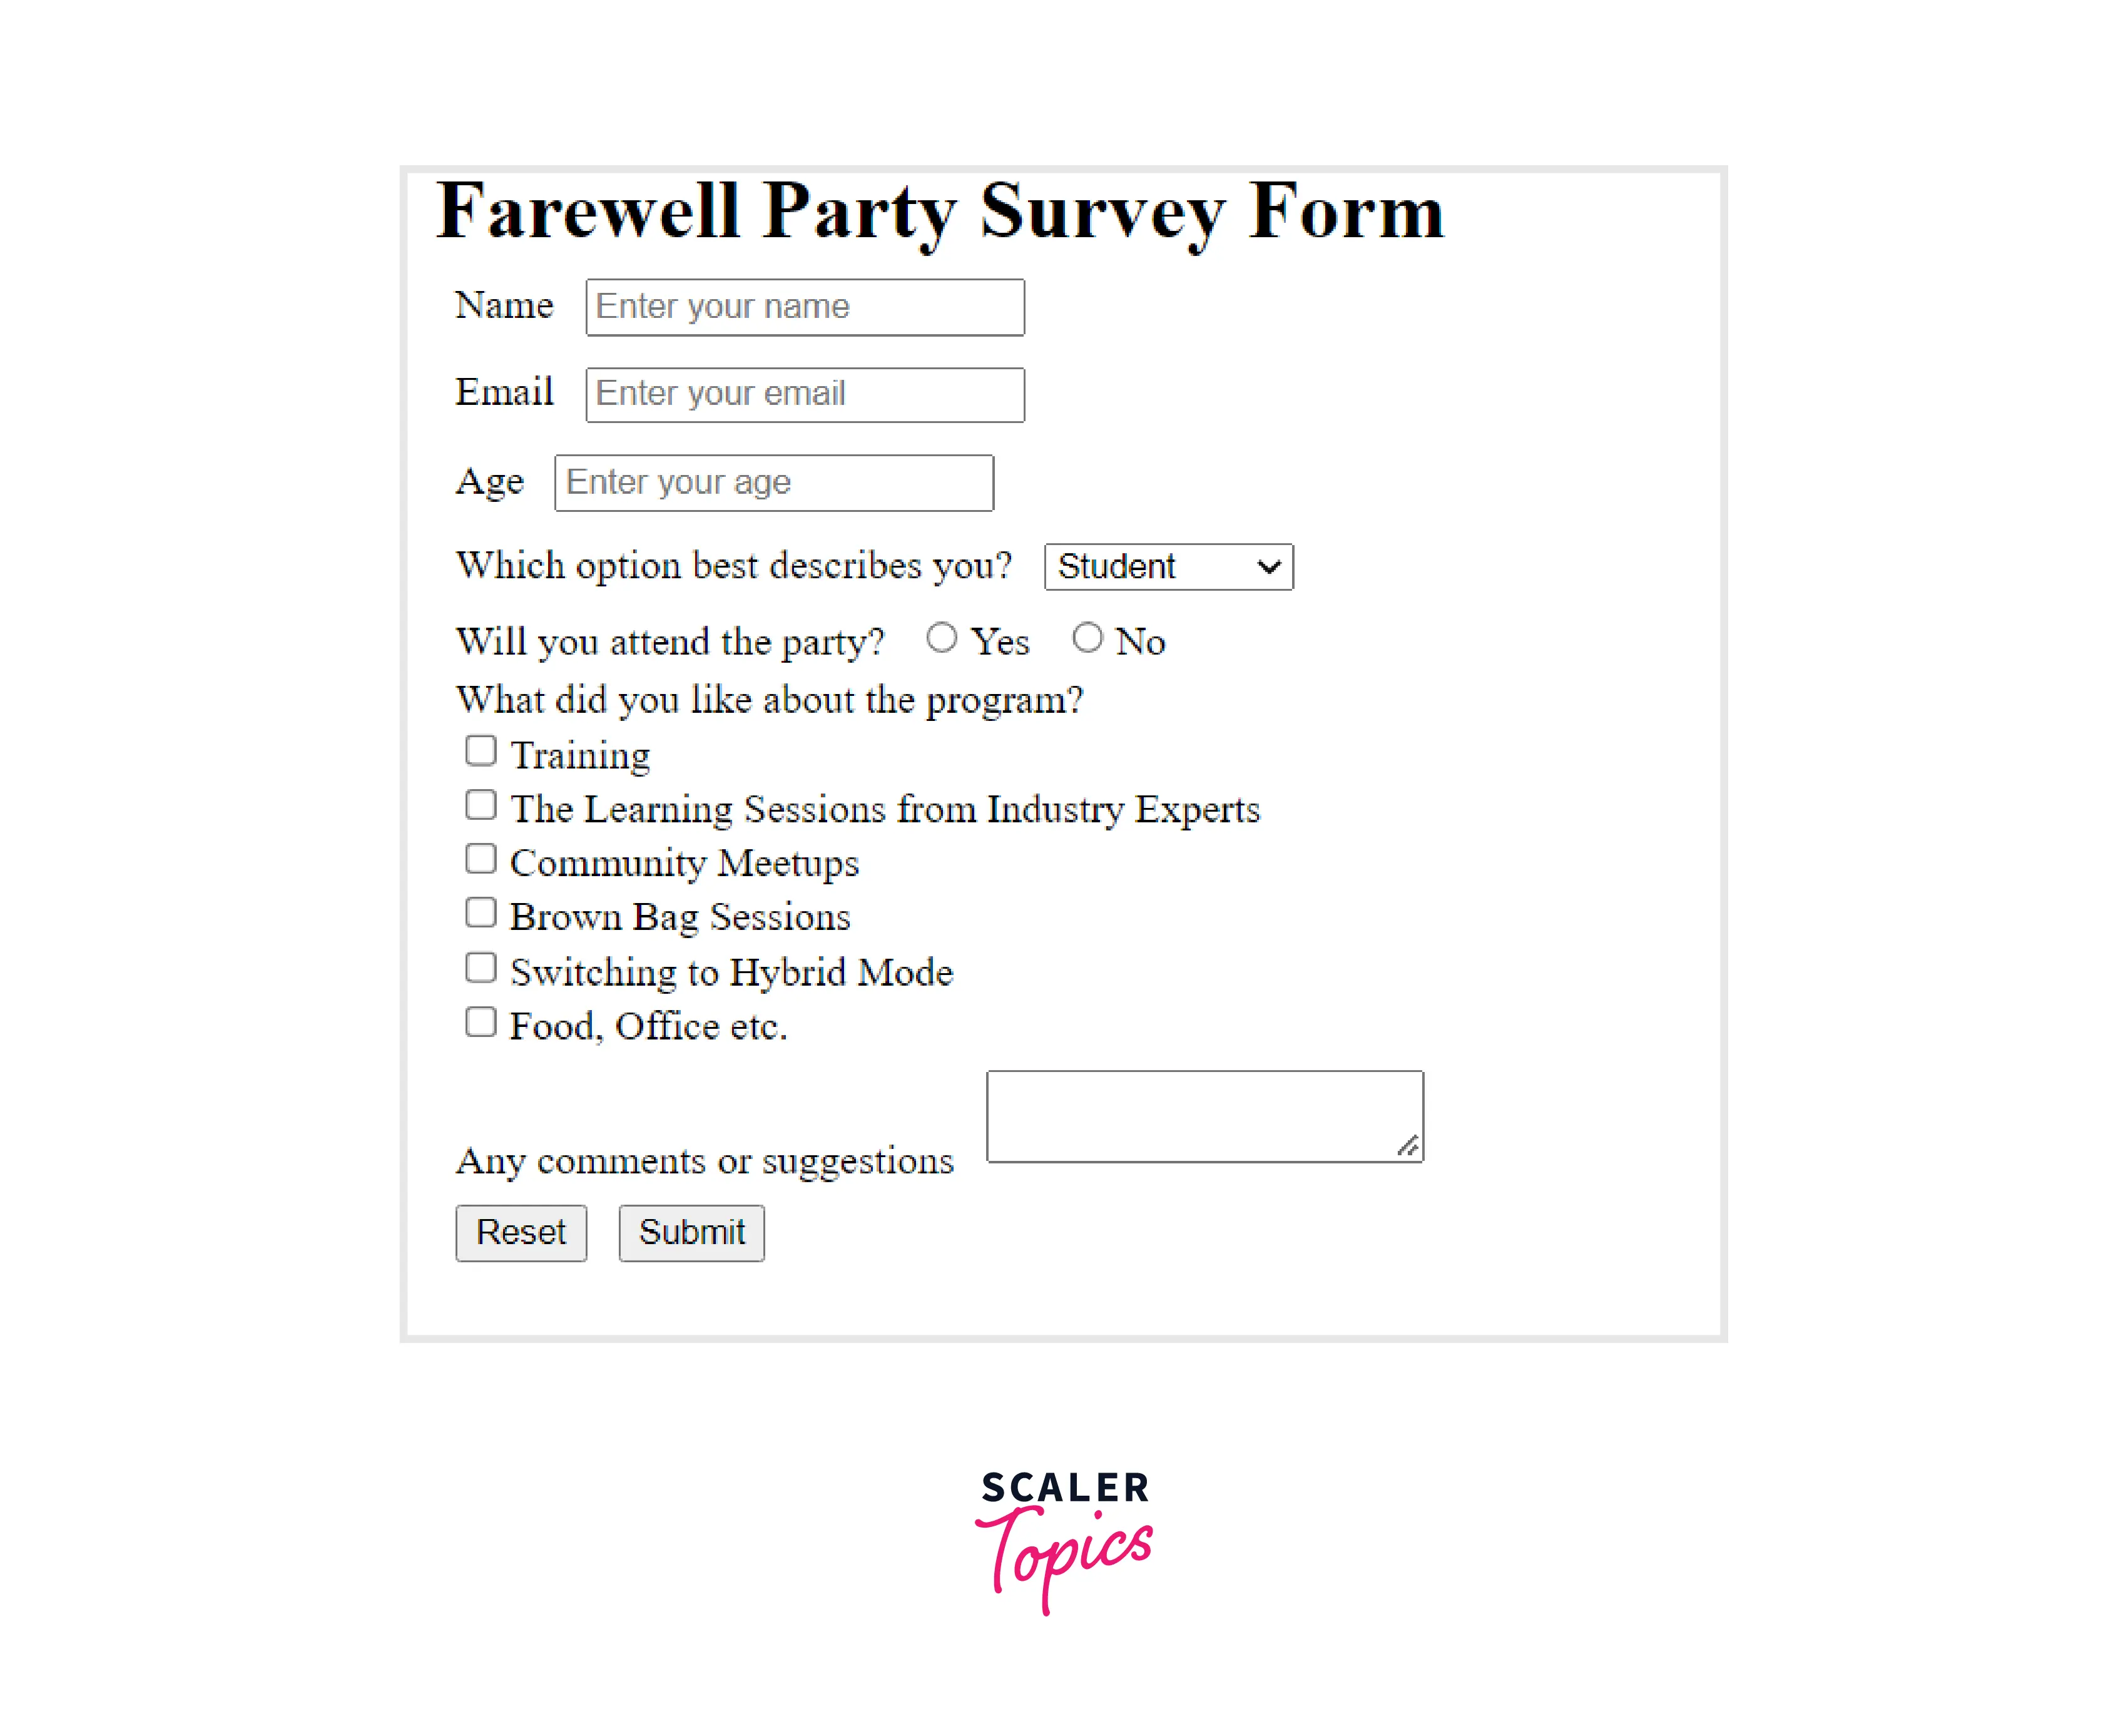
Building the Survey Form
Title Heading
The heading of the form defines what the survey form is about.
Details about the Form
Your project has a form element with an id of survey-form. The form element contains the various input fields like name, email, age, etc. Besides, it has a select dropdown element with at least two options to choose from, radio buttons, a series of checkboxes, and a textarea for additional comments.
The form element presents the reset, and submit buttons.
Different Form Inputs
Name, Email, Number Inside the form element, there is an input field for name, an input field for email, and an input field for age.
- The input field for the name has type set to text, and id="name".
- The input field for email has type set to email, and id="email". If an incorrectly formatted email is entered it shows an HTML5 validation error.
- The input field for age has type set to a number, and id="age". An HTML5 validation error pops up if a non-numeric value is entered.
All input fields have their corresponding label elements that describe the purpose of each field with the following ids: id="label-name", id="label-email", and id="label-age". The fields also contain placeholder text that describes each field.
Dropdown The form element contains a select dropdown element with an id="role" and four options to choose from. It contains its corresponding label element with id="label-role" that describes the purpose of the dropdown.
Radio Buttons The form element allows you to select an option from a group of two radio buttons that are grouped using the name attribute (where name="attend"). It contains corresponding label elements that describe the purpose and values of the radio buttons.
Checkboxes Inside the form element, there are several fields from which a series of checkboxes can be checked each of which has a value attribute. The corresponding labels describe the purpose of the checkboxes.
Textarea The form element presents a textarea along with a corresponding label element for additional comments.
Reset Button Type resets are buttons on clicking which it resets all of the inputs in the form of their initial values.
A Submit Button to send the Data The type submit defines a button for submitting form data to a form handler. After clicking the button, it submits the form to the server.
Complete Code and Output
Output For more better view, kindly click here
What’s Next?
Now that you have created a simple standard HTML form add some styling to it using CSS to improve the user experience. In this article, you'll find a step-by-step guide on how to design your form to enhance its appearance and make it more appealing to users.
Conclusion
- HTML forms are used to collect information from users and save it in our database.
- The form tag is used to create a form in HTML. Multiple input tags are used inside the form tag to take users input.
- The basic input tags used to create a form are text, email, number, radio buttons, checkboxes, etc.
- An input element can have different values for the type property. The “text” specifies a plain text input field, "number" specifies numeric values, and "email" specifies email addresses.
- <input> elements of type radio are generally used as a collection of radio buttons describing a set of related options from which only one radio button can be choosen at a time.
- <input> elements of type checkbox are checked (ticked) when clicked. One or multiple values can be choosen at a time.
- The <select> tag is used to take user input and create a drop-down list. The select tag has a <option> tag, which defines the options available in the drop-down menu.
- <textarea> is the go to solution for multiple line inputs.
- <button> tag is used to create clickable buttons. The type attribute is used to tell the browser what kind of button it is.