Tabbar Flutter
Overview
TabBar is one of the most popular widgets offered by Flutter. Using a TabBar makes navigation significantly better as it is used to provide an easy-to-use mobile application interface. The developers use it to provide a Tab-based interface to the end user. In this article, we will be exploring the TabBar and its properties in detail. By the end of this article, you will be very familiar with the implementation of TabBar in mobile applications.
Introduction
The TabBar is a great tool to represent complex navigation in a very simple fashion. It is a very versatile and powerful tool in Flutter which is nothing but a widget that looks like a horizontal row. Each tab represents a different section of the app. The tabs are designed in such a manner that it is very intuitive for the end-user of what section he will be taken to, by clicking on a particular tab. When the user taps on those tabs, he is taken to the respective sections.
TabBar is one of the most popularly used widgets in mobile applications. With its customizability and features, it makes it very easy for developers to create beautiful mobile applications. In this article, we will dive deeper into the topics such as creating a TabBar, customizing the tab indicator, making it scrollable, listening for tab change events, and preserving the states of the TabBar.
How to Create a TabBar in Flutter?
The process of creating a TabBar in Flutter is fairly simple. We can do this easily just by following a simple sequence of steps.
Now, we will discuss the step-by-step procedure of creating a TabBar.
-
Import the material file:
-
Create a TabController:
-
Now, we need to initialize our tabController:
-
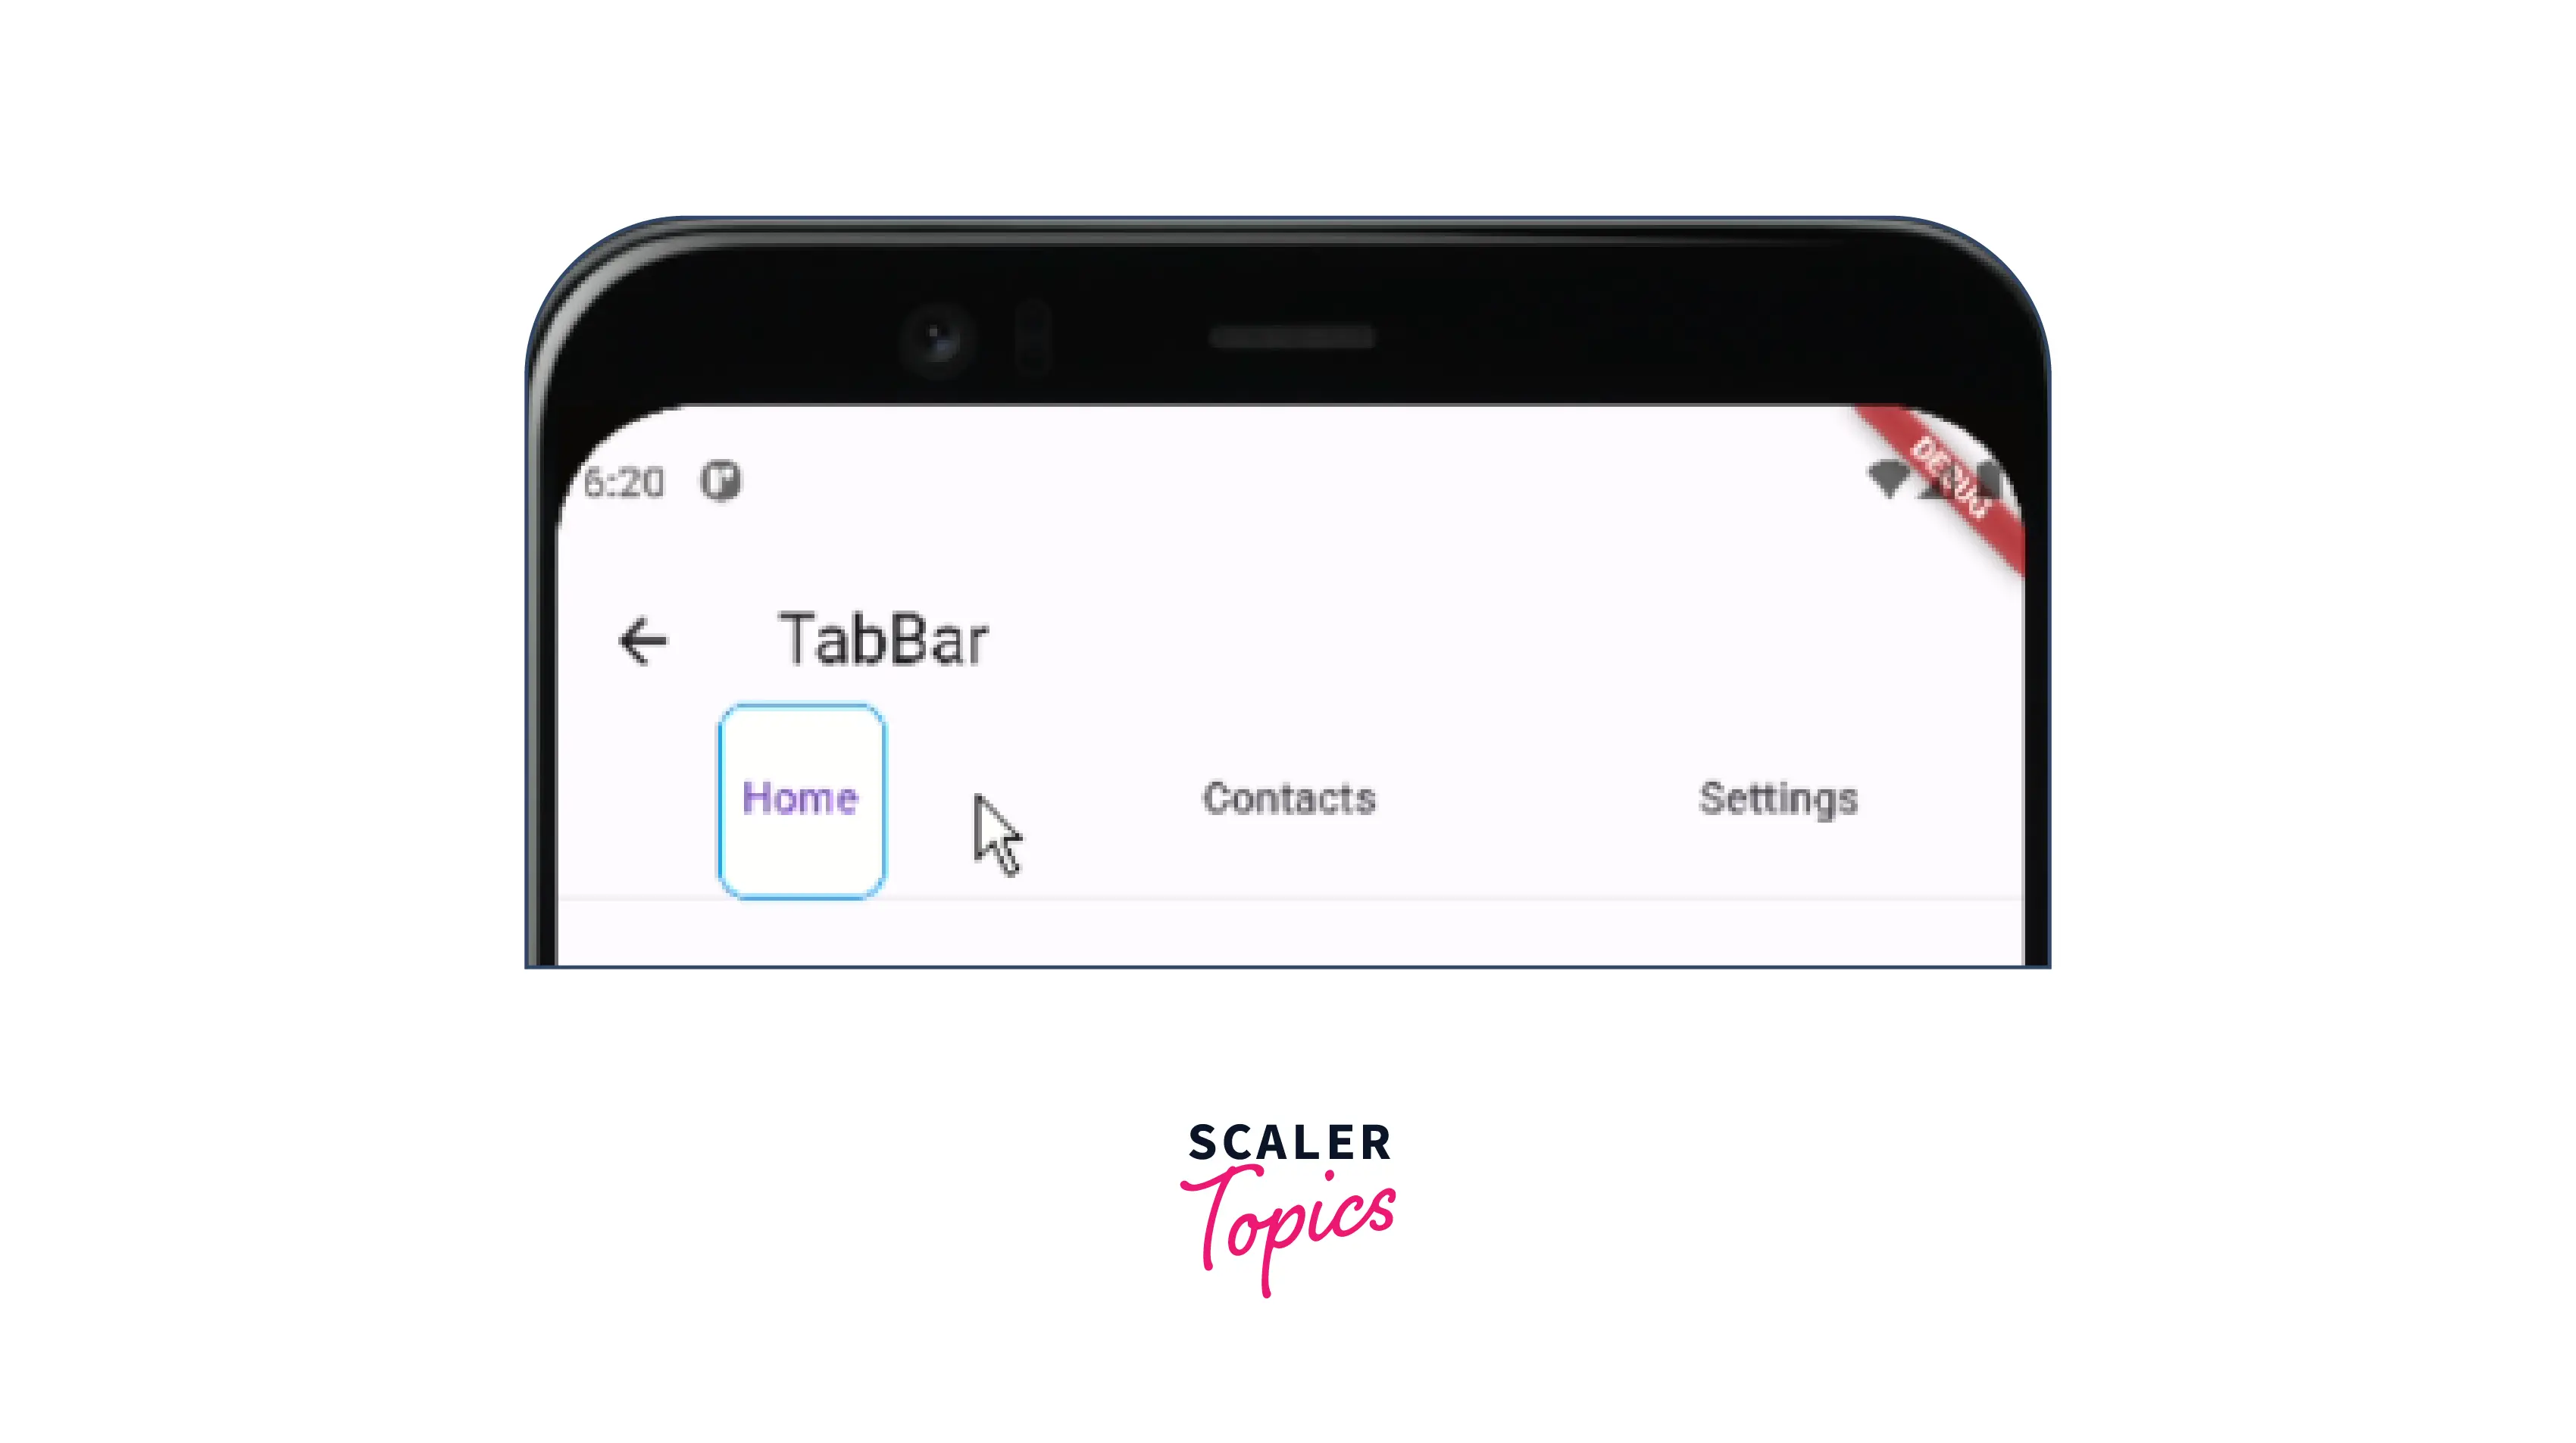
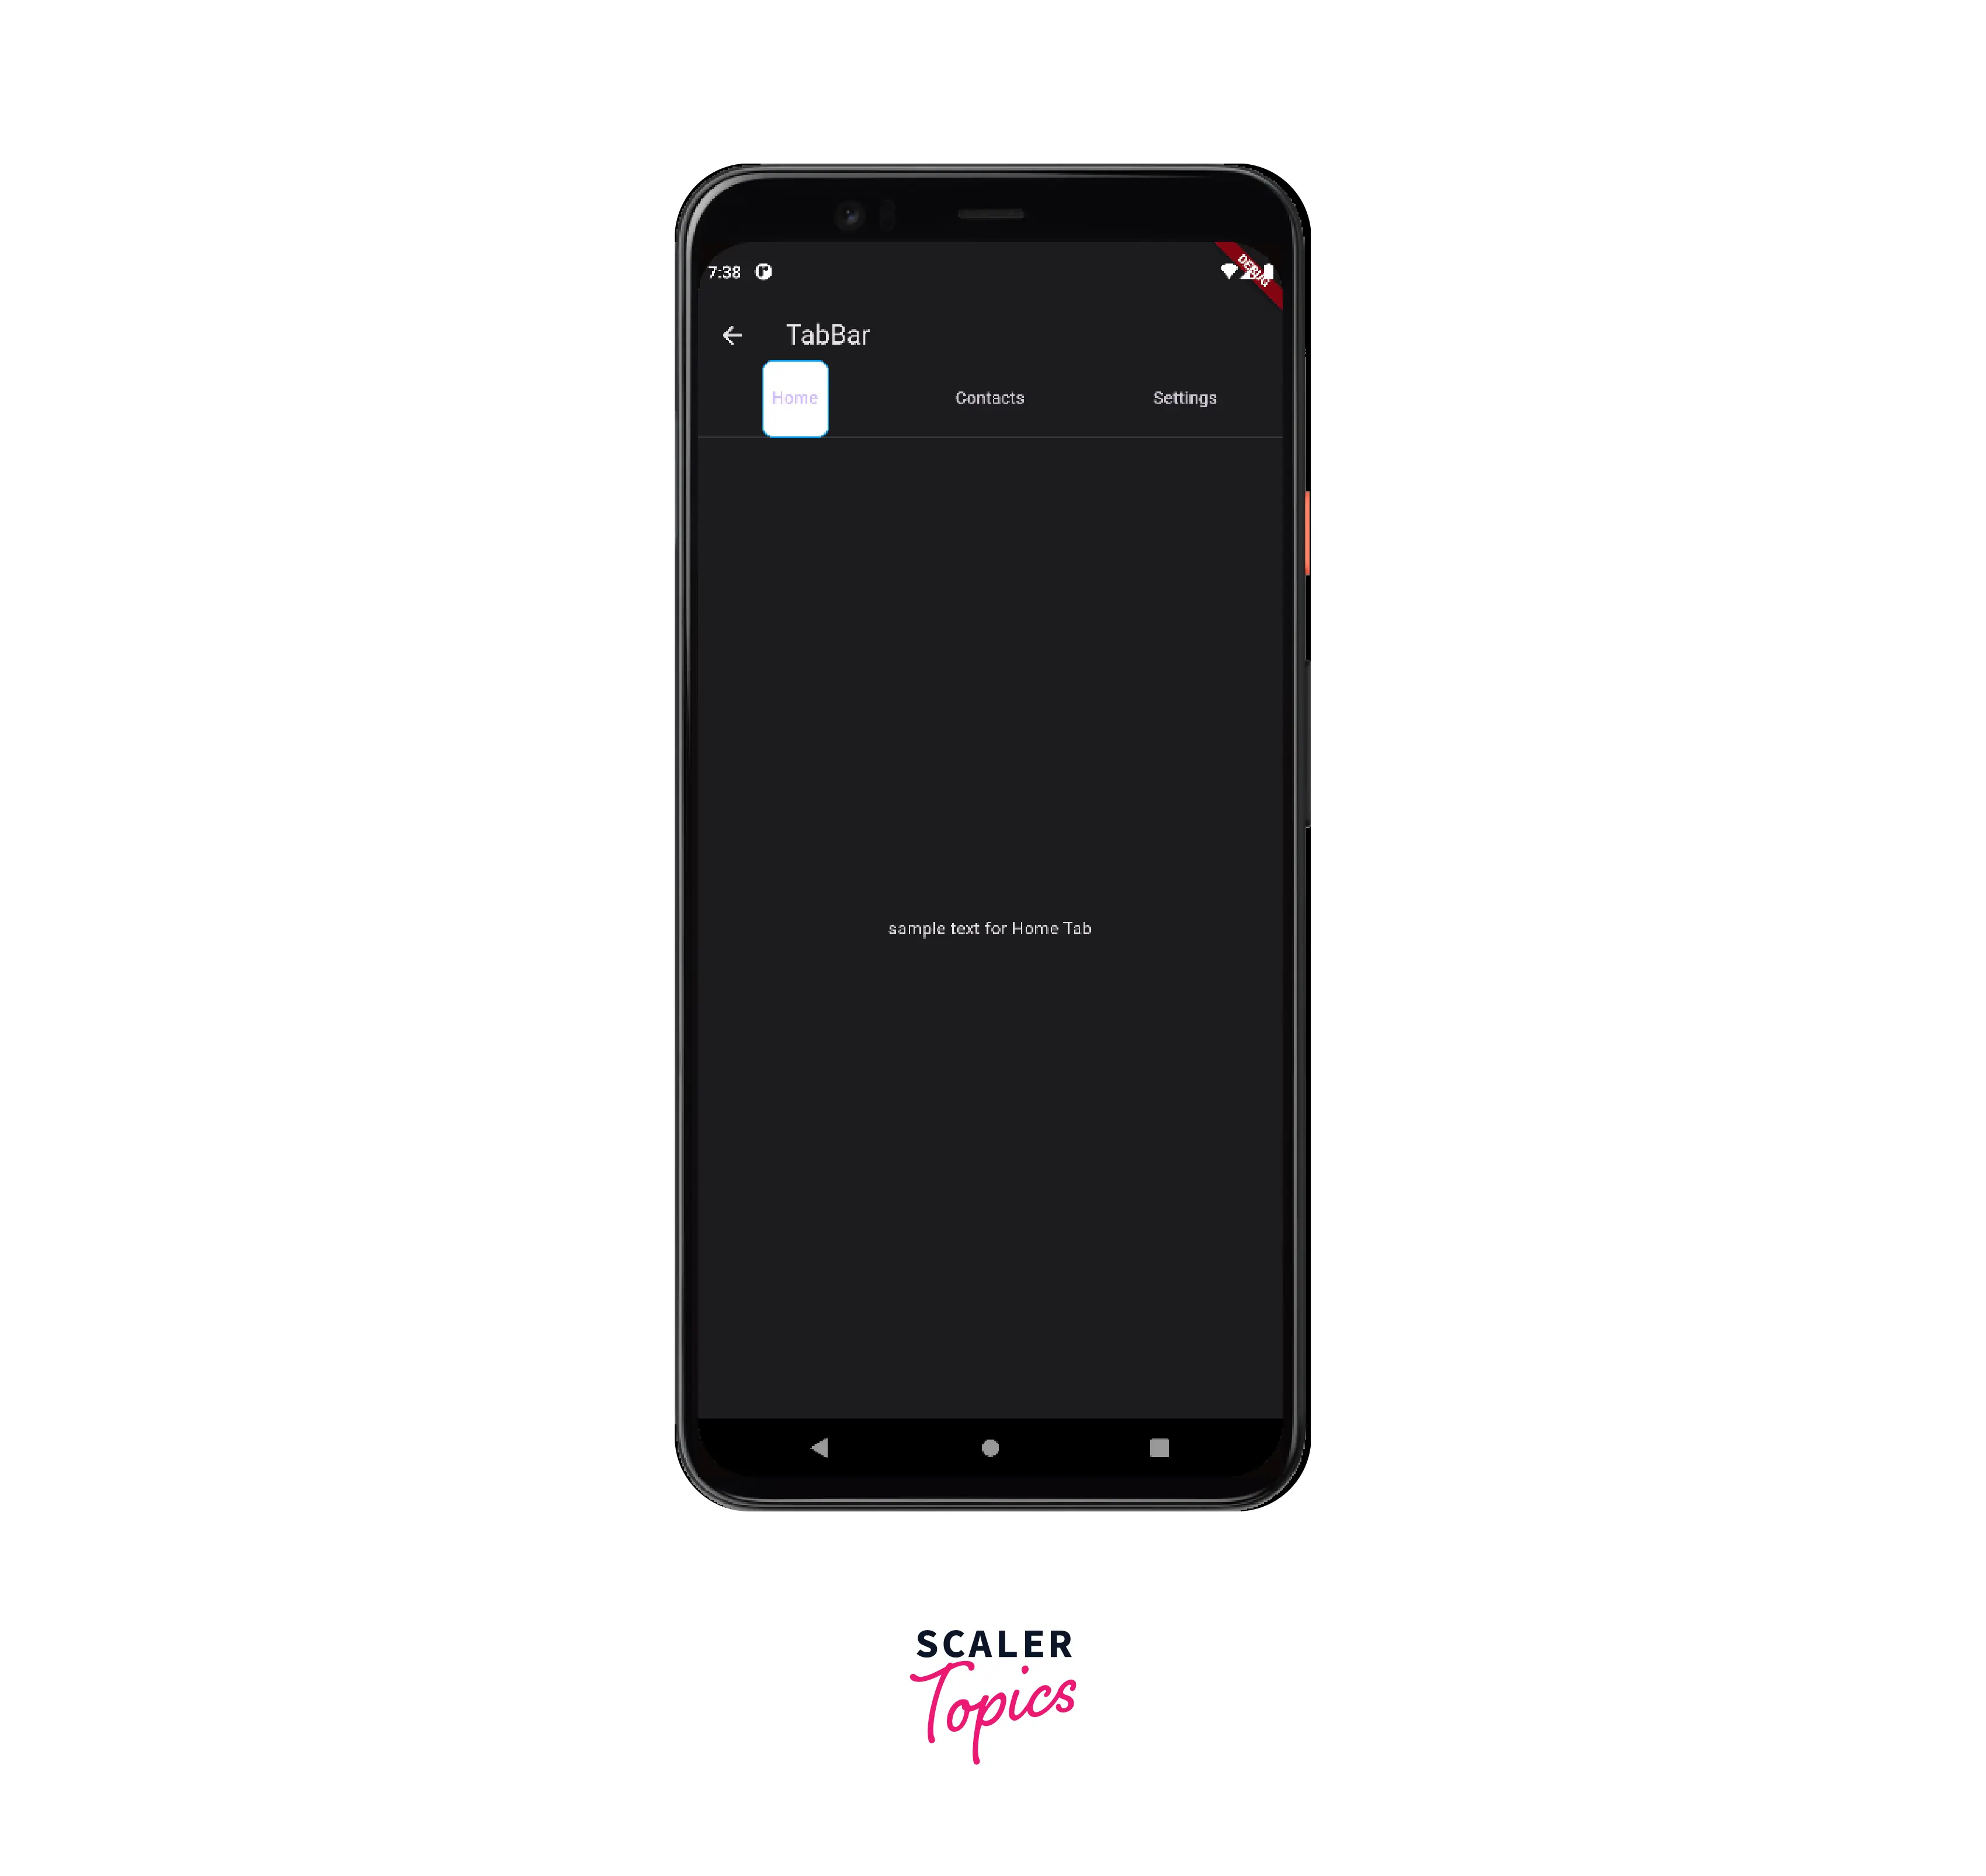
Now, after having done the above-mentioned steps, we now need to add the TabBar to the Scaffold. We will add text label to each tab which makes it clear to the user the view they will be taken to upon clicking that particular tab. With the help of the TabBar view widget, we can add our views for each tab.
The complete source code of the implementation (GitHub Repository Link):
https://github.com/shashwatssp/scaler_flutter_tab_bar/blob/master/lib/basic_tabBar.dart
By following the above four simple steps, we can add the TabBar in our Flutter application.

Customizing the Tab Indicator in the TabBar
Flutter provides us with various ways to customize our tab indicator of the tabbar flutter widget. We generally customize it on the basis of whether the user has selected or unselected it. We set and change the color, height, and shape of the indicator to make it suitable for our application's design. In fact, it is considered one of the notable features of the TabBar that allows one to make such changes to the indicator. We can tweak the various properties such as indicatorColor, indicatorSize, indicatorWeight, etc. for the customization purpose.
Now, we will demonstrate the same in the following steps:
-
In the TabBar section, mention the indicator as a BoxDecoartion and then customize it as per your needs.
-
In the example shown below, we have used the borderRadius, color, and border properties to design the tabs as needed.
-
We have also added padding around the tabs.
The complete source code of the implementation (GitHub Repository Link):
https://github.com/shashwatssp/scaler_flutter_tab_bar/blob/master/lib/customizing_tabBar_indicator.dart
Making Scrollable Tabs with TabBar
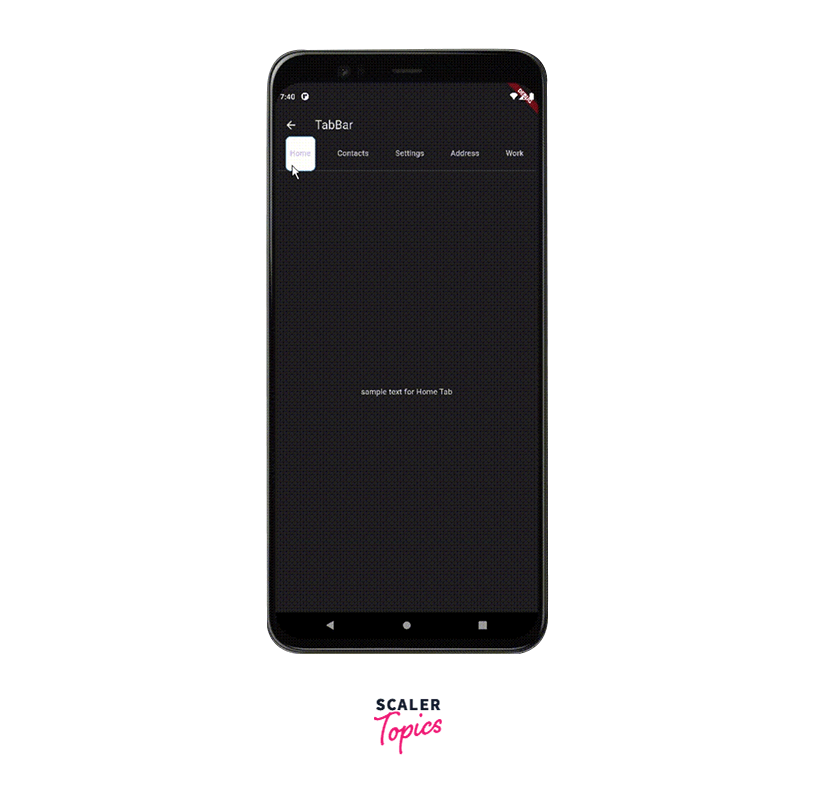
When there are many tabs then we can simply allow the user to scroll through the tabs. The user is able to scroll through the tabs in a horizontal fashion. The user also gets the option to adjust the scroll physics. The TabBar Flutter Widget provides us with a default property named isScrollable which allows us to make these changes.
We can make the TabBar widget scrollable following the below steps:
- We have added two more tabs named Home1 and Contact1 for a better demonstration of the concept.
- In the TabBar, we've set the isScrollable property as true.
- We've wrapped the Scaffold with DefaultTabController.
- For the DefaultTabController we set the length, initialIndex, animationDuration etc.
- Kudos!! the TabBar is scrollable now.
Here, is the complete code implementation of the above steps:
The complete source code of the implementation (GitHub Repository Link):
https://github.com/shashwatssp/scaler_flutter_tab_bar/blob/master/lib/scrollable_tabBar.dart
Listening for Tab Change Event
Listening to the tab change events in the tabbar flutter widget is another important feature. It is often used to create more dynamic and responsive applications.
In this example, we are going to see how we can listen to the tab changes done by the user.
We can listen to the tab change event just by following the few steps as shown below:
-
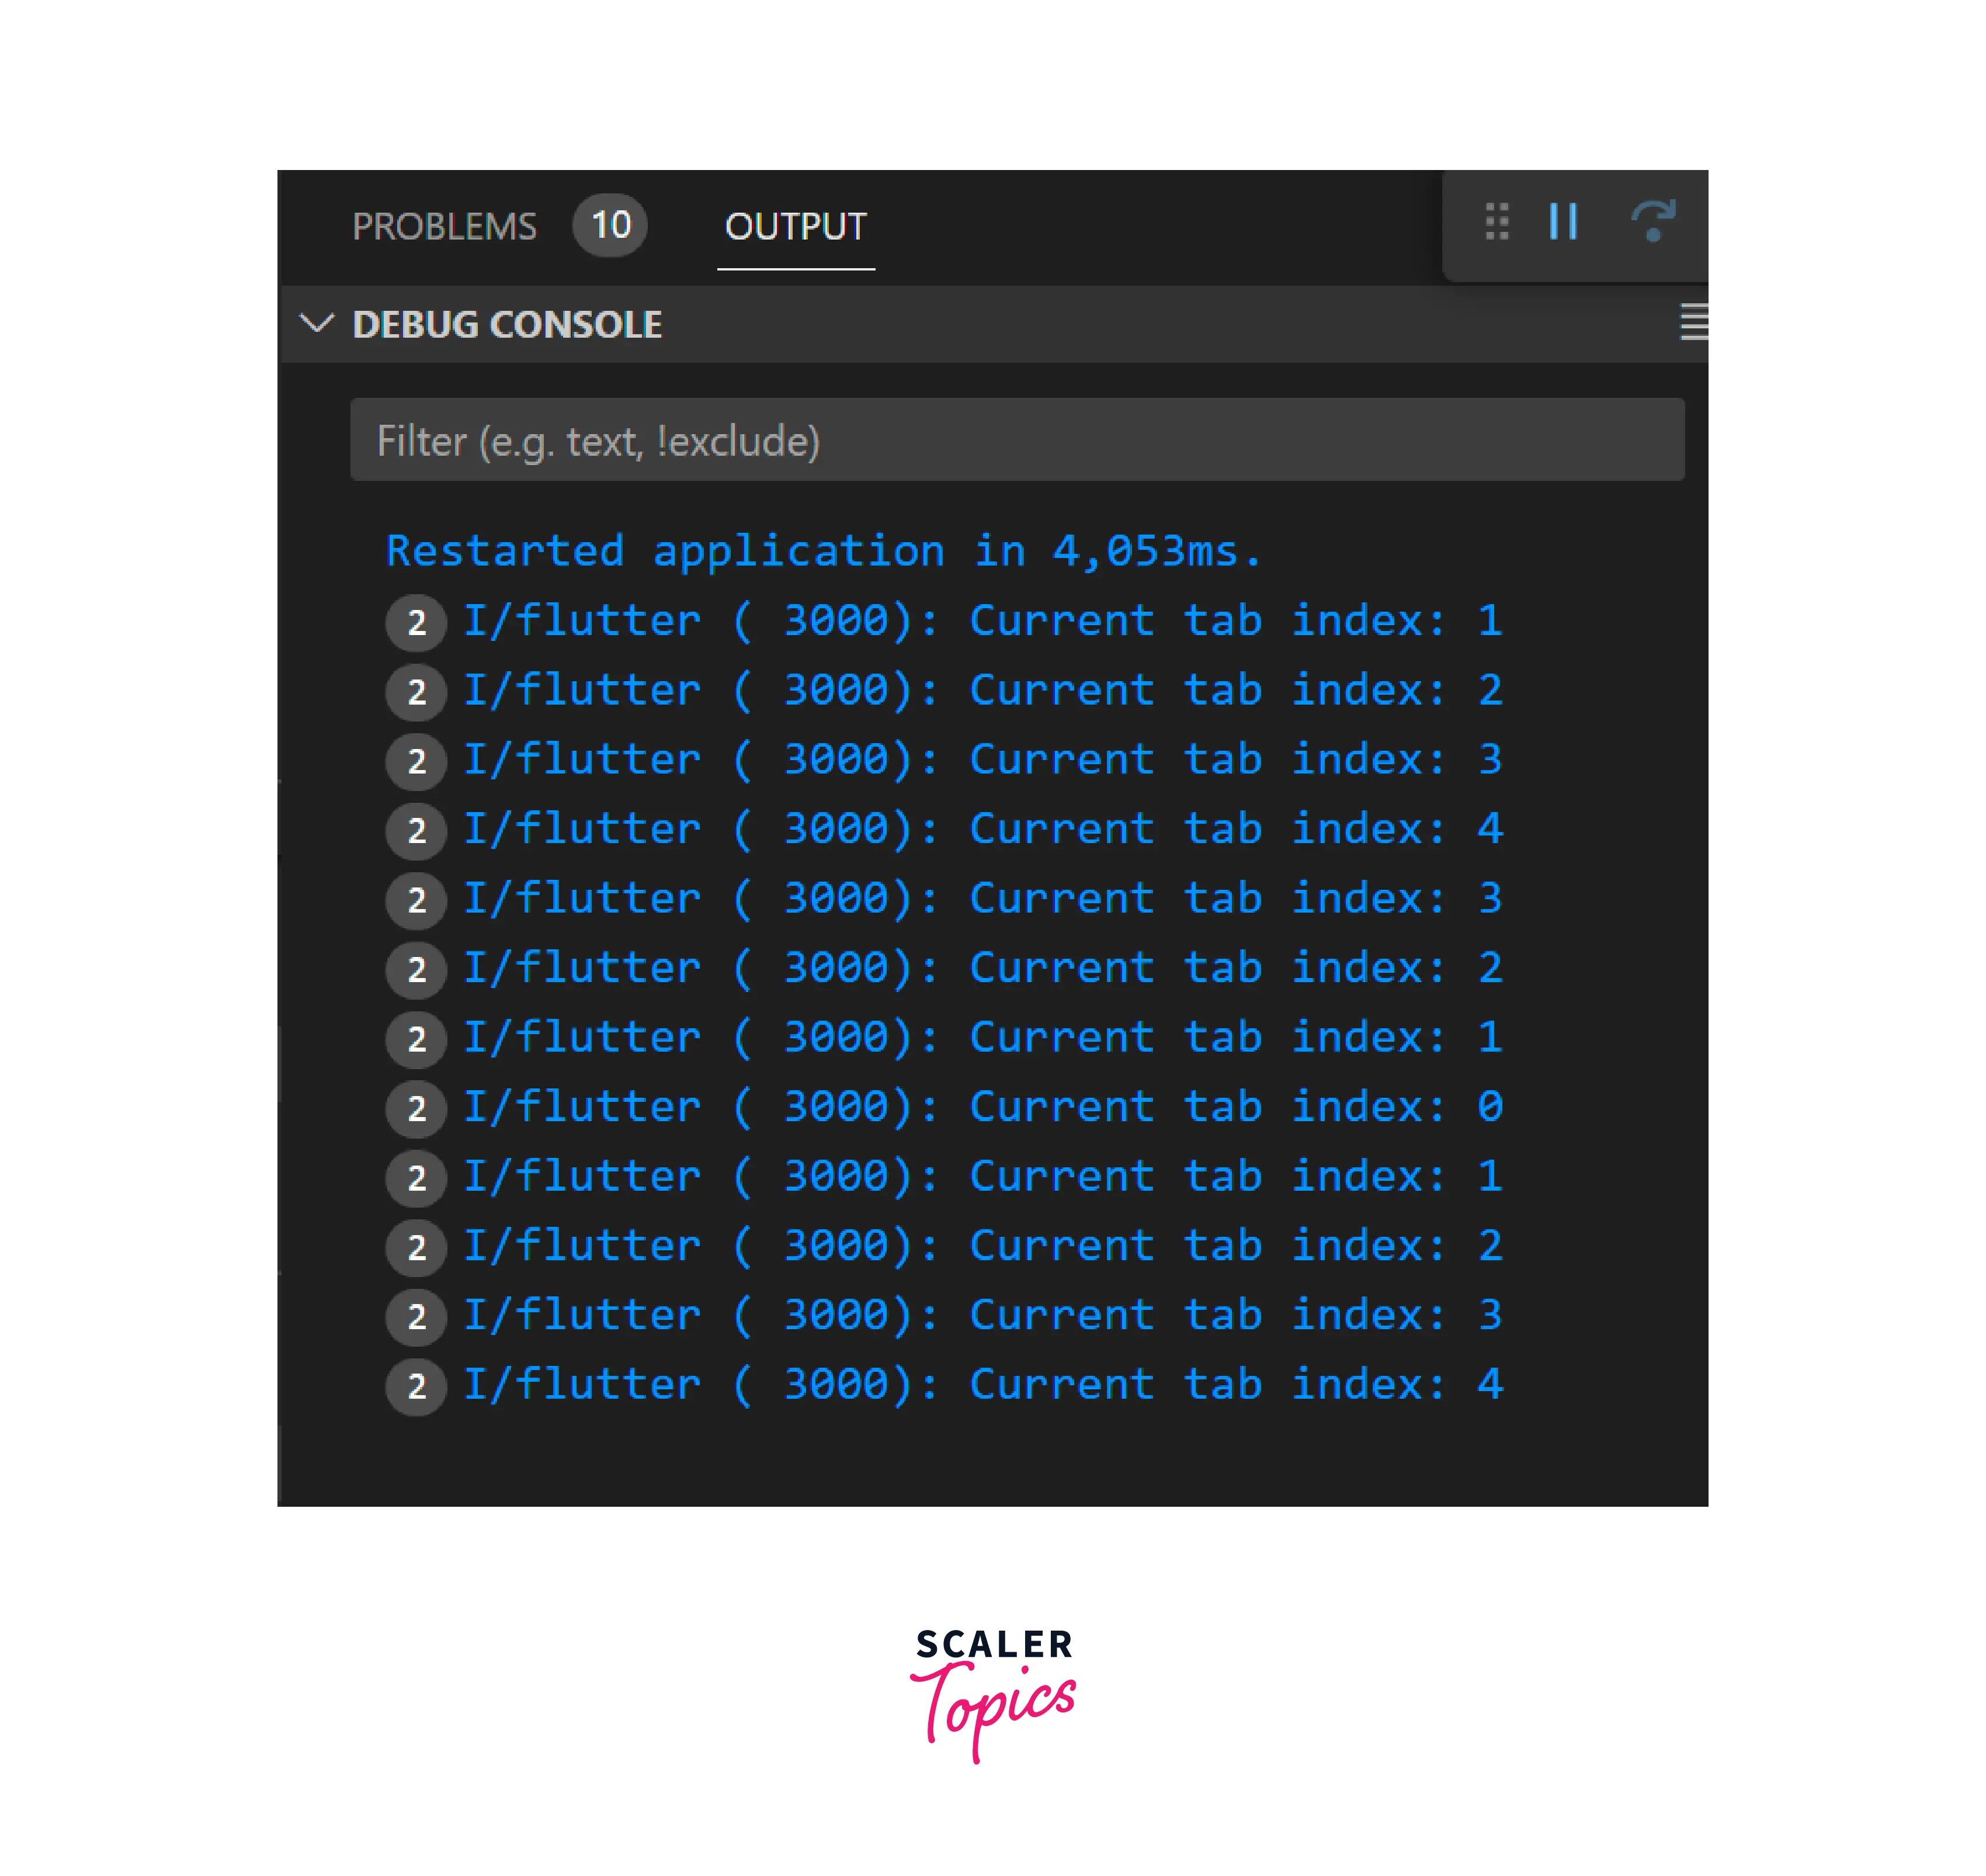
Create a _handleTabChange function which prints the current page index.
Now, we will add the listener and call the handleTabChange function with the listener.
-
In the initstate function, add the tabController.addListener(handleTabChange) to listen to the tab change events.
-
In the initstate function, add the tabController.dispose() to dispose the listener later.
Now as per the above code, whenever the user clicks on any tab the listener gets to know about it and prints it in the console.
The complete source code of the implementation (GitHub Repository Link):
https://github.com/shashwatssp/scaler_flutter_tab_bar/blob/master/lib/listening_for_tab_change.dart
Implementing TabBar without AppBar
Generally, the TabBar is always used with an AppBar but sometimes based upon the requirement of our application, we may need to design a TabBar without the usage of AppBar. This is generally done when the developers want to use custom navigation. Sometimes when we need to display the TabBar at some different location then also we need to implement it the same way.
We can implement the TabBar without AppBar by following the below simple steps:
- Design the Scaffold in the form of a column
- Put the TabBar inside a container, instead of the AppBar.
- Wrap the TabBar with an Expanded widget
- Add a sizedBox at the beginning of Column for better positioning of the TabBar.
- Bingo !! You're done.
Here is the code of the above implementation.
Preserving the State of Tabs
In most modern-day applications, it is often important to preserve the state of tabs. For Example, when the user does some action on one section of the application and then switches to some other section, we need to preserve the action performed by him on the tabbar flutter widget. Failing to preserve the user action can lead to poor user experience as the end user will have to do the same stuff again and again.
We will implement it with the help of PageStorage Widget.
-
In order to preserve the state of tabs, we wrap the TabBarView with PageStorage.
-
In the bucket we pass the PageStorageBucket and we use the PageStorageKey for the TabBarView widget.
-
To Demonstrate that the state has been preserved, we also add three variables x,y, and z, and three functions to increment them.
-
Now, by showing that the values of x,y, and z are preserved upon switching between the pages, it is evident that the stat of the Tabs was preserved.
Here is the code implementation for the above steps:

Example App
We have combined all the above-mentioned features of the tabbar flutter widget into a single app.
The main.dart file of the Example App is as follows:
The home page of the app is named Demo and has links to all the other pages which are implemented above.
The complete source code of the implementation (GitHub Repository Link):
https://github.com/shashwatssp/scaler_flutter_tab_bar

Conclusion
The TabBar widget is one of the most popular widgets in Flutter. It eases the navigation between different sections of the app, providing a better overall user experience. In this article, we have seen the various use cases of the TabBar in detail. Now, we are going to conclude this article by revisiting all the crucial and important aspects of our discussion.
- The TabBar is a very powerful tool used to provide efficient navigation to the user.
- To create a simple TabBar we simply create a tabController and then initialize it.
- We can customize the TabBar on the basis of whether it is in the selected or unselected state.
- The TabBar can also be made scrollable. When we enable this feature, the users can scroll through the tabs horizontally.
- We can also listen to the tab change events. This functionality can be further used to perform some specific functions whenever the tab is changed.
- We need to preserve the state of the tabs even when the user has navigated to some different section of the application. We have discussed how to implement this, in this article.