Data Augmentation with TensorFlow
Overview
For a deep learning model, you should have a large dataset for training the model. But in most cases, the dataset we provide for the model is insufficient for the deep learning model to train properly. So we need to create a copy of slightly modified data from the original dataset for the model to train. This process is called Data Augmentation, which can be done using Tensorflow data augmentation functions.

What is Data Augmentation?
Data Augmentation is the process of copying the original dataset with some slight modifications to the original data, increasing the number of training samples to the dataset for the model to train efficiently.
We can improve the model's performance by slightly changing the dataset and introducing more training samples. There are several conditions where you can use data augmentation for your dataset. Some of them are:
- To prevent overfitting of models
- When the initial training samples are low
- When the accuracy of the model is low
By doing Data Augmentation, we can reduce the operational cost of labeling and cleaning raw datasets.
Types of Data Augmentation
There are several types of data augmentation depending on the data you are working with some of these are:
- Image Augmentation
- Text Data Augmentation
- Audio Data Augmentation
The Augmentation techniques differ for each of the Augmentation types. For example, Tensorflow Data Augmentation for Image has:
- Random Rotation
- Random Flip
- Random Zoom
- Cropping and Resizing
These techniques will improve the training samples for the model to train efficiently.
Text Data Augmentation
Data augmentation techniques can be applied at various levels within a dataset to enhance its diversity and improve model performance. Here's an explanation of how these techniques can be applied at different levels:
-
Character Level:
At the character level, data augmentation involves altering individual characters in text data. This can include techniques like:- Typos and Spelling Variations:
Introducing intentional typos or variations in spellings to simulate real-world errors. - Character Replacement:
Replacing characters with similar-looking characters to mimic OCR errors or handwriting variations. - Case Variations:
Changing the case of letters to simulate different capitalizations.
Example:
Converting "Hello" to "hElLo" or introducing typos like "Helo". - Typos and Spelling Variations:
-
Word Level:
Data augmentation at the word level involves manipulating individual words in a text. This can include techniques like:- Synonym Replacement:
Replacing words with their synonyms while preserving the context of the sentence. - Insertion and Deletion:
Adding or removing words to create more variation in sentence length and structure. - Random Word Swapping:
Swapping the positions of words within a sentence.
Example:
Replacing "happy" with "joyful", or adding an extra word like "very" in a sentence. - Synonym Replacement:
-
Phrase Level:
Augmenting data at the phrase level involves modifying phrases or groups of words in a coherent manner. Techniques at this level include:- Paraphrasing:
Rewriting phrases or sentences while retaining the original meaning. - Sentence Splitting:
Breaking longer sentences into shorter ones or combining shorter sentences into longer ones. - Random Phrase Replacement:
Replacing a phrase with a semantically similar one.
Example:
Paraphrasing "The quick brown fox jumps over the lazy dog" to "The fast brown fox leaps over the inactive canine". - Paraphrasing:
-
Document Level:
Data augmentation can also be applied to entire documents or texts. Techniques at this level include:- Document Summarization:
Creating shorter summaries of longer texts. - Text Combination:
Merging multiple texts to generate a longer document. - Shuffling Paragraphs:
Rearranging the order of paragraphs within a document.
Example:
Generating a concise summary of a news article or combining paragraphs from different articles to create a new document.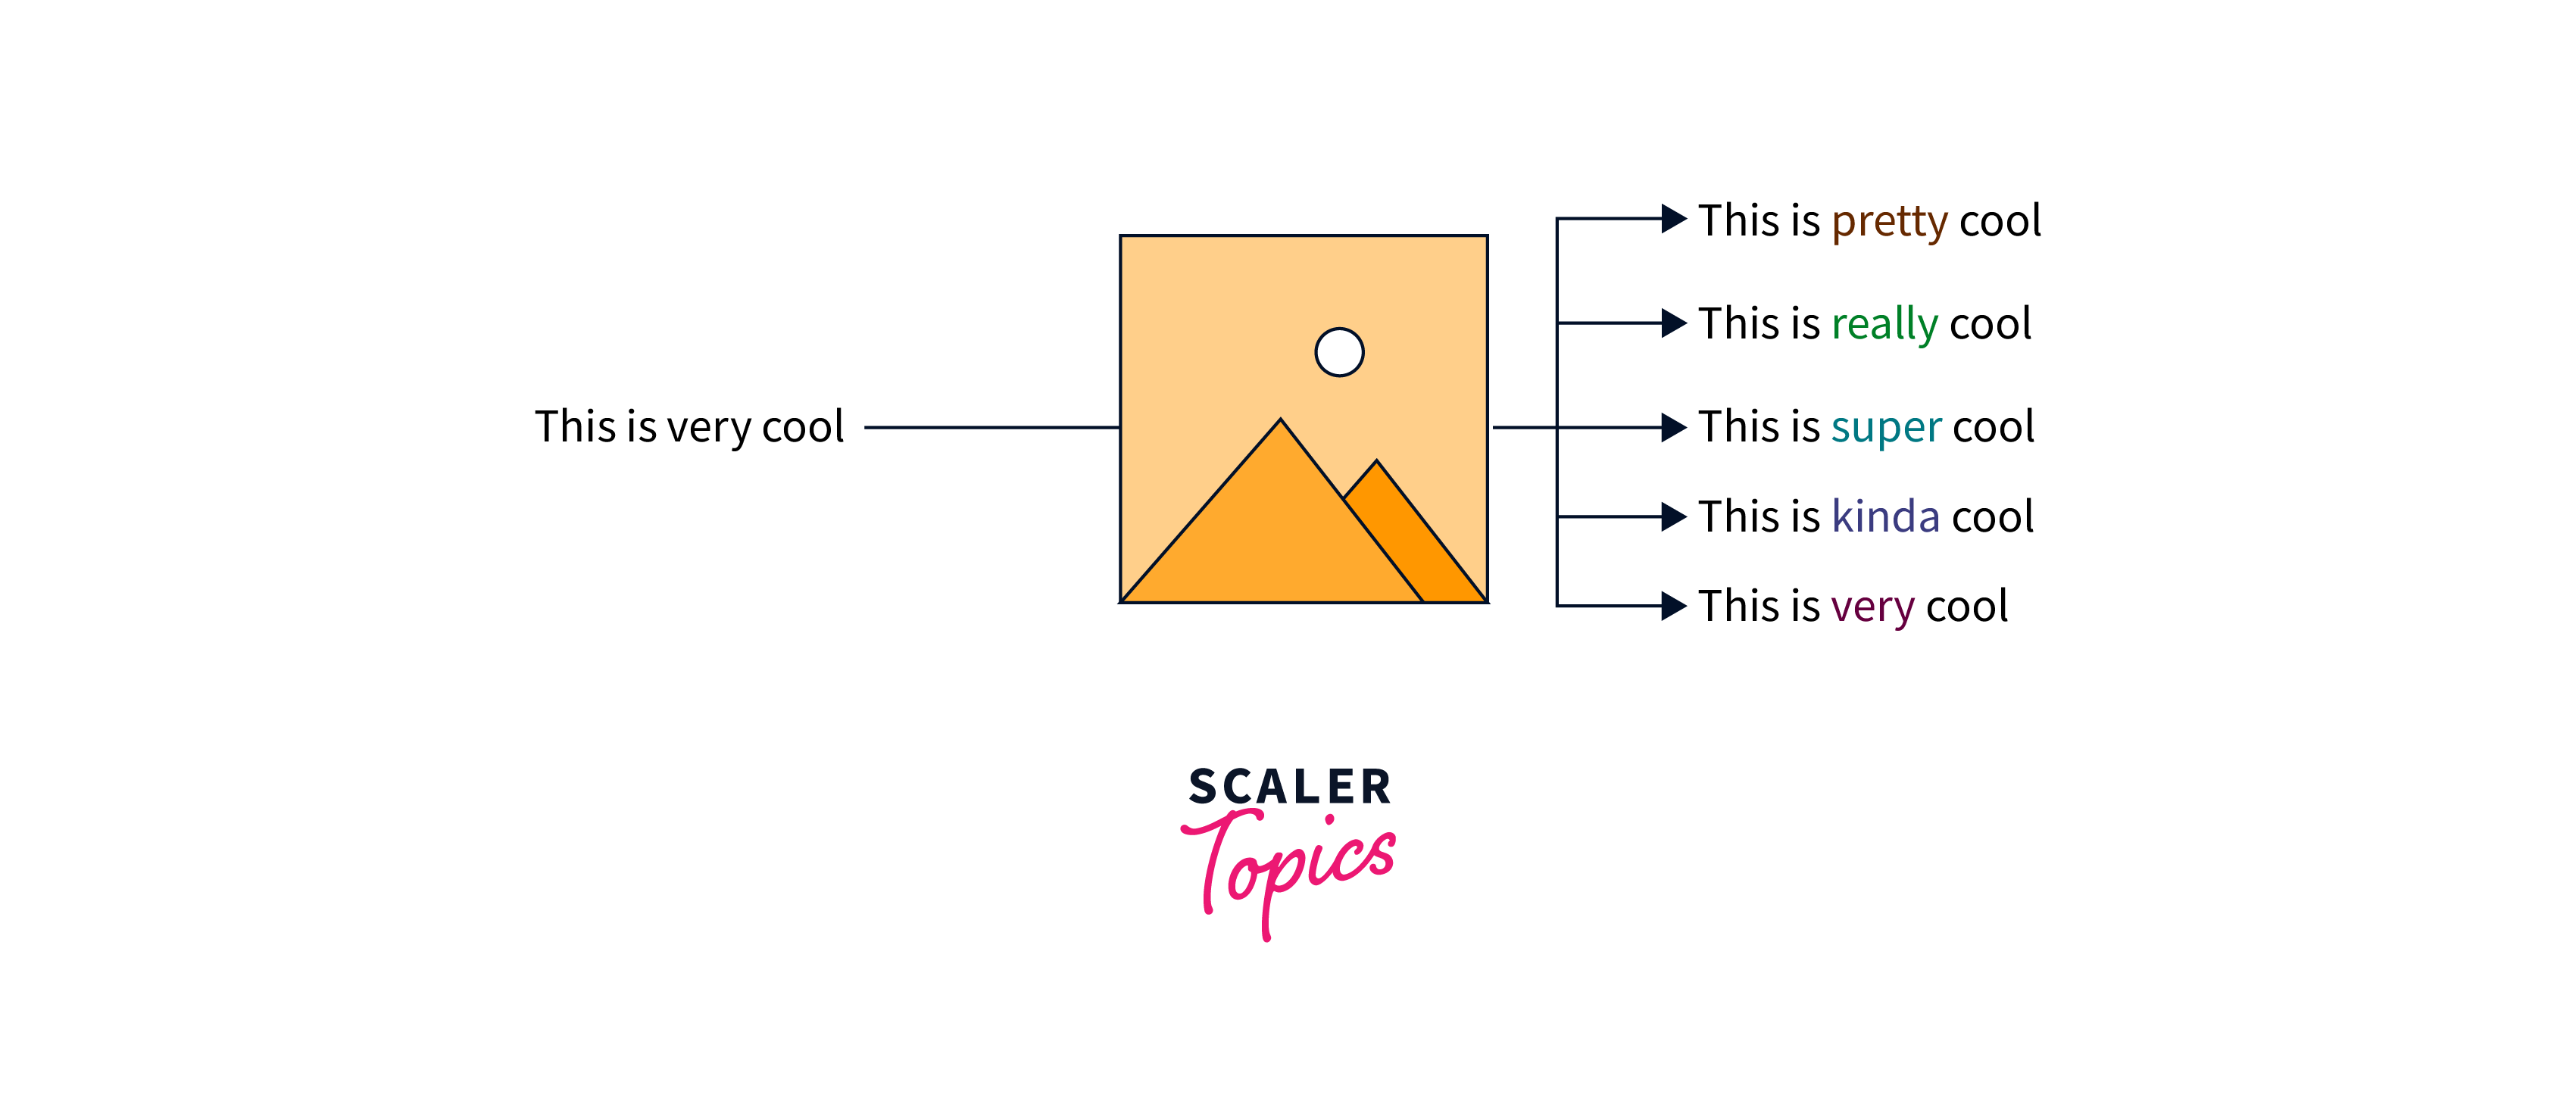
- Document Summarization:
The choice of which level to apply data augmentation depends on the nature of the task and the desired outcome. For instance, character-level augmentation might be more relevant for tasks involving OCR (optical character recognition) systems, while word and phrase-level augmentation might be more beneficial for natural language processing tasks such as sentiment analysis or text classification.
Audio Data Augmentation
Audio Data Augmentation can be done using waveforms and using the spectrogram. Some of the audio augmentation techniques include:
-
Noise Injection:
We can increase the number of audio samples by simply adding some random value to the data using numpy.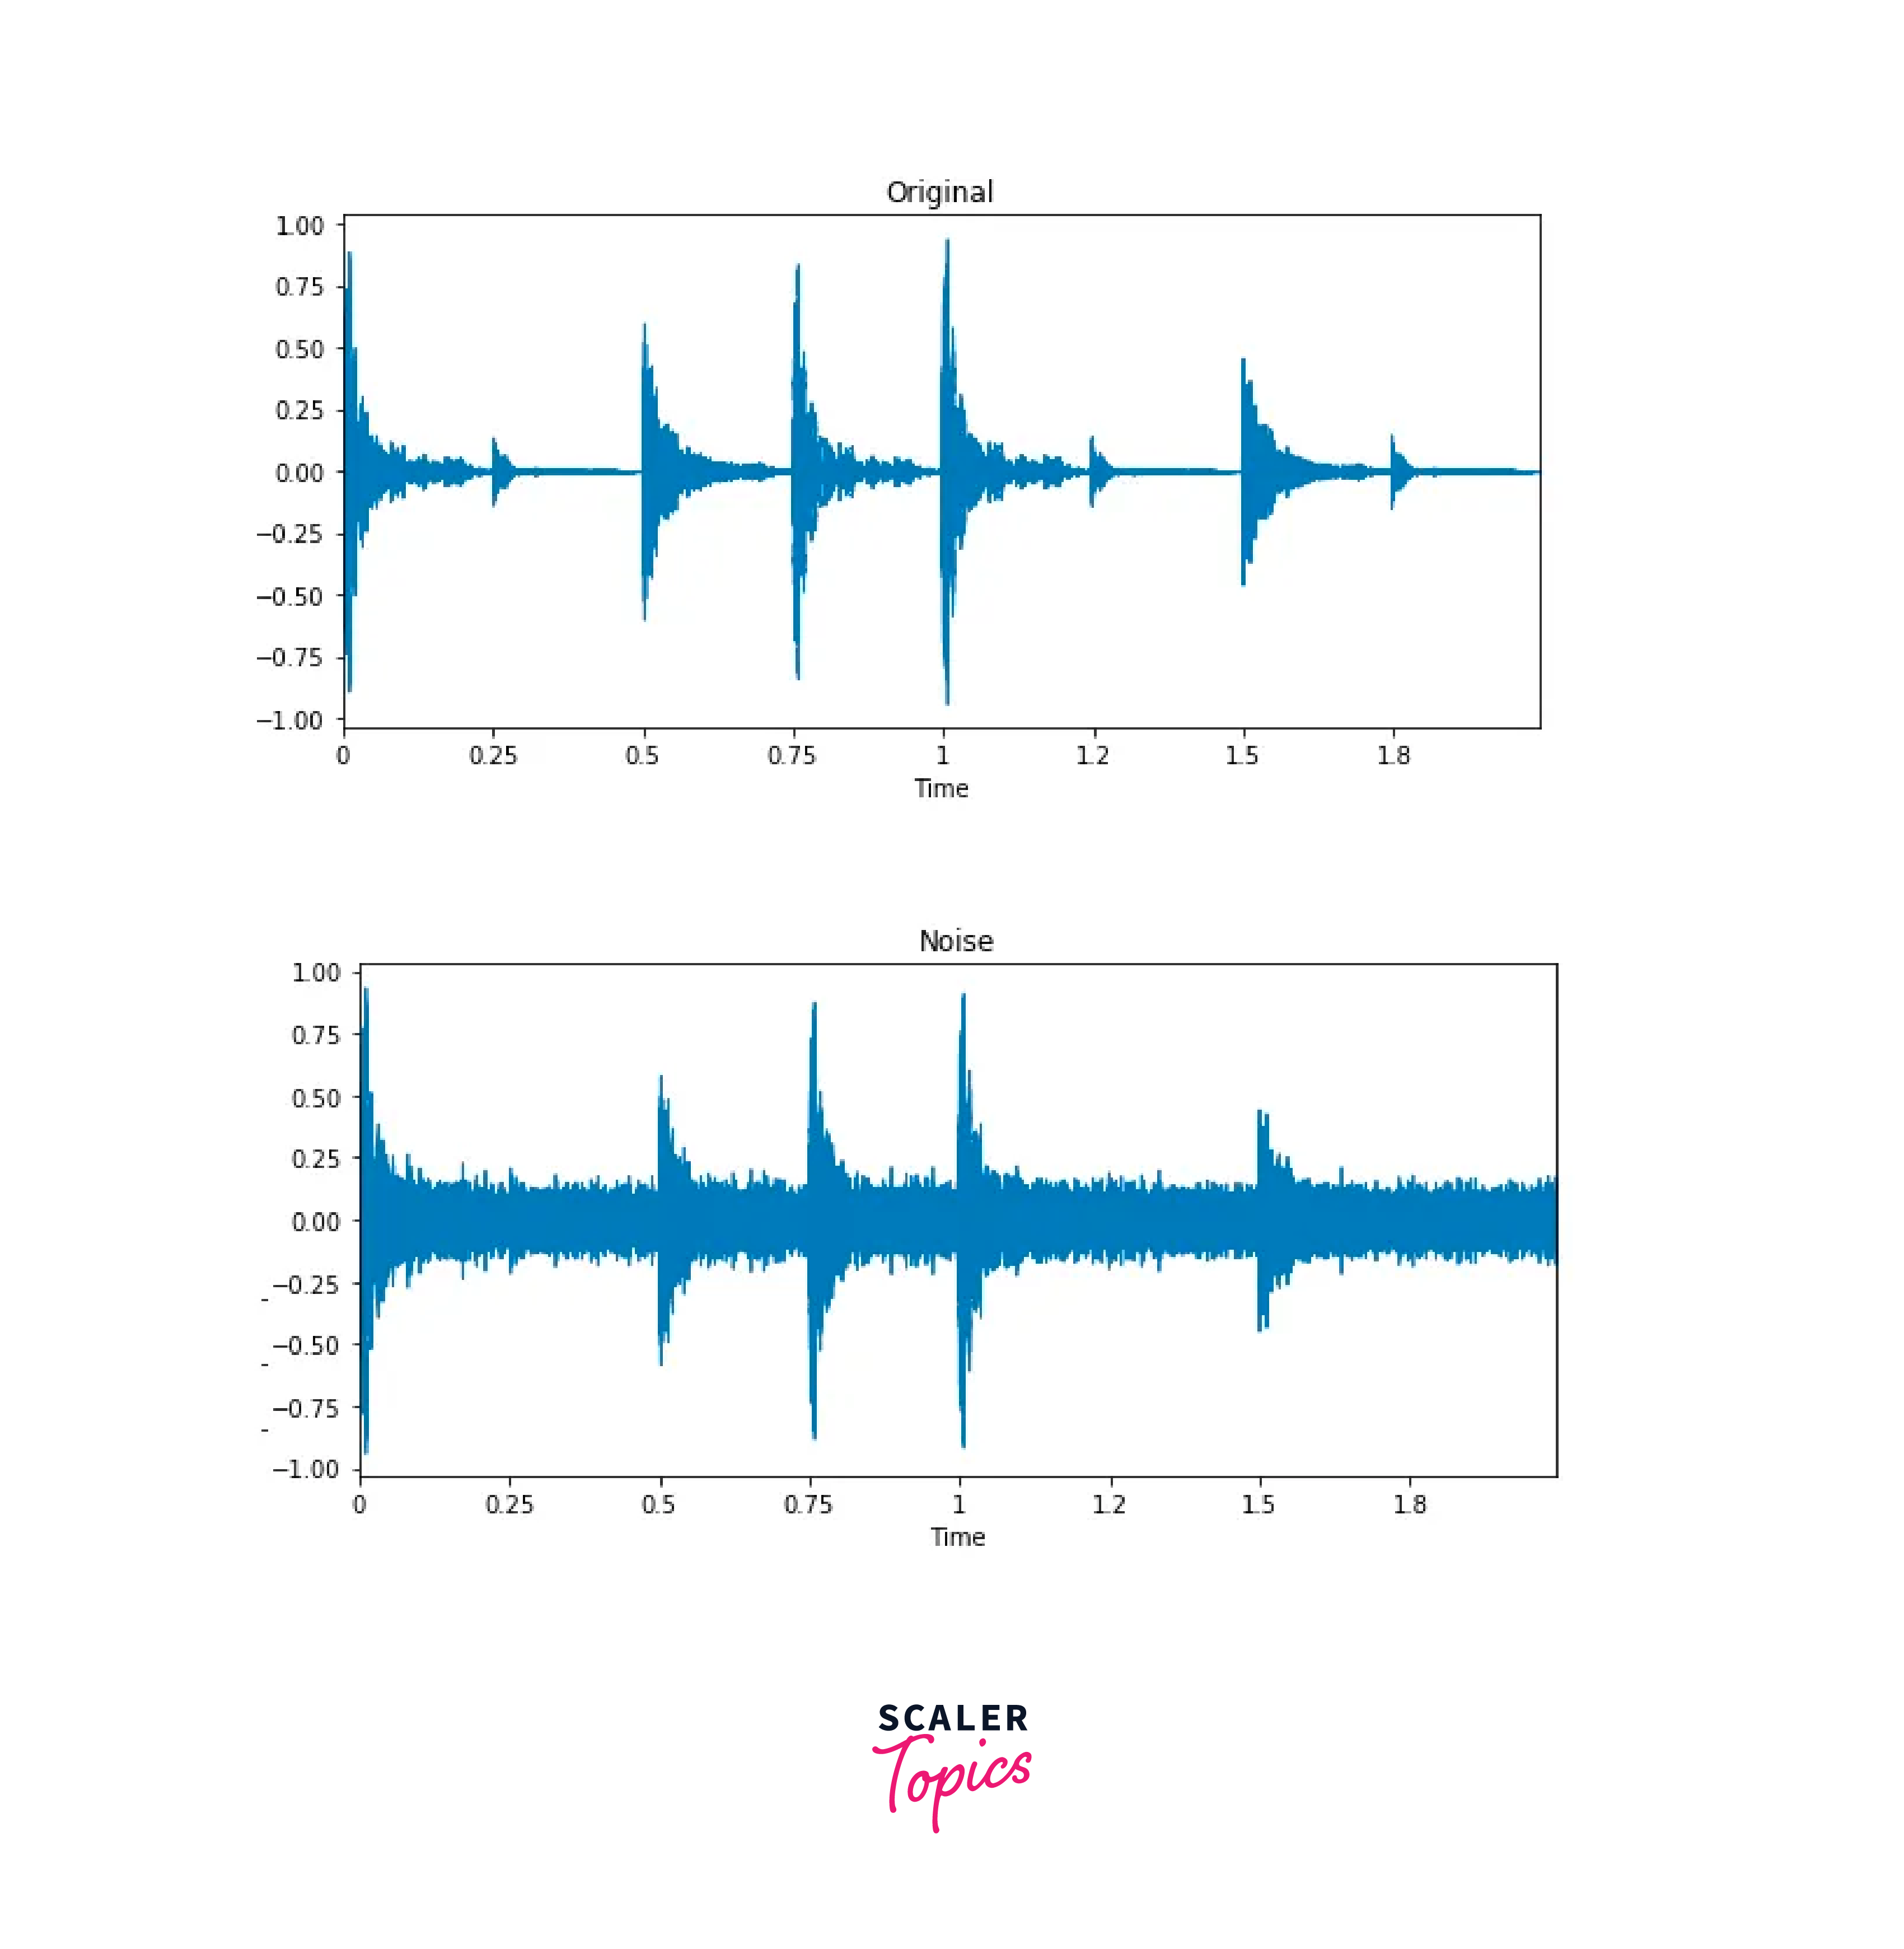
-
Shifting Time:
The idea of shifting time is very simple. It just shifts the audio to left/right with a random second. If shifting audio to the left (fast forward) with x seconds, the first x seconds will be marked as 0 (i.e. silence). If shifting audio to the right (back forward) with x seconds, the last x seconds will be marked as 0 (i.e. silence).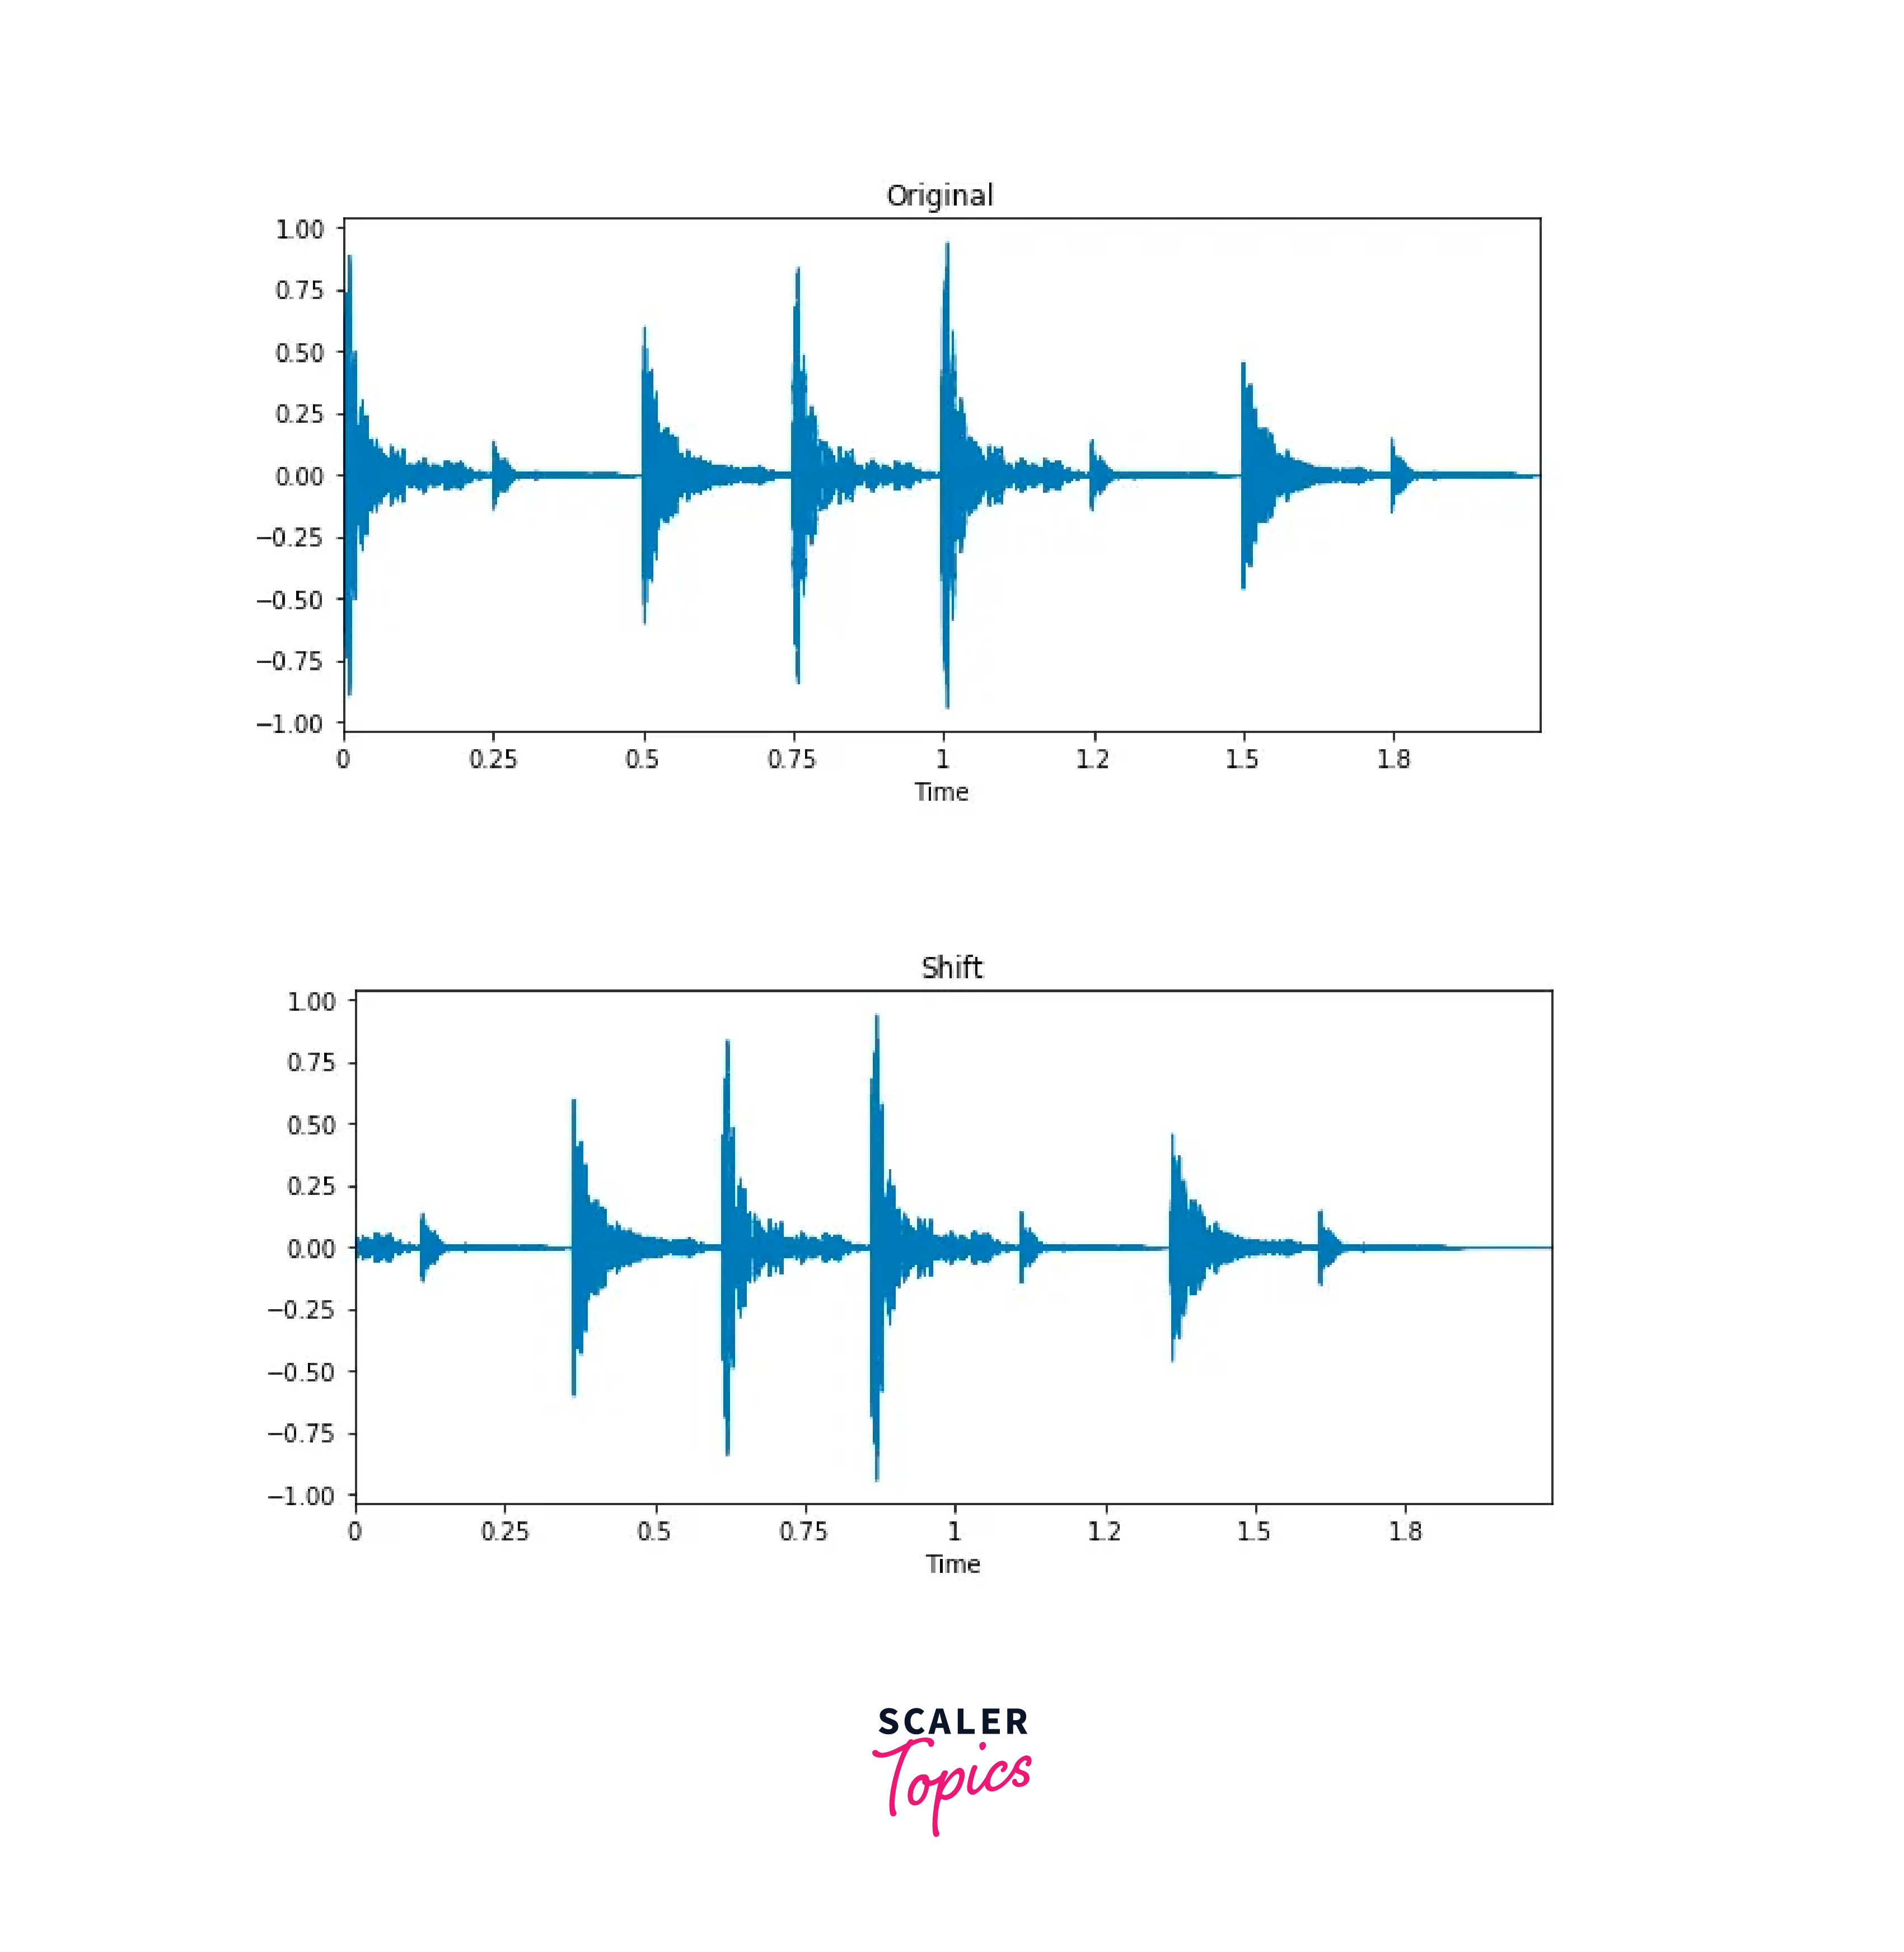
-
Changing Pitch:
We can change the pitch using librosa function.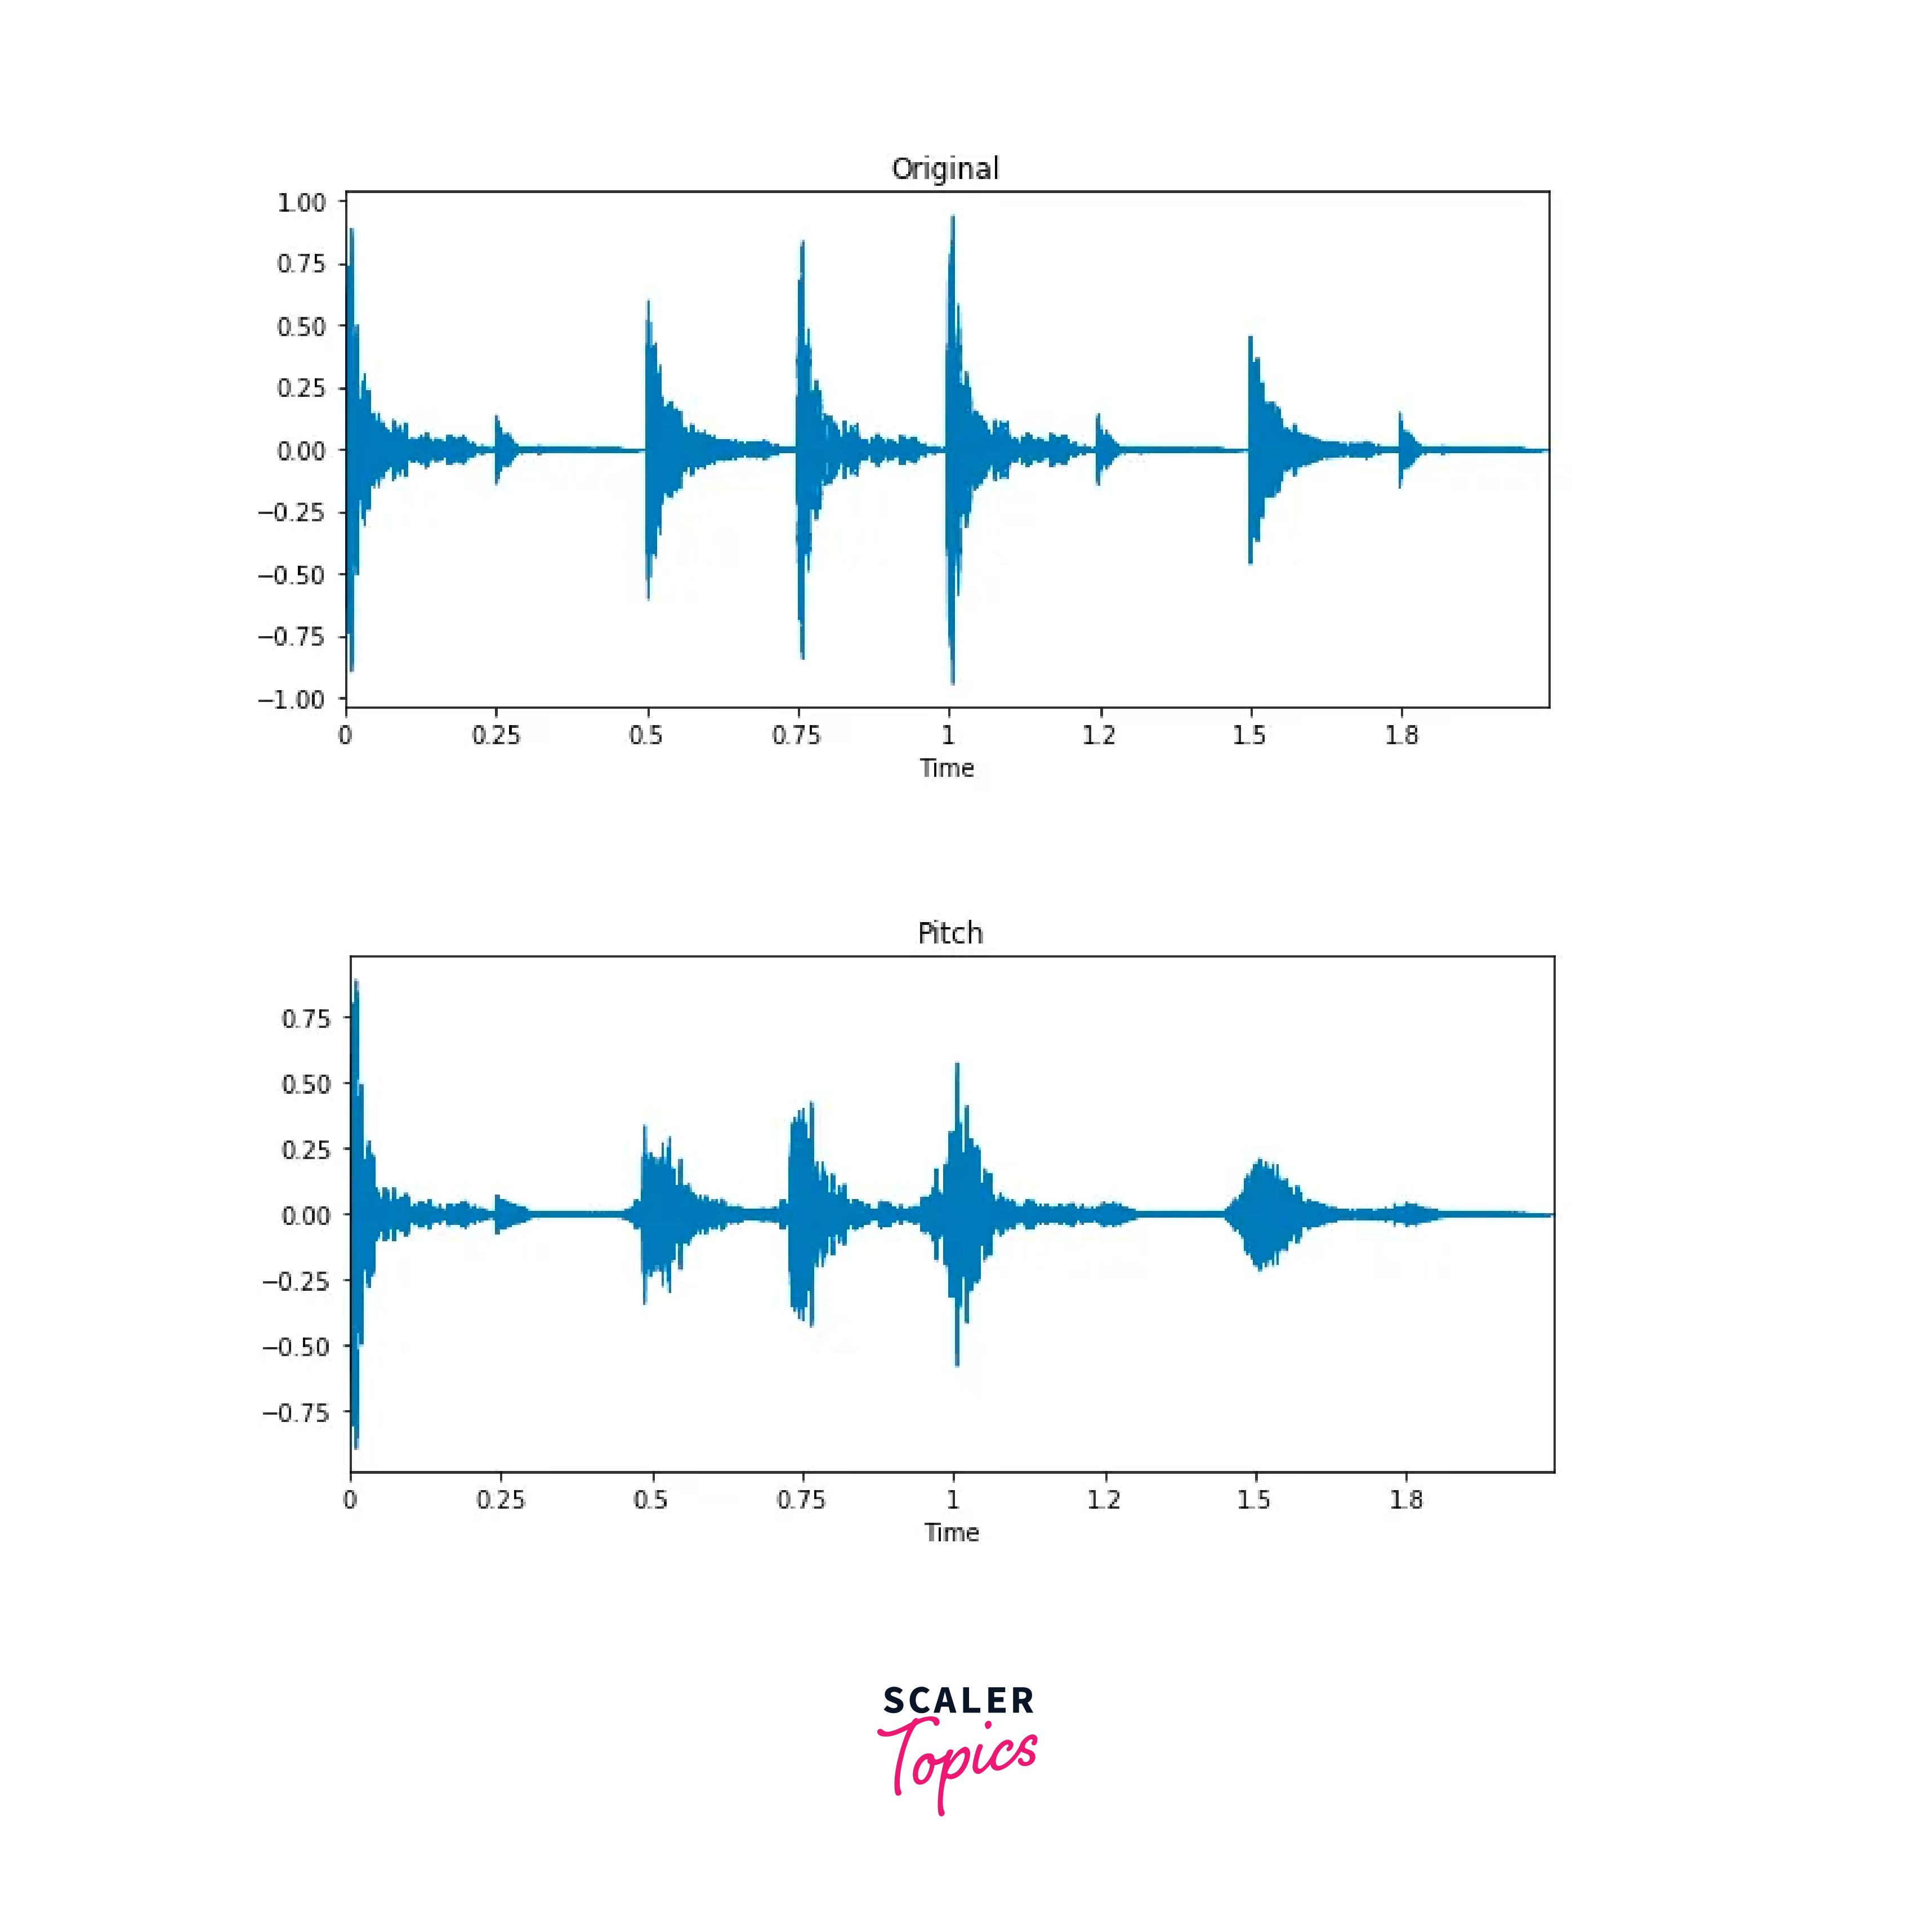
-
Changing Speed:
We can stretch the audio time series by a fixed rate by using the librosa function.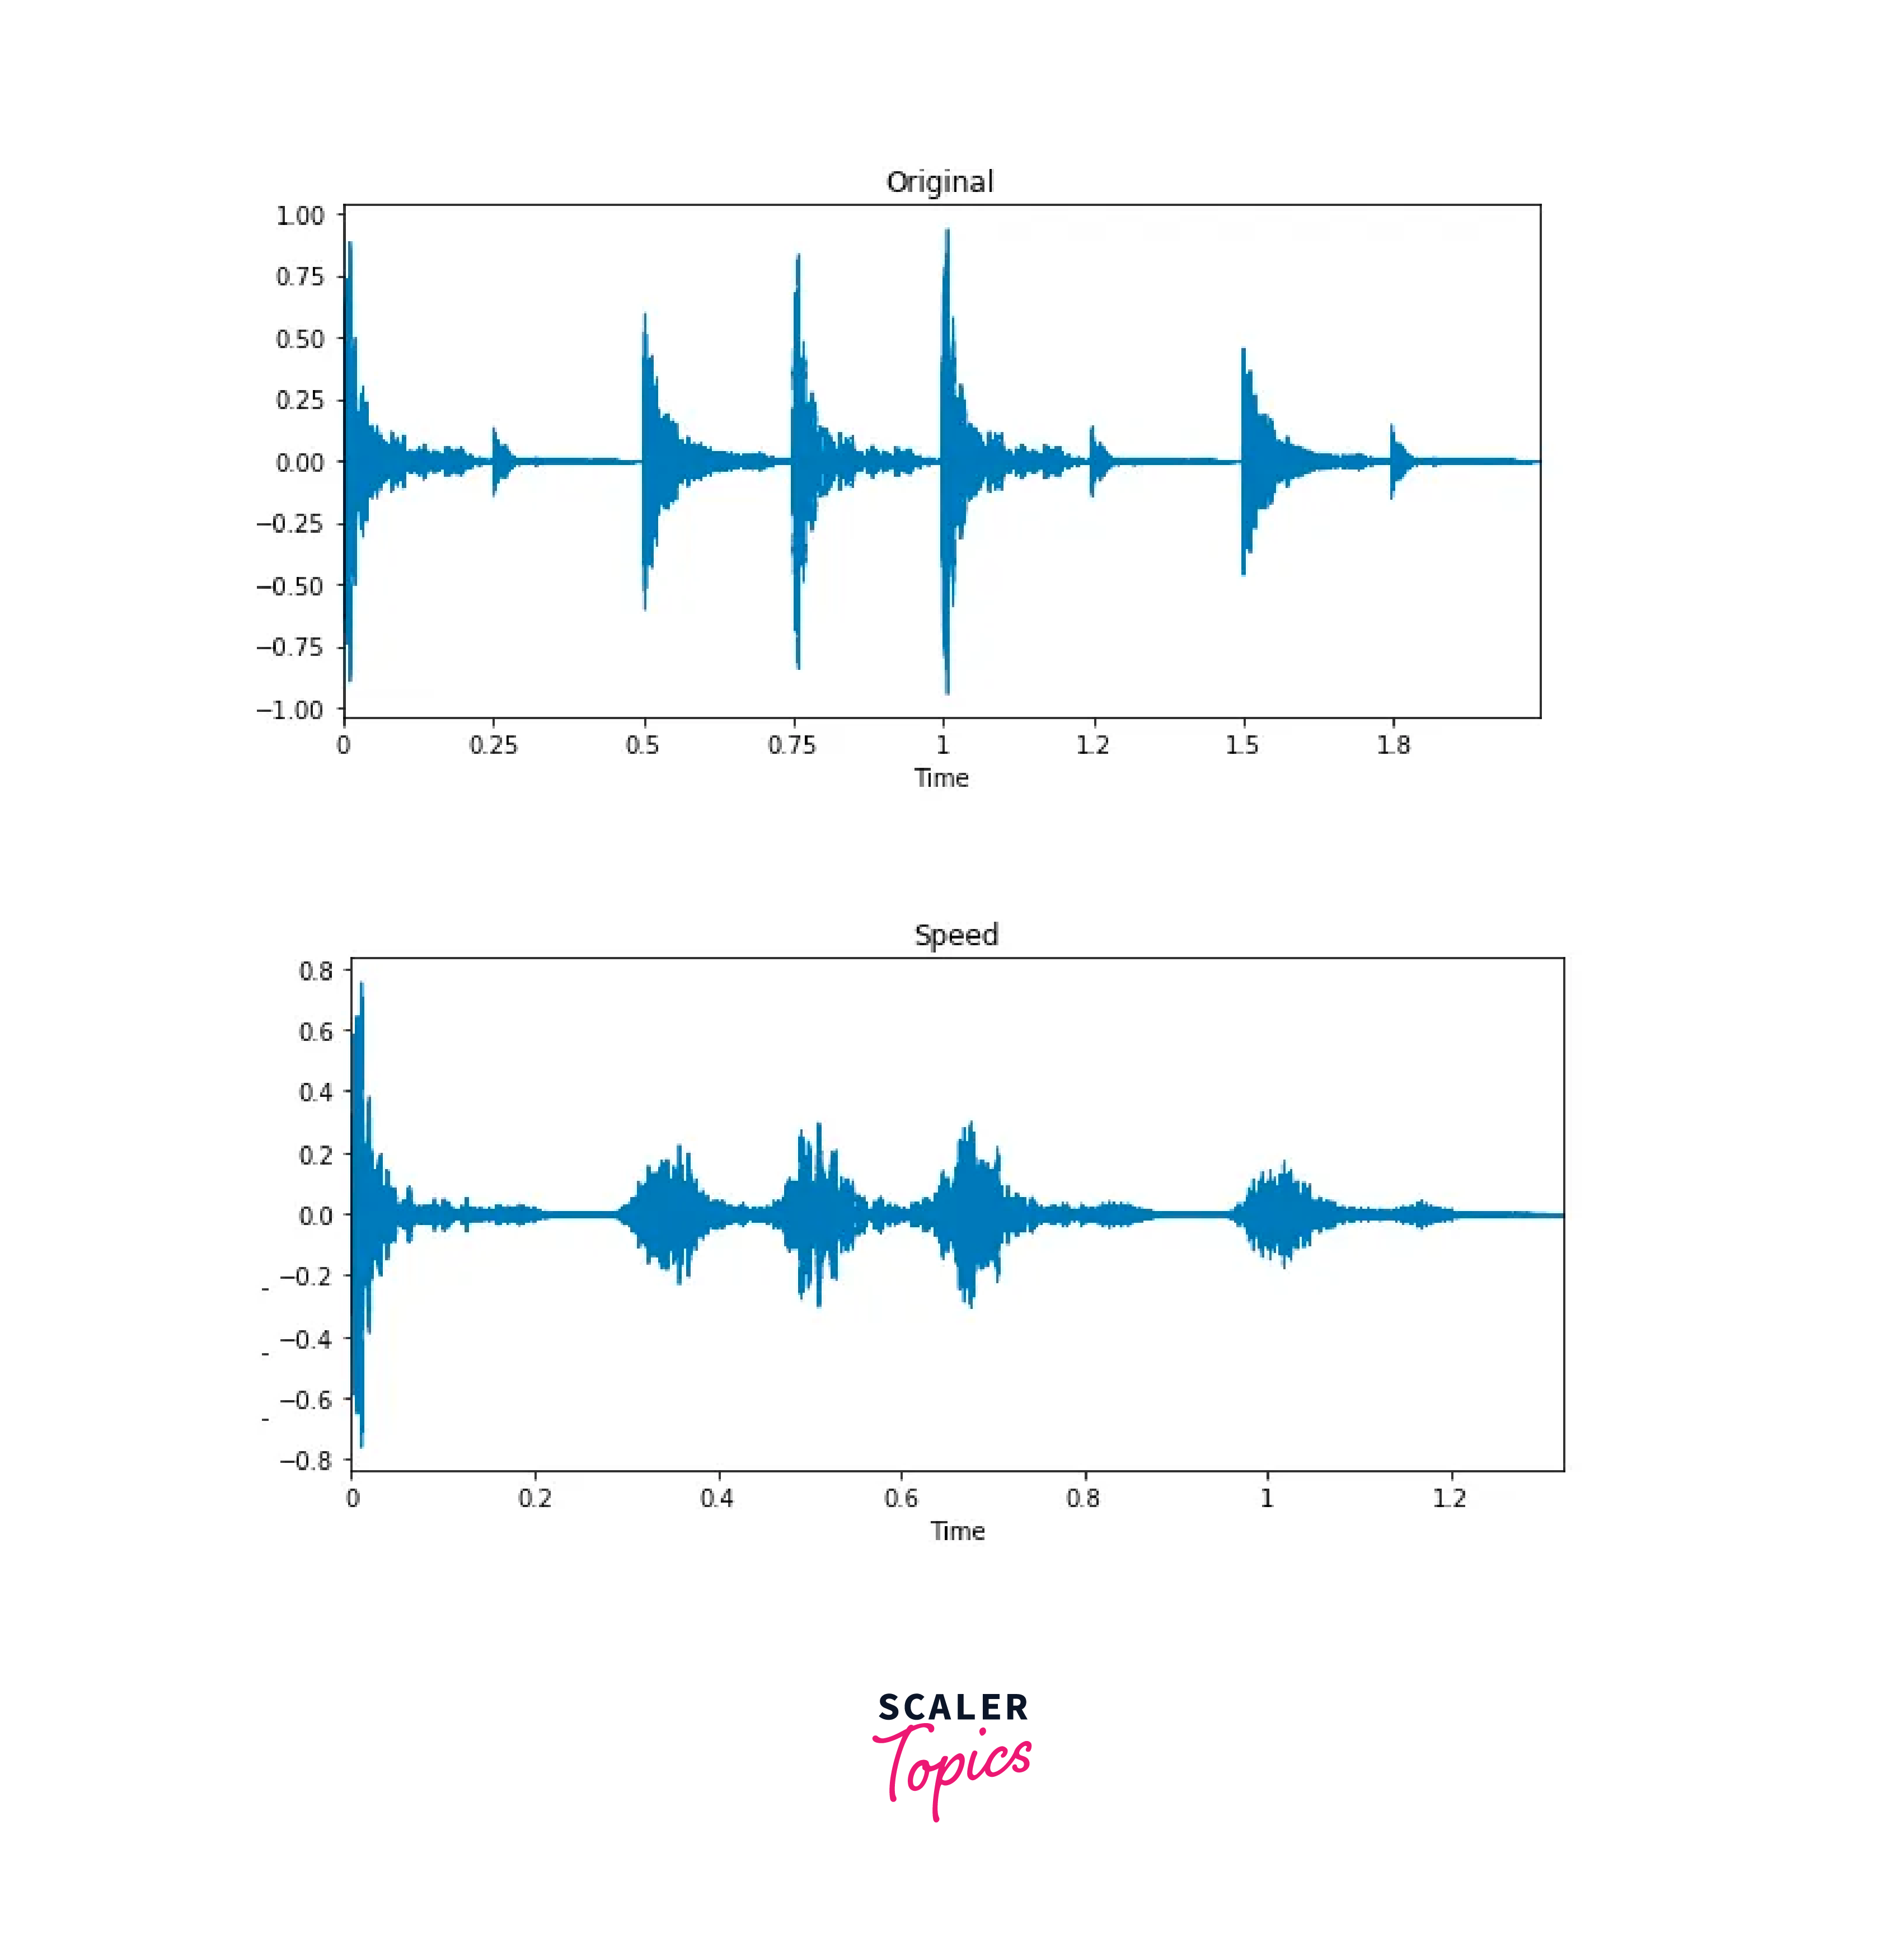
Augmentation Pipelines and Performance Optimization
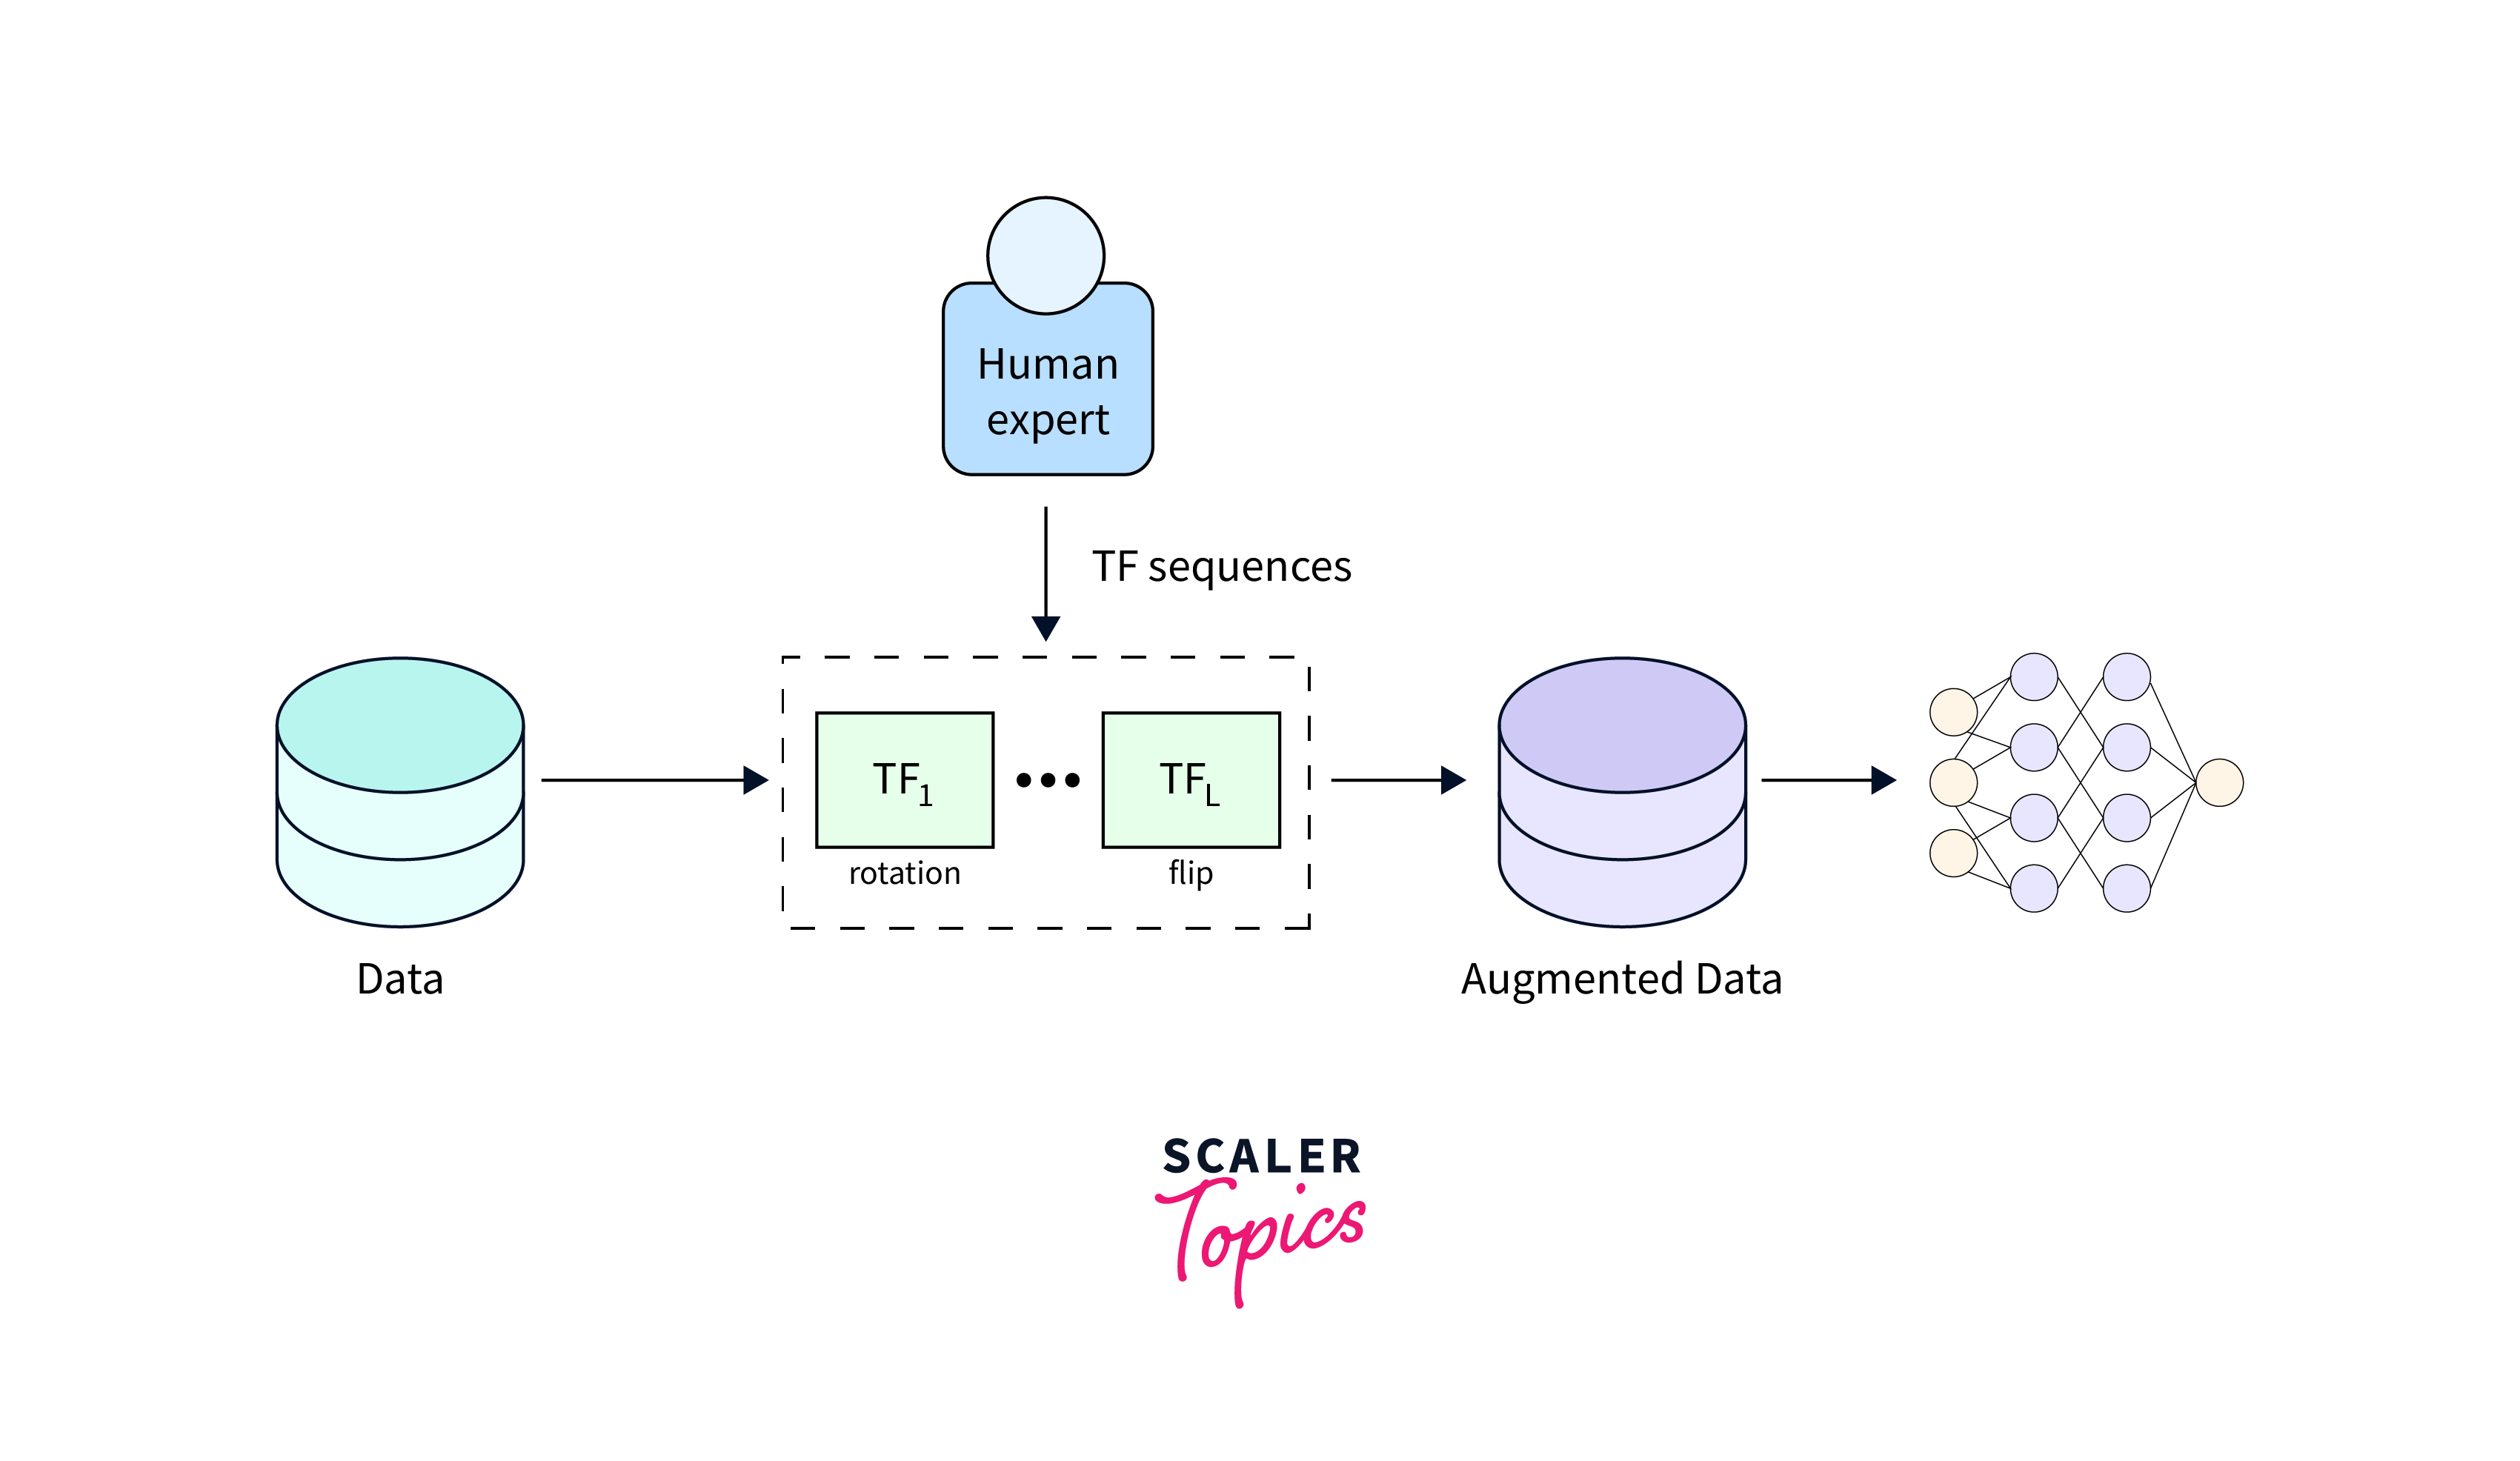
An image augmentation pipeline typically has the following steps:
-
The input data is fed into the augmentation pipeline.
-
The Augmentation pipeline is defined. We can use Tensorflow Data augmentation pipelines containing pre-built functions to augment the data.
-
The input image is fed through the pipeline and processed through each step.
-
After the image is processed, the data is sent for human verification, and after verification, the augmented data is ready to use.
Control Parameters
Control parameters in the context of data augmentation refer to the settings or variables that allow you to tailor the augmentation process to meet specific requirements. These parameters play a crucial role in determining the degree of transformation applied to the data. By adjusting these parameters, you can strike a balance between introducing diversity into the dataset and maintaining the realism of the augmented data. Some of the control parameters in data augmentation are:
- The extent of Transformation:
In Image Augmentation, you might control the rotation angle, amount of zoom, or the degree of brightness. - Diversity vs. Realism:
Control parameters allow you to fine-tune the augmentation to strike a balance between creating diverse data instances and ensuring that the augmented data still aligns with the underlying distribution of the real data. - Domain-Specific Considerations:
Different tasks and domains might require different levels of augmentation. Different tasks and domains might require different levels of augmentation. For instance, in medical imaging, you might want to be cautious with certain transformations that could alter the diagnostic features of the images. Control parameters enable you to customize the augmentation process based on the specifics of your task. - Avoiding Overfitting:
Over-augmenting data can lead to overfitting, where the model becomes too specialized in the augmented variations and performs poorly on new, unseen data. Control parameters allow you to limit the extent of augmentation, preventing the model from learning noise or unrealistic patterns.
These control parameters allow you to guide the augmentation process to align with your specific goals and the characteristics of your data.
Implementation of Data Augmentation in Tensorflow
Now we are going to perform a simple data augmentation task using Tensorflow. In this section we are going to perform simple data augmentation techniques like:
- tf.keras.layers.Resizing
- tf.keras.layers.Rescaling
- tf.keras.layers.RandomFlip
- tf.keras.layers.RandomRotation
1. Setup
For implementing data augmentation using Tensorflow, you need the following libraries:
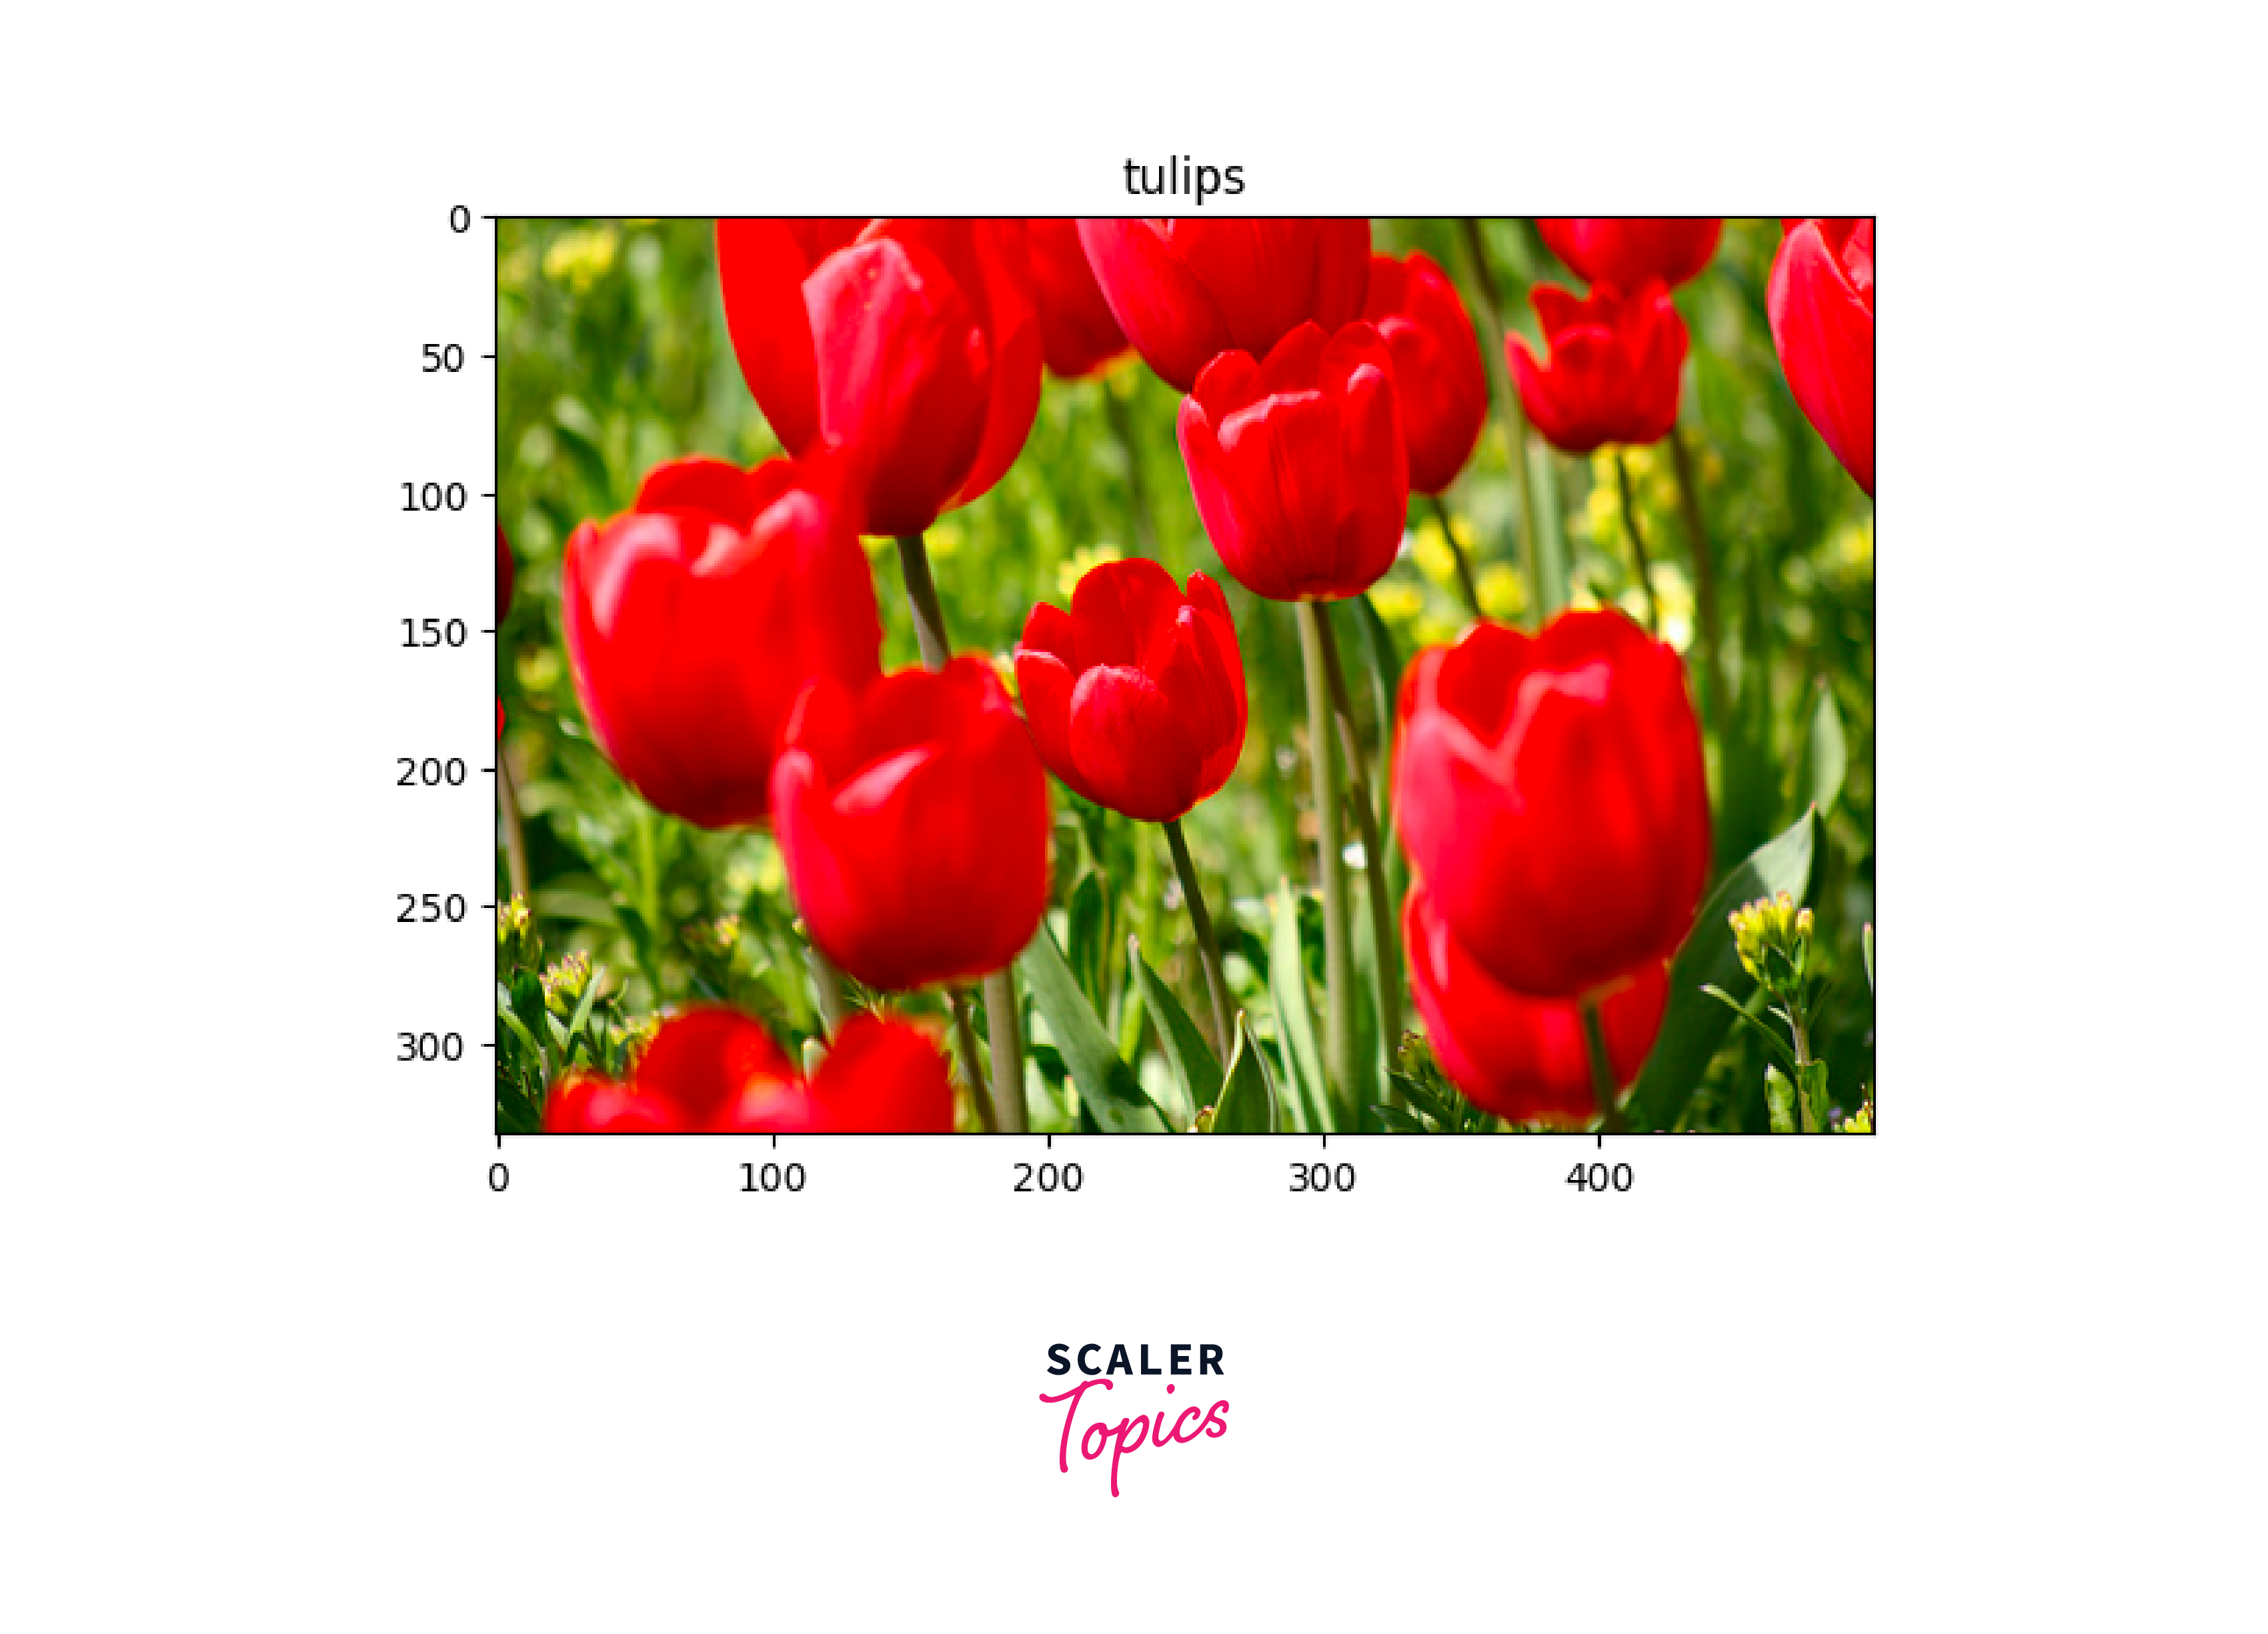
2. Download a Dataset
Output:
Downloading and preparing dataset 218.21 MiB (download: 218.21 MiB, generated: 221.83 MiB, total: 440.05 MiB) to /root/tensorflow_datasets/tf_flowers/3.0.1...

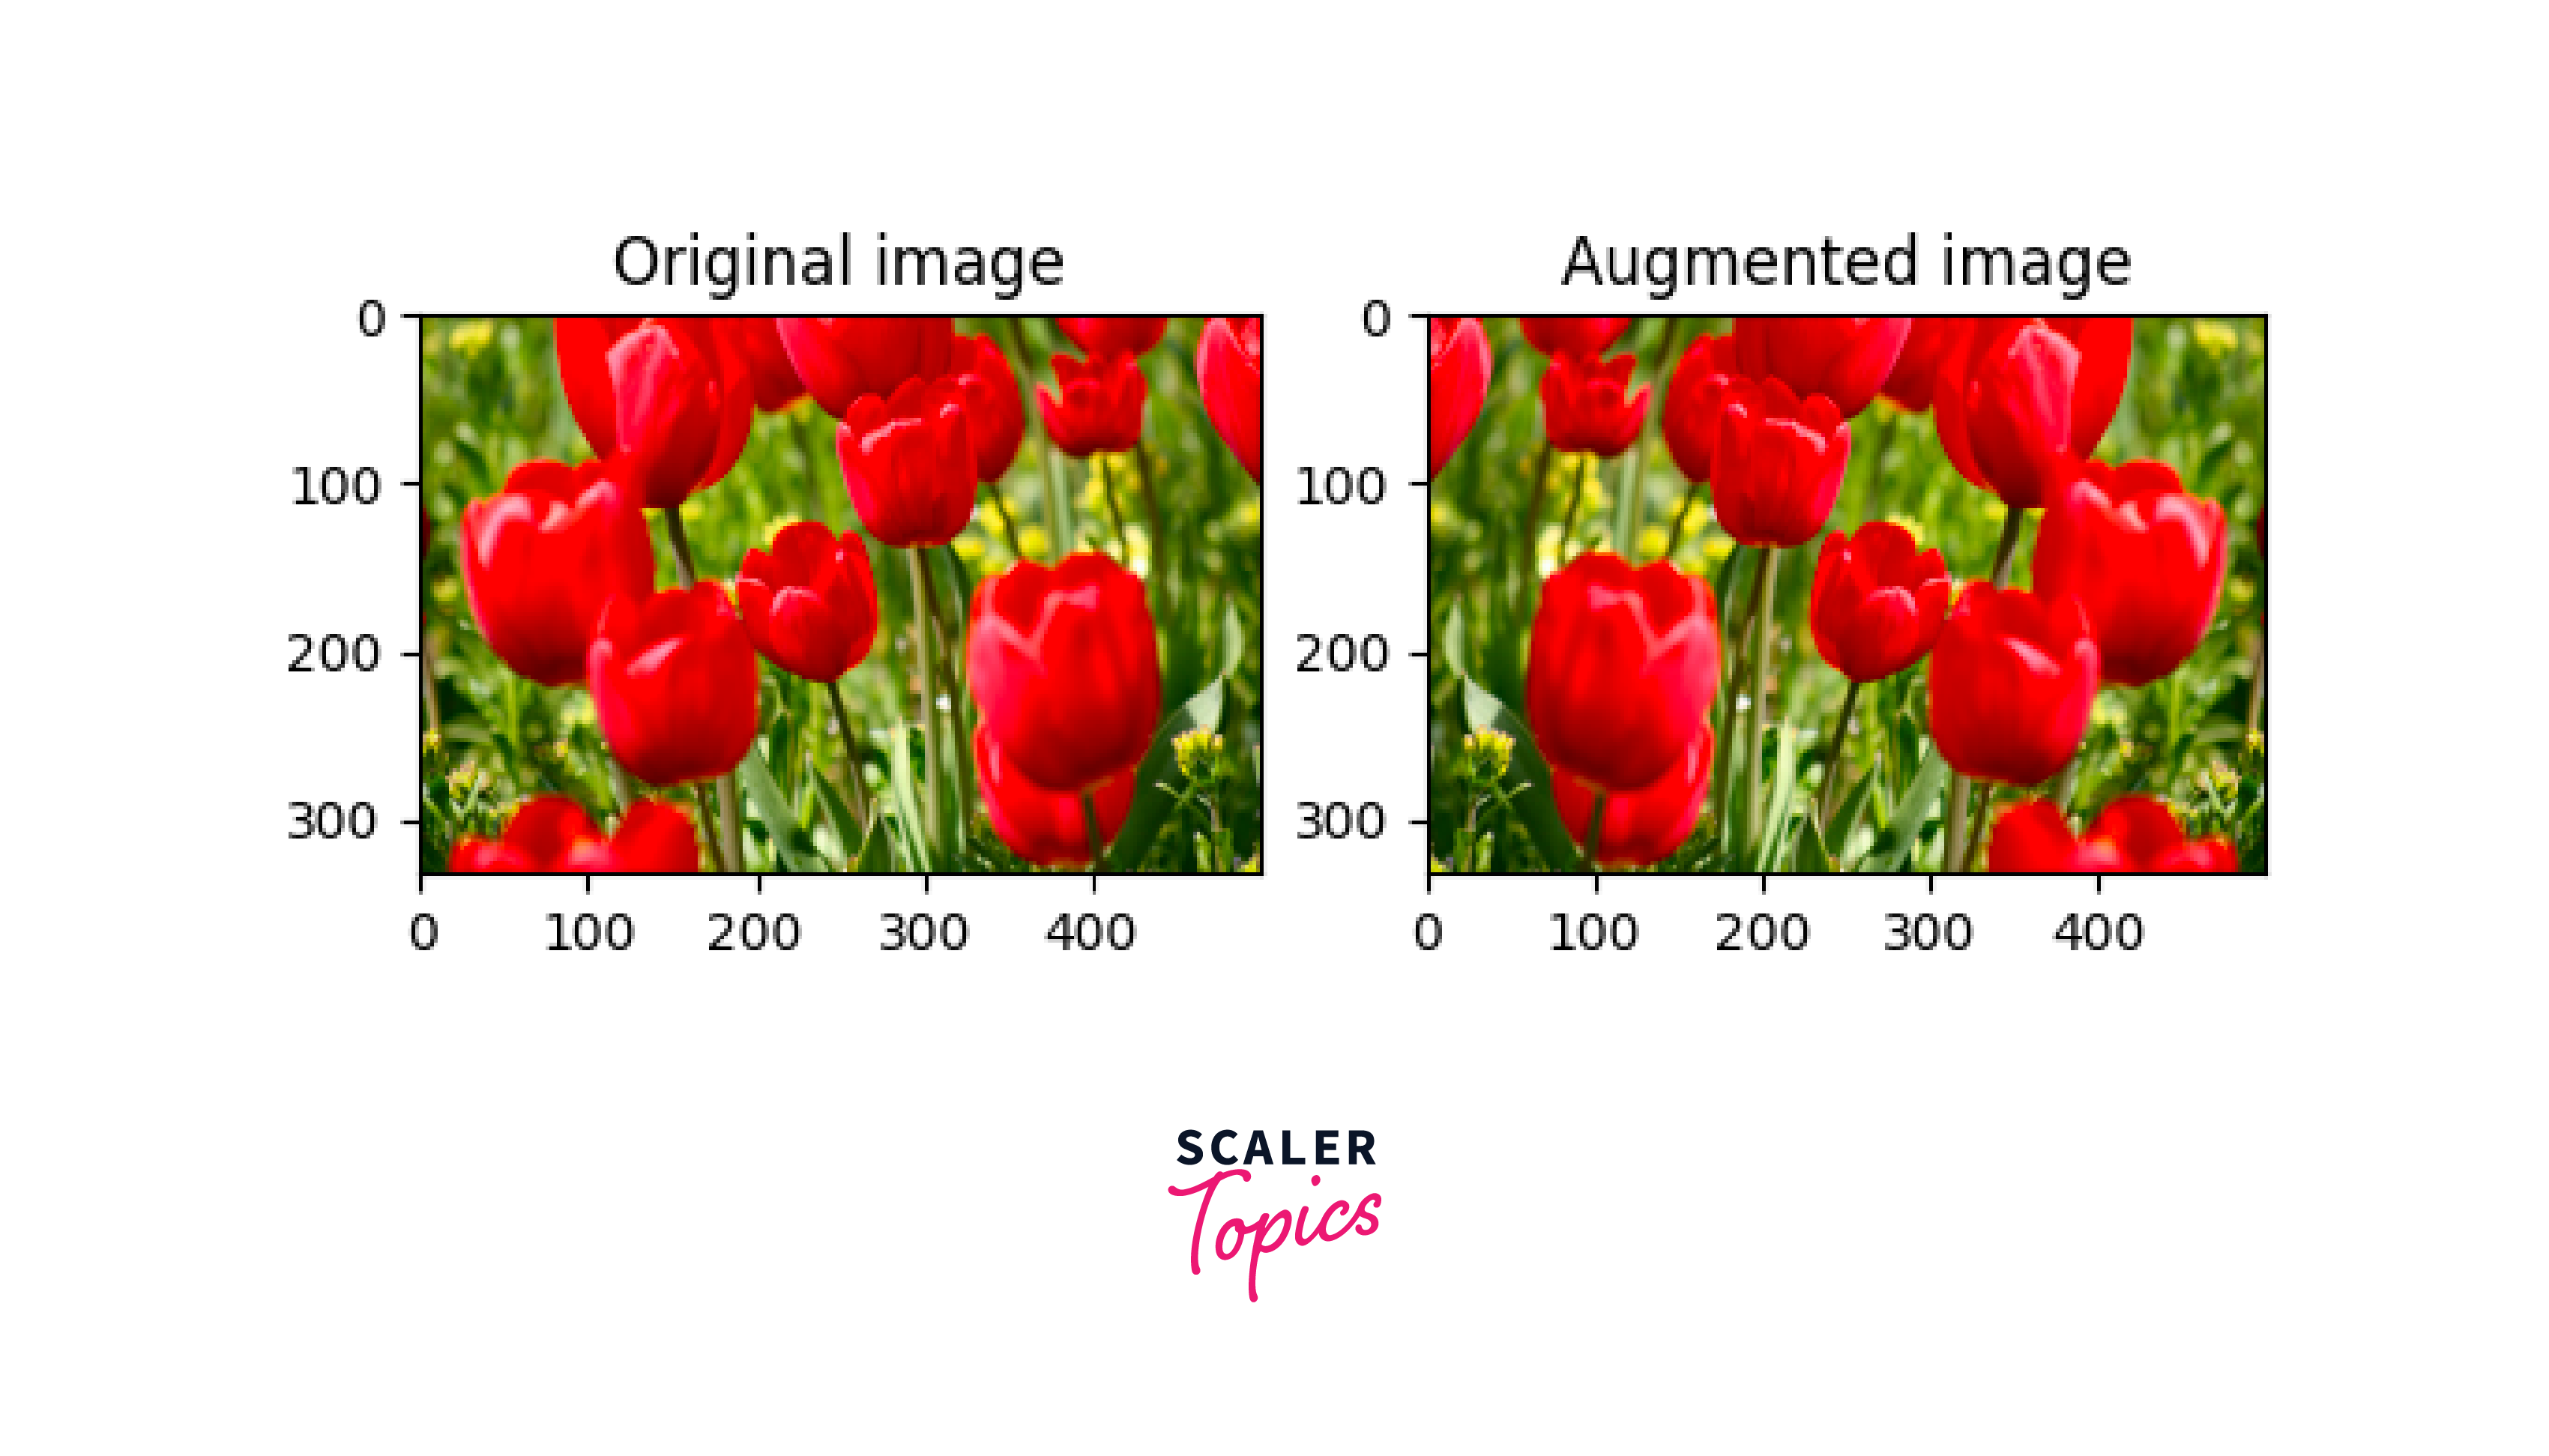
3. Use Keras Preprocessing Layers
We can use keras preprocessing layers before using Tensorflow data augmentation to resize your images to a consistent shape(tf.keras.layers.Resizing) to rescale pixel values(tf.keras.layers.Rescaling)
Visualizing the result:

4.Data Augmentation
We are using tensorflow data augmentation functions like tf.keras.layers.RandomFlip and tf.keras.layers.RandomRotation.
5. Different Options to Use Keras Preprocessing Layers
There are two ways to use the preprocessing layers, each having its benefit:
Option - 1:
Make the preprocessing layers part of your model
- Data augmentation is seamlessly integrated into your on-device workflow, ensuring synchronous execution alongside other layers while leveraging the efficiency of GPU acceleration.
- When you export your model using the model.save functionality, the preprocessing layers become an integral part of the saved model. Consequently, if you decide to deploy this model subsequently, the included preprocessing layers will automatically normalize images based on the specified layer configuration. This eliminates the need to redevelop such logic on the server side, streamlining your deployment efforts significantly.
Option - 2:
Apply the preprocessing layers to your dataset
Using this strategy, you employ Dataset.map to construct a dataset that produces batches of augmented images. With this setup:
Data augmentation takes place asynchronously on the CPU, enabling non-blocking operation. This permits simultaneous training of your model on the GPU and data preprocessing, which can be further optimized by utilizing Dataset.prefetch, as demonstrated below.
However, in this scenario, the preprocessing layers are not included in the model export through Model.save. Consequently, you would either need to affix these layers to your model before saving it or reestablish them at the server level. Following training, you have the option to append the preprocessing layers before proceeding with model export.
6. Apply the Preprocessing Layers to the Datasets
7. Train a Model
Now, we can train the model using the datasets you have just prepared. We are going to train a sequential model with three convolutional models(Conv2d) with a max pooling layer(tf.keras.layers.MaxPooling2D) following each of the convolutional layers. There is a Dense layer(tf.keras.Dense) with 128 neurons on top of it.
Choose the tf.keras.optimizers.Adam optimizer and tf.keras.losses.SparseCategoricalCrossentropy loss function. To view training and validation accuracy for each training epoch, pass the metrics argument to Model.compile.
Train for a few epochs:
Output:
8. Custom Data Augmentation
We can perform custom data augmentation using BaseImageAugmentationLayer. Using BaseImageAugmentationLayer we can augment the data using our custom technique. KerasCV offers a base class for writing data augmentation layers. For, example we can implement a layer that tints all images blue. We'll start by importing libraries.
First, let's implement some helper functions to visualize intermediate results
Now we'll create a custom augmentation layer using the augment_image() function.
Now the layer is set, we can test the augmentation layer by passing the input through the layer. To check the result, let's download a sample image.
After augmentation, we will get the following output:
Output:
9. Using "tf.image"
You can write your own data augmentation pipelines or layers using tf.data and tf.image. Since the flowers dataset was configured with data augmentation, let's reimport it:
Retrieve an image to work with:
Output:
10. Data Augmentation
Now, we have the preprocessed dataset. Now, we can perform data augmentation using tensorflow. In this section, we are going to perform the following functions.
- Flip an image
- Greyscale an image
- Saturate an image
- Change Image brightness
- Center crop an image
- Rotate an image
We are going to perform these operations one by one in the following steps.
-
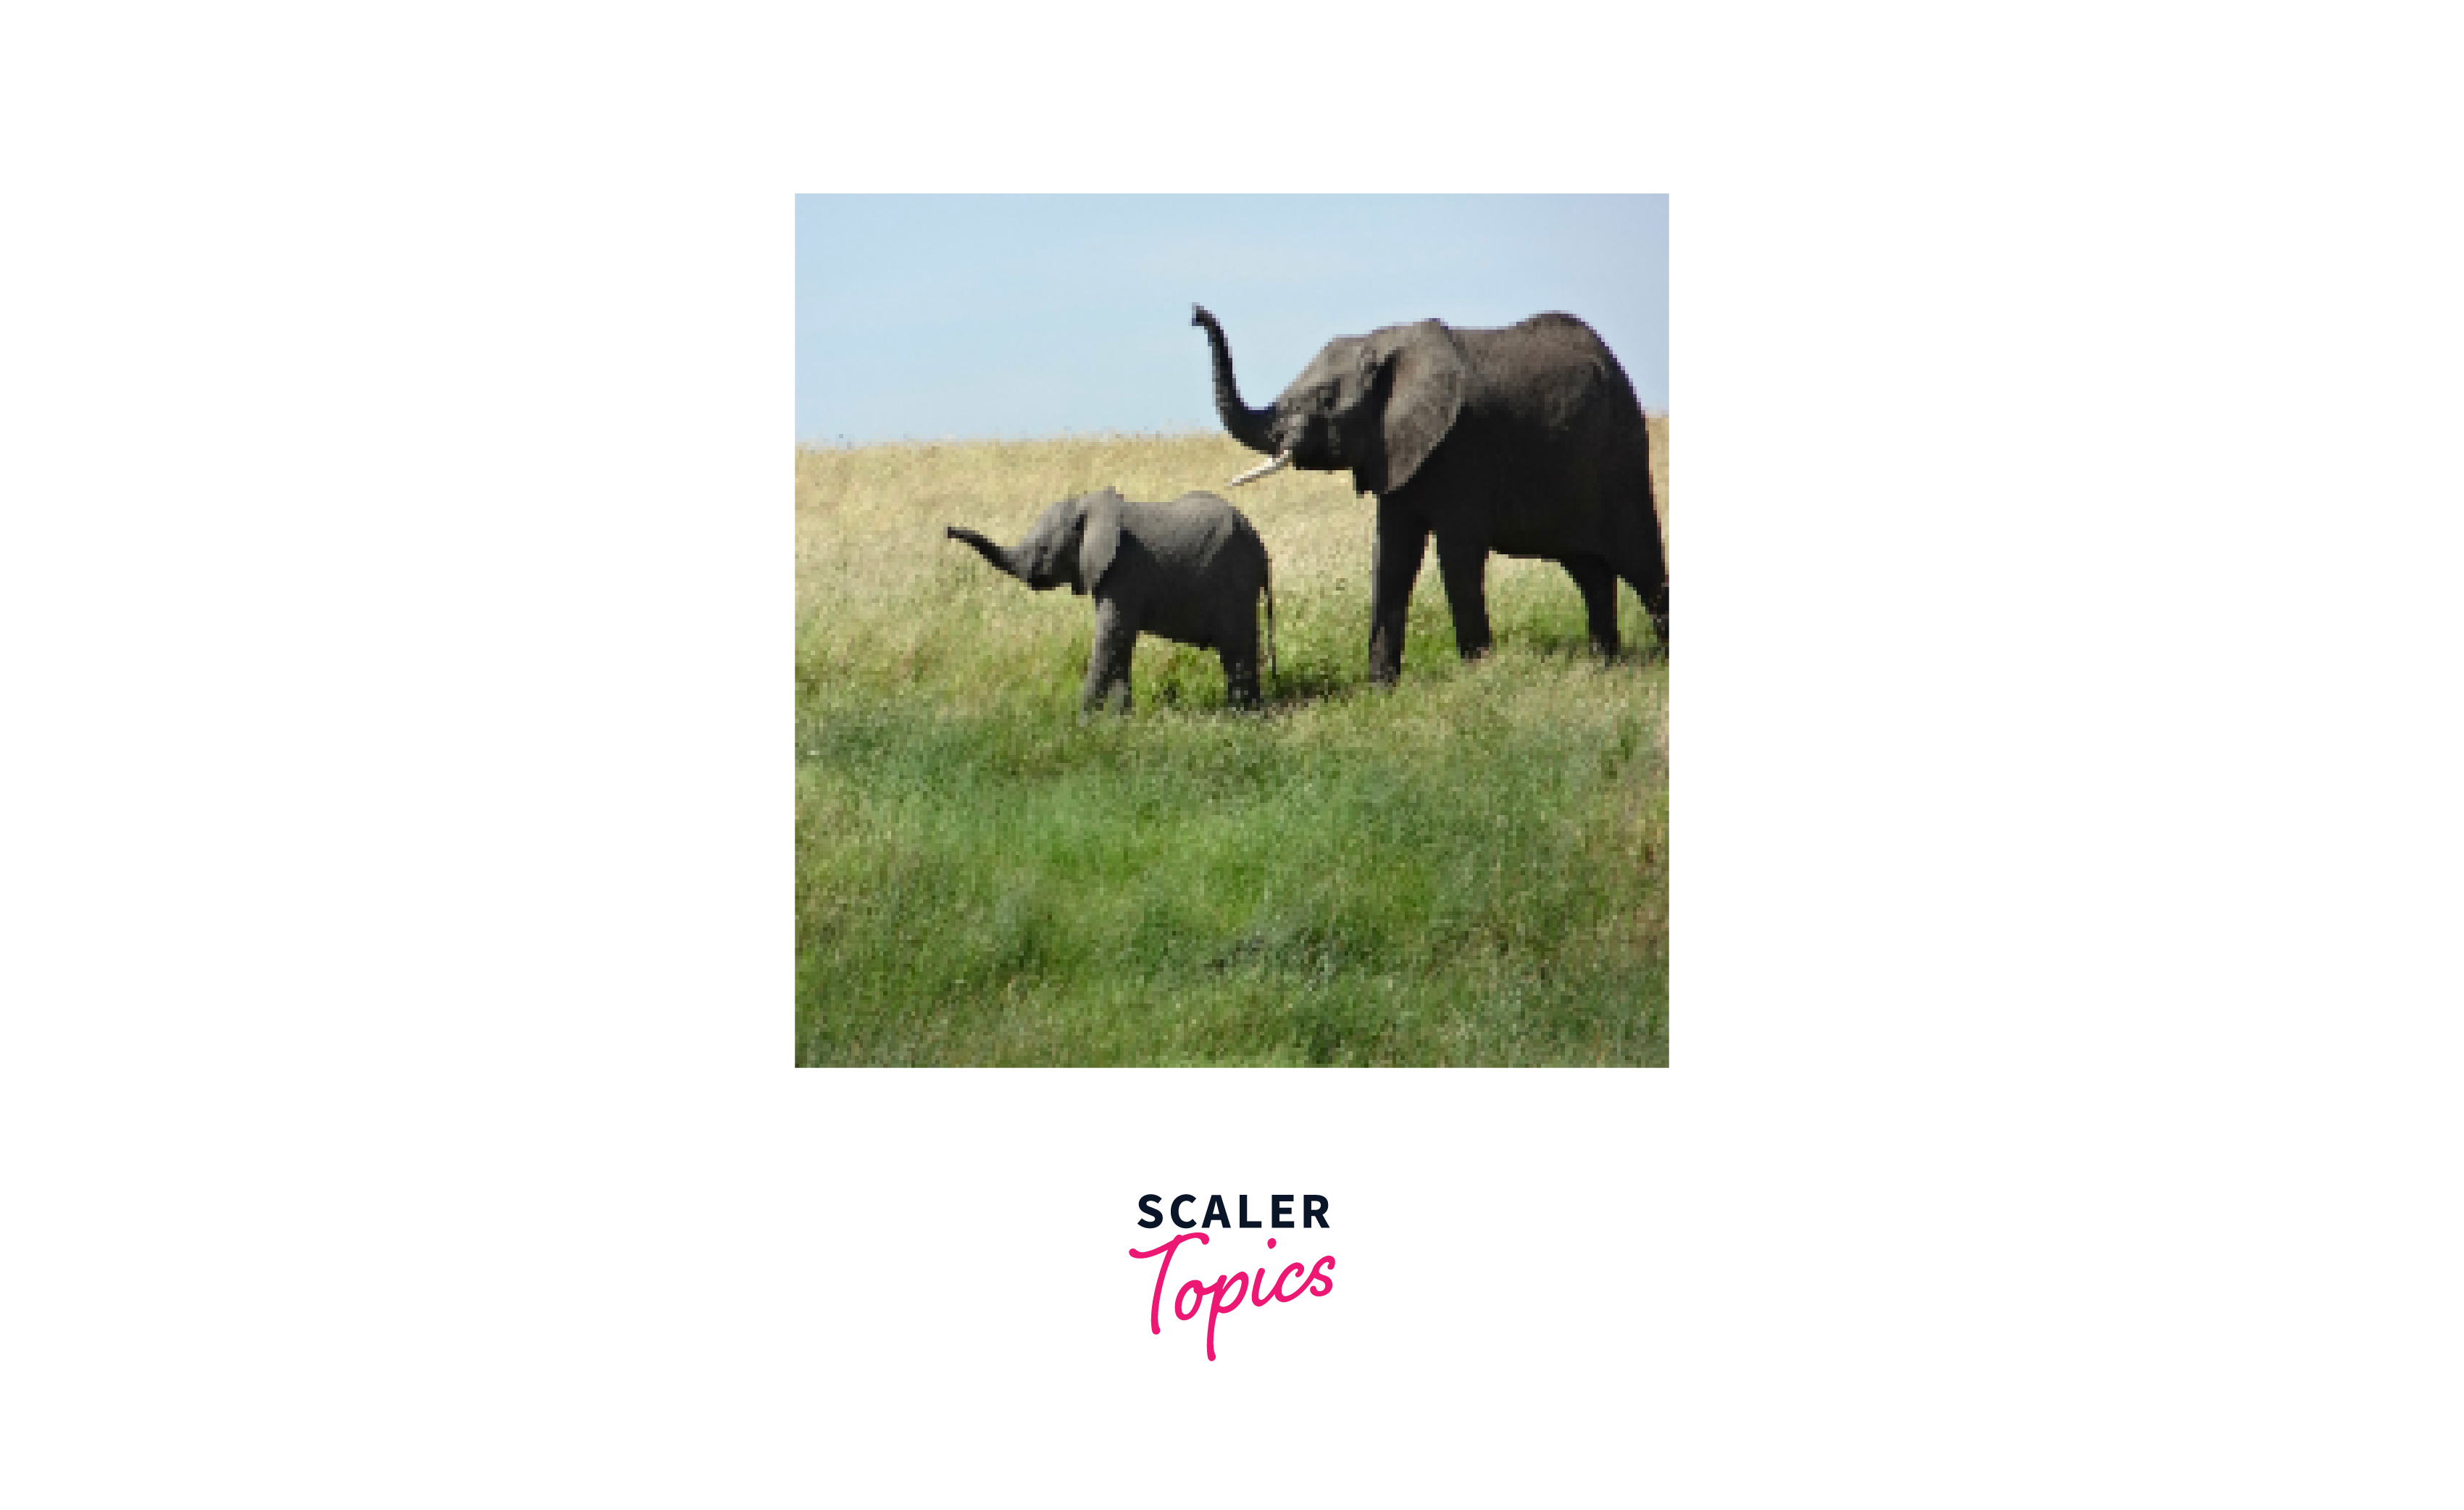
a. Flipping an image:
We can flip an image vertically or horizontally with tf.image.flip_left_right.Output:
-
b. Grayscale an image:
tf.image.rbg_to_grayscale can be used to grayscale an image.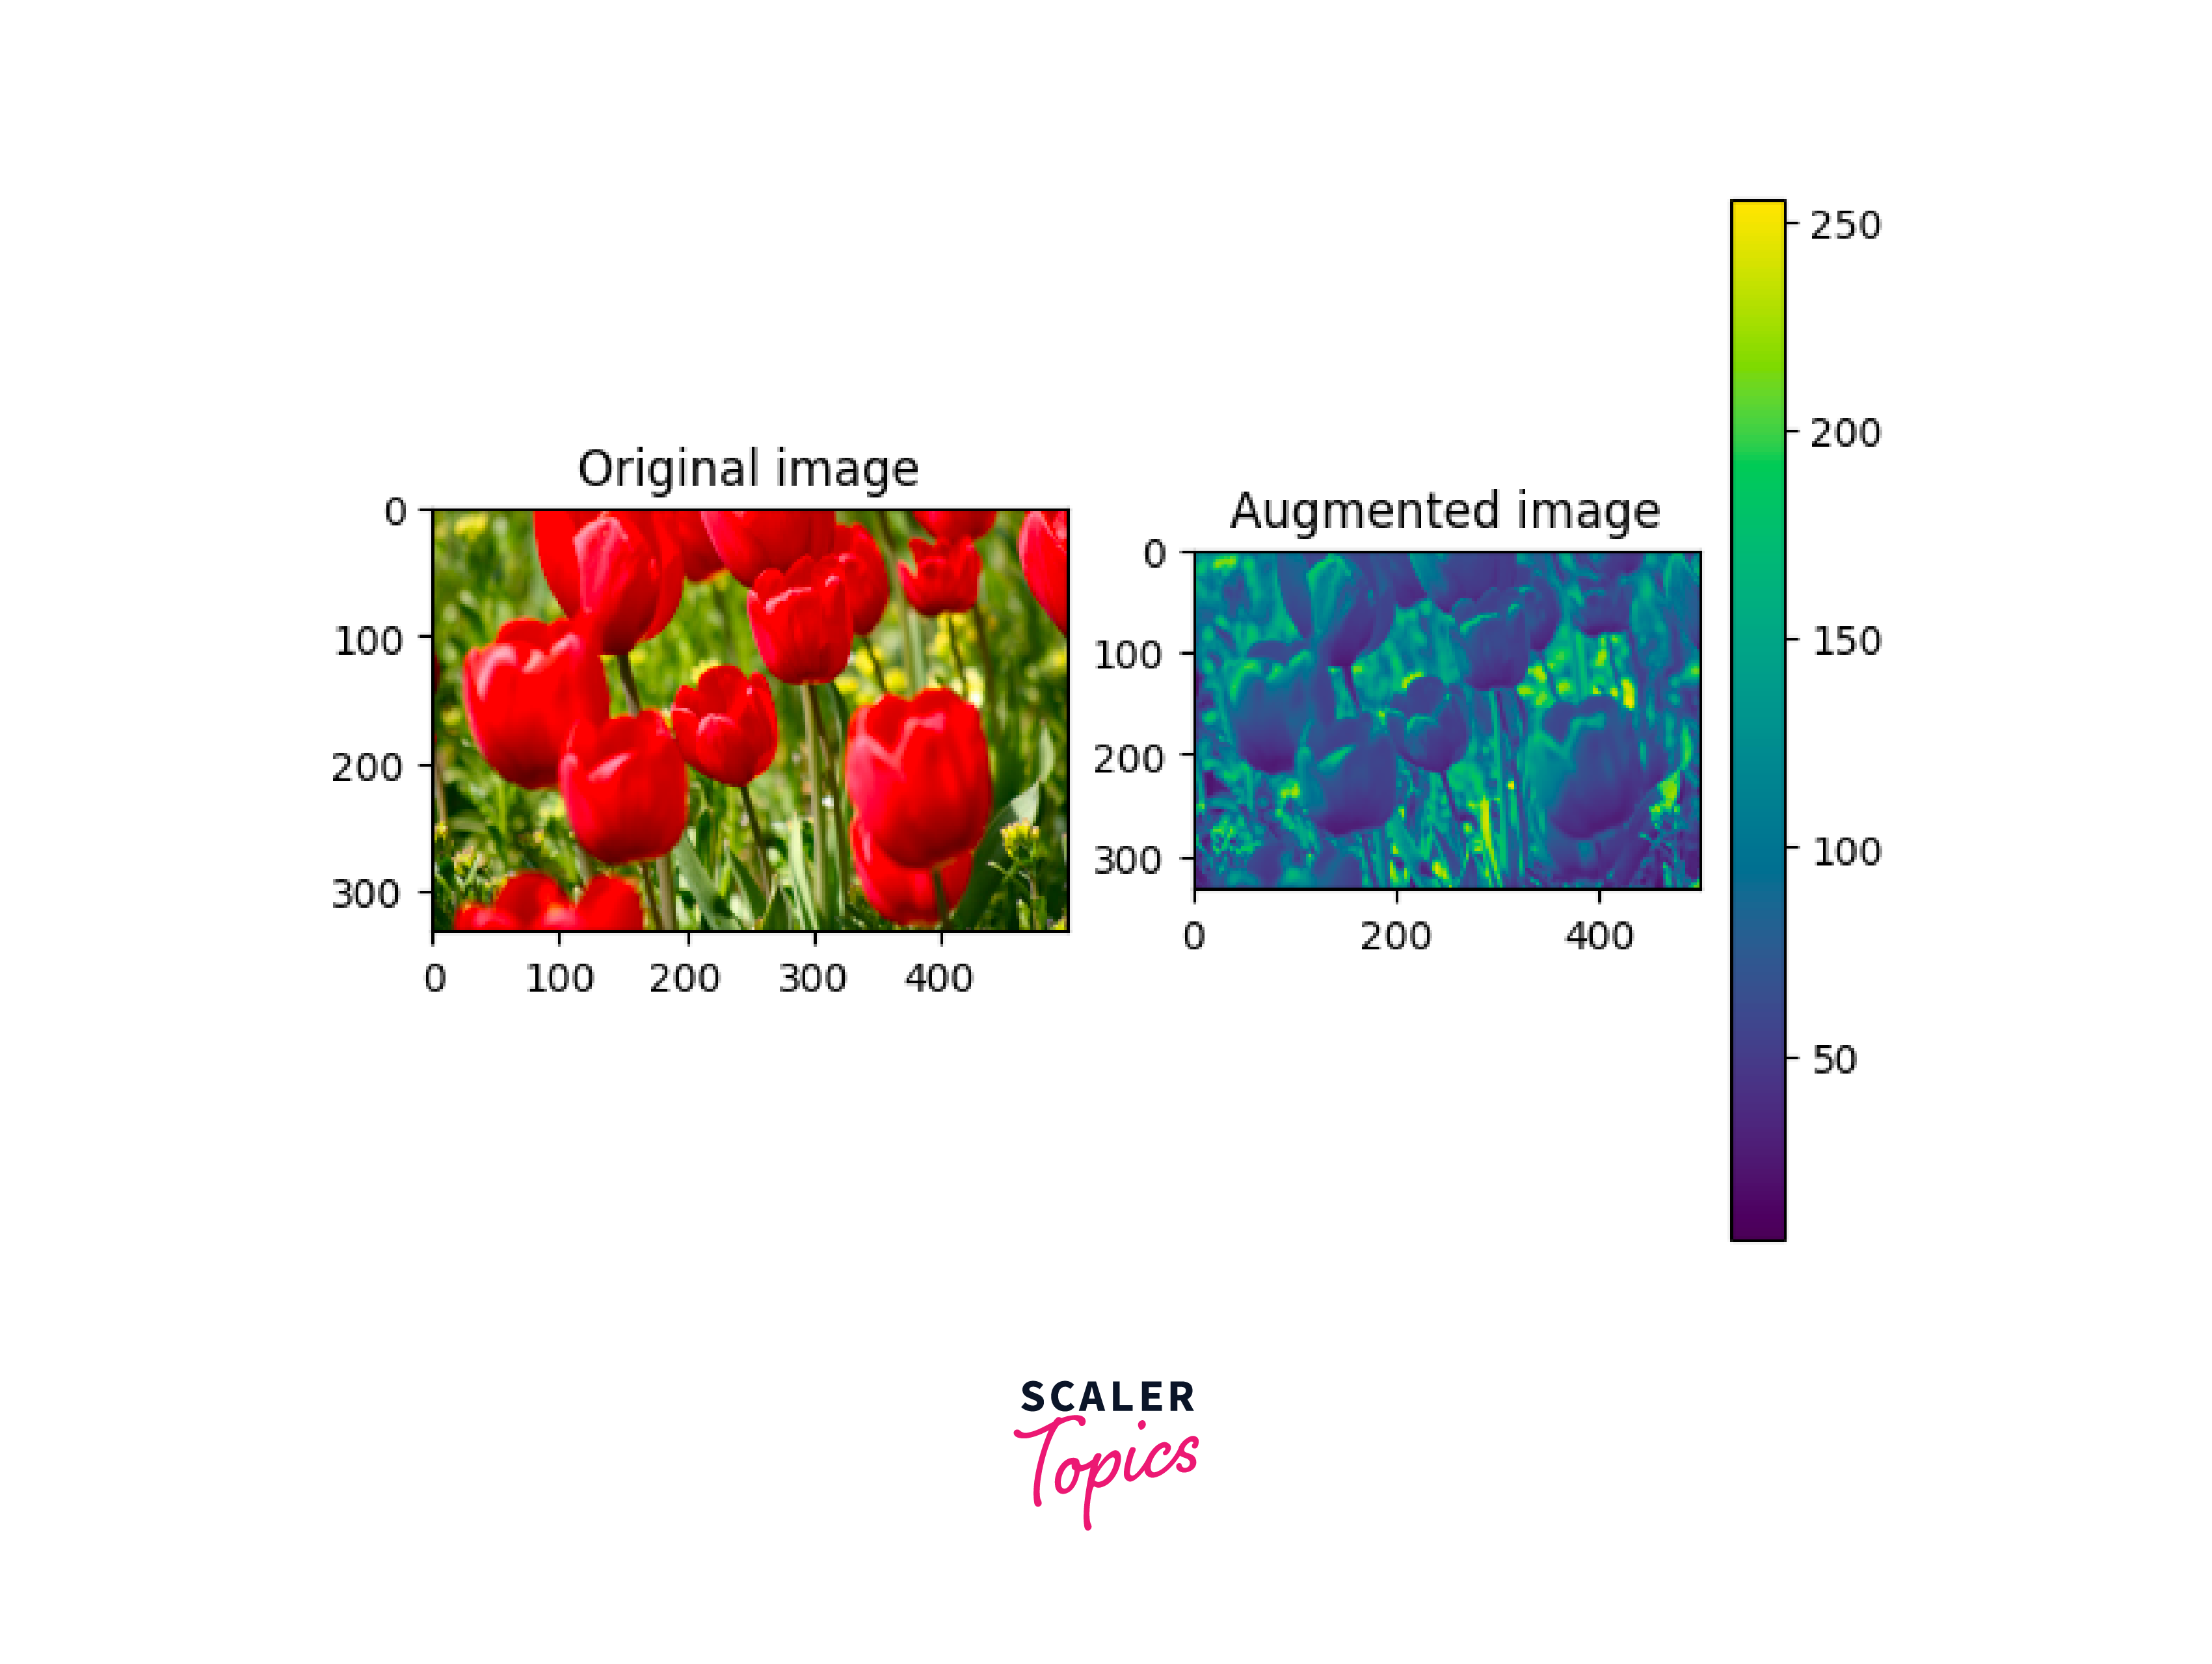
-
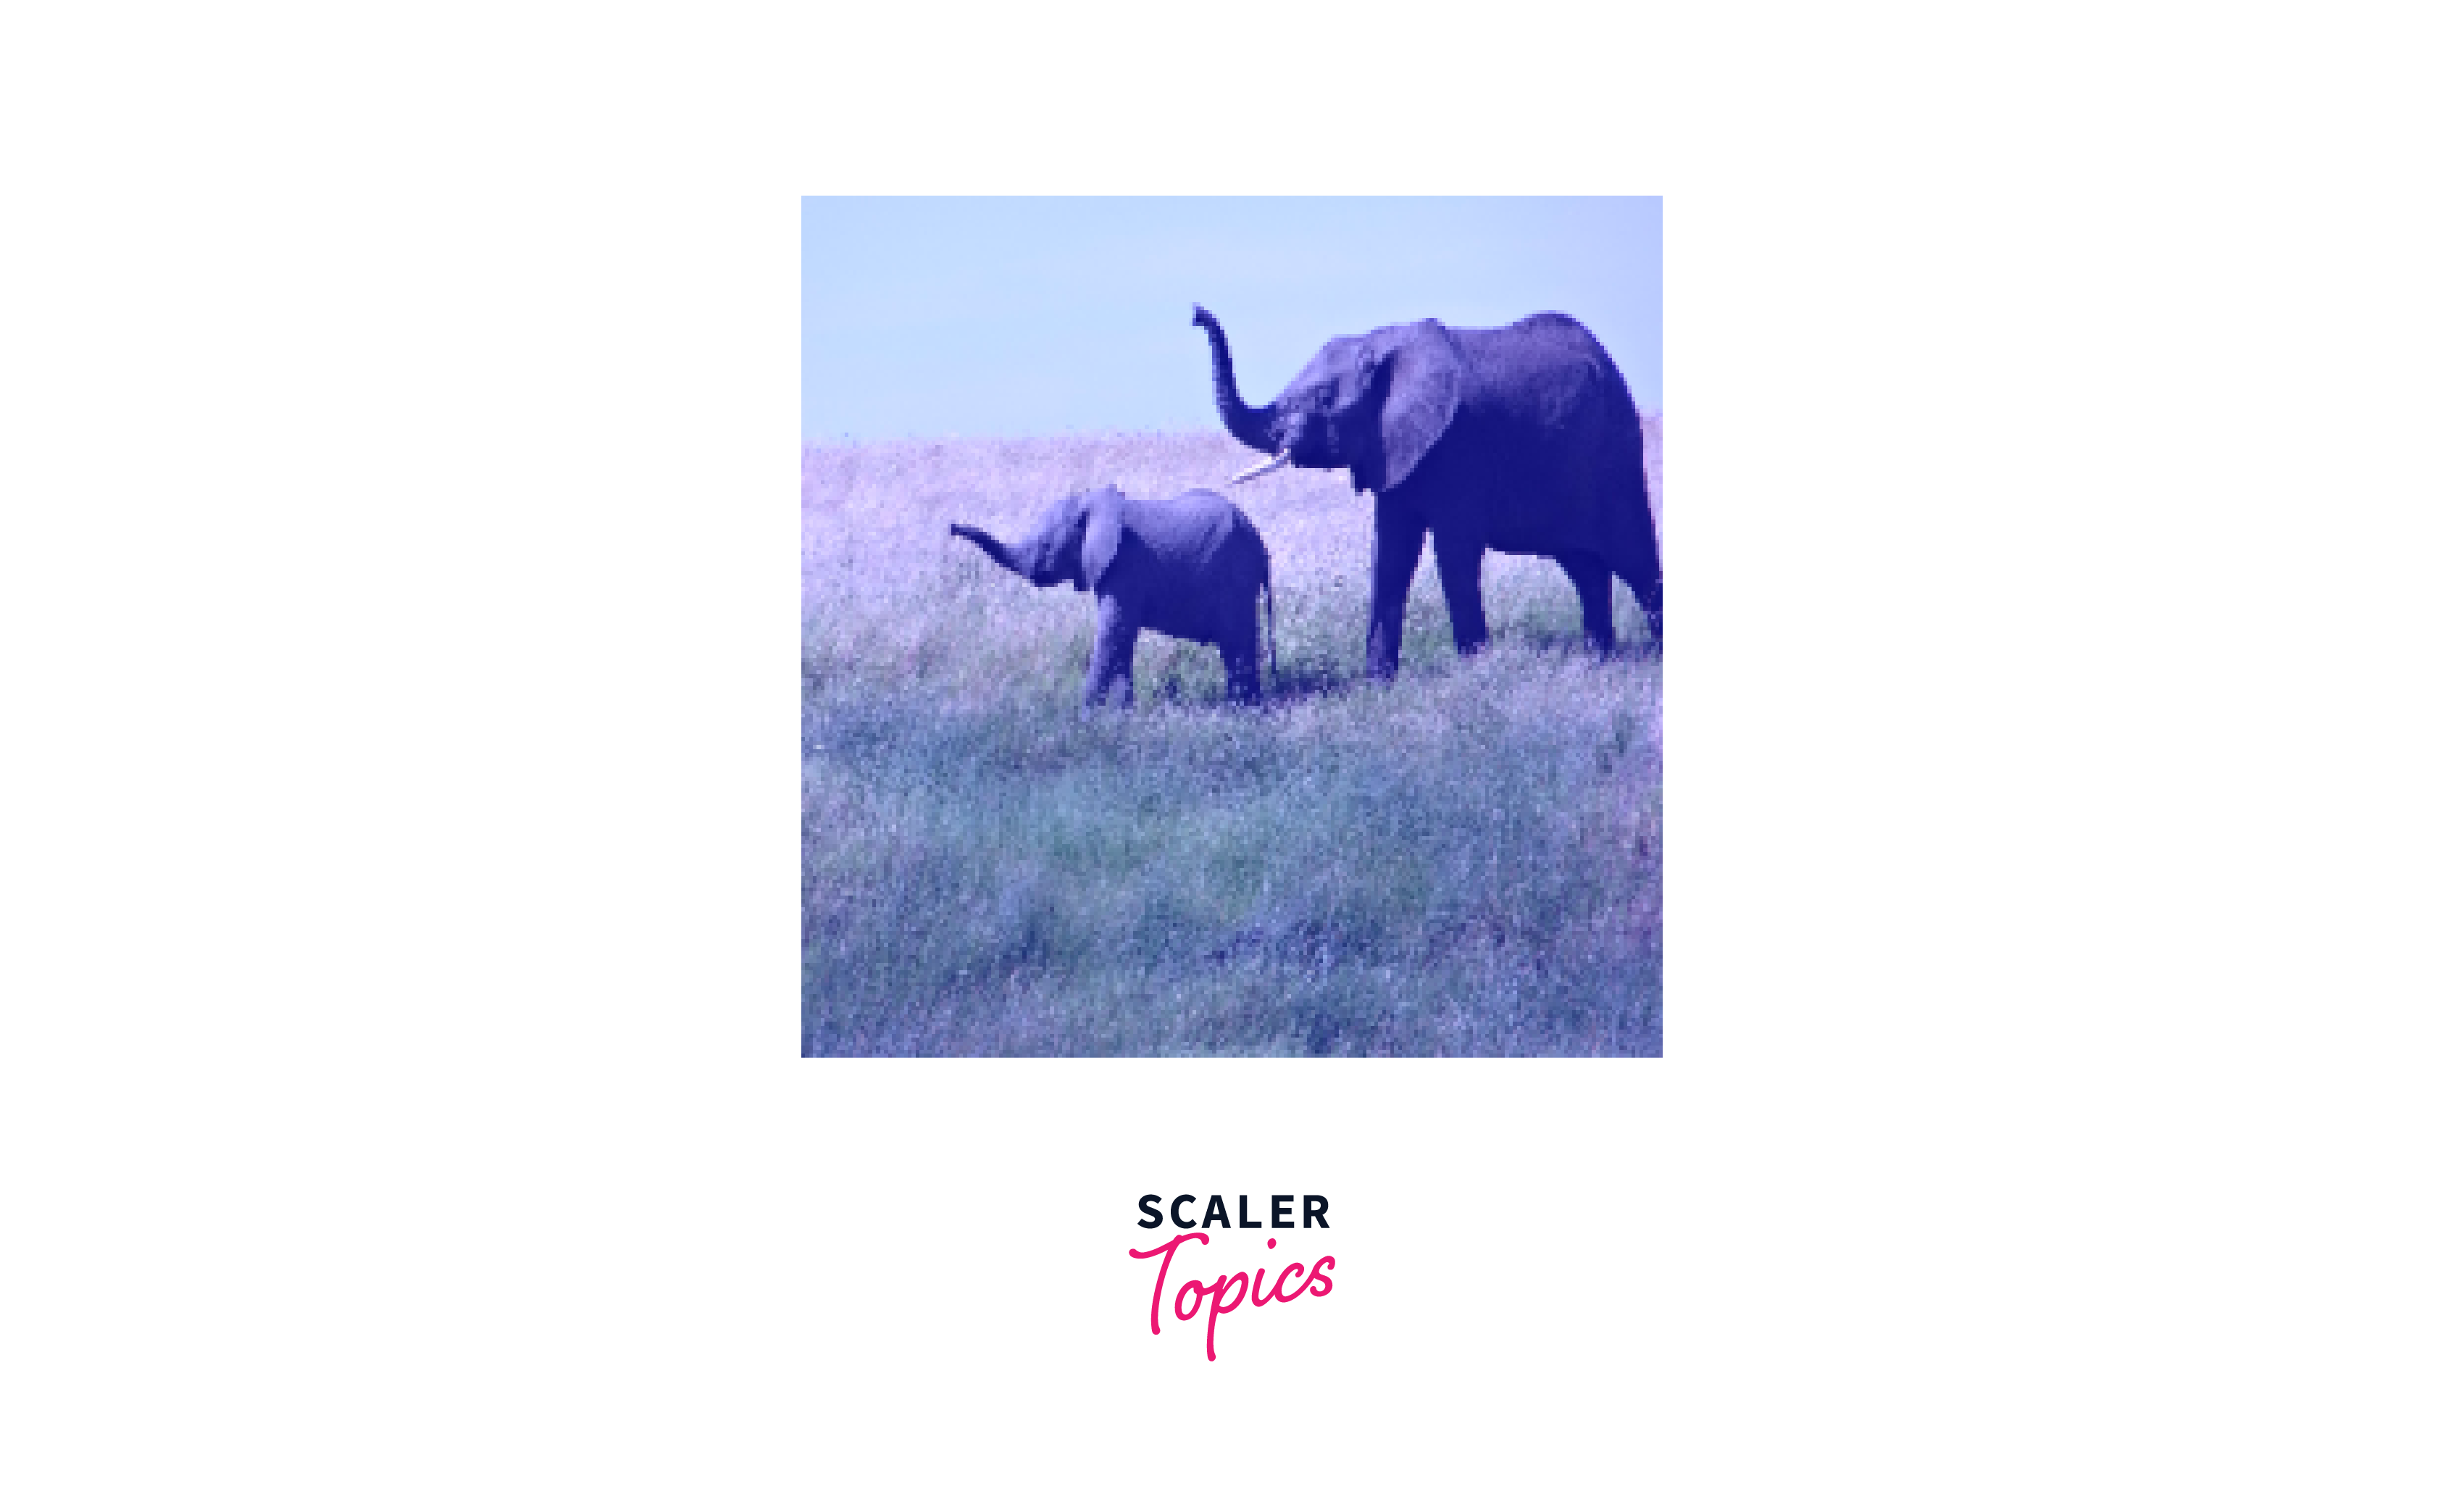
c. Saturate an image:
We can use tf.image.adjust_saturation, which contains two parameters: image and the saturation factor: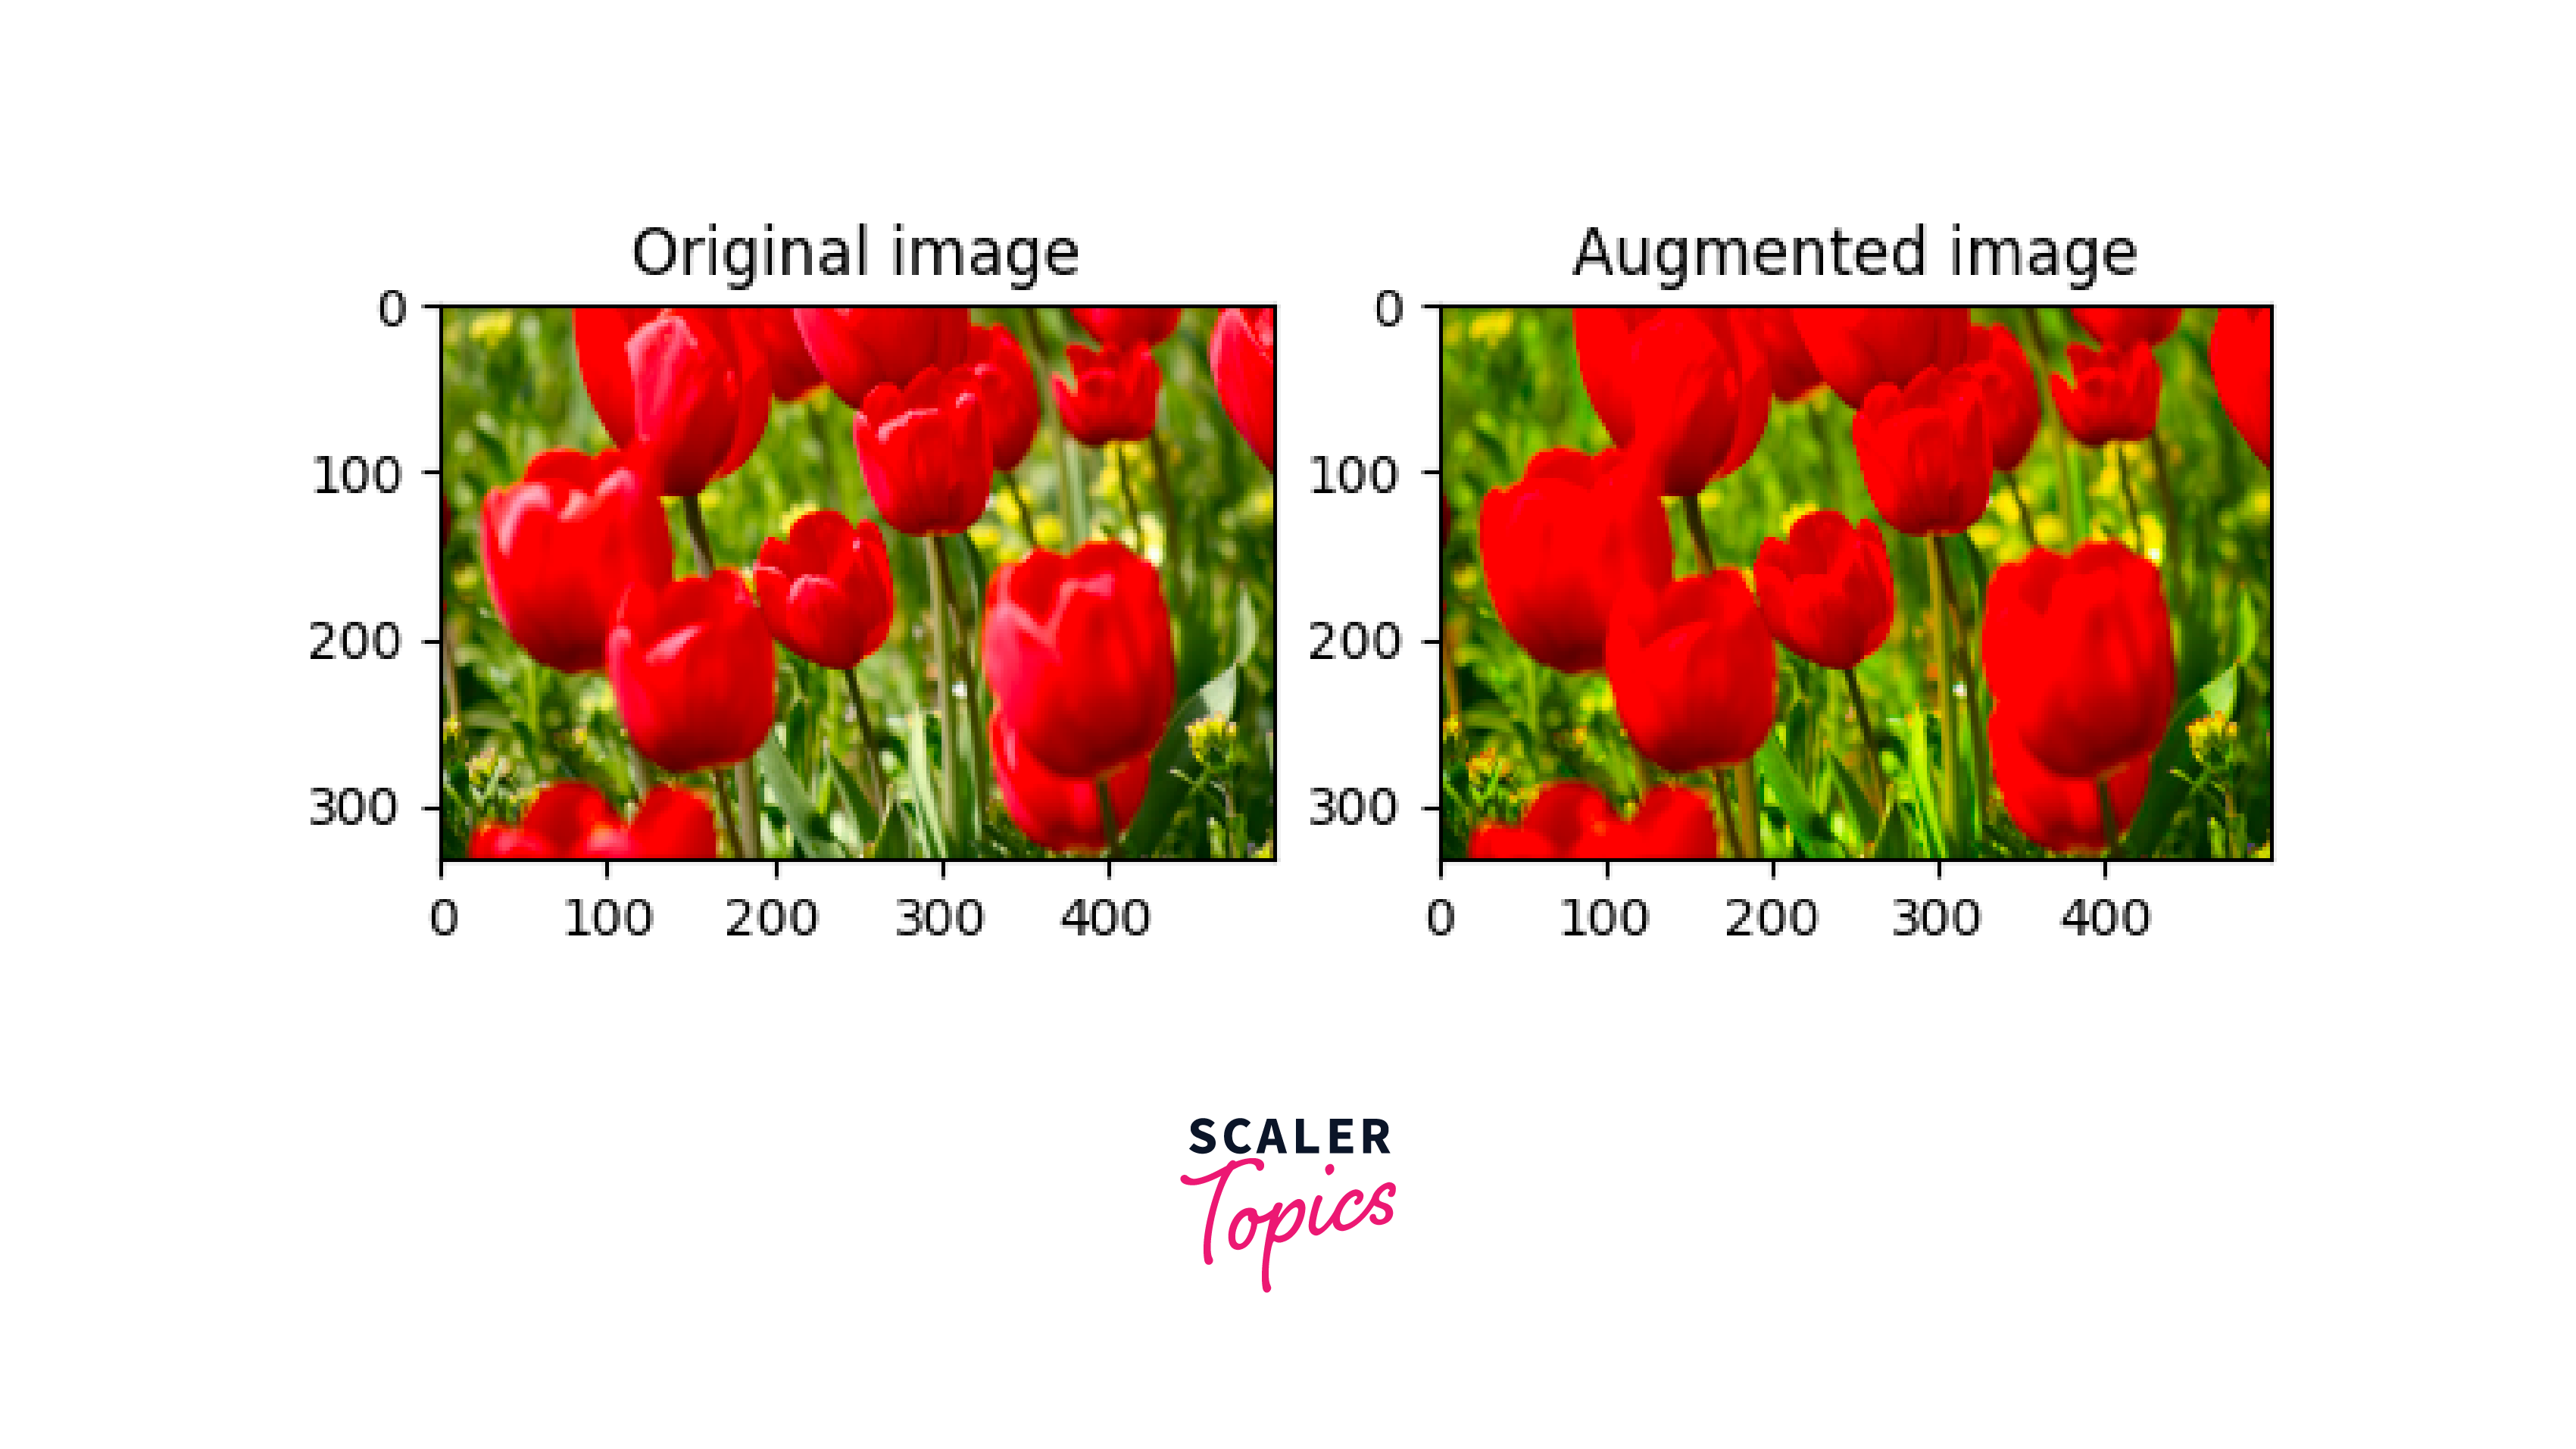
-
d. Change image brightness:
Modify the image's brightness using the tf.image.adjust_brightness function, utilizing a brightness factor as input.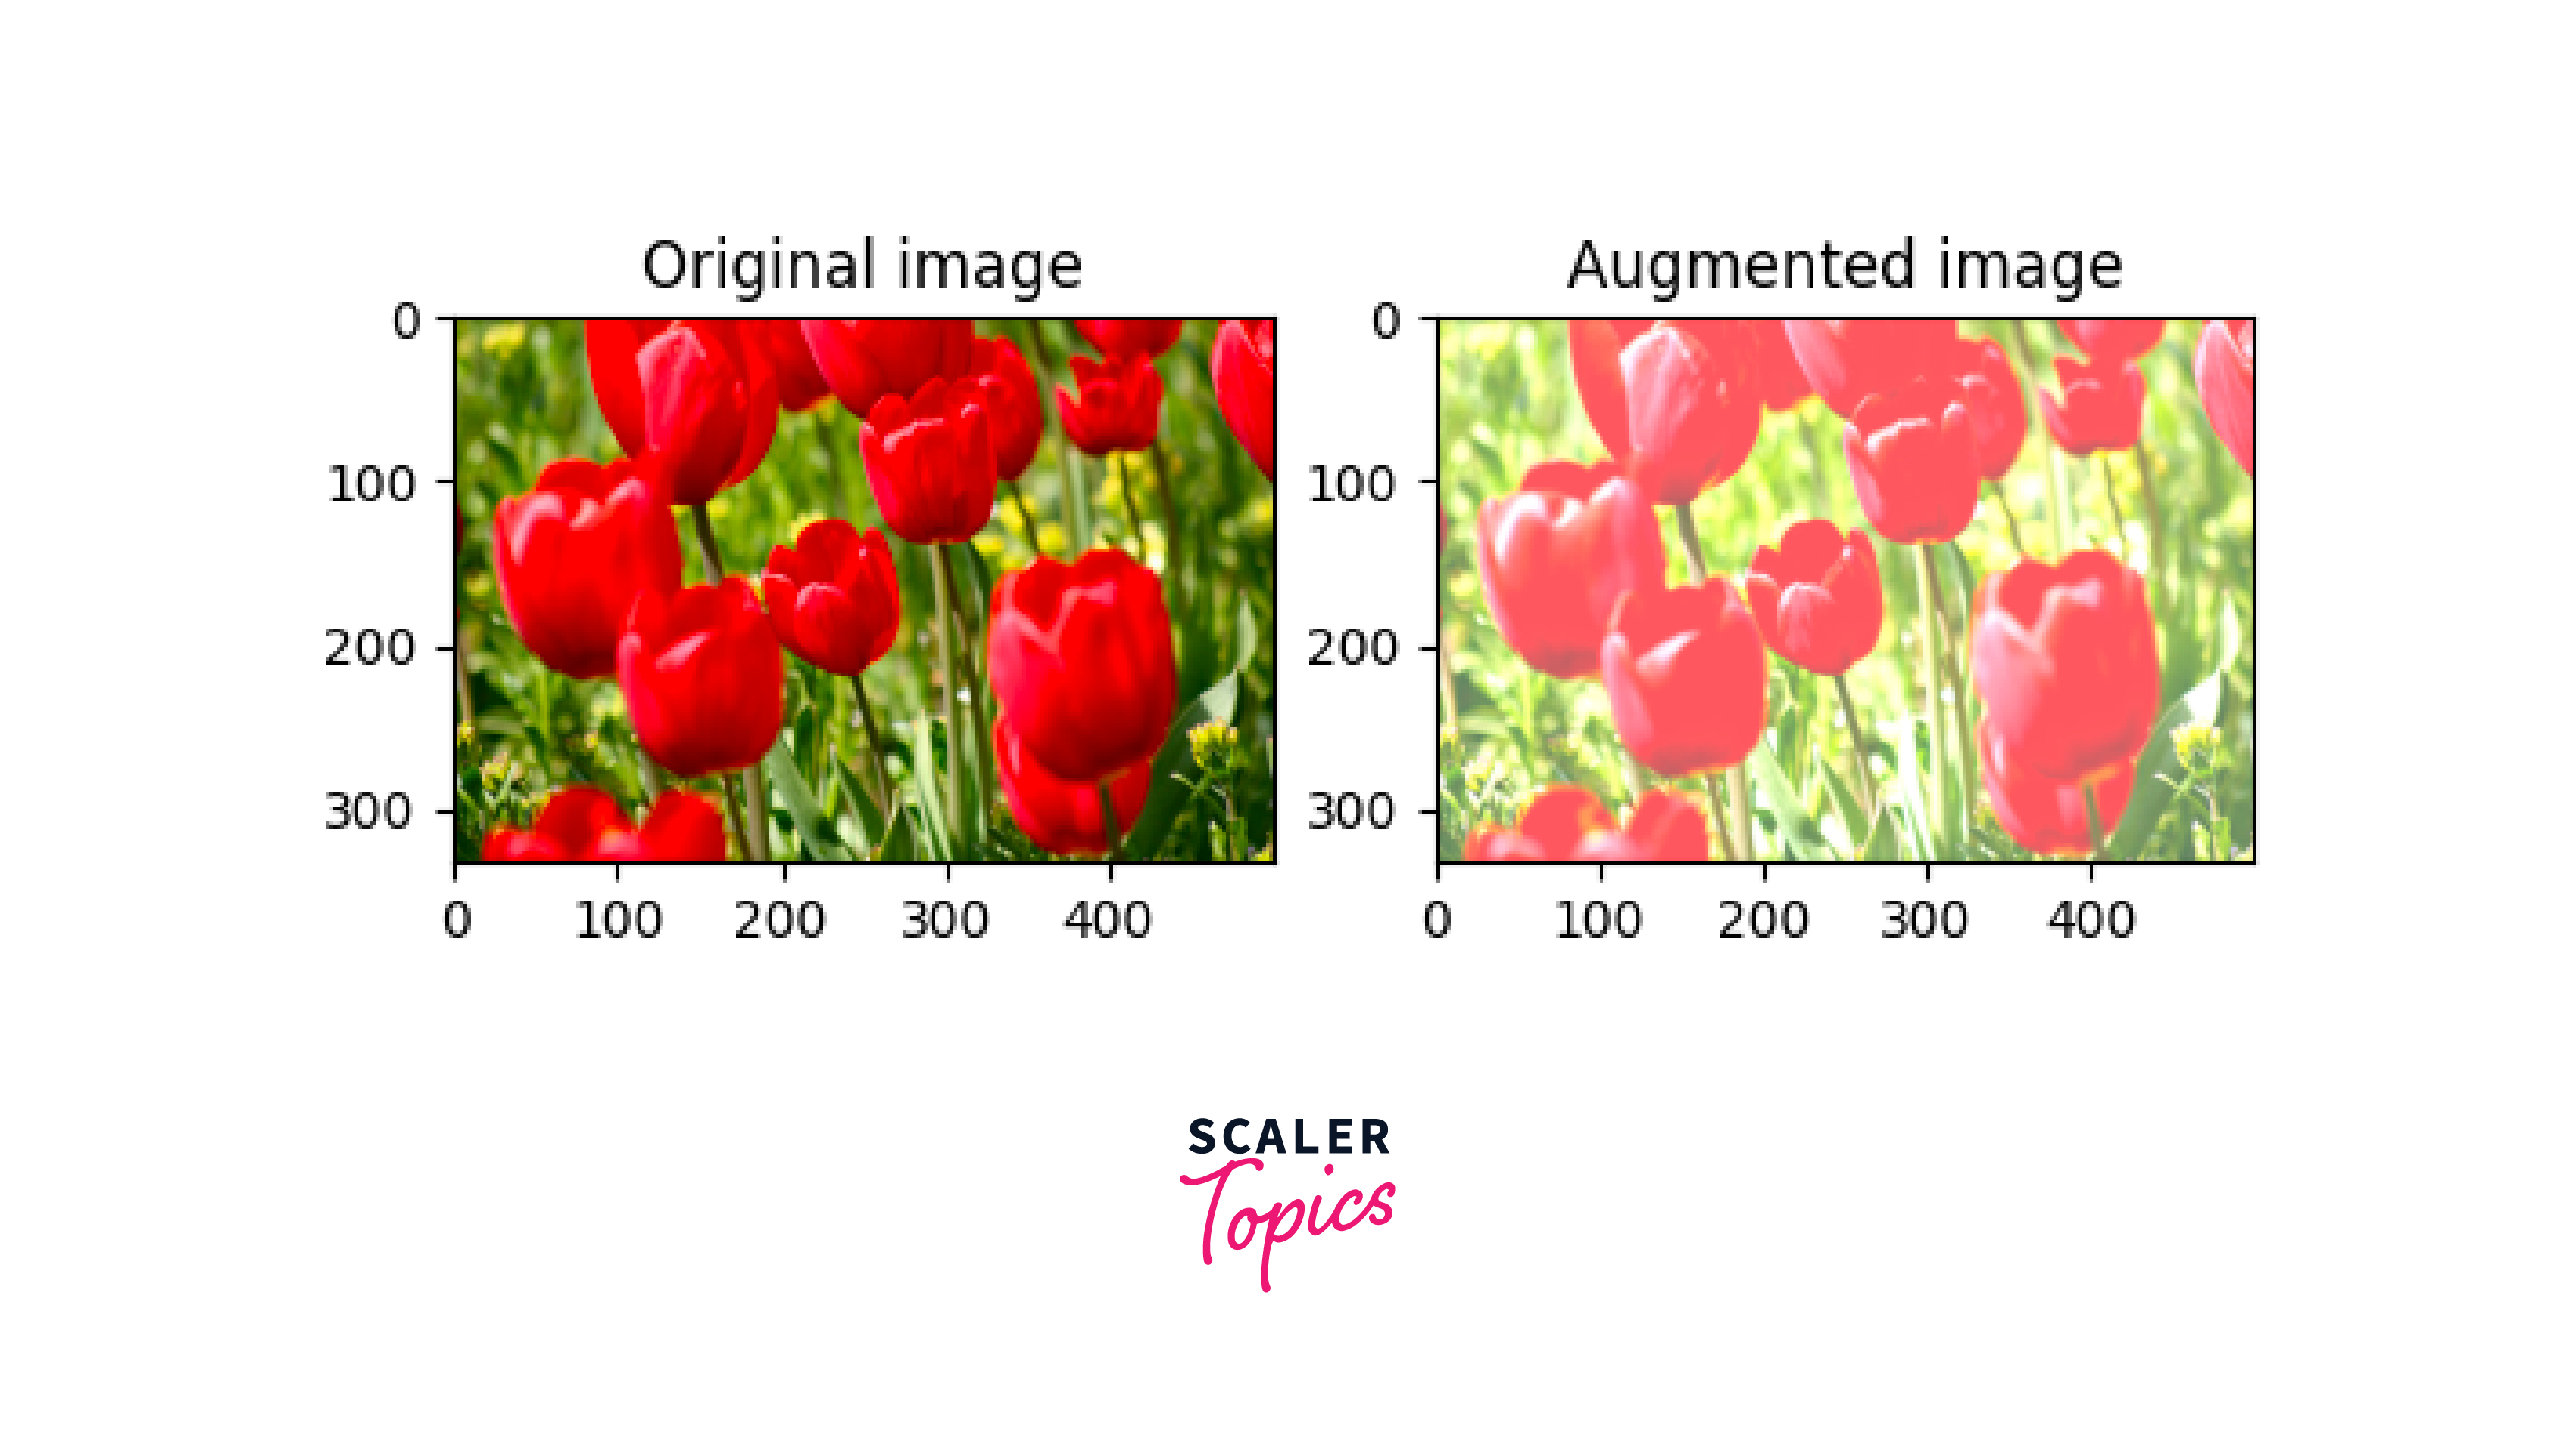
-
e. Center crop an image:
Utilize the tf.image.central_crop function to extract the desired portion of the image from the center.
-
f. Rotate an image:
Rotate an image by 90 degrees using the tf.image.rot90 function.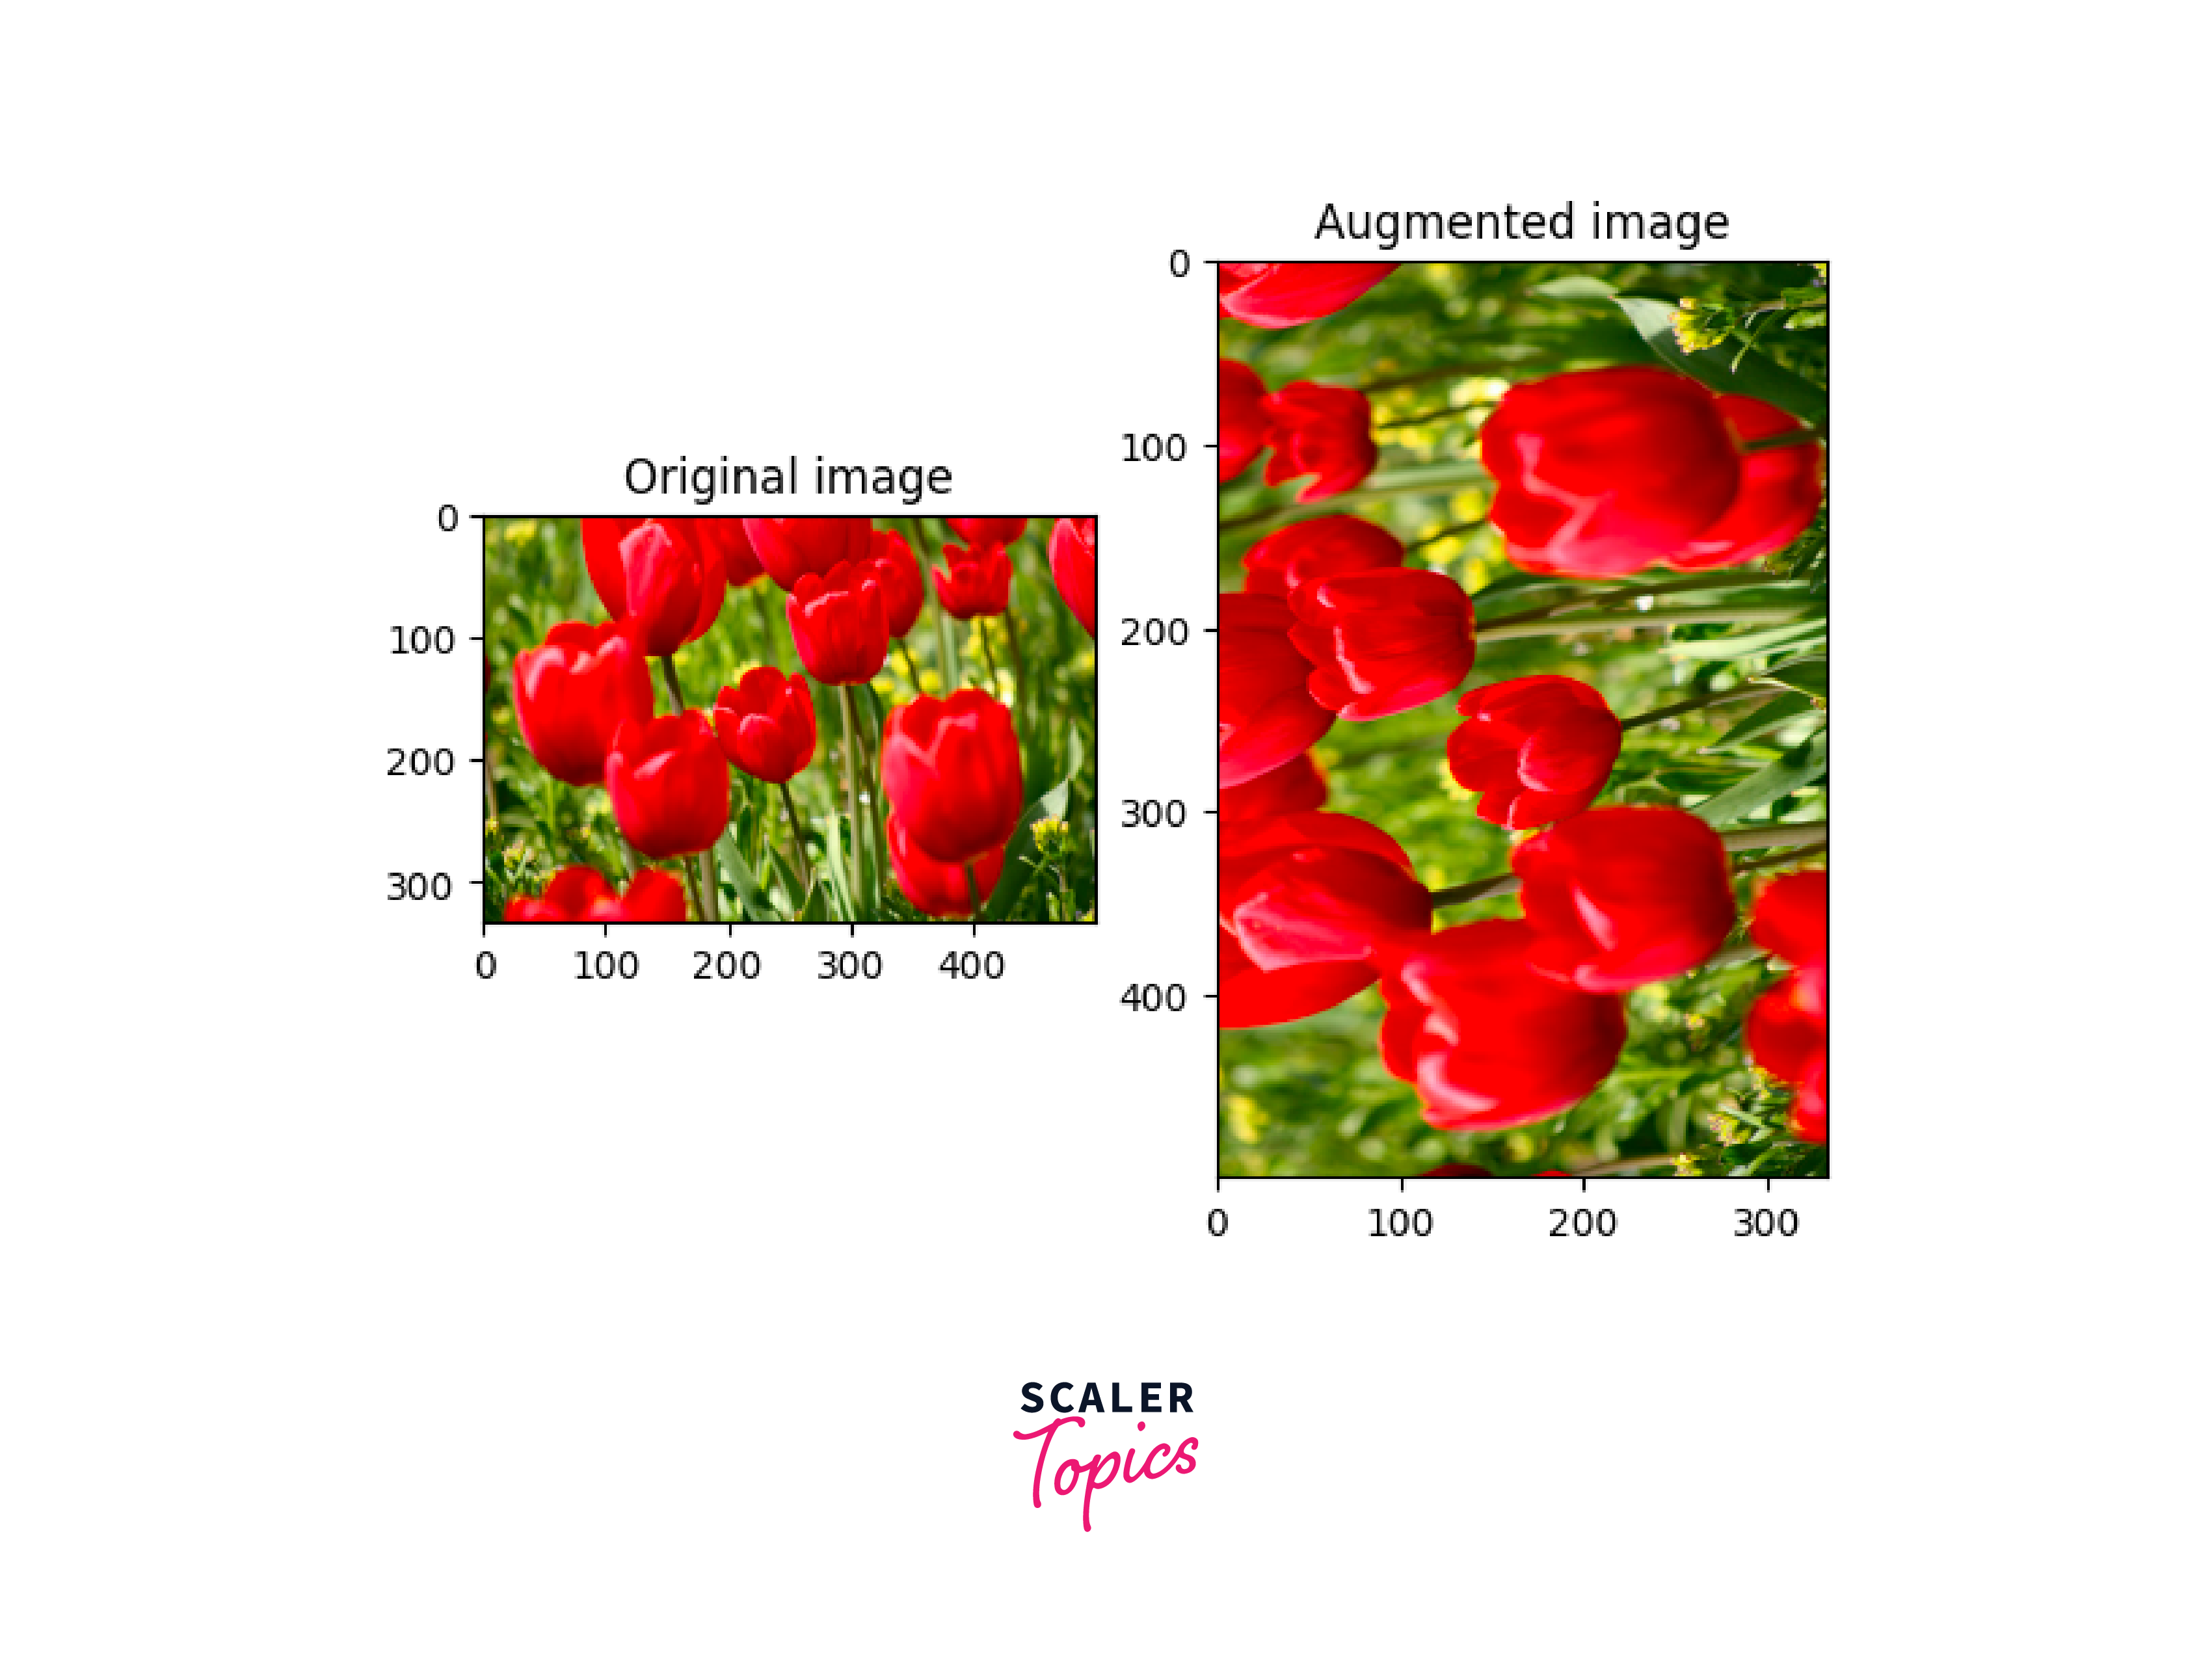
Real-World Applications of Data Augmentation
Data augmentation is a versatile technique with widespread applications across diverse domains, enriching training datasets and improving the performance of machine learning models in various ways:
-
Medical Imaging:
In the realm of medical imaging, where accurate diagnoses are critical, data augmentation is indispensable. Augmenting medical images with rotations, flips, or minor deformations can help models learn robust features and patterns. This is particularly useful for tasks like detecting tumors in MRIs or identifying anomalies in X-rays. -
Autonomous Vehicles:
Autonomous vehicles rely heavily on computer vision models to interpret the surroundings and make driving decisions. Data augmentation enhances model generalization by introducing variations such as different lighting conditions, weather scenarios, and vehicle poses, thus aiding the vehicle's ability to navigate safely and efficiently. -
Natural Language Processing (NLP):
In NLP, data augmentation techniques play a crucial role in text augmentation, enabling models to handle varying writing styles, sentence structures, and vocabulary usage. This is vital for sentiment analysis, text classification, and machine translation tasks, where diverse input data is essential for improved accuracy. -
Object Detection:
Object detection models benefit greatly from data augmentation, as they need to recognize objects from different perspectives, scales, and orientations. Augmenting object datasets with rotations, translations, and occlusions helps train models that are robust to real-world variations, making them effective in scenarios like surveillance and image recognition. -
Speech Recognition:
Augmenting audio data is vital for training robust speech recognition models. Techniques such as adding background noise, altering pitch, and varying speaking rates mimic real-world auditory conditions. This ensures that speech recognition systems perform well in noisy environments and with diverse speakers.
Conclusion
- In conclusion, data augmentation is a powerful technique that transcends various domains, boosting the effectiveness of machine learning models across a multitude of applications.
- Its ability to enhance model performance, improve generalization, and save valuable resources makes it an indispensable tool for modern AI-driven solutions.