Design a Web Page in HTML

Overview
This article delves into the realm of web design, guiding you through the creation of a basic structure using multiple HTML tags. Through various examples, you'll grasp the essential tags needed to design a web page along with knowing the significance of each tag, ensuring cross-browser compatibility, guaranteeing your designs function seamlessly across different platforms.
How to Design a Web Page in HTML?
In this section, we'll see the steps of creating a simple web page design using HTML:
Step 1. Set up a folder and text editor:
- Create a Folder: Create a folder on your computer to keep everything organized in a single place related to files for your web page.
- Open an IDE/Text Editor: Next, open any IDE like IntelliJ, Eclipse, Notepad, Sublime Text, or Visual Studio Code to write your web page code.
Step 2. Start crafting your web page with a basic HTML Structure:
- Initiate your HTML file by inserting the declaration at the beginning. This informs the browser that you are writing HTML code.
- Add the opening and closing HTML tags using <html></html>.
- Within the above HTML tags, add the opening and closing head tags like this <head></head>.
- Inside the head tags created above, include the opening and closing title tags using <title></title> to enter the title of your web page.
Step 3. Enter the content in the body tags:
- After ending the head tag, now we will add opening and closing body tags using <body></body>. This is the section of your page where you'll incorporate all the visible content for your web page.
- Within the body tags, you can commence adding elements like headings, paragraphs, images, and links.
- For a main heading, you can use the <h1></h1> tags, and for subheadings, you can use <h2></h2>, <h3></h3>, and so forth. As you move from <h1> to <h6>, the font size continues to decrease.
- For paragraphs you can use the <p></p> tags and to insert an image, use the <img> tag along with specifying the src attribute with the path of the file or URL of the image.
- To add a link to your web page, you can use the <a></a> tags, with the href attribute indicating the URL.
Let's now understand these tags with the help of some code:
Output:

Step 4. Save Your HTML File:
- Save the HTML File: After completing the code, you can now save your file with a .html extension in the folder created in step 1.
- Give a file name: You can choose any name that represents your web page and save it using .html extension, something like "mywebpage.html."
Step 5. Check your Web Page Design:
- Open Your project: You can now open your web page using any browser like Chrome or Firefox to see the output of your HTML code file.
Step 6. Explore and enhance your Web Page:
- Explore more HTML Tags that can be used in HTML structure to enhance your web page. You can learn about styling using CSS to give your web page a visually appealing look.
- You can even explore some advanced HTML Features like forms, tables, and multimedia elements to make your page more interactive.
HTML Tags and Elements Needed for the Web Page Design
Here's a compilation of crucial HTML tags along with their functions required for crafting a web page:
| HTML Tag | Functionality |
|---|---|
| <h1> to <h6> | This tag is used to create different heading levels for your text. |
| <p> | This tag is used to structure paragraphs of text on your webpage |
| <br> | This tag is used to insert line breaks for better content layout. |
| <ol> | This tag is used to design an ordered list with numbered items |
| <ul> | This tag is used to form an unordered list with bullet-pointed items |
| <li> | This tag specifies individual items within a list |
| <a> | This tag establishes hyperlinks to navigate within your site or to external pages. |
| <img> | This tag is used to add images to your webpage content |
| <src> | THis tag specifies the path or URL of the image file |
| <alt> | This tag provides alternative text for the image |
| <href> | This tag specifies the URL of the linked resource |
| <table> | This tag helps in organizing tabular data in a structured format. |
| <thead> | This tag defines the header section of a table. |
| <tbody> | This tag outlines the main body content of a table. |
| <tfoot> | This tag is used to set the footer section of a table |
| <tr>: | This tag is utilized to generate a row in a table. |
| <td> | This tag defines a cell of data within a table. |
| <form> | This tag is used to construct input forms for user interaction |
| <input> | This tag works by generating various types of input fields within HTML forms. |
| <select> | This tag designs a dropdown menu for selecting various options |
| <option> | This tag is used to specify individual choices within a dropdown menu |
| <header> | This tag establishes the header section of your webpage. |
| <nav> | This tag defines the navigation section of your webpage. |
| <section> | This tag is used to organize content into distinct sections by dividing a web page. |
| <article> | This tag in HTML is used to create an independent and self-contained piece of content. |
| <aside> | This tag is used to include content that is related, but secondary to the main page. |
| <footer> | This tag sets the footer section of your webpage. |
| <strong> | This tag helps in emphasizing text as highly important and making it bold. |
| <em> | This tag helps in emphasizing text as moderately important. |
| <div> | This tag defines a container for grouping and styling content. |
| <span> | This tag is used to create an inline container for styling specific text |
| <button> | This tag helps in developing clickable buttons for user interaction. |
| <label> | This tag defines a label for a form element. |
| <textarea> | This tag is used to create a multiline text input field. |
| <iframe> | This tag works by embedding another document within the current HTML document. |
| <small> | This tag makes text smaller, indicating fine print or secondary content. |
| <sub> | This tag defines the subscript text, typically rendered smaller and below the baseline. |
| <sup> | This tag defines superscript text, typically rendered smaller and above the baseline. |
| <var> | This tag represents the name of a variable in programming or mathematics. |
| <wbr> | This tag defines a word break opportunity within the text. |
| <details> | This tag makes a little widget that lets you see more information or do some things when you click on it. |
| <summary> | This tag provides a summary or label for the content of a <details> element. |
| <fieldset> | This tag groups related elements within a form and provides a visual indication of their relatedness. |
| <legend> | This tag represents a caption for the content of a <fieldset> element. |
Examples of Various Web Page Designing in HTML
Now, let's explore some examples of creating web pages in HTML:
1. Let's design a simple Portfolio Page:
This example illustrates the creation of a simple portfolio page with sections for personal information, projects, and contact details.
Output:
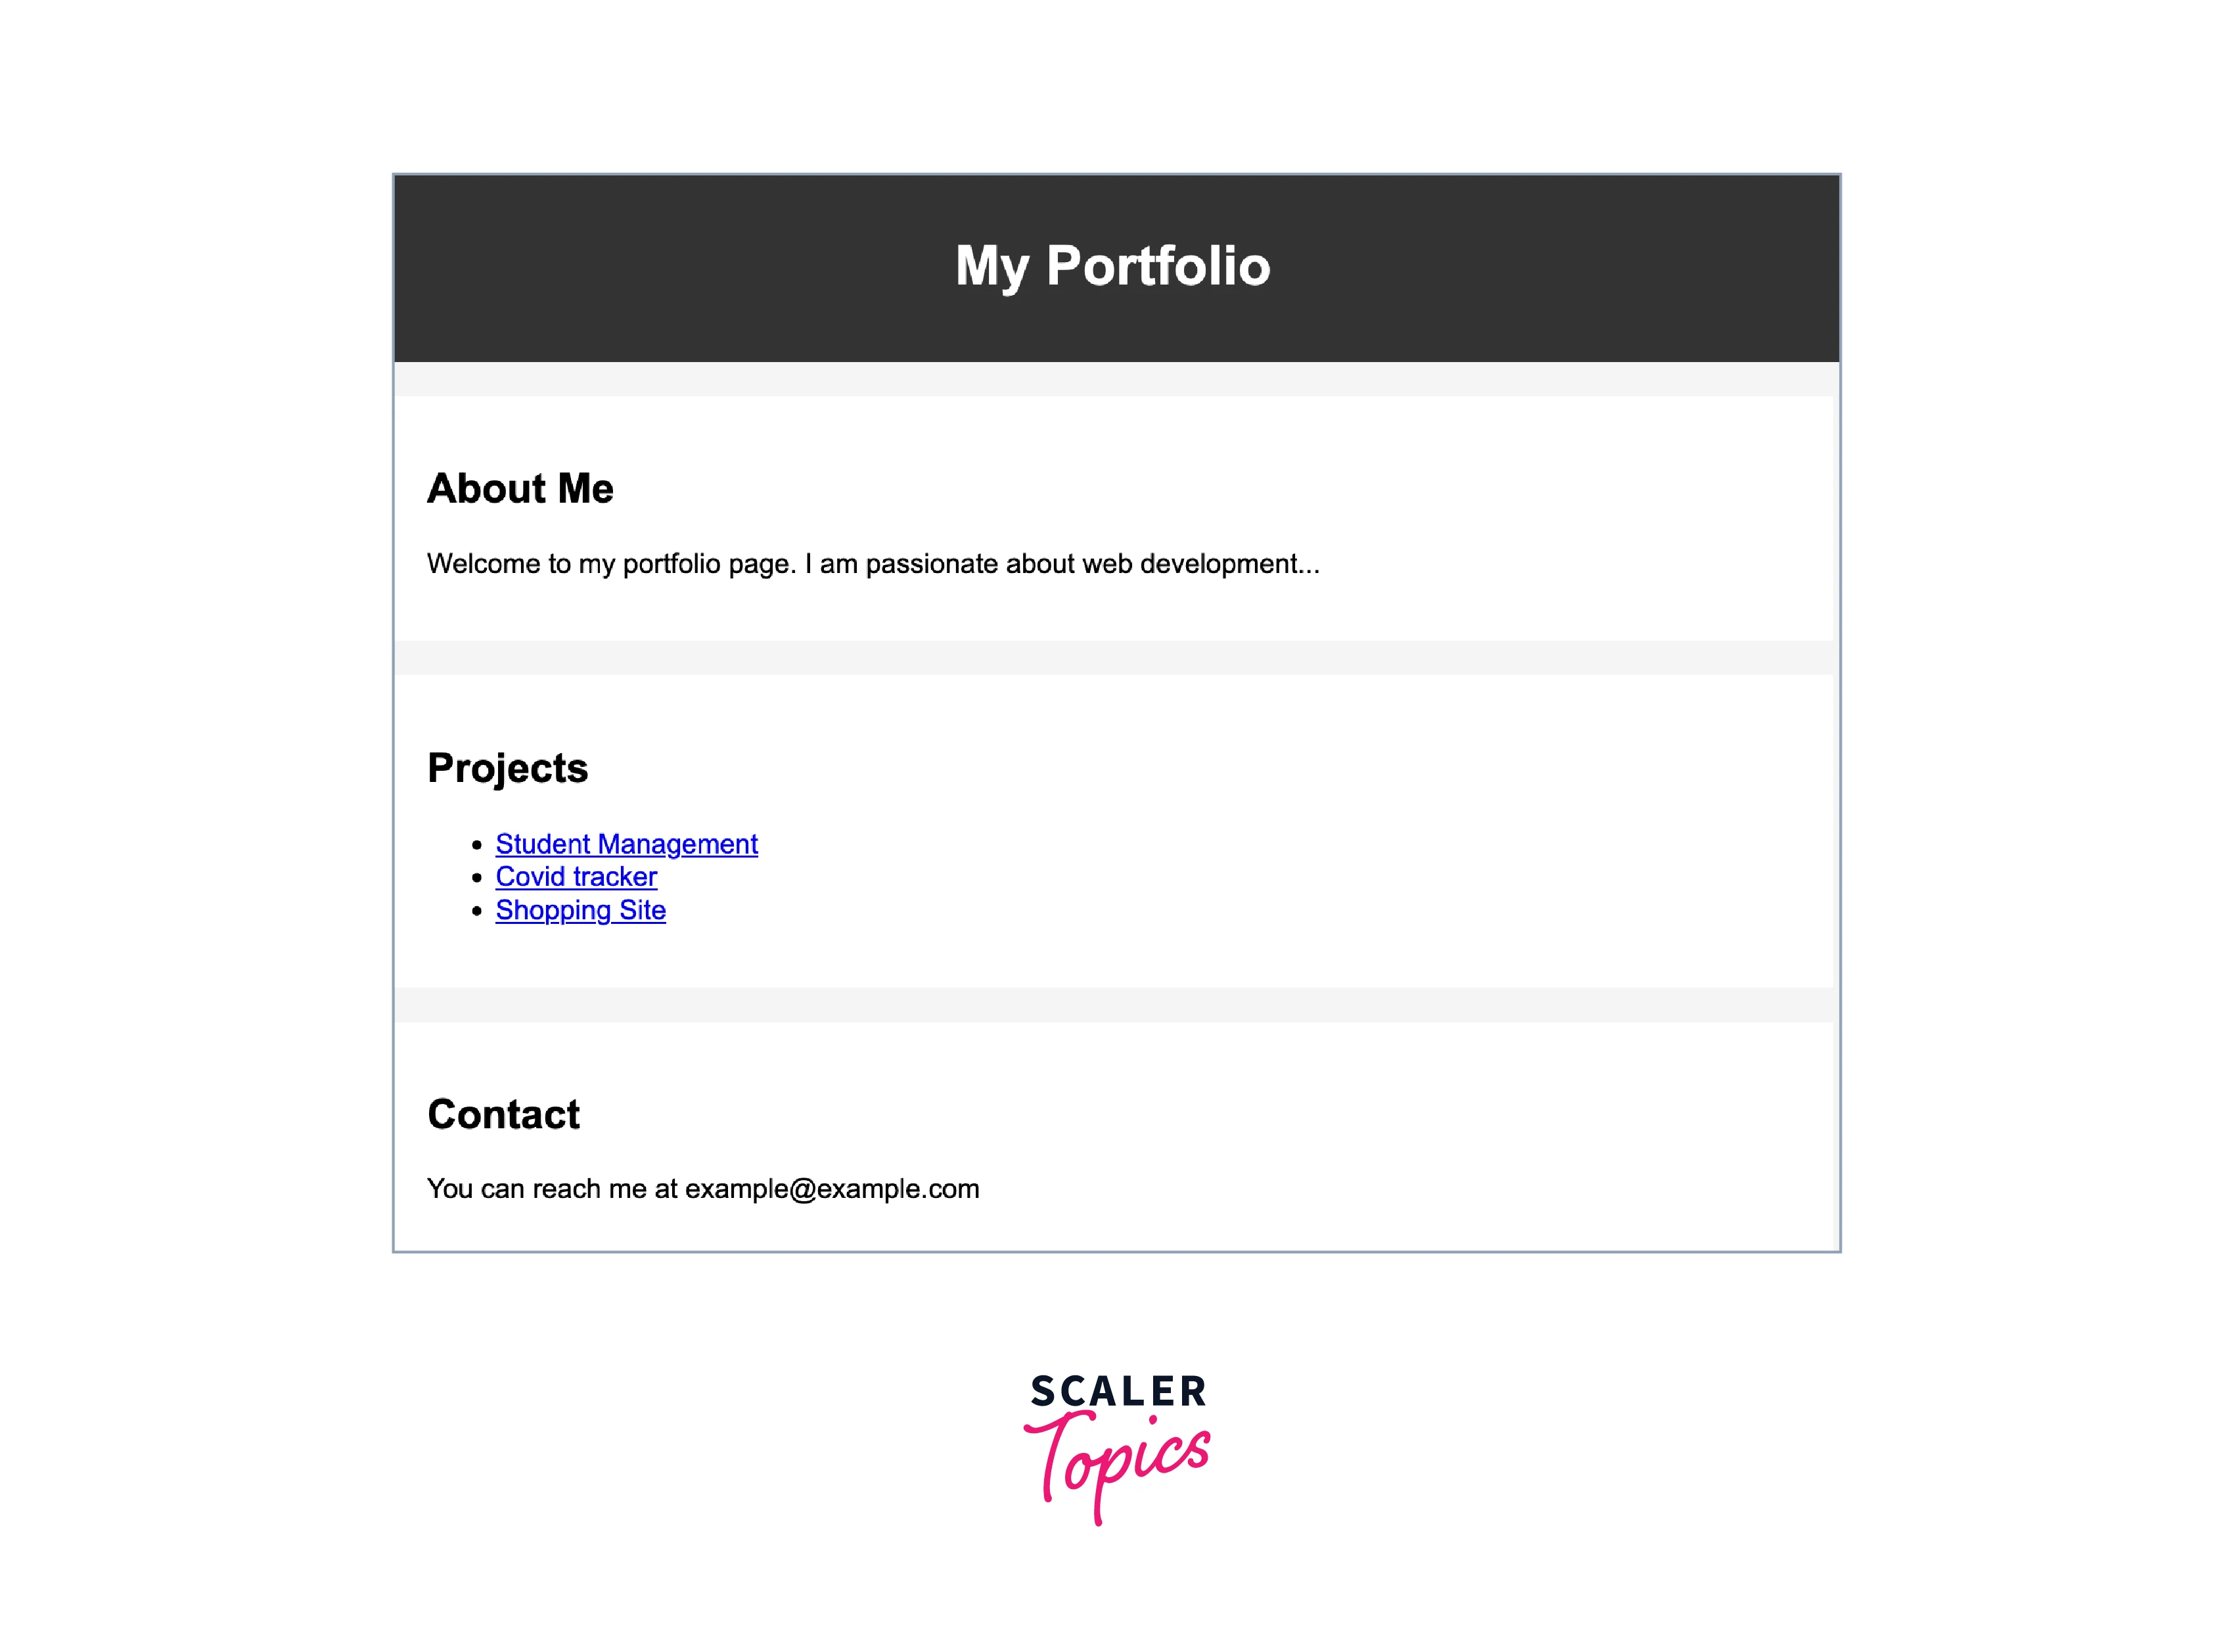
Here in the above example, the HTML file starts with the <!DOCTYPE html> declaration, indicating the document type and the language used. The <head> section contains metadata such as character set, viewport settings, and the page title. The <style> tag within the <head> section includes CSS for styling the page and defines the fonts, colors, spacing, and layout for the overall page and specific sections.
The <body> tag contains the content of the web page. There is a <header> section for the page title and several <section> tags used to organize different parts of the content, such as "About Me," "Projects," and "Contact." Each section contains HTML elements like headings (<h1>, <h2>) and paragraphs using <p>.
2. Let's design a Recipe Page:
This example demonstrates the creation of a recipe page with sections for ingredients and step-by-step instructions.
Output:
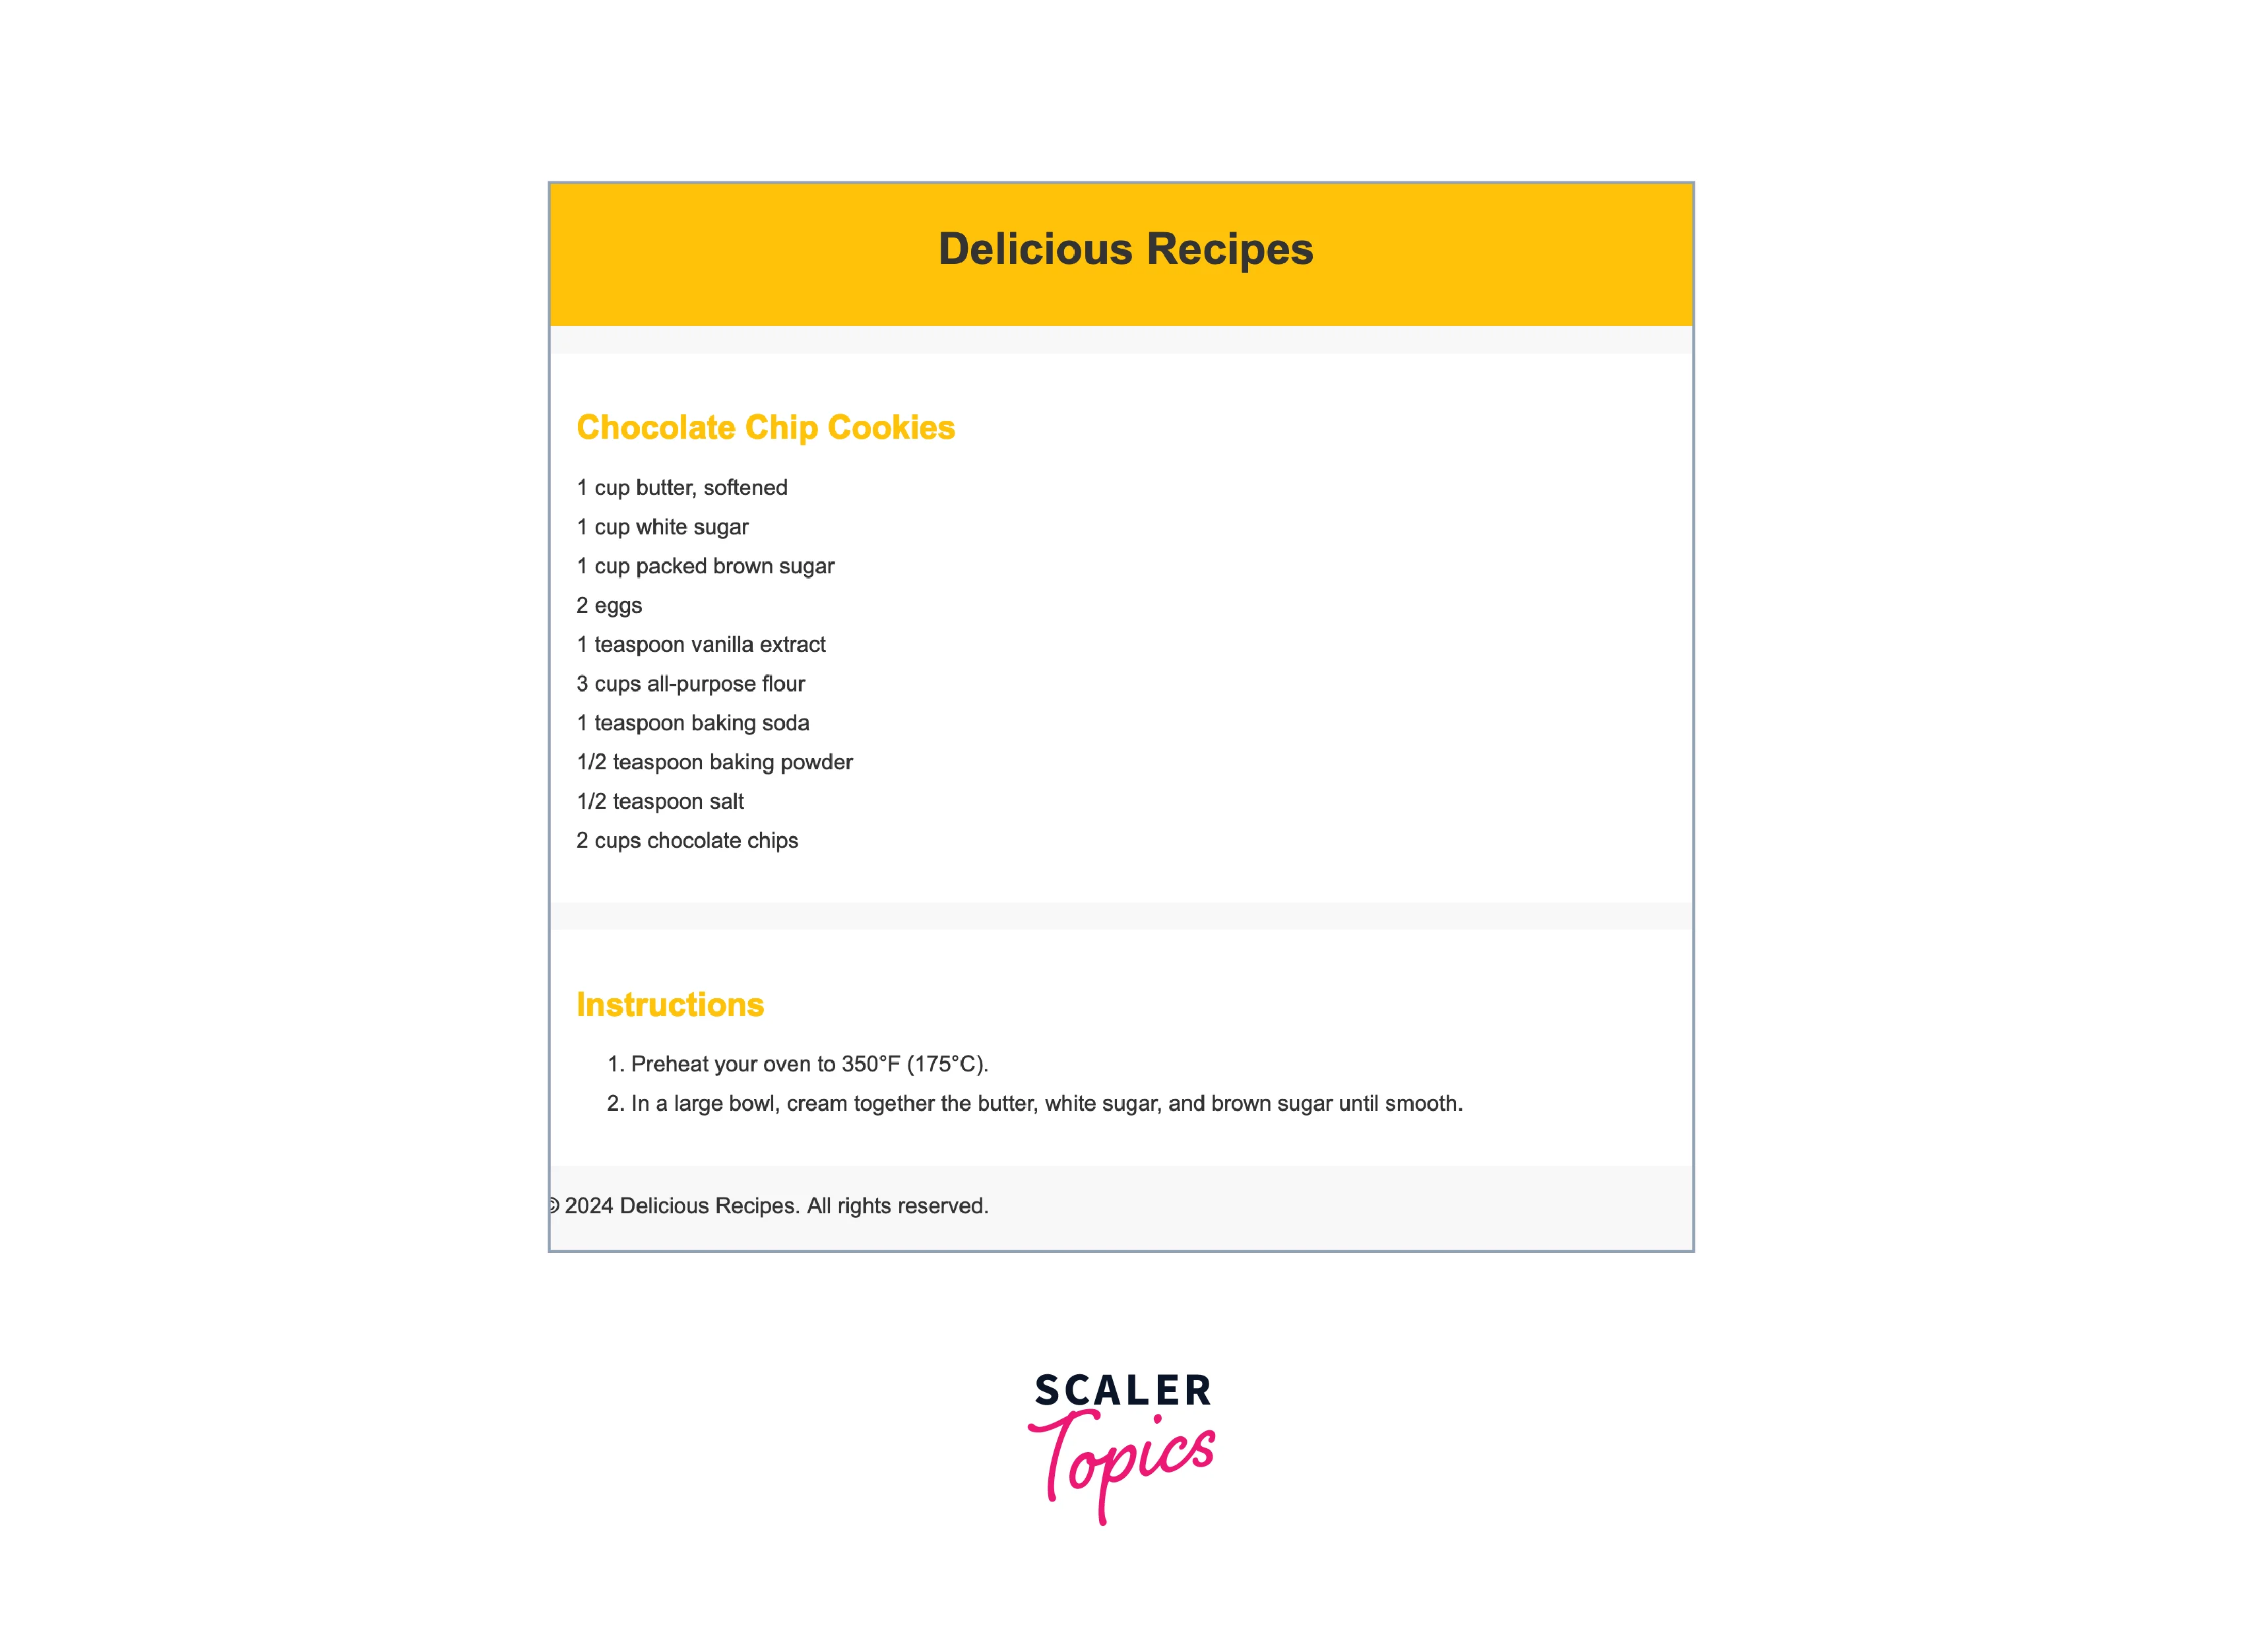
This web page shows the recipe along with instructions using basic HTML tags and CSS styling. Here, <header> represents the introductory content or a group of navigational links at the top of a webpage, and <footer> represents the closing content or metadata of a webpage, typically found at the bottom.
3. Let's design a Blog Page: This example showcases the creation of a blog page with multiple posts, each containing a title, content, and an optional image.
Output:
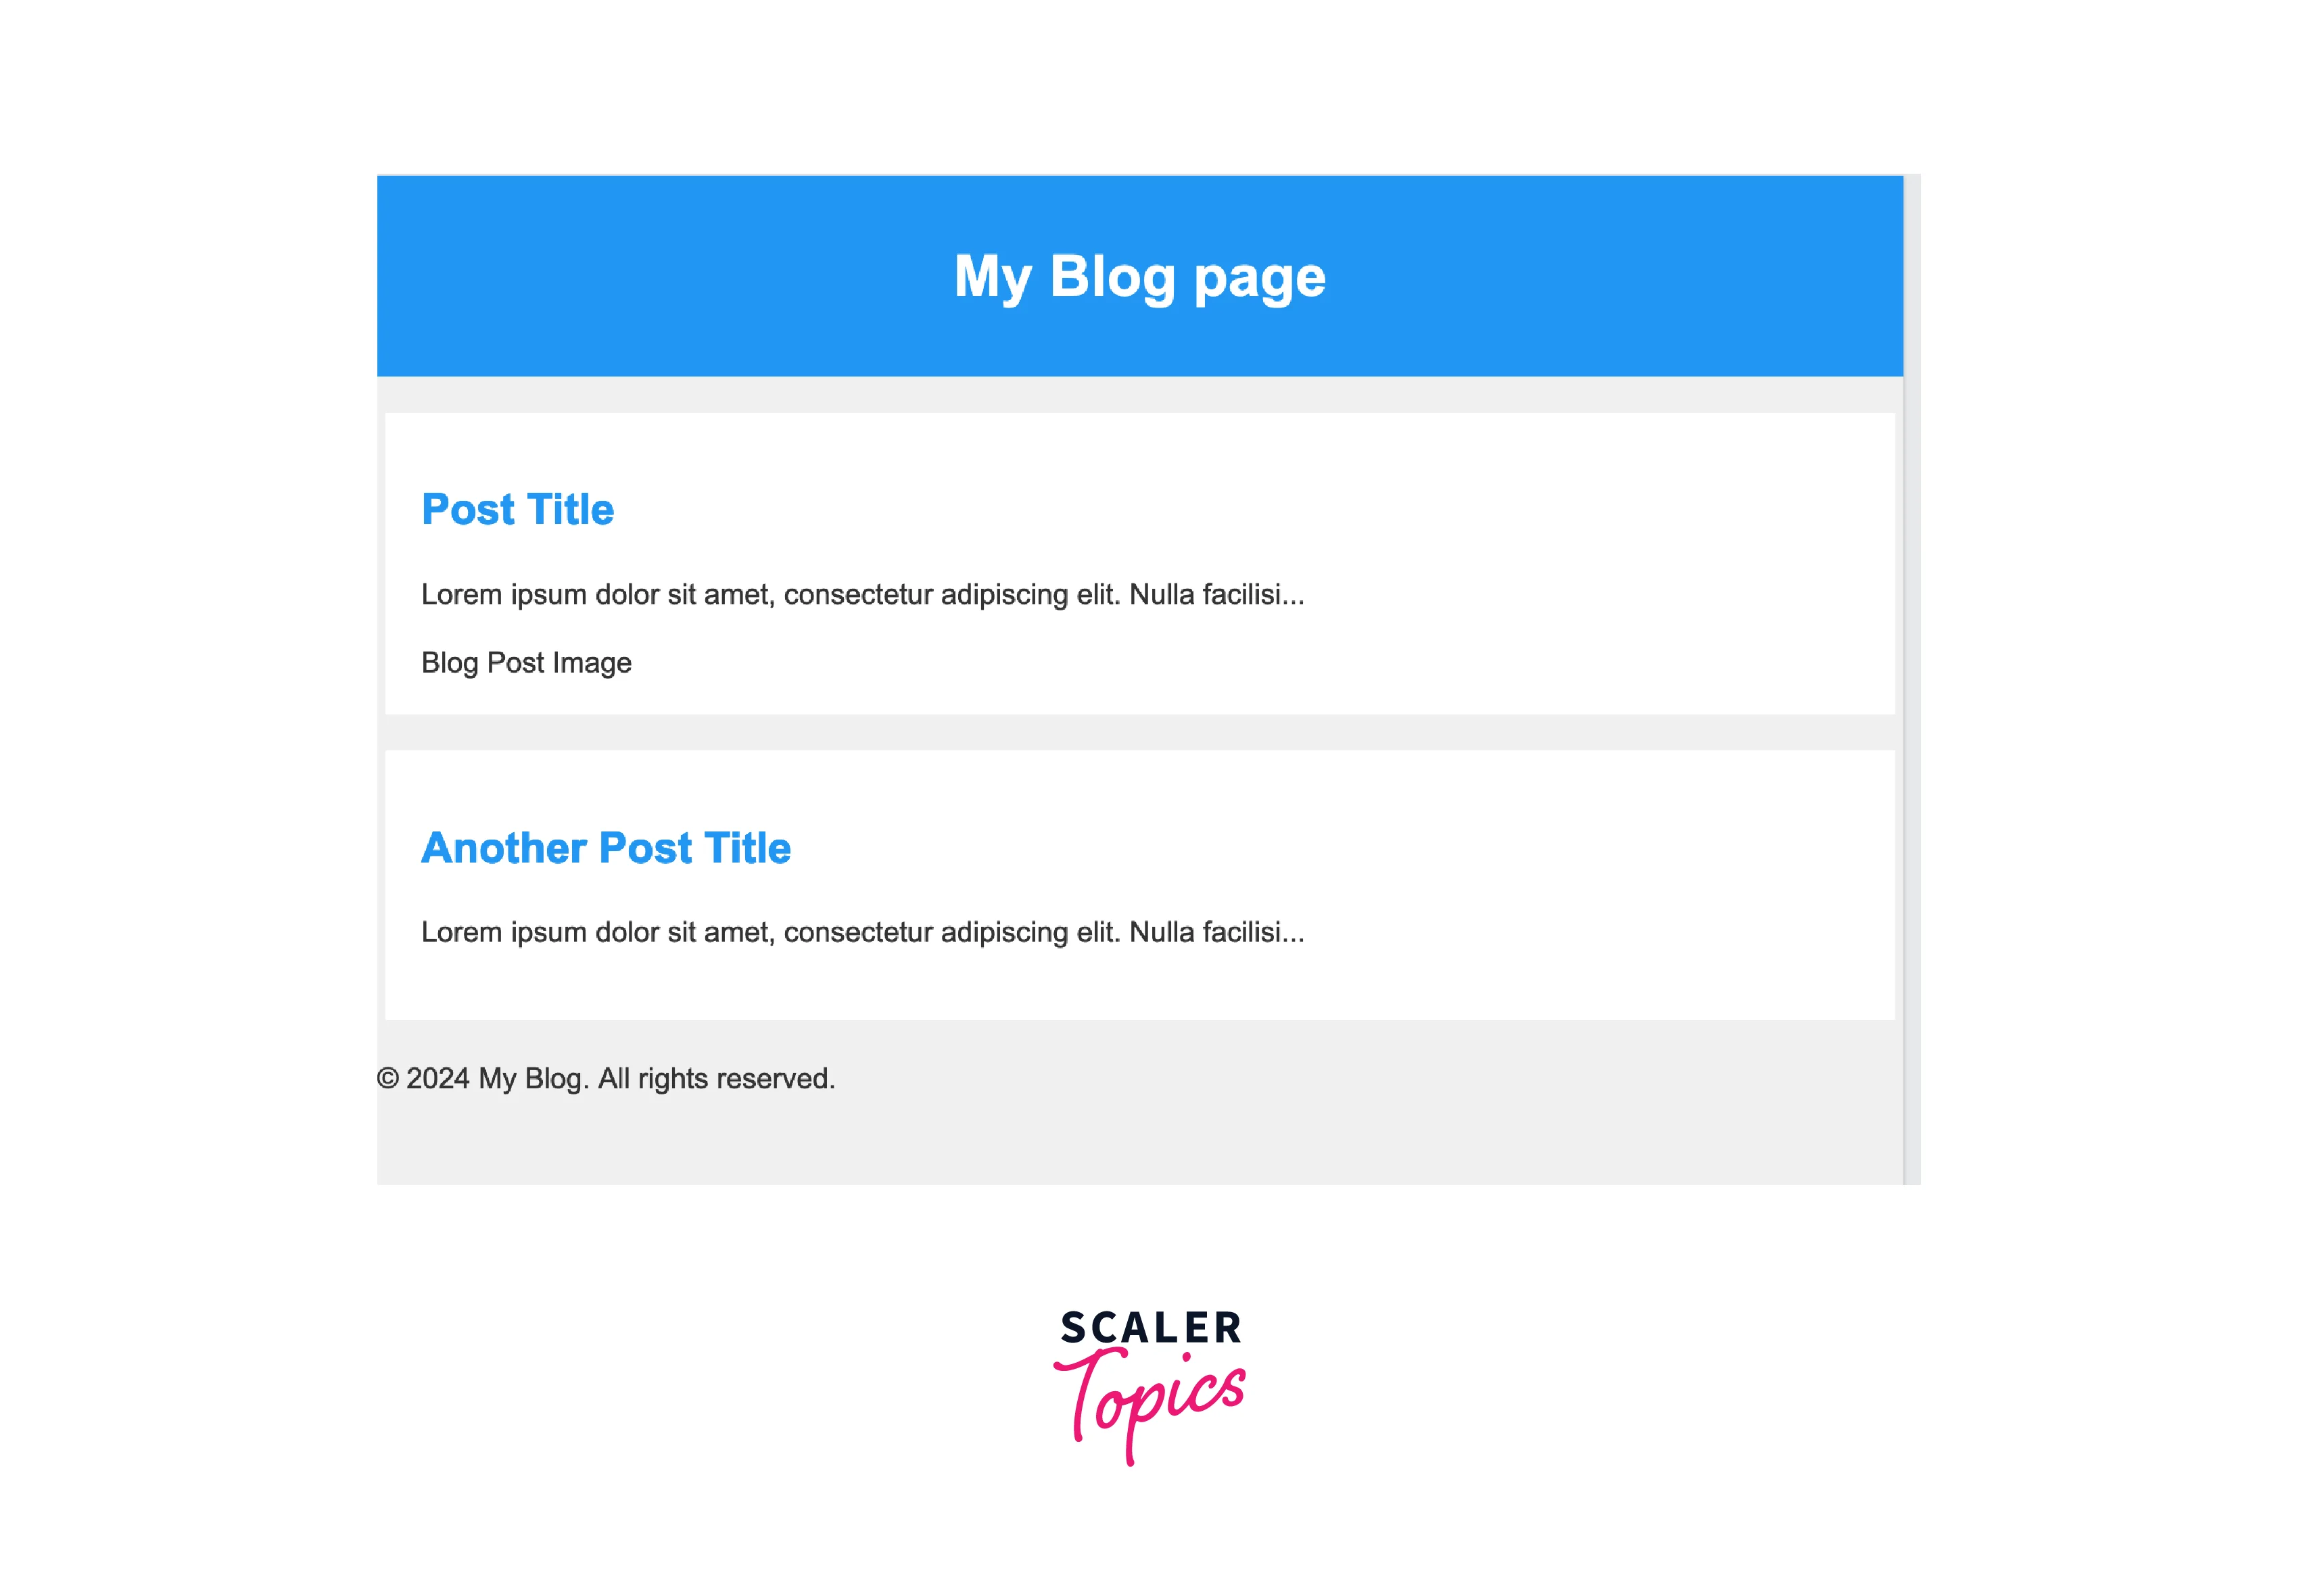
This webpage represents a simple blog structure with a header, individual blog posts, and a footer. Styling is applied to create a visually appealing layout.
4. Let's design a Product Showcase Page: This example demonstrates the creation of a product showcase page, featuring a highlighted product with details and additional products in a section below.
Output:
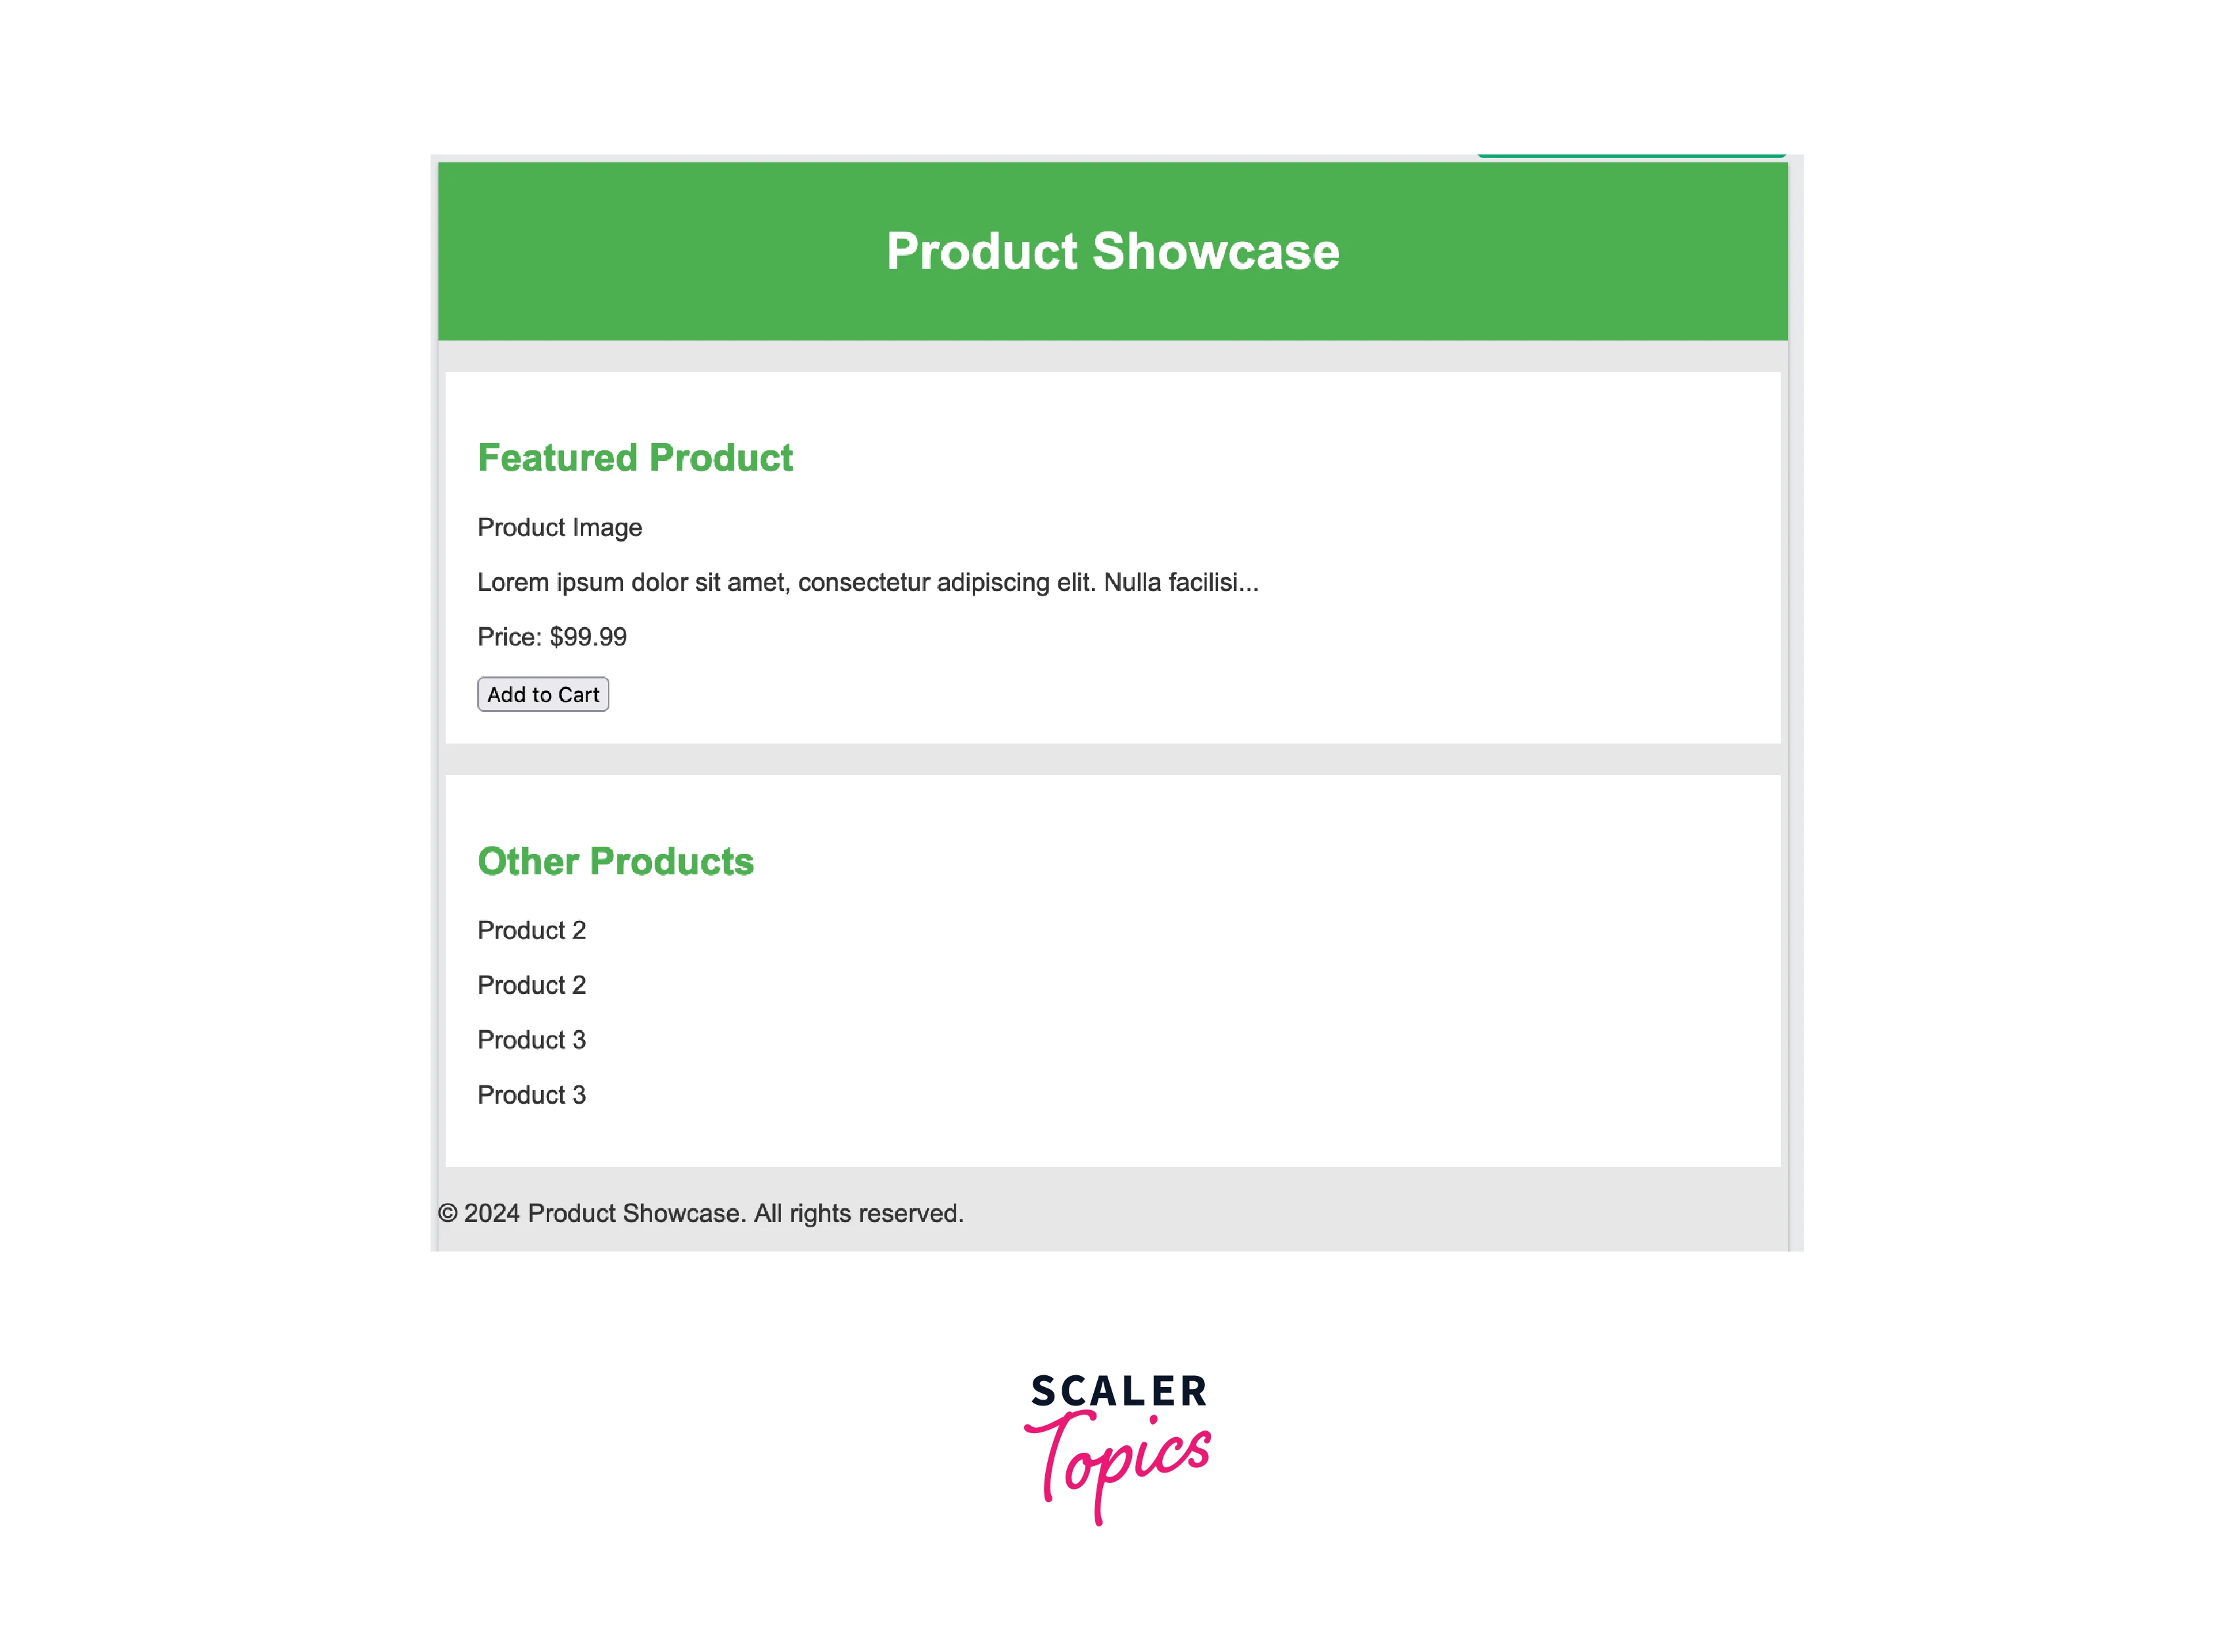
The above webpage serves as an online showcase for different products, making it easy for users to explore and learn about each item using basic HTML tags. We have used <button> tag to create a clickable button for adding items to the cart
Browser Support
You can use these browsers to check the designed web pages and test them to ensure optimal performance and functionality. You can expect a seamless experience when accessing the site using the following browsers:
-
Google Chrome -
Microsoft Edge -
Firefox -
Opera -
Safari
It is recommended to test your web pages on various browsers to ensure efficient performance across different platforms. It helps ensure a consistent and seamless user experience for a diverse audience.
Conclusion
- In this article, we've covered the process of structuring a web page, starting with initializing your HTML file through a doctype declaration, opening and closing HTML tags, and incorporating a title within the head tags.
- You can populate the body tags with various elements like headings, paragraphs, images, and links to create engaging web content.
- After completion, you can save your HTML file in the project folder with a suitable name, and ensure proper file extension (.html).
- You can check the result of your your HTML file in browsers like Chrome or Firefox to visualize and review your web page.
- You can get a seamless user experience across popular browsers such as Google Chrome, Microsoft Edge, Firefox, Opera, and Safari with the website's optimized design.